- Manuals
- Brands
- AGFA Manuals
- Printer
- Drystar 5302
- Reference manual
-
Contents
-
Table of Contents
-
Troubleshooting
-
Bookmarks
Related Manuals for AGFA Drystar 5302
Summary of Contents for AGFA Drystar 5302
-
Page 1
Drystar 5302 Reference manual… -
Page 2
Agfa-Gevaert N.V. shall under no circumstances be liable for any damage arising from the use or inability to use any information, apparatus, method or process disclosed in this document. -
Page 3: Table Of Contents
………………17 Operating modes ………………19 Control modes (local and remote) …………… 21 The local user interface …………….22 Switching on the Drystar 5302 …………..32 Switching off the Drystar 5302 …………..34 Chapter 2: Basic operation (Operator mode) ……….35 Overview of operator functions …………..36…
-
Page 4
5302 R RYSTAR EFERENCE MANUAL Chapter 4: Controlling the Drystar 5302 via a remote PC (with browser) ………………….151 Features …………………. 152 Setup ………………….153 Setting up the connection …………….155 Starting the remote session ……………. 160 Chapter 5: System description ………….. -
Page 5
5302 R RYSTAR EFERENCE MANUAL Appendix C: Quality Control Charts …………211 Appendix D: Index ………………217 2830A EN 20050526… -
Page 6
5302 R RYSTAR EFERENCE MANUAL 2830A EN 20050526… -
Page 7: Chapter 1: Introducing The Drystar 5302
Chapter Introducing the Drystar 5302 This chapter introduces the Drystar 5302 to the user and draws attention to important safety precautions. Drystar 5302 features Safety precautions Security precautions Safety compliance Privacy and security Operating modes Control modes (local and remote)
-
Page 8: Drystar 5302 Features
Any combination of two film formats can be used “online”. Both input trays can be adjusted for all film formats. The input trays of the Drystar 5302 are equipped with an RF-tag reader, which automatically traces the films used in the printer and protects the printer when detecting non-identified media.
-
Page 9
RYSTAR EFERENCE MANUAL Number of output trays. The Drystar 5302 is equipped with 1 output tray, which is suitable for the multiple formats without any adjustment. Integrated A#sharp technology A#sharp is a technology that enhances image sharpness for the Drystar 5302. -
Page 10
Agfa representative. The functionality of the Drystar 5302 is completely controlled via the network. You can control the working of the Drystar 5302 via the local keypad or via a remote PC with a functioning web browser. Customizable features Consumables. -
Page 11: Safety Precautions
EFERENCE MANUAL Safety precautions The Drystar 5302 must only be operated according to its specifications and its intended use. Any operation not corresponding to the specifications or intended use may result in hazards, which in turn may lead to serious injuries or fatal accidents (for example electric shocks).
-
Page 12
In order to reduce the risk of electric shock, do not remove any covers. Type B equipment: Indicates that the Drystar 5302 complies with the limits for type B equipment. Supplementary protective earth connector: Provides a connection between the Drystar 5302 and the potential equalization bus bar of the electrical system as found in medical environments. -
Page 13
EFERENCE MANUAL Transport after installation Before moving the printer, always switch off the machine. The Drystar 5302 should be transported by 3 persons or if not possible with 2. Refer to the Installation manual for more information. When doing this, the stability and the structure of the tabletop have to be taken into account. -
Page 14: Security Precautions
CAUTION (U.S.A. only): In accordance with U.S. Law, this device can only be sold to or ordered by a licensed physician. Printed images should be treated as patient records and should only be viewed by authorized personnel. Introducing the Drystar 5302 2830A EN 20050526…
-
Page 15: Safety Compliance
EC: This is a class A product. In a domestic environment this product may cause radio interference in which case the user may be required to take adequate measures. Compliances The Drystar 5302 has been tested and found to comply with the following international standards and regulations: • the Medical Devices Directive 93/42/EEC •…
-
Page 16
• GB17625.1-2003 (for CCC-Mark) Seismic (earthquake) requirements The printer meets the CA (Californian) requirements. Labels The Drystar 5302 carries the CE, TÜV, cULus and CCC labels. CCC label CE, TÜV and cULus label Introducing the Drystar 5302 2830A EN 20050526… -
Page 17: Privacy And Security
Insurance Portability and Accountability Act) and to meet the IHE standards (Integrated Healthcare Enterprise) some security features are included in the user interface of the Drystar 5302 (available via the web pages only: under ‘Security tools’. Refer to the chapter ‘Controlling the Drystar 5302 via a remote…
-
Page 18
‘communication allowed’ table. A Certification Authority (CA) is responsible for creating a certificate. The CA can be the hospital, Agfa or a third party. This CA distributes the certificate to the hospital security responsible or service technician, who for his part: •… -
Page 19: Operating Modes
5302 R RYSTAR EFERENCE MANUAL Operating modes The Drystar 5302 can be operated in five modes: Operator mode, Key- operator mode, Service mode, Specialist mode and Administrator mode. Operator mode The Operator mode groups all basic functions that are intended for radiographers without special technical skills: •…
-
Page 20
Specialist mode The specialist mode functions are reserved for trained service personnel of the Agfa Customer Support Center. The specialist mode is password protected and is only accessible by browser via a remote PC. Administrator mode (also known as Security) The Administrator mode functions are reserved for the System Administrator. -
Page 21: Control Modes (Local And Remote)
RYSTAR EFERENCE MANUAL Control modes (local and remote) You can control the working of the Drystar 5302 via the local keypad or via a networked remote PC. The table below gives an overview of the operating modes you can access locally and/or via the remote PC.
-
Page 22: The Local User Interface
Power/Reset button Display Keypad Status indicator LED Film input trays Film output tray Never try to open the printer when the Drystar 5302 is printing a film. Always follow the instructions on the display! Introducing the Drystar 5302 2830A EN 20050526…
-
Page 23
• To reset the printer. Do NOT press the Power/Reset button without first following the procedure to stop printing when the Drystar 5302 is printing a film. Refer ‘Switching off the Drystar 5302’ on page 34. 2830A EN 20050526… -
Page 24: Rear Panel
Network • To connect to the hospital network. connector Input/output • To connect a terminal PC (used by the Service connector engineer). Power connector • To connect the printer power cord. Introducing the Drystar 5302 2830A EN 20050526…
-
Page 25
5302 R RYSTAR EFERENCE MANUAL Working with Compact flash cards (CF-card) The Drystar 5302 is equipped with an external CF-card slot, which is located at the rear side. Inserting a CF-card To insert a CF-card in the Drystar 5302: Hold the CF-card vertically with the connector holes in front of the slot and with the flat surface pointing to the left. -
Page 26
5302 R RYSTAR EFERENCE MANUAL Removing a CF-card To remove a CF-card from the Drystar 5302 slot: Push the unlocking lever underneath the CF-card slot. The CF-card is pushed slightly outward. Remove the CF-card gently from the slot. Introducing the Drystar 5302… -
Page 27: The Keypad
RYSTAR EFERENCE MANUAL Audio signals The Drystar 5302 gives status information via beeps. The length of the beep indicates the response of the system to a key command. • A short beep means that Drystar 5302 has accepted the key command and is starting the operation.
-
Page 28
5302 R RYSTAR EFERENCE MANUAL The Drystar 5302 keypad features the following keys: To access the advanced functions of the key- Key- operator mode. Refer to the chapter ‘Advanced operator key operation (Key-operator mode)’. To quit the current function or exit a menu without Escape key saving modifications. -
Page 29: The Display
5302 R RYSTAR EFERENCE MANUAL The display The Drystar 5302 control panel has a backlit LCD display. We distinguish two panel types depending on the selected language: • a backlit LCD display with 4 lines for Western languages (e.g. Dutch, French, Portuguese, Swedish, …).
-
Page 30
In operator mode, appropriate information is displayed in accordance with the status of the printer. The operator basic screen looks as follows, indicating that the Drystar 5302 is ready for operation and that no job is currently being executed. When the printer is busy with at least one print job, the print queue screen is displayed: Mod.name… -
Page 31: Data Entry
To accept an entry in a menu, press the Confirm key. • A short beep acknowledges and terminates the entry. • The Drystar 5302 will sound a long beep if you press a key that is not to be used at that moment. 2830A EN 20050526 Introducing the Drystar 5302…
-
Page 32: Switching On The Drystar 5302
‘Safety precautions’ on page 11. Follow the procedure below to ensure proper start-up of the Drystar 5302 and to check that everything is working correctly. Check that the power cord is plugged in and then switch on the printer by pressing the Power/Reset button.
-
Page 33
If, on the front panel display, the READY message is shown, the status indicator LED is constantly green. It takes 10 minutes (starting up of the Drystar 5302 and heating up of the thermal print head) before you can start printing. The display will inform you that the printer is warming up: •… -
Page 34: Switching Off The Drystar 5302
Queued print jobs will be stored on the hard disk and will be resumed next time the printer is switched on. Press the Power/Reset button to switch off the Drystar 5302. • If the printer is printing, it will finish that print job: •…
-
Page 35: Chapter 2: Basic Operation (Operator Mode)
This chapter will inform on how to manage the print queue, how to print films with priority and how to load new films. Overview of operator functions Managing the print queue Pausing the print queue Viewing the film count info Viewing the printer status About Drystar 5302 consumables Loading films…
-
Page 36: Overview Of Operator Functions
RYSTAR EFERENCE MANUAL Overview of operator functions This section focuses on the basic operating principles of the Drystar 5302. After reading this chapter, the operator should be able to produce diagnostic usable hardcopies. No special technical skills are required. All basic operator functions can be activated directly by pressing a single key on the keypad.
-
Page 37: Managing The Print Queue
Drystar 5302. Refer to the User manual of the acquisition modality for more information.
-
Page 38
5302 R RYSTAR EFERENCE MANUAL A description of the possible status of the jobs is listed in the table below: Status Description Printing Printing of this job is in progress. The necessary calculations are already being Calculating made before printing of the job can be started. Waiting Jobs are queued in the printer memory. -
Page 39: Pausing The Print Queue
RYSTAR EFERENCE MANUAL Pausing the print queue When the Drystar 5302 is printing, you can always pause the print queue by entering the operator menu. To pause the print queue, proceed as follows: During a print job, the ‘print’ screen is displayed: Mod.name…
-
Page 40: Viewing The Film Count Info
EFERENCE MANUAL Viewing the film count info When the Drystar 5302 is printing, you can always view the number of films left in the trays by entering the operator menu. Do not open the input trays to view the number of loaded films while the…
-
Page 41: Viewing The Printer Status
RYSTAR EFERENCE MANUAL Viewing the printer status When the Drystar 5302 is printing, you can always view the printer status by entering the operator menu. To view the printer status, proceed as follows: During a print job, the ‘print’ screen is displayed: Mod.name…
-
Page 42: About Drystar 5302 Consumables
RYSTAR EFERENCE MANUAL About Drystar 5302 consumables The Drystar 5302 can handle blue-transparent (Drystar DT 2B) and clear- transparent (Drystar DT 2C) films. Available film formats are 8×10”, 10×12”, 11×14”, 14×14” and 14×17”. The printer has 2 input trays. Both trays can handle all listed film types and formats.
-
Page 43
5302 R RYSTAR EFERENCE MANUAL Appropriate labels have been applied on the input tray(s) by the service personnel at installation of the printer, indicating the type of new film to be loaded when the tray is empty. 2830A EN 20050526 Basic operation (Operator mode) -
Page 44: Loading Films
The Drystar 5302 can be loaded with 8×10”, 10×12”, 11×14”, 14×14” and 14×17” films. The Drystar 5302 can be loaded with new films in full daylight. Loading films is easy and can be done very quickly. Follow the procedures as described in this section.
-
Page 45
Load a new film pack. Refer to ‘Film loading procedure’ on page 46. When the Drystar 5302 is in the ready state and an input tray is empty: The display shows the following message: Blinking Open the lower input tray. -
Page 46
5302 R RYSTAR EFERENCE MANUAL Film loading procedure Open the empty input tray. To avoid possible film jams, make sure to open input tray all the way. The printer is ready to receive a new film when the following message appears: Basic operation (Operator mode) 2830A EN 20050526… -
Page 47
5302 R RYSTAR EFERENCE MANUAL Remove the white (protective) film sheet. Take film pack, and open it. Verify that the film type on the film pack corresponds with the sticker on the tray! If you do use an other film type, you are advised to change the label on the tray. You can put the film pack onto a table to make manipulation easier. -
Page 48
5302 R RYSTAR EFERENCE MANUAL Remove the plastic film bag partially. Slide the film pack into the input tray, and remove the plastic film bag completely. Basic operation (Operator mode) 2830A EN 20050526… -
Page 49
‘Clearing of film jams’ on page 181. The Drystar 5302 resumes printing as soon as the tray is closed. Loading instructions are also available on the input tray cover. When a film job cannot be done because the tray to which the job is assigned is empty, then the printer will check if the films in the other tray can be used for this and other print jobs in the print queue. -
Page 50
5302 R RYSTAR EFERENCE MANUAL Checking the correct position of a film in the input tray You can verify that the film is properly loaded by watching the lower right corner of the films in the input tray. The rounding of this corner should be smaller than the other three corners. -
Page 51: Chapter 3: Advanced Operation (Key-Operator Mode)
Chapter Advanced operation (Key-operator mode) This chapter gives an overview of functions for the advanced user: Overview of key-operator functions Viewing printer information Changing the configuration settings Printing images Saving the configuration settings Restoring the configuration settings Performing the calibration procedures Cleaning the print head Service actions Quality Control…
-
Page 52: Overview Of Key-Operator Functions
EFERENCE MANUAL Overview of key-operator functions The key-operator menus make it possible to use the Drystar 5302 advanced functions. For general information on the key functions of the Drystar 5302, refer to ‘The local user interface’ on page 22. Overview…
-
Page 53: General
5302 R RYSTAR EFERENCE MANUAL The menu structure General Show settings General Other… Upper input tray Lower input tray Time and date Network(DICOM) Language Image quality Beep on empty tray Logical printers Installed datasets General Change settings Film view Upper Input tray Film type Lower Input tray Film format…
-
Page 54
7 Service Actions 8 Quality Control 9 Installation When you try to enter the key-operator mode while the Drystar 5302 is printing, it will first finish the active print job(s): Blinking If certain mandatory site-specific data has not yet been entered, the following screen is displayed when entering the key-operator mode (refer to ‘Changing the… -
Page 55
Press the Confirm key to return to the key-operator menu. Otherwise, the key- operator menu will be closed. The Drystar 5302 will sound a long beep if you press a key that is not to be used at that moment. -
Page 56: Viewing Printer Information
5302 R RYSTAR EFERENCE MANUAL Viewing printer information A number of data and parameter settings of the printer can be viewed by using the ‘Show settings’ function: Show settings Page General ‘Viewing general information’ Input tray ‘Viewing input tray information’ Network (DICOM) ‘Viewing network (DICOM) information’…
-
Page 57
5302 R RYSTAR EFERENCE MANUAL Accessing the Show settings menu Press the Key-operator key to enter the key-operator mode. On the key-operator main menu, press the Confirm key to select ‘Show settings’. The Show settings menu is displayed: 5 Image quality 6 Logical printers 7 Installed datasets This menu is the starting point for viewing printer information (see next pages). -
Page 58: Viewing General Information
More information, such as site-specific data, can be viewed via the browser only. Refer to the chapter ‘Controlling the Drystar 5302 via a remote PC (with browser)’. Press the Confirm key to return to the Show settings menu. Advanced operation (Key-operator mode)
-
Page 59: Viewing Input Tray Information
5302 R RYSTAR EFERENCE MANUAL Viewing input tray information In this manual, we always will elaborate a case for the lower tray. The procedures of showing the settings are identical for the upper tray. On the Show settings menu, press the Down key once to see the upper tray settings, twice to see the lower tray settings Perform steps 1 and 2 of the ‘Accessing the Show settings menu’…
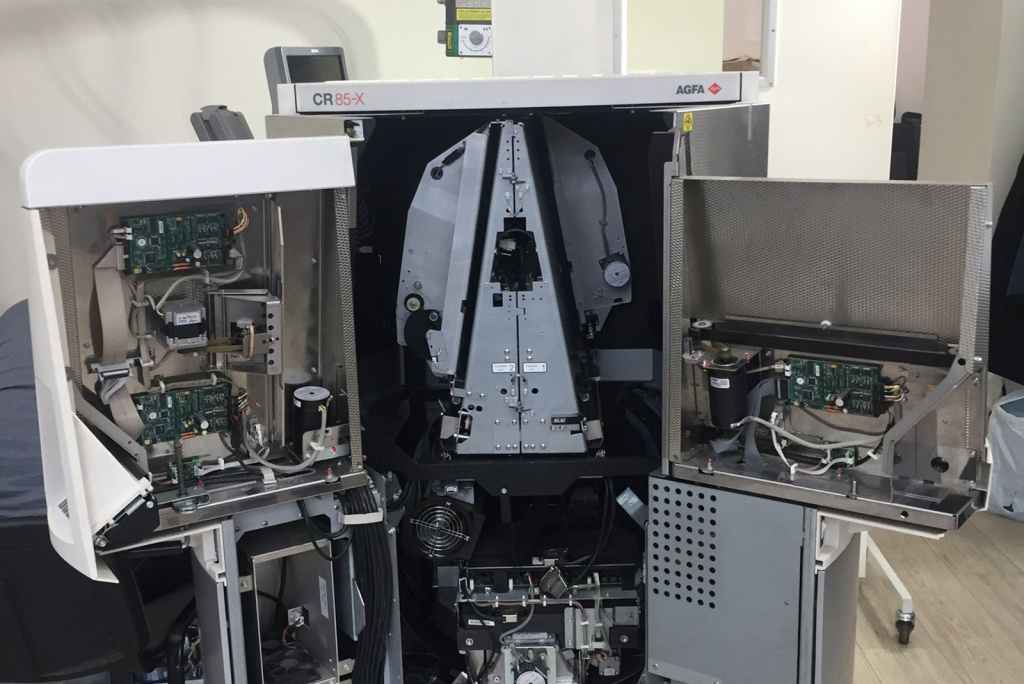
-
Page 60: Viewing Network (Dicom) Information
AE-title of the Drystar 5302, • the hostname of the Drystar 5302, • the domain name, • the IP address of the Drystar 5302, • the netmask used for the Drystar 5302, • the IP address of the router, •…
-
Page 61: Viewing General Image Quality Information
5302 R RYSTAR EFERENCE MANUAL Viewing general image quality information Perform steps 1 and 2 of the ‘Accessing the Show settings menu’ procedure on page 57. On the Show settings menu, press the Down key four times, followed by the Confirm key to select ‘Image quality’.
-
Page 62
5302 R RYSTAR EFERENCE MANUAL The default densitometer type is displayed: X-rite 310 Press the Confirm key to return to step 3, then press the Escape key to return to the Image quality menu (see step 2). In the Image quality menu, press the Escape key to return to the Show settings menu. -
Page 63: Viewing Image Quality Information For A Modality
5302 R RYSTAR EFERENCE MANUAL Viewing image quality information for a modality Perform steps 1 and 2 of the ‘Accessing the Show settings menu’ procedure on page 57. On the Show settings menu, press the Down key four times, followed by the Confirm key to select ‘Image quality’.
-
Page 64: Viewing The Logical Printers Configuration
2 other logical printers e.g. DS_5302_2, DS_5302_3, … This screen gives an overview of the logical printers defined in the Drystar 5302. The logical printers information can be helpful when assigning a modality output to a particular Drystar 5302 profile. Configuring logical printers can be done via the remote webpages.
-
Page 65: Viewing Installed Datasets Information
5302 R RYSTAR EFERENCE MANUAL Viewing installed datasets information Perform steps 1 and 2 of the ‘Accessing the Show settings menu’ procedure on page 57. On the Show settings menu, press the Down key six times, followed by the Confirm key to select ‘Installed datasets’. The ‘Installed datasets’…
-
Page 66: Changing The Configuration Settings
• Via the LOCAL keypad, you can access only the MAIN features. • Via a REMOTE connection, you can access ALL features. For more information about controlling the Drystar 5302 via a remote browser PC, refer to the chapter ‘Controlling the Drystar 5302 via a remote PC (with browser)’…
-
Page 67
5302 R RYSTAR EFERENCE MANUAL ‘Adding a modality’ Image quality ‘Changing general image quality settings — Film calibration’ ‘Changing general image quality settings — Default densitometer’ ‘Changing Image quality settings for a modality — Selecting a lookup table’ ‘Changing Image quality settings for a modality — Changing the interpolation’… -
Page 68
The ‘Change settings’ menu is displayed: 5 Image quality This menu is the starting point for changing the Drystar 5302 settings. Press the Escape key to return to the key-operator main menu. Press the Escape key to quit the key-operator mode. -
Page 69
5302 R RYSTAR EFERENCE MANUAL When the automatic backup is finished, you will also be asked to create a back- up of the new settings on an external CF-card. Do one of the following: • If you want to save the configuration on the back-up CF-card, press the Confirm key (YES). -
Page 70: Changing The Date And Time
5302 R RYSTAR EFERENCE MANUAL Changing the general settings Changing the date and time Perform steps 1 to 2 of the ‘Accessing the Change settings menu’ procedure on page 68. On the Change settings menu, press the Confirm key to select ‘General’. The ‘General’…
-
Page 71: Changing The Language
The ‘General’ screen is displayed: On the ‘General’ screen, press the Down key, followed by the Confirm key to select ‘Language’. The ‘Language’ screen is displayed with the available languages (contact Agfa for the latest Drystar 5302 language availability status). For example: 1*English…
-
Page 72: Changing The Beep On Empty Tray Settings
5302 R RYSTAR EFERENCE MANUAL Changing the beep on empty tray settings Perform steps 1 to 2 of the ‘Accessing the Change settings menu’ procedure on page to select the ‘General’ screen. On the Change settings menu, press the Confirm key to select ‘General’. The ‘General’…
-
Page 73: Changing The Site-Specific Data (Via Remote Browser Only)
5302 R RYSTAR EFERENCE MANUAL Changing the site-specific data (via remote browser only) The following site-specific data are stored in the Drystar 5302 memory: Field Mandatory Site name Site address (contact) City Tel. country code Tel. number Modem Department Contact person…
-
Page 74: Changing The Film View
5302 R RYSTAR EFERENCE MANUAL Changing the input tray settings In this manual, we always will elaborate a case for the lower tray. The procedures of changing the settings are identical for the upper tray. On the Change settings menu, press the Down key once to change the upper tray settings, twice to change the lower tray settings.
-
Page 75: Changing The Film Type
5302 R RYSTAR EFERENCE MANUAL Changing the film type Using the following procedure you can overrule the film type, which is automatically read by means of the Film Identification tag on the film pack. This procedure is only to be used exceptionally when the Film Identification tag info is incorrect.
-
Page 76: Changing The Film Format
5302 R RYSTAR EFERENCE MANUAL Changing the film format Using the following procedure you can overrule the film format, which is automatically read by means of the Film Identification tag on the film pack. This procedure is only to be used exceptionally when the Film Identification tag info is incorrect.
-
Page 77
The overrule settings remain active until a new film pack is loaded. If the format is changed from the previous format, the following message appears (example): 11×14″ ‘Drystar 5302 network You must modify the tray configuration. Refer to configuration’ on page for more information. -
Page 78: Changing The Printer Ae-Title
5302 R RYSTAR EFERENCE MANUAL Changing network (DICOM) configuration Changing the printer AE-title Perform steps 1 to 2 of the ‘Accessing the Change settings menu’ procedure on page 68. On the Change settings menu, press the Down key three times, followed by the Confirm key to select ‘Network (DICOM)’.
-
Page 79: Changing The Hostname
5302 R RYSTAR EFERENCE MANUAL Changing the hostname Perform steps 1 to 2 of the ‘Accessing the Change settings menu’ procedure on page 68. On the Change settings menu, press the Down key three times, followed by the Confirm key to select ‘Network (DICOM)’. The ‘Network (DICOM)’…
-
Page 80: Changing The Domain Name
5302 R RYSTAR EFERENCE MANUAL Changing the domain name Perform steps 1 to 2 of the ‘Accessing the Change settings menu’ procedure on page 68. On the Change settings menu, press the Down key three times, followed by the Confirm key to select ‘Network (DICOM)’. The ‘Network (DICOM)’…
-
Page 81: Changing The Printer Ip Address
5302 R RYSTAR EFERENCE MANUAL Changing the printer IP address Perform steps 1 to 2 of the ‘Accessing the Change settings menu’ procedure on page 68. On the Change settings menu, press the Down key three times, followed by the Confirm key to select ‘Network (DICOM)’.
-
Page 82
5302 R RYSTAR EFERENCE MANUAL Example 1: if the IP address is 120.000.120.120, then the data entry should be as follows: Example 2: if the IP address is 120.0.120.120, then the data entry should be as follows: Press the Confirm key to store the data, or the Escape key to quit the procedure without any changes. -
Page 83: Changing The Netmask
5302 R RYSTAR EFERENCE MANUAL Changing the netmask Perform steps 1 to 2 of the ‘Accessing the Change settings menu’ procedure on page 68. On the Change settings menu, press the Down key three times, followed by the Confirm key to select ‘Network (DICOM)’. The ‘Network (DICOM)’…
-
Page 84: Changing The Router Ip Address
5302 R RYSTAR EFERENCE MANUAL Changing the router IP address Perform steps 1 to 2 of the ‘Accessing the Change settings menu’ procedure on page 68. On the Change settings menu, press the Down key three times, followed by the Confirm key to select ‘Network (DICOM)’.
-
Page 85: Removing A Modality
5302 R RYSTAR EFERENCE MANUAL Removing a modality Perform steps 1 to 2 of the ‘Accessing the Change settings menu’ procedure on page 68. On the Change settings menu, press the Down key three times, followed by the Confirm key to select ‘Network (DICOM)’. The ‘Network (DICOM)’…
-
Page 86: Adding A Modality
5302 R RYSTAR EFERENCE MANUAL Adding a modality Perform steps 1 to 2 of the ‘Accessing the Change settings menu’ procedure on page 68. On the Change settings menu, press the Down key three times, followed by the Confirm key to select ‘Network (DICOM)’. The ‘Network (DICOM)’…
-
Page 87
5302 R RYSTAR EFERENCE MANUAL Press the Confirm key to store the data, or the Escape key to quit the procedure without any changes. The ‘Select modality brand name’ screen is displayed: 2 FUJI 3 SIEMENS 4 PHILIPS Press the up/down arrow keys to select the appropriate modality brand name. If you have selected ‘Default profile’, the modality AE-title will be linked with the default settings. -
Page 88
5302 R RYSTAR EFERENCE MANUAL Press the Confirm key to store the data, or the Escape key to quit the procedure without any changes. The ‘Select preferred FILM TYPE for’ screen will appear: <modality name> 1*Drystar DT 2B 2 Drystar DT 2C You can find the film type on the film packaging, e.g. -
Page 89: Changing General Image Quality Settings — Film Calibration
5302 R RYSTAR EFERENCE MANUAL Changing the image quality settings Changing general image quality settings — Film calibration Perform steps 1 and 2 of the ‘Accessing the Change settings menu’ procedure on page 68. On the Change settings menu, press the Down key four times, followed by the Confirm key to select ‘Image quality’.
-
Page 90
RYSTAR EFERENCE MANUAL Press the up/down key to select the preferred film calibration default. When the setting is ON, the Drystar 5302 will ask you to enter the calibration frequency: Automatic film calibration after every ‘x’ packs Enter the calibration frequency by means of the up/down key. Refer to ‘Data entry’… -
Page 91: Changing General Image Quality Settings — Default Densitometer
5302 R RYSTAR EFERENCE MANUAL Changing general image quality settings — Default densitometer Perform steps 1 and 2 of the ‘Accessing the Change settings menu’ procedure on page 68. On the Change settings menu, press the Down key four times, followed by the Confirm key to select ‘Image quality’.
-
Page 92: Changing Image Quality Settings For A Modality — Selecting A Lookup Table
• If you want to attribute the default profile, select ‘Profile default’ and press the Confirm key. The Drystar 5302 will be loaded with these settings and return to the ‘Image quality’ main menu (see step 2). • If you want to add a custom profile, select ‘Select other’ and press the Confirm key.
-
Page 93
5302 R RYSTAR EFERENCE MANUAL The Drystar 5302 will continue with the ‘Select for Modality’ screen, allowing you to change the Look-up table, the Interpolation and the maximum density (Dmax) values manually. <Modality name> 3 Dmax In the ‘Select for Modality’ screen, press the Confirm key to select ‘Look-up table’. -
Page 94
• If you want to attribute the default profile, select ‘Profile default’ and press the Confirm key. The Drystar 5302 will be loaded with these settings and return to the ‘Image quality’ main menu (see step 2). • If you want to add a custom profile, select ‘Select other’ and press the Confirm key. -
Page 95
5302 R RYSTAR EFERENCE MANUAL The Drystar 5302 will continue with the ‘Select for Modality’ screen, allowing you to change the Look-up table, the Interpolation and the maximum density (Dmax) values manually. <Modality name> 3 Dmax In the ‘Select for Modality’ screen, press the Down key, followed by the Confirm key to select ‘Interpolation’. -
Page 96: Changing Image Quality Settings For A Modality — Changing The Maximum
• If you want to attribute the default profile, select ‘Profile default’ and press the Confirm key. The Drystar 5302 will be loaded with these settings and return to the ‘Image quality’ main menu (see step 2). • If you want to add a custom profile, select ‘Select other’ and press the Confirm key.
-
Page 97
5302 R RYSTAR EFERENCE MANUAL The Drystar 5302 will continue with the ‘Select for Modality’ screen, allowing you to change the Look-up table, the Interpolation and the maximum density (Dmax) values manually. <Modality name> 3 Dmax In the ‘Select for Modality’ screen, press the Down key twice, followed by the Confirm key to select ‘Dmax’. -
Page 98: Printing Images
5302 R RYSTAR EFERENCE MANUAL Printing images A number of ‘test’ images can be printed, either from an external CF-card or from the hard disk: Print image Page Test image ‘Printing test images’ From CF-card ‘Printing files from an external CF-card’ Accessing the print images menu Press the Key-operator key to enter the key-operator mode.
-
Page 99
RYSTAR EFERENCE MANUAL Printing test images Test images are useful for checking the print quality. The Drystar 5302 offers a number of built-in test images stored on the hard disk. Perform steps 1 to 2 of the ‘Accessing the print images menu’… -
Page 100
5302 R RYSTAR EFERENCE MANUAL After about five seconds this screen will disappear. If you try to print another image, the following message will appear: Wait until one or more print jobs have finished before launching a new one. Printing files from an external CF-card TIFF images stored on an external CF-card can be printed using the ‘Print from CF-card’… -
Page 101
5302 R RYSTAR EFERENCE MANUAL Press the up/down arrow keys to select the desired image file, followed by the Confirm key. The ‘Number of copies’ screen is displayed: Number of desired copies Press the arrow keys to increment/decrement the number. followed by the Confirm key to confirm the number of copies. -
Page 102: Saving The Configuration Settings
5302 R RYSTAR EFERENCE MANUAL Saving the configuration settings The save configuration menu allows you to save of all printer settings or to save only the network setting: Save configuration Page General ‘General save configuration procedure’ Network only ‘Network only save configuration procedure’ Accessing the save configuration menu Press the Key-operator key to enter the key-operator mode.
-
Page 103
5302 R RYSTAR EFERENCE MANUAL General save configuration procedure Each time the settings have been changed and confirmed, an automatic back- up of the old configuration is made on the hard disk. You will also be asked to create a back-up on an external CF-card. It is also possible (and recommended) to regularly make a back-up of the printer settings to ensure safe restoring of the values when required. -
Page 104
5302 R RYSTAR EFERENCE MANUAL Remove the CF-card. Refer to ‘Removing a CF-card’ on page 26. As soon as the CF-card has been removed, the following screen is displayed: BAC_<save_set_name> The <save set name > is preceded by the characters “BAC”. BAC stands for General backup. -
Page 105
5302 R RYSTAR EFERENCE MANUAL Network only save configuration procedure Perform steps 1 to 2 of the ‘Accessing the save configuration menu’ procedure on page to select the ‘Save configuration’ screen. On the Save configuration menu, press the Down key, followed by the Confirm key to select ‘Network only’. -
Page 106
5302 R RYSTAR EFERENCE MANUAL Remove the CF-card. Refer to ‘Removing a CF-card’ on page 26. As soon as the CF-card has been removed, the following screen is displayed: NWS_<save_set_name> The <save set name > is preceded by the characters “NWS”. NWS stands for Network only. -
Page 107: Restoring The Configuration Settings
5302 R RYSTAR EFERENCE MANUAL Restoring the configuration settings The restore configuration menu allows you to restore all configuration settings of the printer or to restore only the network setting: Restore configuration Page General ‘Restoring the printer settings’ Network only ‘Restoring the network settings’…
-
Page 108
5302 R RYSTAR EFERENCE MANUAL Restoring the printer settings When necessary, you can restore the configuration settings of the printer. The following functions are available for restoring a back-up copy of the configuration files: • ‘Restoring printer settings from an external CF-card’ (page 108) •… -
Page 109
5302 R RYSTAR EFERENCE MANUAL Insert the CF-card, which contains a back-up of the printer settings. Refer to ‘Inserting a CF-card’ on page 25. Make sure that you insert the correct CF-card, containing the printer settings you want to restore. If no data are available on the CF-card, the following message is displayed: If multiple data are present on the CF-card, the following screens appear successively:… -
Page 110
5302 R RYSTAR EFERENCE MANUAL Press the Confirm key (YES) to proceed with the selected file, or the Escape key (NO) to quit the procedure without any changes. If you press the Confirm key, the printer will restore the configuration from the external CF-card on the hard disk and the following screens appear successively: A:<path><filename>… -
Page 111
5302 R RYSTAR EFERENCE MANUAL Restoring printer settings from the hard disk Perform steps 1 to 2 of the ‘Accessing the re store configuration menu’ procedure on page 107. On the Restore configuration menu, press the Confirm key to select ‘General’. The following ‘Restore Configuration’… -
Page 112: Restoring The Network Settings
5302 R RYSTAR EFERENCE MANUAL Restoring the network settings When necessary, you can restore the network settings of the printer. You can only restore a back-up copy of the network settings from an external CF-card. Perform steps 1 to 2 of the ‘Accessing the re store configuration menu’…
-
Page 113
5302 R RYSTAR EFERENCE MANUAL Press the Confirm key (YES) to proceed with the selected file, or the Escape key (NO) to quit the procedure without any changes. If you press the Confirm key, the printer will restore the network settings from the external CF-card on the hard disk and the following screens appear successively: A:<path><filename>… -
Page 114: Performing The Calibration Procedures
5302 R RYSTAR EFERENCE MANUAL Performing the calibration procedures Accessing the Calibration menu Press the Key-operator key to enter the key-operator mode. On the key-operator main menu, press the Down key five times followed by the Confirm key to select ‘Calibration’. The ‘Select calibration’…
-
Page 115
MDM (Macro Densitometer). The Drystar 5302 is being calibrated during the printing process. If the Drystar 5302 cannot read the Film identification tag, no calibration is possible and the following message is displayed: Press the Confirm key to retry calibrating. -
Page 116
5302 R RYSTAR EFERENCE MANUAL When the film calibration has been completed successfully, three cases are possible: • Calibration successful, results OK. The obtained maximum density (Dmax (3.10)) after calibration is displayed: Blinking Blinking Maximum density = 3.10 (X-Rite 301) •… -
Page 117
5302 R RYSTAR EFERENCE MANUAL Density response of Drystar media Different densitometers can give different results for measuring the same density area on a Drystar film. This is due to spectral response differences between the densitometers. The density values used in this manual are based on the Macbeth TR924 densitometer. -
Page 118: Cleaning The Print Head
5302 R RYSTAR EFERENCE MANUAL Cleaning the print head Print head cleaning must be done when image quality problems occur. To clean the print head: Press the Key-operator key to enter the key-operator mode. On the key-operator main menu, press the Down key five times, followed by the Confirm key to select ‘Calibration’.
-
Page 119
5302 R RYSTAR EFERENCE MANUAL Open the top cover. As soon as the top cover is opened, the ‘Thermal head cleaning’ screen continues giving the following instructions: Open the hold-down bracket. 2830A EN 20050526 Advanced operation (Key-operator mode) -
Page 120
5302 R RYSTAR EFERENCE MANUAL Open the print head unit. The print head unit can be warm. Locate and check on sight the print head resistor line. Be careful not to touch the print head resistor line with your fingers. Advanced operation (Key-operator mode) 2830A EN 20050526… -
Page 121
5302 R RYSTAR EFERENCE MANUAL Clean the print head resistor line. Gently pass over the resistor line a few times with a lint free cloth, slightly moistened with Isopropyl alcohol or Ethanol. Do this only in one direction, i.e. from left to right, without lifting the cloth. -
Page 122: Service Actions
5302 R RYSTAR EFERENCE MANUAL Service actions The Drystar 5302 is capable of assisting the Service engineer and/or hospital technician to maintain or repair the printer. Overview of service actions Four groups of service actions are provided by the Drystar 5302.
-
Page 123
If no data is available for the selected service action, the following screen appears: • If data available for the selected service action, detailed screens appears. Please contact your AGFA representative for detailed information about the various service action screens. Press the Escape key to return to the key-operator main menu. -
Page 124: Quality Control
In order to establish and maintain consistent image quality, a regular evaluation of image quality is advised. The Drystar 5302 contains an automatic QC feature that has been designed to comply with the grayscale reproduction constancy test, according to the international standard IEC 1223-2-4.
-
Page 125
EFERENCE MANUAL Establishing the reference values and verifying image quality After installation of a new Drystar 5302 and before initial use you must establish Quality Control aim values. These values will be used as the base line for comparison when daily Quality Control is done. These values should be determined again after major service, repair or software update. -
Page 126
5302 R RYSTAR EFERENCE MANUAL QC test image The QC image has several additional fields where the QC data can be filled in. This image should be filed as part of the QC procedure. The following two examples illustrate a QC test image for a different film format. -
Page 127
5302 R RYSTAR EFERENCE MANUAL • QC test image for film format 8×10” Geometry test Daily density tests Max D Max D Hi D Hi D Mid D Mid D Lo D Lo D Base Base + Fog + Fog Density Difference (Hi D — Lo D) Weekly spatial… -
Page 128
• Mid density • High density The densitometer of the Drystar 5302 is calibrated at installation. Authorized service personnel should recalibrate the densitometer annually or after major service or repair. To establish the daily operating levels, proceed as follows: Press the Key-operator key to enter the Key-operator mode. -
Page 129
Press the Up/Down arrow keys to select the desired tray, followed by the Confirm key. The following screens appear successively: The Drystar 5302 will automatically print the QC test image. After the image is printed, the system will display the optical density values: The density levels are displayed, e.g: Max D: 3.1… -
Page 130
5302 R RYSTAR EFERENCE MANUAL Record the low, mid and high density levels on Chart 1 (‘Drystar 5302 Determination of Operating Levels’). Refer to ‘Quality Control Charts’ page 211. Press the Confirm key to return to the main menu. Repeat step… -
Page 131
We strongly recommend using a 30 cm (12-inch) machinist scale with 0.5 mm divisions (1/64 inch). Record these values as reference dimensions A on Chart 4 (‘Drystar 5302 Geometric Consistency Control Chart’). Refer to ‘Quality Control Charts’ on page 211. -
Page 132
126) and the upper circle (refer to item 2 on the ‘QC test image’ on page 126). Record these values at the top of Chart 3 (‘Drystar 5302 Artifacts and Spatial Resolution Control Chart’). Refer to ‘Quality Control Charts’ on page 211. -
Page 133
Performing the daily QC test This test must be performed every day before any clinical film can be processed. Turn on the Drystar 5302 and wait at least for 15 minutes. Refer to ‘Switching on the Drystar 5302’ on page 32. -
Page 134
(Densitometer=MB924) Record the low, mid and high density values on Charts 2A and 2B (‘Drystar 5302 Daily Density Control Chart’). Also record the date and time of the test on the charts and on the QC test images. Refer to ‘Quality Control… -
Page 135
2 on the ‘QC test image’ on page 126). Record these values on Chart 3 (‘Drystar 5302 Artifacts and Spatial Resolution Control Chart’). In case of significant artifacts, insufficient spatial resolution or failure of any other recommended QC tests, the cause of the problem must be identified, and corrective action must be taken before the Drystar 5302 can be used for any further clinical imaging. -
Page 136
We strongly recommend using a 30 cm (12-inch) machinist scale with 0.5 mm divisions (1/64 inch). Record these values as measured dimensions A and B on Chart 4 (‘Drystar 5302 Geometric Consistency Control Chart’). Compare the measured A and B dimensions with the reference dimension… -
Page 137: Installation
5302 R RYSTAR EFERENCE MANUAL Installation Two installation operations are possible: • install new software, or upgrade existing software from a CF-card, • perform a complete installation procedure, using the printer installation wizard. Installing new or upgrading existing software It is possible to install new software or new software components. Different software (components) can be installed: •…
-
Page 138
5302 R RYSTAR EFERENCE MANUAL Press the Confirm key to select ‘Installation from CF-card’. Before the procedure starts, the system suggests you make a back-up copy of the current configuration. It is highly recommended to do this, so you can always restore it in case something should go wrong. -
Page 139
5302 R RYSTAR EFERENCE MANUAL Press the up/down arrow keys to select the desired save set file, followed by the Confirm key. The following confirmation screen is displayed: <Dataset def v1.00> Press the Confirm key (YES) to proceed with the selected file, or the Escape key (NO) to quit the procedure without any changes. -
Page 140
5302 R RYSTAR EFERENCE MANUAL Using the installation wizard When you install the Drystar 5302, the installation wizard will guide you through the complete installation procedure. The installation wizard consists of three steps: • ‘Entering the printer network settings’ (page 142), •… -
Page 141
5302 R RYSTAR EFERENCE MANUAL Press the up/down arrow keys to select the desired language. Press the Confirm key to store the data, or the Escape key to quit the procedure without any changes. The ‘Date’ screen is displayed: Press the up/down arrow keys to increment/decrement the numbers or the month. -
Page 142
5302 R RYSTAR EFERENCE MANUAL Press the Confirm key to continue. A screen with information on the sequence of the steps will appear: settings 2.Host specific settings 3.Save configuration Press the Confirm key to start with step 1 or press the Escape key to quit the procedure. -
Page 143
5302 R RYSTAR EFERENCE MANUAL Press the up/down arrow keys to increment/decrement the numbers. Press the left/right arrow keys to move through the fields. Press the Confirm key to store the data. Refer to ‘Data entry’ on page 31. Note that blank spaces will be ignored (see examples below). Example 1: if the IP address is 120.000.120.120, then the data entry should be as follows: Example 2: if the IP address is 120.0.120.120, then the data entry should be as… -
Page 144
5302 R RYSTAR EFERENCE MANUAL Press the Confirm key to store the data, or the Escape key to quit the procedure without any changes. The ‘Router IP address’ screen is displayed: 120.120.120.120 If the Router IP address has already been assigned, it will be shown on the display. Enter the Router IP address by means of the arrow keys. -
Page 145
Press the Escape key to exit the wizard on the local keypad. Refer to ‘Controlling the Drystar 5302 via a remote PC (with browser)’ on page 151. If you wish to continue with the installation wizard from the local keypad, press the Confirm key to continue. -
Page 146
5302 R RYSTAR EFERENCE MANUAL Entering modality specific settings An instruction screen shows the information you need to complete this part of the installation: name -Modality brand -Modality type -Modality AE-title ——————— ask your network administrator for this information. Press the Confirm key to continue or press the Escape key to skip this step. The ‘Enter daily used Modality name’… -
Page 147
5302 R RYSTAR EFERENCE MANUAL Press the Confirm key to store the data, or the Escape key to quit the procedure without any changes. The ‘Select modality type’ screen is displayed: 2 MXVIEW 3 MX800 Press the up/down arrow keys to select the appropriate modality type. Press the Confirm key to store the data, or the Escape key to quit the procedure without any changes. -
Page 148
5302 R RYSTAR EFERENCE MANUAL Press the Confirm key to store the data, or the Escape key to quit the procedure without any changes. A screen summarizing the information you have entered will appear: Following data CTscanner Brand name: Philips Modality type: MXVIEW Modality AE-title:… -
Page 149: Saving The Configuration
5302 R RYSTAR EFERENCE MANUAL Saving the configuration You need to complete this step, otherwise all the install data you have entered will be lost! The printer settings are saved automatically to the hard disk. When 100% is reached, the following ‘Save configuration’ screen will ask you to insert the back-up CF-card: Insert a CF-card.
-
Page 150
5302 R RYSTAR EFERENCE MANUAL Label the CF-card with the BAC_<save_set_name> and press the Confirm key. The installation is now finished, and the following screen is displayed: CALIBRATION Option for further actions and to fill in the SITE-SPECIFIC DATA Press the Confirm key to accept the installation or press the Escape key to redo the installation. -
Page 151: Chapter 4: Controlling The Drystar 5302 Via A Remote Pc (With Browser)
Controlling the Drystar 5302 via a remote (with browser) This chapter will inform you on how to control the functions of the Drystar 5302 via the browser on a remote PC. Features Setup Setting up the connection Starting the remote session…
-
Page 152: Features
A network adapter, • A cross-link Ethernet cable (for a direct link between PC and Drystar 5302) or a straight Ethernet cable (for a connection via an existing network). Using the remote PC, you have access to five operating modes of the Drystar 5302: Operator mode, Key-operator mode, Service mode, Specialist mode, and Administrator (Security).
-
Page 153: Setup
5302 R RYSTAR EFERENCE MANUAL Setup The Drystar 5302 and the PC with browser can be set up in two ways: • using a crossed network cable, or • using a straight network cable. Configuration with crossed network cable In this configuration, a crossed network UTP cable is used to connect the service PC directly to the printer.
-
Page 154
5302 R RYSTAR EFERENCE MANUAL Configuration with straight network cable In this configuration, the PC is connected to the network with a straight network cable. Controlling the Drystar 5302 via a remote PC (with browser) 2830A EN 20050526… -
Page 155: Setting Up The Connection
Attributing a fixed IP address to the PC Go to Settings via the Start menu of Windows and click Control Panel. The Control Panel menu will appear. 2830A EN 20050526 Controlling the Drystar 5302 via a remote PC (with browser)
-
Page 156
5302 R RYSTAR EFERENCE MANUAL In the Control Panel menu, double-click Network. In the Network window, select TCP/IP Protocol, select the Protocols tab, and click Properties. Controlling the Drystar 5302 via a remote PC (with browser) 2830A EN 20050526… -
Page 157
255.255.0.0. Switching off the proxy settings of the browser Open the browser. In the Tools menu, click Internet Options. The Internet Options window will appear. 2830A EN 20050526 Controlling the Drystar 5302 via a remote PC (with browser) -
Page 158
Switch off all proxy settings of the browser and click OK. The PC is ready to make a connection. Refer to ‘Starting the remote session’ on page for more information. Controlling the Drystar 5302 via a remote PC (with browser) 2830A EN 20050526… -
Page 159
IP address to the PC’ on page 155. The PC is ready to make a connection. Refer to ‘Starting the remote session’ page for more information. 2830A EN 20050526 Controlling the Drystar 5302 via a remote PC (with browser) -
Page 160: Starting The Remote Session
Starting the remote session When starting the remote session, make sure the printer is in ‘Ready’ mode. To start the remote session, enter the Drystar 5302 IP address in the Address bar of the browser. The Browser welcome page appears: There are five access levels: Operator, Key-operator, Service Engineer, Specialist and Security (also know as administrator).
-
Page 161
• Password: 5302 You now have access to the Drystar 5302 functions in the key-operator mode. Only one session is active at one time on one printer. Mostly, the menu structure and the browser screens are structured in the same way as the local display of the printer. -
Page 162
• save and restore configuration datasets on/from the remote PC. Do not use the Back and Forward buttons of your browser. Use the links included in the web pages instead. Controlling the Drystar 5302 via a remote PC (with browser) 2830A EN 20050526… -
Page 163: Chapter 5: System Description
Chapter System description In this informative chapter you will find mechanical and functional descriptions. Main components Functional description Changing the film format of the trays Drystar 5302 network configuration Transport after installation…
-
Page 164: Main Components
5302 R RYSTAR EFERENCE MANUAL Main components Front view Top cover Output tray User interface (refer to page 22) Input tray Rear view CF-card slot Network RS-232 =>Service PC Power connection System description 2830A EN 20050526…
-
Page 165: Functional Description
5302 R RYSTAR EFERENCE MANUAL Functional description The Drystar 5302 consists of two functional blocks: a controller and a print engine. The controller • captures the incoming digital data and stores the image, • composes the different images, and •…
-
Page 166: Changing The Film Format Of The Trays
5302 R RYSTAR EFERENCE MANUAL Changing the film format of the trays The key-operator can adjust the film size setting of both input trays (8×10” up to 14×17” film sizes). First, the key-operator has to perform a mechanical modification. After this modification, the ‘film format’…
-
Page 167
5302 R RYSTAR EFERENCE MANUAL Remove the film position tab. Locate the correct tab position for the desired film format. 17″ 14″ 12″ 11″ 8″ 10″ 14″ 2830A EN 20050526 System description… -
Page 168
5302 R RYSTAR EFERENCE MANUAL Put the film position tab in place and push it down until it locks. Load a new film pack. Refer to ‘Loading films’ on page 44. System description 2830A EN 20050526… -
Page 169: Drystar 5302 Network Configuration
EFERENCE MANUAL Drystar 5302 network configuration The Drystar 5302 is a standard network printer. This means that you can just plug it into the (existing) ethernet network without any additional options or accessories. Drystar 5302 is also a native DICOM printer. Therefore the…
-
Page 170: Transport After Installation
5302 R RYSTAR EFERENCE MANUAL Transport after installation The Drystar 5302 is quite compact, so moving the printer over a short distance — if required — can be done in a convenient way. Refer to ‘Safety precautions’ on page 11.
-
Page 171: Chapter 6: Preventive Maintenance
Chapter Preventive maintenance This chapter guides the user through maintenance and cleaning tasks which require no special skills, tools nor training: Preventive maintenance schedule Cleaning the exterior…
-
Page 172: Preventive Maintenance Schedule
Do not touch the resistor line of the print head. • Always switch off the Drystar 5302 and disconnect the power cord from the outlet before carrying out any maintenance work inside the printer. Film jam removal or cleaning the printer head can be done without switching the power off.
-
Page 173: Cleaning The Exterior
5302 R RYSTAR EFERENCE MANUAL Cleaning the exterior Switch off the Drystar 5302 by following the procedure as described in ‘Switching off the Drystar 5302’ on page 34. Remove the power plug from the socket. Wipe the exterior of the printer with a clean, soft, damp cloth.
-
Page 174
5302 R RYSTAR EFERENCE MANUAL Preventive maintenance 2830A EN 20050526… -
Page 175: Chapter 7: Troubleshooting
Troubleshooting This chapter serves as a guide to identify and solve possible problems you may encounter. Troubleshooting checklist The Drystar 5302 does not print Clearing of film jams Film identification problems Start-up errors Maintaining image quality and resolving image qual-…
-
Page 176: Troubleshooting Checklist
RYSTAR EFERENCE MANUAL Troubleshooting checklist The table below lists some general problems, which can occur when working with the Drystar 5302. • The Drystar 5302 does not print. Action Refer to Page ‘Checking the status indicator LED’ ‘Checking the connections’…
-
Page 177
5302 R RYSTAR EFERENCE MANUAL Checking the status indicator LED The LED on the front panel indicates the Drystar 5302 operating status. Use the following table to determine the status of your printer. Receive Printing Colour Light Status Action jobs? Ready (stand-by) Proceed. -
Page 178: The Drystar 5302 Does Not Print
5302 R RYSTAR EFERENCE MANUAL The Drystar 5302 does not print Reset of the printer The Power/Reset button restarts the printer after a software failure or an error. Refer to on page ‘Switching off the Drystar 5302’ Checking the connections Regularly check all electrical connections.
-
Page 179
EFERENCE MANUAL Checking error messages If the Drystar 5302 is not printing your job, you should check the front panel display to see if the Drystar 5302 is indicating an error status. The operator is notified of the situation by means of an error screen and a beep. -
Page 180
5302 R RYSTAR EFERENCE MANUAL Checking the print queue If no error message is displayed, you should check the print queue: Mod.name The status can be: • printing (PR), • calculating (CA). A warning status, indicated by a blinking “W” in the upper right corner of the display, indicates that there is a problem that should be attended to. -
Page 181: Clearing Of Film Jams
5302 R RYSTAR EFERENCE MANUAL Clearing of film jams A film jam can be situated either: • In the input tray section. Refer to ‘Film input tray jams’ on page 182. • In the top section. Refer to ‘Film transport jams (clearing from the top)’ page 185.
-
Page 182
EFERENCE MANUAL Film input tray jams A film jam in the input tray can occur when the Drystar 5302 is opened while a film is currently printed, or when an individual film is incorrectly inserted in the input tray. Refer also to ‘Film identification problems’… -
Page 183
5302 R RYSTAR EFERENCE MANUAL To get a clear view, it may be necessary to remove any remaining film sheets, including the protective (white) sheet. Check if the film feed section of the input tray is clear. 2830A EN 20050526 Troubleshooting… -
Page 184
5302 R RYSTAR EFERENCE MANUAL Reposition the film stack in the film tray, making sure that all the sheets are kept correctly in place (refer to ‘Loading films’ on page 44). Close the film input tray. Troubleshooting 2830A EN 20050526… -
Page 185
5302 R RYSTAR EFERENCE MANUAL Film transport jams (clearing from the top) The following screen indicates that a jam occurred in the upper section of the film transport system. Blinking To remove a jammed film in the transport system: Please note that instructions for removing a film jam in the transport section are present on a sticker at the inside of the top cover. -
Page 186
5302 R RYSTAR EFERENCE MANUAL Open the print head unit. The print head unit can be warm. Gently remove the film sheet(s). Never use force to clear the jammed film. If it is not possible to gently remove the jammed film by pressing the transport buttons, proceed with the procedure as follows. -
Page 187
Press the Confirm key to continue. Make sure to follow carefully the procedures as described in this manual before attempting to open the printer. Refer to ‘Switching off the Drystar 5302’ on page 34. Refer to ‘Loading films’ on page 44. -
Page 188: Film Identification Problems
Overrule the Film Identification tag of the film pack To reload the current or another film pack In case the Drystar 5302 does not start printing after re-inserting a film pack, first check if this film pack is inserted correctly.
-
Page 189
Only your local service organization has the possibility to enable the “Overrule RF- tag Reading” setting! In case the Drystar 5302 does not start printing after inserting a new film pack, check if this film pack is inserted correctly. If the film pack is inserted correctly and the Drystar 5302 does not resume printing,… -
Page 190
5302 R RYSTAR EFERENCE MANUAL Press the Confirm button. • If the “Overrule RF-tag Reading” Setting is active, the following message is displayed: OVERRULE IDENTIFICATION CODE IS ACTIVE Dmax is limited due to safety reasons • If the “Overrule RF-tag Reading” Setting is not activated, the following message will be displayed: Re-enable printing by inserting correct… -
Page 191
5302 R RYSTAR EFERENCE MANUAL Film overrun from current pack The following message is presented when more than 110 copies are printed from the current film pack: THIS PACK. please insert other film pack. Reload a new film pack to resolve this problem. 2830A EN 20050526 Troubleshooting… -
Page 192: Error Messages During Printer Start-Up
‘Checking error messages’ on page 179. After starting up the Drystar 5302, the printer performs a self-test. A progress indicator will show the proceeding of this self-test. During the self-test, a number of messages can appear, meaning that the self-test has failed.
-
Page 193
5302 R RYSTAR EFERENCE MANUAL System self test failed In case the system self test failed, following message appears: ERROR System failure Software self test failed In case the software selftest has failed, following message appears: 2830A EN 20050526 Troubleshooting… -
Page 194: Maintaining Image Quality And Resolving Image Quality Problems
• After the replacement of a thermal head, • When loading new films into the input tray. Overview of calibration functions Two calibration functions are provided for the Drystar 5302. Calibration Purpose When? • To measure and set the system density of the •…
-
Page 195
5302 R RYSTAR EFERENCE MANUAL Understanding the calibration policy You should regularly perform a film calibration to assure an optimal image quality. Film calibration can be initiated in 2 ways: • Automatically, i.e. after printing every ‘x’ new film packs (frequency is adjustable), •… -
Page 196
5302 R RYSTAR EFERENCE MANUAL Persistent white dots or lines appear in the transport direction If fine white dots and one or more fine white lines appear in the transport direction (mostly due to dust infiltration), try the following remedies: Clean the print head resistor line. -
Page 197: Warning Messages
<explanatory text> Press the Confirm key to acknowledge the new warning condition. As long as the warning condition has not been resolved, the other Drystar 5302 screens (except the Key-operator screens) will show a ‘W’ character blinking in the upper right corner (e.g. the Operator menu screen): ‘W’…
-
Page 198: Maintenance Messages
<explanatory text> Press the Confirm key to acknowledge the new maintenance condition. As long as the maintenance action has not been executed, the other Drystar 5302 screens (except the Key-operator screens) will show a ‘M’ character blinking in the upper right corner (e.g. the Operator menu screen): ‘M’…
-
Page 199: Appendix A: Equipment Information Sheet
Appendix Equipment information sheet…
-
Page 200: Specifications
5302 R RYSTAR EFERENCE MANUAL Specifications Product description Type of product Printer Commercial name Drystar 5302 Original seller/manufacturer Agfa-Gevaert N.V. Labelling TÜV-, cULus-Certification Mark, CE-marking CCC Mark Dimensions • Unpacked: width 72.8, length 71.5, height 67.6 Dimensions (approx. values in cm) •…
-
Page 201
5302 R RYSTAR EFERENCE MANUAL Network connectivity RJ45 twisted pair for 10/100Base-TX; Ethernet / connectors Serial RS232 connection Network protocols (TCP/IP services) FTP, Telnet, HTTP DICOM (Default) Image formats TIFF Postscript Not available Power consumption — heat dissipation During operation 250 W — 900 kJ/h In stand-by 70 W — 252 kJ/h… -
Page 202
Print technology Direct thermal printing Reliability Estimated product life (if regularly serviced and maintained > 5 years according to Agfa instructions) Service interventions Max. 2 interventions / 3 years Earthquake (standard) Meets the CA requirements Equipment information sheet 2830A EN 20050526… -
Page 203
5302 R RYSTAR EFERENCE MANUAL Imaging Array — Diagnostic area 8×10” 8” dimensions 10” dimensions pixels pixels 2376 188.65 3070 243.76 10×12” 10” dimensions 12” dimensions pixels pixels 3070 243.76 3653 290.05 11×14” 11” dimensions 14” dimensions pixels pixels 3348 265.83 4358 346.03… -
Page 204: Viewing The System Info Area On A Film
The System info area contains info about: • Printer: (serial number, densitometer info, film counts, software version, etc.), • Controller (image source, date, time, etc.). For more detailed information, refer to the Drystar 5302 Service documentation. Equipment information sheet 2830A EN 20050526…
-
Page 205: Options And Accessories
5302 R RYSTAR EFERENCE MANUAL Options and accessories Mobile / Earthquake provisions Not available. 2830A EN 20050526 Equipment information sheet…
-
Page 206: Connectivity
Drystar 5302 is a Dicom printer and can therefore be connected to all modalities supporting Dicom. Although, to ensure optimal operation and image quality, Agfa has made the effort to test and release the Drystar 5302 with most of modalities on the market. For the complete list or if you want to check on a specific modality, contact your Agfa representative.
-
Page 207: Appendix B: Drystar Media Density Response Data
Appendix Drystar media density response data…
-
Page 208: Drystar Dt 2B
5302 R RYSTAR EFERENCE MANUAL Drystar DT 2B MacBeth Gretag X-rite X-rite X-rite X-rite dens. TR-924 D200-2 0.22 0.16 0.18 0.23 0.19 0.19 0.45 0.47 0.52 0.48 0.48 0.78 0.73 0.75 0.80 0.76 0.76 1.06 1.02 1.03 1.09 1.05 1.04 1.35 1.30 1.31…
-
Page 209: Drystar Dt 2C
5302 R RYSTAR EFERENCE MANUAL Drystar DT 2C MacBeth Gretag X-rite X-rite X-rite X-rite dens. TR-924 D200-2 0.10 0.08 0.07 0.09 0.08 0.07 0.38 0.37 0.36 0.38 0.38 0.38 0.65 0.64 0.64 0.66 0.65 0.65 0.94 0.93 0.92 0.95 0.93 0.93 1.21 1.20…
-
Page 210
5302 R RYSTAR EFERENCE MANUAL Drystar media density response data 2830A EN 20050526… -
Page 211
Appendix Quality Control Charts… -
Page 212
5302 R RYSTAR EFERENCE MANUAL Chart 1 Drystar 5302: Determination of Operating Levels Imager Type: __________ Serial #: _________________ Date ____________________ Film Type: ____________ Emulsion #: ______________ Densitometer: _________________ (default selection) Step 1: Print QC Test images on five consecutive days. Record the optical densities measurements in the tables below. -
Page 213
5302 R RYSTAR EFERENCE MANUAL Chart 2A Drystar 5302 Daily Density Control Chart Imager Type: __________ Serial #: _____________ Film Type:____________ Emul #:___________ Densitometer: ____________________ (default selection) Da te : Initia ls: Upper Control limit = +0.05 Calculated Reference Low Density Level… -
Page 214
5302 R RYSTAR EFERENCE MANUAL Chart 2B Drystar 5302 Daily Density Control Chart Imager Type: __________ Serial #: _____________ Film Type:____________ Emul #:___________ Densitometer: ____________________ (default selection) High Density Upper Control limit = +0.20 Calculated Reference High Density Level Lower Control Limit = -0.20… -
Page 215
5302 R RYSTAR EFERENCE MANUAL Chart 3 Drystar 5302 Artifacts and Spatial Resolution Control Chart Test Frequency: Weekly Drystar 5302 Serial # _____________ Initial Reference Test Date Initial Reference Artifacts Initial Reference Dot Visibility Initial Reference Low Contrast Month Artifacts… -
Page 216
5302 R RYSTAR EFERENCE MANUAL Chart 4 Drystar 5302 Geometric Consistency Control Chart Test Frequency: Annually or as required Drystar 5302 Serial # ______________ Reference Dimensions Measured Dimensions Consistency Aspect Ratio Date: Date: Reference Dimensions Measured Dimensions Consistency Aspect Ratio… -
Page 217
Appendix Index… -
Page 218
DT 2B Configuration with crossed network ………153 ……….209 cable DT 2C Configuration with straight network ………154 cable Control Drystar 5302 via browser ……….151 Earthquake provisions ….. 205 …..161 Enter key-operator level Environmental conditions ….161 Enter operator level Operation …….. -
Page 219
5302 R RYSTAR EFERENCE MANUAL ……..44 ..81 Load new Change Printer IP address ….. 22 ..84 Output tray location Change Router IP address Quality problems of printed films Solve white dots or lines problems ……….196 ……..181 ……. -
Page 220
5302 R RYSTAR EFERENCE MANUAL ……..85 ..194 Remove Quality problems of printed films ……83 Netmask, change Remote PC Configuration with crossed network ……..153 cable Configuration with straight network Operator cable ……..154 ……..30 Main screen ….107 Restoring settings, printer ……….19 Mode… -
Page 221
Description ……..23 Location ……..22 Switch off ……. 34 Drystar 5302 ……157 Proxy settings ….. 32 Switch on Drystar 5302 ……204 System info area Transport after installation ….170 Tray ……..42 Input tray ….176 Troubleshooting checklist TÜV label. See Labels Upgrading software …… -
Page 222
Printed in Belgium Published by Agfa-Gevaert N.V., B-2640 Mortsel-Belgium 2830A EN 20050526…
Техническое писание AGFA DRYSTAR 5302: DRYSTAR_5302_(English_-_brochure).pdf
DRYSTAR 5302 предлагает высококачественную печать в удобном настольном формате, что позволяет выполнять ее рядом с диагностическим устройством даже в самом небольшом пространстве. Такая свобода размещения в сочетании с невысокой стоимостью инвестиции и эксплуатационными расходами делают устройство DRYSTAR 5302 идеальным для многих модальностей и верным ответом на ваши потребности в печати.
DRYSTAR 5302 предлагает Вам все преимущества прямой термографической печати. Уникальная технология термопечати позволяет отказаться от сложных оптических компонентов. Данная технология AGFA, в отличие от систем на основе лазерного экспонирования, не содержит вращающихся или движущихся частей, что делает принтер более надежным и долговечным. Медицинский принтер DRYSTAR обеспечивает легкий и удобный доступ ко всем элементам и агрегатам. Важная особенность – прямой (без искривлений) путь пленки при печати, исключающий возможность ее замятия. Если все же это произойдет, вы сможете легко устранить эту неприятность сами, не вызывая сервисных инженеров, просто откройте верхнюю панель, и вы получите полный доступ ко всем возможным местам прохождения пленки.
Технические характеристики DRYSTAR 5302
- Размеры: в распакованном виде (см): ширина 72,8 , длина 71,5 , высота 53,6
- Вес: в распакованном виде: 90 кг
- Стандартное оснащение: ёмкость жёсткого диска 18 Гбайт
- Питание: Рабочее напряжение 100-120 В; 220-240 В; переменный ток. Сетевые предохранители: 220-240 В (рабочее напряжение); 16/15 А макс., медленно перегорающий предохранитель 100-120 В (рабочее напряжение); 16/15 А макс., медленно перегорающий предохранитель. Частота сети питания 50/60 Гц
- Потребляемая мощность: во время работы 250 Вт, максимум 530 Вт, в режиме ожидания 70 Вт
- Защита: против удара электрическим током Класс 1 (заземлён), поступления воды
- Связь с сетевым окружением: Ethernet/соединители витая пара RJ45 для 10/100Base-TX; последовательный интерфейс/кабель RS232
- Сетевые протоколы: (TCP/IP) FTP, Telnet, HTTP, SNMP, SMTP, LPD
- Условия окружающей среды (рабочие): температура комнаты между +10°C и +30°C, относительная влажность 20-75% без конденсации влаги, Условия окружающей среды (транспортировка и хранение): температура от –25°C до +55°C (хранение), от –25°C до + 70°C (транспортировка), относительная влажность 10-95%. Примечание: увлажнение пленок не допускается! Атмосферное давление 70 кПa — 106 кПa.
- Форматы изображений: DICOM (встроенный), TIFF, Postscript (опция)
- Технология печати: прямая термографическая печать (DDI: Direct Digital Imaging)
- Тип используемой пленки: термографическая пленка DRYSTAR DT10B (голубая основа) – все стандартные форматы: 8×10, 10 x 12, 11 x 14, 14 x 14, 14×17 дюймов; принтер имеет 2 лотка для пленки любого формата вместимостью по 100 листов каждый
- Разрешение при печати: геометрическое – 320 точек на дюйм; контрастное разрешение 12 бит (4096 оттенков серого цвета в каждой точке); область печати 8 x 10 дюймов: 2376 x 3070 пикселей , 10 x 12 дюймов: 3070 x 3653 пикселей, 11 x 14 дюймов: 3348 x 4358 пикселей, 14 x 17 дюймов: 4358 x 5232 пикселей
- Производительность: 8 x 10 дюймов – 140 пленок в час, 14×17 дюймов – 75 пленок в час; 2 размера в прямом доступе
- Время получения первого изображения: приблизительно 77 секунд.
Доставка медицинского термографического принтера AGFA Drystar 5302 осуществляется в Москву, Санкт-Петербург, Новосибирск, Екатеринбург, Нижний Новгород, Казань, Самару, Омск, Ростов-на-Дону, Уфу, Красноярск, Пермь, Волгоград, Воронеж, Саратов, Краснодар, Тольятти, Тюмень, Ижевск, Барнаул, Ульяновск, Иркутск, Владивосток, Ярославль, Хабаровск, Махачкалу, Оренбург, Томск, Новокузнецк, Кемерово, Астрахань, Рязань, Набережные Челны, Пензу, Липецк, Тулу, Киров, Чебоксары, Калининград, Курск, Улан-Удэ, Ставрополь, Магнитогорск, Брянск, Иваново, Тверь, Сочи, Белгород, Симферополь, Севастополь, Крым.
|
|||
|
Онлайн всего: 64 Гостей: 63 Пользователей: 1 levscha |
|||
|
Хранилище файлов |
Правила добавления:
Внимание !!!
Перед тем как загрузить файл, убедитесь, что его нет в «Хранилище файлов» для этого воспользуйтесь поиском.
При добавлении файлов в поле «Название материала» указываем марку аппарата, так как на шильдике или по паспорту.
В поле «Краткое описание» пишем что-это: схема; сервис мануал; руководство по эксплуатации и т.д. Также напишите формат материала, какой программой он сделан.
За сохранность и работоспособность файлов(ссылок) загруженных на сторонние файловые хостинги, Администрация сайта ответственности не несет.
Для загрузки файлов в «Хранилище» воспользуйтесь архиватором WinRAR или 7-Zip, максимальный объем загружаемого файла должен быть не более 15Mb.
Администрация сайта оставляет за собой право удалять и редактировать файлы.
Для скачивания с 4Shared.com необходимо зарегистрироваться и создать аккаунт на 4shared.com или пользоваться другим способом скачивания которые там же предлагаются.
Термопринтер AGFA Drystar 5302 ru
Гостям запрещено просматривать данную страницу, пожалуйста войдите на сайт как пользователь.
[
Регистрация
|
Вход
]
Вопросы по ремонту медицинской техники | Теоретические основы медицинского приборостроения | Информационный раздел | Информация о сайте | Хранилище файлов | Сертификаты и регистрационные удостоверения | Навигатор по сайту |
Написать администратору
Компания AGFA с гордостью представляет медицинский принтер сухой термографической печати DRYSTAR 5302, идеально подходящий для установки в ограниченном пространстве. Принтер может располагаться рядом с диагностическим устройством, либо непосредственно возле рабочего места врача. Компактные размеры DS5302, большие возможности и невысокая цена сделают его Вашим лучшим преобретением.
 Компания «Сибирский успех» является официальным представителем компании Agfa N.V. — одного из мировых лидеров в производстве расходных материалов и оборудования для отделений лучевой диагностики
Приняв решение купить DRYSTAR 5302 в компании «Сибирский успех», Вы гарантированно получаете:
— Цену от официального представителя и гибкие условия оплаты
— Оперативную поддержку нашего авторизованного сервисного центра
— Скидку на пленку DRYSTAR для термопринтера
Высокая надежность, минимальный уход
DICOM принтер DRYSTAR 5302 предлагает вам все преимущества прямой термографической печати. Уникальная технология термопечати позволяет отказаться от сложных оптических компонентов. Данная технология AGFA, в отличие от систем на основе лазерного экспонирования, не содержит вращающихся или движущихся частей, что делает принтер более надежным и долговечным. Важная особенность — прямой (без сгибов) путь пленки при печати, исключающий возможность ее замятия. Если все же это произойдет, Вы сможете легко устранить эту неисправность сами, не вызывая сервисных инженеров, просто откройте верхнюю панель, и Вы получите полный доступ ко всем возможным местам прохождения пленки.
Простота в использовании и экологичность
Принтер соответствует современным экологическим стандартам. Вам больше не нужен процесс проявки, отпадает необходимость использовать темную комнату, готовить химреактивы, все это остается в прошлом. DRYSTAR 5302 использует термографическую пленку, не чувствительную к дневному свету, вследствие чего загрузка термографического принтера производится в обычных условиях отделения, как простого офисного принтера. Принтер работает при низком уровне шума и не выделяет запаха.
Легкое подключение, максимальная гибкость решений
DRYSTAR 5302 является DICOM совместимым принтером, что делает его подключение к любым существующим диагностическим установкам простым и удобным. Для устройств не поддерживающих DICOM соединение возможно через прямое подключение (графический или цифровой интерфейс) с использованием коммуникатора AGFA LINX Paxport. Обычная розетка – это все, что Вам нужно, чтобы начать работать с принтером AGFA DRYSTAR 5302 и получать настоящее качество и удовольствие.
Высокое качество изображения
На основе передовой технологии термопечати компании AGFA создала пленки исключительно высокого диагностического качества для работы с принтерами DRYSTAR. Используя новую пленку DRYSTAR DT 10В на 168-микронной РЕТ-подложке, Вы получите высочайшее качество диагностических изображений, вместе с удобством загрузки пленки при дневном свете. На медицинском принтере DS5302 возможна печать пленки всех стандартных размеров от 8х10 дюймов (20,3х25,4 см) до 14х17 дюймов (35х43 см), с непосредственным доступом к любым двум форматам.
Размеры:
В распакованном виде (см): ширина 72,8, длина 71,5, высота 53,6
Вес:
В распакованном виде: 90 кг
Форматы изображений:
DICOM (встроенный), TIFF, Postscript (опция)
Технология печати:
Прямая термографическая печать (DDI: Direct Digital Imaging)
Тип используемой пленки:
Термографическая пленка DRYSTAR DT 10B (голубая основа) – все стандартные форматы: 8×10 дюймов (20,3х25,4 см), 10×12 дюймов (25,4х30,5 см), 11×14 дюймов (28х35 см), 14×14 дюймов (35х35 см), 14×17 дюймов (35х43 см)
Принтер имеет 2 лотка для пленки любого формата вместимостью по 100 листов каждый
Разрешение при печати:
Геометрическое – 320 точек на дюйм
Область печати 8×10 дюймов: 2376×3070 пикселей, 10×12 дюймов: 3070×3653 пикселей, 11×14 дюймов: 3348×4358 пикселей, 14×17 дюймов: 4358×5232 пикселей
Производительность:
8×10 дюймов – 140 пленок в час
14×17 дюймов – 75 пленок в час
Время получения первого изображения:
Приблизительно 77 секунд
Материалы для просмотра/скачивания:
Лифлет на принтер AGFA Drystar 5302 — SU_Drystar_5302_Datasheet.pdf
Данные, приведенные в этой публикации, являются демонстрационными, соответствуют стандартам и спецификациями, которым должна обязательно отвечать продукция компании AGFA. Характеристики продукции, приведенные в этой публикации, могут быть изменены в любое время без предварительного уведомления.
AGFA и ромб AGFA являются торговыми марками AGFA-Gevaert N.V. (Бельгия) и ее дочерних компаний.
Компания «Сибирский успех» является официальным дистрибьютором «Агфа Н.В.» (AGFA N.V., Бельгия) и представителем торгового знака AGFA в России. У нас Вы можете приобрести медицинское оборудование AGFA со склада в городе Новосибирск с поддержкой единственного за Уралом авторизованного сервисного центра.
По запросу на Этот адрес электронной почты защищён от спам-ботов. У вас должен быть включен JavaScript для просмотра. мы можем предоставить:
— примеры снимков, распечатанных на принтере Drystar 5302
— техническое задание на принтер медицинский Drystar 5302
— требования к помещению для монтажа принтера Drystar 5302
— инструкцию пользователя на принтер Drystar 5302
— регистрационное удостоверение на принтер Drystar 5302
— декларацию о соответствии на принтер Drystar 5302
Для того, чтобы узнать стоимость принтера AGFA DS5302, уточнить характеристики и условия оплаты —
обратитесь к Вашему персональному менеджеру:
Кононенко Дмитрий Александрович
Руководитель подразделения модернизации медицинского оборудования
т/ф.: (383) 373-07-03 доб. 111
м.т.: +7-913-209-97-24
e-mail: Этот адрес электронной почты защищён от спам-ботов. У вас должен быть включен JavaScript для просмотра.
Форма для быстрой связи:
D
5302 R
RYSTAR
EFERENCE MANUAL
For more information on Agfa products and Agfa HealthCare products, please visit www.agfa.com, your Point
of Knowledge.
© Agfa-Gevaert N.V. 2005.
No parts of this document may be reproduced, copied, adapted or transmitted in any form or by any means
without the written permission of Agfa-Gevaert N.V.
Agfa-Gevaert N.V. makes no warranties or representation, expressed or implied, with respect to the accuracy,
completeness or usefulness of the information contained in this document and specifically disclaims warran-
ties of suitability for any particular purpose. Agfa-Gevaert N.V. shall under no circumstances be liable for any
damage arising from the use or inability to use any information, apparatus, method or process disclosed in this
document.
Agfa-Gevaert N.V. reserves the right to make changes to this document without prior notice.
Agfa-Gevaert N.V., Septestraat 27, B-2640 Mortsel, Belgium.
Drystar 5302 is a trademark of Agfa-Gevaert N.V., Belgium.
Agfa and Agfa-Rhombus are trademarks of Agfa-Gevaert AG, Germany.
2
2830A EN 20050526
Suggest us how to improve StudyLib
(For complaints, use
another form
)
Your e-mail
Input it if you want to receive answer
Rate us
1
2
3
4
5
AGFA Drystar 5302: List of Available Documents
Note for Owners:
Guidesimo.com webproject is not a service center of AGFA trademark and does not carries out works for diagnosis and repair of faulty AGFA Drystar 5302 equipment. For quality services, please contact an official service center of AGFA company. On our website you can read and download documentation for your AGFA Drystar 5302 device for free and familiarize yourself with the technical specifications of device.
More Medical Equipment Devices:
-
medi Genumedi PSS
Genumedi® PSSKnee support for relieving strain on the patellar tendon enthesesGenouillèr rotulienne pour soulager les tendons patellairesRodillera de descarga del tendón patelar Gebrauchsanweisung. Instructions for use. Mode d’emploi. Instrucciones de uso. Instruções para aplicação. Istruzioni per l’uso. Gebruiksaanwijzing. Brugsvejledning. Bruksanvisning. Návod k použití. Uputa …
Genumedi PSS Medical Equipment, 46
-
Nortev Flexineb
Lfgkj;d;dflkgj;dlkgjadlkgjsdlkgjdslkj Portable Equine Nebuliser System INSTRUCTIONS FOR USE � …
Flexineb Medical Equipment, 4
-
Vapotherm FELIX-1
1. Remove FELIX-1 from sealed pouch. 2. Ensure all connections are secured by pushing on all the connecting parts: (the adapter to the modified face-tent and tubing to adapter). 3. If using FELIX-1 with Vapotherm Precision Flow, size the appropriate Vapotherm cannula for the patient and place the cannula on the patient’s face.FELIX-1: Negative Pressure Scaven …
FELIX-1 Medical Equipment, 28
-
Gima OXY-10
PROFESSIONAL MEDICAL PRODUCTSGima S.p.A.Via Marconi, 1 — 20060 Gessate (MI) [email protected] — [email protected] PULSOXIMETROOXY-10 PULSE OXIMETEROXY-10 OXYMÈTRE DE POULSOXY-10 OXÍMETRO DE DEDOOXY-10 OXÍMETRO DE DEDOOXY-10 FINGERPULSOXIMETEROXY-10 PULSOKSYMETR NAPALCOWYOXY-10 ΟΞΎΜΕΤΡΟ ΔΑΚΤΎΛΟΎ OXY-10Gima S.p.AVia Marconi, 1 — 20060 Gessate (MI) I …
OXY-10 Medical Equipment, 18
-
Bard TRUGUIDE
BARD® TRUGUIDE®Disposable Coaxial Biopsy NeedleInstructions for UseAiguille pour biopsie coaxiale jetable BARD® TRUGUIDE®Mode d’emploiBARD® TRUGUIDE® Koaxiale Einweg-BiopsienadelGebrauchsanweisungAgo per biopsia coassiale monouso TRUGUIDE® BARD®Istruzioni per l’UsoAguja de biopsia coaxial desechable BARD® TRUGUIDE® Instrucciones de usoBARD® TRUGUIDE® wegwerpbare coaxiale biopsienaa …
TRUGUIDE Medical Equipment, 68
Recommended Documentation:
AGFA Drystar 5302 — высокопроизводительный компактный лазерный медицинский принтер с двумя лотками автоподачи пленки (мультиформатный). Другое название: камера мультиформатная термографическая.
Высокопроизводительный принтер сухой термографической печати DRYSTAR 5302 не потребует много места для установки. DRYSTAR 5302 может располагаться рядом с устройством вывода информации, либо непосредственно возле рабочего места врача.
Высокая надежность, минимальный уход
DRYSTAR 5302 предлагает Вам все преимущества прямой термографической печати. Уникальная технология термопечати позволяет отказаться от сложных оптических компонентов. Данная технология AGFA, в отличие от систем на основе лазерного экспонирования, не содержит вращающихся или движущихся частей, что делает принтер более надежным и долговечным. Медицинский принтер DRYSTAR обеспечивает легкий и удобный доступ ко всем элементам и агрегатам. Важная особенность – прямой (без искривлений) путь пленки при печати, исключающий возможность ее замятия.
Легкость в использовании и экологичность
Принтер соответствует современным экологическим стандартам. Вам больше не нужен процесс проявки, отпадает необходимость использовать темную комнату, разведение химреактивов, все это остается в прошлом. DRYSTAR 5302 использует термографическую пленку, не чувствительную к дневному свету, вследствие чего загрузка термографического принтера производится в обычных условиях, как простой офисный принтер. При работе принтер малошумен и не выделяет запаха.
Легкое подключение, максимальная гибкость решений
DRYSTAR 5302 является DICOM-совместимым принтером, что делает его подключение к любым существующим диагностическим установкам простым и удобным. Для устройств, не поддерживающих DICOM-соединение, возможно прямое подключение (видео или цифровой интерфейс) с использованием коммуникатора AGFA LINX Paxport. Однофазная 16/15A розетка — это все, что Вам нужно, чтобы начать работать с принтером DRYSTAR 5302 и получить отличное качество и удовольствие от Вашей работы.
Высокое качество изображения
На основе передовой технологии термопечати компания AGFA создала пленки исключительно высокого диагностического качества для работы с медицинскими принтерами AGFA DRYSTAR. Используя новую пленку DRYSTAR DT 10 B на 168-микронной PET-подложке, вы получите высочайшее качество диагностических изображений. Вместе с удобством загрузки пленки при дневном свете. Для принтера DRYSTAR 5302 возможна печать всех стандартных размеров пленки: от 8×10 дюймов до 14×17 дюймов, два любых формата в прямом доступе печати (on-line).
Гарантируется 20-летний срок хранения изображений без потери качества. Технология прямой цифровой печати (Direct Digital Imaging), отмеченная многочисленными наградами, получила дополнительные усовершенствования, объединившись с технологией A#Sharp. Эта технология улучшает возможности печати, позволяя в рамках технологии DDI получать более четкую детализацию для всех типов диагностического изображения.
Технические характеристики
Размеры
в распакованном виде (см): ширина 72,8 , длина 71,5 , высота 53,6
Вес
в распакованном виде: 90 кг
Стандартное оснащение
ёмкость жёсткого диска 18 Гбайт
Питание
Рабочее напряжение 100-120 В; 220-240 В; переменный ток. Сетевые предохранители: 220-240 В (рабочее напряжение); 16/15 А макс., медленно перегорающий предохранитель 100-120 В (рабочее напряжение); 16/15 А макс., медленно перегорающий предохранитель. Частота сети питания 50/60 Гц
Потребляемая мощность
во время работы 250 Вт, максимум 530 Вт, в режиме ожидания 70 Вт
Защита
против удара электрическим током Класс 1 (заземлён), поступления воды
Связь с сетевым окружением
Ethernet/соединители витая пара RJ45 для 10/100Base-TX; последовательный интерфейс/кабель RS232
Сетевые протоколы
(TCP/IP) FTP, Telnet, HTTP, SNMP, SMTP, LPD
Условия окружающей среды (рабочие)
температура комнаты между +10°C и +30°C, относительная влажность 20-75% без конденсации влаги, Условия окружающей среды (транспортировка и хранение): температура от –25°C до +55°C (хранение), от –25°C до + 70°C (транспортировка), относительная влажность 10-95%. Примечание: увлажнение пленок не допускается! Атмосферное давление 70 кПa — 106 кПa.
Форматы изображений
DICOM (встроенный), TIFF, Postscript (опция)
Технология печати
прямая термографическая печать (DDI: Direct Digital Imaging)
Тип используемой пленки
термографическая пленка DRYSTAR DT10B (голубая основа) – все стандартные форматы: 8×10, 10 x 12, 11 x 14, 14 x 14, 14×17 дюймов; принтер имеет 2 лотка для пленки любого формата вместимостью по 100 листов каждый
Разрешение при печати
геометрическое – 320 точек на дюйм; контрастное разрешение 12 бит (4096 оттенков серого цвета в каждой точке); область печати 8 x 10 дюймов: 2376 x 3070 пикселей , 10 x 12 дюймов: 3070 x 3653 пикселей, 11 x 14 дюймов: 3348 x 4358 пикселей, 14 x 17 дюймов: 4358 x 5232 пикселей
Производительность
8 x 10 дюймов – 140 пленок в час, 14×17 дюймов – 75 пленок в час; 2 размера в прямом доступе
Время получения первого изображения
приблизительно 77 секунд
- «»
-
- sales@techno-med.ru
Возможен как безналичный расчёт, так и оплата наличными в офисе. Наши менеджеры оформят все необходимые документы.
Вы можете выбрать удобный для вас способ оплаты медицинской техники и оборудования в зависимости от формы организации вашего учреждения – коммерческой, государственной, либо произвести оплату в качестве физического лица:
![]() Для государственных лечебных учреждений:
Для государственных лечебных учреждений:
Реализация медицинского оборудования производится в полном соответствии с действующими Федеральными законами: 44-Ф3, 223-Ф3. Наша компания аккредитована на всех известных электронных торговых площадках РФ. Также мы зарегистрированы на официальном государственном портале поставщиков, что позволяет нам размещать оферты на любое интересное для вас оборудование.
![]() Для коммерческих организаций:
Для коммерческих организаций:
Оплата производится посредством безналичного расчёта на основании договора и счёта. Условия договора согласуются в индивидуальном порядке.
![]() Для физических лиц:
Для физических лиц:
Мы выставляем счёт и договор, заказ оплачивается через любой банк, клиентом которого вы являетесь. (Перечисление не подразумевает открытие счёта, в банке понадобится только выставленный нашей компанией счёт и паспорт плательщика). Также возможна онлайн-оплата через сервис приёма онлайн-платежей Robokassa.
Также ЗАО «ТЕХНО-МЕД» предлагает выгодный лизинг (аренду с правом выкупа), рассрочку и Trade-in (обмен старого на новое с доплатой) медицинского оборудования. За более детальной информацией обратитесь к нашим менеджерам.
ЗАО «ТЕХНО-МЕД» осуществляет оперативную доставку медицинского оборудования по всей России, Беларуси и Казахстану.
По России — любой транспортной компанией, по согласованию с Вами (Деловые линии, DHL Express, СДЭК и т.д.).
По Санкт-Петербургу — собственной курьерской службой. В нашей компании есть парк автомобилей, позволяющий самостоятельно и в короткие сроки доставлять продукцию по Санкт-Петербургу и Ленинградской области.
Самовывоз с нашего склада по адресу г.Санкт-Петербург, Большой Сампсониевский пр-кт., д. 60 лит. Н.
ТЕХНИЧЕСКОЕ ГАРАНТИЙНОЕ ОБСЛУЖИВАНИЕ
Мы гарантируем высокое качество сервиса собственными силами. Предоставляем техническое обслуживание, гарантийный и постгарантийный ремонт. Мы сделаем все возможное, чтобы ваш рентген аппарат работал бесперебойно на протяжении всего его срока службы.