Всем привет, сегодня не просто обзор экрана для центрального мотора Bafang, но и впечатление от годовой эксплуатации моего электровелосипеда, а так же доработки и апгрейды для нового сезона.
Введение
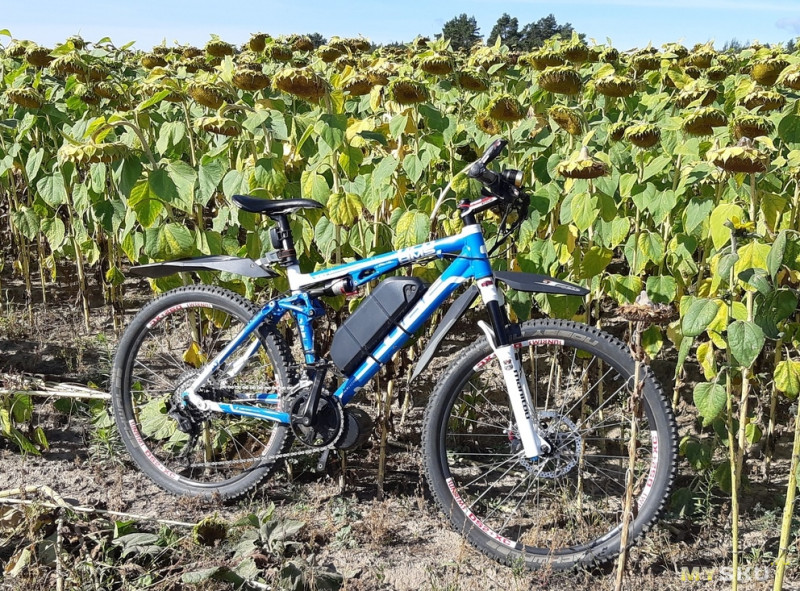
Свой электровелосипед я считаю вполне удачным, самодостаточным проектом.
Мне удалось впихнуть 750 Вт мотор Bafang BBS02B в раму кантрийного двухподвесного велосипеда, и получилось сбалансировано по массе и мощности. Велосипед вполне транспортабелен и может ехать своим педальным ходом, а мощности мотора с усилиями от ног хватает для любых лесных грунтовых поездок по плоскому Брянску.
Да, были проблемы с защитой от проворота мотора в каретке и батареей с китайскими 18650, но все было успешно побеждено и электровелосипед откатал за сезон почти 2000 км (немного, так как в приоритете у меня второй, обычный, мускульно-приводной велосипед). Но гонял я его серьезно: и с ребенком купаться ездил, по пескам, по полям…
Первую тысячу накатал еще летом:
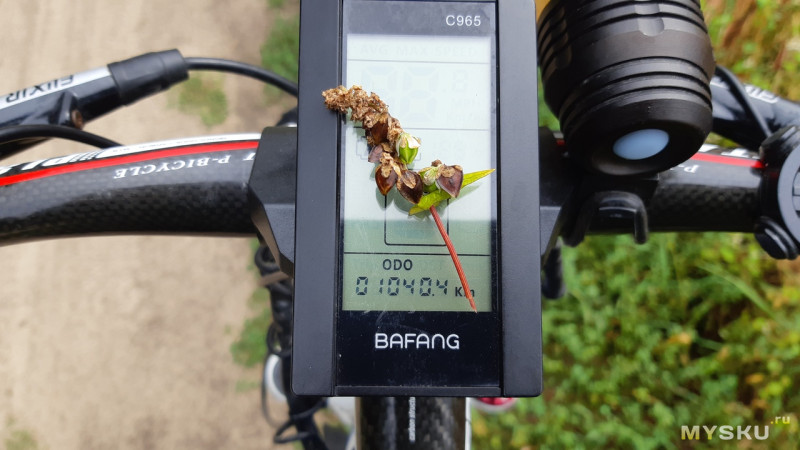
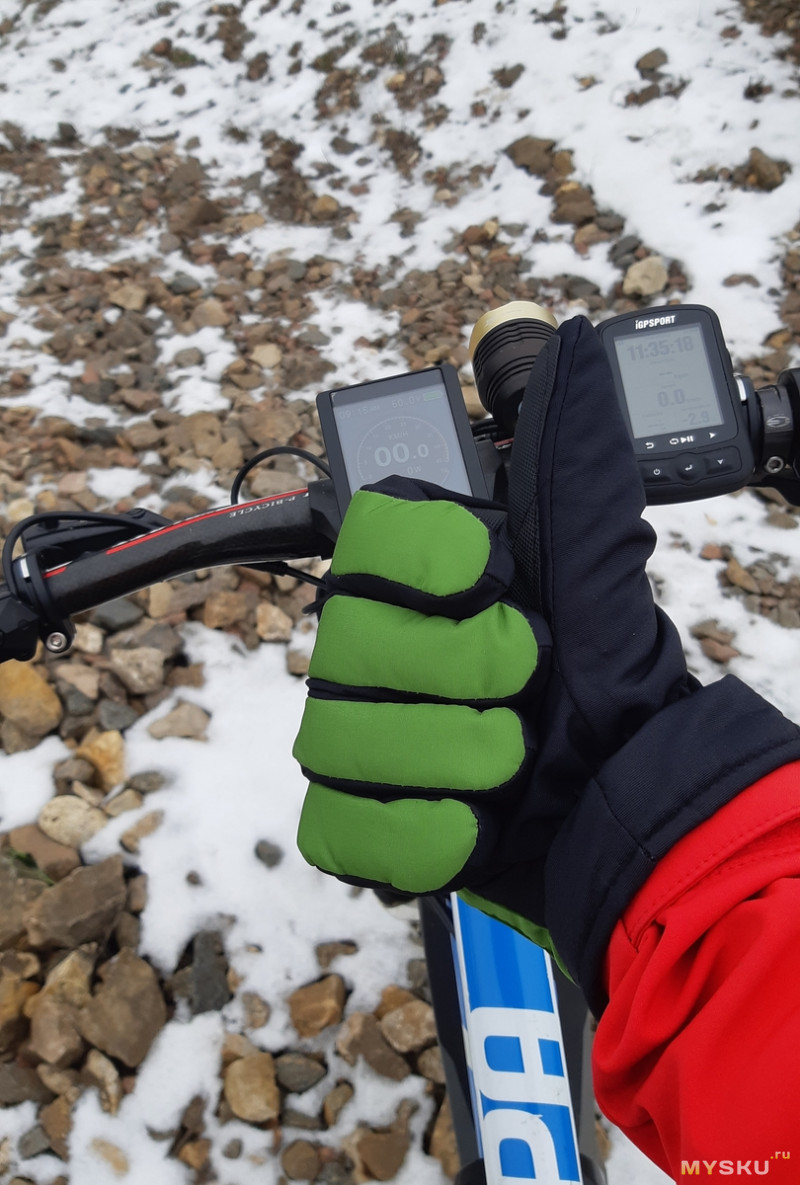
Покатавшись до поздней осени, я понял что модернизация аппарата все-таки назрела:
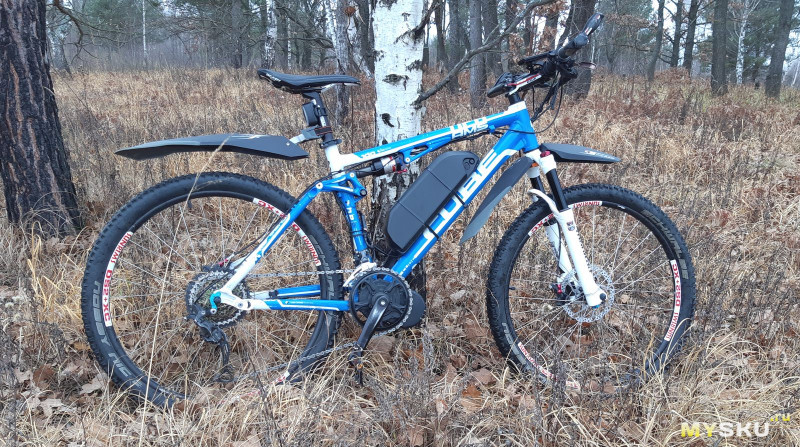
особенно после окончательного отказа переднего тормоза. RIP avid elixir r.
Этапы модернизации
Первым делом, в начале эксплуатации, я поменял цепь и шоссейную кассету на BOLANY 10 скоростей 11-46T, что бы повысить тяговые характеристики велосипеда, в ущерб скоростных конечно же. Кассета нормальная, год отпахала без видимого износа, а условия эксплуатации с мотором тяжелее.
Самым дорогим моментом модернизации стала замена тормозов (без тормозных дисков).
Я выбрал Shimano Deore M6000
Я не пожалел на них полновесных 100$, так как у меня есть положительный опыт эксплуатации старшей модели SLX на втором (а для меня на первом) велосипеде.

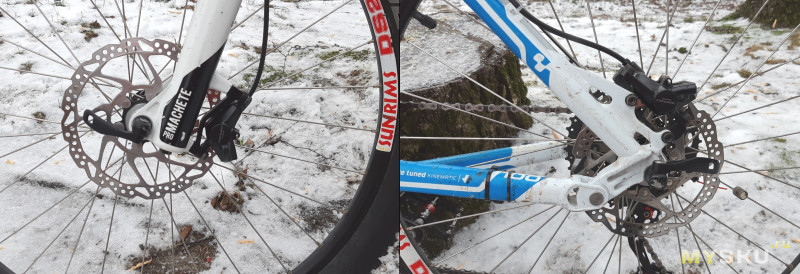
Тормоза отличные, им вполне по силам обуздать 750 Вт мотор. Отмечу так же, современные короткие рукоятки, под один палец — удобно.
Датчики-концевики для гидравлических тормозов, которые я покупал отдельно, мне не пригодились, скажу больше — зря выкинутые деньги. У мотора Bafang грамотно организована система PAS и я пользуюсь только ей (а не «гашеткой»), там мотор сразу прекращает работу, когда не крутишь педали.
Еще дополнения по рулю:
Ссылка на рога. Цена: US $6.21 Я брал за пару долларов с каким-то купоном. Рога годные, алюминиевые с резиновой заглушкой на торце. Рога нужны не сколько для изменения хвата, а больше для защиты рук и защиты экрана на руле при переворачивании велосипеда.
Грипсы я беру традиционно Tioga E GRIP, мне очень нравятся — комфортные.
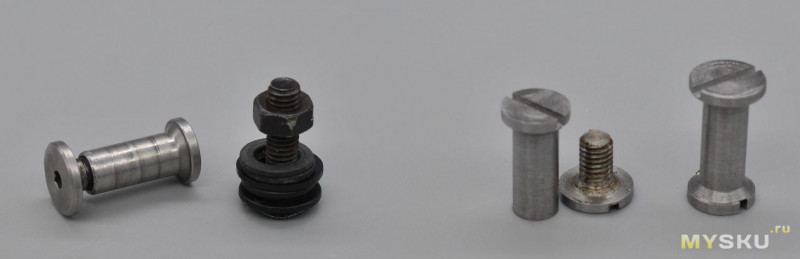
Потерялся у меня винт задней подвески от рамы cube ams100. Ну а как, ожидаемо, что рама не рассчитана на большие нагрузки от мотора. И это еще рама не из алюминиевой фольги как сегодняшние.
Что бы не покупать эти винты, оригиналы стоят дорого, выточил их из хорошей стали на работе.
Части задней подвески (было и стало):
Редуктор 2-я цилиндрическая ступень:

Посмотрел, смазал. Следов износа не заметно.
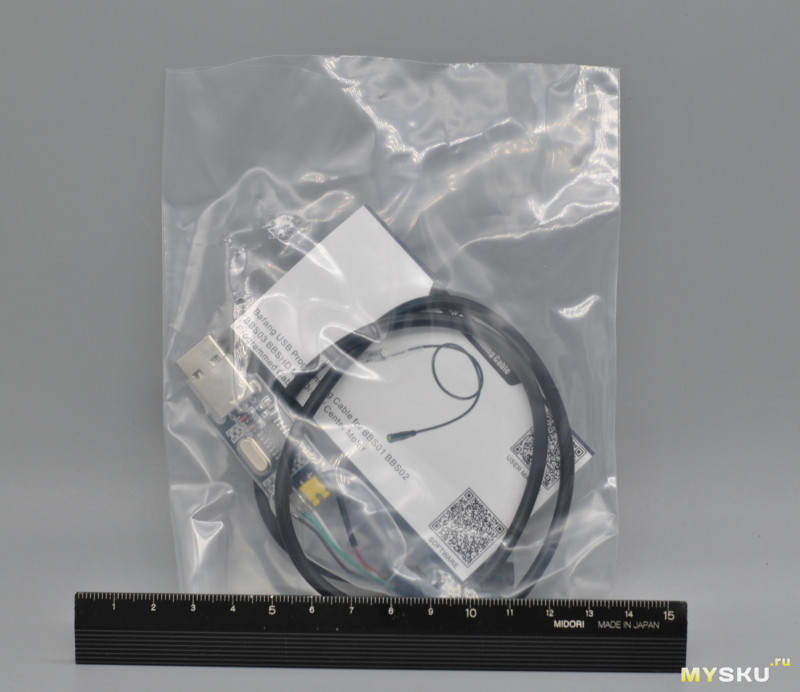
Купил Usb кабель для программирования мотора Bafang. $15.89
Инструкция
Софт
Хотел уменьшить стартовые токи мотора, но на 10-й винде кабель у меня не определился, надо попробовать на другом компе.
Ну и по мелочи, это уже не интересно, перебрал вилку, втулки колес и пр.
В планах наколхозить яркий свет для покатушек по ночному лесу, подумать над дополнительным силовым аккумулятором и над утеплением основного…
Обзор
Собственно, теперь сам заявленный обзор дисплея 850C.
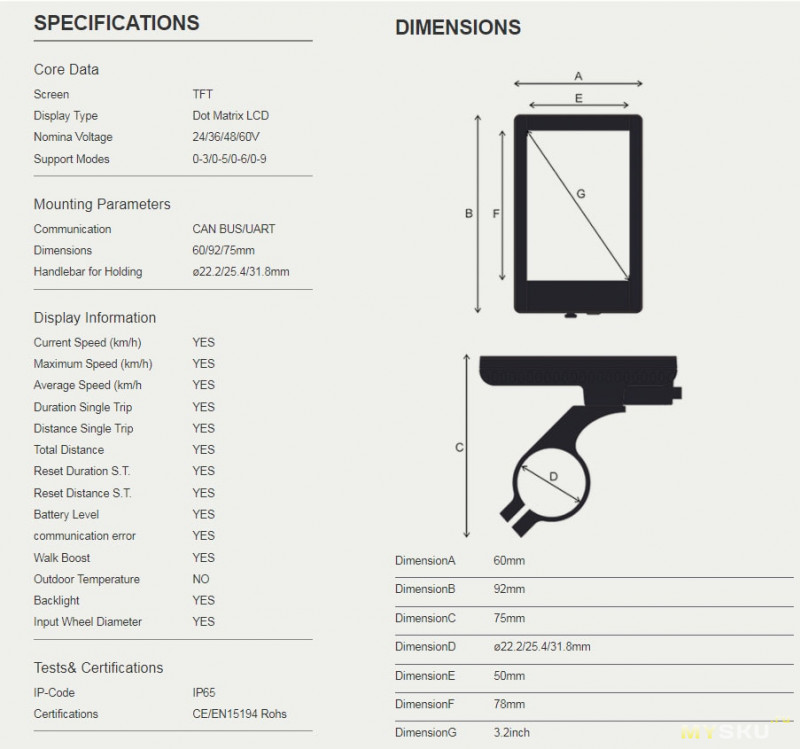
Характеристики от производителя:
Когда я выбирал кит для электровелосипеда год назад, я намеренно не стал покупать набор с этим экраном, он дороже. Но задумав модернизацию велосипеда, решил поменять и экран. Покупал его 11.11 даже сработал какой-то купон али.
Доставка с треком и быстрая.
Упаковка и коробка:

Комплектация:
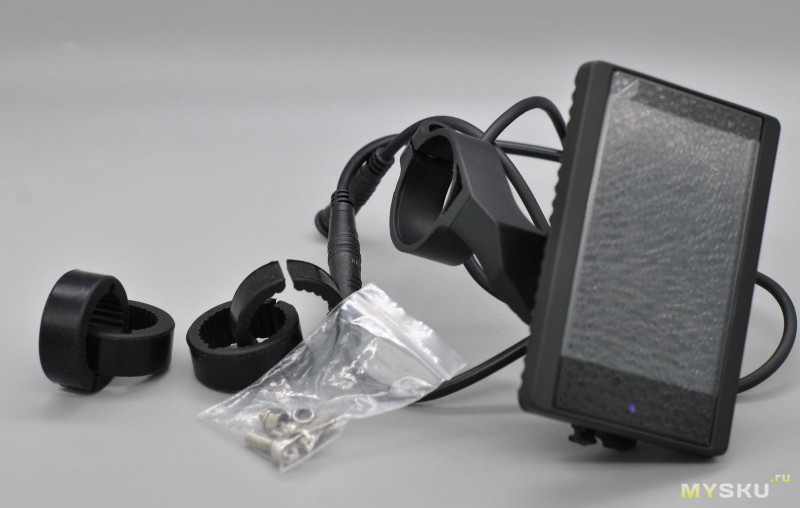
- Дисплей для центрального мотора 850C
- Крепление на центр руля
- Кольца под разные диаметры руля
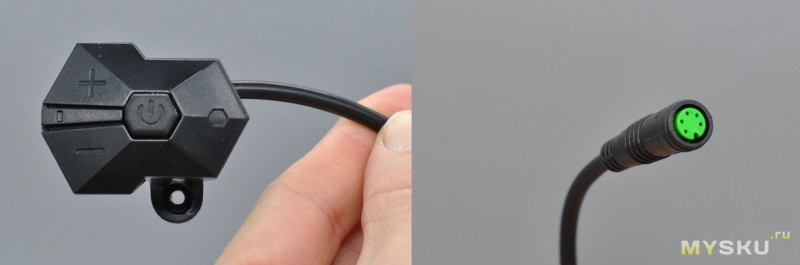
- Крепеж блока кнопок
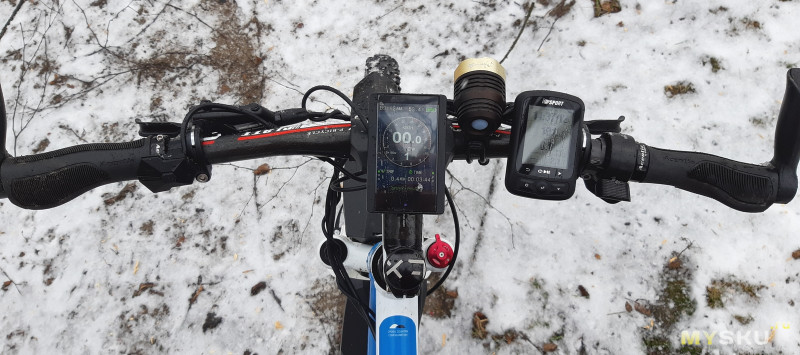
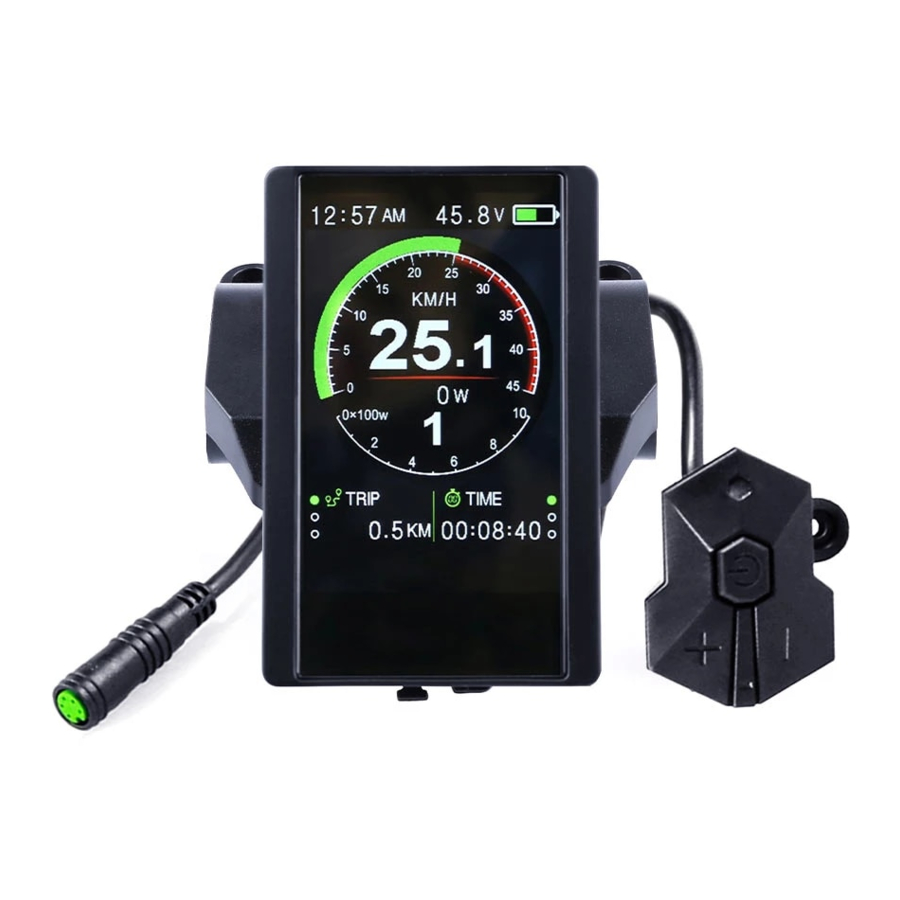
Вот так выглядит экран:
Похож в целом на мой прошлый С965. Только экран теперь цветной 3.2» TFT. На нем штатная защитная пленка.
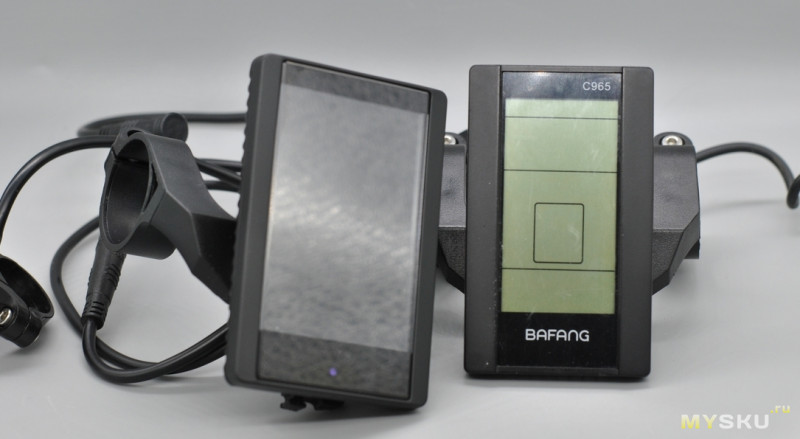
Сравнение размеров с экраном С965:
Вид сбоку:

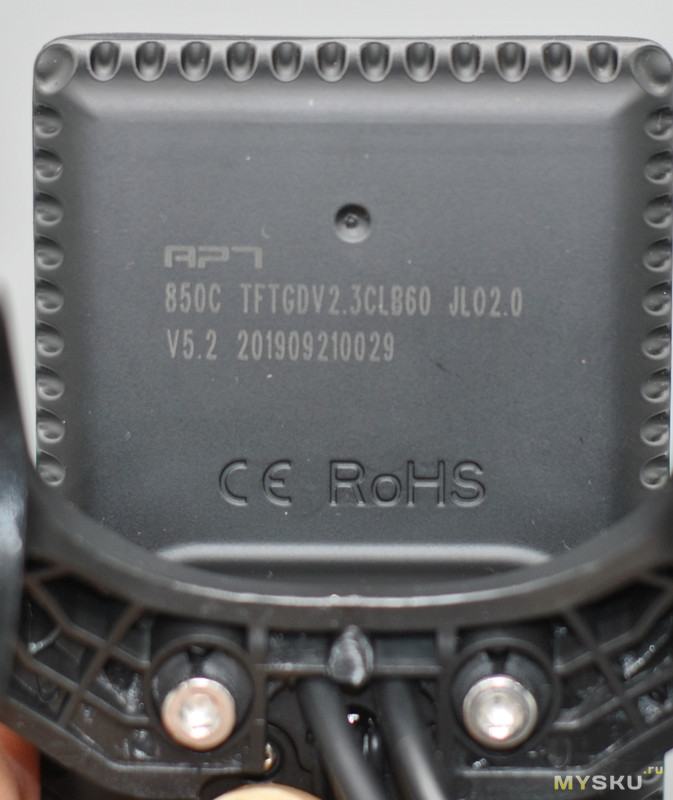
Маркировка сзади:
Еще одно важное дополнение в этой модели:
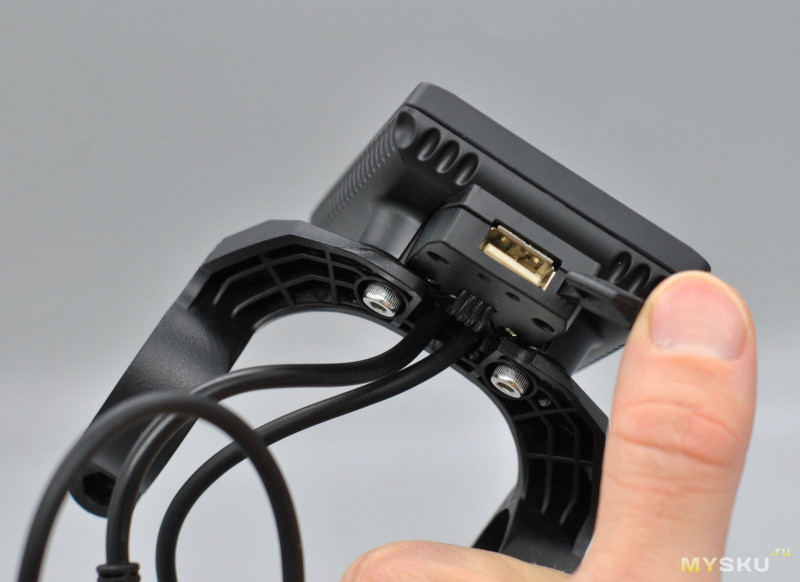
usb порт для зарядки устройств, ток только маловат 5 В 0,5 А.
Управление и подключение (UART) такие же как и в младшей модели:
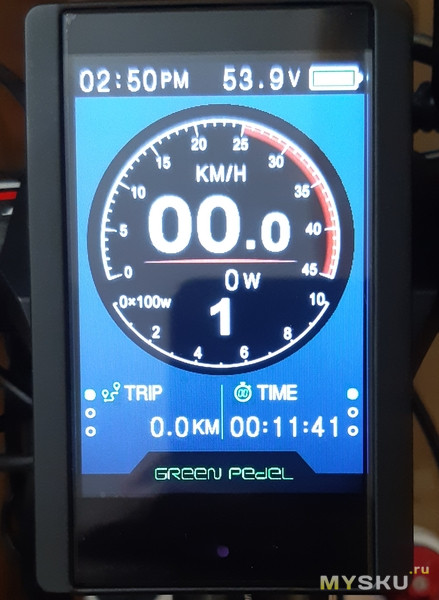
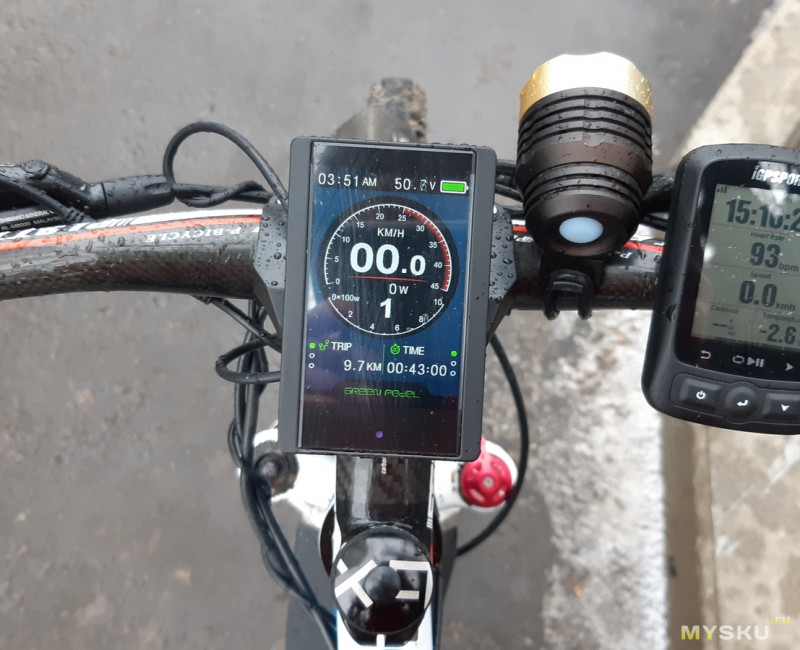
Главный экран:
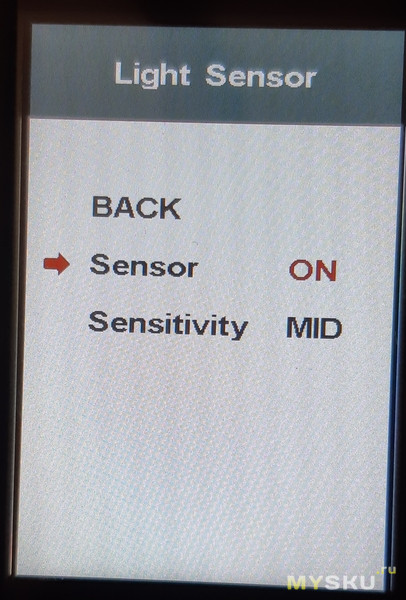
Точка под экраном — датчик света, включает фару когда темнеет. Ну а что, за 70 баксов, почему бы и нет.
Информация теперь выводится более наглядно:
Круговой бар — сверху скорость, снизу мощность. В центре: текущая скорость, мощность и номер уровень поддержки.
Выводится теперь помимо иконки батареи ее текущее напряжение. И работает экран от батареи до 60 В включительно (С965 до 48 В).
Уровней поддержки при педалировании PAS: от 0-9.
Так же есть режим «Пешеход», когда велосипед медленно катится на моторе.
Яркость экрана настраивается.
Меню устройства:
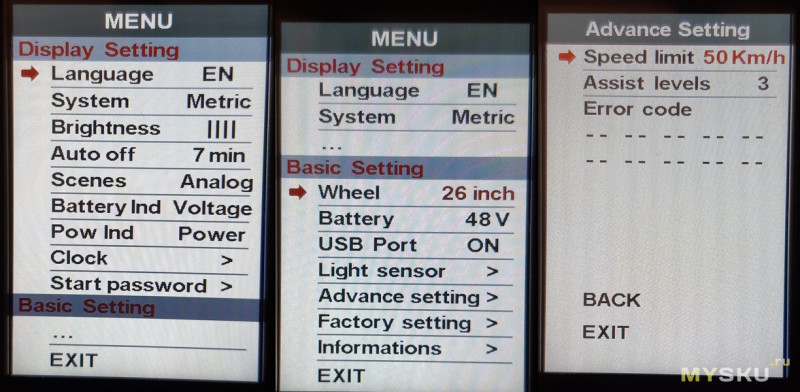
Для расширенных настроек пароль 1919. Там настраивается PAS и ограничение скорости.
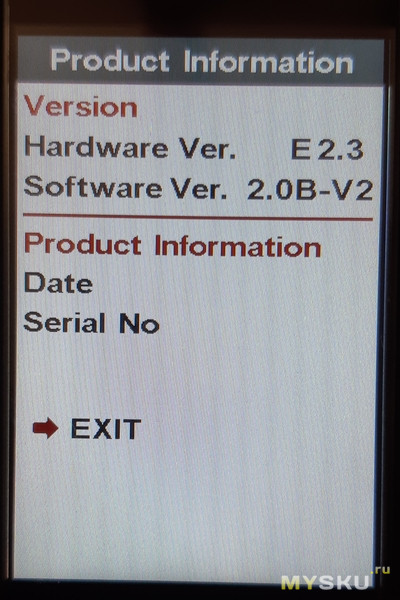
Версия ПО:
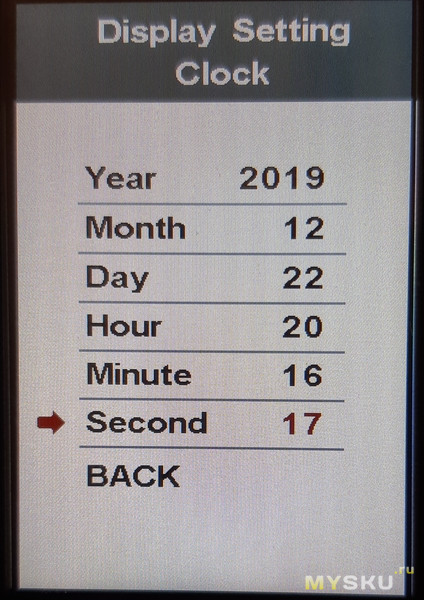
Часы настраиваются:
Но если отключать еще и батарею
не запоминают время.
Настройки датчика света:
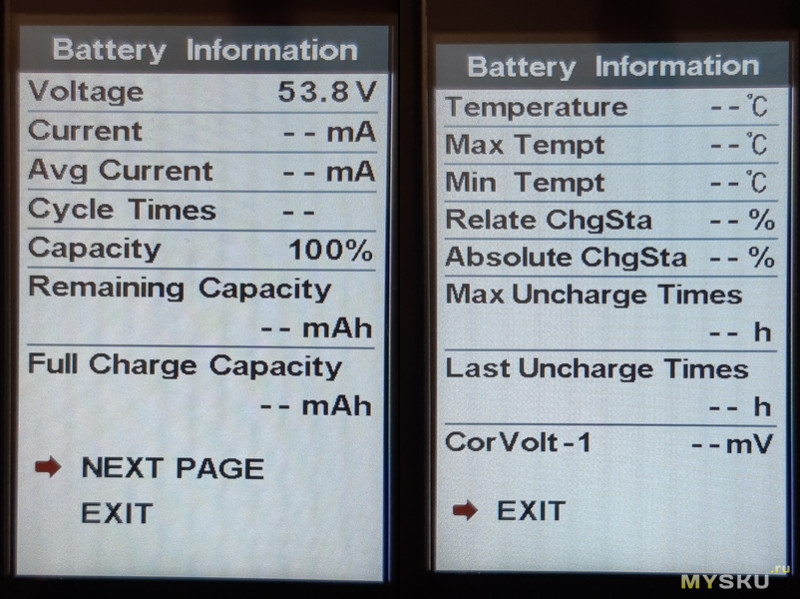
Настройки батарейки:
Скорость загрузки экрана и срабатывание датчика света можно оценить на следующей «гиф»:
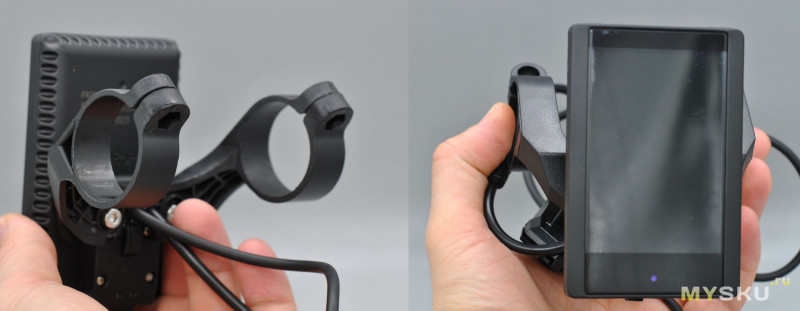
На руле 850C смотрится так:
Сейчас большой выбор экранов для центральных моторов Bafang:
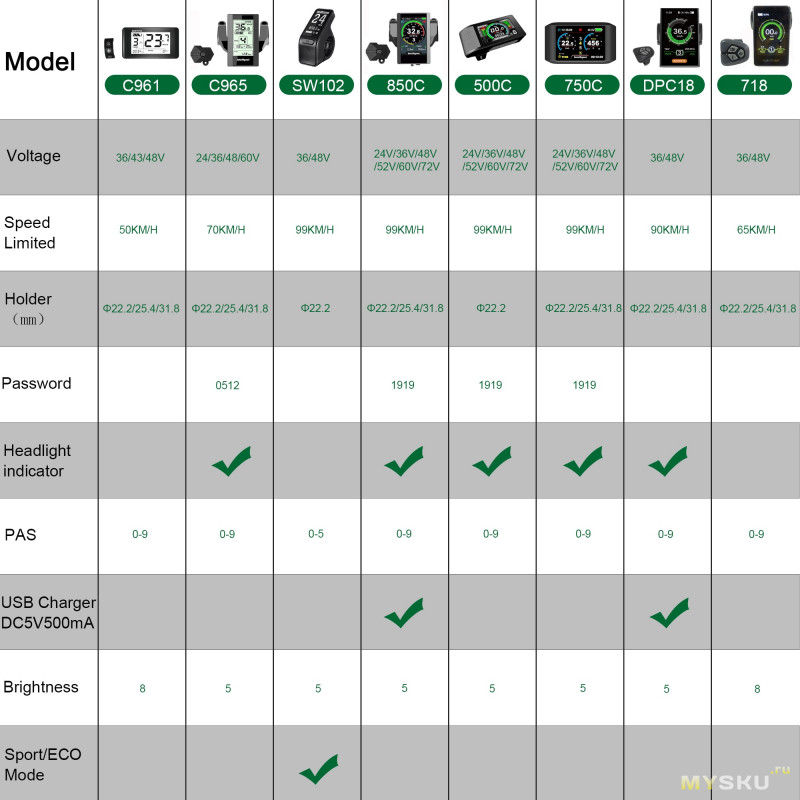
Можно выбрать на любой вкус и кошелек.
Эксплуатация электровелосипеда продолжается:
До новых встреч!
- Manuals
- Brands
- eBike Manuals
- Bicycle Accessories
- P850C
- Manual
-
Contents
-
Table of Contents
-
Bookmarks
Quick Links
Related Manuals for eBike P850C
Summary of Contents for eBike P850C
-
Page 1
P850C Manual August 2020 01392 580040 info@custombuilt-ebikes.co.uk https://custombuilt-ebikes.co.uk… -
Page 2
1. Features Suitable for low temperatures — Max -20℃. High-contrast 3.2inch IPS colour matrix screen. Ergonomic external button design, easy to operate. Speed display : AVG SPEED, MAX SPEED, SPEED(Real-time). Kilometer / Mile : Can be set according to your requirements … -
Page 3: Usage Description
2. TFT screen instructions Battery Clock Brake Signal Front Light Power loop Speed Scale Speed value Power Power indicator Assist level Power Scale Time Mileage LOGO Switchover area 3. Usage Description 7.1 Power On/Off Press and hold the Power button for 1 second to turn the display on/off. The Display will automatically shut down when it isn’t in use.
-
Page 4
7.3 Speed & Mileage mode switch Short press POWER button change speed mileage mode, TRIP→ODO→RANGE→TRIP→TIME→MAX SPEED→AVG SPEED *Range needs smart BMS support. **If there is no operation for 5 seconds, the display will return to the Speed (Real-Time) display automatically. 7.4 Headlight/backlight On/Off Press and hold the UP button for 1 second to turn on/off the headlight, and the screen will switch to the corresponding mode (only if integrated headlight is fitted). -
Page 5: Settings Menu
7.5 Walking mode (6km) Press and hold DOWN button for 2 seconds to select walking mode. Walking mode provides a small amount of power to help you push your bike along if walking. * This feature needs to be supported by controller. 7.6 Data cleanup Press and hold UP &…
-
Page 6
8.1 Language:Default EN ,Un adjustable 8.2 System : Press Up / Down button to switch between Metric / Imperial. 8.3 Brightness : Press Up / Down button to change the brightness of the backlight, ׀is dark, ׀׀׀׀׀is very bright, default value is .׀ Note : You can set the brightness independently between Daytime mode and Night mode. -
Page 7
8.4 Auto off : Press UP/DOWN button to change the auto power off time, from 1 to 9/OFF. The numbers represent minutes. When off is selected, the screen will only turn off when the on/off button is pressed. By default, this is set to 5 minutes. 8.5 Scenes : Analogue only 8.6 Battery Ind : Press UP/DOWN button to change the battery indicator, Voltage / Percentage / OFF. -
Page 8
Voltage Percentage Pow Ind : Press UP/DOWN button to change the Power indicator, Power / Current. * This data represents the power output of the battery (not motor). 8.8 Clock : Clock setting, press POWER button get into the clock setting menu, press UP/DOWN button to set Year/Month/Day/Hour/Min/Sec. -
Page 9
Note : There is a battery inside the screen to ensure the clock keeps time even when display is powered off. This battery is charged when the screen is turned on. If you don’t use your bike for a very long period of time, it can go flat. 8.9 Start password : Press the POWER button to get into the password setting menu. -
Page 10
Basic Settings *Press the DOWN button to move the red arrow to , press POWER button to show all items of the Basic Setting. 8.10 Wheel : Press UP/DOWN to change the wheel size setting. The wheel diameter optionals are 16/18/20/22/24/26/27/27.5/28/29/30/31 inch, 8.11 Battery : This option is not set for a Bafang motor. -
Page 11
low. 8.14 Advance setting : Pressing the POWER button allows you to get into the advance setting menu. The default password is ‘1919’. Speed limit Assist levels Error code 8.15 Speed limit : Pressing UP/DOWN will change speed limit. The allowable options are 10km/h~45km/h. -
Page 12
8.16 Assistance levels : This setting allows you to customise the assistance levels, options are 3/5/9/UBE, UBE represent factory default settings. Advance Setting Advance Setting Advance Setting Advance Setting Speed limit 25km/h Speed limit 25km/h Speed limit 25km/h Speed limit 25km/h Assist levels Assist levels Assist levels… -
Page 13
8.20Information : Shows information about your ebike. Information Speed 15.4 Km/h 32.4 Km/h Mileage Trip 9999.9 Km 99999.9 Km Range 59.9 Km BACK Product Infor Battery Infor 8.21 Product info : This shows the hardware and software versions. Information Product Information… -
Page 14: Error Codes
5. Error Codes 850C can show warning messages. The icon shows that there is an error code, displayed on the bottom of the screen. Error Code Error description Error diaplay 0x01 Normal No error 0x03 Brake signal No error 0x04 Throttle on high position Display 04H on LOGO position 0x05…
-
Page 15
6. Assembly instructions Please pay attention to the screw’s maximum torque value. Damage caused by over tightening of the bolts is not covered by warranty. There are 2 options for the clamp installation, forward or backward. The clamps suit 3 sizes of handlebar — 31.8mm, 25.4mm and 22.2mm. There are optional rubber spacer rings for 25.4mm and 22.2mm handlebars. -
Page 16: Connector Descriptions
7. Connector descriptions 1、 Red wire : Anode(24v/36v/48V) 2、 Blue wire : Power cord to the controller 3、 Black wire : 4、 Green wire : RxD (controller -> display) 5、 Yellow wire : TxD (display -> controller) 8. Assistance level instructions The assistance levels can be customised.
-
Page 17: Specifications
10. Specifications 3.2inch IPS screen 24V/36V/48V battery supply Rated operating current : 40mA Max operating current : 100mA (36V battery, with USB equipment changed) USB changing port : 5V 500mA Off leakage current < 1uA …
The P850c or DPC-14 (as it is also known) is a colour display often used with the Bafang BBS mid-drive electric bike conversion kits. It is a very clear and easy-to-use display and has much greater functionality than its older black-and-white LCD stablemates. Please feel free to use this pdf of the Bafang P850c manual.
p850c manual
-
Contents
-
Table of Contents
-
Bookmarks
Quick Links
VENTURE SCOOTERS
850c Display
User Manual
Product
Model
Abbreviation
TFT LCD Display
850C (DPC-14)
850C-BF
1
Related Manuals for APT 850C
Summary of Contents for APT 850C
-
Page 1
VENTURE SCOOTERS 850c Display User Manual Product TFT LCD Display Model 850C (DPC-14) Abbreviation 850C-BF… -
Page 2: Product Name
1. Product Name TFT display Model : APT TFT 850C 2. Manufacturer Tianjin APT Science and Technology Co., Ltd. Email : yzhao@aptdevelop.com apt@aptdevelop.com 3. Electrical Parameters 3.2inch IPS screen 24V/36V/48V battery supply Rated operating current : 40mA …
-
Page 3
5. Features Suitable for low temperature Max -20℃. High-contrast 3.2inch IPS colourful matrix screen. Ergonomic external button design, easy to operate. Speed display : AVG SPEED, MAX SPEED, SPEED (Real-time). Kilometer / Mile : Can be set according to customers’ habits. … -
Page 4: Functional Description
6. TFT screen instructions 7. Functional Description 7.1 Power On/Off Press and hold button for 1 second can turn on/off the display. The Display can Power automatically shut down when there is no operate & ride for X minutes(X could be 0~9).
-
Page 5
7.3 Speed & Mileage mode switch Short press button can change the speed and mileage mode, AVG SPEED- POWER >MAX SPEED->RT SPEED->ODO->RANGE->TIME->TRIP. **If there is no operation for 5 seconds, display will return Speed (Real-Time) display automatically. 7.4 Headlight/backlight On/Off Press and hold button for 1 second can turn on/off the headlight, and the scree will switch to the… -
Page 6: Parameter Setting
Daytime mode night mode 7.5 Walking mode (6km) Press and hold button for 2 second can get into walking mode, out of the mode DOWN when release the button. * This feature needs to be supported by controller. 7.6 Data cleanup Press and hold UP &…
-
Page 7
Double press button (press interval less than 0.3 second) can get into setting menus, press button can UP/DOWN buttons to change the parameter setting, press POWER switch to next item. Double press button to exit from menu. POWER * Display will automatically quit menu when there is no operation for 30 seconds. * For safety reasons, display can’t get into MENU when riding. -
Page 8
8.3 Auto off : Press UP/DOWN button to change the auto power off time, from 1 to 9 or OFF, the number represent time (minutes) to shutdown, default value is 5 minutes. 8.4 Scenes : Press UP/DOWN button to change the scenes, Digital / Analog. *Display only support Digital scenes for now, Analog scenes will be supported for future. -
Page 9
Voltage Percentage 8.6 Pow Ind : Press UP/DOWN button to change the Power indicator, Analog / Digital/Current. This data represents power output of the battery (not motor). -
Page 10
8.7 Clock : Clock setting, press POWER button get into the clock setting menu, press UP/DOWN button to set Year/Month/Day/Hour/Min/Sec. 8.8 Start password : Press POWER button get into the password setting menu. If you had set Start input ON, you must input right password before power on, password is accorded to your setting. -
Page 11
You need to input the right password before start with 30 seconds, display will power off automatically if the password was wrong. Basic Setting Ad v ance s etting Wheel Battery Factory setting Information *Press DOWN button to move the red arrow to , press POWER button can show all items of the Basic Setting. -
Page 12
8.9 Wheel : Press UP/DOWN can change the wheel setting, optional wheel diameter is 16/18/20/22/24/26/27/27.5/28/29/30/31 inch, 51cm~255cm represent wheel circumference (this needs controller support). 8.10 Battery : Press UP/DOWN will change battery voltage setting, optional value is 24V/36V/48V/UBE,UBE means user define value. 8.11 Advance setting : Press POWER button can get into the advance setting menu, default password is ‘1919’. -
Page 13
*Speed limit and current limit are restricted by controller and motor. 8.13 Assist levels : This parameter can customize assist levels, options are 3/5/9/UBE, UBE represent factory default settings. Error code :Display the last 10 times error code. 8.14 8.15Factory setting : Press POWER button enter Restore Factory settings item, set YES will restore all parameter to factory settings. -
Page 14
*These information needs to be supported by battery communication. 9. Error Code define 850C can show warning message, icon shows on the screen, and show error code at the bottom of the screen, error code from 04~30, definition see the table below. -
Page 15
0x01 Normal No error 0x03 Brake signal No error 0x04 Throttle on high position Display 04H on speed position 0x05 Throttle error Display 05H on speed position 0x06 Low voltage protection Display 06H on speed position 0x07 High voltage protection Display 07H on speed position 0x08 Line of the Hall on motor… -
Page 16
10. Assembly instructions Please pay attention to the screw’s torque value, damaged caused by excessive torque is not within the scope of the warranty. There are 2 directions for the clamp installation, forward or backward. -
Page 17: Connector Descriptions
Clamps suit for 3 size of handlebar, 31.8mm, 25.4mm, 22.2mm, there are transfer rings for 25.4mm and 22.2mm, transfer ring must be assembled with the special directions, pay attention to the green arrow below. 11. Connector descriptions 1、 Red wire : Anode(24v/36v/48V) 2、…
-
Page 18
13. Certification CE / IP65 (water proof) / ROHS.
-

-
January 13 2020, 02:40

- Техника
- Cancel
Цена: $67.69
Перейти в магазин
Всем привет, сегодня не просто обзор экрана для центрального мотора Bafang, но и впечатление от годовой эксплуатации моего электровелосипеда, а так же доработки и апгрейды для нового сезона.
Читать полностью