Просмотр
Доступно к просмотру 673 страницы. Рекомендуем вам скачать файл инструкции, поскольку онлайн просмотр документа может сильно отличаться от оригинала.
-
2008-2011
Руководство по ремонту
и техническому обслуживанию
SPYDER™ GS
SPYDER™ RS
-
Депонирование:
National Library of Quebec
National Library of Canada 2011
Все права защищены. Никакая часть данного издания не может быть воспроизведена каким-либо образом
без предварительного письменного разрешения компании Bombardier Recreational Products Inc. (BRP).
© Bombardier Recreational Products Inc. (BRP) 2011
Отпечатано в Канаде
Техническая литература
Bombardier Recreational Products Inc. (BRP)
Valcourt (Quebec) Canada
® ™ Торговые марки компании Bombardier Recreational Products Inc. (BRP) или ее филиалов.
Can-Am™                SST™
DESS™                  Spyder™
DPS™                   Rotax®
SE5™                   XPS™
В данном документе содержаться упоминания о следующих торговых марках:
Loctite  является торговой маркой компании Loctite Corporation
®
Molykote  является торговой маркой компании Dow Corning Corporation
®
Snap-on  является торговой маркой компании Snap-on Tools Corporation
®
Supertanium  является торговой маркой компании Premier Industrial Corporation
©
WD-40  является торговой маркой компании WD-40 Company
®
-
ОГЛАВЛЕНИЕ
ПРАВИЛА ТЕХНИКИ БЕЗОПАСНОСТИ .......................................................................XI
ВВЕДЕНИЕ .................................................................................................................. XII
ИНФОРМАЦИЯ О ТРАНСПОРТНОМ СРЕДСТВЕ ...........................................................................................XIII
ИНФОРМАЦИЯ О РУКОВОДСТВЕ ...................................................................................................................XIV
ИНФОРМАЦИЯ О КРЕПЕЖЕ ...........................................................................................................................XVIII
Часть 01 ТЕХНИЧЕСКОЕ ОБСЛУЖИВАНИЕ ................................................................ 5
Раздел 01 (РЕГЛАМЕНТ ПЕРИОДИЧЕСКОГО ТЕХНИЧЕСКОГО ОБСЛУЖИВАНИЯ) ...........................5
Раздел 02 (ПРЕДСЕЗОННАЯ ПОДГОТОВКА) ........................................................................................9
ОБЩАЯ ИНФОРМАЦИЯ ....................................................................................................................................... 9
ОПЕРАЦИИ ............................................................................................................................................................. 9
ТРАНСПОРТНОЕ СРЕДСТВО, ПОДГОТОВЛЕННОЕ К ХРАНЕНИЮ ДОЛЖНЫМ ОБРАЗОМ .................... 9
ТРАНСПОРТНОЕ СРЕДСТВО, НЕ ПОДГОТОВЛЕННОЕ К ХРАНЕНИЮ ДОЛЖНЫМ ОБРАЗОМ .............. 9
Раздел 03 (ПОРЯДОК ХРАНЕНИЯ).......................................................................................................11
ОБЩАЯ ИНФОРМАЦИЯ ......................................................................................................................................11
ОПЕРАЦИИ ............................................................................................................................................................11
СИСТЕМА ПОДАЧИ ТОПЛИВА .......................................................................................................................11
ДВИГАТЕЛЬ ......................................................................................................................................................11
СИСТЕМА ОХЛАЖДЕНИЯ ..............................................................................................................................11
ЭЛЕКТРООБОРУДОВАНИЕ ............................................................................................................................11
КОЛЕСА И ШИНЫ .......................................................................................................................................... 12
ТОРМОЗНАЯ СИСТЕМА ................................................................................................................................ 12
ПОДВЕСКА ...................................................................................................................................................... 12
ТРАНСПОРТНОЕ СРЕДСТВО ....................................................................................................................... 12
Часть 02 ДВИГАТЕЛЬ ................................................................................................. 13
Раздел 01 (СНЯТИЕ И УСТАНОВКА ДВИГАТЕЛЯ) ..............................................................................13
ОБЩАЯ ИНФОРМАЦИЯ ..................................................................................................................................... 16
ОПЕРАЦИИ ........................................................................................................................................................... 16
ДВИГАТЕЛЬ ..................................................................................................................................................... 16
ОПОРЫ ДВИГАТЕЛЯ ...................................................................................................................................... 24
Раздел 02 (СИСТЕМА ВПУСКА ВОЗДУХА) ...........................................................................................29
ОБЩАЯ ИНФОРМАЦИЯ ..................................................................................................................................... 30
ОПЕРАЦИИ ........................................................................................................................................................... 30
ВОЗДУШНЫЙ ФИЛЬТР .................................................................................................................................. 30
КОРПУС ВОЗДУШНОГО ФИЛЬТРА ............................................................................................................... 31
Раздел 03 (СИСТЕМА ВЫПУСКА ОТРАБОТАВШИХ ГАЗОВ) ..............................................................33
ОБЩАЯ ИНФОРМАЦИЯ ..................................................................................................................................... 35
ТЕХНИЧЕСКОЕ ОБСЛУЖИВАНИЕ .................................................................................................................... 35
ЗАМЕНА ПЕРЕДНЕЙ ПРОКЛАДКИ Y-ОБРАЗНОЙ ТРУБЫ СИСТЕМЫ
ВЫПУСКА ОТРАБОТАВШИХ ГАЗОВ ............................................................................................................ 35
ПРОВЕРКА СОСТОЯНИЯ ................................................................................................................................... 35
ОПЕРАЦИИ ........................................................................................................................................................... 35
ТЕРМОЗАЩИТНЫЙ КОЖУХ ГЛУШИТЕЛЯ ................................................................................................... 35
ГЛУШИТЕЛЬ .................................................................................................................................................... 36
Y-ОБРАЗНАЯ ТРУБА СИСТЕМЫ ВЫПУСКА ОТРАБОТАВШИХ ГАЗОВ ..................................................... 37
ПРИЕМНАЯ ТРУБА (ПЕРЕДНИЙ ЦИЛИНДР) .............................................................................................. 38
ПРИЕМНАЯ ТРУБА (ЗАДНИЙ ЦИЛИНДР) ................................................................................................... 39
Раздел 04 (СИСТЕМА СМАЗКИ) ...........................................................................................................41
ОБЩАЯ ИНФОРМАЦИЯ ..................................................................................................................................... 46
ТЕХНИЧЕСКОЕ ОБСЛУЖИВАНИЕ .................................................................................................................... 46
МОТОРНОЕ МАСЛО ...................................................................................................................................... 46
ФИЛЬТР МОТОРНОГО МАСЛА ..................................................................................................................... 48
ПРОВЕРКА СОСТОЯНИЯ ................................................................................................................................... 49
ПРОВЕРКА ДАВЛЕНИЯ МОТОРНОГО МАСЛА............................................................................................ 49
rmr2011-069                                                                                           I
- 1
- 2
- 3
- 4
- 673
Для ознакомления с инструкцией необходимо нажать на ссылку «ЗАГРУЗИТЬ», чтобы скачать pdf файл. Если есть кнопка «ПРОСМОТР», то можно просто посмотреть документ онлайн.
Для удобства, Вы можете сохранить данную страницу с файлом руководства по эксплуатации в свой список «избранное» прямо на сайте (доступно для зарегистрированных пользователей).
Смотрите инструкцию для похожих моделей:

Вы можете задать вопрос посетителям сайта по модели CAN-AM Spyder GS (2008 — 2011). Если Вы являетесь её пользователем, то пожалуйста оставьте, по возможности развёрнутый отзыв:
- Manuals
- Brands
- Can-Am Manuals
- Offroad Vehicle
- spyder gs 2008
- Operator’s manual
-
Contents
-
Table of Contents
-
Bookmarks
Quick Links
WARNING
Learn how the Spyder roadster is different.
Read this operator’s guide and watch the safety video.
Complete a training course (if available), practice and become proficient with the controls.
Consult local laws — license requirements vary by location.
Keep this guide in the front storage compartment.
2 1 9
0 0 0
5 3 6
Related Manuals for Can-Am spyder gs 2008
Summary of Contents for Can-Am spyder gs 2008
-
Page 1
WARNING Learn how the Spyder roadster is different. Read this operator’s guide and watch the safety video. Complete a training course (if available), practice and become proficient with the controls. Consult local laws — license requirements vary by location. Keep this guide in the front storage compartment. 2 1 9 0 0 0 5 3 6… -
Page 2
CALIFORNIA PROPOSITION 65 WARNING WARNING This product contains or emits chemicals known to the state of California to cause cancer and birth defects or other reproductive harm. ®™ and the BRP logo are trademarks of Bombardier Recreational Products Inc. or its affiliates. ©… -
Page 3: How To Use This Operator’s Guide
ENT ABOUT THE SPYDER ROAD- If possible, take a training class STER (p.28). that is specifically designed for the Spyder roadster. Check our website In this Operator’s Guide, the word at www.can-am.brp.com for more motorcycle typically refers information about upcoming training two-wheeled motorcycle.
-
Page 4: Table Of Contents
TABLE OF CONTENTS HOW TO USE THIS OPERATOR’S GUIDE ……..1 Know Before You Go ..
-
Page 5
TABLE OF CONTENTS UNDERSTANDING RISK ON THE ROAD ……..32 Type of Vehicle …………..32 Operator Skills and Judgment. -
Page 6
WARRANTY BRP LIMITED WARRANTY – USA AND CANADA: 2008 CAN-AM™ SPYDER™ ROADSTER ……………. 112… -
Page 7
TABLE OF CONTENTS BRP LIMITED WARRANTY OUTSIDE USA AND CANADA: 2008 CAN-AM SPYDER ROADSTER …………116 CALIFORNIA EMISSION CONTROL WARRANTY STATEMENT . -
Page 8: General Precautions
GENERAL PRECAUTIONS Avoid Carbon Monoxide – Never top off the fuel tank. Leave some room for the fuel to expand Poisoning with temperature changes. All engine exhaust contains carbon – Wipe up any spilled fuel. monoxide, a deadly gas. Breathing car- –…
-
Page 9
GENERAL PRECAUTIONS See your authorized Can-Am roadster dealer for available accessories for your vehicle. ______________________… -
Page 10
GENERAL PRECAUTIONS _______________________… -
Page 11: Controls, Instruments And Basic Procedures
CONTROLS, INSTRUMENTS AND BASIC PROCEDURES ______________________…
-
Page 12: Operating During Break-In
After the break-in period, your vehicle should be inspected by an authorized Can-Am roadster dealer as per the MAINTENANCE SCHEDULE (p.72). NOTE: The break-in inspection is per- formed at the expense of the vehicle owner.
-
Page 13: Controls/Instruments
CONTROLS/INSTRUMENTS Many controls are similar to the controls of a motorcycle, but some controls are dif- ferent. It is important to know the location and operation of all controls, and to de- velop and practice smooth and coordinated use of them. See REQUIRED RIDING SKILLS AND PRACTICE EXERCISES (p.
-
Page 14
CONTROLS/INSTRUMENTS To decrease engine speed, roll the 4) Gearshift Lever throttle away from you. The gearshift lever is in front of the left footrest. The gear pattern is Reverse-1-Neutral- 2-3-4-5. rmo2008-001-007_b TO DECREASE SPEED The throttle is spring loaded and should return to idle when you release your grip. -
Page 15
CONTROLS/INSTRUMENTS locks to apply the parking brake. Firm- ly press the pedal down a second time to release the parking brake. rmo2008-001-079_a 1. Parking brake pedal rmo2008-001-080_a 1. Engaging/disengaging parking brake pedal WARNING Do not use the parking brake to slow or stop the vehicle;… -
Page 16: Secondary Controls
CONTROLS/INSTRUMENTS Secondary Controls rmo2008-001-001_a Ignition switch Turn signal button Engine start button Horn button Engine stop switch Reverse interlock lever Hazard warning switch Headlights override button Headlights switch 1) Ignition Switch – seat opening mechanism to access: • fuel tank cap •…
-
Page 17
6) Turn Signal Button to have another one made by an autho- rized Can-Am roadster dealer. The turn signal button is located near the left handgrip. It turns off automat- 2) Engine Start Button… -
Page 18: Multifunction Gauge Cluster
CONTROLS/INSTRUMENTS 9) Headlight Override The button can be used to light up in- side the front storage compartment. There is a headlight override button on The high beams will reflect on the the front of the right handgrip. Push inside of compartment lid when it is and hold the headlight override button opened.
-
Page 19
CONTROLS/INSTRUMENTS 5) Indicator Lamps Indicator lamps will inform you of various conditions or problems. An indicator lamp can flash alone or in combination with another lamp. The digital display provides a brief description for some of the conditions or prob- lems indicated by lamps. -
Page 20
CONTROLS/INSTRUMENTS The gearbox positions are: R (reverse), 1, N (neutral), 2, 3, 4, 5. 10) Engine Temperature Bar gauge that continuously indicates the engine coolant temperature. 11) Digital Speedometer In addition of the analog type speedometer, vehicle speed can also be indicated via this display. -
Page 21
5. Press SET (S) button to change hour. 6. Press MODE (M) button to switch to minute (minute flashes). 7. Press SET (S) button to change minute. 8. Press MODE (M) button. Setting Language For display language setting, refer to an authorized Can-Am roadster dealer. _____________________… -
Page 22: Basic Procedures
BASIC PROCEDURES Starting and Stopping the NOTICE Do not apply throttle while starting the engine. Engine 9. Check the display for problems and Starting the Engine to ensure that the oil light turns off. 10. Release the parking brake. Make WARNING sure the parking brake indicator on Exhaust gas contains poisonous…
-
Page 23: Adjusting Mirrors
BASIC PROCEDURES 2. Shift the transmission into NEU- TRAL. 3. Disengage the parking brake. 4. Dismount on the right side of the vehicle, keeping your foot on the brake pedal. 5. Push the vehicle, using the brake as needed. CAUTION Only push from the right-hand side, so you can reach the rmo2008-001-074_a brake pedal.
-
Page 24: Opening The Seat
BASIC PROCEDURES Fueling Fuel Recommendation Use unleaded gasoline or oxygenat- ed fuel containing no more than 10% ethanol or methanol or both. The gaso- line used must have the following min- imum octane number: MINIMUM OCTANE NUMBER Inside North America 87 ((R+M)/2) rmo2008-001-010 FRONT STORAGE COMPARTMENT…
-
Page 25: Operating In Reverse
BASIC PROCEDURES Operating in Reverse 1. Check that the area behind you is clear, and continue to look back- wards while you ease out the clutch. Slow and stop using clutch and brake, just like when operating normally. 2. Keep your speed low and do not rmo2008-001-016 back up for long distances.
-
Page 26
BASIC PROCEDURES 3. Install a jack under the rear portion of frame. NOTICE Do not jack the vehicle un- der the rear shock. rmr2008-029-002 FRONT SUSPENSION ADJUSTING WRENCH 4. Lift the rear of vehicle until the shock absorber is fully extended. 5. -
Page 27: License Plate Installation
BASIC PROCEDURES rmo2008-002-009 rmr2008-030-004_c DAMPING PAD (P/N 293 740 028) A. Smooth adjustment (position 1) B. Hard adjustment (position 7) Refer to the following procedure for proper installation. NOTE: Never adjust the rear shock absorber cam from position 7 directly 1.
-
Page 28
BASIC PROCEDURES rmo2008-002-010_b TYPICAL 1. Existing hardware 5. Squeeze license plate and support together at each lower corner. ______________________… -
Page 29: Safe Operating Instructions
SAFE OPERATING INSTRUCTIONS _________ ________ SAFE OPERATING INSTRUCTIONS…
-
Page 30: What’s Different About The Spyder Roadster
WHAT’S DIFFERENT ABOUT THE SPYDER ROADSTER The Spyder roadster is a different type vehicles behind you that may not be of road vehicle. This section will help able to stop as quickly. you understand some of the vehicle’s distinctive features and operating char- Antilock Braking System (ABS) acteristics.
-
Page 31: Width
WHAT’S DIFFERENT ABOUT THE SPYDER ROADSTER Width – Shift back into first gear before shut- ting off the engine. Because the Spyder roadster is wider than a typical motorcycle: Driver’s License and Local – Keep the front wheels in your lane Laws during turns.
-
Page 32: Driving Aid Technologies
– a Stability Control System (SCS) which can be ordered only from an au- is designed to limit the power driv- thorized Can-Am roadster dealer. ing the rear tire and to brake individ- ual wheels, which reduces the risk Proper tire inflation pressure and tread…
-
Page 33: Electronic Brake Distribution (Ebd)
DRIVING AID TECHNOLOGIES the vehicle from entering a turn too fast. If you drive too fast for condi- tions, you can lose control, even with VSS. Electronic Brake Distribution (EBD) The Spyder roadster is equipped with an Electronic Brake Distribution (EBD) system.
-
Page 34: Understanding Risk On The Road
UNDERSTANDING RISK ON THE ROAD Before you operate the Spyder road- who develop good skills will have bet- ster, consider your risk of being hurt or ter control of their vehicle. Don’t rely killed in a crash, how you can reduce on your experience with motorcycles, the risk and whether you are willing to automobiles, ATVs, snowmobiles or…
-
Page 35: Vehicle Condition
UNDERSTANDING RISK ON THE ROAD your judgment and skills are impaired by any alcohol consumption. You must be physically able to oper- ate all controls, turn the handlebars through the full range of steering, mount and dismount, and monitor your surroundings to operate the vehicle.
-
Page 36: Riding Gear
RIDING GEAR Riding three-wheeled, open-air vehi- with the back of the operator’s helmet. cles like the Spyder roadster requires Even the best helmet is no guarantee the same protective gear as motorcy- against injury, but statistics indicate cling. Even though the vehicle is more that helmet use significantly reduces stable at low speeds than a motorcy- the risk of brain injury.
-
Page 37
RIDING GEAR Gloves Leather is a good choice because it is durable and wind-resistant and pro- Full-fingered gloves protect hands vides protection against injury. Oth- from the wind, sun, heat, cold and er abrasive-resistant protective gear flying objects. Gloves that fit snugly made of synthetic fabrics are good will improve grip on the handlebars choices, too. -
Page 38
RIDING GEAR be much more comfortable and alert than a rider who is wet and cold. One- or two-piece styles are available, and those designed specifically for motorcycling are best. High-visibility orange or yellow colors are good choic- es. A feature to look for is elastic in the waist, pant legs and sleeves. -
Page 39: Required Riding Skills And Practice Exercises
REQUIRED RIDING SKILLS AND PRACTICE EXERCISES Before you take the Spyder roadster Keep this basic parking lot diagram in on the road, you need to develop rid- mind when setting up the exercises. ing skills and strategies for managing 3 m (10 ft) wide parking lot spaces are risk on the road.
-
Page 40: Preparing To Ride
REQUIRED RIDING SKILLS AND PRACTICE EXERCISES and rear before doing an exercise. Al- – Become familiar with using the en- so, watch out for children and animals. gine stop switch. Directions Preparing to Ride – With the vehicle in NEUTRAL and Know the location and operation of all the parking brake engaged, pull in the vehicle’s controls (p.
-
Page 41
REQUIRED RIDING SKILLS AND PRACTICE EXERCISES Directions 3) Engine Stop while in Motion Purpose For this exercise, do NOT use any throttle. You will be controlling your – Become familiar with using the en- movement using only the clutch in the gine stop switch when in motion so friction zone and brake. -
Page 42
REQUIRED RIDING SKILLS AND PRACTICE EXERCISES 4) Using the Throttle Purpose – Become familiar with operating the throttle. – Learn to balance throttle and clutch. Directions This exercise is similar to the friction zone exercise, except this time you will be using some throttle. You will use the entire straightaway, stopping only at the ends. -
Page 43
REQUIRED RIDING SKILLS AND PRACTICE EXERCISES on the vehicle. You will need to exert more force to turn the handlebar of your vehicle than is needed to turn a motorcycle. However, it is easier to stop while turning than with a motor- cycle. -
Page 44
REQUIRED RIDING SKILLS AND PRACTICE EXERCISES Directions you maintain steering control while ap- plying the maximum braking force. 6 m (20 ft) Weave – Start at one end of the straight away – Weave between every marker/ and accelerate to 8 km/h (5 MPH). intersection of every other park- Partway down the straightaway, ing spot. -
Page 45
REQUIRED RIDING SKILLS AND PRACTICE EXERCISES Purpose – Become familiar with the foot mo- tions needed to shift gears. – Learn to upshift and downshift. Directions This exercise is similar to what you did before, except now you will be upshift- ing on the straightaways, then coming to a stop at the end of each straight- away. -
Page 46
REQUIRED RIDING SKILLS AND PRACTICE EXERCISES • You do not need to apply throttle, – Roll off the throttle and pull in the but once you are comfortable, if clutch lever. space allows, you can adjust the – Step on the shift lever to shift into throttle to increase speed in sec- first gear. -
Page 47: Developing Advanced Riding Skills
REQUIRED RIDING SKILLS AND PRACTICE EXERCISES 9) Swerve 10) Operating in Reverse Purpose Purpose – Become familiar with the vehicle’s – Become familiar with the vehicle’s handling for quick maneuvers. handling and turning radius in re- verse. – Try different variations of braking and swerving.
-
Page 48
REQUIRED RIDING SKILLS AND PRACTICE EXERCISES advanced skills. First, learn the ”Street Strategies” covered in the next sec- tion. Then you can take the vehicle on the road in relatively low-risk situa- tions. Start by riding in less challenging situa- tions: –… -
Page 49: Street Strategies
STREET STRATEGIES This section provides some strategies braking distance is longer on slippery to reduce your risk on the road. Many road surfaces, down hills, or when car- of these strategies are similar to those rying more weight, and visibility may used for motorcycles.
-
Page 50: Being Visible
STREET STRATEGIES When braking, be particularly aware of signals, but they may not cancel after vehicles behind you that may not be shallow turns. Make sure turn signals able to stop as quickly as the Spyder are off after you have completed your roadster.
-
Page 51: Lane Position
STREET STRATEGIES Time of Day and Weather for drivers ahead to see you, you must be able to see their mirrors. When you In dim light, such as at night, at dawn are being followed by a large vehicle, or dusk, or in poor weather such as rain passing vehicles may not be able to or fog, you may be harder to see.
-
Page 52
STREET STRATEGIES are preparing to turn. This can make Turns you more visible and discourage other Remember to slow, look, and steer motorists from trying to drive around through turns. you. Watch for vehicles approaching – Slow: Reduce speed as needed be- from behind. -
Page 53
STREET STRATEGIES When shifting gears while turning, be help maintain enough power. Going careful not to release the clutch lever down hills, a lower gear can provide too fast. Adjust throttle as you release engine braking to control your speed. the clutch lever to match engine and To start while on an incline, hold the vehicle speed in a smooth shift. -
Page 54: Road Conditions And Hazards
STREET STRATEGIES Particularly on curvy roads, Spyder Avoid large water puddles or water roadster riders might become tired streams, and slow down or pull off the sooner than motorcyclists. Don’t push road during heavy rains. If you must yourself to keep up with motorcycles; pass through water, slow down as stop if you are tired.
-
Page 55: On-Road Emergencies
(p. 68) to the near- if necessary. est Can-Am roadster dealer to have If you strike a large enough obstacle, it thoroughly inspected for safety bump or hole, the impact can make the before riding again.
-
Page 56: Carrying A Passenger Or Cargo
CARRYING A PASSENGER OR CARGO Weight Limits 4. The Spyder roadster may be less stable. There is a greater risk of Do not exceed the weight limits for rid- tipping or rolling during extreme ers and cargo. maneuvers with weight that is higher or farther to the rear (like WEIGHT LIMITS a passenger).
-
Page 57: Where To Store Cargo
CARRYING A PASSENGER OR CARGO Instruct the passenger on how to ride Avoid abrupt acceleration, braking and before starting out. Have the passen- turns, especially with inexperienced ger follow these rules: passengers. Sudden, unexpected ma- neuvers can make the passenger fall 1.
-
Page 58: Knowledge Self-Test
You should only replace the tires should make it common practice with those approved by BRP to brake and turn at the same obtained from an authorized time. Can-Am roadster dealer. True False True False 12. Under normal conditions, It is important for the passenger to following distance should be be alert and sober.
-
Page 59
KNOWLEDGE SELF-TEST 14. List 5 ways of being more noticeable to other drivers. 1) _________________________ 2) _________________________ 3) _________________________ 4) _________________________ 5) _________________________ 15. When braking on surfaces with less than ideal traction, you should pump the brakes to help maintain control of the vehicle. -
Page 60: Answers
KNOWLEDGE SELF-TEST Answers 12. b. 2 seconds Under normal conditions, following distance should be False at least two seconds. To stop quickly, press the brake 13. True pedal only. Never use the parking brake while the vehicle is moving. 14. 1) Make sure your lights and False reflectors are clean.
-
Page 61: Safety Information On The Vehicle
SAFETY INFORMATION ON THE VEHICLE This vehicle comes with a hang tag and labels containing important safety informa- tion. Any person who rides this vehicle should read and understand this information on the vehicle before riding. Hang Tag rmo2008-001-102 Safety Card The Safety Card is found at the top of the multifunction gauge cluster.
-
Page 62: Labels
The following labels are on your vehicle, and they should be considered permanent parts of the vehicle. If missing or damaged, they can be replaced free of charge. See an authorized Can-Am roadster dealer. NOTE: The following illustrations used in this Operator’s Guide are a general rep- resentation only.
-
Page 63
SAFETY INFORMATION ON THE VEHICLE Label 1 TIRE INFORMATION rmo2008-001-092_en rmo2008-001-029_b 1. Label 1 location Label 2 Label 3 rmo2008-001-098_en rmo2008-001-093_en rmo2008-001-107_b 1. Label 2 location rmo2008-001-031_c 1. Label 3 located in the front storage compartment _________ ________ SAFE OPERATING INSTRUCTIONS… -
Page 64
SAFETY INFORMATION ON THE VEHICLE Label 4 Label 6 WARNING Clean filler cap before removing. Use only DOT 4 brake fluid from a sealed container. rmo2008-003-006_en rmo2008-001-040_b 1. Label 6 located underneath seat rmo2008-001-029_c 1. Label 4 located on the oil reservoir behind the left middle side panel Label 5 rmo2008-003-003… -
Page 65: Reporting Safety Defects
REPORTING SAFETY DEFECTS Your safety is very important to Bombardier Recreational Products Inc. (BRP). If you have any concerns you should immediately contact BRP’s customer service. In the USA, if you believe that your ve- hicle has a defect which could cause a crash or could cause injury or death, you should immediately inform the Na- tional Highway Traffic Safety Adminis-…
-
Page 66
REPORTING SAFETY DEFECTS ________ ________ SAFE OPERATING INSTRUCTIONS… -
Page 67: Pre-Ride Inspection
PRE-RIDE INSPECTION _____________________…
-
Page 68: Pre-Ride Checklist
See an authorized – Lights: Check operation of head- Can-Am roadster dealer as neces- lights, tail light, brake light, turn sig- sary. nals and hazard warning lights.
-
Page 69: Transporting And Storing
TRANSPORTING AND STORING _____________________…
-
Page 70: Transporting The Spyder Roadster
TRANSPORTING THE SPYDER ROADSTER If your vehicle needs to be transported, 4. Attach the straps to the winch ca- it should be carried on a flatbed trailer ble. If possible, use chains or addi- of the proper size and capacity. tional straps to attach the straps to the winch cable as indicated below to avoid damaging the bumper cov-…
-
Page 71
TRANSPORTING THE SPYDER ROADSTER rmo2008-001-067_a REAR WHEEL ATTACHMENT 1. Tie-down strap rmo2008-001-069_a 2. Inside rear wheel rim ONLY FRONT WHEELS ATTACHMENT – METHOD 1 1. Strap around the rim of each front wheel 11. Firmly attach the rear wheel and attached to the front of trailer tie-down strap to the rear of the trailer with a ratchet. -
Page 72: Storing The Spyder Roadster
2. Charge the battery if needed BRP recommends you have your au- (p.87). thorized Can-Am roadster dealer fully 3. Perform a pre-ride inspection prepare your vehicle for storage. Or, at (p.66), then test-ride the vehicle your convenience, you can follow the at low speed.
-
Page 73: Maintenance
MAINTENANCE _____________________…
-
Page 74: Maintenance Schedule
If not, see your authorized Can-Am roadster dealer. Other important items in the maintenance schedule that are more difficult and re- quire special tools are best performed by your authorized Can-Am roadster dealer. WARNING Turn off the engine and follow these maintenance procedures when per- forming maintenance.
-
Page 75
PERIODIC MAINTENANCE SCHEDULE C: CLEAN INITIAL INSPECTION 1 000 km (600 mi) I: INSPECT AND/OR (To be performed by an authorized Can-Am roadster dealer. ADJUST as required The initial maintenance is very important and must not be neglected.) L: LUBRICATE… -
Page 76
PERIODIC MAINTENANCE SCHEDULE C: CLEAN INITIAL INSPECTION 1 000 km (600 mi) I: INSPECT AND/OR (To be performed by an authorized Can-Am roadster dealer. ADJUST as required The initial maintenance is very important and must not be neglected.) L: LUBRICATE… -
Page 77
PERIODIC MAINTENANCE SCHEDULE C: CLEAN INITIAL INSPECTION 1 000 km (600 mi) I: INSPECT AND/OR (To be performed by an authorized Can-Am roadster dealer. ADJUST as required The initial maintenance is very important and must not be neglected.) L: LUBRICATE… -
Page 78: Maintenance Procedures
MAINTENANCE PROCEDURES Tool Kit 12. front suspension adjusting wrench (not illustrated) (p. 23) The tool kit is located inside the front 13. towel (not illustrated). storage compartment, on the left-hand side of the vehicle. The tools marked with (*) are used only for procedures in the maintenance manual.
-
Page 79
MAINTENANCE PROCEDURES rmo2008-001-032_a rmo2008-001-033_b 1. Middle side panel clips Step 1: Press down top edge Step 2: Push top edge under top side panel’s 2. Press down panel’s top edge with edge both hands and pull out. 3. Secure panel by pushing and turn- ing each clip clockwise (1/4 turn) to its maximum rotation. -
Page 80
MAINTENANCE PROCEDURES Installation 1. Screw 4 Torx screws. NOTICE Do not overtorque. Any deformation on the panel around the screw is an indication that it is too tight. You may damage the pan- rmo2008-001-078_a 3) Rear Side Panel 1. Flat head screwdriver under rivet 2. -
Page 81: Tires
If any of the above occurs, have the tire only the BRP recommended tires, repaired or replaced as soon as possi- which can be ordered only from an ble by an authorized Can-Am roadster authorized Can-Am roadster dealer. dealer. Tire Pressure…
-
Page 82: Drive Belt
(5), have the belt properly tire’s center tread will wear unevenly aligned by an authorized Can-Am road- depending on if the vehicle is driven ster dealer as soon as possible. smoothly or aggressively.
-
Page 83
MAINTENANCE PROCEDURES Drive Belt Wear Inspect the drive belt with the vehicle in neutral, engine off, on a level surface with plenty of room – you will have to roll the vehicle forward or backward to see the full length of the belt. rmo2008-001-109_a DRIVE BELT SURFACES 1. -
Page 84: Engine Oil And Coolant
While riding, if you feel vibrations in the belt or if the belt is skipping sprocket teeth, have the belt tension adjusted as soon as possible by an authorized Can-Am roadster dealer. Engine Oil and Coolant rmo2008-001-017_a NOTICE The procedures for check- 1.
-
Page 85
MAINTENANCE PROCEDURES If the oil level is at the upper mark: 7. Remove the bottom plate under the oil reservoir. 13. Properly tighten the dipstick. 14. Install the left middle side panel (p. 77). Oil and Filter Replacement Change the engine oil and filter at the same time, and only when the engine is warm. -
Page 86
– if debris are present, 24. Install a NEW O-ring on the oil filter see your authorized Can-Am road- cover. ster dealer. 25. Screw the oil filter cover in place. -
Page 87: Brakes
(P/N 219 700 362). quently requires coolant indicates leaks or engine problems. See an au- With the engine cold, check the thorized Can-Am roadster dealer. coolant level as follows: 1. Park the vehicle on a firm, level sur- Brakes face.
-
Page 88: Battery
2. brake pedal for spongy feel 3. brake discs for excessive wear and surface condition 4. brake pads for wear, damage or looseness. See an authorized Can-Am roadster dealer if there are any problems with the brake system. rmo2008-001-040_b Battery 1.
-
Page 89: Clutch Fluid Level Verification
The battery may need to be charged if the vehicle has not been ridden for at least one month. Always have the battery replaced by an authorized Can-Am roadster dealer. WARNING rmo2008-001-044_a 1. NEGATIVE (-) terminal Do not use conventional lead-acid 2.
-
Page 90: Headlights Aiming
MAINTENANCE PROCEDURES The clutch fluid reservoir is near the re- WARNING verse interlock lever on the left handle- Avoid getting brake fluid on skin bar. or in eyes – it may cause severe Check the clutch fluid level as follows: burns.
-
Page 91: Vehicle Care
MAINTENANCE PROCEDURES 5. Beam aiming is correct when the 2. Using a soft, clean cloth, wash the focus point (brightest spot) of the vehicle with water mixed with a headlight reflection is between the mild detergent, such as soap spe- marks.
-
Page 92
MAINTENANCE PROCEDURES ______________________… -
Page 93: Road Side Repairs
ROAD SIDE REPAIRS _____________________…
-
Page 94: Problems
1. Move the other vehicle as close as Use your spare key to have another possible and preferably on the left one made by an authorized Can-Am side of the Spyder roadster. Make roadster dealer as soon as possible. If sure the vehicles are not touching.
-
Page 95: Electrical Accessories Failure
NEGATIVE (-) jumper cable to the thorized Can-Am roadster dealer. NEGATIVE (-) terminal under the After recharging battery, have the vehi- seat of the Spyder roadster. cle inspected by an authorized Can-Am roadster dealer. Electrical Accessories Failure If any electrical accessories stop work- ing on the vehicle, check for blown fus- es and replace if necessary.
-
Page 96
PROBLEMS DESCRIPTION Accessories D.E.S.S. 10 A License plate light Position light Tail lights Service connector Ignition coil 15 A Fuel injectors Clock 10 A rmo2008-001-076_a Hazard warning lights 1. Fuse box located under the service cover Turn signal lights behind the front storage compartment 10 Fan 15 A Fuse Description… -
Page 97: Light Failure
If the light failure still occurs, have cover. the vehicle serviced by an authorized Can-Am roadster dealer. 5. Check whether the filament is melted. WARNING Always turn the ignition switch to the OFF position before replacing a bulb to avoid electric shock.
-
Page 98
PROBLEMS rmo2008-001-121_a 1. Upper console 2. Press on the screwdriver inside hole 3. Insert finger in opening 4. With the other hand, insert the rmo2008-001-084_a screwdriver in the other hole on LIGHTS LOCATION – FRONT OF VEHICLE the upper console. 1. -
Page 99
PROBLEMS 8. Remove the bulb by releasing both clips with a small flat head screw- driver. rmo2008-001-103_a 1. Front turn signal lens screw 2. Turn the connector counterclock- wise as indicated below and re- move lens. rmo2008-001-124_a 1. Bulb housing 2. -
Page 100
PROBLEMS 2. Remove the bulb by pushing in and turning counterclockwise. 3. Install the new bulb by pushing and turning it clockwise. 4. Reinstall the lens. Tail Light/Brake Light 1. Remove the panel under the pas- rmo2008-001-078_a senger seat by unscrewing 7 Torx 1. -
Page 101
PROBLEMS rmo2008-001-118_a rmo2008-003-002_a 1. Connector 3. Turn the bulb holder clockwise and 7. Remove the bulb by pushing in and remove it from the connector. turning counterclockwise. 8. Install the new bulb by pushing and turning it clockwise. 9. Properly reinstall the parts in the re- verse order of their removal. -
Page 102: Engine Does Not Start
– Check to see whether the engine indicator lamp is ON while start- 3. Install the new bulb by pushing and ing. See an authorized Can-Am turning it clockwise. roadster dealer. 4. Reinstall the lens. Engine Does Not Start ENGINE DOES NOT TURN OVER 1.
-
Page 103: Messages In Multifunction Gauge Cluster
Important information about vehicle condition is displayed on the multifunction gauge cluster. When starting the engine, always look at the gauge cluster for any special messages. If a problem persists, go to an authorized Can-Am roadster dealer. INDICATOR MAIN DIGITAL…
-
Page 104
*BRP recommends having the vehicle transported when in LIMP HOME. If you operate the vehicle in LIMP HOME, avoid abrupt maneuvers and immediately go to the nearest authorized Can-Am roadster dealer to have your vehicle serviced before riding again. In LIMP HOME, the engine RPM is limited and the vehicle speed is limited to 74 km/h (46 MPH). -
Page 105: Technical Information
TECHNICAL INFORMATION _____________________…
-
Page 106: Vehicle Identification
These numbers are required by the authorized Can-Am roadster dealer to complete warranty claims properly. No warranty will be allowed by Bombardier Recreational Products Inc.
-
Page 107: Specifications
SPECIFICATIONS MODEL SPYDER GS ENGINE ROTAX 990 60° V-Twin Engine type 4-stroke, Dual Over Head Camshaft (DOHC), liquid cooled Number of cylinders Number of valves 8 valves Bore 97 mm (3.82 in) Stroke 68 mm (2.68 in) Displacement 998 cm³ (60.90 in³) 10.7:1 Compression ratio Dry sump with separate oil reservoir…
-
Page 108
SPECIFICATIONS MODEL SPYDER GS ELECTRICAL SYSTEM Magneto generator output 500 W Ignition system type Electronic ignition with dual output coil Ignition timing Not adjustable Quantity NGK DCPR9E Spark plug Make and type (apply heat-sink paste P12 (P/N 420 897 186) on spark plug thread) 0.7 to 0.8 mm (.027 to .031 in) Engine RPM limiter setting Forward… -
Page 109
SPECIFICATIONS MODEL SPYDER GS ELECTRICAL SYSTEM (cont’d) Camshaft position sensor (CAPS) Engine control module (ECM) Fuel pump 10 A O² heater Purge valve Starter solenoid D.E.S.S. License plate light Position light 10 A Tail lights Fuses under Service connector service cover Ignition coil 15 A Fuel injectors… -
Page 110
SPECIFICATIONS MODEL SPYDER GS FUEL SYSTEM Multi-point Electronic Fuel Injection (EFI) Fuel Delivery Type with dual 57 mm throttle body Fuel pump Type Electrical module in fuel tank Idle speed 1400 ± 50 RPM (not adjustable) Type Regular unleaded gasoline Inside North America 87 (R+M)/2 or higher Fuel… -
Page 111
SPECIFICATIONS MODEL SPYDER GS BRAKES Foot-actuated, fully integrated hydraulic Type 3-wheel braking system with ABS and EBD Dual discs (250 mm x 6 mm) Front brake (9.8 in x 0.24 in) with 4 piston calipers Single disc (250 mm x 6 mm) Rear brake (9.8 in x 0.24 in) with 1 piston caliper 545 to 570 mL… -
Page 112
SPECIFICATIONS MODEL SPYDER GS DIMENSION Overall length 2 667 mm (105 in) Overall width 1 506 mm (59 in) Overall height 1 145 mm (45 in) Seat (top) height 737 mm (29 in) Wheel base 1 727 mm (68 in) Wheel track Front 1 308 mm (51.5 in) -
Page 113: Warranty
WARRANTY _____________________…
-
Page 114: Brp Limited Warranty — Usa And Canada: 2008 Can-Am™ Spyder
2008 CAN-AM™ SPYDER™ ROADSTER 1. SCOPE OF THE LIMITED WARRANTY Bombardier Recreational Products Inc. (“BRP”)* warrants its 2008 Can-Am Spyder roadsters sold by authorized Spyder Dealers (as defined below) in the fifty United States and in Canada from defects in material or workmanship for the period and under the conditions described below.
-
Page 115
BRP LIMITED WARRANTY – USA AND CANADA: 2008 CAN-AM™ SPYDER™ ROADSTER – Damage caused by failure to provide proper maintenance or storage, as de- scribed in the Operator’s Guide. – Damage resulting from removal of parts, improper repairs, improper service or… -
Page 116
BRP LIMITED WARRANTY – USA AND CANADA: 2008 CAN-AM™ SPYDER™ ROADSTER (d) for Spyder roadsters sold to residents of the United States, FIVE (5) YEARS or THIRTY THOUSAND (30 000) KILOMETERS (18,641 MILES), whichever occurs first, on the emission related components included in the chart below:… -
Page 117
BRP LIMITED WARRANTY – USA AND CANADA: 2008 CAN-AM™ SPYDER™ ROADSTER 6. WHAT TO DO TO OBTAIN WARRANTY COVERAGE The customer must cease using the Spyder roadster upon the appearance of an anomaly. The customer must notify a servicing Spyder Dealer within two (2) days of the appearance of a defect, and provide it with reasonable access to the product and reasonable opportunity to repair it. -
Page 118: Brp Limited Warranty Outside Usa And Canada: 2008 Can-Am Tm Spyder Tm Roadster
1. SCOPE OF THE LIMITED WARRANTY Bombardier Recreational Products Inc. (“BRP”)* warrants its 2008 Can-Am Spyder roadsters (the «Products») sold by authorized Can-Am Spyder roadster distributors and dealers located in the EEA (the «EEA» or «European Economic Area» shall mean the countries member of the European Union plus Norway, Iceland and Liechtenstein) or elsewhere, except in the USA and Canada** (the «Distributors / Dealers») from defects in material or workmanship for the period…
-
Page 119
BRP LIMITED WARRANTY OUTSIDE USA AND CANADA: 2008 CAN-AM SPYDER ROADSTER 3. EXCLUSIONS – ARE NOT WARRANTED The following are not warranted under any circumstances: – Replacement of routine maintenance items such as, without limitation, oil and lubricants, filters and spark plugs. -
Page 120
BRP LIMITED WARRANTY OUTSIDE USA AND CANADA: 2008 CAN-AM SPYDER ROADSTER 4. WARRANTY COVERAGE PERIOD This warranty will be in effect from the date of delivery to the first retail consumer or the date the Product is first put into use, whichever occurs first and for the fol-… -
Page 121
BRP LIMITED WARRANTY OUTSIDE USA AND CANADA: 2008 CAN-AM SPYDER ROADSTER 6. WHAT TO DO TO OBTAIN WARRANTY COVERAGE The customer must cease using the Product upon the appearance of an anomaly. The customer must notify an authorized servicing Distributor / Dealer within two (2) months of the appearance of a defect, and provide it with reasonable access to the Product and reasonable opportunity to repair it. -
Page 122
BRP LIMITED WARRANTY OUTSIDE USA AND CANADA: 2008 CAN-AM SPYDER ROADSTER 9. CONSUMER ASSISTANCE In the event of a controversy or a dispute in connection with this limited war- ranty, BRP suggests that you try to resolve the issue at the dealership level. -
Page 123: California Emission Control Warranty Statement
The California Air Resources Board and BRP US Inc. («BRP»)*, on behalf of Bombardier Recreational Products Inc., are pleased to explain the emission control system warranty on your 2008 Can-Am Spyder roadster. In California, new motor vehicles must be designated, built and equipped to meet the State’s stringent anti-smog standards.
-
Page 124: Privacy Obligation/Disclaimer
PRIVACY OBLIGATION/DISCLAIMER We wish to inform you that your contact information will be used for safety and warranty purposes. Sometimes, we also use the contact information of our clients to inform them about our products and to present them offers. Should you prefer not to receive information on our product, services and offers, please let us know by writing to the address below.
-
Page 125: Change Of Address/Ownership
STOLEN UNITS: If your personal vehicle is stolen, you should notify BRP or an au- thorized Can-Am roadster dealer. We will ask you to provide your name, address, phone number, the vehicle identification number and the date it was stolen.
-
Page 126
CHANGE OF ADDRESS/OWNERSHIP _____________________… -
Page 127
WARNING The Spyder roadster is a different type of vehicle- it requires special skills and knowledge. Learn how the Spyder roadster is different. Read this operator’s guide and watch the safety video. Complete a training course (if available), practice, become proficient with the controls, and get a proper license.
|
Detail Specifications: 1038/1038477-spyder_gs_2008.pdf file (23 Dec 2022) |
Accompanying Data:
Can-Am spyder gs 2008 Offroad Vehicle PDF Operator’s Manual (Updated: Friday 23rd of December 2022 05:44:24 AM)
Rating: 4.6 (rated by 6 users)
Compatible devices: Rally 200, DS 450 X mx, Outlander Series 500, outlander 400 series, Maverick, DEFENDER MAX Series 2021, DS250, 2008 Outlander 400 EFI.
Recommended Documentation:
Text Version of Operator’s Manual
(Ocr-Read Summary of Contents, UPD: 23 December 2022)
-
20, Can-Am spyder gs 2008 CONTROLS/INSTRUMENTS The gearbox position s are: R (reverse), 1, N (neutra l), 2, 3, 4, 5. 10) Engine Temp erature Bar ga uge tha t c ontinuously i ndica tes the engine coolant temperature. 11) Digital Speedo meter In addition of the ana log type speedometer, vehicle speed ca n a lso be indicated via this display. Speed c a n be displayed in kilom eters (Km/h) or miles…
-
80, Can-Am spyder gs 2008 MAINTENANCE PROCEDURES Installation 1. S crew 4 To rx screws. NOTICE Do not overtorque. Any deformation on the panel around the screw is an indication that it is too tight. You may damage the pan- el. 3) Rear Sid e Panel Remo val 1. Un latch and lift sea t. 2. Removetopsidepanel. 3. Un screw Torx screws. rmo2008-001-038_a 1. Torx screws 2. Plastic rivets 4. Remo ve plastic rivets as indicated belo…
-
81, MAINTENANCE PROCEDURES NOTICE Do not overtorque. Any deformation on the panel around the screw is an indication that it is too tight. You may damage the pan- el. Tires WARNING Tires th a t are not the recommend- ed type, damaged, worn down be- low the mi nimum tread wear lim it indicator or improperly inflated can cause loss of control. New tir es will n ot operate at thei r …
-
118, BRP L IMITED WARRA NT Y O UTS IDE US A AND CANADA: 2008 CAN -AM TM SPYDER TM ROADSTER 1. SCOP E OF TH E LIMITED WARRAN TY Bomba rdier Recrea tional Products Inc. ( “B RP”)* warrants its 2008 Can-Am Spyde r roadsters (the «Products») sold by authorize d Can-Am Sp yd er roadster distributors and dealers loc ated in the EE A (the «EEA» or &qu…
-
100, PROBL EMS 2. Rem ove the bulb by pushing in a nd turning counterc lockwise. 3. Ins tall the new bulb by pushing and turning it clockwise. 4. Reinstall the lens. Tail Lig ht/Brake Light 1. Rem ove the panel under the pas- senger seat by u nscrewin g 7 Torx screws as indica ted below. rmo2008-001-114_a PANEL UNDER PASSENGER SEAT 1. 7 Torx screws location 2. P a rtially remove right re…
-
34, UN DERSTANDI NG R ISK ON THE ROAD Before y ou operate the Spyder roa d- ster, c ons ider y our risk of being hurt or killed in a crash, how you can reduce the risk and w hether you are willing to take the risk. There are many factors that contribute to the risk that you face. You can control some of the se factors, but others , like the beha v ior of other drivers, a re bey ond …
-
48, REQUIRED RIDING SKILLS A ND PRACTICE E XERCISE S advanced skills. First, le arn the ”Street Strategies” c ov ered in the next sec — tion. Then you can take the vehicle on the ro ad in relatively low-risk situa- tions. Start by riding in less c ha ll enging situa- tions: – short distances – good weat her – low traffic – daytime – lower speeds – no passenger. You …
-
40, REQUIRED RIDING SKILLS A ND PRACTICE E XERCISE S and rear before doing an exercise. Al- so, watch out for children an d animals. Preparin g to Ride Know th e loca tion and operation o f all the vehicle’s c ontrols ( p. 11). Perform the pre-r ide inspection (see p.66) before begin ning. Always start and stop the engine ac- cording to the instructions on p.20. Ridi ng P osture Good post…
-
32, Can-Am spyder gs 2008 DRIV ING AID TE CH NOLOGIES VehicleStabilitySystem (VSS) The Spy der roa ds t er is equippe d with a Vehicle Stability System (VSS). VSS can help you c ontrol the direction of the vehicle and reduce the risk of tip- ping or rolling over in some situations. VSS consists of: –anAntilock Braking System (AB S ) that helps maintain steering control during ha rd…
-
64, SAFETY INFORMATION ON THE VEHICLE Label 4 rmo2008-003-006_en rmo2008-001-029_c 1. Label 4 located on the oil reserv oir behind the left middle side panel Label 5 rmo2008-003-003 COOLANT RESERVOIR CAP rmo2008-003-004_a 1. Label 5 located underneath service cover Label 6 WARNING Clean filler cap before removing. UseonlyDOT4brakefluidfroma sealed contain er. rmo2008-001-040_b 1. Label…
Recommended Instructions:
ALL0235mini, GEM, 1127B, OC130S, KM-650MAH, Galaxy View SM-T670


-
Forth version , May, 2014Published by Chongqing Huansong Industries (Group) Co., Ltd and Hisun Motors Corp USA.Chongqing Huansong Industries (Group) Co., Ltd and Hisun Motors Corp USA holds the copy right.No publishing and reprinting without permissionREAD THIS MANUAL CAREFULLYFor questions regarding this UTV, please contact HISUN at: (877) 838-6188 www.hisunmotors.comREV. 06051401SERVICE …
HS 400 293
-
OWNER’S MANUAL EE—TONTON ROVER & ROVER GT EE—TON ETON E—TON ETON E—TON ETON E—TON ETON E—TON ETON E—TON ETON E—TONTON ROVER ROVER GT Copyright ©2008-2009 ETON America, all rights reserved. …
ROVER 38
-
Bruksanvisning för ATV 90 cc Falcon Bruksanvisning for ATV 90 cc Falcon Instrukcja obsługi quada 90 cm3 Falcon Operating Instructions for ATV 90 Falcon 640-016 SV Bruksanvisning i original NO Bruksanvisning i original PL Instrukcja obsługi w oryginale EN Operating instructions in original 22.08.2014 © Jula AB …
90 Falcon 65
-
INTRODUCTION/WELCOMEWELCOME FROM ALFA ROMEO . . . . . . . . . . 2CONTROLS AT A GLANCEDRIVER COCKPIT . . . . . . . . . . . . . . . . . 4INSTRUMENT CLUSTER . . . . . . . . . . . . . 5GETTING STARTEDKEY FOB . . . . . . . . . . . . . . . . . . . . . 8VEHICLE SECURITY ALARM SYSTEM . . . . . . 10SEAT BELT SYSTEMS . . . . . . . . . . . . . . 11SUPPLEMENTAL RESTRAINT SYSTEM (S …
4C Spider 2015 112
Additional Information:
Popular Right Now:
Operating Impressions, Questions and Answers:
Наш интернет-ресурс, носит исключительно информационный характер и не является публичной офертой, определяемой положениями Статьи 437 (2) ГК РФ. Обращаем Ваше внимание, что мы не можем гарантировать наличие выбранных вами товаров на складе или в салонах, поскольку складские остатки обновляются с задержкой. Для получения точной информации о НАЛИЧИИ и СТОИМОСТИ товара, технических характеристиках и комплектации пожалуйста, обращайтесь к консультантам и продавцам интернет магазина.
Download or browse on-line these Operator’s Manual for Can-Am spyder gs 2008 Offroad Vehicle.
Summary of Contents:
 |
[Page 1] Can-Am spyder gs 2008 ® AND THE BRP LOGO ARE TRADEMARKS OF BOMBARDIER RECREATIONAL PRODUCTS INC. OR ITS AFFILIATES. ©2007 BOMBARDIER RECREATIONAL PRODUCTS INC. ALL RIGHTS RESERVED. PRINTED IN CANADA. 219 000 536 CA OPERATORS GUIDE, SPYDER GS / ENGLISH GUIDE DU CON… |
 |
[Page 2] Can-Am spyder gs 2008 CA LIFORNIA PROPOSITION 65 WAR NING WARNING This product contains or emits chemicals known to the state of California to cause cancer and birth defects or other reproductive harm. ®™ and the BRP logo are trademarks of Bombardier Recreational Produ… |
 |
[Page 3] Can-Am spyder gs 2008 HOW TO US E THIS OPE RATOR’S GU IDE Know Befor e You Go For your saf ety an d the sa fety o f pas- sengers and bystanders, rea d the fol- lowing sections before y ou opera te the Spyder roadster: – GENERA L PRECAU TIONS (p.6) – CONTROLS, INSTRU… |
 |
[Page 4] Can-Am spyder gs 2008 TABLE OF C ON TENT S HOWTO USE THIS OPERATOR’S GUIDE…………………………………. 1 Know BeforeYou Go……………………………………………………. 1 Finding Safety Information ………………………………………… |
 |
[Page 5] Can-Am spyder gs 2008 TABLE OF C ONTENTS UNDERSTANDINGRISK ON THE ROAD …………………………………. 32 Type of Vehicle ………………………………………………………… 32 Operator Skillsand Judgment……………………………………….. |
 |
[Page 6] Can-Am spyder gs 2008 TABLE OF CONTENTS TRANSPORTING AND STOR ING TRANSPORTING THE SPYDER ROADSTER……………………………… 68 STORING THESPYDER ROADSTER……………………………………… 70 MAINTENANCE MAINTENANCE SCHEDULE ……………………….. |
 |
[Page 7] Can-Am spyder gs 2008 TABLE OF C ONTENTS BRP LIM ITED WAR R A NTY OU TS I DE USA AND CA NADA: 2008 CAN-AM TM SPYDER TM ROADSTER …………………………………………………. 116 CALIFORNIA EMISSION CONTROL WARRANTY STATEMENT ……….. 121 PRIVACY OBLIGATION… |
 |
[Page 8] Can-Am spyder gs 2008 GENE RA L P RECAUTIONS Avoid Carbon M onoxide Pois oni ng All engine exhaust c onta ins carbon monoxide, a deadly ga s. Breathing car- bon m onoxide c an cause hea da c hes, dizziness, drowsines s , nausea , confu- sion and eventuall y death. Carbon … |
 |
[Page 9] Can-Am spyder gs 2008 G ENERAL PRECAUTIONS See y our authorized C a n- Am roadster dealer f or av a ilable a c ce ssori es for your vehicle. ______________________ 7 |
 |
[Page 10] Can-Am spyder gs 2008 GENERAL PRECAUTIONS 8 _______________________ |
 |
[Page 11] Can-Am spyder gs 2008 CONTROLS, INSTRUMENTS AND BASIC PROCEDURES T ______________________ 9 |
 |
[Page 12] Can-Am spyder gs 2008 OPERATING D URING BREAK-IN A break -in period of 1 000 km (625 mi) is required for the vehicle. Duringthefirst300km(186mi),avoid hard braking. WARNING New brakes and tires do not op- erate at thei r maximum efficiency until they are w orn in. Braking… |
 |
[Page 13] Can-Am spyder gs 2008 CONTROLS/INSTRUMENTS Many c ontrols are s imilar to the controls of a m otorc ycl e, b ut s om e c ontrols are dif- ferent. It i s important to know the location a nd operat ion of all controls, and to de- velop and practice s m ooth and c oordinated… |
 |
[Page 14] Can-Am spyder gs 2008 CONTROLS/INSTRUMENTS To decreas e engine s peed, roll the throttle away from yo u. rmo2008-001-007_b TO D ECREA SE SPEED The throttle is s pring loaded and should return to idle w hen you release your grip. 3) Clutc h Lever The clutch lever is in fro… |
 |
[Page 15] Can-Am spyder gs 2008 CONTROLS/INSTRUMENTS locks to apply the parking brak e. Firm- ly pre ss the pedal down a second time to release the parking brake. rmo2008-001-079_a 1. Park ing brake pedal rmo2008-001-080_a 1. Engaging/disengaging parking brake pedal WARNING Do not … |
 |
[Page 16] Can-Am spyder gs 2008 CONTROLS/INSTRUMENTS Secondary Controls 85 9 3 4 26 7 1 rmo2008-001-001_a 1 Ignit ion switch 6 Turn signal button 2 Engine start button 7 Horn button 3 Engine stop switch 8 Reverse interl ock lever 4 Hazard warning switch 9 Headlights override button… |
 |
[Page 17] Can-Am spyder gs 2008 CONTROLS/INSTRUMENTS WARNING If you turn the ignition switch to OFF, it shuts off the engine and all the el ectrical systems includ- ing the VSS (p.30), EBD (p.31) and DPS (p.31). If you do this while the vehicle i s moving , you could lose control a… |
 |
[Page 18] Can-Am spyder gs 2008 CONTROLS/INSTRUMENTS 9) Headlight Overr id e There is a headlight override button on the front of the rig ht handgrip. Push and hold the headlight ov erride b utton to operat e the high beam s . This but- ton will light the high beams even if the ign… |
 |
[Page 19] Can-Am spyder gs 2008 CONTROLS/INSTRUMENTS 5) Indicator Lamps Indicator lam ps will inform you of va rious condition s or problems. An i ndica t or lam p c a n flash a lone or in c ombination with a nother lam p. The d igital disp lay p ro vides a brief des c riptio n for… |
 |
[Page 20] Can-Am spyder gs 2008 CONTROLS/INSTRUMENTS The gearbox position s are: R (reverse), 1, N (neutra l), 2, 3, 4, 5. 10) Engine Temp erature Bar ga uge tha t c ontinuously i ndica tes the engine coolant temperature. 11) Digital Speedo meter In addition of the ana log type spe… |
 |
[Page 21] Can-Am spyder gs 2008 CONTROLS/INSTRUMENTS Display Settings Setting Metric/Imperial Units 1. P us h a nd hold S ET (S) button for three s ec onds . 2. Main digital display s s crolling messag e: PUSH _M_ TO S ELECT KM, _S_ TO SELECT MI 3. P ush MODE (M) button to sel ec t… |
 |
[Page 22] Can-Am spyder gs 2008 BASIC PRO CEDURES Sta rti ng and Stopping the En gi ne Starting the Engine WARNING Exhaust gas contains poisonous carbon monoxi de that c an rapidly accumulate in an enclosed or poor- ly ventilated area. If inhaled, i t c an cause serious injury or d… |
 |
[Page 23] Can-Am spyder gs 2008 BASIC PROCEDURES 2. S hift the transmission into NEU- TRAL. 3. Dis enga ge the parking brake. 4. Dis m ount on the righ t side of the vehicle, keepi ng you r foot on the b rake pedal. 5. P ush th e vehicle, using the brake as n eeded. CAUTION Only pu… |
 |
[Page 24] Can-Am spyder gs 2008 BASIC PROCEDURES rmo2008-001-010 FR ONT STORAGE COM PARTMENT Opening the Seat 1. Insert key in ignition sw itch. 2. Push an d tu rn the key 1/4 turn to the right to the seat opening pos i- tion and hol d w hil e lifting seat. rmo2008-001-071_a KEYPOS… |
 |
[Page 25] Can-Am spyder gs 2008 BASIC PROCEDURES rmo2008-001-016 FUELCAPONLEFTSIDEUNDERNEATH SEAT 5. Fill the tank un t il the fuel nozzle au- tomaticall y clicks and shu ts off. Do not try to top off the fuel tank. L ea ve some room for the fuel to ex — p an d with tempera ture c … |
 |
[Page 26] Can-Am spyder gs 2008 BASIC PROCEDURES rmr2008-029-002 FR ONT SUSPENSION ADJUSTING WRENCH rmr2008-029-003 FR ONT SUSPENSION CAM ADJUSTMENT rmr2008-030-004_c A. Smooth adjustm ent (position 1) B. Hard adjustment (position 5) RECOM MENDED FRONT SHOCK ADJUS TME NT LOAD CAM P… |
 |
[Page 27] Can-Am spyder gs 2008 BASIC PROCEDURES rmr2008-030-004_c A. Smooth adjustm ent (position 1) B. Hard adjustment (position 7) NOTE: Never adjust the rear shock absorber cam from position 7 directly to position 1 as it will restrain access to adjustm ent hol es and prevent y… |
 |
[Page 28] Can-Am spyder gs 2008 BASIC PROCEDURES rmo2008-002-010_b TYP ICA L 1. Existin g hardware 5. S queeze license p late a nd support tog ether a t each low er co rner. 26 ______________________ |
 |
[Page 29] Can-Am spyder gs 2008 SA FE OP ERAT ING INSTRUCTIONS T _________ SAF E OPERATING INSTRUCTIONS ________ 27 |
 |
[Page 30] Can-Am spyder gs 2008 WHAT’S DIFFEREN T ABOUT THE SPYDER ROADSTER The Spy der ro ad ste r is a different type of road vehicle. This section will help you understand some of the v ehicle’s distinctive features a nd opera ting cha r- acteristics. Stability The three-whe… |
 |
[Page 31] Can-Am spyder gs 2008 WHAT’S DIFFERENT AB OUT THE S PYDER R OADSTER Width Becau se the Spyder ro ad ster is wider than a typical motorcycl e: – Keep the front wheels in yo ur lane during turns. Be particularly aw a re of where your front wheels are in curves and when … |
 |
[Page 32] Can-Am spyder gs 2008 DRIV ING AID TE CH NOLOGIES VehicleStabilitySystem (VSS) The Spy der roa ds t er is equippe d with a Vehicle Stability System (VSS). VSS can help you c ontrol the direction of the vehicle and reduce the risk of tip- ping or rolling over in some situa… |
 |
[Page 33] Can-Am spyder gs 2008 DRIVING AID TECH NOLOGIES the vehi cle from entering a turn too fast. If you drive too fast for c ondi- tions, you can l os e control, even w ith VSS. Elec tronic Brake D istri bution ( EB D) The Spy der roa ds t er is equippe d with an Electronic B … |
 |
[Page 34] Can-Am spyder gs 2008 UN DERSTANDI NG R ISK ON THE ROAD Before y ou operate the Spyder roa d- ster, c ons ider y our risk of being hurt or killed in a crash, how you can reduce the risk and w hether you are willing to take the risk. There are many factors that contribute … |
 |
[Page 35] Can-Am spyder gs 2008 UNDERSTANDING RISK ON THE ROAD your j udgm ent and skills are impaired by any alcohol consum ption. You must be phys ically able to oper- ate all controls, turn the han dlebars through the full range of steering, mount and dism ount, and monitor your… |
 |
[Page 36] Can-Am spyder gs 2008 RIDIN G GEAR Riding three-wheeled, ope n-air v ehi- cles like th e Spyder roadster requires the same protective gear as motorcy- cling. Even though the vehicle is more stable at low speeds than a motorcy- cle, you can still be thrown off. This sectio… |
 |
[Page 37] Can-Am spyder gs 2008 RIDING GEAR Gloves Full-fingered gloves protect hands from the wind, sun, hea t, cold and flying objects. Gloves tha t fit snugly will im prov e grip on the handlebars and hel p reduce ha nd fa t igue. Sturdy, reinforced moto rcycle gloves help pro- … |
 |
[Page 38] Can-Am spyder gs 2008 RIDING GE AR be much more c om fortable a nd alert than a rider who is wet a nd cold. One — or two-piece styles a re av ailable, and those designed spec ifically for motorcycling are best. High-visibility orange or yell ow colors are good choic- es. … |
 |
[Page 39] Can-Am spyder gs 2008 REQ UIRED RIDIN G SKILLS AND PRACTICE EXERCISES Before you take the S pyder roadster on the road, y ou need to develop rid- ing skills and strategies for managing risk on the road. The follow ing ex er- cises will familiarize you with the basic opera… |
 |
[Page 40] Can-Am spyder gs 2008 REQUIRED RIDING SKILLS A ND PRACTICE E XERCISE S and rear before doing an exercise. Al- so, watch out for children an d animals. Preparin g to Ride Know th e loca tion and operation o f all the vehicle’s c ontrols ( p. 11). Perform the pre-r ide in… |
 |
[Page 41] Can-Am spyder gs 2008 REQUIRED RIDING S KILLS AN D PR ACTICE EXERCISES Directio ns For this exercise, do NO T use any throttle. You will be controlling your movem ent using only the clutch in the frictionzoneandbrake. Begin b y s topping ev ery 6 m (20 feet) (e very marke… |
 |
[Page 42] Can-Am spyder gs 2008 REQUIRED RIDING SKILLS A ND PRACTICE E XERCISE S 4) Using the Thrott le Purpose – Becom e familiar with operat ing the throttle. – Lea rn to balanc e throttle and clutch. Directio ns This exercise is simi lar to the friction zone exercise, except… |
 |
[Page 43] Can-Am spyder gs 2008 REQUIRED RIDING S KILLS AN D PR ACTICE EXERCISES on the v ehicle. You will need to exert more force to turn the handlebar of your vehicle than is needed to turn a motorcycl e. However, it is easier to stop while turning than with a motor- cycle. This… |
 |
[Page 44] Can-Am spyder gs 2008 REQUIRED RIDING SKILLS A ND PRACTICE E XERCISE S you maintain steeri ng c ontrol whil e ap- plying the m aximum braking force. – Start at on e end of the s traight away and accelerate to 8 km/h (5 MPH). Partway do wn the s traightaway, brake quickl… |
 |
[Page 45] Can-Am spyder gs 2008 REQUIRED RIDING S KILLS AN D PR ACTICE EXERCISES 1 rmo2008-001-046_k NO THROTTLE 1. Start Tips for additional practice – You can gradually increase speed as you ge t c om fortab le to 16-19 k m / h (10-12 MPH) for the wea v es , but slow down for t… |
 |
[Page 46] Can-Am spyder gs 2008 REQUIRED RIDING SKILLS A ND PRACTICE E XERCISE S • You do not n eed to apply throttle, but on ce y ou are c om fortable, if space allows, you can adjust the throttle to increase speed in sec- ond g ea r. • Put y our foot back on the peg. – As y… |
 |
[Page 47] Can-Am spyder gs 2008 REQUIRED RIDING S KILLS AN D PR ACTICE EXERCISES 9) Sw erve Purpose – Becom e fam il iar w ith the v ehicle’ s handling for quick maneuv ers . – Try different variations of braking and sw erving. Directio ns At this point you will need to ch an… |
 |
[Page 48] Can-Am spyder gs 2008 REQUIRED RIDING SKILLS A ND PRACTICE E XERCISE S advanced skills. First, le arn the ”Street Strategies” c ov ered in the next sec — tion. Then you can take the vehicle on the ro ad in relatively low-risk situa- tions. Start by riding in less c ha… |
 |
[Page 49] Can-Am spyder gs 2008 STREET STRATEGIES This section prov ide s some strategies to reduce your risk on the ro ad. Many of the se s trategies are si m ilar to those used for motorc ycles . This section is based on guidance for motorcyclists given by the Motorcy- cle Safety… |
 |
[Page 50] Can-Am spyder gs 2008 STREET STRATEGIES When brakin g, be particularly aw are of vehicle s behind you that ma y not be able to s t op as quickl y as the Spy der roadster. Keep Your Eyes Mo vi ng To stay aware of your surroundings, do not fixate on any one thing. Move your… |
 |
[Page 51] Can-Am spyder gs 2008 STREET STRATEGIES Time of Day and Weather In dim light, such as a t night, a t da wn or dusk, or i n poor weather s uc h a s rai n or fog , you ma y be ha rder to s ee. Glare at dawn and dusk or very bright sun- light can also make it ha rd er for ot… |
 |
[Page 52] Can-Am spyder gs 2008 STREET STRATEGIES are p reparing to turn. This can make you more visible and discoura ge other motorists from trying to drive arou nd you. Watch for vehicles approaching from behind. Flash y our brake lights a s they app roach. Be i n first g ear and… |
 |
[Page 53] Can-Am spyder gs 2008 STREET STRATEGIES When s hifting gea rs while turning, be care ful not to release the clutch lever too fast. Adjust throttle as you release the clutch lever to match eng ine a nd vehicle speed in a sm ooth shift. Re- leasing the clutch too quickly o … |
 |
[Page 54] Can-Am spyder gs 2008 STREET STRATEGIES Particularly on curvy roads, Spyder roadster riders might become tired sooner than motorcyclists. Don’t push yourself to keep up with m otorcycles; stop if you are tired. Roa d Conditions and Hazards Ice, Snow and Slush Do no t ri… |
 |
[Page 55] Can-Am spyder gs 2008 STREET STRATEGIES time. Whe n going ove r an obstac le, bump or hole w ith both front wheels, riders should s ta nd up slig htly on the pegs and use legs to absorb the shock. Be prepared for the re ar wheel to strike the obstacle. For na rrower ob st… |
 |
[Page 56] Can-Am spyder gs 2008 CARRYING A PASSENGER O R CARGO We ight Limits Do no t exceed the weight l imits for rid- ers and ca rgo. WEIGHT LIMITS Vehicle load limit (including operator, passenger, cargo and added accessories) 200 kg (440 lb) Front storage compartment 16 kg (35… |
 |
[Page 57] Can-Am spyder gs 2008 CARRYING A PASSENGER OR CARGO Instruct the passeng er on how to ride before starting out. Have the passen- ger follow these rules: 1. Maintain proper ridin g p os ition. Ho ld the passeng er handholds a nd keep feet on the passenger pegs a t all time… |
 |
[Page 58] Can-Am spyder gs 2008 KNOWLED G E SELF-TEST The following provides a sam ple of in- formation that you should ha ve learned by reading this guide. It does not in- clude a ll of the important information, but should give you an idea of wh ether you ha v e a general underst… |
 |
[Page 59] Can-Am spyder gs 2008 KNOW LE DGE SE LF- T E ST 14. Lis t 5 ways of being m ore no ticeable to other drivers. 1) _________________________ 2) _________________________ 3) _________________________ 4) _________________________ 5) _________________________ 15. When braki ng… |
 |
[Page 60] Can-Am spyder gs 2008 KNOW LE DGE SE LF- T E ST Answers 1. False To stop quickly, press the brake pedal only. Never use the parking brake while the vehicle is moving. 2. F alse You s hould do a pre-ride inspe ction every time you ride. 3. F alse If there i s ice, snow, sl… |
 |
[Page 61] Can-Am spyder gs 2008 SAFETY INFO RMATION ON THE VEHICLE This vehicle com es with a ha ng ta g a nd labels containi ng important safety informa- tion. Any person w ho rides this vehicle should read a nd understan d this in form ation on the vehi cle before rid ing. Hang T… |
 |
[Page 62] Can-Am spyder gs 2008 SAFETY INFORMATION O N THE VEHICLE rmo2008-001-096_en SAFETY CARD rmo2008-001-112_a 1. Safety card tab lo cation rmo2008-001-113_a SAFETY CARD PU LL ED OUT Labels The follow ing labels are on y our v ehicle, and th ey s hould be considered p erm an e… |
 |
[Page 63] Can-Am spyder gs 2008 SAFETY INFORMATION O N THE VEHICLE Label 1 TIRE INFORMATION rmo2008-001-092_en rmo2008-001-029_b 1. Label 1 location Label 2 rmo2008-001-098_en rmo2008-001-107_b 1. Label 2 location Label 3 rmo2008-001-093_en rmo2008-001-031_c 1. Label 3 locat ed in … |
 |
[Page 64] Can-Am spyder gs 2008 SAFETY INFORMATION ON THE VEHICLE Label 4 rmo2008-003-006_en rmo2008-001-029_c 1. Label 4 located on the oil reserv oir behind the left middle side panel Label 5 rmo2008-003-003 COOLANT RESERVOIR CAP rmo2008-003-004_a 1. Label 5 located underneath se… |
 |
[Page 65] Can-Am spyder gs 2008 REPORTING SAFETY DEFECTS Your safety is very im portant to Bomba rdier Recre ationa l Products Inc. (BRP). If you have any concerns you should immediately co ntact BRP’s customer service. In the USA, if you believe that your ve- hicle has a defect … |
 |
[Page 66] Can-Am spyder gs 2008 REPORTING SAFETY DEFECTS 64 ________ SAFE OPERATING INSTRUCTION S ________ |
 |
[Page 67] Can-Am spyder gs 2008 PR E-RIDE INSPECTION T _____________________ 65 |
 |
[Page 68] Can-Am spyder gs 2008 PRE-RIDE CHECKLIST WARNING Perform a pre-ride inspection be- fore each ride to d etect potential problems during oper ation. The pre-ride inspectio n can help you monitor wear and deterioration before they become a problem. Correct any problems that … |
 |
[Page 69] Can-Am spyder gs 2008 TRAN SPORTING AND STORING T _____________________ 67 |
 |
[Page 70] Can-Am spyder gs 2008 TRANSPORTING THE SPYDER ROADSTE R If your vehicle needs to be trans ported, it should be c a rried on a flatbe d trailer of the proper size and capacity. CAUTION Ifyouneedtopush the vehicle, do it from the right-hand side to be able to reach th e bra… |
 |
[Page 71] Can-Am spyder gs 2008 TRANSPORTING THE S PYDER ROADSTER rmo2008-001-069_a FR ONT WHEELS ATTACHMENT – METHOD 1 1. Strap around the rim of eac h front wheel and attached to the front of trailer rmo2008-001-073_a FR ONT WHEELS ATTACHMENT – METHOD 2 1. Strap a round each … |
 |
[Page 72] Can-Am spyder gs 2008 STO RING THE SPYDER ROADSTER Ifthevehiclewon’tberiddenforat least four months, s uc h as during the winter, proper storage is necess ary to keep the vehicle in go od c ondition. BRP recom m ends you have y our au- thorized C a n-Am roadster dealer … |
 |
[Page 73] Can-Am spyder gs 2008 MAINTENANCE T _____________________ 71 |
 |
[Page 74] Can-Am spyder gs 2008 MAIN TENAN CE SCHE DUL E Mainten ance is very importa nt for k eeping your vehicle in saf e operat ing condi- tion. Pro per m aintenanc e is the owner’s respons ibi lity. Perform periodic checks and follow the m a intenance schedule. WARNING Failur… |
 |
[Page 75] Can-Am spyder gs 2008 MAINTENANCE SCHEDULE PERIODIC MAINTENANCE SCHEDULE C: CLEA N INITIAL INSPECTION 1 000 km (6 00 mi) I: INSPECT AND/OR ADJUST as required (To be performed by an authorized Can-Am roadster dealer. The initial maintenance is very important and must not b… |
 |
[Page 76] Can-Am spyder gs 2008 MAINTENANCE SCHEDULE PERIODIC MAINTENANCE SCHEDULE C: CLEA N INITIAL INSPECTION 1 000 km (6 00 mi) I: INSPECT AND/OR ADJUST as required (To be performed by an authorized Can-Am roadster dealer. The initial maintenance is very important and must not b… |
 |
[Page 77] Can-Am spyder gs 2008 MAINTENANCE SCHEDULE PERIODIC MAINTENANCE SCHEDULE C: CLEA N INITIAL INSPECTION 1 000 km (6 00 mi) I: INSPECT AND/OR ADJUST as required (To be performed by an authorized Can-Am roadster dealer. The initial maintenance is very important and must not b… |
 |
[Page 78] Can-Am spyder gs 2008 MAIN TENANCE PROCEDURES Tool K i t The tool kit is located inside the front storage c ompartment, on the left-hand side of the vehi cle. rmo2008-001-031_a 1. Tool kit located in the front storage compartm ent It conta ins the tools for the basic m a … |
 |
[Page 79] Can-Am spyder gs 2008 MAINTENANCE PROCEDURES rmo2008-001-032_a 1. Middle side p anel clips 2. P res s down panel’s top edge with b oth hands a nd pull out. rmo2008-001-033_a 3. Lift panel. Installation 1. Insert the m iddl e side panel tabs in- to the lower sid e pa nel… |
 |
[Page 80] Can-Am spyder gs 2008 MAINTENANCE PROCEDURES Installation 1. S crew 4 To rx screws. NOTICE Do not overtorque. Any deformation on the panel around the screw is an indication that it is too tight. You may damage the pan- el. 3) Rear Sid e Panel Remo val 1. Un latch and lift… |
 |
[Page 81] Can-Am spyder gs 2008 MAINTENANCE PROCEDURES NOTICE Do not overtorque. Any deformation on the panel around the screw is an indication that it is too tight. You may damage the pan- el. Tires WARNING Tires th a t are not the recommend- ed type, damaged, worn down be- low th… |
 |
[Page 82] Can-Am spyder gs 2008 MAINTENANCE PROCEDURES rmo2008-001-041_a 1. Tread-wear limit indicator A. Appr opria te t read depth B. Mi ni mum tre ad d epth, rep lace tire It i s n orm a l to see uneven w ea r on tires depe nding on how the vehicle is driv- en and road c onditi … |
 |
[Page 83] Can-Am spyder gs 2008 MAINTENANCE PROCEDURES Drive Belt Wear Inspec t th e drive belt with the v ehicle in neutra l, engine off, on a l ev el surface with plenty of room – y ou w il l hav e to roll the vehi cle forward or backward to see the ful l length of th e belt. r… |
 |
[Page 84] Can-Am spyder gs 2008 MAINTENANCE PROCEDURES Drive Belt Tension While riding, if you feel vibrations in the belt or i f the belt is skipping s proc k et teeth, have the be lt tensi on adj us ted as soon a s possible by an authorized Can-Am roa ds t er dealer. En gi ne Oil… |
 |
[Page 85] Can-Am spyder gs 2008 MAINTENANCE PROCEDURES If the oil level is a t t he upper mark : 13.P roperly tighten the dipstick. 14.Ins ta ll the l eft middle sid e panel (p. 77). Oil and Filter Rep lacement Change the engine oil a nd filter at the sam e t ime, and only when the… |
 |
[Page 86] Can-Am spyder gs 2008 MAINTENANCE PROCEDURES rmr2008-011-104_a 1. Engine oil drain plug 2. Oil filter cover 16.All ow th e oil to drain c om pletely from the crankcase. 17.Clean any m eta l shav ings or resid ue from the magnet at the end o f the engine d rain plug. Shavi… |
 |
[Page 87] Can-Am spyder gs 2008 MAINTENANCE PROCEDURES 38.Close the sea t an d ensure that it is fully latc hed. 39.Ins ta ll the l eft middle sid e panel (p. 77). 40.Di s pos e of used oil per your local e nv ironmenta l regul ations . Coo lan t Level Verification WARNING When ope… |
 |
[Page 88] Can-Am spyder gs 2008 MAINTENANCE PROCEDURES WARNING Avoid getting brake fluid on skin or in ey es – it may cause sev ere burns. In case of contact with the skin, wash thoroughly. In case of contact w ith the eyes, immediate- ly rinse with plenty o f wate r for at least… |
 |
[Page 89] Can-Am spyder gs 2008 MAINTENANCE PROCEDURES Battery Charging The vehicle is equipped with a m a in- tenance- free type battery and is com- pletely s ea led; there i s no need to add water to adjust the electrolyte level. The battery ma y need to be c ha rged if the vehic… |
 |
[Page 90] Can-Am spyder gs 2008 MAINTENANCE PROCEDURES The clutch fluid reserv oir is near the re- verse interloc k lever on t he left handle- bar. Check the cl utc h flui d level a s follows: 1. Pa rk the vehicle on a firm, level sur- face. 2. Look inside the window on top of the … |
 |
[Page 91] Can-Am spyder gs 2008 MAINTENANCE PROCEDURES 5. Beam aiming is c orrec t w hen the focus point (brightest spot) of t he h ea dligh t reflection is be tween the marks. 2 3 1 rmo2008-027-101_a TYP ICA L H EAD LI G H T REF LECTION ON SURFACE TEST 1. Focus point 2. Mark at 70… |
 |
[Page 92] Can-Am spyder gs 2008 MAINTENANCE PROCEDURES 90 ______________________ |
 |
[Page 93] Can-Am spyder gs 2008 ROAD SIDE REPAIRS T _____________________ 91 |
 |
[Page 94] Can-Am spyder gs 2008 PROBLEMS NOTICE If the ve hicle must be transported, do not have it towed – towi ng c an seri ously d amage the vehicle. Refer to TRANSPORTING THE SP YDE R ROADSTER (p. 68) for detailed instructions. Cannot Shift I nto Firs t Gea r If the vehicle c… |
 |
[Page 95] Can-Am spyder gs 2008 PROBLEMS 10.Connect the other end of the black NEGATIVE (-) jumper c able to the NEGATIVE (-) term inal under the seat of the Spyder roads ter. rmo2008-001-044_a 1. NEGAT IVE (-) terminal 2. POSITI VE (+) terminal 11.S t a rt the vehicle with the boo… |
 |
[Page 96] Can-Am spyder gs 2008 PROBL EMS rmo2008-001-076_a 1. Fuse box located under the s ervice cover behind the front storage compartme nt Fuse De scription rmo2008-001-028_a FUSES LOCATED UNDER THE SERVICE COVE R # DESCRIPTION 1 Control main relays ECM control Pillion rider sw… |
 |
[Page 97] Can-Am spyder gs 2008 PROBLEMS Fuse Replacement 1. Remo ve either the service cover or lift seat to access the relevant fuse box. 2. S et the ignition switch to OFF. 3. To open the fus e box under the seat,pushdownonthetaband p ull off the cover. rmo2008-001-037_a OPENING… |
 |
[Page 98] Can-Am spyder gs 2008 PROBL EMS rmo2008-001-084_a LIGHTS LOCATION – FRONT OF VEHICLE 1. Turn signal light (p.97) 2. Headlight (p. 96) 3. Position light (p.99) rmo2008-001-088_a LIG H TS LO C ATION – REAR OF VEH ICLE 1. Tail lig ht/br ake light (p. 98) 2. Turn signal l… |
 |
[Page 99] Can-Am spyder gs 2008 PROBLEMS 8. Rem ove the bulb by releasing both clips with a small flat head screw- driver. rmo2008-001-124_a 1. Bulb housing 2. Bulb retaining clip 9. Inst a ll the n ew bulb by cli pping it to the connector. 10.Ins t a ll the connector in th e bulb … |
 |
[Page 100] Can-Am spyder gs 2008 PROBL EMS 2. Rem ove the bulb by pushing in a nd turning counterc lockwise. 3. Ins tall the new bulb by pushing and turning it clockwise. 4. Reinstall the lens. Tail Lig ht/Brake Light 1. Rem ove the panel under the pas- senger seat by u nscrewin g 7… |
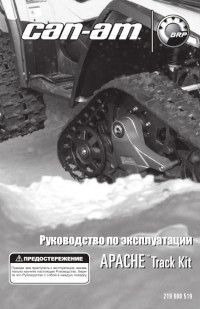
Инструкция на русском языке по эксплуатации и техническому обслуживанию гусеничного комплекта Apache Track Kit для мотовездеходов марки Can-Am.
- Издательство: BRP Inc.
- Год издания: 2007
- Страниц: 33
- Формат: PDF
- Размер: 5,7 Mb

Инструкция на русском языке по эксплуатации и техническому обслуживанию гусеничного комплекта Apache 360 Track Kit для мотовездеходов марки Can-Am.
- Издательство: BRP Inc.
- Год издания: 2011
- Страниц: 33
- Формат: PDF
- Размер: 3,0 Mb
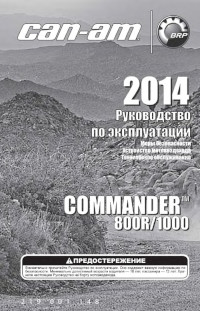
Сборник руководств на русском языке по эксплуатации и техническому обслуживанию мотовездеходов Can-Am моделей Commander 800R и Commander 1000 2011-2014 годов выпуска.
- Издательство: BRP Inc.
- Год издания: 2010-2013
- Страниц: —
- Формат: PDF
- Размер: 37,6 Mb
Руководство на английском языке по техническому обслуживанию и ремонту мотовездеходов Can-Am моделей Commander 800R и Commander 1000 2011 года выпуска.
- Издательство: BRP Inc.
- Год издания: 2010
- Страниц: 423
- Формат: PDF
- Размер: 63,2 Mb
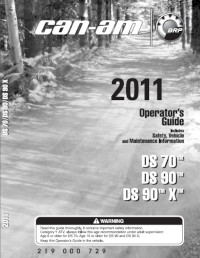
Сборник руководств на английском языке по эксплуатации и техническому обслуживанию квадроциклов Can-Am моделей DS 70/DS 90/DS 90X/DS 250/DS 650 2007-2011 годов выпуска.
- Издательство: BRP Inc.
- Год издания: 2006-2010
- Страниц: —
- Формат: PDF
- Размер: 31,7 Mb

Сборник руководств на русском языке по эксплуатации и техническому обслуживанию квадроциклов Can-Am моделей DS 70/DS 90/DS 90X/DS 250/DS 450/DS 450X 2010-2014 годов выпуска.
- Издательство: BRP Inc.
- Год издания: 2009-2013
- Страниц: —
- Формат: PDF
- Размер: 47,1 Mb
Сборник руководств на русском языке по эксплуатации и техническому обслуживанию квадроциклов Can-Am модели Maverick 2013-2014 годов выпуска.
- Издательство: BRP Inc.
- Год издания: 2012/2013
- Страниц: 158/138
- Формат: PDF
- Размер: 70,1 Mb

Руководство на русском языке по эксплуатации и техническому обслуживанию квадроциклов Can-Am модели Maverick Max 2014 года выпуска.
- Издательство: BRP Inc.
- Год издания: 2013
- Страниц: 142
- Формат: PDF
- Размер: 5,7 Mb

Руководство на английском языке по эксплуатации и техническому обслуживанию квадроциклов Can-Am модели Outlander 400 EFI 2009 года выпуска.
- Издательство: BRP Inc.
- Год издания: 2009
- Страниц: 148
- Формат: PDF
- Размер: 9,6 Mb
Сборник руководств на русском языке по эксплуатации и техническому обслуживанию квадроциклов Can-Am моделей Outlander/Outlander Max 400/500/650/800/1000 2006-2014 годов выпуска.
- Издательство: BRP Inc.
- Год издания: 2006-2013
- Страниц: —
- Формат: PDF
- Размер: 214,3 Mb
Руководство на английском языке по техническому обслуживанию и ремонту мотовездеходов Can-Am моделей Outlander 500/650/800 и Renegade 500/800 2007-2008 годов выпуска.
- Издательство: BRP Inc.
- Год издания: —
- Страниц: 504
- Формат: PDF
- Размер: 28,9 Mb

Сборник руководств на русском языке по эксплуатации и техническому обслуживанию квадроциклов Can-Am модели Renegade 500/800R/1000 2010-2014 годов выпуска.
- Издательство: BRP Inc.
- Год издания: 2009-2013
- Страниц: —
- Формат: PDF
- Размер: 61,1 Mb

Руководство на русском языке по эксплуатации и техническому обслуживанию трициклов Can-Am модели Spyder RS 2011 года выпуска.
- Издательство: BRP Inc.
- Год издания: 2010
- Страниц: 150
- Формат: PDF
- Размер: 18,8 Mb

Руководство на русском языке по эксплуатации и техническому обслуживанию трициклов Can-Am модели Spyder RT 2011 года выпуска.
- Издательство: BRP Inc.
- Год издания: 2010
- Страниц: 178
- Формат: PDF
- Размер: 12,3 Mb

Руководство на русском языке по техническому обслуживанию и ремонту трициклов Can-Am моделей Spyder GS и Spyder RS 2008-2011 годов выпуска.
- Издательство: BRP Inc.
- Год издания: 2011
- Страниц: 698
- Формат: PDF
- Размер: 91,1 Mb

Руководство на русском языке по техническому обслуживанию и ремонту трициклов Can-Am модели Spyder RT 2010-2011 годов выпуска.
- Издательство: BRP Inc.
- Год издания: 2011
- Страниц: 782
- Формат: PDF
- Размер: 85,1 Mb
Перед вами файл pdf, где представлена инструкция (руководство) на русском для CAN-AM Spyder GS (2008 — 2011). Вы можете скачать ее либо изучить в онлайн режиме.
Подробные сведения об инструкции:
Устройство из раздела: трицикл
Бренд-производитель: BOMBARDIER RECREATIONAL PRODUCTS
Наименование модели: CAN-AM Spyder GS (2008 — 2011)
Язык: Руководство на русском языке
Файл: pdf
Размер файла: 200,59 MB
Скачать инструкцию к HARPER HDT2-1110
ЗАГРУЗИТЬ
Просмотр инструкции онлайн
User Manuals, Guides and Specifications for your Can-Am spyder gs 2008 Offroad Vehicle. Database contains 1 Can-Am spyder gs 2008 Manuals (available for free online viewing or downloading in PDF): Operator’s manual .
