Burp Suite — это мощный набор инструментов для тестирования безопасности веб-приложений и сайтов. С помощью этого инструмента можно протестировать буквально все, что вы захотите. Программу могут использовать не только профессионалы, но и новички с минимальным количеством усилий для ее освоения. Программа написана на Java, поэтому может работать на различных платформах, например, Windows, Linux или Mac.
Интерфейс Burp Suite интуитивно понятный, а среди инструментов есть прокси, паук, сканер, декодер, репитер, анализатор последовательностей и многое другое. В этой статье мы рассмотрим как пользоваться Burp Suite, основные возможности программы, а также как ее установить и настроить.
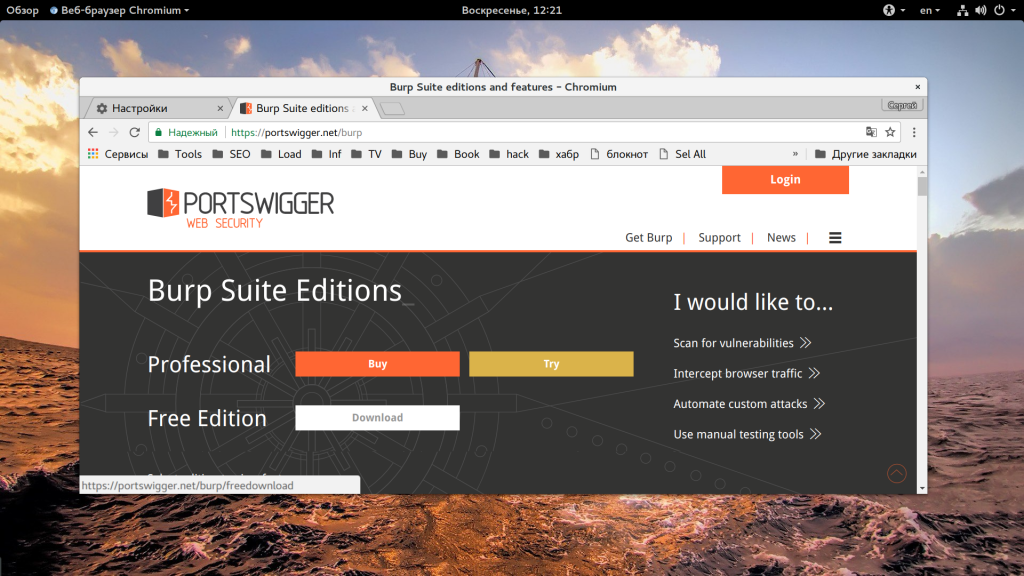
Вы можете загрузить программу из официального сайта. Для этого нажмите ссылку «Get Burp», затем выберите версию «Free»:
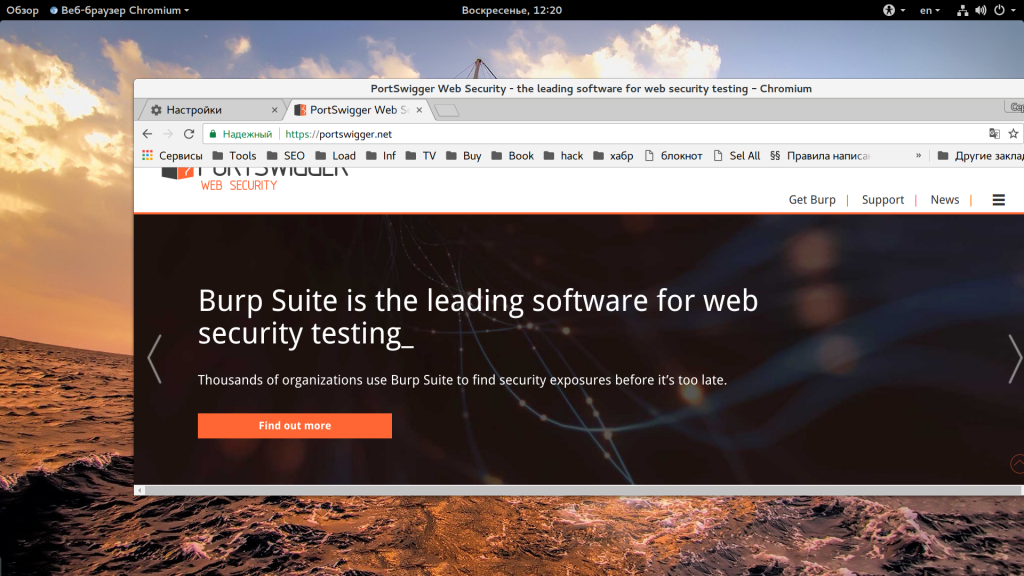
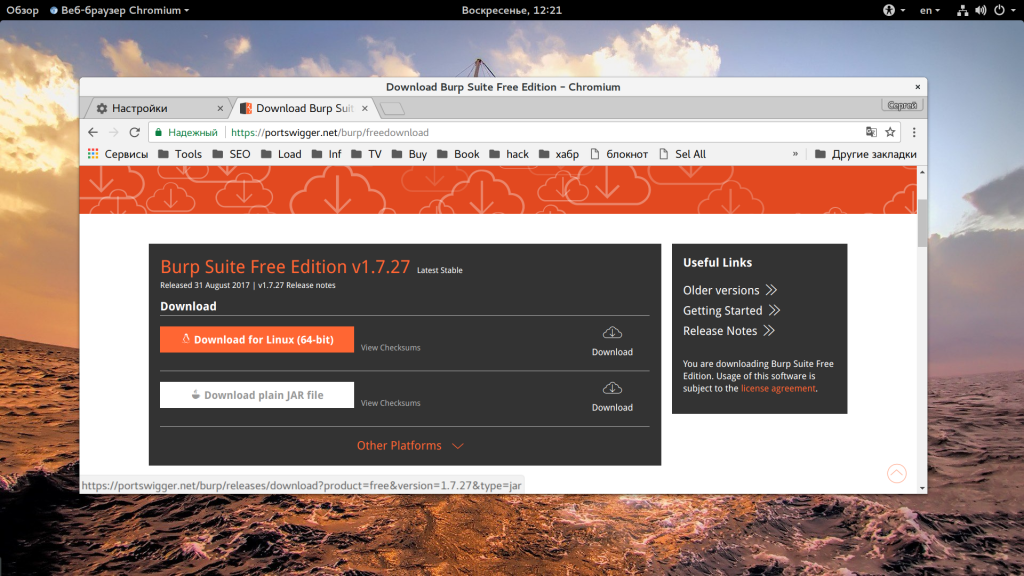
На следующем шаге вы можете выбрать версию в виде скрипта для Linux или же просто Jar файл, который можно запускать в любой операционной системе.
Теперь вы знаете как установить Burp Suite.
Запуск Burp Suite
Для запуска программы вам понадобится установленная Java машина. Откройте командную строку в вашей системе:
- В Windows откройте меню «Пуск» и запустите «cmd.exe»;
- В Mac OS X откройте главное меню, затем «Приложения», «Утилиты» — «terminal.app»;
- В Linux запустите терминал из главного меню или нажмите Ctrl+Alt+T.
Затем наберите такую команду:
java -version
Если java установлена, то вы узнаете ее версию, если же нет, то вам будет нужно ее установить. Дальше вы можете запустить программу просто выполнив двойной клик по файлу .jar. Но можно запускать и через терминал:
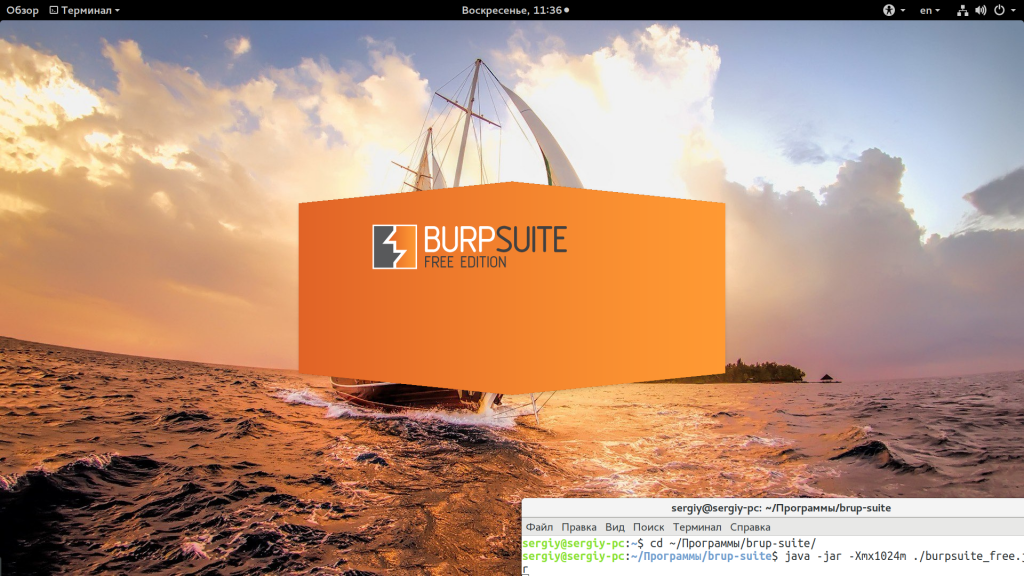
java -jar -Xmx1024m /path/to/burp.jar
Здесь 1024 — это объем оперативной памяти, который компьютер выделит программе. Если все хорошо, то вы увидите заставку:
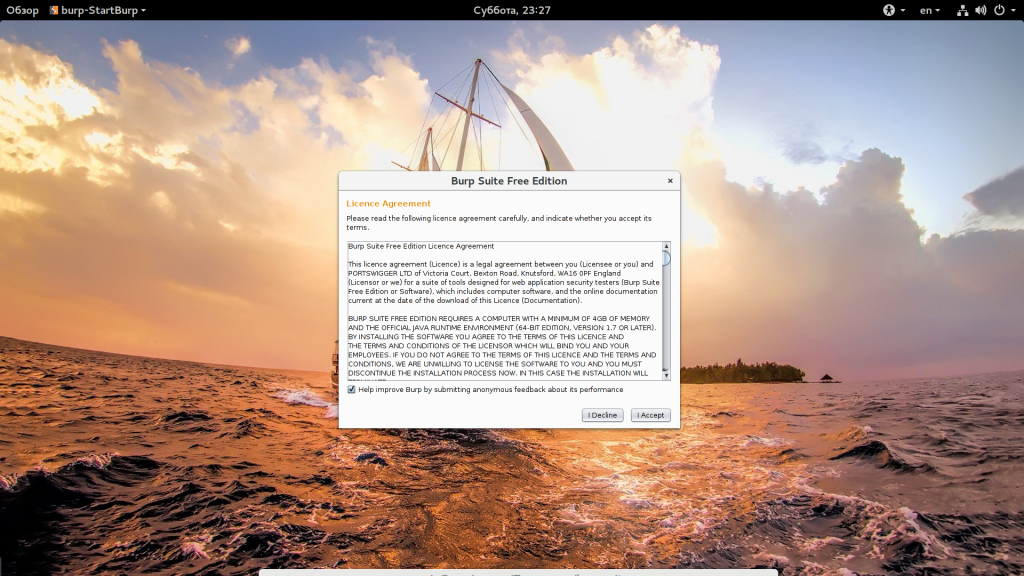
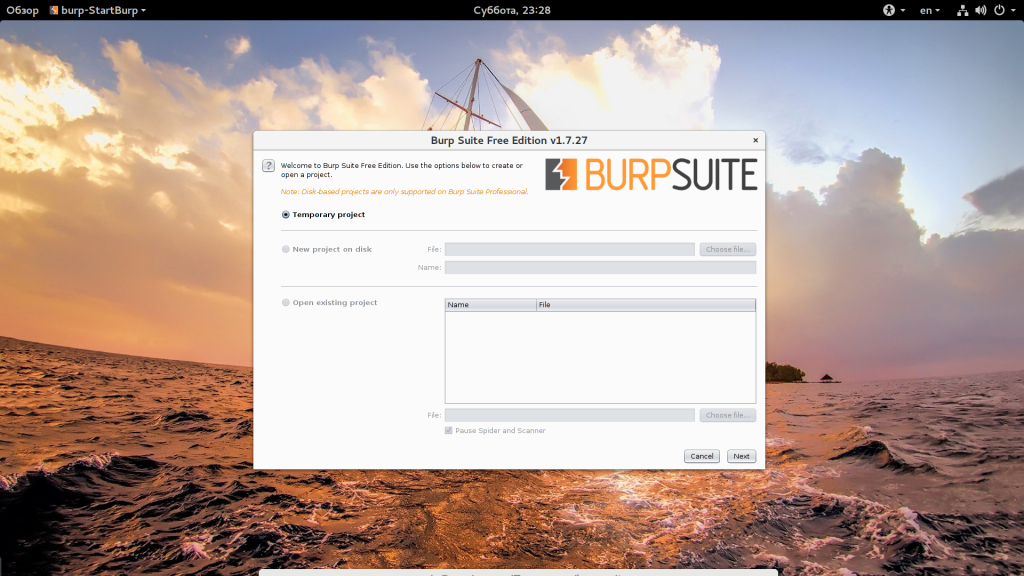
Дальше идет первоначальная настройка программы. В первом окне выберите «Temponary project»:
Затем выберите «Use Burp defaults»:
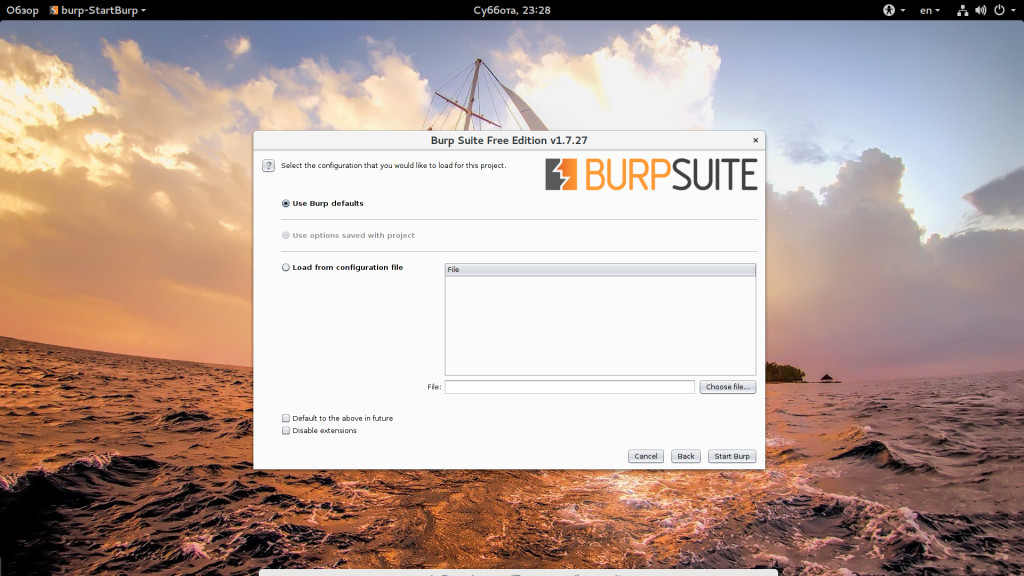
Настройка burp suite завершена.
Как пользоваться Burp Suite
В набор инструментов BurpSuite входят такие программы, дальше мы кратко рассмотрим как пользоваться каждым из них:
- Прокси (Proxy) — для обработки запросов и ответов от сервера;
- Spider — паук для сбора информации на сайтах;
- Repeater — инструмент для замены данных в запросах;
- Intruder —
- Scanner — автоматический сканер уязвимостей, работает только в Pro версии.
Чаще всего Burp Suite используется в качестве прокси, именно с него мы и начнем.
1. Настройка прокси
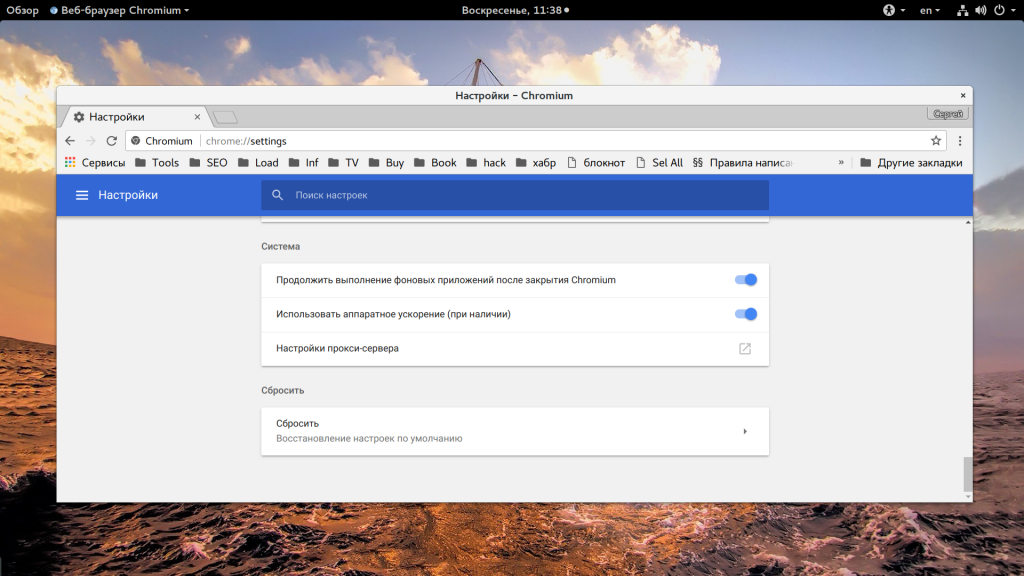
Когда вы пропускаете запросы к сайтам через прокси Burp Suite, то программа позволяет вам редактировать на лету любой из запросов или ответов, вы можете отслеживать все передаваемые заголовки и многое другое. Когда вы запускаете программу, прокси уже запущен, осталось только настроить браузер для работы с ним. Например, для Chrome, откройте «Настройки», затем «Дополнительно», а потом «Настроить прокси сервер»:

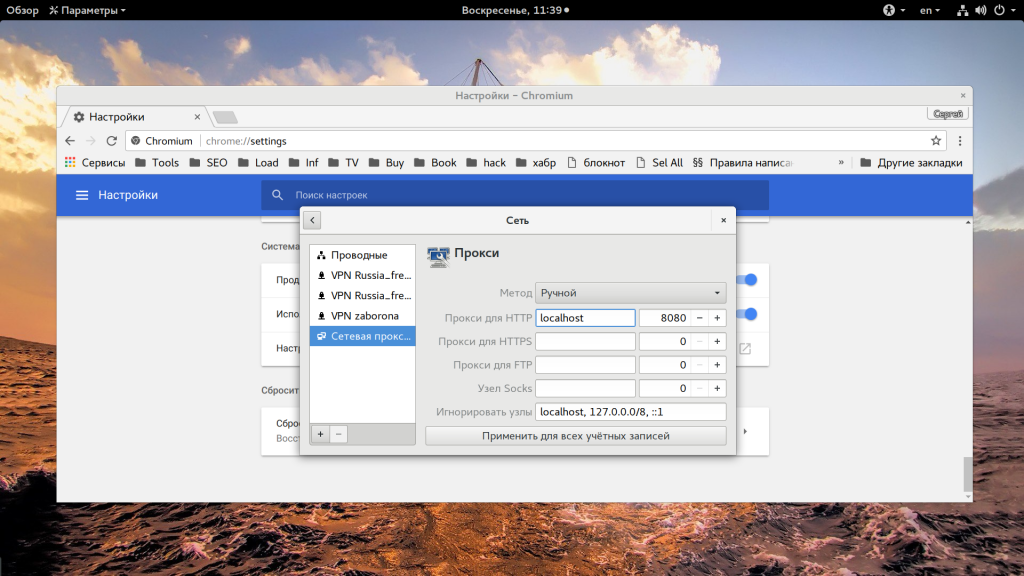
Дальше вам нужно указать адрес прокси localhost, а порт 8080:
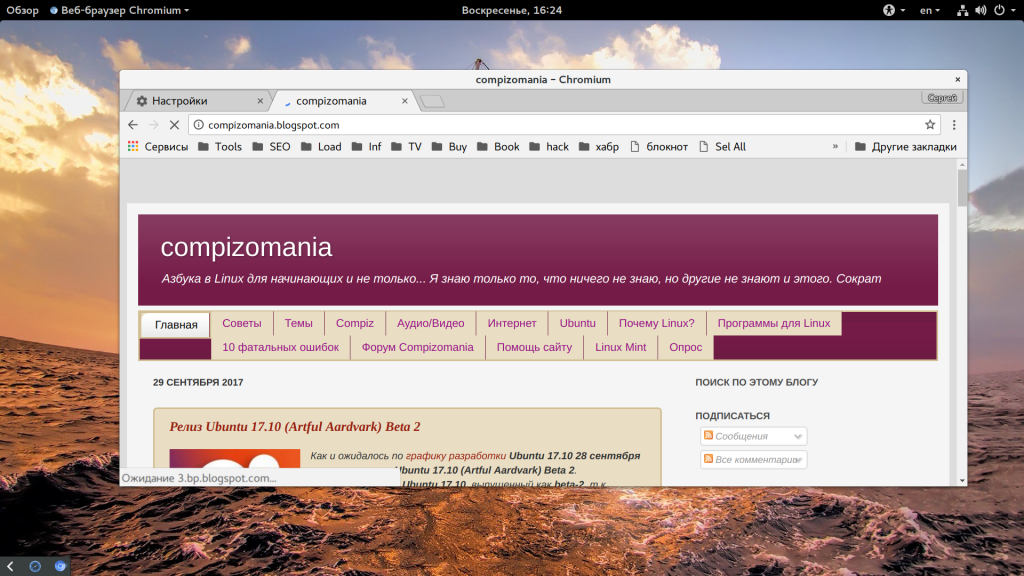
Данная настройка будет работать только для не SSL сайтов. Для обработки HTTPS вам понадобится импортировать сертификат в браузер, а это уже выходит за рамки данной статьи. Теперь откройте любую ссылку в браузере, например, http://compizomania.blogspot.com/.
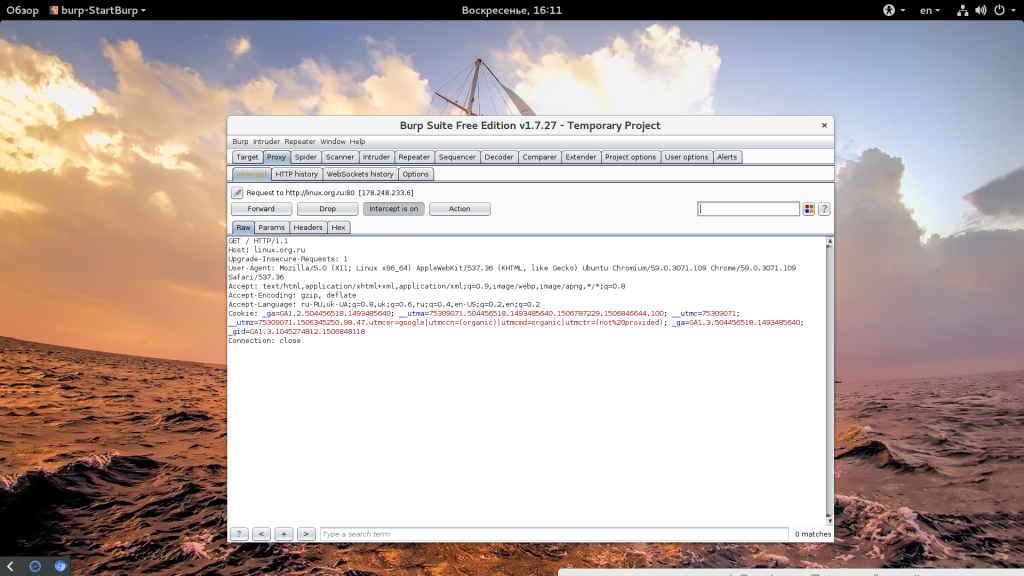
Страница не откроется, а на вкладке «Proxy», «Intercept» вы увидите запрос, отправленный браузером. Его можно отредактировать:
Если не сработало, убедитесь, что включена опция «Intercept is on». Дальше у вас есть три кнопки
- «Forward» — пропустить пакет дальше;
- «Drop» — отбросить пакет;
- «Action» — действия с пакетом.
Пока запрос не отправлен, вы можете отредактировать его так, как вам нужно. Например, изменим значение поля Accept-Encoding на text, чтобы не использовалось шифрование. Далее нажмите «Action» -> «Do intercept» -> «Responce to this request»:
Здесь мы говорим, что хотим перехватить ответ на этот запрос, далее нажмите «Forward»:
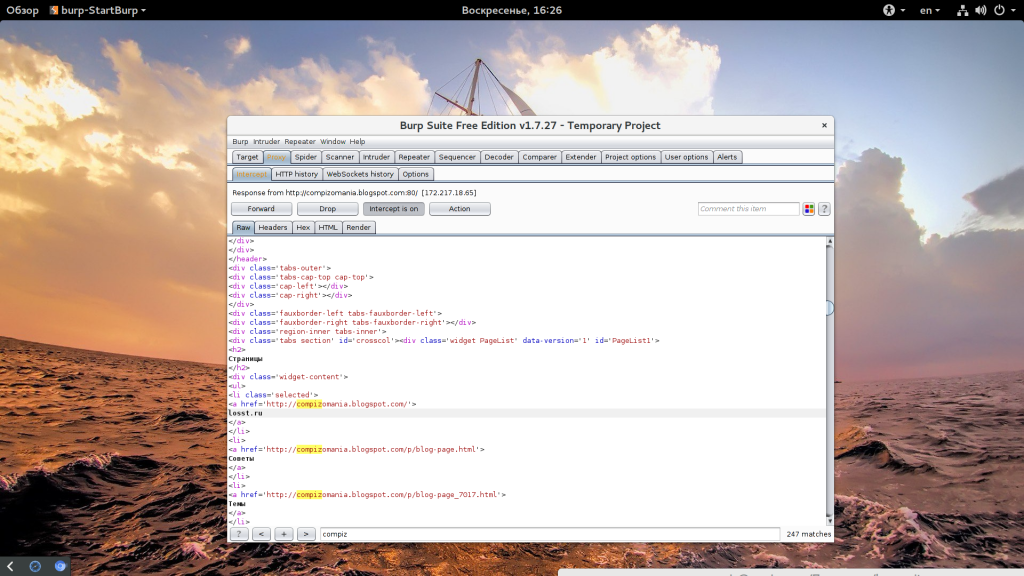
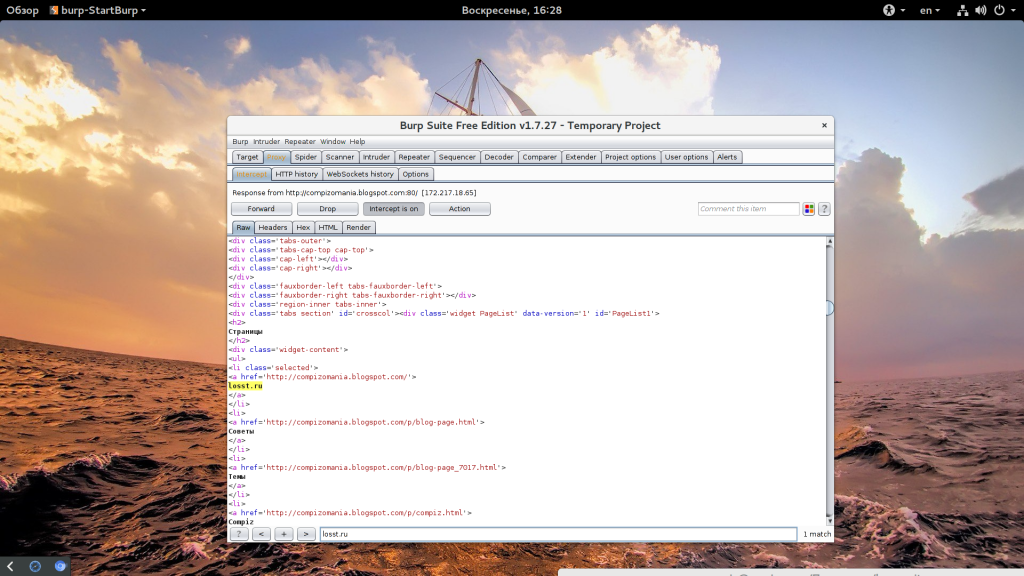
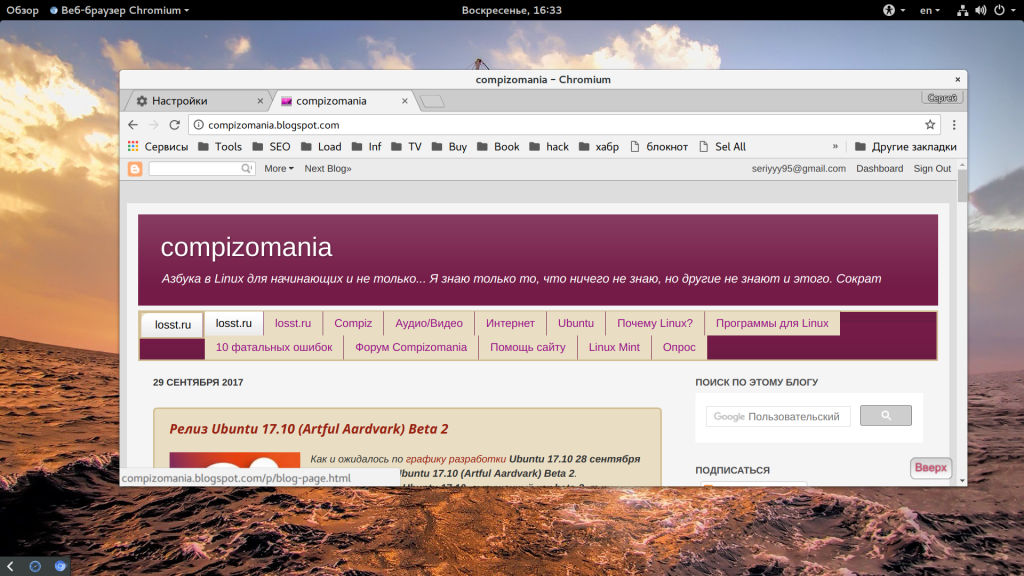
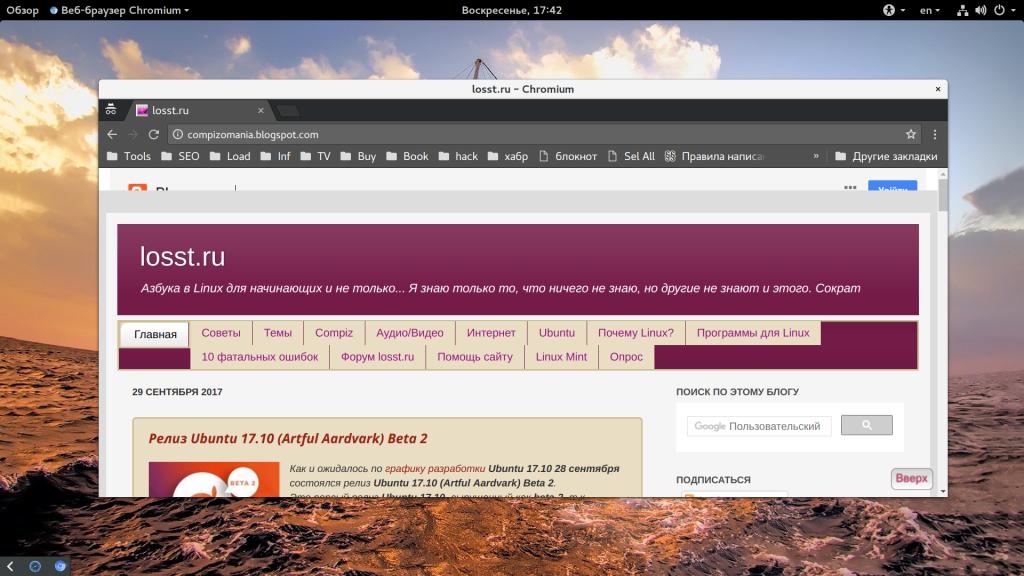
Затем вы увидите перехваченный ответ, его тоже можно редактировать, пока он не был отправлен в браузер, например, заменим слово «Главная» на losst.pro:
Для этого чтобы найти нужный участок текста, можно пользоваться полем поиска внизу страницы.
Дальше нажмите «Forward». Вам нужно будет нажать эту кнопку несколько раз поскольку страница будет пытаться загрузить много нужных ей ресурсов. Или же вы можете установить флажок «Intercept off» чтобы страница загрузилась сама без запросов.
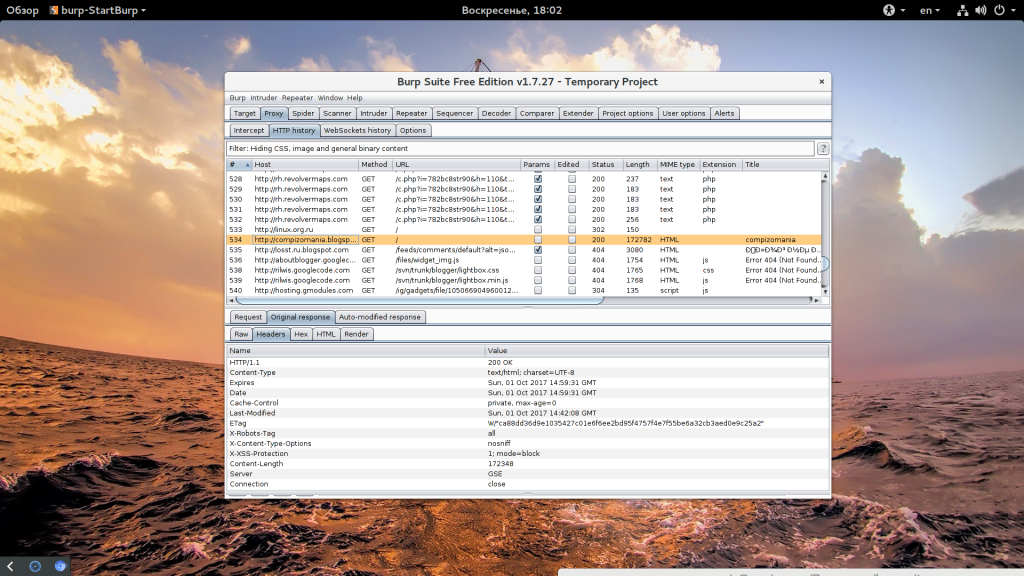
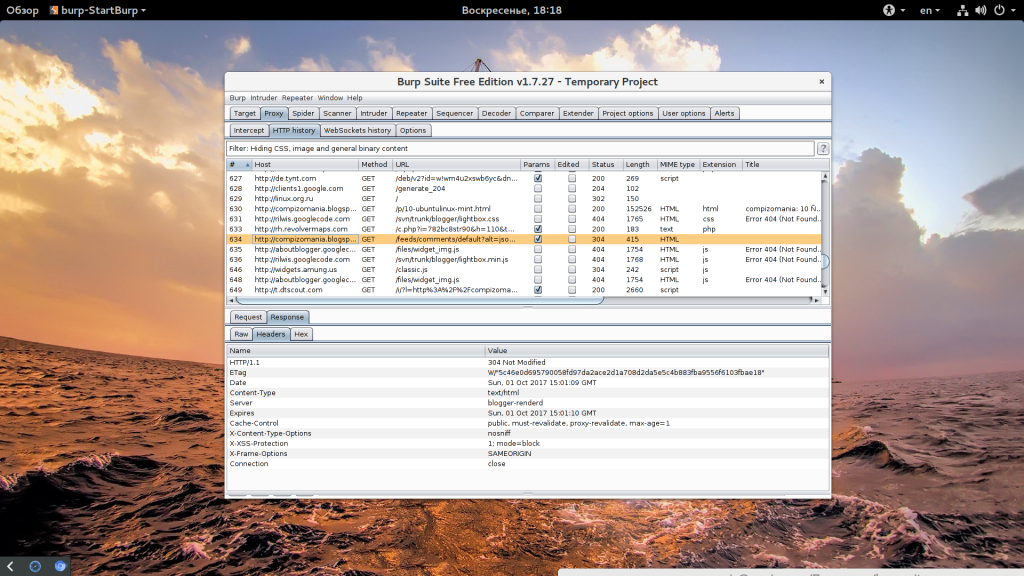
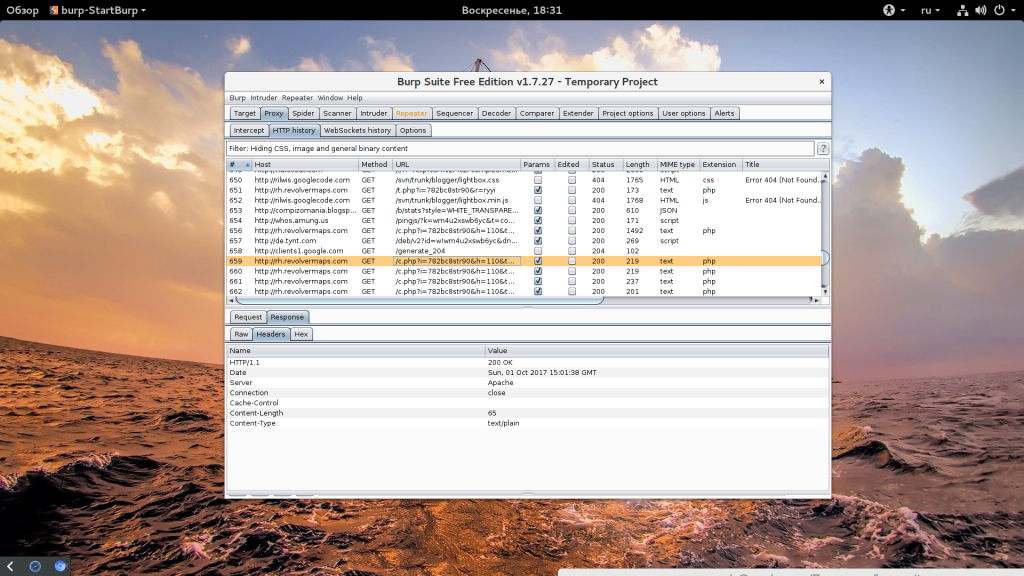
Все перехваченные запросы можно видеть на вкладке «HTTP history»:
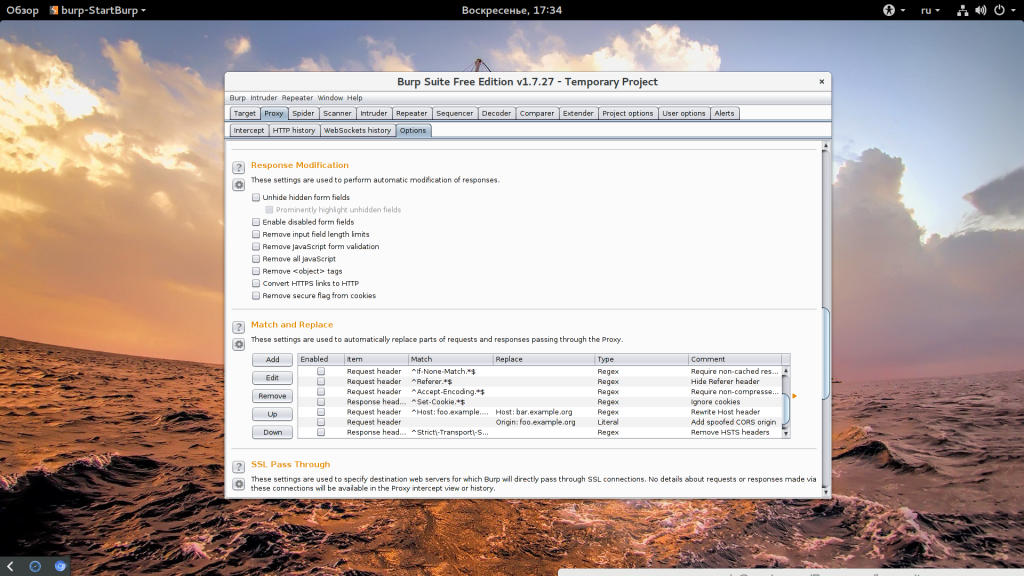
Отсюда их можно отправить в один из инструментов. Прокси может намного больше. Здесь есть автоматическая замена. Перейдите на вкладку «Options» и найдите «Match & Replace»:
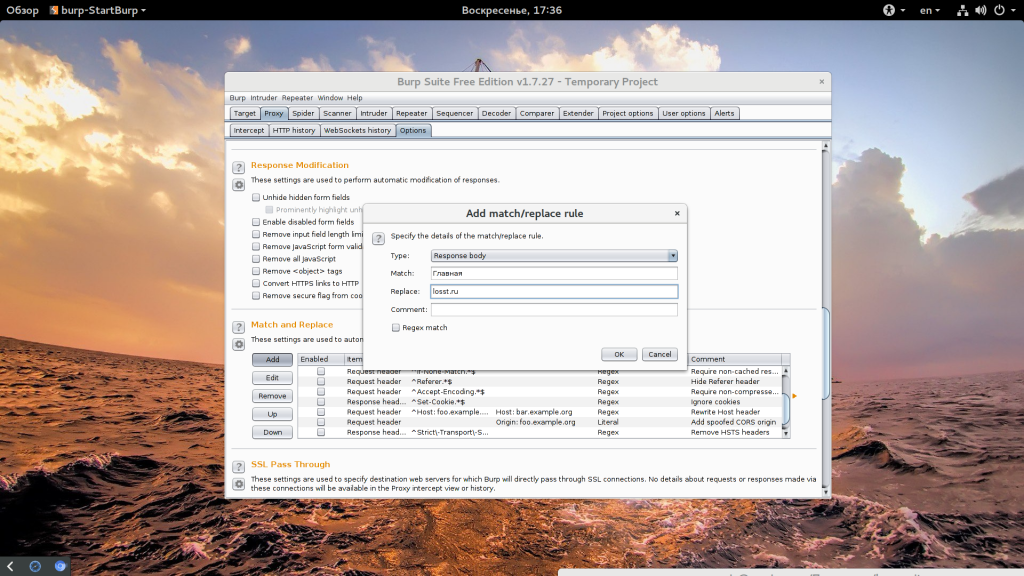
Дальше нажмите «Add» чтобы добавить правило. Тут нужно указать место, где будет выполняться замена, например «Response Body» — в теле ответа. Затем слово или регулярное выражение, которое нужно заменить и на что заменить:
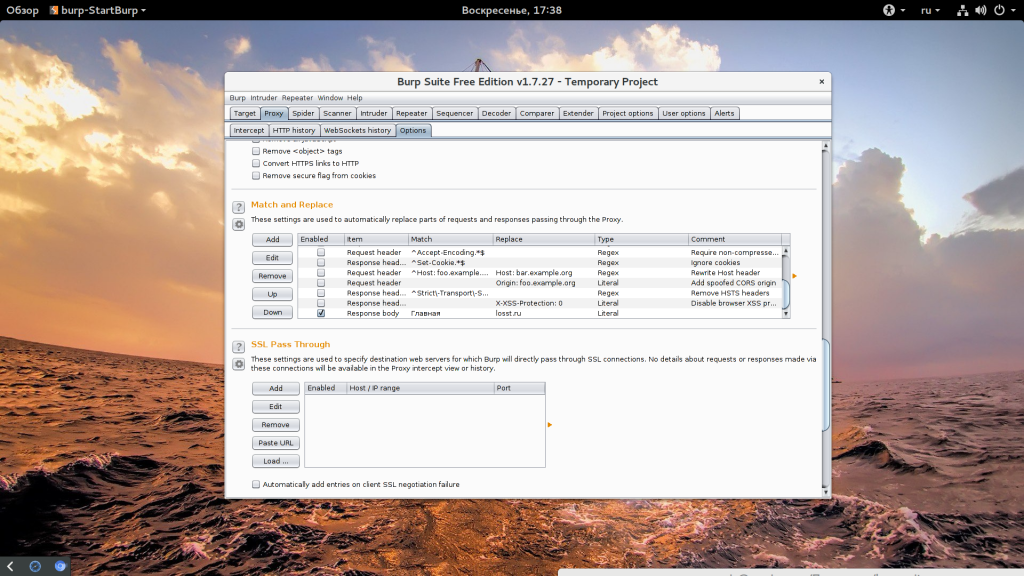
После сохранения правила, нужно поставить напротив него галочку, чтобы его активировать:
Теперь все вхождения указанного слова будут заменяться в получаемых ответах. Только не забудьте про кэш браузера и ответ 304 Not Modified.
2. Использование Intruder
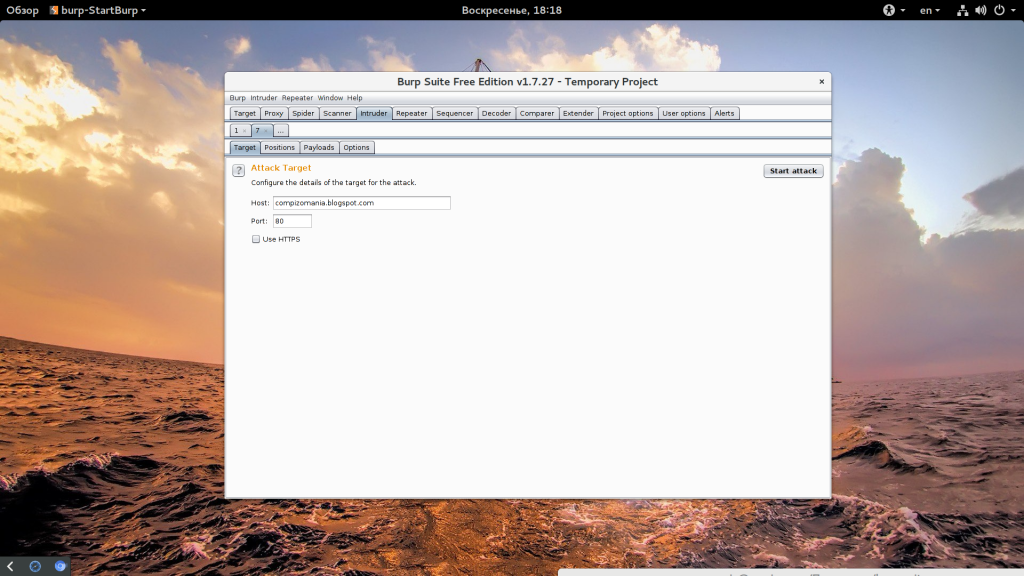
Замена — это самое простое, что можно сделать с помощью Intruder. Этот инструмент позволяет выполнять атаки различных видов, например, атаку перебора пароля, идентификаторов, фаззинг и многое другое. Например, выполним попытку простого анализа страницы на уязвимость к SQL инъекциям. Для этого сначала перейдите на вкладку «Intruder», затем введите в поле URL.
Но будет лучше, если вы возьмете цель на вкладке «Proxy», тогда программа автоматически заполнит тело запроса и вам не понадобится писать его вручную. Для этого откройте «Proxy» -> «HTTP history», а затем найдите нужную ссылку:
Осталось только нажать на ссылке правой кнопкой и выбрать «Send to Intruder». Затем запрос появится там, где нужно:
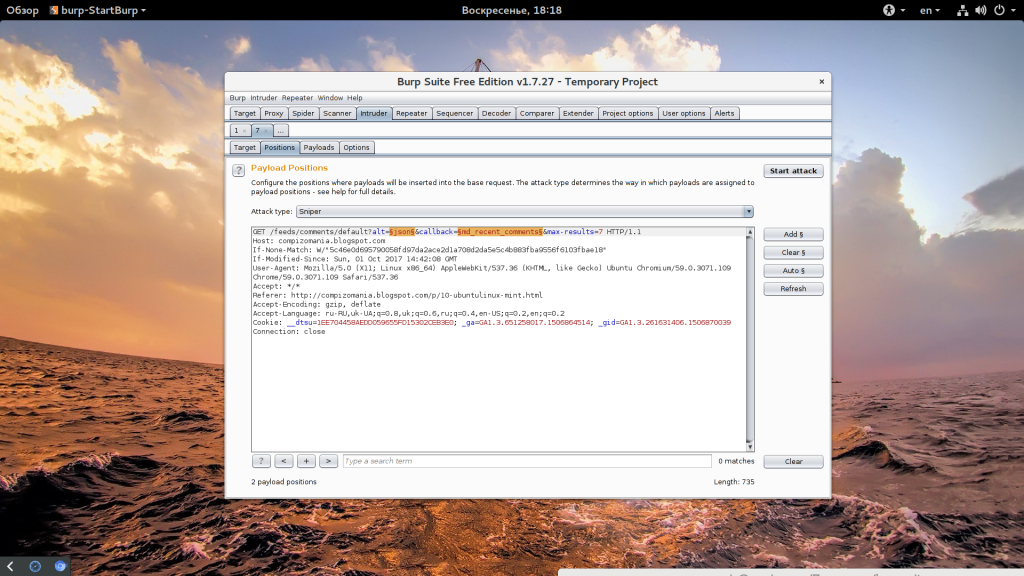
На вкладке «Positions» нужно отметить участки текста или позиции, в которые вы будете подставлять свои значения. Для этого отметьте участок текста и нажмите «Add $$»:
Еще, на этой же вкладке нужно выбрать тип атаки. Доступны такие варианты:
- Sniper — одно поле — один payload;
- Battering ram — все поля — один payload;
- Pitchfork — то же, что и первый вариант, но позволяет связывать между собой данные из разных полей;
- Сluster bomb — поочередно перебирает все данные по всем полям.
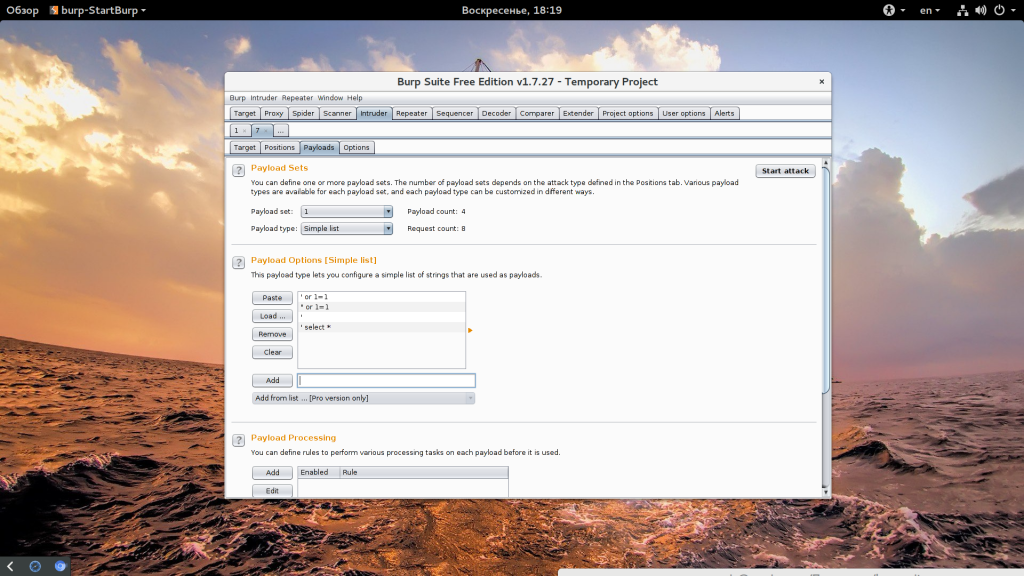
В нашем примере мы будем использовать Sniper. Осталось перейти на вкладку «Payloads» и установить варианты нагрузки, которые мы будем перебирать. Здесь выберите тип атаки «Simply List»:
А затем с помощью кнопки «Add» добавьте несколько пунктов. Осталось нажать кнопку «Start Attack» чтобы начать проверку:
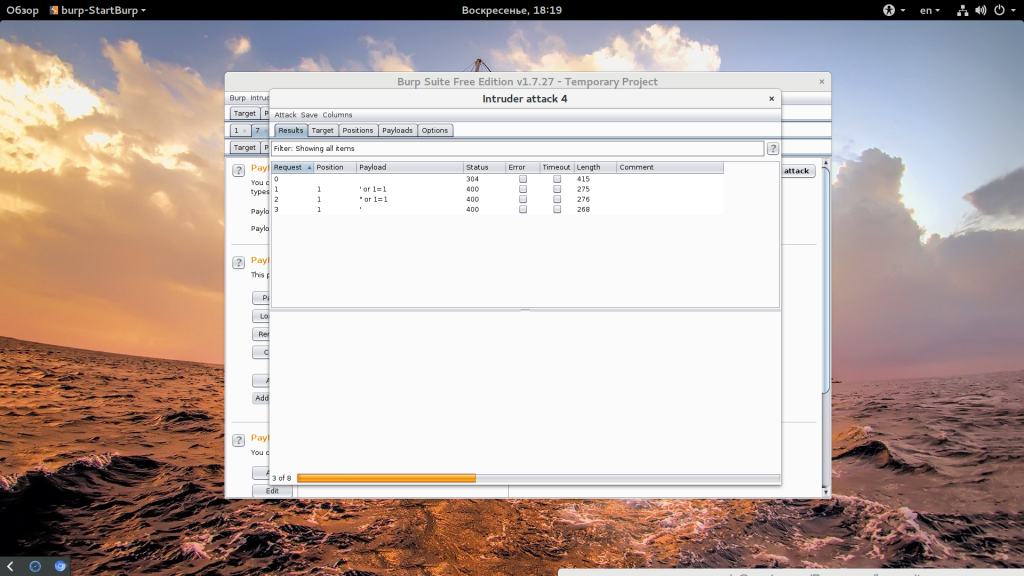
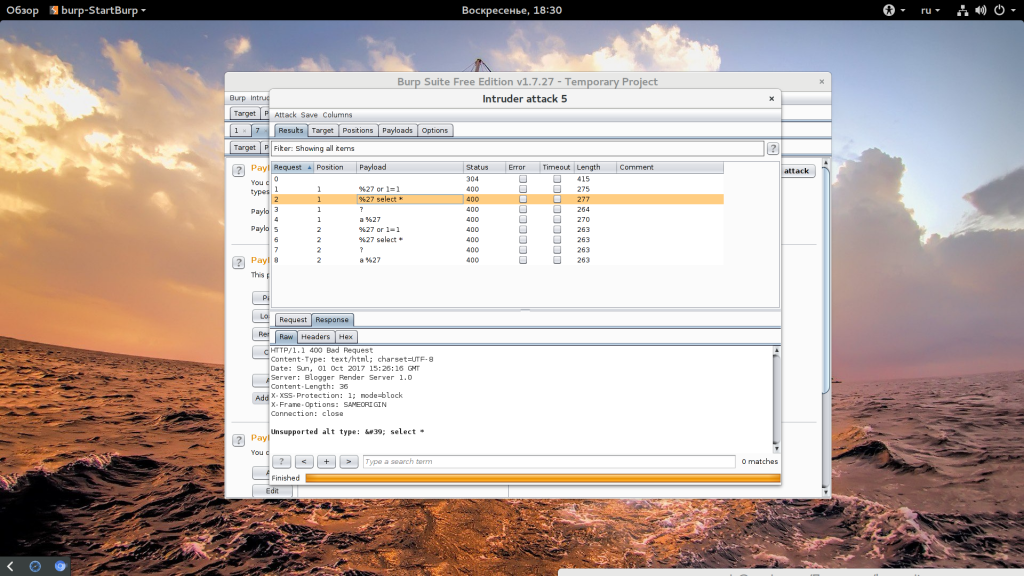
Атака откроется в новом окне, здесь вы сможете увидеть результат, в таблице сразу выводится статус код и размер ответа. Далее вы можете более подробно посмотреть ответ для интересующих вас запросов на вкладке «Response»:
Во всех вариантах мы получили ответ 400, неверный запрос, значит либо сайт хорошо защищен, либо просто я не там искал.
3. Использование Repeater
Того что мы рассмотрели уже достаточно чтобы знать как пользоваться Burp Suite на уровне новичка. Но мы рассмотрим еще один инструмент, который применяется для исследования одного запроса. Это Repeater. Чтобы добавить URL, вам нужно опять найти ее на вкладке «Proxy», а потом нажать «Send to Repeater»:
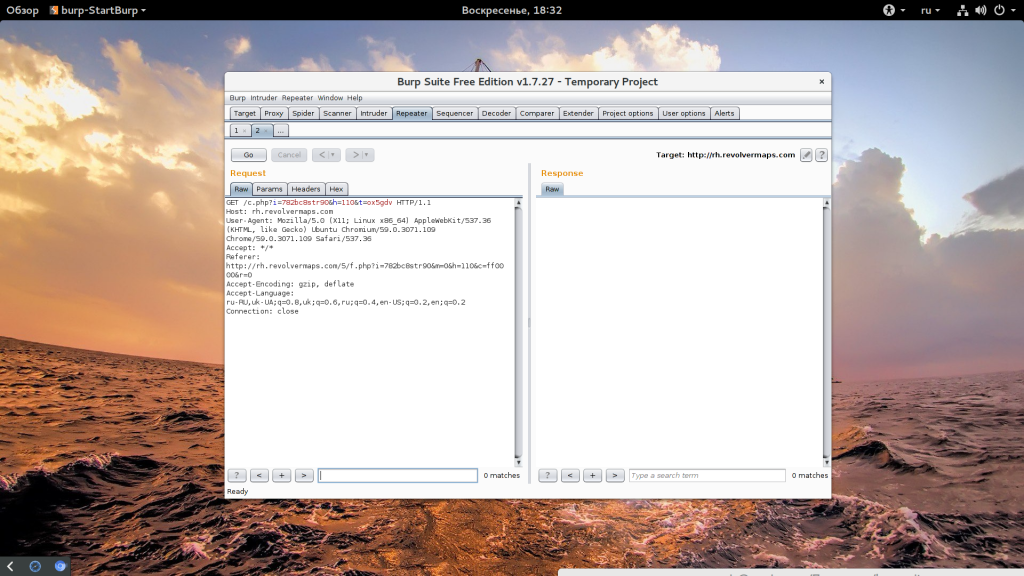
Дальше, на вкладке «Repeater» перед вами появится нужный запрос:
Настройте нужные параметры или измените необходимым образом ссылку и нажмите «Go» чтобы выполнять запрос. Так вам будет проще понять как правильно сделать перед тем, как переходить к массовым запросам в Intruder.
Выводы
В этой статье представлена небольшая инструкция Burp Suite, которая поможет вам освоить программу и проверять свои проекты на наличие проблем с безопасностью. Но не используйте программу в противозаконных целях! Если у вас остались вопросы, спрашивайте в комментариях!
Обнаружили ошибку в тексте? Сообщите мне об этом. Выделите текст с ошибкой и нажмите Ctrl+Enter.
Статья распространяется под лицензией Creative Commons ShareAlike 4.0 при копировании материала ссылка на источник обязательна .
Время на прочтение
6 мин
Количество просмотров 37K
Burp Suite – это платформа для выполнения тестирования по безопасности веб-приложений. В этой заметке я поделюсь несколькими приёмами, как использовать данный инструмент более эффективно.
Настройки
Для правильной работы с любым инструментом важно его настроить под себя. В Burp Suite существуют 2 типа настроек:
- User Options — Настройки относящиеся к самому Burp Suite
- Project Options — Настройки к тому, что хакаешь
Кодировки
При исследовании русскоязычных ресурсов, часто в ответе от сервера вместо кириллицы могут отображаться кракозябры. Чтобы этого избежать можно установить кодировку UtF-8 и продолжать работу в нормальном режиме. Настройки кодировок находятся в User Options -> Display -> Characters Sets.

Хоткеи
Чтобы действительно ускорить свою работу с Burp Suite стоит попробовать перейти на использование сочетаний клавиш. Можно использовать установленные по умолчанию, но также есть возможность перенастроить «под себя». Для управления хоткеями достаточно перейти в User Options -> Misc -> Hotkeys. Несколько полезных сочетаний:
- Кодированиедекодирование:
- Ctrl+(Shift)+U|H|B для “URL|HTML|Base64 (de)code”
- Навигация по GUI:
- Ctrl+Shift+T|P|S|I|R — “Переключение между утилитами”
- Ctrl+I|R|D — «Отправить запрос в утилиту»
- Burp Repeater:
- Ctrl+G — «Выполнить запрос в Burp Repeater»
Proxy Interception
Бывало ли у вас такое, что настроив перенаправление траффика в Burp Proxy приложение почему-то не работало, а в истории запросы так и не появлялись? У меня было так практически каждый раз при старте нового проекта. Всё из-за того, что я забывал отключать перехват в прокси. Каждый раз… Чтобы не травмировать свою нервную систему, можно отключить по умолчанию эту полезную функцию. Перейдите в User -> Misc -> Proxy Interseption и выберите опцию «Always Disable».
Приватность
Не смотря на доверие разработчикам из PortSwigger не стоит передавать лишнюю информацию на их сервера. Даже если вы и сами не против «поделиться», то у ваших заказчиков могут быть более строгие правила. Первое, что необходимо сделать — отключить отправку анонимных сообщений, отправляемых PortSwigger. Перейдите по пути User Options -> Misc -> Performance Feedback и запретите отправку.
Если вы используете Burp Collaborator, то стоит поднять свой собственный и использовать его. Такое решение позволит обходить некоторые WAF, настроенных на блокировку burpcollaborator.net и его поддоменов. Для управления Burp Collaborator переходим в Project Options -> Misc -> Burp Collaborator Server
Используйте конфиг по умолчанию
Чтобы не проделывать работу с настройками для каждого проекта, можно создать конфигурационный файл и загружать его при старте нового проекта. Для этого достаточно проделать следующие шаги:
- Сделайте необходимые изменения
- Сохраните настройки проекта и пользователя (это будут JSON файлы).
- Объедините оба файла в один.
- Обновляйте его по мере необходимости и храните в надежном месте (например, git репозитории).
- Финальный конфиг будет выглядеть так:
{
    "project_options":{
        // options
    },
    "user_options":{
        // options
    }
}
Отключение плагинов
При запуске Burp Suite можно отключать все плагины. Это значительно может ускорить загрузку, особенно если используется множество дополнений.
Включить необходимые дополнения можно позже, учитывая специфику проекта.
Ограничение по памяти
Burp Suite написан на Java, что часто приводит к большому потреблению памяти, особенно в случае долгих автоматических проверок. Для ограничения потребляемых ресурсов можно воспользоваться следующей командой:
java -jar -Xmx2048M burp.jarУтилиты
В данном разделе будут советы по работе со встроенными утилитами в Burp Suite. Наиболее интересные из них:
- Burp Proxy лежит в самом сердце управляемого пользователем рабочего процесса Burp Suite, позволяя вам перехватывать, проверять и модифицировать трафик, движущийся в обоих направлениях между сервером и клиентом.
- Burp Repeater — инструмент для обработки HTTP-запросов, их редактирования и анализа ответов веб-приложений вручную.
- Burp Intruder — мощный инструмент для автоматизации специализированных атак против веб-приложений. Это очень гибкий и хорошо настраиваемый инструмент, который может использоваться для выполнения огромного спектра задач, возникающих во время тестирования приложений.
Найти ссылки на хост
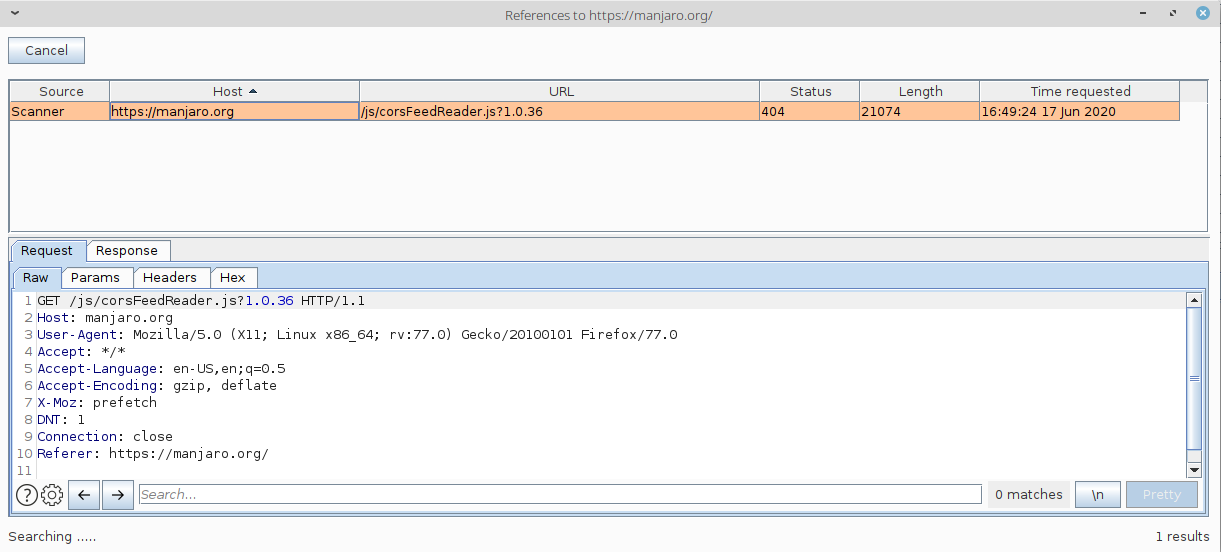
Иногда, появляется необходимость найти ссылки на определённый хост. Конечно, можно воспользоваться поиском в истории запросов, но есть более быстрый и эффективный способ. Переходим во вкадку Target -> Site Map, выбираем из списка необходимый хост, правый клик и Engagement tools -> Find reference. В результате, появится список запросов, ссылающихся на интересующий нас хост.
Автозамена
Многие недооценивают полезность функции автозамены в Burp Proxy. Часто её используют для подмены ответов сервера, с целью отключить защитные механизмы в заголовках; замены false на true для повышения привилегированного доступа и т.п. Для меня же наибольшая польза от этого механизма достигается при тестировании мобильных приложений. Очень удобно в самом интерфейсе приложения вводить простые слова, а в результате отправлять сложные выражения. Например, ввести bxss, а отправить полноценный пейлоад BlindXSS. Также, упрощается работа при вводе паролей. Настройки автозамены вы можете найти в Proxy -> Options -> Match and replace.
Переименование вкладок
Burp Suite позволяет именовать вкладки, когда я узнал об этой возможности, то моей радости не было предела. Сделав двойной клик по заголовоку вклади запроса, можно записать полезную информацию, которая поможет вспомнить что к чему спустя какое-то время.
Работает это не только в Burp Repeater, но и в Burp Intruder, что также бывает полезным.
Автопрокрутка
Очень удобной является функция автопрокрутки при поиске в запросах или ответах. Burp будет автоматически перепрыгивать на результат, после отправки запроса, ускоряя вашу работу. Для включения опции после ввода в поисковой строке того, что вы хотите найти, нажмите кнопку «+», чтобы получить доступ к опциям поиска и отметье «Auto-scroll to match when text changes».
Отчёты
При оформлении отчётов гораздо больше информации поместится и симпатичней будут смотреться скриншоты с вертикальным расположением запросаответа. Для этого в опциях Burp Repeater отметьте View->Top/bottom split
Целевое сканирование
Вы можете использовать интерфейс Burp Intruder, чтбы сконфигурировать сканирование с использованием Burp Scanner только на необходимые параметры, заголовки и т.п. Для этого, выставите маркеры в нужном вам запросе в интерфейсе Burp Intruder так, как вы это делаете обычно, а затем выберите «Scan defined insertion points» из контекстного меню. В результате будет сэкономлено достаточно времени, т.к. по умолчанию Burp Scanner тестирует все, что доступно в запросе, включая cookies, заголовки, URI, параметры запроса.
Обработка полезной нагрузки на лету
В Burp Intruder можно устанавливать различные обработки полезной нагрузки, до отправки запроса. Установленные правила выполняются последовательно, могут быть включены/отключены, чтобы помочь подебажить в случае каких-то проблем в конфигурации. Правила обработки могут быть полезными во множестве различных ситуациях, где вам нужно сгенерировать необычную нагрузку, или, например, закодировать.
Примеры доступных типов правил:
- Add prefix / suffix — Добавляет текст до или после нагрузки.
- Match / replace — Заменяет любую часть в нагрузке, подходящую под регулярное выражение, указанной строкой.
- Encode / Decode — Кодирует или раскодирует нагрузку различных типов: URL, HTML, Base64, ASCII hex.
- Hash — Производит операцию хэширования над нагрузкой.
- Skip if matches regex — Проверяет удовлетворяет ли нагрузка указанному регулярному выражению и если это так, то пропускает нагрузку и переходит к следующей. Это может быть полезным, например, если вам известно, что значение параметра должно иметь минимальную длину и вы хотите пропустить все значения из списка, которые короче данного значения.
Сортировка результатов Intruder
В Burp Intruder можно помечать результаты, содержащие заданные выражения в ответах от сервера. Для каждого выражения Burp добавит столбец с чекбоксами в таблицу с результатами. В результате, можно будет явно увидеть интересные ответы, а при необходимости сгруппировать, кликнув на заголовок столбца.
Использование этой опции становится максимально полезным при анализе больших объемов результатов сканирований и позволяет быстро находить интересующие вас вещи. Например, при тестировании SQL инъекций поиск сообщений содержащих «ODBC», «error» и пр. помогут быстро отыскать уязвимые параметры.
The following tutorials will guide you through the main features and tools of Burp Suite Professional. We’ll show you how to perform both manual and automated testing of targets using Burp Suite.
Was this article helpful?
An error occurred, please try again.
In this Burp Suite Tutorial you will learn everything you need to know to get started in Web Application Security Testing. Burp Suite is arguably one of the most popular tools when it comes to Penetration Testing, or specifically Web Application Testing. Grab a cup of coffee, you are in for a ride!

Burp Suite is a web application framework developed by Portswigger which is used by security professionals to perform penetration testing, check for security flaws and other red team operations. Burp Suite is a collection of multiple tools bundled into a single suite made for Web Application Security or Penetration testing. This Burp Suite tutorial will be the detailed guide to learn about it. I will be demonstrating how to configure and utilize most of Burp Suite’s features properly.
Burp Suite is a collection of multiple tools bundled into a single suite. One of the main features of Burp Suite is the HTTP proxy which sits between the browser and the internet (website) to forward traffic in either direction with the ability to decrypt and read the HTTPS traffic using its SSL certificate, just like a man-in-the-middle attack on ourselves. During the forwarding of traffic, it records, intercepts, replays, and analyzes it while allowing you to manipulate requests and responses from and to the web server.
Other than this, it can be extended with the third-party extensions where you can develop and integrate your own or other’s extension written in Java, Ruby, or Python to automate the testing and the attacks.
Burp Suite is a Java executable file which makes it supportable on all popular platforms. It comes in three editions from which you can choose from:
- BurpSuite Enterprise
- BurpSuite Professional
- BurpSuite Community
More details regarding the differences between the versions can be found here. The community edition also comes pre-installed with Kali Linux.
The features and their usage In this Burp Suite tutorial I will be covering are the following:
- Main interface
- Configure Outbound SOCKS Proxy
- Intercepting HTTP/S Traffic
- Configuring Intercept
- Configuring the Target Scope
- Searching for a specific term
- Using the Spider
- Using the Repeater
- Using the Intruder
- Passive Scanning
- Active Scanning
- Utilizing Sequencer
- Decoder
- Comparer
- Using the Third Party Extension
- Exporting the Results
- Saving the Burp Session
Main Interface
The main interface of Burp Suite which you will get right after starting the application is divided into six sections and multiple panels to work with:
- Tool & Options Tabs – Select between the options and tools to perform different types of operations according to the situation.
- Sitemap View – Displays the sitemap which gets updated by visiting the websites manually or through spidering the websites using the Burp Proxy.
- Requests Queue – Shows the requests being made to the URLs present in the Sitemap View.
- Request/Response Details – The HTTP requests and responses can be read in detail as a result of this selecting the specific request from the Request Queue.
- Issues – The section to view the vulnerability and other application functionality issues regarding the website by selecting the specific website from the Sitemap view.
- Advisory – The section where the Issues are explained in detail how they affect, where they are affecting, their severity, and how to remediate them.
Configure Outbound SOCKS Proxy
Sometimes it is necessary, depending on the scope of your engagement, that you may need to tunnel your Burp Suite proxy traffic through an outbound SOCKS Proxy. It will ensure that all the traffic that passes to the target web application will go through a SOCKS proxy instead of your public IP.
For configuring it, you will need to navigate to the User Options tab located in section 1 as defined before, then choose its sub-tab named Connection, then scroll down to the third section labeled as SOCKS Proxy and enter the details of your SOCKS Proxy there.
Intercepting HTTP/S Traffic
While using the Burp Suite as a proxy, we will need to configure the proxy to make it active and working or else, it will not log and show the URLs and data that is sent or received from the web server. In this Burp Suite tutorial, I will show multiple ways to configure the Burp Proxy in the browser. From section 1, select the Proxy tab then go to the Options tab in the sub row, you will see the Proxy Listener labeled part, enter the proxy details of your local machine to capture its traffic.
Once the proxy configuration is done in Burp Suite, then navigate to your browser and set the proxy configuration there so that the browsers will send the traffic copy to Burp Suite. As the Internet Explorer and Chrome share the same proxy settings, so when you change the setting from either of them, it will reflect in both of them.
In Chrome, you need to navigate to Settings > Advanced Settings > System > Open Proxy Setting there and enter the same proxy details which you had entered in Burp Suite.
Alternatively, for Chrome, there is even an extension named Proxy SwitchSharp where you once set the proxy and then switch between the proxy or no proxy settings with a single click.
Now we come to the Firefox configuration part, Firefox doesn’t share its proxy with any other application and uses its configuration to use the Proxy. To configure the proxy settings in Firefox, you need to navigate to Options > General > Networks > Settings and enter the same proxy details which you had entered in Burp Suite.
Alternatively, for Firefox, there is even an extension named FoxyProxy where you once set the proxy and then switch between the proxy or no proxy settings with a single click.
Configuring Intercept
Now comes the proxy intercept feature configuring part of this Burp Suite tutorial. You will need to set and configure it to capture, pass, reject and manipulate the request going to or coming from the web server of the target site. For configuring it, you need to navigate to the Proxy tab, in its sub-tab go to Options and under it go to the 2nd and 3rd section named Intercept Client Request and Intercept Server Request, set their rules accordingly.
I leave them to the default as they are good to go on that. Meanwhile, the Interceptor is used to act as the Man in the Middle can be operated from Proxy > Intercept.
Configuring the Target Scope
Now comes to the part of how Burp Suite will analyze the target application by examining its GETs and POST requests. Before starting any testing, it is recommended and a good practice to set the scope first. By placing a web application in the scope, Burp will only target that specific web application, and whenever you perform any operation against the scope, it will only target the web application(s) that have been set in the scope.
It will ensure that any potentially malicious traffic or payload(s) will not get any web application which you are not authorized to test. Go to the Target tab and choose the Scope sub-tab from there. Click Add there and insert the target URL which you are authorized to test and set your scope.
Searching for a specific term
You can rely on Burp Suite to make complicated things easy for you. You can search for any specific term or keyword from the ton of data and information just by typing a keyword. It becomes convenient when you have to look for details like a username or password from the bug results pages. Like I have searched for the “test” parameter which I can further process later.
Searching for a specific term or keyword from the Request or Response data, you need to select a request from the Request Queue and then navigate to either Request tab or Response tab from where you would like to search and enter your desired keyword in the textbox below. It will highlight the text in yellow colour for whatever will match your query keyword.
Using the Spider
Starting with what the spider is? A creepy insect? No. In the web terminology, a spider is a process where a robot goes to the internet and crawls through all of the pages that are available on the target web application. All the pages that the spider will go through on the specific web application will get updated in the Sitemap, which is in section 2 of the main interface.
To start the spider on any host, you need to go to Spider tab in Section 1, then in the Control sub-tab, select your scope first as in this Burp Suite tutorial I have defined the suite scope that is actually the scope which I have previously set in the Burp Suite and then hit the Spider running button to run it.
Using the Repeater
The Repeater tab is another one of the most useful features in Burp Suite. I use it hundreds of times during a penetration test. It is used to manipulate any part of the HTTP request including its header and to watch the behaviour of the data which comes back from the server.
To send and process any request in the Repeater, you need to select and right click on any of the requests from the Request queue and select “Send to Repeater”. Alternatively, there is also a shortcut key that is Control + R to perform this task.
Next click on to the “Repeater” tab and make your desired change in the HTTP request, in this Burp Suite tutorial I have made the changes in the value of pid parameter from 1 to 100 and I hit the Go button and then you can observe the changes in the response from the web application server according to your request which you manipulated.
Using the Intruder
The Intruder comes into play when you perform automated testing instead of the manual one. The Burp Intruder is a powerful way to perform automated or semi-targeted fuzzing. You can target it against one or multiple parameters in the HTTP request at the same time.
To send and process any request in the Intruder, you need to select and right click on any of the requests from the Request queue and select “Send to Intruder”. Alternatively, there is also a shortcut key that is Control + I to perform this task.
Now go to the Intruder tab and select the name of the current Intruder instance, then click on the Positions sub-tab. You will see the payload input position already been highlighted by the Burp Suite. You can choose your own choice of position or any position suggested by the Burp Suite. In this Burp Suite tutorial, I have gone along with the Burp Suite suggested position.
Now head over the Payloads sub-tab and choose the type of payload you want to target against the specific position and click the “Start attack” button. It will push all the payloads against that specific input parameter and shows the results in detail.
Passive Scanning
Whenever you go to the browser and visit some pages of the target web application the Burp Suite passively goes into the details of those web pages and analyzes them for the security and other issues and report them in the Issues section which is number 5 on the main interface.
You can passively scan a host, by selecting your desired host from the sitemap and right click on it, then select “Passively scan this host”. It never sends any request to the web server, instead it only analyzes the data that has already been sent by the user while browsing the particular web application.
Active Scanning
In active scanning, Burp Suite goes over to the target web application and analyzes and explores it more actively and in greater detail and analyzes it for security and other issues and reports them in the Issues section which is number 5 on the main interface.
You can actively scan a host, by selecting your desired host from the sitemap and right click on it, then select “Actively scan this host”. It sends different types of requests to the web server and creates and analyzes the that it got from the particular web application.
Utilizing Sequencer
The function of the Sequencer is to check the level of randomness in session tokens provided by the web server. It performs various types of advanced tests to figure it out. In most cases, the session tokens are used to provide authentication for a user so they should not get compromised. The web server must use a high degree of randomness for session tokens, so an adversary can not guess it.
You can perform this test by selecting any request from the Request Queue and right click on it and choose “Send to Sequence”.
Move on to the Sequencer tab, then under the Live Capture sub-tab, hit the “Start Live Capture” button.
Now the Sequencer will repeatedly send the request, thus obtaining a high number of session IDs. The recommended amount to capture is a minimum of 1000 session IDs for an accurate analysis. Once it reaches 1000, click the Stop button and click “Analyze Now” button, it will provide the result through various statistical tests to determine the randomness.
Decoder
The Decoder feature is used to decode or encode the data between the different types of encoding schemes. You can enter the encoded data into the encoded field and decode it into plaintext or any other encoding you like. In this Burp Suite tutorial, I have decoded a Base64 encoded string and decoded it into plaintext. You can do the same vice versa.
Comparer
The Comparer is the feature of Burp Suite which is used to perform a comparison between any two requests, responses or any other form of data. It could be useful when comparing the responses with different inputs or results. It will show the comparison in the highlighted color.
Using the Third Party Extension
Burp extensions are made to enhance the capability of Burp Suite by including the extension in the Burp Suite framework that were developed by other Pentesters. Click on the Extender tab within Burp Suite and click the BApp Store sub-tab and select your desired extension which you like to add and click “Install” to add it to the Burp Suite.
Exporting the Results
Once you have collected all the results, you might want to generate some reports. There are two reports available, HTML and XML. To create a report, select all the issues which you want to be included in the report, then press right click and choose “Report selected issues”.
Go through the Wizard and select which items you want in your report and which format. The HTML report can be open in the browser and while the PDF report will require a PDF file reader software.
Saving the Burp Session
Many times during a penetration test, it is necessary to pause or hold the assessment and continue any time later, or you will be required to share your session with another security analyst. In these situations, the easiest thing is to save a local copy of your session. You can do this by selecting “Save legacy state file” from the Burp menu at the top.
It will create a flat file which you can restore at any point or share with anyone another consultant.
Conclusion
This Burp Suite tutorial has covered a lot of details, and hopefully, after reading this article, you would feel confident while performing a Web Application Penetration Test. We have even a tutorial on Burp Suite that is demonstrating how you can use it in different scenarios which you can find here. You should also experiment with all the features of Burp Suite and test them hands-on. And do comment below, tell us how was your experience going through this tutorial.
In this article we look at BurpSuite, a framework of tools that can be used during penetration testing. We’ll cover the latest release of BurpSuite, version 2.0, getting our hands dirty with the OWASP Juice Shop vulnerable Web application.
Overview
This article is intended for penetration testers and bug bounty hunters as well as software developers who find it important to have security as a component of their development.
BurpSuite has three editions that you can select from:
- BurpSuite Enterprise
- BurpSuite Professional
- BurpSuite Community
We’ll be making use of the BurpSuite Professional Edition v2.0 Beta for the course of this article.
It’s worth noting also is that BurpSuite Community (free) Edition comes bundled with Kali Linux. You will have to pay for the Pro Edition if you need extended functionality. With the Pro Edition, the intruder function will not be throttled, functionality of Extenders, Discover Content, CSRF PoC and Project File saving will all be supported, and your payloads and plugins will be available.
OWASP juice shop initial setup
Installing the OWASP Juice Shop can either be done from sources using node.js, on a Docker container, Vagrant, on an Amazon EC2 instance or on an Azure Container instance. The detailed steps to achieve this can be found here.
Our preferred method will be using node.js. Our setup is running on Ubuntu 18.04 LTS with node.js installed.
For our setup, the very first step is to run npm start within the juice-shop directory. The server will begin listening on port 3000. It is important to ensure that no server is already listening there before you begin. See below:
When you load http://localhost:3000 on your browser, you will see the default juice-shop page. The idea is basically to have an “online” shop where shoppers can shop for different types of juice. You basically shop and add your products to cart and check out.
On loading the application, you will see different juices going for different prices and their descriptions. See below:
We will be attacking this application after completing our BurpSuite setup.
Firefox browser initial setup
In order to capture requests and send them over to Burp, we need to set up the FoxyProxy add-on. We have set up ours to forward traffic to 127.0.0.1 and at port 8080. We shall later configure Burp’s proxy also to 127.0.0.1 at 8080 in order to accept traffic from Firefox.
After this setup, we enable the proxy on FoxyProxy as shown below:
Initial BurpSuite setup and configuration
Here we will set up BurpSuite in preparation for our attacks on the juice-shop.
Creating a project file
Creating a BurpSuite project file is a feature that is only supported in the Pro Edition, an important thing to remember. Follow the following steps:
- On your drive, create a BurpProjectFiles directory
- Launch Burp, click on “New project on disk,” click on the “Choose file” button and navigate the directory created above. While there, create a project file called Juice-Shop-Non-Admin.burp
Click “Next” and “Use Burp defaults,” then select “Start Burp.”
BurpSuite launches and you are greeted with the default panel. Everything we do will now be saved in the Juice-Shop-Non-Admin.burp file.
Setting up the Proxy, Spider and Scanner options
To set the Proxy:
- Click on the Proxy tab and ensure “Intercept is off” by toggling that button
- Click on the “Options” tab. Here, you want to ensure the proxy is checked as “running” and the interface is pointing to 127.0.0.1:8080
- Scroll down to “Intercept Server Responses” and check-to-enable the box that says “Intercept responses based on the following rules”
- Scroll further down to “Response Modification” and check-to-enable the option “Unhide hidden form fields”
To set the Spider and the Scanner options, follow the steps below:
- Click on the “Target” tab then add a target URL for scanning. Burp gives you an option to even directly paste the URL. As can be seen below, Burp then asks you whether or not to log out-of-scope items. Answer “Yes” to maintain a smaller Burp save file
- The target has now been added to scope. You can further restrict items shown on the sitemap by clicking on the filter bar and enabling the checkbox that says “Show only in-scope items.” See below:
- Now it’s time to configure our Scanner or Spider Options. Right click on the target within the sitemap and select “Scan.” Burp will present the screen below, requiring that you configure appropriate “Scan details.” From this screen, you are able to determine whether you want to Crawl (Spider) or Audit (Scan) your target for resources and vulnerabilities. As shown below, we selected both a crawl and an audit of the resources discovered within the URL:
- We then configure our “Scan configuration,” allowing us to select a proper template for either an audit or scan or both
These template options allow you to determine the intensity and duration of your scan or audit.
If you don’t want to go with the templates provided, you can also select a “New” configuration where you can manually specify drilled-down options — for instance, determining Crawl Limits and Crawl Optimization settings:
If you decide to manually configure your options, remember to have “URL path filename” and “URL path folders” since we will be working with REST calls. Also, check “URL to body” and “Body to URL” so that we can be able to check whether any POST requests can be sent as GET requests. See below:
Once you launch your scan, Burp 2.0 includes a new dashboard which you can use to visualize and manage your scans as they run. Using the dashboard, you can now pause and resume individual scans, see descriptions of issues found in real-time and even monitor the event log of the different running scans.
See the dashboard in action below:
Attacking the OWASP juice shop lab
Juice Shop is intended to be a vulnerable Web application. It has multiple classes of vulnerabilities and a scoreboard where challenge scores are recorded to help you keep track of what you have solved. These are all classified according to their level of difficulty. The chart below is from the developer, showing the vulnerability categories tested in the application:
Let’s now discuss BurpSuite’s features: the Intruder, Repeater and Decoder.
Burp Intruder
Burp Intruder is used to automate repetitive tasks such as checking for SQLi. To check for SQLi, we shall click on the Login button on the top bar on our juice shop. On our login form, we input dummy credentials and proceed to examine the HTTP history. We decided to enter admin@gmail.com as the username and pass123 as the password.
The screenshot below shows the request that was sent to the server.
Notice at the bottom we have the credentials we fed into the application. We right-click on the request at the bottom and “Send to intruder.” Now navigate to the “Intruder” tab and “Positions.” Here you will see the email and password highlighted. This means that Burp Intruder is trying to identify the injection point for the SQLi payloads.
Hit “Clear” on the right-hand side, then double-click on the email address (admin@gmail.com) and hit “Add.” It should now be highlighted and padded at the beginning and end as shown:
We shall then navigate to the “Payloads” tab and hit “Load.” What we are doing now is loading a payload list for use in detecting for SQLi. For this demonstration, we are using the payload list xplatform.txt from FuzzDB.
Finally, scroll down and un-check the option “URL-encode these characters,” since these characters are actually used during checks for SQLi. See below.
Once you are done with all these configurations, hit “Start attack.” Once the attack has run, check the results and monitor the response status codes.
As can be seen above, the payloads anything’ OR ‘x’=x and a’ or 1=1– are among those that returned a status code of 200. This means the request was accepted, and we logged in as the admin. Examining the response shows an authentication token and admin email address, as highlighted below.
This means that if we use the payloads that returned the status code 200, we stand a chance of being able to log in as an admin. Sure enough, using username a’ or 1=1– and any password, we are able to log in:
Burp Repeater
Burp Repeater allows you to resend requests in order to monitor the behavior of the application based on specific requests. A good way to see this in action is by testing for the same SQLi above but using different payloads.
- From the “HTTP history” tab, find the POST request that was submitted during our successful login (or any login for that matter). Ours is shown below:
- Right-click on the request and “Send to Repeater.” Your “Repeater” tab should resemble ours as shown below:
- We can now attempt different payloads, replacing a’ or 1=1– with each of the following. All seemed to return a status code of 200:
anything’ OR ‘x’=’x
a’ OR 3=3--
a’ OR ‘a’=a’--
‘ or 1 --’
‘ or 1/*
‘ or 1=1 /*
‘ or username like char(37);
Sure enough, all the payloads we used above were accepted by the server, and we are logged in as admin.
Burp Decoder
Burp Decoder is a very simple yet useful functionality that allow us to encode and decode URLs, ASCII, Octal, Binary, Hex, HTML and even hashes such as Base64.
For instance, the hash b3dhc3AganVpY2Ugc2hvcA== can be decoded using Burp Decoder. It decodes to owasp juice shop. See below:
This can really come in handy, especially during a pentest or bounty-hunting exercise where time is of the essence.
Conclusion
This has been a hands-on article, discussing BurpSuite features while experimenting with the OWASP Juice Shop vulnerable Web application. This article has covered the common basic features of Burp but has in no way exhausted them all. Burp is capable of really advanced features, thanks to its Extender feature that allows third-party scripts to be written and loaded into Burp for extended functionality such as automating attacks. Nevertheless, the features discussed make Burp one of the most common tools pentesters.
Sources
- OWASP Juice Shop Project, OWASP
- Pwning OWASP Juice Shop, Björn Kimminich
- juice-shop, GitHub

