- Manuals
- Brands
- ChamSys Manuals
- DJ Equipment
- MagicQ
- User manual
-
Contents
-
Table of Contents
-
Troubleshooting
-
Bookmarks
Quick Links
ChamSys Ltd
www.chamsys.co.uk
MagicQ User
Manual
Patching, Programming and Playback of shows using
Generic Lighting, Moving Lighting, LED and Media
Servers.
MagicQ User Manual
1
Version 1.4.9.0
Related Manuals for ChamSys MagicQ
Summary of Contents for ChamSys MagicQ
-
Page 1
ChamSys Ltd www.chamsys.co.uk MagicQ User Manual Patching, Programming and Playback of shows using Generic Lighting, Moving Lighting, LED and Media Servers. MagicQ User Manual Version 1.4.9.0… -
Page 2
MagicQ User Manual VERSION 1.4.9.0 This manual is designed for operators of the MagicQ lighting console to help them quickly and effectively learn how to use the console. It has been written by lighting designers for lighting designers. The reader is assumed to have a basic familiarity with the concepts of lights and lighting control systems. -
Page 3
ChamSys Ltd will not accept goods back for repair if the serial number sticker is removed or defaced so that it is illegible. This also applies to warranty repairs. See terms and conditions of sale for full details. -
Page 4: Table Of Contents
TABLE OF CONTENTS Introduction ……………………….18 Which console model? …………………… 18 DMX512 and Art-Net outputs ………………… 19 Care of your MagicQ console …………………. 19 Safety Information ……………………19 Console Concepts ……………………..21 Show Storage ……………………..21 Output channels ……………………… 21 2.2.1…
-
Page 5
Saving Your Show ……………………51 4.20 Playing Back Your Show ………………….51 Patching …………………………. 52 Patching on the MagicQ ………………….52 Getting started with patching ………………….. 52 Testing channels …………………….. 52 Patching a head or dimmer ………………….53 Head names and numbers ………………….54 5.5.1… -
Page 6
Updating Palettes ……………………. 87 Copying and moving Palettes …………………. 88 Removing attributes from Palettes ………………..88 Viewing / Editing Palette contents ………………..88 Modifying Palettes in the personality ………………89 Grabbing Palettes from DMX input ……………….. 89 MagicQ User Manual Version 1.4.9.0… -
Page 7
The Halt field ……………………110 13.3.3 Cue Delay and Fade times ………………..110 13.4 Tracking ……………………….. 110 13.4.1 Tracking on the MagicQ ………………..111 13.4.2 Viewing Cue Data and Tracking Data …………….112 13.4.3 Copying Cues in tracking mode ………………112 MagicQ User Manual… -
Page 8
Faders ……………………….130 16.1.1 Fader activates stack ………………….130 16.1.2 Fader releases stack ………………….130 16.1.3 Fader controls HTP chans ………………..131 16.1.4 Fader controls LTP (IPCB) chans ………………131 16.1.5 Fader controls FX size ………………….. 131 MagicQ User Manual Version 1.4.9.0… -
Page 9
Audio jumps to Cue Step ………………..141 16.8.5 Audio channel ……………………141 16.8.6 Audio level, Audio parameter 1, Audio parameter 2 …………141 16.9 Step (View Defaults only) ………………….142 16.9.1 Step controlled as a chase ………………..142 MagicQ User Manual Version 1.4.9.0… -
Page 10
Status Window……………………152 18.12 Editing Heads ……………………152 18.13 Backup Archives ……………………152 18.14 Using shows on different MagicQ products and show versions ……….152 18.14.1 Configuring number of Universes …………….. 153 18.15 MagicQ profiles ……………………153 18.16 Changing MagicQ Console Software ………………153 18.17… -
Page 11
MQ PRO Consoles Direct Outputs ………………159 19.3.9 ChamSys Twin DMX Interfaces ………………159 19.3.10 ChamSys MagicDMX Interfaces ………………. 159 19.3.11 Using the MagicQ wing DMX512 outputs …………..160 19.3.12 Hot take-over ……………………. 160 19.3.13 Testing Output Universes ………………..160 19.3.14 Copying Output Universes ……………….. -
Page 12
Wireless subnet address ………………..180 19.12.14 Wireless channel ………………….180 19.12.15 Wireless SSID ………………….. 180 19.12.16 Wireless encryption ………………….. 180 19.12.17 Wireless key ……………………181 19.13 Port Settings……………………… 181 19.13.1 MagicQ USB Wings and Interfaces …………….181 MagicQ User Manual Version 1.4.9.0… -
Page 13
19.23 Locking the console ………………….. 188 19.24 Button test mode ……………………188 19.25 Power Supply Protection ………………….. 188 Using MagicQ on PCs and Macs ………………..189 20.1 Simple Generic Console ………………….189 20.2 Technician Test Fixture ………………….190 20.3 Demo Shows ……………………..191 20.4… -
Page 14
Using text strings ………………….. 221 25.3.9 Text display modes ………………….221 25.3.10 Manipulating bitmaps and text ………………222 25.3.11 MagicQ Pixel Mapping FX (Beam Page 3) …………..223 25.3.12 Mixing between pixel mapping layers …………….226 MagicQ User Manual Version 1.4.9.0… -
Page 15
Automated retrieval of thumbnails ………………236 26.5 Live Previews ……………………..236 26.6 Media Window View …………………… 237 26.7 Using MagicQ and Media Server software on the same PC …………. 237 26.7.1 Using the loopback IP address………………. 237 26.7.2 Using Microsoft Loopback Adapter ……………… 237 26.8 Troubleshooting ……………………. -
Page 16
Connection (MagicQ Consoles and MagicQ MaxiWing) …………290 36.3 Enabling the remote input in MagicQ ………………291 Sound to light (audio input) ………………….292 Using MagicQ to control remote video switchers and mixers …………292 Using MagicQ with Visualisers ………………… 294 39.1 Connecting the systems ………………….294 39.1.1… -
Page 17
Enabling MagicQ to output WYSIWYG data …………….300 39.6.1 Running WYSIWYG ………………….301 39.6.2 Running the show! ………………….301 39.6.3 Using MagicQ PC and WYSIWYG on the same PC …………301 39.6.4 Auto Patch ……………………. 302 39.6.5 Auto Focus……………………. 302 39.6.6 Troubleshooting ……………………. -
Page 18: Introduction
The MagicQ operating environment supports 202 playbacks in total – which can be all be accessed either through physical playbacks or through the touch screen. The different models in the MagicQ have different numbers of physical playbacks and buttons, which enables the size of console to be matched to the show.
-
Page 19: Dmx512 And Art-Net Outputs
MagicQ PC supports the same functionality and user interface as the physical consoles making it easy to move between the two products. MagicQ PC can also be used to run complete shows, either as a back-up to the main console or as console in its own right.
-
Page 20
Do not use the console if the power cables are damaged in any way. Repairs should only be undertaken by authorised service representatives. If liquids are spilt over the console then remove power immediately, and seek advice from your authorised service representative. MagicQ User Manual Version 1.4.9.0… -
Page 21: Console Concepts
Some consoles offer a patching facility to allow multiple DMX channels to be patched onto one fader – but these DMX channels can then not be controlled independently. The MagicQ console allows control of all DMX channels individually, whilst utilising grouping and programming functions to enable control of multiple heads or dimmers together.
-
Page 22: Htp / Ltp Channels
The Cue stores FX information for each of the FX that has been recorded into the Cue. The FX information includes the type of FX, the heads that the FX is applied to, and the FX parameters for each head. MagicQ User Manual Version 1.4.9.0…
-
Page 23: Cue Stacks
The console contains a powerful engine for creating special effects (FX). FX can be applied to a group of heads at the touch of a button; there is no need to program lots of different Cues to create the effect. Special MagicQ User Manual Version 1.4.9.0…
-
Page 24: Window Layouts
2.9 Shift Functions The MagicQ lighting console uses SHIFT and CTRL buttons to enable access to advanced features. There is a SHIFT button and a CTRL button adjacent to the top corners of the touch screen in addition to the keys on the keyboard.
-
Page 25: Help
CONTENTS or QUICK START. You can search through the manual by typing some text and pressing SEARCH. To search for the same words again, press SEARCH AGAIN. MagicQ User Manual Version 1.4.9.0…
-
Page 26: Magicq Console Layout
The picture below shows the connections on a MQ100 Pro 2010 console. The MQ200 Pro 2010 and MQ300 Pro 2010 have the same connectors with the addition of extra console lamp sockets. The expansion module slots can be fitted with MagicQ expansion modules such as the twin DMX512 output module, and other future expansion modules.
-
Page 27: Plugging Up
The Pro 2010 consoles support USB keyboards and mice. 3.3 DMX Connections The MagicQ Pro and Pro 2010 series of consoles have 4 direct DMX outputs on the rear of the panel so you can connect your DMX cables direct to the console.
-
Page 28: Powering Up
To reset the console, press SETUP to go to the Setup Window and press SHIFT and QUIT. This performs an immediate soft reset of the console — the MagicQ application will be running the show again within about 2-3 seconds.
-
Page 29: Console Layout
ChamSys Ltd www.chamsys.co.uk 3.7 Console Layout All MagicQ consoles are very similar — they differ only in the number of playback faders. The programming interface is consistent across the entire range of consoles. Window select buttons Touch screen & encoders…
-
Page 30: Touch Screen & Encoders
At the top left and top right of the touch screen there are SHIFT and CTRL buttons. Pressing theses buttons selects alternate functions for the soft buttons and encoders. MagicQ User Manual Version 1.4.9.0…
-
Page 31: Windows
PG UP, PG DN, PG LEFT and PG RIGHT can be used to scroll the window in the appropriate direction. HOME and END can be used to get to the start and end of the window respectively. MagicQ User Manual Version 1.4.9.0…
-
Page 32: Head Control
The NEXT HEAD and PREV HEAD buttons are used to select an individual head to modify. The other buttons control the selection mode; LOCATE, HIGHLIGHT, FAN, SINGLE, ODD/EVEN, and ALL. MagicQ User Manual Version 1.4.9.0…
-
Page 33: Editor Buttons
Playback for taking control of Cue Stacks. The cross fade section contains a GO, STOP. FWD, BCK buttons, a cross fader and a master GO button. The cross fade section controls the current playback selected with the S button. MagicQ User Manual Version 1.4.9.0…
-
Page 34: Keyboard, Keypad, Select & Confirm Windows
3.8 Keyboard, Keypad, Select & Confirm Windows MagicQ has a set of on additional on-screen Windows that can be used to enter text, select items and confirm actions. You can choose whether you use the physical keyboard/keypad to navigate around these items or whether you use the mouse/touch.
-
Page 35: Naming Items
When copying Cues, Cue Stacks or Pages the console by default does not make individual copies of the Cues — the Cue Stacks link to the same Cues. To copy unlinked (i.e. to create new Cues) then press SHIFT and COPY in the above sequence. 3.9.6 Removing items MagicQ User Manual Version 1.4.9.0…
-
Page 36: Recording Items
To include the contents of a Playback into the Programmer, press INCLUDE, then press the SELECT button for the destination Playback. To remove a Playback, press REMOVE, then press the SELECT button for the Playback. Press the SELECT button again to confirm the remove. MagicQ User Manual Version 1.4.9.0…
-
Page 37: Quick Start
Calibration works by finding the bottom left and top right corners of the screen. First press the bottom left of the touch screen and then the top right. You may wish to use a fine but blunt object. MagicQ User Manual Version 1.4.9.0…
-
Page 38: Starting A New Show
Starting a show clears all patching, all programming and all palettes. It does not clear console specific options such as the configuration of the DMX outputs or the calibration of the touch screen. MagicQ User Manual Version 1.4.9.0…
-
Page 39: Enabling Console Outputs
1.3.4.5 then you will need to configure the outputs manually. For each of the Universes you wish to output on the rear panel, select Out Type as “MagicQ Direct” and Port 1, Port 2, Port 3 and Port 4.
-
Page 40: Using Artnet And Artnet To Dmx Interfaces
In most networks the ArtNet sub-net is set to 0 (you can change this on MagicQ in the DMX I/O View of The Setup Window by paging right). The ArtNet universe is the same as the Universe set in “Out Uni” and “In Uni”…
-
Page 41: Connecting External Monitors
4.6.1 Pro 2010 (ProX) Operating System On MagicQ consoles running the Pro 2010 operating system there is support for 2 external monitors with resolution up to 1440×900. These monitors can be touch screens. External monitors must be powered and connected when the console powers up in order to be detected correctly.
-
Page 42: Patching
You will be prompted for the number you wish to prompt and the address where you wish to patch the heads. Use @ to patch at a specific address. For example to patch 5 Mac250 mode 4 to Universe 2 channel 1 enter MagicQ User Manual Version 1.4.9.0…
-
Page 43: Naming And Numbering Heads
For heads it locates the fixture; for dimmers it sets the dimmer to 100%. Press the TEST MODE soft button again to turn test mode off. MagicQ User Manual Version 1.4.9.0…
-
Page 44: Controlling Heads
Selecting Heads In order to control intelligent heads it is necessary to be able to select which heads to use. The MagicQ console keeps track of the currently selected heads to enable it to determine which heads to apply changes to. The operator can select head individually or can use groups to recall configurations of heads that are used frequently.
-
Page 45: Recalling A Group
Pressing SQUARE OFF finishes the job by setting all channels that are less than 50% to 0 whilst setting channels above 50% to full. Use the ALL TO FULL and ALL TO ZERO buttons to change the level of all the channels. Press the CLEAR soft button to clear the programmer. MagicQ User Manual Version 1.4.9.0…
-
Page 46: Locating Heads
Attributes are categorised into four types – Intensity, Position, Colour and Beam. On the MagicQ there is a window for each of these attribute types. Select the required heads, then open the required window.
-
Page 47
In the Colour Window pressing the COL MIX / COL ATTRIBS button changes to the colour picker. Press COL TYPE to select standard colours, Lee colours, Rosco colours or HIS model. MagicQ User Manual Version 1.4.9.0… -
Page 48
ChamSys Ltd www.chamsys.co.uk MagicQ User Manual Version 1.4.9.0… -
Page 49: Recording A Palette
To view a recorded Cue, press the SELECT button for the Playback, and then press CUE to open the Cue Window. To configure options when recording, press SHIFT + RECORD and a toolbar of record options will be displayed. Choose the options you require then press the SELECT button of the Playback as above. MagicQ User Manual Version 1.4.9.0…
-
Page 50: Recording A Cue Stack (Chase Or Theatre Stack)
The timing mode can be changed, so that the Cues play back in a theatre style using the GO / STOP buttons. Select the VIEW OPTIONS view and press the CUE TIMING and CHASE TIMING soft buttons to modify the timing mode. MagicQ User Manual Version 1.4.9.0…
-
Page 51: Selecting And Recording Complete Window Layouts
4.19 Saving Your Show The MagicQ utilises a large hard disk to enable storage of a virtually infinite number of shows. When you are programming a show the show is stored in memory. In order to store your show on the disk you need to press the SAVE SHOW soft button in the Setup Window.
-
Page 52: Patching
– but these DMX channels can then not be controlled independently. The MagicQ console allows access to all DMX channels on all the DMX universes supported on the console. Each channel can be controlled and programmed independently giving superior flexibility.
-
Page 53: Patching A Head Or Dimmer
ENTER. In this way you can modify DMX address, head number, head name and gel for each of your patched heads. MagicQ User Manual Version 1.4.9.0…
-
Page 54: Head Names And Numbers
BY DMX. This will configure the head number for all patched heads to be the DMX channel address of the head. You can then select heads and set intensities using the DMX channel numbers. MagicQ User Manual Version 1.4.9.0…
-
Page 55: Gel Name And Number
Minimum levels can be useful to force a minimum light level on a stage, for example during a changeover. 5.9.1 Limits and Offset. It is possible to set limits and offsets on channels using the Limit and Offset dimmer curves. MagicQ User Manual Version 1.4.9.0…
-
Page 56: Dimmer Curves
When a channel value exceed 255 then it wraps back to 0. 5.10 Dimmer curves MagicQ supports 10 user dimmer curves that can be selected in the Patch Window, View Chans view. User dimmer curves are specified in files of format csv (comma separated variable) with filename dimmercurveuser1.csv, dimercurveuser2.csv etc……
-
Page 57: Patching A Head To Multiple Dmx Addresses
Use the “generic dimmer” personality for the dimmer and the “generic scroller” personality for the scroller. MagicQ has enhanced support for scrollers, so that the colour scroll channel can be tied up with the dimmer channel in one head.
-
Page 58: Editing Head Personality
The Generic Scroller With Dim is set up as a “Virtual” personality – i.e. the channels in the personality can be patched to any location on MagicQ – unlike normal personalities where the channels are sequential from the DMX start address. In the View DMX view, the DMX address fields are used to specify the addresses for each channel in the virtual personality –…
-
Page 59: Copy Head Programming
If the new head types have more channels than the original head types then MagicQ morphs the heads but leaves them unpatched – the user must then repatch the heads at a suitable location.
-
Page 60: Exporting Heads
The console supports comprehensive merging of data from each of the 18 input and output universes. Any output channel can be set to output data from any received input channel, or to merge the two. MagicQ User Manual Version 1.4.9.0…
-
Page 61: Customising Locate Values And Default Values
5.22 Customising Locate values and Default values MagicQ allows the user to define the Locate and Default values for each attribute of each patched heads. The Locate values are the values that are used when the Locate button is pressed. The Default values are the values that are output when a channel is not in the programmer and no playback is controlling a channel.
-
Page 62: Theatre Patch Syntax
Cue. 5.23 Theatre Patch syntax MagicQ supports a Theatre Patch option which changes the syntax used for patching to simplify patching (and re-patching) of large numbers of dimmers. The option is enabled in Setup,View Settings, Keypad, Keypad Syntax Theatre Patch. When this option is set to “yes”…
-
Page 63: Setting Dimmer Levels
Press SHIFT and SQUARE OFF to invert the faders — all channels less than 50% go to 100% whilst all channels above 50% go to 0%. Press the CLEAR soft button to clear the programmer. 6.2 Using the encoders MagicQ User Manual Version 1.4.9.0…
-
Page 64: Using The Keypad
2 digit level. The console knows that you are setting an intensity due to the @ key. Valid levels are 0% to 100%. On MagicQ PC you can use > to indicate THRU and # to indicate FULL. 6.3.1 Setting fade times from the keypad Fade times for intensity channels can be entered from the keypad.
-
Page 65: Using Selected Heads
Type in the name on the external keyboard and then press the SET NAME soft button. b) Press SET, then type in the name on the screen keyboard. Then press the SET NAME soft button. MagicQ User Manual Version 1.4.9.0…
-
Page 66: Programming Of Dimmers Using Gel Colours
Faders in both the Programmer and Presets Views are affected by the level of the Grand Master. They are also affected when a SWAP button is pressed — any HTP channels in the Programmer or the Presets View will be reduced to zero. MagicQ User Manual Version 1.4.9.0…
-
Page 67: Viewing Intensities In The Outputs Window
The Outputs Window includes a View for showing the intensities of all patched channels in a theatrical manner with channels and percentages. Open the Outputs Window by pressing the Out button and select the View Chans soft button. MagicQ User Manual Version 1.4.9.0…
-
Page 68: Controlling Intelligent Heads
In order to control intelligent heads it is necessary to be able to select which heads to use. The MagicQ console keeps track of the currently selected heads to enable it to determine which heads to apply changes to. The operator can select heads individually or can use groups to recall configurations of heads that are used frequently.
-
Page 69: Recording A Group
This is different to some other consoles which primarily use the keypad for selection of heads. On MagicQ it is possible to select heads directly form the keypad at any time by entering the head numbers terminated by @@.
-
Page 70: Selecting Heads On The Keypad Without
At any time you can select all of the heads of a particular type (regardless of head no) by selecting one of the heads and then using SHIFT ALL 1 @@ SHIFT ALL Note that on MagicQ PC you can use > to indicate THRU. @@ 0 deselects all heads. 7.3.2 Selecting heads on the keypad without @@ It is also possible to set the Setup Option “Keypad always select head”.
-
Page 71: Locating Heads
Attribute types is a powerful way of categorising attributes. Attributes are categorised into four types – Intensity, Position, Colour and Beam. On the MagicQ there is a window for each of these attribute types. Select the required heads, then open the required window.
-
Page 72: Using Attribute Banks
CTRL and the FX (was ATTR) button to open the Attribute Window. On the MagicQ console the attribute banks are supported through the Attribute Window. In this Window the top soft buttons are used to select the attribute bank. The leftmost soft button toggles between the two possible pages of attribute banks.
-
Page 73: Using A Mouse Or Track-Ball To Control Pan And Tilt
Press again to return to normal mode. Support for this function is only available on MagicQ consoles and when connected to a MagicQ PC Wing or MagicQ MaxiWing. It is not available when connected to MagicQ MiniWing or MagicQ USB interface as these products do not have X and Y encoders.
-
Page 74: Single Mode
By default changes are applied to all the selected heads. On MagicQ you first select the overall selection of heads you want to control using Groups or keypad selection, then you use the head control buttons to sub-select within that overall selection.
-
Page 75: Changing Overall Selection Order
Sub selection of heads from Groups / Overall Selection When you select heads using Groups or the keypad, MagicQ then enables the operation on a sub selection of the main selection using the Next Head, Prev Head, Odd/Even, and All buttons. This enables the user to select a group of heads and work on heads individually without reselecting the heads.
-
Page 76: Reselecting Heads Using Palettes And Intensities (Active Palette And Intensity)
When you press and hold FAN you get a toolbar on the screen that gives you direct access to fanning options. On MagicQ PC you can press SHIFT + FAN to bring up the FAN toolbar. MagicQ User Manual…
-
Page 77: And Only
Note that if the option “Select heads and palettes from keypad” is set to “No” – then the ** operator must be used to select groups from the keypad: 1 * 2 * * 1 THRU 4 * 5 THRU 8 * * 1 * 3 * * @ FULL ENTER MagicQ User Manual Version 1.4.9.0…
-
Page 78: Fx Engine
To apply a FX to some heads, select the heads then from the FX Window, Group Window, or Prog Window press the ADD FX soft button. MagicQ lists all of the stored “Waveform FX”. Choose the FX to apply. You can apply multiple FX to a head, provided that the FX uses different attributes — e.g. you can mix a Pan Sine with a Tilt Sine.
-
Page 79: Fx Base Values
Minus subtracts the FX from the current base – i.e. the level will never be greater than the base. Abs (absolute). MagicQ ignores the base value for the FX and simply outputs the FX value. This is useful for absolute position FX and for colour change FX.
-
Page 80: Fx Spread (Offsets Over Heads)
FX. FX Segments are the number of adjacent heads that have the same offset. So for example consider 12 heads. With 100% FX spread then without FX parts or FX Segments you get: With FX Segments = 2’s MagicQ User Manual Version 1.4.9.0…
-
Page 81: Fx Direction & Inversion
Inverts change the polarity of the FX waveform rather than reversing the direction. For simple FX Waveforms of 1 or 2 steps the resulting FX will be identical. For FX waveforms with more than 2 steps, they will be different. MagicQ User Manual Version 1.4.9.0…
-
Page 82: Pulse Width
FX. Configure this from the Programmer Window and the Cue Window (use the PAGE RIGHT button to move to the appropriate columns). Both a coarse and a fine spread can be configured. 8.1.10 Flicker FX MagicQ User Manual Version 1.4.9.0…
-
Page 83: Multiple Fx
FX. If the selected heads are the only heads in the FX then no change is made to the FX. When Join FX is pressed MagicQ analyses all the FX in the programmer and joins any similar FX of the same type together.
-
Page 84: Changing Fx
Note that FX in software prior to v1.4.0.3 only three attributes were supported in Waveform FX – the first three attributes programmed in the chase were used in the FX. Use Record Remove to remove unwanted attributes from entire Cue Stack. 8.3 Editing user FX MagicQ User Manual Version 1.4.9.0…
-
Page 85: Palette Fx
The FX in the FX Window can be stored to a FX library file so that the FX can be reloaded and reused in any MagicQ show. Use the SAVE FX LIB to make a FX library file – all the FX in the FX window are stored to the file.
-
Page 86: Palettes
9 Palettes The MagicQ supports a comprehensive palette system for easy access to your favourite looks. When intelligent heads are patched, the console automatically generates palettes for the patched heads. There are three types of palettes corresponding to Colour, Beam and Position. Each palette supports up to 1000 different entries.
-
Page 87: Recording Individual Attributes Into A Palette
A palette can be updated simply be selecting some heads, applying the palette and then re-recording the palette. Only the heads that are selected when you re-record the palette will be modified in the palette — other heads recorded in the palette will not be changed. MagicQ User Manual Version 1.4.9.0…
-
Page 88: Copying And Moving Palettes
You can remove values, entire heads, or entire attributes from the palette entry using the REMOVE button. The View Palette, View Used window can be used to determine how many times Palettes have been used within a show. MagicQ User Manual Version 1.4.9.0…
-
Page 89: Modifying Palettes In The Personality
Typing 0 THRU 3 before selecting a position causes the heads to move to the position with a spread of 3 seconds — i.e. the first head moves immediately whilst the last head takes 3 seconds. MagicQ User Manual Version 1.4.9.0…
-
Page 90: Using Fan
9.12 Selecting Palettes from the keypad You can select palettes from the keypad. Set the Setup Option, “Select channels in Beam, Col, Pos” to yes (default in theatre mode). To select a palette use: COL 5 ENTER MagicQ User Manual Version 1.4.9.0…
-
Page 91
COL 5 / 4 * ENTER It is possible to record, include and remove Palettes from the keypad: RECORD GROUP <group number> ENTER RECORD POS <palette entry> ENTER RECORD COL<palette entry> ENTER RECORD BEAM <palette entry> ENTER MagicQ User Manual Version 1.4.9.0… -
Page 92: Programmer
10.2 Clearing the programmer To clear the Programmer press CLEAR. All channels will be deactivated and all HTP channels will be set to zero. It is possible to force all LTP channels to zero by using CTRL CLEAR. MagicQ User Manual Version 1.4.9.0…
-
Page 93: Activation By Channel Or By Head
HTP channels will remain at zero. MagicQ also supports “IPCB”, “IPC” and “Col”. These group similar parameters together, so for example if you touch a colour attribute or the colour attributes are loaded into the programmer. “IPCB” means all Intensity, Position, Colour and Beam attributes work in this way, whereas “IPC”…
-
Page 94: Levels
Advanced. View Simple is used for simple changes to times including entering split times across the selected heads. View Advanced is used for editing attribute times for a particular head one by one. 10.5.1 View Simple MagicQ User Manual Version 1.4.9.0…
-
Page 95: View Advanced
It is possible to set individual times on a per attribute view – but you must have some heads selected for this to work. Use Remove to remove delay and fade times from heads – the times will be removed and MagicQ will use the General Times for these heads.
-
Page 96: Recording To A Specific Cue Id
“Snap at end” – always snaps at end of fade Note that on software versions before v1.3.4.4, when programming advanced times, MagicQ always performed a fade time regardless of the Instant attribute in the Personality. In v1.3.4.4 and above MagicQ defaults to fading according to the Instant attribute.
-
Page 97: Record Short Cuts
If no heads are currently selected then it uses the first active head in the programmer. Masking can be selected quickly by holding Intensity, Position, Beam or Colour and pressing RECORD for recording only the selected attributes. 10.8.3 Options MagicQ User Manual Version 1.4.9.0…
-
Page 98: Active
Record options return to the defaults once a Cue is recorded. 10.9 Active MagicQ has an Active function for loading attributes into the programmer at their current value. This can be used to ensure that the programmer contains all the attributes of the selected heads, or to add in individual attributes to the programmer.
-
Page 99: Copy Between Heads
PARK to unpark channels. All attributes of selected heads that are in the programmer are parked/unparked. To make all the attributes of the selected heads active, go to the Programmer Window and press SHIFT and ACTIVE. MagicQ User Manual Version 1.4.9.0…
-
Page 100
ChamSys Ltd www.chamsys.co.uk Parking persists over console shutdowns and resets. Parking information is stored in the show file. Parking forces HTP values to the parked value regardless of other playbacks (In Group window, SHIFT + ACTIVE). MagicQ User Manual Version 1.4.9.0… -
Page 101: Outputs Windows
11 Outputs Windows On MagicQ you can view the Outputs in many different ways. MagicQ supports up to 4 different Output Windows. This allows four different output views to be viewed simultaneously. Press the Out button to open the main Output Window. Press 2 and then Out to open the second Output Window, 3 + Out for Output Window 3 and 4 + Out for Output Window 4.
-
Page 102: Dmx Channels View
The movement view shows the relative positions of heads in terms of pan and tilt range on a 2D map. It also shows the current colour of the heads. This enables previewing of FX and relative positions without the lighting rig. Press the VIEW CHANS, VIEW DMX, VIEW MOVE soft buttons. MagicQ User Manual Version 1.4.9.0…
-
Page 103: Plan View
It is possible to create a rig plan in the Outputs window, so that you can easily identify the levels and colours of your moving lights based on their position in the lighting rig. The model of the rig in MagicQ consists of a grid — each cell can be assigned to a particular head number.
-
Page 104: Selection Of Heads In Outputs Plan View
For other plans where head numbers are packed into the grid with no blank spaces – e.g. LED arrays, it is still possible to use this method but the grid must have blank spaces around the edges of the grid. MagicQ User Manual Version 1.4.9.0…
-
Page 105: Editing Cues
Both channel information and FX information is included into the programmer. To snapshot the current output, open the Programmer Window and press the Snapshot soft button. There is a shortcut for recording a complete snapshot — hold THRU and press REC. MagicQ User Manual Version 1.4.9.0…
-
Page 106: Editing Using Include And Update Method
Hold ‘-‘ and press REC for REC REMOVE 12.4.1 Changes to multiple Cues using keypad MagicQ supports record merging / record removing to a range of cues using the keypad – for example, to merge into Cue ids 2 through 4: RECORD MERGE 2 THRU 4 S This function also works for the shortcuts –…
-
Page 107: Editing Using Update
Update. When using a tracking Cue Stack, MagicQ will show all the Cues that have been overriden in the Stack – hence you can make an update even if the attributes were used in a previous Cue on that Cue Stack.
-
Page 108: Cue Stacks
Cue to another. By default the Cue Stack operates like a chase — i.e. each Cue is executed in turn, with timing being handled by a Chase Speed for the whole Cue Stack. MagicQ User Manual Version 1.4.9.0…
-
Page 109: Cue Timing
When using Cue Timing, the timing of each cue is determined by individual Wait, Delay and Fade times for each Cue in the Cue Stack. The MagicQ can execute multiple Cues at one time — for example a Cue Stack could have one Cue that fades in MAC500s in green whilst another Cue fades in HPEs in red.
-
Page 110: The Halt Field
13.4 Tracking By default the MagicQ works in a similar way to most traditional lighting consoles, in that what is in the programmer is recorded into the Cue. This is a «no nonsense» mode where you get what you expect recorded into your Cues.
-
Page 111: Tracking On The Magicq
The MagicQ has a significant amount of in-built memory and a multi Gigabyte disk, so show size is not a major concern. The MagicQ also has powerful editing modes that enable changes to be made to multiple Cues simultaneously –…
-
Page 112: Viewing Cue Data And Tracking Data
Cue Stack, the first Cue will be copied entire state with the following cues being just the changes. If Cues are copied linked in tracking mode then they will always be just the change values not the entire state. MagicQ User Manual Version 1.4.9.0…
-
Page 113: Blocking / Unblocking Cues
Cue Stack Window (page right) and is only relevant when using tracking mode. MagicQ enables one or more Cues to be marked as Cue Only – when MagicQ moves on to the next Cue which is not set to “Cue Only” then it reverts to tracking the Cue Stack from before the “Cue Only” cues.
-
Page 114: The Cue Store And Cue Stack Store
Cue Stack. The result of this simplification is that when a Mark Cue is executed in a Cue Stack, MagicQ will take control of the parameters used in the Marked Cue from other Cue Stacks even though the Cue is not yet executed.
-
Page 115: Assigning Cues And Cue Stacks
13.11 Removing Cues and Cue Stacks Cues can be removed from a Cue Stack by opening the Cue Stack window, then pressing REMOVE and selecting the Cue you wish to remove by pressing in the “Status or Cue Id” field. MagicQ User Manual Version 1.4.9.0…
-
Page 116: Cue Stack Defaults
Cue Stacks and Cues are recorded. When inserting and adding Cues to a Cue Stack it is possible to determine whether MagicQ uses the default settings or derives the settings from the previous Cue in the Cue Stack. The option is set in Setup, Cue Storage Settings, “Derive settings from previous Cue”.
-
Page 117: Timeline
Cue Stack + 1 second. 13.14 Timeline MagicQ supports a timeline facility for viewing the contents of Cues in a Cue Stack in a timeline format. Open the Timeline Window using the Timeline Button (on consoles this is the 4 spare button next to the Media button).
-
Page 118: Playback
Pressing SHIFT + RELEASE releases all playbacks simultaneously. It is also possible to enter a time before doing SHIFT +RELEASE. Holding a single SELECT button and pressing SHIFT + RELEASE releases all the playbacks except the one for which the SELECT is held. MagicQ User Manual Version 1.4.9.0…
-
Page 119: Fader Control
As the fader is moved up the LTP channels are changed from their current values to the values recorded in the Cue. MagicQ supports an additional option “All chans controlled LTP”. This options allows the Playback when it is the last activated, to consider all channels to be LTP. The value of HTP channels controlled by the Playback is the value output, regardless of the HTP level of other Playbacks.
-
Page 120: Dead Black Out (Dbo)
The current playback is the one that has its SELECT button illuminated. The current playback is used by the Cue and Cue Stack windows to determine the Cue and Cue Stack to view / modify. MagicQ User Manual Version 1.4.9.0…
-
Page 121: Manual Control
Cue ID in the Cue Stack and press the Go button in the manual section. It is also possible to perform a Goto and a Preload of the next step to got to in the Cue Stack Window. MagicQ User Manual Version 1.4.9.0…
-
Page 122: Manual Split Cross-Fade
This ensures that shows that will be run on consoles with wings can be programmed on a PC with no wings. It also provides an ideal way of expanding your show control by using virtual playbacks. MagicQ User Manual Version 1.4.9.0…
-
Page 123: Testing Playbacks
Cues but with different chase speeds. You can force an unlinked copy of Cue Stacks by holding SHIFT down when you press the COPY button. This forces both the Cue Stack and its Cues to be copied. MagicQ User Manual Version 1.4.9.0…
-
Page 124: Removing Playbacks
Page 1 and then in the Playbacks Window set «Default Cue Stack» to «On» for the selected Playback. The Cue Stack on Page 1 then appears on any Pages which do not have a Cue Stack assigned. MagicQ User Manual Version 1.4.9.0…
-
Page 125: Set Lists
It is possible to save and load set lists in the Page Window. Set lists are simply text files with a list of page names. When the set list is loaded, MagicQ rearranges the pages so that they are in the order specified in the set list.
-
Page 126: Advanced Playback / Cue Stack Options
The “HTP always active (Use HTP)” has priority over the “All chans controlled LTP” option – therefore HTP channels on playbacks will be output regardless of any other higher priority faders with “All chans controlled LTP”. MagicQ User Manual Version 1.4.9.0…
-
Page 127: Ltp Handling
15.5 Interaction of FX between Playbacks By default, the FX and levels on MagicQ operate independently so it is possible to have a FX running on one Playback and the level (base values that the FX is applying to) coming from a separate Playback.
-
Page 128: Playback Priority
Stacks to be Intensity Masters, FX Speed or FX Size Masters it is not necessary to set Fader Activates Stack to No and Fader Releases Stack to No. MagicQ will ignore these settings and always activate only using the GO button and release using the RELEASE button.
-
Page 129: Intensity Masters
If required, the group associated with an Intenity Master can be changed in Cue Stack Options, Function. When a group number other than 0 is set in the Cue Stack Options, Function menu then MagicQ automatically edits and generates the Cue assigned to the first step in that Cue Stack. Ensure you set the group id on the correct Cue Stack.
-
Page 130: Playback Mode
MagicQ interface must be connected and powered on before MagicQ is started in Playback mode. In Playback mode MagicQ it is not possible to record or make changes to the show data. MagicQ will not save the show files / status files. Changes (e.g. change of chase speed) will be lost when the application is stopped and restarted.
-
Page 131: Fader Controls Htp Chans
When the fader is at 0% the LTP channels are not controlled by this Cue Stack. When the fader is raised above 0% then MagicQ crossfades the LTP channels to the values stored in the Cue under control of the fader.
-
Page 132: Fader Controls Fx Speed
Add/Swap button. When the button is pressed the Intensity of all other active Playbacks will be set to 0%. When the button is released the other Playbacks will be restored to their previous level. MagicQ User Manual Version 1.4.9.0…
-
Page 133: Flash Acts As Go/Back
This is useful for enabling the FLASH button to control attributes other Intensity. For example if the fader is set to control FX size then pressing the Flash button would act like the fader being fully raised – so 100% FX size. MagicQ User Manual Version 1.4.9.0…
-
Page 134: Go Jumps Out Of Loop
When the fader is at 100% then the Cue Stack has no effect. As the fader is lowered then all the channels under control have their intensity reduced. From software version 1.4.4.4 it is possible to have multiple Intensity Masters that control the same channel which work proportionately. MagicQ User Manual Version 1.4.9.0…
-
Page 135: Cue Stack Is A Size Master
Normally when this setting is set to Yes, the setting Cue Stack is an Intensity Master should be set to No. It is possible to have a Cue Stack set to both a Size Master and a Speed Master. When this setting is set to No then the Cue Stack behaves normally. MagicQ User Manual Version 1.4.9.0…
-
Page 136: Group Id
This setting can also be set in the End field in View Cue in the Cue Stack Window. 16.4.6 Activate on page change When set to Yes, then this Cue Stack is activated when the page is changed to the page that this Cue Stack is assigned to. MagicQ User Manual Version 1.4.9.0…
-
Page 137: Release
When set to Yes then the levels of HTP channels (generally Intensity) are affected by the grand master and sub master faders. Channels also are affected by DBO and can be released by SHIFT RELEASE. MagicQ User Manual Version 1.4.9.0…
-
Page 138: Playback Priority
Output of a particular Cue always appears the same regardless of which Cue was executed preciously. MagicQ recalculates the Output as if the Cue Stack had been played back from the first Cue to this Cue by pressing the GO button.
-
Page 139: External Timecode
Send playback state to other consoles When set to Yes then the state of this Playback is sent to other MagicQ consoles on the network. If the Setup, Multi Console setting “Send Playback state to other consoles” is set to Yes then the state of all Playbacks is sent to other consoles regardless of this Cue Stack setting.
-
Page 140: Number Of Repeats
The setting can be used in conjunction with the setting “Audio jumps to Cue Step”. The audio level, audio parameter 1, and audio parameter 2 settings can be used to fine tune how the received audio affects the fader level. 16.8.2 Audio bumps Go MagicQ User Manual Version 1.4.9.0…
-
Page 141: Audio Sets Bpm
Audio channel This setting specifies the audio channel that the Playback will respond to. The ChamSys audio interface supports 7 different frequency bands on two audio inputs (left and right). Selecting the option “Energy” uses all frequency bands mixed together.
-
Page 142: Step (View Defaults Only)
When set to Yes, any FX on channels from previous Cues that are not controlled by a FX in this Cue step have the FX faded out. In tracking modes this setting defaults to No. In non-tracking mode this setting defaults to Yes. The Tracking flag “F” corresponds to the inverse of this setting. MagicQ User Manual Version 1.4.9.0…
-
Page 143: Release Old Chans
Default out fade This is the default FX fade in used when setting a specific FX fade out time. Note that by default FX are faded out using the fade times of the Cue step. MagicQ User Manual Version 1.4.9.0…
-
Page 144: Live Programming (Busking)
Channels added in both views are affected by the Grand Master and by the pressing of SWAP buttons. 17.2 Over-ride / take-over The MagicQ architecture intrinsically supports the combined use of the programmer, playbacks and preset faders so that there is no need to constantly swap between modes, losing your overridden effects. This makes the console ideal for busking shows.
-
Page 145: Modifying Fx Parameters
Prog Window and pressing the REMOVE soft button. When you press CLEAR or remove selected heads from the programmer, the programming will be immediately removed and the heads will be controlled by the playbacks as if the programming had not MagicQ User Manual Version 1.4.9.0…
-
Page 146: Adding In New Fx
17.9 Adding in new FX Since the MagicQ does not make a distinction between programming and run modes, it is always possible to busk new FX. For instance, assume that you have an active playback which has the MAC500s statically focused on the centre vocals position.
-
Page 147: Busking Master
0 seconds to 10 seconds. The rate is shown in the bottom right of the Status Display. The time is applied to selection of palettes and intensities. When FAN mode is selected the change is applied in turn across each of the selected heads. MagicQ User Manual Version 1.4.9.0…
-
Page 148: System Management
18.3 Saving Shows The MagicQ utilises a large hard disk to enable storage of a virtually infinite number of shows. When you are programming a show the show is stored in memory. In order to store your show on the disk you need to press the SAVE SHOW soft button in the Setup Window.
-
Page 149: Loading Shows
.sbk ones are auto backups. When MagicQ saves a show file it saves the show data, the show settings and the console settings. By default when a show is loaded, only the show data and settings are loaded – the console settings are not loaded –…
-
Page 150: Import And Export Of Show Data And Show Merging
– but only with the data from the selected heads. If no heads are selected then MagicQ looks for items that are selected in the Page, Stack Store, and Cue Store windows. Use SHIFT + the cursor keys to select items in these windows. Thus complete pages can be exported using the Page Window, complete Cue Stacks (including the Cues they use) from the Cue Stack Store or individual Cues from the Cue Store.
-
Page 151: Saving And Loading Settings
Windows to catch up. You can force Windows to find the console by using Search and searching for a computer – enter the IP address of the console. Log in as user magicq with password magicq. MagicQ User Manual…
-
Page 152: Status Window
There is a status window in the Setup Window, View System. This shows data associated with the console and with the currently loaded show. This includes show size, data used, last saved times. The status window also shows all the MagicQ consoles on the network, and all the Art-Net devices on the network.
-
Page 153: Configuring Number Of Universes
This is useful in a studio environment where MagicQ can control any one of several studios over Art-Net. When you start up the console you choose which studio to control.
-
Page 154: Resetting A Magicq Console To Factory Defaults
ChamSys Ltd www.chamsys.co.uk To load new software onto the system, copy the .cde file using networking into the main MagicQ folder and select the file in File Manager. Alternatively, insert a USB stick and select the file in File Manager Note that this new upgrade functionality is only available once v1.3.4.9 software or above is loaded on the…
-
Page 155: Settings
Both show settings and console settings are stored in MagicQ show files, but by default only show settings are loaded when a MagicQ show is loaded. To force consoles settings to be loaded as well use SHIFT and LOAD SHOW+CON.
-
Page 156: Playback Mode
The console supports up to 18 universes in and out, which can be configured to use different protocols. Outputs must be configured and enabled before the console will output data. To set up outputs, open the Setup Window and select the VIEW DMX I/O view. MagicQ User Manual Version 1.4.9.0…
-
Page 157: Configuring Output Universes
ChamSys Ltd www.chamsys.co.uk MagicQ software originally supported only 6 universes. A processor upgrade in MagicQ consoles enabled support for 12 universes and this has recently been expanded to 18. To change between 6, 12 and 18 universe operation please see Configuring number of universes 19.3.1…
-
Page 158: Using Art-Net Ii
Net subnet ids. Enter subnet ids using the syntax 1-0 for subnet 1 universe 0. The subnet ids default to 0. In MagicQ software prior to v1.4.4.1 the sub net ids were set in columns to the right in the View DMX/IO view.
-
Page 159: Installing Usb Drivers For Mac And Linux
ChamSys Ethernet Interface To use a ChamSys Ethernet interface box, set Universes 1 to 3 to an Out Type of Art-Net, an In Type of Art- Net and enable them. Set the Out Uni and the In Uni for Universe 1 to 0, for Universe 2 to 1 and Universe 3 to 19.3.6…
-
Page 160: Using The Magicq Wing Dmx512 Outputs
Universes have been explicitly set to “MQ Wing”. Note that it is also possible to use the MagicQ PC Wing direct DMX outputs with a MagicQ console – simply connect the MagicQ PC Wing to the MagicQ console using a USB cable and set the outputs as above.
-
Page 161: Copying Output Universes
2 * Wing Playbacks None Note that the Mini Wing, PC Wing and Maxi Wing can be connected to a MagicQ console to enable extra DMX outputs from the console. Note that they duplicate the Main Playbacks (1-10) – they do not enable extra Playbacks.
-
Page 162: Connecting Playback Wings And Extra Wings
Hold POS, COL or BEAM and press Prev Selects previous range for last encoder changed Head To connect a Mini, PC or Maxi Wing to a console simply enable the MagicQ Wings and Interfaces option. 19.4.2 Connecting Playback Wings and Extra Wings To configure Playback Wings and Extra Wings open the Setup Window and choose View System, View Wings view.
-
Page 163: Connecting Magicq Consoles Together
On MagicQ PC this option is only available to control Playbacks PB1 to PB10 and is only enabled when a MagicQ Wing or MagicQ USB Interface is connected. This feature allows synchronisation of MagicQ with other consoles.
-
Page 164: Pro (Non Pro 2010) Operating System
Then start MagicQ PC and in Setup, View System, View Monitors press the RELOAD MULTIW soft button. MagicQ should detect all the monitors attached up to a total of 4. In Setup, View Settings, Network set MultiWindows to MultiWindows (same PC).
-
Page 165: Mode & Security Settings
19.6.2 Country The country setting determines the Country. Currently the country setting only has the options UK or US – for all countries except US select UK. MagicQ restricts some options including multi console programming on the US version. 19.6.3 Time Zone This is used for astronomical scheduled events.
-
Page 166: Disable Modifications
Keep a backup archive archive With this setting enabled the MagicQ console keeps an of back-ups. It will only archive back-ups created using Auto Backup above – therefore if you turn auto backup off then you will not have an archive.
-
Page 167: Tracking
Chans – otherwise all attributes of the head will be over-riden. MagicQ also supports “IPCB”, “IPC” and “Col”. These group similar parameters together, so for example if you touch a colour attribute or the colour attributes are loaded into the programmer. “IPCB” means all Intensity, Position, Colour and Beam attributes work in this way, whereas “IPC”…
-
Page 168: Fan Mode
Programmer. This setting enables this to be changed so that the times in the Cure are not overwritten. 19.7.11 Update Clears Programmer By default the Programmer is not cleared when the Update button is pressed. MagicQ User Manual Version 1.4.9.0…
-
Page 169: Keypad / Encoder Settings
This setting determines whether when you include Cues and Palette entries into the programmer the console automatically selects the heads. If set to Yes, the console selects all heads that have levels in the Cue or Palette entry. MagicQ User Manual Version 1.4.9.0…
-
Page 170: Keypad Always Selects Heads
When this setting is set to Yes, entering head numbers on the keypad followed by the ENTER key always selects the heads. When set to Yes, some of the advanced features of MagicQ are not available directly from the keypad. When editing numeric fields in the spreadsheet style windows in this mode, the operator must use the SET button rather than editing the field directly.
-
Page 171: Swap Pan And Tilt Encoders
It is strongly recommended that you do not change the physical key caps of these buttons since this may cause irreparable damage to the front panel board. 19.8.11 MagicQ PC keyboard mode This mode sets the function of the keyboard. 1. Normal: the keyboard is used for naming items and selecting heads 2.
-
Page 172: Map Keys To Thru, @, Full
This setting allows the THRU, @ and FULL keys to be mapped to different keys on the keyboard. This is useful in some countries where the normal mappings (>, @ and #) are not easy to select. To set this setting, simply press the 3 keys you wish for the functions followed by ENTER. MagicQ User Manual Version 1.4.9.0…
-
Page 173: Enable Mouse To Control Pan/Tilt
This determines how attributes values are displayed for Encoders – normal, 16bit, %, or pan and tilt in %. 19.9.6 Column Hiding When set to Yes, MagicQ hides columns that are unused – e.g. attributes that the patched moving lights do not support. When set to No all columns are shown regardless of whether they are used. 19.9.7…
-
Page 174: Confirmation Requests
ChamSys support. 19.9.12 Always show Record Options When this setting is set to Yes, MagicQ always shows a Record Options toolbar when the Record button is pressed. An Include Options toolbar is shown when Include is pressed. 19.9.13 Force Window on External Monitor 2 This setting forces a particular Window to be displayed on the External Monitor regardless of other Windows moved onto the Monitor.
-
Page 175: Delete Cue Stacks On Remove Playbacks
When this setting is set to Yes, MagicQ attempts to derive the setting Cue settings from the previous Cue in the Cue Stack. If the Cue is the first in the Cue Stack then MagicQ uses the default Step and Step Times.
-
Page 176: Expand Palettes To Same Head Type
When enabled from the Setup Window, playbacks faders 9 and 10 become Cross Masters for manual Fade In and Fade Out. Pressing the Pause button on either playback 9 or 10 brings the current playback under manual control. MagicQ User Manual Version 1.4.9.0…
-
Page 177: Crossfade Always Controls Pb1
This option determines whether one Playback intensity level can subtract from another Playback’s level. When set to “yes” an FX on one Playback can subtract from the level on another Playback. When set to “no” MagicQ performs pure HTP – i.e. the highest level (including FX) from all the Playbacks is output. 19.11.8 Go reasserts channels This setting determines which channels are reasserted when the Go button of a Playback is pressed.
-
Page 178: Wing Playbacks Sel+Go = Back
When set to “Last active” then after a power up or a reset, MagicQ will reactivate Cue Stacks that were running when the console was powered down or reset. MagicQ will start the Cue Stacks from the step that they were previously on.
-
Page 179: Subnet Mask
The default web server port is 8080. 19.12.8 Multi Windows This option is used to support multiple monitors on a MagicQ PC system or to connect a PC to a MagicQ console to add additional monitor capability. MagicQ User Manual…
-
Page 180: Control Net Ip Address
Setup, View System, View Monitors to reload the monitor setup (Reload Multi Win). When used on a MagicQ console to add additional monitor capability to a MagicQ console then set it to “MultieWindows (remote)” and on the PC run the MagicQ MultiWindow PC application.
-
Page 181: Magicdmx Mode
This option affects MagicQ Wings (Mini, PC, Maxi, Extra, Playback, Execute) and USB Interfaces (Twin DMX, Audio, SMPTE). When set to Yes – auto DMX then MagicQ automatically outputs DMX on the Wings starting from Universe 1 – provided that none of the Universes have been explicitly set to “MQ Wing”.
-
Page 182: Serial Data Bits
19.13.9 Serial touch monitor Determines which monitor on the MagicQ system has a touch screen connected to the serial port. On a Pro console with a serial touch screen connected to the 2 Monitor port select “Monitor 2”. For a duplicate monitor for the on-board screen select “Monitor 1 duplicate”.
-
Page 183: Audio Input
Audio bump simulates audio received at full level. 19.13.12 Audio input The type of audio input – the options are None, “Energy only ChamSys audio”, “ChamSys audio interface” and “ChamSys audio left only” . Audio input is supported via the ChamSys audio interface. The “ChamSys audio interface” option enables control from different frequencies whilst the “Energy only”…
-
Page 184: Timecode Continue Frames
MIDI notes on the channel specified in the macro field in the Cue Stack. When set to Requested Channel then MagicQ will always send the MIDI notes on the MIDI Out Channel that is set reagardless of the channel specified in macro field in the Cue Stack.
-
Page 185: Multiple Console Settings
0 (e.g. 5) may remove the effect of the fault. 19.16.3 Encoder Damping Use this option on a MagicQ PC Wing to improve the performance of the encoder wheels. This option does not have any effect on MagicQ consoles. 19.16.4 Touch Screen The touch screen can be disabled with this setting in case it has gone faulty and is causing problems.
-
Page 186: Screen Save
Some older DMX equipment is not able to work at full DMX speed. Use this option to reduce the DMX refresh rate – note that this option reduces the rate of data MagicQ sends ve rthe network or via USB to the interface.
-
Page 187: Extended Logging
This option allows logging to be disabled. This option should always be enabled except when directed by ChamSys support. 19.16.12 Extended Logging This option allows extended logging to be enabled. ChamSys support may request that Extended Logging is enabled in order to try to solve problems. 19.17 General Settings 19.17.1…
-
Page 188: Console Lamp Brightness
Button test mode is exited in the same way that it is entered. On MagicQ PC to enter button test mode type “test” on the keyboard then hold SHIFT and CONTOL. Hold SHIFT and press CONTROL to exit button test mode.
-
Page 189: Using Magicq On Pcs And Macs
USB interfaces are supported on Universe 1. When MagicQ PC or Mac is installed for the first time, it will show a window with choices of demo shows. This window can be hidden on subsequent starts by pressing the “Hide Options Next Time” button. It can be reactivated by setting the Setup, View Settings, Windows, Start Mode option to “Choose Demo show”.
-
Page 190: Technician Test Fixture
In this mode the console simply operates as a 48 channel traditional theatre console with 48 dimmers patched on Universe 1 at channels 1 through 48. If a MagicQ Wing, MagicQ Twin DMX Interface or MagicDMX interface is connected to MagicQ then the 48 channels will be automatically output on the 1 output.
-
Page 191: Demo Shows
The Playback faders are automatically set up with some useful functions including Macros for Lamp On, Reset and Lamp Off, Locate and Movement, Colour, Gobo and Strobe tests. If a MagicQ Wing, MagicQ Twin DMX Interface or MagicDMX interface is connected to MagicQ then the fixture will be controlled on the 1 output.
-
Page 192: Touch View
20.5 MagicQ PC / Mac Restrictions When MagicQ PC (Windows, Linux or Mac) is not connected to a MagicQ USB interface or MagicQ USB Wing then a small number of remote and automation features are restricted and “Demo Mode” is shown in the titlebar.
-
Page 193: Automation
21.1 Scheduled Events MagicQ now timed events for trigger Cues at specific times of the day or days of the week. Any Cue in a Cue Stack can be set to trigger based on a scheduled event rather than following on from the previous Cue.
-
Page 194: Automated Start Of Playbacks / Executes
63Hz, 160Hz, 400Hz, 1KHz, 2.5KHz, 6.2KHz, 16KHz, 63Hz. The levels for each channel can be used on MagicQ to set the level of Playbacks, to step through cue stacks and to set the speed of chases. The ChamSys Audio interface is enabled by setting the Audio Input option in the Setup Window to “ChamSys audio interface”.
-
Page 195: Keyboard Macros
Playback of keyboard macros can use the times that the macro was recorded with or using external time code sources. By default macros are played back using “Immediate” timing. Use the SET TIMING soft button to change the timing to “Real time” or “Time code”. MagicQ User Manual Version 1.4.9.0…
-
Page 196: In Built Macros
21.4.3 In built Macros MagicQ supports a number of in-built macros which carry out common programming key sequences including quite a few that would normally require multiple key presses or simulataneous pressing of more than one key. The In-built Macros can be useful on touch systems where it is not possible to touch 2 keys at one time.
-
Page 197: Execute Window
The Execute Window is a special window designed to allow the user to customise the look and feel of the MagicQ. This layout of the window is configurable by the user and can contain Groups, Palettes, Macros, Cues and Cue Stacks.
-
Page 198: Full Screen View
Execute Window will only work when a MagicQ PC Wing is connected. The size of the full screen Execute Window can be set via the Set Win Size button – this defaults to 1024 by 768 for MagicQ PC and 800 by 600 for the console.
-
Page 199: Wallpaper
It is possible to set a background wallpaper using the SET WALLPAPER soft button. The wallpaper should be a bmp or jpeg of the size set by the WIN SIZE button. For MagicQ consoles the internal touch screen is 800×600 resolution.
-
Page 200: Head Editor
MagicQ stores personalities in the show/heads folder on the hard disc in the MagicQ console or on MagicQ PC. When you choose a head to use in a show it loads the personality from the disc and stores it in memory. When you save your show, MagicQ writes a copy of the personality into the show file, thus ensuring that your show will work even if it is loaded onto a console which does not have your chosen personalities installed.
-
Page 201: General View
Moving Head can be Mirror or Yoke — press ENTER to swap. Max Pan and Max Tilt are used in visualisation and by the FLIP function. Num Of Chans sets the number of channels for the head. MagicQ User Manual Version 1.4.9.0…
-
Page 202: Options
Virtual Chans. Some personalities, such as the Generic Scroller2chan are set up as a “Virtual” personality – i.e. the channels in the personality can be patched to any location on MagicQ – unlike normal personalities where the channels are sequential from the DMX start address. In the View DMX view, the DMX address fields are used to specify the addresses for each channel in the virtual personality –…
-
Page 203
Rotate2 (11) Iris (3) Rotate1 (10) Focus (12) Gobo2 (9) FX1 (14) Gobo1 (8) Beam attributes page 2 (B2) Frost1 (32) Rotate4 (31) Frost2 (33) Rotate3 (30) Zoom (13) Gobo4 (29) FX2 (15) Gobo3 (28) MagicQ User Manual Version 1.4.9.0… -
Page 204: Ranges View
This view defines the ranges for channels that utilise specific values to access functions such as colour and gobo wheels, shutter channels and control channels. Ranges can be set up at any time regardless of MagicQ User Manual Version 1.4.9.0…
-
Page 205: Importing Ranges
Importing Ranges Ranges can be imported from a .csv format file using the Import Ranges button. The data should be organised in the .csv file in the same column order as the fields in MagicQ. <chan>,<name>,<min>,<max>,<auto pal>,<icon>,<dep chan>,<dep val> 23.4.2…
-
Page 206: Importing Palettes
Palettes can be imported from a .csv format file using the Import Ranges button. The data should be organised in the .csv file in the same column order as the fields in MagicQ. <palette type>,<name>,<num of chans>,<icon>,<chan 1>,<val 1>,<chan 2>,<val2>,……
-
Page 207: Icons
The icons will appear under the “User icons” icon class. At this time user icons are not stored in the show file, so when changing MagicQ systems it will be necessary to load the user icons onto each MagicQ console / MagicQ PC system. We would be pleased to add any user icons to the main icon library –…
-
Page 208
ChamSys Ltd www.chamsys.co.uk MagicQ includes support for personalities with multiple elements (e.g. RGB pixels), so that they can be patched in one action rather than patching the individual elements separately. When these fixtures are patched they continue to be controlled as separate heads with all the associated benefits. The personality simple contains a count of the number of elements. -
Page 209: Loading New Personalities Into Magicq
To update MagicQ with all the latest personalities, download the latest personalities files (heads.all and icons.all) from the ChamSys web site www.chamsys.co.uk. Copy the heads.all file into the show/heads folder and copy the icons.all file into the show/icons folder. Then restart MagicQ (SHIFT + RESET in Setup Window).
-
Page 210: Modifying Existing Fixtures
The shortname and mode should not have any spaces in them. So, for example to make a modification to the Martin Mac500 Mode 1 personality choose the personality then press SAVE AS and enter the new name. martin mac500_mymode MagicQ User Manual Version 1.4.9.0…
-
Page 211: Fx Editor
A MagicQ FX can store data for more than 1 head – so that for instance, you can make a FX with some heads perform circles in whilst others perform squares.
-
Page 212: Palette Fx
Each step in the Waveform FX can use any of the first 256 Palettes. When applying a Palette FX if a Palette does not contain the specified attribute for a selected head then it will use the attribute from the first head in the Palette with that attribute. MagicQ User Manual Version 1.4.9.0…
-
Page 213: Controlling Led Fixtures Using Magicq
25 Controlling LED fixtures using MagicQ MagicQ utilises a powerful Cue engine, which enables it to easily handle large numbers of LED heads in the form of panels, battens and moving lights. MagicQ’s ability to handle large numbers of heads independently ensures that Lighting Designers get to make the most of their LED arrays without being limited by the console.
-
Page 214
To make the most of your LED fixture you can create a grid containing the LED fixtures and then each fixture becomes a “pixel” in the grid. The MagicQ Pixel Mapping Engine can then be used to play back movies, bitmaps and text on the grid. -
Page 215: Using Standard Groups And Fx On The Grid
This makes it easy to quickly generate different FX. Using the auto groups, it is then possible to use standard FX such as RGB, sine waves, pulses to generate FX on your grid. MagicQ User Manual Version 1.4.9.0…
-
Page 216: Pixel Mapper
Media Window. The internal pixel mapping appears as a media server just like an external media server. When the internal Pixel Mapper is patched for a grid then MagicQ sets up the media settings automatically so that the Pixel Mapper appears in the Media Window. In software prior to v1.4.1.4 the pixel mapper control was from the Group, Pos, Colour and Beam Windows.
-
Page 217: Media Priority
Each bitmap layer uses 40 channels from the output channels. When you patch the Pixel Mapper from the Grid View, MagicQ chooses free channels for the layers. These channels are then reserved for the pixel mapper layers and can not be used for controlling real lights. It is best to patch generic bitmap layers to unused universes.
-
Page 218: Inbuilt Bitmaps
It is best to make user bitmaps the same size as the output grid. By default User bitmaps and icons from the internal library are applied to the grid using their normal size. It is possible to make MagicQ scale the user bitmaps and internal icons to the size of the grid — use the Apply Type “Scale to Grid”…
-
Page 219: Live Feed Support
PC running MagicQ Media centre. MagicQ Media centre then sends the live feed information over the network, making it available to all consoles on the network. On MagicQ, select the Pixel Mapper layer and then set the Live Feed Media Page (value 127) and select 1 to 5 for the 5 live feeds.
-
Page 220
The width and height controlled via remote are the width and height of the capture area for the live feed. The resolution for the feed (pixel width and pixel height) is configured on MagicQ Media Centre only. MagicQ User Manual… -
Page 221: Using Text Strings
By using the position and size parameters in the Position Window, the character can be placed anywhere in the grid or made to fill the entire grid. MagicQ User Manual Version 1.4.9.0…
-
Page 222: Manipulating Bitmaps And Text
ChamSys Ltd www.chamsys.co.uk When the mode is set to single words then MagicQ displays each word in turn. Each word must be separated by a single space in the text string. When the mode is set to chunks single chunks then MagicQ displays each chunk in turn. Each chunk must be separated by a single underscore (_) character in the text string.
-
Page 223: Magicq Pixel Mapping Fx (Beam
25.3.11 MagicQ Pixel Mapping FX (Beam Page 3) The FX channels enable FX to be applied to the grid. The FX type selects the FX that is applied. Some of the FX are stand-alone, e.g. lines and rainbows. Others like move and audio FX are applied on top of the selected bitmap or text.
-
Page 224
Vert Rainbow, Horiz Rainbow – enable rainbow patterns across the grid. Modify offset to multiply the rainbow across the grid. Snakes – enable snaking patterns on the grid. Modify the mode to determine the number of snakes, the randomness of the movement and whether they are white or coloured. MagicQ User Manual Version 1.4.9.0… -
Page 225
Audio – shows the selected bitmap or text (from Beam Page 1) dependent on the level of the audio input. A MagicQ Audio Interface module must be connected via USB in order to utilise this FX. In Setup, View Settings, Ports, Audio Input must be set to ChamSys Audio Interface. The Audio Level defaults to 0 which indicates a full audio range signal is expected. -
Page 226: Mixing Between Pixel Mapping Layers
When any active Pixel Map layer is active (dimmer above 0%) then setting “max with base” on that layer will make MagicQ perform a maximum of the Pixel Map effect and any base level for the controlled channels instead of adding to the base level.
-
Page 227: Setting A Base Level For The Bitmap (Software Pre V1.3.4.9)
Grids of groups enable multiple heads to be allocated to one box in the grid. When Bitmaps, Text or internal FX are played back on the grid, then all heads in a group will take the colour/level associated with a particular box in the grid. MagicQ User Manual Version 1.4.9.0…
-
Page 228: Using The Magicq Matrix Viewer
PCshow folder. Then after starting the MagicQ Media Centre, select Matrix, Open Show File, and select the show file. MagicQ Media Centre reads the grid data from the show file and sets up the Viewer to the same size as the grid.
-
Page 229
ChamSys Ltd www.chamsys.co.uk The above example show file bigmatrix.shw uses 2036 generic 3 channel leds (all 12 universes fully utilised) and can be downloaded from www.chamsys.co.uk. MagicQ User Manual Version 1.4.9.0… -
Page 230: Programming Led Using Standard Fx
2 fixtures with the same head number then each head will be treated as a separate head. When MagicQ assigns a virtual dimmer in this way, in the Cue Engine it takes the value of the RGB (CMY) attributes from the playbacks and programmer and then scales these values according to the value of the virtual dimmer channel.
-
Page 231: Making New Led Personalities On Magicq
25.8 Making new LED personalities on MagicQ MagicQ has an in-built personality editor, so it is easy to create new personalities. New personalities can be based on other personalities or created from a blank personality. For simple LED fixtures you may be able to use one of the generic LED personalities — either generic LED 3 chan or generic LED 4 chan.
-
Page 232: Controlling Media Servers With Magicq
The eight encoder wheels enable quick and easy access to the large numbers of control parameters. MagicQ has extremely powerful support for media servers. It is possible to connect to up to 50 different media servers or intelligent media yokes each with different media content. MagicQ downloads thumbnail previews for the media content from each media server independently.
-
Page 233: Patching The Media Server On Magicq
It is also possible to ping from MagicQ – simply type ping followed by the IP address at the command line. From the numeric keypad type … followed by the IP address.
-
Page 234
To determine the IP address of the media server on Windows XP machines, load the Control Panel, and open the Network Connections screen. Double click on the network connection, choose the support tab, and the IP Address is displayed. MagicQ User Manual Version 1.4.9.0… -
Page 235
Set the head number of the first media layer. This tells MagicQ which patched layer is the first media layer on the media server. MagicQ expects layers to be sequential head numbers, e.g. set you head numbers for your layers to 1 to 8. -
Page 236: Thumbnail View
MagicQ retrieves thumbnails when a media bank is selected for the first time, or when the media has been changed by the media server. MagicQ caches the thumbnails on its hard drive. You may need to change to a bank a few times before all the thumbnails for that bank have been downloaded.
-
Page 237: Media Window View
MagicQ can connect to a media server to retrieve a live preview of the master output or of the individual layers. This is very useful where the media server is remote to the console, or in a multiple media server configuration.
-
Page 238: Notes For Specific Media Severs
Using MagicQ with Arkaos There are several personalities in MagicQ to choose from for Arkaos. For ArKaos 3.5, use the arkaos vj35 personality. For ArKaos 3.6 you have four to choose from. To use ArKaos in standard mode, either use arkaos vj36 or arkaos vj36hw if you are using hardware accelerated graphics.
-
Page 239: Using Magicq With Coolux Pandoras Box
Using MagicQ with Coolux Pandoras Box MagicQ supports Coolux Pandoras Box V1-V4, each version having different heads. The personality files can be found under the coolux folder. Each Coolux Pandoras Box exists out of a number of video layers, a number of graphic layers and 1 or 2 camera’s, depending on the of the configuration of the Coolux…
-
Page 240: Using Magicq With Hippotizers
26.9.3.3 Thumbnails on Coolux Pandoras Box V4.5 To get thumbnails on a Coolux Pandoras Box you need at least v4.5 which is planned for the beginning of 2009. 26.9.4 Using MagicQ with Hippotizers MagicQ User Manual Version 1.4.9.0…
-
Page 241
D drive as D. To get live previews on a Hippotizer ensure the TCP/IP service is running. 26.9.4.3 Hippotizer V3 Single mode Hippotizer Personality Universe Address Suggested Head No v3011master v3011layer v3011layer MagicQ User Manual Version 1.4.9.0… -
Page 242
In order for the layers to appear sequential in the Media Window, the standard layers (not the master or pan master layers) should be sequential. We recommend setting the head numbers for the layers to a different range of numbers to the master and pan layers. MagicQ User Manual Version 1.4.9.0… -
Page 243: Using Mbox Extreme With Magicq
A pre-patched show containing 5 layers and several cues to demonstrate the Mbox EXtreme can be found on the documents section of our website. This should be placed in the show folder in MagicQ and can then be opened in the Load Show window, titled mboxdemoshow.shw.
-
Page 244: Networking Of Magicq Consoles
Each MagicQ console and MagicQ PC system should be configured with a different IP address and a different host name. On MagicQ consoles the IP address and host-name are set up in the Setup Window – on MagicQ PC systems the IP address and host-name are set up in Windows.
-
Page 245: Checking Ip Addresses — Ping Test
There is a short cut for use on the console keypad — enter three dots and then the IP address (no space) …2.0.0.3 27.3 Checking consoles on the network It is possible to check which MagicQ consoles are on the network by going to Setup, View System, View Status and selecting the Network tab. MagicQ User Manual…
-
Page 246: Hot Take-Over
In “Preferred mode” only one of the consoles (or MagicQ PCs) on the network is designated as a back up. All the universes on the console are set to “Hot take-over”. Whenever there is no ArtNet traffic on the network for a particular universe, the back-up console starts sending data for that universe.
-
Page 247
Output. When using “Hot take-over” on MagicQ PC, ensure that the IP address of MagicQ PC (set up in Setup Window, View Settings) is set to the valid IP address of the network you are using. If this setting is incorrect then Hot Takeover will not work correctly. -
Page 248: Configuring Hot Take-Over (Prior To V1.4.4.5)
“Hot Takeover” universes. When a universe is set as “Hot Takeover” the MagicQ console takes over the control of the status of the Universe enabling and disabling it according to the ArtNet data received in from the Network.
-
Page 249: Swapping Control Between Multiple Consoles
Status Display underneath the date and time. Note that a MagicQ console is considered a Master if any of the universes that are configured as a hot takeover universe are currently enabled and hence outputting to the network. A MagicQ console is considered a Slave if all universes that are configured as hot takeover universes are currently disabled –…
-
Page 250: Playback Synchronisation Between Consoles
Configuration (MagicQ software v1.3.6.4 and above) From v1.3.6.4 configuration of multi networking is simplified. On all units set Remote Ethernet Protocol to Chamsys Rem (tx and rx). Note this is not required from v1.4.8.6. On all units that will be master units set the “Playback Sync type” option.
-
Page 251: Configuration (Magicq Software V1.3.6.3 And Before)
27.5.2 Configuration (MagicQ software v1.3.6.3 and before) On the master unit set Remote Ethernet Protocol to Chamsys Rem (tx) and on the slave units set Remote Ethernet Protocol to Chamsys Rem (rx). For individual playbacks set the Cue Stack option “Send playback state to other consoles”. For all main playbacks, set the Setup option “Send playback state to other consoles”.
-
Page 252: Grabbing Shows From Other Consoles
“Safe”). This avoids any performance impact from copying of files from live consoles. When set to “Show Sync” MagicQ copies the files as above. It will then load one of the shows that it has copied. If there are multiple consoles on the network then it will always run the show file from the same console.
-
Page 253: Multi Console Programming
Firstly, multi programming enables multiple consoles to access one show file held on the master console with all consoles being able to make changes to that show file. MagicQ ensures that the slave consoles are synchronised to the master console show data. Updates from any console are synchronised across the network.
-
Page 254: Configuration
ChamSys Ltd www.chamsys.co.uk MagicQ supports show file synchronisation in a network. One console is designated as the “Master Prog” console which will keep the master show file. The synchronisation of show data is separate to synchronisation of show playback state and hot takeover.
-
Page 255: Selective Channel Control
– so for example if you were to enable the universes on each of the consoles then there would be a “fight” between the consoles. MagicQ has “selective channel control” which enables the master console to output all the channels and choose which consoles control which channels. With selective channel control the slave consoles send their output data to the show master and then the show master merges the data from all the slaves onto its outputs.
-
Page 256: Configuration
28.2.2 Selecting which console controls which channels MagicQ enables several different ways of selecting which channels are controlled from which console on the network – selected channels, active channels, groups of channels, universes and zones. MagicQ defaults to the show master having control of all the channels.
-
Page 257
The show master can request all channels at all time using the Setup, View DMX I/O, Multi Prog Select button. When the show master is controlling all channels then it shows “MCC” in the status bar. When some channels are under control by a slave console then it shows “SCC”. MagicQ User Manual Version 1.4.9.0… -
Page 258: Remote Control Of Magicq Consoles
MagicQ system. When you start up MagicQ in remote mode it will scan for MagicQ consoles on the network and give a list of the available consoles to select from.
-
Page 259: Iphone / Ipod Touch / Android Remote
MagicQ PC system with a MagicQ PC Wing or MagicQ USB interface attached. There are no restrictions on the MagicQ system that you use to control the remote system – for example, this can be MagicQ PC running on a wireless tablet.
-
Page 260: Magicq Pro 2010 Console With Usb To Wireless Interface
29.3.2 MagicQ Pro 2010 Console with USB to Wireless interface It is possible to use a USB to wireless interface directly from a MagicQ Pro 2010 console. The currently supported interface is the Edimax EW-7711UAn. The Console Wireless settings should be set to Ad-hoc with an IP address of 169.254.1.20 and a subnet mask of 255.255.0.0…
-
Page 261: Remote Control Using Pocket Pc Or Phone With Wireless Device
IP address of the MagicQ (e.g. 2.9.200.5) 2.9.200.5:8080 This URL will get you to the home page on the MagicQ console — a general system overview and a main menu of items, including Remote, Execute, Windows and Network.
-
Page 262
In order to set up a PC, Pocket PC or mobile phone to connect to MagicQ you must ensure that there is a physical connection to MagicQ – either directly via network cable, or via a wireless router. The IP address of the PC, Pocket PC, or mobile phone must be set to be on the same network as the MagicQ –… -
Page 263: Custom Web Server
ChamSys Ltd www.chamsys.co.uk The Network page shows all the MagicQ consoles and PC systems on the networks and enables easy selection of particular consoles for remote control. The Remote and Execute functions are only enabled when connected to a MagicQ console or a MagicQ PC System that is itself connected to a MagicQ wing or MagicQ interface.
-
Page 264
<!— Note for Internet Explorer to work the value feature below is not used and you must put the remote command in the name after cmd —> <button type=»submit» name=»cmd1T» value=»1T»>PB1 act</button> <button type=»submit» name=»cmd1U» value=»1U»>PB1 rel</button> MagicQ User Manual Version 1.4.9.0… -
Page 265: Chamsys Remote Protocol Commands
30 ChamSys Remote Protocol Commands ChamSys remote protocol consists of simple commands consisting of a list parameter values separated by commas ‘,’ and ending in a character A to Z (or a to z). Commands can contain spaces, tabs, and carriage returns;…
-
Page 266: Remote Programming Commands
<time> is an integer time in seconds <group number> is an integer between 1 and 200 <start head> and <end head> are integers between 1 and 6145 <showfile id> is a four digit decimal number between 0000 and 9999. MagicQ User Manual Version 1.4.9.0…
-
Page 267: Attribute Numbers
Cont4 (41) Cont5 (42) 31 Controlling MagicQ over Ethernet The MagicQ console and MagicQ PC software supports the use of an Ethernet protocol for controlling external devices, such as media servers, video or automation computers. MagicQ User Manual Version 1.4.9.0…
-
Page 268: Chamsys Remote Ethernet Protocol
4 bytes, word16 is 2 bytes and byte is 1 byte. ChamSys is 4 characters C R E P. Note that on MagicQ this is stored as little-endian, so that on the network it will appear as P E R C.
-
Page 269
To send several lines of text: Y”Hello”,10,13,”World”,10,13 On the Ethernet the data above is encapsulated in the data field of ChamSys Ethernet Remote Protocol in the UDP packet. Note that commas ‘,’ are not allowed within the ASCII data inside “ “ or ‘ ‘ . If you wish to send ‘,’ then you must send it as its hexadecimal ASCII code. -
Page 270: Reading From The Ethernet
31.3 Reading from the Ethernet By default data received on the Ethernet is ignored. This can be changed to make MagicQ accept remote commands received on the Ethernet port. In the View Settings view of the Setup Window, set the Ethernet Remote Protocol to “ChamSys Rem rx”.
-
Page 271
= sizeof(name); if (!remote_ether_sock) return (0); nbytes = recvfrom (remote_ether_sock, message, MAX_CREP_MSG, 0, (struct sockaddr *) &name, &name_len); if (nbytes > 0) if (rem->chamsys == ((‘C'<<24)|(‘R'<<16)|(‘E'<<8)|(‘P’))) int len = wswap(rem->length); remote_ether_bkwd = rem->seq_fwd; if (len<(MAX_CREP_MSG-(sizeof(remote_ether_message_t)+1))) if (len>size) len = size;… -
Page 272
= ip_address | ~subnet_address; name.sin_family = AF_INET; name.sin_port = htons (REMOTE_ETHER_PORT); name.sin_addr.s_addr = dwswap (my_broadcast_address.s_addr); nbytes = sendto (remote_ether_sock, message, size + (sizeof(remote_ether_message_t)-1), 0, (struct sockaddr *) & name, sizeof(name)); if (nbytes>0) remote_ether_fwd++; return (TRUE); MagicQ User Manual Version 1.4.9.0… -
Page 273: Controlling Magicq Using The Serial Port
MagicQ supports standard baud rates, stop bits and parity options for serial communication. Note that the use of the serial port on MagicQ PC is only enabled when it is connected to a MagicQ PC Wing.
-
Page 274: Reading From The Serial Port
32.3 Reading from the serial port By default data received on the serial port is ignored. This can be changed to make MagicQ accept remote commands received on the serial port. In the View Settings view of the Setup Window, set the serial input type to “ChamSys Serial Remote”.
-
Page 275: Using Midi/Smpte On Magicq
33 Using MIDI/SMPTE on MagicQ The MagicQ console and MagicQ PC software supports the use of MIDI / SMPTE via the MagicQ MIDI / SMPTE interface. Note that the only MagicQ support is through the MagicQ MIDI/SMPTE interface. MIDI/SMPTE directly through PC MIDI interfaces or through the phone (rca) interfaces on the consoles is not supported.
-
Page 276
For example, to send a note for middle C set the macro field to the following: N144,60,127 // Note 60 on velocity 127 N128,60,0 // Note 60 off MagicQ accepts both ‘N’ and ‘n’ to specify MIDI commands. MagicQ User Manual Version 1.4.9.0… -
Page 277: Midi Receive
144,36″1t» 128,36″1u» MagicQ checks the received MIDI note byes to see whether they match the values. So if the MIDI message matches 144 36 then it executes the remote command 1t (Test Playback 1). Similarly if it matches 128 36 then executes the remote command 1u (UnTest Playback 1).
-
Page 278: Default Miditable.txt File
ChamSys Ltd www.chamsys.co.uk From MagicQ Software version 1.3.6.5 it is also possible to map the note or velocity directly into the remote command using the %01 for the note and %02 for the velocity. So the following command would look for Note On, Note 36 and then use the Velocity to jump to a specific step on the Playback.
-
Page 279
ChamSys Ltd www.chamsys.co.uk 128,66″24u» 144,67″25t» 128,67″25u» 144,68″26t» 128,68″26u» 144,69″27t» 128,69″27u» 144,70″28t» 128,70″28u» 144,71″29t» 128,71″29u» 144,72″30t» 128,72″30u» 144,73″31t» 128,73″31u» 144,74″32t» 128,74″32u» 144,75″33t» 128,75″33u» 144,76″34t» 128,76″34u» MagicQ User Manual Version 1.4.9.0… -
Page 280: Remote Commands
When set to Cue Stack 1 or Playback 1 then the commands will affect Cue Stack 1 or the Cue Stack stored on Playback 1 respectively. MagicQ ignores the times in the TIMED GO command and uses the programmed times. GO and RESUME have the same effect.
-
Page 281: Midi Show Control Command Format
// Go Cue 2 on Cue Stack 10 in the Stack Store It is possible to test how MagicQ responds to Midi Show Control messages by typing in the Midi message on the keyboard. This is only supported when connected to a MagicQ Wing or Interface. For example to…
-
Page 282: Timecode Support
Enable timecode receive in the Timecode In Type field, and choose between SMPTE and MIDI Timecode. The time-code type can be set to EBU-25, SMPTE30, NTSC30 and Film 24. When a ChamSys MIDI/SMPTE module is fitted the Status Display will show the current time-code being received from the module.
-
Page 283: Emabling / Disabling Timecode
ChamSys Ltd www.chamsys.co.uk Time code can be triggered from an external SMPTE time code source using the optional ChamSys MIDI/SMPTE module, or it can run from the internal time code source. To control a Cue Stack using external time code set the “External time code” option in the Cue Stack options.
-
Page 284: Using External Timecode
Stack, whether the external timecode received is within the range of the first timecode value in the Cue Stack and the last timecode value in the Cue Stack. MagicQ will only execute a change of Cue if the new value is within the range controlled by that Cue Stack. This helps to avoid the erroneous execution of an entire Cue Stack.
-
Page 285: Timecode Generation
ChamSys Ltd www.chamsys.co.uk 34.3 Timecode generation MagicQ can also master time code. In Setup, choose between SMPTE timecode and MIDI timecode. There are special macro field commands to enable time code mastering and to set the time code. W <enable>…
-
Page 286: Synchronisation With Audio Playback (Winamp)
MagicQ can also accept timecode from Winamp and trigger Cues. In this case Winamp is the master of the system. Winamp can be running on a separate PC to the MagicQ system – in this case you need to run Winamp and MagicQ Media Centre on the PC. The MagicQ console then sends Art-Net information to MagicQ Media Centre, which in turn triggers Winamp.
-
Page 287: Separate Pc Running Winamp
35.2 Separate PC running Winamp MagicQ Media Centre has a tab for control of up to 4 instances of Winamp. In addition MagicQ Media Centre supports sending the Winamp track time from one instance of Winamp to MagicQ as an external timecode input.
-
Page 288: Winamp Settings
MagicQ will only send Play/Pause/Stop/Change track/Change position commands to Winamp, so it is up to the user to configure Winamp to work best for their requirements. For example, for some sound effects, you may wish to loop them, in which case you require the repeat function to be on, and manual playlist advance to be on.
-
Page 289: Using The Remote Input On Magicq
The MagicQ PC Wing, MagicQ MaxiWing and MagicQ consoles support a remote input on the rear panel, which can be used to trigger functions in MagicQ from an external control device or switch. The remote trigger can be used to trigger Cues in Cues Stacks, to flash playbacks, as a master GO button, or as a ADD/SWAP selector.
-
Page 290: Connection (Magicq Consoles And Magicq Maxiwing)
When wiring to an external switch links pins 2 and 4. Then connect the external switch between pins 3 and 1. On MagicQ consoles shipped prior to 22 November 2006 it is necessary to make a modification to the BIOS setup on the console to enable the remote switch. Connect the keyboard to the console, then on start-up press and hold DELETE for 10 seconds –…
-
Page 291: Enabling The Remote Input In Magicq
When using an external signal, setting the type to make will cause a trigger when the voltage differential is positive. The remote trigger action, determines what action is taken by MagicQ when the remote input signal is detected. The options are: •…
-
Page 292: Sound To Light (Audio Input)
38 Using MagicQ to control remote video switchers and mixers MagicQ can now be used to control remote video switchers and mixers such as the Kramer VS series of video switchers, Extron Switchers, Folsom Switchers and Panasonic MX50 video mixer. These devices are connected to a PC system running MagicQ Media Centre using RS232 and then remote controlled from the console using ArtNet.
-
Page 293
ChamSys Ltd www.chamsys.co.uk Take (>0, value is time) Take immediate (when value changes greater or less than 128) T-bar 6-12 Spare ChamSys will add support for alternative video switchers and mixers on request. MagicQ User Manual Version 1.4.9.0… -
Page 294: Using Magicq With Visualisers
Using a Single PC You can use one PC and run both MagicQ PC and the Visualiser on the same PC. To get the best results from this setup, we recommend you use a high screen resolution, or two monitors. In order to use one PC you must set MagicQ to send to applications on this PC.
-
Page 295
ChamSys Ltd www.chamsys.co.uk A dialog box should appear with the title Internet Protocol (TCP/IP) properties. MagicQ User Manual Version 1.4.9.0… -
Page 296: Configuring Magicq
Setting the IP address on MagicQ When using MagicQ and a Visualiser on different PCs it is important to ensure that MagicQ PC knows the IP address of the network port it will to use to communicate with the Visualiser. In the Setup, View Settings, Network set the “IP Address”…
-
Page 297: Enabling Universes For The Visualiser
If you are using the Visualiser on the same PC as MagicQ then set the Visualiser Type to (same PC) – otherwise, set it to (remote). When connecting to WYSIWYG using a MagicQ console, always use WYSIWYG (remote).
-
Page 298: Running Capture
Simply copy the file onto your PC and run it. On MagicQ load the Capture show and raise the fader on playback 1 in MagicQ. You should see the fingers of PAR cans start to chase. If you don’t, ensure you are using the correct executable file for the way you have set up MagicQ, MagicQ is set up correctly, and that you have connectivity between the MagicQ PC or console and the PC running Capture.
-
Page 299: Wysiwyg
39.5.1 Running MagicQ PC Start up MagicQ PC — you should see the initial screen requesting whether you wish to continue you the existing show, load a new show, or want help. Click «load a new show». When asked whether you want to erase the existing show from memory select yes.
-
Page 300: Enabling Magicq To Output Wysiwyg Data
Status column to enabled — WYSIWYG is automatically enabled when you select WYSIWYG as the visualiser. If you are using WYWISYG on the same PC as MagicQ then set the Visualiser to WYSIWYG (same PC) – otherwise, set it to WYSIWYG (remote). When connecting to WYSIWYG using a MagicQ console, always use WYSIWYG (remote).
-
Page 301: Running Wysiwyg
Once you have set up the connection in WYSIWYG then you should be able to run the demo show. On MagicQ PC use the playback faders to control the Mac500 and Mac600 lamps in the demo show. The playback faders are set up to control dimmer, colour, gobo and position on the different faders.
-
Page 302: Auto Patch
MagicQ identifies the fixtures in WYSIWYG and maps the names to the MagicQ fixtures using a mapping table. If MagicQ can not identify a fixture it will not be able to auto patch a fixture. The mapping table is updated in each release to support new fixtures introduced by WYSIWYG. Not all the different fixture modes are supported by both WYSIWYG and MagicQ.
-
Page 303: Troubleshooting
Problem: WYSIWYG will not connect between two separate PCs. Solution: Check that the network ports on the two PCs are configured to the same IP subnet, that they are enabled, and that you have configured MagicQ to use the correct network port (Setup, View Settings, IP address).
-
Page 304: Multiple Monitors On Magicq
1 external monitor directly from the rear panel. It is possible to connect more monitors (up to a total of 4) using the MagicQ Multi Window application running on a PC. The MagicQ MultiWindow application comes as part of the MagicQ PC installation.
-
Page 305: Multiple Windows On Magicq Pc Systems
MagicQ PC for Linux systems currently supports only 1 window. It is possible to reduce the size of this window so that all of MagicQ fits on the screen – this is particularly useful on Linux tablet PCs such as he EEPC and Acer Aspire One.
-
Page 306: Handy Hints
Use the “Lamp On All” and “Lamp Off All” soft buttons in the Macro Window to make turning on/off an entire lighting rig easier. • On the MagicQ PC use F1 to F10 to toggle Playbacks PB1 to PB10 on / off. Use ESC to turn all Playbacks off. MagicQ User Manual…
-
Page 307: Magicq Short Cuts
ChamSys Ltd www.chamsys.co.uk 42 MagicQ Short Cuts • Saving / Loading New show SETUP <View Settings> <New Show> Save show SETUP <View Settings> <Save Show> Load show SETUP <View Settings> <Load Show> Save settings SETUP <View Settings> <Save Setting> Load settings SETUP <View Settings>…
-
Page 308: Playback
@ INC <S> Load entire state of Cue Stack ALL + INCLUDE Load selected heads <SHIFT + INC> <Selected Only> <S> Load from DMX Select heads, <CTRL + INC> ENTER Snapshot output cues PROG, <Snapshot> MagicQ User Manual Version 1.4.9.0…
-
Page 309: Removing Values From The Programmer
Play Palette fan fade 0 to 3s 0 THRU 3 select item Play fan delay 0 to 3s, 1s fade 0 THRU 3 / 1 select item Copy Palettes to Playback <SHIFT + cursor> to select Palettes, COPY <S> MagicQ User Manual Version 1.4.9.0…
-
Page 310: Information Windows
W <Enable> (1 enable, 0 dis) Set current time code gen Q <Time code> Activate Playback 18 on wing 1 A1-18 Go on Playbacks 3 to 5 G3THRU5 Set the level of Playback 6 to 60% C6L60 MagicQ User Manual Version 1.4.9.0…
-
Page 311
ChamSys Ltd www.chamsys.co.uk MagicQ User Manual Version 1.4.9.0… -
Page 312: Troubleshooting
Enter board test mode to determine the cause of the fault (hold top left SHIFT button and press top right SHIFT button) Check a button has not become stuck down Check nothing / no-one is leaning on the keyboard or other buttons MagicQ User Manual Version 1.4.9.0…
-
Page 313: Button Functions
Windows appear in the windows section of the screen. Prev Win This function of this button has changed. It is now renamed EXT and is used to move windows to/from external monitors when using Multi Windows. MagicQ User Manual Version 1.4.9.0…
-
Page 314
Pressing and holding the Outputs button causes the Outputs Window to be temporarily made the active window until the button is released. Type the number 2 to 4 before pressing OUT to open additional Output Windows. Setup MagicQ User Manual Version 1.4.9.0… -
Page 315
To find information on a particular button on the console, press and hold down the Help button and then press the button you wish to get help on. On the MagicQ PC version, press the BUTTON HELP soft button and then press the required button. -
Page 316
Cue Stacks can be recorded, named, removed, moved and copied. Pressing and holding the Stack Store button causes the Stack Store Window to be temporarily made the active window until the button is released. MagicQ User Manual Version 1.4.9.0… -
Page 317
Pressing and holding the Attribute button causes the Attribute Window to be temporarily made the active window until the button is released. This is a Window select button. Pressing this button makes the Pos Window the active window. If the window was not open, then the window is opened. MagicQ User Manual Version 1.4.9.0… -
Page 318
Mode. Fan mode enables adjustments to a number of selected heads to be applied in a non-linear fashion. Pressing and holding Fan enables Fan mode to be entered temporarily. Make your changes and then release the Fan button. Highlight MagicQ User Manual Version 1.4.9.0… -
Page 319
Provides a means of selecting playbacks when slaving other consoles to the MagicQ where the other console does not have separate flash and select buttons. Also used to select playbacks that have been activated through the Playbacks Window as the current playback. -
Page 320
Used to activate a playback. Also used to start the next step in a Cue Stack when the step has been programmed to halt, or after the user has pressed the Pause button. Pause Used to pause the execution of a Cue Stack. MagicQ User Manual Version 1.4.9.0… -
Page 321
It has the same functionality as the Go button associated with a playback. It is designed to be use for theatre style operation where one big GO button is important for cueing a show. MagicQ User Manual Version 1.4.9.0… -
Page 322
The full key is used to indicate 100% when setting levels for dimmers. Page Left This key scrolls the active Window to the left. See Cursor Control. Page Right This key scrolls the active Window to the right. See Cursor Control. Cursor Keys MagicQ User Manual Version 1.4.9.0… -
Page 323
Window on of the encoder controls the gobo attribute of intelligent heads. Pressing the soft button bumps the gobo wheel onto the next gobo. Pressing SHIFT and the soft button bumps the gobo wheel back to the previous gobo. MagicQ User Manual Version 1.4.9.0… -
Page 324: Licensing
45 Licensing The console runs under the Debian Linux operating system (except for the PC version) www.debian.org The software also utilises the MicroWindows library. www.microwindows.org Linux and MicroWindows are subject to the GNU Public License (GPL). MagicQ User Manual Version 1.4.9.0…
-
Page 325: Glossary
Examples are the shutter, iris, gobo wheels and prism wheels. Calibration A process of adjustment. Used on the MagicQ to adjust the touch screen so that touching the screen in a particular position gives an accurate result. Channel The basic unit of control on the console.
-
Page 326
A Cue Stack Option that enables automatic pre-loading of LTP values for following Cues when heads are at zero intensity. Multi Windows MagicQ allows any of the Windows to be moved onto a remote PC using the MagicQ User Manual Version 1.4.9.0… -
Page 327
Pan and Tilt are Pan Lo and Tilt Lo are normally the only attributes of this type. Programmer The functional area of the MagicQ where show data is set up before it is recorded into Cues. Record Record button is used to record items into memory. -
Page 328
Shut down, 310 Include, 88, 89, 105, 106, 107, 266, 320, 326 SMPTE, 149, 155, 183, 275, 277, 282, 283, 285 Locate, 61, 62, 74, 204, 266, 318 Update, 85, 88, 106, 107, 168, 266, 320 MagicQ User Manual Version 1.4.9.0…
Загрузка…
Хочу поделиться своим мануалом для программы MagicqPC.
Т.к. картинки более не доступны в онлайн версии мануала, можно обратиться в наше сообщество в контакте и скачать мануал одним файлом с картинками. http://vk.com/magicqpc
Мануал написан на 2011 год, с тех пор программа претерпела некоторые изменения, как визуальные так и физические.
Поехали. Есть такая компания Chamsys, занимающаяся решениями по управлению светом. Относительно молодая компания, делает пульты с тачскрином. Сердца световиков завоевывает условно бесплатной программой, идентичной по внешнему виду и функциям реальному пульту. Программа на первый взгляд страшная и отталкивает от изучения. Но она того стоит!! Freestyler даже рядом не стоит. Пока что в рунете описания к ней на русском не нашел, потому выкладываю тут, в чем сам смог разобраться благодаря забугорным сайтам.
Итак, качаем программу по ссылке http://www.chamsys.co.uk/download
Для входа на сайт можете использовать логин
nicelight
пароль
4435c47c3da7
или зарегестрироваться самостоятельно.
устанавливаем, появляется 3 ярлыка, запускаем Magicq PС
И тут мы видим рабочее окошко с кучей кнопок, не пугайся. Буквально через час они все будут, как родные  Если выскочит диалоговое окно с картинкой, выбираем New Show—>yes—>normal.

Центральное окно, по периметру обнесенное большими белыми кнопками является имитацией тачскрина реального пульта.
Во внутреннем окне тачскрина будут располагаться все наши окошки, которые мы в будущем будем настраивать. На моем 10” экране оно крайне маленькое и неудобное. Давайте назовем это внутреннее окно рабочей областью.
Большие белые кнопки вокруг него — локальные. Они зависят от того, какое окошко открыто на рабочей области. Дополнительные локальные кнопки можно увидеть, удерживая ctrl или shift.
Серые маленькие квадратные кнопки, в основном справа от тачскрина, являются глобальными. С их помощью мы выполняем самые основные действия, допустим, открываем окна в рабочей области тачскрина. Теперь давайте посмотрим на тачскрин.
.jpg)
Жмем серенькую глобальную кнопку set up(справа в 4м ряду).
Первым делом нам нужно настроить наш переходничок USB-DMX. Для этого нажимаем на белую кнопку Viev DMX I/O.
Видим таблицу. Чамсис вообще строит свой софт, опираясь на таблицы, иногда это не так удобно, зато мы можем редактировать данные программы даже с помощью Exel.
Итак, у нас список позиций для подключения DMX-железа, которое будет рулить головами. Почему список? Потому что Magicq — это серьезная софтина, способная управлять не просто 512 адресами через переходничок, а кучей подключенных переходников, давая возможность управлять гораздо больше, чем 512ю каналами, а значит можно рулить освещением больших масштабов. Звучит вкусно! Каждые 512 каналов называются вселенной (Universal)
Двойным кликом по окошку в 1ом ряде 3го столбика, выбираем наш переходник. Я спаял себе Open-DMX, как самый малокапризный. Кому нужно, могу собрать за недорого и переслать. Его то и выбираем.

Теперь немного о глобальных кнопках. Это небольшие серые квадратики, расположенные справа на консоли.
Сверху вниз:
1) NORM, TOUCH, RED, MAXI – отвечают за переключение режима просмотра. Можете поклатцать: фокус перемещается на тачскрин, фейдеры. Продуманно для таких лэптопов, как у меня.
2) Кнопки для выбора окон. На рабочей области можно открыть несколько окон. Chamsys запоминает все их размеры и положения. Так же можно сохранить свои сочетания окон в рабочей области на отдельную кнопку. Очень удобно.
Некоторые кнопки:
PROG — просмотр содержимого программатора.
SET UP — настройки программы
PTCH — патч приборов
GRP — группы приборов
INT — просмотр и регулировка интенсивностей всех подключенных приборов.
3) группа активных кнопок, необходимых больше для программирования панели, о них позже.

Теперь давай попробуем создать свое первое шоу.
Жмем серую кнопку Set up(справа), далее сверху слева белую локальную VIEV SETTINGS, NEW SHOW(правее) -> yes -> Normal(live). Теперь мы имеем чистую стартовую площадку.
Для начала будем подключать к ней только диммеры.
Рядом с серой глобальной кнопкой SET UP жмем кнопку PTCH
появляется пустое окошко.
Если вы заметили, на 2м рисунке есть командная строка — очень удобная штука, для тех кто любит работать командами а не кнопками.
Чтобы запатчить диммер, жмем локальную CHOOSE DIMMER(сверху) -> PATCH IT(там же правее) — видим окошко с цифровой клавиатурой. здесь мы вводим количество диммеров, подключаемых по порядку, начиная с адреса 1. Давайте здесь подключим 3 диммера, а остальные запатчим с помощью командной строки. Выбираем цифру 3, энтер.
Видим, три подключенных диммера.
Теперь подключим еще 28 диммеров с помощью командной строки, для этого, нажав CHOOSE DIMMER(сверху), просто наберите на клавиатуре 28@4. Набираемая команда тут же отображается в командной строке. Эта команда обозначает — выбрать 27 диммеров подряд, начиная с адреса 4.
Жмем энтер -> Patch It. В результат в окне patch подключен 31 диммер. Чтобы удалить, допустим 31й диммер, жмем внизу справа глобальную кнопку REM(предпоследний ряд), она подсвечивается красным, указывая, что консоль готова удалить, что ни пожелаете  Пожелаем 31 канал, просто ткнув в него мышкой. Жмем yes, диммер удален. Имеем 30 запатченых диммеров. В данный момент окно PATCH открыто на всю рабочую область. Давай немного подвинем его, чтобы можно было открыть и другие окна. Справа вверху найди
глобальную кнопку size, поклацай ее. Заметь, как окно занимает разные позиции на рабочей области, а сзади него находится не закрытое нами окошко SETUP. Выбери его и закрой, используя глобальную кнопку clse (в этом же 2м ряду справа). Если на заднем плане есть еще какие-либо окна, аналогично закрой их. А окошко PATCH размести с помощью кнопки size так, чтобы оно было в левой части рабочей области. Теперь откроем окно OUT(српава 3й ряд) и разместим его на правой части рабочей области. В этом окне мы можем видеть состояние выходов даже, если нет реальных подключенных приборов. Чтобы проверить работу любого диммера, нужно его выделить в окне PATCH и нажать слева локальную кнопку Head Test. Она установит выбранный канал на 100%, что можно будет увидеть в окне OUT.

MagicqPC умеет автоматически группировать приборы по именам и по гелям, т.е. условно заданным цветам (gel).
Как это работает? Давай попробуем промаркировать приборы.
Установив курсор в поле Name первого диммера, зажми шифт, и клацни по полю name пятого диммера. Теперь пиши SOLO DIM, ентер. Приборы переименовались. Аналогично назовем вторые пять приборов BACK DIM, 11-15 LEFT PAR, 16-20 RIGHT PAR.
Теперь разукрасим их гели. В дальнейшем гели помогут нам при программировании. Нажми на поле Gel первого прибора и введи 19 ентер. Он приобрел красный цвет. Аналогично дадим другие цвета остальным приборам, допустим, как на картинке.

Теперь сгруппируем их. Во время активного окна PATCH нажми вверху локальную кнопку AUTO GROUPS -> Dimmer groups. Открыв окно с группами кнопкой grp(справа 6й ряд), ты увидишь создавшиеся группы, как по именам, так по их составляющим и по гелям. Мы можем навести порядок в группах с помощью последних двух рядов глобальных кнопок справа внизу: удалить некоторые группы(rem), переместить из одной ячейки в другую(mve) или переименовать(set). Позже группы будут находиться слева вверху на рабочей области так что давай удалим все ненужные группы, а оставшиеся разместим комфортно для глаз. Синтаксис такой, что Chamsys-у нужно сначала сказать, что делать(rem/mve/set), а потом указать, с какой ячейкой это делать.
Теперь можем сохранить наше шоу:
Set up(справа) ->VIEW SETTINGS(сверху) -> SAVE SHOW. Введи имя своего шоу, только не забудь его! допустим Moscow -> ентер. Открывая шоу в следующий раз, увидишь в папке с сейвами кучу мусора, мешающего найти твое шоу
Давай закроем все окна, удерживая шифт, жми clse справа вверху. Теперь можно создать комбинацию окон на рабочей области и сохранить ее на горячую локальную кнопку.
Откроем группы, кнопкой grp(справа) и клацая кнопку size(2й ряд, справа) расположим это окно сверху слева на четверть рабочей области.
Теперь открывай программатор prog(справа) и размести его на рядом с группами вверху. Третьим окном расположим OUTPUT, справа кнопка out. Отдадим ему оставшуюся нижнюю половину рабочей области. В этом окне должны быть активными локальные кнопки VIEW PLAN, VIEW COLOR и VIEW GRID.

Чтобы сохранить такую комбинацию окон, нажми rec(справа внизу) набери имя виду, допустим First и, зажав ctrl выбери сверху в локальных кнопках пустую область, нажав на нее. Теперь каждый раз, нажав ctrl, ты увидешь на этом месте твою кнпоку first, нажав которую, получишь эту комбинацию окон. Удобно, не правда ли? 
В окне OUTPUTS можно сделать сетку с визуальным расположением твоих приборов. Для начала установим размер сетки кнопкой SET GRID SIZE -> 15/15, ентер и переключим вид на VIEW HD NOS. Теперь добавляем наши группы приборов на сетку: выбираем группу, допустим All Back, переходим в окно OUTPUTS, выбираем положение нашей группы в сетке и жмем INSERT HEDS H (сверху). Теперь группа приборов появилась на нашем виртуальном плане. Аналогично расположим остальные необходимые группы.
При необходимости приборы можно расположить удобней кнопками rem/cpy/mve Теперь в окне OUTPUTS можно вернуть вид VIEW COLORS и мы увидим гели каждого прибора на плане.

Если теперь отключить сетку, отжав кнопку VIEW GIRD, получим эскизный план приборов на сцене, с которым уже можно работать. Выбери в окне GROUP любую группу и поклацай на тачпаде снизу справа локальную кнопку Sel Heads Intensity(0-50-100%). Смотри, что происходит в программаторе и на эскизном плане. Каждая група, которую ты выбирал? внеслась в программатор, если теперь нажать запись на ползунок, все произведенные изменения(которые отображаются в программаторе, полистай его) будут записаны. Давай запишем изменение интенсивности группы соло по первому ползунку. Для начала очистим программатор, нажав глобальную кнопку clr(внизу справа). Это нужно делать каждый раз перед подготовкой к записи. Теперь выбираем группу All Solo и жмем локальную Sel Heads Intensity(справа) пока значения не достигнут 100%. Теперь нажимаем rec(нижний ряд справа) вводим имя фейдера, допустим Solo и нажимаем на кнопку S над первым ползунком. Готово. Очищаем программатор(clr), чтобы он не мешал нам менять интенсивность, и двигаем ползунком — меняется яркость приборов. Если дважды кликнуть по имени ползунка, откроем его параметры, среди которых есть fade — время исполнения. Можешь установить его на 2 секунды и посмотреть, что произойдет.
Если что не корректно написал, стукни в личку, поправим материал.
====
еще уроки
Как запатчить noname голову
Управляем интенсивностью диммеров
Обсудить какие-либо возникающие вопросы можно в группе в контакте:
http://vk.com/magicqpc
Работа добавлена на сайт samzan.net: 2016-06-20
Поможем написать учебную работу
Если у вас возникли сложности с курсовой, контрольной, дипломной, рефератом, отчетом по практике, научно-исследовательской и любой другой работой — мы готовы помочь.

Предоплата всего
от 25%

Подписываем
договор
Спасибо Харизмат за созданный мануал !
Содержание
- Magicq PC Быстрый старт
- Создание personality файла для твоей головы, которая не знакома программе
- Начинаем «общаться» с приборами
Magicq PC Быстрый старт
Хочу поделиться своим мануалом для программы MagicqPC.
Есть такая компания Chamsys, занимающаяся решениями по управлению светом. Относительно молодая компания, делает пульты с тачскрином. Сердца световиков завоевывает условно бесплатной программой, идентичной по внешнему виду и функциям реальному пульту. Программа на первый взгляд страшная и отталкивает от изучения. Но она того стоит!! Freestyler даже рядом не стоит. Пока что в рунете описания к ней на русском не нашел, потому выкладываю тут, в чем сам смог разобраться благодаря забугорным сайтам.
Итак, качаем программу по ссылке http://www.chamsys.co.uk/download
Для входа на сайт можете использовать логин
nicelight
пароль
4435c47c3da7
или зарегестрироваться самостоятельно.
устанавливаем, появляется 3 ярлыка, запускаем Magicq PС
И тут мы видим рабочее окошко с кучей кнопок, не пугайся. Буквально через час они все будут, как родные Если выскочит диалоговое окно с картинкой, выбираем New Show—>yes—>normal.
Центральное окно, по периметру обнесенное большими белыми кнопками является имитацией тачскрина реального пульта.
Во внутреннем окне тачскрина будут располагаться все наши окошки, которые мы в будущем будем настраивать. На моем 10” экране оно крайне маленькое и неудобное. Давайте назовем это внутреннее окно рабочей областью.
Большие белые кнопки вокруг него — локальные. Они зависят от того, какое окошко открыто на рабочей области. Дополнительные локальные кнопки можно увидеть, удерживая ctrl или shift.
Серые маленькие квадратные кнопки, в основном справа от тачскрина, являются глобальными. С их помощью мы выполняем самые основные действия, допустим, открываем окна в рабочей области тачскрина. Теперь давайте посмотрим на тачскрин.
Жмем серенькую глобальную кнопку set up(справа в 4м ряду).
Первым делом нам нужно настроить наш переходничок USB-DMX. Для этого нажимаем на белую кнопку Viev DMX I/O.
Видим таблицу. Чамсис вообще строит свой софт, опираясь на таблицы, иногда это не так удобно, зато мы можем редактировать данные программы даже с помощью Exel.
Итак, у нас список позиций для подключения DMX-железа, которое будет рулить головами. Почему список? Потому что Magicq — это серьезная софтина, способная управлять не просто 512 адресами через переходничок, а кучей подключенных переходников, давая возможность управлять гораздо больше, чем 512ю каналами, а значит можно рулить освещением больших масштабов. Звучит вкусно! Каждые 512 каналов называются вселенной (Universal)
Двойным кликом по окошку в 1ом ряде 3го столбика, выбираем наш переходник. Я спаял себе Open-DMX, как самый малокапризный. Кому нужно, могу собрать за недорого и переслать. Его то и выбираем.
Теперь немного о глобальных кнопках. Это небольшие серые квадратики, расположенные справа на консоли.
Сверху вниз:
1) NORM, TOUCH, RED, MAXI – отвечают за переключение режима просмотра. Можете поклатцать: фокус перемещается на тачскрин, фейдеры. Продуманно для таких лэптопов, как у меня.
2) Кнопки для выбора окон. На рабочей области можно открыть несколько окон. Chamsys запоминает все их размеры и положения. Так же можно сохранить свои сочетания окон в рабочей области на отдельную кнопку. Очень удобно.
Некоторые кнопки:
PROG — просмотр содержимого программатора.
SET UP — настройки программы
PTCH — патч приборов
GRP — группы приборов
INT — просмотр и регулировка интенсивностей всех подключенных приборов.
3) группа активных кнопок, необходимых больше для программирования панели, о них позже.
Теперь давай попробуем создать свое первое шоу.
Жмем серую кнопку Set up(справа), далее сверху слева белую локальную VIEV SETTINGS, NEW SHOW(правее) -> yes -> Normal(live). Теперь мы имеем чистую стартовую площадку.
Для начала будем подключать к ней только диммеры.
Рядом с серой глобальной кнопкой SET UP жмем кнопку PTCH
появляется пустое окошко.
Если вы заметили, на 2м рисунке есть командная строка — очень удобная штука, для тех кто любит работать командами а не кнопками.
Чтобы запатчить диммер, жмем локальную CHOOSE DIMMER(сверху) -> PATCH IT(там же правее) — видим окошко с цифровой клавиатурой. здесь мы вводим количество диммеров, подключаемых по порядку, начиная с адреса 1. Давайте здесь подключим 3 диммера, а остальные запатчим с помощью командной строки. Выбираем цифру 3, энтер.
Видим, три подключенных диммера.
Теперь подключим еще 28 диммеров с помощью командной строки, для этого, нажав CHOOSE DIMMER(сверху), просто наберите на клавиатуре 28@4. Набираемая команда тут же отображается в командной строке. Эта команда обозначает — выбрать 27 диммеров подряд, начиная с адреса 4.
Жмем энтер -> Patch It. В результат в окне patch подключен 31 диммер. Чтобы удалить, допустим 31й диммер, жмем внизу справа глобальную кнопку REM(предпоследний ряд), она подсвечивается красным, указывая, что консоль готова удалить, что ни пожелаете Пожелаем 31 канал, просто ткнув в него мышкой. Жмем yes, диммер удален. Имеем 30 запатченых диммеров. В данный момент окно PATCH открыто на всю рабочую область. Давай немного подвинем его, чтобы можно было открыть и другие окна. Справа вверху найди
глобальную кнопку size, поклацай ее. Заметь, как окно занимает разные позиции на рабочей области, а сзади него находится не закрытое нами окошко SETUP. Выбери его и закрой, используя глобальную кнопку clse (в этом же 2м ряду справа). Если на заднем плане есть еще какие-либо окна, аналогично закрой их. А окошко PATCH размести с помощью кнопки size так, чтобы оно было в левой части рабочей области. Теперь откроем окно OUT(српава 3й ряд) и разместим его на правой части рабочей области. В этом окне мы можем видеть состояние выходов даже, если нет реальных подключенных приборов. Чтобы проверить работу любого диммера, нужно его выделить в окне PATCH и нажать слева локальную кнопку Head Test. Она установит выбранный канал на 100%, что можно будет увидеть в окне OUT.
MagicqPC умеет автоматически группировать приборы по именам и по гелям, т.е. условно заданным цветам (gel).
Как это работает? Давай попробуем промаркировать приборы.
Установив курсор в поле Name первого диммера, зажми шифт, и клацни по полю name пятого диммера. Теперь пиши SOLO DIM, ентер. Приборы переименовались. Аналогично назовем вторые пять приборов BACK DIM, 11-15 LEFT PAR, 16-20 RIGHT PAR.
Теперь разукрасим их гели. В дальнейшем гели помогут нам при программировании. Нажми на поле Gel первого прибора и введи 19 ентер. Он приобрел красный цвет. Аналогично дадим другие цвета остальным приборам, допустим, как на картинке.
Теперь сгруппируем их. Во время активного окна PATCH нажми вверху локальную кнопку AUTO GROUPS -> Dimmer groups. Открыв окно с группами кнопкой grp(справа 6й ряд), ты увидишь создавшиеся группы, как по именам, так по их составляющим и по гелям. Мы можем навести порядок в группах с помощью последних двух рядов глобальных кнопок справа внизу: удалить некоторые группы(rem), переместить из одной ячейки в другую(mve) или переименовать(set). Позже группы будут находиться слева вверху на рабочей области так что давай удалим все ненужные группы, а оставшиеся разместим комфортно для глаз. Синтаксис такой, что Chamsys-у нужно сначала сказать, что делать(rem/mve/set), а потом указать, с какой ячейкой это делать.
Теперь можем сохранить наше шоу:
Set up(справа) ->VIEW SETTINGS(сверху) -> SAVE SHOW. Введи имя своего шоу, только не забудь его! допустим Moscow -> ентер. Открывая шоу в следующий раз, увидишь в папке с сейвами кучу мусора, мешающего найти твое шоу
Давай закроем все окна, удерживая шифт, жми clse справа вверху. Теперь можно создать комбинацию окон на рабочей области и сохранить ее на горячую локальную кнопку.
Откроем группы, кнопкой grp(справа) и клацая кнопку size(2й ряд, справа) расположим это окно сверху слева на четверть рабочей области.
Теперь открывай программатор prog(справа) и размести его на рядом с группами вверху. Третьим окном расположим OUTPUT, справа кнопка out. Отдадим ему оставшуюся нижнюю половину рабочей области. В этом окне должны быть активными локальные кнопки VIEW PLAN, VIEW COLOR и VIEW GRID.
Чтобы сохранить такую комбинацию окон, нажми rec(справа внизу) набери имя виду, допустим First и, зажав ctrl выбери сверху в локальных кнопках пустую область, нажав на нее. Теперь каждый раз, нажав ctrl, ты увидешь на этом месте твою кнпоку first, нажав которую, получишь эту комбинацию окон. Удобно, не правда ли?
В окне OUTPUTS можно сделать сетку с визуальным расположением твоих приборов. Для начала установим размер сетки кнопкой SET GRID SIZE -> 15/15, ентер и переключим вид на VIEW HD NOS. Теперь добавляем наши группы приборов на сетку: выбираем группу, допустим All Back, переходим в окно OUTPUTS, выбираем положение нашей группы в сетке и жмем INSERT HEDS H (сверху). Теперь группа приборов появилась на нашем виртуальном плане. Аналогично расположим остальные необходимые группы.
При необходимости приборы можно расположить удобней кнопками rem/cpy/mve Теперь в окне OUTPUTS можно вернуть вид VIEW COLORS и мы увидим гели каждого прибора на плане.
Если теперь отключить сетку, отжав кнопку VIEW GIRD, получим эскизный план приборов на сцене, с которым уже можно работать. Выбери в окне GROUP любую группу и поклацай на тачпаде снизу справа локальную кнопку Sel Heads Intensity(0-50-100%). Смотри, что происходит в программаторе и на эскизном плане. Каждая група, которую ты выбирал? внеслась в программатор, если теперь нажать запись на ползунок, все произведенные изменения(которые отображаются в программаторе, полистай его) будут записаны. Давай запишем изменение интенсивности группы соло по первому ползунку. Для начала очистим программатор, нажав глобальную кнопку clr(внизу справа). Это нужно делать каждый раз перед подготовкой к записи. Теперь выбираем группу All Solo и жмем локальную Sel Heads Intensity(справа) пока значения не достигнут 100%. Теперь нажимаем rec(нижний ряд справа) вводим имя фейдера, допустим Solo и нажимаем на кнопку S над первым ползунком. Готово. Очищаем программатор(clr), чтобы он не мешал нам менять интенсивность, и двигаем ползунком — меняется яркость приборов. Если дважды кликнуть по имени ползунка, откроем его параметры, среди которых есть fade — время исполнения. Можешь установить его на 2 секунды и посмотреть, что произойдет.
Создание personality файла для твоей головы, которая не знакома программе
Редактор голов необходим, если приобретенная тобою голова(любой другой прибор) отсутствует в списке приборов для патча. Тогда есть возможность создать его конфигурационный файл самому. Редактор голов открывается из окна Patch локальной кнопкой EDIT HEAD ( сверху). Если мы прежде выбирали голову, она будет доступна для редактирования, если не выбирали, то сейчас ты можешь либо выбрать ее CHOOSE HEAD, чтобы потом изменять, либо создать новую NEW HEAD ( кнопки вверху, справа).
Для примера выберем Pocket Scan фирмы GLP и будем его изменять.
В HEAD EDITOR-е есть 5 глобальных вкладок для редактирования прибора.
После редактирования параметров головы, ее можно сохранить на диск. Но если мы ее запатчим в шоу и сохраним шоу, то эта голова скопируется так же в сейв шоу, что позволяет работать с ней даже с другого компьютерапульта, не имеющего в своей базе этой головы.
Первая глобальная вкладка VIEW GENERAL содержит 5 локальных вкладок:
1) Names. Содержит имя прибора.
— Manufacturer name – фирма производитель
— Short name – короткое имя ( используется в маленьких окнах)
— Head Description – полное имя
— WYSIWYG name – имя, отображаемое в визуализаторе.
2) Params
— Move head – выбор типа движения: голова или сканер(mirror)
— Max pan/tilt – максимальный угол разворота по ширине/длине (в градусах)
— num of chans – количество каналов в приборе
— dmx offset – смещение адреса, чаще всего 1
— dmx max min – минимальный и максимальный начальный адрес, который можно указать прибору (max = 512 –(num of chans))
3) Options
— Colour mix – цветовое пространство (CMY голубое-пурпурное-жолтое, RGB – красно-зелено-синее)
— virtual channels – используется, если прибор имеет виртуальные адреса. Допустим,у меня есть панорамные скролы с двумя каналами, стоящими порознь. Установив эту опцию, ты не запатчишь прибор на определенный адрес. А его виртуальные адреса можно будет указать в окне PATCH с видом View DMX в столбцах DMX пример на картинке http://s006.radikal.ru/i213/1103/3f/43cde2d0d4a7.jpg
— Fake HSI пока что недееспособная программно функция
— Dimmer Curve – выбор типа изменения яркости.
4) Multi
Раздел предназначен для приборов с несколькими приборами в одной преднастройке прибора.
5) Media
Раздел предназначен для подключения медиасервера.
Следующая вкладка VIEW CHANS
Тут мы будем присваивать действия для каждого канала в приборе.
В столбиках идут:
— имя канала,
— тип канала: LTP — на выходе будет последнее изменение, HTP, на выходе будем самое максимальное значение. Если не знаешь, что это за свойства, очень советую дополнительно почитать про HTPLTP литературку.
— указание на параметры 16-ти битности при необходимости,
— Instant – необходимость мгновенного изменения значения канала (допустим для цвета или маски),
— Slow enc – замедленное изменения значения, если мы меняем его энкодером
— invert – инвертирование канала ( 0=255, 1=254)
— Attrib no – указывает, какую функцию консоли исполняет этот канал. Щелкнув по полю дважды, мы выбираем необходимое действие для канала.
— Enc – двойным щелчком открываем окно для присвоения изменения данного канала тому или иному энкодеру. Эти параметры выстанавливаются автоматически, но можно их подправить по удобству.
Расшифровка: I1A обозначает – изменение первой интенсивности по энкодеру А; P1X – изменение 1й позиции(допустим PAN) по энкодеру X; P1Y – 2ая позиция(TILT) на энкодер Y, хотя странно почему она не P2Y; C1B – цвет на энк. В; B1D – параметр луча( beam ) на энкодер D, это может быть маска, призма, и т.п.
Третья вкладка VIEW RANGES
Самая обширная и необходима для указания типа работы и диапазонов каждого канала. Столбики идут в такой последовательности: выбор канала, имя, минимальное максимальное значение (диапазон 0-255), auto pal – для создания палитр, иконка.
Каждый канал может содержать несколько диапазонов.
Допустим, у нас есть в сканере 6 масок, каждая маска сменяется на определенном уровне DMX в канале. Тогда диапазоны для масок будут выглядеть так:
Выбирая иконку, нажми локальную кнопку SIMPLE VIEW, не смотря на то, что она уже является активной. Это переключит вид в наглядный режим. Вообще иконки можно присваивать многим элементам и в других окнах программы, просто нажми shift+set (глобальная кнопка).
Deep chan/val поля позволяют сделать данный диапазон зависимым от другого канала в этом устройстве. Допустим, мы хотим, чтобы маска цветок была, когда цвет красный. Тогда выбираем в Deep Chan – канал color и указываем значение в Deep val.
Диапазоны можно захватывать из программатора кнопкой CAPTURE RANG.
Слева на тачпаде есть кнопка Attr Test, которая устанавливает значение канала выбранного диапазона на реальном выходе в среднее между min и max значение. Если установить курсор на поле min или max, то значение канала во время теста будет равно значению этого поля.
Для удаления любого поля, выбрав его, дважды нажми глобальную кнопку rem.
Следующая вкладка VIEW PALLETES дает возможность создать палитры по умолчанию для создаваемых приборов, тут все понятно, выбираем цвет и уровень канала(level 1) на котором этот цвет генерируется прибором. Если цветовых каналов много, то, соответственно, вбиваем значения для каждого канала.
Интересно, что выбор столбца Type позволяет менять не только цвета, но и делать предустановки для всех остальных параметров прибора. Диапазоны и палитры можно импортировать(*.CSV) и открывать с помощью EXEL для ручного редактирования.
Последняя вкладка VIEW MACROS
Необходима для задания дополнительных функций прибора, таких как, включения и выключения лампы или перезагрузки каналов мотора. Позже эти макросы можно использовать горячими кнопками.
Теперь можно и сохранить нашу голову, жмем локальную SAVE AS, прописываем имя из 2х слов – фирма и модель, жмем энтер. Голова сохранится с расширением *.HED в папке C:Program FilesChamsys LtdMagicQ PCshowheads, сохрани ее отдельно. Если ты переустановишь программу, нужно добавить этот фаил на свое родное место (showheads) и во время патча, выбирая голову по CHOOSE HEAD, зажми шифт. Появится кнопка RECREATE INDEX. Нажав ее, ты обновишь базу приборов, и твоя голова появится в списке.
Начинаем «общаться» с приборами
Теперь давай посмотрим, как можно менять интенсивности приборов вручную.
Открой окошко INTENSITY правой глобальной кнопкой int. Пошевелив некоторыми ползунками, ты увидишь, что они все покраснели, это значит что их значения были внесены в программатор. Можно так же менять значения интенсивностей с помощью команд:
2@30 ентер — установит 2й прибор на интенсивность 30%.
1>5@70 ентер — приборы 1234567 устанавливаются на 70%
6>8@100 ентер — приборы 678 на 100%
1>7-2>4+9@# ентер — включить приборы 1 567 9 на 100%
Все произведенные изменения занеслись в программатор. Чтобы удалить из программатора любую интенсивность, выбери ее и нажми REMOVE CURSOR(сверху)
Удалить из программатора все изменения можно глобальной кнопкой clr.
Сделаем еще один персональный вид: для начала закроем все окна по шифт+cls(справа). В верхней части рабочей области расположим INTENSITY ( не забываем про кнопку size), а в нижней OUTPUTS. Сохраним этот вид с названием Int, нажав глобальную кнопку
rec -> вводим имя -> контрал + давим на свободное окошко сверху.
==
==
Когда активно окно INTENSITY, слева вверху есть 2 вида VIEW PROG и VIEW PRESETS, первый вид вносит изменения только в программатор для последующей записи значений, второй вид дает возможность регулировать интенсивности диммеров на лету, сразу передавая значения реальным приборам и не записывая их в программер. Продолжим работать в окне INTENSITY с видом VIEW PROG.
Слева на тачпаде есть столбик локальных кнопок, позволяющих фильтровать отображаемые интенсивности по типу, гелю, имени и самая нижняя чтобы снова вернуть отображение всех уровней. Поклацай фильтр по гелю, пока на экране не останутся только пять RIGHT PAR-ов. Теперь нажми локальную SELECT ALL (сверху), ползунки стали жирными. Отрегулируем их интенсивности с помощью правой нижней кнопки на тачпаде Sel Heads Dimmer. Нажимая ее получаем значения 0,50,100%.
==
==
А если нам нужно допустим 38? Обрати внимание, что рядом с левым и правым столбиком локальных кнопок есть энкодеры, слева A,B,C,D и справа E,F,Y,x. они отвечают за более точную регулировку функций рядом стоящих с ними кнопок. Работают глючновато, как по мне. Жми на верхнюю или нижнюю часть энкодера и жди, пока значение не начнет стремительно расти(убывать); угадать, когда оно таки начнет сложно. Можно еще клацать по энкодеру, но до него доходит туго =
В общем, устанавливаем выбранные энкодеры в 100% и записываем их на 3й ползунок: rec -> набираем Right -> жмем на кнопку s над 3м фейдером. Переименовать его в случае чего можно глобальной кнопкой set.
Теперь очистим программер (clr) и вернемся к нашему первому виду на группы — удерживая Сtrl, выбери сверху first. Есть такое понятие, как cue, тоесть сцены. Определенные положения параметров приборов. Создадим наш первый Cue стек.
Выбери группу ALL SOLO, теперь найди справа на глобальной панели кнопку odd even (7й ряд), зажми ее и перетащи мышку на odd в выскочившем меню, таким образом выбрав только нечетные светильники. Закрой окно (cls), установи их интенсивности на 100% (Sel Heads Intensity) и запиши на свободный фейдер с именем Solo Cue. Очистив программатор, аналогично запиши на тот же ползунок(!) четные светильники из группы соло — в odd even выбрав even. Теперь, подняв фейдер, на карте увидим, как зажигаются то четные то нечетные диммеры. Настройки этого стека можно открыть двойным щелчком по кнопке S над ползунком, я не совсем понял, как они работают. Если менять значение столбика Times с chase на cues, только тогда можно редактировать fade и delay значения.
Каждая записываемая нами позиция хранится в Cue store (глобальная, 5й ряд) ввиде истории, даже если ты удалишь ее с фейдера.
Любой записанный на фейдер КЪЮ можно занести в программатор, если мы хотим его поправить и переписать, допустим, на другой фейдер. Делается это нажатием глобальной кнопки inc справа внизу -> выбор фейдера нажатием на его кнопку S. Все, данные этого къю в программаторе.
Пульт умеет работать в слепом режиме. Активируется он глобальной кнопкой blnd и позволяет программировать консоль, не выводя значения на приборы. Это полезно если тебе нужно сделать пару эффектов, а шоу уже началось.
Эта статья будет постоянно обновляться по мере того, как будут появляться новые предложения на рынке.
Я вам советую обзавестись своим пультом. Не важно: usb-контроллер или полноразмерная консоль. Выбор будет сделать легче, если вы трезво продумаете варианты применения сейчас и в перспективе.
У обладания пультом есть плюсы.
Хорошо выучите систему
Вы будете решать разнообразные задачи и это поможет быстрее и глубже изучить возможности вашего пульта. Не важно, какая у вас модель — софт един для всей линейки пультов у производителей. С хорошими знаниями конкретной системы, вы сможете быть востребованы как программист и оператор.
Сможете работать быстро
Знание быстрых комбинаций упрощает и ускоряет работу с софтом. Со временем вы сформируете мышечную память на сочетания клавиш и будете совершать действия с автоматизмом. Углубленное знание системы тоже скажется на скорости выполнения операций с консолью.
У вас появится преимущество
При равных условиях, заказчик отдаст предпочтение человеку со своим пультом. Вы сможете продавать свои услуги дороже.
Облегчите себе жизнь
Вам не будет страшно, что на говнополяне вам поставят Пилот или Санлайт. Приятно работать в комфортных условиях.
Поможете производителю и другим пользователям
Не думайте, что от вас ничего не зависит. Производителю сложно смоделировать все возможные пользовательские сценарии. Отправляйте баги и предлагайте идеи по развитию софта. Это двигает разработку вперед и полезно всем.
Что выбрать?
У всех производителей есть недорогие начальные решения. Я определил требования, чтобы сузить поиск:
- Распространенность.
Иными словами, райдерность отобранных систем. Нет никакого смысла обладать и учить редкие невостребованные консоли. Я сужу по совокупным упоминаниям в профессиональных изданиях и сетевых сообществах. - Цена.
Не больше 2000 € с бижутерией типа миди-контроллеров и дополнительным софтом. Профессиональное оборудование может продаваться с большими скидками, поэтому ориентируюсь на цены из открытых источников. - Физические фейдеры и кнопки — обязательно.
На сегодняшний день самые популярные системы:
- Avolites
- Chamsys
- MA Lighting (grandMA2 и grandMA3)
- High End Systems (Hog 4)
- Obsidian Control Systems (Onyx)
Санлайт с Лайтжокеями и прочей маргинальщиной не рассматривается, поскольку не имеет пультовой логики программирования.
На остальных взглянем подробнее.
Avolites
В 2022 году я вернулся на систему Аволайтс. Визуально у Аво самый приятный графический интерфейс. Есть все, что нужно: встроенный визуализатор, базовый медиасервер, таймкод с таймлайном. После лет, проведенных на MA2, меня ничто не раздражает.
Аволайтс победил пиратство. Китайские поддельные пульты работают только до версии v.11.4. Для старых оригинальных пультов нужен лицензионный usb-ключ AvoKey. Китайским подделкам AvoKey не поможет обновиться до свежих версий (v.15 и далее).
Avolites T1 — начальное устройство в экосистеме Аво.
Производитель предлагает USB-интерфейс на один DMX-выход. Чтобы втиснуться в требования про фейдеры и кнопки, придется прибегнуть к пиратскому тюнингу. За дополнительные 99 € программа OsiMIDI позволит подключить миди-контроллер и замапить фейдеры, кнопки, энкодеры.
- 1 выход DMX
- Фейдеры, кнопки и энкодеры на миди-контроллере с отдельной платной программой
- Цена: 250 € + контроллер 40 € + софт 99 €. Итого 390 € за весь набор
- Встроенный визуализатор
Если есть деньги, советую доплатить и купить Avolites T2 за 750 €.
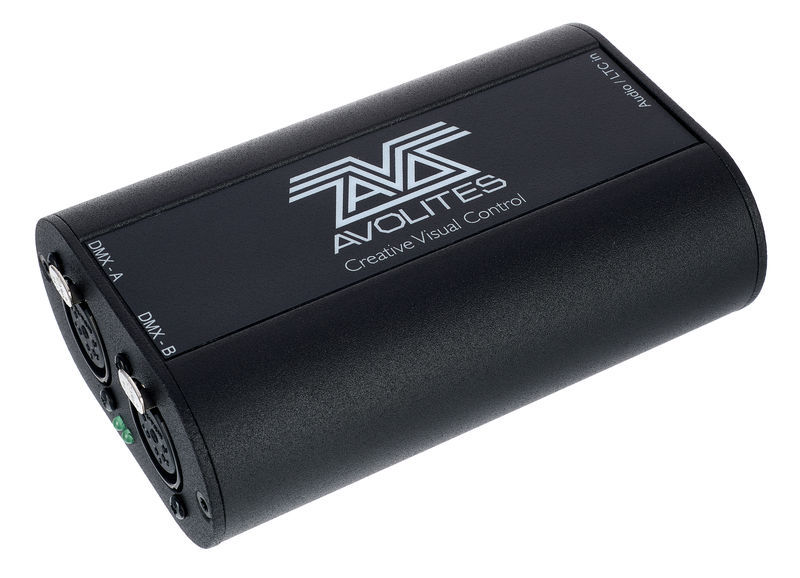
Тут на борту уже 2 DMX выхода, вход для LTC таймкода и разрешено подключать миди-контроллеры без ухищрений.
Следующий по старшинству: Avolites Titan Mobile за 3100 €.
Примеры лоукост сетапов с Аволайтсом
Популярная в мире система со своим визуализатором и медиасервером. Часто обновляется, заимствует удачные функции у других производителей.
Мощь Камсиса в том, что их софт MagicQ бесплатно дает 64 юниверса с любым артнет преобразователем. Через заворот кишок можно подключить миди-контроллер, но для этого потребуется какая-нибудь железка от Камсиса.
В 2022 году у Камсиса не осталось в продуктовой линейке никаких недорогих крыльев — всё сняли с производства. По словам представителей, к концу года будут анонсированы новинки.
Ничего пиратского по Камсису не существует.
За 14 € или даже бесплатно в подарок от дилера можно получить «шнурок» MagicDMX Basic на одну физическую DMX-линию. Есть ограничение — софт будет работать беспрерывно 5 часов, после этого придется перезапустить программу.
Донгл MagicDMX Full за 80 € будет работать без ограничений.
USB-донгл MagicQ Rack Mount за 540 € снимает ограничения на миди. Можно подключить миди-контроллер и замапить фейдеры, кнопки, энкодеры.

Примеры лоукост сетапов с Камсисом
MA Lighting
Пока наиболее распространенная и райдерная система в мире — grandMA2. В настоящее время вся линейка grandMA2 снята с производства. Можно купить оригинальные устройства на вторичном рынке или подделки.
Самый дешевый билет в мир grandMA2 — это пиратские usb-флешки российского производства, которые определяются как Command Wing или Fader Wing. Каждая флешка разблокирует по 2048 параметров и в отличии от устройств с Алиэкспресса не привязана к версиям софта. Флешки стоят по 7500 рублей. Купить можно у меня.
В grandMA2 очень просто подключать миди-устройства. Проще всего это сделать с помощью программы RD/ShowCockpit, лицензия на это обойдется в 80 € (не продается россиянам). Крутость программы в том, что кроме фейдеров и кнопок позволяет замаппить энкодеры на миди-контроллере.
Наши хакеры национализировали и Шоукокпит. Полную пиратскую версию ShowCockpit Pro 4.6.0 со всеми плагинами можно найти в закрепах в телеграм-чате Clear — Художники по свету.
Покупай российское! Наш разработчик Артем Сысолятин создал приложение Midi to grandMA2. Дешевле и местами круче португальского аналога. Рекомендую!
midigma.com
Лоукост сетапы на grandMA2
MA Lighting GrandMA3
malighting.com/product/grandma3-onpc-2port-node-2k-4010512/

Презентация новой линейки состоялась в январе 2018 года. Продукт до сих пор сырой и малопригодный для использования. Есть вероятность, что за счет преданной пользовательской базы достигнет возможностей grandMA2, но темпы удручающие.
Ничего пиратского по grandMA3 пока не выпущено.
Самое недорогое предложение — это контроллер grandMA3 onPC 2Port Node 2K. Система позволяет подключать миди-контроллеры без стороннего софта. На момент написания заметки, опция в софте недоступна. Not Implemented Yet, как у них принято говорить.
- 2 выхода DMX, 2048 параметров приборов можно раскидать хоть на 256 линий по артнету
- Фейдеры, кнопки и энкодеры на миди-контроллере
- Цена: 1390 €
- Встроенный визуализатор
- Следующий по старшинству: grandMA3 onPC command wing за 5400 €.
Hog 4
Популярная система с огромной пользовательской базой по всему миру. В последних версиях открыли возможность мапить фейдеры, кнопки и энкодеры на миди-контроллеры.
Самое простое устройство — usb-устройство Hog 4 DMX Widget. Стоит около 730 €.
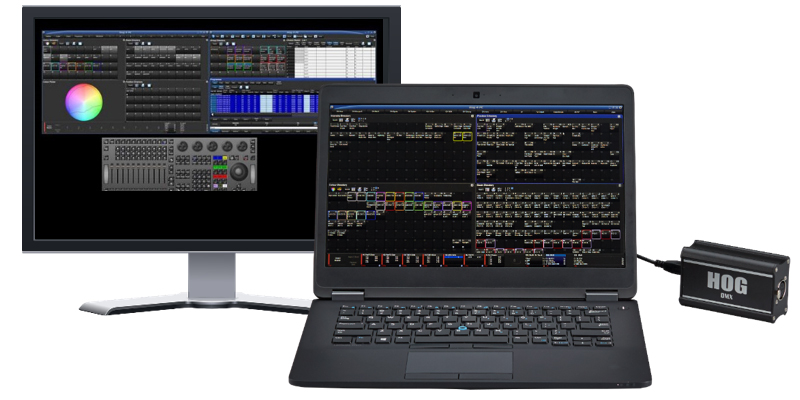
В линейке Hog 4 появилась флешка ETCnomad USB key unlocked, которая разблокирует 12 юниверсов по артнету. Стоит около 1500 €.
Владимир Тихонов, гений радиоэлектроники из Красноярска много лет занимается производством национализированных устройств семейства Hog 4.
Среди множества виджетов и артнет-преобразователей, которые он делает, я выделяю роскошный контроллер, получивший народное название «Двуручный кастет». Это крыло, полностью имитирующее работу Hog 4 Hoglet. Стоит 75 000 рублей.
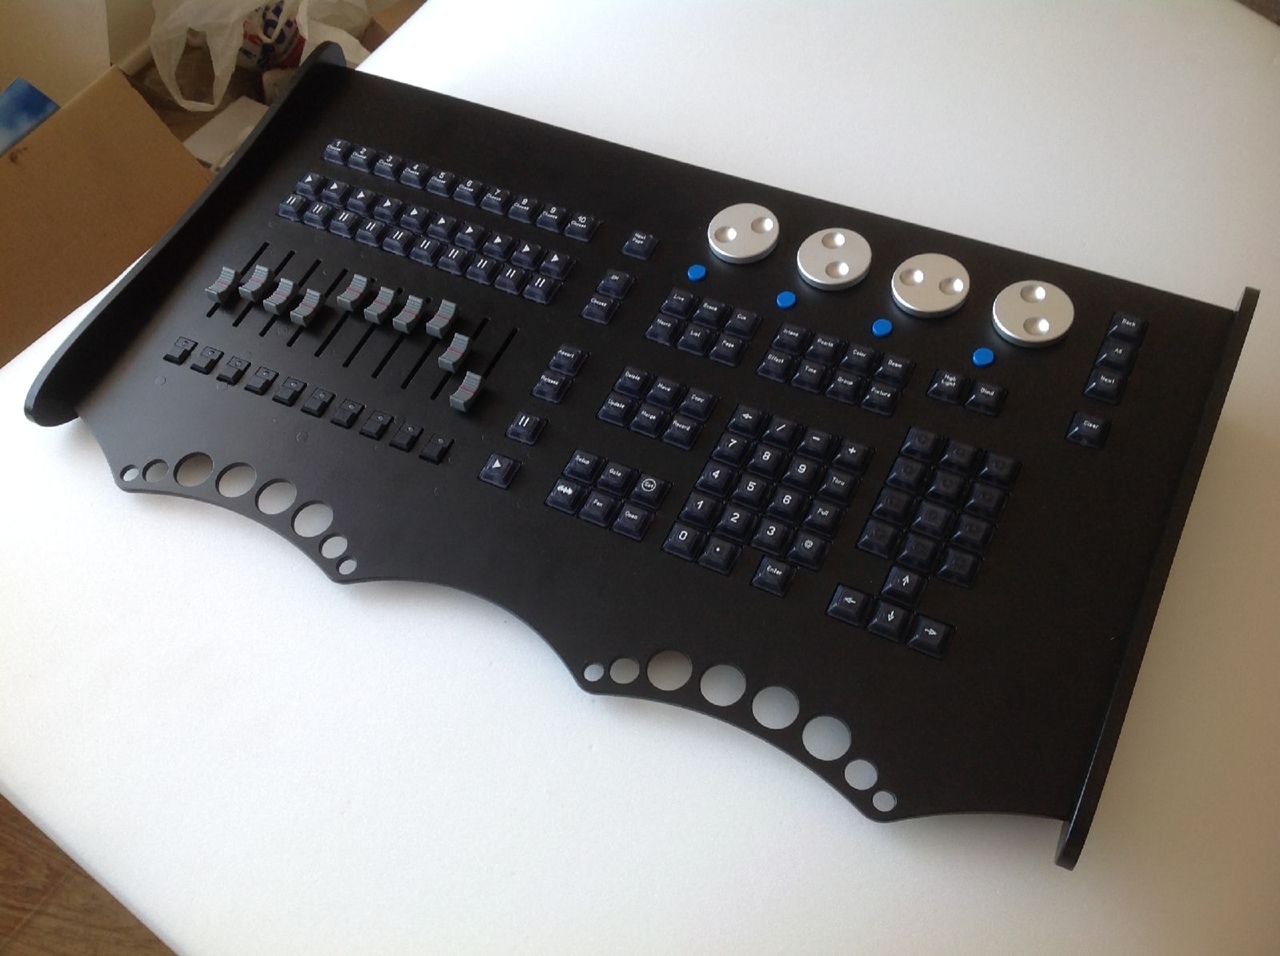
Рекомендую, обращайтесь к нему напрямую: udodus@gmail.com
Obsidian NX Touch
obsidiancontrol.com/nx-touch
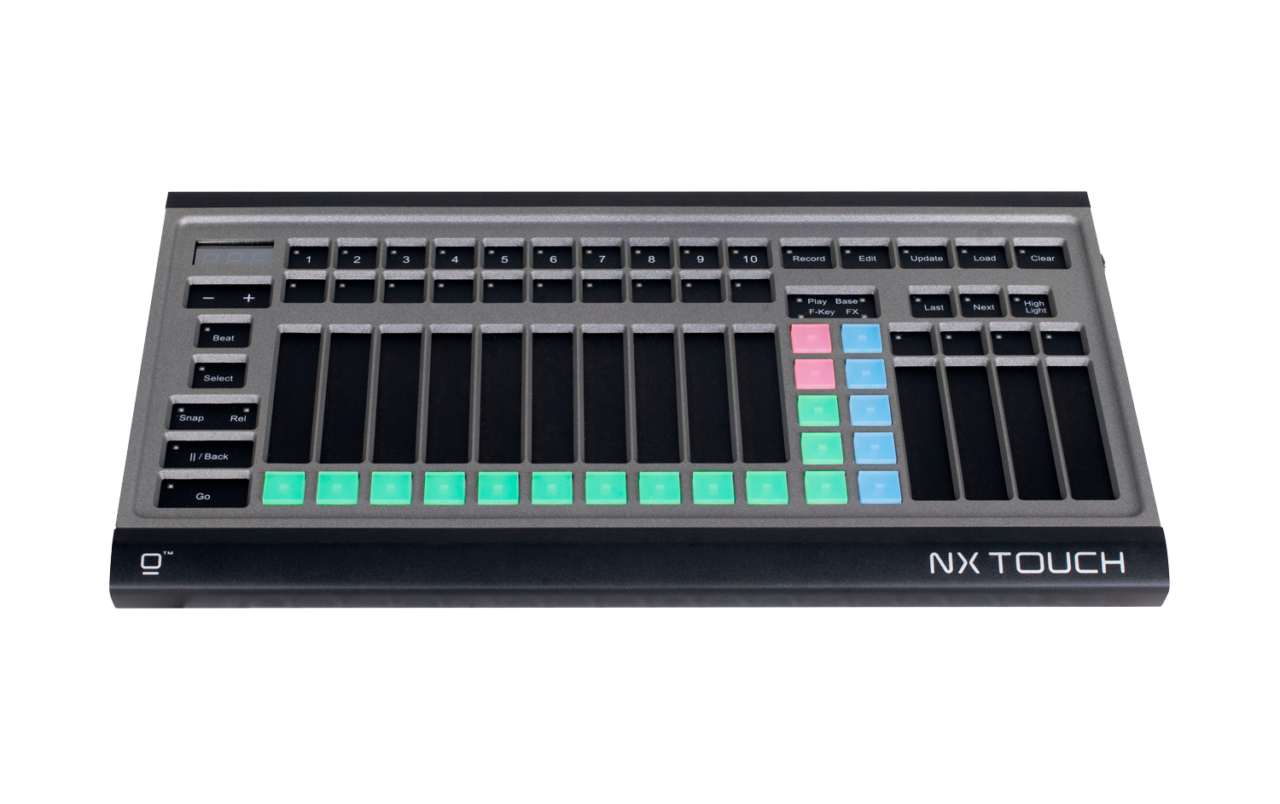
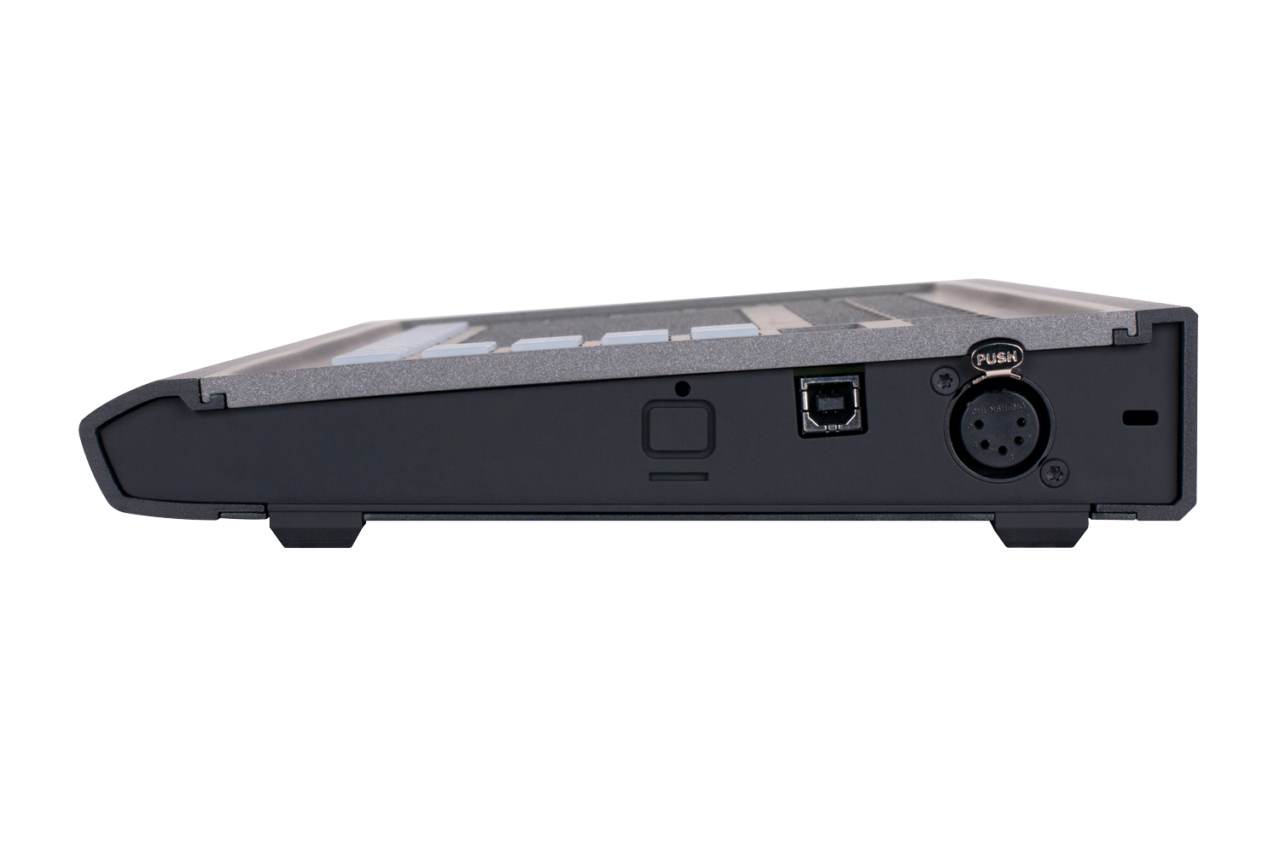
До продажи компании Elation, продукт принадлежал компании Martin и назывался Martin M-Touch. Его можно купить до сих пор и он ничем не отличается, кроме логотипа на панели.
Пульт с сенсорными панелями в качестве фейдеров. Можно подключать миди-конроллеры с полноценными фейдерами. На устройстве есть энкодеры и командные кнопки.
- 1 выход DMX, 4 выхода по артнету
- Сенсорные фейдеры или миди-контроллер
- Цена: 530 €
- Следующий по старшинству: NX Wing за 2500 €
А можно дешевле?
Можно. Оникс бесплатно дает 1 юниверс по артнету. Миди-контроллер прицепить при этом не получится, система специально будет выполнять OSC команды с задержкой.
Пиратского по системе Оникс ничего не выпускается.
Примеры лоукост сетапов на Обсидиан Ониксе
Art-net преобразователи
Поддерживайте российских производителей, вон их сколько оказывается!
| Выходы DMX | Цена, руб | |
| Siberian Lighting LanUNO 512 | 1 | 12500 |
| Siberian Lighting LanDUO 1024 | 2 | 15000 |
| Siberian Lighting LanQUAD | 4 | 20000 |
| ЯRILO LANdmx2 | 2 | 13950 |
| ЯRILO LANdmx4 | 4 | 18950 |
| DMX Tools DMX Widget 2U | 2 | 15000 |
| DMX Tools DMX Widget 3U | 3 | 17000 |
| Владимир Тихонов ART-Net <-> DMX 2 | 2 | 8000 |
| Владимир Тихонов ART-Net <-> DMX 4 | 4 | 12 000 |
Выводы
Самое недорогое решение — нелегальное grandMA2, для бессовестных и бездуховных. Несмотря на то, что линейка снята с производства — это самая популярная туровая система в мире. Покупаете за несколько тысяч рублей устройство на 2048 параметров, артнет преобразователь, подключаете миди-контроллер с замапленными фейдерами, кнопками и энкодерами — пульт готов!
Obsidian Onyx — самое выгодное и удобное предложение. Контроллер с энкодерами и фейдерами. Да, сенсорными, но можно прикрутить миди-контроллер. Система развивается очень быстро, пользовательская база большая.
Самая щедрая система — Chamsys MagicQ. USB-ключ MagicQ Rack Mount открывает миди и дает 64 юниверса по артнету.
Самое национализированное устройство — «Двуручный кастет» от Владимира Тихонова. За 75 000 рублей вы получаете полноценное крыло, рядом с которым вас будут уважать!
Для всех пультов нужен ноутбук или компьютер. Сенсорный экран — обязательно, даже не спорьте.
Есть что добавить? Не сдерживайте себя в комментариях или в личку.