- Manuals
- Brands
- Tchibo Manuals
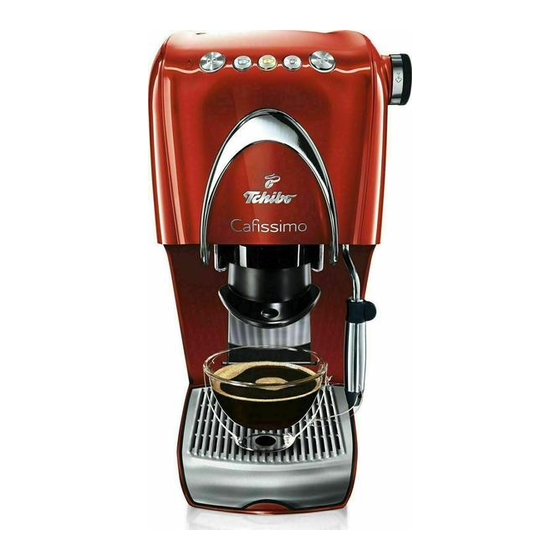
- Coffee Maker
- Cafissimo CLASSIC
- Original instructions for use and warranty
-
Contents
-
Table of Contents
-
Bookmarks
Quick Links
Welcome to
Original instructions for use and guarantee
for Cafissimo CLASSIC
Find it only at Tchibo
Related Manuals for Tchibo Cafissimo CLASSIC
Summary of Contents for Tchibo Cafissimo CLASSIC
-
Page 1
Welcome to Original instructions for use and guarantee for Cafissimo CLASSIC Find it only at Tchibo… -
Page 2
— perfect espresso, caffè crema and filter coffee. Just press a button and your Cafissimo CLASSIC will do the rest. Our team of experts have optimally harmonized the machine and capsules so that your coffee develops its full aroma. -
Page 3
The features of your Cafissimo CLASSIC at a glance: • Unique three pressure level system: Intelligent interaction between machine and capsule means every page coffee is automatically perfect, as each type of coffee is prepared at the correct pressure. • Individually programmable beverage size: page Brew however strong a cup you like according to your personal taste. -
Page 4: Table Of Contents
Contents 5 At a glance 15 Tips for use 20 Frothing milk 15 Coffee strength 20 Tips for a perfect milk froth 6 Control panel in detail 15 Interrupting/stopping the brewing 20 Dispensing steam functions of the buttons process 23 Frothing milk Overview of the indicator lights 15 Full aroma 24 After frothing —…
-
Page 5: At A Glance
At a glance Control panel 30 Rinsing with water after Water tank a long period of non-use Steam knob for 31 Automatic switch-off steam and hot water 32 Cleaning 32 Frequency of cleaning Stop lever 32 Cleaning the capsule holder (metal bracket) 33 Cleaning the steam wand and frother nozzle…
-
Page 6: Control Panel In Detail Functions Of The Buttons
Control panel in detail — functions of the buttons The colours of the buttons are visible when the Making filter coffee machine is switched on. (blue cup for blue capsule) Flashing buttons indicate that the machine is Making caffè crema heating up, cooling down or preparing a beverage.
-
Page 7: Overview Of The Indicator Lights
Overview of the indicator lights Machine is heating up to brew coffee Machine is ready to brew coffee/dispense water Brewing cycle is running Machine is heating up to produce steam (for milk froth) Machine is ready to dispense steam (for milk frothing) The machine is cooling down from steam production temperature to lower coffee brewing temperature Start-up is being carried out…
-
Page 8
Descaling programme: waiting for the cleaning phase to start (capsule holder is not fitted, stop lever is not pressed down, steam valve is open, water tank empty, button not yet pressed) Descaling programme: waiting for the rinsing phase to start (capsule holder is not fitted, stop lever is not pressed down, steam valve is open, water tank empty, button not yet pressed) Descaling programme: cleaning phase, rinsing phase… -
Page 9: Overview Of The Acoustic Signals
Overview of the acoustic signals The machine will indicate when it is ready to begin a process or when it has finished one. Heating up / cooling down is completed Water level decreases to below MIN mark during use 1 short acoustic signal 1 short acoustic signal 5 seconds after coffee has been brewed Descaling programme: refill the tank with water…
-
Page 10: The Unique Three Pressure Level System
The unique three pressure level system The Cafissimo CLASSIC has a unique three pressure level The three coffee selection buttons each represent a dif fer — system meaning that it is optimally designed to brew your ent brewing pressure. The colour of the cups matches the favourite type of coffee.
-
Page 11: Intended Use And Location
• Brewing filter coffee, caffè crema and espresso with the machine as described in these instructions to avoid Tchibo capsules. accidental injury or damage. • Frothing milk. Keep these instructions for future reference.
-
Page 12: Safety Warnings
Safety warnings DANGER to children and people with a restricted damp hands. Do not use the machine outdoors. capability of operating appliances • Never leave the machine to operate unattended. • Children must not be allowed to play with the appliance. •…
-
Page 13
CAUTION – risk of injuries or material damage radiator or anything similar. • Only use original Tchibo Cafissimo capsules. Neither • Route the mains cord so that it cannot be tripped over. use capsules from other manufacturers, nor damaged… -
Page 14: Initial Operation — Before First-Time Use
Initial operation – Before first-time use — IMPORTANT Before you can use the machine, water must be pumped into the piping system. The separately enclosed leaflet explains how you should proceed. 14 Initial operation…
-
Page 15: Tips For Use
Tips for use Coffee strength • Espresso tastes best when served in a preheated cup. Also read the section ”Hot water to preheat cups”. • Each capsule is portioned for one cup of filter coffee, caffè crema or espresso. Residues of coffee grounds and capsule bases •…
-
Page 16: Brewing Coffee
Brewing coffee 1. Press the On/Off button The button flashes and the heating up process starts. While the machine heats up a few drops of water may drip from the capsule holder. This is normal and harmless. As soon as all the indicator lights remain permanently lit the machine is ready.
-
Page 17
4. Place the cup on the centre of the round opening of the drip tray. Fold down the hinged tray if you are using small cups. The tray is held by a magnet when it is folded up. 5. Press the button that corresponds to the capsule you have inserted. -
Page 18
Disposing of used capsules 1. Press the stop lever upwards. The capsule holder will be released and slightly lowered. 2. Now pull the capsule holder to the front out of the machine. If necessary, hold a dish underneath to catch possible drips. -
Page 19: Adjusting The Strength Of The Coffee
Adjusting the strength of the coffee Adjust the strength of the coffee to suit your personal 1. Proceed as you would do for brewing coffee: insert a taste by adjusting the quantity of water. capsule, press the stop lever down, place a cup under- neath.
-
Page 20: Frothing Milk
Frothing milk Tips for a perfect milk froth • The milk has to be well cooled. • Depending on your individual taste, use milk with a fat content of up to 3.5%. • Milk that has already been warmed does not froth well. Dispensing steam You will need steam to froth the milk.
-
Page 21
1. Press the On/Off button to switch the machine on. 2. Press the button with the steam symbol The button flashes red and the machine heats up to produce steam. 40—105 sec. As soon as the button lights up permanently in red, a short signal will sound and the machine is ready for use. -
Page 22
3. Hold a heat-resistant receptacle with a handle beneath the steam nozzle. 4. Slowly turn the steam knob anticlockwise beyond the resistance point. A small quantity of water will be dis charged. Do not be alarmed! The steam is emitted under pressure. -
Page 23: Frothing Milk
Frothing milk 6. Fill a cup or small jug one third full with cold milk. 7. Hold the receptacle under the steam nozzle, ensuring that the steam nozzle is deeply immersed in the milk. 8. Slowly turn the steam knob anticlockwise beyond the resistance point.
-
Page 24: After Frothing — Let Off Steam
After frothing — let off steam To ensure that air does not get trapped in the system and to rinse the frother nozzle through, proceed as follows: 10. Press the steam button to switch off the steam function. The steam button flashes white. 11.
-
Page 25
12. Slowly turn the steam knob anticlockwise as far as it will go. The frother nozzle will first begin to emit steam and then hot water. As soon as all buttons light up continuously, a short signal will sound. Turn the steam knob clockwise to close it. -
Page 26: Brewing And Frothing Temperatures / Heating And Cooling The Machine
Brewing and frothing temperatures / heating and cooling the machine Lower temperatures are needed to brew coffee and espresso Have you accidentally pressed the steam button? than those required for dispensing steam to froth milk. If the steam button has been pressed accidentally, simply When you press the steam button, the machine will press it again to switch it off.
-
Page 27: Hot Water To Preheat Cups
Hot water to preheat cups This is a function that comes in handy when you want to The machine is ready to dispense hot water when the preheat an espresso cup. steam button lights up in white. You can reach this stage in the following ways: a) If the machine is switched off: Press the On/Off button As soon as all the buttons remain permanently lit, a…
-
Page 28: Preparing Coffee Specialities
Preparing coffee specialities In this section we have put together a selection of Cappuccino delicious coffee recipes: to prepare these specialities The classic espresso speciality, which owes its name to the you will need the following basic ingredients: two-tone brown and white cowl of the monastic order of •…
-
Page 29: Coffee Mocha
Coffee Mocha Latte Macchiato The American version of chocolate coffee. This decorative treat is the latest trend. Ingredients: Ingredients: 1 black espresso capsule (40 ml) 1 black espresso capsule (40 ml) 100 to 120 ml full cream milk 100 to 120 ml full cream milk 20 to 30 ml chocolate syrup Preparation Cocoa powder to decorate (if desired)
-
Page 30: Rinsing With Water After A Long Period Of Non-Use
Rinsing with water after a long period of non-use If the machine has not been used for more than 2 days, stale water and air will be trapped in the system. In rare cases, air can also have entered the system while milk was being frothed.
-
Page 31: Automatic Switch-Off
WARNING – risk of scalds due to hot water splashes or steam • The machine begins heating as soon as it has been switched on. If you proceed slowly, the water may already be hot. Place a receptacle beneath the steam nozzle. Turn the steam knob anticlockwise until water is dis — pensed from the frother nozzle into the receptacle.
-
Page 32: Cleaning
Cleaning Cleaning the capsule holder DANGER – risk of fatal electric shock The capsule holder is made up of two parts and must be • Remove the mains plug from the wall socket taken apart before being cleaned. before cleaning the machine. Turn the upper •…
-
Page 33: Cleaning The Steam Wand And Frother Nozzle
Cleaning the steam wand and frother nozzle Cleaning the floater, drip tray and grid The floater, drip tray and grid can be washed up by hand WARNING – risk of burns due to hot machine or cleaned in the dishwasher. Put the floater into the parts cutlery basket.
-
Page 34: Cleaning The Hinged Tray
Cleaning the hinged tray Cleaning the water tank The hinged tray can be detached for easy cleaning. The water tank should be cleaned once a week. 1. Fold the tray down. 1. Pull the water tank up and out, keeping it vertical. Holding it on one side, pull 2.
-
Page 35: Descaling
— a special des- can cause damage. caling agent for coffee machines. durgol® swiss espresso® is available from any Tchibo branch and How often must the machine be descaled? from specialist retailers. Please observe the manu- The frequency with which you will need to descale your facturer’s instructions.
-
Page 36
Descaling When the descaling procedure is completed, a signal will sound and the caffè crema and espresso buttons 1. Remove the water tank from the machine and pour one will flash. portion (125 ml) durgol ® swiss espresso ® into the empty water tank. -
Page 37: Problems / Solutions
Problems / Solutions The coffee drips out very slowly. • The machine is calcified. • Wrong button has been pressed (for espresso only Too little/too much coffee/water is dispensed. 40 ml water are dispensed). • Quantity of water has been incorrectly set. Refer to ”Adjusting the strength of the coffee”.
-
Page 38
No steam is generated. • The machine has not yet heated up. The frother nozzle does not dispense water. • Frother nozzle and/or steam wand is clogged. Too little or no coffee comes out, • In rare cases, the capsules are not correctly perforated and the capsule cannot be removed. -
Page 39: Technical Specifications
Sound pressure level: <70 dB(A) Ambient temperature: +10 to +40°C Made exclusively for: Tchibo GmbH, Überseering 18, 22297 Hamburg, Germany In the course of product improvement, we reserve the right to make technical and optical modifications to the machine. 39 Technical specifications…
-
Page 40: Declaration Of Conformity
Declaration of Conformity Disposal The machine and its packaging have been manufactured We herewith confirm compliance of the product with the following directives: from valuable materials that can be recycled. Recycling reduces the amount of refuse and helps to 2006/42/EC – Machinery Directive preserve the environment.
-
Page 41: Guarantee
This guarantee does not restrict statutory warranty rights. within the guarantee period. In order for the guarantee to be granted, all warranty claims must be accompanied by proof of purchase from Tchibo or from an authorised Tchibo distribution partner. Product number…
-
Page 42
Enjoy perfect coffee There is even more to enjoying perfect coffee at the press of a button than coffee machine and capsules. For that very special Cafissimo experience we offer you a range of accessories, for example our capsule dispenser or our elegantly designed latte macchiatio glasses.
-
Инструкции по эксплуатации
1

CAFISSIMO COMPACT инструкция по эксплуатации
(31 страница)
- Языки:Русский
-
Тип:
PDF -
Размер:
3.89 MB -
Описание:
Кофемашина
Просмотр
На NoDevice можно скачать инструкцию по эксплуатации для CAFISSIMO COMPACT. Руководство пользователя необходимо для ознакомления с правилами установки и эксплуатации CAFISSIMO COMPACT. Инструкции по использованию помогут правильно настроить CAFISSIMO COMPACT, исправить ошибки и выявить неполадки.
Смотреть руководство для Tchibo Cafissimo easy ниже. Все руководства на ManualsCat.com могут просматриваться абсолютно бесплатно. Нажав кнопку «Выбор языка» вы можете изменить язык руководства, которое хотите просмотреть.

MANUALSCAT | RU
Вопросы и ответы
У вас есть вопрос о Tchibo Cafissimo easy, но вы не можете найти ответ в пользовательском руководстве? Возможно, пользователи ManualsCat.com смогут помочь вам и ответят на ваш вопрос. Заполните форму ниже — и ваш вопрос будет отображаться под руководством для Tchibo Cafissimo easy. Пожалуйста, убедитесь, что вы опишите свои трудности с Tchibo Cafissimo easy как можно более детально. Чем более детальным является ваш вопрос, тем более высоки шансы, что другой пользователь быстро ответит на него. Вам будет автоматически отправлено электронное письмо, чтобы проинформировать вас, когда кто-то из пользователей ответит на ваш вопрос.
Задать вопрос о Tchibo Cafissimo easy
- Бренд:
- Tchibo
- Продукт:
- кофеварки
- Модель/название:
- Cafissimo easy
- Тип файла:
- Доступные языки:
- польский
Сопутствующие товары Tchibo Cafissimo easy
инструкцияTchibo Cafissimo Tuttocaffe

D/A GB PL
www.tchibo.de
Unser Service für Sie
Aus Überzeugung von der Qualität unserer Produkte gewähren wir Ihnen
volle 40 Monate Garantie auf unsere Maschinen. Da wir aber ständig
daran interessiert sind, uns noch weiter zu verbessern, sind wir für Ihre
Anregungen jederzeit dankbar.
Wir freuen uns auf Ihren Besuch in einer unserer über 600 Tchibo Filialen
in Deutschland und 150 Tchibo Filialen in Österreich.
Natürlich sind wir auch gerne telefonisch und im Internet für Sie da.
Sie erreichen uns unter www.tchibo.de/cafissimo und www.tchibo.at/cafissimo
oder telefonisch täglich zwischen 8 und 22 Uhr unter:
D 01805/60 25 60
(0,14 €/Min. a. d. Festnetz; maximal 0,42 €/Min. a. d. Mobilfunk)
A 0800/88 02 65
(gebührenfrei)
D/A GB PL
www.tchibo.de
Herzlich Willkommen bei
Bedienungsanleitung und Garantie
für Cafissimo TUTTOCAFFÈ
Job: 4219 440 36171
Datum: 14-09-05
von: timea.trojko
Uhrzeit: 14:08:13
Seite: p1
Version: —
pCoverObjekt:
Посмотреть инструкция для Tchibo Cafissimo Tuttocaffe бесплатно. Руководство относится к категории кофеварки, 30 человек(а) дали ему среднюю оценку 8.5. Руководство доступно на следующих языках: английский. У вас есть вопрос о Tchibo Cafissimo Tuttocaffe или вам нужна помощь? Задайте свой вопрос здесь
Главная
| Tchibo | |
| Cafissimo Tuttocaffe | 48862 | |
| кофеварка | |
| английский | |
| Руководство пользователя (PDF) |
Производительность
| Размещение бытового устройства | Столешница |
| Тип продукта | Капсульная кофеварка |
| Количество носиков | 1 |
| Емкость для сваренного кофе | — |
| Емкость водного резервуара | 0.7 L |
| Вместимость в чашках | — чашек |
| Тип кофе | Капсульный кофе |
| Система подачи горячей воды | — |
| Тип кофеварки | Полуавтомат |
| Максимальное рабочее давление | 3 бар |
| Встроенная мельница | Нет |
| Капсульная/чалдовая система | Caffitaly |
Эргономика
| Цвет товара | Black, Red |
| Тип управления | Кнопки |
| Встроенный экран | Нет |
Программы и функции приготовления пищи
| Приготовление кофе | Да |
| Приготовление ристретто | — |
| Приготовление эспрессо | Да |
| Приготовление американо | — |
| Приготовление капучино | — |
| Приготовление латте | — |
| Приготовление латте макиато | — |
| Приготовление мокаччино | — |
| Приготовление лунго | — |
| Приготовление сaffe crema | Да |
| Приготовление горячего молока | — |
| Приготовление чая | Да |
| Приготовление горячего шоколада | — |
| Приготовление молочно-шоколадного напитка | — |
| Приготовление орзо | — |
Энергопитание
| Автовыключение | Да |
| Самовыключение через (маск) | 9 min |
Прочие свойства
Вес и размеры
| Ширина | 150 mm |
| Глубина | 360 mm |
| Высота | 265 mm |
| Вес | 4000 g |
показать больше
Не можете найти ответ на свой вопрос в руководстве? Вы можете найти ответ на свой вопрос ниже, в разделе часто задаваемых вопросов о Tchibo Cafissimo Tuttocaffe.
Не нашли свой вопрос? Задайте свой вопрос здесь
Для ознакомления с инструкцией необходимо нажать на ссылку «ЗАГРУЗИТЬ», чтобы скачать pdf файл. Если есть кнопка «ПРОСМОТР», то можно просто посмотреть документ онлайн.
Для удобства, Вы можете сохранить данную страницу с файлом руководства по эксплуатации в свой список «избранное» прямо на сайте (доступно для зарегистрированных пользователей).
Смотрите инструкцию для похожих моделей:

Вы можете задать вопрос посетителям сайта по модели CAFISSIMO COMPACT. Если Вы являетесь её пользователем, то пожалуйста оставьте, по возможности развёрнутый отзыв:

Instructions for use and warranty for Cafissimo easy
Tchibo GmbH D-22290 Hamburg · 99127HBXIX · 2018-12
Contents
Intended use and location
2
Intended use and location
9
Making a beverage
2
About these instructions
11
3
Safety warnings
Adjusting the strength of the
beverage (beverage quantity)
5
At a glance
12
Standby mode
5
Control panel — button
functions
12
Cleaning
13
Descaling
15
Problems / solutions
16
Disposal
16
Technical specifications
17
Warranty
6
Initial operation — prior to
first use
7
Rinsing the machine
8
The finest aroma — the finest
flavour
8
The machine has been designed for the following uses:
• Brewing black coffee, caffè crema and espresso with Tchibo capsules.
It has been designed for use in households or for similar
applications such as
• in shops, offices or similar work areas,
• in agricultural buildings,
• by customers in hotels, motels, bed and breakfast
establishments or other places offering accommodation.
Set up the machine in a dry, indoor room. Avoid rooms with high humidity or
high dust content. The machine is suitable for use at ambient temperatures
of +10 to +40°C.
About these instructions
Read the safety warnings carefully and only use the machine as described in
these instructions to avoid accidental injury or damage. Keep these instructions
for future reference.
If you pass the machine on to another person, remember to give them these
instructions.
Using large / small cups or
glasses
We check every machine carefully and test them with coffee capsules and
water. Despite thorough cleaning, it is possible for minimal residues of
coffee and water to remain in the machine.
This is not a sign of poor quality – the machine is in perfect working order.
Symbols used in these instructions:
This symbol warns you of
the danger of injury.
This symbol warns against the
danger of injury caused by
electricity.
Signal words:
DANGER warns you of potential severe injuries and danger to life.
WARNING warns you of injuries and severe material damage.
CAUTION warns you of minor injuries and damage.
This indicates additional information.
2
Safety warnings
Only connect the machine to a properly installed, earthed
wall socket. The mains voltage must comply with the
requirements stated in the machine’s technical specifications.
• The mains cable must not be kinked or squeezed.
Keep it away from sharp edges and sources of heat.
• Do not use the machine if the machine, mains cable
or mains plug is damaged or if the machine has been
dropped.
• Do not make any modifications to the machine, mains
cable or other parts. Electrical appliances must only be
repaired by qualified electricians, as improper repairs can
cause considerable damage. Only have repairs carried out
by a specialist workshop or our customer care service.
• If the mains cable of this machine becomes damaged, it
must be replaced by the manufacturer, its customer
service or by a similarly qualified person in order to avoid
any hazards.
• Remove the mains plug from the wall socket ...
... if a fault occurs,
... if the machine will not be used for any length of time,
... before cleaning the machine.
Always pull on the mains plug, not the cable.
• To disconnect the machine from the power supply
completely, remove the mains plug from the wall socket.
•
DANGER to children and people with a restricted capability of operating
appliances
Children must not be allowed to play with the machine.
Keep the machine and mains cable away from children
under the age of 8.
• This machine can be used by children aged 8 and over or
by people with reduced physical, sensory or mental
capabilities, or who lack experience and/or knowledge,
provided they are supervised or have been trained in the
safe use of the machine and understand the potential
dangers.
• Children must not be allowed to clean the machine unless
they are over 8 years of age and supervised while doing so.
This machine is maintenance-free.
• Set up the machine out of the reach of children.
• Keep the packaging material out of the reach of children.
There is a risk of suffocation!
•
DANGER due to electricity
Never immerse the machine, mains plug or mains cable in
water, as this could cause an electric shock. Never touch
the mains plug with wet hands. Do not use the machine
outdoors.
• Never leave the machine unattended while in use.
•
3
WARNING – risk of fire
•
The capsule opening contains two capsule punchers. These
punchers pierce both sides of the capsule when the lever
is pressed down. Never reach into the capsule opening.
Keep your fingers and any objects away from the capsule
opening as you fold down the lever.
• Do not lift the machine up by the lever. To move the
machine, hold it by the outer casing.
• Place the machine on a solid, level surface that is well
illuminated and resistant to moisture and heat.
• To ensure that the casing does not melt, do not place the
machine on a hob or directly next to a hot oven, radiator
or anything similar.
• Route the mains cable in such a way that it cannot be
tripped over. Do not let the mains cable hang down from
the surface the machine is put on. Otherwise, there is
a risk of the machine being pulled down.
• The machine is equipped with non-slip feet. Work surfaces
often have varnished or plastic finishes and are treated
with a variety of care products. Some of these may contain
substances that react adversely to the non-slip feet and
soften them. If necessary, place a non-slip mat under the
machine.
• The machine must not be exposed to temperatures below
4 °C. Residual water in the heating system could freeze and
cause damage.
•
Set up the machine so that it is free-standing. It must not
lean against a wall or be placed in a corner, in a cupboard,
against a curtain or anything similar.
WARNING – risk of scalds/burns
Do not touch the spout during or immediately after use.
Avoid contact with beverages being dispensed from the
spout.
• Do not raise the lever while the machine is being used.
Keep the capsule opening closed and do not pull out the
front drawer with the used capsule container.
•
CAUTION – risk of injuries or material damage
Use only original Tchibo Cafissimo capsules. Do not
use capsules from other manufacturers, nor damaged or
deformed capsules, and never fill the machine with ground
coffee or coffee beans, as this would damage the machine.
In these cases, any repairs would not be covered by the
warranty.
• Only use the machine with the front drawer and used
capsule container inserted.
• Always pour fresh, cold tap/drinking water into the water
tank. Do not use carbonated mineral water or any other
liquids.
• Descale the machine as soon as it indicates that this is
necessary.
•
4
At a glance
Water tank
Control panel —
button functions
Lever for opening
and closing the capsule opening
Indicator light
• Flashes red
(water container empty)
Capsule opening
• Lights up yellow (machine
needs to be descaled)
Control panel
Spout
• Make espresso
Used capsule
container
• Make caffè crema
• Make black coffee
Front drawer
Drip grid
Drip tray
5
Initial operation — prior to first use
1. Make sure that the used capsule
container is correctly inserted
into the front drawer. The front
drawer needs to be pushed in all
the way and the drip tray
correctly inserted.
3. The lever must be folded down.
Fold it down if necessary.
4. Place an empty cup underneath
the spout.
2. Fill the water tank up to
the MAX mark with fresh,
cold tap/drinking water.
- Open the flap in the top of the
water tank and pour in the water
through the filling inlet, or ...
5. Connect the mains plug to an
easily accessible wall socket.
- ... pull the water tank straight up
and out of the machine and then
fill it with water.
When you reinsert the water tank
into the machine, push it down
as far as it will go.
6. Press one of the 3 beverage
buttons to switch on the
machine.
You will hear a brief beeping
sound.
6
The indicator light flashes yellow
and the 3 beverage buttons flash
white.
Rinsing the machine
After switching the machine on for the first time, or if you have not used the
machine for longer than 2 days, rinse the machine by allowing 2 cups of water
to flow through it (without a capsule).
7. Press the middle button
(caffè crema).
The pump starts to operate.
As soon as the pipes are filled
with water, the pump stops
automatically. A small quantity
of water runs into the cup
underneath the spout. You will
then hear 2 beeps.
1. Fill the water tank up to the
MAX mark with fresh, cold
tap/drinking water.
2. Fold down the lever if necessary.
3. Place an empty cup underneath
the beverage spout.
Only the 3 beverage buttons will
continue to flash; the machine is
heating up to brew coffee.
4. If necessary, press one of the
3 beverage buttons to switch on
the machine.
You will hear a short beeping
sound.
As soon as the machine has heated
up, you will hear a beeping sound.
The 3 beverage buttons will remain
permanently lit.
5. Once all 3 beverage buttons are
permanently lit, press the middle
button (caffè crema). The pump
will flush water through the
pipes, which will then run into the
cup underneath.
The machine will beep once the
rinsing process has finished.
8. Pour away the water in the cup and rinse the machine twice as described in the
“Rinsing the machine” section.
The machine is then ready for use.
7
6. Pour the water away.
The finest aroma — the finest flavour
7. Repeat steps 3 to 6.
One capsule per cup
8. To switch the machine off,
press the left button (espresso)
and the middle button
(caffè crema) briefly at the same
time.
Each capsule is a single portion for one cup of black coffee, caffè crema or
espresso.
Full aroma
Only insert a capsule when you intend to use the machine. The capsule is pierced
as it is inserted. If it is not used immediately, the aroma will fade.
9. Finally, empty the front drawer
and, if necessary, the used
capsule container:
a
b
Preheating the cup
Fill the cup with hot water and then pour it away shortly before using the cup.
This helps your cup of coffee taste its best.
m Lift off the drip tray (a).
m Pull out the front drawer
as illustrated (b).
Beverage strength
Adjust the strength of the coffee to suit your personal taste by changing the
quantity of water. This is very easy to do, and is described in the “Adjusting the
strength of the beverage (beverage quantity)”section.
c
d
Using large / small cups or glasses
m Remove the used capsule
container (c).
m Empty the front drawer and,
if necessary, the used capsule
container (d).
10. Reinsert all parts into the
machine.
Leave the drip tray in for espresso
and "normal" cups of coffee.
8
Remove the drip tray for tall
glasses.
Making a beverage
1. Press one of the 3 beverage
buttons to switch on the
machine.
You will hear a short beeping
sound.
The capsule must be intact: Do not pierce it and do not remove the capsule
lid or insert a deformed capsule!
4. Fold the lever down completely.
This pierces the base and lid of
the inserted capsule.
The 3 beverage buttons flash while
the machine is heating up to make
a beverage.
5. Press the beverage button that
corresponds to the capsule you
have inserted:
As soon as the machine has heated
up, you will hear a beeping sound.
The 3 beverage buttons will remain
permanently lit.
Espresso
2. Place an empty cup underneath
the spout.
Caffè crema or
3. Fold back the lever as far as it
will go and insert a capsule as
illustrated with the lid facing
forwards.
Black coffee.
The brewing process starts and stops automatically. You will hear a beeping sound
as soon as the machine has finished brewing coffee.
9
6. Before removing the coffee cup
from the drip grid, fold back the
lever as far as it will go.
8. Finally, empty the front drawer,
the used capsule container and
the drip tray if necessary:
The machine loses pressure.
Some liquid may leak out when
this happens.
The used capsule then falls into
the used capsule container.
a
b
m Lift off the drip tray (a).
m Pull out the front drawer
as illustrated (b).
c
m Remove the used capsule
container (c).
The used capsule container
must be emptied once a day
or when it is full.
Approx. 4 capsules fit inside.
f
m Empty the used capsule
container (d).
As is the case with professional espresso machines, a small amount of
espresso or caffè crema is pre-brewed for espresso and caffè crema
capsules. This enhances the aroma. This process can be identified by the
short pause at the beginning of the brewing process. Black coffee is made
without a pre-brewing process, just like with standard filter coffee machines.
m If you would like to stop the brewing process prematurely, press the same
beverage button again while brewing.
d
Tip: You can adjust the strength of the beverage by altering the amount of water.
Refer to the “Adjusting the strength of the beverage (beverage quantity)”
section for information on how to do this.
e
m Empty the front drawer (e).
m Empty the drip tray if
necessary (f).
Default settings (amounts are approximate):
Espresso approx. 40 ml I Caffè crema approx. 125 ml I Black coffee approx. 125 ml
9. Reinsert all parts into the
machine.
7. To switch the machine off,
press the left button (espresso)
and the middle button
(caffè crema) briefly at the
same time.
10
Restoring the factory settings
Adjusting the strength of the beverage
(beverage quantity)
To reset to the original beverage amounts, proceed as follows:
1. Switch the machine off
if necessary: To do this, press
the left button (espresso) and
the middle button (caffè crema)
briefly at the same time.
Adjust the strength of the beverage to suit your personal taste by altering the
quantity of water. You can do this for one single brewing procedure or save the
setting.
Adjusting the strength for the current brewing procedure (without saving
the setting)
m If the beverage is too weak for your taste, you can stop the water flow
prematurely by pressing the flashing beverage button.
2. Then press and keep holding
down the middle button
(caffè crema) and the righthand button (black coffee).
m If the beverage is too strong for your taste, start the brewing procedure
again without inserting a new capsule. Press the button again as soon as
sufficient water has run through.
3. In addition, press the left button
(espresso) once briefly until
you hear a beeping sound
as confirmation and the
3 beverage buttons flash.
Default settings (amounts are approximate):
Espresso approx. 40 ml I Caffè crema approx. 125 ml I Black coffee approx. 125 ml
The water quantity can be set between approx. 30 and 250 ml.
Setting the strength permanently (saving the setting)
4. Now let go of the middle and
right-hand buttons.
You can change the factory settings for the water quantity permanently.
This enables you to make your favourite beverage every time, exactly the way
you like it. You can customise the setting for each type of coffee: for espresso,
caffè crema and black coffee.
The factory settings for the water quantities have been restored.
1. Proceed in the same way as described in the “Making a beverage” section:
Fill the water tank, insert a capsule and place a cup underneath the spout.
2. Press and hold the relevant beverage button (the indicator light will turn
yellow) until the required beverage quantity has been dispensed into the cup.
When you release the button, the machine will save that quantity. The machine
will beep and the yellow indicator light will disappear as confirmation.
If the settings are not to your taste, simply repeat the procedure to change them
again.
11
Standby mode
CAUTION – material damage
Do not use any caustic, aggressive or abrasive products for cleaning.
If no button has been pressed for about 9 minutes, the machine will automatically
switch to standby mode. The 3 beverage buttons will go out.
The machine will then use very little electricity. This is both a safety function
and a way to save energy. However, you should always switch the machine off
manually after use:
Cleaning the casing
m Wipe the casing with a soft, damp cloth.
m Wipe the compartment for the used capsule container with a soft, damp cloth
as required.
m To switch the machine off, press
the left button (espresso) and
the middle button (caffè crema)
briefly at the same time.
Rinsing the water tank daily
m Rinse out the water tank daily under running water. This prevents limescale
deposits or other particles from clogging the opening on the bottom of the
water tank.
m Press one of the 3 beverage
buttons to switch the machine
on again. You will hear a short
beeping sound.
Thoroughly cleaning the water tank weekly
The water tank should be cleaned thoroughly once a week.
m Wash the water tank in warm water with washing-up liquid. Rinse it out
thoroughly under running water and then dry it.
The tank is not dishwasher-safe.
To disconnect the machine from the power supply completely, remove the
mains plug from the wall socket.
Cleaning the used capsule container and drip tray/grid
1. Lift off the drip tray.
2. Remove the drip grid from the
drip tray and empty the drip tray.
Cleaning
3. Pull out the front drawer and
remove the used capsule
container.
DANGER – risk of fatal electric shock
• Switch off the machine and remove the mains plug from the wall
socket before cleaning the machine.
4. Empty the used capsule
container.
• Never immerse the machine, mains plug or mains cable in water
or any other liquids.
• Do not clean the machine with a water jet. Clean it only as
described in the following instructions.
12
5. Wash all parts using a washing-up liquid. Dry the parts thoroughly. The drip tray,
drip grid, front drawer and used capsule container can also be cleaned in the
dishwasher.
6. Then reinsert all parts into the machine.
2. Pour in a descaling agent:
m Remove the water tank from the
machine and pour one portion
(125 ml) of durgol® swiss espresso®
into the empty water tank.
IMPORTANT: Pour in water up to
the MAX mark and reinsert the
container.
Descaling
If the indicator light is yellow, the
machine needs to be descaled.
Do this within the next couple of
days. Do not wait any longer,
otherwise so much limescale may
collect that a descaling agent will
no longer have any effect.
Descaling takes approx.
30 minutes.
m If you are using a different descaling agent, read the manufacturer’s
instructions. IMPORTANT: Pour in the descaling solution up to the MAX mark
and reinsert the container into the machine.
3. Fold down the lever and remove
the drip tray if necessary.
4. Place a container with a capacity
of at least 600 ml under the
spout.
You will need to empty this
container several times
during the descaling
process.
CAUTION — damage to the machine due to limescale deposits
• Descale the machine as soon as it indicates that this is necessary
(after approx. 50 litres). This increases its service life and saves energy.
• Do not use any descaling agents made on the basis of formic acid.
• Use a standard liquid descaling agent suitable for coffee and espresso
machines. Other agents may damage materials in the machine and/or
have no effect.
®
5. Press and hold the left
button (espresso) and the
right-hand button (black coffee)
at the same time for approx.
5 seconds.
®
Tip: We recommend durgol swiss espresso , which is available from any Tchibo
branch and from specialist retailers.
To descale the machine, proceed as follows:
1. Switch the machine off if
necessary: To do this, press
the left button (espresso) and
the middle button (caffè crema)
at the same time.
13
6. The middle beverage button will
light up and the indicator light
will flash alternately between
red/yellow. Press the middle
beverage button to start
descaling.
8. Remove the water tank, the front
drawer and the used capsule
container from the machine.
9. Wash all parts using a washing-up
liquid. Dry all parts thoroughly.
10. Then reinsert all parts into the
machine.
The descaling procedure begins.
The middle beverage button will
go out and the indicator light will
flash alternately between
red/yellow. The procedure takes
approx. 25 minutes.
Rinsing phase
11. For the rinsing phase, fill the
water tank up to the MAX
mark with cold tap water.
The machine pumps descaling solution into the pipes several times in 2.5-minute
intervals. About 60 ml is dispensed into the container below every time.
12. Place an empty container with
a capacity of at least 600 ml
under the spout.
7. Do not leave the machine unattended during the descaling process.
Make sure you pour out the water in the container underneath in time to
prevent the container from overflowing.
As soon as all of the descaling
solution has been pumped through
the machine, the machine stops
for approx. 2.5 minutes.
The indicator light will continue
to flash alternately between
red/yellow.
13. Press the middle beverage
button to start rinsing.
After 2.5 minutes, the middle
beverage button will light up again
and you will hear a beeping sound.
14
The rinsing phase will begin.
The middle beverage button will
go out and the indicator light will
flash yellow. The procedure takes
approx. 2 minutes.
14. Approx. 600 ml of water will be rinsed through the system. Keep an eye on
the container and empty it before it overflows.
15. The machine automatically switches to standby once it is finished.
The indicator light goes out. The descaling process is complete.
The indicator light
stays yellow.
The machine needs to be descaled.
Do this within the next couple of days. Do not wait any
longer, otherwise so much limescale may collect that
a descaling agent will no longer have any effect.
A self-induced defect of this kind will not be covered by
the warranty.
Proceed as described in the “Descaling”section.
It is not possible to
press down the
lever.
Check whether the used capsule container is full.
Empty it if necessary.
The rinsing phase
does not finish;
the water tank is
empty, the indicator
light is flashing red
and the machine is
beeping.
Fill the water tank with cold tap water up to the MAX
mark and reinsert the tank into the machine. Continue
with step 12 in the chapter “Descaling”, section “Rinsing
phase”.
Problems / solutions
The indicator light
is flashing red and
there are several
beeping sounds.
Is the water tank empty?
There are coffee
grounds in the cup.
A small residue of coffee grounds always remains at the
bottom of the cup. This is a feature of the system and is
not a fault.
m Fill the water tank with fresh water.
m Press one of the beverage buttons. The pump starts
to operate. As soon as the pipes are filled with water,
the pump stops automatically. When the beverage
buttons remain permanently lit, the machine is ready
for use again.
The beverage is not Especially in the case of espresso, the quantity is so small
hot enough.
compared to the size of the cup that it cools down quickly.
Preheat the cup by filling it with hot water and pouring it
away shortly before using the cup.
Water is dripping
out of the spout.
The water in the system expands as the machine heats up
and, as a result, a little water drips out of the spout.
15
If a capsule is trapped in the capsule opening, fold the
lever back completely and press the capsule through from
the top to the bottom. Do not reinsert a capsule if it is
deformed!
Disposal
Technical specifications
The product and its packaging have been manufactured from valuable materials
that can be recycled. Recycling reduces the amount of refuse and helps to
preserve the environment.
Dispose of the packaging in the proper manner. Make use of the local facilities
provided for collecting paper, cardboard and lightweight packaging.
Appliances marked with this symbol must not be disposed of along with
household waste!
You are legally bound to dispose of old appliances separately from
household waste. Information about where old appliances can be disposed of free
of charge is available from your local authorities.
16
Type / Model:
Cafissimo 370 635
Product number:
see “Warranty” section
Mains voltage:
220—240 V ~ 50 Hz
Power:
1250 watts
Power consumption
when turned off:
<0.5 watts
Automatic switch-off:
approx. 9 minutes
Protection class:
I
Pump pressure:
max. 15 bar
Sound pressure level:
<70dB(A)
Ambient temperature:
+10 to +40°C
Preset brew quantities:
Black coffee approx. 125 ml
Caffè crema approx. 125 ml
Espresso approx. 40 ml
Made exclusively for:
Tchibo GmbH, Überseering 18,
22297 Hamburg, Germany
Warranty
Product number
We grant a 24-month warranty from the date of purchase.
Tchibo GmbH, Überseering 18, 22297 Hamburg, Germany
You can find your Cafissimo
machine’s product number
on the type plate on the
220-240V ~50Hz
bottom of the casing.
Before laying the Cafissimo
Ty pe:
on its side, remove the water
tank, the drip tray and front drawer with used capsule container. Lay a cloth or
mat underneath the machine to protect the surface from remaining liquid/water
that may leak out.
A r t. -N o . 380833
We will remedy all defects in workmanship or materials within the warranty
period. In order for the warranty to be granted, all warranty claims must be
accompanied by proof of purchase from Tchibo or from an authorised Tchibo
distribution partner. This warranty is only valid within the EU, Switzerland and
Turkey.
If, contrary to our expectations, a defect is found, please contact our customer
care service at the following e-mail address:
[email protected]
Our customer consultants will be pleased to advise you on further procedure.
Damage due to improper use, failure to decalcify as well as worn parts and
consumables, are not covered by the warranty.
Please have the product number at hand in case of any queries.
This warranty does not restrict statutory warranty rights.
17
Product
number
Note for Owners:
Guidesimo.com webproject is not a service center of Tchibo trademark and does not carries out works for diagnosis and repair of faulty Tchibo Cafissimo Pure equipment. For quality services, please contact an official service center of Tchibo company. On our website you can read and download documentation for your Tchibo Cafissimo Pure device for free and familiarize yourself with the technical specifications of device.
More Coffee Maker Devices:
-
Gastroback 42636
Art.-Nr. 42636 Design Espresso Maschine Advanced ControlBedienungsanleitungDESIGN ESPRESSO MASCHINE ADVANCED CONTROLGASTR OBACK®Read all provided instructions before first usage! Model and attachments are subject to change! …
42636 Coffee Maker, 29
-
grossag KA 48
Kaffee-Automat mit Glaskanne Coffee-Maker with Glas-Jug D — Gebrauchsanweisung GB — Instructions for use KA 48 2 Beschreibung / Description 1 Deckel Wasserbehälter Water tank lid 2 Brüharm Brewing unit 3 Deckel für Filterhalter Filterholder lid 4 Filterhalter Filterholder 5 Glaskanne Glas jug 6 Ein-/Aus-Taster On-/Off-push switch 7 …
KA 48 Coffee Maker, 8
-
Braun Aromaster KF 43
Aromaster10 Aromasterplus10 Aromaster12 KF 43 Type 4087KF 47 Type 4069KF 63 Type 4076KaffeemaschineCoffeemakerCafetièreCafeteraCafeteiraMacchina de caffè filtroKoffiezetterKaffeemaskineKaffetrakterKaffebryggareKahvinkeitin∫·ÊÂÙȤڷäÓÙ‚‡Í‡ä‡‚Ó‚‡Í‡ItalianoIstruzioni d’uso GaranziaNederlandsGebruiksaanwijzingGarantieDanskBrugsanvisningGarantiNorskBruk …
Aromaster KF 43 Coffee Maker, 4
-
Coway CHP-06DL
CHP-06DL»APPARECCHIO PER IL TRATTAMENTO DI ACQUA POTABILE» «ATTENZIONE : QUESTA APPARECCHIATURA NECESSITA DI UNA REGOLARE MANUTENZIONE PERIODICA» e»L’INSTALLAZIONE DI QUESTA APPARECCHIATURA DEVE ESSERE ESEGUITA DA SOGGETTI ABILITATI AI SENSI DELLA LEGGE 46/90″Manuale d’InstallazionePrima di installare, leggere questo manuale e co …
CHP-06DL Coffee Maker, 44
-
La Marzocco GB/5s
La Marzocco Technical Bulletin #41 New Steam Wand Assembly on GB/5s and FB/80s Dear La Marzocco Family Member, Herewith we would like to inform you about the latest modifications on our machines: 1) Beginning with machine SN# 2487, ALL GB/5 and FB/80 models will be equipped with a new steam wand valve assembly, inclusive of a built-in anti-suction valve. SEE IMAGE BELOW This feature will av …
GB/5s Accessory, 8