-
Contents
-
Table of Contents
-
Troubleshooting
-
Bookmarks
Quick Links
XP 2 i
Operation Manual
for XP2i Digital Test Gauge (Standard and Dual-Display(DD))
Related Manuals for Crystal XP2i
Summary of Contents for Crystal XP2i
-
Page 1
XP 2 i Operation Manual for XP2i Digital Test Gauge (Standard and Dual-Display(DD)) -
Page 2: Table Of Contents
. . . . . . . . . . . . . . . . . . . . . . . . . . . . . . . . . . XP2i DataLoggerXP Gauge Operation .
-
Page 3: Overview
(with or without the red cover or rubber boot). Circuitry is mounted in shock absorbing elastomer supports and the batteries are easily accessible by removing four screws. But you won’t need to change the batteries often, since 3 AA batteries operate the XP2i for up to 1500 hours of continuous use.
-
Page 4: Operating Instructions
Connect the XP2i to your system. CAUTION: Use a wrench (¾» or 19mm) for installation and removal of XP2i! There is a limit to how much rotational force can be applied to the case, so don’t rely on, or use, the case to screw the XP2i into a fitting, and don’t use the case to remove the XP2i fitting, either.
-
Page 5: Functions
Units that you don’t need or never use can be turned off. You can also define a special unit for your XP2i with ConfigXP. You can use the XP2i to display directly in a unit not otherwise available, such as feet of seawater, or foot-pounds of torque. When you select your custom unit from the keypad, the screen displays the USER icon.
-
Page 6
WARNING: This gauge can display zero pressure when connected to a source of pressure! Do not rely on the display indication before disconnecting— it may not be indicating true pressure. Never disconnect pressure instrumentation without first relieving system pressure! To Clear the Zero Value on an XP2i zero… -
Page 7
(4 times per second), and the displayed value is the average of the most recent 3 to 10 calculations. By increasing the number of calculations in the average, the XP2i will indicate a more stable rate. However, the XP2i will react more slowly to changes in rate. -
Page 8
If you start the XP2i in the No Auto Off mode, you may select the brightness level in the same way. The light will never time out and turn off. Turn off the XP2i,… -
Page 9
The following applies only to models where inches of water is a selectable pressure unit. As shipped from the factory, the XP2i is set to display inches of water corresponding to the density of water at 4° C (39.2° F). You may require a different water density for your application, so the XP2i can be set to use the density of water at 20°… -
Page 10
Battery Replacement The XP2i uses 3 AA batteries. Loosen the four rear panel screws to gain access to the battery compartment. These four panel screws are captive inside the panel and are not removable. Pull the panel up to expose the battery compartment. After replacing the batteries, the XP2i will start operating immediately… -
Page 11
Functions Reset If for some reason the XP2i needs to be reset, remove any battery for at least one minute, then reinstall the battery. If the reset is successful, the XP2i will start operating without pressing the on/off button. Reset will clear the zero, peak values will be reset to the current reading, and the XP2i will be set to the default engineering units. -
Page 12: Data Logging With Dataloggerxp
DataLoggerXP is an optional data logging mode available for the XP2i gauge. You may purchase the DataLoggerXP option with your original order or add it later. With the XP2i’s long battery life, and Ultra Low Power (ULP) mode, you can log data over an entire year, without the need for external power supplies or battery replacements.
-
Page 13
….. . A set of one or more readings taken by the XP2i. The user can specify different logging parameters for each successive run. -
Page 14: Installing The Software
„ „ „ „ „ INSTALLING THE SOFTWARE DataLoggerXP can either be installed from a CD provided by Crystal Engineering, or downloaded from the Crystal Engineering website. We recommend you check the website for the latest version. Installing from the CD Run the Setup.exe application located on the install CD.
-
Page 15: Dataloggerxp Software Operation
DATALOGGERXP SOFTWARE OPERATION As described in the prior section, the DataLoggerXP application provides complete control of the settings for data logging mode on the XP2i. You can change logging parameters and download data using the application. In this section, you will find a description of each of the functional areas of the application.
-
Page 16
To Connect to the Gauge Plug the serial cable into the computer and XP2i gauge ports. In the DataLoggerXP main window, click Connect. The program will retrieve the current logging parameters, and then allow downloading, viewing, and saving data, as well as updating the logging parameters. -
Page 17
Data Logging Parameters Logging parameters can be set up one of two ways: on a computer connected to an XP2i, or from the XP2i keypad. This second option allows the user to make changes in the logging parameters while in the field. Once the logging parameters have been selected, the gauge can begin recording data. The two param- eters that affect data logging (logging interval and logging type) are covered below. -
Page 18
In the Data View dialog box, you can select the run you wish to display, and choose to include or exclude recording events. Events are non-data readings, such as tare values, low battery indications, or logging parameters. XP2i Operation Manual… -
Page 19
If the file name does not include a “.xlt” or “.xls” extension, the data will be saved as a comma separate text file (ending either “.txt” or “.csv”) of that name. To Clear All Data Runs In the DataLoggerXP main window, click the Clear button to erase all runs from the gauge, making all memory available for the next sequence of runs. ƒ XP2i Operation Manual… -
Page 20: Xp2I Dataloggerxp Gauge Operation
XP2I DATALOGGERXP GAUGE OPERATION When in data logging mode, XP2i provides data logging capability along with many of the features of a standard XP2i. In order to allow operation as a data logger, some of the standard functionality of the standard XP2i is suspended.
-
Page 21
Keypad Usage The following buttons and button combinations are used to control data logging runs on the XP2i. Where two keys are indicated, the operation is executed by pressing and holding down the first key, then pressing and holding down the second key until the action is completed. -
Page 22
Holding these two keys will clear the logging memory of the XP2i. If the gauge is recording, you must first stop logging as described above. When these but- tons are pressed, the gauge will first display its current state (Off, CLr, etc), then the number of data points available, and then CLr, indicating the clear action was successful. -
Page 23
XP2i Reset or Battery Change Data collected by the XP2i will not be lost with a gauge reset or battery change, although any run in progress will be stopped. A reset or battery change will affect the operation of the gauge’s real-time clock. When the XP2i is connected to DataLoggerXP and the logging parameters are set, DataLoggerXP also sets the gauge’s real-time clock. -
Page 24: Excel Templates
You can bypass this selection during the save process to choose a different template to save your data into. Select the Use Excel Template check box and use the Browse button to find and select an alternative template. XP2i Operation Manual…
-
Page 25: Enclosure
WRENCH HEX DIAPHRAGM ADDITIONAL SENSOR LENGTH WITH OPTIONAL FITTING ADAPTERS 1.15 1.03 1.30 (29.1) (26.1) (32.6) 1/4 INCH MNPT ADAPTER 1/4 INCH MBSP ADAPTER M20X1.5 ADAPTER (P/N MPM-1/4MPT) (P/N MPM-1/4BSP) (P/N MPM-M20X1.5) ALL DIMENSIONS ARE IN INCHES (MILLIMETERS) XP2i Operation Manual…
-
Page 26: Serial Numbers
SERIAL NUMBERS Serial Number Location The serial number of your XP2i is located in two places; on the stem above the pressure fitting and behind the battery cover under the battery furthest from the serial port connection. You may also find your serial number using ConfigXP software. See ConfigXP for more information.
-
Page 27: Specifications
Storage……-40 to 75° C (-40 to 167° F). Battery should be removed if stored for more than one month. Media Compatibility Liquids and gases compatible with 316 Stainless Steel. XP2i Operation Manual…
-
Page 28
WARNING: Do not use RS-232 in hazardous locations. Pressure Connection … . Crystal CPF Female (1/4″ medium pressure tube system). U.S. Patent No. 8,794,677 Compatible with HiP LM4 and LF4 Series, Autoclave Engr SF250CX Male and Female Series. -
Page 29: Power
CSA: The XP2i is Intrinsically Safe only if powered by one of the following battery types: CSA: Le XP2i est un système à sécurité Intrinsèque seulement s’il est alimenté par un des Piles de type suivant: Approved Battery Type Marking (Approuvé…
-
Page 30: Pressure Ranges, Display Scales, & Resolution
• XP2i will indicate pressure up to 10% above Range Pressure. Above 110%, the XP2i display will flash, indicating that the applied pressure exceeds the cali- brated pressure range. If the calibrated pressure range is exceeded, the pressure displayed may not be accurate.
-
Page 31: Safety & Certifications
• Because the enclosure of the XP2i and XP2i-DD is made of aluminium, if it is mounted in an area where the use of category 1 G apparatus is required, it must be installed such that, even in the event of rare incidents, ignition sources due to impact and friction sparks are excluded.
-
Page 32: Atex/Iecex Safety Instructions
Zařízení musí být nainstalováno takovým způsobem, aby ani v ojedinělých náhodných případech nemohlo dojít ke vzniku zdroje vznícení způsobeného jiskrami vzniklými nárazy a třením. Schválené Baterie – ČESKY (Czech) Přístroj XP2i je jiskrově bezpečný pouze pokud je napájen jedním z následujících typů baterií: Approved Battery Type Marking Rayovac Max Plus 815 -20 to 50°…
-
Page 33
El equipo se deberá instalar de tal modo que, incluso en el caso de un accidente, las fuentes de ignición debido a chispas por fricción o impactos sean evitadas. Pilas Aprobadas – ESPAÑOL (Spanish) El XP2i solo es intrínsecamente seguro si se alimenta con uno de los siguientes tipos de pilas: Approved Battery Type… -
Page 34
L’équipement doit être installé de manière à ce que, même lors d’incidents rares, les sources d’allumage suite à un impact et des étincelles de friction soient évitées. Piles Approuvées – FRANÇAIS (French) Le XP2i est un système à sécurité Intrinsèque seulement s’il est alimenté par un des Piles de type suivant: Approved Battery Type… -
Page 35
L’apparecchiatura deve essere installata in modo tale che, anche nell’ipotesi remota di un incidente, vengano evitate fonti di ignizione dovute a scintille da impatto e da frizione. Batterie Approvate – ITALIANO (Italian) L’ XP2i è a Sicurezza Intrinseca solo se alimentato da uno dei seguenti tipi di batteria: Approved Battery Type… -
Page 36
Laite tulee asentaa siten, että siinä epätodennäköisessä tapauksessa, että hankaus aiheuttaa kipinöitä, ei lähellä ole syttyviä materiaaleja. Käyttöön Hyväksytyt Paristot – SUOMEN KIELI (Finnish) XP2i mittari on turvallinen määritellyissä räjähdysvaarallisissa tiloissa ainoastaan, kun käytetään seuraavia paristoja: Approved Battery Type Marking Rayovac Max Plus 815 -20 to 50°… -
Page 37: Support
TROUBLESHOOTING The XP2i is a very high performance gauge. Due to the high resolution of this product, you may observe conditions that appear to be defects in the product, but are in fact a result of being able to resolve and measure pressure to a degree not possible with other instruments.
-
Page 38: Calibration
0.025% of reading, or equivalent in terms of percent of full scale. This level of accuracy requires the use of piston (deadweight) gauges or very high performance pressure controllers. “Zero” the XP2i, then record displayed pressure for two or more pressure points. Determine if the XP2i would benefit from an overall increase or decrease of the indicated pressures.
-
Page 39: Software
AC Adapter Kit Permits operation of an XP2i from an AC supply of 90 — 264 VAC and 47 — 63 Hz . Includes interchangeable international plugs (for USA, Europe, U . K . , and Australia) . Adapter will not charge batteries, but in the event of AC power loss, XP2is will automatically revert to battery operation .
-
Page 40: Contact Us
WARRANTY Crystal Engineering Corporation warrants the XP2i Digital Test Gauge to be free from defects in material and workmanship under normal use and service for one (1) year from date of purchase to the original purchaser. It does not apply to batteries or when the product has been misused, altered or damaged by accident or abnormal conditions of operation.
-
Page 41
© 2016 Crystal Engineering Corporation 708 Fiero Lane, Suite 9, San Luis Obispo, California 93401-8701 4870. N…
![]()
2i
XPDigital Test Gauge
Operation Manual
C R Y S T A L
engineeringcorporation
Contents
Introduction.. . . . . . . . . . . . . . . . . . . . . . . . . . . . . . . . . . . . . . . . . . . . . . . . . . . . . . . .1
Operating Instructions.. . . . . . . . . . . . . . . . . . . . . . . . . . . . . . . . . . . . . . . . . . . . . . . .2
Units button.. . . . . . . . . . . . . . . . . . . . . . . . . . . . . . . . . . . . . . . . . . . . . . . . . . . . . . . . . . . . .2 Zero.. . . . . . . . . . . . . . . . . . . . . . . . . . . . . . . . . . . . . . . . . . . . . . . . . . . . . . . . . . . . . . . . . . .3 Tare (-DD, DUAL-LINE DISPLAY XP2i ONLY).. . . . . . . . . . . . . . . . . . . . . . . . . . . . . . . . . . . . . . . . . . 4 Rate (-DD, DUAL-LINE DISPLAY XP2i ONLY).. . . . . . . . . . . . . . . . . . . . . . . . . . . . . . . . . . . . . . . . . 4
Peak detection and Average .. . . . . . . . . . . . . . . . . . . . . . . . . . . . . . . . . . . . . . . . . . . . .4 Differential Mode (-DD, DUAL-LINE DISPLAY XP2i ONLY).. . . . . . . . . . . . . . . . . . . . . . . . . . . . . 5
Resetting (clearing) recorded peak values.. . . . . . . . . . . . . . . . . . . . . . . . . . . . . . . . . .5 Automatic shut-off.. . . . . . . . . . . . . . . . . . . . . . . . . . . . . . . . . . . . . . . . . . . . . . . . . . . . . . .6 Backlighting the Display.. . . . . . . . . . . . . . . . . . . . . . . . . . . . . . . . . . . . . . . . . . . . . . . . . .6 Measuring Vacuum.. . . . . . . . . . . . . . . . . . . . . . . . . . . . . . . . . . . . . . . . . . . . . . . . . . . . . .6 Water Density (Inches of Water).. . . . . . . . . . . . . . . . . . . . . . . . . . . . . . . . . . . . . . . . . . . .6 Overpressure Conditions .. . . . . . . . . . . . . . . . . . . . . . . . . . . . . . . . . . . . . . . . . . . . . . . . .7 Low battery indication .. . . . . . . . . . . . . . . . . . . . . . . . . . . . . . . . . . . . . . . . . . . . . . . . . . .7 Battery replacement.. . . . . . . . . . . . . . . . . . . . . . . . . . . . . . . . . . . . . . . . . . . . . . . . . . . . .7 Reset.. . . . . . . . . . . . . . . . . . . . . . . . . . . . . . . . . . . . . . . . . . . . . . . . . . . . . . . . . . . . . . . . . .8 PSVtest Mode.. . . . . . . . . . . . . . . . . . . . . . . . . . . . . . . . . . . . . . . . . . . . . . . . . . . . . . . . . . .8 Internal Data Logging (-DL DataLoggerXP Option).. . . . . . . . . . . . . . . . . . . . . . . . . . . . . .9
Calibration.. . . . . . . . . . . . . . . . . . . . . . . . . . . . . . . . . . . . . . . . . . . . . . . . . . . . . . . . .9
XP2i Serial Numbers.. . . . . . . . . . . . . . . . . . . . . . . . . . . . . . . . . . . . . . . . . . . . . . . . .10
Serial Number Location… … … … … … … … … … … … … … … … ……………………………..10 Serial Numbering System.. . . . . . . . . . . . . . . . . . . . . . . . . . . . . . . . . . . . . . . . . . . . . . . .10 Model Numbering System.. . . . . . . . . . . . . . . . . . . . . . . . . . . . . . . . . . . . . . . . . . . . . . .11
Specifications .. . . . . . . . . . . . . . . . . . . . . . . . . . . . . . . . . . . . . . . . . . . . . . . . . . . . .12
Accuracy.. . . . . . . . . . . . . . . . . . . . . . . . . . . . . . . . . . . . . . . . . . . . . . . . . . . . . . . . . . . . .12 Temperature.. . . . . . . . . . . . . . . . . . . . . . . . . . . . . . . . . . . . . . . . . . . . . . . . . . . . . . . . . . .12 Humidity.. . . . . . . . . . . . . . . . . . . . . . . . . . . . . . . . . . . . . . . . . . . . . . . . . . . . . . . . . . . . . .12 Media Compatibility.. . . . . . . . . . . . . . . . . . . . . . . . . . . . . . . . . . . . . . . . . . . . . . . . . . . .12 Pressure Conversions .. . . . . . . . . . . . . . . . . . . . . . . . . . . . . . . . . . . . . . . . . . . . . . . . . . .13 Connections.. . . . . . . . . . . . . . . . . . . . . . . . . . . . . . . . . . . . . . . . . . . . . . . . . . . . . . . . . . .13 Power.. . . . . . . . . . . . . . . . . . . . . . . . . . . . . . . . . . . . . . . . . . . . . . . . . . . . . . . . . . . . . . . .13 Enclosure.. . . . . . . . . . . . . . . . . . . . . . . . . . . . . . . . . . . . . . . . . . . . . . . . . . . . . . . . . . . . .14
Pressure Ranges, Display Scales & Resolution.. . . . . . . . . . . . . . . . . . . . . . . . . . .15 Intrinsic Safety.. . . . . . . . . . . . . . . . . . . . . . . . . . . . . . . . . . . . . . . . . . . . . . . . . . . . .16 Certifications.. . . . . . . . . . . . . . . . . . . . . . . . . . . . . . . . . . . . . . . . . . . . . . . . . . . . . .16
Software.. . . . . . . . . . . . . . . . . . . . . . . . . . . . . . . . . . . . . . . . . . . . . . . . . . . . . . . . . .17
LabVIEW™ drivers.. . . . . . . . . . . . . . . . . . . . . . . . . . . . . . . . . . . . . . . . . . . . . . . . . . . . . .17 ConfigXP Configuration Software… … … … … … … … … … … … … ………………………….17
Replacement Parts.. . . . . . . . . . . . . . . . . . . . . . . . . . . . . . . . . . . . . . . . . . . . . . . . .17
Accessories.. . . . . . . . . . . . . . . . . . . . . . . . . . . . . . . . . . . . . . . . . . . . . . . . . . . . . . .17
AC adapter kit.. . . . . . . . . . . . . . . . . . . . . . . . . . . . . . . . . . . . . . . . . . . . . . . . . . . . . . . . .17 Plastic Carrying Case.. . . . . . . . . . . . . . . . . . . . . . . . . . . . . . . . . . . . . . . . . . . . . . . . . . .17 Protective Boot.. . . . . . . . . . . . . . . . . . . . . . . . . . . . . . . . . . . . . . . . . . . . . . . . . . . . . . . . .17 6″ Gauge Adapter Kit.. . . . . . . . . . . . . . . . . . . . . . . . . . . . . . . . . . . . . . . . . . . . . . . . . . .17 8½″ Gauge Adapter Kit.. . . . . . . . . . . . . . . . . . . . . . . . . . . . . . . . . . . . . . . . . . . . . . . . . .17 Connection Adapter.. . . . . . . . . . . . . . . . . . . . . . . . . . . . . . . . . . . . . . . . . . . . . . . . . . . .17 RS-232 Cable.. . . . . . . . . . . . . . . . . . . . . . . . . . . . . . . . . . . . . . . . . . . . . . . . . . . . . . . . . .17
ATEX Safety Instructions .. . . . . . . . . . . . . . . . . . . . . . . . . . . . . . . . . . . . . . . . . . . . .18
ČESKY (Czech) .. . . . . . . . . . . . . . . . . . . . . . . . . . . . . . . . . . . . . . . . . . . . . . . . . . . . . . . . . . . . 18 DEUTSCH (German). . . . . . . . . . . . . . . . . . . . . . . . . . . . . . . . . . . . . . . . . . . . . . . . . . . . . . . . . 18 ENGLISH (English) .. . . . . . . . . . . . . . . . . . . . . . . . . . . . . . . . . . . . . . . . . . . . . . . . . . . . . . . . . . 19 ESPAÑOL (Spanish).. . . . . . . . . . . . . . . . . . . . . . . . . . . . . . . . . . . . . . . . . . . . . . . . . . . . . . . . . 19 FRANÇAIS (French).. . . . . . . . . . . . . . . . . . . . . . . . . . . . . . . . . . . . . . . . . . . . . . . . . . . . . . . . . 20 ITALIANO (Italian).. . . . . . . . . . . . . . . . . . . . . . . . . . . . . . . . . . . . . . . . . . . . . . . . . . . . . . . . . . 20 NEDERLANDS (Dutch).. . . . . . . . . . . . . . . . . . . . . . . . . . . . . . . . . . . . . . . . . . . . . . . . . . . . . . . 21 POLSKI (Polish).. . . . . . . . . . . . . . . . . . . . . . . . . . . . . . . . . . . . . . . . . . . . . . . . . . . . . . . . . . . . . 21
SUOMEN KIELI (Finnish).. . . . . . . . . . . . . . . . . . . . . . . . . . . . . . . . . . . . . . . . . . . . . . . . . . . . . . 22
Troubleshooting.. . . . . . . . . . . . . . . . . . . . . . . . . . . . . . . . . . . . . . . . . . . . . . . . . . . .22
Noisy or unstable reading when used with fluids.. . . . . . . . . . . . . . . . . . . . . . . . . . . . .22 Non-repeatability of pressure measurements.. . . . . . . . . . . . . . . . . . . . . . . . . . . . . . .23 Slow return to zero and/or non-repeatability of pressure measurements.. . . . . . . . .23 Err 1 displayed.. . . . . . . . . . . . . . . . . . . . . . . . . . . . . . . . . . . . . . . . . . . . . . . . . . . . . . . . .23 Err 2 displayed.. . . . . . . . . . . . . . . . . . . . . . . . . . . . . . . . . . . . . . . . . . . . . . . . . . . . . . . . .23 Err 5 or Err 6 displayed.. . . . . . . . . . . . . . . . . . . . . . . . . . . . . . . . . . . . . . . . . . . . . . . . . . .23 Display continuously flashes all segments.. . . . . . . . . . . . . . . . . . . . . . . . . . . . . . . . . .23
Trademarks.. . . . . . . . . . . . . . . . . . . . . . . . . . . . . . . . . . . . . . . . . . . . . . . . . . . . . . . .24
Service and Support.. . . . . . . . . . . . . . . . . . . . . . . . . . . . . . . . . . . . . . . . . . . . . . . .24
How to Contact Us:.. . . . . . . . . . . . . . . . . . . . . . . . . . . . . . . . . . . . . . . . . . . . . . . . . . . . .24
European Community Declaration of Conformity: CE.. . . . . . . . . . . . . . . . . . . . .25
European Community Declaration of Conformity: ATEX.. . . . . . . . . . . . . . . . . . .26
Warranty.. . . . . . . . . . . . . . . . . . . . . . . . . . . . . . . . . . . . . . . . . . . . . . . . . . . . . . . . . .27

XP2i Operation Manual • Page 1
Introduction
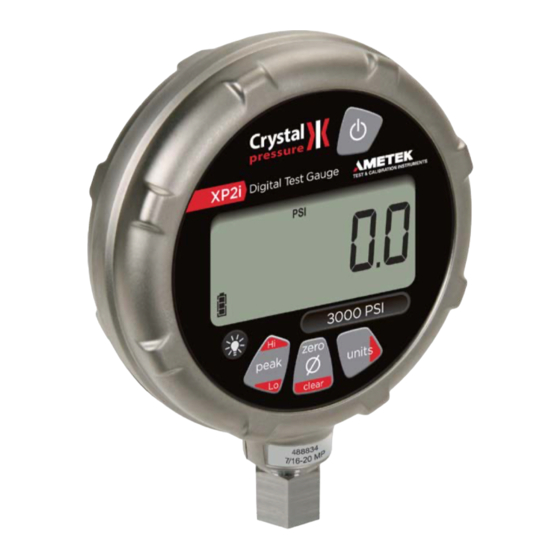
Thank you for choosing the XP2i Digital Test Gauge from Crystal Engineering Corporation.
Your XP2i is a combination of leading edge technology and rugged industrial design.
Accuracy is 0.1 percent of reading — so any XP2i can typically replace several gauges you may have been using. The XP2i is fully temperature compensated — so there is no change in accuracy throughout the entire operating temperature range!
The XP2i’s case is made from rugged aluminum alloy utilizing a gasket to seal the enclosure against dust and water intrusion. Even the RS-232 connector is fully sealed (with or without the cover). Circuitry is mounted in shock adsorbing elastomer supports and the batteries are easily accessible by removing four screws. But you won’t need to change the batteries often, since 3 AA batteries operate the XP2i for up to 1500 hours of continuous use. Other features include:
continuous recording of peak and valley pressure readings a removable filter (to keep out large particle contaminants) all welded 316 stainless steel sensor
can be cleaned for oxygen service
Your XP2i can be customized, through the use of ConfigXP™ software available from Crystal Engineering. Your personal computer can disable, enable or modify a variety of features of your XP2i. Look for the ConFIGXPPROGRAMMABLE logo for programmable features, like:
a user defined pressure scale, and/or disable unused pressure units password protection to prevent unauthorized changes
disable keypad recalibration, peak button, and/or units button expand or decrease allowable Zero range
set the gauge to a different density of water factor (4°C, 60°F or 68°F) store a 12 digit ID or tag number in non-volatile memory
adjust calibration values
We hope your XP2i meets your expectations, and we’re interested in any comments or suggestions you may have. You can send us a note at: sales@crystalengineering.net. Many features in this and our other products are a direct result of your comments!
Crystal Engineering is the company that designs, manufactures, markets and services the nVision reference pressure recorder, XP2i and 30 series pressure calibrators, MultiCal multimeter pressure adapters and a variety of industry specific pressure measuring equipment. Crystal Engineering pioneered features like full temperature compensation and “of reading” rated gauges and calibra-
tors. Pressure measuring equipment is the only thing we do and that’s why we say:
PRESSURE is Our BUSINESS™
C R Y S T A L
engineeringcorporation
Page 2 • XP2i Operation Manual
Operating Instructions
The XP2i is shipped with batteries installed, so it’s ready to use. Press and hold the  (on/off) button. The XP2i will first test all LCD segments. Release the
  button when the XP2i indicates pressure.
The XP2i always resumes operation in the mode and the units of the pressure last used, and it does not automatically rezero when turned on.
Connect the XP2i to your system. Use pipe thread tape or pipe thread sealant on the ¼″NPT fitting (except when connecting to Crystal’s QTF Series CPF fitting). Always use a wrench (¾″or 19mm) for installation and removal of XP2i! There is a limit to how much rotational force can be applied to the case, so don’t rely on, or use, the case to screw the XP2i into a fitting, and don’t use the case to remove the XP2i fitting, either.
WARNING: Severe injury or damage can occur through improper use of pressure instruments! Do not exceed recommended pressure limits of tubing and fittings. Be certain all pressure connections are secured.
CAUTION: Never insert any object into the pressure connection! The sensor diaphragm is very thin and can be damaged or destroyed by solid or sharp objects. Cleaning of the sensor must be done with appropriate solvents only.
Most XP2is are intended for gauge pressure measurement. That is, they indicate the dif erence between applied pressure and ambient barometric pressure. However, the zero button can be used to force an XP2i to read zero pressure at any applied pressure, up to the full scale rating of the gauge. The factory default setting limits the maximum zero value to 200 PSI, but this limit can be changed with ConFIGXP .
Some XP2is are rated for absolute pressure. Absolute gauges indicate the difference between applied pressure and an internal vacuum reference. Absolute pressure is always positive. For instance barometric pressure at sea level is on average about 14.7 PSI (approximately 100 kPA or 1 bar), so at sea level this is the lowest expected pressure indication. However, absolute gauges can be “zeroed” (unless prevented by ConfigXP). After zeroing an absolute gauge it is possible to indicate a negative pressure.
WARNING: This gauge can display zero pressure when connected to a source of pressure! Do not rely on the display indication before disconnecting — it may not be indicating true pressure. Never disconnect pressure instrumentation without first relieving system pressure!
Units button
Pressing this button causes the XP2i to select the next available unit of pressure measurement. See “Pressure Ranges, Display Scales & Resolution” for the list of pressure units available for your model.
C R Y S T A L
engineeringcorporation

XP2i Operation Manual • Page 3
ConFIGXP PROGRAMMABLE Units that you don’t need or never use can be turned off. You can also define a special unit for your XP2i with ConfigXP. That way you can use the XP2i to display directly in a unit not otherwise available, such as feet of seawater, or foot-pounds of torque. When your custom unit is selected and displayed on the XP2i, all pressure unit icons will be off.
Zero
To zero the XP2i you must turn off peak indication, then press the zero button for at least ½ second. To zero a dual-line display XP2i you must turn off display of peak or TARE values (press the peak button until second line is blank, or displaying average or rate), then press the zero button for at least ½ second.
The display will then briefly flash all dashed lines (- — — — -), indicating that it has been re-zeroed. If you attempt to zero the gauge while more than 200 PSI is applied (or the pressure limit set with ConfigXP), the command will be ignored, and “- -HI-” will be displayed.
WARNING: This gauge can display zero pressure when connected to a source of pressure! Do not rely on the display indication before disconnecting–it may not be indicating true pressure. Never disconnect pressure instrumentation without first relieving system pressure!
To clear the Zero Value on an XP2i turn off peak indication then press and hold the zero button until the display changes from (- — — — -) to (- — -).
To clear the Zero Value on a dual-line XP2i turn off display of peak or TARE values (press the peak button until second line is blank, or displaying average or rate), then press and hold the zero button until the display changes from (- — — — -) to (- — -).
This is especially useful for absolute gauges that have been zeroed while measuring barometric pressure.
|
Zeroed |
Clear Zero (Unzero) |
ConFIGXP PROGRAMMABLE You can change the point at which the Zero button will display “- -HI-”. For instance, you could set the maximum zero to 3000 PSI, if you need to mix high pressure gases. You can also disable the zero button entirely, by setting the Zero value to a large negative or positive number.
On an XP2i the zero button changes its function when the peak high ( HI

 ) or the peak low ( LO
 ) icon is displayed. While a peak icon is displayed the zero button becomes the clear
 button.
On a dual-line XP2i the zero button changes its function depending on what is being displayed on the second line.
C R Y S T A L
engineeringcorporation

Page 4 • XP2i Operation Manual
Tare (-DD, DUAL-LINE DISPLAY XP2i ONLY)
Tare is a constant value subtracted from the true pressure. For instance, if you were mixing gases by partial pressure, you might want to fill a tank to 1760 PSI with air, then add another 440 PSI of helium. To reduce the chance of error, you could tare the gauge at 1760 PSI. Then you would add helium until the indication reached 440.
|
PSI |
PSI |
PSI |
|
TARE |
TARE |
TARE |
|
Fill to pressure |
Press the Tare button |
Top-off with helium |
To use the tare feature, press the Peak button until TARE is displayed. Apply pressure to the gauge until the desired tare value is reached. Press the zero button. The top line will change from true pressure to the tared pressure. The amount of the tare will be displayed on the second line.
ConFIGXP PROGRAMMABLE The tare function is disabled by default, but can be enabled with ConfigXP.
Tare is in effect only when the tare icon is on.
Rate (-DD, DUAL-LINE DISPLAY XP2i ONLY)
Rate is the measurement of pressure change per minute. When in rate mode, the second line will display the rate, and the HI
 , LO
, LO , AVG and TARE icons will not be lit. Rate is calculated every pressure measurement (3 times per second), and the displayed value is the average of the most recent 3 to 10 calculations. By increasing the number of calculations in the average, the XP2i will indicate a more stable rate. However, the XP2i will react more slowly to changes in rate.
To use the rate feature, press the Peak button until no icons are lit but the second line is displaying a value. As pressure changes, the second line will indicate rate of change.
ConFIGXP PROGRAMMABLE The rate function is disabled by default, but can be enabled and configured with ConfigXP. The number of calculations can also be set with the digital interface.
Peak detection and Average
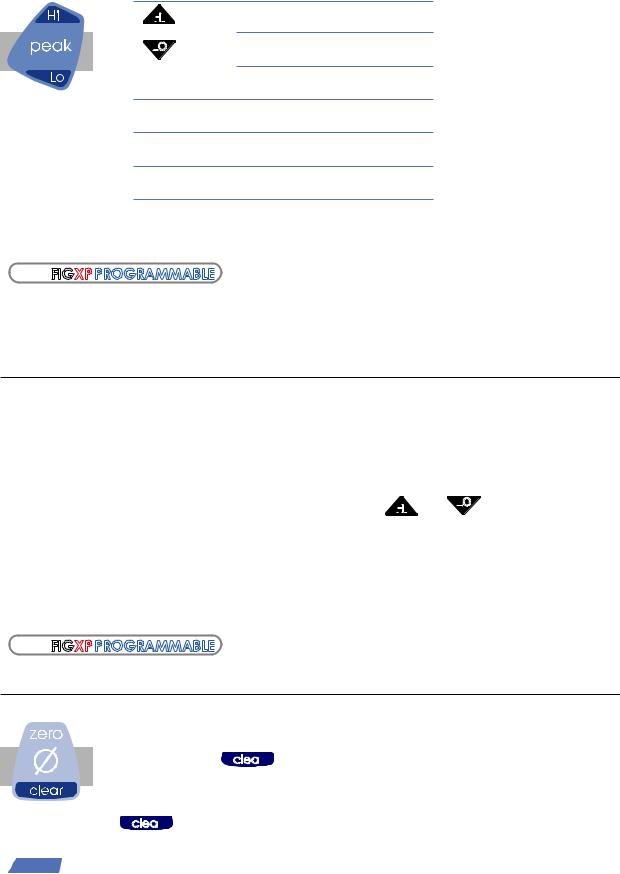
On the XP2i, pressing the Peak button causes the display to cycle through the following:
HI

 . . . . . . Recorded maximum pressure
LO
 . . . . . . Minimum recorded pressure
|
HI |
LO . . . Average pressure* |
<No Icon> . . . Live pressure display
* From the factory this Average Pressure is disabled. Use ConfigXP to enable.
C R Y S T A L
engineeringcorporation
XP2i Operation Manual • Page 5
On the -DD, dual-line XP2i, pressing the Peak button causes the display to cycle through the following:
HI

 . . . . . . Recorded maximum pressure
LO
 . . . . . . Minimum recorded pressure
AVG. . . . . . Average pressure
TARE. . . . . . Tare
<No Icon>. . . Rate of change
<No Icon>. . . Off
Peak high and low values are not saved when the gauge shuts off; they will reset to the current reading when the XP2i is turned on or reset.
ConFIGXP PROGRAMMABLE In some cases the ability to display a peak value may not be needed, or may even be dangerous. ConfigXP allows you to disable this button.
XP2is can average 1 to 10 readings, recalculated every time pressure is measured (3 times per second). Enable and set the number of readings to be averaged with ConfigXP.
Differential Mode (-DD, DUAL-LINE DISPLAY XP2i ONLY)
Differential mode allows the XP2i-DD gauge (the master) to be connected to a second XP2i or XP2i-DD gauge (the slave) and display the pressure difference between the two gauges. A standard RS232 cable (p/n 2400) and null modem adapter (p/n 3456) or a NULL modem cable are required to directly connect the gauges. You must use ConfigXP to enable this feature, and once enabled, use the PEAK button on the master gauge until the HI

 and LO
 icons are displayed simultaneously. An XP2i-DD gauge must be running firmware version R0110 or later, and an XP2i gauge must be running firmware version R0010 or later for this feature to work. Use XP2iUpdate (available on the Crystal Engineering web site) to upgrade to the latest firmware. An application note detailing the operation of differential mode is available from the Crystal Engineering web site, and and includes instructions on how to connect and setup both gauges.
ConFIGXP PROGRAMMABLE The differential mode is disabled by default, but can be enabled and configured with ConfigXP.
Resetting (clearing) recorded peak values
Peak values can only be cleared when displaying either a high or low recorded pressure. Press the clear button for at least ½ second. Dashed lines will then briefly appear across the display indicating that both peak values have been cleared. Both peak high and low values will then display the current applied pres-
sure. Pressing the clear button while either peak hi or peak lo icon is displayed will not affect the zero value. If you need to rezero the gauge, you must turn off both peak icons by pressing the
peak button.
C R Y S T A L
engineeringcorporation
Page 6 • XP2i Operation Manual
Automatic shut-off
The XP2i has a shutoff timer and will turn off automatically after 20 minutes of non-operation. Pressing any button or sending any command via the RS-232 connection resets the shutoff timer for another 20 minutes of operation.
The shutoff feature can be defeated, if desired, when turning the XP2i on. Pressing the  (on/off) and zero buttons simultaneously will prevent the XP2i from automatically turning off. The XP2i will briefly display the words “No Auto Off” to indicate that it will not turn off. The shutoff feature can be toggled or enabled again when turning the XP2i on. Pressing the same
  (on/off) and zero buttons returns the XP2i to auto off functionality. The XP2i will briefly display
the words “Auto Off 20” to indicate that will turn off after 20 minutes of inactivity. These settings are retained when the product is powered down.
Backlighting the Display
Pressing the  (backlight) button instantly lights the display at maximum brightness, but
to keep it on you need to hold down the button for 2 seconds. The display will flash briefly, indicating that it will stay on for 1 minute. If you press the  button again, the backlight
will go into a lower brightness setting to extend battery life, the display will again flash briefly, and remain on for 2 minutes. Press the  button once more and the light will go out.
If you start the XP2i in the “No Auto Off” mode, you select the brightness level the same way, but the light will never time out and turn off; you will have to either turn off the XP2i or press the backlight  again until the light goes out.
Measuring Vacuum
All versions of the XP2i can be used to measure moderate vacuum, though only ranges of 300 PSI (and 20 bar or 2000 kPa) and lower are actually tested and certified for vacuum operation.
When measuring pressure less than ambient barometric conditions, a minus (-) sign will appear.
Absolute gauges (models with a “B” in front of “XP2i” in the part number) will NOT indicate a negative sign when vacuum is applied, unless the zero button has been pressed while a pressure greater than full vacuum is applied to the gauge. If your absolute gauge does indicate a negative pressure, you can clear the zero value (“unzero”) by pressing the zero button until the display changes from —— (5 dashes) to — — — (dash, space, dash, space, dash). See “Zero” for details.
CAUTION: XP2is are not recommended for continuous use at high vacuum.
For continuous use at high vacuum with high accuracy, choose our XP2i-DP Differential Pressure Gauge. For product details, refer to our web site at www.crystalengineering.net.
Water Density (Inches of Water)
The following applies only to models where inch of water is a selectable pressure unit. As shipped from the factory, the XP2i is set to display inches of water corresponding to the density of water at
C R Y S T A L
engineeringcorporation
 Loading…
Crystal XP2i: List of Available Documents
Note for Owners:
Guidesimo.com webproject is not a service center of Crystal trademark and does not carries out works for diagnosis and repair of faulty Crystal XP2i equipment. For quality services, please contact an official service center of Crystal company. On our website you can read and download documentation for your Crystal XP2i device for free and familiarize yourself with the technical specifications of device.
More Measuring Instruments Devices:
-
Bosch LR 2 Professional
Robert Bosch Power Tools GmbH70538 StuttgartGERMANYwww.bosch-pt.com1 609 92A 4HW (2018.12) T / 265de Originalbetriebsanleitungen Original instructionsfr Notice originalees Manual originalpt Manual originalit Istruzioni originalinl Oorspronkelijke gebruiksaanwijzingda Original brugsanvisningsv Bruksanvisning i originalno Original driftsinstruksfi Alkuperäiset ohjeetel Πρωτότυπο οδηγι …
LR 2 Professional Receiver, 265
-
Fluke 1736
SetupHanger KitPower Supply121 2Single Insulated Current Carrying ConductorTactile BarrierReleaseCombination Logger/Power Supply Separate Logger SeparatePowerSupply600V CAT IIIAC CURRENT CLAMPSERIAL NUMBERLoadDirection ArrowCanada (4280546)Europe/UK (New STD 4280531) UK (4280554)China (4280568)USA (4275029)PN 4584017 September 2015© 2015 Fluke Corporation. All rights reserved. All product name …
1736 Measuring Instruments, 2
-
Parker Research Corp PL-10
PORTABLE MAGNETIZING COILS Parker’s portable magnetizing coils are designed for magnetic particle inspection of ferrous metal parts. The coils allow for the use of either dry powder or wet fluorescent inspection media and may be used for demagnetizing as well. The coils are molded in a tough, black polyurethane and comes equipped with a foot switch and 10′ (3.048 m) neoprene power …
PL-10 Measuring Instruments, 2
-
Huayi DM6013A
OPERATION MANUAL OF DIGITAL LCR METER 1、General This meter is a steady performance, battery-driven 3 1/2 digital LCR meter, which has the figure of unit symbol displaying, accuracy reading and wide range measurement. This meter has the function of measuring inductance, resistance, capacitance test. In addition, it’s ideal for testing SMD type components. Plus, the meter offers advanced feature …
DM6013A Measuring Instruments, 2
Recommended Documentation:
„ „ „ „ „
The XP2i is shipped with batteries installed, so it’s ready to use. Press and hold the
(
)
the
on/off
button when the XP2i indicates pressure.
The XP2i always resumes operation in the mode and the units of the pressure last used, and it does not automatically rezero when turned on.
Connect the XP2i to your system.
!
CAUTION: Use a wrench (¾» or 19mm) for installation and removal of XP2i! There is a limit to how much rotational force can be applied to the case, so
don’t rely on, or use, the case to screw the XP2i into a fitting, and don’t use the case to remove the XP2i fitting, either.
!
CAUTION: Never insert any object into the pressure connection! The sensor diaphragm is very thin and can be damaged or destroyed by solid or sharp
objects. Cleaning of the sensor must be done with appropriate solvents only.
!
WARNING: Severe injury or damage can occur through improper use of pressure instruments! Do not exceed recommended pressure limits of tubing
and fittings. Be certain all pressure connections are secured.
Most XP2i’s are intended for gauge pressure measurement. That is, they indicate the difference between applied pressure and ambient barometric pressure.
(
)
However, the
zero
button can be used to force an XP2i to read zero pressure at any applied pressure, up to the full scale rating of the gauge. The factory
default setting limits the maximum zero value to 20 psi, but this limit can be changed with
Some XP2i’s are rated for absolute pressure. Absolute gauges indicate the difference between applied pressure and an internal vacuum reference. Absolute
pressure is always positive. For instance barometric pressure at sea level is on average about 14.7 psi (approximately 100 kPa or 1 bar), so at sea level this is the
lowest expected pressure indication. However, absolute gauges can be «zeroed» (unless prevented by ConfigXP). After zeroing an absolute gauge it is possible
to indicate a negative or positive gauge pressure.
!
WARNING: This gauge can display zero pressure when connected to a source of pressure! Do not rely on the display indication before disconnecting—
it may not be indicating true pressure. Never disconnect pressure instrumentation without first relieving system pressure!
(
)
on/off
button. The XP2i will first test all LCD segments. Release
.
2
Overview
XP2i Operation Manual
Table of Contents for Crystal XP2i:
-
Specications 27 XP2i Operation Manual POWER Batteries . . . . . . . . . . . . . . . . . . . . . . . .Three size AA (LR6) batteries. ! WARNING: Do not remove or change the batteries in hazardous locations. Approved Batteries ATEX/IECEx: The XP2i is Intrinsically Safe only if powered by one of the following battery types: Approved Battery Type Ta= Marking Rayovac Max Plus 815 -20 to 50° C Ex ia IIC T4 Ga Energizer E91 * E
-
Specications 25 XP2i Operation Manual Specifications Accuracy Includes all eects of linearity, hysteresis, repeatability, temperature, and stability for one year. Gauges must be exercised whenever exposed to signicant changes in environmental conditions to achieve these specications, and (if not an absolute model), rezeroed. To exercise a gauge, cycle the gauge between zero (ambient barometric pressure) and the press
-
Data Logging with DataLoggerXP 16 XP2i Operation Manual Data Management X To Download Data from the Gauge 1 Connect the gauge to your computer. 2 In the DataLoggerXP main window, click the Download button. Depending on the number of readings, it can take up to 15 seconds to download all the data. Once the data has been downloaded, the View and Save buttons will be available. X To View a Data Run In the DataLoggerXP main window, click the
-
Functions 3 XP2i Operation Manual Functions units Units Button Pressing this button causes the XP2i to select the next available unit of pressure measurement. See Pressure Ranges, Display Scales, & Resolution on page 28 or the list of pressure units available for your model. Units that you don’t need or never use can be turned o. You can also dene a special unit for your XP2i with CongXP. You can use the XP2i to display directly in a unit not otherwise available, such as feet of seawater, or foot-pounds of tor
-
Functions 9 XP2i Operation Manual Reset If for some reason the XP2i needs to be reset, remove any battery for at least one minute, then reinstall the battery. If the reset is successful, the XP2i will start operating without pressing the (on/o) button. Reset will clear the zero, peak values will be reset to the current reading, and the XP2i will be set to the default engineering units. ! WARNING: Do not remove or change the batteries in hazardous locations. Communications/Programming The XP2i responds to a query-based command language which allow
-
Data Logging with DataLoggerXP 21 XP2i Operation Manual Ultra Low Power (ULP) Mode The XP2i can log for extended periods with Ultra Low Power Mode, activated by the key combinations explained in Keypad Usage on page 19. Ultra Low Power Mode takes readings in Actual Mode, according to the set logging interval. The letters ULP replace the live pressure reading during a recording. You must stop the recording
-
Data Logging with DataLoggerXP 14 XP2i Operation Manual X To Connect to the Gauge 1 Plug the serial cable into the computer and XP2i gauge ports. 2 In the DataLoggerXP main window, click Connect. The program will retrieve the current logging parameters, and then allow downloading, viewing, and saving data, as well as updating the logging parameters. X Password Protection The password protection feature of the gauge allows you to prevent unauthorized c
-
Enclosure 24 XP2i Operation Manual SERIAL NUMBERS Serial Number Location The serial number of your XP2i is located in two places; on the stem above the pressure tting and behind the battery cover under the battery furthest from the serial port connection. You may also nd your serial number using CongXP software. See CongXP for more information. Serial Numbering System Serial Numbers consist of 6 numbers, with the left most digit representing the year of manufacture. For example: 267358 was manufactured during 2012. The serial
-
Data Logging with DataLoggerXP 20 XP2i Operation Manual X Units units Pressing and holding the (units) button briey causes the XP2i to display information about the logging state. If you continue to hold the (units) button, a logging run will begin or end. Immediately after pressing the (units) button, the gauge will display the operating mode as one of these values: The logging memory is Clear, data is empty, and the XP2i is idle. The XP2i is currently logging data. The XP2i is logging in On Dem
Questions, Opinions and Exploitation Impressions:
You can ask a question, express your opinion or share our experience of Crystal XP2i device using right now.