
- Manuals
- Brands
- Dexter Power Manuals
- Saw
- NC1300CS
- User manual
-
Contents
Table of Contents -
Bookmarks
Available languages
-
EN
-
PT
Quick Links
Original Instructions
PT
MANUAL DO USUÁRIO
USERS MANUAL
EN
Importado e distribuído por
LEROY MERLIN CIA BRASILEIRA DE
BRICOLAGEM — CNPJ 01.438.784/0001-05
Made in China 2018
NC1300CS
Circular Saw
4
16
Related Manuals for Dexter Power NC1300CS
Summary of Contents for Dexter Power NC1300CS
-
Page 1
Original Instructions NC1300CS Circular Saw MANUAL DO USUÁRIO USERS MANUAL Importado e distribuído por LEROY MERLIN CIA BRASILEIRA DE BRICOLAGEM — CNPJ 01.438.784/0001-05 Made in China 2018… -
Page 2
Original Instructions 11 12 Fig. 1 Fig. 3 Fig. 2 Fig. 4 Fig. 5 Fig. 6 Fig. 7 Dexter Power… -
Page 3
Original Instructions Fig. 8 Fig. 9 Dexter Power… -
Page 4
Se forem fornecidos dispositivos para a conexão de extração de pó e instalações de coleta, verifique se os mes- mos estão conectados e sendo usados adequadamente. O uso de coletor de pó pode reduzir os perigos relacionados com o pó. Dexter Power… -
Page 5
Use sempre lâminas com orifícios para eixo de tamanho e formato corretos (diamante ou redonda). Lâminas que não correspondem à ferragem de montagem da serra operarão de maneira excêntrica, causando perda de controle. Dexter Power… -
Page 6
Tome cuidado com o tempo que a lâmina leva para parar depois que o interruptor é solto. OS SEGUINTES RISCOS SÃO TÍPICOS DO USO DESTA MÁQUINA: — lesões provocadas por tocar as peças rotativas, especialmente a lâmina — lesões provocadas por quebra da lâmina da serra Dexter Power… -
Page 7
— Não troque a montagem de iluminação a laser por um tipo diferente. Quaisquer reparos devem ser executados apenas pelo fabricante ou agente de serviço autorizado. — Não tente reparar você mesmo o guia laser — Não tente trocar quaisquer partes do guia laser. — Sempre desligue o laser quando não estiver em uso. Dexter Power… -
Page 8
A máquina foi projetada para serrar madeira. Não use acessórios de máquinas para fins diferentes daqueles para os quais foram concebidos! Todas as outras aplicações estão expressamente excluídas. DADOS DA MÁQUINA Especificação técnica: Designação do tipo NC1300CS Serra Circular Tensão nominal 127V~ , 60Hz Entrada de potência nominal 1300W… -
Page 9
Incluindo risco de danos pessoais, perda de vida ou danos à ferramenta no caso de não observância das instruções neste manual Indica perigo de choque elétrico. Desligue imediatamente o plugue da rede elétrica caso o cabo fique danificado e durante a manutenção. Use proteção para os olhos. Use máscara de pó Dexter Power… -
Page 10
Para instalar o tubo de extração de poeira, simplesmente encaixe-o na direção da ferramenta. Para remover, basta puxar da ferramenta. Para uma extração de pó ideal, conecte a porta de extração de pó a um aspirador de pó apropriado ou ao sistema de extração de pó da oficina. Dexter Power… -
Page 11
Após a reparação ou substituição da lâmina de serra, certifique-se de que ela corre livremente, rodando a lâmina com a mão. Plugue a máquina em uma fonte de alimentação e opere a serra sem carga para verificar se ela funciona uniformemente antes de usá-la para cortar qualquer material. Dexter Power… -
Page 12
Apenas ligue o feixe de laser quando a ferramenta estiver na peça de trabalho. Marque a linha de corte na peça de trabalho. Ajuste a profundidade e o ângulo de corte, conforme necessário. Dexter Power… -
Page 13
Lubrificação Todos os rolamentos nesta ferramenta são lubrificados com uma quantidade suficiente de lubrificante de alto grau para a vida útil da unidade em condições normais de funcionamento; desta forma, não é necessária lubrificação adicional. Dexter Power… -
Page 14
TRADUÇÃO DAS INSTRUÇÕES ORIGINAIS Dexter Power… -
Page 15
Se produtos danificados forem enviados diretamente à Dexter pelo consumidor, a Dexter só será capaz de processar esses produtos se o consumidor pagar os custos de envio. 8. Os produtos entregues de maneira mal acondicionada não serão aceitos pela Dexter. Dexter Power… -
Page 16
Do not use the power tool if the switch does not turn it on and off. Any power tool that cannot be controlled with the switch is dangerous and must be repaired. Dexter Power… -
Page 17
Kickback is the result of saw misuse and/or incorrect operating procedures or conditions and can be avoided by taking proper precautions as given below. Dexter Power… -
Page 18
Pay attention to the maximum rotational speed. The maximum rotational speed marked on the saw blade shall not be exceeded. Where stated, the speed range shall be adhered to. c) Do not use saw blades which are cracked. Repairing is not permitted. Dexter Power… -
Page 19
— Do not change the laser light assembly with a different type. Any repairs must only be carried out by the laser manufacture or authorized service agent. — Do not attempt to repairs the laser guide by yourself — Do not attempt to change any parts of the laser guide. — Always switch off the laser when not used. Dexter Power… -
Page 20: Table Of Contents
The machine is designed to saw wood. Do not use machine attachments for works other than those for which they are designed for! All other applications are expressly ruled out. MACHINE DATA Technical specification: Type designation NC1300CS circular saw Rated voltage 127V~ , 60Hz Rated power input 1300W…
-
Page 21: Safety Instructions
Denotes risk of personal injury, loss of life or damage to the tool in case of non-observance of the instructions in this manual Indicates electrical shock hazard. Immediately unplug the plug from the mains electricity in the case that the cord gets damaged and during maintenance. Wear eye protection. Wear dust mask Dexter Power…
-
Page 22: Dust Extraction Adaptor
For optimum dust extraction, connect the dust extraction port to a suitable vacuum cleaner or workshop dust extraction system. Wrench storage Fig. 6 For more convenient operation, the wrench can be stored in the base plate. Just pull the wrench out for use. Insert it into the slots after use. Dexter Power…
-
Page 23
WARNING: The saw blades shipped with this product are for cutting wood. Do not attempt to saw stone and ceramic tile materials with these saw blades. Before operation, ensure that the saw blades are free from damage and properly fitted to the product. Dexter Power… -
Page 24
After completing your cut, release the trigger switch and allow the blade to come to a complete stop. Do not remove the saw from the pieceworker while the blade is moving. Switch off the laser beam by pushing the laser switch backward on completion of the cut. Dexter Power… -
Page 25
Check the function of the lower guard, ensure it opens and closes smoothly. Remove any dust that might block the guard. Lubrication All the bearings in this tool are lubricated with a sufficient amount of high grade lubricant for the life of the unit under normal operating conditions, therefore no further lubrication is required. Dexter Power… -
Page 26
Original Instructions Dexter Power… -
Page 27
If faulty goods are sent directly to Dexter by the consumer, Dexter will only be able to process these goods if the consumer pays the shipping costs. 8. Products which are delivered in a poorly packaged condition will not be accepted by Dexter. Dexter Power…
Инструкция для Циркулярной пилы Dexter 
Циркулярная пила Dexter оснащена двигателем мощностью 1300 Вт, развивающим до 5800 об/мин. Рассчитана на работу с дисками размером 185 мм и посадочным диаметром 20 мм. Инструмент способен распиливать древесину толщиной до 62 мм под углом 90° и 46 мм под углом 45°. Подключается к бытовой электросети кабелем длиной 3 м. Гарантия производителя на инструмент — 3 года.
Особенности циркулярной пилы Dexter
- Мягкие рельефные накладки обеспечивают удобный и надежный хват инструмента при работе.
- Блокировка случайного запуска и прозрачный защитный кожух диска повышают безопасность при использовании пилы.
- Опорная металлическая платформа быстро фиксируется под необходимым углом без использования специальных ключей.
- Комфорт в работе повышают встроенная система удаления опилок и возможность крепления параллельного упора.
- Сравнение0
- Закладки0
![]()
- Главная
- Строительство и ремонт
- Инструменты
- Оборудование для мастерской
- Станки

-
SM-18507352
-
Уточняйте у менеджера1000
-
19.30 кг
-
Складская
-
Высота пропила под углом 45° (мм):
40
-
Высота пропила под углом 90° (мм):
48
-
2
-
210
-
Длина сетевого кабеля (м):
2
-
Длина стола (платформы) (мм):
600
-
Количество зубцов на диске:
40
-
Нет
-
DEXTER POWER
- Показать все характеристики
- Описание
- Характеристики
- Отзывы 0
Инструкция для Dexter Power MJ10200IIIC-I
Пила стационарная Dexter предназначена для продольного и поперечного пиления древесных материалов, а также паркетной доски, ламината, фанеры и доборных брусков для оконных и дверных коробок. Для работы используются пильные диски диаметром 210 мм с размером посадочного отверстия 30 мм. Основные узлы выполнены из стали и алюминия. Платформа для подачи материала изготовлена из стали. Срок гарантии — 2 года.
Преимущества
- Максимальная глубина пропила при угле 90° — 48 мм — допускает качественный распил досок толщиной до 45 мм включительно.
- Пилу можно использовать для устройства пазов и четвертей в брусках и досках.
- Длины кабеля 2 м достаточно, чтобы не применять удлинители.
| Характеристики | |
| Статус | Складская |
| Высота пропила под углом 45° (мм) | 40 |
| Высота пропила под углом 90° (мм) | 48 |
| Гарантия (лет) | 2 |
| Диаметр лезвия (мм) | 210 |
| Длина сетевого кабеля (м) | 2 |
| Длина стола (платформы) (мм) | 600 |
| Количество зубцов на диске | 40 |
| Лазерная направляющая | Нет |
| Марка | DEXTER POWER |
| Материал платформы | Сталь |
| Основной материал | Сталь и алюминий |
| Посадочный диаметр диска (мм) | 30 |
| Потребляемая мощность (Вт) | 1300 |
| Страна производства | Китай |
| Тип лезвия | Карбид |
| Тип продукта | Циркулярный станок |
| Тип упаковки | Коробка |
| Вес, кг | 19.3 |
Теги: Пила стационарная Dexter Power MJ10200IIIC-I,
1300 Вт,
210 мм,
16 800 р.,
SM-18507352,
DEXTER POWER,
Станки
Мы cохраняем файлы cookie: это помогает сайту работать лучше. Если Вы продолжите использовать сайт, мы будем считать, что Вас это устраивает.
Ok
- Manuals
- Brands
- Dexter Power Manuals
- Tools
- PC1300RT
- Original instructions manual
-
Contents
-
Table of Contents
-
Troubleshooting
-
Bookmarks
Available languages
-
EN
-
PT
Quick Links
Router
PC1300RT
PT
EN
EAN CODE: 3 276000 256373
Instruções originais / Original Instructions
Related Manuals for Dexter Power PC1300RT

Summary of Contents for Dexter Power PC1300RT
-
Page 1
Router PC1300RT EAN CODE: 3 276000 256373 Instruções originais / Original Instructions… -
Page 3
SÍMBOLOS Para reduzir o risco de lesões, o usuário deve ler este manual de instruções Máquina classe II — Isolamento duplo — Você não precisa de nenhum plugue com aterramento Apresenta risco de acidente pessoal, morte ou danos à ferramenta no caso de não observação das instruções deste manual Indica perigo de choque elétrico. -
Page 4
1. ÁREA DE APLICAÇÃO DA FRESADORA Este produto destina-se a fresar ranhuras, arestas, perfis e furos alongados, bem como para cortes de moldes em madeira, plástico e materiais de construção leves, apoiando-se firmemente sobre a peça de trabalho. Não utilize máquinas, ferramentas e acessórios para aplicações adicionais (veja as instruções do fabricante) em outros trabalhos que não aqueles para os quais foram projetados. -
Page 5
2. INSTRUÇÕES DE SEGURANÇA 2. SEGURANÇA ELÉTRICA a) Os plugues de ferramentas elétricas devem corresponder à tomada. Nunca modifique o plugue de maneira alguma. Não use nenhum plugue adaptador com ferramentas elétricas aterradas (ligadas à terra). O uso de plugues não modificados e de tomadas correspondentes reduzirá o risco de choque elétrico. -
Page 6
2. INSTRUÇÕES DE SEGURANÇA d) Remova qualquer chaveta ou chave de ajuste antes de ligar a ferramenta elétrica. Uma chave ou chaveta que permaneça conectada a uma parte giratória da ferramenta elétrica pode resultar em lesão pessoal. e) Não se incline sobre a pistola. Mantenha os pés no chão e o equilíbrio o tempo todo. -
Page 7
2. INSTRUÇÕES DE SEGURANÇA f) Mantenha as ferramentas cortantes afiadas e limpas. As ferramentas de corte apropriadamente mantidas, com pontas de corte afiadas, têm menor probabilidade de engripar e são mais fáceis de controlar. g) Use a ferramenta elétrica, acessórios e pontas etc. em conformidade com estas instruções, levando em consideração as condições de trabalho e a tarefa a ser realizada. -
Page 8
2. INSTRUÇÕES DE SEGURANÇA • O limite máximo indicado de velocidade de rotação da broca não deve ser excedido. • A fresa deve sempre ser conduzida para o lado oposto da direção de rotação da broca (rotação da broca). • A broca deve estar trabalhando à velocidade total antes de abaixar na peça de trabalho. -
Page 9
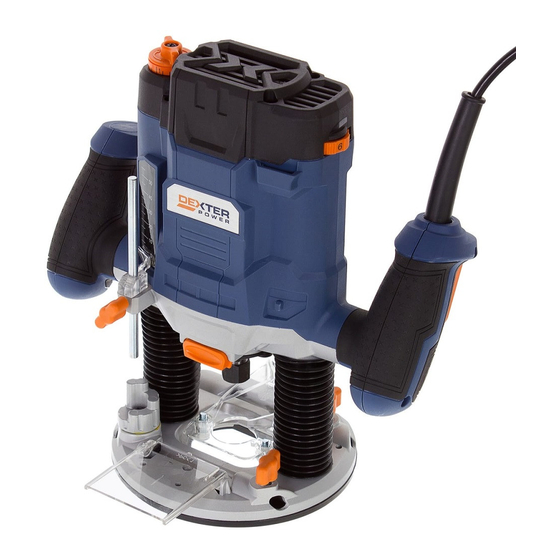
3. DESCRIÇÃO Interruptor Liga/Desliga Botão de travamento Ajustador de velocidade Alavanca de botão serra de fresagem Botão de travamento da ponta do eixo Porca da pinça Amortecedor para parada de profundidade Parada de profundidade Botão de ajuste fino Adaptador de extração de pó Parafuso de travamento Parafuso para a guia de margem Placa de base… -
Page 10
4. DADOS TÉCNICOS Designação do tipo PC1300RT Tensão nominal 127V~ 60Hz Entrada de potência nominal 1300W Velocidade, n 11000-30000/min Tamanho da pinça 6/8mm Profundidade máxima de corte 55 mm 5. ANTES DE LIGAR O EQUIPAMENTO ADVERTÊNCIA: O aparelho deve ser desligado da alimentação antes de entrar em funcionamento. -
Page 11
5. ANTES DE LIGAR O EQUIPAMENTO Para remover a broca 1. Mantenha o botão de bloqueio do eixo abaixado. 2. Afrouxe a porca das pinças usando uma chave e remova a broca. 3. Aperte a porca e solte o bloqueio do eixo. Instalando a guia de margem A guia de margem é… -
Page 12
5. ANTES DE LIGAR O EQUIPAMENTO Se várias profundidades diferentes de corte são necessárias para trabalhar na peça, estas também podem ser pré-ajustadas utilizando o amortecedor de etapa. Direção de avanço O movimento de avanço da fresa deve ser sempre realizado contra a direção de rotação desta (moagem). Ao efetuar a moagem na direção da rotação de fresa (corte baixo), a fresa pode perder o controle, eliminando, assim, o controle pelo usuário. -
Page 13
6. OPERAÇÃO ADVERTÊNCIA: Antes de ligar a ferramenta na tomada, sempre verifique se o gatilho e o botão de trava funcionam corretamente. Para ligar, pressione o botão de trava e aperte o gatilho. Para desligar, solte o botão de gatilho. PROCESSOS DE FRESA Ajuste a profundidade de corte como descrito previamente. -
Page 14
7. MANUTENÇÃO Sempre desligue o equipamento antes de realizar qualquer operação de ajuste ou manutenção. Se o cabo de alimentação estiver danificado, ele deve ser substituído pelo fabricante ou o seu representante de serviço, a fim de evitar riscos. Desconecte da fonte de alimentação imediatamente se o cabo de alimentação estiver danificado. Tome cuidado para não expor essa ferramenta à… -
Page 15
8. RESOLUÇÃO DE PROBLEMAS Problema Causa possível Solução O produto não liga Não conectado à fonte de alimentação Conectado à fonte de alimentação O cabo de alimentação ou o plugue estão com defeito Verifique com um eletricista. Outros defeitos elétricos no produto Verificar com um eletricista especializado O produto não chega Cabo de extensão não adequado para… -
Page 16
VISÃO DETALHADA… -
Page 17: Table Of Contents
SYMBOLS To reduce the risk of injury, user must read instruction manual Class II machine – Double insulation – You don’t need any earthed plug Denotes risk of personal injury, loss of life or damage to the tool in case of non- observance of the instructions in this manual Indicates electrical shock hazard.
-
Page 18: Area Of Application Of Router
1. AREA OF APPLICATION OF ROUTER This product is intended for routing grooves, edges, profiles and elongated holes as well as for template cuts in wood, plastic and light building materials, while resting firmly on the workpiece. Do not use machines, tools and accessories for additional applications (see manufacturer’s instructions) for works other than those for which they are designed for.
-
Page 19
2. SAFETY INSTRUCTIONS c) Do not expose power tools to rain or wet conditions. Water entering a power tool will increase the risk of electric shock. d) Do not abuse the cord. Never use the cord for carrying, pulling or unplugging the power tool. -
Page 20
2. SAFETY INSTRUCTIONS 4. POWER TOOL USE AND CARE a) Do not force the power tool. Use the correct power tool for your application. The correct power tool will do the job better and safer at the rate for which it was designed. b) Do not use the power tool if the switch does not turn it on and off. -
Page 21
2. SAFETY INSTRUCTIONS 2. USE CLAMPS OR ANOTHER PRACTICAL WAY TO SECURE AND SUPPORT THE WORKPIECE TO A STABLE PLATFORM. Holding the work by your hand or against the body leaves it unstable and may lead to loss of control. •… -
Page 22: Description
2. SAFETY INSTRUCTIONS • Never stop the router by applying lateral pressure to the bit. • Do not force the router. Your router will do a better job if you take it slowly. • Avoid cutting nails and screws. Inspect timber and remove all nails and screws before cutting.
-
Page 23: Technical Data
4. TECHNICAL DATA Type designation PC1300RT Rated voltage 127V~ 60Hz Rated power input 1300W Speed, n 11000-30000/min Collet size 6/8mm Max. cutting depth 55mm 5. BEFORE PUTTING THE EQUIPMENT INTO OPERATION WARNING: The device should be disconnected from the mains before putting into operation.
-
Page 24
5. BEFORE PUTTING THE EQUIPMENT INTO OPERATION To remove the bit 1. Keep the spindle lock button depressed. 2. Loosen the collets nut using the wrench and remove the bit. 3. Tighten the collect nut and release the spindle lock. Installing edge guide The edge guide is an effective aid to cutting in a straight line when chamfering or grooving. -
Page 25: Operation
5. BEFORE PUTTING THE EQUIPMENT INTO OPERATION Direction of feed The feed motion of the router must always be carried out against the rotation direction of the router bit (up-grinding). When milling in the direction with the rotation of the router bit (down-cutting), the router can break loose, eliminating control by the user. 6.
-
Page 26
6. OPERATION ROUTING PROCESS Adjust the depth-of-cut as previously described. Place the router on the workpiece and switch on. Push down the plunge lock lever and slowly lower the router until the depth stop runs against the depth stop buffer. Lock the router in position by release plunge lock lever, carry out the cutting procedure with uniform feed. -
Page 27: Maintenance
7. MAINTENANCE Always disconnect the device before performing any adjustment or maintenance operation. If the supply cord is damaged, it must be replaced by the manufacturer or its service agent in order to avoid a hazard. Disconnect from the power supply immediately if the supply cord is damaged. Take care not to expose this tool to the rain.
-
Page 28: Warranty
8. TROUBLE SHOOTING Problem Possible cause Solution Product does Not connected to power supply Connect to power supply not start Power cord or plug is defective Check by a specialist electrician. Other electrical defect to the product Check by a specialist electrician Product does not Extension cord not suitable for Use a proper extension cord…
-
Page 29
DETAILED VIEW… -
Page 30
Serial No.: 20171400DDMMYY01XXXXXX Importado e distribuído por LEROY MERLIN CIA BRASILEIRA DE Número de série.: 20171400DDMMYY01XXXXXX BRICOLAGEM — CNPJ 01.438.784/0001-05 * Garantia de 2 anos / 2-years guarantee Made in China 2017…