Подключил IP-камеру D-Link DCS-910
С этим делом не все так однозначно, потому краткое описание процесса:
1)Само собой подключить камеру к свичу либо компьютеру и включить камеру в электросеть.
Если все нормально, светодиод под линзой камеры должен светиться зеленым. Если светодиод горит красным, значит камера не видит Ethernet.
2)Установить с компакт диска программы «Setup Wizard» и «D-View Cam».
3)Запустить Setup Wizard:
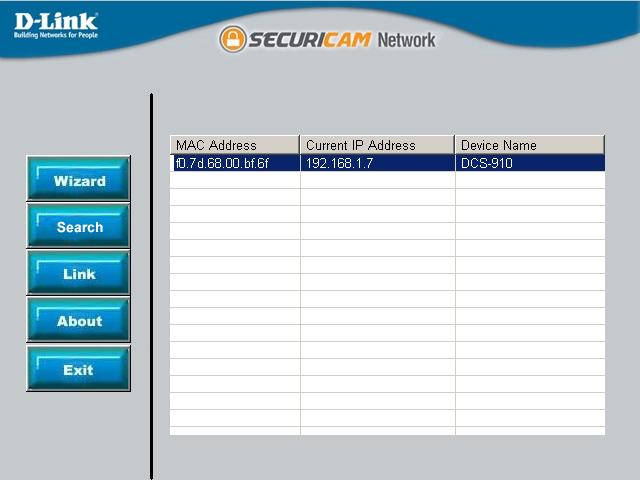
3-1)Программа найдет IP-камеру. Камера будет иметь какой-то IP-адрес по умолчанию. В моем случае камера имела IP-адрес 192.168.1.7
Нажимаем «Wizard».
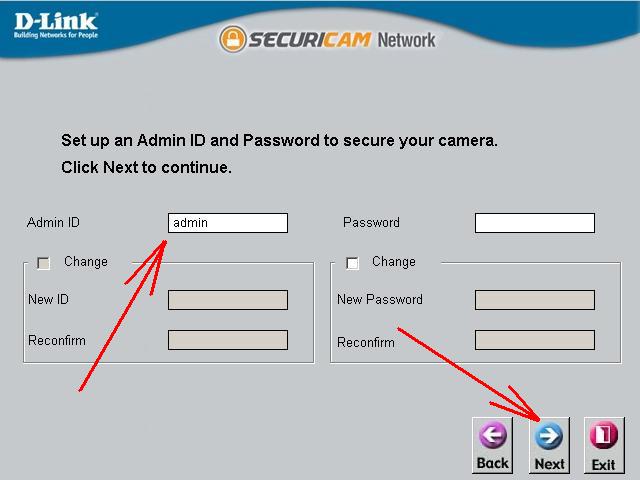
3-2) Ввести имя пользователя admin и нажать Next
3-3)Нажать Static IP, ввести новый IP-адрес и маску сети согласно настройкам сети.

Я ввел IP-адрес 192.168.0.7, т.к. в сети, где будет установлена камера, адреса имеют диапазон 192.168.0.1-192.168.0.254 и маска сети 255.255.255.0
В Deefault Gateway ввел IP-адрес компьютера, для которого ставлю камеру.
Нажать Next.
3-4)Нажать Restart.

IP-камера будет перезагружаться до 30 секунд, светодиод под линзой будет мигать. Откроется снова первая страница.
3-5)Нажать Link
Если не заходит на камеру, проверить настройки подключения. Я часа 3 не мог зайти на камеру, пока не убрал настройки прокси-сервера.

4)В браузере появится окно ввода пользователя и пароля. Вводим пользователя admin и пустой пароль.

4-1)Теперь мы находимся на html-страничке нашей камеры. Настраиваем вмдео нашей камеры.
Заходим Setup->Video.
Настраиваем:
Resolution— разрешение камеры. Максимум 640×480.
FPS— кол-во кадров в секунду. Максимум 30.
View Mode— режим просмотра, ставим «Java».
В режиме «Java» на html-страничке камеры будет транслироваться изображение с камеры в реальном времени.
В режиме «Image» на html-страничке камеры будет показывать всего-лишь статическую фотографию.
Jpeg Quality— качество фотографий. Ставим «High»- высокое.

4-2)Переходим на закладку Live video и видим, что вместо статичной фотографии идет он-лайн трансляция видео с камеры.

В принципе, камеру уже можно использовать для просмотра видео с любого компьютера, находящегося в той же сети, что и камера. Для этого достаточно в любом браузере набрать адрес камеры, в моем случае это http://192.168.0.7, ввести имя пользователя и пароль.
И вот она, он-лайн трасляция.

5)
Но намного удобнее для просмотра использовать не браузер, а программу D-View Cam, которая идет в комплекте.
Для этого заходим Пуск-> Все программы-> D-Link-> D-ViewCam-> Main Console.
Нажимаем значок настроек.
Выбираем пункт «Настройки».

5-1)Заходим на закладку «Камера» и нажимаем кнопку «Поиск».

5-2) Находим нашу камеру, ставим галочку напротив нее и нажимаем «ОК»

5-3) Появится сообщение. Подключиться невозможно, т.к. не ввели логин и пароль.
Жмем «ОК».

5-4) Тем не менее, камера добавилась в список. Нажимем на нее 2 раза левой кнопкой мыши.

5-5) Вводим логин и пароль. Жмем «ОК».

5-6) Видео с камеры появилось, все хорошо. Жмем «ОК».

Теперь при входе в программу D-Link-> D-ViewCam-> Main Console будет показывать видео с камеры.

Внимание! Для настройки фокуса нужно покрутить линзу, иначе изображение может быть размытым.
По теме:
Веб-камера, работающая через Ethernet. D-Link DCS-910, простое видеонаблюдение.
- Manuals
- Brands
- D-Link Manuals
- Security Camera
- SECURICAM DCS-910
- User manual
-
Contents
-
Table of Contents
-
Troubleshooting
-
Bookmarks
Quick Links
Related Manuals for D-Link dcs-910
Summary of Contents for D-Link dcs-910
-
Page 2: Table Of Contents
D-ViewCam Installation ………. 40 Add a Camera …………..43 Live Video …………..24 Setup > Wizard …………24 Using & Configuring the DCS-910 ……..48 Internet Connection Setup Wizard ……. 25 Router Set-Up and Installation ……..51 Network Setup …………. 27 Troubleshooting ………..
-
Page 3
Table of Contents Networking Basics ……….56 Check your IP address …………. 56 Statically Assign an IP address ……..57 D-Link DCS-910 User Manual… -
Page 4: Product Overview
• DCS-910 Internet Camera • CAT5 Ethernet Cable • Power Adapter • Manual, Software and D-Link Click ‘n Connect setup utility on CD • Quick Install Guide • Camera Stand Note: Using a power supply with a different voltage than the one included with your product will cause damage and void the warranty for this product.
-
Page 5: Introduction
C o n g r a t u l a t i o n s o n y o u r p u rc h a s e o f t h e D C S — 9 1 0 I n t e r n e t C a m e r a ! T h e D C S — 9 1 0 i s a v e r s a t i l e a n d unique solution for your small office or home. Unlike a PC Camera, the DCS-910 is a stand-alone system with a bui lt — i n C P U that trans mit s hi g h qual ity video i mage s fo r mo n ito r i n g.
-
Page 6: Features
Features • Simple to Use: The DCS-910 is a stand-alone system with a built-in CPU, requiring no special hardware or software such as PC frame grabber cards. The DCS-910 supports both ActiveX mode for Internet Explorer and Java mode for Internet Explorer and Netscape Navigator ™…
-
Page 7: Hardware Overview
Section 1 — Product Overview Hardware Overview Front View Camera Lens Power and Link LED Camera Stand D-Link DCS-910 User Manual…
-
Page 8: Rear View
Section 1 — Product Overview Rear View Reset Ethernet Connector Power Connector Camera Stand D-Link DCS-910 User Manual…
-
Page 9: Hardware Installation
Section 1 — Product Overview Hardware Installation Attach the Swivel Stand Locate the stand mount on the back panel of the DCS-910 and screw on the swivel stand to the DCS-910. Connect the Ethernet Cable Connect the included Ethernet cable to the network cable connector located on the bottom panel of the DCS-910 and attach it to the network.
-
Page 10
Attach the external power supply to the DC power input connector located on the bottom panel of the DCS-910 and connect it to your local power supply. Note: Power source is confirmed when the red LED Power Indicator located below the lens on the DCS-910 is illuminated. -
Page 11: Software Installation
Software Installation Using D-Link Click ‘n Connect Turn on the computer and Insert the D-Link DCS-910 Installation CD in the CD-ROM drive. Use the D-Link Click ‘n Connect utility for initial setup. The following step-by-step instructions will be shown in Windows XP.
-
Page 12
Click Next If you have not yet connected the Ethernet cable to the camera, do so now. Connect the other end of the cable to your computer or to the LAN. Click Next to continue. Click Next D-Link DCS-910 User Manual… -
Page 13
If the camera is successfully located, the MAC ID you wrote down previously appears in the MAC ID List. If there are multiple MAC IDs listed, choose the MAC ID for the camera being installed. Click Next to continue. Click Next D-Link DCS-910 User Manual… -
Page 14
(Static) IP address assigned by the ISP. Click Next to continue. Click Next If you need to manually assign IP settings for a Fixed IP Address, enter the information and click Next to continue. Click Next D-Link DCS-910 User Manual… -
Page 15
“admin” leave the password entry blank and click the OK button. See below for more information on using the camera’s web interface. Click Exit to quit the D-Link Click ‘n Connect utility. Click Exit to quit or ADVANCED Options to… -
Page 16: Install Setup Wizard Software
Install Setup Wizard Software The DCS-910 includes Setup Wizard software as an alternative to using the D-Link Click ‘n Connect utility for camera setup. Users might also want to install the Setup Wizard on their system to be able to re-install or install new camaeras in the future.
-
Page 17
Click the Next button to proceed with the installation of the Setup Wizard. You will be able to choose where to put the software on your computer in a menu that appears later. Click Next Read the license agreement and click Yes if you agree and want to proceed with installation. Click Yes D-Link DCS-910 User Manual… -
Page 18
Click the Finish button to complete the Setup Wizard installation. The computer will need to be restarted before the Setup Wizard can be used. A menu appears offering the option of restarting now or later. Upon restarting the Setup Wizard is ready to use. Click Finish D-Link DCS-910 User Manual… -
Page 19: Configuration
After installing the Setup Wizard software and restarting the computer, a new folder appears in Programs containing the Setup Wizard. To launch the Setup Wizard go to Programs —> D-Link —> Setup Wizard SE and click on the D-Link Setup Wizard SE icon.
-
Page 20
IP Address and Subnet Mask suitable for your local network. Enter a Default Gateway IP address to access the camera from remote locations or oterh subnets. Enter DNS IP addresses if needed for remote access accross the Internet. Click Next D-Link DCS-910 User Manual… -
Page 21
Section 3 — Configuration If you need to make any changes, click Back to modify your settings. Otherwise, click Restart to save and apply your settings. Click Restart D-Link DCS-910 User Manual… -
Page 22: Viewing Your Internet Camera
Web browser. Click Link The Setup Wizard will automatically open your web browser to the IP address of the DCS-910, in this example it is: http://192.198.0.102. Your DCS-910 may have a different IP Address. Enter admin as the default username and leave the password blank. Click OK to continue.
-
Page 23
• When you connect to the home page of your camera, you will be prompted to download ActiveX. If you want to use ActiveX to view your video images instead of Java, then you must download ActiveX. D-Link DCS-910 User Manual… -
Page 24: Configuration
Setup > Wizard You may choose to configure your network by using the Internet Connection Setup Wizard that includes step-by-step instructions. Otherwise, you may manually configure your connection using the Manual Internet Connection Setup. D-Link DCS-910 User Manual…
-
Page 25: Internet Connection Setup Wizard
Section 3 — Configuration Internet Connection Setup Wizard This wizard will guide you through a step-by-step process to configure your new D-Link Camera and connect the camera to the Internet. Click Next to proceed. Click Next You may configure your camera using •…
-
Page 26
Configure the correct time to ensure that all events triggered, captured and scheduled at the right time. Then, click Next to proceed. Click Next This page displays your configured settings. Click Apply to save and activate the setting, or Back to change your settings. Click Apply D-Link DCS-910 User Manual… -
Page 27: Network Setup
TCP ports 80. A corresponding port must be opened on the router. For example, if the port is changed to 1010, users must type in the web browser “http://192.168.0.100:1010” instead of “http://192.168.0.100”. UPnP Settings: Enable this setting to configure your camera as an UPnP device in the network. D-Link DCS-910 User Manual…
-
Page 28: Setup > Ddns
Select your Dynamic DNS Server from the pull down menu. Host Name: Enter the host name of the DDNS server. User Name: Enter your username or e-mail used to connect to the DDNS. Password: Enter your password used to connect to the DDNS server. D-Link DCS-910 User Manual…
-
Page 29: Setup > Image Setup
Vertically rotates the video. If the camera is installed upside down, Flip Image and Mirror should both be checked. Mirror: Horizontally rotates the video. Brightness Control: Allows you to adjust the brightness level. Contrast Control: Allows you to adjust the contrast level. Saturation Control: Allows you to adjust the saturation level. . D-Link DCS-910 User Manual…
-
Page 30: Setup > Video
Quality: Select the desired image quality from five levels: Highest, High, Medium, Low, and Lowest. Light Frequency: Select the proper frequency (50Hz or 60Hz) to reduce image flicker. D-Link DCS-910 User Manual…
-
Page 31: Setup > Mail
This is the e-mail address of recipient for the SMTP server. Address: User Name: If the SMTP server uses authentication, you must enter your user name here. Password: This is the password that you use with your user name to connect to the SMTP server. D-Link DCS-910 User Manual…
-
Page 32: Time Schedule
This will send a snapshot to the e-mail account that you have configured in the E-mail section. If you have configured the SMTP account correctly, Account: you will be able to send a test file to the e-mail account of the recipient. D-Link DCS-910 User Manual…
-
Page 33: Setup > Ftp
Specifies the password to access the external FTP server. Directory Path: Specifies the destination folder in the external FTP server. Passive Mode: Enabling passive mode will allow access to an external FTP server if your camera is behind a router protected by a firewall. D-Link DCS-910 User Manual…
-
Page 34: Time Schedule
This will send a snapshot to the FTP server that you have configured in the Upload section. If you have configured the FTP correctly, you will be able to see a test file in your FTP server. D-Link DCS-910 User Manual…
-
Page 35: Setup > Time And Date
Internet time server. Choose the one that is closest to your camera, Copy your Computer’s Time Click to synchronize the time information from your PC. Settings: Set the Date and Time Select this to set the time manually. Manually: D-Link DCS-910 User Manual…
-
Page 36: Maintenance > Device Management
Section 3 — Configuration Maintenance > Device Management In this section, you can change the administrator’s password and configure the server settings for your camera. You can also manage the user account(s) that access to your camera. D-Link DCS-910 User Manual…
-
Page 37: Maintenance > Backup And Restore
Section 3 — Configuration Maintenance > Backup and Restore In this section, you can save and restore your configuration, restore the factory settings, and/or restart the camera. D-Link DCS-910 User Manual…
-
Page 38: Maintenance > Firmware Upgrade
Maintenance > Firmware Upgrade Your current firmware version and date will be displayed on your screen. You may go to the D-Link Support Page to check for the latest firmware versions available. To upgrade the firmware on your DCS-910, please download and save the latest firmware version from the D-Link Support Page to your local hard drive.
-
Page 39: Status > System
Section 3 — Configuration Status > System This section displays all the details information about your device and network settings. D-Link DCS-910 User Manual…
-
Page 40: D-Viewcam Installation
D-ViewCam Installation D-ViewCam software is included for the administrator to manage up to 32 D-Link IP cameras remotely. You may now use the software to configure all the advanced settings for your cameras. D-ViewCam is a comprehensive management tool for IP surveillance.
-
Page 41
Section 3 — Configuration Click Next to continue. Click Next Click Browse if you would like to choose a specific folder for the installation, otherwise click Next to continue. Click Next D-Link DCS-910 User Manual… -
Page 42
Section 3 — Configuration Click Next to start the installation. Note: The D-ViewCam installation process may take several minutes to complete. Click Next Click Finish to complete the installation. Click Finish D-Link DCS-910 User Manual… -
Page 43: Add A Camera
Add a Camera This section will show you how to start and add a camera to the D-ViewCam system. To start D-ViewCam, select Start > All Programs > D-Link > D-Link D-ViewCam. Enter Admin as the default user name and leave the password blank.
-
Page 44
Section 3 — Configuration Welcome to the Add Camera Wizard. Use this wizard to add your cameras to the D-ViewCam system. Note: Use the left or right arrow to navigate the wizard. Click / Next to continue. Click Next D-Link DCS-910 User Manual… -
Page 45
LAN with same subnet. The system will place all of the cameras under the default map called My Map. Click Next to continue. DCS-910-55 If you choose Add Manually, you will need to enter the IP address of the camera(s). Click Next to continue. D-Link DCS-910 User Manual… -
Page 46
• Non-Office Hours Only: Continuously monitoring during non-office hours (06:00 PM to 08:00 AM) and ONLY recording when motion is detected. Note: Excluding 24/7 Continuous Recording, other schedule recording types can ONLY do recording when motion is detected. Click Next to continue. DCS-910 DCS-910-55 D-Link DCS-910 User Manual… -
Page 47
Click Next to continue. The Add Camera wizard is now complete. Click Close to access the D-ViewCam’s main screen. Your D-ViewCam Installation is Complete! Note: Please refer to the D-ViewCam user manual for information about using D-ViewCam. D-Link DCS-910 User Manual… -
Page 48: Using & Configuring The Dcs-910
Using & Configuring the DCS-910 D-Link’s DCS-910 is a versatile and cost effective Internet Camera offering both video and audio monitoring. It can also serve as a powerful surveillance system in security applications. DCS-910 can be used with any wired router. This section explains how to view the camera from either the Internet or from inside your internal network.
-
Page 49
Run the Setup Wizard program from the CD included with the DCS-910. Follow the steps in the Quick Installation Guide to configure the DCS-910. The camera will be assigned a local IP Address that allows it to be recognized by the router. Write down this IP Address for future reference. -
Page 50
Run your Internet Explorer Web browser. In the address bar, type in the IP Address that was assigned to the Internet Camera by the Installation Wizard program. The DCS-910 Home Page appears with a window displaying live video from the camera. You are able to view this screen from any PC running Internet Explorer on your LAN. -
Page 51: Router Set-Up And Installation
Router Set-Up and Installation The following steps generally apply to any router that you have on your network. The D-Link DI-624 is used as an example to clarify the configuration process. Configure the initial settings of the DI-624 by following the steps outlined in the DI-624 Quick Installation Guide.
-
Page 52: Open Virtual Server Ports To Enable Remote Image Viewing
The firewall security features built into the DI-624 router prevent users from accessing the video from the DCS-910 over the Internet. The router connects to the Internet over a series of numbered ports. The ports normally used by the DCS-910 are blocked from access over the Internet.
-
Page 53
Enter valid ports in the Virtual Server section of your router. Please make sure to check the box next to the camera name on the Virtual Server List to enable your settings. D-Link DCS-910 User Manual… -
Page 54: Troubleshooting
Reposition the Internet Camera into a more shaded area immediately as prolonged exposure to bright lights will damage the CMOS sensor. D-Link DCS-910 User Manual…
-
Page 55
If you are using Internet Explorer with a version number of lower than 5, then you will need to upgrade your Web browser software in order to view the streaming video transmitted by the Internet Camera. D-Link DCS-910 User Manual… -
Page 56: Networking Basics
Check your IP address After you install your new D-Link adapter, by default, the TCP/IP settings should be set to obtain an IP address from a DHCP server (i.e. wireless router) automatically. To verify your IP address, please follow the steps below.
-
Page 57: Statically Assign An Ip Address
Network Connections. Windows XP — Click on Start > Control Panel > Network Connections. Step 2 Right-click on the Local Area Connection which represents your D-Link network adapter and select Properties. Step 3 Highlight Internet Protocol (TCP/IP) and click Properties.
Часто задаваемые вопросы
В: Как настроить камеру DCS-910/DCS-920 без компакт-диска?
О: Подключите компьютер к маршрутизатору с помощью кабеля Ethernet. Зайдите на
сайт поддержки D-Link: http://dlink.ru. Загрузите утилиту Setup Wizard SE из
раздела технической поддержки DCS-910/DCS-920. Установите и запустите
утилиту Setup Wizard SE. Камера должна быть обнаружена автоматически. Можно
использовать мастер установки, входящий в утилиту для настройки устройства
или нажать на Link для непосредственного доступа к устройству. Имя
пользователя по умолчанию ‘admin’. Пароль по умолчанию ‘ ‘ (оставьте поле
пустым). Если пароль был изменен и забыт, то необходимо перезагрузить
DCS-910/DCS-920 для установки пароля ‘ ‘ (пустое поле).
Если DCS-910/DCS-920 не может найти DHCP-сервер, введите IP-адрес по
умолчанию: http://192.168.0.20
В: Как восстановить в DCS-910/DCS-920 настройки по умолчанию?
О: Убедитесь, что DCS-910/DCS-920 включена. С помощью скрепки нажмите и
удерживайте кнопку Reset в течение 10 секунд. Камера должна вернуться к
заводским настройкам по умолчанию.
В: Как установить камеру, если нет маршрутизатора?
О: Подключите камеру непосредственно к порту Ethernet компьютера. Необходимо
назначить компьютеру статический IP-адрес из того же диапазона адресов, что и
камера, например 192.168.0.1. Можно получить доступ к настройкам устройства
через IP-адрес по умолчанию http://192.168.0.20.
В: Почему DCS-920 не подключается к беспроводной сети после настройки
камеры?
О: После включения и настройки беспроводного соединения, отключите Ethernet –
соединение между DCS-920 и компьютером. Подождите 60 секунд, и устройство
автоматически подключится к настроенному беспроводному соединению.
За дополнительной информацией о поиске неисправностей, обратитесь, пожалуйста,
к руководству пользователя на компакт-диске.
7
В данной статье мы узнаем о том, как организовать систему видеонаблюдения своими руками у себя дома или в малом/среднем офисе. Рассматривать будем на примере оборудования D-Link.. Данная простая система работает с камерами, которые можно использовать внутри помещений: камера D-Link DCS-910, беспроводная камера D-Link DCS-2121, а так же камерами наружного наблюдения: беспроводные камера D-Link DCS-3420 .
Имея работающую компьютерную сеть в офисе, организация видеонаблюдения становится очень простой. Многие считают, что система видеонаблюдения требует установки устройств обработки видеосигнала, устройств записи изображения, матричных коммутаторов и видеомониторов для систем видеонаблюдения. Но используя IP видеокамеры вам необходимо иметь лишь камеру и компьютер. Цифровые видеокамеры имеют встроенный блок цифровой обработки сигнала и запись сигнала может производиться непосредственно на жесткий диск любого компьютера находящегося в сети.
Далее рассмотрим как получить изображение с вашей камеры при условии, что вы находитесь вне сети, в которой установлена камера. Для этого:
Следует отметить, что камеры D-Link могут выполнять все современные функции такие, как: включение записи при появлении объекта в угол обзора камеры, слежение за объектом, снятие скриншота зафиксированного объекта, система ночного видения и т.д. Далее приведем сравнительную таблицу наиболее популярных камер D-Link.
Скачать файл PDF «D-Link DCS-910/90 DCS-910/90 Инструкция по эксплуатации» (4.71 Mb)
Популярность:
2841 просмотры
Подсчет страниц:
72 страницы
Тип файла:
Размер файла:
4.71 Mb
-
D-Link DCS-910/90 — page 1
…
-
D-Link DCS-910/90 — page 2
2 D-Link DCS-910/920 User Manual T able of Contents Pr oduct Overview ……………………………………………….. 4 P ac kage Contents……………………………………………. 4 System Requirements ……………………………………… 4 Introduction …………………………………………………….. 5 F …
-
D-Link DCS-910/90 — page 3
3 D-Link DCS-910/920 User Manual T able of Contents Netw orking Basics ……………………………………………. 62 Chec k y our IP address …………………………………… 62 Statically Assign an IP address ……………………….. 63 T echnical Specifications ……………………………………. 64 Contacting T e …
-
D-Link DCS-910/90 — page 4
4 D-Link DCS-910/920 User Manual Section 1 — Product Overview • DCS-910/920 Inter net Camera • CA T5 Ethernet Cable • P ower Adapter • Antenna (a v ailable only f or the DCS-920) • Manual and Softw are on CD • Quic k Install Guide • Camera Stand Note: Using a power supply with a diff erent v oltage than the one inclu ded with you r pr …
-
D-Link DCS-910/90 — page 5
5 D-Link DCS-910/920 User Manual Section 1 — Product Overview Introduction Congr atulations on y our purchase of the DCS-910/920 Internet Camera ! The DCS-910/920 is a v ersatile and unique solution f or your small office or home . Unlik e a PC Camera, the DCS-910/920 is a stand-alone system with a b uilt-in CPU that transmits high quality video i …
-
D-Link DCS-910/90 — page 6
6 D-Link DCS-910/920 User Manual Section 1 — Product Overview • Simple to Use: The DCS-910/920 is a stand-alone system with a built-in CPU , requir ing no special hardware or software such as PC frame gr abber cards. The DCS-910/920 suppor ts both Activ eX mode f or Internet Explorer and J a v a mode for Internet Explorer and Netscape Navigator ? …
-
D-Link DCS-910/90 — page 7
7 D-Link DCS-910/920 User Manual Section 1 — Product Overview Hardware Over view Front View Wireless Antenna* Camera Stand P ower and Link LED Camera Lens * Wireless Antenna is provided with the DCS-920 only . …
-
D-Link DCS-910/90 — page 8
8 D-Link DCS-910/920 User Manual Section 1 — Product Overview Rear View Camera Stand P ower Connector Reset Ethernet Connector Wireless Antenna* * Wireless Antenna is provided with the DCS-920 only . …
-
D-Link DCS-910/90 — page 9
9 D-Link DCS-910/920 User Manual Section 1 — Product Overview Hardware Installation Note: It is required that an Ether net cable is used during initial setup . Once y our wireless configuration is set, you may disconnect the Ether net cable and begin communicating wirelessly with y our DCS-920. Connect the Ethernet Cable Connect the included Ether …
-
D-Link DCS-910/90 — page 10
10 D-Link DCS-910/920 User Manual Section 1 — Product Overview The Inter net Camer a comes with a camer a stand with a s wiv el ball scre w head that can be attached to the Inter net Camera back panel soc ket ca vity . Attach the camer a stand to the Inter net Camera and station it for your application. There are holes located in the base of the ca …
-
D-Link DCS-910/90 — page 11
11 D-Link DCS-910/920 User Manual Section 2 — Installation Wireless Installation Considerations The D-Link Wireless* Inter net Camera lets y ou access your network using a wireless connection from anywhere within the operating range of y our wireless network. How ev er , the number , thic kness and location of walls , ceilings, or other objects tha …
-
D-Link DCS-910/90 — page 12
12 D-Link DCS-910/920 User Manual Section 2 — Installation T urn on the computer and Inser t the D-Link DCS-910/920 Driv er CD in the CD-ROM dr iv e. The follo wing step-b y-step instructions will be shown in Windo ws ® XP . The similar steps and screens will be shown for other Windows operating systems. If the CD A utor un function does not autom …
-
D-Link DCS-910/90 — page 13
13 D-Link DCS-910/920 User Manual Section 2 — Installation Clic k Next to contin ue. Clic k Y es Clic k Next Clic k Y es to accept the License Agreement. …
-
D-Link DCS-910/90 — page 14
14 D-Link DCS-910/920 User Manual Section 2 — Installation T o star t the installation clic k Next . Note: The installation ma y take se v eral minutes to complete . Clic k Next Please wait while the Setup Wizard is being installed. …
-
D-Link DCS-910/90 — page 15
15 D-Link DCS-910/920 User Manual Section 2 — Installation Clic k Finish to complete the installation. Clic k Finish …
-
D-Link DCS-910/90 — page 16
16 D-Link DCS-910/920 User Manual Section 2 — Installation Clic k on the D-Link Setup Wizard SE icon that was created in your Windows Star t menu. The Setup Wizard will appear and display the MA C address of the DCS-910/920, and an IP Address (which ma y or ma y not be correc t depending on what you ha v e you r DCS-910/9 20 connecte d to). If y ou …
-
D-Link DCS-910/90 — page 17
17 D-Link DCS-910/920 User Manual Section 3 — Configuration Setup Wizard The f ollowing options are a vailab le on the Installation Wizard screen: Configuration This section will show y ou how to configure y our new D-Link Internet camera using the D-Link Setup Wizard SE. Clic k Wizar d Y our camera’ s IP Address will be displa yed along with …
-
D-Link DCS-910/90 — page 18
18 D-Link DCS-910/920 User Manual Section 3 — Configuration Enter the admin ID and pass word. Note: The def ault Admin ID is admin with the pass word left b lank. Clic k Next Clic k Next Clic k Next S e l e c t DH CP if y ou w a n t to ob ta in a n e w I P ad dr es s e v ery t im e t h e ca me r a bo ot s u p , or s el ec t st at ic I P to u se t …
-
D-Link DCS-910/90 — page 19
19 D-Link DCS-910/920 User Manual Section 3 — Configuration Clic k Next Clic k Restar t If you need to make any changes, click Back to modify y our settings. Otherwise, clic k Restar t to sa ve and apply y our settings. Note: Wireless is a v ailable only f or the DCS-920. E n t e r y o u r w i r e l e s s e n c ryp ti on k e y an d cl ic k Ne x t …
-
D-Link DCS-910/90 — page 20
20 D-Link DCS-910/920 User Manual Section 3 — Configuration Y our setup is now completed! Clic k Link to launch the W eb page of y our camera, and vie w the images using y our W eb browser . Clic k Link Viewing Y our Internet Camera Enter admin as the def ault user name and leav e the pass word blank. Clic k OK to continue . The Setup Wizard will …
-
D-Link DCS-910/90 — page 21
21 D-Link DCS-910/920 User Manual Section 3 — Configuration The Home screen of y our camera can be accessed from the Setup Wizard using the Link button. Y ou may also use y our fa vorite W eb browser , type “ h t t p : / / address” in the address bo x, where address is the IP address that you ha v e assigned to y our camera in the pre vious se …
-
D-Link DCS-910/90 — page 22
22 D-Link DCS-910/920 User Manual Section 3 — Configuration Configuration Live Video ActiveX: Java: F or Windo ws ® Users that do not hav e Ja v a installed, please choose this option to view video streaming on the Home page. F or Windows ® users that hav e J av a installed, you can also use this f or vie wing video . Mac users must choose this …
-
D-Link DCS-910/90 — page 23
23 D-Link DCS-910/920 User Manual Section 3 — Configuration Internet Connection Setup Wizard This wizard will guide y ou through a step-b y-step process to configure your new D-Link Camera and connect the camera to the Inter net. Clic k Next to proceed. Y ou ma y configure your camera using • DHCP Connection (by def ault), where y our DHCP ser …
-
D-Link DCS-910/90 — page 24
24 D-Link DCS-910/920 User Manual Section 3 — Configuration Enter a name f or your camer a. Then, clic k Next to proceed. Configure the correct time to ensure that all e vents tr iggered, captured and scheduled at the right time. Then, clic k Next to proceed. This page displa ys your configured settings. Click Appl y to sa ve and activ ate the s …
-
D-Link DCS-910/90 — page 25
25 D-Link DCS-910/920 User Manual Section 3 — Configuration Network Setup Select this connection if you hav e a DHCP server running on your network and would lik e a dynamic IP address to be updated to your camera automatically . Y ou ma y obtain a static or fixe d IP address and other netwo rk inf or ma tion from your network administrator for y …
-
D-Link DCS-910/90 — page 26
26 D-Link DCS-910/920 User Manual Section 3 — Configuration Setup > Wireless Ser vice Set Identifier , an identifier for y our wireless network. The def ault setting is channel 6. Select the same channel that is using by other wireless devices within y our network. When there is interf erence from the wireless networks that ov er lap with one …
-
D-Link DCS-910/90 — page 27
27 D-Link DCS-910/920 User Manual Section 3 — Configuration (Dynamic Domain Name Ser v er) will hold a DNS host name and synchronize the pub lic IP address of the modem when it has been modified. The user name and passw ord are required when using the DDNS ser vice. Click to enab le the DDNS function. Select your Dynamic DNS Server from the pull …
-
D-Link DCS-910/90 — page 28
28 D-Link DCS-910/920 User Manual Section 3 — Configuration Setup > Image Setup Check to enab le antiflick er . V er tically rotates the video . If the camera is installed upside down, Flip Ima g e and Mirr or should both be check ed. Horizontally rotates the video . Allows y ou to adjust the br ightness le vel. Allows y ou to adjust the contr …
-
D-Link DCS-910/90 — page 29
29 D-Link DCS-910/920 User Manual Section 3 — Configuration Setup > Video Video Profile: Light Frequency: Video Configuration Encode T ype: Resolution: FPS: Quality: The compression f or mat used when viewing y our camera. Select the desired video resolution from three f or mats: 640×480, 320×240, and 160×120. The higher setting can obtain be …
-
D-Link DCS-910/90 — page 30
30 D-Link DCS-910/920 User Manual Section 3 — Configuration Setup > Mail Email Account SMTP Server Address: Sender e-mail Address: Receiver e-mail Address: User Name: Password: This is the domain name or IP address of y our e xter nal e-mail ser v er . This is the e-mail address of the person sending the camera snapshots. This is the e-mail add …
-
D-Link DCS-910/90 — page 31
31 D-Link DCS-910/920 User Manual Section 3 — Configuration T ime Schedule Enable e-mail image to e-mail account: Interval: T est E-mail Account: Choosing Alwa ys will star t sending snapshots to the recipient’ s e-mail account r ight a wa y . Choosing Schedule will allow you to schedule when to star t and stop the sending of snapshots to the re …
-
D-Link DCS-910/90 — page 32
32 D-Link DCS-910/920 User Manual Section 3 — Configuration Setup > FTP FTP Ser ver Host Address: Port Number: User Name: Password: Directory Path: Passive Mode: This is the IP address of the FTP ser v er that you will be connecting to . Def ault is por t 21. If changed, e xter nal FTP client prog ram m ust change the ser v er connection por t …
-
D-Link DCS-910/90 — page 33
33 D-Link DCS-910/920 User Manual Section 3 — Configuration T ime Schedule Enable upload image to FTP server: Always: Schedule: Video Frequency: Base File Name: File: T est FTP Ser ver: Checking this bo x will enable video upload to the FTP server y ou hav e selected. Selecting this option allows snapshots to be uploaded to y our FTP as soon as yo …
-
D-Link DCS-910/90 — page 34
34 D-Link DCS-910/920 User Manual Section 3 — Configuration Setup > T ime and Date T est FTP Ser ver: Synchronize NTP Server: Copy your Computer’ s Time Settings: Set the Date and Time Manually: Select the time zone for your region from the pull-down men u. Ne tw ork T im e Pro toc ol will syn chro niz e yo ur cam er a with an Internet time s …
-
D-Link DCS-910/90 — page 35
35 D-Link DCS-910/920 User Manual Section 3 — Configuration Maintenance > Device Management In this section, you can change the administrator’ s pass word and confi gure th e serv er sett ing s f or y our ca mer a. Y o u can also manage the user account(s) that access to y our camera. …
-
D-Link DCS-910/90 — page 36
36 D-Link DCS-910/920 User Manual Section 3 — Configuration Maintenance > Backup and Restore In this section, y ou can sa v e and restore your configuration, restore the factory settings, and/or restar t the camera. …
-
D-Link DCS-910/90 — page 37
37 D-Link DCS-910/920 User Manual Section 3 — Configuration Maintenance > Firmware Upgrade Y ou r c ur re nt fi rmw ar e v er si on a nd d ate wil l be disp la y ed o n y our scr ee n. Y ou ma y go to the D- Li nk Sup po r t P age to che c k f or t he l at es t firmw are v er sion s a v ail ab le . T o upgrade the fir mware on y our DCS-910/9 …
-
D-Link DCS-910/90 — page 38
38 D-Link DCS-910/920 User Manual Section 3 — Configuration Status > System This section displa ys all the details inf or mation about y our de vice and network settings. …
-
D-Link DCS-910/90 — page 39
39 D-Link DCS-910/920 User Manual Section 3 — Configuration D-ViewCam Installation D- Vi e wCa m soft war e is incl uded f or th e ad mini str ator to man age up to 32 D-L ink IP ca mer as re mo te ly . Y ou ma y no w us e th e so ft w are to co nfi gu re a ll t he a dv anc ed s etti ngs f or y our c am er as . D- Vie wCa m is a co mp re he ns iv …
-
D-Link DCS-910/90 — page 40
40 D-Link DCS-910/920 User Manual Section 3 — Configuration Clic k Next to contin ue. Clic k Brow se if y ou would like to choose a specific f older f or the installation, otherwise clic k Next to contin ue. Clic k Next Clic k Next …
-
D-Link DCS-910/90 — page 41
41 D-Link DCS-910/920 User Manual Section 3 — Configuration C l i c k N e xt t o st art th e in st al la ti on . No te : T he D -V ie wC am in stal lati on p ro ce ss ma y ta ke se v er al m in ute s t o co mp le te . Clic k Ne xt Clic k Finish to complete the installation. Clic k Finish …
-
D-Link DCS-910/90 — page 42
42 D-Link DCS-910/920 User Manual Section 3 — Configuration Add a Camera T o star t D-ViewCam, select Start > All Programs > D-Link > D-Link D-ViewCam . Enter Admin as the def ault user name and leav e the passw ord b lank. Clic k / OK to log into the system and access the Add Camera Wizard. Note: Please ref er to page 51 in the D-ViewCam …
-
D-Link DCS-910/90 — page 43
43 D-Link DCS-910/920 User Manual Section 3 — Configuration W elcome to the Add Camera Wizard. Use this wizard to add your camer as to the D-ViewCam system. Note: Use the left or right arrow to na vigate the wizard. Clic k / Next to contin ue. Clic k Next …
-
D-Link DCS-910/90 — page 44
44 D-Link DCS-910/920 User Manual Section 3 — Configuration Choose which method to add y our camera(s). Y ou can choose A u to Disco very to automatically search for your camera(s), or choose Add Manuall y to add your camera(s) via the camera’ s IP address . Clic k Next to continue . If y ou choose A uto Discovery , the system will search all av …
-
D-Link DCS-910/90 — page 45
45 D-Link DCS-910/920 User Manual Section 3 — Configuration D-Vie wCam shows the detected IP camera(s) inf or mation. Y ou can choose and schedule the recording f or each camera. • 24/7 Continuous Recor ding : Continuously recording 24 hours a da y , 7 da ys a week. • 24/7 Motion Detection Recor ding : Continuously monitor ing b ut ONL Y recor …
-
D-Link DCS-910/90 — page 46
46 D-Link DCS-910/920 User Manual Section 3 — Configuration Select Y es to add other camera(s), or select No if y ou ha ve no additional camera(s) to be added. Click Ne xt to continue . The Add Camera wizar d is now complete . Click Close to access the D-Vie wCam’ s main screen. Y our D-ViewCam Installation is Complete! Note: Please ref er to th …
-
D-Link DCS-910/90 — page 47
47 D-Link DCS-910/920 User Manual Section 4 — Security Wireless Security This section will show y ou the diff erent lev els of security you can use to protect y our data from intr uders. The DCS-920 off ers the f ollowing types of security: • WP A-PSK (Pre-Shared K ey) • WEP (Wired Equiv alent Pr iv acy) What is WEP? WEP stands f or Wired Equiv …
-
D-Link DCS-910/90 — page 48
48 D-Link DCS-910/920 User Manual Section 4 — Security What is WP A? WP A, or Wi-Fi Protected Access, is a Wi-Fi standard that was designed to improv e the security f eatures of WEP (Wired Equiv alent Pr iv acy). The 2 major improv ements ov er WEP: • Improv ed data encr yption through the T emporal K e y Integrity Protocol (TKIP). TKIP scramb le …
-
D-Link DCS-910/90 — page 49
49 D-Link DCS-910/920 User Manual Section 4 — Security D-Link’ s DCS-910/920 is a versatile and cost eff ective Inter net Camera offering both video and audio monitor ing. It can also ser v e as a pow erful sur v eillance system in secur ity applications . The DCS-910/920 can be used with any wired or 802.11b/g wireless router (applicable only f …
-
D-Link DCS-910/90 — page 50
50 D-Link DCS-910/920 User Manual Section 4 — Security Run the Setup Wizard program from the CD included with the DCS-910/920. Follo w the steps in the Quick Installation Guide to configure the DCS-910/920. The camera will be assigned a local IP Address that allows it to be recognized b y the router . Write down this IP Address f or future ref ere …
-
D-Link DCS-910/90 — page 51
51 D-Link DCS-910/920 User Manual Section 4 — Security Run your Internet Explorer W eb browser . In the address bar , type in the IP Address that was assigned to the Inter net Camera by the Installation Wizard program. The DCS-910/920 Home P age appears with a window displa ying live video from the camera. Y ou are able to vie w this screen from an …
-
D-Link DCS-910/90 — page 52
52 D-Link DCS-910/920 User Manual Section 4 — Security The f ollowing steps generally apply to any router that you hav e on y our network. The D-Link DI-624 is used as an e xample to clarify the configur ation process . Configure the initial settings of the DI-624 b y f ollowing the steps outlined in the DI-624 Quic k Installation Guide. 3 Access …
-
D-Link DCS-910/90 — page 53
53 D-Link DCS-910/920 User Manual Section 4 — Security Note: Because a dynamic W AN IP can change from time to time depending on your ISP , y ou ma y want to obtain a Static IP address from your ISP . A Static IP address is a fix ed IP address that will not change ov er time and will be more con v enient f or you to use to access y our camera from …
-
D-Link DCS-910/90 — page 54
54 D-Link DCS-910/920 User Manual Section 4 — Security Repeat the abov e steps adding the por t 80 to both the Public and Private P or t sections. A check mar k appear ing before the entr y name will indicate that the por ts are enabled. Impor tant: Some ISPs b loc k access to por t 80 and other commonly used Inter net por ts to conser ve bandwidth …
-
D-Link DCS-910/90 — page 55
55 D-Link DCS-910/920 User Manual Section 5 — T roubleshooting T roubleshooting 1. Why does the P ower LED not light up constantl y? The po wer supply used might be at f ault. Confir m that you are using the provided power supply , which is DC 5V , f or the Inter net Camera. Also v er ify that the po wer supply is well connected, and/or the option …
-
D-Link DCS-910/90 — page 56
56 D-Link DCS-910/920 User Manual Section 5 — T roubleshooting 5. Noisy images occur . How can I solve the pr oblem? The video images might be noisy if the Inter net Camera is used in a v er y low light en vironment. 6. The images are poor quality , how can I impr ove the image quality? Mak e sure that your computers displa y proper ties are set to …
-
D-Link DCS-910/90 — page 57
57 D-Link DCS-910/920 User Manual Appendix A — Wireless Basics D-Link wireless products are based on industr y standards to provide easy-to-use and compatible high-speed wireless* connectivity within y our home, business or public access wireless networks. Str ictly adhering to the IEEE standard, the D-Link wireless f amily of products will allo w …
-
D-Link DCS-910/90 — page 58
58 D-Link DCS-910/920 User Manual Appendix A — Wireless Basics What is Wireless? Wireless or WiFi technology is another wa y of connecting y our computer to the network without using wires. WiFi uses radio frequency to connect wirelessly , so y ou hav e the freedom to connect computers anywhere in your home or office network. Wh y D-Link Wireless …
-
D-Link DCS-910/90 — page 59
59 D-Link DCS-910/920 User Manual Appendix A — Wireless Basics Who uses wireless? Wireless technology as become so popular in recent years that almost e ver y one is using it, whether it’ s f or home, office, b usiness, D-Link has a wireless solution f or it. Home • Giv es ev er y one at home broadband access • Surf the W eb , check email, i …
-
D-Link DCS-910/90 — page 60
60 D-Link DCS-910/920 User Manual Appendix A — Wireless Basics Where is wireless used? Wireless technology is e xpanding ev er ywhere not just at home or office. P eople lik e the freedom of mobility and it’ s becoming so popular that more and more pub lic f acilities now provide wireless access to attract people. The wireless connection in pub …
-
D-Link DCS-910/90 — page 61
61 D-Link DCS-910/920 User Manual Appendix A — Wireless Basics Security Don’t let y ou ne xt-door neighbors or intruders conne ct to you r wireless netw or k. Secure you r wireless netw or k b y turning on the WP A or WEP secur ity f eature on the router . Ref er to product manual f or detail inf or mation on ho w to set it up . There are basical …
-
D-Link DCS-910/90 — page 62
62 D-Link DCS-910/920 User Manual Appendix B — Networking Basics Networking Basics Check your IP address After y ou install your new D-Link adapter , b y def ault, the TCP/IP settings should be set to obtain an IP address from a DHCP ser v er (i.e. wireless router) automatically . T o v er ify y our IP address, please f ollow the steps belo w . Cli …
-
D-Link DCS-910/90 — page 63
63 D-Link DCS-910/920 User Manual Appendix B — Networking Basics Statically Assign an IP address If you are not using a DHCP capable gate wa y/router , or you need to assign a static IP address, please follo w the steps below: Step 1 Windows ® Vista — Click on Star t > Contr ol P anel > Netw ork and Internet > Netw ork and Sharing Center …
-
D-Link DCS-910/90 — page 64
64 D-Link DCS-910/920 User Manual Appendix C — T echnical Specifications T echnical Specifications Network* • TCP/IP (DHCP or Static IP Address) • Wired LAN: 10/100Mbps • 802.11g Wireless (Suppor ts up to 54Mbps transf er rate)** • 802.11b Wireless (Suppor ts up to 11Mbps transf er rate)** Web Access Requirements • An y Ja va-Enab led o …
-
D-Link DCS-910/90 — page 65
65 D-Link DCS-910/920 User Manual Appendix C — T echnical Specifications Power Consumption: • DCS-910 (3.25W), DCS-920 (4.25W) Environmental specification • Operating temperature: 0 ° C to 40 °C (32° F to 104 °F) • Storage temperature: -20 ° C to 70 ° C (-4 ° F to 158 °F) • Operating relative humidity: 20% to 80% non-condensing Wa …
-
D-Link DCS-910/90 — page 66
Y ou can find softw are updates and user documentation on the D-Link website. U .S. and Canadian customers can contact D-Link technical suppor t through our Web site, or by phone. T ech Support for customer s within the United States: D-Link T echnical Suppor t o ver the T elephone: (877) 453-5465 D-Link T echnical Suppor t o ver the Internet: htt …
-
D-Link DCS-910/90 — page 67
67 D-Link DCS-910/920 User Manual Appendix E — Warranty W arranty Subject to the ter ms and conditions set f or th herein, D-Link Systems, Inc. (“D-Link”) provides this Limited W arranty: • Only to the person or entity that originally purchased the product from D-Link or its author ized reseller or distrib utor , and • Only f or products pu …
-
D-Link DCS-910/90 — page 68
68 D-Link DCS-910/920 User Manual Appendix E — Warranty Limited Software W arranty: D-L ink wa rra nts that the sof twa re por ti on of the pro duct (“Sof twa re”) will su bst anti all y con fo r m to D-L ink’ s then curr ent fun cti onal spec ific atio ns f or the Software, as set for th in the applicab le documentation, from the date of or …
-
D-Link DCS-910/90 — page 69
69 D-Link DCS-910/920 User Manual Appendix E — Warranty • After an RMA number is issued, the defectiv e product m ust be pac kaged securely in the original or other suitable shipping package to ensure that it will not be damaged in transit, and the RMA n umber m ust be prominently mar k ed on the outside of the pac kage. Do not include an y manua …
-
D-Link DCS-910/90 — page 70
70 D-Link DCS-910/920 User Manual Appendix E — Warranty IF ANY IMPLIED W ARRANTY CANNO T BE DISCLAIMED IN ANY TERRIT OR Y WHERE A PR ODUCT IS SOLD , THE DURA TION OF SUCH IMPLI ED W ARRA NTY SHALL BE LIMITED T O THE DURA TI ON OF THE APPLICA BLE W ARRANTY PERIOD SET FOR TH ABO VE. EXCEP T AS EXPRES SL Y CO VERE D UNDER THE LIMIT ED W ARRANTY PR O V …
-
D-Link DCS-910/90 — page 71
71 D-Link DCS-910/920 User Manual Appendix E — Warranty CE Mark W arning: This is a Class B product. In a domestic environment, this product ma y cause radio interf erence, in which case the user ma y be required to take adequate measures . FCC Statement: This equipment has been tested and found to comply with the limits f or a Class B digital de v …
-
D-Link DCS-910/90 — page 72
72 D-Link DCS-910/920 User Manual V ersion 1.0 March 14, 2008 Product registration is entirely v oluntar y and f ailure to complete or retur n this form will not diminish y our w arranty rights. Registration …
- Описание
- Характеристики
- Сертификаты
- Заказ
- Изображения
- Загрузки
- Смотрите также
Описание
Описание
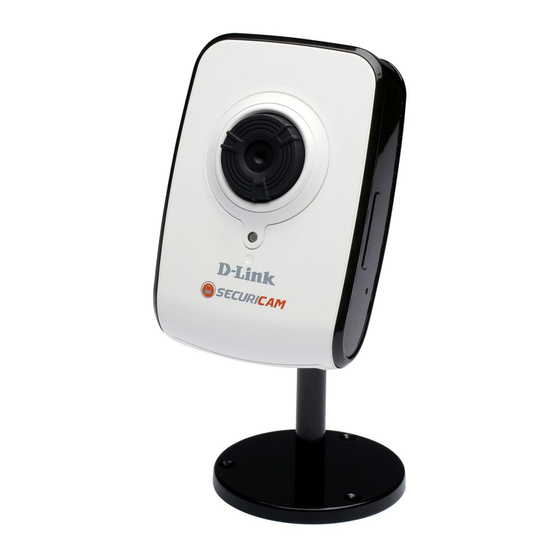
Камера DCS-910 является идеальным решением для дома и небольшого офиса. В отличие от стандартных Web-камер, DCS-910 оснащена встроенным процессором CPU и Web-сервером, который обеспечивает безопасную передачу видео высокого качества. Доступ к DCS-910 осуществляется удаленно, управление доступом осуществляется с персонального компьютера или ноутбука в локальной сети или через Интернет посредством Web-браузера. Благодаря простоте установки и интуитивно понятному Web-интерфейсу, достигается простота интеграции данного устройства в сеть Ethernet / Fast Ethernet.
Помимо этого DCS-910 поддерживает функции удаленного мониторинга и обнаружения движения*, что позволяет создавать комплексное и эффективное по стоимости решение для дома и небольшого офиса
* Данный функционал реализуется с помощью дополнительного программного обеспечения
Характеристики
-
Поддерживаемые ОС
- Windows 2000 / Windows XP /Windows Vista / Linux/ MAC OS X10.3 or above
- Utility
- Windows 2000 / Windows XP /Windows Vista
Сетевые протоколы
- IPV4, ARP, TCP, UDP, ICMP
- DHCP Client
- NTP Client
- DNS Client
- DDNS Client
- SMTP Client
- FTP Client
- HTTP Server
- PPPoE
Встроенный сетевой интерфейс
- 10/100BASE-TX Fast Ethernet
Видео-кодеки
- MJPEG
Сенсор
- Сенсор CMOS VGA ¼ дюйма
SDRAM
- 8 Мбайт
FLASH-память
- 2 Мбайт
Кнопка RESET
- Сброс к заводским настройкам
Поддерживаемые видео-алгоритмы
- MJPEG
- JPEG для стоп-кадров
Функционал видео
- Настройка размера картинки и качества
- Метки времени и вставка текста
- Переворот и зеркальное отображение изображения
Разрешение
- 640 х 480 до 15fps
- 320 х 240 до 30fps
- 160 х 120 до 30fps
Освещенность
- 1 Лк@F2.8
Управление
- AGC (Auto Gain Control)
- AWB (Auto White Balance)
- AES (Auto Electronic Shutter)
Сертификаты
Заказ
DCS-910 Securicam Network IP-камера для видеонаблюдения за безопасностью дома/малого офиса
Изображения
DCS-910
Вид спереди