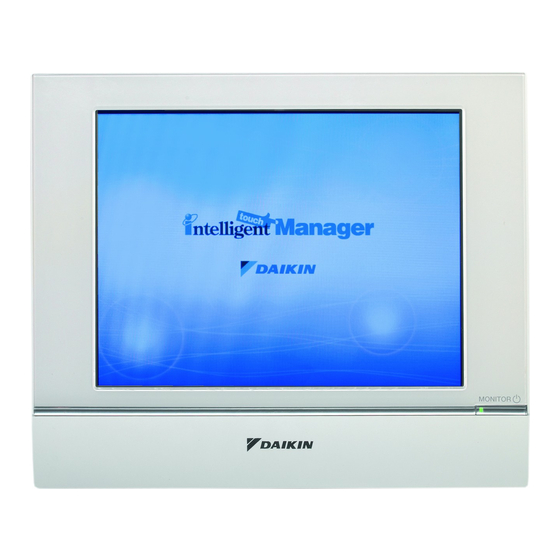
Intelligent Touch Manager DAIKIN DCM601A51- с полным интегрированием со всем оборудованием
В наличии
Описание DCM601A51:
Удобство для пользователя
› Интуитивно понятный интерфейс.
› Наглядная схема и прямой доступ к основным функциям внутреннего блока.
› Непосредственный доступ ко всем функциям с сенсорного экрана или сетевого интерфейса.
Интеллектуальная система контроля энергопотреблением
› Режим мониторинга соответствия энергозатрат планируемым.
› Позволяет выявить источники энергозатрат.
› Комплексные функции программирования работы по расписанию позволяют обеспечить корректную работу системы на протяжении всего года.
› Энергосбережение за счет привязки работы кондиционеров к прочему оборудованию —
системам обогрева и т.д.
Гибкость применения
› Перекрестная интегрируемость (обогрев, кондиционирование, коммерческие системы,
холодильные системы и центральные кондиционеры).
› Протокол BACnet для интегрирования продукции сторонних производителей.
› Входы и выходы для интегрирования дополнительного оборудования: систем освещения, насосов и т.д. на модулях WAGO.
› Модульная концепция как для небольших, так и для крупных объектов.
› Управление работой до 512 групп внутренних блоков через 1 ITM и объединение нескольких ITM через веб-интерфейс.
Простота сервиса и пусконаладки
› Дистанционная проверка заправки хладагентом без выезда на объект.
› Более удобная процедура поиска неисправностей.
› Сокращение времени пусконаладки благодаря инструменту подготовки к ней.
› Автоматическая адресация внутренних блоков.

Обзор функций Intelligent Touch Manager:
Языки
› английский
› французский
› немецкий
› итальянский
› испанский
› голландский
› португальский
Управление
› Доступ через сеть
› Пропорциональное
распределение питания (опция)
› Журнал эксплуатации (неисправности, часы наработки и т.д.)
› Интеллектуальная система контроля энергопотреблением:
— мониторинг соответствия
энергозатрат планируемым
— выявления источников
энергопотерь
› Принудительный режим
› Плавающая температурная уставка
Построение системы
› Управление до 512 групп (интегратор ITM plus + 7 iPU) (включая адаптер iTM)
› Ethernet TCPIP
Интерфейс WAGO
› Модульная интеграция оборудования сторонних производителей.
— Устройство сопряжения WAGO (интерфейс между WAGO и Modbus).
— Модуль Di
— Модуль Do
— Модуль Ai
— Модуль Ao
— Модуль термистора
— Модуль Pi
Устройства управления
› Индивидуальное управление (512 групп)
› Настройка расписания (недельное расписание, календарь на год, график на сезон).
› Регулирование блокировки.
› Ограничение для температурной уставки.
› Ограничение диапазона температурных уставок.
Подключается к следующим устройствам:
— DX Split, Sky Air, VRV
— Чиллеры (через контроллер MT3-EKMBACIP).
— Центральные кондиционеры Daikin.
— Фэн-койлы.
— Daikin Altherma Flex.
— Гидроблоки LT и HT.
— Воздушные завесы.
— WAGO I/O.
— Протокол BACnet.
Видео DCM601A51
Скачать инструкцию DCM601A51:
Скачать сервисное руководство DCM601A51.pdf
Скачать DCM601A51 инструкция по монтажу.pdf
Скачать руководство пользователя DCM601A51.pdf
Преимущества покупки запчастей Daikin в нашем магазине:
— Гарантия официального сервисного центра – 6 месяцев;
— 100% гарантия совместимости, при подборе запчасти по модели кондиционера;
— Бесплатная доставка до терминала транспортной компании в вашем городе, а в Москве до двери;
— Техническая поддержка и консультация по установке от собственной сервисной службы;
— Только оригинальные запасные части Daikin;
— Возможность выставления счета с учетом НДС 20%.

-
Contents
-
Table of Contents
-
Bookmarks
Quick Links
Installation Manual
intelligent Touch Manager
Model
DCM601A51
00_CV_3P291714-1.indd 1
5/13/2011 2:54:17 PM
Related Manuals for Daikin DCM601A51
Summary of Contents for Daikin DCM601A51
-
Page 1
Installation Manual intelligent Touch Manager Model DCM601A51 00_CV_3P291714-1.indd 1 5/13/2011 2:54:17 PM… -
Page 2: Safety Precautions
An insufficient power supply capacity or improper electrical construction may lead to electric shocks or fire. Installation Manual 3P291714-1 English DCM601A51 intelligent Touch Manager 01_EN_3P291714-1.indd 2 5/18/2011 1:45:48 PM…
-
Page 3
Otherwise, a short-circuit may occur in a pressure switch, temperature switch, or other protective equipment, forcing the unit to operate unexpectedly. In addition, use of parts other than those specified by DAIKIN may result in firing. Install an earth leakage breaker, as required. -
Page 4: Table Of Contents
2.7.2 Requirements that must be met ………………24 Installation ………………….25 Wall mounting …………………….. 25 3.1.1 Parts to be used ………………….25 3.1.2 Installation procedure ………………..25 Installation Manual 3P291714-1 English DCM601A51 intelligent Touch Manager 01_EN_3P291714-1.indd 4 5/18/2011 1:45:48 PM…
-
Page 5
Viewing target area and management point information in list format ……..42 Viewing target areas and management points ……………. 42 Starting/stopping an area or management point …………..43 English Installation Manual 3P291714-1 DCM601A51 intelligent Touch Manager 01_EN_3P291714-1.indd 5 5/18/2011 1:45:48 PM… -
Page 6
Installation Manual 3P291714-1 English DCM601A51 intelligent Touch Manager 01_EN_3P291714-1.indd 6 5/18/2011 1:45:49 PM… -
Page 7: Before Installation
(e-1) Cable tie, 1 pc. (e-2) Push mount tie, 3 pcs. (f-1) Installation manual (This manual), 1 pc. (f-2) Manual CD, 1 pc. (f-3) Paper template, 2 pcs. English Installation Manual 3P291714-1 DCM601A51 intelligent Touch Manager 01_EN_3P291714-1.indd 7 5/18/2011 1:45:49 PM…
-
Page 8: Understanding External Dimensions
Understanding external dimensions • intelligent Touch Manager body 255.8mm 50mm 272mm 25mm 136mm 136mm 25mm 4.5mm 4.5mm 4.5mm 4.5mm 290mm • Wall mounting metal plate 234.2±0.5mm 60mm 40mm Installation Manual 3P291714-1 English DCM601A51 intelligent Touch Manager 01_EN_3P291714-1.indd 8 5/18/2011 1:45:49 PM…
-
Page 9
• Frame bracket 281.4±0.1mm 241±0.1mm 61.6mm (28.4mm) (28.4mm) 104.8mm 224.6±0.1mm • Angle bracket 28.2mm 11.6mm 20mm 43.7mm English Installation Manual 3P291714-1 DCM601A51 intelligent Touch Manager 01_EN_3P291714-1.indd 9 5/18/2011 1:45:50 PM… -
Page 10: Understanding Where Terminals And Switches Are Located
[DIII] The communication line connection terminals for “DIII-NET”, which enables communications with DAIKIN’s air conditioning equipment. [LINE, PHONE] The sockets used when subscribing to the DAIKIN “AIRNET” online monitoring service for air-conditioning systems. To use the AIRNET service, you need to sign a separate maintenance contact.
-
Page 11: Front Panel
Off: The monitor is powered off. On (Orange): The monitor display is off. On (Green): The monitor display is on. [RESET//] The switch for restarting the intelligent Touch Manager. English Installation Manual 3P291714-1 DCM601A51 intelligent Touch Manager 01_EN_3P291714-1.indd 11 5/18/2011 1:45:50 PM…
-
Page 12: Side Face
An example of cables routed to the rear face of the intelligent Touch Manager is shown below. <Routing of cables> To conduit tube Installation Manual 3P291714-1 English DCM601A51 intelligent Touch Manager 01_EN_3P291714-1.indd 12 5/18/2011 1:45:50 PM…
-
Page 13: Determining Installation Place
30 mm from the right side edge, and 60 mm from the bottom edge of the unit. <Installation space required for intelligent Touch Manager> Required installa- tion space 30mm 100mm 100mm 30mm 243mm MONITOR MONITOR 290mm 60mm MONITOR MONITOR 60mm Wall English Installation Manual 3P291714-1 DCM601A51 intelligent Touch Manager 01_EN_3P291714-1.indd 13 5/18/2011 1:45:51 PM…
-
Page 14: Connection
Phillips screwdriver. Connecting DIII-NET-compatible air conditioning equipment DIII-NET is a unique air conditioning equipment communication capability developed by DAIKIN. Using DIII-NET, you can centrally control multiple DAIKIN DIII-NET-compatible air conditioning devices by connecting them to your intelligent Touch Manager. WARNING •…
-
Page 15: Terminals Location And Conceptual Connection Diagram
A maximum of 64 remote controller groups (128 indoor units) can be connected. A maximum of 64 indoor units can be connected when power distribution is enabled. English Installation Manual 3P291714-1 DCM601A51 intelligent Touch Manager 01_EN_3P291714-1.indd 15 5/18/2011 1:45:51 PM…
-
Page 16: Requirements That Must Be Met
Equipment that controls multiple air conditioners is referred to as “centralized controller”. DAIKIN’s product portfolio includes a wide range of centralized controllers suited to differ- ent applications or target sizes, which can be used in combination to construct an optimal air conditioning system.
-
Page 17: Connecting A Lan Cable
• Do not clamp the cables with high-current lines such as a power cable. NOTE For how to connect the intelligent Touch Manager to a PC network, contact your net- work administrator. English Installation Manual 3P291714-1 DCM601A51 intelligent Touch Manager 01_EN_3P291714-1.indd 17 5/18/2011 1:45:52 PM…
-
Page 18: Terminals Location And Conceptual Connection Diagram
(enabled for use). • You cannot close the cover when the switch set to “FRONT”. To close the cover, select “BACK”. SERVICE LAN LAN SW Installation Manual 3P291714-1 English DCM601A51 intelligent Touch Manager 01_EN_3P291714-1.indd 18 5/18/2011 1:45:52 PM…
-
Page 19: Connecting I/O Module
Connecting I/O module The intelligent Touch Manager can be used in conjunction with the I/O module. The I/O module provides a maximum of 960 I/O points for controlling non-DAIKIN peripheral equipment such as lighting equipment and security lock systems. WARNING •…
-
Page 20: Address Setup
• Power distribution is available for a maximum of 64 air conditioners (indoor units) per DIII-NET port. • With iTM plus adaptors, however, you can connect up to 512 indoor units per port. Installation Manual 3P291714-1 English DCM601A51 intelligent Touch Manager 01_EN_3P291714-1.indd 20 5/18/2011 1:45:53 PM…
-
Page 21: Terminals Location And Conceptual Connection Diagram
• Do not clamp the cables with high-current lines such as a power cable. NOTE When emergency stop input signal is enabled, you cannot restart all the air condition- ers unless you disable it. English Installation Manual 3P291714-1 DCM601A51 intelligent Touch Manager 01_EN_3P291714-1.indd 21 5/18/2011 1:45:53 PM…
-
Page 22: Connecting Itm Plus Adaptors
Touch Manager (Rear face) iTM plus adaptor plus ADP IF (intelligent Touch Manager) plus ADP IF (iTM plus adaptor) iTM plus adaptor on which termination resistor must be enabled Installation Manual 3P291714-1 English DCM601A51 intelligent Touch Manager 01_EN_3P291714-1.indd 22 5/18/2011 1:45:53 PM…
-
Page 23: Requirements That Must Be Met
Connect the power supply to the three terminals, L (Live), N (Neutral), and ground in the POWER sec- tion. Earth Breaker Power supply 100-240VAC 50/60 Hz English Installation Manual 3P291714-1 DCM601A51 intelligent Touch Manager 01_EN_3P291714-1.indd 23 5/18/2011 1:45:54 PM…
-
Page 24: Requirements That Must Be Met
• For the earth wire, use a green wire with yellow stripes. Do not connect the earth wire to gas or water pipes, lighting rod, or telephone earth wire. Installation Manual 3P291714-1 English DCM601A51 intelligent Touch Manager 01_EN_3P291714-1.indd 24 5/18/2011 1:45:54 PM…
-
Page 25: Installation
Although you may use any of these screw holes, use ones closer to the edge as much as possible to prevent wobbling. • Secure the wall mounting metal plate at four points using the round-head wood screws. English Installation Manual 3P291714-1 DCM601A51 intelligent Touch Manager 01_EN_3P291714-1.indd 25 5/18/2011 1:45:54 PM…
-
Page 26: Flush Wall Mounting
• Frame bracket, 1 pc. • Angle bracket, 2 pcs. • Flat-head screw (M4×40), 4 pcs. • Pan-head screw (M4×14, with spring washer and plain washer), 4 pcs. Installation Manual 3P291714-1 English DCM601A51 intelligent Touch Manager 01_EN_3P291714-1.indd 26 5/18/2011 1:45:54 PM…
-
Page 27: Wall Opening Dimensions
Touch Manager through the cable hole provided at the bottom of the frame bracket. • Before installing the intelligent Touch Manager body, remove the terminal cover from the rear face. English Installation Manual 3P291714-1 DCM601A51 intelligent Touch Manager 01_EN_3P291714-1.indd 27 5/18/2011 1:45:55 PM…
-
Page 28
You can remove it by hand as this is not screwed. Removing the frame reveals four screw holes, two holes each to the left and right of the monitor display. Installation Manual 3P291714-1 English DCM601A51 intelligent Touch Manager 01_EN_3P291714-1.indd 28 5/18/2011 1:45:55 PM… -
Page 29
<Installing intelligent Touch Manager body> Pan-head screw 4. Snap the resin frame back into the front face of the intelligent Touch Manager as it was before. English Installation Manual 3P291714-1 DCM601A51 intelligent Touch Manager 01_EN_3P291714-1.indd 29 5/18/2011 1:45:55 PM… -
Page 30: Direct Mounting To Control Enclosure
3. Snap the resin frame back into the front face of the intelligent Touch Manager as it was before. Installation Manual 3P291714-1 English DCM601A51 intelligent Touch Manager 01_EN_3P291714-1.indd 30 5/18/2011 1:45:55 PM…
-
Page 31
To prevent the risk of electric shock by accidentally touching these power termi- nals, for safety, be sure to attach the terminal cover before starting the installa- tion procedure. Terminal cover Control enclosure intelligent Touch Manager English Installation Manual 3P291714-1 DCM601A51 intelligent Touch Manager 01_EN_3P291714-1.indd 31 5/18/2011 1:45:56 PM… -
Page 32: Basic Setup
When finished assigning air conditioner addresses, proceed to the next step. 2. Touch OK. The Language Settings screen appears. CAUTION Before power-on, make sure that all installation and connection procedures are done without problems. Installation Manual 3P291714-1 English DCM601A51 intelligent Touch Manager 01_EN_3P291714-1.indd 32 5/18/2011 1:45:56 PM…
-
Page 33: Setting Up Display Language
“Locale setup” means to set up how you want to see items that are expressed in different ways depending on the region, such as the data/time, temperature, and decimal point, on the display. <Locale Settings screen> Dummy English Installation Manual 3P291714-1 DCM601A51 intelligent Touch Manager 01_EN_3P291714-1.indd 33 5/18/2011 1:45:56 PM…
-
Page 34: Setting Time Zone
(Enable or disable the daylight saving time function. If enabled, select the start time and the end time.) 2. Touch OK. The A/C Auto Register screen appears. Installation Manual 3P291714-1 English DCM601A51 intelligent Touch Manager 01_EN_3P291714-1.indd 34 5/18/2011 1:45:56 PM…
-
Page 35: Confirming Air Conditioner Auto Registration Results
The names of buttons and areas of a wired remote controller used in this section are shown below. <Wired Remote Controller> Address display area Parameter number display area Programming time buttons Temperature setting buttons Timer ON/OFF button Inspection / Test operation button English Installation Manual 3P291714-1 DCM601A51 intelligent Touch Manager 01_EN_3P291714-1.indd 35 5/18/2011 1:45:56 PM…
-
Page 36: Procedure For A Wired Remote Controller
“00”. In the address display area, the current address setting is displayed. (This area will show “–” if no address is set.) <Step 2> GROUP SETTING Installation Manual 3P291714-1 English DCM601A51 intelligent Touch Manager 01_EN_3P291714-1.indd 36 5/18/2011 1:45:57 PM…
-
Page 37
<Step 4> GROUP SETTING 5. Press the Timer ON/OFF button to make the “GROUP” indicator stay lit. The DIII-NET address has been set. <Step 5> GROUP SETTING English Installation Manual 3P291714-1 DCM601A51 intelligent Touch Manager 01_EN_3P291714-1.indd 37 5/18/2011 1:45:57 PM… -
Page 38: Procedure For A Navigation Remote Controller
F i e l d s e t t i n g l i s t Group No. s e t t i n g Indoor unit Air net No. set Error record Retur n Setting Installation Manual 3P291714-1 English DCM601A51 intelligent Touch Manager 01_EN_3P291714-1.indd 38 5/18/2011 1:45:58 PM…
-
Page 39
6. Press the Menu/Enter button. The DIII-NET address has been set. <Step 6> Group No. s e t t i n g (Group) Group No 1-03 Retur n Release English Installation Manual 3P291714-1 DCM601A51 intelligent Touch Manager 01_EN_3P291714-1.indd 39 5/18/2011 1:45:58 PM… -
Page 40: Setting An Unique Address To Each Unit (When Power Distribution Is Enabled)
When power distribution is enabled, you need to set a unique address for each unit. For how to set an address, refer to the commissioning manual. Installation Manual 3P291714-1 English DCM601A51 intelligent Touch Manager 01_EN_3P291714-1.indd 40 5/18/2011 1:45:58 PM…
-
Page 41: Outdoor Unit Address Setup
4. Press the BS2 to change to the desired address. (The default setting is “0”.) 5. Press the BS3 twice to fix the address setting. 6. Press the BS1 button once to return to the normal mode. English Installation Manual 3P291714-1 DCM601A51 intelligent Touch Manager 01_EN_3P291714-1.indd 41 5/18/2011 1:45:58 PM…
-
Page 42: Quick Operation Guide
Touch the In button to go to the area being selected and view the areas and manage- ment points in it. Touch the Out button to go to the area one level above the current area. Installation Manual 3P291714-1 English DCM601A51 intelligent Touch Manager 01_EN_3P291714-1.indd 42 5/18/2011 1:45:59 PM…
-
Page 43: Starting/Stopping An Area Or Management Point
(operating) and gray when stopped. When Confirmation Dialog is set to “Enabled” in the system setup, the corresponding message appears. Select the Yes button to confirm the Start/Stop operation. English Installation Manual 3P291714-1 DCM601A51 intelligent Touch Manager 01_EN_3P291714-1.indd 43 5/18/2011 1:45:59 PM…
-
Page 44
3P291714-1 EM11A016 (1104) HT 00_CV_3P291714-1.indd 2 5/13/2011 2:54:17 PM…
![]()
Installation Manual
intelligent Touch Manager
Model
DCM601A51

DAIKIN INDUSTRIES, LTD.
DCM601A51
DCM601A52
DCM601A53
Low Voltage 2006/95/EC
Electromagnetic Compatibility 2004/108/EC *
DAIKIN.TCF.008 L6/03-2012
DEKRA Certification B.V. (NB0344)
59277-KRQ/ECM95-4301
<![if ! IE]>
<![endif]>1-3P316608
Shinri Sada
Manager Quality Control Department
23th. of Mar. 2012
Umeda Center Bldg., 2-4-12, Nakazaki-Nishi,
Kita-ku, Osaka, 530-8323 Japan

Safety Precautions
Also see installation manual attached to equipment you connect.
Please read these “SAFETY PRECAUTIONS” carefully before installing air conditioning unit and be sure to install it correctly.
•They both contain important information regarding safety. Be sure to observe all precautions without fail.

 WARNING
  CAUTION
Failure to follow these instructions properly may result in personal injury or loss of life.
Failure to observe these instructions properly may result in property damage or personal injury, which may be serious depending on the circumstances.
•After completing installation, conduct a trial operation to check for faults and explain to the customer how to operate the air conditioner and take care of it with the aid of the operation manual. Ask the customer to store the installation manual along with the operation manual for future reference.
 WARNING
•Ask your dealer or other qualified personnel to carry out installation work.
Do not attempt to install the unit yourself. Improper installation may result in an electric shock or fire.
•Do not relocate or reinstall the unit yourself.
Improper installation work may result in an electric shock or fire.
Ask your local dealer to carry out relocation and reinstallation of the unit.
•Install the unit in accordance with the instructions in this installation manual.
Improper installation may result in an electric shock or fire.
•Be sure to use only the specified accessories and parts for installation work.
Failure to use the specified parts may result in the unit falling, an electric shock, or fire.
•Install the unit on a foundation strong enough to withstand the weight of the unit.
A foundation of insufficient strength may result in the equipment falling and causing injury.
•Always perform installation work with the power supply shut off.
Touching energized electric parts causes an electric shock.
•Do not disassemble, modify or repair the unit.
An electric shock or fire may be caused.
•Make sure that all wiring is secured, that the specified wires are used, and that there is no strain on the terminal connections or wires.
Improper connection or securing of wires may result in abnormal heat build-up or fire.
•The choice of materials and installations must comply with the applicable national and international standards.
•Carry out installation work taking earthquakes into account.
Failure to do so during installation work may result in the unit falling and causing accidents.
•Make sure that a separate power supply circuit is provided for this unit and that all electrical work is carried out by qualified personnel according to local laws and regulations and this installation manual.
An insufficient power supply capacity or improper electrical construction may lead to an electric shock or fire.
•When wiring the power supply and connecting the remote controller wiring and transmission wiring, position the wires so that the electric parts box lid can be securely fastened.
Improper positioning of the electric parts box lid may result in an abnormal heat buildup, an electric shock, or fire.
|
English |
Installation |
Manual 3P291714-1 |
3 |
|
DCM601A51 |
intelligent Touch Manager |

 WARNING
•Be sure to earth the unit.
Do not earth the unit to a utility pipe, lightning conductor or telephone earth lead.
Imperfect earthing may result in an electric shock or fire.
•Do not change the protective equipment settings.
Otherwise, a short-circuit may occur in a pressure switch, temperature switch, or other protective equipment, forcing the unit to operate unexpectedly.
In addition, use of parts other than those specified by DAIKIN may result in firing.
•Install an earth leakage breaker, as required.
Failure to install an earth leakage breaker may result in an electric shock or fire.
•This appliance is not intended for use by persons (including children) with reduced physical, sensory or mental capabilities, or lack of experience and knowledge, unless they have been given supervision or instruction concerning use of the appliance by a person responsible for their safety.
 • Children should be supervised to ensure that they do not play with the appliance.
 CAUTION
 • Be very careful about product transportation.
•Safely dispose of the packing materials.
Tear apart and throw away plastic packaging bags so that children will not play with them.
If children play with a plastic bag which was not torn apart, they face the risk of suffocation.
 • This unit is a class B product.
•In a domestic environment, this product may cause radio interference.
In such case, the user may be required to take adequate measures.
•Disposal requirements Dismantling of the unit,treatment of the refrigerant,of oil and of other parts must be done in accordance with relevant local and national legislation.
•Fill the wiring through hole with putty.
Entry of water or insects may result in electric leakage or malfunction.
•Do not operate with wet hands.
An electric shock and malfunction may be caused.
•Do not wash this unit with water.
An electric shock or fire may be caused.
•Install the indoor and outdoor units, power cord, and connecting wires at least 1 meter away from televisions or radios.
This is to prevent picture interference and noise. (Depending on the incoming signal strength, a distance of 1 meter may not be sufficient to eliminate noise.)
•Do not install the unit in the following places.
1.Where there is a high concentration of mineral oil spray or vapor (e.g.a kitchen).
Plastic parts will deteriorate, parts may fall off and water leakage could result.
2.Near machinery emitting electromagnetic radiation.
Electromagnetic radiation may disturb the operation of the control system and result in a malfunction of the unit.
3.Where flammable gas may leak, where there is carbon fibre or ignitable dust suspensions in the air, or where volatile flammables such as paint thinner or gasoline are handled.
Operating the unit in such conditions may result in fire.
4.High temperature area or directly flamed point.
Abnormal heat build-up or firing may be caused.
5.Moist area, or place that may be exposed to water.
If water enters inside the unit, an electric shock and malfunction may be caused.
|
4 |
Installation |
Manual 3P291714-1 |
English |
|
DCM601A51 |
intelligent Touch Manager |
Contents
|
1 |
Before Installation ……………………………………………………………………………………… |
7 |
||
|
1.1 |
Checking that all accessories are included …………………………………………………………………….. |
7 |
||
|
1.2 |
Understanding external dimensions ……………………………………………………………………………… |
8 |
||
|
1.3 |
Understanding where terminals and switches are located ……………………………………………… |
10 |
||
|
1.3.1 |
Rear face ……………………………………………………………………………………………………….. |
10 |
||
|
1.3.2 |
Front panel …………………………………………………………………………………………………….. |
11 |
||
|
1.3.3 |
Side face ………………………………………………………………………………………………………… |
12 |
||
|
1.3.4 |
Routing of cables …………………………………………………………………………………………….. |
12 |
||
|
1.4 |
Determining installation place …………………………………………………………………………………….. |
13 |
||
|
1.4.1 Installation place and mounting direction ……………………………………………………………. |
13 |
|||
|
1.4.2 |
Environmental conditions …………………………………………………………………………………. |
13 |
||
|
1.4.3 |
Required space ………………………………………………………………………………………………. |
13 |
|
2 |
Connection ………………………………………………………………………………………………. |
14 |
||
|
2.1 |
Removing terminal cover from rear face ………………………………………………………………………. |
14 |
||
|
2.2 |
Connecting DIII-NET-compatible air conditioning equipment…………………………………………… |
14 |
||
|
2.2.1 Terminals location and conceptual connection diagram ………………………………………… |
15 |
|||
|
2.2.2 |
Requirements that must be met ………………………………………………………………………… |
16 |
||
|
2.2.3 Precautions for using multiple centralized controllers ……………………………………………. |
16 |
|||
|
2.3 |
Connecting a LAN cable ……………………………………………………………………………………………. |
17 |
||
|
2.3.1 Terminals location and conceptual connection diagram ………………………………………… |
18 |
|||
|
2.3.2 |
Requirements that must be met ………………………………………………………………………… |
18 |
||
|
2.4 |
Connecting I/O module ……………………………………………………………………………………………… |
19 |
||
|
2.4.1 Terminals location and conceptual connection diagram ………………………………………… |
19 |
|||
|
2.4.2 |
Requirements that must be met ………………………………………………………………………… |
19 |
||
|
2.4.3 |
Address setup…………………………………………………………………………………………………. |
20 |
||
|
2.5 |
Connecting an emergency stop input device or electric energy meters ……………………………. |
20 |
||
|
2.5.1 Terminals location and conceptual connection diagram ………………………………………… |
21 |
|||
|
2.5.2 |
Requirements that must be met ………………………………………………………………………… |
21 |
||
|
2.6 |
Connecting iTM plus adaptors ……………………………………………………………………………………. |
22 |
||
|
2.6.1 Terminals location and conceptual connection diagram ………………………………………… |
22 |
|||
|
2.6.2 |
Requirements that must be met ………………………………………………………………………… |
23 |
||
|
2.7 |
Connecting power supply ………………………………………………………………………………………….. |
23 |
||
|
2.7.1 Terminals location and conceptual connection diagram ………………………………………… |
23 |
|||
|
2.7.2 |
Requirements that must be met ………………………………………………………………………… |
24 |
|
3 |
Installation ……………………………………………………………………………………………….. |
25 |
||
|
3.1 |
Wall mounting ………………………………………………………………………………………………………….. |
25 |
||
|
3.1.1 Parts to be used ……………………………………………………………………………………………… |
25 |
|||
|
3.1.2 Installation procedure ………………………………………………………………………………………. |
25 |
|||
|
English |
Installation |
Manual 3P291714-1 |
5 |
|
|
DCM601A51 |
intelligent Touch Manager |

|
3.2 |
Flush wall mounting ………………………………………………………………………………………………….. |
26 |
||
|
3.2.1 Parts to be used ……………………………………………………………………………………………… |
26 |
|||
|
3.2.2 |
Wall opening dimensions ………………………………………………………………………………….. |
27 |
||
|
3.2.3 |
Installation procedure ………………………………………………………………………………………. |
27 |
||
|
3.3 |
Direct mounting to control enclosure …………………………………………………………………………… |
30 |
||
|
3.3.1 Parts to be used ……………………………………………………………………………………………… |
30 |
|||
|
3.3.2 |
Wall opening dimensions ………………………………………………………………………………….. |
30 |
||
|
3.3.3 |
Installation procedure ………………………………………………………………………………………. |
30 |
||
|
4 |
Basic Setup ……………………………………………………………………………………………… |
32 |
||
|
4.1 |
Powering on data backup battery ……………………………………………………………………………….. |
32 |
||
|
4.2 |
Powering on intelligent Touch Manager and air conditioners …………………………………………… |
32 |
||
|
4.3 |
Setting up display language ……………………………………………………………………………………….. |
33 |
||
|
4.4 |
Setting up locale ………………………………………………………………………………………………………. |
33 |
||
|
4.5 |
Setting time zone ……………………………………………………………………………………………………… |
34 |
||
|
4.6 |
Setting current time and daylight saving time ……………………………………………………………….. |
34 |
||
|
4.7 |
Confirming air conditioner auto registration results ……………………………………………………….. |
35 |
||
|
4.8 |
Assigning a DIII-NET address for each air conditioner …………………………………………………… |
35 |
||
|
4.8.1 Remote controller buttons and areas …………………………………………………………………. |
35 |
|||
|
4.8.2 Procedure for a wired remote controller ……………………………………………………………… |
36 |
|||
|
4.8.3 Procedure for a navigation remote controller……………………………………………………….. |
38 |
|||
|
4.8.4 Setting an unique address to each unit (when power distribution is enabled)…………… |
40 |
|||
|
5 |
Outdoor Unit Address Setup …………………………………………………………………….. |
41 |
||
|
5.1 |
Procedure ……………………………………………………………………………………………………………….. |
41 |
||
|
6 |
Quick Operation Guide …………………………………………………………………………….. |
42 |
||
|
6.1 |
Viewing target area and management point information in list format ………………………………. |
42 |
||
|
6.2 |
Viewing target areas and management points ……………………………………………………………… |
42 |
||
|
6.3 |
Starting/stopping an area or management point …………………………………………………………… |
43 |
|
6 |
Installation |
Manual 3P291714-1 |
English |
|
DCM601A51 |
intelligent Touch Manager |

Before you start installing the intelligent Touch Manager, complete the following preparations.
•Check that the intelligent Touch Manager comes with all accessories.
•Confirm where the terminals and switches of the intelligent Touch Manager are located.
•Check that an appropriate space for installing the intelligent Touch Manager is available.
|
1.1 |
Checking that all accessories are included |
||||
|
Based on the following accessory list, check that all accessories for the intelligent Touch |
|||||
|
Manager are included. Should there be any missing or defective parts, contact your dealer. |
|||||
|
<Accessories included with intelligentTouch Manager> |
|||||
|
A |
B |
D |
|||
|
d-1 |
d-2 |
||||
|
E |
|||||
|
e-1 |
|||||
|
a-1 |
b-1 |
b-2 |
b-3 |
e-2
C
F
f-1 f-2
f-3
A(a-1) intelligent Touch Manager body (1 pc.)
BWall mounting parts
(b-1) Round-head wood screw (φ4.1×25), 4 pcs. (b-2) P-tight screw (φ3×8), 1 pc. (b-3) Wall mounting metal plate, 1 pc.
CFlush wall mounting parts
(c-1) Flat-head screw (M4×40), 4 pcs. (c-2) Pan-head screw (M4×14, with spring washer and plain washer), 4 pcs.
(c-3) Frame bracket, 1 pc. (c-4) Angle bracket, 2 pcs.
DControl enclosure parts
(d-1) Pan-head screw (M4×40, with spring washer and plain washer), 4 pcs. (d-2) Nut (φ4), 4 pcs.
E(e-1) Cable tie, 1 pc. (e-2) Push mount tie, 3 pcs.
F(f-1) Installation manual (This manual), 1 pc. (f-2) Manual CD, 1 pc.
(f-3) Paper template, 2 pcs.
|
English |
Installation |
Manual 3P291714-1 |
7 |
|
DCM601A51 |
intelligent Touch Manager |

1.2Understanding external dimensions
•intelligent Touch Manager body
<![if ! IE]>
<![endif]>243mm
<![if ! IE]>
<![endif]>8mm
4.5mm 
4.5mm 8mm
| <![if ! IE]>
<![endif]>8mm |
<![if ! IE]>
<![endif]>29.5mm |
|
4.5mm |
|
|
4.5mm |
|
| <![if ! IE]>
<![endif]>8mm |
| <![if ! IE]>
<![endif]>151.5mm |
<![if ! IE]>
<![endif]>207mm |
• Wall mounting metal plate
234.2mm
<![if ! IE]>
<![endif]>191mm
60mm 40mm
Thickness 0.8mm
|
8 |
Installation |
Manual 3P291714-1 |
English |
|
DCM601A51 |
intelligent Touch Manager |

• Frame bracket
<![if ! IE]>
<![endif]>224mm
|
281.4mm |
|
|
241mm |
61.6mm |
| <![if ! IE]>
<![endif]>234.4mm |
<![if ! IE]>
<![endif]>207.7mm |
7.5mm
• Angle bracket
| <![if ! IE]>
<![endif]>112.15mm |
||
| <![if ! IE]>
<![endif]>211.5mm |
<![if ! IE]>
<![endif]>224mm |
<![if ! IE]>
<![endif]>251.5mm |
20mm
43.7mm
Thickness 1.6mm
|
English |
Installation |
Manual 3P291714-1 |
9 |
|
DCM601A51 |
intelligent Touch Manager |

1.3Understanding where terminals and switches are located
Understand the arrangement of terminals and the location of openings on the unit and plan how to route the cable and in which order to connect its wires to facilitate the installation procedure. For connection details including the cable type and terminal size, refer to “2. Connection”.
1.3.1Rear face
Most terminals are located on the rear face of the intelligent Touch Manager. However, they are covered with a terminal cover for safety reasons. Removing 2 screws to detach this cover reveals various types of terminals as shown below.
<Rear face of intelligentTouch Manager>
A[POWER] The power line connection terminals. A power supply voltage of 100 to 240
VAC (at 50/60 Hz) is required. Near this terminal block, there is a blue resin cable mount used for securing the power supply cables with cable ties.
B[DIII] The communication line connection terminals for “DIII-NET”, which enables communications with DAIKIN’s air conditioning equipment.
C[LINE, PHONE] The sockets used when subscribing to the DAIKIN “Air Conditioning Network Service System” online monitoring service for air-conditioning systems. To use the “Air Conditioning Network Service System” service, you need to sign a separate maintenance contact.
D[RESERVE] No Use.
E[RS-485] The terminals for connecting serial equipment.
F[plus ADP IF] The terminals for connecting one or more iTM plus adaptors when the intelligent Touch Manager is used to control more air conditioning devices.
G[Di (1-4),COM] The terminals for connecting an external signal input device for stopping air conditioners in an emergency, or for connecting electric energy meters for calculating the electricity usage of individual air conditioners.
H[LAN] The socket for connecting the intelligent Touch Manager to an Ethernet network.
|
10 |
Installation |
Manual 3P291714-1 |
English |
|
DCM601A51 |
intelligent Touch Manager |
![]()
1.3.2Front panel
Located below the monitor display on the front panel are four LEDs that indicate the operating status of the intelligent Touch Manager. Sliding the front slide cover down and then removing a screwed cover reveals terminals used during the setup after installation or during maintenance work.
<Front face of intelligentTouch Manager>
A[SERVICE LAN] The socket for temporarily connecting the intelligent Touch Manager to a LAN from its front face, instead of its rear face, during installation or maintenance.
B[LAN SW] The switch for selecting which Service LAN socket, one on the front face or one on the rear face, is to be activated.
You cannot close the cover when the switch set to“FRONT”.To close the cover, select “BACK”.
C[BACKUP] The switch for turning on/off the backup power supply for retaining the current settings.
D[DIII MASTER] The switch used when there are two or more DIII-NET centralized controllers to select the “MASTER” or “SLAVE” controllers.
E[CPU ALIVE] LED (Green) The LED that indicates that the CPU is operating normally. The CPU is operating normally when this LED is blinking and malfunctioning when it is on or off.
(It takes about 10 seconds for detection of the abnormality.)
On: Installation failure
Off: A hardware failure occurred.
F[LAN LINK] LED (Green) The LED that indicates whether or not the hardware connection is established normally between the intelligent Touch Manager and the equipment connected to the LAN port. It lights green when the LAN port is linked normally.
G[DIII MONITOR] LED (Yellow) This LED blinks when data is being sent or received on DIII-NET.
H[MONITOR] key and LED (Orange/Green) Each time you press this key, the monitor display turns on/off. The color of the LED also changes accordingly to the condition of the monitor display.
Off: The monitor is powered off.
On (Orange):The monitor display is off. On (Green):The monitor display is on.
I[RESET//] The switch for restarting the intelligent Touch Manager.
|
English |
Installation |
Manual 3P291714-1 |
11 |
|
DCM601A51 |
intelligent Touch Manager |

1.3.3Side face
On the left side face of the intelligent Touch Manager, a USB port cover is provided. You use this cover during setup after installation or during maintenance. You also see an attached label, bearing the model, weight, power ratings and the serial number of the intelligent Touch Manager.
<Side face of intelligentTouch Manager>
[ ] Pulling up the rubber cover reveals a USB socket. This socket can be raised 90 degrees, so you can plug in a USB device to it from the front direction when there is no clearance from the side edge of the unit.
1.3.4Routing of cables
To flush-mount the intelligentTouch Manager to the wall, you need to route in advance the cables through the cable hole of the frame bracket.
An example of cables routed to the rear face of the intelligent Touch Manager is shown below.
<Routing of cables>
A
A To conduit tube
Make sure that each wiring is secured with supplied cable ties.
Secure the power supply cables to the blue resin cable mount with white cable ties and secure them to the other wiring with black cable ties as shown on the wiring diagram
(example).
To secure the wiring with black cable ties, insert the cable tie head into the provided hole.
|
12 |
Installation |
Manual 3P291714-1 |
English |
|
DCM601A51 |
intelligent Touch Manager |

1.4Determining installation place
Be sure to install the intelligent Touch Manager in a place that meets the conditions described in 1.4.1 through 1.4.3 below.
1.4.1Installation place and mounting direction
Below are the description of the installation place and mounting direction. Be sure to confirm.
•Installation place: Indoor, free from dust and water splashes
•Mounting direction: Vertical
1.4.2Environmental conditions
Make sure that the installation environment meets the following conditions.
•The ambient temperature must be 0 to 40 °C.
•The ambient humidity must be 85% RH or less (without condensation).
•There must be no electromagnetic disturbance.
1.4.3Required space
Required installation space
To install the intelligent Touch Manager, the following space is required. Make sure that there is a minimum clearance of 30 mm from the top edge, 100 mm from the left side edge, 30 mm from the right side edge, and 60 mm from the bottom edge of the unit.
<Installation space required for intelligentTouch Manager>
A
|
30mm |
||
|
100mm |
100mm |
30mm |
|
243mm |
||
|
MONITOR |
MONITOR |
|
|
290mm |
||
|
60mm |
 B
B
60mm
ATop
BWall
|
English |
Installation |
Manual 3P291714-1 |
13 |
|
DCM601A51 |
intelligent Touch Manager |

2 Connection
Required procedures
Equipment-spe- cific procedures
This chapter describes the procedure for connecting the intelligent Touch Manager with
DAIKIN air conditioning devices and other equipment.
In addition to air conditioners, the intelligent Touch Manager can monitor and control a wide range of equipment. However, the required connection procedures vary depending on the equipment to be connected.
•2.2 Connecting DIII-NET-compatible air conditioning equipment
•2.7 Connecting power supply
•2.3 Connecting a LAN cable
•2.4 Connecting I/O module
•2.5 Connecting an emergency stop input device or electric energy meters
•2.6 Connecting iTM plus adaptors

 WARNING
•Do not turn the power supply on until all connections are made. Also, make sure that the local circuit breaker, if available, is turned off. Not doing so may cause an electric shock.
•After completing connections, check again that all wires are connected correctly before turning on the power supply.
•All field supplied parts and materials,electric works must conform to local codes.
•All wiring must be performed by an authorized electrician.
2.1Removing terminal cover from rear face
<Removing terminal cover>
Before you start any of these connection procedures, remove the terminal cover from the rear face. To do so, remove two screws using a Phillips screwdriver.
2.2ConnectingDIII-NET-compatibleairconditioningequipment
DIII-NET is a unique air conditioning equipment communication capability developed by DAIKIN.Using DIII-NET, you can centrally control multiple DAIKIN DIII-NET-compatible air conditioning devices by connecting them to your intelligent Touch Manager.

 WARNING
•Be sure to perform this procedure with the power supply turned off. Not doing so may cause an electric shock.
•The maximum length of adhered wiring of high current electrical line of power wires and weak current line of communication wires must be kept to 20 meters or less.
|
14 |
Installation |
Manual 3P291714-1 |
English |
|
DCM601A51 |
intelligent Touch Manager |
 Loading…
- Manuals
- Brands
- Daikin Manuals
- Control Panel
- DCM601A51
- Commissioning manual
-
Contents
-
Table of Contents
-
Troubleshooting
-
Bookmarks
Quick Links
Commissioning Manual
intelligent Touch Manager
Model
DCM601A51
MONITOR
ON
SLAVE
LAN SW
CPU ALIVE
LAN LINK DⅢ MONITOR
BACKUP
DⅢ MASTER
FRONT BACK
RESET
SERVICE LAN
OFF
MASTER
Related Manuals for Daikin DCM601A51
Summary of Contents for Daikin DCM601A51
-
Page 1
Commissioning Manual intelligent Touch Manager Model DCM601A51 MONITOR SLAVE LAN SW CPU ALIVE LAN LINK DⅢ MONITOR BACKUP DⅢ MASTER FRONT BACK RESET SERVICE LAN MASTER… -
Page 2: Table Of Contents
(When carrying out pre-engineering using the current setting) ….52 • Scenario 3: Restore with existing property’s backup data ……….54 • Scenario 4: Implementation of new functions due to existing property’s upgrade ..55 Commissioning Manual EM11A021 DCM601A51 intelligent Touch Manager…
-
Page 3
• Setting up the IP address (Windows Vista Business) ……….. 97 • Setting up the IP address (Windows 7 Professional) ……….101 • Precautions when using Internet Explorer on Windows Vista and Windows 7…. 104 • Network Connection Check ………………105 Commissioning Manual EM11A021 DCM601A51 intelligent Touch Manager… -
Page 4
• Service Settings Tab (Menu List Screen) …………..115 • Controller Access Setup ………………… 116 Appendix ………………120 8. Useful Information ………………120 8-1 Troubleshooting ………………….120 9. Hardware Specifications …………….122 9-1 iTM Hardware Specification ……………….. 122 Commissioning Manual EM11A021 DCM601A51 intelligent Touch Manager… -
Page 5: System Overview
Port 1~4: Power meter pulse input Emergency Stop signal input Port 1: Input signal (contact) such as Port 2~4: Power meter pulse input power outage signal Input signal (contact) such as power outage signal Commissioning Manual EM11A021 DCM601A51 intelligent Touch Manager…
-
Page 6: Engineering
5-1 Activation Enable dealer options. Entering the Activation key * When necessary 5-2 Dealer Option Setup Register management points and Layout View. 4-1 Mgmt. Point Data Regist (Load from CSV or register manually) Commissioning Manual EM11A021 DCM601A51 intelligent Touch Manager…
-
Page 7
Set up “Main” and “Sub”. 4-3 DIII-NET Engineering Install pre-engineering data and Layout View data. 4-10 Installation Activate optional maker functions. 5-1 Activation Enable dealer options. Entering the Activation key * When necessary 5-2 Dealer Option Setup Commissioning Manual EM11A021 DCM601A51 intelligent Touch Manager… -
Page 8: Logging Into Service Mode
1. Display the Menu List screen. 2. Touch the four corners of the screen in the indicated order. The Password Input dialog appears. 3. Enter the service password (daikin) and touch the OK button to log into the SE Mode. Commissioning Manual EM11A021…
-
Page 9
Furthermore, if the screen is locked, entering the service password instead of the administrator password after carrying out the special operation indicated below, allows you to unlock the screen and log into the SE Mode. Commissioning Manual EM11A021 DCM601A51 intelligent Touch Manager… -
Page 10: Names And Functions
(See page 12.) Allows you to configure the network IP address and other Network (See page 87.) related settings Web Remote Management Allows you to configure the Web Remote Management user (See page 90.) Commissioning Manual EM11A021 DCM601A51 intelligent Touch Manager…
-
Page 11: Service Settings Tab
CSV format. Activation Enables optional maker functions based on entered Activation keys. NOTE Optional maker functions refer to the Power Proportional Distribution and Energy Navigator functions. Commissioning Manual EM11A021 DCM601A51 intelligent Touch Manager…
-
Page 12
You can also make it run at a set time by using the Schedule function. (13) Energy Navigator (Optional function) Sets up the reference room temperature, month to start collecting data, and energy conversion type to be used by the Energy Navigator. Commissioning Manual EM11A021 DCM601A51 intelligent Touch Manager… -
Page 13: System Settings Tab
Sets up the network IP addresses as well as the Web Servers. Web Access Users Sets up Web users for Web Remote Management. Backup Allows you to export the system file and setup data. Commissioning Manual EM11A021 DCM601A51 intelligent Touch Manager…
-
Page 14: Basic Functions
Load the management equipment in the site point data created using the pre-engineering tool to iTM Start up iTM and auto recognize A/C See 4-7 Pre-engineering Create management point data using the pre-engineering tool Commissioning Manual EM11A021 DCM601A51 intelligent Touch Manager…
-
Page 15: Registering A Management Point With The Itm Unit
Point Data Register screen (see page 10). is the list of registered management points. Touch the A/C Auto Register button to display the Auto Search Result screen. is the search results list. The Detailed Type and Port/Address are displayed. Commissioning Manual EM11A021 DCM601A51 intelligent Touch Manager…
-
Page 16
Remove button. The management point moves to and is deleted from the list of candidates that can be registered. Touching the Rem. ALL button deletes all of the candidates that can be registered. Commissioning Manual EM11A021 DCM601A51 intelligent Touch Manager… -
Page 17
2. Manually registering management points Register one by one the management points that are not registered by automatic recognition. Touch the Add button to display the Management Point Types screen. Commissioning Manual EM11A021 DCM601A51 intelligent Touch Manager… -
Page 18
Tabs and items displayed on the Mng. Point Attributes screen vary depending on the selected management point type. Set up by switching the displayed tabs as necessary. For details of each tab, see page 21 onwards. Commissioning Manual EM11A021 DCM601A51 intelligent Touch Manager… -
Page 19
NOTE Modify as necessary since the copy has exactly the same data. Registering as is will cause duplicated address error and the like. Commissioning Manual EM11A021 DCM601A51 intelligent Touch Manager… -
Page 20
[Management point name] ([Management point ID]) <-> [Management point name] ([Management point ID]) numbers ===== Internal Pi address duplication ===== Duplicate object IDs BACnet Duplicated object IDs [Management point name] ([Management point ID]) <-> [Management point name] ([Management point ID]) ===== Duplicate object IDs Commissioning Manual EM11A021 DCM601A51 intelligent Touch Manager… -
Page 21
When finished, touch the OK button (14). A settings data check is carried out and the Information check screen displayed if errors are found. If no problems are found, the dialog below appears. Touching the Yes button after confirming restarts the iTM unit. Commissioning Manual EM11A021 DCM601A51 intelligent Touch Manager… -
Page 22: Detailed Mgmt. Point Attributes Screen And Button Descriptions
<Indoor, Ventilator, D3Chiller, D3Di, and D3Dio> (15) (15) (16) (17) (18) (19) (16) (17) (20) (18) (19) (20) <External Dio> <Di, Pi, External Ai> (15) (16) (17) (18) (16) (17) (18) (19) (20) (19) (20) <Outdoor> <Internal Ai> Commissioning Manual EM11A021 DCM601A51 intelligent Touch Manager…
-
Page 23
For the port number, touch the Modify button and enter it in the Numerical Input dialog that appears. For the address, select it using the combo box. Duplicated addresses cannot be registered. All addresses must be different. Commissioning Manual EM11A021 DCM601A51 intelligent Touch Manager… -
Page 24
The number of characters you can enter is 0 to 50, irrespective of single or double byte. (20) Icon field Sets up the icon for the management point. Touch the Modify button and set the icon in the Icon Setup screen that appears. Commissioning Manual EM11A021 DCM601A51 intelligent Touch Manager… -
Page 25
Touch the Modify button and enter the value in the Numerical Input dialog that appears. Addresses can be specified in steps of 1 and within the following ranges of values. Indoor unit: 1 to 128, Outdoor unit: 1 to 127, Internal Pi: 1 to 127 Commissioning Manual EM11A021 DCM601A51 intelligent Touch Manager… -
Page 26
Select the check box when setting up Fresh Up and/or Auto Air Volume. (24) Fresh Up check box Select the check box to enable Fresh Up. (25) Auto Air Volume check box Select the check box to enable Auto Air Volume. Commissioning Manual EM11A021 DCM601A51 intelligent Touch Manager… -
Page 27
Select whether to carry out error detection when the external Di or external Dio is off from Enable and Disable. (30) Error input type radio button Select the error input detection from A type and B type. Commissioning Manual EM11A021 DCM601A51 intelligent Touch Manager… -
Page 28
Sets up the unit. Touch the Modify button and enter the value in the Text Input dialog that appears. The number of characters you can enter is 0 to 8, irrespective of single or double byte. Commissioning Manual EM11A021 DCM601A51 intelligent Touch Manager… -
Page 29
Sets up the coefficient b. Touch the Modify button and enter the value in the Numerical Input dialog that appears. You can enter a value in the −10.000 to 10.000 range, in increments of 0.001. Commissioning Manual EM11A021 DCM601A51 intelligent Touch Manager… -
Page 30
For the lower limit, touch the Modify button and enter it in the Numerical Input dialog that appears. For the monitoring status, select from Disable, Monitoring, and Monitor + History from the combo box. Commissioning Manual EM11A021 DCM601A51 intelligent Touch Manager… -
Page 31
Sets up the Target Point and Target analog value for the Internal Ai. Touch the Ref.. button and select the Target Point and Target analog value to set from the Analog Point Selection screen that appears (see page 32). Commissioning Manual EM11A021 DCM601A51 intelligent Touch Manager… -
Page 32
*3 The former or latter value will be used depending on whether Unit Type is Other or Thermistor, respectively. (When loading a CSV file with Thermistor selected, the default value will be used regardless of the input data.) Commissioning Manual EM11A021 DCM601A51 intelligent Touch Manager… -
Page 33
Analog Point Selection screen. (50) (49) (49) is the list of management points with analog value. (50) is the list of analog values that applicable to the Internal Ai of the selected management point. Commissioning Manual EM11A021 DCM601A51 intelligent Touch Manager… -
Page 34: Registering Management Points Using A Csv File
Touch the Yes button on the Confirm dialog that appears. Saving to the USB memory starts. Saving is complete when a save completion dialog appears. Touch the Close button to return to the main Mgmt. Point Data Register screen. Commissioning Manual EM11A021 DCM601A51 intelligent Touch Manager…
-
Page 35
File names that can be loaded are limited to “ManagementPointData.csv”. If a file is named differently, rename it in advance. Touch the Yes button on the Confirm dialog that appears to start loading. Commissioning Manual EM11A021 DCM601A51 intelligent Touch Manager… -
Page 36
The Display Merge Results screen consists of the tabs: Add, Modify, Modification Failed, and No change. After checking the list on each tab, touch the Close button to return to the main Mgmt. Point Data Register screen. Commissioning Manual EM11A021 DCM601A51 intelligent Touch Manager… -
Page 37
The format of the CSV file output from the iTM is as shown below. A CSV file output when no management point data is registered can be used as a template for new implementations since only the area used by the system and the header portion are output. Commissioning Manual EM11A021 DCM601A51 intelligent Touch Manager… -
Page 38
Commissioning Manual EM11A021 DCM601A51 intelligent Touch Manager… -
Page 39: Other Setting
(−1). To enable pulse value merge, rewrite it to a valid range value. • Daikin recommends you to leave the management point ID in the CSV file in blank so that they are automatically set up at loading.
-
Page 40: Diii-Net Engineering
(2). Enable: The Setpoint Restriction is enabled. Auto: The Setpoint Restriction is disabled when an upper central unit is present. The Setpoint Restriction is enabled when an upper central unit is not present. Commissioning Manual EM11A021 DCM601A51 intelligent Touch Manager…
-
Page 41
(4). Touching the OK button displays a confirmation dialog. Touch the Yes button to commit. The screen closes and the system restarts. NOTE If you install or uninstall another controller, please review the configuration of the Setpoint Range Limit. Commissioning Manual EM11A021 DCM601A51 intelligent Touch Manager… -
Page 42: Time Zone
1. Log into SE Mode from the Menu List screen and display the Service Settings tab (see page 7). Touch the Changeover Option button on the Service Settings tab to display the Changeover Option screen (see page 10). Commissioning Manual EM11A021 DCM601A51 intelligent Touch Manager…
-
Page 43
Release button (3). The Changeover Option becomes “Selectable”. At that moment, the Changeover Option for the other indoor units in the same refrigeration system also becomes “Selectable”. Touching the Refresh button updates the contents displayed in (1). Close the screen using the Close button. Commissioning Manual EM11A021 DCM601A51 intelligent Touch Manager… -
Page 44: History Mgmt. (Delete)
NOTE If you specified a period to delete, you can cancel deletion halfway but the history data before cancelling will be deleted. Make sure before executing because the deleted data cannot be recovered. Commissioning Manual EM11A021 DCM601A51 intelligent Touch Manager…
-
Page 45: Pre-Engineering
*1 Whether to write automatically accumulated data to USB memory is selectable. Pre-engineering Tool and iTM Unit Data Flow Diagram NOTE iTM integrator uses the backup data for restoring because it is not compatible with the Pre- engineering tool. Commissioning Manual EM11A021 DCM601A51 intelligent Touch Manager…
-
Page 46
Maintenance of Layout View edit × × existing property Scenario 3: Restore with existing property’s × × × backup data Scenario 4: Implementation of new functions × × due to existing property’s upgrade Commissioning Manual EM11A021 DCM601A51 intelligent Touch Manager… -
Page 47: Displaying The Main Screen
Supported security software McAfee 2011 Norton 2011 Virus Buster 2011 Flash Player Version 11.1 Web browser Internet Explorer 8, 9 Firefox 10.0 Displaying the main screen 1. Start up the pre-engineering tool on the PC. Commissioning Manual EM11A021 DCM601A51 intelligent Touch Manager…
-
Page 48
2. On the login screen that appears, enter the password and click the Login button (1). The iTM Pre-engineering tool main screen appears if the correct password has been provided. Main screen Commissioning Manual EM11A021 DCM601A51 intelligent Touch Manager… -
Page 49: Scenario 1: Installation To New Property
A dialog confirming whether to delete the data in the folder appears. Click the Yes button to commit and return to the iTM Pre-engineering tool main screen. Commissioning Manual EM11A021 DCM601A51 intelligent Touch Manager…
-
Page 50
The demo version for PC allows you to make similar settings as with the iTM unit. Make settings as required. When finished, click the button and return to the Pre-engineering tool main screen. Commissioning Manual EM11A021 DCM601A51 intelligent Touch Manager… -
Page 51
If you click the Yes button to confirm the deletion, the output of data starts and the screen closes. NOTE Check that the USB memory is ready for writing data. The output will fail if it is damaged, has insufficient storage capacity, or is write-protected. Commissioning Manual EM11A021 DCM601A51 intelligent Touch Manager… -
Page 52
“Layout Setup data only” is available when the Layout option is enabled and saves only the Layout Setup data to the USB memory. For the method of entering the Layout Setup data to the iTM unit, see the supplementary volume Layout View Creation Tool (EM11A024). Commissioning Manual EM11A021 DCM601A51 intelligent Touch Manager… -
Page 53: Scenario 2: Maintenance Of Existing Property
If the property data is created using an older version, a dialog that prompts upgrade appears. Click the OK button. The absolute path is displayed in (12) when a property data is selected. Commissioning Manual EM11A021 DCM601A51 intelligent Touch Manager…
-
Page 54
The Layout Setup data backup and restore procedures are the same as when modifying the Layout View of an existing property. For the method of editing the Layout Setup data, see the supplementary volume Layout View Creation Tool (optional). Commissioning Manual EM11A021 DCM601A51 intelligent Touch Manager… -
Page 55: Scenario 3: Restore With Existing Property’s Backup Data
2. Move all the data in the folder copied to the USB memory to directly below the USB memory. 3. Insert the USB memory prepared with PC to the iTM integrator to restore. (For details, see 4-10 Installation) Commissioning Manual EM11A021 DCM601A51 intelligent Touch Manager…
-
Page 56: Scenario 4: Implementation Of New Functions Due To Existing Property’s Upgrade
1. From your PC, access the Network Solution page of the Distributor’s Page. Then, download and save the updater program onto the USB memory. 2. Insert the USB memory with the updater program into iTM and install. For the installation procedure, see 4-10 Installation. Commissioning Manual EM11A021 DCM601A51 intelligent Touch Manager…
-
Page 57: Backup
All iTM functions run normally even during backup. However, operation from the iTM unit’s screen is restricted during backup. The following describes how to create a backup. 1. Display the System Settings tab of the Menu List screen (see page 12). Commissioning Manual EM11A021 DCM601A51 intelligent Touch Manager…
-
Page 58
(XXXXXXXXXXXX: MAC address of the iTM, YYYYMMDD_HHMMSS: Year, Month, Day, Hour, Minute and Second of the backup execution time) • When backup fails because the USB memory is not inserted or due to an error, an error dialog appears. Commissioning Manual EM11A021 DCM601A51 intelligent Touch Manager… -
Page 59: Installation
5 times on the screen. Touch the centre of each cross in order. You can start the calibration again by touching a point far from the cross. The calibration is complete when you touched the cross 5 times. Commissioning Manual EM11A021 DCM601A51 intelligent Touch Manager…
-
Page 60
Name of the installer controller Version of the installer (10) Current hardware name (11) Current MAC address (12) Name of the installer hardware (13) Installer’s MAC address (14) Message displayed in accordance with the installation tool’s status. Commissioning Manual EM11A021 DCM601A51 intelligent Touch Manager… -
Page 61: Contact Info
You can enter up to 50 characters in each line, regardless of single or double byte. When finished setting up the contact information, touch the OK button to close the screen. Commissioning Manual EM11A021 DCM601A51 intelligent Touch Manager…
-
Page 62
3. The registered contact information can be checked on the Contact tab of the Information screen accessible from the Standard View screen. (See User’s Manual (EM11A015)) Commissioning Manual EM11A021 DCM601A51 intelligent Touch Manager… -
Page 63: Setting Outdoor Unit
If the specified type of outdoor unit is wrong, leakage check operation cannot be executed correctly. Be careful when setting the type. NOTE When you use the outdoor unit as Internal Pi, check that the pulse amount is correct in the detailed information screen. Commissioning Manual EM11A021 DCM601A51 intelligent Touch Manager…
-
Page 64: Precautions When Using Diii-Net Expander Adapter
RX38MY1E RX16MTL RX26MYLE RX38MYL RXYQ16M7W1B RX16MTLE RX28MTL RX38MYLE RXYQ18M7W1B RXYQ20M7W1B RX16MY1 RX28MTLE RX40MTL RXYQ22M7W1B RX16MY1E RX28MY1 RX40MTLE RX16MYL RX28MY1E RX40MY1 RXYQ24M7W1B RX16MYLE RX28MYL RX40MY1E RXYQ26M7W1B RXYQ28M7W1B RX18MTL RX28MYLE RX40MYL RXYQ30M7W1B RX18MTLE RX30MTL RX40MYLE Commissioning Manual EM11A021 DCM601A51 intelligent Touch Manager…
-
Page 65
RXYQ46PY1 RXY16MYLE RXY40MTL RHXY16MY1 RXYQ48PY1 RXY18MTL RXY40MTLE RHXY18MY1 RXYQ50PY1 RXY18MTLE RXY40MY1 RHXY20MY1 RXYQ52PY1 RXY18MY1 RXY40MY1E RHXY22MY1 RXYQ54PY1 RXY18MY1E RXY40MYL RHXY24MY1 RXYQ8PY1C RXY18MYL RXY40MYLE RHXY26MY1 RXYQ10PY1C RXY18MYLE RXY42MTL RHXY28MY1 RXYQ12PY1C RXY20MTL RXY42MTLE RHXY30MY1 RXYQ14PY1C Commissioning Manual EM11A021 DCM601A51 intelligent Touch Manager… -
Page 66
REYQ42M8W1B RXYQ24M8W1B RXYQ5M9W1B RHXYQ8PY1 REYQ44M8W1B RXYQ26M8W1B RXYQ8M9W1B RHXYQ10PY1 REYQ46M8W1B RXYQ28M8W1B RXYQ10M9W1B RHXYQ12PY1 REYQ48M8W1B RXYQ30M8W1B RXYQ12M9W1B RHXYQ14PY1 RXYQ18MAY1 RXYQ32M8W1B RXYQ14M9W1B RHXYQ16PY1 RXYQ20MAY1 RXYQ34M8W1B RXYQ16M9W1B RHXYQ18MAY1 RXYQ22MAY1 RXYQ36M8W1B RXYQ18M9W1B RHXYQ20MAY1 RXYQ24MAY1 RXYQ38M8W1B RXYQ20M9W1B RHXYQ22MAY1 RXYQ26MAY1 Commissioning Manual EM11A021 DCM601A51 intelligent Touch Manager… -
Page 67
RXYQ42PRY6 RHXY30PY1 RXQ26PY16 RXYQ10PAY19 RXYQ44PRY6 RHXY32PY1 RXQ28PY16 RXYQ12PAY19 RXYQ46PRY6 RHXY34PY1 RXQ30PY16 RXYQ14PAY19 RXYQ48PRY6 RHXY36PY1 RXQ32PY16 RXYQ16PAY19 RXYQ50PRY6 RHXY38PY1 RXQ34PY16 RXYQ18PAY19 RXYQ52PRY6 RHXY40PY1 RXQ36PY16 RXYQ20PAY19 RXYQ54PRY6 RHXY42PY1 RXQ38PY16 RXYQ16PHY1 RXYQ22PAY19 RHXY44PY1 RXQ40PY16 RXYQ24PAY19 RXYQ18PHY1 Commissioning Manual EM11A021 DCM601A51 intelligent Touch Manager… -
Page 68
CMSQ200A7W1B 1008 RHXYQ12PAY1 1075 RXYHQ18P9W1B 1142 RXYQ72PYDN 1209 CMSQ250A7W1B 1009 RHXYQ14PAY1 1076 RXYHQ20P9W1B 1143 RXYQ96PTJU 1210 RWEYQ60MTJU 1010 RHXYQ16PAY1 1077 RXYHQ22P9W1B 1144 RXYQ96PYDN 1211 RWEYQ72MTJU 1011 RHXYQ18PAY1 1078 RXYHQ24P9W1B 1145 RXYQ120PTJU 1212 RWEYQ84MTJU Commissioning Manual EM11A021 DCM601A51 intelligent Touch Manager… -
Page 69
RQCYQ280P 1241 RQYP680A 1252 RQCEQ744P 1220 RWEYQ144PTJU 1231 RQCYQ360P 1242 RQYP730A 1253 RQCEQ816P 1221 RWEYQ252PTJU 1232 RQCYQ460P 1243 RQYP785A 1254 RQCEQ848P 1222 RWEYQ216PTJU 1233 RQCYQ500P 1244 RQYP850A 1223 RXYMQ36MVJU 1234 RQCYQ540P 1245 RQCEQ280P Commissioning Manual EM11A021 DCM601A51 intelligent Touch Manager… -
Page 70: Leakage Check
Web Remote Management Router internet intranet LAN port D3Plus adapter for iTM • By schedule DIII-NET DIII-NET • Manually Multi air conditioners for building Multi air conditioners for building Refrigerant Charging Operation Service person Commissioning Manual EM11A021 DCM601A51 intelligent Touch Manager…
-
Page 71: Preparations
Manually register indoor units that belong to the refrigeration system of each outdoor unit based on the installation information. 1. Log into SE Mode from the Menu List screen and display the Service Settings tab (see page 7). Commissioning Manual EM11A021 DCM601A51 intelligent Touch Manager…
-
Page 72
The other items display the address and name of the outdoor units, as well as the number of indoor units registered with the selected outdoor unit, and registered schedules. 3. Selecting an outdoor unit and touching the Register button displays the Registration of Indoor Unit screen. Commissioning Manual EM11A021 DCM601A51 intelligent Touch Manager… -
Page 73: Running Leakage Check By Schedule Control
Running Leakage Check by Schedule Control Set up a schedule program to run Leakage Check. and touch the Schedule button 1. Select an outdoor unit from the Outdoor Unit list display the Schedule Setup screen. (10) Commissioning Manual EM11A021 DCM601A51 intelligent Touch Manager…
-
Page 74
Set to the time gap on DST start date → Not executed (The specified time does not occur) Set to the duplicated period of time on DST end date → Executed twice (The specified time occurs twice) Commissioning Manual EM11A021 DCM601A51 intelligent Touch Manager… -
Page 75: Copying A Schedule Program
Touch the OK button to overwrite the schedule program and close the dialog. Example: The above screens shows the operation when the schedule program set up for an outdoor unit named “od 1” is copied to an outdoor unit named “od 2”. Commissioning Manual EM11A021 DCM601A51 intelligent Touch Manager…
-
Page 76: Starting Leakage Check By Manual Operation
• Indoor units registered in the same refrigeration system as the target outdoor unit At least one is experiencing equipment error. At least one is under maintenance. At least one is in emergency stop. Commissioning Manual EM11A021 DCM601A51 intelligent Touch Manager…
-
Page 77: Stopping Leakage Check By Manual Operation
Check for the outdoor unit is stopped. If a communication error occurs with the target outdoor unit, the Leakage Check cannot be stopped. NOTE When the Leakage Check stops, the “Maintenance” status placed on the outdoor unit and indoor units registered in the same refrigeration system is released. Commissioning Manual EM11A021 DCM601A51 intelligent Touch Manager…
-
Page 78: Outputting The Leakage Check Results To A Csv File
Result Outdoor 1 Outdoor 2 Outdoor 80 Check Date/ Check Date Leakage Amount Check Date Leakage Amount Check Date Leakage Amount Leakage Amount 2010/11/10 2010/11/10 2010/5/10 AM2:00 AM2:00 AM1:00 2010/5/10 2010/5/23 AM1:00 AM2:30 Commissioning Manual EM11A021 DCM601A51 intelligent Touch Manager…
-
Page 79
• Always check the following in the history before checking the leakage check results. Leakage check fails if an equipment error occurs during leakage check. Run leakage check again after clearing the cause of the error. Commissioning Manual EM11A021 DCM601A51 intelligent Touch Manager… -
Page 80: Conflict With Other Controls
* Refers to indoor units registered in the same refrigeration system as the target outdoor unit. In this table, Enabled/Disabled applies if at least one indoor unit among those registered is in the relevant status. Commissioning Manual EM11A021 DCM601A51 intelligent Touch Manager…
-
Page 81
* In power limit control, a command is sent to the outdoor unit via the outdoor unit external control adapter (DTA104A * * ). • Leakage check and iTM energy saving control cannot be conducted at the same time. Leakage check will be conducted before energy saving control. Commissioning Manual EM11A021 DCM601A51 intelligent Touch Manager… -
Page 82: Failure Mode
• Incorrect Leakage other than the target Check results indoor units are placed under maintenance Schedule Set up an None — Only the program with the smallest number will be executed setup overlapping program Commissioning Manual EM11A021 DCM601A51 intelligent Touch Manager…
-
Page 83
• Ability to re-send is a communication communication failure is recorded time of 180 minutes Leakage Check Leakage Check error error occurred into the history has elapsed instruction to outdoor units under maintenance Commissioning Manual EM11A021 DCM601A51 intelligent Touch Manager… -
Page 84
Leakage Check end iTM stops after None — There is no problem since the Leakage Check results are Leakage Check already received end due to power outage Commissioning Manual EM11A021 DCM601A51 intelligent Touch Manager… -
Page 85: Optional Functions
To activate an optional maker function, you must acquire the Activation key before making settings on site. Since Activation keys are available at the Daikin Distributor’s Page, you need a PC connected to the Internet. To obtain the key, the MAC address indicated on the iTM main unit and the software ID shown in the license form supplied with the main unit will be requested.
-
Page 86
4. Touch the OK button on the Activation Setup screen. A confirmation dialog with the message “Settings have been changed. Reboot now to enable new settings?” appears. Touch the Yes button and restart the iTM unit. Commissioning Manual EM11A021 DCM601A51 intelligent Touch Manager… -
Page 87: Dealer Option Setup
3. When finished, touch the OK button. A confirmation dialog with the message “Settings have been changed. Reboot now to enable new settings?” appears. Touch the OK button and restart the iTM unit. Commissioning Manual EM11A021 DCM601A51 intelligent Touch Manager…
-
Page 88: Operating Optional Functions
The following describes how to set this up. 1. Touch the Network button on the System Settings tab of the Menu List screen to display the Network screen (see page 12). <IP Address Input dialog> <Name Input dialog> Commissioning Manual EM11A021 DCM601A51 intelligent Touch Manager…
-
Page 89
Default gateway address Preferred DNS address Alternate DNS address 3. Set up the Web server port number. Touch the Web Server button to display the Web Server screen and set up the port number. Commissioning Manual EM11A021 DCM601A51 intelligent Touch Manager… -
Page 90
Touch the OK button to save and close the screen. 4. When finished, touch the OK button. A confirmation dialog appears. 5. A restart confirmation message is displayed. Touch the Yes button to reflect the setting and restart the iTM. Commissioning Manual EM11A021 DCM601A51 intelligent Touch Manager… -
Page 91: Web Remote Management
Display resolution: 1024 x 768 or higher Network 100Base-TX Real transfer rate: 115 kbps or higher Supported security software McAfee 2011 Norton 2011 Virus Buster 2011 Flash Player Version 11.1 Web browser Internet Explorer 8, 9 Firefox 10.0 Commissioning Manual EM11A021 DCM601A51 intelligent Touch Manager…
-
Page 92: Connecting The Pc And Itm
Use a 100Base-TX or higher Ethernet cross cable. Ethernet (Cross cable) ETHERNET 100BASE-TX When connecting the PC and iTM via a hub: Use a 100Base-TX or higher Ethernet straight cable. Ethernet (Straight cable) ETHERNET 100BASE-TX Commissioning Manual EM11A021 DCM601A51 intelligent Touch Manager…
-
Page 93: Checking The Web Browser And Flash Player Versions
In the case of Firefox, you can check by selecting [Help] → [About Mozilla Firefox]. Check that the version is 8.0.xxxx.xxxxxxx or 9.0. xxxx.xxxxxxx. (The xxx portion may be any) 2. Enter the address of the site for checking the Flash Player version: http://www.adobe.com/ software/flash/about/ Commissioning Manual EM11A021 DCM601A51 intelligent Touch Manager…
-
Page 94: Setting Up The Ip Address (Windows Xp Professional)
Necessary software can be downloaded from Microsoft, Adobe, and other sites for free. Setting up the IP address (Windows XP Professional) 1. Select [Start] → [Control Panel]. 2. Click [Network and Internet Connections]. Commissioning Manual EM11A021 DCM601A51 intelligent Touch Manager…
-
Page 95
3. Click [Network Connections]. 4. Double click [Local Area Connection]. Commissioning Manual EM11A021 DCM601A51 intelligent Touch Manager… -
Page 96
5. Select [Properties]. 6. Select [Internet Protocol (TCP/IP)] and click [Properties]. Commissioning Manual EM11A021 DCM601A51 intelligent Touch Manager… -
Page 97
8. Check that the settings are correct and click [OK] to close the [Internet Protocol (TCP/IP) Properties] and [Local Area Connection Properties] screens. Click [Close] to close the [Local Area Connection Status] screen and finish setup. Commissioning Manual EM11A021 DCM601A51 intelligent Touch Manager… -
Page 98: Setting Up The Ip Address (Windows Vista Business)
Setting up the IP address (Windows Vista Business) 1. Select [Start] → [Control Panel]. 2. Click [Network and Internet]. 3. Click [Network and Sharing Center]. Commissioning Manual EM11A021 DCM601A51 intelligent Touch Manager…
-
Page 99
4. Click [Manage network connections]. 5. Double click [Local Area Connection]. Commissioning Manual EM11A021 DCM601A51 intelligent Touch Manager… -
Page 100
6. Click [Properties]. 7. Select [Internet Protocol Version 4 (TCP/IPv4)] and click [Properties]. Commissioning Manual EM11A021 DCM601A51 intelligent Touch Manager… -
Page 101
9. Check that the settings are correct and click [OK] to close the [Internet Protocol Version 4 (TCP/ IPv4) Properties] and [Local Area Connection Properties] screens. Click [Close] to close the [Local Area Connection Status] screen and finish setup. Commissioning Manual EM11A021 DCM601A51 intelligent Touch Manager… -
Page 102: Setting Up The Ip Address (Windows 7 Professional)
Setting up the IP address (Windows 7 Professional) 1. Select [Start] → [Control Panel]. 2. Click [Network and Internet]. 3. Click [Network and Sharing Center]. Commissioning Manual EM11A021 DCM601A51 intelligent Touch Manager…
-
Page 103
4. Double click [Local Area Connection]. 5. Select [Properties]. Commissioning Manual EM11A021 DCM601A51 intelligent Touch Manager… -
Page 104
6. Select [Internet Protocol Version 4 (TCP/IPv4)] and click [Properties]. 7. To connect to the iTM via the Internet, ask its IP address and subnet mask to your network administrator and set them up. Commissioning Manual EM11A021 DCM601A51 intelligent Touch Manager… -
Page 105: Precautions When Using Internet Explorer On Windows Vista And Windows 7
Select the tool. Open Internet Options. Deselect [Turn on Protected Mode]. Click the OK button on the [Internet Options] window. Click the OK button on the [Warning] window. Commissioning Manual EM11A021 DCM601A51 intelligent Touch Manager…
-
Page 106: Network Connection Check
Network Connection Check Check whether the Ethernet connection between a PC and iTM is normal. Carry out the following procedure from the PC. <Windows XP> <Windows VISTA, Windows 7> Commissioning Manual EM11A021 DCM601A51 intelligent Touch Manager…
-
Page 107
1. From the Start menu of the PC, select “All Programs” → “Accessories” → “Command Prompt”. Alternatively, select “Run” from the Start menu of the PC, enter “cmd” in Open and click the OK button. (Windows XP) Commissioning Manual EM11A021 DCM601A51 intelligent Touch Manager… -
Page 108
2. The command prompt starts up. Type “ping” followed by one single byte space and then the iTM IP address, and press the Enter key. (In this example, the IP address is 192.168.0.1) Commissioning Manual EM11A021 DCM601A51 intelligent Touch Manager… -
Page 109: Logging Into Service Mode Via Web Remote Management
The procedure to log into Service Mode is similar as that from the unit, by clicking the four corners of the browser’s window and entering the password. For details, see “2-2 Logging into Service Mode”. Commissioning Manual EM11A021 DCM601A51 intelligent Touch Manager…
-
Page 110: Itm Integrator Explanation
USB memory. 2. Publish the activation key of the basic software. In the same way as in step 1, access the Network Solution page and then go to the Activation key issue page. Commissioning Manual EM11A021 DCM601A51 intelligent Touch Manager…
-
Page 111
Open the front slide cover and turn the screws to remove the < BACKUP switch > front slide cover. Set the BACKUP switch to “ON”. 4. Install the software. For the procedure, see 4-10 Installation. Commissioning Manual EM11A021 DCM601A51 intelligent Touch Manager… -
Page 112
If so, refer to the step 3 on the previous page to turn on the data backup battery. When done, touch the OK button shown with the message on the screen. Then, the Locale setup screen appears. Commissioning Manual EM11A021 DCM601A51 intelligent Touch Manager… -
Page 113
[Decimal point / CSV separate] Select the decimal point symbol and the delimiter for CSV files. [Icon Color] Select the icon color. 2. When setup is done, touch OK. The Time Zone Settings screen appears. Commissioning Manual EM11A021 DCM601A51 intelligent Touch Manager… -
Page 114
1. On the Time/DST Setup screen, set up the date/time and the daylight saving time schedule. (Enable or disable the daylight saving time function. If enabled, select the start time and the end time.) 2. Touch OK. The A/C Auto Register screen appears. Commissioning Manual EM11A021 DCM601A51 intelligent Touch Manager… -
Page 115: Itm Integrator Service Settings
Service settings described in this chapter are for the iTM integrator unit. Settings for iTM units are to be made in the respective iTM, or from the iTM integrator Standard View screen by accessing the respective iTM. Commissioning Manual EM11A021 DCM601A51 intelligent Touch Manager…
-
Page 116: Service Settings Tab (Menu List Screen)
The setup method is the same as that for the iTM. See “4-11 Contact Info”. NOTE All settings in this Service Settings tab are for the iTM integrator unit. Please note that they are not for the iTM unit to be controlled using the iTM integrator. Commissioning Manual EM11A021 DCM601A51 intelligent Touch Manager…
-
Page 117: Controller Access Setup
Set up the connection between the iTM to be controlled and the iTM integrator. 1. Display the Service Settings tab on the iTM integrator Menu List screen. 2. Touch the Controller Access button to display the Controller Access Setting screen. Commissioning Manual EM11A021 DCM601A51 intelligent Touch Manager…
-
Page 118
User Setup, then touch the Modify button to enter it in the Numerical Input dialog that appears. The possible value range, value at shipment, and initial value at new registration for the IP address and Web server port number are as follows. Commissioning Manual EM11A021 DCM601A51 intelligent Touch Manager… -
Page 119
• The controller name is the name set up in the network settings on the iTM unit. See “6-1 Network” in this manual. • The controller name is automatically acquired if the communication between iTM integrator and iTM is working normally. Commissioning Manual EM11A021 DCM601A51 intelligent Touch Manager… -
Page 120
If there is an iTM whose connection status is “Disconnected”, the following Confirm dialog appears. To exit setup leaving the iTM disconnected, touch the Yes button. To return to the Controller screen, touch the No button. 7. Open and close all the Layout Views of iTM. Commissioning Manual EM11A021 DCM601A51 intelligent Touch Manager… -
Page 121: Appendix
DIII-NET pin terminals are not firmly Connect DIII-NET pin terminals firmly. DIII-NET pin terminals. connected. Check the installation status of other There is a source of noise around the Separate DIII-NET from the source of units. DIII-NET. noise. Commissioning Manual EM11A021 DCM601A51 intelligent Touch Manager…
-
Page 122
The operation mode was fan mode. Check the PPD settings. subject indoor unit is operating. indoor unit. The thermostat was always OFF Check the PPD settings. though the air conditioner was operating in cool or heat mode. Commissioning Manual EM11A021 DCM601A51 intelligent Touch Manager… -
Page 123: Hardware Specifications
290 × 243 × 50 (W × H × D) Weight 2.4 kg Time accuracy Within −195.7 to 79.1 sec/month Operating temperature range 0 — 40 °C Operating humidity range 85 % or less Commissioning Manual EM11A021 DCM601A51 intelligent Touch Manager…
-
Page 124
==Recommended product (Operation confirmed)== Kingston Data Traveler Generation 3 (G3) 32 GB Supported security McAfee 2011 software Norton 2011 Virus Buster 2011 Flash Player Version 11.1 Web browser Internet Explorer 8, 9 Firefox 10.0 Commissioning Manual EM11A021 DCM601A51 intelligent Touch Manager… -
Page 125
EM11A021 (1208) HT…
Table of Contents for Daikin DCM601A51:
-
Installation Manual 3P291714-1 DCM601A51 intelligent Touch Manager 11English 1.3.2 Front panel Located below the monitor display on the front panel are four LEDs that indicate the oper- ating status of the intelligent Touch Manager. Sliding the front slide cover down and then removing a screwed cover reveals terminals used during the setup after installation or during maintenance work. <Front face of intelligent Touch Manager> A [SERVICE LAN] The socket for temporarily connecting the intelligent Touch Manager to a LAN f
-
12 Installation Manual 3P291714-1 DCM601A51 intelligent Touch Manager English 1.3.3 Side face On the left side face of the intelligent Touch Manager, a USB port cover is provided. You use this cover during setup after installation or during maintenance. You also see an attached label, bearing the model, weight, power ratings and the serial number of the intelligent Touch Manager. <Side face of intelligent Touch Manager> [ ] Pulling up the rubber co
-
14 Installation Manual 3P291714-1 DCM601A51 intelligent Touch Manager English 2 Connection This chapter describes the procedure for connecting the intelligent Touch Manager with DAIKIN air conditioning devices and other equipment. In addition to air conditioners, the intelligent Touch Manager can monitor and control a wide range of equipment. However, the required connection procedures vary depending on the equipment to be connected. Required proc
-
Installation Manual 3P291714-1 DCM601A51 intelligent Touch Manager 39English NOTE The “Group No. setting” menu is not displayed when the intelligent Touch Manager is not powered on. Power on the intelligent Touch Manager and wait for a while before trying to operate the remote controller. The “Group No. setting” menu is not displayed also when the intelligent Touch Manager is not communicating with the indoor units normally. Make sure that the cables are connected correctly. 3.
-
Installation Manual 3P291714-1 DCM601A51 intelligent Touch Manager 9English • Frame bracket 281.4±0.1mm 207.7mm 234.4±0.1mm 151.5±0.1mm 61.6mm Φ38.5 241±0.1mm 224.6±0.1mm (28.4mm) 224±0.1mm 61.6mm (28.4mm) 104.8mm • Angle bracket 251.5mm 224±0.1mm 112.15mm 211.5±0.2mm 28.2mm 20mm 43.7mm 11.6mm 01_EN_3P291714-1.indd 9 5/18/2011 1:45:50 PM
-
32 Installation Manual 3P291714-1 DCM601A51 intelligent Touch Manager English 4 Basic Setup If you are sure that all connections have been made, proceed to the basic setup of the intelligent Touch Manager. Here, “basic setup” means setting up the intelligent Touch Man- ager in preparation for controlling the operation of your air conditioning system. Turning on the power of the intelligent Touch Manager starts a setup program that lets
-
Installation Manual 3P291714-1 DCM601A51 intelligent Touch Manager 27English 3.2.2 Wall opening dimensions Use the following dimensional drawing to provide a sufcient opening. NOTE The supplied paper template helps you mark the dimensions of the required wall open- ing. <Wall opening dimensions for ush wall mounting> 4 257.5mm 208mm 8.25mm 120.5mm 120.5mm 8.25mm 8mm 8mm 104mm 104mm D E A B C E A Inner wall B Building structure C intelligent Touch Manager D 60 mm min.
-
Installation Manual 3P291714-1 DCM601A51 intelligent Touch Manager 29English <Removing frame> MONITOR 3. Insert the intelligent Touch Manager into the frame bracket secured to the wall and install it to the frame bracket using the pan-head screws. <Installing intelligent Touch Manager body> A A A A A Pan-head screw 4. Snap the resin frame back into the front face of the intelligent Touch Manager as it was before. 01_EN_3P291714-1.indd 29 5/18/
-
26 Installation Manual 3P291714-1 DCM601A51 intelligent Touch Manager English <Wall mounting installation> MONITOR A B A C C C C A Wall B P-tight screw C Round-head wood screw NOTE ■ How to use the P-tight screw Screw in from the bottom of the intelligent Touch Manager. A B C A P-tight screw B intelligent Touch Manager C Wall mounting metal plate 3.2 Flush wall mounting 3.2.1 Parts to be used To ush-mount
-
Installation Manual 3P291714-1 DCM601A51 intelligent Touch Manager 3English WARNING When wiring the power supply and connecting the remote controller wiring and trans- mission wiring, position the wires so that the electric parts box lid can be securely fas- tened. Improper positioning of the electric parts box lid may result in an abnormal heat build-up, electric shock, or re. Be sure to earth the unit. Do not earth the unit to a utility pipe, lightning conductor or telephone earth lead. Imperfect earthing may result in electric shock
-
Installation Manual 3P291714-1 DCM601A51 intelligent Touch Manager 13English 1.4 Determining installation place Be sure to install the intelligent Touch Manager in a place that meets the conditions described in 1.4.1 through 1.4.3 below. 1.4.1 Installation place and mounting direction Below are the description of the installation place and mounting direction. Be sure to conrm
-
Installation Manual 3P291714-1 DCM601A51 intelligent Touch Manager 25English 3 Installation The intelligent Touch Manager can be installed in the following three ways: • Wall mounting: The intelligent Touch Manager is hooked onto the wall mounting metal plate secured to the wall. • Flush wall mounting: The rear portion of the intelligent Touch Manager is embedded in the wall. • Direct mounting to control enclosure: The intelligent Touch Manager is dir
-
30 Installation Manual 3P291714-1 DCM601A51 intelligent Touch Manager English 3.3 Direct mounting to control enclosure 3.3.1 Parts to be used To mount the intelligent Touch Manager directly to the control enclosure, use the following accessory mounting parts: • Pan-head screw (M4×20, with spring washer and plain washer), 4 pcs. 3.3.2 Wall opening dimensions Use the following dimensional drawing to provide a sufcient opening. NOTE The supplied paper template helps you mark the dimensions of the required wall open- ing. <
-
Installation Manual 3P291714-1 DCM601A51 intelligent Touch Manager 19English 2.4 Connecting I/O module The intelligent Touch Manager can be used in conjunction with the I/O module. The I/O module provides a maximum of 960 I/O points for controlling non-DAIKIN peripheral equipment such as lighting equipment and security lock systems. WARNING • Be sure to perform this procedure with the power supply tu
Questions, Opinions and Exploitation Impressions:
You can ask a question, express your opinion or share our experience of Daikin DCM601A51 device using right now.