-
Contents
-
Table of Contents
-
Bookmarks
Quick Links
Related Manuals for DigiTech TRIO+ Band Creator+ Looper
Summary of Contents for DigiTech TRIO+ Band Creator+ Looper
-
Page 1
OWNER’S MANUAL… -
Page 2
The foregoing is in lieu of all other warranties, expressed or implied, and DigiTech neither assumes nor authorizes any person to assume any obligation or liability in connection with the sale of this product. In no event shall DigiTech or its dealers be liable for special or consequential damages or from any delay in the performance of this warranty due to causes beyond their control. -
Page 3: Table Of Contents
TABLE OF CONTENTS Introduction …………..1 Using Alternate Time & Adjusting Song Tempo..27 Using Alternate Time …………….27 Adjusting Song Tempo…………..27 Features ……………..2 Advanced Features ………….28 Quick Start …………..3 Enabling A Drum Stick Count-In ………..28 Starting A Song With A Count-In ……….28 microSD Card Information ……….4 Recording A Loop With The Band Using A Count-In ..28 Supported microSD Cards …………..4…
-
Page 4: Introduction
INTRODUCTION Thanks for choosing the DigiTech® TRIO+ Band Creator™ + Looper pedal. The TRIO+ is a simple-to-use guitar pedal that listens to the way you play and automatically generates bass and drum parts that match your song. Just plug your guitar into the TRIO+, press the BAND footswitch to teach the TRIO+ your chords and rhythm, then press the BAND footswitch again to start playing with your own personal band! Bass and drum levels can be adjusted for the perfect mix using the BASS and DRUMS knobs.
-
Page 5: Features
• 1/8″ (3.5 mm) Mini Headphone Output With Headphone Level Control • Up To 12 Songs With Loops Can Be Stored To A microSD Card (Included) • Additional Hands-Free Control Available Using An Optional DigiTech FS3X Footswitch • Dual Soft Touch Vacuum Switches •…
-
Page 6: Quick Start
QUICK START To get up and running quickly with the TRIO+, see the TRIO+ Quick Start Guide that was included in the box or visit http://digitech.com/en-US/products/trio-plus#documentation.
-
Page 7: Microsd Card Information
MICROSD CARD INFORMATION The TRIO+ autosaves your work onto the microSD card so you don’t need to worry about remembering to save parts and songs. To ensure that you don’t unexpectedly lose data, always stop the TRIO+ playback and wait at least 5 seconds without making changes to your songs before ejecting the microSD card or removing power to the pedal.
-
Page 8: Connectors & User Interface
See ‘Output Jack Operation’ on page 15 for more information. CONTROL IN Jack Connect an optional DigiTech FS3X Footswitch to this jack for additional hands-free control. See ‘Using An FS3X Footswitch’ on page 32 for more information. USB Port This Mini USB port is used for updating the TRIO+’s firmware and connecting to the free TRIO Manager Software.
-
Page 9
HEADPHONE OUT Jack Connect a pair of headphones to this 1/8” (3.5 mm) mini jack. This output is optimized for headphones having an impedance of 60 Ohms or less. Note that the output jacks are auto-sensing and the AMP and MIXER outputs will be muted when a plug is connected to the HEADPHONE OUT jack. -
Page 10: User Interface
User Interface SEQUENCE Button Press this button to program the song sequence. Once a sequence is programmed, pressing this button will turn Sequence mode on or off. For more information on programming a song sequence, see ‘Programming A Song Sequence’ on page 21. PART Buttons The TRIO+ can learn up to 5 different song parts (for example, an intro, verse, chorus, bridge, and outro).
-
Page 11
TEMPO Knob & AUDIOLASTIC™ LED The TEMPO knob adjusts the TRIO+’s global playback tempo and was designed to adjust the tempo of a song after it is complete. See ‘Adjusting Song Tempo’ on page 27 for more information on adjusting the tempo of songs. -
Page 12
LOOP Knob Adjusts the level of your recorded loop and overdubs in the mix. When set to the 12 o’clock position, loop playback level will match the guitar input level (unity gain). 10. DRUMS Knob Adjusts the level of the drums in the mix. 11. -
Page 13
14. LOOPER Footswitch & LED Press this footswitch to record loops and overdubs. For more information on using the looper, see ‘Recording Loops & Overdubs’ on page 22. The LOOPER LED indicates the status of the looper for the selected song part. The following table describes the available states of the LOOPER LED. -
Page 14
15. BAND Footswitch & LED Pressing this footswitch changes the TRIO+’s state. It is used to teach the band, start and stop band and loop playback, and clear the band. See ‘Teaching The TRIO+ Band’ on page 17 for more information. The BAND LED indicates the status of the band for the selected song part. -
Page 15: Making Connections/Applying Power
MAKING CONNECTIONS/APPLYING POWER To connect the TRIO+ pedal: Turn down the guitar amp or headphone volume. If connecting to a mixer, turn down the gain/trim control and lower the fader on the channel you’re connecting to. Make all connections to the TRIO+ as shown in ‘Connection Diagrams’ on page 13. Connect the included HARMAN power adapter to the TRIO+ POWER input connector then connect the other end to an available AC outlet and wait for the TRIO+ to boot.
-
Page 16: Connection Diagrams
CONNECTION DIAGRAMS Amplifier Setup HARMAN PS0913DC (9VDC) Power Adapter Guitar Effects TRS CABLE FS3X Footswitch Optional Use only unbalanced TS instrument cables for audio connections. NOTE: When only the AMP OUT jack is used, an inverse cabinet emulation is added to the bass and drums signal.
-
Page 17: Amplifier + Mixer Setup
Amplifier + Mixer Setup HARMAN PS0913DC (9VDC) Power Adapter Guitar Effects TRS CABLE Mixer Mixer FS3X Footswitch Optional Use only unbalanced TS instrument cables for audio connections. NOTE: When connected to both the MIXER and AMP OUT jacks, the guitar signal will be fed to the AMP output and the bass and drum parts will be fed to the MIXER output.
-
Page 18: Output Jack Operation
OUTPUT JACK OPERATION The output jacks have an auto-sensing feature which allows the TRIO+ to automatically optimize the outputs for the application. The chart below describes how the TRIO+ will operate depending on which outputs are connected. Operation MIXER OUT AMP OUT HEADPHONE OUT Description…
-
Page 19: Using Guitar Effects
USING GUITAR EFFECTS The TRIO+ provides two ways to add effects to your guitar signal: you can use the built-in effects and/or connect your favorite outboard effects to the FX Loop. Whichever way you decide to work, the effects will be applied to your guitar signal when playing or while recording loops and overdubs.
-
Page 20: Teaching The Band & Working With Song Parts
TRIO+ interface. You also have the option of selecting parts by pressing and holding the BAND footswitch for 2 seconds or by using an optional DigiTech FS3X Footswitch. See ‘Using An FS3X Footswitch’ on page 32 for more information. Another option is to program a song sequence that will automatically switch between parts as the song plays.
-
Page 21
TIP: When completing the learning phase, press the LOOPER footswitch instead of the BAND footswitch to immediately begin recording your loop. Press the LOOPER footswitch again when done recording or wait for the song part to reach its end. TIP: If you make a mistake and want to immediately clear the part and re-teach the band, rather than pressing and releasing the BAND footswitch upon completion of the learning phase, hold it for 2 seconds then repeat steps 4-6 above. -
Page 22: Clearing The Trio+ Band
Clearing The TRIO+ Band Clearing a song part allows you to re-teach the TRIO+ the part — for example, if you made a mistake during the last pass or wish to play something different for the part. NOTE: If a loop has been recorded with the band, the loop will be cleared and restored along with the band part.
-
Page 23: Programming Song Part Intensities
Programming Song Part Intensities Each song part can be programmed for normal intensity (PART button is green — this is the default) or high intensity (PART button is red). Programming the chorus or bridge of your songs with a higher backing band intensity can help add dynamics, making your songs more exciting.
-
Page 24: Programming A Song Sequence
Programming A Song Sequence Playback of the various parts that make up a song can be ordered and automated by creating a song sequence. This allows you to focus on your playing rather than manually switching song parts. To program a song sequence: Press the SEQ button (the button will begin flashing).
-
Page 25: Recording Loops & Overdubs
RECORDING LOOPS & OVERDUBS The TRIO+’s built-in looper can be used as a traditional looper (with no backing band) or loops can be recorded with the backing band. Once the initial loop has been recorded, an unlimited number of overdubs can be recorded on top of it.
-
Page 26: Recording Loops Without The Backing Band
When the part ends, the LOOPER LED will light solid green and the loop you just recorded will begin playing along with the band. If your guitar part ends before the song part, press the LOOPER footswitch to stop loop recording or keep your guitar silent until the part ends. TIP: To clear the loop so you can re-record it, follow the instructions described in ‘Clearing Loops’ on page 25.
-
Page 27: Recording Overdubs
Recording Overdubs Overdub recording can be initiated while a loop is playing or from a stopped state. To record an overdub while a loop is playing: Press the LOOPER footswitch once to enable overdub recording (the LOOPER LED will turn solid amber). You can begin playing your overdubbed parts over the loop.
-
Page 28: Undoing/Redoing The Last Recorded Loop/Overdub
Undoing/Redoing The Last Recorded Loop/Overdub The last recorded loop/overdub can be undone during playback. This provides a quick method for re-recording a loop or overdub on-the-fly. If a loop/overdub is undone by accident, it can be restored using the redo feature. To undo the last recorded loop/overdub: During playback, press and hold the LOOPER footswitch for 2 seconds until the LOOPER LED flashes briefly.
-
Page 29: Recording Loops To An Entire Song Sequence
Recording Loops To An Entire Song Sequence It is possible to record all the initial loops to a song in one pass after all the song parts have been learned by the TRIO+ and a song sequence has been programmed. This can provide a more realistic experience and organic feel during the loop recording process.
-
Page 30: Using Alternate Time & Adjusting Song Tempo
USING ALTERNATE TIME & ADJUSTING SONG TEMPO Using Alternate Time Pressing the ALT TIME button selects an alternate interpretation of the selected song part’s tempo — usually this is either double or half the current tempo. If the TRIO+ can’t find a suitable tempo and number of bars by halving or doubling, the alternate time will remain the same as the original timing.
-
Page 31: Advanced Features
ADVANCED FEATURES Enabling A Drum Stick Count-In The TRIO+ has a drum stick count-in feature that can be used to perform the following functions: • Provide a 1-bar count-in before playing a song. • Record loops with the band that start on the first downbeat of a part. The count-in feature is a one-time operation, so it must be enabled each time you want to use it.
-
Page 32: Providing Hints To The Trio+ When Teaching
guitar part ends before the song part, press the LOOPER footswitch to stop loop recording or keep your guitar silent until the part ends. When the part ends, the LOOPER LED will light solid green and the loop you just recorded will begin playing along with the band. TIP: To clear the loop so you can re-record it, follow the instructions described in ‘Clearing Loops’ on page 25.
-
Page 33: Tempo Interpretation Using The Alt Time Button
To match a new part’s tempo to the previous part using the metronome: If the band is playing, press the BAND footswitch to stop band playback. Using the PART buttons, select the part to which you want to teach or record the loop. If you’re recording a loop, ensure the AUDIOLASTIC™…
-
Page 34: Managing Songs
MANAGING SONGS Storing Songs The TRIO+ autosaves all songs and loops on the included microSD card. Up to 12 songs (each with up to 5 parts with loops) can be stored to an installed microSD card. See ‘microSD Card Information’ on page 4 for information on compatible microSD cards.
-
Page 35: Using An Fs3X Footswitch
USING AN FS3X FOOTSWITCH An optional DigiTech FS3X Footswitch can be connected to the CONTROL IN jack for additional hands-free control. A TRS (tip-ring-sleeve) 1/4” cable must be used when TRS Cable connecting the FS3X to the TRIO+. When using an optional FS3X…
-
Page 36: The Genres & Styles
THE GENRES & STYLES The DigiTech TRIO+ was designed to create the impression of playing with an actual rhythm section — a feeling that is very different than playing to static backing tracks. The styles will follow your own chord progression and transition between chords using an understanding of musical theory.
-
Page 37
Genre-Based Styles Style Knob Time Genre Feel Style Description Position Signature Mid tempo jazz blues. Sounds best at tempos between 65-120. Bass walks slowly between chords. More sparse style with Blues Even 8ths little decoration. Simple beat with straight kick and snare. Hats in the normal intensity section, switching to cymbals in the high intensity section. -
Page 38
Genre-Based Styles Style Knob Time Genre Feel Style Description Position Signature Slow Chicago-style blues. Sounds best at tempos between 60-115. Bass arpeggiates Blues Swing 8ths chords on 8th notes with the occasional busy fill. Simple swung beat with brush snare action. Lo-fi blues band. -
Page 39
Genre-Based Styles Style Knob Time Genre Feel Style Description Position Signature Blues waltz. Sounds best at tempos between 50-130. Bass rhythm is similar to blues style #11 with alternating root, 5th up, and 2nd Blues Swing 8ths down. Snare and hats in normal intensity section switching to snare and ride in the high intensity section. -
Page 40
Genre-Based Styles Style Knob Time Genre Feel Style Description Position Signature Electric funk. Sounds best at tempos between 70-125. Funky syncopated bass R&B Even 16ths with lots of chromatic walking and octave jumps. Straight funk drumming with brush snare in normal intensity section. ’60s soul with tambourine. -
Page 41
Genre-Based Styles Style Knob Time Genre Feel Style Description Position Signature Classic rock. Sounds best at tempos between 60-110. Bass similar to rock style Rock Even 16ths #2 but slightly more spacious. Classic rock drums, with hats changing to cymbals and busier kick in the high intensity section. -
Page 42
Genre-Based Styles Style Knob Time Genre Feel Style Description Position Signature British invasion. Sounds best at tempos between 100-140. Slightly bluesy bass with lots of motion in transition bars. Straight Rock Even 8ths rock beat with steady snare and tight 16th note hats in the normal intensity section, changing to 8th note cymbals in the high intensity section. -
Page 43
Genre-Based Styles Style Knob Time Genre Feel Style Description Position Signature Jazz funk pop. Sounds best at tempos between 65-130. Grooving bass with small Alternative embellishments. Funky drums switching Even 16ths Rock between tight hats and snare in the normal intensity section to a looser hat and higher intensity snare in the high intensity section. -
Page 44
Genre-Based Styles Style Knob Time Genre Feel Style Description Position Signature Classic reggae. Sounds best at tempos between 75-100. Sparse bass sits on root Alternative and leaves a lot of room. Drums are carried Even 8ths Rock by hat groove and snare/side-stick pattern in the normal intensity section. -
Page 45
Genre-Based Styles Style Knob Time Genre Feel Style Description Position Signature Classic galloping metal drum pattern with heavy cymbal work in the high intensity Metal Even 8ths section. Energetic bass locks in with the kick and hi-hat patterns. ’90s metal feel with hip-hop influence and flying cymbals. -
Page 46
Genre-Based Styles Style Knob Time Genre Feel Style Description Position Signature 6/8 blast style. The high intensity section double-times the hats and snare with the Metal Even 16ths kick for a bomb blast feel. Bass line is slower, with a simple groove. Heavy swung 3/4 style with a big splashy hat sound. -
Page 47
Genre-Based Styles Style Knob Time Genre Feel Style Description Position Signature Praise and worship-style pop. Sounds best at tempos between 55-110. Bass pins down the root of the chord on even 8ths Even 8ths with some octave jumps. Steady rock beat with hats and snare in the normal intensity section, cymbals added in the high intensity section. -
Page 48
Genre-Based Styles Style Knob Time Genre Feel Style Description Position Signature Straight pop waltz. Sounds best at tempos between 80-150. Slow bass plays the root and walks between chords with occasional Even 8ths large jumps. Sparse drum beat alternates tight hat and steady brush snare in the normal intensity section with ride cymbal and snare in the high intensity section. -
Page 49
Genre-Based Styles Style Knob Time Genre Feel Style Description Position Signature Modern indie synthpop from the US, light drum machine style disco beat with a looser E-Pop Even 8ths open-hat feel switching to a tight groove in the high intensity section. Bass alternates between short 8th notes and held notes. -
Page 50
Genre-Based Styles Style Knob Time Genre Feel Style Description Position Signature Modern ’80s retro style with a fractured 6/8 feel. Arpeggiated bass and sparse E-Pop Even 8ths electronic drum pattern with tight kicks and syncopated hi-hat patterns becoming more driving in the high intensity section. Modern Scandinavian synth pop in 3/4. -
Page 51
Genre-Based Styles Style Knob Time Genre Feel Style Description Position Signature Percussion-heavy, slightly off-kilter drum groove with slowly walking bass. The high Hip-Hop Even 16ths intensity section has a heavier downbeat, with the hats pushing the beat forward more. Tight, modern funk style beat with layered snare and clap and slightly shuffling hats. -
Page 52
Genre-Based Styles Style Knob Time Genre Feel Style Description Position Signature Fast country ballad. Sounds best at tempos between 90-120. Bass on 1/2 notes playing root/5th/octave. Simple beat driven by Country Even 8ths slightly loose hats and rimshot or brush snare in the normal intensity section with cymbal and snare in the high intensity section. -
Page 53
Genre-Based Styles Style Knob Time Genre Feel Style Description Position Signature Western swing bebop. Sounds best at tempos between 60-110 or 160-200. Sparse bass sitting on the root with occasional 5ths and octaves and short walks between Country Swing 8ths chords. -
Page 54
Genre-Based Styles Style Knob Time Genre Feel Style Description Position Signature Country rock waltz. Sounds best at tempos between 50-110. Bass plays the root on the one with simple rhythmic embellishments. Subtle double-time hats and side-stick/ Country Straight 8ths brush snare on beats 2 and 3 in the normal intensity section, switching to cymbals and snare on beats 2 and 3 in the high intensity section. -
Page 55
Genre-Based Styles Style Knob Time Genre Feel Style Description Position Signature Steady swung beat with tambourine and brush snare beats. Tambourine switching to Folk Swing 8ths hats at higher tempos in the high intensity section. Bass on octave and 5ths, and walking between chords. -
Page 56
Genre-Based Styles Style Knob Time Genre Feel Style Description Position Signature Tango performed on snare and shaker in the normal intensity section with a slightly higher intensity in the high intensity section Latin Even 8ths with some percussive flourishes, and a subtle kick drum. -
Page 57
Genre-Based Styles Style Knob Time Genre Feel Style Description Position Signature Although there aren’t jazz-style swung rhythms in traditional Latin styles, this style option was added for people who want Latin Swing 8ths some latin vibe to go with their swung rhythms. -
Page 58
Genre-Based Styles Style Knob Time Genre Feel Style Description Position Signature Smooth jazz with poppy rhythm. Sounds best at tempos between 70-130. Sparse staccato bass groove with octave jumps. Jazz Even 16ths Grooving drums, moving from tambourine and side-stick in the normal intensity section to hats and snare in the high intensity section. -
Page 59
Genre-Based Styles Style Knob Time Genre Feel Style Description Position Signature Slow swing ballad. Sounds best at tempos between 70-120. Bass walks up and down each chord with short transition fills. Jazz Swing 8ths Shuffling brush snare/side-stick and pedal hat keeping time in the normal intensity section. -
Page 60: Trio Manager Software/Firmware Updates
The TRIO Manager Software can be used to backup and manage all your TRIO+ song data using a computer. It can also be used to update firmware. For the latest information on the TRIO Manager Software, please visit http:// digitech.com/en/products/trio-plus.
-
Page 61: Specifications
Type: Unbalanced, 1/4″ TS Impedance: 1 MΩ FX Return: Type: Unbalanced, 1/4″ TS Impedance: 1 MΩ Control Input Type: 1/4″ TRS (compatible with DigiTech FS3X) Outputs Amp Output: Type: Unbalanced, 1/4″ TS Impedance: 1 kΩ Frequency Response: 25 Hz–20 kHz Mixer Output: Type: Unbalanced, 1/4″…
-
Page 62
Looper Bit Depth: 24-bit Sample Rate: 44.1 kHz Maximum Recording Time: 230 seconds per song part — based on a minimum 50 BPM and 48 bars per part Type: Mini-B SD Card Requirements Type: microSDHC, Class 10 Min/Max Storage Size: 8 GB/32 GB Physical Dimensions:… -
Page 63
TRIO+ Owner’s Manual 5064509-B © 2017 HARMAN. All rights reserved. DigiTech is a registered trademark of HARMAN. Some TRIO+ styles licensed from PG Music Inc ®, makers of Band-in-a-Box ®. To learn more about Band-in-a-Box, visit http://pgmusic.com. Drum kit and acoustic bass recordings by Digital Sound Factory®.
![]()
digitech.com
ТРИО+
Руководство по быстрому старту
№: 5064507-А
 ИНСТРУКЦИЯ ПО НАЧАЛУ РАБОТЫ
НАЧАЛО РАБОТЫ
ЧТО В КОРОБКЕ
- TRIO + Band Creator + Лупер
- Адаптер питания
- Карта Micro SD на 8 ГБ
ЗАРЕГИСТРИРУЙТЕ ВАШ ПРОДУКТ / ПОЛУЧИТЕ РУКОВОДСТВО ПОЛЬЗОВАТЕЛЯ
Чтобы зарегистрировать продукт и загрузить руководство пользователя, посетите веб-сайт http://digitech.com
ПОДКЛЮЧИТЕ ТРИО+
A. Выключите гитару amp или громкость наушников. При подключении к микшеру уменьшите уровень усиления/регулировки и опустите фейдер на канале, к которому вы подключаетесь.

B. Выполните соединения, используя схему справа для справки.
C. Подключите прилагаемый адаптер питания к входному разъему питания TRIO +, затем подключите другой конец к свободной розетке переменного тока и подождите, пока TRIO + загрузится.
D. Увеличьте громкость гитары до упора, затем играйте и постепенно увеличивайте громкость гитары. amp или громкости наушников, пока не будет достигнут желаемый уровень. Если вы используете микшер, установите фейдер канала на единицу (0), затем поднимите регулятор усиления/триммера до нужного уровня.


ВЗЯТЬ ГРУППУ
ПРИМЕЧАНИЕ: Если кнопки PART мигают желтым цветом, убедитесь, что карта Micro SD установлена в слот на левой стороне педали TRIO+. Для работы TRIO+ необходимо установить карту Micro SD.
ПРИМЕЧАНИЕ. Поверните отключите подсказки стиля и темпа, повернув ручку STYLE, пока не погаснут все светодиоды STYLE, и нажимайте кнопку ALT TIME, пока она не погаснет.
A. Установите уровни BASS и DRUMS примерно на 10 часов.
B. Выберите ЖАНР, который вы хотите использовать для партии песни, которую вы будете обучать TRIO+.
C. Нажмите педальный переключатель BAND, чтобы активировать TRIO+. Держите гитару тихо, пока не будете готовы взять первый аккорд. Светодиод над ножным переключателем BAND начнет быстро мигать красным цветом.

НАУЧИТЕ ГРУППЕ
А. Начните играть свою партию в стабильном ритме. Вы обучаете TRIO+ последовательности аккордов, поэтому играйте четко и избегайте украшений.
B. Когда вы закончите последовательность аккордов, нажмите педальный переключатель BAND так же, как вы играете ту же сильную долю, с которой вы начали. Сейчас группа начнет играть.
ПРИМЕЧАНИЕ: Чтобы очистить часть, чтобы вы могли заново обучить группу, см. шаг 10.

КОНТРОЛЬ ГРУППА
ПРИМЕЧАНИЕ: Для каждой части песни можно выбрать различные настройки GUITAR FX, GENRE, STYLE, SIMPLE BASS и ALT TIME.

ВКЛЮЧИТЕ ЛУПЕР
A. Запустите группу, нажав педаль BAND, если она еще не играет. B. Установите ручку уровня LOOP на 12 часов.
C. Убедитесь, что индикатор AUDIOLASTIC не горит. Если это не так, отрегулируйте регулятор TEMPO и установите его в положение «12 часов».
D. Нажмите педальный переключатель LOOPER, чтобы активировать лупер для записи. Пока группа играет, индикатор LOOPER будет быстро мигать красным, пока партия группы не начнется сначала.

ЗАПИСАТЬ ЦИКЛ
A. Как только партия группы перезапустится с самого начала, индикатор LOOPER загорится красным цветом, указывая на то, что лупер записывает. Начните играть партию гитары.
B. Когда партия группы достигает конца, индикатор LOOPER загорится зеленым, и только что записанный луп будет воспроизводиться вместе с группой.
ПРИМЕЧАНИЕ: Чтобы очистить цикл, чтобы вы могли перезаписать его, см. шаг 10.
A. Начните играть, когда индикатор LOOP загорится красным цветом.

ЗАПИСАТЬ НАЛОЖЕНИЕ
A. Нажмите педальный переключатель LOOPER один раз, чтобы включить запись с наложением. Индикатор LOOPER загорится желтым цветом, и теперь вы можете воспроизводить наложение поверх петли.
B. Когда вы закончите наложение, нажмите ножной переключатель LOOPER, чтобы вернуться в режим воспроизведения Looper. Светодиод LOOPER снова загорится зеленым цветом.
ПРИМЕЧАНИЕ: Чтобы очистить последнее записанное наложение, чтобы его можно было перезаписать, см. шаг 10.

ПОВТОР ДЛЯ КАЖДОЙ ЧАСТИ ПЕСНИ
A. Нажмите педальный переключатель BAND, чтобы остановить воспроизведение группы/лупа.
B. Выберите следующую часть песни с помощью кнопок PART.
C. Повторяйте шаги 3–9, пока не будут выучены все части песни и записаны петли.
ПРИМЕЧАНИЕ: Чтобы выучить следующую партию в том же темпе, что и предыдущая, нажмите и удерживайте новую
ЧАСТЬ кнопку в течение 2 секунд, чтобы включить счет в метрономе для обучения новой части.

ОЧИСТКА ПЕТЕЛЬ И ЧАСТЕЙ
ЧТОБЫ ОЧИСТИТЬ ЧАСТЬ
A. Нажмите педальный переключатель BAND, чтобы остановить воспроизведение группы.
B. Нажмите и удерживайте педальный переключатель BAND в течение 2 секунд, пока светодиод педального переключателя BAND не погаснет, а затем не начнет медленно мигать красным цветом. Нажмите и удерживайте футсвитч BAND еще раз в течение 2 секунд, чтобы восстановить очищенную партию.

ПРИМЕЧАНИЕ: Если петля записана с группой, петля будет очищена и восстановлена вместе с партией группы.
ЧТОБЫ ОЧИСТИТЬ ЦИКЛ
A. Нажмите педальный переключатель BAND, чтобы остановить воспроизведение петли.
B. Нажмите и удерживайте педальный переключатель LOOPER в течение 2 секунд, пока светодиод педального переключателя LOOPER не начнет мигать красным, а затем погаснет. Нажмите и удерживайте ножной переключатель LOOPER еще раз в течение 2 секунд, чтобы восстановить очищенный цикл.

ЧТОБЫ УДАЛИТЬ НАЛОЖЕНИЕ
A. Во время воспроизведения лупа нажмите и удерживайте педальный переключатель LOOPER в течение 2 секунд, пока индикатор педального переключателя LOOPER не начнет мигать желтым, чтобы стереть последний наложенный звук. Нажмите и удерживайте ножной переключатель LOOPER еще раз в течение 2 секунд, чтобы восстановить последнее наложение.
ПРИМЕЧАНИЕ: Только последнее записанное наложение может быть очищено. Каждый раз, когда записывается новое наложение, ранее записанное наложение микшируется с исходным лупом.

ПРОГРАММНАЯ ПЕСНЯ ДИНАМИКА И ПОСЛЕДОВАТЕЛЬНОСТЬ
A. Чтобы сделать партию более интенсивной, например, припев или бридж, остановите воспроизведение группы, выберите партию, затем снова нажмите кнопку PART. Светодиод загорится красным, показывая, что группа будет играть партию более интенсивно. При необходимости повторите для других частей

B. Чтобы запрограммировать последовательность песен, нажмите кнопку SEQ (кнопка начнет мигать).

C. Нажмите каждую кнопку PART в нужном порядке. Обратите внимание, что вы можете секвенировать одну и ту же часть несколько раз.

D. Когда закончите, снова нажмите кнопку SEQ. Различные кнопки PART будут мигать, показывая порядок запрограммированной последовательности песен.

E. Теперь песня будет воспроизводиться в запрограммированном порядке при нажатии ножного переключателя BAND. Включите или выключите секвенирование, остановив воспроизведение петли/полосы и нажав кнопку SEQ.

F. Чтобы очистить последовательность песен, убедитесь, что кнопка SEQ включена, затем нажмите и удерживайте кнопку в течение 2 секунд (кнопка начнет мигать). Повторите шаги CD, чтобы перепрограммировать последовательность песен, или нажмите кнопку SEQ, чтобы выйти из режима Sequence Program.

РАБОТА С ПЕСНАМИ
СОХРАНЕНИЕ ПЕСЕН И ПЕТЛЕЙ
Все песни и лупы автоматически сохраняются на вставленную карту Micro SD в режиме реального времени. Можно сохранить до 12 песен с петлями.
ВЫБЕРИТЕ НОВУЮ ПЕСНЮ
А. Нажмите кнопку SONG.
B. Поверните ручку STYLE, чтобы выбрать пустую песню (светодиоды STYLE будут выключены для пустых песен).
C. Нажмите кнопку SONG еще раз, чтобы выйти. Выполните шаги 3–9, чтобы добавить детали.

ЗАГРУЗИТЬ ПЕСНЮ
А. Нажмите кнопку SONG.
B. Поверните ручку STYLE, чтобы выбрать песню для загрузки (ранее сохраненные песни будут подсвечены тусклым красным цветом).
C. Нажмите кнопку SONG еще раз, чтобы выйти.

ЧТОБЫ ОЧИСТИТЬ ПЕСНЮ
А. Нажмите кнопку SONG.
B. Поверните ручку STYLE, чтобы выбрать песню для очистки.
C. Нажмите и удерживайте кнопку SONG в течение 2 секунд, чтобы удалить выбранную песню.
Внимание что очистка песни не может быть отменена.

Наслаждаться! И спасибо, что выбрали DigiTech.
![]() © 2022 CORTEK Corp. DigiTech является зарегистрированным товарным знаком CORTEK Corp.
© 2022 CORTEK Corp. DigiTech является зарегистрированным товарным знаком CORTEK Corp.
Все права защищены.
Документы / Ресурсы
Рекомендации

DigiTech Главная — DigiTech
Для ознакомления с инструкцией необходимо нажать на ссылку «ЗАГРУЗИТЬ», чтобы скачать pdf файл. Если есть кнопка «ПРОСМОТР», то можно просто посмотреть документ онлайн.
Для удобства, Вы можете сохранить данную страницу с файлом руководства по эксплуатации в свой список «избранное» прямо на сайте (доступно для зарегистрированных пользователей).
Смотрите инструкцию для похожих моделей:

Вы можете задать вопрос посетителям сайта по модели DIGITECH TRIO BAND CREATOR. Если Вы являетесь её пользователем, то пожалуйста оставьте, по возможности развёрнутый отзыв:
Посмотреть инструкция для Digitech Trio+ бесплатно. Руководство относится к категории без категории, 1 человек(а) дали ему среднюю оценку 7.5. Руководство доступно на следующих языках: английский. У вас есть вопрос о Digitech Trio+ или вам нужна помощь? Задайте свой вопрос здесь
Не можете найти ответ на свой вопрос в руководстве? Вы можете найти ответ на свой вопрос ниже, в разделе часто задаваемых вопросов о Digitech Trio+.
Инструкция Digitech Trio+ доступно в русский?
Не нашли свой вопрос? Задайте свой вопрос здесь
![]()
OWNER’S MANUAL
WARRANTY
We at DigiTech® are very proud of our products and back-up each one we sell with the following warranty:
1.Please register online at digitech.com within ten days of purchase to validate this warranty. This warranty is valid only in the United States.
2.DigiTech warrants this product, when purchased new from an authorized U.S. DigiTech dealer and used solely within the U.S., to be free from defects in materials and workmanship under normal use and service. This warranty is valid to the original purchaser only and is non-transferable.
3.DigiTech liability under this warranty is limited to repairing or replacing defective materials that show evidence of defect, provided the product is returned to DigiTech WITH RETURN AUTHORIZATION, where all parts and labor will be covered up to a period of one year (this warranty is extended to a period of six years when the product has been properly registered through our website). A Return Authorization number may be obtained by contacting DigiTech. The company shall not be liable for any consequential damage as a result of the product’s use in any circuit or assembly.
4.Proof-of-purchase is considered to be the responsibility of the consumer. A copy of the original purchase receipt must be provided for any warranty service.
5.DigiTech reserves the right to make changes in design, or make additions to, or improvements upon this product without incurring any obligation to install the same on products previously manufactured.
6.The consumer forfeits the benefits of this warranty if the product’s main assembly is opened and tampered with by anyone other than a certified DigiTech technician or, if the product is used with AC voltages outside of the range suggested by the manufacturer.
7.The foregoing is in lieu of all other warranties, expressed or implied, and DigiTech neither assumes nor authorizes any person to assume any obligation or liability in connection with the sale of this product. In no event shall DigiTech or its dealers be liable for special or consequential damages or from any delay in the performance of this warranty due to causes beyond their control.
NOTE: The information contained in this manual is subject to change at any time without notification. Some information contained in this manual may also be inaccurate due to undocumented changes in the product since this version of the manual was completed. The information contained in this version of the owner’s manual supersedes all previous versions.
TECHNICAL SUPPORT & SERVICE
If you require technical support, contact DigiTech Technical Support. Be prepared to accurately describe the problem. Know the serial number of your device — this is printed on a sticker attached to the chassis. If you have not already taken the time to register your product, please do so now at digitech.com.
Before you return a product to the factory for service, we recommend you refer to this manual. Make sure you have correctly followed installation steps and operating procedures. For further technical assistance or service, please contact our Technical Support Department at (801) 566-8800 or visit digitech.com. If you need to return a product to the factory for service, you MUST first contact Technical Support to obtain a Return Authorization Number.
NO RETURNED PRODUCTS WILL BE ACCEPTED AT THE FACTORY WITHOUT A RETURN AUTHORIZATION NUMBER.
Please refer to the Warranty information, which extends to the first end-user. After expiration of the warranty, a reasonable charge will be made for parts, labor, and packing if you choose to use the factory service facility. In all cases, you are responsible for transportation charges to the factory. If the product is still under warranty, DigiTech will pay the return shipping.
Use the original packing material if it is available. Mark the package with the name of the shipper and with these words in red: DELICATE INSTRUMENT, FRAGILE! Insure the package properly. Ship prepaid, not collect. Do not ship parcel post.
TABLE OF CONTENTS
Introduction 1
Features 2
Quick Start 3
microSD Card Information 4
Supported microSD Cards 4 What’s Stored To The microSD Card 4 Changing The microSD Card 4 Accessing The microSD Card 4
Connectors & User Interface 5
Connectors 5
User Interface 7
Making Connections/Applying Power 12
Connection Diagrams 13
Amplifier Setup 13
Mixer Setup 13
Amplifier + Mixer Setup 14
Headphone Setup 14
Output Jack Operation 15
Using Guitar Effects 16
Using The Built-In Guitar Effects 16 Using External Effects Connected To The FX Loop 16
Teaching The Band & Working With Song Parts 17
Teaching The TRIO+ Band 17 Clearing The TRIO+ Band 19 Playing/Switching Between Song Parts 19 Programming Song Part Intensities 20 Programming A Song Sequence 21
Recording Loops & Overdubs 22
Recording Loops With The Backing Band 22 Recording Loops Without The Backing Band 23 Recording Overdubs 24 Undoing/Redoing The Last Recorded Loop/Overdub 25 Clearing Loops 25 Recording Loops To An Entire Song Sequence 26
Using Alternate Time & Adjusting Song Tempo 27
Using Alternate Time 27 Adjusting Song Tempo 27
Advanced Features 28
Enabling A Drum Stick Count-In 28 Starting A Song With A Count-In 28 Recording A Loop With The Band Using A Count-In 28 Providing Hints To The TRIO+ When Teaching 29 Pre-Selecting A Style 29
Matching Tempo To A Previous Song Part Using The Metronome 29
Tempo Interpretation Using The ALT TIME Button 30
Managing Songs 31
Storing Songs 31
Creating A New Song 31
Loading A Song 31
Clearing A Song 31
Using An FS3X Footswitch 32 The Genres & Styles 33
TRIO Manager Software/Firmware Updates 57
Specifications 58
INTRODUCTION
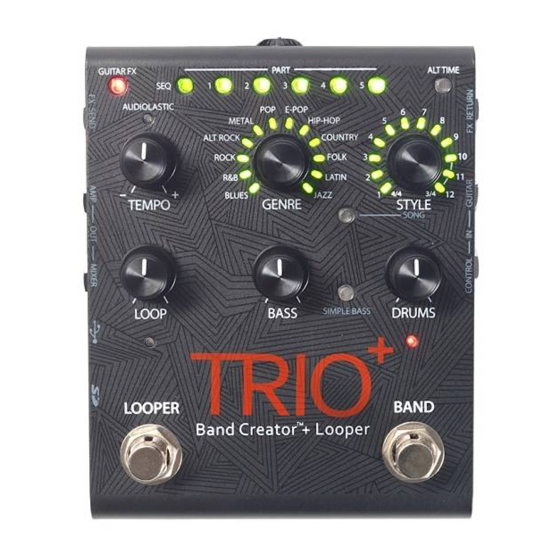
Thanks for choosing the DigiTech® TRIO+ Band Creator™ + Looper pedal. The TRIO+ is a simple-to-use guitar pedal that listens to the way you play and automatically generates bass and drum parts that match your song. Just plug your guitar into the TRIO+, press the BAND footswitch to teach the TRIO+ your chords and rhythm, then press the BAND footswitch again to start playing with your own personal band! Bass and drum levels can be adjusted for the perfect mix using the BASS and DRUMS knobs. The SIMPLE BASS button lets you select between 3 bass line modes for busy or simple bass lines.
Press the LOOPER footswitch to record a loop along with an unlimited number of overdubs. Loop playback level can be controlled using the LOOP knob. Loops can be recorded by themselves, operating just like a traditional looper, or along with the band. Apply the built-in effects to your guitar signal by enabling the GUITAR FX button, and/or connect your favorite effects to the FX SEND and FX RETURN jacks.
The TRIO+ provides 12 music genres to choose from including: Blues, R&B, Rock, Alternative Rock, Metal, Pop, Electronic Pop, Hip-Hop, Country, Folk, Latin, and Jazz. 12 song styles are available for each genre and can be selected using the STYLE knob, including selection between 3/4 and 4/4 time signatures. Multi-colored LEDs around the STYLE knob indicate which styles best match your song.
The TRIO+ can learn up to 5 different song parts, perfect for creating an intro, verse, chorus, bridge, and outro. Song parts can be recalled on-the-fly as the song plays back or pre-programmed as a sequence for automated playback. An optional DigiTech FS3X Footswitch can be connected to the CONTROL IN jack for additional handsfree control with 3 modes of operation to select from.
The tempo of songs can be varied continuously using the TEMPO knob. The ALT TIME button can be used to quickly try out different interpretations of the song whenever half or double time alternatives are available. Each song part can be programmed for normal or high intensity, making it possible to increase the impact of your chorus or bridge.
Auto-sensing outputs automatically adapt to optimize the audio for your application. Connect the AMP output to your guitar amplifier if using one. Connect the MIXER output to a mixer if no guitar amplifier is being used and the TRIO+ will automatically apply a guitar speaker cabinet emulator to the guitar signal, making it sound as if you were playing through a guitar amp/cabinet. When connected to both the MIXER and AMPLIFIER outputs, the guitar signal will be fed to the AMP output and the bass and drums will be fed to the MIXER output. There’s also a headphone output with dedicated level control, so you can practice or write songs whenever, wherever inspiration strikes.
Up to 12 songs along with loops can be stored to the included microSD card. Need to create more songs? No problem. Just insert a new microSD card and you’re ready to start teaching the band your new songs. To manage all your songs and loops on a computer, download the free TRIO Manager software from digitech.com, available for Windows® and Mac®.
1
FEATURES
•12 Music Genres To Choose From
•12 Styles Selectable Per Genre
•Can Learn Up To 5 Different Parts Per Song
•Programmable Song Part Intensities For Creating Song Dynamics
•Programmable Song Part Sequencer
•3 Bass Line Modes
•Built-in Looper With Unlimited Overdubs & 1 Layer Of Undo/Redo
•Adjustable Tempo With Audiolastic™ Time Stretching & Quick Selection Of Alternate Time Interpretation
•Independently Adjustable Level Controls For Bass, Drums, & Loops
•Built-In Guitar Effects Designed For Each Genre
•Amp & Mixer Outputs
•FX Loop For Connecting External Effect Pedals
•1/8″ (3.5 mm) Mini Headphone Output With Headphone Level Control
•Up To 12 Songs With Loops Can Be Stored To A microSD Card (Included)
•Additional Hands-Free Control Available Using An Optional DigiTech FS3X Footswitch
•Dual Soft Touch Vacuum Switches
•Rugged Design
•Included Power Adapter
2
QUICK START
To get up and running quickly with the TRIO+, see the TRIO+ Quick Start Guide that was included in the box or visit http://digitech.com/en-US/products/trio-plus#documentation.
3

MICROSD CARD INFORMATION
The TRIO+ autosaves your work onto the microSD card so you don’t need to worry about remembering to save parts and songs. To ensure that you don’t unexpectedly lose data, always stop the TRIO+ playback and wait at least 5 seconds without making changes to your songs before ejecting the microSD card or removing power to the pedal.
Supported microSD Cards
The TRIO+ supports microSD cards that meet the following specifications:
•microSDHC
•8 GB–32 GB
•Class 10
What’s Stored To The microSD Card
The microSD card stores the following information:
•Recorded Loops
•Song Info
•User Preferences (including FS3X footswitch configuration)
See ‘Specifications’ on page 58 for information on the maximum loop recording time.
Changing The microSD Card
To change the microSD card:
1.If any changes have been made to a part or song, wait at least 5 seconds before removing the card.
2.Press the card in with your thumb then slowly release. The card will partially eject and all 5 PART buttons will flash amber, indicating that the TRIO+ does not have a valid microSD card inserted.
3.Grasp the card with your fingers and pull it out, noting the orientation of the card.
4.Insert the replacement card using the same orientation noted in the previous step. Press the card all the way in then release. The card will lock into place and the 5 PART buttons will flash amber sequentially for about 5 seconds, then the card will be ready for use. When a valid card is detected, the STYLE LEDs will circle green and the last active song used for that card will be loaded.
NOTE: If an SD card is not detected by the TRIO+, all PART buttons will flash amber. If an incompatible SD card is inserted or if there is an error when reading the card, all PART buttons will flash red.
WARNING! When a microSD card is inserted into the TRIO+ for the first time, it will be formatted for the TRIO+ and overwritten. Any existing data on the microSD card will be lost.
Accessing The microSD Card
The song and loop data on the microSD card is stored in a highly optimized format that is not directly accessible from a computer and must be accessed using the TRIO Manager software. See ‘TRIO Manager Software/ Firmware Updates’ on page 57 for more information.
4
CONNECTORS & USER INTERFACE
Connectors
1.FX SEND Jack
Connect this output to the input of an external guitar effect stomp box or pedalboard. See ‘Using External Effects Connected To The FX Loop’ on page 16 for more information.
2.FX RETURN Jack
Connect the output of an external guitar effect stomp box or pedalboard to this input. See ‘Using External Effects Connected To The FX Loop’ on page 16 for more information.
3.AMP OUT Jack
Connect this output to the input of a guitar amplifier. Note that the output jacks are auto-sensing and output functionality will change depending on which outputs are connected. See ‘Output Jack Operation’ on page 15 for more information.
4.GUITAR IN Jack
Connect your guitar to this jack. The guitar signal fed to this jack should be unprocessed. If using external effects, they should be connected to the FX SEND and RETURN jacks.
5.MIXER OUT Jack
Connect this output to the line input of a mixer. Note that the output jacks are auto-sensing and output functionality will change depending on which outputs are connected. See ‘Output Jack Operation’ on page 15 for more information.
6.CONTROL IN Jack
Connect an optional DigiTech FS3X Footswitch to this jack for additional hands-free control. See ‘Using An FS3X Footswitch’ on page 32 for more information.
7.USB Port
This Mini USB port is used for updating the TRIO+’s firmware and connecting to the free TRIO Manager Software. See ‘TRIO Manager Software/Firmware Updates’ on page 57 for more information.
5
8 9 10
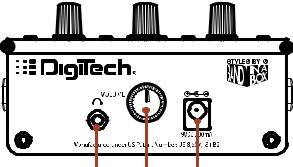
8.HEADPHONE OUT Jack
Connect a pair of headphones to this 1/8”(3.5 mm) mini jack. This output is optimized for headphones having an impedance of 60 Ohms or less. Note that the output jacks are auto-sensing and the AMP and MIXER outputs will be muted when a plug is connected to the HEADPHONE OUT jack. See ‘Output Jack Operation’ on page 15 for more information.
9.VOLUME Knob
Adjusts the volume of the headphone output.
10.POWER Input Jack
Connect only the included Harman power adapter to this jack. See ‘Specifications’ on page 58 for power adapter information.
6

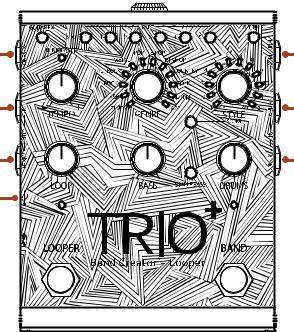
User Interface |
1 |
2 |
|
3 |
4 |
|
|
5 |
6 |
|
|
7 |
8 |
|
|
9 |
10 |
|
|
11 |
12 |
|
|
13 |
||
|
14 |
15 |
1.SEQUENCE Button
Press this button to program the song sequence. Once a sequence is programmed, pressing this button will turn Sequence mode on or off. For more information on programming a song sequence, see ‘Programming A Song Sequence’ on page 21.
2.PART Buttons
The TRIO+ can learn up to 5 different song parts (for example, an intro, verse, chorus, bridge, and outro). The PART 1-5 buttons are used to select between these 5 parts. The PART buttons have 7 states, they are:
•Off — The part has not been learned and is not selected.
•Dim Green — The part has been learned and is not selected.
•Bright Green — The part is selected.
•Dim Red — The part has been learned, is programmed for high intensity, and is not selected.
•Bright Red — The part has been learned, is programmed for high intensity, and is selected.
•Dim Amber — A loop has been recorded to the part with no backing band and the part is not selected.
•Bright Amber — A loop has been recorded to the part with no backing band and the part is selected.
See ‘Teaching The Band & Working With Song Parts’ on page 17 for more information on song parts.
3.GUITAR FX Button
Press this button to apply the built-in effects to your guitar signal. See ‘Using The Built-In Guitar Effects’ on page 16 for more information.
4.ALT TIME Button
Pressing this button selects an alternate interpretation of the selected song part’s tempo — usually this is either double or half the current tempo since this can be ambiguous. If the TRIO+ can’t find a suitable tempo and number of bars by halving or doubling, the alternate time will remain the same as the original timing. See ‘Using Alternate Time’ on page 27 for more information on using the Alternate Time feature.
7
![]()
5.TEMPO Knob & AUDIOLASTIC™ LED
The TEMPO knob adjusts the TRIO+’s global playback tempo and was designed to adjust the tempo of a song after it is complete. See ‘Adjusting Song Tempo’ on page 27 for more information on adjusting the tempo of songs.
NOTE: The AUDIOLASTIC LED must be off to record into the looper. See ‘Adjusting Song Tempo’ on page 27 for more information.
6.STYLE Knob
Selects between the various styles available for each genre. Once a song part has been learned by the TRIO+, the multi-colored LEDs surrounding the STYLE knob will light to indicate which selections are the best match for the part — based on the selected genre — and the style that best matches the part will be automatically selected. Note that there is also a way to «tell» the TRIO+ that you want a certain style prior to teaching it a part — see ‘Pre-Selecting A Style’ on page 29 for more information.
The STYLE LED which is brightest indicates the current selection. There are 2 possible colored states for each LED, they are:
•Green — Indicates a style which matches both time signature and feel (straight or swing).
•Amber — Indicates a style which matches the time signature of your song, but has a different feel.
For all genres, styles 1-9 are in 4/4 and styles 10-12 are in 3/4. If the TRIO+ detects that you played in 4/4, then the 4/4 LEDs will be lit green or amber and the 3/4 LEDs will be off. You can still select 3/4 options by turning the knob to select a 3/4 style at which point the 3/4 LEDs will light and the 4/4 LEDs will go off. The same will happen in reverse if the TRIO+ detects that you played in 3/4.
The first time you teach the TRIO+ a progression it will choose the best style for your chord progression based on the genre that is selected. It doesn’t matter which genre you use when teaching the TRIO+ a song. You can always switch between genres and styles at any time to hear a different groove or feel based on your original song idea. See ‘The Genres & Styles’ on page 33 for more information on the available styles.
7.GENRE Knob
Selects the genre type for the selected song part. Genres can be selected before or after teaching the TRIO+ your song parts, so you’re free to experiment and change genres at any time. Genre selection is retained when you select a new part to teach the TRIO+ or when starting a new song. Genre selection can be made independently for each song part.
As you select genres, the LEDs around the STYLE knob will update to identify which styles are best suited for your song part based on the genre selected. When a genre is selected for the first time, after the TRIO+ learns your song, the TRIO+ will automatically choose from one of the styles shown in green that best match your playing. See ‘The Genres & Styles’ on page 33 for more information on the available genres.
8.SONG Button
Press this button to access song selection. See ‘Managing Songs’ on page 31 for more information on loading, clearing, and creating new songs.
8
9.LOOP Knob
Adjusts the level of your recorded loop and overdubs in the mix. When set to the 12 o’clock position, loop playback level will match the guitar input level (unity gain).
10.DRUMS Knob
Adjusts the level of the drums in the mix.
11.BASS Knob
Adjusts the level of the bass in the mix.
12.SIMPLE BASS Button
Enabling this button will select a simpler bass line. This button has 3 states, they are:
•Off — The TRIO+ will play an active bass line that fits with the detected chords (this is the default setting).
•Green — The TRIO+ will play a simplified bass line, playing only the root notes of each chord.
•Red — The TRIO+ will play an even simpler bass line, playing only the first root note of each bar and sustaining it until the next bar.
13.microSD Card Slot
A compatible microSD card (included) must be properly installed in this slot for the TRIO+ to operate. If a compatible microSD card is not detected, all PART buttons will flash amber. See ‘microSD Card Information’ on page 4 for further information on microSD card installation and compatibility.
9
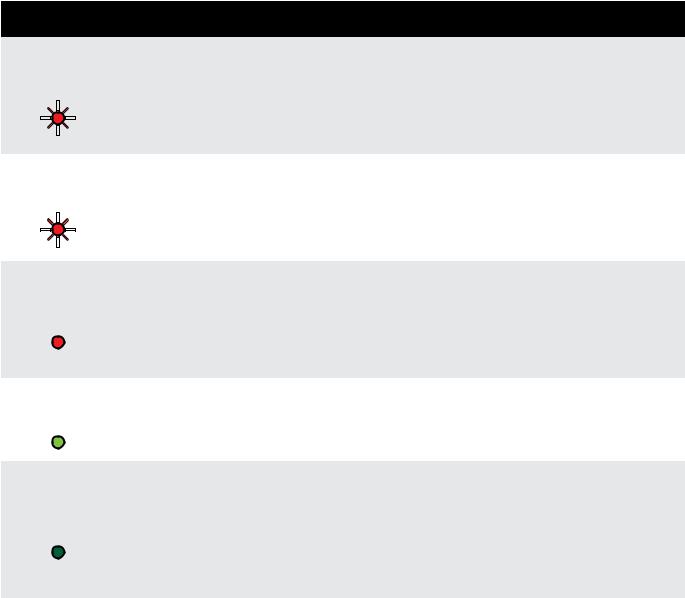
14.LOOPER Footswitch & LED
Press this footswitch to record loops and overdubs. For more information on using the looper, see
‘Recording Loops & Overdubs’ on page 22.
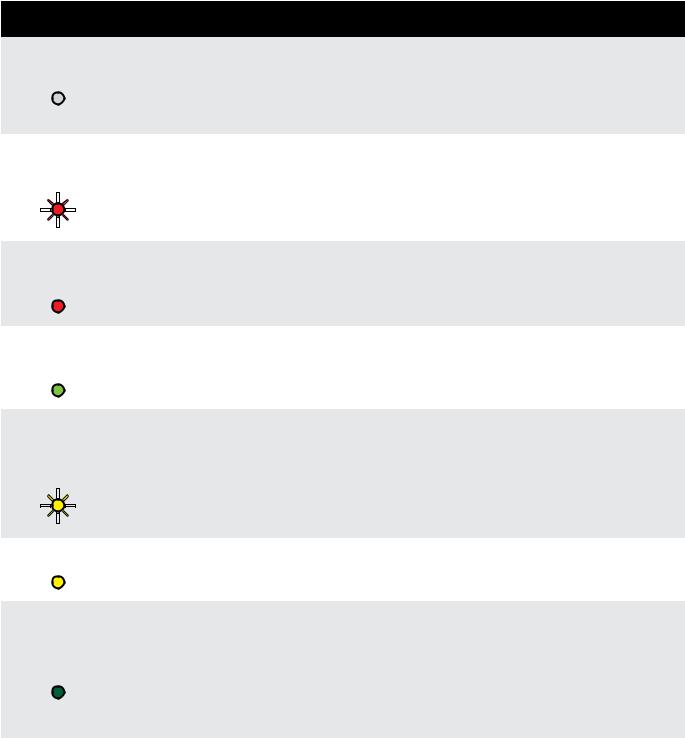
The LOOPER LED indicates the status of the looper for the selected song part. The following table describes the available states of the LOOPER LED.
|
LOOPER LED |
State |
Description |
||||||
|
Off |
Loop |
No loop has been recorded for the selected part and the looper is |
||||||
|
not armed for recording. Press the LOOPER footswitch to arm the |
||||||||
|
Hasn’t Been |
||||||||
|
looper for recording — note that the AUDIOLASTIC™ LED must be |
||||||||
|
Recorded |
||||||||
|
off to record loops. |
||||||||
|
Rapidly |
Looper |
The looper is armed for recording and recording will begin when |
||||||
|
Flashing Red |
||||||||
|
Armed & |
you start playing (when the looper is armed from a stopped state) |
|||||||
|
Ready To |
or when the song part returns to the start (when the looper is |
|||||||
|
Record |
armed during band playback). |
|||||||
|
Solid Bright |
Recording |
|||||||
|
Red |
The looper is recording what you are playing. |
|||||||
|
Loop |
||||||||
|
Solid Bright |
A loop has been recorded for the selected part and is playing back. |
|||||||
|
Green |
Playing Loop |
|||||||
|
Press the LOOPER footswitch to record overdubs. |
||||||||
|
Rapidly |
Looper |
|||||||
|
Flashing |
||||||||
|
Amber |
Armed For |
Playback is stopped, the looper is armed for overdub recording, and |
||||||
|
Overdub |
recording will begin when you start playing. |
|||||||
|
Recording |
||||||||
|
Solid Amber |
Recording |
The looper is recording an overdub. Press the LOOPER footswitch to |
||||||
|
Overdub |
stop overdub recording. |
|||||||
|
A loop has been recorded, but looper and band playback is |
||||||||
|
Solid Dim |
Loop |
stopped. Press the BAND footswitch to start band and loop |
||||||
|
Recorded |
playback. Press the LOOPER footswitch to arm overdub recording. |
|||||||
|
Green |
||||||||
|
& Playback |
Hold the LOOPER footswitch for 2 seconds to clear the loop. |
|||||||
|
Stopped |
Immediately hold the LOOPER footswitch again for 2 seconds to |
|||||||
|
restore the cleared loop. |
||||||||
10
15.BAND Footswitch & LED
Pressing this footswitch changes the TRIO+’s state. It is used to teach the band, start and stop band and loop playback, and clear the band. See ‘Teaching The TRIO+ Band’ on page 17 for more information.
The BAND LED indicates the status of the band for the selected song part. The following table describes the available states of the BAND LED.
|
BAND LED |
State |
Description |
||||||
|
Slowly |
The selected song part has not yet been learned by the TRIO+. Press |
|||||||
|
Flashing Red |
Band Hasn’t |
the BAND footswitch to arm the TRIO+ for learning. Note that the |
||||||
|
TRIO+ cannot learn a song part if a loop has already been recorded |
||||||||
|
Learned Part |
||||||||
|
with no backing band. In this case, the loop must first be cleared |
||||||||
|
before the TRIO+ will be able to learn the part. |
||||||||
|
Rapidly |
Band Armed |
|||||||
|
Flashing Red |
The TRIO+ is armed and waiting for you to start playing so it can |
|||||||
|
& Ready To |
||||||||
|
learn your song part. |
||||||||
|
Learn |
||||||||
|
Solid Bright |
The TRIO+ is currently learning the song and you should be playing |
|||||||
|
Band |
to teach the TRIO+ the chords and timing. Pressing the BAND |
|||||||
|
Red |
footswitch will stop the learning phase and begin band playback. In |
|||||||
|
Learning |
||||||||
|
the event you make a mistake, holding the BAND footswitch for 2 |
||||||||
|
seconds will quickly clear the learned part so you can try again. |
||||||||
|
Solid Bright |
The TRIO+ is playing the song. Pressing the BAND footswitch will |
|||||||
|
Green |
Band Playing |
stop band playback. Holding the BAND footswitch for 2 seconds |
||||||
|
will queue up the next learned part for automatic playback. |
||||||||
|
The TRIO+ has learned the selected song part, but band and loop |
||||||||
|
Solid Dim |
playback is stopped. Press the BAND footswitch to start band and |
|||||||
|
Band |
loop playback. Or, while stopped, hold the BAND footswitch for 2 |
|||||||
|
Green |
||||||||
|
Stopped |
seconds to clear the selected part and loop. Immediately hold the |
|||||||
|
BAND footswitch again for 2 seconds to restore the cleared part |
||||||||
|
and loop. |
||||||||
11
MAKING CONNECTIONS/APPLYING POWER
To connect the TRIO+ pedal:
1.Turn down the guitar amp or headphone volume. If connecting to a mixer, turn down the gain/trim control and lower the fader on the channel you’re connecting to.
2.Make all connections to the TRIO+ as shown in ‘Connection Diagrams’ on page 13.
3.Connect the included Harman power adapter to the TRIO+ POWER input connector then connect the other end to an available AC outlet and wait for the TRIO+ to boot.
4.Turn your guitar volume all the way up then strum and gradually increase the guitar amp or headphone volume until the desired level is achieved. If using a mixer, set the channel fader to unity (0) then raise the gain/trim control for the desired level.
12
CONNECTION DIAGRAMS
Amplifier Setup
|
Harman |
||
|
PS0913DC (9VDC) |
||
|
Power Adapter |
Guitar Effects |
|
|
IN |
||
|
OUT |
IN |
|
OUT |
IN |
||
|
Amp |
OUT |
IN |
|
|
OUT |
IN |
TRS CABLE |
|
|
FS3X Footswitch |
|
Use only unbalanced TS instrument cables for audio connections. |
Optional |
NOTE: When only the AMP OUT jack is used, an inverse cabinet emulation is added to the bass and drums signal. See ‘Output Jack Operation’ on page 15 for more information.
Mixer Setup
|
Harman |
|
|
PS0913DC (9VDC) |
|
|
Power Adapter |
Guitar Effects |
FS3X Footswitch
|
Use only unbalanced TS instrument cables for audio connections. |
Optional |
|||||||||||||||||||||||
NOTE: When only the MIXER OUT jack is used, speaker cabinet emulation is added to the guitar signal. See
‘Output Jack Operation’ on page 15 for more information.
13
Amplifier + Mixer Setup
|
Harman |
||
|
PS0913DC (9VDC) |
||
|
Power Adapter |
Guitar Effects |
|
|
IN |
||
|
OUT |
IN |
|
OUT |
IN |
|||
|
Amp |
OUT |
IN |
||
|
OUT |
IN |
TRS CABLE |
||
|
IN |
Mixer |
|||
|
FS3X Footswitch |
|
Use only unbalanced TS instrument cables for audio connections. |
Optional |
|||||||||||||||||||||||
NOTE: When connected to both the MIXER and AMP OUT jacks, the guitar signal will be fed to the AMP output and the bass and drum parts will be fed to the MIXER output. See ‘Output Jack Operation’ on page 15 for more information.
Headphone Setup
|
Harman |
Headphones |
|
PS0913DC (9VDC) |
|
|
Power Adapter |
Guitar Effects |
OUT 

 IN
IN
OUT 


 IN
IN
|
IN |
|
|
IN |
TRS CABLE |
|
FS3X Footswitch |
|
Use only unbalanced TS instrument cables for audio connections. |
Optional |
NOTE: When the HEADPHONE OUT jack is used, AMP and MIXER outputs will be muted. The signal present in the headphones will be stereo and speaker cabinet emulation will be applied to the guitar signal. See
‘Output Jack Operation’ on page 15 for more information.
14
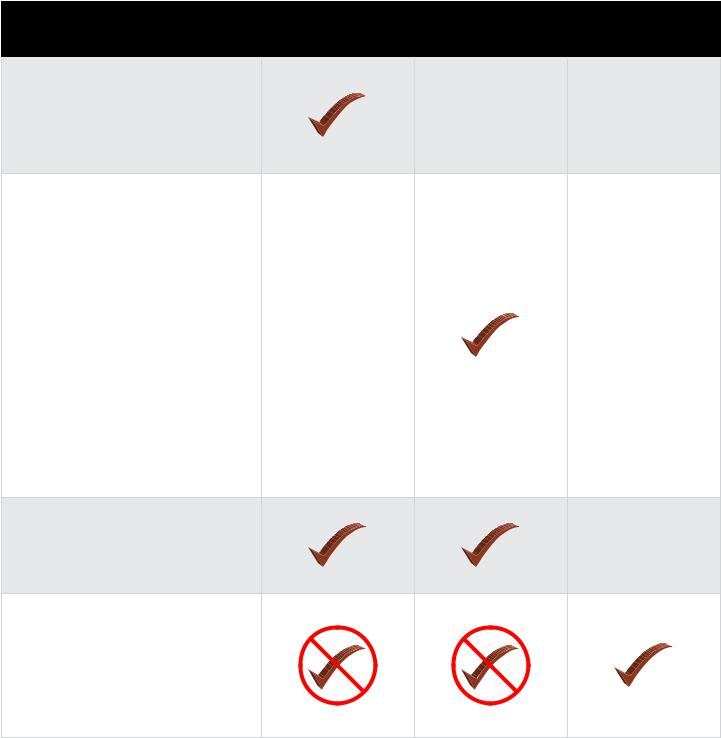
OUTPUT JACK OPERATION
The output jacks have an auto-sensing feature which allows the TRIO+ to automatically optimize the outputs for the application. The chart below describes how the TRIO+ will operate depending on which outputs are connected.
|
Operation |
MIXER OUT |
AMP OUT |
HEADPHONE OUT |
|
Description |
Connected |
Connected |
Connected |
Speaker cabinet emulation will be applied to the guitar signal,
including loops, and a mono mix of the bass, drums, and guitar will be sent to the MIXER OUT jack.
A mono mix of the bass, drums, and guitar signal will be sent to the AMP OUT jack. Complimentary equalization will be applied to the drum and bass parts to make them sound better when played back through a guitar speaker cabinet.
NOTE: When using your guitar amp to play the drums and bass from the TRIO+, set the amp to run as cleanly as possible in order to avoid distorting the backing band. The drums and bass are pre-EQ’d to sound best through a clean amp with «flat» EQ settings.
The guitar signal, including loops, will be fed to the AMP OUT jack only. The mix of bass and drums will be sent to the MIXER OUT jack.
Speaker cabinet emulation will be applied to the guitar signal.
A stereo mix of the bass, drums, and guitar will be sent to the HEADPHONE OUT jack. The MIXER and AMP outputs will be muted.
15

USING GUITAR EFFECTS
The TRIO+ provides two ways to add effects to your guitar signal: you can use the built-in effects and/or connect your favorite outboard effects to the FX Loop. Whichever way you decide to work, the effects will be applied to your guitar signal when playing or while recording loops and overdubs. The TRIO+ will «listen» to the clean guitar signal at the GUITAR IN jack when learning your songs, so you don’t have to worry about disabling effects when teaching the TRIO+.
Using The Built-In Guitar Effects
The TRIO+’s built-in effects can be turned on or off using the GUITAR FX button. The button has 3 states, they are:
•LED Off — The built-in guitar effects are disabled.
•LED Green — Indicates that a rhythm guitar effect will be applied to your guitar signal.
•LED Red — Indicates that a lead guitar effect will be applied to your guitar signal.
NOTE: Effect types are dependent on the genre selected.
Using External Effects Connected To The FX Loop
External guitar effects can be connected to the FX SEND and FX RETURN jacks. Any externally-connected effects should be connected to these jacks rather than the TRIO+’s GUITAR IN jack. This allows the external effects to be used without affecting TRIO+ operation.
See ‘Connection Diagrams’ on page 13 to see an example of external effects connected to these jacks.
16
 Loading…