- Manuals
- Brands
- Xerox Manuals
- All in One Printer
- DocuCentre SC2020
- User manual
-
Contents
-
Table of Contents
-
Troubleshooting
-
Bookmarks
Quick Links
®
®
Xerox
DocuCentre
SC2020
User Guide
Related Manuals for Xerox DocuCentre SC2020
Summary of Contents for Xerox DocuCentre SC2020
-
Page 1
® ® Xerox DocuCentre SC2020 User Guide… -
Page 2
©2015 Xerox Corporation. All rights reserved. Xerox and Xerox and Design are trademarks of Xerox Corporation in the United States and/or other counties. Paragraph Tools is copyright © 2001-2007 by Silicon Prairie Software, LLC and Steven Kubis. Changes are periodically made to this document. Changes, technical inaccuracies, and typographic errors will be corrected in subsequent editions. -
Page 4: Table Of Contents
Activating the Communication Port To Use ……….36 ® ® Xerox DocuCentre SC2020…
-
Page 5
Loading Paper in Tray 5 (bypass) …………63 ® ® Xerox DocuCentre SC2020… -
Page 6
Canceling the Fax Being Received ……….. 100 ® ® Xerox DocuCentre SC2020… -
Page 7
Major Print Driver Functions …………148 ® ® Xerox DocuCentre SC2020… -
Page 8
Replacing the Drum Cartridge …………244 ® ® Xerox DocuCentre SC2020… -
Page 9
Optional Components …………..308 ® ® Xerox DocuCentre SC2020… -
Page 10
Notes and Restrictions on the Use of the Print Feature ……. . 311 ® ® Xerox DocuCentre SC2020… -
Page 11: Before Using The Device
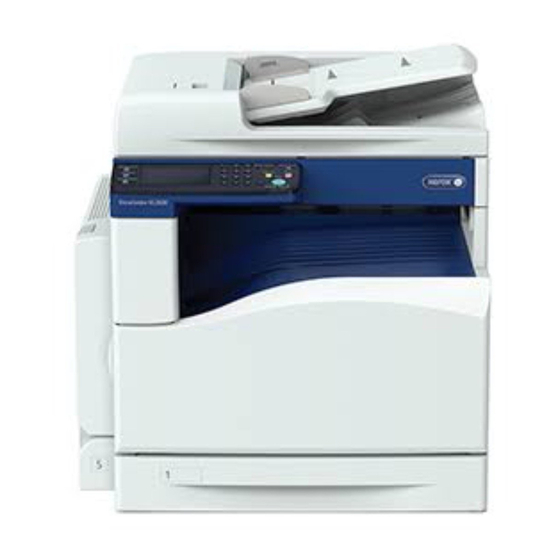
Device. Preface Thank you for selecting the DocuCentre SC2020, referred to as the Device. This guide describes how to operate the device and the precautions you should follow during operation. To get the most out of the device and to use it effectively, be sure to read this guide before use.
-
Page 12: Accompanying Manuals
Fax: Describes the basic operations and features of the fax feature. • Scan: Describes the basic operations and features of the scan feature. • Print: Describes the basic printing operations. • Tools: Describes how to change the default settings. ® ® Xerox DocuCentre SC2020 User Guide…
-
Page 13: Conventions
Loading the document or paper in portrait orientation when viewed from ,Portrait (P) the front of the device. ,Landscape (L) • Loading the document or paper in landscape orientation when viewed from the front of the device. ® ® Xerox DocuCentre SC2020 User Guide…
-
Page 14: Safety Notes
CAUTION: Any unauthorized alteration including an addition of new functions or connection to external devices may not be covered by the product warranty. Contact your local Xerox representative for more information. Follow all warning instructions marked on this product. The warning marks stand for the followings: Used for item that if not followed strictly, can lead death or severe or fatal injuries and the possibility to do it is comparatively high.
-
Page 15: Electrical Safety
Do not damage or alter the power cord. Damage and alteration may generate heat and eventually cause electric shock or a fire accident. If the power cord is damaged or insulated wires are exposed, contact your local Xerox representative for its replacement. Do not use a damaged or uninsulated cord to avoid the risk of electric shock and a fire accident.
-
Page 16: Device Installation
• the power cord is not cracked or worn down. Once you notice any unusual condition, switch off and unplug this product first and contact your local Xerox representative. Device Installation WARNING: Do not locate this product where people might step on or trip over the power cord. Friction or excessive pressure may generate heat and eventually cause electric shock or a fire accident.
-
Page 17
10 ° 10 ° 10 ° 10 ° To bundle wires and cables, always use the cable ties and spiral tubes that Xerox supplies. Otherwise, it may cause some defects. ® ® Xerox DocuCentre SC2020 User Guide… -
Page 18
Humidity: 15–85% When the product is left in a chilly room and the room is rapidly warmed up by heater, dew condensation may form inside the product and cause a partial deletion on printing. ® ® Xerox DocuCentre SC2020 User Guide… -
Page 19: Operational Safety
This may cause injuries. 2/22/16When you need to open paper trays, do it one after the other. If you need to pull out a tray to remove paper jam, contact your local Xerox representative. Do not pull out a tray, otherwise it may cause injuries.
-
Page 20
Do not apply excessive force to hold thick document on the document glass. It may break the glass and cause injuries. To move this product to another location, contact your local Xerox representative. Ventilate well during extended operation or mass copying. It may affect the office air environment due to odor such as ozone in a poorly ventilated room. -
Page 21: Consumables
Never throw a toner cartridge into an open flame. Remaining toner in the cartridge may catch fire and cause burn injuries or explosion. If you have a used toner cartridge no longer needed, contact your local Xerox representative for its disposal.
-
Page 22: Regulation
Changes and modifications to this product not specifically approved by Xerox may void the user’s authority to operate this equipment.
-
Page 23: Environment
Before Using the Device Environment • For environmental protection and efficient use of resources, Xerox reuses returned toner cartridges, waste toner bottles and drum cartridges to make recycle parts, recycle materials or energy recovery. • Proper disposal is required for toner cartridges, waste toner bottles and drum cartridges no longer needed.
-
Page 24: Wide Dhcp Client
SOFTWARE. ALSO, THERE IS NO WARRANTY IMPLIED OR OTHERWISE, NOR IS SUPPORT PROVIDED. Feedback of the results generated from any improvements or extensions made to this software would be much appreciated. Any such feedback should be sent to: Akihiro Tominaga ® ® Xerox DocuCentre SC2020 User Guide…
-
Page 25: Md5
Except as contained in this notice, the name of SunSoft, Inc. shall not be used in advertising or otherwise to promote the sale, use or other dealings in this Software without written authorization from SunSoft Inc. ® ® Xerox DocuCentre SC2020 User Guide…
-
Page 26: Jpeg Library
1993 by Sun Microsystems, Inc. All rights reserved. © • powf.c: * Copyright 1993 by Sun Microsystems, Inc. All rights reserved. © • scalbnf.c: * Copyright 1993 by Sun Microsystems, Inc. All rights reserved. ® ® Xerox DocuCentre SC2020 User Guide…
-
Page 27: Legal Notice
Copyright material or trademarks without the consent of the owner • Postage stamps and other negotiable instruments This list is not inclusive and no liability is assumed for either its completeness or accuracy. In case of doubt, contact your legal counsel. ® ® Xerox DocuCentre SC2020 User Guide…
-
Page 28
Before Using the Device ® ® Xerox DocuCentre SC2020 User Guide… -
Page 29: Environment Settings
To use the device as a network printer, you need to activate the port to use for printing. – LPD: Activate this setting when using the LPD port. – Port9100: Activate this setting when using the Port9100 port. ® ® Xerox DocuCentre SC2020 User Guide…
-
Page 30: Scan Feature
The device supports the following communication networks for fax transmissions: • Public switched telephone network (PSTN) • Private branch exchanges (PBX) You must also make settings in [Region] and [Date & Time] to use the Fax functions on this device. ® ® Xerox DocuCentre SC2020 User Guide…
-
Page 31: Interface Cables
Press the power switch to the [ ] position to turn the power OFF. Note: Ensure that the display is turned off. Connect a USB cable to the USB port. Connect the other end of the USB cable to the computer. ® ® Xerox DocuCentre SC2020 User Guide…
-
Page 32: Using The Ethernet Interface
Ensure that the display is turned off. Connect a network cable to the Ethernet port. Note: Prepare a network cable suitable for your network connection. When you replace the network cable, contact our Customer Support Center. ® ® Xerox DocuCentre SC2020 User Guide…
-
Page 33: Setting The Network Environment
Print the System Settings Report to check whether the device IP address has already been set. You can also check the IP address in the following methods: • On the message field of the touch screen • On the [About This MFP] screen ® ® Xerox DocuCentre SC2020 User Guide…
-
Page 34
For information on how to check on the [About This MFP] screen, refer to Checking the Device IP Address on page 230. • For information on how to check using CentreWare Internet Services, refer to the online Help of CentreWare Internet Services. ® ® Xerox DocuCentre SC2020 User Guide… -
Page 35: Setting The Device Ip Address (Ipv6)
For information on how to set the IP address using CentreWare Internet Services, refer to the online Help of CentreWare Internet Services. Setting the Device IP Address (IPv6) The device supports IPv6 addresses in an IPv6 network environment. ® ® Xerox DocuCentre SC2020 User Guide…
-
Page 36: When Using The Printer Setup Utility For Setting The Ip Address
Driver CD Kit CD-ROM. When using the Printer Setup Utility for Setting IP Address, make sure that the device is not in use. Insert the Driver CD Kit CD-ROM into your computer. The Launcher runs automatically. ® ® Xerox DocuCentre SC2020 User Guide…
-
Page 37
As a list of available IP addresses and Mac addresses appears, select the device and click [Next]. If you already have the IP address of the device, click [Enter IP Address] and directly enter the IP address on the displayed window. ® ® Xerox DocuCentre SC2020 User Guide… -
Page 38
For information on how to check on the About This MFP screen, refer to Checking the Device IP Address on page 230. • For information on how to check using CentreWare Internet Services, refer to the online Help of CentreWare Internet Services. ® ® Xerox DocuCentre SC2020 User Guide… -
Page 39: Activating The Communication Port To Use
Help of CentreWare Internet Services. Using CentreWare Internet Services CentreWare Internet Services CentreWare Internet Services provides services such as changing settings using a web browser on a computer connected to a TCP/IP network environment. ® ® Xerox DocuCentre SC2020 User Guide…
-
Page 40: Supported Environments And Settings
See your web browser’s manual for how to make the setting. You will also need to make other web browser settings to make CentreWare Internet Services work properly. ® ® Xerox DocuCentre SC2020 User Guide…
-
Page 41: Starting Centreware Internet Services
When specifying a port number, add «:» and the port number after the IP address or the Internet address. • The IPv6 address cannot be entered manually in some cases depending on the web browser that you use. • HTTPS is not supported. ® ® Xerox DocuCentre SC2020 User Guide…
-
Page 42: Installing The Print Driver/Scan Driver
The CD-ROM contains the following print driver. Print Driver Name Description DocuCentre SC2020 Click [Print/Fax Driver] in the [Main] menu of the Driver CD Kit to start installation. The standard print driver converts the data created by the application software to images before sending them to the printer.
-
Page 43: Uninstalling
CD-ROM Documentation (HTML) included on the CD-ROM. Uninstalling Other Software To uninstall other software installed from the Driver CD Kit CD-ROM, see the application Readme file. Readme files can be displayed from the Product Information (HTML) on the CD-ROM. ® ® Xerox DocuCentre SC2020 User Guide…
-
Page 44
Environment Settings ® ® Xerox DocuCentre SC2020 User Guide… -
Page 45: Product Overview
Holds document in place. Document glass Place document here. Control panel Contains the buttons, the LED indicators, and the touch screen used for operations. For more information, refer to Control Panel on page 48. ® ® Xerox DocuCentre SC2020 User Guide…
-
Page 46: Right Side, Rear
Ethernet Port Connect a network cable. USB Port Connect a USB 2.0 cable. Power switch Switches the power of the device on and off. For more information, refer to Power Source on page 45. ® ® Xerox DocuCentre SC2020 User Guide…
-
Page 47: Inside
Magenta drum cartridge Contains the photo conductor for magenta toner. [R3] Cyan drum cartridge [R2] Contains the photo conductor for cyan toner. Black drum cartridge [R1] Contains the photo conductor for black toner. ® ® Xerox DocuCentre SC2020 User Guide…
-
Page 48: Duplex Automatic Document Feeder
Scans the loaded documents. Note: In this guide, the duplex automatic document feeder is referred to as the document feeder. Power Source Turning the Power On The following describes how to switch the power on. ® ® Xerox DocuCentre SC2020 User Guide…
-
Page 49: Turning The Power Off
When powering the device on after it has been switched off, wait 15 seconds after the display goes off. Before switching the power off, make sure that the device has completed all copy or print jobs. Then, make sure that the <Data> LED does not light up. ® ® Xerox DocuCentre SC2020 User Guide…
-
Page 50: Power Saver Modes
The fusing unit life is largely influenced by power distribution time on the device. Setting the amount of time the device waits before activating the Power Saver function to a long value will keep the device’s ® ® Xerox DocuCentre SC2020 User Guide…
-
Page 51: Exiting Power Saver Modes
Machine Status Error Data Component Function Touch Screen Displays the operation menu items and the device status messages. Numeric keypad Press these buttons to enter numbers (such as number of copies) or text. ® ® Xerox DocuCentre SC2020 User Guide…
-
Page 52
IP address. <Job Status> button Press this button to check/cancel a current job or pending job. <Services Home> button Press this button to display the Services Home screen. ® ® Xerox DocuCentre SC2020 User Guide… -
Page 53: Touch Screen — Services Home Screen
You can also limit the copy function by using Copy Auditron. Notes: • For more information on Copy Auditron, refer to Copy Auditron on page 183. • For more information on Print Auditron, refer to Print Auditron on page 183. ® ® Xerox DocuCentre SC2020 User Guide…
-
Page 54: Entering Characters
During operations, a screen for entering text sometimes appears. The following describes how to enter text. Note: You can select the keyboard layout from QWERTY, AZERTY, and QWERTZ. For information on how to select the keyboard layout, refer to Keyboard Layout on page 213. ® ® Xerox DocuCentre SC2020 User Guide…
-
Page 55: Using The Number Pad
Redial/Pause Power Saver Clear All Stop Start Error Data Available Characters You can enter the characters as follows by using the number pad: 0 to 9, * and #. ® ® Xerox DocuCentre SC2020 User Guide…
-
Page 56: Setting The Options Configuration
The following procedure uses Windows 7 and PCL 6 driver as an example. The procedure differs depending on the OS and the print driver. Select [Start] > [Devices and Printers]. Right-click the printer icon of the DocuCentre SC2020 and select [Printer properties]. Click the [Configuration] tab. ®…
-
Page 57: If [Printer Searching Method] Is Displayed
Click [Bi-Directional Setup]. Click [Get Information from Printer]. If [Printer Searching Method] is displayed The device information is not loaded onto the print driver. Complete the following operations. Select [Specify Address], and click [Next]. ® ® Xerox DocuCentre SC2020 User Guide…
-
Page 58: Cooling Mode
Do not open the front cover or switch off the device during the mode. • For screen B: During the Cooling mode, open the cover illustrated on the screen to reduce the time for cooling. ® ® Xerox DocuCentre SC2020 User Guide…
-
Page 59: Loading Paper
Use of non-recommended paper types may result in paper jams, lower print quality, malfunctions, or damage to the device. To achieve optimum device performance, use only paper types recommended by Xerox. If you desire to use paper other than the paper recommended by Xerox, contact our Customer Support Center. CAUTIONS: •…
-
Page 60: Supported Paper Weights And Sheet Counts
(Up to 10 mm) 185.7 kg When using 80 g/m paper When using Xerox standard paper Notes: • Paper jams may result if you attempt to print on a different paper type or size than the type or size selected in the print driver, or from a tray that does not support the loaded paper.
-
Page 61: Supported Paper Type
Before copying or printing, fan the stack of paper well and reload it in the tray. H-paper Plain Before copying or printing, fan the stack of paper well and reload it in the tray. ® ® Xerox DocuCentre SC2020 User Guide…
-
Page 62: Usable Paper
Plain DocuPaper Black Plain DocuPaper Plain Before copying or printing, fan the stack of paper well and reload it in the tray. White Label Plain Xerox Green Label Plain K-paper Plain Plain J Paper Plain JD Paper Bond PAPER ONE All Purpose…
-
Page 63: Unusable Paper
Plain Colotech + Heavyweight Heavyweight Unusable Paper Using paper not recommended by Xerox may cause a paper jam or device malfunction. Use paper recommended by Xerox. • Damp or wet paper • Paper preprinted with other printer or copying device •…
-
Page 64: Loading Paper
For more information on setting [Tray Priority], refer to Tray Priority on page 212. Loading Paper in Trays 1 and 2 The following describes the procedure for loading paper in Trays 1 and 2. ® ® Xerox DocuCentre SC2020 User Guide…
-
Page 65
• Pulling out all the trays at once may cause the device to tilt or fall, causing injury. For Tray 1, push down the metal plate. ® ® Xerox DocuCentre SC2020 User Guide… -
Page 66: Loading Paper In Tray 5 (Bypass)
Fan the stack of paper well before loading paper in a tray. It prevents paper from sticking to each other and reduces paper jams. Open the Tray 5 (bypass). Note: If necessary, pull out the extension tray. Pull out the extension tray gently. ® ® Xerox DocuCentre SC2020 User Guide…
-
Page 67: Changing Paper Size
For more information on how to set the paper quality, refer to Changing the Paper Settings on page 66. ® ® Xerox DocuCentre SC2020 User Guide…
-
Page 68: Changing The Paper Size For Trays 1 And 2
Remove any paper loaded in the tray. For Tray 1, push down the metal plate. While pinching the levers of the two paper guides, move them to the edges of paper. ® ® Xerox DocuCentre SC2020 User Guide…
-
Page 69: Changing The Paper Settings
• For information on the paper size setting for Tray 5, refer to Tray 5 (Bypass) on page 206. Press the <Machine Status> button. <Machine Status> button Services Home Job Status Machine Status ® ® Xerox DocuCentre SC2020 User Guide…
-
Page 70
[Size]. To use a non-standard document size, set [Size] to [Custom Size], and then specify the paper size • When using a non-standard size envelope, specify the size without the flap in [Custom Size]. Select the desired paper type. Select [OK]. ® ® Xerox DocuCentre SC2020 User Guide… -
Page 71: Copy
• Single sheet • Multiple sheets • Document glass • Single sheet • Bound documents, such as books Document Feeder Supported document sizes You can place standard size documents in the document feeder. ® ® Xerox DocuCentre SC2020 User Guide…
-
Page 72
Remove any paper clips or staples from document before placing it in the document feeder. Place the document in the center of the document feeder, with the side to be scanned (or the front surface of a 2 sided document) facing up. ® ® Xerox DocuCentre SC2020 User Guide… -
Page 73
The device automatically determines the tray holding the appropriate paper, based on the document size and the specified zoom ratio. Supported document sizes You can select one of the following document sizes from [Original Size]. ® ® Xerox DocuCentre SC2020 User Guide… -
Page 74
When using the document glass, make sure to close the document glass cover after finishing your copy job. Place the document face down, and align it against the top left corner of the document glass. Close the document glass cover. ® ® Xerox DocuCentre SC2020 User Guide… -
Page 75: Making Advanced Settings
You can enter a value between 1 and 999 for the number of copies. Use the numeric keypad to enter the desired number of copies. Numeric keypad Redial/Pause Power Saver Clear All Stop Start Error Data ® ® Xerox DocuCentre SC2020 User Guide…
-
Page 76: Starting The Copy Job
Copying multiple sets of documents You can continue copying multiple sets of documents using any of the following settings: • Collation: Collated • 2-Sided Copying: 1 2-Sided/2 2-Sided • Pages Per Side: 2-Up ® ® Xerox DocuCentre SC2020 User Guide…
-
Page 77: About Auto Rotation
While the device is copying, you can cancel the currently executing job, and check or cancel pending jobs. Canceling the Current Copy Job To cancel the currently executing copy job: Press the <Stop> button. <Stop> button Redial/Pause Power Saver Clear All Stop Start Error Data ® ® Xerox DocuCentre SC2020 User Guide…
-
Page 78: Checking Job Status
You can copy both sides of an ID card (name card, employee card, etc.) on one side of paper. Select [ID Card Copy] to use this feature. Original document Original orientation Copied output Front side Front side Back side Back side Place an ID card in the upright position. ® ® Xerox DocuCentre SC2020 User Guide…
-
Page 79
[ID Card Copy] tab – Output Color – Select Tray • [Quality] tab – Lighten/Darken – Sharpness – Saturation – Auto Background Suppression For more information, refer to the Advanced Copy Settings on page 77. ® ® Xerox DocuCentre SC2020 User Guide… -
Page 80: Advanced Copy Settings
Select [Scan Side 2]. Advanced Copy Settings This section describes the advanced functions available for Copy feature. ® ® Xerox DocuCentre SC2020 User Guide…
-
Page 81
For more information on defaults that can be changed, and how to change them, refer to Copy Defaults on page 191. Press the <Services Home> button. <Services Home> button Services Home Job Status Machine Status ® ® Xerox DocuCentre SC2020 User Guide… -
Page 82: Output Color
Password Locked). If you set [Output Color] to [Full Color] and the [Service Lock] setting for [Copy] to [On] (Color Password Locked), you will need to enter the four digit passcode after pressing the <Start> button. ® ® Xerox DocuCentre SC2020 User Guide…
-
Page 83: Select Tray
[Tray 2] is only available when the One Tray Module (Optional) is installed. When [Any] is displayed as the paper size and type in Tray 5 (bypass), you can select the paper size and type from this menu. ® ® Xerox DocuCentre SC2020 User Guide…
-
Page 84: Reduce/Enlarge
Bold values are the factory default menu settings. 100% Auto% A3 A5 A3 A4, B4 B5 B4 A4, B5 A5 A3 B4, A4 B5 115% B4 A3, B5 A4 ® ® Xerox DocuCentre SC2020 User Guide…
-
Page 85
You can also specify the value in increments of 1% from 25 to 400 by selecting [ ] or [ ] or entering a value using the number pad. See the following table for specific zoom ratios. Copy Original 100% 122% 141% 172% 200% 100% 115% 141% 163% ® ® Xerox DocuCentre SC2020 User Guide… -
Page 86: 2-Sided Copying
<Start> button. If you want to place a new document, replace the document with a new document, and then select [Continue] or press the <Start> button. ® ® Xerox DocuCentre SC2020 User Guide…
-
Page 87: Lighten/Darken
Works well with light documents or faint pencil markings. Darken +2 Darken +1 Normal Works well with normal typed or printed documents. Lighten +1 Works well with dark documents. Lighten +2 Lighten +3 ® ® Xerox DocuCentre SC2020 User Guide…
-
Page 88: Original Type
Used for documents with text. Photo Used for documents with photos. Sharpness To adjust the sharpness to make the copy image sharper or softer than the original. Select the [Quality] tab, and then select [Sharpness]. ® ® Xerox DocuCentre SC2020 User Guide…
-
Page 89: Saturation
Select the desired setting, and then select [OK]. Note: Bold values are the factory default menu settings. Vivid Makes the copy image sharper than the original. Normal The color clarity of the image is the same as the original. ® ® Xerox DocuCentre SC2020 User Guide…
-
Page 90: Auto Background Suppression
To sort the copy output. For example, if you make two copies of three page documents, one complete three page document will be printed followed by the second complete document. Select the [Output] tab, and then select [Collation]. ® ® Xerox DocuCentre SC2020 User Guide…
-
Page 91: Original Size
[Continue] or press the <Start> button. If you finish copying, select [Print Now]. Original Size To select the default document size. Select the [Output] tab, and then select [Original Size]. Select the desired setting, and then select [OK]. ® ® Xerox DocuCentre SC2020 User Guide…
-
Page 92
Auto Tabloid (11 x 17″) Legal (8.5 x 14″) Folio (8.5 x 13″) Letter (8.5 x 11″) Letter (8.5 x 11″) A3 (297 x 420 mm) B4 (257 x 364 mm) ® ® Xerox DocuCentre SC2020 User Guide… -
Page 93: Pages Per Side
Select the desired setting, and then select [OK]. Note: Bold values are the factory default menu settings. Does not perform Pages Per Side printing. 2-Up Automatically reduces the original pages to fit onto one sheet of paper. ® ® Xerox DocuCentre SC2020 User Guide…
-
Page 94: Edge Erase
Specify the value in increments of 1 mm (0.1 inch). 0 50 mm (0.0 2.0″) Middle 0 mm (0″) Specify the value in increments of 1 mm (0.1 inch). 0 50 mm (0.0 2.0″) ® ® Xerox DocuCentre SC2020 User Guide…
-
Page 95: Fax
, A4 , A4 , B5 , B5 , 11 × 17″ , 8.5 × 14″ , 8.5 × 13″ , 8.5 × 11″ , 8.5 × 11″ , 8K , 16K , and 16K ® ® Xerox DocuCentre SC2020 User Guide…
-
Page 96
Remove any paper clips or staples from document before placing it in the document feeder. Place the document in the center of the document feeder, with the side to be scanned (or the front surface of a 2-Sided document) facing up. ® ® Xerox DocuCentre SC2020 User Guide… -
Page 97
Do not apply excessive force to hold thick document on the document glass. It may break the glass and cause injuries. Follow the steps below to place a document on the document glass. ® ® Xerox DocuCentre SC2020 User Guide… -
Page 98: Specifying The Recipient
Place document face down, and align it against the top left corner of the document glass. Close the document glass cover. Specifying the Recipient Follow the steps below to specify the fax recipient. ® ® Xerox DocuCentre SC2020 User Guide…
-
Page 99: Using The Numeric Keypad
Use the numeric keypad to enter the fax recipient’s number. Notes: • To delete the entered numbers, press the <C> (Clear) button. • You can enter fax numbers of up to 50 digits in length. ® ® Xerox DocuCentre SC2020 User Guide…
-
Page 100: Making Advanced Settings
You may need to enter a passcode to use the copy feature. Ask your system administrator for the passcode. Make advanced settings as needed. Example: Settings in the [Options] tab For more information on advanced settings, refer to Advanced Fax Settings on page 100. ® ® Xerox DocuCentre SC2020 User Guide…
-
Page 101: Starting The Fax Job
[Scan Another Page]. When you have finished loading documents, select [Done. Fax Now]. Operations during Faxing (Sending) You can cancel the fax currently being sent, and check or cancel pending jobs. ® ® Xerox DocuCentre SC2020 User Guide…
-
Page 102: Canceling The Fax Being Sent
For more information on operation in job screen, refer to Canceling the Current Job page 235 Press the <Job Status> button. <Job Status> button Services Home Job Status Machine Status Select a fax job. Check the job status. ® ® Xerox DocuCentre SC2020 User Guide…
-
Page 103: Operations During Faxing (Receiving)
You can also cancel the received fax from the Active Jobs screen. For more information on the Active Jobs screen, refer to Canceling the Current Job on page 235. Advanced Fax Settings This section describes the advanced functions available for Fax feature. ® ® Xerox DocuCentre SC2020 User Guide…
-
Page 104
For more information on defaults that can be changed, and how to change them, refer to Defaults on page 204). Press the <Services Home> button. <Services Home> button Services Home Job Status Machine Status Select [Fax]. ® ® Xerox DocuCentre SC2020 User Guide… -
Page 105: Lighten/Darken
Creates copies with a dark density. Use this setting to scan document containing light objects. Normal Creates copies with the same density as document. Lighten +1, +2, and +3 Creates copies with a light density. Use this setting to scan document containing dark objects. ® ® Xerox DocuCentre SC2020 User Guide…
-
Page 106: Resolution
Super Fine resolution. Note: Faxes scanned in the Super Fine mode transmit at the highest resolution supported by the receiving device. Photo Suitable for documents containing photographic images. ® ® Xerox DocuCentre SC2020 User Guide…
-
Page 107: Onhook
Select the copy method, and then select [OK]. – 1-Sided Select [1-Sided] for a one-sided document. – 2-Sided Select [2-Sided] for a two-sided document. You can select the edge to be bound from the following. ® ® Xerox DocuCentre SC2020 User Guide…
-
Page 108: Original Size
, A4 , 8.5 × , B5 , B5 , A4 , A4 , 8.5 × 11″ , 8.5 × 11″ , 16K , 16K 11″ , 8.5 × 11″ , 16K , B5 ® ® Xerox DocuCentre SC2020 User Guide…
-
Page 109: Delayed Send
You can specify a time between 00:00 and 23:59 (or between 1:00 and 12:59 AM/PM when the 12-hour clock has been set). • You cannot specify a date. Select the [Options] tab, and then select [Delayed Send]. Select [On]. Note: Select [Off] to disable this function. ® ® Xerox DocuCentre SC2020 User Guide…
-
Page 110: Polling Receive
Select the [Options] tab, and then select [Polling Receive]. Select [On], and then select [OK]. Cover Page You can attach a cover page to faxes. Select the [Options] tab, and then select [Cover Page]. ® ® Xerox DocuCentre SC2020 User Guide…
-
Page 111: Sending A Fax Manually
102. Select [OnHook], and then select [Manual Send]. Note: [OnHook] can be selected when [Original Size] is set to other than [Auto]. Enter the remote fax device’s fax number using the number pad. ® ® Xerox DocuCentre SC2020 User Guide…
-
Page 112: Sending A Delayed Fax
The Delayed Start mode can be used to save scanned documents for transmission at a specified time to take advantage of lower long distance rates. Place document in the device. Press the <Services Home> button. <Services Home> button Services Home Job Status Machine Status Select [Fax]. ® ® Xerox DocuCentre SC2020 User Guide…
-
Page 113
• For more information, refer to Lighten/Darken on page 102. Select the [Options] tab, and then select [Delayed Send]. Select [On]. Enter the start time using the number pad, and then select [OK]. ® ® Xerox DocuCentre SC2020 User Guide… -
Page 114: Sending A Fax From The Driver (Direct Fax)
CD Kit on the Mac OS X, and then open the [MacOSX] folder. Open either the [10.5-] folder depending on the version of Mac OS X you are running. Double-click [FX DocuCentre SC2020.dmg], and then follow the on-screen instructions to install the fax driver.
-
Page 115
Specify the fax settings. For more information, refer to the Help of the driver. Notes: • For Windows, make sure to set [Job Type] to [Fax]. • The settings done here are only applied to a single fax job. For Windows: ® ® Xerox DocuCentre SC2020 User Guide… -
Page 116
Enter the name and fax number directly. Select a fax number from the address book. – Look Up Address Book: Displays a list of fax numbers that are saved in the file specified for [My Address Book file]. ® ® Xerox DocuCentre SC2020 User Guide… -
Page 117: Receiving A Fax
171, or by selecting [Manual Receive] in [OnHook] (you can hear voice or fax tones from the remote device) and then pressing the <Start> button. The device begins receiving a fax and returns to the standby mode when the reception is completed. ® ® Xerox DocuCentre SC2020 User Guide…
-
Page 118: Receiving A Fax Automatically In The Tel/Fax Mode Or Ans/Fax Mode
Before using the DRPD option, Distinctive Ring service must be installed on your telephone line by the telephone company. To set up DRPD, you will need another telephone line at your location, or someone available to dial your fax number from outside. ® ® Xerox DocuCentre SC2020 User Guide…
-
Page 119
To set up the DRPD: Press the <Machine Status> button. <Machine Status> button Services Home Job Status Machine Status Select the [Tools] tab, and then select [Admin Settings]. Select [Fax Settings]. Select [Fax Line Settings]. ® ® Xerox DocuCentre SC2020 User Guide… -
Page 120: Receiving Faxes In The Memory
In the secure receiving mode, all incoming faxes will go in memory. When the mode turns off, any faxes stored will be printed. Note: Before operation, ensure [Panel Lock] is enabled. ® ® Xerox DocuCentre SC2020 User Guide…
-
Page 121
To turn the secure receiving mode on: Press the <Machine Status> button. <Machine Status> button Services Home Job Status Machine Status Select the [Tools] tab, and then select [Admin Settings]. Select [Fax Settings]. Select [Incoming Defaults]. Select [Secure Receive]. ® ® Xerox DocuCentre SC2020 User Guide… -
Page 122
To print received documents: Press the <Job Status> button. <Job Status> button Services Home Job Status Machine Status Select [Secure Fax Receive]. Enter the passcode, and then select [OK]. The faxes stored in memory are printed. ® ® Xerox DocuCentre SC2020 User Guide… -
Page 123: Fax Activity Report
Fax Activity Report lets you check whether fax send and receive operations ended normally. For each fax sent or received, the reports record the sender or recipient name and the transmission result/status. For information on how to print the Fax Activity Report, refer to Printing Reports/Lists on page 232. ® ® Xerox DocuCentre SC2020 User Guide…
-
Page 124
Partner (the destination is unable to receive the job), Send Again (the resending count exceeded the limit), XXX-XXX (communication error) • «Cancelled» indicates that the user cancelled the job. • «XXX-XXX» indicates an error code. Total The total number of pages sent. ® ® Xerox DocuCentre SC2020 User Guide… -
Page 125
(user cancelled the job), Receive Again (reception error), Fwd Wait (job is waiting to be forwarded), Fwd Doing (job is being forwarded), Fwd Done (job is completely forwarded), XXX-XXX (transmission error) • «XXX-XXX» indicates an error code. Total The total number of pages received. ® ® Xerox DocuCentre SC2020 User Guide… -
Page 126
® ® Xerox DocuCentre SC2020 User Guide… -
Page 127: Scan
The document sizes with an asterisk can be automatically detected depending on the settings. You can select one of the following alternative document sizes. For more information, refer to Original Size Detected on page 176. B5 (default) or 16K ® ® Xerox DocuCentre SC2020 User Guide…
-
Page 128
Remove any paper clips or staples from document before placing it in the document feeder. Place the document in the center of the document feeder, with the side to be scanned (or the front surface of a 2-Sided document) facing up. ® ® Xerox DocuCentre SC2020 User Guide… -
Page 129
In this case, select a document size manually by selecting [Original Size] from the menu items. Depending on the selected document size, the printout may be too large for the paper or may have shadows at the edges. ® ® Xerox DocuCentre SC2020 User Guide… -
Page 130
When using the document glass, make sure to close the document glass cover after finishing your scan job. Place the document face down, and align it against the top left corner of the document glass. Close the document glass cover. ® ® Xerox DocuCentre SC2020 User Guide… -
Page 131: Using The Scan Feature
Setting Up the Computer Note: For Windows 8, the computer automatically connects the device using WSD. There is no need to install the device manually. For Windows 7: Click [Start] > [Computer] > [Network]. ® ® Xerox DocuCentre SC2020 User Guide…
-
Page 132: Scanning Using The Twain Driver
Click [Start] > [All Programs] > [Microsoft Office] > [Microsoft Office 2010 Tools] > [Microsoft Clip Organizer]. Click [File] > [Add Clips to Organizer] > [From Scanner or Camera]. In the [Insert Picture from Scanner or Camera] dialog box, under [Device], select your device. Click [Custom Insert]. ® ® Xerox DocuCentre SC2020 User Guide…
-
Page 133: Scanning Using The Wia Driver
When using applications that use WIA 2.0, such as [Windows Fax and Scan] on Windows Vista, Windows 7, Windows 8, and Windows 10, the [Feeder (Scan both sides)] option can be selected for 2-sided scanning. ® ® Xerox DocuCentre SC2020 User Guide…
-
Page 134: Using A Scanner On The Network
Click [Paint] > [From scanner or camera] (Click [File] > [From Scanner or Camera] for Windows Server 2008 and Windows Vista. The [Scan using FX DocuCentre SC2020 (WIA — USB)] window appears.. Note: The illustration may vary for different operating systems Select [Document Feeder] or [Flatbed] in [Paper source].
-
Page 135: Overview
– FTP service of Microsoft Internet Information Services 5.1 – FTP service of Microsoft Internet Information Services 6.0 – Windows Vista, Windows Server 2008 – FTP service of Microsoft Internet Information Services 7.0 ® ® Xerox DocuCentre SC2020 User Guide…
-
Page 136: Setting A Login Name And A Password (Smb Only)
Account. The following uses Windows 7 as an example. The procedure differs depending on the OS. Click [Start] > [Control Panel]. Click [User Accounts and Family Safety]. Click [User Accounts]. Click [Create a password for your account] and add in a password for your user login account. ® ® Xerox DocuCentre SC2020 User Guide…
-
Page 137: Creating A Shared Folder (Smb Only)
Select the [Share this folder] check box. Enter a shared name in the [Share name] box. Note: Write down this shared name because you will use this name in the next setting procedure Click [Add]. ® ® Xerox DocuCentre SC2020 User Guide…
-
Page 138: Setting A Destination Using An Address Book
The following procedure uses Windows 7 as an example. The procedure differs depending on the OS. Before beginning to setup a destination, make sure you have the IP addresses you need such as device and computer. ® ® Xerox DocuCentre SC2020 User Guide…
-
Page 139
If user name and password are required, enter the correct user name and password. Note: The default user name is «admin», and the default password is «1111». Under [Network Scan (Comp./Serv.)], click [Computer/Server Address Book]. Select any unused number and click [Add]. ® ® Xerox DocuCentre SC2020 User Guide… -
Page 140
(Refer to Setting a Login Name and a Password (SMB Only) on page 133 for details on how to add a password in your user login account.) Re-enter Re-enter your password. Password ® ® Xerox DocuCentre SC2020 User Guide… -
Page 141
Using Address Book Editor The following procedure uses Windows 7 as an example. Note: If the [Address Book Editor] window appears, go to step 4. Select your printer from the list. Click [OK]. ® ® Xerox DocuCentre SC2020 User Guide… -
Page 142
Enter a friendly name that you want it to appear on the address book. Server Type Select [Computer (SMB)] if you store the document in a shared folder of your computer. Select [Server (FTP)] if you use an FTP server. ® ® Xerox DocuCentre SC2020 User Guide… -
Page 143
(Refer to Setting a Login Name and a Password (SMB Only) on page 133 for details on how to add a password in your user login account). Confirm Login Re-enter your password. Password ® ® Xerox DocuCentre SC2020 User Guide… -
Page 144: Sending An Email With The Scanned Image
To send an Email attached with the scanned image from the device, follow the steps below: • Setup the Email address book through CentreWare Internet Services. For more information, refer to Registering a New Email Address on page 142. EMail Settings From CentreWare Internet Services, click [Properties]. ® ® Xerox DocuCentre SC2020 User Guide…
-
Page 145: Registering A New Email Address
The device web page appears. Note: For information on how to check the IP address of the device, refer to Checking the Device IP Address on page 230. Click the [Address Book] tab. ® ® Xerox DocuCentre SC2020 User Guide…
-
Page 146: Sending An Email With The Scanned File
The [Add Email Address] page appears. Enter a name in the [Name] field and Email address in the [Email Address] field. Click the [Apply] button. Sending an Email With the Scanned File Place document in the device. ® ® Xerox DocuCentre SC2020 User Guide…
-
Page 147: Operations During Scanning
To cancel the currently scanning job: On the device Press the <Stop> button. <Stop> button Redial/Pause Power Saver Clear All Stop Start Error Data On the computer Select [Delete] on the screen that appears while scanning. ® ® Xerox DocuCentre SC2020 User Guide…
-
Page 148: Checking Job Status
To adjust the amount of colors to make the contrast of Page 201 colors darker or lighter than the original. Auto To suppress the background of the original to enhance Page 202 Background text on the scanned image. Suppression ® ® Xerox DocuCentre SC2020 User Guide…
-
Page 149
To select the default document size. Page 199 Edge Erase To specify the top and bottom margins of the scanned Page 202 image. File Name To specify the detailed setting for file name. Page 203 ® ® Xerox DocuCentre SC2020 User Guide… -
Page 150: Scan To Network
To specify whether to create a folder when saving Page 203 scanned images. Note: For more information on defaults that can be changed, and how to change them, refer to Scan Defaults on page 198. ® ® Xerox DocuCentre SC2020 User Guide…
-
Page 151: Print
• different sizes. Printing This section describes how to print document. The procedure used to print will vary according to the application you are using. See your application’s manual for the specific procedure. ® ® Xerox DocuCentre SC2020 User Guide…
-
Page 152: Operations During Printing
Print The steps below are the operation used for the [DocuCentre SC2020] print driver screen. Select [Print] from the application’s [File] menu. Select [DocuCentre SC2020 PCL 6]. If needed, click [Properties] to make advanced settings. Note: For information on the Print functions, click [Help] in the print driver screen to display the Help Information.
-
Page 153
Select the document name that you desired to cancel, and then press the <Delete> key. If there is no document displayed on the window, cancel it manually on the device. ® ® Xerox DocuCentre SC2020 User Guide… -
Page 154
Print ® ® Xerox DocuCentre SC2020 User Guide… -
Page 155: Tools
Panel Settings Purpose: To print a detailed list of all the settings on the control panel menus. PCL Fonts List Purpose: To print a sample of the available PCL fonts. ® ® Xerox DocuCentre SC2020 User Guide…
-
Page 156: Billing Meters
Purpose: To print the list of status of pending faxes. Billing Meters Purpose: To check the total number of printed pages (including the number of the pages of the copied documents and received fax documents). ® ® Xerox DocuCentre SC2020 User Guide…
-
Page 157: Admin Settings
Bold values are the factory default menu settings. Paper Tray Purpose: To specify the default paper tray. Values: Auto Tray5 (Bypass) Tray1 Tray2 * [Tray2] is available only when the One Tray Module (Optional) is installed. ® ® Xerox DocuCentre SC2020 User Guide…
-
Page 158
* The default for [Output Size] varies depending on region-specific factory. inch series Tabloid (11 x 17″) Legal (8.5 x 14″) Folio (8.5 x 13″) Letter (8.5 x 11″) A3 (297 x 420 mm) B4 (257 x 364 mm) ® ® Xerox DocuCentre SC2020 User Guide… -
Page 159
Prints on both sides of a sheet of paper to be bound by long edge. Short Edge Flip Prints on both sides of a sheet of paper to be bound by short edge. ® ® Xerox DocuCentre SC2020 User Guide… -
Page 160
Times BdIt ITC A G Go BkOb Courier Helvetica ITC A G Go Dm Courier It Helvetica Ob ITC A G Go DmOb Courier Bd Helvetica Bd ZapfC MdIt Courier BdIt Helvetica BdOb ZapfDingbats ® ® Xerox DocuCentre SC2020 User Guide… -
Page 161
Note: The [Font Pitch] menu is only displayed for fixed or mono spaced fonts. Form Line Purpose: To set the number of lines in a page. ® ® Xerox DocuCentre SC2020 User Guide… -
Page 162
Disables the Hex Dump feature. Enable Enables the Hex Dump feature. Draft Mode Purpose: To save toner by printing in the draft mode. The print quality is reduced when you print in the draft mode. ® ® Xerox DocuCentre SC2020 User Guide… -
Page 163
Prints in the color mode. Ignore Form Feed Purpose: To specify whether to ignore blank pages that only contain Form Feed control codes. Values: Disables the Ignore Form Feed feature. Enables the Ignore Form Feed feature. ® ® Xerox DocuCentre SC2020 User Guide… -
Page 164: Network Setup
«nnn.nnn.nnn.nnn» is a value in the range of «0» to «254». «127» and any value in the range of «224» to «254» cannot be specified for the first octet of a gateway address. ® ® Xerox DocuCentre SC2020 User Guide…
-
Page 165
Uses 10BASE-T Full-duplex. 100BASE-TX Half Uses 100BASE-TX Half-duplex. 100BASE-TX Full Uses 100BASE-TX Full-duplex. Protocols Purpose: To enable or disable each protocol. The change becomes effective after the device is turned off and then on again. ® ® Xerox DocuCentre SC2020 User Guide… -
Page 166
Disables HTTP-SSL/TLS. HTTP-SSL/TLS Enable Enables HTTP-SSL/TLS. Note: [HTTP-SSL/TLS] is available only when a certificate is created using CentreWare Internet Services. For information on creating a certificate, refer to the online Help of CentreWare Internet ® ® Xerox DocuCentre SC2020 User Guide… -
Page 167
Purpose: To initialize network data stored in non-volatile memory (NVM). After executing this function and rebooting the device, all network settings are reset to their default values. Values: Reset Initializes the network data stored in NVM. Delete All Certificates ® ® Xerox DocuCentre SC2020 User Guide… -
Page 168: Fax Settings
New Zealand Philippines Singapore South Korea Thailand Vietnam Company Name Purpose: To set the sender name to be printed on the header on faxes. Line Type Purpose: To select the default line type. ® ® Xerox DocuCentre SC2020 User Guide…
-
Page 169
Sets the volume of the line monitor to middle. Sets the volume of the line monitor to maximum. • DRPD Pattern Purpose: To provide a separate number for faxing with a distinctive ring pattern. ® ® Xerox DocuCentre SC2020 User Guide… -
Page 170
Values: Lower Sets the external telephone hook detection threshold to Lower. Normal Sets the external telephone hook detection threshold to Normal. Higher Sets the external telephone hook detection threshold to Higher. ® ® Xerox DocuCentre SC2020 User Guide… -
Page 171
Turns off the volume of the ring tone. Sets the volume of the ring tone to minimum. Middle Sets the volume of the ring tone to middle. Sets the volume of the ring tone to maximum. Auto Answer Setup ® ® Xerox DocuCentre SC2020 User Guide… -
Page 172
Enable Requires a passcode to receive faxes. 0000–9999 Sets or changes the passcode Change Passcode required to receive faxes. * This item is available only when [Secure Receive Set] is set to [Enable]. ® ® Xerox DocuCentre SC2020 User Guide… -
Page 173
The device restricts incoming faxes to A4 size (210 mm width) and B4 size (257 mm width). A4/B4/A3 The device restricts incoming faxes to A4 size (210 mm width), B4 size (257 mm width), and A3 size (297 mm width). ® ® Xerox DocuCentre SC2020 User Guide… -
Page 174
Auto Reduction Automatically reduces a fax page to fit it onto the appropriate paper size. Transmission Defaults Purpose: To configure settings for transmitting fax. Auto Redial Setup Purpose: To configure settings for automatic redial. ® ® Xerox DocuCentre SC2020 User Guide… -
Page 175
Private Automatic Branch Exchange (PABX). Fax Cover Page Purpose: To set whether to attach a cover page to faxes. Values: Does not attach a cover page to faxes. Attaches a cover page to faxes. ® ® Xerox DocuCentre SC2020 User Guide… -
Page 176
Purpose: To set whether to display the fax number of the recipient on the sending fax screen when manually sending a fax. Values: Does not display the fax number when manually sending a fax. Displays the fax number when manually sending a fax. Fax Reports ® ® Xerox DocuCentre SC2020 User Guide… -
Page 177
Fax Protocol Purpose: To set whether to print the protocol monitor report, which helps you identify the cause of a communication problem. Values: Print Always Prints a protocol monitor report after every fax transmission. ® ® Xerox DocuCentre SC2020 User Guide… -
Page 178: System Settings
<Power Saver> button on the control panel changes the status of the device to the standby mode and lights up the touch screen. Date & Time Purpose: To specify the date and time formats. Values: Time Zone Sets the time zone. ® ® Xerox DocuCentre SC2020 User Guide…
-
Page 179
Sets B5 as the alternative document size that can be detected automatically. Sets 16K as the alternative document size that can be detected automatically. Display Brightness Purpose: To adjust the screen brightness of the control panel. ® ® Xerox DocuCentre SC2020 User Guide… -
Page 180
Non-Copy Job Tone Does not emit a tone when a job other than a copy job is complete. Soft Emits a tone when a job other than a copy job is complete. Normal Loud ® ® Xerox DocuCentre SC2020 User Guide… -
Page 181
Disables all the alert tones. Soft Sets the volume of all the alert tones at once. Normal Loud Low Toner Alert Message Purpose: To specify whether to show the alert message when the toner is low. ® ® Xerox DocuCentre SC2020 User Guide… -
Page 182
You can search the phone numbers only from the local Address Book when [Fax Server Address Book] is set to [Off]. Email Server Address Book Purpose: To specify whether to search the email addresses from the Address Book for the LDAP server. ® ® Xerox DocuCentre SC2020 User Guide… -
Page 183
3 Minutes 4 Minutes Fault Timeout Purpose: To specify the amount of time the device waits before canceling a job that stops abnormally. The print job is canceled if the time-out time is exceeded. ® ® Xerox DocuCentre SC2020 User Guide… -
Page 184: Output Settings
Purpose: To specify whether the device outputs PDL data, which is not supported by the device, as text when the device receives it. Text data is printed on A4 or Letter size paper. ® ® Xerox DocuCentre SC2020 User Guide…
-
Page 185
Nearest Size Substitutes paper of nearest size. Use Tray5 (Bypass) Substitutes paper from Tray5 (Bypass). Letterhead 2-Sided Purpose: To specify whether to print on both sides when using letterhead. ® ® Xerox DocuCentre SC2020 User Guide… -
Page 186
Purpose: To specify whether to permit the printing of data without authentication information. Values: Does not permit non-account user to print the data. Permits non-account user to print the data. Auto Color To Mono Print ® ® Xerox DocuCentre SC2020 User Guide… -
Page 187
If you see white spots on the print output, try to decrease the voltage. Note: The print quality changes depending on the setting values you select for this item. ® ® Xerox DocuCentre SC2020 User Guide… -
Page 188
-5 to +10 Heavyweight Gloss (170–256 g/m -5 to +10 Labels (106–256 g/m -5 to +10 Postcard -5 to +10 Envelope -5 to +10 Adjust Alignment Purpose: To adjust the alignment of the printed image. ® ® Xerox DocuCentre SC2020 User Guide… -
Page 189
Purpose: To initialize the non-volatile (NV) memory for system parameters, Address Book data for fax, or Address Book data for scan. After executing this function and rebooting the device, the menu parameters or data, except the parameters for the network, are reset to their factory default values. ® ® Xerox DocuCentre SC2020 User Guide… -
Page 190: Adjust Altitude
Non-Genuine Toner Purpose: To use toner cartridge of another manufacturer. Note: Using a non-Xerox toner cartridge may severely damage the device. The warranty does not cover damages caused by using non-Xerox toner cartridges. Values: Does not use toner cartridge of another manufacturer.
-
Page 191: Secure Settings
Limiting Access to Copy, Fax, and Scan on page 220. Purpose: To specify whether to enable or disable each of the device services, or to require a passcode to use the services. ® ® Xerox DocuCentre SC2020 User Guide…
-
Page 192
Enables the PC Scan service, but requires a passcode to Locked use the service. Disabled Disables the PC Scan service. ID Card Copy Enable Enables the ID Card Copy service. Disable Disables the ID Card Copy service. ® ® Xerox DocuCentre SC2020 User Guide… -
Page 193
Enable Only allows emails to be sent to specified domains. Software Download Purpose: To enable or disable download of firmware updates. Values: Disable Disables firmware updates. Enable Enables firmware updates. Display Network Information ® ® Xerox DocuCentre SC2020 User Guide… -
Page 194: Default Settings
Purpose: To select color or black and white copying. Values: Full Color Copies in color mode. Black & White Copies in black and white mode. Select Tray Purpose: To specify the input tray. ® ® Xerox DocuCentre SC2020 User Guide…
-
Page 195
81% B4 A4, B5 A5 86% A3 B4, A4 B5 115% B4 A3, B5 A4 122% A4 B4, A5 B5 141% A4 A3, B5 B4 200% A5 A3 ® ® Xerox DocuCentre SC2020 User Guide… -
Page 196
A4 (297 x 210 mm) A4 (210 x 297 mm) B5 (257 x 182 mm) B5 (182 x 257 mm) A5 (148 x 210 mm) 8K (270 x 390 mm) 16K (270 x 195 mm) ® ® Xerox DocuCentre SC2020 User Guide… -
Page 197
When [Auto] is selected, the device assumes that the document size is the size of the print media loaded in Tray 1 or Tray 5 (bypass). Original Type Purpose: To select the copy image quality. ® ® Xerox DocuCentre SC2020 User Guide… -
Page 198
Increases the color saturation to brighten the color of the copy. Normal The color saturation is the same as the original. Pastel Decreases the color saturation to lighten the color of the copy. Auto Background Suppression ® ® Xerox DocuCentre SC2020 User Guide… -
Page 199
Sets the color balance level of low density magenta. -3 to +3 Midtones Sets the color balance level of medium density magenta. -3 to +3 Highlights Sets the color balance level of high density magenta. -3 to +3 ® ® Xerox DocuCentre SC2020 User Guide… -
Page 200
Prints on both sides of a sheet of paper to be bound by Original Binding long edge. Short Edge Prints on both sides of a sheet of paper to be bound by Binding short edge. ® ® Xerox DocuCentre SC2020 User Guide… -
Page 201: Scan Defaults
To modify the defaults for the [Scan] menu and [Email] menu defaults. Note: Bold values are the factory default menu settings. File Format Purpose: To specify the file format to save the scanned image. Values: Multi-Page TIFF ® ® Xerox DocuCentre SC2020 User Guide…
-
Page 202
[600 dpi] cannot be selected when [Output Color] is set to [Color]. Original Size Purpose: To specify the default document size. Values: mm series Auto A3 (297 x 420 mm) B4 (257 x 364 mm) A4 (297 x 210 mm) ® ® Xerox DocuCentre SC2020 User Guide… -
Page 203
A4 (297 x 210 mm) A4 (210 x 297 mm) B5 (257 x 182 mm) B5 (182 x 257 mm) A5 (148 x 210 mm) 8K (270 x 390 mm) 16K (270 x 195 mm) ® ® Xerox DocuCentre SC2020 User Guide… -
Page 204
Values: Sharpen Makes the scanned image sharper than the original. Normal Does not make the scanned image sharper or softer than the original. Soften Makes the scanned image softer than the original. Contrast ® ® Xerox DocuCentre SC2020 User Guide… -
Page 205
Sets the value in increments of 0.1 inch (1 mm). 0.0–2.0 inch (0–50 mm) Left/Right 0.1 inch (2 mm) Sets the value in increments of 0.1 inch (1 mm). 0.0–2.0 inch (0–50 mm) ® ® Xerox DocuCentre SC2020 User Guide… -
Page 206
Create Folder Purpose: To specify whether to create a folder when saving scanned images. Values: Does not create a folder when saving a scanned image. Creates a folder when saving a scanned image. ® ® Xerox DocuCentre SC2020 User Guide… -
Page 207: Fax Defaults
This item is available only when [2-Sided Scanning] is set to [2-Sided Printing] in the [Scan Defaults] menu. Lighten/Darken Purpose: To adjust the density to make the copy lighter or darker than the original. ® ® Xerox DocuCentre SC2020 User Guide…
-
Page 208
A5 (148 x 210 mm) 8K (270 x 390 mm) Tabloid (11 x 17″) Legal (8.5 x 14″) Folio (8.5 x 13″) Letter (8.5 x 11″) inch series Auto Tabloid (11 x 17″) Legal (8.5 x 14″) ® ® Xerox DocuCentre SC2020 User Guide… -
Page 209: Tray Management
Use the [Tray Management] menu to define the print media loaded in Tray 1 and Tray 2. Note: Bold values are the factory default menu settings. Tray Settings Purpose: To configure tray settings. Tray 5 (Bypass) Purpose: To specify the paper loaded in Tray 5 (bypass). ® ® Xerox DocuCentre SC2020 User Guide…
-
Page 210
Letter (8.5 x 11″) Letter (8.5 x 11″) Custom Size Length(x) 210 mm Specifies the length of the custom size paper. 98–432 mm Width(y) 297 mm Specifies the width of the custom size paper. 89–297 mm ® ® Xerox DocuCentre SC2020 User Guide… -
Page 211
16K (270 x 195 mm) 16K (195 x 270 mm) Custom Size Length(x) 8.3 inches Specifies the length of the custom size paper. 3.9–17.0″ Width(y) 11.7 inches Specifies the width of the custom size paper. 3.5–11.7″ ® ® Xerox DocuCentre SC2020 User Guide… -
Page 212
Labels (106–256 g/m Pre-Printed (60–89 g/m Colored (60–89 g/m Postcard Postcard Reload Envelope * The default for [Size] varies depending on region-specific factory default. Tray 1 Purpose: To specify the paper loaded in Tray 1. ® ® Xerox DocuCentre SC2020 User Guide… -
Page 213
Letterhead (60–89 g/m Pre-Printed (60–89 g/m Colored (60–89 g/m Tray 2 Note: Tray2 is available only when the One Tray Module (optional) is installed. Purpose: To specify the paper loaded in Tray 2. ® ® Xerox DocuCentre SC2020 User Guide… -
Page 214
Length(x) 210 mm Specifies the length of the custom size Size paper. (8.3 inches) 182–432 (7.2–17.0 inches) Width(y) 297 mm Specifies the width of the custom size paper. (11.7 inches) 140–297 (5.5–11.7 inches) ® ® Xerox DocuCentre SC2020 User Guide… -
Page 215: Tray Priority
Purpose: To set the priority order of the paper trays for automatic tray selection. If paper trays loaded with the same paper size and type exists, the paper tray is selected according to this priority order. ® ® Xerox DocuCentre SC2020 User Guide…
-
Page 216: Language Settings
Bold values are the factory default menu settings. Purpose: To determine the language of the text on the control panel. Values: English (Simplified Chinese) (Korean) (Vietnamese) (Thai) Keyboard Layout Purpose: To select the keyboard layout on the control panel. ® ® Xerox DocuCentre SC2020 User Guide…
-
Page 217: Executing Calibration
If density or color is not calibrated well despite the periodic execution of auto calibration, contact our Customer Support Center. Press the <Machine Status> button. <Machine Status> button Services Home Job Status Machine Status Select the [Tools] tab. ® ® Xerox DocuCentre SC2020 User Guide…
-
Page 218
Calibration Chart against the left side of the document glass. • Place at least five sheets of white paper on the Calibration Chart and close the document cover. 14. Select [Start]. 15. Select [Yes, Restart] ® ® Xerox DocuCentre SC2020 User Guide… -
Page 219: Panel Lock Function
Disabling the control panel menus does not prevent access to the [Secure Print], [Sample Print] and [Tray Settings] menus. Enabling the Panel Lock Press the <Machine Status> button. <Machine Status> button Services Home Job Status Machine Status Select the [Tools] tab. Select [Admin Settings]. Select [Secure Settings]. ® ® Xerox DocuCentre SC2020 User Guide…
-
Page 220
[OK]. Perform steps 4 and 5. Select [Change Passcode], and then select [OK]. Enter the current passcode, and then select [OK]. Perform steps 8 and 9. This will change the passcode. ® ® Xerox DocuCentre SC2020 User Guide… -
Page 221: Disabling The Panel Lock
Re-enter the passcode to confirm the passcode that you entered, and then select [OK]. Disabling the Panel Lock Press the <Machine Status> button. <Machine Status> button Services Home Job Status Machine Status Select the [Tools] tab. Select [Admin Settings]. ® ® Xerox DocuCentre SC2020 User Guide…
-
Page 222
Tools Enter the passcode, and then select [OK]. Note: The factory-default panel passcode is 0000. Select [Secure Settings]. Select [Panel Lock]. Select [Panel Lock Set]. Select [Disable], and then select [OK]. ® ® Xerox DocuCentre SC2020 User Guide… -
Page 223: Limiting Access To Copy, Fax, And Scan
Copy Lock, or Scan Lock. Note: The Service Lock feature cannot be used simultaneously with the Copy Auditron feature. Press the <Machine Status> button. <Machine Status> button Services Home Job Status Machine Status Select the [Tools] tab. ® ® Xerox DocuCentre SC2020 User Guide…
-
Page 224
Limiting Access to Copy, Fax, and Scan Select [Admin Settings]. Select [Secure Settings]. Select [Panel Lock]. Select [Panel Lock Set]. ® ® Xerox DocuCentre SC2020 User Guide… -
Page 225
Enter the new passcode using the number pad and then select [OK]. Re-enter the passcode and then select [OK]. Note: The default passcode is 0000. 10. Select [ ] once. 11. Select [Service Lock]. ® ® Xerox DocuCentre SC2020 User Guide… -
Page 226: Setting The Power Saver Option
You can set the Power Saver for the device. The device switches to the Power Saver mode after the specified time. Note: If [Panel Lock Set] is set to [Enable], you need to enter the four digit passcode to enter the [Admin Settings] menu. ® ® Xerox DocuCentre SC2020 User Guide…
-
Page 227
Setting the Power Saver Option To set the Power Saver: Press the <Machine Status> button. <Machine Status> button Services Home Job Status Machine Status Select the [Tools] tab. Select [Admin Settings]. Select [System Settings]. Select [General]. ® ® Xerox DocuCentre SC2020 User Guide… -
Page 228
] or enter the desired value using the number pad, and then select [OK]. You can select from 1–150 minutes for [Low Power Timer] or 0–60 minutes for [Sleep Timer]. To return to the previous screen, select [ ® ® Xerox DocuCentre SC2020 User Guide… -
Page 229: About The Concurrent Jobs Feature
After executing this function and rebooting the device, the address book or all the menu parameters, except the parameters for the network, are reset to their default values. Press the <Machine Status> button. <Machine Status> button Services Home Job Status Machine Status Select the [Tools] tab. ® ® Xerox DocuCentre SC2020 User Guide…
-
Page 230
Setting the Power Saver Option Select [Admin Settings]. Select [Maintenance]. Select [Initialize NVM]. Select the desired setting. Select [Initialize]. The device restarts automatically to apply the settings. ® ® Xerox DocuCentre SC2020 User Guide… -
Page 231: Machine Status
Shows the percentage of the remaining black toner. – Shows the percentage of the remaining cyan toner. – Shows the percentage of the remaining magenta toner. – Shows the percentage of the remaining yellow toner. – [Other Supplies] ® ® Xerox DocuCentre SC2020 User Guide…
-
Page 232: Selecting Language
The default language may vary depending on the region of purchase. Follow the steps below to select the language. Press the <Machine Status> button. <Machine Status> button Services Home Job Status Machine Status Select the [Tools] tab. Select [Language Settings]. ® ® Xerox DocuCentre SC2020 User Guide…
-
Page 233: Checking The Device Ip Address
Checking the Device IP Address You can display the IPv6 or IPv4 address of your device. Press the <Machine Status> button. <Machine Status> button Services Home Job Status Machine Status Select [About This MFP]. ® ® Xerox DocuCentre SC2020 User Guide…
-
Page 234: Checking The Meter
Meter2 Displays the total number of monochrome prints. Meter3 Displays the total number of large size color prints. Meter4 Displays the total number of color and monochrome prints (Meter 1 + Meter 2). ® ® Xerox DocuCentre SC2020 User Guide…
-
Page 235: Printing Reports/Lists
To print a page for testing colors. Protocol Monitor To print a detailed list of monitored protocols. To print the list of all fax addresses stored as Fax Address Book information. Fax Address Book ® ® Xerox DocuCentre SC2020 User Guide…
-
Page 236
<Machine Status> button Services Home Job Status Machine Status Select [Report/List]. Select the report or list to print, and then select [Print]. Note: To cancel printing while a job is printing, press the <Stop> button. ® ® Xerox DocuCentre SC2020 User Guide… -
Page 237: Job Status
If any outgoing faxes have been reserved, you can check them by selecting [Fax Job (Waiting to Send)]. Press the <Job Status> button. Select [Fax Job (Waiting to Send)]. The list of reserved fax jobs appears. ® ® Xerox DocuCentre SC2020 User Guide…
-
Page 238: Canceling The Current Job
Press the <Job Status> button. Select [Fax Job (Waiting to Send)]. Select a reserved fax job. Select [Delete]. You may not be able to cancel a job depending on the status of the job processing. ® ® Xerox DocuCentre SC2020 User Guide…
-
Page 239: Maintenance
Never use a vacuum cleaner for spilled toner and residual toner in this product, toner cartridge or toner bottle. It may catch fire by electric sparks inside a vacuum cleaner and cause explosion. Use a broom or a wet cloth to wipe off spill. If you spill a large volume of toner, contact your local Xerox representative.
-
Page 240: Handling Consumables/Periodic Replacement Parts
• Never throw a waste toner bottle into an open flame. Toner may catch fire and cause burn injuries or explosion. If you have a used waste toner bottle no longer needed, contact your local Xerox representative for its disposal.
-
Page 241
Then, Replace the XXXX Cartridge. This warning appears only when Xerox toner cartridge is used ([Non-Genuine Toner] is set to [Off]). The remaining page yield differs depending on printing conditions, contents of the documents, and frequency of turning on/off the device. -
Page 242
Never throw a toner cartridge into an open flame. Remaining toner in the cartridge may catch fire and cause burn injuries or explosion. • If you have a used toner cartridge no longer needed, contact your local Xerox representative for its disposal. Notes: •… -
Page 243: Replacing The Waste Toner Container [R5]
Replacing the Waste Toner Container [R5] The waste toner container holds used toner. The following messages are displayed on the touch screen according to the status of the waste toner container. Follow the messages. ® ® Xerox DocuCentre SC2020 User Guide…
-
Page 244
Never use a vacuum cleaner for spilled toner and residual toner in this product, toner cartridge or toner bottle. It may catch fire by electric sparks inside a vacuum cleaner and cause explosion. Use a broom or a wet cloth to wipe off spill. If you spill a large volume of toner, contact your local Xerox representative. -
Page 245
After removing the waste toner container, do not touch the parts shown in the illustration. Toner can dirty or stain your hands. Never lay the waste toner box on its side as this may cause its malfunction or toner spills. ® ® Xerox DocuCentre SC2020 User Guide… -
Page 246
Take a new container out of the box in advance. Install a new waste toner container, and then lock it. Turn the lock lever clockwise, and then close the front cover. Insert the used waste toner container into the supplied plastic bag. ® ® Xerox DocuCentre SC2020 User Guide… -
Page 247: Replacing The Drum Cartridge
The remaining page yield differs depending on printing conditions, contents of the documents, and frequency of turning on/off the device. The use of drum cartridges not recommended by Xerox may lower the device’s output quality or performance. Always use drum cartridges recommended by Xerox in the device.
-
Page 248: Cleaning The Device
Normally, clean the LED Print Heads when you replace the waste toner container. However, if you have image quality problems such as white or colored stripes appearing on copied or printed outputs, clean the LED Print Heads. ® ® Xerox DocuCentre SC2020 User Guide…
-
Page 249
Take care not to drop the waste toner container while you are removing it. • After removing the waste toner container, do not touch the parts shown in the illustration. Toner can dirty or stain your hands. ® ® Xerox DocuCentre SC2020 User Guide… -
Page 250
Insert the cleaning bar into each slot until it stops, and then slowly slide the bar back out. Return the cleaning bar to the back side of the front cover. Install the waste toner container, and then lock it. ® ® Xerox DocuCentre SC2020 User Guide… -
Page 251: Cleaning The Touch Screen
To ensure clean copies at all times, clean the document glass cover and the document glass about once a month. ® ® Xerox DocuCentre SC2020 User Guide…
-
Page 252: Cleaning The Document Presser And The Narrow Glass Strip
If the document presser or the narrow glass strip becomes soiled, smudges may appear on copies, faxes, or scanned documents and the device may not detect the document sizes properly. To ensure clean copies at all times, clean the document presser and the narrow glass strip about once a month. ® ® Xerox DocuCentre SC2020 User Guide…
-
Page 253: Cleaning Document Feeder Rollers
If the document feeder rollers become soiled, smudges may appear on copies, faxes or scanned documents and paper jams may occur. To ensure clean copies at all times, clean the document feeder rollers about once a month. ® ® Xerox DocuCentre SC2020 User Guide…
-
Page 254: Managing The Device
Managing the Device This section describes how to check the device status using CentreWare Internet Services or the Status Messenger feature. ® ® Xerox DocuCentre SC2020 User Guide…
-
Page 255: Checking Or Managing The Device With Centreware Internet Services
Set the email address where notices about changes in device status or errors are sent. Notification Items Set the contents of the notices to send in the email. Port Status StatusMessenger Select [Enabled]. ® ® Xerox DocuCentre SC2020 User Guide…
-
Page 256
Write one command on each line and separate each command and parameter with a space or a tab. When the same command is written two or more times in one email, the second and subsequent commands are ignored. ® ® Xerox DocuCentre SC2020 User Guide… -
Page 257
#Status Set this when you want to check the device status. Example of Commands When the read only password is “ronly”, and to check the device status: #Password ronly #Status #NetworkInfo ® ® Xerox DocuCentre SC2020 User Guide… -
Page 258
Maintenance ® ® Xerox DocuCentre SC2020 User Guide… -
Page 259: Problem Solving
276 – No: If you cannot resolve an error despite following the above procedure, contact our Customer Support Center. Device Problems Check the device’s status again if you suspect a malfunction. ® ® Xerox DocuCentre SC2020 User Guide…
-
Page 260
Is the required port status Check the status of the port to use, and then set to [Enabled]? set the port status to [Enabled]. Refer to Activating the Communication Port To Use on page 36. ® ® Xerox DocuCentre SC2020 User Guide… -
Page 261
Refer to Placing Document on page 68. set in the correct positions? Is the document folded? Smooth out the document and place it again correctly. Refer to Placing Document on page 68. ® ® Xerox DocuCentre SC2020 User Guide… -
Page 262
Tray 5 positions. Tray 5 (bypass) and the (bypass). Refer to Error Code on page 277. <Start> button is Refer to Loading Paper in Tray 5 (bypass) pressed. page 63. ® ® Xerox DocuCentre SC2020 User Guide… -
Page 263: Image Quality Problems
If the image quality of the printout is poor, use the table below to find our most likely cause, and take the required action. If the image quality remains poor after taking the required action, contact our Customer Support Center. ® ® Xerox DocuCentre SC2020 User Guide…
-
Page 264
Refer to Loading Paper in Trays 1 and 2 away from the corners of page 61. the tray? Refer to Loading Paper in Tray 5 (bypass) page 63. ® ® Xerox DocuCentre SC2020 User Guide… -
Page 265
When making enlarged copies, some in copies. an enlarged copy of the enlargement factors can create striped document with a too large patterns. Adjust the copy enlargement enlargement factor? factor. Refer to Reduce/Enlarge on page 81. ® ® Xerox DocuCentre SC2020 User Guide… -
Page 266
Refer to Replacing the Drum Cartridge damaged. page 244. The narrow glass strip is Clean the narrow glass strip. dirty. Refer to Cleaning the Document Presser and the Narrow Glass Strip on page 249. ® ® Xerox DocuCentre SC2020 User Guide… -
Page 267
Replace the paper with new paper. on the fingers. The paper is unsuitable. Load the correct type of paper. The toner is not fused to the paper. The paper is contaminated with toner. ® ® Xerox DocuCentre SC2020 User Guide… -
Page 268
63. type and size of the paper actually loaded. Multiple pages were fed Ruffle through the stack of paper through the device at once. thoroughly before leading it. ® ® Xerox DocuCentre SC2020 User Guide… -
Page 269
Align the horizontal and vertical paper guides are not aligned to guides properly. the correct position. Refer to Loading Paper in Trays 1 and 2 page 61. Refer to Loading Paper in Tray 5 (bypass) page 63. ® ® Xerox DocuCentre SC2020 User Guide… -
Page 270: Copying Problems
You have placed a You cannot place documents with different document containing size pages. pages of different sizes. Copy Output Problems The table below lists possible solutions to problems with the copy output. ® ® Xerox DocuCentre SC2020 User Guide…
-
Page 271
Place a stack of white paper on top of the document to bring it into proper contact with the document glass. ® ® Xerox DocuCentre SC2020 User Guide… -
Page 272
Smooth out the document and place it again correctly. Refer to Placing Document on page 68. The edges of copies are The document exceeds Adjust the reduction/enlargement factor to cut off. the printable area. reduce the copy slightly. ® ® Xerox DocuCentre SC2020 User Guide… -
Page 273: Printer Problems
Check the error information, and take the the device. required action. Job execution has been Use the screen to select whether to cancel the paused. job. Print Output Problems The table below lists possible solutions to print output problems. ® ® Xerox DocuCentre SC2020 User Guide…
-
Page 274: Fax Problems
The document does not feed into the Ensure that the document is not wrinkled and you are device. putting it in correctly. Check that the document is of the right size, not too thick or thin. ® ® Xerox DocuCentre SC2020 User Guide…
-
Page 275
The other fax device may be turned off, out of paper, or connection with another fax device fails. cannot answer incoming calls. Speak with the other device operator and ask her/him to sort out the problem. ® ® Xerox DocuCentre SC2020 User Guide… -
Page 276: Scan Problems
Execute [Initialize NVM]. Scan Problems This section provides possible solutions to various problems you may encounter when using the Scan feature. The table below lists possible solutions when you are unable to scan. ® ® Xerox DocuCentre SC2020 User Guide…
-
Page 277
Communication speed becomes slow in scan mode because of the large amount of memory required to analyze and reproduce the scanned image. Scanning images at a high resolution takes more time than scanning at a low resolution. ® ® Xerox DocuCentre SC2020 User Guide… -
Page 278
Scanner is busy receiving or printing data. When the current job is completed, try again. • Invalid handle. • Scanning has failed. The selected port is currently being used. Restart your computer and try again. ® ® Xerox DocuCentre SC2020 User Guide… -
Page 279: Scan Driver/Printer Utility Problems
Ensure that the device is turned on. Ensure that the scan driver is installed on your computer. (The Address Book Editor retrieves the Address Book data via the scan driver when the device is connected using a USB cable.) ® ® Xerox DocuCentre SC2020 User Guide…
-
Page 280: Error Code
Refer to the error codes in the following table to resolve problems. If an error code is displayed, any print data remaining in the device and information stored in the device’s memory is not secured. ® ® Xerox DocuCentre SC2020 User Guide…
-
Page 281
Switch off the device power, make sure that the touch screen is blank, and then switch on the device power. Contact our Customer Support Center if 016-741 this failure is repeated. 016-742 016-743 016-744 016-745 ® ® Xerox DocuCentre SC2020 User Guide… -
Page 282
Confirm the login-able computers with your system administrator. 031-522 Select [Close], or wait for the time set in [Fault Timeout] for the device to recover. Check if the login name (domain name and user name) and password are correct. ® ® Xerox DocuCentre SC2020 User Guide… -
Page 283
Check the access right of the folder you specified. 031-532 Select [Close], or wait for the time set in [Fault Timeout] for the device to recover. Shorten the name of the file or the forwarding destination folder. ® ® Xerox DocuCentre SC2020 User Guide… -
Page 284
Check the user invalid setting with your system administrator. 031-547 Select [Close], or wait for the time set in [Fault Timeout] for the device to recover. Check the user lock-out status with your system administrator. ® ® Xerox DocuCentre SC2020 User Guide… -
Page 285
Check if a folder with the name you specified can be created in the storage location. Check if a folder that has the same name as the one you specified already exists. ® ® Xerox DocuCentre SC2020 User Guide… -
Page 286
Print the received fax, or wait for a while until the fax is sent. • Print the fax job stored using the Secure Receive feature. For more information on the Secure Receive feature, refer to Secure Receive on page 169. ® ® Xerox DocuCentre SC2020 User Guide… -
Page 287
Select [Close], or wait for the time set in [Fault Timeout] for the device to recover. The device rejected a fax from the blocked number. For more information, refer to Junk Fax Filter on page 169. ® ® Xerox DocuCentre SC2020 User Guide… -
Page 288
Select [Close], or wait for the time set in [Fault Timeout] for the device to recover. Try the following: • Retry the same operation. • Check if the memory of the device or remote device is full. ® ® Xerox DocuCentre SC2020 User Guide… -
Page 289
Check the status of the remote device. 035-720 Select [Close], or wait for the time set in [Fault Timeout] for the device to recover. Check the features supported by the remote device. ® ® Xerox DocuCentre SC2020 User Guide… -
Page 290: Paper Jams
Carefully remove the jammed paper without tearing it. Do not leave any pieces of paper in the device. WARNING: If you need to pull out a tray to remove paper jam, contact your local Xerox representative. Do not pull out a tray, otherwise it may cause injuries.
-
Page 291: Paper Jam In Left Side Cover [A]
If the paper is jammed around the fusing unit Pull down the handle [A1]. Remove the jammed paper. Note: Do not leave any torn pieces of paper inside the device. Return the handle [A1] back to its position. ® ® Xerox DocuCentre SC2020 User Guide…
-
Page 292
If the paper is jammed in the location as shown in the right figure, lift the handle [A2], and then remove the jammed paper pulling upwards. Return the handle [A2] to its position. Push on the center of the left side cover [A], close it slowly, and raise the Tray 5 (bypass). ® ® Xerox DocuCentre SC2020 User Guide… -
Page 293: Paper Jam In Left Side Cover [B]
Follow the steps below to clear paper jams in Trays 1 and 2. Remove the jammed paper by referring to the following: – Tray 1: Paper Jam in Left Side Cover [A] on page 288 ® ® Xerox DocuCentre SC2020 User Guide…
-
Page 294
Remove the jammed paper. Note: If the paper tears, check to make sure there are no remaining shreds in the device. Push the tray in gently until it stops. ® ® Xerox DocuCentre SC2020 User Guide… -
Page 295: Paper Jams In Tray 5 (Bypass)
Pull up the front handle of the document feeder top cover, and open the document feeder top cover completely. Note: The cover will remain fixed in position when fully opened. Open the cover slowly. ® ® Xerox DocuCentre SC2020 User Guide…
-
Page 296
Turn the knob to feed the document to the top, then remove it. Note: If the document has been fed into the feeder, do not pull it out directly. The document may tear. Close the document feeder’s inner cover. ® ® Xerox DocuCentre SC2020 User Guide… -
Page 297
Place the entire document again. Note: Torn, wrinkled or folded document pages can cause document jams, or damage. Always copy torn, wrinkled, or folded documents by placing them directly on the document glass. ® ® Xerox DocuCentre SC2020 User Guide… -
Page 298: Getting Help
Problem Solving Getting Help Xerox provides several automatic diagnostic tools to help you produce and maintain print quality. Control Panel Messages The control panel provides you with information and troubleshooting help. When an error or warning condition occurs, the control panel displays a message informing you of the problem.
-
Page 299
Problem Solving Select the [Tools] tab. Select [Admin Settings]. Select [Maintenance]. Select [Non-Genuine Toner]. Select [On], and then select [OK]. The device switches to the Non-Genuine mode. ® ® Xerox DocuCentre SC2020 User Guide… -
Page 300
Problem Solving ® ® Xerox DocuCentre SC2020 User Guide… -
Page 301: Appendix
Maximum: A3, 11 x 17″ Minimum:Tray 1: A5 Tray 2 (optional): A5 Tray 5 (bypass): A5 (Non-standard size: 89 × 98 mm) Image loss width: 5.5 mm max. at top, bottom, right, and left. ® ® Xerox DocuCentre SC2020 User Guide…
-
Page 302
Tray 1: 60–90 g/m² Tray 2 (optional): 60–256 g/m² Tray 5 (bypass): 60–216 g/m² Note: Use paper recommended by Xerox. Copying may not be performed correctly depending on the conditions. First Copy Output Time <When the document glass is used>… -
Page 303
Optional:500 sheets (One Tray Module) Maximum Paper Capacity: 850 sheets (Standard + One Tray Module) : When using 80 g/m² paper Note: : When using Xerox standard paper Continuous Copy 999 sheets Output Tray Capacity 250 sheets (A4 ) When using 80 g/m² paper Power Supply AC 220–240 V ±10%, 5 A, 50/60 Hz ±3%… -
Page 304: Print Functions
Print Resolution Output resolution: 1200 x 2400 dpi Data processing resolution: 600 x 600 dpi for Standard and High Quality PCL6/5e, HBPL Protocol Network connection: TCP/IP (lpd, IPP/IPPS, Port9100, SMB, WSD ® ® Xerox DocuCentre SC2020 User Guide…
-
Page 305
Windows 10 x64 Mac OS X 10.5–10.11 Note: For information about the latest supported OS, refer to our official website. Fonts PCL6/5: 81 European fonts, 36 Symbol set Connectivity Ethernet 100BASE-TX/10BASE-T, USB 2.0 ® ® Xerox DocuCentre SC2020 User Guide… -
Page 306
: color, grayscale, and monochrome: 400 x 400 dpi, 2/22/16300 x 300 dpi, 200 x 200 dpi, 150 x 150 dpi Monochrome:24 sheets/minute Scanning Speed Color: 19 sheets/minute Xerox Standard Document (A4 ), at 200 dpi Connectivity Ethernet 100BASE-TX/10BASE-T, USB 2.0 Scan to PC Driver… -
Page 307
Appendix • *3 Please refer to our official website for the latest support operating systems. ® ® Xerox DocuCentre SC2020 User Guide… -
Page 308
400 x 400 dpi, 300 x 300 dpi, 200 x 200 dpi, 150 x 150 dpi Monochrome:24 sheets/minute Scanning Speed Color: 19 sheets/minute Xerox Standard Document (A4 ), at 200 dpi Connectivity Standard: Ethernet 100BASE-TX/10BASE-T Scan to PC Protocol… -
Page 309
Direct Fax Functions (Optional) Send Document Size A3, B4, A4 Scanning Resolution Same as the Fax Functions Transmission Speed Same as the Fax Functions No. of Fax Lines Same as the Fax Functions ® ® Xerox DocuCentre SC2020 User Guide… -
Page 310
Capacity 110 sheets Note: When using 80 g/m² paper. Feeding Speed Monochrome:20 sheets/minute (A4 , 1-Sided), 13 pages/minute (A4 , 2-Sided) Color : 18 sheets/minute (A4 , 1-Sided), 11 pages/minute (A4 , 2-Sided) ® ® Xerox DocuCentre SC2020 User Guide… -
Page 311: Printable Area
5.5 mm Unprintable area Printable area 5.5 mm 5.5 mm Paper feed 5.5 mm direction Optional Components The following table shows the optional components available. To purchase these options, contact our Customer Support Center. ® ® Xerox DocuCentre SC2020 User Guide…
-
Page 312: Notes And Restrictions
If the output file name includes characters other than alphanumeric, it is not displayed correctly on the Job History Report. • Document Feeder The device does not detect a document placed in the document feeder during Sleep mode. ® ® Xerox DocuCentre SC2020 User Guide…
-
Page 313: Notes And Restrictions On The Use Of The Copy Feature
This section describes notes and restrictions to observe when using the Scan feature. For the notes and restrictions on the scan driver, see the «Readme» information on the CD-ROM for the Driver CD Kit that came with the device. • Address Book ® ® Xerox DocuCentre SC2020 User Guide…
-
Page 314: Notes And Restrictions On The Use Of The Print Feature
In this case, open and close the front cover of this device and check one more time if the message is still displayed. ® ® Xerox DocuCentre SC2020 User Guide…
-
Page 315
45, 307 canceling a job, 144 duplex output unit, 307 capacity, 307, 308 CentreWare Internet Services, 136 Changing numbers, 53 changing paper size in Trays 1 and 2, 64 ECM, 173 ® ® Xerox DocuCentre SC2020 User Guide… -
Page 316
298 Measurements, 176 hard disk, 298 memory, 117, 298 Hex Dump, 159 narrow glass strip, 45 ID Card Copy, 75 Network Setup, 161 Ignore Form Feed, 160 No Account User Print, 183 ® ® Xerox DocuCentre SC2020 User Guide… -
Page 317
306 power switch, 43 Send Header, 173 Prefix Dial, 172 Sending a delayed fax, 109 Print ID, 181 Sending a fax from the driver (Direct Fax), 111 print resolution, 301 ® ® Xerox DocuCentre SC2020 User Guide… -
Page 318
Tray Management, 206 Tray Settings, 206 troubleshooting, 256 turning the power off, 46 turning the power on, 45 TWAIN, 129 unable to copy, 267 unable to print, 270 uninstalling, 40 unusable paper, 60 ® ® Xerox DocuCentre SC2020 User Guide… -
Page 319
® ® Xerox DocuCentre SC2020 User Guide… -
Page 320
® ® Xerox DocuCentre SC2020 User Guide…
Инструкцию для Xerox DocuCentre SC2020 на русском языке, в формате pdf можно скачать с нашего сайта. Наш каталог предоставляем Вам инструкцию производителя фирмы Xerox, которая была взята из открытых источников. Ознакомившись с руководством по эксплуатации от Xerox, Вы на все 100% и правильно сможете воспользоваться всеми функциями устройства.
Для сохранения инструкции «Струйное МФУ Xerox DocuCentre SC2020» на русском языке на вашем компьютере либо телефоне, нажмите кнопку «Скачать инструкцию». Если активна кнопка «Инструкция онлайн», то Вы можете просмотреть документ (manual), в своём браузере онлайн.
Если у Вас нет возможности скачать инструкцию по эксплуатации либо просмотреть её, Вы можете поделиться ссылкой на эту страницу в социальных сетях и при удобном моменте скачать инструкцию. Либо добавьте эту страницу в закладки Вашего браузера, нажав кнопку «Добавить страницу в закладки браузера».
![]()
DocuCentre SC2020
РуководствоBasic Operationпо Guideосновным операциям
This manual describes the basic operations for using this machine.
В данном руководстве приведено описание основных операций, выполняемых на аппарате.

Windows является зарегистрированным товарным знаком компании Microsoft Corporation в США и (или) других странах.
Все наименования продуктов (брендов) являются товарными знаками или зарегистрированными товарными знаками своих соответствующих владельцев.
Снимки экранов их программ Microsoft перепечатаны с разрешения компании Microsoft Corporation.
В настоящем руководстве инструкции по безопасности помечены значком  .
.
Перед выполнением необходимых процедур следует во всех случаях сначала ознакомиться с инструкциями, а затем следовать их указаниям.
Поскольку в копировальном аппарате предусмотрена функция по предотвращению подделки определенных документов, в некоторых редких случаях изготовленные копии могут не соответствовать ожидаемым результатам.
Компания Xerox не несет ответственности за неисправности аппарата, вызванные заражением компьютерными вирусами или несанкционированным взломом.
Важно
1.Данное руководство защищено законодательством об авторском праве. Согласно законодательству об авторском праве данное руководство запрещено копировать или модифицировать полностью или частично без письменного разрешения издателя.
2.Части данного руководства могут изменяться без предварительного уведомления.
3.Мы готовы принимать комментарии о неясностях, ошибках, упущениях или пропущенных страницах.
4.Ни в коем случае не допускается выполнение на аппарате каких-либо операций, не представленных в явном виде в настоящем руководстве. Недопустимые операций могут привести к неисправностям или несчастным случаям. Компания Xerox не несет ответственности за какиелибо проблемы, ставшие результатом наразрешенных операций на оборудовании.
Экспорт настоящего продукта строго контролируется согласно японским законам валютного регулирования и международной торговли и (или) экспортным регулированием США.
XEROX, логотип сферы, символизирующей подключения и CentreWare являются товарными знаками компании Xerox Corporation в США или товарными знаками компании Xerox Co., Ltd.

Функции, для которых необходимы опциональные компоненты
Опциональные компоненты требуются для использования указанных далее функций. За дополнительной информацией следует обращаться в Центр поддержки клиентов.
Факс
Факс
Direct Fax
Опциональные компоненты
Комплект факса
Однолотковый модуль
Стенд
3

Оглавление |
|
|
Функции, для которых необходимы опциональные компоненты………………………. |
3 |
|
Оглавление …………………………………………………………………………………………………………………………. |
4 |
|
Предисловие ………………………………………………………………………………………………………………………. |
5 |
|
Предисловие ………………………………………………………………………………………………………. |
5 |
|
Типы руководств……………………………………………………………………………………………….. |
5 |
|
Основные функции панели управления …………………………………………………………………….. |
6 |
|
Информативные советы………………………………………………………………………………………………….. |
7 |
|
Перед началом работы на аппарате…………………………………………………………………………… |
9 |
|
Уведомления о безопасности………………………………………………………………………… |
9 |
|
Перед началом работы на аппарате…………………………………………………………………………. |
11 |
|
Нормативные положения……………………………………………………………………………… |
17 |
|
Охрана окружающей среды…………………………………………………………………………. |
17 |
|
Правовое уведомление …………………………………………………………………………………. |
17 |
|
Подготовка………………………………………………………………………………………………………………………… |
18 |
|
Типы бумаги ……………………………………………………………………………………………………… |
18 |
|
Загрузка бумаги ………………………………………………………………………………………………. |
19 |
|
Размещение документов ………………………………………………………………………………. |
21 |
|
Копирование…………………………………………………………………………………………………………………….. |
22 |
|
Изготовление копий……………………………………………………………………………………….. |
22 |
|
Копирование удостоверения……………………………………………………………………….. |
23 |
|
Изготовление 2-сторонних копий ………………………………………………………………. |
24 |
|
Подборка отпечатков…………………………………………………………………………………….. |
25 |
|
Изготовление увеличенных или уменьшенных копий………………………….. |
26 |
|
Копирование двух страниц на один лист…………………………………………………. |
27 |
|
Печать…………………………………………………………………………………………………………………………………. |
28 |
|
Выполнение печати ………………………………………………………………………………………… |
28 |
|
Сканирование ………………………………………………………………………………………………………………….. |
29 |
|
Импорт данных сканирования через приложение ……………………………….. |
29 |
|
Отправка данных сканирования по эл. почте ………………………………………… |
30 |
|
Отправка данных сканирования на компьютер (по сети)…………………… |
31 |
|
Факс…………………………………………………………………………………………………………………………………….. |
32 |
|
Использование функции факса…………………………………………………………………… |
32 |
|
Регистрация адресной книги ……………………………………………………………………….. |
34 |
|
Устранение проблем………………………………………………………………………………………………………. |
35 |
|
Застревание бумаги ……………………………………………………………………………………….. |
35 |
|
Застревание документов………………………………………………………………………………. |
36 |
|
Коды ошибок ……………………………………………………………………………………………………. |
37 |
|
Указатель…………………………………………………………………………………………………………………………….. |
1 |
4

Предисловие
Предисловие
Благодарим вас за выбор аппарата DocuCentre SC2020 (далее “аппарат”).
Внастоящем руководстве описывается эксплуатация аппарата и меры предосторожности, которые необходимо соблюдать при его использовании. Чтобы извлечь максимальную пользу и использовать аппарат эффективно, следует предварительно ознакомиться с настоящим руководством.
Вданном руководстве предполагается, что пользователь обладает базовыми знаниями об операционной среде используемого персонального компьютера и компьютерных сетей. За информацией об операционной среде используемого персонального компьютера и компьютерных сетей, а также базовыми знаниями о работе компьютерных сетей следует обращаться к соответствующим руководствам, предоставленным вместе с персональным компьютером, операционной системой и сетевой системой.
После прочтения настоящего руководства, его — в справочных целях — следует хранить в доступном месте. Оно может оказаться полезным, если пользователь забудет, как выполнять операции или при возникновении проблем с аппаратом.
За подробной информацией о данном аппарате, следует обращаться к “Руководству пользователя”, содержащемуся на компакт-диске, входящем в комплект поставки аппарата.
Сразу же после установки аппарата мы рекомендуем изменить идентификатор (ID) системного администратора и пароль. Дополнительные сведения о смене пароля, см. в разделе “Сист. средства > Функция блокировки панели” в Руководстве пользователя.
Типы руководств
Для аппарата предоставляются указанные далее руководства.
Сопроводительные руководства
Руководство по основным операциям (настоящее руководство)
В настоящем руководстве представлены краткие справочные данные об основных операциях, ежедневном обслуживании и устранении проблем для данного аппарата.
Руководство пользователя
Это руководство описывает использование функций копирования, печати, факса и сканирования, а также настройку бумаги, выполнение ежедневного обслуживания, настройку статуса аппарата, устранение неисправностей и сетевые настройки.
Руководство (HTML)
Это руководство описывает установку и настройку драйверов и среды принтера.
Справка драйвера принтера
В справочном файле приводится описание функций принтера и его работа.
Руководства для опциональных компонентов
Для данного аппарата предусмотрены опциональные компоненты. Опциональные компоненты поставляются вместе с руководством по установке, в котором приведена информация о настройке изделия и другие сведения.
5

Основные функции панели управления
|
Redial/Pause |
Power Saver |
|
Services Home |
|
Job Status |
Clear All |
Stop |
||||
|
Start |
||||||
|
Machine Status |
||||||
|
Data |
Error |
|||||
|
13 |
12 |
11 |
10 |
9 |
8 |
7 |
|
№ |
Компонент |
Функция |
|
1 |
Сенсорный экран |
Отображает пункты операционного меню и сообщения о состоянии |
|
аппарата. |
||
|
2 |
Цифровая клавиатура |
Кнопки клавиатуры используются для ввода цифр (например, числа |
|
копий) или текста. |
||
|
3 |
Кнопка повторного |
Используется для вставки паузы между цифрами при наборе номера |
|
набора/паузы |
телефона получателя. |
|
|
4 |
Кнопка “Полный сброс” |
Используется для сброса отображаемых настроек каждой функции на |
|
значения по умолчанию или сброса введенных цифр. Настройки |
||
|
возвращаются в состояние, в котором они находились при включении |
||
|
аппарата. |
||
|
5 |
Кнопка экономии |
Подсвечивается, когда аппарат переходит в режим экономии энергии |
|
энергии |
после того, как он некоторое время не использовался. При нажатии |
|
|
этой кнопки аппарат переходит в режим экономии энергии или |
||
|
выходит из него. |
||
|
6 |
Кнопка “Стоп” |
Используется для отмены текущей или сбойной работы. |
|
7 |
Кнопка “Старт” |
Используется для начала сканирования документов или |
|
подтверждения значений каждой из настроек. |
||
|
8 |
Светоиндикатор ошибок |
Мигает при возникновении ошибки системы. |
|
Загорается при возникновении любой ошибки, кроме ошибки системы |
||
|
аппарата, например, застревание бумаги, или если бумага закончилась. |
||
|
9 |
Светоиндикатор данных |
Мигает, когда аппарат отправляет или принимает данные. Этот |
|
светоиндикатор горит, если данные сохранены в памяти аппарата, или |
||
|
если на аппарате получены сообщения факса, ожидающие печати. |
||
|
10 |
Кнопка C (сброс) |
Используется для удаления одной введенной цифры. |
|
11 |
Кнопка “Статус аппарата” |
Используется для печати отчетов и проверки информации об аппарате, |
|
например, состояния расходных материалов или IP-адреса аппарата. |
||
|
12 |
Кнопка “Статус работы” |
Используется для проверки/отмены текущей работы или работы, |
|
находящейся в состоянии ожидания. |
||
|
13 |
Кнопка “Основные |
Используется для отображения экрана основных режимов. |
|
режимы” |
||
6

Информативные советы
При регулярном использовании многофункциональных устройств знание некоторых вещей может помочь пользователю избежать проблем и работать на аппарате более эффективно.
Пожалуйста, прочитайте настоящее руководство перед тем, как начать пользоваться аппаратом.
Внутрь лотка следует вкладывать только бумагу
В лотках не должно находиться никаких других предметов, кроме бумаги.
В пустое пространство между направляющими и стенками лотка нельзя класть никакие предметы.
Это предотвратит следующую проблему:
Возникновение шума с левой стороны аппарата.
Используется правильный драйвер принтера?
При использовании нового многофункционального устройства необходимо установить новый драйвер принтера. Следует установить новый драйвер для данного аппарата (DocuCentre SC2020).
Проверьте, что нудный драйвер принтера
установлен на OK! вашем
компьютере. OK!
Это предотвратит следующие проблемы:
Печать нечитаемых символов.
Печать посторонних линий.
Неполная печать изображений
Возникновение ошибок и отказ печати.
Печать изображений в неправильных тонах.
7

Информативные советы
Для получения четких копий необходимо очистить стекло!
Перед началом копирования следует проверить состояние стекла.
Даже при использовании податчика документов, грязь на стекле может Указание привести к неудовлетворительным результатам.
При использовании податчика документов:
Следует очистить узкую стеклянную полоску с левой стороны от стекла экспонирования. Протрите стекло мягкой тканью, смоченной водой, а затем сухой тканью.
При использовании стекла экспонирования:
Следует очистить стекло экспонирования. Протрите стекло мягкой тканью, смоченной водой, а затем сухой тканью.
Грязные участки можно обнаружить, посмотрев на стекло под разными углами.
Это предотвратит следующие проблемы:
Черные полосы на копиях при использовании податчика документов.
Черные пятна на копиях при использовании стекла экспонирования.
Примечание о включении/выключении питания аппарата
При перезапуске аппарата следует выждать 10 секунд перед его повторным включением.
8

Перед началом работы на аппарате |
||||||||
Уведомления о безопасности |
||||||||
|
Перед началом работы с аппаратом следует внимательно ознакомиться с разделом |
||||||||
|
“Уведомления о безопасности”. |
||||||||
|
Данный продукт и рекомендованные расходные материалы прошли испытания и |
||||||||
|
признаны соответствующими строгим требованиям безопасности; они также |
||||||||
|
одобрены агентствами по производственной безопасности и признаны |
||||||||
|
соответствующими стандартам по охране окружающей среды. Чтобы обеспечить |
||||||||
|
безопасную эксплуатацию, необходимо выполнять приведенные далее инструкции. |
||||||||
|
ПРЕДУПРЕЖДЕНИЕ! |
||||||||
|
Любые несанкционированные модификации, включая добавление новых функций |
||||||||
|
или подключение к внешним устройствам, возможно, не подпадают под действие |
||||||||
|
гарантии на изделие. За дополнительной информацией следует обращаться в |
||||||||
|
представительство Xerox. |
||||||||
|
Следует соблюдать все предупреждения, указанные на данном продукте. |
||||||||
|
Предупреждающие знаки имеют следующие значения: |
||||||||
|
ОПАСНОСТЬ! |
Используется для инструкций, несоблюдение которых с относительно |
|||||||
|
высокой вероятностью может привести к смерти или тяжелым |
||||||||
|
(смертельным) травмам. |
||||||||
|
ПРЕДУПРЕЖДЕНИЕ! |
Используется для инструкций, несоблюдение которых может привести к |
|||||||
|
тяжелым или смертельным травмам. |
||||||||
|
ВНИМАНИЕ! |
Используется для инструкций, несоблюдение которых может привести к |
|||||||
|
травмам пользователя или повреждениям аппарата. |
||||||||
|
: этот значок используется для инструкций, на которые необходимо |
||||||||
|
обращать внимание при обращении с аппаратом. В целях |
||||||||
|
безопасной эксплуатации аппарата необходимо тщательно |
||||||||
|
следовать инструкциям. |
||||||||
|
Внимание! |
Пожароопасно |
Взрывоопасно |
Опасность |
Горячая |
Движущийся |
Опасность |
||
|
поражения |
поверхность |
объект |
прищемить |
|||||
|
электрическим |
пальцы |
|||||||
|
током |
||||||||
|
: запрещающий знак В целях избежания опасных действий |
||||||||
|
необходимо тщательно следовать инструкциям. |
||||||||
|
Запрещено |
Отрытое пламя |
Не |
Не |
Не |
Не допускать |
Ни в коем случает |
||
|
запрещено |
прикасаться |
использовать |
разбирать |
попадания |
не касаться |
|||
|
в ванной |
влаги |
влажными руками |
||||||
|
: значок используется для действий, которые необходимо выполнять. |
||||||||
|
При выполнении указанных важных действий следует внимательно |
||||||||
|
следовать инструкциям. |
||||||||
|
Инструкции |
Отключить |
Заземление/ |
||||||
|
питание |
заземлить |
|||||||
|
9 |

Перед началом работы на аппарате
Электробезопасность
 ПРЕДУПРЕЖДЕНИЕ!
Данный продукт должен эксплуатироваться от источника питания, соответствующего параметра, указанным на шильдике аппарата. Проверять соответствие источника питания указанным параметрам следует у местного поставщика электроэнергии.
ПРЕДУПРЕЖДЕНИЕ! Данное изделие необходимо подключить к защитному контуру заземления.
Данное изделие оснащено заземляющим штекером. Этот штекер можно подключать к только к заземленным гнездам. Это функция безопасности. Если штекер не подходит к гнезду, во избежание поражения электрическим током, следует обратиться к электрику, чтобы заменить гнездо. Ни в коем случае нельзя использовать адаптер для подключения изделия к незаземленному источнику питания.
Неправильное подключение заземляющего контакта может привести к поражению электрическим током.
Кабель электропитания следует подключать непосредственно к заземленному гнезду (розетке). В целях предотвращения перегрева или воспламенения не допускается использование удлинителей, адаптеров с несколькими розетками или разветвителей. Чтобы проверить заземлено ваше гнездо (розетка) или нет, следует обращаться в местное представительство Xerox.
Данное изделие необходимо подключать к параллельной цепи или гнезду, имеющему большую емкость, чем номинальные параметры силы тока и напряжения, указанные для данного изделия. См. шильдик на задней панели аппарата, где указаны номинальная силы тока и напряжение.
Ни в коем случае нельзя касаться шнура электропитания влажными руками. Это может привести к поражению электрическим током.
Не допускается ставить какие-либо предметы на шнур электропитания.
Штекер и гнездо не должны быть покрыты покрыты пылью. Пыльная и влажная среда может привести к появлению слабого тока в соединении. Это может вызвать нагрев и, в конечном итоге, — воспламенение.
Во избежание риска поражения электрическим током и воспламенения следует использовать только шнур электропитания, поставленный вместе с настоящим изделием или рекомендованный компанией Xerox.
Шнур электропитания предназначен для использования исключительно с данным изделием. Его нельзя использовать с каким-либо другим продуктом.
Нельзя использовать поврежденный или модифицированный шнур электропитания. Повреждения или модификации шнура электропитания могут привести к его нагреву и, в конечном итоге, — к поражению электрическим током или воспламенению.
Если кабель электропитания поврежден или оголены его изолированные провода, следует обратиться за заменой в местное представительство Xerox. Во избежание поражения электрическим током или воспламенения, использование поврежденного или неизолированного шнура электропитания не допускается.
10
![]()
Перед началом работы на аппарате
 ВНИМАНИЕ!
При чистке данного изделия его следует во всех случаях выключать и отсоединять от источника питания. Доступ к внутренним частям находящего под напряжением аппарата может привести к поражению электрическим током.
Не допускается подключение аппарата к питанию, если выключатель питания находится в положении “Вкл”. Подсоединение и отсоединение штекера под напряжением может привести к его деформации и нагреву и, в конечном итоге, — к воспламенению.
При отсоединении штекера следует держать штекер, а не шнур, иначе это может привести к повреждению шнура и поражению электрическим током или воспламенению.
Изделие следует выключать и отсоединять от сети, если оно (например, функция факса) не используется в течение выходных или отпускного периода. Следует отметить, что если аппарат выключен, он не сможет принимать факсы.
Раз в месяц следует выключать аппарат и проверять,
что шнур электропитания надежно подсоединен к гнезду;
штекер не нагревается, не заржавел и не деформирован;
штекер и гнездо не запылены и не покрыты ржавчиной;
шнур электропитания не имеет трещин и не изношен.
При обнаружении ненормального состояния следует выключить аппарат и отсоединить его от питания, а затем обратиться в представительство Xerox.
Установка аппарата
 ПРЕДУПРЕЖДЕНИЕ!
Этот аппарат не следует размещать в таких местах, где люди могут наступить на шнур электропитания или споткнуться об него. Трение шнура электропитания или чрезмерное давление на него могут привести к его нагреву и, в конечном итоге, — к поражению электрическим током или воспламенению.
 ВНИМАНИЕ!
Ни в коем случае не допускается установка данного аппарата в следующих местах:
рядом с отопительными батареями и другими источниками тепла.
Рядом с воспламеняющимися материалами, способными источать горючие летучие вещества, например, рядом с занавесками.
В жарких, влажных, пыльных и плохо вентилируемых помещениях.
Под прямым солнечным светом.
Рядом с кухонными плитами или увлажнителями воздуха.
Данное изделие необходимо устанавливать на ровной, прочной поверхности, способной выдержать вес 71 кг. Иначе, при наклоне аппарат может упасть и стать причиной травм.
Аппарат следует устанавливать в хорошо вентилируемых помещениях. Не допускается заслонять вентиляционные отверстия на аппарате.
При установке необходимо соблюдать приведенные далее минимальные расстояния в целях вентиляции и обеспечения доступа к шнуру электропитания. При обнаружении каких-либо аномальных состояний аппарат следует отключить от питания.
11

Перед началом работы на аппарате
|
С дуплексным автоматическим податчиком оригиналов |
С дуплексным автоматическим податчиком оригиналов и |
||||||
|
однолотковым модулем |
|||||||
|
1 101 |
1 101 |
||||||
|
80 |
326 |
595 |
100 |
80 |
326 |
595 |
100 |
|
100 |
100 |
||||||
|
586 |
586 |
||||||
|
1 498 |
1 503 |
||||||
|
412 |
417 |
||||||
|
400 |
400 |
|
(Единицы: мм) |
(Единицы: мм) |
Наклон аппарата при установке не должен составлять более 10 градусов. Иначе он может упасть и стать причиной травм.
|
спереди |
слева |
||||
|
спереди |
|||||
|
сзади |
слева |
справа |
справа |
||
|
10° |
сзади |
° |
10° |
10° |
|
|
10 |
Для связки проводов следует пользоваться хомутками и гофрированными трубками, поставляемым компанией Xerox. Иначе могут возникнуть повреждения.
12

Перед началом работы на аппарате
Прочее
Чтобы поддерживать оптимальные рабочие параметры аппарата всегда следует соблюдать следующие условия эксплуатации:
Температура: 10–32 C Влажность 15–85%
Если изделие оставлено в холодном помещении. которое затем быстро нагревается с помощью обогревателя, конденсация может накапливаться внутри аппарата, что может вызвать неполное пропечатывание изображений.
Безопасность при эксплуатации
 ПРЕДУПРЕЖДЕНИЕ!
Действия оператора по обслуживанию аппарата приведены в документации пользователя, поставляемой вместе с аппаратом. Не допускается выполнение каких-либо процедур, не описанных в документации.
В целях безопасности конструкция данного изделия предусматривает блокировку доступа оператора к опасным участкам. Опасные участки изолированы от операторов кожухами или защитными деталями, для снятия которых требуются инструменты. В целях избежания поражения электрическим током и травм, ни в коем случае нельзя снимать эти кожухи и защитные детали.
Во избежание поражения электрическим током и воспламенения, при возникновении указанных далее ситуаций, следует немедленно отключить аппарат и обратиться в местное представительство Xerox.
Из аппарата идет дым, или его поверхность перегрелась.
Аппарат издает необычные звуки или запахи.
Шнур электропитания потрескался или изношен.
Сработал размыкатель цепи, предохранитель или какое-либо иное устройство безопасности.
На аппарат пролилась какая-либо жидкость.
Аппарат пропитался водой.
Повреждена какая-либо часть аппарата.
Не допускается вставлять какие-либо предметы в отверстия или прорези на данном аппарате.
На аппарат нельзя ставить или класть указанные далее предметы.
Емкости с жидкостью, например цветочные вазы или чашки с напитками.
Металлические предметы, например скрепки или скобки.
Тяжелые предметы.
Если на аппарат пролилась жидкость или в него попали металлические предметы, это может привести в поражению электрическим током или воспламенению.
В аппарате не допускается использование токопроводящей бумаги, например бумаги для оригами, копировальной карбоновой бумаги или бумаги с токопроводящим покрытием. При застревании такой бумаги она может вызвать короткое замыкание и, в конечно итоге, — воспламенение.
При чистке данного изделия следует использовать специально предназначенные для этого чистящие средства. Использование других чистящих средств может привести в ухудшению эксплуатационных характеристик аппарата. Во избежание воспламенения и взрыва, ни в коем случае не допускается использование чистящих средств в аэрозольной упаковке.
13

Перед началом работы на аппарате
Если для устранения застревание необходимо снять лоток, следует обратиться в местное представительство Xerox. Нельзя снимать лоток, поскольку это может привести к травме.
Не допускается проигрывание компакт-диска, поставленного вместе с изделием в музыкальном проигрывателе компакт-дисков. Во всех случаев следует использовать привод CD-ROM. Иначе сильный звук может повредить аудиопроигрыватель или нанести вред слуху.
 ВНИМАНИЕ!
Следует во всех случаях соблюдать все предупреждения, указанные на данном изделии, или сопровождающие данное изделие. Во избежание риска ожога и поражения электрическим током, ни в коем случае не следует прикасаться к участку со знаками “Высокая температура” или “Высокое напряжение”.
Электрические и механические защитные блокировки необходимо поддерживать в действующем состоянии. Защитные блокировки необходимо держать на удалении от магнитных материалов. Магнитные материалы могут привести к случайному срабатыванию изделия и вызвать травмы или поражение электрическим током.
Не пытайтесь удалить бумагу, застрявшую глубоко внутри изделия, особенно бумагу, намотавшуюся на блок фьюзера или ролик нагрева. Это может привести к травмам и ожогам. Следует немедленно выключить аппарат и обратиться в местное представительство Xerox.
Не допускается приложение чрезмерных усилий, чтобы прижать плотный документ к стеклу экспонирования. Стекло при этом может сломаться и вызвать травмы.
При перемещении данного изделия в другое помещение следует обращаться в местное представительство Xerox.
При продолжительной эксплуатации или изготовлении большого количества копий следует обеспечивать хорошую вентиляцию аппарата. В плохо вентилируемом помещений запахи, например, запах озона, могут отрицательно сказаться офисной среде.
Для обеспечения удобной и безопасной рабочей среде необходима соответствующая вентиляция.
Расходные материалы
 ПРЕДУПРЕЖДЕНИЕ!
Все расходные материалы следует хранить в соответствии с инструкциями на их упаковке или контейнере.
Для данного изделия ни в коем случае не допускается использование пылесоса для уборки рассыпавшегося тонера и удаления остатков тонера из картриджа или контейнера.
Тонер может воспламениться от статических разрядов внутри пылесоса и вызвать взрыв.
Для уборки тонера следует использоваться влажную ткань. Если рассыпался большой объем тонера, следует обращаться в местное представительство Xerox.
14

Перед началом работы на аппарате
Ни в коем случае нельзя сжигать тонер-картриджи на отрытом огне. Остатки тонера в картридже могут воспламениться и привести к взрыву и ожогам. По вопросам утилизации использованных тонер-картриджей следует обращаться в местное представительство Xerox.
Ни в коем случае нельзя сжигать сборники отработанного тонера на открытом огне. Остатки тонера могут воспламениться и привести к взрыву и ожогам. По вопросам утилизации сборников отработанного тонера следует обращаться в местное представительство Xerox.
 ВНИМАНИЕ!
Принт-картриджи (или барабаны, если они не являются картриджами) и тонер-картриджи следует хранить в недоступном для детей месте. Если ребенок случайно проглотил тонер, он должен его выплюнуть, прополоскать рот водой, выпить воды и немедленно обратиться к врачу.
При замене принт-картриджа (или барабана, если они не является картриджами) и тонер-картриджа следует соблюдать осторожность, чтобы не рассыпать тонер. Если тонер рассыпался, следует избегать его соприкосновения с одеждой, кожей, глазами и ртом, а также не допускать попадания тонера в дыхательные пути.
Если тонер рассыпался на кожу или одежду, его следует смыть мылом и водой. Если частицы тонера попали в глаза, глаза следует промыть большим количеством воды в течение, как минимум, 15 минут до исчезновения раздражения. При необходимости следует обратиться к врачу.
При попадании тонера в дыхательные пути следует выйти на свежий воздух и прополоскать рот водой.
При проглатывании тонера его следует выплюнуть, прополоскать рот водой, выпить большое количество воды и немедленно обратиться к врачу.
15
 Loading…
|
Код: 111530
Бесплатная доставка
? В корзину Сравнить Купить в один клик Новости интернет-магазина «Лаукар»:28.03.2023 22.02.2023 13.02.2023 Дополнительная информация в категории МФУ:Принтеры и МФУ — особенности и термины Таблица Авторизованных сервисных центров по брендам. Описание Инструкция Отзывы (0) В интернет-магазине бытовой техники «Лаукар» Вы можете скачать инструкцию к товару МФУ Xerox DocuCentre SC2020 (SC2020V_U) совершенно бесплатно. Все инструкции, представленные на сайте интернет-магазина бытовой техники «Лаукар», предоставляются производителем товара. Для того чтобы скачать инструкцию, Вам необходимо нажать на ссылку «скачать инструкцию», расположенную ниже, а в случае, если ссылки нет, Скачать инструкцию Смотреть инструкцию
Фирма-производитель оставляет за собой право на внесение изменений в конструкцию, дизайн и комплектацию товара: МФУ Xerox DocuCentre SC2020 (SC2020V_U). Пожалуйста, сверяйте информацию о товаре с информацией на |


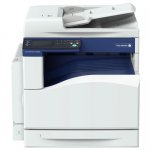


- Manuals
- Brands
- Fuji Xerox Manuals
- All in One Printer
- DocuCentre SC2020
- User manual
-
Contents
-
Table of Contents
-
Troubleshooting
-
Bookmarks
Quick Links
DocuCentre SC2020
User Guide
Related Manuals for Fuji Xerox DocuCentre SC2020
Summary of Contents for Fuji Xerox DocuCentre SC2020
-
Page 1
DocuCentre SC2020 User Guide… -
Page 2
As the copying machine contains a feature designed to prevent forging of certain documents, there may be rare instances where copies do not achieve the desired results. Fuji Xerox is not responsible for any breakdown of machines due to infection of computer virus or computer hacking. -
Page 3: Table Of Contents
Table of Contents Table of Contents Before Using the Machine ……………………9 Preface …………………………….. 10 Types of Manuals ………………………… 11 Using This Guide…………………………12 Organization of This Guide ……………………12 Conventions…………………………13 Safety Notes………………………….. 15 Electrical Safety ……………………….16 Machine Installation……………………..17 Operational Safety ………………………..
-
Page 4
Installing the Print Driver/Scan Driver…………………..42 Installing the Print Driver …………………….42 Installing the Scan Driver …………………….42 Uninstalling …………………………42 Product Overview……………………….45 Machine Components ……………………….46 Front, Left Side…………………………46 Right Side, Rear………………………..47 Inside …………………………..48 Duplex Automatic Document Feeder………………..49 Power Source…………………………..50 Switching the Power On ……………………..50 Switching the Power Off ………………………50 Power Saver Modes ……………………….51 Entering Power Saver Modes ……………………51… -
Page 5
Table of Contents Canceling the Current Copy Job………………….79 Checking Job Status……………………… 79 ID Card Copy…………………………. 80 Advanced Copy Settings……………………..82 Output Color…………………………83 Select Tray …………………………83 Reduce / Enlarge……………………….84 2 Sided Copying……………………….86 Lighten / Darken ……………………….86 Original Type………………………… -
Page 6
Receiving a Fax Manually Using an External Telephone…………114 Receiving Faxes Using the DRPD Mode………………. 114 Receiving Faxes in the Memory ………………….115 Other Ways to Fax ……………………….116 Using the Secure Receiving Mode…………………. 116 Using an Answering Machine ………………….118 Using a Computer Modem…………………… -
Page 7
Table of Contents Enabling the Panel Lock……………………..202 Disabling the Panel Lock ……………………204 Limiting Access to Copy, Fax, and Scan ………………..206 Setting the Power Saver Option ……………………209 About the Concurrent Jobs Feature………………….211 Resetting to Factory Defaults ……………………212 10 Machine Status ………………………..215 Checking Consumables ……………………..216 Selecting Language ……………………….217 Checking the Machine’s IP Address ………………….218… -
Page 8
Scan Problems …………………………264 Scan Driver/Printer Utility Problems ………………….266 Error Code…………………………..267 Paper Jams…………………………… 274 Paper Jam in Left Side Cover [A] ………………….274 Paper Jam in Left Side Cover [B] ………………….275 Paper Jams in Trays 1 and 2 …………………… 276 Paper Jams in Tray 5 (bypass)…………………. -
Page 9: Before Using The Machine
1 Before Using the Machine This chapter describes how to use this guide, as well as safety notes and legal notice you should read before using the machine. Preface ………………………… 10 Types of Manuals…………………….. 11 Using This Guide ……………………… 12 Safety Notes ………………………
-
Page 10: Preface
1 Before Using the Machine Preface Thank you for selecting the DocuCentre SC2020 (hereafter referred to as «the machine»). This guide describes how to operate the machine and the precautions you should follow during operation. To get the most out of the machine and to use it effectively, be sure to read this guide before use.
-
Page 11: Types Of Manuals
Types of Manuals Types of Manuals The following guides are provided with the machine. Accompanying Manuals User Guide (this guide) (Driver CD Kit) The guide describes how to use the copy, print, fax and scan features as well as how to set the paper, perform everyday maintenance, make machine status settings, perform troubleshooting, and set up a network.
-
Page 12: Using This Guide
1 Before Using the Machine Using This Guide This guide is intended for first time users of the machine. It describes the basic operations for the copy, fax, scan, and print features. Organization of This Guide This guide consists of the following chapters: 1 Before Using the Machine Describes how to use this guide and provides license information.
-
Page 13: Conventions
Using This Guide 14 Appendix Describes the specifications of the machine, optional accessories, and cautions/restrictions. Conventions The screen shots and illustrations used in this guide vary depending on the machine configuration and optional components installed. Some of the items in the screen shots may not be displayed or available depending on your machine configuration.
-
Page 14
1 Before Using the Machine Portrait Orientation Landscape Orientation feed direction feed direction… -
Page 15: Safety Notes
Any unauthorized alteration including an addition of new functions or connection to external devices may not be covered by the product warranty. Contact your local Fuji Xerox representative for more information. Follow all warning instructions marked on this product. The warning marks stand for the…
-
Page 16: Electrical Safety
Plug the power cord directly into a grounded electrical outlet. To prevent overheat and a fire accident, do not use an extension cord, a multi-plug adaptor or a multiple connector. Consult your local Fuji Xerox representative to check if an outlet is grounded.
-
Page 17: Machine Installation
Once you notice any unusual condition, switch off and unplug this product first and contact your local Fuji Xerox representative. Machine Installation Do not locate this product where people might step on or trip over the power cord.
-
Page 18
1 Before Using the Machine With Duplex Automatic Document Feeder With Duplex Automatic Document Feeder and One Tray Module 1101 1101 Unit; mm Unit; mm Do not incline the product at more than 10 degree angle. Otherwise, it may fall over and cause injuries. -
Page 19: Operational Safety
To avoid the risk of electric shock and a fire accident, switch off and unplug the product promptly in the following conditions, then contact your local Fuji Xerox representative. The product emits smoke or its surface is unusually hot.
-
Page 20: Consumable
1 Before Using the Machine If you need to pull out a tray to remove paper jam, contact your local Fuji Xerox representative. Do not pull out a tray, otherwise it may cause injuries. Never play the CD-ROM supplied with the product on an audio player. Always use a CD-ROM player.
-
Page 21
Safety Notes Never throw a waste toner bottle into an open flame. Toner may catch fire and cause burn injuries or explosion. If you have a used waste toner bottle no longer needed, contact your local Fuji Xerox representative for its disposal. Keep drum cartridges (or drum if not a cartridge type) and toner cartridges out of the reach of children. -
Page 22: Location Of Warning And Caution Labels
1 Before Using the Machine Location of Warning and Caution Labels Always follow all warning instructions marked on or supplied with this product. To avoid the risk of burn injuries and electric shock, never touch the area with the «High Temperature» or «High Voltage» marks on.
-
Page 23: Regulation
Changes and modifications to this product not specifically approved by Fuji Xerox may void the user’s authority to operate this equipment.
-
Page 24: About License
1 Before Using the Machine About License This section describes information about licenses. Be sure to read through it. JPEG Code Our printer software uses some of the codes defined by the Independent JPEG Group. Libcurl COPYRIGHT AND PERMISSION NOTICE Copyright (c) 1996 — 2006, Daniel Stenberg, <daniel@haxx.se>.
-
Page 25: Wide Dhcp Client
About License THIS SOFTWARE IS PROVIDED BY THE FREEBSD PROJECT «AS IS» AND ANY EXPRESS OR IMPLIED WARRANTIES, INCLUDING, BUT NOT LIMITED TO, THE IMPLIED WARRANTIES OF MERCHANTABILITY AND FITNESS FOR A PARTICULAR PURPOSE ARE DISCLAIMED. IN NO EVENT SHALL THE FREEBSD PROJECT OR CONTRIBUTORS BE LIABLE FOR ANY DIRECT, INDIRECT, INCIDENTAL, SPECIAL, EXEMPLARY, OR CONSEQUENTIAL DAMAGES (INCLUDING, BUT NOT LIMITED TO, PROCUREMENT OF SUBSTITUTE GOODS OR SERVICES;…
-
Page 26: Md5
1 Before Using the Machine Copyright (C) 1991-2, RSA Data Security, Inc. Created 1991. All rights reserved. License to copy and use this software is granted provided that it is identified as the «RSA Data Security, Inc. MD5 Message-Digest Algorithm» in all material mentioning or referencing this software or this function.
-
Page 27: Math Library
About License package is highly portable C code; we have tested it on many machines ranging from PCs to Crays. We are releasing this software for both noncommercial and commercial use. Companies are welcome to use it as the basis for JPEG-related products. We do not ask a royalty, although we do ask for an acknowledgement in product literature (see the README file in the distribution for details).
-
Page 28: Legal Notice
1 Before Using the Machine Legal Notice Copying or printing certain documents may be illegal in your country. Penalties of fines or imprisonment may be imposed on those found guilty. The following are examples of items that may be illegal to copy or print in your country. Currency Banknotes and checks Bank and government bonds and securities…
-
Page 29: Environment Settings
2 Environment Settings This chapter describes the machine’s operating environment. Note • For information on optional components required to make some settings in this chapter, contact our Customer Support Center. Supported Environment ………………….30 Interface Cables ……………………..32 Setting the Network Environment ………………34 Activating the Communication Port To Use…………..
-
Page 30: Supported Environment
2 Environment Settings Supported Environment This section describes the environment settings needed to use the machine’s print, scan and fax features. Print Feature The machine can be connected directly to a computer for use as a local printer, or can be connected to a network for use as a network printer.
-
Page 31: Fax Feature
Supported Environment Using the Network connection Scan to E-mail Uses the SMTP protocol to send the document scanned by the machine as an e-mail attachment. For information on how to use this feature, refer to «Sending an E-mail With the Scanned File» (P.141). Scan to PC (Network) Uses the FTP or SMB protocol to save the document scanned by the machine in a common folder created on a network PC.
-
Page 32: Interface Cables
2 Environment Settings Interface Cables When connecting the machine directly to a computer, use a USB interface. When connecting the machine to a network, use an Ethernet interface. Using the USB Interface The machine supports the USB 2.0 interface. To connect the USB interface: Press the power switch to the [ ] position to turn the power OFF.
-
Page 33
Interface Cables Press the power switch to the [ ] position to turn the power OFF. Note • Make sure that the display is turned off. Connect a network cable to the Ethernet port. Note • Prepare a network cable suitable for your network connection. -
Page 34: Setting The Network Environment
2 Environment Settings Setting the Network Environment This section describes how to make the settings needed to use the TCP/IP protocol. Note • The machine supports IPv6 addresses in an IPv6 network environment. For more information, refer to «Setting the Machine’s IP Address (IPv6)» (P.35). Configuration on the Machine IP addresses are managed for the entire system.
-
Page 35: Setting The Machine’s Ip Address (Ipv6)
Setting the Network Environment If the machine’s IP address has not been set, set the IP address by using the Printer Setup Utility for Setting IP Address included in the Driver CD Kit, using the control panel to change the [Get IP Address] setting to [Panel], or using CentreWare Internet Services. Printer Setup Utility for Setting IP Address Control Panel CentreWare Internet Services…
-
Page 36: When Using The Printer Setup Utility For Setting The Ip Address
2 Environment Settings For information on how to check on the [About This MFP] screen, refer to «Checking the Machine’s IP Address» (P.218). For information on how to check using CentreWare Internet Services, refer to the online Help of CentreWare Internet Services.
-
Page 37
Setting the Network Environment Make sure that the network cable is connected to the machine, and then click [Next]. As a list of available IP addresses and Mac addresses appears, select the machine and click [Next]. If you already have the IP address of the machine, click [Enter IP Address] and directly enter the IP address on the displayed window. -
Page 38
2 Environment Settings After confirming information displayed, click [Apply]. The specified settings are applied. Click [Finish] to exit the Printer Setup Utility for Setting IP Address. When the settings are properly configured, the machine reboots automatically. Confirm the assigned IP address after completing the setting process by one of the following methods. -
Page 39: Activating The Communication Port To Use
Activating the Communication Port To Use Activating the Communication Port To Use Use CentreWare Internet Services to activate the communication port you want to use. You can activate the following ports: Port Description Select [Enabled] to use the LPD port. Port9100 Select [Enabled] to use the Port9100 port.
-
Page 40: Using Centreware Internet Services
2 Environment Settings Using CentreWare Internet Services CentreWare Internet Services CentreWare Internet Services provides services such as changing settings using a web browser on a computer connected to a TCP/IP network environment. For more information on how to use CentreWare Internet Services, refer to the online Help of CentreWare Internet Services.
-
Page 41: Starting Centreware Internet Services
Using CentreWare Internet Services You will also need to make other web browser settings to make CentreWare Internet Services work properly. The following procedure is based on the Internet Explorer 6.0. From the [Tools] menu, select [Internet Options]. In the [General] tab, click [Settings] under [Temporary Internet Files]. In the [Settings] dialog box, select [Check for newer versions of stored pages:].
-
Page 42: Installing The Print Driver/Scan Driver
The CD-ROM contains the following print driver. Print Driver Name Description FX DocuCentre SC2020 Click [Print/Fax Driver] in the [Main] menu of the Driver CD Kit to start installation. The standard print driver converts the data created by the application software to images before sending them to the printer.
-
Page 43
Installing the Print Driver/Scan Driver Uninstalling Other Software To uninstall other software installed from the Driver CD Kit CD-ROM, see the application’s Readme file. Readme files can be displayed from the «Product Information (HTML)» on the CD-ROM. -
Page 44
2 Environment Settings… -
Page 45: Product Overview
3 Product Overview This chapter lists the name of each machine component, and describes basic operations such as how to turn the power ON/OFF and use the control panel. Machine Components……………………. 46 Power Source ……………………..50 Power Saver Modes ……………………51 Control Panel ……………………..
-
Page 46: Machine Components
3 Product Overview Machine Components This section describes the machine components and their functions. Front, Left Side Component Description Document glass cover Holds document in place. Document glass Place document here. Control panel Contains the buttons, the LED indicators, and the touch screen used for operations.
-
Page 47: Right Side, Rear
Machine Components Right Side, Rear Component Description Ethernet Port Connect a network cable. USB Port Connect a USB 2.0 cable. Power switch Switches the power of the machine on and off. For more information, refer to «Power Source» (P.50). Power cord connector Connects the power cord.
-
Page 48: Inside
3 Product Overview Inside Component Description Yellow toner [Y] cartridge Contains yellow toner (the powder used to form the image). Magenta toner [M] cartridge Contains magenta toner (the powder used to form the image). Cyan toner [C] cartridge Contains cyan toner (the powder used to form the image). Black toner [K] cartridge Contains black toner (the powder used to form the image).
-
Page 49: Duplex Automatic Document Feeder
Machine Components Duplex Automatic Document Feeder Component Description Document feeder top cover Open this cover to remove any jammed paper. Inner cover Open this cover to remove any jammed paper. Document guides Aligns the edges of documents. Document feeder tray Load documents here.
-
Page 50: Power Source
3 Product Overview Power Source Switching the Power On The following describes how to switch the power on. The machine takes approximately 39 seconds or less to warm up and to be ready to copy, print, or fax after the power is turned on. It may take slightly longer than normal depending on the device configuration.
-
Page 51: Power Saver Modes
Power Saver Modes Power Saver Modes The machine is installed with the Power Saver function that will automatically cut off the electricity to the machine if no copy or print data is received for a certain duration. There are two Power Saver modes: Low Power mode and Sleep mode. Low Power Mode The machine’s power is not turned OFF completely in Low Power mode.
-
Page 52: Control Panel
3 Product Overview Control Panel The names and functions of the control panel’s components are described below. Redial/Pause Power Saver Services Home Job Status Clear All Stop Start Machine Status Error Data Component Function Touch Screen Displays the operation menu items and the machine status messages. Numeric keypad Press these buttons to enter numbers (such as number of copies) or text.
-
Page 53: Touch Screen — Services Home Screen
Control Panel Touch Screen — Services Home Screen This section describes the fields and buttons on the Services Home screen which is displayed by pressing the <Services Home> button. Message Field Toner Status Icon Function Buttons Message Field Displays the printer status, error message, and IP address assigned to the printer. Toner Status Icon Displays the condition of toner in six levels (The toner level for each color: 100%, 80%, 60%, 40%, 20%, 0%).
-
Page 54: Auditron
3 Product Overview Auditron Auditron contains an authentication function that can set limits on what processes can be used, as well as an account management that can be used to control usage based on authentication. The following illustration shows how the machine works with Print Auditron. You can also limit the copy function by using Copy Auditron.
-
Page 55: Entering Characters
Entering Characters Entering Characters This section describes how to use the keyboard displayed on the control panel and the number pad. Using the Keyboard Displayed on the Control Panel During operations, a screen for entering text sometimes appears. The following describes how to enter text.
-
Page 56: Setting The Options Configuration
The following procedure uses Windows 7 and PCL 6 driver as an example. The procedure differs depending on the OS and the print driver. Select [Start] > [Devices and Printers]. Right-click the printer icon of the DocuCentre SC2020 and select [Printer properties]. Click the [Configuration] tab. Click [Bi-Directional Setup].
-
Page 57
Setting the Options Configuration Click [Get Information from Printer]. If [Printer Searching Method] is displayed The machine’s information is not loaded onto the print driver. Complete the following operations. 1) Select [Specify Address], and click [Next]. 2) Enter the printer name or IP Address in the [Printer Name or IP Address] field. -
Page 58: Cooling Mode
3 Product Overview Cooling Mode The machine enters the Cooling mode if its internal temperature rises too high. During this mode, either of the following screen is displayed on the touch screen. Screen A Screen B This screen disappears when the internal temperature has cooled down. Wait until the screen disappears.
-
Page 59: Loading Paper
4 Loading Paper This chapter describes the paper that can be used with the machine, precautions when handling paper, and how to load paper in trays. Paper Types……………………….. 60 Loading Paper ……………………..65 Changing Paper Size……………………68 Changing the Paper Settings ………………..70…
-
Page 60: Paper Types
Use of non-recommended paper types may result in paper jams, lower print quality, malfunctions, or damage to the machine. To achieve optimum machine performance, use only paper types recommended by Fuji Xerox. If you desire to use paper other than the paper recommended by Fuji Xerox, contact our Customer Support Center. WARNING Do not use conductive paper such as origami paper, carbonic paper or conductively-coated paper.
-
Page 61: Supported Paper Type
Paper Types Duplexing (two-sided printing) The following paper types support automatic duplexing: Paper Type (Quality) Plain (60 — 89 gsm) Bond (90-105 gsm) Heavyweight (106-169 gsm) Supported Paper Type Standard Paper When printing or copying on commonly used paper (plain paper), use paper meeting the standards described below.
-
Page 62: Usable Paper
4 Loading Paper Basis Weight Paper Name Paper Type Notes / Countermeasure (gsm) Professional Plain Do not keep the paper unsealed in a high-humidity condition. Plain Before copying or printing, fan the stack of paper well and reload it in the tray. H-paper Plain Before copying or printing,…
-
Page 63: Unusable Paper
Colotech + Heavyweight Heavyweight Unusable Paper Using paper not recommended by Fuji Xerox may cause a paper jam or machine malfunction. Use paper recommended by Fuji Xerox. Damp or wet paper Paper pre-printed with other printer or copying machine Wrinkled, creased, or ripped paper…
-
Page 64
4 Loading Paper When Heavyweight Paper/Extra-HW Paper is supplied to the Tray 5 and causes paper jams, reduce the paper quantity or turn over the paper in the Tray 5. -
Page 65: Loading Paper
Loading Paper Loading Paper This section describes how to load paper in a paper tray. Types of paper loaded in trays The machine automatically detects the size and orientation of paper loaded in a tray, but the paper type must be set manually. Each tray’s default paper type setting is Plain paper. Change the paper type setting when loading a different type of paper.
-
Page 66: Loading Paper In Tray 5 (Bypass)
4 Loading Paper Important • While the machine is copying or printing, do not pull out the tray that the job uses. • To prevent paper jams or loading errors, do not load different sizes or types of paper on top of any remaining paper in a tray.
-
Page 67
Loading Paper Load paper with the side to be copied or printed on facing down, inserting paper until its edge lightly touches against the paper feed entrance. Important • Do not load mixed paper types in a tray. • Do not load paper above the maximum fill line. It may cause paper jams or machine malfunctions. -
Page 68: Changing Paper Size
4 Loading Paper Changing Paper Size This section describes how to change paper size in Trays 1 and 2. Important • Do not load mixed paper sizes into a tray. Note • A paper type is preset for Trays 1 and 2. Normally, [Plain] is set for the trays. When changing it to a different paper type, change the paper quality settings to match the type of paper to be loaded so that you can maintain high quality printing.
-
Page 69
Changing Paper Size Load paper with the side to copy or print on facing up. Align the leading edge of paper with the left side of the tray. Important • Do not load paper above the maximum fill line. It may cause paper jams or machine malfunctions. -
Page 70: Changing The Paper Settings
4 Loading Paper Changing the Paper Settings This section describes how to change the paper type setting for a tray. A paper type is preset for Trays 1 and 2. Normally, [Plain] is set for the trays. To maintain the same print quality after changing paper in a different quality in the same tray, you need to change the paper quality setting for the tray that matches new paper loaded.
-
Page 71
Changing the Paper Settings Select [Type], and then select the desired paper type. Note • If you select Tray 5 (bypass), [Size] and [Type] are displayed. To change the paper size, select [Size]. To use a non-standard document size, set [Size] to [Custom Size], and then specify the paper size. -
Page 72
4 Loading Paper… -
Page 73: Copy
5 Copy This chapter describes the Copy functions and operations. Overview of Copy Operations ………………..74 Operations Performed While Copying……………… 79 ID Card Copy ……………………..80 Advanced Copy Settings ………………….82…
-
Page 74: Overview Of Copy Operations
5 Copy Overview of Copy Operations This section describes the basic flow of copy operations including placing document in the machine and making advanced settings. Placing Document The following two methods are available to place document: Document feeder Single sheet Multiple sheets Document glass Single sheet…
-
Page 75: Document Glass
Overview of Copy Operations Place the document in the center of the document feeder, with the side to be scanned (or the front surface of a 2 sided document) facing Align the document guides to each side of document. Open the document stopper. Document Glass Document sizes supporting automatic detection The document size is detected automatically when [Original Size] is set to [Auto].
-
Page 76: Making Advanced Settings
5 Copy Follow the steps below to place document on the document glass. You can place a single sheet document or bound document such as book on the document glass. Open the document glass cover. Important • When using the document glass, make sure to close the document glass cover after finishing your copy job.
-
Page 77: Entering The Number Of Copies
Overview of Copy Operations Select [Copy]. Make advanced settings as needed. Refer to «Advanced Copy Settings» (P.82). Entering the Number of Copies You can enter a value between 1 and 999 for the number of copies. Use the numeric keypad to enter the desired Numeric keypad number of copies.
-
Page 78: Starting The Copy Job
5 Copy Starting the Copy Job Press the <Start> button. <Start> button Important • If document is placed in the document feeder, do not press down on the document while it is Redial/Pause Power Saver being fed through the machine. Clear All Stop Note…
-
Page 79: Operations Performed While Copying
Operations Performed While Copying Operations Performed While Copying While the machine is copying, you can cancel the currently executing job, and check or cancel pending jobs. Canceling the Current Copy Job To cancel the currently executing copy job: Press the <Stop> button. <Stop>…
-
Page 80: Id Card Copy
5 Copy ID Card Copy You can copy both sides of an ID card (name card, employee card, etc.) on one side of paper. Select [ID Card Copy] to use this feature. Original document Original orientation Copied output Front side Front side Back side Back side…
-
Page 81
ID Card Copy Press the <Start> button. <Start> button Redial/Pause Power Saver Clear All Stop Start Error Data To continue scanning the other side of the ID card, place the other side of the ID card face down slightly away from the top left corner of the document glass, and then close the document glass cover. -
Page 82: Advanced Copy Settings
5 Copy Advanced Copy Settings This section describes the advanced functions available for Copy feature. Setting Item Purpose Page: Copy Output Color To select the mode for color or black and P.83 white copying. Select Tray To select a tray. P.83 Reduce / Enlarge To reduce or enlarge the size of a copied…
-
Page 83: Output Color
Advanced Copy Settings Select [Copy]. Select the desired setting item as needed. Output Color To select the mode for color or black and white copying. Select [Output Color] on the [Copy] tab. Select [Full Color] or [Black & White], and then select [OK].
-
Page 84: Reduce / Enlarge
5 Copy Select the desired setting, and then select [OK]. Note • Bold values are the factory default menu settings. Auto The paper is fed from an automatically selected tray. Tray5 (Bypass) The paper is fed from the Tray 5 (bypass). Tray 1 The paper is fed from Tray 1.
-
Page 85
Advanced Copy Settings A4, B4 A4, B5 B4, A4 115% A3, B5 122% B4, A5 141% A3, B5 200% inch series 100% Auto% 8.5 x 11″ 5.5 x 8.5″ A4, B4 8.5 x 14″ 8.5 x 11″ 11 x 17″, A4 8.5 ×… -
Page 86: Sided Copying
5 Copy 2 Sided Copying To make duplex copies with the specified binding position. Select [2 Sided Copying] on the [Copy] tab. Select the desired setting, and then select [OK]. Note • Bold values are the factory default menu settings. Select 1-sided or 2-sided and 1 Sided specify binding position for the 2-…
-
Page 87: Original Type
Advanced Copy Settings Select the desired level on the [Lighten / Darken] bar, and then select [OK]. You can select a contrast level from seven levels between [Darken] and [Lighten]. Selecting a cell on the left side of the bar makes the document contrast darker, and selecting a cell on the right side of the bar makes the document contrast lighter.
-
Page 88: Saturation
5 Copy Select the [Quality] tab, and then select [Sharpness]. Select the desired setting, and then select [OK]. Note • Bold values are the factory default menu settings. Sharpen Makes the copy image sharper than the original. Normal The color clarity of the image is the same as the original. Soften Makes the copy image softer than the original.
-
Page 89: Auto Background Suppression
Advanced Copy Settings Auto Background Suppression To suppress the background of the original to enhance text on the copy. Select the [Quality] tab, and then select [Auto Background Suppression]. Select [On], and then select [OK]. Collation To sort the copy output. For example, if you make two copies of three page documents, one complete three page document will be printed followed by the second complete document.
-
Page 90: Original Size
5 Copy When you are using the document glass and it is set to [Collated], the display prompts you for another page after pressing the <Start> button. 1) If you want to place a new document, replace the document with a new document, and then select [Continue] or press the <Start>…
-
Page 91: Pages Per Side
Advanced Copy Settings Letter (8.5 x 11″) Letter (8.5 x 11″) inch series Auto Tabloid (11 x 17″) Legal (8.5 x 14″) Folio (8.5 x 13″) Letter (8.5 x 11″) Letter (8.5 x 11″) A3 (297 x 420 mm) B4 (257 x 364 mm) A4 (297 x 210 mm) A4 (210 x 297 mm) B5 (257 x 182 mm)
-
Page 92: Edge Erase
5 Copy Note • Bold values are the factory default menu settings. Does not perform Pages Per Side printing. 2-Up Automatically reduces the original pages to fit onto one sheet of paper. Edge Erase To specify the top and bottom margins of the copy. Note •…
-
Page 93: Fax
6 Fax This chapter describes the Fax functions. Note • This feature is available when the Fax Kit is (optional) installed. Overview of Fax Operations ………………… 94 Operations during Faxing (Sending)………………99 Operations during Faxing (Receiving) …………….100 Advanced Fax Settings ………………….101 Sending a Fax Manually………………….
-
Page 94: Overview Of Fax Operations
6 Fax Overview of Fax Operations This section describes the basic flow of fax operations including placing document in the machine, setting the recipient address, and making advanced settings. Important • You must set the [Region] and [Date & Time] items to use the Fax feature. For more information, refer to «Region»…
-
Page 95
Overview of Fax Operations Important • To avoid paper jams, use the document glass for mixed size, folded, wrinkled, cut-and-pasted documents, curled paper, or carbon-backed paper. If you can flatten the curled document, you can use the document. Follow the steps below to place document in the document feeder. You can place a single or multiple pages of a document. -
Page 96: Specifying The Recipient
6 Fax Important • The paper size for fax transmissions is different from the document sizes supporting automatic detection. For more information, refer to «Original Size» (P.103). CAUTION Do not apply excessive force to hold thick document on the document glass. It may break the glass and cause injuries.
-
Page 97: Making Advanced Settings
Overview of Fax Operations Press the <Services Home> button. <Services Home> button Select [Fax]. Services Home Note • You must enter the [Region] setting to use the Fax feature. If a message asking you to set the Job Status region appears when you select [Fax], set your region.
-
Page 98: Starting The Fax Job
6 Fax Make advanced settings as needed. Example: Settings in the [Options] tab For more information on advanced settings, refer to «Advanced Fax Settings» (P.101). Starting the Fax Job Press the <Start> button. <Start> button Important • If the document is placed in the document feeder, do not press down on the document Redial/Pause Power Saver…
-
Page 99: Operations During Faxing (Sending)
Operations during Faxing (Sending) Operations during Faxing (Sending) You can cancel the fax currently being sent, and check or cancel pending jobs. Canceling the Fax Being Sent To cancel the fax currently being sent: Press the <Stop> button. <Stop> button Redial/Pause Power Saver Clear All…
-
Page 100: Operations During Faxing (Receiving)
6 Fax Operations during Faxing (Receiving) You can cancel the fax currently being received. Canceling the Fax Being Received To cancel the fax currently being received. Press the <Stop> button. <Stop> button Redial/Pause Power Saver Clear All Stop Start Error Data Select the fax job that you want to cancel, and then select [Delete].
-
Page 101: Advanced Fax Settings
Advanced Fax Settings Advanced Fax Settings This section describes the advanced functions available for Fax feature. Setting Item Purpose Page: Lighten / Darken To adjust the contrast to make the copy P.102 lighter or darker than the original. Resolution To set the scan resolution. P.102 OnHook To send or receive faxes manually.
-
Page 102: Lighten / Darken
6 Fax Lighten / Darken You can set the density from seven levels. Select [Lighten / Darken] on the [Fax] tab. Select the density level, and then click [OK]. Darken +1, +2, and +3 Creates copies with a dark density. Use this setting to scan document containing light objects.
-
Page 103: Onhook
Advanced Fax Settings Note • Faxes scanned in the Super Fine mode transmit at the highest resolution supported by the receiving device. Photo Suitable for documents containing photographic images. OnHook Use this function to send or receive faxes manually. For information on how to send a fax manually, refer to «Sending a Fax Manually» (P.107). For information on how to receive a fax manually, refer to «Receiving a Fax Manually in the TEL Mode»…
-
Page 104: Delayed Send
6 Fax Select the [Options] tab, and then select [Original Size]. Select the document size, and then select [OK]. Auto If document is a standard size, the machine detects the document size automatically. The paper size used for sending the fax is determined by the detected document size.
-
Page 105: Polling Receive
Advanced Fax Settings Select the [Options] tab, and then select [Delayed Send]. Select [On]. Note • Select [Off] to disable this function. Use the numeric keypad to enter the time, and then select [OK]. Polling Receive You can receive faxes from the remote fax machine when you want to receive it. Select the [Options] tab, and then select [Polling Receive].
-
Page 106: Cover Page
6 Fax Cover Page You can attach a cover page to faxes. Select the [Options] tab, and then select [Cover Page]. Select [On], and then select [OK].
-
Page 107: Sending A Fax Manually
Sending a Fax Manually Sending a Fax Manually This section describes how to send a fax manually. Place document in the machine. Press the <Services Home> button. <Services Home> button Services Home Job Status Machine Status Select [Fax]. Adjust the document resolution to suit your fax needs. For more information, refer to «Resolution»…
-
Page 108: Sending A Delayed Fax
6 Fax Sending a Delayed Fax The Delayed Start mode can be used to save scanned documents for transmission at a specified time to take advantage of lower long distance rates. Place document in the machine. Press the <Services Home> button. <Services Home>…
-
Page 109
Sending a Delayed Fax Enter the start time using the number pad, and then select [OK]. Select the [Fax] tab. Enter the fax number of the recipient using the number pad. You can also use speed or group dial numbers. Press the <Start>… -
Page 110: Sending A Fax From The Driver (Direct Fax)
Driver CD Kit on the Mac OS X, and then open the [MacOSX] folder. Open either the [10.5-] folder depending on the version of Mac OS X you are running. Double-click [FX DocuCentre SC2020.dmg], and then follow the on-screen instructions to install the fax driver.
-
Page 111
Sending a Fax from the Driver (Direct Fax) For Windows: For Mac OS X: For Windows, click [OK] to close the [Printing Preferences] dialog box, and then click [Print]. The [Recipient Setting] dialog box appears. For Mac OS X, click [Print]. The [Set / Check Fax Transmission] dialog box appears. For Windows: For Mac OS X:… -
Page 112
6 Fax Specify the destination for the recipient in one of the following ways. For more information on how to specify the destination, refer to the Help of the driver. 1) Enter the name and fax number directly. 2) Select a fax number from the address book. Look Up Address Book: Displays a list of fax numbers that are saved in the file specified for [My Address Book file]. -
Page 113: Receiving A Fax
Receiving a Fax Receiving a Fax This section describes the fax receiving modes and the other ways to receive a fax. About Receiving Modes Note • To use the TEL/FAX Mode or Ans/FAX Mode, connect an external telephone or answering machine to the TEL connector on the rear of the machine.
-
Page 114: Receiving A Fax Manually Using An External Telephone
6 Fax Receiving a Fax Manually Using an External Telephone This feature works best when you are using an external telephone connected to the TEL connector on the rear of the machine. You can receive a fax from someone you are talking to on the external telephone without having to go to the machine.
-
Page 115: Receiving Faxes In The Memory
Receiving a Fax Select [Fax Line Settings]. Select [ ] until [DRPD Pattern] appears, and then select [DRPD Pattern]. Select the desired pattern, and then select [OK]. Reboot the machine by turning the power switch off and then on again. Receiving Faxes in the Memory Since the machine is a multi-tasking device, it can receive faxes while you are making copies or printing.
-
Page 116: Other Ways To Fax
6 Fax Other Ways to Fax This section describes how to use the secure receiving mode, an answering machine, and a computer modem. Using the Secure Receiving Mode You may need to prevent your received faxes from being accessed by unauthorized people. You can turn on the secure fax mode using the [Secure Receive] option to restrict printing out all of the received faxes when the machine is unattended.
-
Page 117
Other Ways to Fax Select [Secure Receive]. Select [Secure Receive Set]. Select [Enable], and then select [OK]. Enter a four-digit password using the number pad, and then select [OK]. To return to the top level of the System menu, press the <Clear All> button. When a fax is received in the secure receiving mode, the machine stores it into memory and the [Active Jobs] screen displays [Secure Receive] to… -
Page 118: Using An Answering Machine
6 Fax Select [Secure Fax Receive]. Enter the passcode, and then select [OK]. The faxes stored in memory are printed. To turn the secure receiving mode off: Access the [Secure Receive Set] menu by following steps from 1 to 6 in «To turn the secure receiving mode on:»…
-
Page 119: Using A Computer Modem
Other Ways to Fax If you answer the call and hear fax tones, the machine will answer the fax call if you Select [Manual Receive] in [OnHook] (you can hear voice or fax tones from the remote machine), and then press the <Start> button and hang up the receiver. Press the two-digit remote receive code and hang up the receiver.
-
Page 120: Fax Activity Report
6 Fax Fax Activity Report Fax Activity Report lets you check whether fax send and receive operations ended normally. For each fax sent or received, the reports record the sender or recipient name and the transmission result/status. For information on how to print the Fax Activity Report, refer to «Printing Reports/Lists» (P.220). Item Description Sent…
-
Page 121
Fax Activity Report Item Description Received The serial number of each incoming fax. Job# A document number appended automatically when the fax job is received. Remote The sender’s information, in the following priority order: Terminal 1. Remote ID 2. Communication mode Remote ID is the sender’s phone number. -
Page 122
6 Fax… -
Page 123: Scan
7 Scan This chapter describes the print function. Scanning Procedure ……………………124 Scanning to a Computer ………………….127 Using a Scanner on the Network………………131 Sending an E-Mail With the Scanned Image …………..140 Operations during Scanning………………..143 Advanced Scanner Settings ………………..144…
-
Page 124: Scanning Procedure
7 Scan Scanning Procedure This section describes the basic flow of scan operations including placing document in the machine and making advanced settings. Placing the Document The following two methods are available to load documents: Document feeder Single sheet Multiple sheets Document glass Single sheet Bound documents, such as books…
-
Page 125
Scanning Procedure Important • To avoid paper jams, use the document glass for mixed size, folded, wrinkled, cut-and-pasted documents, curled paper, or carbon-backed paper. If you can flatten the curled document, you can use the document. Follow the steps below to place document on the document feeder. You can place a single or multiple pages of a document. -
Page 126: Using The Scan Feature
7 Scan Selectable document sizes in the scan driver A3 (297 × 420 mm), A4 (210 × 297 mm), A5 (148 × 210 mm), B4 (257 × 364 mm), B5 (182 × 257 mm), 8.5 × 11″, 8.5 × 14″, 11 × 17″, 7.25 × 10.5″, and Custom. CAUTION Do not apply excessive force to hold thick document on the document glass.
-
Page 127: Scanning To A Computer
Scanning to a Computer Scanning to a Computer This section describes how to scan document to a computer. Scanning From the Control Panel — WSD Scan If the machine is connected to a computer via network using WSD (Web Services on Devices), you can use the WSD Scan function to send scanned images to a computer.
-
Page 128: Scanning Using The Twain Driver
7 Scan Scanning Using the TWAIN Driver The machine supports the TWAIN driver for scanning images. The following procedure uses Windows 7 as an example. The procedure differs depending on the OS and Microsoft Office version. Note • Ensure that the machine is connected to the computer via the USB cable. The following procedure to scan an image uses Clip Organizer as an example.
-
Page 129
Click [Paint] > [From scanner or camera] (Click [File] > [From Scanner or Camera] for Windows XP, Windows Server 2003, Windows Server 2008 and Windows Vista). The [Scan using FX DocuCentre SC2020 (WIA — USB)] window appears. Note • The illustration may vary for different operating systems. -
Page 130
7 Scan Click [Next] to start scanning. Follow the on-screen instructions to edit the picture after it is copied to your computer. -
Page 131: Using A Scanner On The Network
Using a Scanner on the Network Using a Scanner on the Network This section describes how to use a scanner on the network. Note • This feature does not require a network scan driver. Overview The Scan to Server/Computer feature allows you to scan documents and send the scanned document to a network computer via the FTP or SMB protocol.
-
Page 132: Setting A Login Name And A Password (Smb Only)
7 Scan • Windows Server 2003 FTP service of Microsoft Internet Information Services 6.0 • Windows Vista, Windows Server 2008 FTP service of Microsoft Internet Information Services 7.0 • Windows 7, Windows Server 2008 R2 FTP service of Microsoft Internet Information Services 7.5 •…
-
Page 133
Using a Scanner on the Network Create a folder in the desired directory on your computer (Example of folder name: MyShare). Right-click the folder, and then select [Properties]. Click the [Sharing] tab, and then click [Advanced Sharing]. For Windows Vista, when the [User Account Control] dialog box appears, click [Continue]. Select the [Share this folder] check box. -
Page 134: Setting A Destination Using An Address Book
7 Scan Note • Do not use [Everyone] as the user login name. Click [OK]. Click [OK] to exit the [Advanced Sharing] dialog box. Click [Close]. Note • To add sub-folders, create new folders in the shared folder you have created. Example: Folder name: MyShare, Second-level folder name: MyPic, Third-level folder name: John You should now see MyShareMyPicJohn in your directory.
-
Page 135
Using a Scanner on the Network Note • The default user name is «11111», and the default password is «x-admin». Under [Network Scan (Comp./Serv.)], click [Computer/Server Address Book]. Select any unused number and click [Add]. The [Add Network Scan Address] page appears. -
Page 136
7 Scan To fill in the fields, enter the information as follows: Name (Displayed Enter a friendly name that you want it to appear on the [Computer/ on Printer) Server Address Book]. Server Type Select [Computer (SMB)] if you store the document in a shared folder of your computer. -
Page 137
Using a Scanner on the Network Click [Start] > [All Programs] > [Fuji Xerox] > [DocuCentre SC2020] > [Address Book Editor]. The [Select Device] window appears. Note • If the [Address Book Editor] window appears, go to step 4. Select your printer from the list. -
Page 138: Sending The Scanned File On The Network
7 Scan Computer Settings Clicking this button opens the wizard screen which guides you wizard through several steps. When you complete the steps in the wizard, the settings for [Server Address] are automatically configured. Server Name / IP Enter a server name or IP address of your computer or the FTP server Address that you have shared out.
-
Page 139
Using a Scanner on the Network Select [Scan to]. Select [Network]. Select [ ] until the desired address appears and then select that address. Select [OK]. Specify scan options such as [Output Color], [Resolution], [2 Sided Scanning], and [File Format] on the [Scan to Network], [Quality] and [Options] tabs. For more information, refer to «File Format»… -
Page 140: Sending An E-Mail With The Scanned Image
7 Scan Sending an E-Mail With the Scanned Image To send an e-mail attached with the scanned image from the machine, follow the steps below: Setup the E-mail address book through CentreWare Internet Services. For more information, refer to «Registering a New E-Mail Address» (P.140). E-Mail Settings From CentreWare Internet Services, click [Properties].
-
Page 141: Sending An E-Mail With The Scanned File
Sending an E-Mail With the Scanned Image Click the [Address Book] tab. If user name and password are required, enter the correct user name and password. Note • The default user name is «11111», and the default password is «x-admin». Click [Email Address Book].
-
Page 142
7 Scan Select [E-mail]. Specify a recipient from the following, and then select [OK]: [New Recipient]: Enter an e-mail address directly. [Address Book]: Select from the following types of address books: [Device Address Book — Individuals]: Select an e-mail address registered in the address book. -
Page 143: Operations During Scanning
Operations during Scanning Operations during Scanning While the machine is scanning document, you can cancel the currently executing job, and check or cancel the pending jobs. Canceling the Current Scan Job To cancel the currently scanning job: On the machine Press the <Stop>…
-
Page 144: Advanced Scanner Settings
7 Scan Advanced Scanner Settings This section describes the advanced functions available for Scan feature. For more information on the setting values, refer to «Scan Defaults» (P.190). Scan to E-mail Setting Item Purpose Page: Quality Output Color To select the mode for color or black and «Output Color»…
-
Page 145
Advanced Scanner Settings Setting Item Purpose Page: Quality Lighten / Darken To adjust the contrast to make the scanned «Lighten / Darken» image lighter or darker than the original. (P.192) Sharpness To adjust the sharpness to make the «Sharpness» scanned image sharper or softer than the (P.192) original. -
Page 146
7 Scan… -
Page 147: Print
8 Print This chapter describes how to print using the print driver. Major Print Driver Functions………………..148 Printing……………………….149 Operations during Printing………………… 150…
-
Page 148: Major Print Driver Functions
8 Print Major Print Driver Functions This section describes the major print driver functions used for printing. The print driver must be installed before use. For information on how to install the print driver, refer to «Installing the Print Driver/Scan Driver» (P.42). Note •…
-
Page 149: Printing
The procedure used to print will vary according to the application you are using. See your application’s manual for the specific procedure. The steps below are the operation used for the [FX DocuCentre SC2020] print driver screen. Select [Print] from the application’s [File] menu.
-
Page 150: Operations During Printing
8 Print Operations during Printing You can cancel the currently printing job. Stopping the Print Job To cancel the currently printing job: On the machine Press the <Stop> button, or select [Delete] on the <Stop> button touch screen. Redial/Pause Power Saver Clear All Stop Start…
-
Page 151: Tools
9 Tools Each function is set to the factory default (initial) settings, but you can customize these settings to match your operating environment. You can change the settings in [Tools]. Note • Some settings cannot be displayed on some models. An optional component is required. For more information, contact our Customer Support Center.
-
Page 152: Understanding The Machine Menus
9 Tools Understanding the Machine Menus When the machine is connected to a network and available to a number of users, the access to the [Admin Settings] can be limited. This prevents other users from using the control panel to inadvertently change a user default that has been set by the administrator. However, you can use your print driver to override user defaults and select settings for individual print jobs.
-
Page 153: Billing Meters
Understanding the Machine Menus Fax Address Book Purpose: To print the list of all fax addresses stored as Fax Address Book information. Email Address Book Purpose: To print the list of all e-mail addresses stored as Email Address Book information. Server Address Purpose: To print the list of all server addresses stored as Server Address information.
-
Page 154
9 Tools To create a group of fax destinations and register it under a two-digit dial code. Up to six group dial codes can be registered. PCL Settings Use the [PCL Settings] menu to change machine settings that only affect jobs using the PCL emulation printer language. -
Page 155
Understanding the Machine Menus inch series Tabloid (11 x 17″) Legal (8.5 x 14″) Folio (8.5 x 13″) Letter (8.5 x 11″) A3 (297 x 420 mm) B4 (257 x 364 mm) A4 (210 x 297 mm) B5 (182 x 257 mm) A5 (148 x 210 mm) 8K (270 x 390 mm) 16K (195 x 270 mm) -
Page 156
9 Tools Values: CG Times LetterGothic CourierPS CG Times It LetterGothic It CourierPS Ob CG Times Bd LetterGothic Bd CourierPS Bd CG Times BdIt Albertus Md CourierPS BdOb Univers Md Albertus XBd SymbolPS Univers MdIt Clarendon Cd Palatino Roman Univers Bd Coronet Palatino It Univers BdIt… -
Page 157
Understanding the Machine Menus PC-850 PS MATH WINBALT PC-852 PI FONT SYMBOL PC-1004 LEGAL WINGDINGS PC-8 TK ISO-4 DNGBTSMS Font Size Purpose: To specify the font size for scalable typographic fonts, within the range of 4.00 to 50.00. The default is 12.00. Font size refers to the height of the characters in the font. -
Page 158
9 Tools Enables the Image Enhance feature. Hex Dump Purpose: To help isolate the source of a print job problem. With [Hex Dump] selected, all data sent to the machine is printed in hexadecimal and character representation. Control codes are not executed. -
Page 159: Network Setup
Understanding the Machine Menus Enables the Ignore Form Feed feature. Network Setup Use the [Network Setup] menu to change the machine settings affecting jobs sent to the machine through the network. Note • Bold values are the factory default menu settings. Ethernet Purpose: To confirm or specify network settings.
-
Page 160
9 Tools Gateway Address When an IP address is being set manually, the gateway address is specified using the format «nnn.nnn.nnn.nnn». Each octet that makes up «nnn.nnn.nnn.nnn» is a value in the range of «0» to «254. «127» and any value in the range of «224»… -
Page 161
Understanding the Machine Menus WSD Scan Disable Disables WSD scan. Enable Enables WSD scan. SNMP UDP Disable Disables the Simple Network Management Protocol (SNMP) UDP port. Enable Enables the SNMP UDP port. StatusMessenger Disable Disables the Status Messenger feature. Enable Enables the Status Messenger feature. -
Page 162
9 Tools Purpose: To disable 802.1x authentication. The change becomes effective after the machine is turned off and then on again. Values: Disable Disables 802.1x. Reset Network Setup Purpose: To initialize network data stored in non-volatile memory (NVM). After executing this function and rebooting the machine, all network settings are reset to their default values. -
Page 163
Understanding the Machine Menus Thailand Vietnam Company Name Purpose: To set the sender name to be printed on the header on faxes. Line Type Purpose: To select the default line type. Values: PSTN Uses PSTN. Uses PBX. Line Monitor Purpose: To set the volume of the line monitor, which audibly monitors a transmission through the internal speaker until a connection is made. -
Page 164
9 Tools Values: Pattern1-7 DRPD is a service provided by some telephone companies. DRPD patterns are specified by your telephone company. The patterns provided with the machine are shown below: Pattern1 Pattern2 Pattern3 Pattern4 Pattern5 Pattern6 Pattern7 Ask your telephone company which pattern you need to select to use this service. -
Page 165
Understanding the Machine Menus Values: TEL Mode Automatic fax reception is turned off. You can receive a fax by picking up the handset of the external phone and then pressing the remote receive code, or by selecting [Manual Receive] in [OnHook] to [On] (you can hear voice or fax tones from the remote machine) and then pressing the <Start>… -
Page 166
9 Tools Auto Answer Ans/FAX Sets the interval at which the machine goes into the fax receive mode after the external 0-255 answering machine receives an incoming call. The value is set in increments of 1 second. Junk Fax Filter Purpose: To reject unwanted faxes by accepting faxes only from the fax numbers registered in the Fax Address Book. -
Page 167
Understanding the Machine Menus Print and E-mail Prints incoming faxes and also forward them to a specified e-mail address. Forward to Server Forwards incoming faxes to a specified server. Print and Forward to Server Prints incoming faxes and also forwards them to a specified server. -
Page 168
9 Tools Values: Prints excess images or text at the bottom of a fax page without discarding it. Discards any excess images or text. Auto Reduction Automatically reduces a fax page to fit it onto the appropriate paper size. Transmission Defaults Purpose: To configure settings for transmitting fax. -
Page 169
Understanding the Machine Menus Fax Cover Page Purpose: To set whether to attach a cover page to faxes. Values: Does not attach a cover page to faxes. Attaches a cover page to faxes. Send Header Purpose: To print the information of the sender on the header of the faxes. Values: Does not print the sender’s information on the header of faxes. -
Page 170
9 Tools Fax Reports Purpose: To configure settings for fax reports. Fax Activity Purpose: To set whether to automatically print a Fax Activity Report after every 50 incoming and outgoing fax communications. Values: Auto Print Automatically prints a Fax Activity Report after every 50 incoming and outgoing fax communications. -
Page 171
Understanding the Machine Menus Note • Bold values are the factory default menu settings. General Purpose: To configure general settings for the machine. Power Saver Purpose: To specify the time for transition to Power Saver mode. Values: Low Power Timer 1 min Specifies the time taken by the machine to enter Low Power mode after it finishes a job. -
Page 172
9 Tools Values: Millimeters (mm) Selects millimeter as the default measurement unit. Inches («) Selects inch as the default measurement unit. Original Size Detected Purpose: To specify the size of paper to be automatically detected when you use standard sizes of a document or the machine is set to detect sizes of a document. -
Page 173
Understanding the Machine Menus Panel Alert Tone Does not emit a tone when the control panel entry is incorrect. Soft Emits a tone when the control panel entry is incorrect. Normal Loud Machine Ready Tone Does not emit a tone when the machine is ready to process a job. -
Page 174
9 Tools All Tones Disables all the alert tones. Soft Sets the volume of all the alert tones at once. Normal Loud Low Toner Alert Message Purpose: To specify whether to show the alert message when the toner is low. Values: Does not show the alert message when the toner is low. -
Page 175
Understanding the Machine Menus Email Server Address Book Purpose: To specify whether to search the e-mail addresses from the Address Book for the LDAP server. Values: Does not search the e-mail addresses from the Address Book for the LDAP server. Searches the e-mail addresses from the Address Book for the LDAP server. -
Page 176
9 Tools Values: Disables the fault time-out. 60 sec Sets the amount of time the machine waits before canceling a job that stops abnormally. 3-300 sec Output Settings Purpose: To configure settings concerning output from the machine. Default Paper Size Purpose: To specify the default paper size. -
Page 177
Understanding the Machine Menus To specify the position of banner sheet, and also specify the tray in which the banner sheet is loaded. Values: Insert Position Does not print the banner sheet. Front Inserted before the first page of every copy. Back Inserted after the last page of every copy. -
Page 178
9 Tools Values: Does not limit functions by Auditron authentication. Limits functions by Auditron authentication. Print Auditron Purpose: To specify whether to limit the print functions that can be used per user by Auditron authentication. Values: Does not limit functions by Auditron authentication. Limits functions by Auditron authentication. -
Page 179
Understanding the Machine Menus Note • Bold values are the factory default menu settings. Adjust Paper Type Purpose: To specify paper density settings. Values: Plain Lightweight Heavyweight Labels Lightweight Heavyweight Adjust Transfer Belt Unit Purpose: To adjust the transfer bias when ghosting occur. (The ghost image may be the image of the previous page, or a part of the page currently printing.) Values: If faint ghosts appear, try to decrease the value. -
Page 180
9 Tools Postcard -5 to +10 Envelope -5 to +10 Adjust Alignment Purpose: To adjust the alignment of the printed image. Values: Adjust Lead/Side Regi Tray 5 Lead Regi (X) 0.0 mm (Bypass) -2.0 to 2.0 mm Side Regi (Y) 0.0 mm -2.0 to 2.0 mm Tray 1… -
Page 181
Purpose: To use toner cartridge of another manufacturer. Note • Using a non-Fuji Xerox toner cartridge may severely damage the machine. The warranty does not cover damages caused by using non-Fuji Xerox toner cartridges. Values: Does not use toner cartridge of another manufacturer. -
Page 182: Secure Settings
9 Tools To calibrate the control panel. Secure Settings Use the [Secure Settings] menu to set a passcode to limit access to the menus. This prevents items from being changed accidentally. Note • Bold values are the factory default menu settings. Panel Lock Purpose: To set a limited access to [Admin Settings] with a passcode, and to set or change the…
-
Page 183
Understanding the Machine Menus Scan To Network Enabled Enables the Scan To Network service. Password Locked Enables the Scan To Network service, but requires a passcode to use the service. Disabled Disables the Scan To Network service. Enabled Enables the Scan To WSD Scan service. Scan To WSD Password Locked Enables the Scan To WSD Scan service, but requires a passcode to use the service. -
Page 184: Default Settings
9 Tools Software Download Purpose: To enable or disable download of firmware updates. Values: Disable Disables firmware updates. Enable Enables firmware updates. Display Network Information Purpose: To show or hide network information in the message field of the Services Home screen. Value: Show IPv4 Address Shows the IPv4 address of the machine on the <Services Home>…
-
Page 185
Understanding the Machine Menus Select Tray Purpose: To specify the input tray. Values: Auto The paper is fed from an automatically selected tray. Tray5 (Bypass) The paper is fed from Tray 5 (bypass). Tray1 The paper is fed from Tray 1. The paper is fed from Tray 2. -
Page 186
9 Tools 78% 8.5 x 14″ 8.5 x 11″ 94% A3 11 x 17″, A4 8.5 × 11″ 129% 8.5 x 11″ 8.5 x 14″ 141% A4 A3, B5 180% 4 x 6″ 8.5 x 11″ 200% A5 Note • You can also use the number pad to input the desired zoom ratio from 25% to 400%, or select ] to enlarge the zoom ratio or select [ ] to reduce the zoom ratio in 1% intervals. -
Page 187
Understanding the Machine Menus Letter (8.5 x 11″) A3 (297 x 420 mm) B4 (257 x 364 mm) A4 (297 x 210 mm) A4 (210 x 297 mm) B5 (257 x 182 mm) B5 (182 x 257 mm) A5 (148 x 210 mm) 8K (270 x 390 mm) 16K (270 x 195 mm) 16K (195 x 270 mm) -
Page 188
9 Tools Soften Makes the copy softer than the original. Saturation Purpose: To set the default color saturation level. Values: Vivid Increases the color saturation to brighten the color of the copy. Normal The color saturation is the same as the original. Pastel Decreases the color saturation to lighten the color of the copy. -
Page 189
Understanding the Machine Menus Cyan Shadows Sets the color balance level of low density cyan. -3 to +3 Midtones Sets the color balance level of medium density cyan. -3 to +3 Highlights Sets the color balance level of high density cyan. -
Page 190: Scan Defaults
9 Tools Edge Erase Purpose: To specify the value of the top and bottom margins. Values: Top / Bottom 0.1 inch (2 mm) Sets the value in increments of 0.1 inch (1 mm). 0.0-2.0 inch (0-50 mm) Left / Right 0.1 inch (2 mm) Sets the value in increments of 0.1 inch (1 mm).
-
Page 191
Understanding the Machine Menus Original Size Purpose: To specify the default document size. Values: mm series Auto A3 (297 x 420 mm) B4 (257 x 364 mm) A4 (297 x 210 mm) A4 (210 x 297 mm) B5 (257 x 182 mm) B5 (182 x 257 mm) A5 (148 x 210 mm) 8K (270 x 390 mm) -
Page 192
9 Tools 8K (270 x 390 mm) 16K (270 x 195 mm) 16K (195 x 270 mm) 2 Sided Scanning Purpose: To scan both sides of a sheet of paper. Values: 1 Sided Scans one side of a document. 2 Sided Binding of Long Edge Scans both sides of a document to be bound… -
Page 193
Understanding the Machine Menus Normal Does not adjust the amount of colors to make the contrast of colors darker or lighter than the original. Less Adjusts the amount of colors to make the contrast of colors lighter than the original. Auto Background Suppression Purpose: To suppress the background of the original to enhance text on the scanned image. -
Page 194: Fax Defaults
9 Tools Values: Small Sets the Quality/File Size level to [Small]. Normal Sets the Quality/File Size level to [Normal]. Large Sets the Quality/File Size level to [Large]. File Name Purpose: To specify whether to add a prefix or suffix to the file name. Values: Auto Does not add a prefix or suffix to the file name.
-
Page 195
Understanding the Machine Menus 2 Sided Binding of Long Edge Scans both sides of a document to be bound Binding by long edge. Original Short Edge Scans both sides of a document to be bound Binding by short edge. * : This item is available only when [2 Sided Scanning] is set to [2 Sided Printing] in the [Scan Defaults] menu. Lighten / Darken Purpose: To adjust the density to make the copy lighter or darker than the original. -
Page 196: Tray Management
9 Tools Folio (8.5 x 13″) Letter (8.5 x 11″) A3 (297 x 420 mm) B4 (257 x 364 mm) A4 (210 x 297 mm) B5 (182 x 257 mm) A5 (148 x 210 mm) 8K (270 x 390 mm) Delayed Send Purpose: This feature enables you to set a specific time for the fax transmission to start.
-
Page 197
Understanding the Machine Menus Size A3 (297 x 420 mm) (mm series) B4 (257 x 364 mm) A4 (297 x 210 mm) A4 (210 x 297 mm) B5 (257 x 182 mm) B5 (182 x 257 mm) A5 (148 x 210 mm) 8K (270 x 390 mm) 16K (270 x 195 mm) 16K (195 x 270 mm) -
Page 198
9 Tools Size Tabloid (11 x 17″) (inch series) Legal (8.5 x 14″) Folio (8.5 x 13″) Letter (8.5 x 11″) Letter (8.5 x 11″) A3 (297 x 420 mm) B4 (257 x 364 mm) A4 (297 x 210 mm) A4 (210 x 297 mm) B5 (257 x 182 mm) B5 (182 x 257 mm) -
Page 199
Understanding the Machine Menus Type Plain (60-89 gsm) Plain Reload Bond (90-105 gsm) Bond Reload Recycled (60-105 gsm) Recycled Reload Punched (60-89 gsm) Letterhead (60-89 gsm) Heavyweight (HW) (106-169 gsm) HW Reload Extra Heavyweight (X-HW) (170-256 gsm) X-HW Reload Gloss (106-169 gsm) Gloss Reload Heavyweight Gloss (170-256 gsm) HW Gloss Reload… -
Page 200: Tray Priority
9 Tools To specify the paper loaded in Tray 2. Values: Display Tray Enter a check to display a popup message that prompts to set Type and Size when Prompt paper is loaded in Tray 2. The factory default is on (check). Size Auto Detect Custom Size…
-
Page 201: Language Settings
Understanding the Machine Menus Values: 1 First Tray5 (Bypass) Sets Tray 5 (bypass) as the first priority. Tray1 Sets Tray 1 as the first priority. Tray2 Sets Tray 2 as the first priority. 2 Second Tray5 (Bypass) Sets Tray 5 (bypass) as second priority. Tray1 Sets Tray 1 as the second priority.
-
Page 202: Panel Lock Function
9 Tools Panel Lock Function This feature prevents unauthorized personnel from changing the settings made by the administrator. However, you can select settings for individual print jobs using the print driver. Note • Disabling the control panel menus does not prevent access to the [Secure Print], [Sample Print] and [Tray Settings] menus.
-
Page 203
Panel Lock Function Select [Panel Lock]. Select [Panel Lock Set]. Select [Enable], and then select [OK]. Enter the new passcode, and then select [OK]. Note • The factory-default panel passcode is 0000. • Be sure to remember the passcode. The procedure described below allows you to reset the passcode, but the settings for Address Book are cleared. -
Page 204: Disabling The Panel Lock
9 Tools Disabling the Panel Lock Press the <Machine Status> button. <Machine Status> button Services Home Job Status Machine Status Select the [Tools] tab. Select [Admin Settings]. Enter the passcode, and then select [OK]. Note • The factory-default panel passcode is 0000. Select [Secure Settings].
-
Page 205
Panel Lock Function Select [Panel Lock]. Select [Panel Lock Set]. Select [Disable], and then select [OK]. Enter the current passcode, and then select [OK]. -
Page 206: Limiting Access To Copy, Fax, And Scan
9 Tools Limiting Access to Copy, Fax, and Scan Enabling the Copy Lock, Fax Lock, and Scan Lock options limits access to copy, fax, and scan operations by requiring a passcode to be entered before copying, scanning, faxing, or printing. Taking Fax Lock as an example, the following procedure explains how to enable or disable the option.
-
Page 207
Limiting Access to Copy, Fax, and Scan Select [Panel Lock Set]. Select [Enable], and then select [OK]. Enter the new passcode using the number pad and then select [OK]. Re-enter the passcode and then select [OK]. Note • The default passcode is 0000. Select [ ] once. -
Page 208
9 Tools Select [Fax]. Enabled Password Locked Color Password Locked (available only for Copy Lock) Disabled… -
Page 209: Setting The Power Saver Option
Setting the Power Saver Option Setting the Power Saver Option You can set the Power Saver for the machine. The machine switches to the Power Saver mode after the specified time. Note • If [Panel Lock Set] is set to [Enable], you need to enter the four digit passcode to enter the [Admin Settings] menu.
-
Page 210
9 Tools Select [Power Saver]. Select [Low Power Timer] or [Sleep Timer]. Select [ ] or [ ] or enter the desired value using the number pad, and then select [OK]. You can select from 1-150 minutes for [Low Power Timer] or 0-60 minutes for [Sleep Timer]. -
Page 211: About The Concurrent Jobs Feature
About the Concurrent Jobs Feature About the Concurrent Jobs Feature This feature enables you to start a concurrent job while a fax job is running. This is done by temporally displaying the Services Home screen and switching to a different function that can be run concurrently such as copy or scan.
-
Page 212: Resetting To Factory Defaults
9 Tools Resetting to Factory Defaults After executing this function and rebooting the machine, the address book or all the menu parameters, except the parameters for the network, are reset to their default values. Press the <Machine Status> button. <Machine Status> button Services Home Job Status Machine Status…
-
Page 213
Resetting to Factory Defaults Select the desired setting. Select [Initialize]. The machine restarts automatically to apply the settings. -
Page 214
9 Tools… -
Page 215: 10 Machine Status
10 Machine Status This chapter describes how to check the basic information and status of your machine. Note • Some settings are not displayed on some models. An optional component is required. For more information, contact our Customer Support Center. Checking Consumables………………….
-
Page 216: Checking Consumables
10 Machine Status Checking Consumables The Machine Status screen displays the status of consumables such as the toner cartridge and the drum cartridge. Follow the steps below to check the status of consumables. Press the <Machine Status> button. <Machine Status> button Services Home Job Status Machine Status…
-
Page 217: Selecting Language
Selecting Language Selecting Language You can select from five languages, English, Simplified Chinese, Korean, Vietnamese, and Thai, for the user interface language used in the control panel display. Note • The default language may vary depending on the region of purchase. Follow the steps below to select the language.
-
Page 218: Checking The Machine’s Ip Address
10 Machine Status Checking the Machine’s IP Address You can display the IPv6 or IPv4 address of your machine. Press the <Machine Status> button. <Machine Status> button Services Home Job Status Machine Status Select [About This MFP]. Select the [Network] tab. The IP address of your machine is displayed.
-
Page 219: Checking The Meter
Checking the Meter Checking the Meter The Billing Meter screen shows the total number of printed pages (including the number of the pages of the copied documents and received fax documents). Item Description Meter1 Displays the total number of color prints. Meter2 Displays the total number of monochrome prints.
-
Page 220: Printing Reports/Lists
10 Machine Status Printing Reports/Lists The machine can print the following reports/lists: The reports and lists with an asterisk can be printed only when the Fax Kit (optional) is installed. Report/List Purpose System Settings To print a list of the current user default values, the installed options, the amount of installed print memory, and the status of machine supplies.
-
Page 221
Printing Reports/Lists Select the report or list to print, and then select [Print]. Note • To cancel printing while a job is printing, press the <Stop> button. -
Page 222
10 Machine Status… -
Page 223: 11 Job Status
11 Job Status This chapter describes how to check the status of current or pending jobs, and how to cancel jobs. Note • Some settings cannot be displayed when the Fax Kit (optional) is not installed. For more information, contact our Customer Support Center. Checking Current/Pending Jobs ……………….
-
Page 224: Checking Current/Pending Jobs
11 Job Status Checking Current/Pending Jobs You can check the status of the following current or pending jobs: Current print, scan or fax job Pending print jobs Pending fax jobs to send Note • Completed jobs are not displayed. Press the <Job Status> button. <Job Status>…
-
Page 225: Canceling A Pending Fax Job
Checking Current/Pending Jobs Select [Delete]. Important • You may not be able to cancel a job depending on the status of the job processing. • If the machine is being used as a local printer, it may take some time to cancel the job depending on the type of print job being executed.
-
Page 226
11 Job Status… -
Page 227: 12 Maintenance
12 Maintenance This chapter describes how to replace consumables and clean the machine. Replacing Consumables ………………….228 Cleaning the Machine………………….236 Managing the Machine………………….241…
-
Page 228: Replacing Consumables
Use a broom or a wet cloth to wipe off spill. If you spill a large volume of toner, contact your local Fuji Xerox representative. Never throw a toner cartridge into an open flame. Remaining toner in the cartridge may catch fire and cause burn injuries or explosion.
-
Page 229: Replacing The Toner Cartridge
Cartridge. *1 : This warning appears only when Fuji Xerox toner cartridge is used ([Non-Genuine Toner] is set to [Off]). *2 : The remaining page yield differs depending on printing conditions, contents of the documents, and frequency of turning on/ off the machine.
-
Page 230
Never throw a toner cartridge into an open flame. Remaining toner in the cartridge may catch fire and cause burn injuries or explosion. If you have a used toner cartridge no longer needed, contact your local Fuji Xerox representative for its disposal. -
Page 231: Replacing The Waste Toner Container [R5]
Replacing Consumables Unpack a new toner cartridge, and shake it lightly up/down, and left/right 10 times. Important • Do not touch the shutter. Orient the toner cartridge with the arrow ( ) facing up, and insert it as far as it will go. Close the front cover.
-
Page 232
• The proper disposal of used waste toner containers is required. Return the old waste toner container to our Customer Support Center. • The use of waste toner containers not recommended by Fuji Xerox may degrade image quality and performance. Use only waste toner containers recommended by Fuji Xerox. -
Page 233
Replacing Consumables • After removing the waste toner container, do not touch the parts shown in the illustration. Toner can dirty or stain your hands. Important • Never lay the waste toner box on its side as this may cause its malfunction or toner spills. Prepare a new waste toner container. -
Page 234
12 Maintenance Insert the used waste toner container into the supplied plastic bag. Use both hands to carefully place the used waste toner container into the empty box. Important • Return the old waste toner container to our Customer Support Center. -
Page 235: Replacing The Drum Cartridge
* : The remaining page yield differs depending on printing conditions, contents of the documents, and frequency of turning on/ off the machine. Important • The use of drum cartridges not recommended by Fuji Xerox may lower the machine’s output quality or performance. Always use drum cartridges recommended by Fuji Xerox in the machine.
-
Page 236: Cleaning The Machine
12 Maintenance Cleaning the Machine This section describes how to clean the machine such as the outer casing, the document glass cover, the document feeder, and the document glass. WARNING When cleaning this product, use the designated cleaning materials exclusive to it. Other cleaning materials may result in poor performance of the product.
-
Page 237
Cleaning the Machine Make sure that the machine is not operating, and open the front cover. Turn the lock lever counterclockwise. Unlock the waste toner container, and then pull it out making sure to hold it upright so that the waste toner does not spill out. -
Page 238: Cleaning The Touch Screen
12 Maintenance Remove the cleaning bar from the back side of the front cover, and then clean each of the LED Print Heads once with the bar. Insert the cleaning bar into each slot until it stops, and then slowly slide the bar back out. Return the cleaning bar to the back side of the front cover.
-
Page 239: Cleaning The Document Glass Cover And The Document Glass
Cleaning the Machine • Cleaning the touch screen with an excessive force may cause the screen to be damaged. Wipe the screen gently. Cleaning the Document Glass Cover and the Document Glass If the document glass cover and the document glass become soiled, smudges may appear on copies, faxes, or scanned documents and the machine may not detect the document sizes properly.
-
Page 240: Cleaning Document Feeder Rollers
12 Maintenance Wipe the document presser with a soft cloth moistened with water to remove any dirt, and then wipe it with a soft, dry cloth. Important • Do not press the film with an excessive force as it can be easily damaged. •…
-
Page 241: Managing The Machine
Managing the Machine Managing the Machine This section describes how to check the machine status using CentreWare Internet Services or the Status Messenger feature. Checking or Managing the Machine with CentreWare Internet Services When the machine is installed in a TCP/IP environment, you can use CentreWare Internet Services to check the machine status, the remaining volume of consumables, and the paper loaded in this machine.
-
Page 242
12 Maintenance Item to be Item Description configured Select appropriate settings for sending and Protocol Settings > Machine’s E-mail E-mail Address, receiving e-mail. SMTP Server Address, SMTP Server Port Number, E-Mail Send Authentication, Login Name, Password, SMTP Server Connection Status, POP3 Server Address, POP3 Server Port Number,… -
Page 243
Managing the Machine When the same command is written two or more times in one e-mail, the second and subsequent commands are ignored. Command Parameter Description #Password Password Use this command at the top of the e-mail when a password for read only is set. You can omit this command when the password is not set. -
Page 244
12 Maintenance… -
Page 245: 13 Problem Solving
13 Problem Solving This chapter provides possible solutions to various problems you may encounter with the machine. Troubleshooting ……………………. 246 Machine Problems ……………………247 Image Quality Problems ………………….251 Copying Problems……………………257 Printer Problems ……………………. 260 Fax Problems……………………..262 Scan Problems ……………………..264 Scan Driver/Printer Utility Problems……………….
-
Page 246: Troubleshooting
13 Problem Solving Troubleshooting This section describes troubles that may occur with the machine and their solutions. Follow the troubleshooting procedure below to solve the problems. There is a problem with the [Action] Refer to «Machine Problems» (P.247) . machine’s operation. A message is displayed.
-
Page 247: Machine Problems
Machine Problems Machine Problems Check the machine’s status again if you suspect a malfunction. Symptom Possible Cause Remedy The machine is Is the power switched ON? Switch the power ON. not powered on. Refer to «Power Source» (P.50). Is the power cord plugged Switch the power OFF and make sure the into the power outlet? power plug is inserted securely.
-
Page 248
13 Problem Solving Symptom Possible Cause Remedy Unable to insert Did you open a cover or Do not forcibly insert or remove the tray. or remove a tray. switch the machine off during Switch off the power. In a few seconds, printing? switch on the power. -
Page 249
Machine Problems Symptom Possible Cause Remedy Paper is often Is paper loaded correctly in Load paper correctly. jammed or the tray? Refer to «Loading Paper in Trays 1 and 2» (P.65). wrinkled. Is the tray inserted correctly? Correctly insert the tray by firmly pushing it until it stops. -
Page 250
13 Problem Solving Symptom Possible Cause Remedy Documents often Are suitable types of Correctly load the documents suitable for the jam. documents being used? document feeder. Refer to «Placing Document» (P.74). Are you using the irregular shaped documents, business cards, transparencies, or thin documents? Are there any sticky tags, Remove any sticky tags, paper clips, or… -
Page 251: Image Quality Problems
Image Quality Problems Image Quality Problems If the image quality of the printout is poor, use the table below to find our most likely cause, and take the required action. If the image quality remains poor after taking the required action, contact our Customer Support Center.
-
Page 252
13 Problem Solving Symptom Possible Cause Remedy Copies are out of Have you placed the Place the document correctly. position or document correctly? Refer to «Placing Document» (P.74). crooked. Is the paper loaded correctly Load the paper correctly. in the tray? Refer to «Loading Paper in Trays 1 and 2″… -
Page 253
Image Quality Problems Symptom Possible Cause Remedy Black spots The drum cartridge has Replace the drum cartridge with a new one. appear in copies. deteriorated or been Refer to «Replacing the Drum Cartridge» (P.235). damaged. Black or colored The drum cartridge has Replace the drum cartridge with a new one. -
Page 254
13 Problem Solving Symptom Possible Cause Remedy White spots The paper is unsuitable. Load the correct type of paper. appear in areas of The drum cartridge has Replace the drum cartridge with a new one. black fill. deteriorated or been Refer to «Replacing the Drum Cartridge»… -
Page 255
Image Quality Problems Symptom Possible Cause Remedy The printout The paper is damp. Replace the paper with new paper. contains white The paper is unsuitable. Load the correct type of paper. areas, or white or colored stripes. The printout is When using the Tray 5 Load paper of the correct type and size in the faint overall. -
Page 256
13 Problem Solving Symptom Possible Cause Remedy White or color The drum cartridge has Replace the drum cartridge with a new one. patches appear deteriorated or been Refer to «Replacing the Drum Cartridge» (P.235). vertically. damaged. The toner cartridge has run Replace the toner cartridge with a new one. -
Page 257: Copying Problems
Copying Problems Copying Problems This section provides possible solutions to various problems you may encounter when using the Copy features. Unable to Copy The table below lists possible solutions when you are unable to copy. Symptom Possible Cause Remedy The document is The document size is too The minimum size of document that can be not fed properly…
-
Page 258
13 Problem Solving Symptom Possible Cause Remedy Copies are too The copy density adjustment Adjust the copy density. dark or too light. is not right. Refer to «Lighten / Darken» (P.86). The document is light. Adjust the copy density. Refer to «Lighten / Darken» (P.86). The image quality setting is If the copy output of black text is too light, not correct for the document. -
Page 259
Copying Problems Symptom Possible Cause Remedy The copy is not The document glass cover or Clean the document glass cover or document the desired size. document glass is dirty. glass. Refer to «Cleaning the Document Glass Cover and the Document Glass» (P.239). The document is a Place a sheet of white paper over the transparency or highly… -
Page 260: Printer Problems
13 Problem Solving Printer Problems Unable to Print The table below lists possible solutions when you are unable to print. Symptom Possible Cause Remedy Data remains in The machine’s power is not Switch the machine’s power ON. the printer icon. Refer to «Power Source»…
-
Page 261
Printer Problems Symptom Possible Cause Remedy The computer is Confirm whether the print On the computer, select the print driver not using the print driver on the computer is the supplied with the machine. If the print driver driver supplied one supplied with the is not listed for selection, install the print with the machine… -
Page 262: Fax Problems
13 Problem Solving Fax Problems The table below lists possible solutions to fax problems. Symptom Remedy The machine is not working, Unplug the power cord and plug it in again. there is no display and the Ensure that there is power to the electrical receptacle. buttons are not working.
-
Page 263
Fax Problems Symptom Remedy Documents are not stored in There may not be enough memory to store the document. If the the memory. display shows a [Memory Full] message, delete any documents you no longer need from the memory and then restore the document, or wait for the job in progress (e.g., a fax transmission or reception) to complete. -
Page 264: Scan Problems
13 Problem Solving Scan Problems This section provides possible solutions to various problems you may encounter when using the Scan feature. The table below lists possible solutions when you are unable to scan. Symptom Remedy The scanner does not work. Ensure that you place the document to be scanned facing down from the document glass, or facing up in the document feeder.
-
Page 265
Scan Problems Symptom Remedy A smear appears at the same Clean the document glass. location on the output when Refer to «Cleaning the Machine» (P.236). scanned using the document glass. Images are skewed. Ensure that the document is loaded straight in the document feeder or on the document glass. -
Page 266: Scan Driver/Printer Utility Problems
13 Problem Solving Scan Driver/Printer Utility Problems The table below lists possible solutions to scan driver/printer utility problems. Symptom Remedy Unable to retrieve the Address Check that the USB cable or Ethernet cable is connected Book data from the printer on properly.
-
Page 267: Error Code
Error Code Error Code This section describes error codes. An error message and error code (xxx-xxx) are displayed if printing terminated abnormally because of an error, or a malfunction occurred in the machine. Refer to the error codes in the following table to resolve problems. Important •…
-
Page 268
13 Problem Solving Error Code Remedy 016-764 Select [Close], or wait for the time set in [Fault Timeout] for the machine to 016-765 recover. Contact the SMTP server administrator. 016-766 016-767 Select [Close], or wait for the time set in [Fault Timeout] for the machine to 016-768 recover. -
Page 269
Error Code Error Code Remedy 031-528 Select [Close], or wait for the time set in [Fault Timeout] for the machine to recover. Check if the machine can communicate via network with the forwarding destination SMB server. For example, check the following: Connection of the network cable TCP/IP settings Communication with Port 137 (UDP), 138 (UDP), and 139 (TCP) -
Page 270
13 Problem Solving Error Code Remedy 031-545 Select [Close], or wait for the time set in [Fault Timeout] for the machine to recover. Check the necessity of password change with your system administrator. 031-546 Select [Close], or wait for the time set in [Fault Timeout] for the machine to recover. -
Page 271
Error Code Error Code Remedy 031-588 Select [Close], or wait for the time set in [Fault Timeout] for the machine to recover. Check if the storage location has free space. 031-590 Select [Close], or wait for the time set in [Fault Timeout] for the machine to recover. -
Page 272
13 Problem Solving Error Code Remedy 033-762 Select [Close], or wait for the time set in [Fault Timeout] for the machine to recover. The machine rejected a fax from the blocked number. For more information, refer to «Junk Fax Filter» (P.166). 033-763 Select [Close], or wait for the time set in [Fault Timeout] for the machine to 033-764… -
Page 273
Error Code Error Code Remedy 035-702 Select [Close], or wait for the time set in [Fault Timeout] for the machine to 035-704 recover. 035-705 035-706 035-708 Select [Close], or wait for the time set in [Fault Timeout] for the machine to recover. -
Page 274: Paper Jams
Carefully remove the jammed paper without tearing it. Do not leave any pieces of paper in the machine. WARNING If you need to pull out a tray to remove paper jam, contact your local Fuji Xerox representative. Do not pull out a tray, otherwise it may cause injuries. CAUTION Do not attempt to remove a paper deeply jammed inside the product, particularly a paper wrapped around the fusing unit or the heat roller.
-
Page 275: Paper Jam In Left Side Cover [B]
Paper Jams 2) Remove the jammed paper. Note • Do not leave any torn pieces of paper inside the machine. 3) Return the handle [A1] back to its position. 4) Push on the center of the top left cover, close it slowly, and raise the Tray 5 (bypass).
-
Page 276: Paper Jams In Trays 1 And 2
13 Problem Solving Pull the release lever, and slowly open the left side cover [B]. Remove the jammed paper. Note • The paper may be jammed in the upper part where it is difficult to see. Check thoroughly for jammed paper. •…
-
Page 277: Paper Jams In Tray 5 (Bypass)
Paper Jams Remove the jammed paper. Note • If the paper tears, check to make sure there are no remaining shreds in the machine. Push the tray in gently until it stops. Paper Jams in Tray 5 (bypass) Follow the steps below to clear a paper jam in the Tray 5 (bypass). Inspect the inside (around the paper feed entrance) of the Tray 5 (bypass), and remove the jammed paper.
-
Page 278: Document Jams
13 Problem Solving Document Jams Follow the steps below to remove the jammed document in the document feeder. Pull up the front handle of the document feeder top cover, and open the document feeder top cover completely. Note • The cover will remain fixed in position when fully opened.
-
Page 279
Document Jams Close the document feeder top cover until it clicks into place, and confirm that there is no space between the near or far side of the cover and the document feeder. If you cannot find the document, carefully lift up the document feeder. If you find the document, remove it, and then close the document feeder. -
Page 280: Getting Help
13 Problem Solving Getting Help Fuji Xerox provides several automatic diagnostic tools to help you produce and maintain print quality. Control Panel Messages The control panel provides you with information and troubleshooting help. When an error or warning condition occurs, the control panel displays a message informing you of the problem.
-
Page 281: Non-Genuine Mode
Non-Genuine Mode Non-Genuine Mode When toner within a toner cartridge is empty, the [Out of Toner] message appears. When you want to use the machine in Non-Genuine mode, program the mode and replace the toner cartridge. Important • If you use the machine in the Non-Genuine mode, the performance of the machine may not be at its optimum.
-
Page 282
13 Problem Solving… -
Page 283: 14 Appendix
14 Appendix This chapter describes the machine specifications, optional components, and notes and restrictions. Specifications ……………………..284 Printable Area……………………..291 Optional Components………………….292 Notes and Restrictions………………….293…
-
Page 284: Specifications
Tray 1: 60 — 90 gsm Tray 2 (optional): 60 — 256 gsm Tray 5 (bypass): 60 — 216 gsm Important • Use paper recommended by Fuji Xerox. Copying may not be performed correctly depending on the conditions. First Copy Output Time <When the document glass is used>…
-
Page 285
(One Tray Module) Maximum Paper Capacity: 850 sheets (Standard + One Tray Module) Important • : When using 80 gsm paper • : When using Fuji Xerox standard paper Continuous Copy 999 sheets Output Tray Capacity 250 sheets (A4 ) Important •… -
Page 286
400 x 400 dpi, 300 x 300 dpi, 200 x 200 dpi, 150 x 150 dpi Monochrome: 24 sheets/minute Scanning Speed Color: 19 sheets/minute Fuji Xerox Standard Document (A4 ), at 200 dpi Connectivity Ethernet 100BASE-TX/10BASE-T, USB 2.0… -
Page 287
200 x 200 dpi, 150 x 150 dpi color: 400 x 400 dpi, 300 x 300 dpi, 200 x 200 dpi, 150 x 150 dpi Monochrome: 24 sheets/minute Scanning Speed Color: 19 sheets/minute Fuji Xerox Standard Document (A4 ), at 200 dpi Connectivity Standard: Ethernet 100BASE-TX/10BASE-T… -
Page 288
14 Appendix Scan to PC Protocol TCP/IP (SMB, FTP, WSD (Network: Operating ® ® Microsoft Windows XP x86 Push Systems ® ® Scanning) Microsoft Windows Server 2003 x86 ® ® Microsoft Windows Server 2003 x64 ® ® Microsoft Windows XP Professional x64 Edition ®… -
Page 289
Specifications Transmission Speed G3: 33.6/31.2/28.8/26.4/24.0/21.6/19.2/16.8/14.4/12.0/9.6/7.2/4.8/2.4 kbps No. of Fax Lines Telephone subscriber line, PBX, facsimile communication network (PSTN), Max. 1 port (G3-1 port) Direct Fax Functions (Optional) Send Document Size A3, B4, A4 Scanning Resolution Same as the Fax Functions Transmission Speed Same as the Fax Functions No. -
Page 290
14 Appendix Feeding Speed Monochrome: 20 sheets/minute (A4 , 1 Sided), 13 pages/minute (A4 , 2 Sided) Color 18 sheets/minute (A4 , 1 Sided), 11 pages/minute (A4 , 2 Sided) Dimensions Width 540 × Depth 492 × Height 119 mm Weight 7 kg One Tray Module (Optional) -
Page 291: Printable Area
Printable Area Printable Area The standard printable area is the area of the page within 5.5 mm from the top, bottom, left and right edges of the paper. The actual printable area may vary depending on the printer (plotter) and control language. 5.5 mm Unprintable area Printable area…
-
Page 292: Optional Components
14 Appendix Optional Components The following table shows the optional components available. To purchase these options, contact our Customer Support Center. Product Name Description Fax Kit Adds the Fax feature to the machine. One Tray Module A tray that can load 500 sheets of paper (when using 80 gsm paper).
-
Page 293: Notes And Restrictions
Notes and Restrictions Notes and Restrictions This section describes the notes and restrictions to observe when using the machine. Notes and Restrictions on the Use of the Machine Notes on Switching Off the Power After the power is switched off, the machine performs internal power off processes for a while.
-
Page 294: Notes And Restrictions On The Use Of The Copy Feature
14 Appendix Right after the drum cartridge or toner cartridge is replaced, the image quality may be poor. Use the automatic calibration function. Notes and Restrictions on the Use of the Copy Feature ID Card Copy The front and back side of the placed ID card are printed on each half sheet of a paper in center except the following cases: When the size of ID card is larger than the standard printable size of the ID Card Copy feature, a part of the image may be cut off.
-
Page 295: Index
Index Index Numerics canceling a job ……………. 143 capacity…………….289, 290 2 Sided Copying ………….. 86, 189 CentreWare Internet Services ……….. 134 2 Sided Print …………..155, 167 Changing numbers …………..55 2 Sided Scanning……….103, 192, 194 changing paper size in Trays 1 and 2……..68 802.1x ………………
-
Page 296
Display Brightness…………..172 FAX Mode ……………… 113 Display Manual Fax Recipients……… 169 Fax Number …………….162 Display Network Information ……….. 184 Fax Pending…………..153, 220 document feeder…………. 74, 94, 124 fax problems …………….262 Document feeder top cover ……….49 Fax Protocol…………….170 document feeder tray…………..49 Fax Server Address Book …………. -
Page 297
Index IP Address (IPv6) ……………35 Modem Speed…………….169 IP Filter………………161 IP Mode………………159 IPP ………………..39 narrow glass strip……………49 IPsec………………… 160 Network Setup …………….. 159 No Account User Print …………178 No. of fax lines…………….. 289 Job History……………152, 220 Non-Genuine Toner …………… 181 Job Status button………… -
Page 298
PDL ………………..286 replacing a toner cartridge……….229 Polling Receive…………….. 105 replacing consumables …………228 Port9100 ………………39 Report / List…………….152 Portrait………………155 Report 2 Sided Print ………….. 177 power consumption…………… 285 reports/lists …………….220 power cord connector…………..47 Reset Network Setup…………. 162 Power on Wizard………….. -
Page 299
Index standard paper…………….61 Tray 2 ……………….46, 199 Start button ……………..52 Tray 5 (Bypass)…………..46, 196 Status Messenger …………39, 241 tray lock………………292 Stop button………………52 Tray Management…………..196 storing and handling paper………..63 Tray Priority …………….200 Substitute Tray……………. 177 Tray Settings …………….196 Supplies ……………… -
Page 300
DocuCentre SC2020 User Guide ME6739E2-1 (Edition 2) March 2014 , . o © , . o…