![]()
XM
Electronic GB Labelmaker
Instructions for Use
Elektronisk S
Märkmaskin
Bruksanvisning
Elektroninen FIN
Tarrakirjoitin
Käyttöohjeet
Dymo LetraTag XM
This product is CE marked in accordance with the CE directive and is designed to conform with the following international standards:
|
Safety – |
BSEN 60950 |
|
IEC 950 |
|
|
UL 1950 |
—EN 61000-4-2 (1995)
—EN 61000-4-3 (1995)
—ENV 50204 (1995)
—EN 55022 (1994) + amendment 1 (1995)
—FCC Class B (part 15)
* Although unlikely, it is possible that abnormal behaviour may result from electrostatic discharges. In such cases, should normal operation not resume, follow the relevant procedure as detailed in the trouble-shooting section: No response to keys.
The user should avoid directly touching the thermal print head.
© 2000 Esselte N.V., Industriepark-Noord 30, 9100 Sint-Niklaas, Belgium

|
CAPS |
STYLE B |
123 |
|
|
DYMO |
|||
|
labelmaker |
|||
|
RE |
VIE |
||
|
P |
|||
|
B |
W |
||
|
|
|||
|
CAPS |
0 |
||
|
4 |
5 |
||
|
D |
E |
||
|
E |
A |
B
C
F


¿ ¡ : (
)
|
D |
% + = # |
° |
|
E |
£ Æ Ø Œ ß |
|
|
F |
Å Ã Ñ Õ Â |
|
|
G |
æ ø œ * |
‘ |
|
H |
å ã ñ õ |
â |
I
PRINT 
 STYLE B
  123
123
labelmaker
PRINT

W
|
1 |
2 |
3 |
4 |
5 |
|
A |
B |
C |
D |
E |
|
6 |
7 |
8 |
9 |
0 |
|
F |
G |
H |
I |
J |
|
SIZE |
STYLE |
2 = |
123 |
|
K |
L |
M |
N |
|
|
. |
’ |
! |
? |
|
|
P |
R |
S |
||
|
Q |
||||
|
* |
& |
— |
@ |
|
|
U |
V |
W |
X |
|
|
C |
$ |
ß |
´Å |
|
|
Z |
Æ |
O |
Lj SYMBOLS
 …
…
|
Visit our website (www.dymo.com) for information |
GB |
|
on obtaining tapes and accessories for the LetraTag. |
Power Supply
•Insert six size AA batteries, as shown in Fig. A.
•Remove batteries if the Labelmaker is to be unused for some time.
Inserting the cassette
•The Labelmaker uses paper, plastic and metallic labels.
•Insert cassette as shown in Fig. B and press until it «clicks» into place — Fig. C.
•Check that the cassette is correctly located before closing the access door.
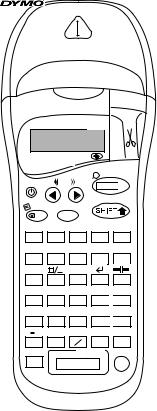
The Display
•Shows up to 6 characters plus cursor and 5 indicators ▲ as shown below. Indicators show whether a feature is selected.
CAPS 

 STYLE B
  123
123
▲▲ ▲ ▲ ▲
123456
|
▲ |
||||||
|
CAPS = capital letters |
= box/underline |
STYLE = outline/italic etc. |
||||
|
B = BIG CAPS |
= shift key |
Function keys
ON/OFF
Switches the power on and off.
•Switches off automatically after two minutes if no keys are pressed. The last label will be retained automatically in memory.
Note: If the batteries are removed for more than a few seconds, the memory will be lost.

CAPITALS
•Press for all subsequent characters in UPPER CASE (CAPITALS), as confirmed by the CAPS indicator in the display.
•Press again to cancel and return to lower case.
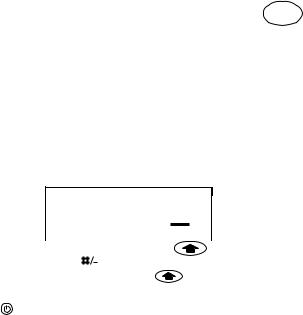
SHIFT KEY
•Press  before pressing a number, punctuation or function indicated above a key.
DELETE  DEL
DEL
• Press to delete the character to the left of the cursor or to exit function menus.
CLEAR  +
+
CLEA
 DEL
DEL
R
•Press to clear all the text and stored labels but leave the last labelsettings unchanged.
CURSOR KEYS  or
or 
•Press to move the cursor along the text, one character at a time.
•Press  +
+  or
or  to move the cursor to the beginning or end of the label or to the beginning of the next or previous label, when labels are stored.
•When used in conjunction with certain function keys, use  or
or  to select options.
SPACE
|
• Press |
to insert a space into the text. |
The «B» (BIG CAPS) mode will produce highly visible labels using the entire print height.
• To create a label in «B» mode use  to move the cursor under «B» and press OK .
Note: 1. «B» can not be selected if text is entered. In that case press  DEL to remove all text and then select «B«.
2.When «B» is selected, all other options are not available.
3.Stored labels in memory can not be converted into Big font.
•Now key in text and the label is ready to print in BIG CAPS ONLY.
|
SIZE |
|||||||||||||||||||||
|
• |
To exit “B” mode, press |
+ |
K |
and select another text size, then press OK . |
|||||||||||||||||
|
BOX/UNDERLINE |
+ |
||||||||||||||||||||
|
L |
|||||||||||||||||||||
|
• There are seven options available under the BOX/UNDERLINE feature: |
|||||||||||||||||||||
|
1. |
Normal — |
= DYMO |
|||||||||||||||||||
|
2. |
Underlined — |
= DYMO |
|||||||||||||||||||
|
3. |
Round Corners — |
= |
DYMO |
||||||||||||||||||
|
4. |
Shaded Box — |
= |
|||||||||||||||||||
|
DYMO |
|||||||||||||||||||||
|
5. |
Toothed Box — |
= |
|||||||||||||||||||
|
DYMO |
|||||||||||||||||||||
|
6. |
Crocodile Box — |
= |
DYMO |
||||||||||||||||||
|
7. |
Pointed Box — |
= |
DYMO |
||||||||||||||||||
|
• |
Use |
or |
to move the cursor under the desired option. Press OK . |
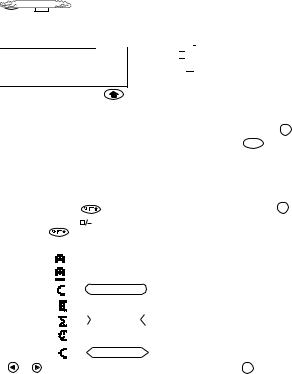
•There are 5 options available under the STYLE menu.
•Place cursor under required STYLE and press OK .
• Print two lines of half height characters.
CAPS 

 STYLE B
  123
123
|
Normal |
Outline |
Shadow |
Italic |
Vertical |
||||||||
|
2 = |
|
• Type the first line of text eg. DYMO and press |
then |
N |
. |
|
|
The display shows an arrow ( |
) to indicate the line break. Type the second |
|||
|
line of your text, eg. DYMO |
LABEL This will print as |
|||
|
DYMO |
||||
|
LABEL |
Note: The Box/Underline and Style features are not available on 2-line labels.
NEW LABEL  + O .
+ O .
• Press  + O .
+ O .
Allows you to start a new label after stored labels. You may store as many labels as you like until the memory is full when an error flash warning is given. To make space in the memory you can edit any stored label.
INTERNATIONAL CHARACTERS
To add a diacritical (accent) to create an international character, enter the character first, followed by the diacritical.
|
Eg. a + |
ˆ |
= á |
ˆ |
||||
|
a + |
+ |
= â |
|||||
 Loading…
SYMBOLS
Press
followed by the space bar (
) to access symbols and special
characters. The display will show: A-H? (or A-F? if «B» has been selected)
Press
to cancel, or press a letter key ‘A’ to ‘H’ until you find the line of
DEL
symbols required. See table.
Use
or
to select a symbol. Press
to place the symbol in the label.
OK
Printing a label
• To print a label place the cusor anywhere within the label and press
.
PRINT PREVIEW
+
Allows you to preview all your labels before printing.
• Press
+
and all labels in memory will scroll across the display.
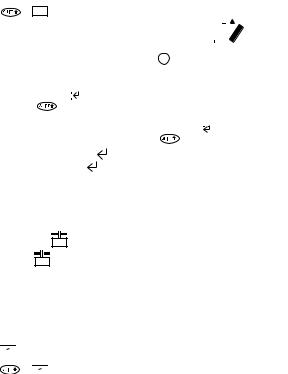
CUTTING A LABEL
• To cut a label push the cutter forward as shown in Fig. E.
• The label has a split in the backing for easy removal, as shown in Fig. F.
Cleaning
• Check and clean the print head regularly to ensure optimum print quality — see
Fig. D.
• Using the cleaning tool D1 supplied, clean the print head as shown in D2.
Troubleshooting
No display
• check machine is on
• check batteries and replace if necessary
No response to keys
• remove batteries for a few minutes then refit. The Labelmaker will now reset
No printing or poor text
• check batteries and replace if necessary
• check tape cassette installed correctly and not empty
• clean print head (see ‘Cleaning’)

Ленточный принтер DYMO Letra Tag для этикеток
Сегодня приобрёл себе новую игрушку, как когда-то обещал в статье Бюджетная СКС в офисе. Ещё одно желание исполнено, и попробую сделать небольшой обзор принтера. Небольшой обзор — потому что описывать там совсем нечего, ну разве что сделать огромную таблицу всех символов которые он может печатать и которую мне делать лень 
Принтер предназначен для печати любого текста на самоклеющихся ленточках шириной 12 мм. Ленточки бывают пластиковые и бумажные, и разных цветов. Фактически, это можно обозвать этикетками. Может применяться например для подписывания автоматов в щитках, маркировки патч-панелей или розеток для CKC чтобы не писать чего-то на коленках кривыми ручками.

Лента DYMO для печати этикеток
Принцип работы очень простой: набрали нужный текст и символы, выставили оформление этикетки и нажали на печать.

Картридж с лентой ставится в принтер
Принтер подумал, выползла ленточка. Нажимаем на серую кнопку с ножницами, отрезали этикетку. Ну и дальше снимаем защитную бумажку с клеевого слоя и клеим её куда хотим. Для того чтобы защитную бумажку было удобно снимать она разрезана посредине на две части — достаточно «сломать» этикетку пополам — и края бумажки сами отойдут.

Английские буквы имеются в виде символов
Следует обращать внимание на выбор материала этикетки: они бывают из пластика и из бумаги. Пластиковые ленты более прочные, красивые (бывают разных цветов), но плохо сгибаются и лучше всего будут держаться на ровной поверхности. Бумажные помягче, поэтому их можно клеить и на кабели. Но следует не забывать про чистые руки! Клеющий слой довольно слабый и малейшая грязь ослабит его ещё больше.
В Россию поставляются уже только русифицированные версии принтеров и на многих сайтах написано что язык только русский. Это — не так (тоже парился пока покупал): английские буквы есть, но они идут как символы и вызываются при помощи следущего нажатия кнопок: [SHIFT], [SYMBOLS] и потом кнопок [А], [Б], [В],… которые выдают список символов (и букв в том числе). Нужная буква или символ выбирается при помощи кнопок со стрелками и впечатывается при помощи нажатия кнопки [OK].
Ну, попробуем чего-нибудь напечатать.

Набрали текст и напечатали этикетку
Текста на экране всего на 6-7 символов. Поначалу это кажется неудобным, а на самом деле — вполне устраивает, потому что чаще всего печатаются этикетки вроде номера розетки в формате XX000, которые как раз короткие. Нажимаем кнопку [PRINT] и получаем красивую бамашку:

А вот и распечатка этикетки
Дорвался до принтера и полез обвешивать этикетками всё вокруг и писать матерные слова. А потом добрался до кухни и промаркировал баночки с приправами.
")
Добрался до кухни и промаркировал банки 
Жёлтая этикетка — пластиковая, и это будет проверкой для неё — удержится ли она на баночках или отвалится.
Дополнение от 2021 года: на пластике надписи продержались аж года до 2019ого, после чего сильно поблёкли, и яч выкинул эти баночки напрочь вместе с наклейками =)
Ещё в принтере есть несколько вариантов шрифта и рамочек вокруг этикеток. При желании можно писать в две строки, но шрифт получается какой-то растянутый по горизонтали и выглядит некрасиво.

Разные типы шрифтов и оформления наклеек
Ну и до кучи попробовал то, для чего собираюсь затачивать принтер, — промаркировать патч-корд.

Попробовал маркировать патч-корд из витой пары
Использовал бумажную ленту, самый мелкий шрифт (1го размера). Конечно, бумажка на малом радиусе тоже клеилась плохо, но проблему решил канцелярский скотч :)) Обмотал поверх и получилось красиво, прочно и немарко — плёнка скотча защищает бумажку от пачканья. Будет заказ — попробую притащить и намаркировать силовые кабели. Достало уже маркером писать каракули!
Дополнение. Вся эта затея с этим принтером у меня не прижилась, потому что маркировать им модульку в щите оказалось неудобно (длина этикетки зависит от длины текста), а маркировать кабели на объекте было неудобно из-за того что как только на этиткетку попадёт хоть немного пыли или грязи, то она сразу же перестаёт клеиться.
Долгое время я использовал маркировку DKC ГрафоПласт (и вот пост про неё), а потом в 2016 году купил себе принтер Godex G500 и маркиркую им всё при помощи разных маркировочных этикеток и бирок от WAGO. Все посты по теме маркировки собраны у меня по тэгу «Маркировка».

Visit our website (www.dymo.com) for information
on obtaining tapes and accessories for the LetraTag.
Power Supply
• Insert six size AA batteries, as shown in Fig. A.
• Remove batteries if the Labelmaker is to be unused for some time.
Inserting the cassette
• The Labelmaker uses paper, plastic and metallic labels.
• Insert cassette as shown in Fig. B and press until it «clicks» into place — Fig. C.
• Check that the cassette is correctly located before closing the access door.
The Display
• Shows up to 6 characters plus cursor and 5 indicators ▲ as shown below.
Indicators show whether a feature is selected.
STYLE
B
123
CAPS
CAPS = capital letters = box/underline STYLE = outline/italic etc.
B = BIG CAPS
= shift key
Function keys
ON/OFF
Switches the power on and off.
• Switches off automatically after two minutes if no keys are pressed. The last
label will be retained automatically in memory.
Note: If the batteries are removed for more than a few seconds,
the memory will be lost.
▲
▲
▲▲
▲
▲
123456
GB
Downloaded from www.Manualslib.com manuals search engine
Note for Owners:
Guidesimo.com webproject is not a service center of Dymo trademark and does not carries out works for diagnosis and repair of faulty Dymo LetraTAG XM equipment. For quality services, please contact an official service center of Dymo company. On our website you can read and download documentation for your Dymo LetraTAG XM device for free and familiarize yourself with the technical specifications of device.
More Label Maker Devices:
-
Intermec PM43
Worldwide Headquarters6001 36th Avenue WestEverett, Washington 98203U.S.A.tel 425.348.2600fax 425.355.9551www.intermec.com© 2011 Intermec Technologies Corporation. All rights reserved.To print a test label with the Icon Printer. 要使用 Icon Printer 打印测试标签。若要使用 Icon Printer 列印測試標籤。Pour imprimer une étiquette test avec l’imprimante Icon. Ausdrucken eines Pr …
PM43 Printer, 2
-
Argox iX4 Series
*Specifications, accessories, parts and programs are subject to change without notice.Note:iX4 Series7F., No.126, Ln.235, Baoqiao Rd., Xindian Dist.,New Taipei City 231, Taiwan (R.O.C.)Tel: +886-2-8912-1121 Fax: +886-2-8912-1124https://www.argox.comhttps://www.youtube.com/user/argoxmktemail:[email protected] © 2019. Argox Information Co., Ltd. All Rights Reserved.Argox Information Co., …
iX4 Series Label Maker, 2
-
CognitiveTPG Advantage LX
WARNING — SHOCK HAZARD and STATIC DISCHARGE:CAUTION — PRINTER SETUP & HANDLING:Never operate the printer in a location where it can get wet. Personal injury could result. The discharge of electrostatic energy that accumulates on the surface of the human body or other surfaces can damage or destroy the print head or electronic components used in this device. DO NOT TOUCH the print head or the …
Advantage LX Label Maker, 2
-
Zebra ZP 450
980546-003 A ZP 450 User Guide 355TroubleshootingResolutions1. The printer is not receiving power.• Have you turned on the printer power?• C hec k power c onnec tions f rom the wal l outl et to the power s uppl y, and f rom the power s uppl y to the printer.• D is c onnec t the printer f rom the wal l outl et f or 3 0 s ec onds and then rec onnec t the printer to the wal l outl e …
ZP 450 Printer, 2
-
MUNBYN ITPP941
CONTENTSDriver Installation…………………………………………………………………………………………………………… — 1 -Mac Driver………………………………………………………………………………………………………………….- 1 -Windows Driver…………………………………………………………………………. …
ITPP941 Label Maker, 34