инструкцияBraun Series 7 70-S1000s

www.service.braun.com
90081363/XI-21
90081363_UI_S7_Shaver+Attachments_EURO+KOREA.indd 190081363_UI_S7_Shaver+Attachments_EURO+KOREA.indd 1 05.11.21 11:0205.11.21 11:02
Stapled booklet, 120 x 170 mm, 80 p (incl. 8 p cover), 4C
Посмотреть инструкция для Braun Series 7 70-S1000s бесплатно. Руководство относится к категории бритвы, 1 человек(а) дали ему среднюю оценку 7.5. Руководство доступно на следующих языках: русский, английский. У вас есть вопрос о Braun Series 7 70-S1000s или вам нужна помощь? Задайте свой вопрос здесь
Главная
| Braun | |
| Series 7 70-S1000s | |
| бритва | |
| русский, английский | |
| Руководство пользователя (PDF) |
Не можете найти ответ на свой вопрос в руководстве? Вы можете найти ответ на свой вопрос ниже, в разделе часто задаваемых вопросов о Braun Series 7 70-S1000s.
Инструкция Braun Series 7 70-S1000s доступно в русский?
Не нашли свой вопрос? Задайте свой вопрос здесь
- Manuals
- Brands
- Braun Manuals
- Electric Shaver
- 7 series
- Cleaning instructions manual
-
Contents
Table of Contents -
Bookmarks
Quick Links
Braun Series7 Electric
Shaver Cleaning
Instructions
Braun GmbH
Related Manuals for Braun 7 Series
Summary of Contents for Braun 7 Series
-
Page 1
Braun Series7 Electric Shaver Cleaning Instructions Braun GmbH… -
Page 2: Table Of Contents
Cleaning the Shaver Using the Clean and Renew Station Replacing the Clean and Renew Cartridge Overview To ensure a close shave and efficient operation of the Braun Series7 shaver, you must clean the shaver regularly. The Braun Series7 cleaning system offers the user two cleaning options: •…
-
Page 3: The Braun Series7 Electric Shaver
The Braun Series7 Electric Shaver The Braun Series7 electric shaver features a pivoting foil cutting head for grooming and an LCD display to show the battery charge and cleaning levels. The details of the Braun Series7 shaver are displayed in Figure 2 below.
-
Page 4: The Clean And Renew Station
The details of the Clean and Renew Station are displayed in Figures 7 and 8 below. Reservoir Opening Cleaning Level Lights Start Cleaning Button AC Power Fluid Status Cord Outlet Lights Clean and Renew Cartridge Figure 7: Front Side Figure 8: Right Side Braun Series7 Electric Shaver Cleaning Instructions…
-
Page 5: Cleaning The Shaver Using The Clean And Renew Station
Figure 9: Small AC Plug Figure 10: Large AC Plug 2. Insert the Braun Series7 shaver upside down into the Clean and Renew reservoir opening at the top of the station. Note: If the shaver is properly seated inside the reservoir cavity, one of three cleaning level lights illuminates on the right side of the Station.
-
Page 6: Replacing The Clean And Renew Cartridge
Renew Station. The Clean and Renew Cartridge is displayed in Figure 13 below. Warning: The Clean and Renew Cartridge is filled with a highly flammable alcohol solution that must be kept away from all heat sources. Figure 13: Clean and Renew Cartridge Braun Series7 Electric Shaver Cleaning Instructions…
-
Page 7
Figure 15: Unlocked Station 2. Slide out the old cleaning fluid cartridge (see Figure 16). Figure 16: Sliding Out Old Cartridge 3. Drain the contents of the spent cartridge and dispose of the empty plastic tank. Braun Series7 Electric Shaver Cleaning Instructions… -
Page 8
5. Slide the new Clean and Renew cartridge into the bottom of the Clean and Renew station base. Figure 18: Sliding in New Cartridge 6. Push down on the Clean and Renew Station housing until it locks into position with a click. Braun Series7 Electric Shaver Cleaning Instructions…
730
720
www.braun.com/register
Type 5694
Type 5695
Series7
reset
trimmer
trimmer
trimmer
on
off
on
off
Series 7Series 7
Series 7
Series 7
730
intensive
sensitive
99456645_730_CEEMEA_S1.indd 199456645_730_CEEMEA_S1.indd 1 18.01.2010 13:55:03 Uhr18.01.2010 13:55:03 Uhr
Stapled booklet, 110×200 mm, 70 p (incl. 6 p cover), 2/2c = black + PMS541u
Braun Infolines
GB
0800 783 70 10
IRL
1 800 509 448
F
0 800 944 802
B
0 800 14 592
PL
0 801 127 286
0 801 1 BRAUN
CZ
221 804 335
SK
02/5710 1135
H
(06-1) 451-1256
HR
01/6690 330
SLO
080 2822
TR
0 800 261 63 65
RUS
8 800 200 20 20
UA
+ 38 044 428 65 05
HK
852-25249377
(Audio Supplies Company Ltd.)
www.service.braun.com
English 4
Français 9
Polski 14
âesk˘ 20
Slovensk˘ 26
Magyar 31
Hrvatski 36
Slovenski 41
Türkçe 46
êÛÒÒÍËÈ 51
ì͇ªÌҸ͇ 57
69
Braun GmbH
Frankfurter Straße 145
61476 Kronberg/Germany
www.braun.com
99456645/II-10
GB/F/PL/CZ/SK/H/HR/SLO/TR/
RUS/UA/Arab
99456645_730_CEEMEA_S2.indd 199456645_730_CEEMEA_S2.indd 1 03.02.2010 8:49:22 Uhr03.02.2010 8:49:22 Uhr
reset
trimmer
trimmer
trimmer
on
off
on
off
Series 7
730
intensive
sensitive
trimmer
trimmer
trimmer
on
off
on
off
reset
trimmer
trimmer
trimmer
on
off
on
off
Series 7Series
7
Series 7
Series 7
730
intensive
sensitive
2
1
3
4
5
8
7
6
9
10
12
Series 7
Series 7
11
99456645_730_CEEMEA_S3.indd 199456645_730_CEEMEA_S3.indd 1 18.01.2010 14:00:54 Uhr18.01.2010 14:00:54 Uhr
4
Our products are designed to meet the highest
standards of quality, functionality and design. We
hope you enjoy your new Braun Shaver.
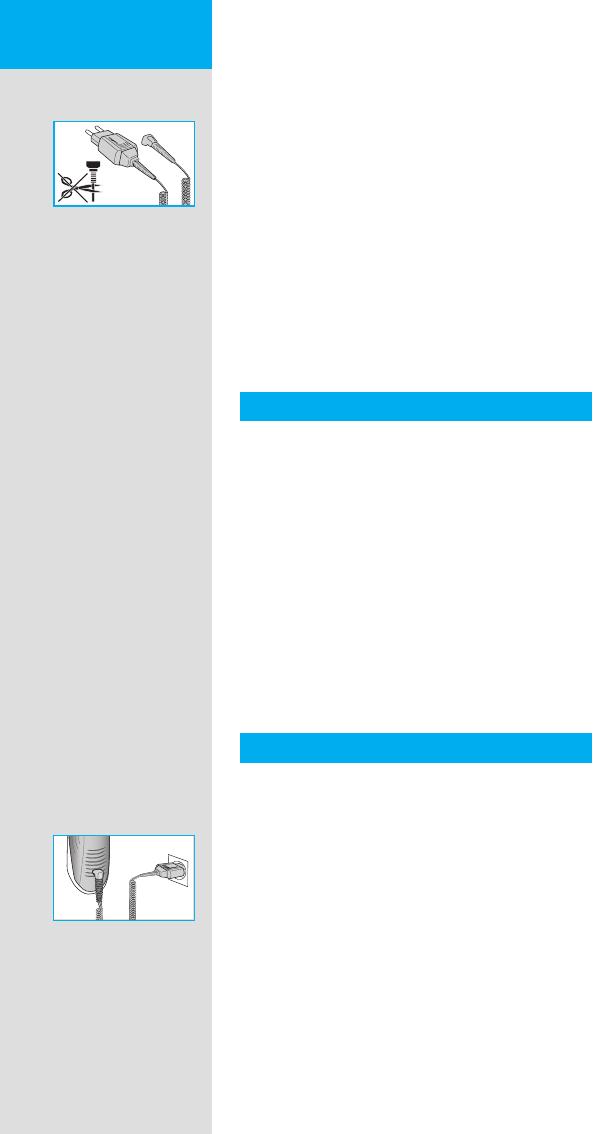
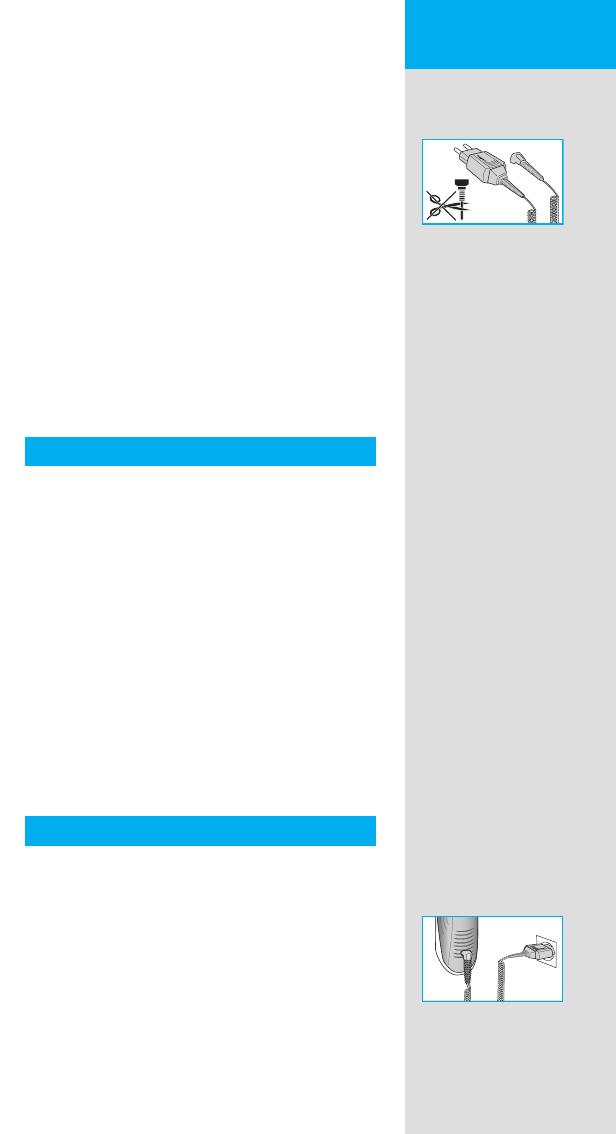
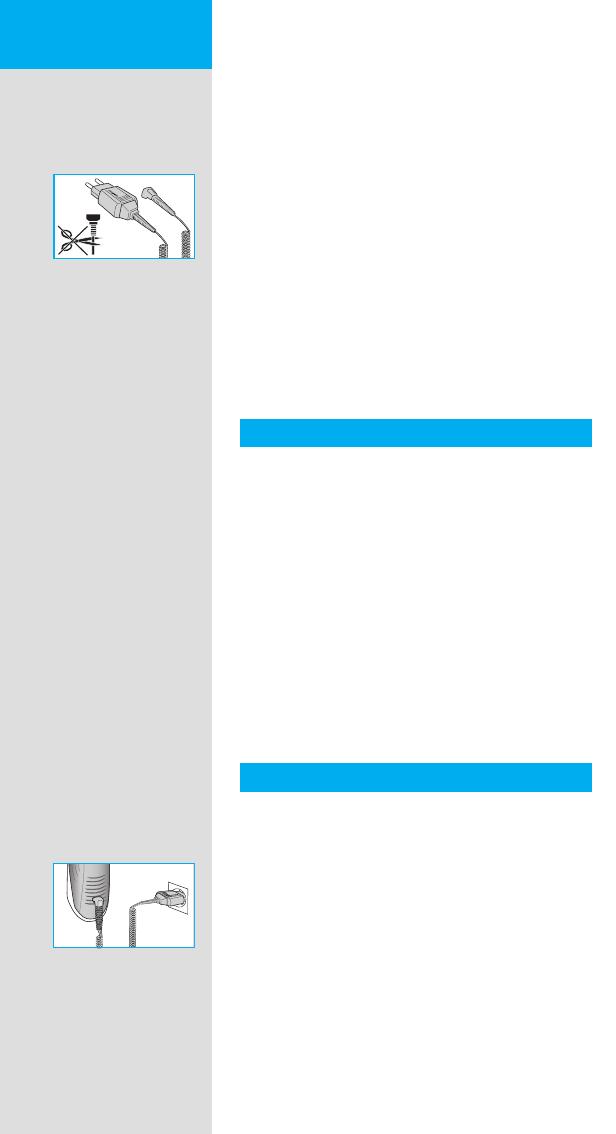
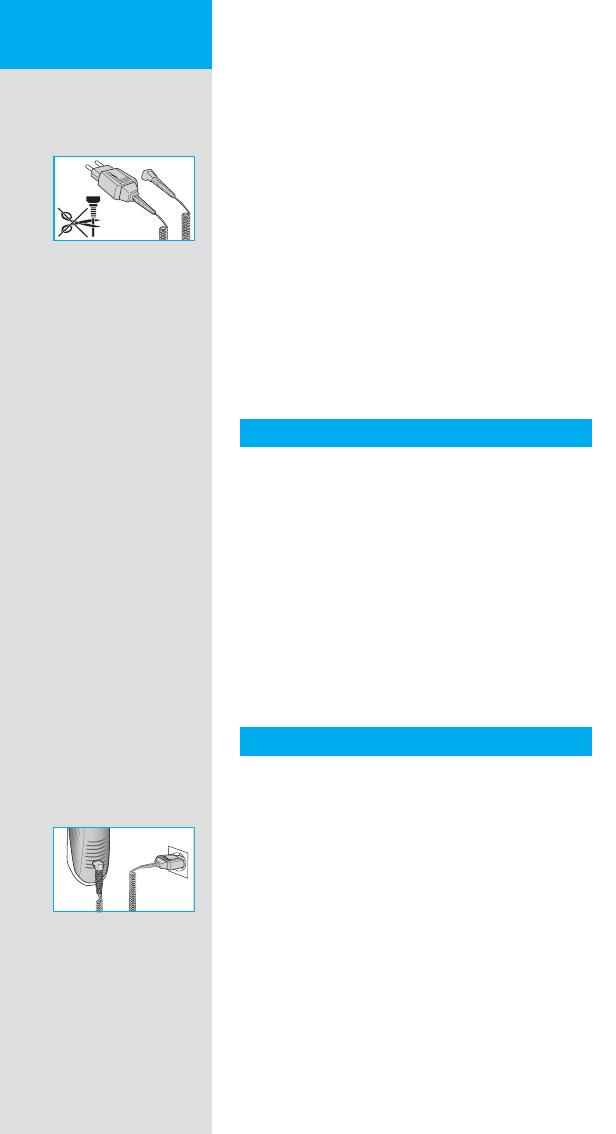
Warning
Your shaver is provided with a special cord
set, which has an integrated Safety Extra Low
Voltage power supply. Do not exchange or
tamper with any part of it, otherwise there is risk
of electric shock.
This appliance is not intended for use by children
or persons with reduced physical or mental
capabilities, unless they are supervised by a
person responsible for their safety. In general,
we recommend that you keep the appliance out
of reach of children.
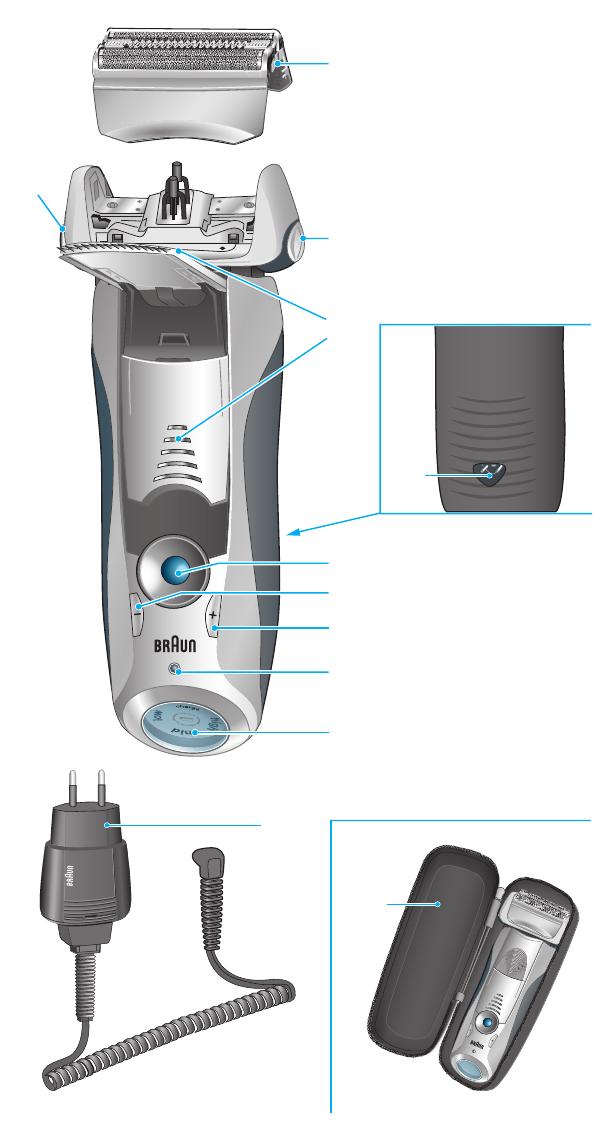
Description
1 Foil & Cutter cassette
2 Cassette release button
3 Shaver head «lock» switch
4 Pop-out long hair trimmer
5 On/off switch
6 «sensitive» (–) setting button
7 «intensive» (+) setting button
8 Reset button
9 Shaver display
0 Shaver power socket
q Travel case
w Special cord set
Charging
The best environmental temperature for charging
is between 5 °C and 35 °C.
• Using the special cord set w, connect the
shaver to an electrical outlet with the motor
switched off and charge it for at least one hour.
• A full charge provides up to 50 minutes
of cordless shaving time. This may vary
according to your beard growth.
• If the rechargeable battery has run out of
power (discharged), you may also shave by
connecting the shaver to an electrical outlet via
the special cord set.
STOPSTOP
English
99456645_730_CEEMEA.indd 499456645_730_CEEMEA.indd 4 09.02.2010 11:38:06 Uhr09.02.2010 11:38:06 Uhr
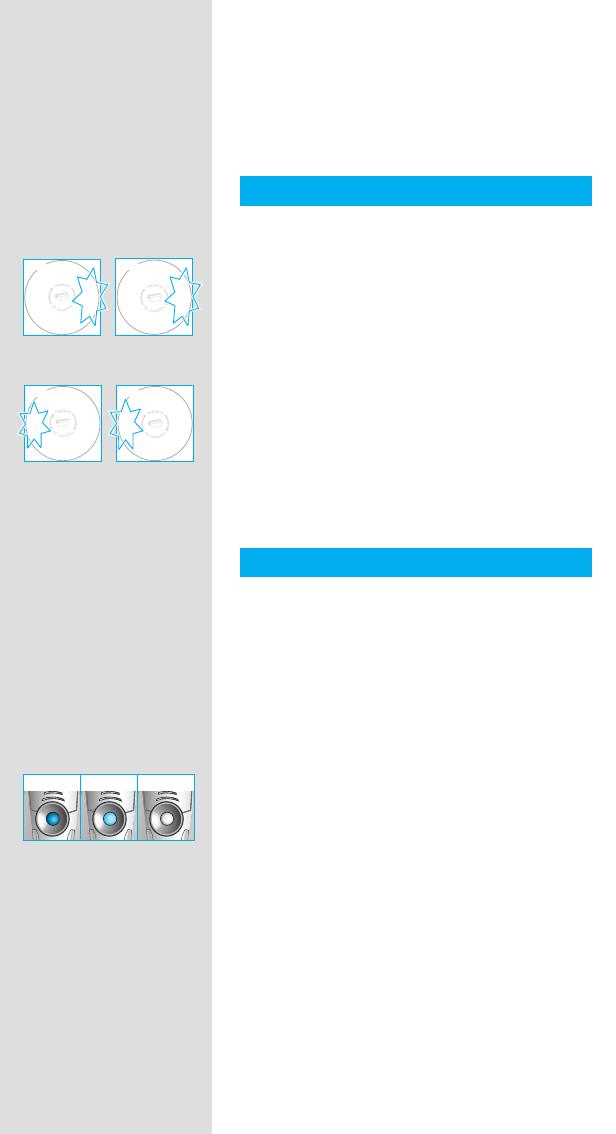
5
Shaver display 9
The green indicator fl ashes when the shaver is
being charged or when in use.
When the battery is fully charged, the charge
segment «high» (720) / «high» «mid» (730) will
light up continuously provided that the shaver is
switched on or connected to an electrical outlet.
The red «low» indicator fl ashes when the battery
capacity has dropped below 20%, provided the
shaver is switched on. The remaining capacity
will then be suffi cient for 2 to 3 shaves.
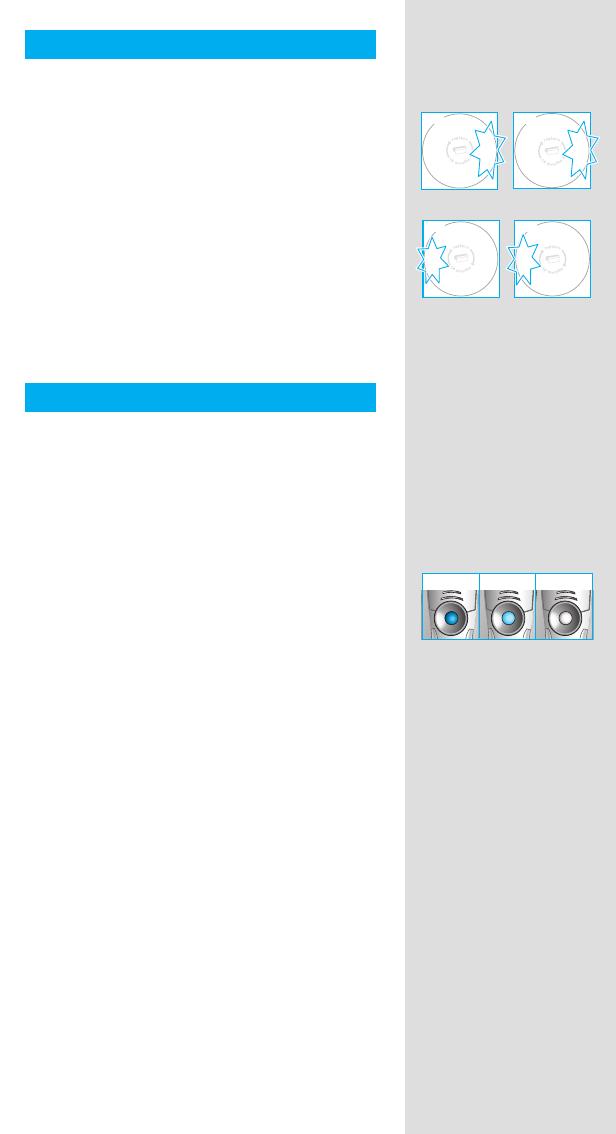
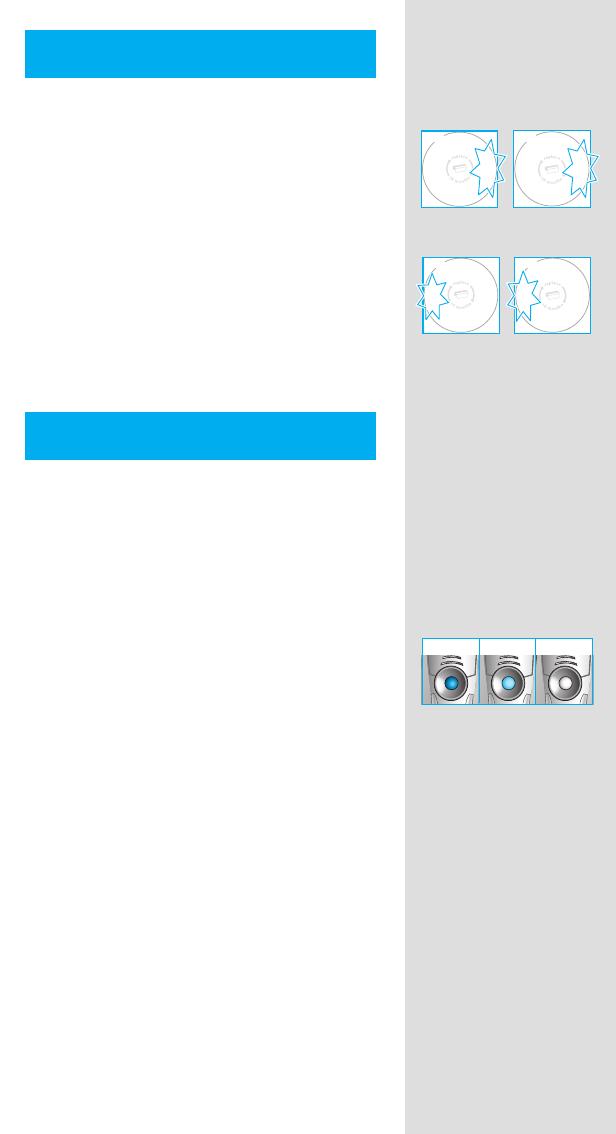
Personalizing your shaver
Personalizing your shaver
With the «sensitive» 6 and «intensive» 7
buttons you can choose the best setting for
shaving different areas of your face and as per
your specifi c needs. The different settings are
indicated by the pilot light incorporated in the
on/off switch 5:
• «Intensive» = dark blue (powerful shave)
• «Normal» = light blue
• «Sensitive» = white (for a thorough comfortable
shave in sensitive areas of your
face such as neck)
For a thorough and fast shave we recommend
the «intensive» setting.
Pressing the « + » or « – » button activates your
preferred setting. When switching on next time,
the last used setting will be activated.
c
h
a
r
g
e
h
i
g
h
m
i
d
l
o
w
h
i
g
h
l
o
w
730 720
c
h
a
r
g
e
h
i
g
h
m
i
d
l
o
w
h
i
g
h
l
o
w
730 720
c
h
a
r
g
e
h
i
g
h
m
i
d
l
o
w
h
i
g
h
l
o
w
730 720
c
h
a
r
g
e
h
i
g
h
m
i
d
l
o
w
h
i
g
h
l
o
w
730 720
on
off
on
off
siv
itive
on
off
on
off
siv
itive
on
off
on
off
siv
itive
sensitivenormalintensive
on
off
on
off
siv
itive
on
off
on
off
siv
itive
on
off
on
off
siv
itive
sensitivenormalintensive
99456645_730_CEEMEA.indd 599456645_730_CEEMEA.indd 5 09.02.2010 11:38:07 Uhr09.02.2010 11:38:07 Uhr
6
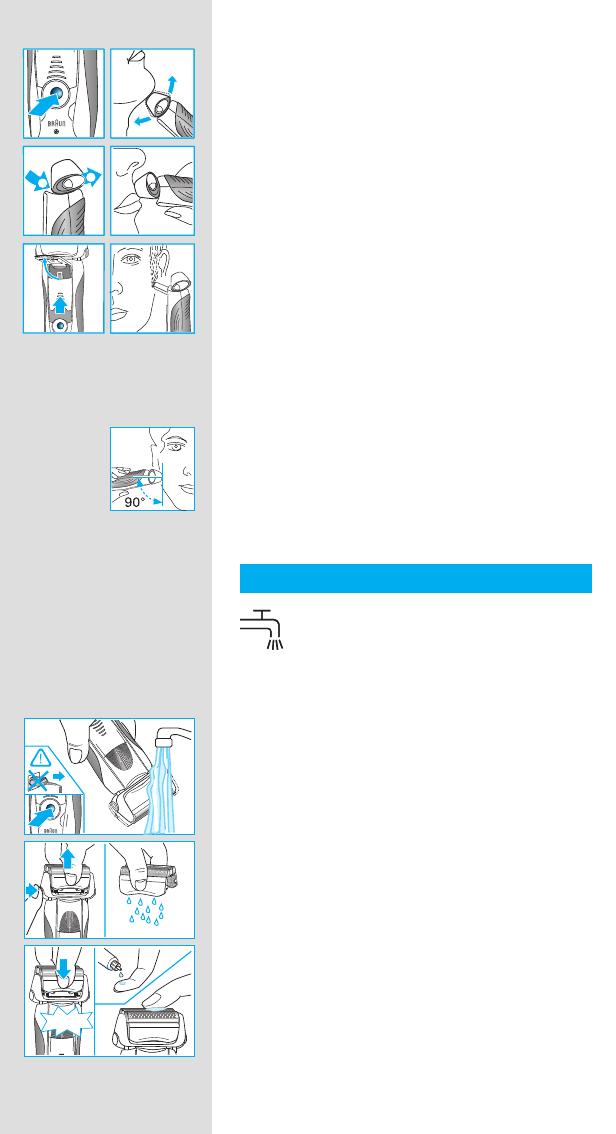
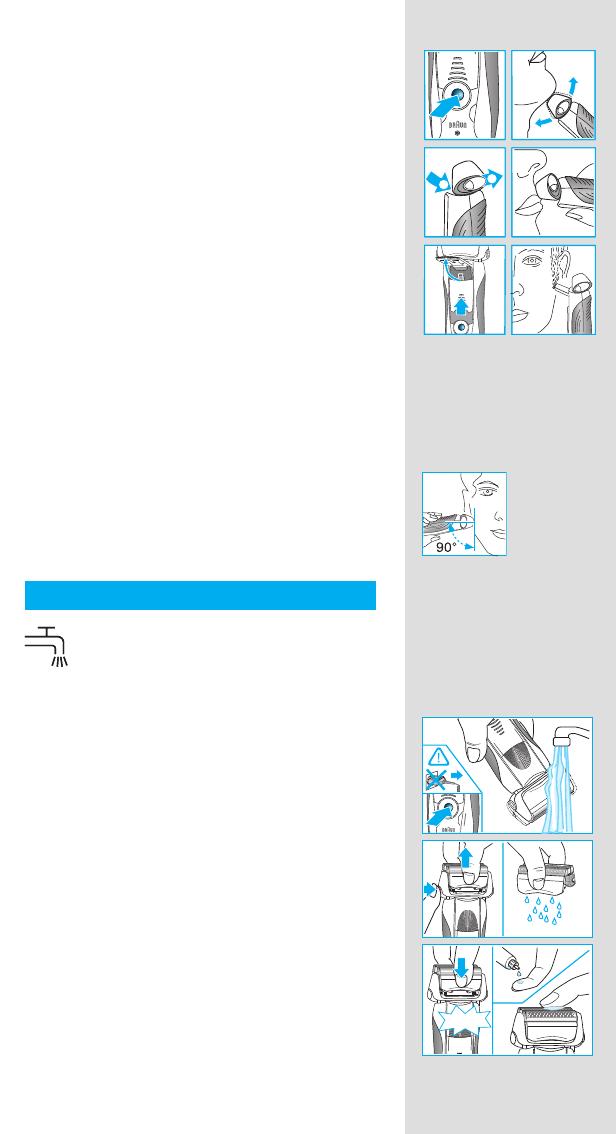
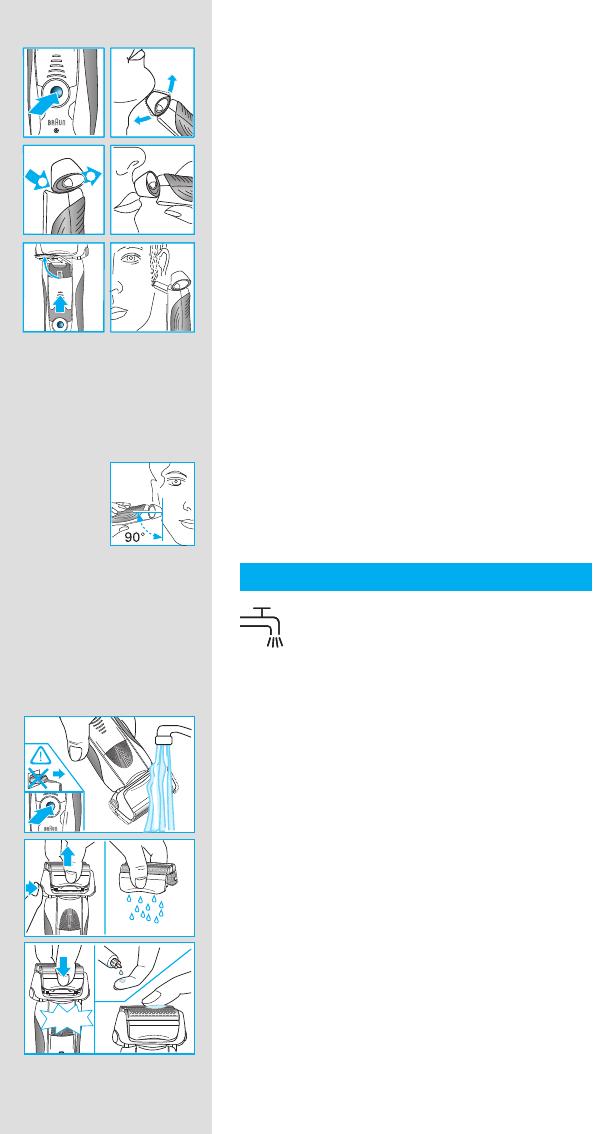
How to use
Press the on/off switch
5 to operate the shaver:
• The pivoting shaver head and fl oating foils
automatically adjust to every contour of your
face.
• To shave hard to reach areas (e.g. under the
nose) slide the shaver head «lock» switch 3 to
the back position to lock the pivoting head at
an angle.
• To trim sideburns, moustache or beard, slide
the pop-out long hair trimmer
4 upwards.
Tips for the perfect shave
For best shaving results, Braun recommends you
to follow 3 simple steps:
1. Always shave before washing your face.
2. At all times, hold the shaver at right angles
(90°) to your skin.
3. Stretch your skin and shave against the
direction of your beard growth.
Cleaning
The shaver head is suitable for cleaning
under running tap water.
Warning: Detach the shaver from the
power supply before cleaning the shaver
head in water.
Regular cleaning ensures better shaving
performance. Rinsing the shaving head under
running water after each shave is an easy and
fast way to keep it clean:
• Switch the shaver on (cordless) and rinse
the shaving head under hot running water.
You may use liquid soap without abrasive
substances. Rinse off all foam and let the
shaver run for a few more seconds.
• Next, switch off the shaver, press the release
button 2 to remove the Foil & Cutter cassette
1 and let it dry.
• If you regularly clean the shaver under
water, then once a week apply a drop of
light machine oil on top of the Foil & Cutter
cassette.
t
lock
1
2
trimmer
lock
lock
lock
on
on
off
off
intensive
sensitive
t
lock
1
2
trimmer
lock
lock
lock
on
on
off
off
intensive
sensitive
oil
trim
mer
er
re
le
a
s
e
trimmer
re
le
a
s
e
click!
Series 7
Series 7
Series
Series
oil
trim
mer
er
re
le
a
s
e
trimmer
re
le
a
s
e
click!
Series 7
Series 7
Series
Series
99456645_730_CEEMEA.indd 699456645_730_CEEMEA.indd 6 09.02.2010 11:38:08 Uhr09.02.2010 11:38:08 Uhr
7
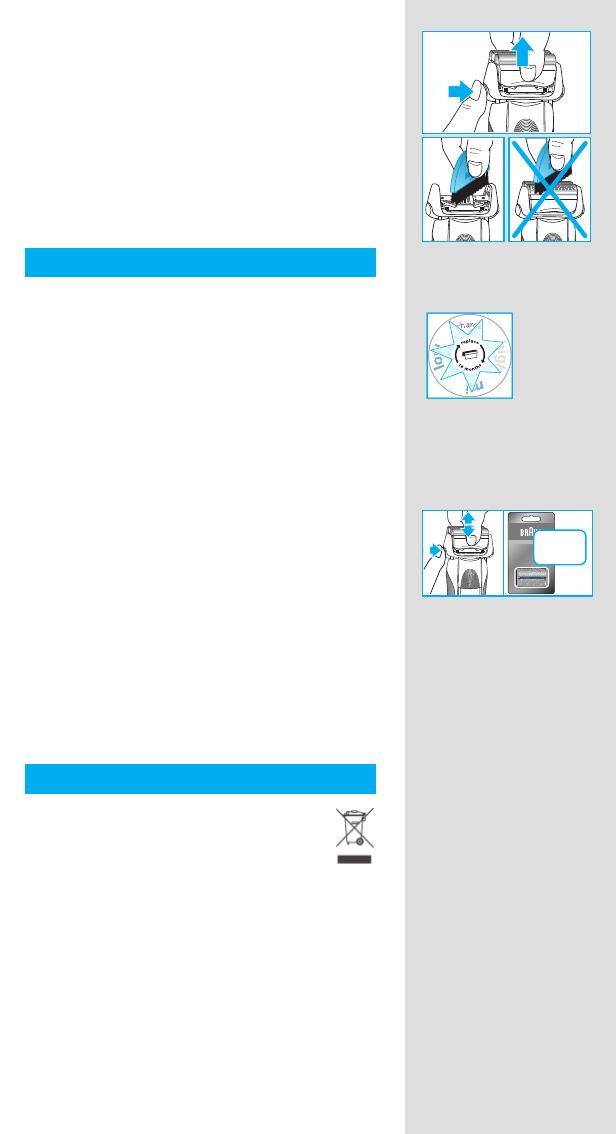
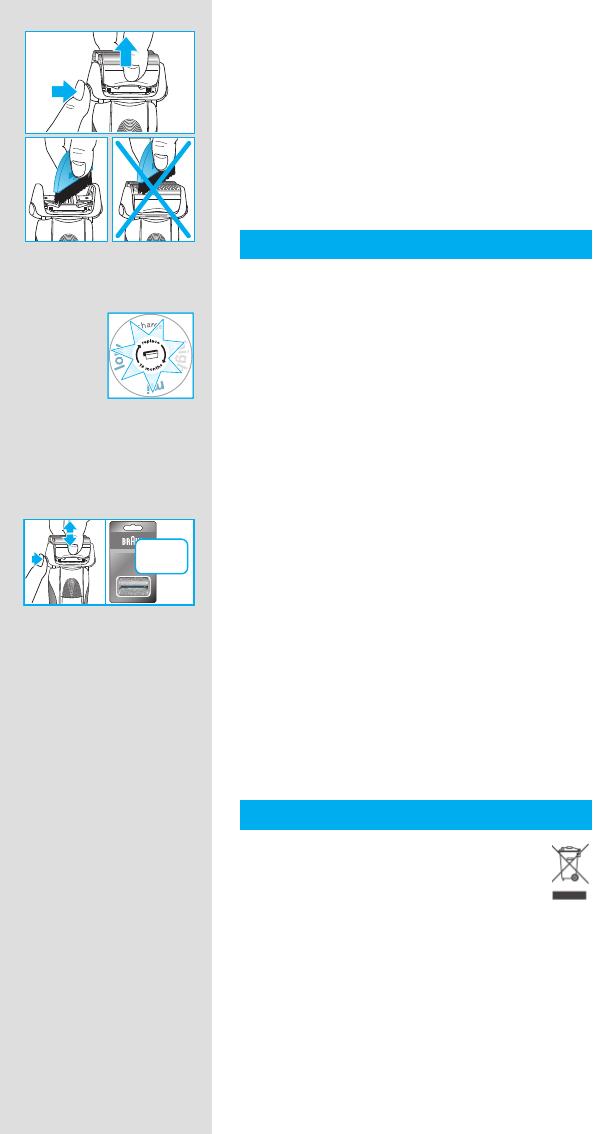
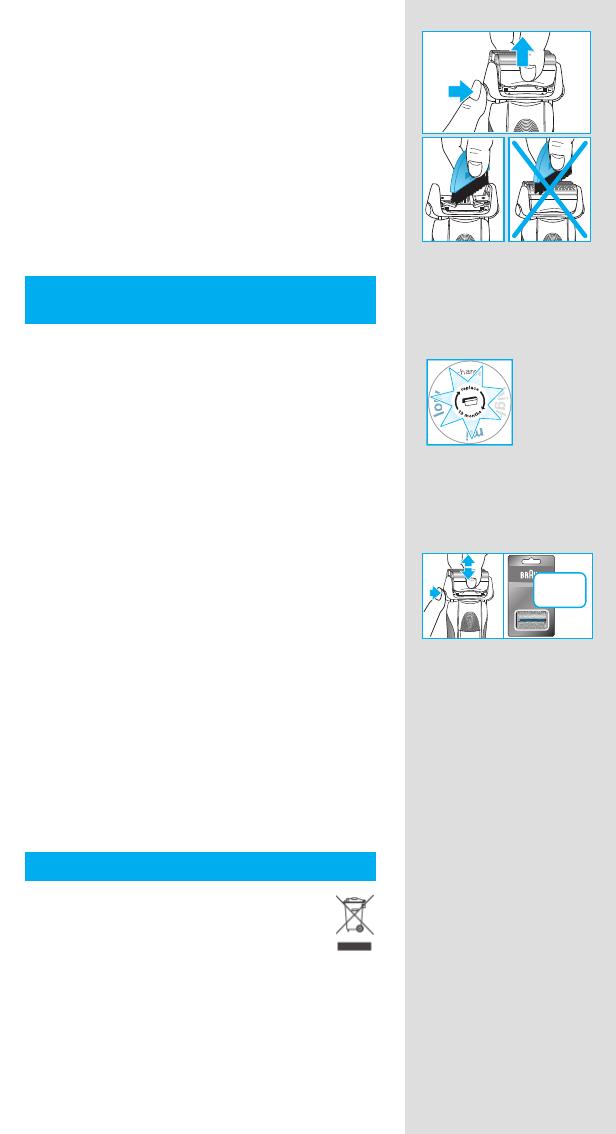
Alternatively, you may clean the shaver using the
brush provided:
• Switch off the shaver. Remove the Foil & Cutter
cassette
1 and tap it out on a fl at surface.
Using the brush, clean the inner area of the
pivoting head. However, do not clean the foil
and cutter cassette with the brush as this may
damage it.
Keeping your shaver in top shape
Replacing the Foil & Cutter cassette / reset
To maintain 100% shaving performance,
replace the Foil & Cutter cassette 1, when the
replacement symbol lights up on the shaver
display 9 (after about 18 months) or when
cassette is worn
The replacement symbol will remind you during
the next 7 shaves to replace the Foil & Cutter
cassette. Then the shaver will automatically reset
the display.
After you have replaced the Foil & Cutter
cassette, use a ball-pen to push the reset button
8 for at least 3 seconds to reset the counter.
While doing so, the replacement light blinks and
goes off when the reset is complete. The manual
reset can be done at any time.
Accessories
Available at your dealer or Braun Service
Centres:
• Foil & Cutter cassette 70S
Environmental notice
This product contains rechargeable
batteries. In the interest of protecting the
environment, please do not dispose of the
product in household waste at the end of
its useful life. Disposal can take place at a
Braun Service Centre or at appropriate
collection points provided in your country.
Subject to change without notice.
For electric specifi cations, see printing on
the special cord set.
re
le
a
s
e
re
le
a
s
e
re
le
a
s
e
Series 7
Series 7
re
le
a
s
e
re
le
a
s
e
re
le
a
s
e
Series 7
Series 7
dd
er
re
le
a
s
e
70S
Series 7
er
re
le
a
s
e
70S
Series 7
99456645_730_CEEMEA.indd 799456645_730_CEEMEA.indd 7 09.02.2010 11:38:09 Uhr09.02.2010 11:38:09 Uhr

8
Guarantee
We grant a 2 year guarantee on the product
commencing on the date of purchase. Within the
guarantee period we will eliminate any defects in
the appliance resulting from faults in materials or
workmanship, free of charge either by repairing
or replacing the complete appliance at our
discretion.
This guarantee extends to every country where
this appliance is supplied by Braun or its
appointed distributor.
This guarantee does not cover: damage due to
improper use, normal wear and tear (e.g. shaver
foil or cutter block) as well as defects that have
a negligible effect on the value or operation of
the appliance. The guarantee becomes void if
repairs are undertaken by unauthorised persons
and if original Braun parts are not used.
To obtain service within the guarantee period,
hand in or send the complete appliance with
your sales receipt to an authorised Braun
Customer Service Centre (address information
available online at www.service.braun.com).
For UK only:
This guarantee in no way affects your rights
under statutory law.
99456645_730_CEEMEA.indd 899456645_730_CEEMEA.indd 8 09.02.2010 11:38:09 Uhr09.02.2010 11:38:09 Uhr
9
Français
Nos produits sont conçus pour répondre aux
normes les plus élevées en matière de qualité,
fonctionnalité et design. Nous espérons que
vous apprécierez votre nouveau rasoir Braun.
Attention
Votre système de rasage est livré avec
un cordon d’alimentation qui intègre une
prise transformateur basse tension. Vous
ne devez remplacer ou modifi er aucun de
ses composants, afi n d’éviter tout risque
d’électrocution.
Cet appareil n’est pas destiné à des enfants
ou des personnes aux capacités physiques,
sensorielles ou mentales réduites à moins
qu’elles ne soient sous la surveillance d’un
adulte responsable de leur sécurité. Nous
recommandons de garder l’appareil hors de
portée des enfants.
Description
1 Cassette de rasage
2 Bouton d’éjection de la cassette
3 Bouton de verrouillage de la tête du rasoir
«lock»
4 Tondeuse rétractable pour poils longs
5 Interrupteur marche/arrêt
6 Bouton de réglage sensible « sensitive » (–)
7 Bouton de réglage intensif « intensive » (+)
8 Bouton de réinitialisation
9 Ecran d’affi chage du rasoir
0 Prise d’alimentation du rasoir
q Trousse de voyage
w Cordon d’alimentation
Charge du rasoir
La température ambiante idéale pour la mise en
charge se situe entre 5 °C et 35 °C.
• A l‘aide du cordon d‘alimentation w, branchez
le rasoir à une prise de courant avec le moteur
arrêté et chargez-le pendant au moins une
heure
• Une charge complète procure jusqu’à 50
minutes de temps de rasage sans fi l. Cela peut
varier selon la densité, la dureté et la longueur
de votre barbe.
STOPSTOP
99456645_730_CEEMEA.indd 999456645_730_CEEMEA.indd 9 09.02.2010 11:38:10 Uhr09.02.2010 11:38:10 Uhr
10
• Si la batterie est complètement déchargée,
vous pouvez également vous raser en
branchant le rasoir sur une prise de courant via
le cordon d‘alimentation.
Ecran d’affi chage du rasoir 9
Le voyant vert clignote lorsque le rasoir est en
charge ou en utilisation.
Lorsque la batterie est complètement chargée,
le segment de charge « high » (720) / « high »
« mid » (730) est allumé en continu, quand le
rasoir fonctionne ou quand il est branché sur une
prise de courant.
L’indicateur « low » rouge clignote quand le
rasoir fonctionne pour indiquer que la capacité
de la batterie est inférieure à 20 %. La capacité
restante est suffi sante pour 2 à 3 rasages.
Personnalisez votre rasoir
Personnalisez votre rasoir
A l’aide des boutons de réglage sensible
« sensitive » 6 et intensif « intensive » 7, vous
pouvez sélectionner le meilleur réglage pour
raser les différentes zones de votre visage et
pour répondre à vos besoins spécifi ques. Les
différents réglages sont indiqués par le voyant
lumineux intégré à l’interrupteur marche / arrêt
5 :
• « Intensive » = bleu foncé (rasage puissant)
• « Normal » = bleu clair
• « Sensitive » = blanc (pour un rasage doux,
complet et agréable des zones
sensibles du visage ou du cou)
Pour un rasage complet et rapide, nous
recommandons le réglage « intensive ».
Appuyez sur le bouton « + » ou « – » pour activer
votre réglage préféré. Lors de la prochaine
mise en marche, le dernier réglage utilisé sera
sélectionné.
c
h
a
r
g
e
h
i
g
h
m
i
d
l
o
w
h
i
g
h
l
o
w
730 720
c
h
a
r
g
e
h
i
g
h
m
i
d
l
o
w
h
i
g
h
l
o
w
730 720
c
h
a
r
g
e
h
i
g
h
m
i
d
l
o
w
h
i
g
h
l
o
w
730 720
c
h
a
r
g
e
h
i
g
h
m
i
d
l
o
w
h
i
g
h
l
o
w
730 720
on
off
on
off
siv
itive
on
off
on
off
siv
itive
on
off
on
off
siv
itive
sensitivenormalintensive
on
off
on
off
siv
itive
on
off
on
off
siv
itive
on
off
on
off
siv
itive
sensitivenormalintensive
99456645_730_CEEMEA.indd 1099456645_730_CEEMEA.indd 10 09.02.2010 11:38:10 Uhr09.02.2010 11:38:10 Uhr
11
Utilisation
Appuyez sur l’interrupteur marche/arrêt
5 pour
mettre en marche le rasoir :
• La tête pivotante du rasoir et les grilles
fl exibles s’adaptent automatiquement aux
contours de votre visage.
• Pour raser les zones diffi ciles à atteindre
(ex. : sous le nez), faites glisser le « lock » de
verrouillage de la tête du rasoir
3 vers l’arrière
pour bloquer la tête pivotante en position
inclinée.
• Pour tailler les pattes, moustache et barbe,
faites coulisser la tondeuse rétractable pour
poils longs 4 vers le haut.
Conseils pour un rasage parfait
Pour des résultats de rasage optimaux, Braun
vous invite à suivre les 3 recommandations
suivantes :
1. Rasez-vous toujours avant de vous laver le
visage.
2. Tenez toujours le rasoir à angle droit (90°) par
rapport à votre peau.
3. Tendez la peau et rasez la barbe dans le sens
inverse de la pousse du poil.
Nettoyage
La tête du rasoir peut passer sous le
robinet d’eau courante.
Attention : Débranchez le rasoir avant de
le nettoyer à l’eau.
Un nettoyage régulier garantit une performance
de rasage optimale. Rincer la tête du rasoir sous
l‘eau courante après chaque utilisation est une
façon facile et rapide de la garder propre :
• Mettez le rasoir en marche (sans cordon
d’alimentation) et rincez la tête du rasoir
sous le robinet. Il est possible d’utiliser du
savon liquide ne contenant pas de substance
abrasive. Rincez toute la mousse et laissez le
rasoir en marche pendant quelques secondes.
• Ensuite, arrêtez le rasoir, appuyez sur le
bouton d’éjection de la cassette 2 pour retirer
la cassette de rasage 1 et laissez-la sécher.
• Si vous nettoyez régulièrement le rasoir sous
l’eau, appliquez ensuite une fois par semaine
une goutte d’huile fl uide de machine à coudre
sur le haut de la cassette de rasage.
on
on
off
off
intensive
sensitive
on
on
off
off
intensive
sensitive
oil
trim
mer
er
re
le
a
s
e
trimmer
re
le
a
s
e
click!
Series 7
Series 7
Series
Series
oil
trim
mer
er
re
le
a
s
e
trimmer
re
le
a
s
e
click!
Series 7
Series 7
Series
Series
99456645_730_CEEMEA.indd 1199456645_730_CEEMEA.indd 11 09.02.2010 11:38:10 Uhr09.02.2010 11:38:10 Uhr
12
Vous pouvez aussi nettoyer le rasoir à sec avec
la brosse fournie :
• Arrêtez le rasoir. Retirez la cassette de
rasage
1 et tapotez-la sur une surface plane.
Nettoyez l’intérieur de la tête pivotante à l’aide
de la brosse. Toutefois, ne nettoyez pas la
cassette avec la brosse car cela risque de
l’endommager.
Gardez votre rasoir en bon état
Remplacement de la cassette de rasage /
réinitialisation
Pour conserver une performance de rasage effi —
cace à 100 %, remplacez la cassette de rasage
1 lorsque le symbole s’allume sur l’écran du
rasoir 9 (au bout de 18 mois environ) ou lorsque
la cassette est usée.
Le symbole de remplacement vous rappellera
durant les 7 prochains rasages de remplacer la
cassette de rasage. Le rasoir réinitialisera ensuite
automatiquement l’écran.
Après le remplacement de la cassette de rasage,
utilisez un stylo pour presser le bouton de
réinitialisation 8 pendant au moins 3 secondes
afi n de réinitialiser le compteur.
Le témoin lumineux de remplacement clignote et
s’éteint lorsque la réinitialisation est terminée. Il
est possible de faire une réinitialisation manuelle
à tout moment.
Accessoires
Disponibles chez votre vendeur ou dans les
centres de service Braun :
• Cassette de rasage 70S
Informations relatives à l’environnement
Ce produit contient des batteries
rechargeables. Dans un souci de
protection de l’environnement, veuillez
ne pas jeter le produit avec les ordures
ménagères au terme de son cycle de vie.
Vous pouvez remettre ce produit au centre
de service Braun ou aux points de collecte
dans votre pays.
Susceptible d’être modifi é sans préavis.
Pour les spécifi cations électriques, se référer aux
inscriptions sur l’adaptateur basse tension.
re
le
a
s
e
re
le
a
s
e
re
le
a
s
e
Series 7
Series 7
re
le
a
s
e
re
le
a
s
e
re
le
a
s
e
Series 7
Series 7
dd
er
re
le
a
s
e
70S
Series 7
er
re
le
a
s
e
70S
Series 7
99456645_730_CEEMEA.indd 1299456645_730_CEEMEA.indd 12 09.02.2010 11:38:11 Uhr09.02.2010 11:38:11 Uhr

13
Garantie
Nous accordons une garantie de 2 ans sur ce
produit, à partir de la date d‘achat.
Pendant la durée de la garantie, Braun prendra
gratuitement à sa charge la réparation des vices
de fabrication ou de matière en se réservant
le droit de décider si certaines pièces doivent
être réparées ou si l‘appareil lui-même doit être
échangé.
Cette garantie s‘étend à tous les pays où cet
appareil est commercialisé par Braun ou son
distributeur exclusif.
Cette garantie ne couvre pas : les dommages
occasionnés par une utilisation inadéquate,
l’usure normale (par exemple, grille et bloc-
couteaux) ainsi que les défauts d’usures qui ont
un effet négligeable sur la valeur ou l’utilisation
de l’appareil. Cette garantie devient caduque
si des réparations ont été effectuées par des
personnes non agréées par Braun et si des
pièces de rechange ne provenant pas de Braun
ont été utilisées.
Pour toute réclamation intervenant pendant la
période de garantie, retournez ou rapportez
l‘appareil ainsi que l‘attestation de garantie à
votre revendeur ou à un Centre Service Agréé
Braun.
Se référez à www.service.braun.com ou appelez
08.10.30.97.80 pour connaitre le Centre Service
Agrée Braun le plus proche de chez vous.
Clause spéciale pour la France
Outre la garantie contractuelle exposée ci-
dessus, nos clients bénéfi cient de la garantie
légale des vices cachés prévue aux articles 1641
et suivants du Code civil.
99456645_730_CEEMEA.indd 1399456645_730_CEEMEA.indd 13 09.02.2010 11:38:12 Uhr09.02.2010 11:38:12 Uhr
14
Polski
Nasze produkty zostały zaprojektowane tak,
aby sprostać najwyższym standardom jakości,
funkcjonalności oraz zaprezentować najlepszy
design. Mamy nadzieję, że jesteście zadowoleni
z nowej golarki marki BRAUN.
Ostrzeżenia
Twój system golący posiada specjalny przewód
zasilania o niskim napięciu (SELV). Nie wymie-
niaj na własną rękę żadnej z jego części, gdyż
grozi to porażeniem prądem.
To urządzenie nie jest przeznaczone do
samodzielnego użycia przez dzieci i osoby
niepełnosprawne umysłowo, jeżeli nie są one
kontrolowane przez osoby za nie odpowiedzialne.
Na ogół rekomendujemy przechowywanie
urządzenia z dala od dzieci.
Opis
1 Blok ostrzy tnących i folii golącej
2 Przycisk zwalniający blok
3 Przycisk blokujący głowicę golarki «lock»
4 Wysuwany trymer
5 Przycisk włacznik/wỳłacznik «on/off»
6 Przycisk programu golenia wrażliwych
miejsc «sensitive» (–)
7 Przycisk programu golenia intensywnego
«intensive» (+)
8 Przycisk resetujący
9 Wskaźniki naładowania i czystości golarki
0 Gniazdko zasilające golarkę
q Pudełko podróżne
w Specjalny przewód zasilający
Opis urzàdzenia
Najlepsza dla ładowania temperatura powietrza
to od 5° C do 35 °C.
Używając specjalnego zestawu kabli w golarkę
należy podłaczyc do zewnętrznego źródła
pradu i ładować co najmniej przez 60 minut.
Całkowite naładowanie umożliwia golenie
bezprzewodowe do 50 minut. Może się to
zmieniać w zależności od długości zarostu.
Jeśli bateria wyczerpie się, możesz golić się
golarką podłączoną przewodem do źródła
zasilania.
•
•
•
STOPSTOP
99456645_730_CEEMEA.indd 1499456645_730_CEEMEA.indd 14 09.02.2010 11:38:12 Uhr09.02.2010 11:38:12 Uhr
15
Wskaźniki naładowania i czystości
golarki 9
Zielony wskaźnik świeci gdy golarka jest w
trakcie ładowania lub jest w użyciu.
Gdy bateria jest w pełni naładowana wskaźnik
oznaczony jako «high» (720) / «high» «mid» (730)
świeci światłem ciągłym.
Gdy golarka jest włączona, a poziom nałado-
wania baterii spada poniżej 20%, czerwony
wskaźnik zasilania oznaczony jako «low»
zaczyna mrugać. Pozostała bateria wystarczy na
2 do 3 goleń.
Dostosuj golarkę do własnych
potrzeb
Dostosuj golarkę do własnych potrzeb
Za pomocą przycisków programów golenia
wrażliwych miejsc 6 i golenia intensywnego
7 możesz wybrać najlepsze ustawienie do
golenia różnych obszarów twarzy zgodnie z
własnymi potrzebami. Ustawienia wskazywane
są za pomocą światła
na pilocie uruchamianym
włącznikiem «on/off»
5:
• «Intensive» = granatowy (golenie o dużej
mocy)
• «Normal» = niebieski
• «Sensitive» = biały (dokładne, a jednocześnie
bezpieczne golenie wrażliwych
fragmentów twarzy jak szyja)
Dla dokładnego i szybkiego golenia polecane jest
ustawienie programu intensywnego golenia.
Poprzez naciśnięcie przycisków «+» i «–»
możesz uaktywnić preferowane ustawienia. Przy
kolejnym uruchomieniu golarki, automatycznie
włączą się ostatnio używane ustawienia.
c
h
a
r
g
e
h
i
g
h
m
i
d
l
o
w
h
i
g
h
l
o
w
730 720
c
h
a
r
g
e
h
i
g
h
m
i
d
l
o
w
h
i
g
h
l
o
w
730 720
c
h
a
r
g
e
h
i
g
h
m
i
d
l
o
w
h
i
g
h
l
o
w
730 720
c
h
a
r
g
e
h
i
g
h
m
i
d
l
o
w
h
i
g
h
l
o
w
730 720
on
off
on
off
siv
itive
on
off
on
off
siv
itive
on
off
on
off
siv
itive
sensitivenormalintensive
on
off
on
off
siv
itive
on
off
on
off
siv
itive
on
off
on
off
siv
itive
sensitivenormalintensive
99456645_730_CEEMEA.indd 1599456645_730_CEEMEA.indd 15 09.02.2010 11:38:12 Uhr09.02.2010 11:38:12 Uhr
16
Sposób użycia
Aby uruchomić golarkę naciśnij przycisk
«on/off»
5:
Ruchoma głowica oraz sprężyste folie golące
automatycznie dostosowują się do każdego
kształtu twarzy.
Aby ogolić trudnodostępne miejsca (na przy-
kład obszar pod nosem) należy ustawić głowicę
golarki pod odpowiednim kątem, a następnie
unieruchomić ją przyciskiem blokującym
3.
Aby przyciąć bokobrody, wąsy lub brodę należy
ustawić trymer 4 do długich włosów ku górze.
Wskazówki dotyczące perfekcyjnego golenia
Aby osiągnąć doskonałe efekty golenia, marka
Braun zaleca stosowanie się do trzech prostych
zasad:
1. Zawsze myj twarz przed goleniem
2. Przez cały czas trzymaj golarkę pod
odpowiednim kątem (90°)
3. Napnij skórę i przeciągaj golarkę pod włos
Czyszczenie
Głowica golarki nadaje się do mycia pod
bieżącą wodą.
Ostrzeżenie: Przed zanurzeniem głowicy
w wodzie należy odłączyć golarkę od
źródła zasilania.
Regularne czyszczenie zapewnia większą
skuteczność golenia. Płukanie głowicy golarki
pod bieżącą wodą po każdym goleniu jest łatwym
i szybkim sposobem utrzymywania urządzenia w
czystości.
Włącz golarkę (bez kabla) i przemywaj głowicę
pod ciepłą, bieżącą wodą. Możesz użyć mydła
w płynie nie zawierającego chropowatych
substancji. Spłucz całą pianę i pozostaw
golarkę włączoną przez kilka kolejnych sekund.
Następnie wyłącz golarkę, naciśnij przycisk
zwalniający 2 aby zdjąć blok z ostrzami i folią
golącą 1 i pozostaw do wyschnięcia.
Jeśli regularnie czyścisz golarkę pod wodą,
raz w tygodniu nanoś kroplę lekkiego oleju do
maszyn na zewnętrzną część bloku z ostrzami
i folią golącą.
•
•
•
•
•
•
t
lock
1
2
trimmer
lock
lock
lock
on
on
off
off
intensive
sensitive
t
lock
1
2
trimmer
lock
lock
lock
on
on
off
off
intensive
sensitive
oil
trimmer
er
re
le
a
s
e
trimmer
re
le
a
s
e
click!
Series 7
Series 7
Series
Series
oil
trimmer
er
re
le
a
s
e
trimmer
re
le
a
s
e
click!
Series 7
Series 7
Series
Series
99456645_730_CEEMEA.indd 1699456645_730_CEEMEA.indd 16 09.02.2010 11:38:13 Uhr09.02.2010 11:38:13 Uhr
17
Zamiennie można także czyścić golarkę za
pomocą pędzla:
Wyłącz golarkę. Zdejmij blok z ostrzami oraz
folią golącą 1 i pozostaw go na płaskiej
powierzchni. Użyj pędzelka i wyczyść
wewnętrzne obrotowej głowicy. Nie czyść
nakładki pędzlem, który mógłby ją zniszczyć.
Utrzymanie golarki w najlepszej
kondycji
Wymiana bloku z ostrzami i folią golacą
Aby utrzymać 100% wydajność golenia, należy
wymieniać blok gdy zaświeci się symbol wymiany
9 (po około 18 miesiącach) lub gdy folia oraz
ostrza się zużyją.
Symbol wymiany będzie przypominał o zmianie
nakładki przez 7 kolejnych goleń. Następnie
golarka automatycznie wyłączy wyświetlanie
przypomnienia.
Po wymianie bloku użyj długopisu aby wcisnąć
na około 3 sekundy przycisk resetujący 8 dzięki
czemu licznik będzie liczył liczbę goleń od nowa.
Podczas wykonywania tej czynności, światełko
zmiany będzie mrugało, a następnie całkiem się
wyłączy. Ręczne resetowanie można wykonać
w dowolnym momencie.
Akcesoria
Dostępne w każdym sklepie AGD/RTV lub
w serwisach marki BRAUN:
Kaseta z ostrzami i folią golacą 70S
Uwagi dotyczàce ochrony Êrodowiska
Urzàdzenie to wyposa˝one jest w baterie
przystosowane do wielokrotnego
∏adowania. Aby zapobiec zanieczy-
szczaniu Êrodowiska, pod koniec okresu
eksploatacji produktu nie wyrzucaj go do
kosza na Êmieci. Mo˝esz pozostawiç go
w punkcie serwisowym marki Braun lub
jednym ze specjalnych punktów zajmujàcych
si´ zbiórkà zu˝ytych produktów w wybranych
miejscach na terenie kraju.
•
•
re
le
a
s
e
re
le
a
s
e
re
le
a
s
e
Series 7
Series 7
re
le
a
s
e
re
le
a
s
e
re
le
a
s
e
Series 7
Series 7
dd
er
re
le
a
s
e
70S
Series 7
er
re
le
a
s
e
70S
Series 7
99456645_730_CEEMEA.indd 1799456645_730_CEEMEA.indd 17 09.02.2010 11:38:13 Uhr09.02.2010 11:38:13 Uhr

18
Powy˝sze informacje mogà ulec zmianie bez
uprzedniego powiadomienia.
Specyfi kacje elektryczne zosta∏y wydrukowane
na specjalnym kablu sieciowym.
Warunki gwarancji
1. Procter and Gamble DS Polska sp. z.o.o.
gwarantuje sprawne działanie sprzętu w
okresie 24 miesięcy od daty jego wydania
Kupującemu. Ujawnione w tym okresie wady
będą usuwane bezpłatnie, przez wymieniony
przez fi rmę Procter and Gamble DS Polska
sp. z.o.o. autoryzowany punkt serwisowy, w
terminie 14 dni od daty dostarczenia sprzętu
do autoryzowanego punktu serwisowego.
2. Kupujący może wysłać sprzęt do naprawy do
najbliżej znajdującego się autoryzowanego
punktu serwisowego wymienionego przez
fi rmę Procter and Gamble DS Polska sp.
z.o.o. lub skorzystać z pośrednictwa sklepu,
w którym dokonał zakupu sprzętu. W takim
wypadku termin naprawy ulegnie wydłużeniu
o czas niezbędny do dostarczenia i odbioru
sprzętu.
3. Kupujący powinien dostarczyć sprzęt
w oryginalnym opakowaniu fabrycznym
dodatkowo zabezpieczonym przed
uszkodzeniem. Uszkodzenia spowodowane
niedostatecznym zabezpieczeniem sprzętu
nie podlegają naprawom gwarancyjnym.
4. Niniejsza gwarancja jest ważna z
dokumentem zakupu i obowiązuje na
terytorium Rzeczypospolitej Polskiej.
5. Okres gwarancji przedłuża się o czas od
zgłoszenia wady lub uszkodzenia do naprawy
sprzętu.
6. Naprawa gwarancyjna nie obejmuje czynności
przewidzianych w instrukcji, do wykonania
których Kupujący zobowiązany jest we
własnym zakresie i na własny koszt.
7. Ewentualne oczyszczenie sprzętu
dokonywane jest na koszt Kupującego według
cennika danego autoryzowanego punktu
serwisowego i nie będzie traktowane jako
naprawa gwarancyjna.
8. Gwarancją nie są objęte:
a) mechaniczne uszkodzenia sprzętu
spowodowane w czasie jego użytkowania
lub w czasie dostarczania sprzętu do
naprawy;
99456645_730_CEEMEA.indd 1899456645_730_CEEMEA.indd 18 09.02.2010 11:38:14 Uhr09.02.2010 11:38:14 Uhr

19
b) uszkodzenia i wady wynikłe na skutek:
– używania sprzętu do celów innych niż
osobisty użytek;
– niewłaściwego lub niezgodnego z
instrukcją użytkowania, konserwacji,
przechowywania lub instalacji;
– używania niewłaściwych materiałów
eksploatacyjnych;
– napraw dokonywanych przez
nieuprawnione osoby; stwierdzenie
faktu takiej naprawy lub samowolnego
otwarcia sprzętu powoduje utratę
gwarancji;
– przeróbek, zmian konstrukcyjnych lub
używania do napraw nieoryginalnych
części zamiennych fi rmy Braun;
c) części szklane, żarówki oświetlenia;
d) ostrza i folie do golarek oraz materiały
eksploatacyjne.
9. Bez nazwy i modelu sprzętu, daty jego
zakupu potwierdzonej pieczątką i podpisem
sprzedawcy karta gwarancyjna jest nieważna.
10. Niniejsza gwarancja na sprzedany towar
konsumpcyjny nie wyłącza, nie ogranicza
ani nie zawiesza uprawnień Kupującego
wynikających z niezgodności towaru z
umową.
99456645_730_CEEMEA.indd 1999456645_730_CEEMEA.indd 19 09.02.2010 11:38:14 Uhr09.02.2010 11:38:14 Uhr
20
âesk˘
Naše výrobky jsou vyrobeny tak, aby splňovaly
nejvyšší nároky na kvalitu, funkčnost a design.
Doufáme, že budete se svým novým holicím
strojkem Braun spokojeni.
Upozornění
Váš holicí systém je vybaven speciálním síťovým
přívodem s integrovaným bezpečnostním síťo-
vým adaptérem. Nevyměňujte ani nerozebírejte
žádnou z jeho částí, jinak by mohlo dojít k úrazu
elektrickým proudem.
Tento přístroj nesmí používat děti ani osoby
se sníženými fyzickými, smyslovými nebo
mentálními schopnostmi bez dohledu osoby,
která je zodpovědná za jejich bezpečnost.
Doporučujeme uchovávat přístroj mimo dosah
dětí.
Popis
1 Kazeta s holicí planžetou a břitovým blokem
2 Uvolňovací tlačítko kazety
3 Tlačítko «lock» (uzamčení) holicí hlavy
4 Výsuvný zastřihovač dlouhých vousů
5 Spínač zapnutí/vypnutí «on/off»
6 Spínač režimu «sensitive» (–)
7 Spínač režimu «intensive» (+)
8 Tlačítko pro vynulování «reset»
9 Displej holicího strojku
0 Síťová zásuvka holicího strojku
q Cestovní pouzdro
w Speciální síťový přívod
Nabíjení holicího strojku
Nejvhodnější teplota okolí pro nabíjení je 5 °C
až 35 °C.
Pomocí speciálního síťového přívodu w
zapojte vypnutý holicí strojek do síťové zásuvky
a nabíjejte jej po dobu minimálně 1 hodiny.
Plné nabití poskytuje kapacitu pro až 50 minut
holení bez síťového přívodu, v závislosti na
délce vašich vousů.
Pokud je akumulátorová baterie vybitá, můžete
se oholit i holicím strojkem připojeným k síti
prostřednictvím speciálního síťového přívodu.
•
•
•
STOPSTOP
99456645_730_CEEMEA.indd 2099456645_730_CEEMEA.indd 20 09.02.2010 11:38:14 Uhr09.02.2010 11:38:14 Uhr
Главная > Разное > Электробритва браун 7 серия
Электробритва браун 7 серия
Бритва Braun инструкция скачать бесплатно
| Модель: | Формат: | Размер: | Язык: | Скачать: |
| Электробритва браун 7 серия инструкция | ~2-8 MB | русский |  |
Бритва Series 7 от Braun
Электробритва Браун 7 серия. Отзывы*
Преимущества:
- цена, качество;
- тихая электробритва;
- имеет 3 режима скорости;
- красивый дизайн, качественный пластик;
- нету раздражения кожи, бреет гладко;
- удобно держать в руках;
- хорошо держит заряд и есть индикация заряда;
- бреет очень чисто, гладко и мягко;
- легко чистится и моется;
- имеет удобный триммер и фиксатор для бритья труднодоступных мест;
- можно регулировать скорость;
- гарантия 2 года.
Недостатки:
- нету стационарного держателя;
- маленький чехол.
* отзывы составлены на базе модели 720s-4 серии 7 из 103 отзывов на Яндекс.Маркет.
Совместимость
Бритва Браун инструкция по применению подходит для следующих моделей:
790cc, 720, 730, 9565, 9566, 9585, 9591, 9595, 9781, 9782, 9785, 9791, 9795, 720s-3, 720s-4, 720s-5, 720s-6, 720s-7, 730s-3, 730s-4, 735cc-4, 735s-3, 740s-6, 740s-7, 750cc, 750cc-3, 750cc-4, 750cc-5, 750cc-6, 750cc-7, 760cc, 760cc-3, 760cc-4, 760cc-5, 760cc-6, 760cc-7, 765cc, 765cc-3, 765cc-4, 765cc-5, 765cc-6, 765cc-7, 790cc-3, 790cc-4, 790cc-5, 790cc-6, 790cc-7, 795cc-3, 797cc-7, 799cc-6, 799cc-7, Boss, Limited Edition 2010, Limited Edition 2011, Limited Edition 2012, Porsche
Braun бритва инструкция. Как скачать руководство?
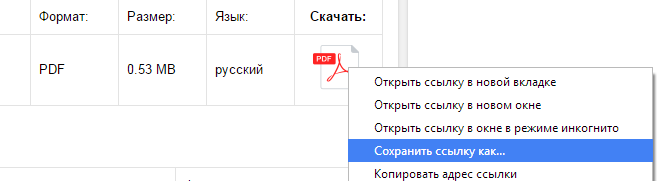
Скачать инструкция Braun легко, в начале страницы перед Вами таблица следующего вида:

Нажимайте правой кнопкой на изображении PDF, после чего ищите в списке «Сохранить как», далее сохраняете на Вашем ПК электробритва braun инструкция, например:
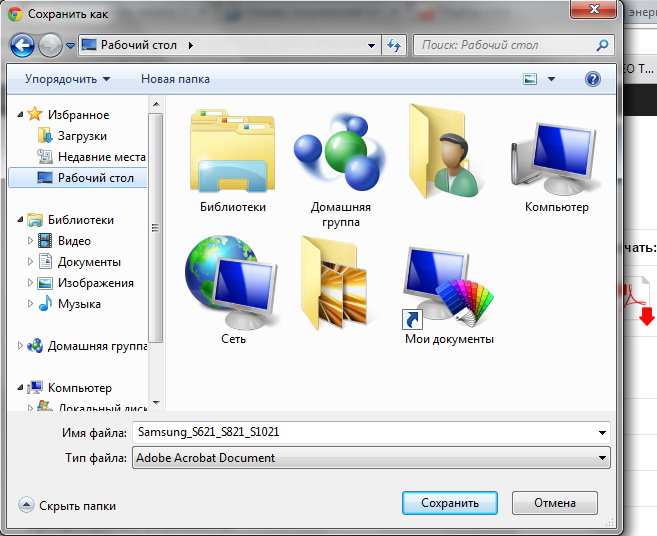
И последний шаг, выбираете папку, в которой желаете сохранить бритва браун инструкция, например на рабочем столе:
Надеемся, у Вас получилось найти электробритва braun инструкция, скачать и успешно ею воспользоваться. Желаем Вам приятного пользования Вашей техникой.