-
Инструкции
-
Сушильные машины
- Electrolux

Инструкция к Electrolux EW8HR259ST
PDF, 7.56 Мб
Информация о приборе
PDF, 292.98 Кб
Класс энергоэффективности
PDF, 395.52 Кб
Схема с размерами
PNG, 86.45 Кб

Инструкция к Electrolux EW6CR428W
PDF, 2.98 Мб
Схема с размерами
JPG, 61.72 Кб

Инструкция к Electrolux EW9H1R88SC
PDF, 1.48 Мб
Схема с размерами
JPG, 36.27 Кб

Инструкция к Electrolux EW8HR359S
PDF, 11.12 Мб
Схема с размерами
JPG, 59.16 Кб

Инструкция к Electrolux EW9H1R89B
PDF, 1.46 Мб

Инструкция к Electrolux EDH 3897 SDE
PDF, 4.02 Мб
Информация о приборе
PDF, 132.67 Кб
Класс энергоэффективности
PDF, 394.36 Кб

Инструкция к Electrolux EDP2074PDW
PDF, 22.77 Мб
Информация о приборе
PDF, 132.62 Кб
Класс энергоэффективности
PDF, 391.82 Кб

Инструкция к Electrolux EDH 3498 RDE
PDF, 5.71 Мб

Инструкция к Electrolux EW6CR527P
PDF, 1.26 Мб
Схема с размерами
JPG, 61.79 Кб

Инструкция к Electrolux EW8HR358S
PDF, 7.68 Мб
Схема с размерами
JPG, 36.34 Кб

Инструкция к Electrolux EDH3686GDE
PDF, 5.58 Мб
Информация о приборе
PDF, 276.92 Кб
Класс энергоэффективности
PDF, 393.42 Кб

Инструкция к Electrolux EDC2086PDW
PDF, 1.32 Мб
Информация о приборе
PDF, 240.51 Кб
Класс энергоэффективности
PDF, 391.89 Кб

Инструкция к Electrolux EW8HR258B
PDF, 7.51 Мб
Схема с размерами
JPG, 59.16 Кб

Инструкция к Electrolux EW8HR357S
PDF, 3.91 Мб

Инструкция к Electrolux EDH3488GOW
PDF, 3.98 Мб
Информация о приборе
PDF, 260.73 Кб
Класс энергоэффективности
PDF, 395.74 Кб

Представленные на нашем сайте руководства по эксплуатации сушильных машин компании Electrolux помогут Вам разобраться со всеми тонкостями настройки устройств.
Бумажное руководство, даже если имеется, не всегда удобно в использовании, поэтому мы собрали некоторое количество инструкций на нашем сайте. Вы можете абсолютно бесплатно скачать любую из инструкций в формате pdf или воспользоваться просмотром в браузере.
Инструкции по моделям
Вернуться

Сушильные машины
-
Contents
-
Table of Contents
-
Bookmarks
Quick Links
Related Manuals for Electrolux Tumble dryer
Summary of Contents for Electrolux Tumble dryer
-
Page 2: Table Of Contents
The materials are identified according Check that the tumble dryer is undamaged. If you to international standards. discover any damage, faults or that anything is missing, you should notify the seller immediately.
-
Page 3: Safety Information
Safety information Before installing or using the tumble dryer, read the instruction booklet carefully, including its hints and warnings. Doing so will help ensure that your dryer will function properly and to best advantage. Anyone using the dryer should be thoroughly familiar with its instructions for use and the safety aspects.
-
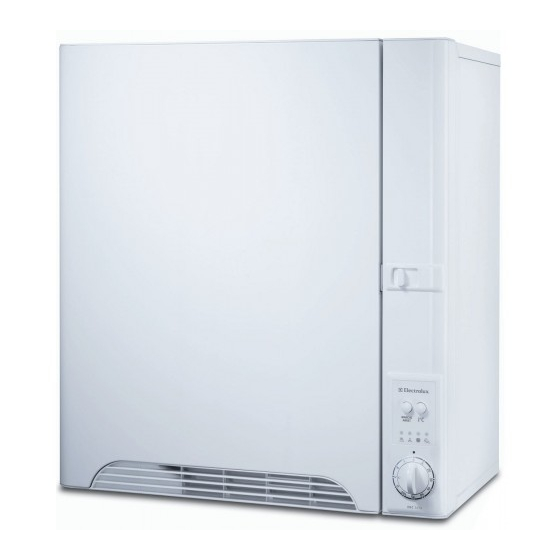
Page 4: Description Of The Appliance
Description of the appliance Door Latch (push the knob to the right to open) Avoid opening the door while a program is in progress. Space for programme chart (Self-adhesive label) Control panel Warm air discharge Air ducts Condenser This is built into the door and needs to be cleaned at regular intervals.
-
Page 5
Description of the appliance 13. Connector for drain hose There is a drain hose as an extra accessory for you who want and can connect the tumble- dryer directly to a drain outlet. Fix the hose to the connector (13) after releasing the hose clip and removing the plug. -
Page 6: Instructions For Use
Check that the dryer is connected to the electrical supply. (dry items) Open the door by pushing the knob to the To help you load your tumble dryer correctly, here right (A). are some examples of average garment or item weights. These are based on cotton goods.
-
Page 7: Items Which Should Not Be Tumble Dried
If dried outdoors on Dry flat a line these fibres will be blown away by the wind. In a tumble dryer the fluff is collected in the filter and accumulates through the drying process. This is very significant to those who suffer from asthma or allergies.
-
Page 8: Programme Chart
The programs can be divided into two types: automatic programs and timed programs. The automatic programs (A–D) switch off the tumble dryer when the load has been dried to the extent required. The timed programs are for special requirements or finishing drying individual items. Using these, the dryer will continue to dry through the time you have set, unless the load is dry before that time has elapsed.
-
Page 9: The Indicator Lights
The indicator lights The indicator lights on the panel have three possible statuses: fixed light, flashing slowly and flashing rapidly. The table below explains the meanings of the various lights or combinations of lights. Fixed light Drying stage in progress. Cool-down stage in progress.
-
Page 10: Maintenance
(this could cause overheating). Cleaning the condenser As in all types of tumble dryer, the air circulated through the dryer picks up fluff. As a result, some fluff will accumulate in the condenser, so it needs to be cleaned occasionally.
-
Page 11: Emptying The Water Tank
Maintenance Emptying the water tank If you have connected the tumble dryer directly to a waste pipe with the accessory hose, you can ignore this section. But note that even if the water tank has been by- passed in this way, the indicator light that warns that the tank is full will flash intermittently during the anti-crease stage.
-
Page 12: If The Dryer Is Not Working
Turn the selector to the setting required. sequence 1->2->3->4->1->2 etc. If this does not help, call service. Never attempt to repair the tumble dryer yourself. Repairs carried out by unauthorised or inexperienced persons can cause injury or serious malfunctioning.
-
Page 13: Service
Service Service and spare parts If a fault arises, first work through the list «If the dryer is not working» to make sure that it is not a problem which you can put right yourself. If you have to call out a service engineer to remedy one of the problems in this list, you risk having to pay the call-out charge yourself.
-
Page 14: Installation
Installation Positioning You can install this dryer in a number of different ways. The adjustable feet must not be removed, We will show you the most suitable of these. Whichever they ensure that there is adequate venti- way you install it, here are some points to bear in mind: lation underneath the dryer.
-
Page 15: Wall Mounting
Installation Wall mounting If you are installing the dryer between wall-mounted Different wall materials require different types of cupboards, you should use the wall mounting console. mounting hardware. Purchase mounting hardware If the adjacent cupboards are more than 370 mm suited to the walls in your home.
This manual is also suitable for:
Rdc 3250