Дата: 24 марта 2014 года | Язык: KK, RU, UA | Размер: 462.79 Kb
Подробное описание процесса первоначальной установки и настройки устройства.
Дата: 24 марта 2014 года | Язык: RU | Размер: 1.27 Mb
Руководство, в котором в доступной форме изложены основные характеристики устройства и правила его эксплуатации
Дата: 29 января 2019 года | Язык: UA | Размер: 1.27 Mb
Руководство, в котором в доступной форме изложены основные характеристики устройства и правила его эксплуатации
Дата: 23 марта 2021 года | Язык: KK | Размер: 1.38 Mb
|
Код: 35255 Извините, товара сейчас нет в наличии
Бесплатная доставка
Извините, товара сейчас нет в наличии Сравнить Новости интернет-магазина «Лаукар»:28.03.2023 22.02.2023 13.02.2023 Дополнительная информация в категории Принтер:Таблица Авторизованных сервисных центров по брендам. Описание Инструкция Отзывы (1) В интернет-магазине бытовой техники «Лаукар» Вы можете скачать инструкцию к товару Принтер Epson L120 струйный совершенно бесплатно. Все инструкции, представленные на сайте интернет-магазина бытовой техники «Лаукар», предоставляются производителем товара. Для того чтобы скачать инструкцию, Вам необходимо нажать на ссылку «скачать инструкцию», расположенную ниже, а в случае, если ссылки нет, Скачать инструкцию Смотреть инструкцию
Фирма-производитель оставляет за собой право на внесение изменений в конструкцию, дизайн и комплектацию товара: Принтер Epson L120 струйный. Пожалуйста, сверяйте информацию о товаре с информацией на |


- Manuals
- Brands
- Epson Manuals
- Printer
- L120
- User manual
-
Contents
-
Table of Contents
-
Bookmarks
Quick Links
Related Manuals for Epson L120
Summary of Contents for Epson L120
-
Page 1
L120 User’s Guide… -
Page 3: Table Of Contents
Contents L120 User’s Guide ……………………….7 Product Basics ……………………….8 Printer Parts Locations ……………………. 8 Control Panel Buttons and Lights ………………..8 Printer Parts — Top ……………………… 9 Printer Parts — Inside ……………………10 Printer Parts — Back……………………11 The Power Off and Sleep Timers ………………….. 11 Changing the Power Off and Sleep Timer Settings — Windows …………
-
Page 4
Refilling Ink …………………………45 Ink Safety Precautions ……………………45 Check Ink Levels ……………………..46 Disabling Special Offers with Windows ………………47 Purchase Epson Ink ……………………… 48 Ink Bottle Part Numbers……………………. 49 Refilling the Ink Tanks ……………………49 Adjusting Print Quality……………………..54 Print Head Maintenance…………………… -
Page 5
Checking the Number of Sheets………………….68 Checking the Sheet Counter — Windows ………………68 Checking the Sheet Counter — OS X ………………..69 Cleaning and Transporting the Product ………………..71 Cleaning the Product…………………….. 71 Transporting Your Product ……………………. 71 Solving Problems ……………………….76 Checking for Software Updates…………………. -
Page 6
Interface Specifications ……………………101 Notices …………………………102 FCC Compliance Statement………………….102 Trademarks ……………………….103 Copyright Notice……………………..103 A Note Concerning Responsible Use of Copyrighted Materials……….. 104 Default Delay Times for Power Management for Epson Products ……….104 Copyright Attribution ……………………104… -
Page 7: L120 User’s Guide
L120 User’s Guide Welcome to the L120 User’s Guide. For a printable PDF copy of this guide, click here.
-
Page 8: Product Basics
Product Basics See these sections to learn about the basic features of your product. Printer Parts Locations The Power Off and Sleep Timers Printer Parts Locations See these sections to identify the parts on your printer. Control Panel Buttons and Lights Printer Parts — Top Printer Parts — Inside Printer Parts — Back…
-
Page 9: Printer Parts — Top
power button power light The error light cancel button Parent topic: Printer Parts Locations Printer Parts — Top Sheet feeder Paper support Ink tanks…
-
Page 10: Printer Parts — Inside
Control panel Edge guide Parent topic: Printer Parts Locations Printer Parts — Inside Front cover Print head in home position Parent topic: Printer Parts Locations…
-
Page 11: Printer Parts — Back
Printer Parts — Back AC inlet USB port Parent topic: Printer Parts Locations The Power Off and Sleep Timers The product enters sleep mode or turns off automatically if it is not used for a period of time. You can adjust the time period before power management, but increasing the time reduces the product’s energy efficiency.
-
Page 12
1. Access the Windows Desktop, right-click the product icon in the Windows taskbar, and select Printer Settings. 2. Click the Maintenance tab. 3. Click the Printer and Option Information button. You see this window: 4. Select the time period you want as the Power Off Timer setting. 5. -
Page 13: Changing The Power Off And Sleep Timer Settings — Os X
Changing the Power Off and Sleep Timer Settings — OS X You can use the printer software to change the time period before the printer enters sleep mode or turns off automatically. 1. Do one of the following: • OS X 10.6/10.7/10.8/10.9: In the Apple menu or the Dock, select System Preferences. Select Print &…
-
Page 14
4. Select the time period you want as the Sleep Timer setting. 5. Click Apply. 6. If you see the confirmation message, click Yes, then close the Printer Settings window. Parent topic: The Power Off and Sleep Timers… -
Page 15: Loading Paper
Loading Paper Before you print, load paper for the type of printing you will do. Loading Paper Paper Loading Capacity Loading Paper You can print on plain paper in these sizes: Letter (8.5 × 11 inches [216 × 279 mm]), A4 (8.3 × 11.7 inches [210 ×…
-
Page 16
2. Slide the edge guide left. 3. Insert paper, printable side up and short edge first, against the right side. If you are inserting a stack of paper, fan the sheets first and tap the stack on a flat surface to even the edges. -
Page 17
4. Slide the edge guide against the paper, but not too tightly. Note: Leave enough space in front of the product for the paper to be fully ejected. Always follow these paper loading guidelines: • Load only the recommended number of sheets. •… -
Page 18: Paper Loading Capacity
Paper Loading Capacity Paper type Load up to this many sheets Plain paper — Letter (8.5 × 11 inches Approx. 50 sheets for one-sided printing * [216 × 279 mm]) or A4 (8.3 × 11.7 inches 15 sheets for two-sided printing [210 ×…
-
Page 19: Printing From A Computer
Note: If you have an Internet connection, it is a good idea to check for updates to your product software on Epson’s support website. If you see a Software Update screen, select Enable automatic checking and click OK. The update scans your system to see if you have the latest product software. Follow the on-screen instructions.
-
Page 20
2. Select the print command in your application. Note: You may need to select a print icon on your screen, the Print option in the File menu, or another command. See your application’s help utility for details. 3. If necessary, select your product name as the printer you want to use. Note: You may also need to select Properties or Preferences to view your print settings. -
Page 21: Print Quality Options — Windows
6. Select the Quality setting that matches the print quality you want to use. 7. Select a Color option: • To print a color document or photo, select the Color setting. • To print text and graphics in black or shades of gray, select the Black/Grayscale setting. 8.
-
Page 22: Selecting Double-Sided Printing Settings — Windows
2-Up and 4-Up Prints 2 or 4 pages on one sheet of paper. Click the Page Order button to select page layout and border options. 2×1 Poster, 2×2 Poster, 3×3 Poster, 4×4 Poster Prints one image on multiple sheets of paper to create a larger poster. Click the Settings button to select image layout and guideline options.
-
Page 23: Double-Sided Printing Options — Windows
3. Select the double-sided printing options you want to use. 4. Click OK to return to the Main tab. 5. Print a test copy of your double-sided document to test the selected settings. 6. Follow any instructions displayed on the screen during printing. Note: The surface of the paper may smear during double-sided printing.
-
Page 24: Selecting Additional Layout And Print Options — Windows
Binding Edge Options Select a setting that orients double-sided print binding in the desired direction. Binding Margin Options Select options that define a wider margin to allow for binding. Booklet Select the Booklet checkbox to print double-sided pages as a booklet. Parent topic: Selecting Double-sided Printing Settings — Windows Selecting Additional Layout and Print Options — Windows…
-
Page 25: Custom Color Correction Options — Windows
1. To change the size of your printed document or photo, select the Reduce/Enlarge Document checkbox and select one of these sizing options: • Select the Fit to Page option to size your image to fit the paper you loaded. Select the size of the your document or photo as the Document Size setting, and the size of your paper as the Output Paper setting.
-
Page 26
Color Controls Lets you select a Color Mode setting, individual settings for Brightness, Contrast, Saturation, and Density, and individual color tones. Depending on the selected color mode, you can also adjust the midtone density using the Gamma setting. Fix Photo Improves the color, contrast, and sharpness of flawed photos. -
Page 27: Image Options And Additional Settings — Windows
Parent topic: Selecting Additional Layout and Print Options — Windows Image Options and Additional Settings — Windows You can select any of the Image Options and Additional Settings to customize your print. Some options may be pre-selected or unavailable, depending on other settings you have chosen. Image Options Emphasize Text Adjusts the weight of printed text to increase readability.
-
Page 28: Printing Your Document Or Photo — Windows
2. Place your cursor over one of the Printing Presets to view its list of settings. 3. Use any of the available options on the screen to control your printing presets. 4. To choose an option for printing, select it. 5.
-
Page 29: Checking Print Status — Windows
1. Click OK to save your settings. You see your application’s Print window, such as this one: 2. Click OK or Print to start printing. Checking Print Status — Windows Parent topic: Printing with Windows Checking Print Status — Windows During printing, you can see the progress of your print job by right-clicking the printer icon in the Windows taskbar.
-
Page 30: Selecting Default Print Settings — Windows
You can control printing using the options on the screen. • To cancel printing, right-click on any print job and click Cancel. • To pause printing, right-click on any print job and click Pause. • To restart printing, right-click on any paused print job and click Restart. Parent topic: Printing Your Document or Photo — Windows Selecting Default Print Settings — Windows…
-
Page 31: Changing The Language Of The Printer Software Screens
3. Select the print settings you want to use as defaults in all your Windows programs. 4. Click OK. These settings are now the defaults selected for printing. You can still change them as needed for printing in any program session. Changing the Language of the Printer Software Screens Parent topic: Printing with Windows…
-
Page 32: Changing Automatic Update Options
You see the maintenance options: 4. Select the language you want to use as the Language setting. 5. Click OK to close the printer software window. The printer software screens appear in the language you selected the next time you access them. Parent topic: Selecting Default Print Settings — Windows Changing Automatic Update Options…
-
Page 33: Printing With Os X
You can print with your product using any OS X printing program, as described in these sections. Note: If you have an internet connection, it is a good idea to check for updates to your product software on Epson’s support website. Selecting Basic Print Settings — OS X…
-
Page 34: Selecting Basic Print Settings — Os X
Managing Color — OS X Printing Your Document or Photo — OS X Selecting Printing Preferences — OS X Parent topic: Printing From a Computer Selecting Basic Print Settings — OS X Select the basic settings for the document or photo you want to print. 1.
-
Page 35
Note: The print window may look different, depending on the version of OS X and the application you are using. 5. Select the Copies and Pages settings as necessary. Note: If you do not see these settings in the print window, check for them in your application before printing. -
Page 36
7. Select any application-specific settings that appear on the screen, such as those shown in the image above for the Preview application. 8. Select Print Settings from the pop-up menu. You see these settings: 9. Select the Print Quality setting you want to use. 10. -
Page 37: Print Quality Options — Os X
Related tasks Selecting Page Setup Settings — OS X Printing Your Document or Photo — OS X Print Quality Options — OS X You can select any of the available Print Quality options to fine-tune the quality of your print. Normal For everyday text and image printing.
-
Page 38: Selecting Print Layout Options — Os X
Note: If you do not see these settings in the print window, check for them in your application before printing. They may be accessible by selecting Page Setup from the File menu. 1. Select the size of the paper you loaded as the Paper Size setting. You can also select a custom setting to create a custom paper size.
-
Page 39: Sizing Printed Images — Os X
Parent topic: Printing with OS X Sizing Printed Images — OS X You can adjust the size of the image as you print it by selecting Paper Handling from the pop-up menu on the Print window. • To print only selected pages in a multi-page document, select an option from the Pages to Print pop- up menu.
-
Page 40: Color Matching And Color Options — Os X
Color Matching and Color Options — OS X You can select from these settings on the Color Matching and Color Options menus. Color Matching Settings EPSON Color Controls Lets you manage color using controls in your printer software, or turn off color management. ColorSync Prints using standard color profiles for your product and paper to help match image colors.
-
Page 41: Printing Your Document Or Photo — Os X
Color Options Settings Manual Settings Lets you select manual color adjustments. Click the arrow next to Advanced Settings and select settings for Brightness, Contrast, Saturation, and individual color tones. You can also select a color Mode setting for printing photos and graphics and the Fix Red-Eye setting to reduce or remove red- eye in photos.
-
Page 42: Checking Print Status — Os X
Checking Print Status — OS X Parent topic: Printing with OS X Checking Print Status — OS X During printing, you can view the progress of your print job and control printing. 1. Click the printer icon when it appears in the Dock. You see the print status window: 2.
-
Page 43: Printing Preferences — Os X
3. Select Driver or Options. You see a screen like this: 4. Select any of the available printing preferences. 5. Click OK. Printing Preferences — OS X Parent topic: Printing with OS X Printing Preferences — OS X You can select from these settings on the Options or Driver tab. Skip Blank Page Ensures that your product does not print pages that contain no text or images.
-
Page 44: Cancelling Printing Using A Product Button
Warning Notifications Lets you choose whether or not to receive warning notifications from the printer software for various operating conditions. Establish bidirectional communication Allows the product to communicate with the computer. Do not change the default setting unless you experience issues when using a shared printing pool. Parent topic: Selecting Printing Preferences — OS X Cancelling Printing Using a Product Button…
-
Page 45: Refilling Ink
Ink Refilling Precautions • Use ink bottles with the correct part number for this product. • The use of non-Epson ink may cause damage that is not covered by Epson’s warranty, and under certain circumstances, may cause erratic product behavior.
-
Page 46: Check Ink Levels
• After bringing an ink bottle inside from a cold storage site, allow it to warm up at room temperature for at least three hours before using it. • Store ink bottles in a cool, dark place. • Store the ink bottles in the same environment as the product. When storing or transporting an ink bottle after removing its seal, do not tilt the bottle and do not subject it to impacts or temperature changes.
-
Page 47: Disabling Special Offers With Windows
You can disable special offers messages from Epson using a utility on your Windows computer. Note: You may see the Epson Special Offers screen every time you print (if your computer is connected to the Internet). Select Do not display this message again and click Decline to disable online offers.
-
Page 48: Purchase Epson Ink
Latin America.) Parent topic: Check Ink Levels Purchase Epson Ink You can purchase genuine Epson ink and paper from an Epson authorized reseller. To find the nearest reseller, visit global.latin.epson.com or call your nearest Epson sales office (website available in Spanish…
-
Page 49: Ink Bottle Part Numbers
Note: This product was originally designed to work with genuine Epson inks. Your product may not function properly if you use other types of ink and may affect Epson’s warranty. The included ink bottles must be used for printer setup and are not for resale. The printer ships with full ink bottles and part of the ink from the first bottles is used to charge the print head.
-
Page 50
4. Remove the ink tank’s cap. Note: Make sure the color of the ink tank matches the ink color you want to refill, and only remove the cap from that ink tank. Be careful not to spill any ink. 5. Snap off the tip of the bottle cap, but do not dispose of the bottle cap tip so you can use it to seal the bottle cap later, if necessary. -
Page 51
Caution: Install the bottle cap tightly; otherwise, ink may leak. 6. Refill the ink tank with the correct color ink up to the upper line on the ink tank. -
Page 52
7. If any ink remains in the ink bottle after filling the ink tank, place the bottle cap tip securely on the bottle cap and store the ink bottle upright for later use. 8. Place the cap securely on the ink tank. 9. -
Page 53
Related concepts Purchase Epson Ink Related references Ink Safety Precautions… -
Page 54: Adjusting Print Quality
Adjusting Print Quality If your print quality declines, you may need to run a utility to clean or align the print head. If running these utilities does not solve the problem, you may need to flush the ink tubes. Print Head Maintenance Print Head Alignment Cleaning the Paper Path Checking the Number of Sheets…
-
Page 55: Checking The Nozzles Using The Product Buttons
Parent topic: Print Head Maintenance Checking the Nozzles Using the Product Buttons You can check the print head nozzles using the buttons on your product. 1. Press the power button to turn the product off. 2. Load a few sheets of plain paper in the product. 3.
-
Page 56: Checking The Nozzles Using A Computer Utility
6. If there are no gaps, the print head is clean and you can continue printing. If there are gaps or the pattern is faint, clean the print head. Parent topic: Print Head Nozzle Check Related concepts Print Head Cleaning Related tasks Loading Paper Checking the Nozzles Using a Computer Utility…
-
Page 57
You see a window like this: 5. Click Print. 6. Check the printed pattern to see if there are gaps in the lines. Print head is clean… -
Page 58
Print head needs cleaning 7. If there are no gaps, click Finish. If there are gaps or the pattern is faint, clean the print head. Parent topic: Print Head Nozzle Check Related concepts Print Head Cleaning Related tasks Loading Paper… -
Page 59: Print Head Cleaning
Print Head Cleaning If print quality has declined and the nozzle check pattern indicates clogged nozzles, you can clean the print head. Note: You may not be able to clean the print head when the ink level in any of the tanks is low. You may have to refill the ink tank first.
-
Page 60: Cleaning The Print Head Using A Computer Utility
Related tasks Loading Paper Cleaning the Print Head Using a Computer Utility You can clean the print head using a utility on your Windows or Mac computer. 1. Make sure no product lights are indicating errors. 2. Load a few sheets of plain paper in the product. 3.
-
Page 61
5. Click Start to begin the cleaning cycle. power light flashes throughout the cleaning cycle and stays on when the cleaning cycle is finished. Caution: Never turn off the product during a cleaning cycle or you may damage it. 6. When the power light stops flashing and remains on, you can check to see if the nozzles are clean;… -
Page 62
Print head needs cleaning • If there are no gaps, click Finish. • If there are gaps or the pattern is faint, click Clean to clean the print head again. If you don’t see any improvement after cleaning the print head up to 3 times, turn off the product and wait at least 12 hours. -
Page 63: Ink Tube Flushing
Flushing the ink tubes affects the service life of the ink pads by causing them to reach their capacity sooner. Contact Epson to purchase replacement ink pads before they reach the end of their service life. When the ink pads reach the end of their service life, the product stops printing and you must contact Epson for support.
-
Page 64
Note: After flushing the ink tubes, you must turn off the product and wait at least 12 hours before printing again. Before you begin, make sure no product lights are indicating errors. 1. Do one of the following: • Windows: Right-click the product icon in the Windows taskbar and select Printer Settings. Then click the Maintenance tab. -
Page 65: Print Head Alignment
4. When you finish flushing the ink tubes, turn off the product and wait at least 12 hours before printing. 5. Print a document and check the print quality. If the print quality did not improve, contact Epson for support.
-
Page 66
• OS X 10.6/10.7/10.8/10.9: In the Apple menu or the Dock, select System Preferences. Select Print & Fax, Print & Scan, or Printers & Scanners, select your product, and select Options & Supplies. Select Utility and select Open Printer Utility. •… -
Page 67: Cleaning The Paper Path
• If no patterns are aligned in one or more of the sets, choose the closest one in each set and click Realignment. Then print another alignment sheet and check it. Note: Click Skip (where available) if you want to skip a particular alignment sheet. 7.
-
Page 68: Checking The Number Of Sheets
Checking the Number of Sheets You can view an option that displays the number of sheets of paper that have fed through the product. Checking the Sheet Counter — Windows Checking the Sheet Counter — OS X Parent topic: Adjusting Print Quality Checking the Sheet Counter — Windows You can check the the number of sheets of paper that have fed through the product by checking the sheet counter.
-
Page 69: Checking The Sheet Counter — Os X
5. After checking the number of sheets fed into the printer, click OK to close the window. Note: The number of sheets is displayed only when Epson Status Monitor 3 is enabled. Parent topic: Checking the Number of Sheets Checking the Sheet Counter — OS X You can check the the number of sheets of paper that have fed through the product by checking the sheet counter.
-
Page 70
• OS X 10.5: In the Apple menu or the Dock, select System Preferences. Select Print & Fax, select your product, and select Open Print Queue. Select Utility. 2. Select Printer and Option Information. You see this window: 3. After checking the number of sheets fed into the printer, click OK to close the window. Parent topic: Checking the Number of Sheets… -
Page 71: Cleaning And Transporting The Product
Cleaning and Transporting the Product If your product gets dirty or you need to move it some distance, follow the instructions in these sections. Cleaning the Product Transporting Your Product Cleaning the Product To keep your product working at its best, you should clean it several times a year. Caution: Do not use a hard brush, benzene, alcohol, or paint thinner to clean the product or you may damage it.
-
Page 72
2. Open the front cover and check to see if the print head is in the far right position (the home position). If not, turn on the product, wait for the print head to move to the far right, then turn the product off again. -
Page 73
7. Remove the paper support and detach its mount. 8. Open the front cover and secure the print head to the case with tape. -
Page 74
Caution: Do not touch or place tape on the white flat cable inside the product; otherwise, you may damage your product. 9. Close the front cover and secure it with tape. 10. Check to make sure that the ink tank caps are installed securely. -
Page 75
11. Place the product in its original packaging materials, if possible, or use equivalent cushioning around the product. Caution: • Keep the product level during transport. Otherwise, ink may leak. • Do not put opened ink bottles in the box with the product. Before using the product, be sure to remove the tape from the print head. -
Page 76: Solving Problems
When to Uninstall Your Product Software Where to Get Help Checking for Software Updates Periodically, it’s a good idea to check Epson’s support website for free updates to your product software. Visit the driver download site at global.latin.epson.com/Soporte (website available in Spanish and Portuguese only).
-
Page 77: Product Light Status
The error light is flashing If the lights still flash, there may be a product error. Turn the product off, check inside for jammed paper or foreign objects, then turn the product back on. If the error continues, contact Epson for support.
-
Page 78: Running A Product Check
USB cable and try updating the firmware again. If the error The error light is on continues, contact Epson for support. Initial ink charging may not be complete. Turn off the product and fill the power light is on ink tanks as described on the Start Here sheet.
-
Page 79: Solving Setup Problems
• If the product’s print head stops moving or making noise, and the charging process has not finished after approximately 20 minutes, turn off your product. Turn it back on and check to see if charging is still in progress. If it is still in progress, contact Epson for help. Parent topic:…
-
Page 80: Software Installation Problems
The product voltage may not match the electrical outlet rating. Unplug it immediately and check the label on the back of the product for its voltage rating. Caution: If the voltage rating does not match, do not plug your product back in. Contact Epson for support.
-
Page 81: Paper Feeding Problems
Paper Ejection Problems Parent topic: Solving Problems Paper Feeding Problems If you have problems feeding paper, try these solutions: • If paper does not feed for printing, remove it. Then reload it in the sheet feeder against the right side and beneath the tab.
-
Page 82: Paper Ejection Problems
4. Press the cancel button to resume printing. 5. Carefully follow all paper loading instructions when you load new paper. Parent topic: Solving Paper Problems Related tasks Loading Paper Paper Ejection Problems If you have problems with paper ejecting properly, try these solutions: •…
-
Page 83: Nothing Prints
Nothing Prints Product Icon Does Not Appear in Windows Taskbar Printing is Slow Parent topic: Solving Problems Nothing Prints If you have sent a print job and nothing prints, try these solutions: • Make sure your product is turned on. •…
-
Page 84: Product Icon Does Not Appear In Windows Taskbar
3. Click the Maintenance tab. 4. Click the Extended Settings button. 5. Select Enable EPSON Status Monitor 3, then click OK. 6. Click the Monitoring Preferences button. 7. Click the checkbox for the option that adds the shortcut icon to the taskbar.
-
Page 85: Solving Page Layout And Content Problems
• If printing becomes slower after printing continuously for a long time, the product may have automatically slowed down to protect the print mechanism from overheating or becoming damaged. Let the product rest with the power on for 30 minutes, then try printing again. For the fastest printing, select the following settings in your product software: •…
-
Page 86: Inverted Image
Inverted Image If your printed image is inverted unexpectedly, try these solutions: • Turn off any mirror or inversion settings in your printing application. • Turn off the Mirror Image, Flip horizontally, or Reverse page orientation settings in your printer software.
-
Page 87: Incorrect Margins On Printout
Print Head Nozzle Check Print Head Cleaning Related tasks Selecting Basic Print Settings — Windows Selecting Basic Print Settings — OS X Selecting Printing Preferences — OS X Incorrect Margins on Printout If your printed page has incorrect margins, try these solutions: •…
-
Page 88: Incorrect Image Size Or Position
• Windows XP: Click Start and select Printers and Faxes. (Or open the Control Panel, select Printers and Other Hardware if necessary, and select Printers and Faxes.) Right-click your product name, select Open, right-click the stalled print job, click Cancel, and click Yes. •…
-
Page 89: Solving Print Quality Problems
Related tasks Loading Paper Selecting Basic Print Settings — Windows Selecting Additional Layout and Print Options — Windows Selecting Basic Print Settings — OS X Selecting Printing Preferences — OS X Solving Print Quality Problems Check these sections if your printouts have problems with print quality, but your image looks fine on your computer screen.
-
Page 90: Blurry Or Smeared Printout
Selecting Additional Layout and Print Options — Windows Selecting Basic Print Settings — OS X Selecting Printing Preferences — OS X Blurry or Smeared Printout If your printouts are blurry or smeared, try these solutions: • Make sure your paper is not damp, curled, old, or loaded incorrectly in your product. •…
-
Page 91: Faint Printout Or Printout Has Gaps
Selecting Printing Preferences — OS X Selecting Basic Print Settings — Windows Selecting Basic Print Settings — OS X Faint Printout or Printout Has Gaps If your printouts are faint or have gaps, try these solutions: • Run a nozzle check to see if any of the print head nozzles are clogged. Then clean the print head, if necessary.
-
Page 92: Incorrect Colors
• Your printed colors can never exactly match your on-screen colors. However, you can use a color management system to get as close as possible. Try using the color management options in your printer software. • For best results, use genuine Epson ink. Parent topic: Solving Print Quality Problems…
-
Page 93: When To Uninstall Your Product Software
• Windows 8.x: Navigate to the Apps screen and select Control Panel > Programs > Programs and Features. Select the uninstall option for your Epson product, then select Uninstall/Change. Note: If you see a User Account Control window, click Yes or Continue.
-
Page 94: Uninstalling Product Software — Os X
In the next window, select your product, if necessary, and click OK. Then follow any on-screen instructions. 4. Restart your computer, then see the Start Here sheet to re-install your software. Note: If you find that re-installing your product software does not solve a problem, contact Epson. Parent topic: When to Uninstall Your Product Software Uninstalling Product Software — OS X In most cases, you do not need to uninstall your product software before re-installing it.
-
Page 95
Visit Epson’s support website at global.latin.epson.com/Soporte for solutions to common problems. You can download drivers and documentation, get FAQs and troubleshooting advice, or e-mail Epson with your questions. (Website available in Spanish and Portuguese only.) Speak to a Support Representative Before you call Epson for support, please have the following information ready: •… -
Page 96
If your country does not appear in the list, contact the sales office in the nearest country. Toll or long distance charges may apply. Purchase Supplies and Accessories You can purchase genuine Epson ink and paper from an Epson authorized reseller. To find the nearest reseller, visit global.latin.epson.com or call your nearest Epson sales office (website available in Spanish and Portuguese only). -
Page 97: Technical Specifications
• Windows 7 • Windows Vista • Windows XP Professional x64 Edition • Windows XP SP3 Note: Visit Epson’s support website at global.latin.epson.com/Soporte for the latest in compatibility and drivers for your product (website available in Spanish and Portuguese only).
-
Page 98: Printing Specifications
Note: Since the quality of any particular brand or type of paper may be changed by the manufacturer at any time, Epson cannot guarantee the quality of any non-Epson brand or type of paper. Always test a sample of paper stock before purchasing large quantities or printing large jobs.
-
Page 99: Printable Area Specifications
Technical Specifications Ink Specifications Note: This product was originally designed to work with genuine Epson inks. Your product may not function properly if you use other types of ink and may affect Epson’s warranty. The included ink bottles must be used for printer setup and are not for resale. The printer ships with full ink bottles and part of the ink from the first bottles is used to charge the print head.
-
Page 100: Dimension Specifications
Color Black, Cyan, Magenta, Yellow Temperature Storage: –4 to 104 °F (–20 to 40 °C) 1 month at 104 °F (40 °C) Ink freezes at 3.2 °F (–16 °C) Ink thaws and is usable after 3 hours at 77 °F (25 °C) Parent topic: Technical Specifications Related references…
-
Page 101: Environmental Specifications
Power consumption Printing: 10 W (ISO/IEC24712); approximately Ready mode: 2 W; approximately Sleep mode: 0.6 W; approximately Power off mode: 0.3 W; approximately Parent topic: Technical Specifications Environmental Specifications Temperature Operating: 50 to 95 °F (10 to 35 °C) Storage: –4 to 104 °F (–20 to 40 °C) 1 month at 104 °F (40 °C) Humidity Operating: 20 to 80% RH…
-
Page 102: Notices
Notices Check these sections for important notices about your product. FCC Compliance Statement Trademarks Copyright Notice FCC Compliance Statement For United States Users This equipment has been tested and found to comply with the limits for a Class B digital device, pursuant to Part 15 of the FCC Rules.
-
Page 103: Trademarks
Seiko Epson Corporation. The information contained herein is designed only for use with this Epson product. Epson is not responsible for any use of this information as applied to other products.
-
Page 104: A Note Concerning Responsible Use Of Copyrighted Materials
Notices A Note Concerning Responsible Use of Copyrighted Materials Epson encourages each user to be responsible and respectful of the copyright laws when using any Epson product. While some countries’ laws permit limited copying or reuse of copyrighted material in certain circumstances, those circumstances may not be as broad as some people assume.

Руководство пользователя
Авторские права и торговые марки
Авторские права и торговые марки
Авторские права и торговые марки
Никакую часть данного документа нельзя воспроизводить, хранить в поисковых системах или передавать
в любой форме и любыми способами (электронными, механическими, путем копирования, записи или
иными) без предварительного письменного разрешения Seiko Epson Corporation. По отношению
использования содержащейся здесь информации никаких патентных обязательств не предусмотрено.
Равно как не предусмотрено никакой ответственности за повреждения, произошедшие вследствие
использования содержащейся здесь информации. Относительно использования содержащейся здесь
информации не предусмотрено никаких патентных обязательств. Также не существует никаких
обязательств, касающихся ущерба, понесенного вследствие использования этой информации.
Seiko Epson Corporation и ее филиалы не несут ответственности перед покупателями данного продукта или
третьими сторонами за понесенные ими повреждения, потери, сборы или затраты, вызванные
несчастными случаями, неправильным использованием продукта, недозволенной модификацией,
ремонтом или изменением продукта и невозможностью (исключая США) строгого соблюдения
инструкций по работе и обслуживанию, разработанных Seiko Epson Corporation.
Seiko Epson Corporation не несет ответственности за любые повреждения или проблемы, возникшие из-за
использования любых функций или расходных материалов, не являющихся оригинальными продуктами
EPSON (Original EPSON Products) или продуктами, одобренными EPSON (EPSON Approved Products).
Seiko Epson Corporation не несет ответственности за любые повреждения, возникшие из-за
электромагнитных наводок, вызванных использованием любых интерфейсных кабелей, не являющихся
продуктами, одобренными Seiko Epson Corporation (Epson Approved Products).
EPSON
— зарегистрированная торговая марка, EPSON EXCEED YOUR VISION или EXCEED YOUR
®
VISION — торговые марки Seiko Epson Corporation.
PRINT Image Matching
и логотип PRINT Image Matching — торговые марки Seiko Epson Corporation.
™
Copyright © 2001 Seiko Epson Corporation. All rights reserved.
Intel
— зарегистрированная торговая марка Intel Corporation.
®
PowerPC
— зарегистрированная торговая марка International Business Machines Corporation.
®
Microsoft
, Windows
и Windows Vista
— зарегистрированные торговые марки Microsoft Corporation.
®
®
®
Apple
, Macintosh
, Mac OS
и OS X
— зарегистрированные торговые марки Apple Inc.
®
®
®
®
Adobe, Adobe Reader, Acrobat и Photoshop — торговые марки Adobe System Incorporated, которые могут
быть зарегистрированы в некоторых юрисдикциях.
Примечание: прочие названия продуктов упоминаются в документе только для идентификации и могут
являться торговыми марками соответствующих владельцев. Epson отрицает владение любыми правами
на эти марки.
Copyright © 2013 Seiko Epson Corporation. All rights reserved.
Содержание данного руководства и технические характеристики изделия могут меняться без
предварительного уведомления.
2

Руководство пользователя
Содержание
Содержание
Печать по размеру страницы…………. 25
Авторские права и торговые марки
Печать Pages per sheet (Страниц на листе)
Авторские права и торговые марки……….. 2
……………….…………….. 26
Общий доступ к устройству для печати……. 28
Настройка в Windows………………. 28
Установка в Mac OS X….…………… 31
Введение
Поиск информации………………….. 6
Предостережения, важная информация
Бутылки с чернилами
и примечания……..……….………. 6
Версии операционных систем……………. 6
Перезаправка чернил
Важные инструкции по безопасности, меры
предосторожности при работе с бутылками
для чернил и их характеристики….……... 33
Важные инструкции
Важные инструкции по безопасности……. 33
Важные инструкции по безопасности………. 8
Меры предосторожности при
Рекомендации и предупреждения о работе с
перезаправке чернил…….…………. 33
устройством……………………….. 8
Характеристики бутылок с чернилами…… 34
Установка/использование устройства. . . . . . . 8
Проверка уровня чернил………………. 34
Обращение с чернилами…………….. 10
Перезаправка контейнеров для чернил…….. 35
Знакомство с устройством
Обслуживание устройства и ПО
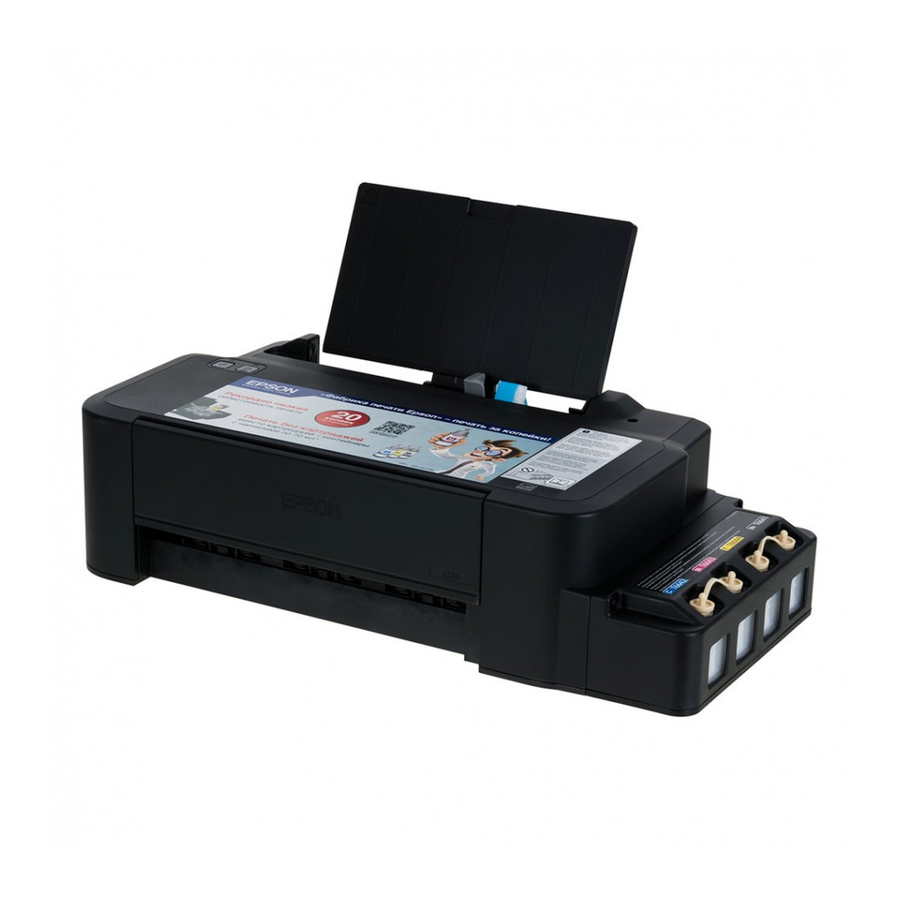
Детали устройства…….…………….. 11
Проверка дюз печатающей головки………. 38
Руководство к панели управления……….. 13
Утилита проверки дюз Nozzle Check
Кнопки и световые индикаторы……….. 13
(Проверка дюз) (для Windows)………… 38
Утилита проверки дюз Nozzle Check
(Проверка дюз) (для Mac OS X)…..……. 38
Обращение с бумагой
Панель управления.……………….. 39
Использование, загрузка и хранение
Прочистка печатающей головки…………. 39
носителей………………………… 14
Утилита Head Cleaning (Прочистка
Хранение носителей……………….. 14
печатающей головки) (для Windows)……. 40
Выбор бумаги……………………… 14
Утилита Head Cleaning (Прочистка
Загрузка бумаги…………………..… 15
печатающей головки) (для Mac OS X)……. 40
Панель управления.……………….. 41
Калибровка печатающей головки….…….. 41
Идет печать
Утилита Print Head Alignment (Калибровка
Драйвер принтера и утилита Status Monitor…. 17
печатающей головки) (для Windows)……. 41
Доступ к ПО принтера в Windows……… 17
Утилита Print Head Alignment (Калибровка
Доступ к драйверу принтера в Mac OS X. . . . . 18
печатающей головки) (для Mac OS X)……. 42
Основные операции…………………. 19
Очистка направляющей для бумаги………. 42
Основы печати…….………..…… 19
Использование утилиты Paper Guide
Отмена печати……….………..…. 22
Cleaning (Чистка направляющей бумаги)
Дополнительные возможности………….. 23
для Windows………….…………. 42
Предустановки устройства (только для
Использование утилиты Paper Guide
Windows)……………………….. 23
Cleaning (Чистка направляющей бумаги)
Двусторонняя печать (только для
для Mac OS X…………………….. 43
Windows)……………………….. 24
Замена чернил в тюбиках с чернилами…….. 43
3

Руководство пользователя
Содержание
Утилита Power Ink Flushing
Отпечатки получаются с небольшим
(Технологическая прочистка чернил) для
наклоном……………………….. 63
Windows…………..…………… 44
Изображение перевернуто…………… 63
Утилита Power Ink Flushing
Печатаются пустые страницы…………. 63
(Технологическая прочистка чернил) для
Отпечаток смазанный или потертый……. 63
Mac OS X……………….………. 44
Печать идет слишком медленно……….. 64
Сохранение электроэнергии……………. 45
Бумага подается неправильно..…………. 64
В Windows………………………. 45
Бумага не подается………………… 64
В Mac OS X.…………………….. 45
Бумага подается по несколько листов сразу
Тихий режим работы принтера………..… 46
……………….…………….. 64
В Windows………………………. 46
Бумага загружена неправильно………… 65
В Mac OS X.…………………….. 46
Бумага выталкивается не полностью или
сминается………………………. 65
Проверка количества поданных листов
бумаги……….………..………… 46
Устройство не печатает………….……. 65
Очистка устройства………..………... 46
Индикаторы не горят…………..….. 65
Индикаторы загорелись и погасли……… 65
Очистка внешних деталей устройства……. 46
Горит только индикатор питания………. 66
Очистка внутренних поверхностей
устройства………………………. 47
Транспортировка устройства…………… 47
Информация о продукте
Проверка и установка вашего ПО………… 50
Требования к системе………………… 67
Проверка ПО, установленного на вашем
В Windows………………………. 67
компьютере…………..…………. 50
В Mac OS X………….………….. 67
Установка ПО……………………. 51
Технические характеристики…………… 67
Удаление ПО..……………….……. 51
Характеристики принтера……………. 67
В Windows………………………. 51
Механические характеристики………… 69
В Mac OS X.…………………….. 52
Электрические характеристики……….. 69
Условия окружающей среды………….. 69
Соответствие стандартам и допускам..….. 70
Индикаторы ошибок
Интерфейс…………….………… 70
Индикация ошибок в панели управления…… 54
Служба поддержки
Устранение неисправностей
Web—сайт технической поддержки……….. 71
печати
Обращение в службу поддержки
Диагностирование проблемы…………… 56
пользователей продукции EPSON………… 71
Проверка состояния устройства……….. 56
Перед обращением в Epson…………… 71
Замятие бумаги…………………….. 58
Информация в Интернет………….… 72
Извлечение замятой бумаги из устройства
Сервисные центры на Тайване………… 72
……………………………… 58
Служба поддержки пользователей EPSON
Предотвращение замятия бумаги………. 59
……………….…………….. 73
Справка по качеству печати……………. 59
Контактная информация для справки,
поддержки и сервиса:………………. 73
Горизонтальные полосы…………….. 60
Справочная служба для пользователей во
Несовпадение или полосы по вертикали. . . . 60
Вьетнаме……………………….. 73
Цвета неправильные или отсутствуют…… 61
Справочная служба для пользователей в
Расплывчатый или смазанный отпечаток. . . . 61
Индонезии……………………… 74
Проблемы отпечатков, не связанные
Справочная служба для пользователей в
с качеством печати……………..…… 62
Гоконге………………………… 74
Неправильные или искаженные символы. . . . 62
Справочная служба для пользователей в
Неправильные поля…….…………. 62
Малайзии….…………..………. 75
4

Руководство пользователя
Содержание
Справочная служба для пользователей в
Индии…………………………. 75
Справочная служба для пользователей на
Филипинах………………….….. 76
Указатель
5

Руководство пользователя
Введение
Введение
Поиск информации
Последние версии следующих руководств доступны на web-сайте поддержки пользователей Epson.
http://www.epson.eu/Support (Европа)
http://support.epson.net/ (за пределами Европы)
❏ Установка (печатный вариант):
Содержит информацию об установке устройства и установке ПО.
❏ Руководство пользователя (PDF-файл):
Содержит подробные инструкции о работе, технике безопасности и устранении неполадок. См. это
руководство при использовании устройства с компьютером.
Для просмотра руководства в формате PDF необходимы Adobe Acrobat Reader 5.0 или выше, или
Adobe Reader.
Предостережения, важная информация
и примечания
Предостережения, важная информация и примечания в этом Руководстве пользователя описаны ниже.
Предостережение
!
необходимо соблюдать во избежание телесных травм.
Важную информацию
c
необходимо соблюдать, чтобы не повредить оборудование.
Примечания
содержат полезные советы и ограничения при работе с устройством.
Версии операционных систем
В этом руководстве пользователя приняты следующие сокращения.
❏ Наименование Windows 8 относится к системам Windows 8, Windows 8 Proи Windows 8.1.
❏ Windows 7 означает Windows 7 Home Basic, Windows 7 Home Premium, Windows 7 Professional и
Windows 7 Ultimate.
❏ Windows Vista означает Windows Vista Home Basic Edition, Windows Vista Home Premium Edition,
Windows Vista Business Edition, Windows Vista Enterprise Edition и Windows Vista Ultimate Edition.
6
Руководство пользователя
Введение
❏ Windows XP означает Windows XP Home Edition, Windows XP Professional x64 Edition и Windows XP
Professional.
❏ В данном руководстве наименование Mac OS X 10.9.x относится к операционной системе X Mavericks,
наименование Mac OS X 10.8.x относится к операционной системе X Mountain Lion. Кроме этого,
наименование Mac OS X относится к ОС Mac OS X 10.9.x, Mac OS X 10.8.x, Mac OS X 10.7.x, Mac OS X
10.6.x и Mac OS X 10.5.8.
7

Руководство пользователя
Важные инструкции
Важные инструкции
Важные инструкции по безопасности
Прочтите и выполняйте эти инструкции, чтобы обеспечить безопасное использование устройства.
Убедитесь, что сохранили настоящее руководство для последующих ссылок. Также, следуйте всем
предупреждениям и инструкциям, которые нанесены на корпус устройства.
❏ Используйте только шнур питания, поставляемый с устройством, и не используйте шнур от любого
другого оборудования. Применение других шнуров с устройством или шнура питания, поставляемого
с устройством, для подключения другой аппаратуры может привести к возгоранию или поражению
электрическим током.
❏ Убедитесь, что шнур питания отвечает соответствующим местным стандартам безопасности.
❏ Запрещается разбирать, дорабатывать и ремонтировать питающий кабель, вилку, блок принтера или
дополнительные устройства, если это не оговорено специально в инструкциях по работе с данным
изделием.
❏ Отключите устройство от электросети и предоставьте для ремонта квалифицированным специалистам
в следующих случаях:
Шнур питания или вилка повреждены; внутрь устройства попала жидкость; устройство упало или
поврежден корпус; устройство работает неправильно или заметно медленнее. Не пытайтесь сделать
регулировки, которые не описаны в инструкции по эксплуатации.
❏ Устройство должно находиться рядом с электрической розеткой, от которой шнур питания можно
легко отсоединить.
❏ Не устанавливайте и не храните устройство на открытом воздухе, в сильно загрязненных или
запыленных местах, рядом с источниками воды и тепла, в местах, подверженных ударам, вибрации
или резким изменениям температуры или влажности.
❏ Будьте осторожны, не проливайте на устройство жидкости и не трогайте устройство мокрыми руками.
Рекомендации и предупреждения о работе с
устройством
Прочтите и выполняйте эти инструкции, чтобы избежать повреждения устройства или вашей
собственности. Убедитесь, что сохранили настоящее руководство для последующих ссылок.
Установка/использование устройства
❏ Не блокируйте и не закрывайте отверстия на корпусе устройства.
❏ Используйте источник питания только указанного на наклейке устройства типа.
❏ Не подключайте устройства к розеткам, от которых питаются регулярно включающиеся
и выключающиеся фотокопировальные аппараты или системы кондиционирования.
8
Руководство пользователя
Важные инструкции
❏ Не подключайте устройство к розеткам, оснащенным настенными выключателями или
автоматическими таймерами.
❏ Устанавливайте компьютер и устройство вдали от потенциальных источников помех, таких, как
громкоговорители или базовые модули беспроводных телефонов.
❏ Шнуры питания следует прокладывать в местах, где они не будут истираться, изнашиваться,
сплющиваться, скручиваться и подвергаться порезам. Не ставьте предметы на шнуры питания и
следите за тем, чтобы на адаптер переменного тока и шнуры питания не наступали и не переезжали их.
Особенно тщательно следите за тем, чтобы все шнуры питания были прямыми на концах и в местах
соединения с адаптером переменного тока.
❏ Если вы подключаете устройство через удлинитель, убедитесь, что общая нагрузка от всех устройств,
подключенных к этому удлинителю, не превышает максимально допустимой. Также убедитесь, что
общая нагрузка от всех устройств, подключенных к электрической розетке, не превышает
максимально допустимой.
❏ Если вы намерены использовать устройство в Германии, подключайте его через 10- или 16-амперный
автоматический выключатель для защиты от короткого замыкания или избыточного тока.
❏ При подключении данного продукта к компьютеру или другому устройству с помощью кабеля
убедитесь в правильности ориентации разъемов. Каждый разъем можно подключить лишь одним
способом. Если вставить разъем неправильно, можно повредить оба устройства, соединенные кабелем.
❏ Размещайте устройство на плоской устойчивой поверхности, которая шире основания устройства в
любом направлении. При установке устройства около стены, оставляйте между ним и стеной
промежуток не менее 10 см. Устройство не будет работать правильно, если оно установлено под углом
или качается.
❏ При хранении и транспортировке принтера не наклоняйте устройство, не переворачивайте его и не
устанавливайте на бок, иначе чернила могут вылиться.
❏ Необходимо обеспечить достаточное пространство с тыльной стороны для размещения кабелей, и
пространство над изделием для свободного открывания крышки.
❏ Не устанавливайте устройство в местах, подверженных резким изменениям температуры и влажности.
Держите устройство вдали от прямых солнечных лучей, источников яркого света и тепла.
❏ Не вставляйте предметы в отверстия на корпусе устройства.
❏ Не допускайте попадания рук во внутреннюю часть устройства во время печати.
❏ Не прикасайтесь к плоскому белому шлейфу и тюбикам с чернилами внутри устройства.
❏ Не используйте аэрозольные баллоны, содержащие воспламеняющиеся газы внутри или рядом с
устройством. Это может привести к пожару.
❏ Не перемещайте печатающую головку самостоятельно, этим вы можете повредить устройство.
❏ Всегда выключайте принтер при помощи кнопки P. Не отключайте устройство от источника питания
и не выключайте источник питания, пока индикатор P не прекратит мигать.
❏ Перед транспортировкой устройства убедитесь в том, что печатающая головка находится в обычном
(крайнем правом) положении.
9

Руководство пользователя
Важные инструкции
❏ Необходимо при ближайшей возможности заполнить контейнер для чернил, если их уровень не
превышает нижней линии. Длительное использование изделия при уровне чернил ниже минимальной
линии может привести к выходу его из строя.
❏ Если вы не планируете использовать устройство в течение долгого периода времени, обязательно
отключите его от электрической розетки.
Обращение с чернилами
Инструкции по технике безопасности при работе с чернильными картриджами, а также рекомендации/
предупреждения по работе с устройством находятся в разделе по ссылке.
& «Перезаправка чернил» на стр. 33
10