-
Contents
-
Table of Contents
-
Bookmarks
Quick Links
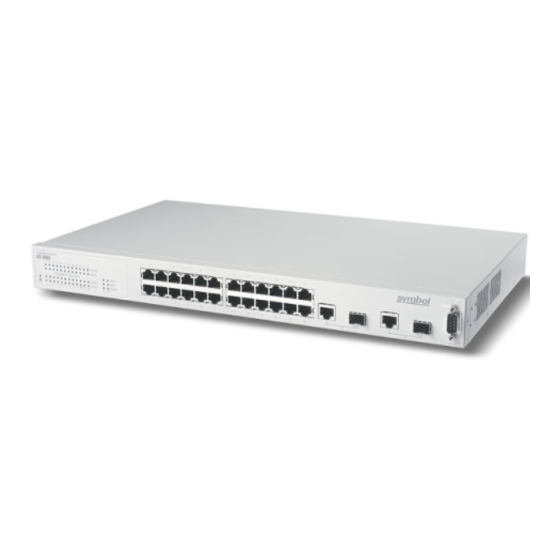
ES3000 Ethernet Switch
User Guide
Related Manuals for Symbol ES3000
Summary of Contents for Symbol ES3000
-
Page 1
ES3000 Ethernet Switch User Guide… -
Page 3: Ethernet Switch
ES3000 Ethernet Switch User Guide 72E-68446-01 Revision A May 2004…
-
Page 4
Symbol does not assume any product liability arising out of, or in connection with, the application or use of any product, circuit, or application described herein. No license is granted, either expressly or by implication, estoppel, or otherwise under any Symbol Technologies, Inc., intellectual property rights. An implied license only exists for equipment, circuits, and subsystems contained in Symbol products. -
Page 5: Table Of Contents
About the ES3000 Ethernet Switch ……..
-
Page 6
Establishing a RS-232 Serial Connection to the Ethernet Switch ..1-5 Administration of the ES3000 Ethernet Switch ……1-6 Installing a SFP Fiber Transceiver. -
Page 7
Main Menu->Ports->Port Security->Radius……3-35 Main Menu->Ports->Port Security ->802.1x ……3-36 Main Menu->Ports->Power over Ethernet. -
Page 8
ES3000 User Guide Chapter 4. Web Management Access General Information ……….4-2 Saving Web Interface Configuration Changes . -
Page 9
Chapter 5. Command Line Interface ES3000 Ethernet Switch Command Brief ……. . . 5-1 Help Key. -
Page 10
ES3000 User Guide VLAN Commands ……….5-74 Quality of Service Commands . -
Page 11: Introduction
Introduction The ES3000 User Guide provides general instructions for configuring and using the ES3000 Ethernet Switch. This guide provides information general in nature for those who may be new to the E3000 Ethernet Switch device. Notational Conventions The following conventions are used in this document: •…
-
Page 12: Service Information
If the problem cannot be solved over the phone, you may need to return your equipment for servicing. If that is necessary, you will be given specific directions. Symbol Technologies is not responsible for any damages incurred during shipment if the approved shipping container is not used. Shipping the units improperly can possibly void the warranty.
-
Page 13: Chapter 1. Switch Management Overview
ES 3000 (non PoE) — Part Number ES-3000-10-WW The PoE and non-PoE versions of the ES3000 use different versions of the bootcode and runtime software. Do not attempt to use PoE software with a non-PoE switch. Do not attempt to use non-…
-
Page 14: Management Access Overview
A virtual terminal protocol is a software program (such as Telnet) allowing the establishment of a management session from a Macintosh, PC or UNIX workstation. Because Telnet runs over TCP/IP, at least one IP address is required on the ES3000 Ethernet Switch before establishing access to it with a virtual terminal protocol.
-
Page 15: Snmp Protocol
1.5 Default Installation 1.5.1 Preparing for Site Installation Site preparation for the ES3000 Ethernet Switch installation begins with a site survey and network analysis. Review the site survey reports to determine specific equipment placement, site-specific port capacity, and power drops. Ensure the installation area is free of dust and dirt.
-
Page 16: Package Contents
Inspect the package contents and report any missing or damaged items to the Symbol sales representative. The package (for both the PoE and non-PoE Ethernet Switch models) should contain the following: • ES3000 Ethernet Switch • Quick Installation Guide • Rack-mounting brackets •…
-
Page 17: Supplying Power
1.5.3 Supplying Power To cable the ES3000 Ethernet Switch to receive power: 1. Connect the supplied AC power cord to the power connector on the rear of the Ethernet Switch. 2. Plug the cord into a standard AC outlet with a voltage range from 100VAC to 240VAC.
-
Page 18: Administration Of The Es3000 Ethernet Switch
IP address to the switch. To configure or determine the IP address on the switch via direct serial connection: 1. Use HyperTerminal (or other communications utility) to secure a connection to the ES3000 Ethernet Switch.
-
Page 19
To use the ES3000 Command Line Interface (CLI) to configure the device: 1. Use HyperTerminal (or other communications utility) to secure a connection to the ES3000 Ethernet Switch. 2. Hit the return key <Enter> to display the ES3000 logon screen. -
Page 20
The Web interface General Information page displays. Refer to Chapter 3 for information on using the ES3000 serial interface to configure the device. Refer to Chapter 4 instructions on using the Web interface to configure the device. Refer to Chapter 5… -
Page 21: Installing A Sfp Fiber Transceiver
1.7 Installing a SFP Fiber Transceiver The ES3000 Ethernet Switch supports a SFP (small form factor pluggable) fiber channel transceiver used in fiber channel cable installations. To install the SFP Fiber Transceiver: 1. Remove the rubber plug protecting the optics on the transceiver.
-
Page 22
1-10 ES3000 User Guide… -
Page 23: Chapter 2. Firmware Upgrades
Once completed, the software version requires verification within the System page. The PoE and non-PoE versions of the ES3000 switch use different versions of the bootcode and runtime software. Do not attempt to use PoE software with a non-PoE switch. Do not attempt to…
-
Page 24
ES3000 User Guide Symbol recommends using a RS-232 serial port connection to the switch during the software upgrade. When using a Telnet Session or Web interface, the connection to the switch is not available until the switch has completed its boot cycle and entered the Spanning Tree forwarding mode. -
Page 25: Chapter 3. Administration Console Access
Administration Console Access The administration console is an internal, character-oriented, VT-100/ANSI menu-driven user interface for management configuration activities. View the administration console from a terminal, PC, Apple Macintosh, or UNIX workstation connected to the switch console port. 3.1 Direct Access Management Method The direct access management method is required when initially setting up the switch.
-
Page 26
ES3000 User Guide The following are Symbol recommended terminal-emulation programs: • HyperTerminal (which is built into the Microsoft Windows operating systems) • ZTerm (Apple Macintosh) • TIP (UNIX workstation) To set up the connection using a HyperTerminal on a PC (but other systems follow similar steps): 1. -
Page 27
5. Verify the port settings are: Baud Rate: 19200 Data Bits: Parity: None Stop Bits: Flow Control: None Administration Console Access… -
Page 28
ES3000 User Guide 6. Click OK. When the HyperTerminal window displays, a connection exists to the switch and a logon screen displays. If a login screen or main menu does not display, hit the return key. -
Page 29: User Interface
Main Menu->System Admin.->Tools->Save Config. on page 3-24. Use the Save Config page to save all updates to the menu-driven interface. Once updates are made refer back to the target configuration page to ensure the updates have been implemented by the ES3000 Ethernet Switch.
-
Page 30: Main Menu Options
ES3000 User Guide 3.4 Main Menu Options The main menu displays the submenus available. Select Enter when a highlighted option confirms the choice of the specified submenu. The hotkey or letter within square bracket of each menu option can also be typed to directly choose the option. There are ten main menu items to choose from: •…
-
Page 31
Administration Console Access… -
Page 32: General Information
ES3000 User Guide 3.5 General Information The General Information screen displays information on the operational state of the ES3000 Ethernet Switch. Use this information for general configuration information when accessing other menu items. • System up for • Boot Code Version •…
-
Page 33: Main Menu->System Administration->System Configuration
3.5.1 Main Menu->System Administration->System Configuration Use the System Configuration screen to access System Name, Contact Person, and System Location submenus required for configuring the device. The MAC address and Object ID also display, but these items are not user configurable. There are three submenus at System Configuration menu, •…
-
Page 34: Main Menu->System Admin.->Access Configuration
• Management Access • Quit Use the IP Config menu to manage the IP related information for the ES3000 from the System IP Configuration menu. Use the Management Access menu to enable or disable the Web, SNMP and/or telnet interfaces from the Management Access menu.
-
Page 35: Main Menu->Access->System Ip Configuration
3.5.3 Main Menu->Access->System IP Configuration Use the System IP Configuration menu to manage IP related information for the ES3000 supported system. • IP Assignment Mode • Manual — Manually enter IP related information • DHCP — The switch accepts DHCP broadcast from a DHCP server and automatically configures IP related information The default setting is DHCP.
-
Page 36: Main Menu->Access->Management Access
3-12 ES3000 User Guide • Press Ctrl-W to save any changes to NVRAM. 3.5.4 Main Menu->Access->Management Access Use the Management Access screen to enable or disable the Web, SNMP, and/or telnet interfaces. The Management Access menu can also be used to change the user name and password. User names and passwords are case sensitive and can be up to 20 characters long.
-
Page 37
The configurable fields within the Management Access menu have the following values: Set Console UI Time Out: Set Telnet UI Time Out: Change Local User Name: Change Local Password: Enable/Disable Telnet Server: Enable/Disable SNMP Agent: Enable/Disable Web Server: Session is disconnected when the time out occurs Telnet session is disconnected when the time out occurs Defines the name of the local user Changes the password of the local user… -
Page 38: Main Menu->System Admin->Snmp Configuration Menu
SNMP manager to certain conditions on the network. A trap could result from improper user authentication, PoE power usage over threshold or network topology changes.. Use the SNMP Configuration menu to manage the ES3000 switch using the Simple Network Management Protocol (SNMP) from a network management station. Configure the switch to participate in the SNMP community and add the SNMP host agent to the host table.
-
Page 39
3-15 Administration Console Access The SNMP Configuration page has four options: • System Information • Authorized Managers • Trap Receivers • Trap Selection… -
Page 40: Main Menu->Snmp Config.->System Information
3-16 ES3000 User Guide 3.5.6 Main Menu->SNMP Config.->System Information Use the System Information page to display system information to set the system name, location, and contact information. The MAC address and Object ID are also shown, but the MAC address and…
-
Page 41: Main Menu->Snmp Config.->Authorized Managers
3.5.7 Main Menu->SNMP Config.->Authorized Managers Use the Authorized Managers page to list the SNMP managers and their associated information. There are two community strings in default mode, private and public. Read-only is allowed with public and read-write is granted to private. Change the two community strings as required. Four commands are available to set the Manager IP, community string, Status, Privilege, and IP address.
-
Page 42: Main Menu->Snmp Config.->Trap Receiver Configuration
3-18 ES3000 User Guide 3.5.8 Main Menu->SNMP Config.->Trap Receiver Configuration When Authentication Traps is Enabled, the system generates an SNMP trap upon a host authorization failure. The failure occurs when a host attempts to gain access to the system but the host IP is not in the SNMP host table.
-
Page 43: Main Menu->Snmp Config. ->Trap Selection
3.5.9 Main Menu->SNMP Config. ->Trap Selection Three commands are available to configure individual trap parameters: Enable/Disable Auth Fail Trap: Add Link Down Trap Ports: Delete Link Down Trap Ports: 3.5.9.1 Port Link Down Trap When on, the system generates an SNMP trap upon a port link down. This failure occurs when a link is disconnected.
-
Page 44
3-20 ES3000 User Guide… -
Page 45: Main Menu->System Admin. ->Tools Menu
3.5.10 Main Menu->System Admin. ->Tools Menu The Tools Menu has six options: • Software Upgrade • System Reboot • Save Config. • Upload/Download Config. • SNTP Config • System Log These individual menu options are discussed in detail in the sections that follow. 3-21 Administration Console Access…
-
Page 46: Main Menu->System Admin.->Tools->Software Upgrade
3-22 ES3000 User Guide 3.5.11 Main Menu->System Admin.->Tools->Software Upgrade If new improvements to the software on the switch become available, use the Software Upgrade menu to upgrade the switch to the new software version. Once the IP address of the TFTP and the name of the new software image file are properly configured, the user can upgrade the software with command on this menu.
-
Page 47: Main Menu->System Admin.->Tools->System Reboot
3.5.12 Main Menu->System Admin.->Tools->System Reboot When the system reboots, reboot Status and reboot Type options display: Reboot Status: Stop The switch is powered down. Normal The switch conducts a warm reboot as normal when rebooted. Reboot Type: Normal Reboot with current runtime code and configuration. Factor-Default The switch runs as factor default after reboot.
-
Page 48: Main Menu->System Admin.->Tools->Save Config
Save updated settings to Flash once changes to the screens within the console interface have been made. Use the Save Config screen as the central location to save changes made within the ES3000 Ethernet Switch menu-driven interface. Once updates have been saved to the system using the Save Config page, refer back to the target configuration screen to ensure the changes have been implemented by the ES3000 Ethernet Switch.
-
Page 49: Main Menu->System Admin. ->Tools ->Upload/Download Config
3.5.14 Main Menu->System Admin. ->Tools ->Upload/Download Config. There are four configurable functions within the Upload/Download Configuration page: Set TFTP Server IP Address Set Configuration File Name Upload Configuration File Download Configuration File Administration Console Access user can enter the server IP address to get the TFTP server. user can enter the file name that they want to config user can upload the configuration file user can download configuration file from a TFTP server…
-
Page 50: Main Menu->System Admin.->Tools->Sntp Config
3-26 ES3000 User Guide 3.5.15 Main Menu->System Admin.->Tools->SNTP Config. There are configurable functions in the SNTP Configuration page: Set SNTP Server IP Set SNTP Interval Set Time Zone Set Daylight Saving Simple Network Time Protocol, the user can enter SNTP server IP to gain access.
-
Page 51: Main Menu->System Admin.->Tools->System Log
The System Log is a tool for observing system behavior. Clear the system log by selecting Clear System Log. Symbol recommends referring to the System Log when contacting the Support Center to determine if an ES3000 event has been recorded.
-
Page 52: Main Menu->Port Configuration Menu
3-28 ES3000 User Guide 3.5.17 Main Menu->Port Configuration Menu Use the Port Configuration menu to set the port characteristics related to link operations. All of the parameters on the Port Configuration page are toggle settings. To change, or toggle, between options, select Ctrl-M to move the curser to the ports field and strike the space bar when the appropriate option is highlighted.
-
Page 53: Main Menu->Ports->Basic Port Config
3-29 Administration Console Access 3.5.18 Main Menu->Ports->Basic Port Config. Use the Basic Port Configuration menu to configure port status (link type, admin enable/disable, link up/down, mode, and flow control). To mirror other ports, select Port Mirroring.
-
Page 54: Main Menu->Ports->Basic Port Config.->Port Status & Config
3-30 ES3000 User Guide 3.5.19 Main Menu->Ports->Basic Port Config.->Port Status & Config. The Port Status & Configuration menu contains the following editable fields: Type The type of a port, this field is not user configurable. Admin field Enables or disables the port.
-
Page 55
port compliant with IEEE 802.3u. If the other port is not IEEE802.3u compliant, the port defaults to half-duplex (10 Mbps mode). Users can operate the communication speed and duplex mode manually. Flow Control Enables or disables Flow Control. Flow control is a protocol preventing packets from being dropped by reducing the amount of traffic to a level that can be accommodated. -
Page 56: Main Menu->Ports->Basic Port Config->Port Counters
Use the Port Counters menu to select the port where information is required. Refer to the Total and Avg./s lists for individual port information. Reset the ES3000 to retrieve the latest information immediately. The Refresh mode is to set to a defined refresh interval.
-
Page 57: Main Menu->Ports->Basic Port Config->Port Mirroring
3.5.21 Main Menu->Ports->Basic Port Config->Port Mirroring Port mirroring allows one port on the ES3000 to see all of the packets passing through any other port on the switch. Usually, a network analyzer is attached to the monitoring port so the network administrator can debug problems with the monitored port.
-
Page 58: Main Menu->Ports->Port Security
3-34 ES3000 User Guide 3.5.22 Main Menu->Ports->Port Security Use the Port Security screen to enable or disable the Web, SNMP, and/or telnet interfaces or change the user name and password. User names and passwords are case sensitive and can be up to 20 characters long.
-
Page 59: Main Menu->Ports->Port Security->Radius
3-35 Administration Console Access 3.5.23 Main Menu->Ports->Port Security->Radius Use the Radius menu option to configure the advanced security settings of the switch to limit the access to the management interfaces. There are two advanced security options beyond the basic password protection: RADIUS client authentication and 802.1X port authentication. If the user has a RADIUS server on the network, authentication of management access can be conducted through the RADIUS server.
-
Page 60: Main Menu->Ports->Port Security ->802.1X
(30sec.), the supplicant requiring and server responding time, the maximum request times and the quiet period if there is no any activity on the ES3000. Configure the up re-authentication period when re-authentication status is Enabled. Go back to the…
-
Page 61: Main Menu->Ports->Power Over Ethernet
3.5.25 Main Menu->Ports->Power over Ethernet Use Power-over-Ethernet (PoE) to eliminate using a 110/220 VAC power source to power access points and other devices on a wired LAN. If using a Power-over-Ethernet system, only a single CAT5 Ethernet cable carrying both power and data to each device is required. The single cable scheme provides greater flexibility in the placement of access points and network devices and can significantly decrease installation costs.
-
Page 62
3-38 ES3000 User Guide Global Configuration Power Usage: Management Method: Detection Method: Sets the power usage threshold for sending a trap. The action to take when the power sink over the power budget, use one of the following: 1) Low priority port is shut down;… -
Page 63
3-39 Administration Console Access… -
Page 64: Main Menu->Ports->Link Aggregation
3-40 ES3000 User Guide 3.5.26 Main Menu->Ports->Link Aggregation Use the Link Aggregation menu to allow multiple links between switches to work as one virtual link (aggregate link). Trunks can be defined for similar port types only. For example, a 10/100 port cannot form a Port Trunk with a gigabit port.
-
Page 65: Main Menu->Ports->Link Aggregation->La Config
3.5.27 Main Menu->Ports->Link Aggregation->LA Config Use the LA Configuration menu to define multiple links between switches to work as one virtual link or aggregate link. Trunks can be defined for similar port types only. For example, a 10/100 port cannot form a Port Trunk with a gigabit port.
-
Page 66: Main Menu->Ports->Link Aggregation->Set Port Priority
3-42 ES3000 User Guide 3.5.28 Main Menu->Ports->Link Aggregation->Set Port Priority The default system priority is the same in all ports. If configuring a port with different priority in the link aggregation, go to set port priority to configure the port priority.
-
Page 67: Main Menu>Vlans
3-43 Administration Console Access 3.5.29 Main Menu>VLANs A Virtual Local Area Network (VLAN) is a means to electronically separate ports on the same switch from a single broadcast domain into separate broadcast domains. By using a VLAN, users can group by logical function instead of physical location.
-
Page 68: Main Menu->Vlans->Vlans By Vlan-Id
3-44 ES3000 User Guide 3.5.30 Main Menu->VLANs->VLANs by VLAN-ID Create a new VLAN, add new ports to an existing VLAN, remove ports from an existing VLAN, delete a VLAN, Set Management Status, and/or Set GVRP Status from the VLAN by VLAN-ID screen. Six…
-
Page 69
To create a new VLAN Group: 1. Select Create VLAN. 2. Enter the VLAN ID and name in the provided fields. 3. Add VLAN members if so desired. 4. Click Apply. To delete a VLAN Group: 1. Select Delete VLAN. 2. -
Page 70
3-46 ES3000 User Guide To set the GARP VLAN registration protocol (GVRP) message status (GARP refers to General Attribute Registration Protocol): 1. Select Set GVRP Status. 2. Choose E to enable and D to disable. To set Management Status: 1. Select Set Management Status. -
Page 71: Main Menu->Vlans->Vlan Port Configuration Menu
3.5.31 Main Menu->VLANs->VLAN Port Configuration Menu Use the VLAN Port Configuration screen to configure VLAN configurations for each port. The PVID is default to 1 for every port. Set Port VID: Sets PVID of a port. Set Frame Type: Sets the acceptable frame types, All or Tagged Only. When Tagged Only is selected, all non-tagged packet are dropped.
-
Page 72: Main Menu->Igmp Snooping Configuration Menu
The ES3000 can “snoop” the messaging protocol to keep track of multicast groups and to insure multicast traffic is sent only to the appropriate ports within a VLAN. In networks where multimedia applications generate multicast traffic, IGMP can reduce unnecessary bandwidth by limiting traffic forwarding otherwise broadcast to the network.
-
Page 73: Main Menu->Igmp Snooping->Igmp Snooping Config
3.5.33 Main Menu->IGMP Snooping->IGMP Snooping Config. Enable The system detects IGMP queries, report packets, and manage IP multicast traffic through the switch. Disable The switch forwards traffic and disregards any IGMP requests. Users can set up Host port aged time and router port aged time to snoop the network and the IGMP Snooping status report interval.
-
Page 74: Main Menu->Igmp Snooping->Vlan Filter Table
3-50 ES3000 User Guide 3.5.34 Main Menu->IGMP Snooping->VLAN Filter Table Use the VLAN Filter Table to define the VLAN not to be included in the set Vlan Filter. Enter the VLAN ID (1-4094) in the VLAN ID field. Ensure the Status field is set to Filter.
-
Page 75: Main Menu->Igmp Snooping->Router Port Table
3-51 Administration Console Access 3.5.35 Main Menu->IGMP Snooping->Router Port Table The Router Port Table menu displays the ports in a VLAN ID connecting to the router. The user can snoop the package from the router side of the ports. Select Next Page to display additional VLAN IDs should they exist.
-
Page 76: Main Menu->Spanning Tree Configuration Menu
ES3000 User Guide 3.5.36 Main Menu->Spanning Tree Configuration Menu The ES3000 can be configured to use one of three spanning tree protocols. Spanning Tree Protocol (STP) is compatible with legacy equipment. Rapid Spanning Tree Protocol (RSTP) is signficantly faster than STP. Multiple Spanning Tree Protocol (MSTP) is based on RSTP and extends RSTP in a way that is useful for switches implementing VLANs.
-
Page 77: Main Menu->Spanning Tree->Forwarding Db
3.5.37 Main Menu->Spanning Tree->Forwarding DB Use the Forwarding Database option to view the dynamic MAC addresses currently in the address database. When addresses are in the database, the packets intended for those addresses are forwarded directly to those ports. The Administrator can display addresses in the table by port, VLAN, and/or MAC address by entering the short key.
-
Page 78
3-54 ES3000 User Guide Static Address Table: Use the Static Addresses Table to specify Media Access Control (MAC) addresses for specific ports not purged from the bridge table by the aging function. There are 3 entries in the table. Two commands are available to add and/or remove an entry. -
Page 79: Main Menu->Spanning Tree->Mstp Config
3-55 Administration Console Access 3.5.38 Main Menu->Spanning Tree->MSTP Config. 3.5.39 Main Menu->Spanning Tree->Multiple Spanning Tree Configuration->MSTP Config. Rapid spanning tree (IEEE 802.1w) is supported to reduce the spanning tree established time. Each spanning tree establishment process takes several timeouts to avoid a loop, even the edge switch. The user can configure the switch to avoid the long latency due to timeouts if there is only a single connection to the switch.
-
Page 80
3-56 ES3000 User Guide The upper half of the MSTP Config screen displays information about the Multiple Spanning Tree Configuration. Status: Global MSTP Status: Protocol Version: MST Config ID Selector: MST Region Name: Status of global multiple spanning tree protocol. Enabled indicates that MSTP is running while Disabled indicates MSTP is not running. -
Page 81
MST Region Version: MST Config Digest: Command: Enable/Disable Global MSTP: Set MSTP Protocol Version: Cist Configuration: Cist Basic Port Configuration: Cist Advanced Port Config: Set MSTI Region Name: Set MSTI Region Version: Designated Topology Info: Regional Topology Info: Configure the switch to ensure the SPT works properly. The Common Instant Spanning Tree Configuration Menu enables the user to configure the switch-wide parameters, such as Cist Hello Time, Cist Maximum Age, and Cist Forward Delay. -
Page 82: Main Menu->Spanning Tree->Cist Config
3-58 ES3000 User Guide 3.5.40 Main Menu->Spanning Tree->CIST Config. Status Hello Time: Maximum Age: Forward Delay: Bridge Priority: Command Set Cist Bridge Priority: Set Cist Bridge Hello Time: Set Cist Bridge Maximum Age: Set MSTP Max Hop Count Delay: Time between configuration messages sent by the Spanning Tree…
-
Page 83
3-59 Administration Console Access Rapid Spanning Tree When a port running the standard STP is connected, it goes through the STP negotiation (listening -> learning -> forwarding or blocking) before it is available. If a client is trying to access a server through the switch running STP negotiation, it is not able to connect to it immediately. -
Page 84: Main Menu->Spanning Tree->Mstp Config->Cist Basic Port Config
3-60 ES3000 User Guide 3.5.41 Main Menu->Spanning Tree->MSTP Config->CIST Basic Port Config. Use the CIST Basic Port Config. menu to configure the port edge status, port P-TO-P status, and restart port migration to prevent the wrong link.
-
Page 85: Main Menu -> Spanning Tree -> Mstp Config. -> Cist Advanced Port Config
3-61 Administration Console Access 3.5.42 Main Menu -> Spanning Tree -> MSTP Config. -> CIST Advanced Port Config. Use the CIST Advanced Port Config. menu to set up the port edge status, port P-TO-P status, and restart port migration to prevent the wrong link.
-
Page 86: Mstp Instance Config
3-62 ES3000 User Guide 3.5.43 Main Menu->Spanning Tree->MSTP Config.->MSTP Instance Config. A small tree instance can be considered in the MSTP. One Instance can have more than one VLAN. Use the MSTP Instance Config. menu to add or remove a VLAN, or remove the MST Instance as…
-
Page 87: Main Menu->Spanning Tree->Mstp Config
3-63 Administration Console Access 3.5.44 Main Menu->Spanning Tree->MSTP Config.->Designated Topology Info. The Designated Topology Info. page displays read-only topology information for each port.
-
Page 88: Main Menu->Spanning Tree->Mstp Config
3-64 ES3000 User Guide 3.5.45 Main Menu->Spanning Tree->MSTP Config.->Regional Topology Info. The Regional Topology Info. page displays regional topology information (read-only) for each port.
-
Page 89: Main Menu->Qos (Quality Of Service Configuration Menu)
Administration Console Access 3.5.46 Main Menu->QoS (Quality of Service Configuration Menu) The ES3000 implements IEEE 802.1p Quality of Service (QoS) processing. QoS policies examine packets and classify them. The classification is used to drop packets or to assign markers to the packets.
-
Page 90: Main Menu->Qos->Policy Config
3-66 ES3000 User Guide 3.5.47 Main Menu->QoS->Policy Config. Differentiated Service (DiffServ) uses a priority tag in the data packet (the Differentiated Service Code Point or DSCP) to determine the priority of the packet. The Policy Config menu maps the various DSCP tags to the two four queues on each port.
-
Page 91: Main Menu->Qos->Queue Config
3-67 Administration Console Access 3.5.48 Main Menu->QoS->Queue Config. Port Prioritization allows the user to specify which ports have greater precedence in situations where traffic can be buffered in the switch due to congestion. Traffic that comes in on ports with a setting of high is transmitted before those that come in on a port with a normal setting.
-
Page 92: Main Menu->Qos->Queue Config.->Queue Mapping
3-68 ES3000 User Guide 3.5.49 Main Menu->QoS->Queue Config.->Queue Mapping The priority tag of each packet is divided into four queues on each output port within the Queue Mapping screen. The default setup each queue assuming two priorities sequentially. Configure the traffic class as needed. Quality of Service works only after the QoS status is Enabled…
-
Page 93: Main Menu->Qos->Rate Limiting
Use the Rate Limiting screen to configure the broadcast storm control to enable or disable traffic control in the networks. Rate limiting, or storm control, prevents ports on the ES3000 switch from being overwhelmed by a broadcast, unicast, or multicast storm. A storm results when packets flood the LAN, which degrades network performance.
-
Page 94: Main Menu->Qos->Rate Limiting->Broadcast Storm Control
3-70 ES3000 User Guide 3.5.51 Main Menu->QoS->Rate Limiting->Broadcast Storm Control Configuration Menu Use the Storm Control Configuration page to set the limitation of broadcast, multicast, and/or DLF (Destination Look Failure) packets delivered to the CPU. Each kind of packet determines the network load.
-
Page 95: Execute Cli
The CLI (Command Line Interface) provides a means to configure the system for advanced users. Symbol recommends the CLI for adavanced users who do not need to navigae a menu-driven interface to configure the ES3000 Ethernet Switch. See Chapter 5 for detailed information.
-
Page 96
3-72 ES3000 User Guide… -
Page 97: Chapter 4. Web Management Access
Web Management Access The Symbol ES3000 Managed Switch provides a built-in browser interface for configuring and managing remotely using a standard Web browser such as Microsoft Internet Explorer or Netscape Navigator. The browser interface also allows for system monitoring of the Switch. The help page covers many of the basic functions and features of the switch and its Web interface.
-
Page 98: General Information
Ports VLANs IGMP Snooping Spanning Tree Each submenu item has its own set of options for configuring the ES3000 Ethernet Switch by a specific functional area. Configure IP address information, management access and user information Configure port security, PoE and link aggregation.
-
Page 99: Saving Web Interface Configuration Changes
System Admin->Tools->Save Configuration on page 4-14. Use the Save Configuration page to save all updates to the Web interface. Once updates are made, refer back to the target configuration page to ensure the updates have been implemented by the ES3000 Ethernet Switch.
-
Page 100: System Admin->Access->Ip Configuration
ES3000 User Guide 4.2.1 System Admin->Access->IP Configuration The IP Configuration menu manages the IP related information of the system. To manually configure the IP address: 1. Enter a site-specific IP address, Gateway address and Net mask. 2. Click Apply to change the IP settings.
-
Page 101: System Admin->Access->Management Access
4.2.2 System Admin->Access->Management Access Use the Management Access screen to enable or disable the Web, SNMP and/or telnet interfaces. Use the Management Access screen to change the user name and password. User names and passwords are case sensitive and can be up to 20 characters long. Enable/Disable the Web interface from the Management Access screen.
-
Page 102: System Admin->Access->User Name Password Change
ES3000 User Guide 4.2.3 System Admin->Access->User Name Password Change The user name and password can be up to 20 characters and are case sensitive. The password entered is encrypted on the screen and displays as a sequence of asterisks (*). Use the User Name Password Change screen to: •…
-
Page 103: System Admin->Snmp Configuration
PoE power usage over threshold or network topology changes. Manage the ES3000 by SNMP from a network management station. Configure the switch to participate in the SNMP community and add the host agent to the host table. This prevents unauthorized SNMP access to the switch from non-approved SNMP hosts.
-
Page 104: System Admin->Snmp Configuration->Snmp Information
ES3000 User Guide 4.2.5 System Admin->SNMP Configuration->SNMP Information Create up to ten different community strings with either READ or READ-WRITE privileges. Set the strings prior to setting host access, as the host table depends on the existence of community strings.
-
Page 105: System Admin->Snmp Configuration->Authorized Managers
Web Management Access 4.2.6 System Admin->SNMP Configuration->Authorized Managers Use the SNMP Host Table to add and remove hosts from access rights granted to community groups. The permissions GET, SET, and TRAP are assigned to a community name. These permissions are assigned to individual machines by adding those machines and their IP address to the appropriate community string.
-
Page 106: System Admin->Snmp Configuration->Trap Receiver
4-10 ES3000 User Guide 4.2.7 System Admin->SNMP Configuration->Trap Receiver Authentication Traps When enabled, the system generates an SNMP trap upon a host authorization failure. The failure occurs when a host tries to gain access to the system but the host IP is not in the SNMP host table.
-
Page 107
4-11 Web Management Access… -
Page 108: System Admin->Tools->Software Upgrade
4-12 ES3000 User Guide 4.2.8 System Admin->Tools->Software Upgrade Use the Software Upgrade menu to upgrade the software for the switch through TFTP protocol, reboot the system with variety options and save configuration to Flash and View Statistic information. If new improvements to the software that runs the switch become available, use the Software Upgrade menu to upgrade the switch to the new software release.
-
Page 109: System Admin->Tools->System Reboot
4.2.9 System Admin->Tools->System Reboot Two options are provided when the system reboots, Reboot Status: Stop: Shutdown the system Start: Reboot the system Reboot Type Normal: Boot up with runtime configuration Factory Default: Boot up with factory default configuration 4-13 Web Management Access…
-
Page 110: System Admin->Tools->Save Configuration
Configuration page as the central location to save changes made within the ES3000 Ethernet Switch Web interface. Once changes have been saved to the system using the Save Configuration page, refer back to the target configuration screen to ensure the changes have been implemented by the ES3000 Ethernet Switch.
-
Page 111: System Admin->Tools->Sntp Configuration
4.2.11 System Admin->Tools->SNTP Configuration Use the following editable functions in the SNTP Configuration page are required: Set SNTP Server IP Simple Network Time Protocol, user can enter SNTP server IP to get into it. Set SNTP Interval Set up SNTP polling interval (1min for example). Set Time Zone Set up the time zone, like Casablance, Monrovia 4-15…
-
Page 112: System Admin->Tools->System Log Menu
4-16 ES3000 User Guide 4.2.12 System Admin->Tools->System Log Menu Use the System Log Menu to trace the entry when and from where, then users can know the entry system history. Select Clear to clean the table.
-
Page 113: System Admin->Tools->Tftp Configuration File Upload/Download
4.2.13 System Admin->Tools->TFTP Configuration File Upload/ Download There are fours functions in the page TFTP Configuration File Upload/Download page: Set TFTP Server IP Address Set Configuration File Name Upload Configuration File Download Configuration File enter the server IP address to get the TFTP server. enter the file name that they want to config upload the configuration file download configuration file from a TFTP server…
-
Page 114: System Admin->Ports->Port Status And Configuration
4-18 ES3000 User Guide 4.2.14 System Admin->Ports->Port Status and Configuration Configure the characteristics related to link operations. All of the parameters on the Port Status and Configuration page are toggle settings. To change, or toggle, between options, hit Ctrl-M to move the curser to the ports field and strike the space bar when the appropriate option is highlighted.
-
Page 115
4-19 Web Management Access Enabling the GBIC connector for a Gigabit Ethernet port disables the built-in 1000BASE-T port. GBIC ports do not support Auto Negotiation. Manually configure the GBIC port. The default values are 1000 Mbps, full duplex. -
Page 116: System Admin->Ports->Port Counters
4-20 ES3000 User Guide 4.2.15 System Admin->Ports->Port Counters Use the Port Counters screen to select the target port for displaying port information. Selected a target port form the Select Port pull-down menu and click Apply to display counter information for that port.
-
Page 117: System Admin->Ports->Ip (Port) Mirroring
4.2.16 System Admin->Ports->IP (Port) Mirroring Port mirroring allows one port on the ES3000 to see all of the packets passing through any other port on the switch. Usually, a network analyzer is attached to the monitoring port so the network administrator can debug problems with the monitored port.
-
Page 118: System Admin->Ports->Port Security ->Radius Configuration
4-22 ES3000 User Guide 4.2.17 System Admin->Ports->Port Security ->Radius Configuration Use the Radius Configuration screen to configure switch advanced security settings to limit the access to management interfaces. There are two advanced security options beyond the basic password protection: RADIUS client authentication and 802.1X port authentication. If a RADIUS server is on the network, configure the authentication of management access through a RADIUS server.
-
Page 119: System Admin->Ports->Port Security ->802.1X Configuration
4.2.18 System Admin->Ports->Port Security ->802.1x Configuration Use the 802.1x screen to: • Create the NAS ID used for connection • Configure the port to pass security to • Set port control type • Set the operational or administrative control direction •…
-
Page 120: System Admin->Ports->Power Over Ethernet
The ES3000 has a maximum PoE power budget of 170 watts. This is enough to supply 7 watts to all 24 PoE ports on the switch. The switch supplies a maximum of 16.5 watts per port.When a new powered device is connected to a port, the ES3000 switch checks whether enough power remains in the power budget to support the device.
-
Page 121: System Admin->Ports->Power Over Ethernet->Port Configuration
4-25 Web Management Access 4.2.20 System Admin->Ports->Power over Ethernet->Port Configuration The Port Configuration page provides a port-by-port selection option for the PoE function. To set up administration, priority and/or limit, apply one or more ports simultaneously. There are 8 parameters for each port. 3 of the 8 parameters are user configurable, the other 5 are values assigned by the system to display information on the power supplied.
-
Page 122
4-26 ES3000 User Guide Down: Status: The status of the port. When a power device is connected and power is provided, Powered is displayed for the port. Class: 4 classes are specified within IEEE 802.3af to help determine the maximum number of PDs the system can support. -
Page 123
Example: The switch ports could require a PoE scheme similar to the following: Port 1, 5 2, 6 3, 7 1. The administrator needs to click ports 1 and 5 and choose Disable. 2. Select Apply to disable ports 1 and 5. 3. -
Page 124: System Admin->Ports->Power Over Ethernet->Poe Global Configuration
The power supply in the ES3000 Ethernet Switch is 225W. 170W is dedicated to the powered devices as a power budget. The switch is capable of providing power to 11 devices requiring a maximum power of 15.4W…
-
Page 125: Poe Determination Flowchart
Power Management Method: When the power budget is running out as more powered · Maximum power allowed for powered devices. 170W for the ES3000 switch. The powered device detection method. Older devices could contain a capacitor. If this option is disabled (default), capacitor devices are not detected and powered.
-
Page 126
4-30 ES3000 User Guide · Power Usage Threshold: • Low priority port will be shutdown. When a newly powered device is connected, the switch searches among its currently connected and powered devices. If any port has lower priority than the newly connected… -
Page 127
1. The flowchart assumes capacitor detection is enabled, otherwise, the path is No. 2. When selecting a priority-based power supply scheme, the «Yes» flow applies. Otherwise, the sequence of connections applies. 3. When the power consumption percentage is over the threshold, an SNMP trap is issued to corresponding receivers. -
Page 128
4-32 ES3000 User Guide 3. Powered Device (capacitor). If capacitor detection enabled is not selected for a global configuration, go to Power Not Provided (step 13). (this step is combined with next step to make the flow chart clearly). 4. Check the connected device requirement on power based on capacitor. If it is not a powered device, go to Power Not Provided (step 13). -
Page 129: System Admin->Ports->Link Aggregation->System Priority
4-33 Web Management Access 4.2.23 System Admin->Ports->Link Aggregation->System Priority Enter a number between 0-65535 to set up the system priority for the link aggregation. Click Apply to implement. Link Aggregation allows multiple links between switches to work as one virtual link aggregate link).
-
Page 130: System Admin->Ports->Link Aggregation->Add Group
4-34 ES3000 User Guide 4.2.24 System Admin->Ports->Link Aggregation->Add Group Use Link Aggregation to configure multiple links between switches to work as one virtual link (aggregate link). Link Aggregation can be defined for similar port types only. A 10/100 port cannot form a Port Link Aggregation with a gigabit port.
-
Page 131: System Admin->Ports->Link Aggregation->Set Port Priority
4-35 Web Management Access 4.2.25 System Admin->Ports->Link Aggregation->Set Port Priority Use the Set Port Priority screen to specify the ports with greater precedence in situations where traffic could be buffered in the switch due to congestion. Traffic on ports with a high priority is transmitted before traffic with a low priority setting.
-
Page 132: Vlans->Vlan Config->Vlans By Vlan-Id
4-36 ES3000 User Guide 4.2.26 VLANs->VLAN Config->VLANs by VLAN-ID A Virtual Local Area Network (VLAN) is a means to electronically separate ports on the same switch from a single broadcast domain into separate broadcast domains. Users can group by logical function instead of physical location.
-
Page 133: Vlans->Vlan Config->Creating/Modify Vlan
4.2.27 VLANs->VLAN Config->Creating/Modify VLAN To create a VLAN, select the Create/Modify VLAN menu item. For advanced users, refer Chapter 5 To create a VLAN: 1. Specify a VLAN ID (between 2 — 4094) for the new target VLAN within the VLAN ID field. VLAN #1 cannot be deleted under any circumstance.
-
Page 134
4-38 ES3000 User Guide 4. Add Ports as untagged or tagged members, or select the Forbidden checkbox for the target port to prevent dynamic membership via GVRP. If a port is added to multiple VLANs as a tagged member, that port becomes an 802.1Q trunk port. -
Page 135: Vlans->Vlan Config->Create/Modify 802.1Q Trunk
4.2.28 VLANs->VLAN Config->Create/Modify 802.1Q Trunk IEEE 802.1Q is the standard for encapsulating packets and marking them with VLAN information before sending them across a link between two switches. Use the Create/Modify 802.1Q Trunk screen to modify the encapsulation behavior on a port-by-port basis rather than on a VLAN-by-VLAN basis.
-
Page 136
4-40 ES3000 User Guide… -
Page 137: Vlans->Vlan Config->Vlans By Port
4.2.29 VLANs->VLAN Config->VLANs by Port Use the VLAN by Port screen to configure VLAN port information on a port-by-port basis. 1. Select Modify to configure VLAN information for the target port. 2. Configure trunk ports and VLAN membership as required. In the example below, Ports 25-26 are 802.1Q trunk ports with VLANs 1-2 as members.
-
Page 138: Igmp Snooping->Igmp Snooping Config->Igmp Snooping Configuration Menu
The ES3000 can “snoop” the messaging protocol to keep track of multicast groups and to insure multicast traffic is sent only to the appropriate ports within a VLAN. In networks where multimedia applications generate multicast traffic, IGMP can reduce unnecessary bandwidth by limiting traffic forwarding otherwise broadcast to the network.
-
Page 139
4-43 Web Management Access The page displays: IGMP Snooping Status: The global enabled or disabled status of IGMP snooping. The administrator can select Enabled or Disabled. When Enabled, the switch detects IGMP queries, reports, and manages multicast traffic through the switch for all VLANs. When Disabled, the switch forwards traffic and disregards IGMP requests. -
Page 140: Igmp Snooping->Igmp Snooping Config->Vlan Filter Table
4-44 ES3000 User Guide 4.2.31 IGMP Snooping->IGMP Snooping Config->VLAN Filter Table Use the VLAN Filter Table to define the VLAN not to be included in the set Vlan Filter. Enter the VLAN ID (1-4094) in the VLAN ID field. Ensure the Status field is set to Filter. Click Apply to remove…
-
Page 141: Igmp Snooping->Igmp Snooping Config->Router Port Table
4-45 Web Management Access 4.2.32 IGMP Snooping->IGMP Snooping Config->Router Port Table The Router Port Table page displays the ports in VLANs connected to the router. User can snoop the package from router side in these ports.
-
Page 142: Spanning Tree->Forwarding Db->Add Static Fdb Entries
ES3000 User Guide 4.2.33 Spanning Tree->Forwarding DB->Add Static FDB Entries The ES3000 can be configured to use one of three spanning tree protocols. Spanning Tree Protocol (STP) is compatible with legacy equipment. Rapid Spanning Tree Protocol (RSTP) is significantly faster than STP.
-
Page 143: Spanning Tree->Forwarding Db->Fdb By Port/Mac/Vlan
4-47 Web Management Access 4.2.34 Spanning Tree->Forwarding DB->FDB by Port/MAC/VLAN When the number of hosts increase on a network, the Forwarding Database grows sharply. Looking for a MAC address can become time-consuming work. The system provides three different ways for an administrator to look over MAC addresses;…
-
Page 144: Spanning Tree->Mstp Configuration->Mstp Config
ES3000 User Guide 4.2.35 Spanning Tree->MSTP Configuration->MSTP Config The ES3000 Ethernet switch is compliant with IEEE802.1D Spanning Tree Protocol (STP), IEEE 802.1w Rapid Spanning Tree, and IEEE 802.1s Multiple Spanning Tree. STP ensures only one path is active at a time between any two network nodes. There can more than one physical path between any two nodes, forming a loop, either created for redundancy or by accident.
-
Page 145
4-49 Web Management Access… -
Page 146: Spanning Tree->Mstp Configuration->Cist Configuration
4-50 ES3000 User Guide 4.2.36 Spanning Tree->MSTP Configuration->CIST Configuration Status Hello Time: Time between configuration messages sent by the Spanning Tree algorithm Maximum Age Amount of time before a configuration message is discarded by the system Forward Delay Amount of time system spends transitioning from the learning to listening to…
-
Page 147
4-51 Web Management Access… -
Page 148: Spanning Tree->Mstp Configuration->Cist Basic Port Configuration
4-52 ES3000 User Guide 4.2.37 Spanning Tree->MSTP Configuration->CIST Basic Port Configuration Use the CIST Basic Port Configuration screen to set up the port, priority and path cost and enable/ disable the port STP status. Use the Port menu to define the target port. Use the Priority field to set…
-
Page 149: Spanning Tree->Mstp Configuration->Cist Advanced Port Configuration
4-53 Web Management Access 4.2.38 Spanning Tree->MSTP Configuration->CIST Advanced Port Configuration Use the CIST Advanced Port Configuration screen to configure the port edge status, port P-TO-P status, and restart port migration to prevent the wrong link. Click Apply to implement the changes.
-
Page 150: Mstp Instance Configuration
4-54 ES3000 User Guide 4.2.39 Spanning Tree->MSTP Configuration->MSTP Instance Configuration One instance can have more than one VLAN. Use the MSTP In stance Configuration page to add or remove a VLAN, or remove a MST and Instance Port configuration. Specify a single instance (a range of instances separated by a hyphen) or a series of instances separated by a comma.
-
Page 151: Spanning Tree->Mstp Configuration->Designated Topology Information
4-55 Web Management Access 4.2.40 Spanning Tree->MSTP Configuration->Designated Topology Information Use the Designated Topology Information page to display designated topology information for each port.
-
Page 152: Regional Topology Information
4-56 ES3000 User Guide 4.2.41 Spanning Tree->MSTP Configuration->Regional Topology Information Use the Regional Topology Information page to display regional topology information for each port.
-
Page 153: Qos->Policy Config->Create Classifier
CoS priority or DSCP value. The queues are serviced using a weighted round robin algorithm. There are two means to differentiate ES3000 traffic, VLAN tags or Differentiated Service Code Points (DSCP) in the header of packets. By using either VLAN tags (port-based) or DSCP (DiffServ), configure the switch so specific traffic takes priority over less critical traffic.
-
Page 154
4-58 ES3000 User Guide Nine parameters are available to classify a data packet, including the Source Mac Address, Destination Mac Address, VLAN ID, DSCP, Protocol, Source IP Address, Destination IP Address, Source Layer 4 Port Number, and Destination Layer 4 Port Number. -
Page 155
Destination MAC: The destination MAC address on a data packet. The format is same as source MAC address. VLAN ID: The ID of a VLAN. The value is between 1 and 4094. 0 is used to indicate no VLAN and 4095 is reserved for system use. DSCP: Differentiated Service Code Point has 6 bits and the value is between 0 and 63. -
Page 156
4-60 ES3000 User Guide Source IP Address: Destination IP Address: Source Layer 4 Port: Destination Layer 4 Port: ICMP is the basic ping command. When a ping command is issued, the packet sent is an ICMP echo packet. The packet waits for the ICMP echo reply packet to complete the ping process. -
Page 157: Qos->Policy Configuration->Create In-Profile Action
4.2.43 QoS->Policy Configuration->Create In-Profile Action The In-Profile Action applies to the ingress data packets. Like the Classifier, it has a unique ID as index. The index is a number between 1 and 65535. Four actions are possible: Action Drop Policed-dscp Policed-precedence Policed-cos Description…
-
Page 158: Qos->Policy Configuration->Create Out-Profile Action
4-62 ES3000 User Guide The precedence and CoS (Class of Service) has three bits. The value is between 0 and 7. Higher values have priority. DSCP combines Precedence and ToS (Type of Service). DSCP is 6 bits long for the priority and the value ranges from 0 and 63.
-
Page 159: Qos->Policy Configuration->Create No-Match Action
4.2.45 QoS->Policy Configuration->Create No-Match Action Committed Rate: The unit for 10/100Mbps port is 1Mbits and 1000Mbps ports is 8Mbits. When the data rate higher than committed rate, the data is sent as best effort. In other words, the packet is delivered when the bandwidth is available.
-
Page 160: Qos->Policy Configuration->Create Port List
4-64 ES3000 User Guide 4.2.46 QoS->Policy Configuration->Create Port List Use the Create Port List page to configure the QoS group by ID, and key in the port in the port list to have the same priority. Select the ports for any Classifier and Action. As shown in the following figure, we have two port lists available and creating the 3rd list which consists of ports 2, 4, 6, and 8 to 12.
-
Page 161: Qos->Policy Configuration->Create Policy
4-65 Web Management Access 4.2.47 QoS->Policy Configuration->Create Policy Use the Create Policy screen to set up the QoS group by Policy ID, and key in the policy (1-65535) by classifier, in profile action, no match action, out profile action, and data path ID in the blank space. View the setting report by clicking Apply.
-
Page 162: Qos->Policy Configuration->Policy Sequence
4-66 ES3000 User Guide 4.2.48 QoS->Policy Configuration->Policy Sequence Select Policy Sequence from the Policy Configuration menu to launch the Display Policy Sequence By Port page. Select Display by Index order to display the policy index for the selected port. Select…
-
Page 163
4-67 Web Management Access Examples with Applied Policies When all policies are enabled, use a ping command to check the packet transmissions between switch 172.16.5.219 and host 172.16.5.56 The ping receives responses regardless of whether these policies are enabled or disabled. In other words, these policies are not applied to traffic to the CPU. The traffic between host 172.16.5.56 and switch 172.16.5.218 is verified (in this example). -
Page 164
4-68 ES3000 User Guide… -
Page 165: Qos->Queue Config->Queue Mapping
4-69 Web Management Access 4.2.49 QoS->Queue Config->Queue Mapping The priority tag of each packet is divided into four queues on each output port. The default setup is each queue taking two priorities sequentially. The Administrator can configure the traffic class as needed.
-
Page 166
4-70 ES3000 User Guide An Administrator can modify the traffic mapping as required. Quality of Service works only after the QoS status is enabled. After the modification, set the QoS Status to Enabled and click Apply to implement the changes. -
Page 167: Qos->Rate Limiting->Storm Control Configuration
Web Management Access 4.2.50 QoS->Rate Limiting->Storm Control Configuration Rate limiting, or storm control, prevents ports on the ES3000 switch from being overwhelmed by a broadcast, unicast, or multicast storm. A storm results when packets flood the LAN, which degrades network performance. With rate limiting enabled, the switch monitors incoming traffic by counting packets over a period of time.
-
Page 168
4-72 ES3000 User Guide There are three kinds of storm control; DLF, Broadcast, and Multicast. DLF: Destination Look Failure packets. DLF packets are broadcast to all ports except the incoming port. Broadcast: Packets are delivered to all ports except the incoming port as DLF packets. -
Page 169: Chapter 5. Command Line Interface
5.1 ES3000 Ethernet Switch Command Brief 5.1.1 Help Key Command Description abbreviated-command- Provides a list of commands that begin with a particular character string. entry<?> (No space between command and question mark.) abbreviated-command- Completes a partial command name. entry<Tab> <?>…
-
Page 170
ES3000 User Guide… -
Page 171: Command Hierarchy
Command Line Interface 5.1.2 Command Hierarchy A specific value for each command mode displays at the prompt line. Use specific commands to enter or exit each command mode. The administrator can only enter command modes from specific modes and only exit to specific command modes.
-
Page 172
ES3000 User Guide Command Mode User EXEC(exec) Privileged EXEC(privExec) Global Configuration(config) Interface Configuration(config-if) Switch(config-if)# Prompt Enter/Exit Command Switch> Default mode, automatically enter logout or exit to quit CLI. Switch# enable to enter from User EXEC mode logout to quit CLI; disable or exit… -
Page 173
Command Line Interface The prompt displays the switch name, Switch, and the current CLI command mode: • User EXEC-Switch> • Privileged EXEC-Switch # • Global Configuration-Switch (config)# • Interface Configuration-Switch (config-if)#… -
Page 174
ES3000 User Guide The ESW3000 command sets are organized into the tree hierarchy. The commands, that are not in the same level of the command tree are not available until the user has navigated down to that level. In a lower level of the command tree, the user can still enter the global configuration commands that are in the top level of the command tree. -
Page 175: Basic Commands
5.2 Basic Commands help The help command is in each command mode and displays a brief message about using the CLI help system. help The help command has no arguments or keywords. YNTAX ESCRIPTION The help command has no default setting. EFAULT ALUE All mode…
-
Page 176
ES3000 User Guide enable The enable command changes the command mode from User EXEC to privExec mode. enable The enable command has no arguments or keywords. YNTAX ESCRIPTION The enable command has no default setting. EFAULT ALUE User EXEC OMMAND… -
Page 177
interface The interface command moves to the Interface Configuration (config-if) command mode. interface The interface command has no arguments or keywords. YNTAX ESCRIPTION The interface command has no default setting. EFAULT ALUE Global configuration OMMAND ODES Nortel EFERENCE XAMPLE Switch(config)# interface FastEthernet0/1 Switch(config-if)# Switch(config)# interface VLAN 1 Switch(config-if)#… -
Page 178
5-10 ES3000 User Guide Use the end command to exit configuration mode. YNTAX ESCRIPTION EFAULT ALUE OMMAND ODES EFERENCE exit The exit command quits to the previous mode. exit YNTAX ESCRIPTION EFAULT ALUE OMMAND ODES EFERENCE XAMPLE Switch#exit Switch> Switch(config-if)#exit Switch(config)# The end command has no argument. -
Page 179
ping Use the ping command to display ping test information. ping <ip> <ip> IP address YNTAX ESCRIPTION The ping command has no default setting. EFAULT ALUE All command modes OMMAND ODES Nortel EFERENCE Switch Tools Configuration -> Ping Execution XAMPLE Switch# ping 172.16.3.152 Type Ctrl-C to abort. -
Page 180
5-12 ES3000 User Guide copy tftp image Use the copy tftp image command to download image or config files. copy tftp<ip-address> <file name>image YNTAX ESCRIPTION EFAULT ALUE OMMAND ODES EFERENCE XAMPLE Switch# copy tftp 172.16.3.152 image. img image Downloading Image From Remote Server. Type Ctrl-C to abort. -
Page 181
XAMPLE Switch# copy running-config tftp 172.16.3.152 config.txt Please wait a minute. 2581 bytes data transferred! Switch# copy tftp 172.16.3.152 config.txt running-config Please wait a minute. 2581 bytes data transferred! Switch# copy running-config startup-config Use this command to save the config to NVRAM. copy running-config startup-config YNTAX ESCRIPTION… -
Page 182: Web Browser Commands
5-14 ES3000 User Guide 5.3 Web Browser Commands ip http server Use this command to enable or disable access to the Web server embedded in the system. ip http server no ip http server YNTAX ESCRIPTION EFAULT ALUE OMMAND ODES…
-
Page 183
show ip http server Use the show ip http server command to display telnet. show ip http server The show ip http server command has no arguments or keywords. YNTAX ESCRIPTION The show ip http server command has no default setting. EFAULT ALUE Privileged EXEC… -
Page 184: Snmp Commands
5-16 ES3000 User Guide 5.4 SNMP Commands snmp-server agent Use the snmp-server agent command to enable or disable the access to the SNMP agent embedded in the system. snmp-server agent no snmp-server agent YNTAX ESCRIPTION EFAULT ALUE OMMAND ODES EFERENCE…
-
Page 185
snmp-server location To set the system location string. snmp-server location <string> no snmp-server location A string of length with 50 characters maximum YNTAX ESCRIPTION No system location string is set by default EFAULT ALUE Global configuration OMMAND ODES Cisco EFERENCE Basic Switch Configuration Menu->System Administration->Set System Location XAMPLE… -
Page 186
5-18 ES3000 User Guide XAMPLE !Set system Contact Information «MIS_1» Switch(config)# snmp-server contact MIS_1 Switch(config)# !Clean system Contact Information to default Switch(config)# no snmp-server contact Switch(config)# snmp-server community Use the snmp-server community command to set up the community access string for use with SNMP protocol. -
Page 187
!Disable SNMP manager entry index-4 Switch(config)# no snmp-server community 4 Switch(config)# snmp-server host Use the snmp-server host command to set up the recipient of SNMP notification operation. snmp-server host <index> type<traptype><ip> trap <string> no snmp-server host <index> type<traptype><ip> trap <string> <index>… -
Page 188
5-20 ES3000 User Guide snmp-server enable traps Use the snmp-server enable traps command to enable or disable the specified SNMP notification. snmp-server enable traps <notification-type> <notification-option> no snmp-server enable traps <notification-type> <notification-option> YNTAX ESCRIPTION EFAULT ALUE OMMAND ODES EFERENCE XAMPLE <notification-type>… -
Page 189
show snmp Use the show snmp command to display snmp trap-receivers information. show snmp The show snmp command has no arguments or keywords. YNTAX ESCRIPTION The show snmp command has no default setting. EFAULT ALUE Privileged EXEC OMMAND ODES Cisco EFERENCE Basic Switch Configuration ->… -
Page 190: Basic System Management Commands
5-22 ES3000 User Guide 5.5 Basic System Management Commands hostname Use the hostname command to specify the host name for the system. hostname <string> YNTAX ESCRIPTION EFAULT ALUE OMMAND ODES EFERENCE XAMPLE !Set system name «switch_1» Switch(config)# hostname switch_1 Switch(config)#…
-
Page 191
XAMPLE Switch# show sys-info System up for Boot Code Version : 1.0.0.07 / Feb 16 2004 14:35:55 Runtime Code Version : 1.0.7.05 / Apr 01 2004 09:33:00 Hardware Information Version : Version1 DRAM Size : 32MB Fixed Baud Rate : 9600bps Flash Size : 8MB Administration Information… -
Page 192
5-24 ES3000 User Guide console inactivity-timer Use the console inactivity-timer command to specify an inactivity timeout value for the console. console inactivity-timer <min> YNTAX ESCRIPTION EFAULT ALUE OMMAND ODES EFERENCE XAMPLE ! Set console timeout 5min Switch(config)# console inactivity-timer 5… -
Page 193
XAMPLE Switch# show console Console UI Idle Timeout: 5 Min. Console ——— Active Switch# telnet-server enable Use the telnet-server command to enable or disable access to the telnet server. telnet-server enable no telnet-server The telnet-server command has no argument. YNTAX ESCRIPTION The feature is enabled by default. -
Page 194
5-26 ES3000 User Guide telnet-server inactivity-timer Use the telnet-server inactivity-timer command to specify an inactivity timeout value for telnet server. telnet-server inactivity-timer <min> YNTAX ESCRIPTION EFAULT ALUE OMMAND ODES EFERENCE XAMPLE ! Set telnet timeout 5min Switch(config)# telnet-server inactivity-timer 5… -
Page 195: Ip Addressing Commands
XAMPLE Switch# show telnet-server Telnet UI Idle Timeout: 5 Min. Telnet Server ————— enabled Switch# 5.6 IP Addressing Commands ip address Use the ip address command to specify an IP address and subnet mask for the system. ip address <ip> <mask> <ip>…
-
Page 196
5-28 ES3000 User Guide ip address dhcp Use the ip address dhcp command to enable or disable the system to acquire its IP address through DHCP. ip address dhcp YNTAX ESCRIPTION EFAULT ALUE OMMAND ODES EFERENCE XAMPLE !Set IP address use dhcp… -
Page 197
show ip conf Use the show ip conf command to display IP configurations. show ip conf The show ip conf command has no arguments or keywords. YNTAX ESCRIPTION The show ip conf command has no default setting. EFAULT ALUE Privileged EXEC OMMAND ODES None… -
Page 198: Security Commands
5-30 ES3000 User Guide 5.7 Security Commands username Use the username command to specify the user name and password for logging into the system. username name <string> YNTAX ESCRIPTION EFAULT ALUE OMMAND ODES EFERENCE XAMPLE ! Set username «admin» password «delta»…
-
Page 199: Layer-2 Interface Commands
5.8 Layer-2 Interface Commands shutdown Use the shutdown command to enable or disable a port. interface <port> shutdown no shutdown <port> YNTAX ESCRIPTION The shutdown feature is enabled by default. EFAULT ALUE Interface configuration OMMAND ODES Cisco EFERENCE Basic Switch Configuration Menu->Port->Set Status XAMPLE ! Enable port-3 Switch(config)# interface fastethernet0/3…
-
Page 200
5-32 ES3000 User Guide speed-duplex Use the speed-duplex command to configure the speed and duplex mode for a port. interface <port> speed-duplex <option> YNTAX ESCRIPTION EFAULT ALUE OMMAND ODES EFERENCE XAMPLE ! set port-3 speed 100 duplex full Switch(config)# interface fastethernet0/3… -
Page 201
flow-control Use the flow-control command to enable or disable the flow control for a port. interface <port> flow-control no flow-control <port> YNTAX ESCRIPTION The flow control feature is enabled by default. EFAULT ALUE Interface configuration OMMAND ODES Cisco EFERENCE Basic Switch Configuration Menu->Port->Set Flow control XAMPLE ! Enable Flow control port-3 Switch(config)# interface fastethernet0/3… -
Page 202
5-34 ES3000 User Guide XAMPLE Switch# show interface Port Trunk —- —— 1/10 1/11 1/12 Type Link Status ——— —— ——— 10/100TX Down Enabled 10/100TX Down Enabled 10/100TX Down Enabled 10/100TX Down Enabled 10/100TX Down Enabled 10/100TX Down Enabled 10/100TX… -
Page 203
show interface counters Use the show interface counters command to display interface statistics. show interface counters <port> <port> YNTAX ESCRIPTION The feature is disabled by default. EFAULT ALUE Privileged EXEC OMMAND ODES EFERENCE Main Menu -> Statistics Menu XAMPLE Switch# show interface counters fastethernet0/2 Total RX Bytes Total RX Pkts 64-Byte Pkts… -
Page 204
5-36 ES3000 User Guide XAMPLE Switch# show interface counters errors fastethernet0/2 CRC/Align Errors Fragments Switch # port monitor Use the port monitor command to configure a port to monitor traffic from another port. interface <port> port monitor <port> direction <direction>… -
Page 205
XAMPLE ! Set port-2 Monitoring Port , port-4 Monitored Port, direction is both. Switch(config)# interface fastethernet0/2 Switch(config-if)# port monitor fastethernet0/4 direction both Switch(config-if)# !Disable port-2 Monitoring Port , port-4 Monitored Port Switch(config)# interface fastethernet0/2 Switch(config-if)# no port monitor Switch(config-if)# show monitor Use the show monitor command to display port monitoring information. -
Page 206
5-38 ES3000 User Guide storm-control threshold Use the storm-control threshold command to configure the mulitcast storm control for a port. storm-control threshold<threshold> YNTAX ESCRIPTION EFAULT ALUE OMMAND ODES EFERENCE XAMPLE ! Set rate 3000 packets per second Switch(config)# strom-control threshold 3000 Switch(config)# <threshold>… -
Page 207
storm-control broadcast Use the strom-control broadcast command to configure the broadcast storm control for a port. storm-control broadcast no storm-control broadcast The storm-control broadcast command has no arguments or keywords. YNTAX ESCRIPTION The default value is disabled. EFAULT ALUE Global configuration OMMAND ODES Cisco… -
Page 208
5-40 ES3000 User Guide ! Disable multicast storm control Switch(config)# no storm-control mutlicast storm-control unicast Use the storm-control unicast command to configure the unicast(DLF) storm control for a port. storm-control unicast no storm-control unicast YNTAX ESCRIPTION EFAULT ALUE OMMAND ODES… -
Page 209
show storm-control Use the show storm-control command to display storm-control status. show storm-control The show storm-control command has no arguments or keywords. YNTAX ESCRIPTION The show storm-control command has no default setting. EFAULT ALUE Privileged EXEC OMMAND ODES Cisco EFERENCE Basic Switch Configuration Menu ->… -
Page 210: Link Aggregation Commands
5-42 ES3000 User Guide 5.9 Link Aggregation Commands lacp Use the lacp command to add ports to a port LACP group or delete ports from the group. lacp <trunkKEY> <port list> <mode> YNTAX ESCRIPTION EFAULT ALUE OMMAND ODES EFERENCE <trunkKEY>…
-
Page 211
XAMPLE ! Set port-1 port-2 port-3 link aggregation, and LACP key =10 and mode = active Switch(config)# lacp 10 1,2,3 active Switch(config)# ! Set port-10-13 link aggregation,and LACP key =42 and mode = passive Switch(config)# lacp 42 10-13 passive Switch(config)# ! Set port-5-7 link aggregation,and LACP key =42 and mode = manual Switch(config)# lacp 12 5-7 manual Switch(config)#… -
Page 212
5-44 ES3000 User Guide lacp port-priority Use the lacp port-priority command to LACP port priority. lacp port-priority <priority-value> YNTAX ESCRIPTION EFAULT ALUE OMMAND ODES EFERENCE XAMPLE ! set port 3 port-priority 40 Switch(config)# interface fastethernet0/3 Switch(config-if)# lacp port-priority 40 Switch(config-if)# show lacp Use the show lacp command to display link aggregation information. -
Page 213
XAMPLE Switch# show lacp System Priority : 40000 Mode Member post list —- ——— ——— Manual Active 4,5,6 Switch# Switch# show lacp 2 System Priority : 40000 Key 2 Attached port list —- ——— ——— Switch# Command Line Interface ——— ——— ——— ———… -
Page 214: Mac Address Commands
5-46 ES3000 User Guide 5.10 MAC Address Commands mac-address-table static Use the mac-address table static command to insert a static MAC address. mac-address-table static <mac-addr> <port> vlan <vlanID> YNTAX ESCRIPTION EFAULT ALUE OMMAND ODES EFERENCE XAMPLE ! Add static entry mac address 00:00:A0:21.00:11 port port-4 vlan 2 Switch(config)# mac-address-table static 00:00:A0:21.00:11…
-
Page 215
mac-address-table aging-time Use the mac-address-table aging-time command to control aging time for dynamic MAC addresses. mac-address-table aging-time<sec> Integer ranges from 10 — 1000000. YNTAX ESCRIPTION Default value is 300. EFAULT ALUE Global configuration OMMAND ODES Cisco EFERENCE Basic Switch Configuration Menu -> Forwarding Database-> Set Age-Out time XAMPLE ! Set Age-Out time 300 sec… -
Page 216
5-48 ES3000 User Guide show mac-address-table mac Use the show mac-address-table mac command to list MAC addresses by individual MAC address. show mac-address-table mac YNTAX ESCRIPTION EFAULT ALUE OMMAND ODES EFERENCE XAMPLE Switch# show mac-address-table mac MAC Address —————— 00:30:AB:00:09:20… -
Page 217
XAMPLE Switch# show mac-address-table interface fastethernet0/26 MAC Address —————— 00:30:AB:00:09:20 00:30:AB:00:09:21 00:30:AB:00:09:22 00:30:AB:00:09:23 00:30:AB:00:09:24 Switch# show mac-address-table vlan Use the show mac-address-table vlan command to display the MAC address table by VLAN. show mac-address-table vlan <vlanID> <vlanID> YNTAX ESCRIPTION The show mac-address-table vlan command has no default setting. EFAULT ALUE Privileged EXEC… -
Page 218
5-50 ES3000 User Guide show mac-address-table static Use the show mac-address-table static command to display the MAC address table by static. show mac-address-table static YNTAX ESCRIPTION EFAULT ALUE OMMAND ODES EFERENCE XAMPLE Switch# show mac-address-table static MAC Address ——————— 00:00:A0:21:00:11 Switch# The c command has no arguments or keywords. -
Page 219: Multiple Spanning Tree Commands
5.11 Multiple Spanning Tree Commands spanning-tree mst Use the spanning-tree mst command to enable or disable multiple spanning tree. spanning-tree mst enable spanning-tree mst disable The spanning-tree mst command has no arguments or keywords. YNTAX ESCRIPTION EFAULT ALUE Global configuration OMMAND ODES EFERENCE…
-
Page 220
5-52 ES3000 User Guide XAMPLE !Cnfigure the MSTP name “Symbol” Switch(config)# spanning-tree mst name Symbol Switch(config)# spanning-tree mst revision Use the spanning-tree mst revision command to configure the mst revision number. spanning-tree mst revison <revision> YNTAX ESCRIPTION EFAULT ALUE OMMAND… -
Page 221
XAMPLE !Set STP Compatible Switch(config)# spanning-tree mst version stpCompatible Switch(config)# spanning-tree mst max-hops Use the spanning-tree mst max-hops command to configure the maximum hops count. spanning-tree mst max-hops<hop> <hop> YNTAX ESCRIPTION EFAULT ALUE Global configuration OMMAND ODES EFERENCE XAMPLE !Set Max Hop 40 Switch(config)# spanning-tree mst max-hops 40 Switch(config)# spanning-tree mst priority… -
Page 222
5-54 ES3000 User Guide XAMPLE !Set CIST priority 40960 Switch(config)# spanning-tree mst priority 40960 Switch(config)# spanning-tree mst max-age Use the spanning-tree mst max-age command to configure the value of CIST bridge Max Age. spanning-tree mst max-age <seconds> YNTAX ESCRIPTION EFAULT… -
Page 223
Global configuration OMMAND ODES EFERENCE XAMPLE !set CIST Hello Time 5 seconds Switch(config)# spanning-tree mst hello-time 5 Switch(config)# spanning-tree mst forward-time Use the spanning-tree mst forward time command to configure the CIST bridge Forward Time value. spanning-tree mst forward-time <seconds> <seconds>… -
Page 224
5-56 ES3000 User Guide spanning-tree mst instance priority Use the spanning-tree mst instance priority command to configure the bridge priority instance value. spanning-tree mst <instance> priority <priority> YNTAX ESCRIPTION EFAULT ALUE OMMAND ODES EFERENCE XAMPLE !Set bridge priority 4096 for instance 2… -
Page 225
spanning-tree mst instance vlan Use the spanning-tree mst instance vlan command to map vlans to instances. spanning-tree mst instance<instance-id> vlan<vlan-range> <instance> YNTAX ESCRIPTION <vlan-range> EFAULT ALUE Global configuration OMMAND ODES EFERENCE XAMPLE !Set Vlan 2-5 to instance 2 Switch(config)# spanning-tree mst instance 2 vlan 2-5 Switch(config)# spanning-tree mst shutdown Use the spanning tree mst shutdown command for Enabling/Disabling MSTP interface function. -
Page 226
5-58 ES3000 User Guide ! Disable MSTP on port 4 Switch(config)# interface fastethernet0/4 Switch(config-if)# spanning-tree mst shutdown Switch(config)# spanning-tree mst port-priority Use the spanning-tree mst port priority command to configure CIST Port Priority. spanning-tree mst port-priority <priority> YNTAX ESCRIPTION EFAULT… -
Page 227
XAMPLE ! Set CIST port path cost 4000 on port 4 Switch(config)# interface fastethernet0/4 Switch(config-if)# spanning-tree mst cost 4000 Switch(config-if)# spanning-tree mst init-migration Init Protocol Migration on the Port in MSTP. spanning-tree mst init-migration The spanning-tree mst init-migration command has no arguments or YNTAX ESCRIPTION keywords. -
Page 228
5-60 ES3000 User Guide spanning-tree mst edgeport Use the spanning-tree mst edgeport command to configure the Edge Port Status in MSTP. spanning-tree mst edgeport YNTAX ESCRIPTION EFAULT ALUE OMMAND ODES EFERENCE XAMPLE ! Set Edge port TRUE on port 4… -
Page 229
EFAULT ALUE Interface configuration OMMAND ODES EFERENCE XAMPLE ! Force p2p false on port 4 Switch(config)# interface fastethernet0/4 Switch(config-if)# spanning-tree mst point-to-point forcefalse Switch(config-if)# spanning-tree mst instance shutdown Use the spanning-tree mst instance shutdown command to Enable/Disable MSTP function on the interface. -
Page 230
5-62 ES3000 User Guide spanning-tree mst instance port-priority Use the spanning-tree mst instance port-priority command to configure instance Port Priority. spanning-tree mst instance<instance-id> port-priority <priority> YNTAX ESCRIPTION EFAULT ALUE OMMAND ODES EFERENCE XAMPLE ! Set CIST port priority 64 on port 4 for instance 8… -
Page 231
show spanning-tree mst configuration Use the show spanning-tree mst configuration command to display the MSTP configuration. show spanning-tree mst configuration The show spanning-tree mst configuration command has no arguments or YNTAX ESCRIPTION keywords. The show spanning-tree mst configuration command has no default EFAULT ALUE setting. -
Page 232
5-64 ES3000 User Guide show spanning-tree mst cist configuration Use this command to display the MSTP CIST configuration. show spanning-tree mst cist configuration YNTAX ESCRIPTION EFAULT ALUE OMMAND ODES EFERENCE XAMPLE Switch# show spanning-tree mst cist configuration Cist Root Port:… -
Page 233
show spanning-tree mst cist interface Use this command to display MSTP CIST configuration information for interface. show spanning-tree mst cist interface <port list> <port list> YNTAX ESCRIPTION The show spanning-tree mst cist interface command has no default EFAULT ALUE setting. Privileged EXEC OMMAND ODES… -
Page 234
5-66 ES3000 User Guide show spanning-tree mst instance configuration Use this command to display MSTP CIST configuration. show spanning-tree mst <instance> configuration YNTAX ESCRIPTION EFAULT ALUE OMMAND ODES EFERENCE XAMPLE Switch# show spanning-tree mst 5 configuration Msti Root Port: 0… -
Page 235
show spanning-tree mst instance interface Use this command to display MSTP CIST configuration information for interface. show spanning-tree mst <instance> interface <port list> <instance> YNTAX ESCRIPTION <port list> The show spanning-tree mst instance interface command has no default EFAULT ALUE setting. -
Page 236: Igmp Snooping Commands
5-68 ES3000 User Guide 5.12 IGMP Snooping Commands ip igmp snooping Use the ip igmp snooping command to enable or disable IGMP snooping as implemented in the system. ip igmp snooping no ip igmp snooping YNTAX ESCRIPTION EFAULT ALUE OMMAND…
-
Page 237
Advanced Switch Configuration Menu->IGMP Snooping->Set Host Port Aged Tim, Set Router Port Aged Time XAMPLE !Enable igmp snooping router port age out time 300 sec Switch(config)# ip igmp snooping aging-time router 300 Switch(config)# !Enable igmp snooping host port age out time 300 sec Switch(config)# ip igmp snooping aging-time host 300 Switch(config)# ip igmp snooping report-forward-interval… -
Page 238
5-70 ES3000 User Guide ip igmp snooping vlan-filter vlan Use this command to filter IGMP snooping on a specific interface in the system. ip igmp snooping vlan-filter vlan <vlanID> YNTAX ESCRIPTION EFAULT ALUE OMMAND ODES EFERENCE XAMPLE !Filt igmp snooping on vlan1… -
Page 239
XAMPLE Switch# show ip igmp snooping conf IGMP Snooping Status Host Port Age-Out Time Router Port Age-Out Time : 300 sec Report Forward Interval Switch# show mac-address-table multicast Use this command to display Layer2 multicast entries information for VLAN. show mac-address-table multicst This command has no arguments or keywords. -
Page 240
5-72 ES3000 User Guide show ip igmp snooping mrouter Use this command to display multicast router port information for VLAN. show ip igmp snooping mrouter YNTAX ESCRIPTION EFAULT ALUE OMMAND ODES EFERENCE XAMPLE Switch# show ip igmp snooping mrouter VLAN ID… -
Page 241
show ip igmp snooping vlan-filter-table Use this command to display IGMP Snooping VLAN filter information. show ip igmp snooping vlan-filter-table This command has no arguments or keywords. YNTAX ESCRIPTION This command has no default setting. EFAULT ALUE Privileged EXEC OMMAND ODES None EFERENCE… -
Page 242: Vlan Commands
5-74 ES3000 User Guide 5.13 VLAN Commands vlan init Use the vlan init command to remove all vlans and reset ports to default VLAN vlan init YNTAX ESCRIPTION EFAULT ALUE OMMAND ODES EFERENCE XAMPLE !remove all vlan. Switch(config)# vlan init…
-
Page 243
XAMPLE ! create a 802.1Q vlan untag port 1-5, 10, 15-19 Switch(config)# interface vlan3 Switch(config-if)# name VLAN-3 Switch(config-if)# member 1-5,10,15-19 Switch(config-if)# ! modify participation (remove 10, 15-19) Switch(config)# interface vlan3 Switch(config-if)# member 1-5 Switch(config-if)# forbidden Use the forbidden command to create a new VLAN or modify an existing one in the system. interface <vlanID>… -
Page 244
5-76 ES3000 User Guide management Use the management command to remove a port member from a VLAN. interface <vlanID> management YNTAX ESCRIPTION OMMAND ODES EFERENCE XAMPLE ! Set Vlan3 management Switch(config)# interface vlan3 Switch(config-if)# management Switch(config-if)# no interface Use the no interface command to delete a VLAN in the system. -
Page 245
PVID Use the PVID command to configure a PVID on a port. PVID <vlanID> <vlanID> YNTAX ESCRIPTION Interface configuration OMMAND ODES None EFERENCE XAMPLE ! Set port 2 PVID 3 Switch(config)# interface fastethernet0/2 Switch(config-if)# PVID 3 Switch(config-if)# frame-type Use the frame-type command to configure the frame type on a port. frame-type <type>… -
Page 246
5-78 ES3000 User Guide show vlan Use the show-vlan command to display VLAN information. show vlan <vlanID> YNTAX ESCRIPTION EFAULT ALUE OMMAND ODES EFERENCE XAMPLE Switch# show vlan all VLAN Name —- —————————— ——— Default VLAN VLAN-2 VLAN-3 Switch# gvrp Use the gvrp command to enable or disable the GVRP protocol implemented in the system. -
Page 247
XAMPLE ! Enable GVRP Switch(config)# gvrp Switch(config)# ! Disable GVRP Switch(config)# no gvrp Switch(config)# show vlan gvrp Use the show vlan gvrp command to display VLAN information. show vlan gvrp <vlanID> YNTAX ESCRIPTION The show vlan gvrp command has no default setting. EFAULT ALUE Privileged EXEC… -
Page 248
5-80 ES3000 User Guide show vlan port Use the show vlan port command to display VLAN information. show vlan port YNTAX ESCRIPTION EFAULT ALUE OMMAND ODES EFERENCE XAMPLE Switch# show vlan port Port PVID Acceptable Frame Type —- —- ———————… -
Page 249: Quality Of Service Commands
5.14 Quality of Service Commands mls qos Use the mls qos command to enable or disable the QoS implemented in the system. mls qos no mls qos The mls qos command has no argument. YNTAX ESCRIPTION The feature is disabled by default. EFAULT ALUE Global configuration…
-
Page 250
5-82 ES3000 User Guide XAMPLE ! traffic class(Queue) 1 mapping to Priority 5 Switch(config)# priority-queue cos-map 1 5 Switch(config)# show mls qos Use the show mls qos command to display QoS information. show mls qos YNTAX ESCRIPTION EFAULT ALUE OMMAND… -
Page 251
XAMPLE Switch# show priority-queue cos-map Pritority Traffic Class ——— ————- Switch# 5-83 Command Line Interface… -
Page 252: Diffserv Commands
5-84 ES3000 User Guide 5.15 Diffserv Commands diffserv classifier Use the diffserv classifier command to configure the classifier for diffserv. diffserv classifier <index> [src-mac <mac>] [dst-mac <mac>] [vlan-id <vid>] [dscp <ds>] [protocol <pro>] [src-ip <ip>] [dst-ip <ip>] [src-14-port <port>] [dst-14-port <port>] no diffserv classifier <index>…
-
Page 253
XAMPLE ! Create a classifier Index:23, source MAC address: 00:00:01:02:03:04 Vlan ID is 40 Switch(config)# diffserv classifier 23 src-mac 00:00:01:02:03:04 vlan-id Switch(config)# ! delete a classifier Index 23 Switch(config)# no diffserv classifier 23 Switch(config)# diffserv inprofile Use the diffserv inprofile command to configure in-profile action for diffserv. diffserv inprofile <index>… -
Page 254
5-86 ES3000 User Guide diffserv nomatch Use the diffserv nomatch command to configure nomatch action for diffserv. diffserv nomatch <index> [drop | policed-dscp <ds> | precedence <precedence> | cos <cos>] YNTAX ESCRIPTION EFAULT ALUE OMMAND ODES EFERENCE XAMPLE ! Create a no-match Index:2 , replace COS value to 3… -
Page 255
diffserv outprofile Use the diffserv outprofile command to configure the out-profile for diffserv. diffserv outprofile <index> committed-rate<unit> burst-size<volume> [drop | dscp <ds>] <index> YNTAX ESCRIPTION <meter-id> <ds> EFAULT ALUE Global configuration command OMMAND ODES EFERENCE XAMPLE ! Create a out-profile Index 4, set committed-rate to 23, burst-size 4 and out-profile action drop. -
Page 256
5-88 ES3000 User Guide XAMPLE ! Create a portlist Index 5, set port 3-7 . Switch(config)# diffserv portlist 5 3-7 Switch(config)# ! delete a port-list 5 Switch(config)# no diffserv portlist 5 Switch(config)# diffserv policy Use the diffserv policy command to configure the policy for diffserv. -
Page 257
! delete a policy Index 5 Switch(config)# no diffserv policy 5 Switch(config)# show diffserv classifier Use the show diffserv classifier command to display diffserv classifier information. show diffserv classifier The show diffserv classifier command has no arguments or keywords. YNTAX ESCRIPTION EFAULT ALUE… -
Page 258
5-90 ES3000 User Guide show diffserv inprofile Use the diffserv inprofile command to display the diffserv in-profile information. show diffserv inprofile YNTAX ESCRIPTION EFAULT ALUE OMMAND ODES EFERENCE XAMPLE Switch# show diffserv inprofile In-Profile Action: Index Action ———————————— policed-dscp Switch# show diffserv outprofile Use the show diffserv outprofile command to display diffserv out-profile information. -
Page 259
show diffserv portlist Use the show diffserv portlist command to display diffserv portlist information. show diffserv portlist The show diffserv portlist command has no arguments or keywords. YNTAX ESCRIPTION EFAULT ALUE Privileged EXEC OMMAND ODES EFERENCE XAMPLE Switch# show diffserv portlist Portlist: Index Portlist —— —————————————————————… -
Page 260
5-92 ES3000 User Guide show diffserv policy Use the show diffserv policy command to display diffserv policy information. show diffserv policy [<index>] YNTAX ESCRIPTION EFAULT ALUE OMMAND ODES EFERENCE XAMPLE Switch# show diffserv policy all Policy : Index Classifier Precedence In-Profile No-Match Out-Profile PortList Status -… -
Page 261
show diffserv policy prcedence port Use this command to show diffserv policy precedence by port information. show diffserv policy-precedence port<port num> [sort index/precedence] The command has no arguments or keywords. YNTAX ESCRIPTION EFAULT ALUE Privileged EXEC OMMAND ODES EFERENCE XAMPLE Switch# show diffserv policy-precedence port 5 sort precedence Selected Port Number: 5 Precedence… -
Page 262: Commands
5-94 ES3000 User Guide 5.16 802.1x Commands dot1x radius Use the dot1x nas-id command to set 802.1x admin status. dot1x radius <NASID> YNTAX ESCRIPTION EFAULT ALUE OMMAND ODES EFERENCE XAMPLE ! NAS ID «dot1x_auth» Switch(config)# dot1x radius dot1x_auth Switch(config)# dot1x port-control Use the dot1x port-control command to set 802.1x port control status.
-
Page 263
Cisco EFERENCE XAMPLE ! set port-control auto on port 5 Switch(config)# interface fastethernet0/5 Switch(config-if)# dot1x port-control auto Switch(config)# dot1x re-authentication Use the dot1x re-authentication command to set 802.1x port re-authentication. dot1x re-authentication no dot1x re-authentication The dot1x re-authentication command has no arguments or keywords. YNTAX ESCRIPTION EFAULT… -
Page 264
5-96 ES3000 User Guide dot1x timeout re-authperiod Use this command to set the number of seconds between re-authentication attempts. The command affects the behavior of the switch only if periodic re-authentication is enabled. dot1x timeout re-authperiod <minute> YNTAX ESCRIPTION EFAULT… -
Page 265
dot1x timeout quiet-period Use this command to set the number of seconds the switch remains in quiet state following a failed authentication exchange with the client. dot1x timeout quiet-period <second> <second> YNTAX ESCRIPTION EFAULT ALUE Interface configuration OMMAND ODES Cisco EFERENCE XAMPLE ! Set quiet period time 60 sec on port 7… -
Page 266
5-98 ES3000 User Guide dot1x timeout tx-period Use this command to set the number of seconds the switch waits for a response to an EAP-request/identity frame from the client before retransmitting the request. dot1x timeout tx-period <second> YNTAX ESCRIPTION EFAULT… -
Page 267
dot1x re-authenticate Use this command to re-authenticate on an 802.1X-authorized port. dot1x re-authenticate The dot1x re-authenticate command has no arguments or keywords. YNTAX ESCRIPTION EFAULT ALUE Interface configuration OMMAND ODES Cisco EFERENCE XAMPLE ! re-authenticate on port 3 now Switch(config)# interface fastethernet0/3 Switch(config-if)# dot1x re-authenticate Switch(config-if)# dot1x init… -
Page 268
5-100 ES3000 User Guide dot1x control-direction Use the dot1x control-direction command to impose dot1x authentication on either incoming or outgoing traffic. dot1x control-direction <direction> : <direction> YNTAX ESCRIPTION OMMAND ODES EFERENCE XAMPLE ! Set Control direction Both on port 5… -
Page 269
show dot1x show dot1x <port-list> <port-list> YNTAX ESCRIPTION EFAULT ALUE Privileged EXEC OMMAND ODES Cisco EFERENCE XAMPLE Switch# show dot1x 1-2 NAS ID : dot1x_auth Port No : 1 Port Status : Authorized Port Control : Force Authorized Quiet Period : 60 Supplicant Timeout : 30 Maxumum Request… -
Page 270: Radius Commands
5-102 ES3000 User Guide 5.17 Radius Commands radius-server host Use the radius-server host command to specify a RADIUS server host. radius-server host < ip-address> [timeout <seconds>] [retransmit <retries>] [key <string>] no radius-server YNTAX ESCRIPTION OMMAND ODES EFERENCE XAMPLE !Set radius server 192.168.0.1 timeout 5 second retransmit 4 times and Shared Secret «karl_radius»…
-
Page 271
show radius-server Use the show radius-server command to display Radius configure information. show radius-server The show radius-server command has no arguments or keywords. YNTAX ESCRIPTION The show radius-server command has no default setting. EFAULT ALUE Privileged EXEC OMMAND ODES EFERENCE XAMPLE Switch# show radius Server IP Address :… -
Page 272: Sntp Commands
5-104 ES3000 User Guide 5.18 SNTP Commands sntp server Use the sntp server command to configure the sntp server snto server <ip> YNTAX ESCRIPTION EFAULT ALUE OMMAND ODES XAMPLE ! Configure SNTP server ip 172.16.5.198. Switch(config)# sntp server 172.16.5.198 Switch(config)# sntp poll-interval Use this command to configure the polling interval for sntp operation.
-
Page 273
sntp daylight-saving Use this command to enable or disable daylight saving, if time zone is applicable. sntp daylight-saving no sntp daylight-saving This command has no argument. YNTAX ESCRIPTION This command is disabled by default EFAULT ALUE Global configuration OMMAND ODES None EFERENCE Basic Switch Configuration Menu->SNTP Configuration->… -
Page 274
5-106 ES3000 User Guide XAMPLE !Configure timezone to Taipei. Switch(config)# sntp timezone 50 Switch(config)# show sntp Use the show sntp configuration information for the interface show sntp YNTAX ESCRIPTION EFAULT ALUE OMMAND ODES EFERENCE XAMPLE Switch# show sntp Date ( YYYY/MM/DD ) -
Page 275: Syslog Commands
5.19 Syslog Commands show log Use the show log command to display log for the switch show log YNTAX ESCRIPTION The show log command has no default setting EFAULT ALUE Priviliaged EXEC OMMAND ODES EFERENCE XAMPLE Switch# show log Entry Time(YYYY/MM/DD HH:MM:SS) Event —— ————————- ————————————- 0000/00/00 00:00:18…
-
Page 276
5-108 ES3000 User Guide log clear Use the log clear command to delete the syslog log clear YNTAX ESCRIPTION EFAULT ALUE OMMAND ODES EFERENCE XAMPLE Switch(config)# log clear Switch(config)# Global configuration… -
Page 277: Power Over Ethernet Commands
5.20 Power Over Ethernet Commands peth trap Use the peth trap command to configure a PoE trap. peth trap no peth trap The peth trap command has no arguments or keywords YNTAX ESCRIPTION EFAULT ALUE Global configuration OMMAND ODES EFERENCE XAMPLE !Set PETH trap on Switch(config)# peth trap…
-
Page 278
5-110 ES3000 User Guide peth disconnection-method Use the peth disconnection-method command to configure the dosconnection method. peth disconnection-method <method> YNTAX ESCRIPTION EFAULT ALUE OMMAND ODES EFERENCE XAMPLE !Set disconnection-method low-priority Switch(config)# peth disconnection-method low-priority Switch(config)# peth capacitor-detection Use the peth capacitor-detection command to set the power detection method. -
Page 279
XAMPLE !Enable capacitor detection Switch(config)# peth capacitor-detection Switch(config)# peth limit Use the peth limit command to set the power limit on a port. peth limit <mwatt> <mwatt> YNTAX ESCRIPTION 15 watt EFAULT ALUE Interface configuration OMMAND ODES EFERENCE XAMPLE !Set power limit 10 watt on port 2 Switch(config)# interface fastethernet0/2 Switch(config-if)# peth limit 15 Switch(config-if)#… -
Page 280
5-112 ES3000 User Guide XAMPLE !Set priority low oon port 3 Switch(config)# interface fastethernet0/3 Switch(config-if)# peth priority low Switch(config-if)# peth shutdown Use the peth shutdown command to shut down a PoE port. peth shutdown YNTAX ESCRIPTION EFAULT ALUE OMMAND ODES… -
Page 281
show peth-conf Use the show peth-conf command to display switch Ethernet settings.. show peth-conf This command has no arguments or keywords. YNTAX ESCRIPTION EFAULT ALUE Prilileged EXEC OMMAND ODES EFERENCE XAMPLE Switch# show peth-conf Power budget Power Consumption Power usage threshold Power Management Method : Low priority port will be shut down Power Detection Method Switch#… -
Page 282
5-114 ES3000 User Guide XAMPLE Switch# show peth-port No. Admin. Status — —— ————— —— —— ——— ——— ——— —- Not Powered Down Not Powered Not Powered Not Powered Not Powered Not Powered Not Powered Not Powered Not Powered Not Powered… -
Page 283: Miscellaneous Commands
5.21 Miscellaneous Commands system mtu Use the system mtu command to set the mtu length. system mtu 1578 no system mtu The system mtu command has one argument for the current version that YNTAX ESCRIPTION is required to be 1578. EFAULT ALUE Global configuration…
-
Page 284
5-116 ES3000 User Guide… -
Page 285: Sample Configuration File
5.22 Sample Configuration File ! Configuration file hostname switch-24+2 snmp-server location taipei snmp-server contact taipei username name admin password software spanning-tree priority 30000 spanning-tree max-age 7 spanning-tree hello-time 1 spanning-tree forward-time 10 spanning-tree interface FastEthernet0/1 shutdown speed-duplex 10-full no flow-control port security max-mac-count 100 port security action shutdown spanning-tree cost 23…
-
Page 286
5-118 ES3000 User Guide interface FastEthernet0/2 shutdown no flow-control interface FastEthernet0/3 no flow-control interface FastEthernet0/4 speed-duplex 100-full no flow-control interface FastEthernet0/5 no flow-control interface FastEthernet0/6 no flow-control interface FastEthernet0/7 no flow-control spanning-tree port-priority 20 interface FastEthernet0/8 no flow-control spanning-tree cost 10… -
Page 287
interface FastEthernet0/9 no flow-control interface FastEthernet0/10 spanning-tree cost 2 spanning-tree port-priority 3 interface FastEthernet0/11 spanning-tree cost 2 spanning-tree port-priority 3 interface FastEthernet0/12 spanning-tree cost 2 spanning-tree port-priority 3 interface FastEthernet0/13 spanning-tree cost 2 spanning-tree port-priority 3 interface FastEthernet0/14 no flow-control interface FastEthernet0/15 no flow-control 5-119… -
Page 288
5-120 ES3000 User Guide interface FastEthernet0/16 no flow-control interface FastEthernet0/17 no flow-control interface FastEthernet0/18 no flow-control interface FastEthernet0/19 no flow-control port security max-mac-count 1 port security action noaction interface FastEthernet0/20 no flow-control port security Secure port security action trap-shutdown interface FastEthernet0/21… -
Page 289
port monitor FastEthernet0/23 interface FastEthernet0/23 no flow-control interface FastEthernet0/24 no flow-control interface GigabitEthernet0/25 no flow-control interface GigabitEthernet0/26 giga-port-type GBIC no flow-control vlan-type 802.1q interface vlan1 name Default VLAN untagged 0/1-26 interface vlan2 name inter VLAN untagged 0/1,0/5-9 5-121 Command Line Interface… -
Page 290
5-122 ES3000 User Guide tagged 0/2 forbidden 0/3-4 interface vlan3 name ext VLAN untagged 0/14 tagged 0/15 forbidden 0/10-13 ip address 172.16.3.42 255.255.240.0 ip igmp snooping ip igmp snooping aging-time 300 ip default-gateway 172.16.5.111 no ip http server mac-address-table aging-time 400… -
Page 291
5-123 Command Line Interface mls qos priority-queue cos-map 0 1 priority-queue cos-map 0 2 priority-queue cos-map 1 6 priority-queue cos-map 1 7 port storm-control broadcast threshold medium console inactivity-timer 0 no telnet-server telnet-server inactivity-timer 10… -
Page 292
5-124 ES3000 User Guide… -
Page 293: Appendix A. Specifications & Pin Assignments
Specifications & Pin Assignments A.1 Specifications The ES3000 Ethernet Switch has the following specifications: Width Height Depth Weight Max Power Consumption Operating Temperature 482.6 mm with mounting brackets 440 mm without moutning brackets 44 mm (1RU) 256 mm PoE version 8.95 lbs. (with rack brackets) PoE version 8.95 lbs.
-
Page 294: Plug And Rj-45 Connector
ES3000 User Guide Operating Humidity MTBF A.2 RJ-45 Plug and RJ-45 Connector In a Fast Ethernet network, it is important all 100BASE-T certified Category 5 cabling use RJ-45 plugs. The RJ-45 plug accepts 4-pair UTP or shielded twisted-pair (STP) 100-ohm cable and connects into the RJ-45 connector.
-
Page 295: Appendix B. Cabling Guidelines
Cabling Guidelines B.1 Fast Ethernet Cable Guidelines Fast Ethernet uses UTP cable, as specified in the IEEE 802.3u standard for 100BASE-TX.The specification requires Category 5 UTP cable consisting of either two-pair or four-pair twisted insulated copper conductors bound in a single plastic sheath. Category 5 cable is certified up to 100 MHz bandwidth.
-
Page 296: Termination Method
ES3000 User Guide B.1.2 Termination Method To minimize cross-talk noise, maintain the twist ratio of the cable up to the point of termination; verify untwist at any RJ-45 plug or patch panel does not exceed 0.5 inch (1.5 cm). B.2 Category 5 Cable…
-
Page 297: Patch Panels And Cables
technology automatically senses which connection, MDI or MDI-X, is needed and makes the right connection. B.4 Patch Panels and Cables If using patch panels, ensure they meet the 100BASE-TX requirements. Symbol recommends Category 5 UTP cable for patch cables and work area cables to ensure the UTP patch cable rating meets or exceeds the distribution cable rating.
-
Page 298: Length
ES3000 User Guide B.5.3 Length The maximum distance limitation between two pieces of equipment is 100 m, as per the original Ethernet specification. The end-to-end link is called the «channel.» TSB-67 defines the «Basic Link» which is the portion of the link that is part of the building infrastructure.
-
Page 299: Patch Cables
B.5.6 Patch Cables When installing equipment, replace old patch panel cables that do not meet Category 5e specifications. As pointed out in the NEXT section, this near end piece of cable is critical for successful operation. B.5.7 Optimum Performance For optimum performance of the 1000BASE-T product, it is important to fully qualify the cable installation and ensure it meets or exceeds ANSI/EIA/TIA-568-A:1995 or ISO/IEC 11801:1995 Category 5 specifications.
-
Page 300
ES3000 User Guide… -
Page 301: Appendix C. Customer Support
Symbol Technologies provides its customers with prompt and accurate customer support. Use the Symbol Support Center as the primary contact for any technical problem, question or support issue involving Symbol products. If the Symbol Customer Support specialists cannot solve a problem, access to all technical disciplines within Symbol becomes available for further assistance and support.
-
Page 302
ES3000 User Guide North American Contacts Inside North America, contact Symbol by: Symbol Technologies, Inc. One Symbol Plaza Holtsville, New York 11742-1300 Telephone: 1-631-738-2400/1-800-SCAN 234 Fax: 1-631-738-5990 Symbol Support Center (for warranty and service information): telephone: 1-800-653-5350 fax: (631) 563-5410 Email: support@symbol.com… -
Page 303
Web Support Sites MySymbolCare http://www.symbol.com/services/msc Symbol Services Homepage http://symbol.com/services Symbol Software Updates http://symbol.com/services/downloads Symbol Developer Program http://software.symbol.com/devzone Additional Information Obtain additional information by contacting Symbol at: 1-800-722-6234, inside North America +1-631-738-5200, in/outside North America http://www.symbol.com/… -
Page 304
ES3000 User Guide… -
Page 305
10BASE-T The IEEE specification for 10 Mbps Ethernet over Category 3, 4, or 5 twisted-pair cable. 100BASE-FX The IEEE specification for 100 Mbps Fast Ethernet over fiber-optic cable. 100BASE-TX The IEEE specification for 100 Mbps Fast Ethernet over Category 5 twisted-pair cable. 1000BASE-SX The IEEE specification for 1000 Mbps Gigabit Ethernet over fiber-optic cable. -
Page 306
GL-2 ES3000 User Guide Backbone The part of a network used as a primary path for transporting traffic between network segments. Bandwidth The information capacity, measured in bits per second, that a channel could transmit. Bandwidth examples include 10 Mbps for Ethernet, 100 Mbps for Fast Ethernet, and 1000 Mbps (I Gbps) for Gigabit Ethernet. -
Page 307
Full-duplex A system that allows packets to be transmitted and received at the same time and, in effect, doubles the potential throughput of a link. Half-duplex A system that allows packets to transmitted and received, but not at the same time. Contrast with full-duplex. -
Page 308
GL-4 ES3000 User Guide Multicast A single packet sent to a specific group of end stations on a network. Port monitoring The ability to monitor the traffic passing through a port on a device to analyze network characteristics and perform troubleshooting. -
Page 309
GL-5 Traffic prioritization Giving time-critical data traffic a higher quality of service over other, non-critical data traffic. Unicast A packet sent to a single end station on a network. VLAN Virtual LAN. A logical association that allows users to communicate as if they were physically connected to a single LAN, independent of the actual physical configuration of the network. -
Page 310
GL-6 ES3000 User Guide… -
Page 311
Numerics 1000BASE-T Gigabit Ethernet Category 5 cables ……B-3 NEXT ……..B-4 return loss . -
Page 312
IN-2 ES3000 User Guide guidelines……. .B-1 length ……..B-4 patch panels. -
Page 313
dot1x re-authenticate command ….5-99 dot1x re-authentication command….5-95 dot1x timeout quiet-period command . -
Page 314
IN-4 ES3000 User Guide adding groups ……4-34 cabling guidelines ……3-41 configuration . -
Page 315
polling interval, setting ……3-26 port monitor command……5-36 ports configuration 802.1x settings. -
Page 316
IN-6 ES3000 User Guide radius-server host command ….5-102 Rapid Spanning Tree Protocol, see RSTP rate limits ……3-69, 4-71 reboot protocol . -
Page 317
sntp timezone……. 5-105 software browser versions……4-1 rebooting. -
Page 318
IN-8 ES3000 User Guide Web interface ……2-1 user interface about ……..3-5 logging out . -
Page 320
Symbol Technologies, Inc. One Symbol Plaza Holtsville, New York 11742-1300 http://www.symbol.com 72E—68446-01 Revision A May 2004…
- Главная >>
- Полезно знать >>

Рекомендуем ознакомиться с системой управления ECOntrol6. Подробнее
Контроллер ES 3000, устанавливаемый на компрессорах Ceccato, это современная управляющая система, специально
разработанная для компрессоров средней и высокой производительности. Он позволяет осуществлять:
- √ Управление всеми операциями и параметрами, необходимыми при использовании компрессора: создаваемое избыточное
давление, управление осушителем, остановка и запуск машины - √ Регулировку и проверку компрессора
- √ Фиксирование и сохранение информации о произошедших нештатных ситуациях в работе
- √ Остановку компрессора в случае обнаружения сбоев в работе
- √ Визуальное предоставление информации о наступлении сроков обслуживания машины
В устройстве применена клавиатура сенсорного типа, не боящаяся загрязнений. Контроллер имеет цифровые и аналоговые
порты для подключения различных внешних устройств. Программное обеспечение контроллера позволяет осуществлять
многоуровневый доступ к перепрограммированию параметров для специалистов разной квалификации.
Имеется также защита от ввода заведомо нереальных или опасных параметров работы.
Функция энергосбережения с “интеллектуальным управлением”
Управляющая программа ES 3000 позволяет значительно снизить потребление энергии в режиме разгрузки путём
использования функции «интеллектуального управления», автоматически рассчитывая для каждого цикла ожидаемое
время работы в режиме разгрузки. Количество пусков-остановок оптимизируется исходя из текущего потребления
воздуха и максимально-допустимого кол-ва остановок в течении часа.
Сразу по достижению максимального давления компрессор переходит в режим разгрузки, даже если потребление
воздуха в текущий момент отсутствует. Затем, исходя из вышеуказанных параметров, компрессор либо переходит
в режим останова, либо продолжит работу в режиме разгрузки до следующего цикла.
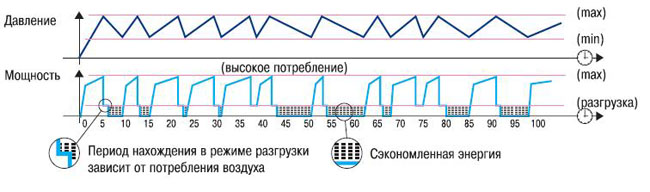
В нашем каталоге можно найти компрессоры винтовые Ceccato с поддержкой данной системы управления.
Производитель: ORIGINAL PART (CECCATO) изготавливается на территории Европейского союза
Код производителя: 2202360275
Применение: Блок управления (контроллер) ES3000 для винтового компрессора CECCATO серии CSA G2 (5,5-20HP), CSB G1 (15-40HP), CSB G2 (15-40HP), CSD G1 (75-125HP).
Для бесперебойной работы винтового компрессора CECCATO, следует проводить техническое обслуживание (ТО) по замене расходных материалов каждые 3000 моточасов или один раз в год, а именно:
- замена масла;
- замена воздушного фильтра;
- замена масляного фильтра;
- замена фильтра-маслоотделителя (сепаратора);
- замена с использованием специального сервисного набора (KIT);
- проведение технического обслуживания всасывающего клапана (используется специальный ремкомплект)
Блок управления Ceccato ES 3000 (ES3000 EL.CARD V.12-24AC) 2202360275 — Характеристики
| Производитель | CECCATO |
| Страна происхождения | Бельгия |
| Тип запасной части | Контроллер (блок управления) |
| Тип компрессора | Винтовой |
| Серия винтового компрессора CECCATO | CSA, CSB, CSD |
| Код производителя / артикул | 2202360275 |
| Габаритные размеры | 145 × 145 × 75 мм |
| Вес | 0.6 кг |
Блок управления Ceccato ES 3000 (ES3000 EL.CARD V.12-24AC) 2202360275 отзывы
Отзывов об этом товаре пока нет. Будьте первым!
 Загрузка данных авторизации

- Описание
- Отзывы
Характеристики
Распродажа складских остатков запчастей из наличия по закупочным ценам.
Описание товара
Электронный модуль управления с цифровым дисплеем
Контроллер ES 3000 — это современная управляющая система, специально разработанная для компрессоров средней и высокой производительности.
Позволяет осуществлять:
- управление всеми операциями и параметрами, необходимыми при использовании компрессора: создаваемое избыточное давление, управление осушителем, остановка и запуск машины;
- регулировку и проверку компрессора;
- фиксирование и сохранение информации о произошедших нештатных ситуациях в работе;
- остановку компрессора в случае обнаружения сбоев в работе;
- визуальное предоставление информации о наступлении сроков обслуживания машины.
В устройстве применена клавиатура сенсорного типа, не боящаяся загрязнений. Контроллер имеет цифровые и аналоговые порты для подключения различных внешних устройств. Программное обеспечение контроллера позволяет осуществлять многоуровневый доступ к перепрограммированию параметров для специалистов разной квалификации. Имеется также защита от ввода заведомо нереальных или опасных параметров работы.
Опция доступна для следующих моделей компрессоров:
5,5 — 2 лс / 4 — 15 кВт CSA
7,5 — 20 лс / 5,5 — 15 кВт CSA Tank and Dry
15 — 40 лс / 11 — 30 кВт CSB
Помогите другим пользователям с выбором — будьте первым,
кто поделится своим мнением об этом товаре.
%name%%date%
Плюсы
Минусы
Отзыв
%photos%
%answer%
-
Page 1: Symbol ES3000
ES3000 Ethernet Switch User Guide[…]
-
Page 2: Symbol ES3000
[…]
-
Page 3: Symbol ES3000
ES3000 Ethernet Switch User Guide 72E-68446-01 Revision A May 2004[…]
-
Page 4: Symbol ES3000
© 2004 by Symbol T echnologies, Inc. All rights reserved. No part of this publication may be reproduced or used in any form, or by any electrical or mechanical means, without permission in writing from Symbol. This includes electronic o r mechanical means, such as photocopying, recording, or information storage and retrieval systems. The material […]
-
Page 5: Symbol ES3000
Contents About This Guide Introduction . . . . . . . . . . . . . . . . . . . . . . . . . . . . . . . . . . . . . . . . . . . . . . . . . . . . . . . . v ii Notational Conventions . . . . . . . . . . . . . . . . . . . . . . . . . . . . . . . . . . . . . . . . . . . . . . . vii Service Information . . . . . . . . . . . . . . . . . . . . . . . . . . .[…]
-
Page 6: Symbol ES3000
ES3000 Use r Guide iv Supplying Power . . . . . . . . . . . . . . . . . . . . . . . . . . . . . . . . . . . . . . . . . . . . . . . . 1-5 Establishing a RS-232 Serial Connection to the Ethernet Switch . . . . . . . . . . 1-5 Administration of the ES3000 Ethernet Switch . . . . . . . . . . . . . . . . . . . . . . . . . . . . 1-6 Installing a SFP Fib[…]
-
Page 7: Symbol ES3000
v Main Menu->Ports->Port Security->Radius. . . . . . . . . . . . . . . . . . . . . . . . . . . 3-35 Main Menu->Ports->Port Security ->802.1x . . . . . . . . . . . . . . . . . . . . . . . . . . 3-36 Main Menu->Ports->Power over Ethernet. . . . . . . . . . . . . . . . . . . . . . . . . . . . 3-37 Main Menu->Ports->Link A[…]
-
Page 8: Symbol ES3000
ES3000 Use r Guide vi Chapter 4. Web Management Access General Information . . . . . . . . . . . . . . . . . . . . . . . . . . . . . . . . . . . . . . . . . . . . . . . . . 4-2 Saving Web Interface Configuration Changes . . . . . . . . . . . . . . . . . . . . . . . . . . . . . 4-3 System Admin->Access->IP Configuration . . . . . . . . . . . .[…]
-
Page 9: Symbol ES3000
vii Spanning Tree->Forwarding DB->FDB by Port/MAC/VLAN . . . . . . . . . . . . . . 4-47 Spanning Tree->MSTP Configuration->MSTP Config . . . . . . . . . . . . . . . . . . . 4-48 Spanning Tree->MSTP Configuration->CIST Configuration . . . . . . . . . . . . . . 4-50 Spanning Tree->MSTP Configuration->CIST Basic Port Configurat[…]
-
Page 10: Symbol ES3000
ES3000 Use r Guide viii VLAN Commands . . . . . . . . . . . . . . . . . . . . . . . . . . . . . . . . . . . . . . . . . . . . . . . . . . 5-74 Quality of Service Commands . . . . . . . . . . . . . . . . . . . . . . . . . . . . . . . . . . . . . . . . 5-81 Diffserv Commands . . . . . . . . . . . . . . . . . . . . . . . . . . . . . . . . . . . . . . […]
-
Page 11: Symbol ES3000
About This Guide Introduction The ES3000 User Guide provid es general instructions for config uring and using the ES300 0 Ethernet Switch. This guid e provides inform ation general in nature for th ose who may be ne w to the E3000 Ethernet Switch device. Notational Conventions The following conve ntions are used in this docume nt: • Italics are u[…]
-
Page 12: Symbol ES3000
ES3000 Use r Guide viii • Sequential lis ts (those describing step-by -s tep procedures) appe ar as numbered lists. Service Information If a problem with is encountered with the equipmen t, contact the Symbol Customer Support . Refer to Appendix C for contac t information. Before calling, h ave the model numb er and serial numb er at hand. If the[…]
-
Page 13: Symbol ES3000
Switch Management Overview 1.1 About the ES3000 Ethernet Switch The ES3000 Ethernet Switch comes in two versions. One version provides Power over Ethe rnet (PoE) in a ccordance with IEEE standard 8 02.3a f. This allows comp atible Ethernet devices to obtain power from the 10/100BaseT Ethernet wiring. IEEE 8 02.3af PoE senses th e need for power bef[…]
-
Page 14: Symbol ES3000
ES3000 Use r Guide 1-2 1.2 Management Access Overview The Symbol ES3000 Managed Switch pro vides user interface flexibility using: • An administration console • A W eb Browser interface • External SNMP-based network-management application. The administration console and Web Browser inte rface a re embedded in the switch firmware. 1.3 SNMP Acc[…]
-
Page 15: Symbol ES3000
Switch Management Overview 1-3 virtual terminal protocol (T elnet), and a terminal connecting directly to the console port through a null- modem serial cable. 1.4.2 SNMP Protocol SNMP is the standard manageme nt protocol for multi-vendor IP networks. SNMP supports transaction-based queries allo wing the protocol to format messages an d transmit inf[…]
-
Page 16: Symbol ES3000
ES3000 Use r Guide 1-4 1.5.2 Package Contents Inspect the package co ntents and report any missin g or damaged items to the Symbol sales representative. The package (for both the Po E and non-PoE Ethernet Switch models) should con tain the following: • ES3000 Ethernet Switch • Quick Installa tion Guide • Rack-mounting brackets • Power cord […]
-
Page 17: Symbol ES3000
Switch Management Overview 1-5 1.5.3 Supplying Power T o cable the ES3000 Ethernet Switch to receive powe r: 1. Connect the supplied AC power cord to the power connector on the rear of the Ethe rnet Switch. 2. Plug the cord into a standa rd AC outlet with a voltage range fro m 100V AC to 240V AC. The Ethernet Switc h is ready to receive p ower . 1.[…]
-
Page 18: Symbol ES3000
ES3000 Use r Guide 1-6 1.6 Administration of t he ES3000 Ethernet Switch There are three management us er interfaces on the switch: menu-driven, CLI, and Web. The menu- driven and CLI interfaces are a ccessed using a direct serial connection or via T elnet over an Ethernet connection. The Web interface is accessible via HTTP over an Ethernet con ne[…]
-
Page 19: Symbol ES3000
Switch Management Overview 1-7 T o use the ES3000 Command Line In terface (CLI) to configure the device: 1. Use HyperT erminal (or other communications utility) to secure a con nection to the ES3000 Ethernet Switch. 2. Hit the return key < Enter > to display the ES3000 logon sc reen. 3. Enter a user name of admin and password of symbol . Pres[…]
-
Page 20: Symbol ES3000
ES3000 Use r Guide 1-8 2. Enter a user name of admin and passwor d of symbol . Press OK . The Web interface General Information page displays. Refer to Chapter 3 for information on using th e ES3000 seria l interface to c onfigure the device. Refer to Chapter 4 for instructions on using the Web interface to configure the device. Refer to Ch apter 5[…]
-
Page 21: Symbol ES3000
Switch Management Overview 1-9 1.7 Installing a SFP Fiber T ransceiver The ES3000 Ethernet Switch s upports a SFP (sma ll form factor pluggable) fiber channe l transceiver used in fiber channel cab le installations. T o install the SFP Fiber T ransceiver: 1. Remove the rubber plug protecting the optics on the transceiver . 2. Insert the transceiver[…]
-
Page 22: Symbol ES3000
ES3000 Use r Guide 1-10[…]
-
Page 23: Symbol ES3000
Firmware Upgrades Symbol periodically releases new ve rsions of t he firmware that runs on the ES3 000 Ethernet Switch. These software rele ases provide new fe at ures that can extend the us eful life of the ES3000 Ethernet Switch. T o upgrade software on the switch, boot the switch from a TF TP server instead of its own non- volatile memory (NVRAM[…]
-
Page 24: Symbol ES3000
ES3000 Use r Guide 2-2 Symbol recommends using a RS-232 serial p ort connection to the switch during the software upgrade. When us ing a T elnet Session or Web interface, the connection to the switch is not available until the switch has completed its boot cycle and entered the Spanning T ree forwarding mode. This can ta ke up to three minutes. T o[…]
-
Page 25: Symbol ES3000
Administration Console Access The administration console is an in ternal, char acte r -oriented , VT -100/ANSI menu-driven user interface for management con figuration activi tie s. View the administration console from a terminal, PC, Apple Macintosh, o r UNIX workstation connected to the switch console port. 3.1 Direct Access Management Method The[…]
-
Page 26: Symbol ES3000
ES3000 Use r Guide 3-2 The following are Symbol recommended terminal-emulation programs: • HyperT erminal (which is built into the Microsoft Windows operating systems) • ZT erm (Apple Macintosh) • TIP (UNIX workstatio n) T o set up the connection using a Hype rT erminal on a PC (but other sys tems follow similar steps): 1. Click the Start but[…]
-
Page 27: Symbol ES3000
Administration Console Acce ss 3-3 5. V erify the port settings are: Baud Rate : 19200 Data Bits: 8 Parity: None Stop Bits : 1 Flow Contro l: None[…]
-
Page 28: Symbol ES3000
ES3000 Use r Guide 3-4 6. Click OK . When the HyperT erminal window displays , a connection exists to the switch and a logon screen displays. If a login screen or main men u does not display , hit the return key .[…]
-
Page 29: Symbol ES3000
Administration Console Acce ss 3-5 T o use the arrow keys when attached to the Us er Interface via a T elnet Session to tog gle forward and backward. Choose Properties from the terminal pull-down menu and verify the VT100 Arrows option is turned on. 3.2 User Interface The switch provides a menu-driven interface for man aging the switch, as well as […]
-
Page 30: Symbol ES3000
ES3000 Use r Guide 3-6 3.4 Main Menu Options The main menu displa ys the submenus available. Select Enter when a highlighted option confirms the choice of the specified submenu . The hotkey or letter within square bracket of each menu option can also be typed to directly choose the option. There are ten main menu items to choos e from: • General […]
-
Page 31: Symbol ES3000
Administration Console Acce ss 3-7[…]
-
Page 32: Symbol ES3000
ES3000 Use r Guide 3-8 3.5 General Information The General Information screen disp lays information on the operation al state of the ES3000 Ethernet Switch. Use this information for general configuration information when accessing othe r menu items. • System up for System run time after boot up • Boot Code V ersion The version and timestamp of […]
-
Page 33: Symbol ES3000
Administration Console Acce ss 3-9 3.5.1 Main Menu->Sy stem Administration->Sy stem Configurati on Use the Sy stem Configurat ion screen to access System Name , Contact Person, and System Location subme nus required for configuring th e device. The MAC ad dress and Object ID also display , but these items are not user configurab le. There are[…]
-
Page 34: Symbol ES3000
ES3000 Use r Guide 3-10 3.5.2 Main Menu->Sy stem Admi n.->Access Configuration There are three submenu options within the Access Configuration menu: • IP Conf ig. • Management Access •Q u i t Use the IP Config menu to manage the IP related information fo r the ES3000 from the System IP Configuration me nu. Use the Management Acces s men[…]
-
Page 35: Symbol ES3000
Administration Console Acce ss 3-11 3.5.3 Main Menu->Access->Sy stem IP Configuration Use the Sy stem IP Configuration menu to manag e IP related information for the ES3000 supported system. • IP Assi gnment Mode • Manual — Manually enter IP related info rmation • DHCP — The switch accepts DHCP broadcast from a DHCP serv er and automati[…]
-
Page 36: Symbol ES3000
ES3000 Use r Guide 3-12 •P r e s s Ctrl-W to save any c hanges to NVRAM. 3.5.4 Main Menu->Access ->Management Access Use the Management Access screen to enable or disable the Web, SNMP , and/or telnet interfaces. The Management Acc ess menu can also be us ed to change the user n ame and password. Us er names and passwords are case sen sitiv[…]
-
Page 37: Symbol ES3000
Administration Console Acce ss 3-13 The configurable fields within the Managem en t Access menu have the following values: Set Console UI T ime Out: Session is discon nected when the time o ut occurs Set T elnet UI T ime Out: T elnet session is disconn ected when the time out occurs Change Local User Name: Defines the name of the local user Change […]
-
Page 38: Symbol ES3000
ES3000 Use r Guide 3-14 3.5.5 Main Menu->Sy stem Admin->SNMP Configuration Menu Simple Network Management Protocol (SNMP) is a messaging prot ocol allowing communication between network manage rs and agents. An SNMP manager is part of a ne twork management system (NMS), allowing an administrator to manage the network by making requests to age[…]
-
Page 39: Symbol ES3000
Administration Console Acce ss 3-15 The SNMP Configurat ion page has four options: • System Information • Authorized Managers • T rap Receivers • T rap Sele ction[…]
-
Page 40: Symbol ES3000
ES3000 Use r Guide 3-16 3.5.6 Main Menu->SNMP Config.->Sy stem Information Use the Sy stem Information page to display system information to set the system name, location, and contact information. Th e MAC address and Object ID are also shown , but the MAC address and Object ID are not user configurable.[…]
-
Page 41: Symbol ES3000
Administration Console Acce ss 3-17 3.5.7 Main Menu->SNMP Conf i g.->Authorized Managers Use the Authorized Manage rs page to list the SNMP managers and their associated in formation. There are two community strings in d efault mode, pr ivate and public. Read-only is allowed with public and read-write is granted to private. Chang e the two co[…]
-
Page 42: Symbol ES3000
ES3000 Use r Guide 3-18 3.5.8 Main Menu->SNMP Config.- >T rap Receiver Configuration When Authenticatio n T raps is Enabled , the system generates an SNMP trap upon a host authorization failure . The failure occurs when a host attempts to gain acce ss to the system but the host IP is n ot in the SNMP host ta ble. Authenticati on Failure T rap[…]
-
Page 43: Symbol ES3000
Administration Console Acce ss 3-19 3.5.9 Main Menu->SNMP Config. ->T rap Selection Three commands are available to configu re individual trap parameters: 3.5.9.1 Port Link Down T rap When on, the sy stem generates an SNMP trap u pon a port link down. Th is failure occurs whe n a link is disconnected. The refore, symbol recommends each p ort […]
-
Page 44: Symbol ES3000
ES3000 Use r Guide 3-20[…]
-
Page 45: Symbol ES3000
Administration Console Acce ss 3-21 3.5.10 Main Menu->Sy stem Admin. ->T ools Menu The T ools Menu h as six options: • Software Upgrad e • System Reboot • Save Config. • Upload/Download Config. •S N T P C o n f i g •S y s t e m L o g These individual menu options are discussed in detail in the sections that follow .[…]
-
Page 46: Symbol ES3000
ES3000 Use r Guide 3-22 3.5.11 Main Menu->Sy stem Admin.->T ools->Software Upgrade If new improvements to the software on the switch become available, use the So ftware Upgrade menu to upgrade the switch to the new software ve rsion. Once the IP address of the TF TP and the name of the new softwa re image file are properly c onfigured, the[…]
-
Page 47: Symbol ES3000
Administration Console Acce ss 3-23 3.5.12 Main Menu->Sy stem Admin.->T o ols->Sy stem Reboot When the system reboots, reboot Status and reboot Ty p e option s display: Reboot Status: Reboot T ype: Stop The switch is powered down. Normal The switch conducts a warm reboot as normal wh en rebooted. Normal Re boot with current runtime code an[…]
-
Page 48: Symbol ES3000
ES3000 Use r Guide 3-24 3.5.13 Main Menu->Sy stem Admin.->T o ols->Save Config. Save update d settings to Fla sh once changes to the screens within the co nsole interface have bee n made. Use the Save Config screen as the central location to save changes made within the ES3000 Ethernet Switch menu-d riven interface. Once updates have been […]
-
Page 49: Symbol ES3000
Administration Console Acce ss 3-25 3.5.14 Main Menu->Sy stem Admin. ->T ools ->Upload/Download Config. There are four configurable func tions within the Uploa d/Download Configuration page: Set TF TP Server IP Addres s user can enter the server IP addre ss to get the T F TP s erver . Set Configuration File Name user can ente r the file na[…]
-
Page 50: Symbol ES3000
ES3000 Use r Guide 3-26 3.5.15 Main Menu->Sy stem Admin.->T o ols->SNTP Config. There are configurable function s in the SNTP Configuration page: Set SNTP Server IP Simple Network T ime Pro tocol, the user can enter SNTP server IP to gain access. Set SNTP Interval Set SNTP polling interval. Set T ime Zone Set the time zone Set Daylight Sav[…]
-
Page 51: Symbol ES3000
Administration Console Acce ss 3-27 3.5.16 Main Menu->Sy stem Admin.->T o ols->Sy stem Log The System Log is a tool for observing sy stem behavior . Clear the system log by selec ting Clear Sy stem Log . Symbol recommends referring to the System Log when contacting the Suppo rt Center to determine if an ES3000 event has been recorded.[…]
-
Page 52: Symbol ES3000
ES3000 Use r Guide 3-28 3.5.17 Main Menu->Port Configuration Menu Use the Port Configurat ion menu to set the port characteristics rela ted to link operations. All of the parameters on the Port Config uration page are togg le settings. T o ch ange, or toggle , between options, sele ct Ctrl-M to move the curser to the ports field an d strike the […]
-
Page 53: Symbol ES3000
Administration Console Acce ss 3-29 3.5.18 Main Menu->Ports- >Basic Port Config. Use the Basic Port Confi guration menu to configure port status (link type, adm in enable/disable, link up/down, mode, and flow control). T o mirror other ports, select Port Mirroring .[…]
-
Page 54: Symbol ES3000
ES3000 Use r Guide 3-30 3.5.19 Main Menu->Ports->Basic Port Config.->Port Status & Config. The Port Status & Confi guration menu contains the following edita ble fields: Ty p e The type of a port, this field is not user configurable. Admin field Enables or disables the port. Link The status of a port. The status is Up when a port i[…]
-
Page 55: Symbol ES3000
Administration Console Acce ss 3-31 port compliant with IEEE 802.3u. If the other port is not IEEE802.3u compliant, th e port defaults to half-duplex (10 Mb ps mode). Users can ope rate the communicatio n speed and duplex m ode manually . Flow Control Enables or disables Flow Control. Flow control is a protocol preventing packets from be ing droppe[…]
-
Page 56: Symbol ES3000
ES3000 Use r Guide 3-32 3.5.20 Main Menu->Ports->Basic Port Config->Port Counters Use the Port Counters menu to select the port where info rmation is required. Refer to the To t a l and Av g . / s lists for individual port information. Reset the ES3000 to retrieve the latest in formation immediately . The Refresh mode is to set to a de fin[…]
-
Page 57: Symbol ES3000
Administration Console Acce ss 3-33 3.5.21 Main Menu->Ports->Basic Port Config->Port Mirroring Port mirroring allows one port on the ES3000 to see all of the packets passing through any other port on the switch. Usually , a network analyzer is attached to the monitoring port so the network administrator can debug proble ms with the monitor[…]
-
Page 58: Symbol ES3000
ES3000 Use r Guide 3-34 3.5.22 Main Menu->Ports->Port Security Use the Port Security screen to enable or dis able the W eb, SNMP , and/or telnet interfaces or change the user name and password . User names and passwords are ca se sensitive and can be up to 20 characters long. When using telnet, the user can only enable/disa ble the W eb inter[…]
-
Page 59: Symbol ES3000
Administration Console Acce ss 3-35 3.5.23 Main Menu->Ports- >Port Security->Radius Use the Radius menu option to configure the advanced security settings of the switch to limit the access to the management interface s. There are two advanced security options beyon d the basic password protection: RADIUS c lient authentication an d 802.1X […]
-
Page 60: Symbol ES3000
ES3000 Use r Guide 3-36 3.5.24 Main Menu->Ports->Port Security ->802. 1x Use the 802.1x menu to configure the NAS ID used for connection, the port to pass the security , the port control type, the operational or administrative control direction, the transmission period (3 0sec.), the supplicant req uiring and server respon ding time, the m[…]
-
Page 61: Symbol ES3000
Administration Console Acce ss 3-37 3.5.25 Main Menu->Ports->Power over Ethernet Use Power -over -Ethe rnet (PoE) to eliminate using a 110/2 20 V AC power source to power access points and other devices o n a wired LAN. If usin g a Pow er -ove r -Ethe rnet system, only a single CA T5 Ethernet cable carrying both po wer and data to each device[…]
-
Page 62: Symbol ES3000
ES3000 Use r Guide 3-38 Global Configuration Power Usage: Sets the power usage threshold for sen ding a trap. Management Me thod: The action to take whe n the power sink over th e power budget, use one of the follo wing: 1) Low priority po rt is shut down; 2) Deny next port connectio n. Detection Method: E nables or d isables the power capacitor de[…]
-
Page 63: Symbol ES3000
Administration Console Acce ss 3-39[…]
-
Page 64: Symbol ES3000
ES3000 Use r Guide 3-40 3.5.26 Main Menu->Ports->Link Aggregat ion Use the Link Aggregation menu to allow multiple links between switches to work as one virtual link (aggregate link ). T runks can be d efined for similar po rt types only . Fo r example, a 10/100 port cannot form a Port T runk with a gigabit port. For 10/100 ports, trunks can […]
-
Page 65: Symbol ES3000
Administration Console Acce ss 3-41 3.5.27 Main Menu->Ports->Li nk Aggregation->LA Config Use the LA Configuration menu to define multiple links between switches to work as one virtual lin k or aggregate link. T runks can be define d for similar port types only . For ex ample, a 10/100 port ca nnot form a Port T runk with a gigabit port. S[…]
-
Page 66: Symbol ES3000
ES3000 Use r Guide 3-42 3.5.28 Main Menu->Ports->Link Ag gregation->Set Port Priori ty The default system priority is the same in all ports. If configuring a port with different priority in the link aggregation, g o to set port priority to configure the port priority .[…]
-
Page 67: Symbol ES3000
Administration Console Acce ss 3-43 3.5.29 Main Menu>VLANs A V irtual Local Area Network (VLAN) is a means to electronically sepa rate ports on the same switch from a single broadcast domain into separate broadcast domains. By usin g a VLAN, users can group by logical functio n instead of physica l location. There are 409 6 VLANs supported on th[…]
-
Page 68: Symbol ES3000
ES3000 Use r Guide 3-44 3.5.30 Main Menu->VLAN s->VLANs by VLAN-ID Create a new VLAN, add new ports to an existing VLAN, remov e ports from an existing VLAN, delete a VLAN, Set Managemen t Status, and/or Set GVRP Status from the VLAN by VLAN-ID screen. Six commands are available: Create VLAN: Creates a new VLAN, a unique ID is required. Delet[…]
-
Page 69: Symbol ES3000
Administration Console Acce ss 3-45 T o create a new VLAN Group: 1. Select Create VLAN . 2. Enter the VLAN ID and name in the provided fields. 3. Add VLAN members if so desired. 4. Click Apply . T o delete a VLAN Group: 1. Select Delete VLAN . 2. Give the correspondin g VLAN ID. T o configure a VLAN Member: 1. Select Delete VLAN. 2. Give the corres[…]
-
Page 70: Symbol ES3000
ES3000 Use r Guide 3-46 T o set the GARP VLAN registration protocol (GVRP) message st atus (GARP refe rs to General Attribute Registration Protocol): 1. Select Set GVRP Status . 2. Choose E to enab le and D to disable. T o set Management Status: 1. Select Set Management Status . 2. Choose E to enab le and D to disable. Adding a VLAN T o create a VL[…]
-
Page 71: Symbol ES3000
Administration Console Acce ss 3-47 3.5.31 Main Menu->VLANs->VLA N Port Configuration Menu Use the VLAN Port Configuration screen to c onfigure VLAN configu rations for each port. Th e PVID is default to 1 for every port. When a PVID on VLAN configuration is deleted, the PVID is changed to the default valu e of PVID, 1. All other co nfigurati[…]
-
Page 72: Symbol ES3000
ES3000 Use r Guide 3-48 3.5.32 Main Menu->IGMP Sn ooping Configuration Menu The Internet Group Man agement Protocol (IGMP) is an Internet protocol allowing a host to rep ort its multicast group membersh ip to multicast route rs. Multicasting allows one compu ter on the Internet to send information to other com puters having identified themselves[…]
-
Page 73: Symbol ES3000
Administration Console Acce ss 3-49 3.5.33 Main Menu->IGMP Sno oping->IGMP Snooping Confi g. Users can set up Hos t port aged time a nd router port aged time to snoop the ne twork and the IGMP Snooping s tatus report interval. Enable The system detects IGMP que ries, report packets, and mana ge IP multicast traffic through the switch. Disable[…]
-
Page 74: Symbol ES3000
ES3000 Use r Guide 3-50 3.5.34 Main Menu->IGMP Snoopi ng->VLAN Filter T able Use the VLAN Filter T able to define the VLAN not to be included in the set Vlan Filter . Enter the VLAN ID (1-4094) in the VLAN ID field. Ensure the Stat us field is set to Filter .[…]
-
Page 75: Symbol ES3000
Administration Console Acce ss 3-51 3.5.35 Main Menu->IGMP Snoopi ng->Router Port T able The Router Port T able menu displays the ports in a VLAN ID connecting to the router . The user can snoop the package fro m the router side of the ports. Select Next Page to display additional VLAN IDs should they exist.[…]
-
Page 76: Symbol ES3000
ES3000 Use r Guide 3-52 3.5.36 Main Menu->Spanni ng T ree Configuration Menu The ES3000 can be con figured to use one of three spann ing tree protocols. Spann ing T ree Protocol (STP) is compatible with legacy equipment. Rapid Spa nning T ree Protocol (RSTP) is sign ficantly faster than STP . Multiple Spanning T ree Protocol (MSTP) is based on R[…]
-
Page 77: Symbol ES3000
Administration Console Acce ss 3-53 3.5.37 Main Menu->Spanning T ree->Forwarding DB Use the Forwarding Databa se option to view the dy namic MAC addresses currently in the address database. When addresses are in the data base, the packets intended for those addresses are forwarded directly to those ports. The Administrato r can di splay addr […]
-
Page 78: Symbol ES3000
ES3000 Use r Guide 3-54 Static Address T able: Use the Static Addresses T able to specify Media Access Control (MAC) addre sses for specific ports not purged from the bridge table by the ag ing fu nction. There are 3 entries in the table. T wo commands are available to add and/or remo ve an entry . T o add an entry , follow the pop-out prompt. 1. E[…]
-
Page 79: Symbol ES3000
Administration Console Acce ss 3-55 3.5.38 Main Menu->Spa nni ng T ree->MSTP Config. 3.5.39 Main Menu->Spanning T r ee->Multiple Spanning T ree Configuration->MSTP Config. Rapid spanning tree (IEEE 802 .1w) is supported to reduce the spanning tree establishe d time. Each spanning tree e stablishment process ta kes several time outs t[…]
-
Page 80: Symbol ES3000
ES3000 Use r Guide 3-56 The upper half of the MSTP Config screen displays information ab out the Multiple Spannin g T ree Configuration. Status: Global MSTP Status: Status of global multiple span ning tree protocol. Enabled indicates that MSTP is running while Disa bled indicates MSTP is not running. Protocol V ersion : Three protocol versions are […]
-
Page 81: Symbol ES3000
Administration Console Acce ss 3-57 Command: Configure the switch to ensure the SPT work s properly . The Common Ins tant Spanning T ree Configuration Menu enables the user to configur e the switch-wide parameters, such as Cist Hello T ime, Cist Maximum Age, an d Cist Forward Delay . MST Re gion V ersion: Like MST R egion Name, the MST Regi on V er[…]
-
Page 82: Symbol ES3000
ES3000 Use r Guide 3-58 3.5.40 Main Menu->Spa nni ng T ree->CIST Config. Status Command Hello T i me: T ime between config uration messages sent by the Spanning T ree algorithm Maximum Age: The time before a configuratio n message is discarded by the system Forward Delay: The time the system spends transitioning from the learning to the liste[…]
-
Page 83: Symbol ES3000
Administration Console Acce ss 3-59 Rapid Spannin g T ree When a port running the stan dard STP is connected, it go es through the STP negotiatio n ( listening -> learning -> forwarding or blockin g) before it is available. If a client is trying to access a server through the switch running STP nego tiation, it is not able to conne ct to it i[…]
-
Page 84: Symbol ES3000
ES3000 Use r Guide 3-60 3.5.41 Main Menu->Spanning T ree->M STP Config->CIST Basic Port Config. Use the CIST Basic Po rt Config. menu to configure the port edg e status, port P-TO-P status, and restart port migration to prevent the wrong link.[…]
-
Page 85: Symbol ES3000
Administration Console Acce ss 3-61 3.5.42 Main Menu -> Spanning T ree -> MSTP Config. -> CIST Advanced Port Config. Use the CIST Advanc ed Port Config. menu to set up the port edge status , port P-TO-P status, and restart port migration to prevent the wrong link.[…]
-
Page 86: Symbol ES3000
ES3000 Use r Guide 3-62 3.5.43 Main Menu->Spanning T ree- >MSTP Config.->MSTP Instance Config. A small tree instance can be consid ered in the MSTP . One Instance can have more than one VLAN. Use the MSTP Instance Config. menu to add or remove a VLAN, or remove the MST In stance as well as MST Instance and Instanc e Port configuratio n.[…]
-
Page 87: Symbol ES3000
Administration Console Acce ss 3-63 3.5.44 Main Menu->Spanning T r ee->MSTP Config.->Designated T opology Info. The Designated T opology Info. page displays read-o nly topology informatio n for each p ort.[…]
-
Page 88: Symbol ES3000
ES3000 Use r Guide 3-64 3.5.45 Main Menu->Spanning T r ee->MSTP Config.->Regional T opology Info. The Regional T opology Info. page displays regiona l topology info rmation (read-only ) for each port.[…]
-
Page 89: Symbol ES3000
Administration Console Acce ss 3-65 3.5.46 Main Menu->QoS (Quality of Service Configuration Menu) The ES3000 implements IEEE 802 .1p Quality of Service (QoS) proce ssing. QoS policies examine packets and classify them. The clas sification is used to drop packets or to assign markers to the packets. The markers are Clas s of Service (CoS) Priorit[…]
-
Page 90: Symbol ES3000
ES3000 Use r Guide 3-66 3.5.47 Main Menu->QoS->Policy Config. Differentiated Se rvice (DiffServ) uses a priority ta g in the data packet (the Differentiated Service Code Point or DSCP) to determine the priority of the packet. The Policy Config menu maps the various DSCP tags to the two four queues on ea ch port. The Classifier a llows users t[…]
-
Page 91: Symbol ES3000
Administration Console Acce ss 3-67 3.5.48 Main Menu->QoS->Queue Config. Port Prioritization allows the user to specify which ports have greater precedence in situations where traffic can be buffered in the switch due to congestion. T raffic that comes in on ports with a setting of high is transmitted before those that come in on a po rt with[…]
-
Page 92: Symbol ES3000
ES3000 Use r Guide 3-68 3.5.49 Main Menu->QoS->Queue Config.->Queue Mapping The priority tag of each packet is divide d into four queues on each output port within the Queue Mapping screen. The default setup each queue assuming two priorities sequentially . Configure th e traffic class as neede d. Quality of Service work s only after the Q[…]
-
Page 93: Symbol ES3000
Administration Console Acce ss 3-69 3.5.50 Main Menu->QoS->Rate Limit ing Use the Rate Limiting screen to configure the bro adcast storm control to enable or disable traffic control in the networks. Rate limiting, or storm control, prev ents ports on the ES3000 switch fro m being overwhelmed by a broadcast, unica st, or multicast storm. A sto[…]
-
Page 94: Symbol ES3000
ES3000 Use r Guide 3-70 3.5.51 Main Menu->QoS->Rate Limit ing->Broadcast Storm Control Configuration Menu Use the Storm Control Configuration page to set th e limitatio n of broadcast, mul ticast, and/ or DLF (Destina tion Look Failure) pa ckets de livered to the CPU. Each kind of packet determines the netw ork load. When the load reaches […]
-
Page 95: Symbol ES3000
Administration Console Acce ss 3-71 3.5.52 Execute CLI The CLI (Command Line Interface) provide s a means to configure the sy stem for advanced users. Symbol recommends the CLI for a davanced users who do not need to navigae a menu-driven interface to configure the ES3000 Ethernet Switch. See Chapter 5 for detailed information. Once Run CLI is sele[…]
-
Page 96: Symbol ES3000
ES3000 Use r Guide 3-72[…]
-
Page 97: Symbol ES3000
W eb Management Access The Symbol ES3000 Managed Sw itch provides a bu ilt-in browser interface for configuring and managing remotely using a standard Web browser such as Microsoft Internet Explo rer or Netscape Navigator . The browse r interface also allows for system monitoring of th e Switch. The help page covers man y of the basic functions and[…]
-
Page 98: Symbol ES3000
ES3000 Use r Guide 4-2 4.1 General Information The General Information screen is a welcome pa ge displaying system information. Th ere are no editable parameters on the screen. Use the General Informa tion page to access the following subme nus: Each submenu item has its own set of op tions for configuring the ES3000 Ethernet Switch by a specific f[…]
-
Page 99: Symbol ES3000
Web Manage ment Access 4-3 4.2 Saving W eb Interfac e Configuration Changes T o save chang es made with in the W eb interface, refer to System Admin->T ools->Sa ve Configuration on page 4-14 . Use the Save Con figuration page to save all updates to the Web interface. Once updates are made, re fer back to the target configu ration page to ensu[…]
-
Page 100: Symbol ES3000
ES3000 Use r Guide 4-4 4.2.1 Sy stem Admin->Acce ss->IP Conf iguration The IP Configuration menu manages the IP related information of the system. T o manually configure the IP add ress: 1. Enter a site-specific IP address, Gateway address and Net mask. 2. Click Apply to change the IP settings. 3. Save the Configuration to Flash and reset the[…]
-
Page 101: Symbol ES3000
Web Manage ment Access 4-5 4.2.2 Sy stem Admin->Acce ss->Management Access Use the Manageme nt Access screen to enab le or disable the Web, SNMP and/or telnet interfaces . Use the Management Access scre en to change the user name and password . User names and passwords are case sensitive and can be up to 20 characters long. Enable/Disable the[…]
-
Page 102: Symbol ES3000
ES3000 Use r Guide 4-6 4.2.3 Sy stem Admin->Access->Us er Name Password Change The user name and password can be up to 20 charac ters and are c ase sensitive. T he password entered is encrypted on the screen and displays as a sequence of asterisk s (*). Use the User Name Password Change screen to: • Enable or Disable the password protectio […]
-
Page 103: Symbol ES3000
Web Manage ment Access 4-7 4.2.4 Sy stem Admin->SNMP Configuration Simple Network Management Protocol (SNMP) is a messaging prot ocol allowing communication between network manag ers and agents. An SNMP manager is part o f a network management sy stem (NMS), allowing an administrator to manage the network by making requests to agents. An SNMP ag[…]
-
Page 104: Symbol ES3000
ES3000 Use r Guide 4-8 4.2.5 Sy stem Admin->SNMP Conf iguration->SNMP Information Create up to ten different community strings with either READ or READ-WRITE privileges. Set the strings prior to setting host access, as the ho st table depends on the existence of community strings. The public string has GET privile ges by default.[…]
-
Page 105: Symbol ES3000
Web Manage ment Access 4-9 4.2.6 Sy stem Admin->SNMP Confi guration->Autho rized Managers Use the SNMP Host T able to add and remove host s from access rights granted to community groups. The permissions GET , SET , and TRAP are assigned to a community name. These permissions are assigned to individual machines by adding those machin es and t[…]
-
Page 106: Symbol ES3000
ES3000 Use r Guide 4-10 4.2.7 Sy stem Admin->SNMP Conf iguration->T rap Receiver Authentication T raps When enabled, the system gene rates an SNMP trap upon a host authorization failure. The failure occurs when a ho st tries to gain acce ss to the system but the host IP is not in the SNMP host table. Authenticati on Failure T rap All hosts in[…]
-
Page 107: Symbol ES3000
Web Manage ment Access 4-11[…]
-
Page 108: Symbol ES3000
ES3000 Use r Guide 4-12 4.2.8 Sy stem Admin->T ools->Software Upgrade Use the Software Upgrade menu to upgrade the software fo r the switch through T F T P protocol, reboot the syste m with variety options and save co nf iguration to Flash and View Statistic information. If new improvements to the software that runs the switch be come availab[…]
-
Page 109: Symbol ES3000
Web Manage ment Access 4-13 4.2.9 Sy stem Admin->T ools->Sy stem Reboot T wo options are p rovided when the system reboots, Reboot Status: Reboot T ype Stop: Shutdown th e system Start: Reboot the sy stem Normal : Boot up with runtime configu ration Factory Default: Boot up with factory default configuration[…]
-
Page 110: Symbol ES3000
ES3000 Use r Guide 4-14 4.2.10 Sy stem Admi n->T ools->Save Configuration After making changes to the screens within the Web Interface, save the changed settings to Flas h. If changes are not save d to NVRAM, they are lost during the next switch re set or reboot. Use the Sa ve Configuration page as the ce ntral location to save changes made w[…]
-
Page 111: Symbol ES3000
Web Manage ment Access 4-15 4.2.11 Sy stem Admi n->T ools->SNTP Configuration Use the following editable functions in th e SNTP Configuratio n page are required: Set SNTP Server IP Simple Network T ime Protoco l, user can enter SNTP server IP to get into it. Set SNTP Interval S et up SNTP polling in terval (1min fo r example) . Set T ime Zo n[…]
-
Page 112: Symbol ES3000
ES3000 Use r Guide 4-16 4.2.12 Sy stem Admi n->T ools->Sy stem Log Menu Use the Sy stem Log M enu to trace the entry when and fro m where, then users can know the entry system history . Select Clear to clean the table.[…]
-
Page 113: Symbol ES3000
Web Manage ment Access 4-17 4.2.13 Sy stem Admi n->T ools->TF TP Configuration File Upload/ Download There are fours functions in the page TF TP Configur ation File Uploa d/Download page: Set TF TP Server IP Address ente r the server IP address to get the TF TP server . Set Configuration File Name enter the file name that they wan t to config[…]
-
Page 114: Symbol ES3000
ES3000 Use r Guide 4-18 4.2.14 Sy stem Admin->Ports->Po rt Status and Confi guration Configure the ch aracteristics rela ted to link operations. All of the parameters on the Port Status and Configuration page are toggle settings. T o change, or toggle, b etween options, hit Ctrl-M to move the curser to the ports field and strike the space bar[…]
-
Page 115: Symbol ES3000
Web Manage ment Access 4-19 Enabling the GBIC con nector for a Gigabit Ethernet port disables the built-in 1000BASE-T port. GBIC ports do not suppo rt Auto Negotiation. Manually configure the GBIC port. The default values are 10 00 Mbps, full duplex.[…]
-
Page 116: Symbol ES3000
ES3000 Use r Guide 4-20 4.2.15 Sy stem Admin->Ports->Port Counters Use the Port Counters screen to select the target port for displaying port information. Selec ted a target port form the Select Port pull-down menu and click Apply to display counter information for that port. Refer to the To t a l list and the A verage/sec list for data. Clic[…]
-
Page 117: Symbol ES3000
Web Manage ment Access 4-21 4.2.16 Sy stem Admin->Por ts->IP (Port) Mirroring Port mirroring allows one port on the ES3000 to see all of the packets passing through any other port on the switch. Usually , a network analyzer is attached to the monitoring port so the network administrator can debug proble ms with the monitored port. The ES3000 […]
-
Page 118: Symbol ES3000
ES3000 Use r Guide 4-22 4.2.17 Sy stem Admin->Ports->Port Security ->Radius Configuration Use the Radius Config uration screen to co nfigure switch advanced security settings to limit the access to management in terfaces. There are two advanc ed security options beyond the basic password protection: RADIUS client authentica tion and 802.1X[…]
-
Page 119: Symbol ES3000
Web Manage ment Access 4-23 4.2.18 Sy stem Admin->Ports->Port Security ->802. 1x Configuration Use the 802.1x screen to: • Create the NAS ID used for connection • Configure the port to pass security to • Set port control type • Set the ope rational or admi nistrative control direction • Define the transmis sion period • Configu[…]
-
Page 120: Symbol ES3000
ES3000 Use r Guide 4-24 4.2.19 Sy stem Admin->Por ts->Power over Ethernet Use Power -over -Ethe rnet (PoE) to eliminate using a 110/2 20 V AC power source to power access points and other device s on a wired LAN. If usi ng a Power -over -E thernet system, only a single CA T5 Ethernet cable carry ing both power and data to each device is requi[…]
-
Page 121: Symbol ES3000
Web Manage ment Access 4-25 4.2.20 Sy stem Admin->Ports-> Power over Ethernet->Port Configuration The Port Configuration page provides a port-by-port selection option for the PoE function. T o set up administration, priority a nd/or limit, apply on e or more ports simultaneously . There are 8 parameters for each port. 3 of the 8 pa rameter[…]
-
Page 122: Symbol ES3000
ES3000 Use r Guide 4-26 Down: Power is not allowe d on this port. When Adm in is set to Down , all other parameters are meaningless . The user can change the administration configuring Admin to either Enable or Disable. Stat us: The status of the port. When a power de vice is connected and power is provided, Powered is displayed for the port. Class[…]
-
Page 123: Symbol ES3000
Web Manage ment Access 4-27 Example: The switch po rts could require a PoE scheme simil ar to the following: 1. The administrator needs to click ports 1 and 5 and cho ose Disable . 2. Select Apply to disable ports 1 and 5. 3. Continue selectin g ports and de fining their PoE priority . Click Apply when completed. Port Admi n Priority Limit 1, 5 Dow[…]
-
Page 124: Symbol ES3000
ES3000 Use r Guide 4-28 4.2.21 Sy stem Admin->Ports->Powe r over Ethernet->PoE Global Configuration Use the PoE Glob al Configuration page to modi fying a global set up of PoE fu nctions, including detection method, power managem ent method, and power usage thresho ld. The first parameter is the power budget, pre-determ ined by the power s[…]
-
Page 125: Symbol ES3000
Web Manage ment Access 4-29 4.2.22 PoE Determ ination Flowchart Power Budget: Ma ximum power allowe d for powered devices. 170W fo r the ES3000 switch. Detection Method: The powered dev ice detection me thod. Older devices c ould contain a capacitor . If this option is disabled (default), cap acitor devices are not detected and powered. Newer devic[…]
-
Page 126: Symbol ES3000
ES3000 Use r Guide 4-30 · • Low priority port will be shutdown . When a newly powered device is conne cted, the switch searches among its currently connecte d and powered devices. If any port has lower priority than the newly connected port, the switch discontinues the power supply to the lower priority port a nd provides power to the newly conn[…]
-
Page 127: Symbol ES3000
Web Manage ment Access 4-31 The algorithm s tarts when a p ort is connecte d, 1. Port Connected . Port connection detected 2. Powered Device (resistor) . V erify the connected device requirement. If it is a powered device, go to Power Not Provided (ste p 13). 1. The flowchart assumes capa citor detection is enabled, oth erwise, the path is No. 2. W[…]
-
Page 128: Symbol ES3000
ES3000 Use r Guide 4-32 3. Powered Device (capacitor) . If capacitor d etection enabled is not selected for a global configuration, go to Powe r Not Provided (step 13 ). (this step is combined with next step to make the flow chart clearly). 4. Check the conn ected device re quirement on power ba sed on capacitor . If it is not a powered device, go […]
-
Page 129: Symbol ES3000
Web Manage ment Access 4-33 4.2.23 Sy stem Admi n->Ports->Li nk Aggregation->Sy stem Priority Enter a number between 0-6553 5 to set up the system priority for the lin k aggregation. Click Apply to implement. Link Aggregation allo ws multiple links between sw itches to work as one virtual link aggregate link).[…]
-
Page 130: Symbol ES3000
ES3000 Use r Guide 4-34 4.2.24 Sy stem Admin->Ports-> Link Aggregation->Add Group Use Link Aggregation to configure multiple lin ks between switches to work as one virtual lin k (aggregate link). Link Aggreg ation can be defined for simila r port types only . A 10/100 port c annot form a Port Link Ag gregation with a gigabit port. T o defi[…]
-
Page 131: Symbol ES3000
Web Manage ment Access 4-35 4.2.25 Sy stem Admin->Ports->Link Aggregation->Set Port Priori ty Use the Set Port Priority screen to specify the ports with greater preceden ce in situations where traffic could be buffered in the switch due to conge stion. T raffic on ports with a high priority is transmitted before traffic with a low priority[…]
-
Page 132: Symbol ES3000
ES3000 Use r Guide 4-36 4.2.26 VLANs->VLAN Config->VLANs by VLAN-ID A V irtual Local Area Network (VLAN) is a means to electronically separate ports on the same switch from a single broadcast d omain into separate broa dcast domains. Users can group by logical functio n instead of physical lo cation. T wo memberships ar e a vailable for a VLA[…]
-
Page 133: Symbol ES3000
Web Manage ment Access 4-37 4.2.27 VLANs->VLAN Config ->Creating/Modify VLAN T o create a VLAN, select the Create/Modify VLAN menu item. For advanced users, refer Chap ter 5 for CLI command modes. T o create a VLAN: 1. Specify a VLAN ID (between 2 — 4094) for the new target VLAN within the VLAN ID field. VLAN #1 ca nnot be deleted under any c[…]
-
Page 134: Symbol ES3000
ES3000 Use r Guide 4-38 4. Add Ports as untagg ed or tagged membe rs, or select the Forbidden checkbox for the target port to prevent dynamic membership via GVRP . If a port is adde d to multiple VLANs as a tagged member , that port becomes an 80 2.1Q trunk port. 5. By default, GVRP is enabled on all ports so dynam ic VLAN membership can occur . Di[…]
-
Page 135: Symbol ES3000
Web Manage ment Access 4-39 4.2.28 VLANs->VLAN Config->Cr eate/Modify 802.1Q T runk IEEE 802.1Q is the standard for encaps ulating pac kets and marking them with VLAN information before sendin g them across a link between two switches. Use the Create/Modify 802.1Q T runk screen to modify the encapsulati on behavior on a port-by-port basis rat[…]
-
Page 136: Symbol ES3000
ES3000 Use r Guide 4-40[…]
-
Page 137: Symbol ES3000
Web Manage ment Access 4-41 4.2.29 VLANs->VLAN Config->VLANs by Port Use the VLAN by Port screen to configure VLAN port information on a port-by-port basis. 1. Select Modify to configure VLAN information for the target port. 2. Configure trunk ports and VLAN membership as required. In the exam ple below , Ports 25-26 are 802.1Q trunk ports wi[…]
-
Page 138: Symbol ES3000
ES3000 Use r Guide 4-42 4.2.30 IGMP Snooping->IGMP Sno oping Config->IGMP Snooping Configuration Menu The Internet Group Man agement Protocol (IGMP) is an Internet protocol allowing a host to rep ort its multicast group membersh ip to multicast route rs. Multicasting allows one compu ter on the Internet to send information to other com puters[…]
-
Page 139: Symbol ES3000
Web Manage ment Access 4-43 The page d isplays: IGMP Snoopin g Status : The global enabled or disabled status of IGMP sno oping. The administrator can select Enabled or Disabled. When Enab led, the switc h detects IGMP q ueries, reports, and manages multicast traffic through the switch for all VLANs. When Disabled, the switch forwards traffic and d[…]
-
Page 140: Symbol ES3000
ES3000 Use r Guide 4-44 4.2.31 IGMP Snooping->IGMP Sno oping Config->VLAN Filter T able Use the VLAN Filter T able to define the VLAN not to be included in the set Vlan Filter . Enter the VLAN ID (1-4094) in the VLAN ID field. Ensure the Status field is set to Filter . Click Apply to remove the VLAN ID from the set VLAN Filter[…]
-
Page 141: Symbol ES3000
Web Manage ment Access 4-45 4.2.32 IGMP Snooping->IGMP Snoopi ng Config->Router Port T able The Router Port T able page displays the p orts in VLANs connected to th e router . User can sno op the package from ro uter side in these ports.[…]
-
Page 142: Symbol ES3000
ES3000 Use r Guide 4-46 4.2.33 Spanning T ree->Forwarding DB->Add Static FDB Entries The ES3000 can be con figured to use one of three spann ing tree protocols. Spann ing T ree Protocol (STP) is com patible with legac y equipment. Ra pid Span ning T ree Prot ocol (RS TP) is signif icantly fa ster than STP . Multiple Span ning T ree Protocol ([…]
-
Page 143: Symbol ES3000
Web Manage ment Access 4-47 4.2.34 Spanning T ree->Forwardi ng DB->FDB by Port/MAC/VLAN When the number of hosts increase on a network, the Forwarding Datab ase grows sharply . Loo king for a MAC address c an become time -consuming work. The sys tem provides three d ifferent ways for an administrator to look over MAC addresses; by a spe cifie[…]
-
Page 144: Symbol ES3000
ES3000 Use r Guide 4-48 4.2.35 Spanning T ree->MSTP Co nfiguration->MSTP Config The ES3000 Ethernet sw itch is complian t with IEE E802.1D Spannin g T ree Protocol (STP), IEE E 802.1w Rapid Spanning T ree, and IEEE 802.1s Multiple Spannin g T ree. STP ensures only one path is active at a time between any two network nodes. There can more than[…]
-
Page 145: Symbol ES3000
Web Manage ment Access 4-49[…]
-
Page 146: Symbol ES3000
ES3000 Use r Guide 4-50 4.2.36 Spanning T ree->MSTP Con figuration->CIST Configuration Status Command Hello T ime: T ime between config uration messages sent by the Spanning T ree algo rithm Maximum Ag e Amount of time before a configuration messa ge is discarded by the system Forward Dela y Amount of time system spends transiti oning from th[…]
-
Page 147: Symbol ES3000
Web Manage ment Access 4-51[…]
-
Page 148: Symbol ES3000
ES3000 Use r Guide 4-52 4.2.37 Spanning T ree->MSTP Con figuration->CIST Basic Port Configuration Use the CIST Basic Port Conf iguration screen to set up the port, priority and path cost and enable/ disabl e the port STP stat us. Use the Port menu to define the target port. Use the Priority field to set the port priority . Click Apply once al[…]
-
Page 149: Symbol ES3000
Web Manage ment Access 4-53 4.2.38 Spanning T ree->MSTP Con figuration->CIST Advanced Port Configuration Use the CIST Advanced Po rt Configuration screen to configure the port edge status, port P-TO-P status, and restart port mig ration to prevent the wrong link. Click Apply to implement the changes.[…]
-
Page 150: Symbol ES3000
ES3000 Use r Guide 4-54 4.2.39 Spanning T ree->MSTP Co nfiguration->MSTP Instance Configuration One instance c an have more th an one VLAN. Us e the M STP In stance Config uration page to add or remove a VLAN, or remove a MST and Instance Port configura tion. Specify a single instanc e (a range of instances sep arated by a hyphen) or a series[…]
-
Page 151: Symbol ES3000
Web Manage ment Access 4-55 4.2.40 Spanning T ree->MSTP Config uration->Designated T opology Information Use the Designated T opo logy Informatio n page to display designated topology information for each port.[…]
-
Page 152: Symbol ES3000
ES3000 Use r Guide 4-56 4.2.41 Spanning T ree->MSTP Con figuration->Regional T opology Information Use the Regional T opology Information page to display regional topology information fo r each port.[…]
-
Page 153: Symbol ES3000
Web Manage ment Access 4-57 4.2.42 QoS->Policy Con fig->Create Classifier The ES3000 implements IEEE 802 .1p Quality of Service (QoS) proce ssing. QoS policies examine packets and classify them. Th e classification is used to drop packets or ass ign markers to the packets. The markers are Class of Serv ice (CoS) Priority , T ype of Service (T[…]
-
Page 154: Symbol ES3000
ES3000 Use r Guide 4-58 Nine parameters are available to classify a d a ta packet, including the Source Ma c Address, Destination Mac Address, VLAN ID, DSCP , Protocol , Source IP Address, Destination IP Add ress, Source Layer 4 Port Number , an d Destination Layer 4 Port Number . Classifier Index: A unique ID to distinguish a classifie r . The val[…]
-
Page 155: Symbol ES3000
Web Manage ment Access 4-59 Destination MAC: The destination MAC address on a d ata packet. The format is same as source MAC address. VLAN ID: The ID of a VLAN. Th e value is betwe en 1 and 4094 . 0 is used to indicate no VLAN and 4095 is reserved for system use. DSCP: Differentiated Service Code Point has 6 bits and the value is between 0 and 63. […]
-
Page 156: Symbol ES3000
ES3000 Use r Guide 4-60 ICMP is the basic ping command. When a ping com mand is issued, the packet sent is an ICMP echo packet. Th e packet waits for the ICMP echo reply packet to co mplete the ping process. The ICMP returns additional info rmation to an echo reply if there is a ping failure (network or host unreachable etc.). Source IP Address: Th[…]
-
Page 157: Symbol ES3000
Web Manage ment Access 4-61 4.2.43 QoS->Policy Configuration->Create In-Profile Action The In-Profile Action applies to the ingre ss data pa ckets. Like the Classifier , it has a unique ID as index. The index is a n umber between 1 and 65535. Four actio ns are possible: Action Description V alue Range Drop Packet is drop ped N /A Policed-d sc[…]
-
Page 158: Symbol ES3000
ES3000 Use r Guide 4-62 The precedence and Co S (Class of Service) has three bits. The valu e is between 0 and 7. Higher values have priority . DSCP combines Precedence and T oS (T ype of Service). DSCP is 6 bits long for the priority and the value ranges from 0 and 63. 4.2.44 QoS->Policy Configuratio n->Create Out-Profile Action Out-Profile […]
-
Page 159: Symbol ES3000
Web Manage ment Access 4-63 4.2.45 QoS->Policy Configura tion->Create No-Match Action No-Match Action resembles In-Profile Action. No-M atch Action applies to ingress traffic where the data packets do not match the associa ted policy . F our actions are available (Drop, Police d-dscp, Policed-precedenc e, and Policed-cos). Enter an ID betw ee[…]
-
Page 160: Symbol ES3000
ES3000 Use r Guide 4-64 4.2.46 QoS->Policy Configur ation->Create Port List Use the Create Port List page to configure the QoS group by ID, and key in the port in the port list to have the same priority . Select the ports for an y Classifier and Action. As shown in the following figure, we have two port lists av ailable and creating the 3rd l[…]
-
Page 161: Symbol ES3000
Web Manage ment Access 4-65 4.2.47 QoS->Policy Configuration->Create Policy Use the Create Policy screen to set up the QoS group by Policy ID, and key in the policy (1-65535) by classifier , in pro file action, no matc h action, out profile action, an d data path ID in the blank sp ace. V iew the setting report by clicking Appl y . Using the […]
-
Page 162: Symbol ES3000
ES3000 Use r Guide 4-66 4.2.48 QoS->Policy Configuration->Policy Sequence Select Policy Sequence from the Policy Configuration menu to launch the Display Policy Sequence By Port page. Select Display b y Index order to display the policy ind ex for the selected port. Select Display by sequen ce order to display the selected port policy sequ en[…]
-
Page 163: Symbol ES3000
Web Manage ment Access 4-67 Examples with Applied Policies When all policies are enabled , use a ping command to check the pa cket transmissions be tween switch 172.16.5.2 19 and host 172.16 .5.56 The ping receives res ponses regardless of whether these policies are enabled or disabled. In other words, these policies are not applied to traffic to t[…]
-
Page 164: Symbol ES3000
ES3000 Use r Guide 4-68[…]
-
Page 165: Symbol ES3000
Web Manage ment Access 4-69 4.2.49 QoS->Queue Config->Queue Mapping The priority tag of each pack et is divided into four queues on ea ch output port. The default setup is each queue taking two priorities sequ entially . The Administrato r can configure the traffic class as needed. Enabled or disab led Queue Mapping with in the QoS Status fie[…]
-
Page 166: Symbol ES3000
ES3000 Use r Guide 4-70 An Administrator can modify the tra ffic mapping as required. Quality of Service works only after the QoS status is enabled. After the modification, set the QoS Status to Enabled and click Apply to implement the changes. Priority Queue 00 10 21 31 42 52 63 73[…]
-
Page 167: Symbol ES3000
Web Manage ment Access 4-71 4.2.50 QoS->Rate Limiting->Sto rm Control Configuration Rate limiting, or storm control, prev ents ports on the ES3000 switch fro m being overwhelmed by a broadcast, unica st, or multicast storm. A storm results when pa ckets flood the LAN, which degrades network performance. With rate limiting enabled, th e switch[…]
-
Page 168: Symbol ES3000
ES3000 Use r Guide 4-72 There are three kinds of storm control; DLF , Broadcast, an d Multicast. When Enabled, th e CPU drops packets beyon d the specified thresh old. Otherwise, the CPU processe s these packet ty pes without any limitatio ns. The def ault setting is Disabled fo r all three packet types. DLF: Destination Look Failure packets. DLF p[…]
-
Page 169: Symbol ES3000
Command Line Interface 5.1 ES3000 Ethernet Switch Command Brief 5.1.1 Help Key Command Description abbreviated-command- entry<?> Provides a list of commands that begin with a particular charac ter string. (No space between command and question mark.) abbreviated-command- entry<T ab> Completes a partial command name. <?> Lists all […]
-
Page 170: Symbol ES3000
ES3000 Use r Guide 5-2[…]
-
Page 171: Symbol ES3000
Command Line Interface 5-3 5.1.2 Command Hierarchy A specific value for each command mod e displays at the prompt line. Use specific comm ands to enter or exit each command mode. The a dministrator can only enter command modes from specific mo des and only exit to specific command modes.[…]
-
Page 172: Symbol ES3000
ES3000 Use r Guide 5-4 Command Mode Prompt Enter/Exit Command User EXEC(exec) Switch> D efault mode, automatically enter logout or exit to quit CLI. Privileged EXEC(privExec) Switch# enable to enter from User EXEC mode logout to quit CLI; disable or exit to User EXEC Global Configuration(config) Switch(conf ig)# configure to enter from Privilege[…]
-
Page 173: Symbol ES3000
Command Line Interface 5-5 The prompt displays the switch name , Switch, and the current CLI command mode: • User EXEC-Switch> • Privileged EXEC-Switch # • Global Config uration-Switch (config)# • Interface Configuratio n-Switch (config -if)#[…]
-
Page 174: Symbol ES3000
ES3000 Use r Guide 5-6 The ESW3000 command sets are orga nized into the tr ee hierarchy . The co mmands, that are not in the same level of the command tree are not available un til the user has navigated down to that level. In a lower level of the command tree, th e user can st ill enter the global config uration commands that are in the top level […]
-
Page 175: Symbol ES3000
Command Line Interface 5-7 5.2 Basic Commands help The help command is in ea ch command mode and disp lays a brief messa ge about using the CLI help system. help S YNTAX D ESCRIPTION : The help command ha s no arguments or keywords. D EFAULT V ALUE : The help command has no default se tting. C OMMAND M ODES : All mode R EFERENCE : Nortel E XAMPLE :[…]
-
Page 176: Symbol ES3000
ES3000 Use r Guide 5-8 enable The enable comman d changes the command mode from User EXEC to pr ivExec mode. enable S YNTAX D ESCRIPTION : The enable command has no arguments or keywo rds. D EFAULT V ALUE : The enable command has no default setting. C OMMAND M ODES : User EXEC R EFERENCE :C i s c o E XAMPLE : Switch> enable Switch# configure The[…]
-
Page 177: Symbol ES3000
Command Line Interface 5-9 interface The interface command moves to the Interface Configuration (config-if) com mand mode. interface S YNTAX D ESCRIPTION : The interfa ce command has no argu ments or keyword s. D EFAULT V ALUE : The interface comm and has no default setting. C OMMAND M ODES : Global configuratio n R EFERENCE : Nortel E XAMPLE : Swi[…]
-
Page 178: Symbol ES3000
ES3000 Use r Guide 5-10 end Use the end command to exit configuratio n mode. end S YNTAX D ESCRIPTION : The end co mmand has no argument. D EFAULT V ALUE : The end command has no de fault setting. C OMMAND M ODES : All command modes R EFERENCE :C i s c o exit The exit co mmand quits to th e previous mode. exit S YNTAX D ESCRIPTION : The exit co mma[…]
-
Page 179: Symbol ES3000
Command Line Interface 5-11 ping Use the ping command to display ping test information . ping <i p> S YNTAX D ESCRIPTION : <ip> IP address D EFAULT V ALUE : The ping command has no defa ult setting. C OMMAND M ODES : All command modes R EFERENCE : Nortel M ENU : Switch Tools Config uration -> Ping Execution E XAMPLE : Switch# ping 17[…]
-
Page 180: Symbol ES3000
ES3000 Use r Guide 5-12 copy tftp image Use the copy tftp image command to dow nload image or config files. copy tftp <ip-address> <file name> image S YNTAX D ESCRIPTION : <ip> IP address < file name > file name D EFAULT V ALUE : The copy tftp image command has no default setting. C OMMAND M ODES : Privileged EXEC R EFERENCE[…]
-
Page 181: Symbol ES3000
Command Line Interface 5-13 E XAMPLE : Switch# copy running-config tftp 172.16.3.152 config.txt Please wait a minute. 2581 bytes data transferred! Switch# copy tftp 172.16.3.1 52 config.txt running-config Please wait a minute. 2581 bytes data transferred! Switch# copy running-config startup-config Use this command to save the config to NVRAM. copy […]
-
Page 182: Symbol ES3000
ES3000 Use r Guide 5-14 5.3 W eb Browser Commands ip http server Use this command to enable or disable access to the Web server embedded in the syste m. ip http server no ip http server S YNTAX D ESCRIPTION : The ip http server command ha s no argument. D EFAULT V ALUE : The feature is enabled by defa ult. C OMMAND M ODES : Global configuratio n R […]
-
Page 183: Symbol ES3000
Command Line Interface 5-15 show ip http server Use the show ip http server command to display telnet. show ip http server S YNTAX D ESCRIPTION : The show ip http server comman d has no arguments or keywords. D EFAULT V ALUE : The show ip http server command has no default setting. C OMMAND M ODES : Privileged EXEC R EFERENCE : None M ENU : Basic S[…]
-
Page 184: Symbol ES3000
ES3000 Use r Guide 5-16 5.4 SNMP Commands snmp-server agent Use the snmp-server ag ent command to enable or disable the access to the SNMP agent embe dded in the system . snmp-server agen t no snmp-server age nt S YNTAX D ESCRIPTION : The snmp-server age nt command has no argument D EFAULT V ALUE : The snmp-server agent fe ature is enabled by defau[…]
-
Page 185: Symbol ES3000
Command Line Interface 5-17 snmp-server location T o set the system location strin g. snmp-server location <string> no snmp-server loca tion S YNTAX D ESCRIPTION : A string o f length with 5 0 characters maximum D EFAULT V ALUE : No system loc ation string is set by defau lt C OMMAND M ODES : Global configuratio n R EFERENCE :C i s c o M ENU […]
-
Page 186: Symbol ES3000
ES3000 Use r Guide 5-18 E XAMPLE : !Set system Contact Informat ion «MIS_1» Switch(config)# snmp-server contact MIS_1 Switch(config)# !Clean system Contact Inform ation to default Switch(config)# no snmp-server contact Switch(config)# snmp-server community Use the snmp-server community co mmand to set up the community access string for us[…]
-
Page 187: Symbol ES3000
Command Line Interface 5-19 !Disable SNMP manager entry index-4 Switch(config)# no snmp-serv er community 4 Switch(config)# snmp-server host Use the snmp-server host command to set up the recipient of SNMP notification operation. snmp-server host <index > type<tra ptype> <ip> trap <string> no snmp-server host <in dex> […]
-
Page 188: Symbol ES3000
ES3000 Use r Guide 5-20 snmp-server enable traps Use the snmp-server enable trap s command to enable or disable the specified SNMP notification. snmp-server enable traps <noti fication-type> <n otification-option> no snmp-server enable traps <no tification-type> <n otification-option> S YNTAX D ESCRIPTION :< notification-[…]
-
Page 189: Symbol ES3000
Command Line Interface 5-21 show snmp Use the show snmp command to display snmp trap-receivers inform ation. show snmp S YNTAX D ESCRIPTION : The show snmp comma nd has no arguments or keywords . D EFAULT V ALUE : The show snmp command ha s no default setting. C OMMAND M ODES : Privileged EXEC R EFERENCE :C i s c o M ENU : Basic Switch Configuratio[…]
-
Page 190: Symbol ES3000
ES3000 Use r Guide 5-22 5.5 Basic Sy stem Management Commands hostname Use the hostname command to specify the host name for the system. hostname <string> S YNTAX D ESCRIPTION : A string o f length with 50 characters maximum D EFAULT V ALUE : No host name strin g is set by default C OMMAND M ODES : Global configuratio n R EFERENCE :C i s c o […]
-
Page 191: Symbol ES3000
Command Line Interface 5-23 E XAMPLE : Switch# show sys-info System up for : 1hr (s), 18min(s), 06sec(s) Boot Code Version : 1.0. 0.07 / Feb 16 2004 14:35:55 Runtime Code Version : 1.0. 7.05 / Apr 01 2004 09:33:00 Hardware Information Version : Versio n1 DRAM Size : 32MB Fixed Baud Rate : 9600bp s Flash Size : 8MB Administration Information Switch […]
-
Page 192: Symbol ES3000
ES3000 Use r Guide 5-24 console inactivity-timer Use the console inactivity-timer command to specify an inactivity timeout value for the console. console inactivity-timer <min> S YNTAX D ESCRIPTION : 0 — 60 minutes (0 means no tim eout) D EFAULT V ALUE : The default value is 5 minute s. C OMMAND M ODES : Global configuratio n R EFERENCE :H P […]
-
Page 193: Symbol ES3000
Command Line Interface 5-25 E XAMPLE : Switch# show console Console UI Idle Timeout: 5 M in. Console ——— Active Switch# telnet-server enable Use the telnet-server command to enable or disable ac cess to the telnet server . telnet-server enable no telnet-server S YNTAX D ESCRIPTION : The teln et-server command has no argume nt. D EFAULT V ALUE […]
-
Page 194: Symbol ES3000
ES3000 Use r Guide 5-26 telnet-server inactivity-timer Use the telnet-server inactivity-time r command to spec ify an inac tivity timeout value for telnet server . telnet-server inactivity-timer <min> S YNTAX D ESCRIPTION : 1 — 60 minute s D EFAULT V ALUE : The default value is 5 minute s C OMMAND M ODES : Global configuratio n R EFERENCE : N[…]
-
Page 195: Symbol ES3000
Command Line Interface 5-27 E XAMPLE : Switch# show telnet-server Telnet UI Idle Timeout: 5 Mi n. Telnet Server ————— enabled Switch# 5.6 IP Addressing Commands ip address Use the ip address command to specify an IP address and subnet mask for the syste m. ip addres s <ip> <mask> S YNTAX D ESCRIPTION : <ip> IP address &l[…]
-
Page 196: Symbol ES3000
ES3000 Use r Guide 5-28 ip address dhcp Use the ip address dhcp command to ena ble or disable the system to acquire its IP addres s through DHCP . ip addres s dhcp S YNTAX D ESCRIPTION : The ip ad dress dhcp-bootp command has no argument. D EFAULT V ALUE : The feature is disabled by d efault. C OMMAND M ODES : Layer-2 switch => Global configurat[…]
-
Page 197: Symbol ES3000
Command Line Interface 5-29 show ip conf Use the show ip conf command to display IP con figurations. show ip conf S YNTAX D ESCRIPTION : The show ip conf command has no arguments or keywords. D EFAULT V ALUE : The show ip conf command has no default setting. C OMMAND M ODES : Privileged EXEC R EFERENCE : None E XAMPLE : Switch# show ip conf MAC Add[…]
-
Page 198: Symbol ES3000
ES3000 Use r Guide 5-30 5.7 Security Commands username Use the username command to spec ify the user name and password for loggin g into the system. username name <string> S YNTAX D ESCRIPTION : The user name string is limited to 13 characters. D EFAULT V ALUE : Both are set to «manager». C OMMAND M ODES : Global configuratio n R EF[…]
-
Page 199: Symbol ES3000
Command Line Interface 5-31 5.8 Layer -2 Interface Commands shutdown Use the shutdown command to ena ble or disable a port. interface <port> shutdown no shutdown S YNTAX D ESCRIPTION : <port> Port instan ce D EFAULT V ALUE : The shutdown feature is enabled by default. C OMMAND M ODES : Interface configuration R EFERENCE :C i s c o M ENU[…]
-
Page 200: Symbol ES3000
ES3000 Use r Guide 5-32 speed-duplex Use the speed-duplex command to configure the speed and duple x mode for a port. interface <port> speed-dup lex <option> S YNTAX D ESCRIPTION : <port> Port instan ce < option >, D EFAULT V ALUE : The default value is set to auto. C OMMAND M ODES : Interface configuration R EFERENCE :C i s[…]
-
Page 201: Symbol ES3000
Command Line Interface 5-33 flow-control Use the flow-con trol command to enable or disab le the flow control for a port. interface < port > flow-control no flow-control S YNTAX D ESCRIPTION :< port > Port instance D EFAULT V ALUE : The flow control feature is enabled by default. C OMMAND M ODES : Interface configuration R EFERENCE :C i[…]
-
Page 202: Symbol ES3000
ES3000 Use r Guide 5-34 E XAMPLE : Switch# show interface Port Trunk Type Link Status Mode Flow Ctrl —- —— ——— —— ——— ——- ———- 1/1 — 10/100TX Down Enabled Auto Enabled 1/2 — 10/100TX Down Enabled Auto Enabled 1/3 — 10/100TX Down Enabled Auto Enabled 1/4 — 10/100TX Down Enabled Auto Enabled 1/5 — 10/100TX Down E[…]
-
Page 203: Symbol ES3000
Command Line Interface 5-35 show interface counters Use the show interface co unters command to display in terface statistics. show interface counte rs <port> S YNTAX D ESCRIPTION : <port> Port instan ce. D EFAULT V ALUE : The feature is disabled by d efault. C OMMAND M ODES : Privileged EXEC R EFERENCE : M ENU : Main Menu -> Statist[…]
-
Page 204: Symbol ES3000
ES3000 Use r Guide 5-36 E XAMPLE : Switch# show interface count ers errors faste thernet0/2 CRC/Align Errors Undersiz e Pkts Oversize Pkts 0 0 0 Fragments Jabbers Collisions 0 0 0 Switch # port monitor Use the port monitor command to configur e a port to monitor traffic from another port. interface <port> port monitor <port> direction &[…]
-
Page 205: Symbol ES3000
Command Line Interface 5-37 E XAMPLE : ! Set port-2 Monitoring Port , port-4 Monitored Port, directi on is both. Switch(config)# interface fa stethernet0/2 Switch(config-if)# port moni tor fastethernet0/4 direction both Switch(config-if)# !Disable port-2 Monitoring P ort , port-4 Monitored Port Switch(config)# interface fa stethernet0/2 Switch(conf[…]
-
Page 206: Symbol ES3000
ES3000 Use r Guide 5-38 storm-control threshold Use the storm-control threshold command to configure the mulitcast storm control for a port. storm-control thres hold <threshold> S YNTAX D ESCRIPTION : <threshold> Threshold value for a port (packets per second). D EFAULT V ALUE : C OMMAND M ODES : Global configuratio n R EFERENCE :C i s […]
-
Page 207: Symbol ES3000
Command Line Interface 5-39 storm-control broadcast Use the strom-control broadcast command to configure the broadcast storm control for a port. storm-control broadcast no storm-contro l broadcast S YNTAX D ESCRIPTION : The storm-con trol broadcast comma nd has no arguments or keywords. D EFAULT V ALUE : The default value is disa bled. C OMMAND M O[…]
-
Page 208: Symbol ES3000
ES3000 Use r Guide 5-40 ! Disable multicast storm co ntrol Switch(config)# no storm-con trol mutlicast storm-control unicast Use the storm-control unicast command to confi gure the unicast(DLF) storm control for a port. storm-control unicast no storm-control unicast S YNTAX D ESCRIPTION : The storm-con trol unicast comma nd has no arguments or keyw[…]
-
Page 209: Symbol ES3000
Command Line Interface 5-41 show storm-control Use the show storm-control command to dis play storm-control status. show storm-c ontrol S YNTAX D ESCRIPTION : The show storm-c ontrol command has no arguments or keywords . D EFAULT V ALUE : The show storm-control command ha s no default setting. C OMMAND M ODES : Privileged EXEC R EFERENCE :C i s c […]
-
Page 210: Symbol ES3000
ES3000 Use r Guide 5-42 5.9 Link Aggregation Commands lacp Use the lacp command to add ports to a port LACP group or delete ports from the group. lacp <trunkKEY> <port list> <mod e> S YNTAX D ESCRIPTION : <trunkKE Y> Trunk LACP key <port list> A list of port instances <mode> D EFAULT V ALUE : The feature is disab[…]
-
Page 211: Symbol ES3000
Command Line Interface 5-43 E XAMPLE : ! Set port-1 port-2 port-3 link aggregation, and LACP key =10 and mode = active Switch(config)# lacp 10 1,2, 3 active Switch(config)# ! Set port-10-13 link aggreg ation,and LACP key =42 and mode = passive Switch(config)# lacp 42 10-1 3 passive Switch(config)# ! Set port-5-7 link aggregat ion,and LACP key =42 a[…]
-
Page 212: Symbol ES3000
ES3000 Use r Guide 5-44 lacp port-priority Use the lacp port-priority co mmand to LACP port priority . lacp port-priority <priority-value> S YNTAX D ESCRIPTION : <priority-value> Lacp port priority 0-255 D EFAULT V ALUE : C OMMAND M ODES : Interface configuration R EFERENCE :C i s c o M ENU : E XAMPLE : ! set port 3 port-priority 4 0 Sw[…]
-
Page 213: Symbol ES3000
Command Line Interface 5-45 E XAMPLE : Switch# show lacp System Priority : 40000 Key Mode Member post list —- ——— ——— ——— ——— 1 Manual 2,3 2 Active 4,5,6 Switch# Switch# show lacp 2 System Priority : 40000 Key 2 Key Pri Attached port list —- ——— ——— ——— ——— 41 4 51 5 61 6 Switch#[…]
-
Page 214: Symbol ES3000
ES3000 Use r Guide 5-46 5.10 MAC Address Commands mac-address-table static Use the mac-address table static command to insert a static MAC addres s. mac-address-table static <mac-addr> <port> vlan <vlanID> S YNTAX D ESCRIPTION : <mac-addr> MAC a ddress <port> Port instance <vlanID> VLAN ID D EFAULT V ALUE : This […]
-
Page 215: Symbol ES3000
Command Line Interface 5-47 mac-address-table aging-time Use the mac-address-table ag ing-time command to control ag ing time for dynamic MAC addresses. mac-address-table ag ing-time <sec> S YNTAX D ESCRIPTION : Integer ran ges from 10 — 1000000. D EFAULT V ALUE : Default value is 300. C OMMAND M ODES : Global configuratio n R EFERENCE :C i s[…]
-
Page 216: Symbol ES3000
ES3000 Use r Guide 5-48 show mac-address-table mac Use the show mac-address-table mac co mmand to list MAC addresses by individual MAC address. show mac- address-table mac S YNTAX D ESCRIPTION : The show mac -address-table mac comma nd has no arguments or keywords. D EFAULT V ALUE : The show mac-addre ss-table mac command has no defau lt setting. C[…]
-
Page 217: Symbol ES3000
Command Line Interface 5-49 E XAMPLE : Switch# show mac-address-tab le interface fastethernet0/26 MAC Address Port —————— ————— —— 00:30:AB:00:09:20 26 00:30:AB:00:09:21 26 00:30:AB:00:09:22 26 00:30:AB:00:09:23 26 00:30:AB:00:09:24 26? Switch# show mac-address-table vlan Use the show mac-address-table vlan com mand to displ[…]
-
Page 218: Symbol ES3000
ES3000 Use r Guide 5-50 show mac-address-table static Use the show mac-address-table static comma nd to display the MAC address table by static. show mac-ad dress-table static S YNTAX D ESCRIPTION : The c command has no arguments or keywords. D EFAULT V ALUE : The command has no defau lt setting. C OMMAND M ODES : Privileged EXEC R EFERENCE : None.[…]
-
Page 219: Symbol ES3000
Command Line Interface 5-51 5.11 Multiple Spanning T ree Commands spanning-tree mst Use the spanning-tree mst comma nd to enable or disable multiple span ning tree. spanning-tree mst enable spanning-tree mst disab le S YNTAX D ESCRIPTION : The spanning-tree mst co mmand has no arguments or keywords. D EFAULT V ALUE : C OMMAND M ODES : Global config[…]
-
Page 220: Symbol ES3000
ES3000 Use r Guide 5-52 E XAMPLE : !Cnfigure the MSTP name “Sym bol” Switch(config)# spanning-tre e mst name Symbol Switch(config)# spanning-tree mst revision Use the spanning-tree mst re vision command to configure the mst revision nu mber . spanning-tree mst reviso n <revision> S YNTAX D ESCRIPTION : <priority> Integer ranges from[…]
-
Page 221: Symbol ES3000
Command Line Interface 5-53 M ENU : E XAMPLE : !Set STP Compatible Switch(config)# spanning-tre e mst version st pCompatible Switch(config)# spanning-tree mst max-hops Use the spanning-tree mst max-ho ps command to configure the maxim um hops count. spanning-tree mst max-h ops <hop> S YNTAX D ESCRIPTION : <hop> Integer ranges from 6 to […]
-
Page 222: Symbol ES3000
ES3000 Use r Guide 5-54 E XAMPLE : !Set CIST priority 40960 Switch(config)# spanning-tre e mst priority 40960 Switch(config)# spanning-tree mst max-age Use the spanning-tree mst max-ag e command to configure the value of CIST bridge Max Age. spanning-tree mst max-a ge <second s> S YNTAX D ESCRIPTION : <seconds> Intege r ranges from 6 to[…]
-
Page 223: Symbol ES3000
Command Line Interface 5-55 C OMMAND M ODES : Global configuratio n R EFERENCE : M ENU : E XAMPLE : !set CIST Hello Time 5 secon ds Switch(config)# spanning-tre e mst hello-time 5 Switch(config)# spanning-tree mst forward-time Use the spanning-tree mst fo rward time command to config ure the CIST bridge Forward T ime value. spanning-tree mst forwar[…]
-
Page 224: Symbol ES3000
ES3000 Use r Guide 5-56 spanning-tree mst instance priority Use the spanning-tree mst instance priority command to configure the brid ge priority instance value. spanning-tree mst <instance> priority <priority> S YNTAX D ESCRIPTION : <priority> Integer ranges from 1 to 64 Valid prio rity vales are: 4096, 81 92, 12288, 1 6384, 2048[…]
-
Page 225: Symbol ES3000
Command Line Interface 5-57 spanning-tree mst instance vlan Use the spanning-tree mst ins tance vlan command to map vlans to instances. spanning-tree mst ins tance <insta nce-id> vlan <vlan-range> S YNTAX D ESCRIPTION : <instance> Integer ranges from 1 to 64 <vlan-range > Integer ranges from 0 to 4096 D EFAULT V ALUE : C OMM[…]
-
Page 226: Symbol ES3000
ES3000 Use r Guide 5-58 ! Disable MSTP on port 4 Switch(config)# interface fa stethernet0/4 Switch(config-if)# spanning-tree mst shutdown Switch(config)# spanning-tree mst port-priority Use the spanning-tree mst port priority co mmand to configure CIST Port Priority . spanning-tree mst port-priority <priority> S YNTAX D ESCRIPTION : <prior[…]
-
Page 227: Symbol ES3000
Command Line Interface 5-59 E XAMPLE : ! Set CIST port path cost 40 00 on port 4 Switch(config)# interface fa stethernet0/4 Switch(config-if)# spanning- tree mst cost 4000 Switch(config-if)# spanning-tree mst init-migration Init Protocol Migration on the Port in MSTP . spanning-tree mst init-migration S YNTAX D ESCRIPTION : The spanning-tree mst in[…]
-
Page 228: Symbol ES3000
ES3000 Use r Guide 5-60 spanning-tree mst edgeport Use the spanning-tree mst edge port command to configure the Ed ge Port Status in MSTP . spanning-tree mst ed geport S YNTAX D ESCRIPTION : The spanning-tree mst ed geport command has no arguments or keywords. D EFAULT V ALUE : C OMMAND M ODES : Interface configuration R EFERENCE : M ENU : E XAMPLE[…]
-
Page 229: Symbol ES3000
Command Line Interface 5-61 D EFAULT V ALUE : C OMMAND M ODES : Interface configuration R EFERENCE : M ENU : E XAMPLE : ! Force p2p false on port 4 Switch(config)# interface fa stethernet0/4 Switch(config-if)# spanning- tree mst point-to-point forcefalse Switch(config-if)# spanning-tree mst instance shutdown Use the spanning-tree mst ins tance shut[…]
-
Page 230: Symbol ES3000
ES3000 Use r Guide 5-62 spanning-tree mst inst ance port-priority Use the spanning-tree mst instance port-priority command to configure instance Port Priority . spanning-tree mst ins tance <instanc e-id> port-priority <priority> S YNTAX D ESCRIPTION : <instance> Integer ranges from 0 to 64 <priority> Valid priority values ar[…]
-
Page 231: Symbol ES3000
Command Line Interface 5-63 show spanning-tree mst configuration Use the show spanning-tree mst configuration command to display the MSTP configuration. show spann ing-tree mst configuratio n S YNTAX D ESCRIPTION : The show spanning-tree mst configuration command has no arguments or keywords. D EFAULT V ALUE : The show spanning-tre e mst configurat[…]
-
Page 232: Symbol ES3000
ES3000 Use r Guide 5-64 show spanning-tree mst cist configuration Use this command to display the MSTP CIST configuration. show spanning-tre e mst cist configuration S YNTAX D ESCRIPTION : The show spanning -tree mst cist configuration command has no arguments or ke ywords. D EFAULT V ALUE : The show sp anning-tree mst cist c onfiguration command h[…]
-
Page 233: Symbol ES3000
Command Line Interface 5-65 show spanning-tree mst cist interface Use this command to display MSTP CIST configuration information for interface. show spanni ng-tree mst cist interface <port list> S YNTAX D ESCRIPTION : <port list> A list of port instances D EFAULT V ALUE : The show spanning-tre e mst cist interface command has no defaul[…]
-
Page 234: Symbol ES3000
ES3000 Use r Guide 5-66 show spanning-tree mst instance configuration Use this command to display MSTP CIST configuration. show spanning-tre e mst <instance> configuration S YNTAX D ESCRIPTION : <instance> Integer ranges from 1 to 64 D EFAULT V ALUE : The show spanning-tre e mst instance configurat ion command has no default setting. C […]
-
Page 235: Symbol ES3000
Command Line Interface 5-67 show spanning-tree mst instance interface Use this command to display MSTP CIST configuration information for interface. show spanning-tre e mst <instance> interface <port li st> S YNTAX D ESCRIPTION : <instance> Integer ranges from 1 to 64 <port list> A list of port instances D EFAULT V ALUE : Th[…]
-
Page 236: Symbol ES3000
ES3000 Use r Guide 5-68 5.12 IGMP Snooping Commands ip igmp snooping Use the ip igmp snooping command to enable or disable IGMP snooping as imp lemented in the system. ip igmp snooping no ip igmp snooping S YNTAX D ESCRIPTION : The ip igmp snooping command has no argument. D EFAULT V ALUE : The feature is disabled by d efault. C OMMAND M ODES : Glo[…]
-
Page 237: Symbol ES3000
Command Line Interface 5-69 M ENU : Advanced Switch Config uration M enu->IGMP Snooping-> Set Host Port Aged Tim, Set Router Port Aged Time E XAMPLE : !Enable igmp snooping router port age out time 300 sec Switch(config)# ip igmp snoo ping aging-time router 300 Switch(config)# !Enable igmp snooping host p ort age out time 300 sec Switch(confi[…]
-
Page 238: Symbol ES3000
ES3000 Use r Guide 5-70 ip igmp snooping vlan -filter vlan Use this command to filter IGMP snooping on a specific interface in the system. ip igmp snooping vlan-filter vlan <vlanID> S YNTAX D ESCRIPTION : <vlanID> VLAN ID D EFAULT V ALUE : The feature is disabled by d efault. C OMMAND M ODES : Global configuratio n R EFERENCE : None M E[…]
-
Page 239: Symbol ES3000
Command Line Interface 5-71 E XAMPLE : Switch# show ip igmp snoopin g conf IGMP Snooping Status : E nabled Host Port Age-Out Time : 2 60 sec Router Port Age-Out Time : 3 00 sec Report Forward Interval : 1 0 sec Switch# show mac-address-table multicast Use this command to display Layer2 mu lticast entries information for VLAN. show mac-address-table[…]
-
Page 240: Symbol ES3000
ES3000 Use r Guide 5-72 show ip igmp snooping mrouter Use this command to display multicas t router port information for VLAN. show ip igmp snooping mrouter S YNTAX D ESCRIPTION : This comman d has no a rguments or keywor ds. D EFAULT V ALUE : This command has no default setting. C OMMAND M ODES : Privileged EXEC R EFERENCE :C i s c o . M ENU : Adv[…]
-
Page 241: Symbol ES3000
Command Line Interface 5-73 show ip igmp snooping vlan-filter -table Use this command to display IGMP Snoopin g VLAN filter information. show ip igmp snooping vlan-filter -table S YNTAX D ESCRIPTION : This comman d has no a rguments or keywor ds. D EFAULT V ALUE : This command has no default setting. C OMMAND M ODES : Privileged EXEC R EFERENCE : N[…]
-
Page 242: Symbol ES3000
ES3000 Use r Guide 5-74 5.13 VLAN Commands vlan init Use the vlan init command to remove all vlans and reset ports to de fault VLAN vlan init S YNTAX D ESCRIPTION : The vlan in it command has no arguments or keywords D EFAULT V ALUE : This command has no default setting. C OMMAND M ODES : Global configuratio n R EFERENCE : M ENU : Advanced Switch C[…]
-
Page 243: Symbol ES3000
Command Line Interface 5-75 E XAMPLE : ! create a 802.1Q vlan untag port 1-5, 10, 15-19 Switch(config)# interface vl an3 Switch(config-if)# name VLAN -3 Switch(config-if)# member 1- 5,10,15-19 Switch(config-if)# ! modify participation (remo ve 10, 15-19) Switch(config)# interface vl an3 Switch(config-if)# member 1- 5 Switch(config-if)# forbidden Us[…]
-
Page 244: Symbol ES3000
ES3000 Use r Guide 5-76 management Use the management command to remove a port member from a VLAN. interface <vlanID> manageme nt S YNTAX D ESCRIPTION : <vlanID> VLAN ID C OMMAND M ODES : Interface configuration R EFERENCE :C i s c o M ENU : E XAMPLE : ! Set Vlan3 management Switch(config)# interface vl an3 Switch(config-if)# management[…]
-
Page 245: Symbol ES3000
Command Line Interface 5-77 PVID Use the PVID command to configure a PVID on a port. PVID <vlanID> S YNTAX D ESCRIPTION : <vlanID> VLAN ID C OMMAND M ODES : Interface configuration R EFERENCE : None M ENU : E XAMPLE : ! Set port 2 PVID 3 Switch(config)# interface fa stethernet0/2 Switch(config-if)# PVID 3 Switch(config-if)# frame-type U[…]
-
Page 246: Symbol ES3000
ES3000 Use r Guide 5-78 show vlan Use the show-vlan command to displa y VLAN information. show vl an <vlanID> S YNTAX D ESCRIPTION : <vlanID> VLAN ID. D EFAULT V ALUE : The show vlan command has no default setting. C OMMAND M ODES : Privileged EXEC R EFERENCE : Foundry M ENU : Advanced Switch Config uration -> VLAN Management Menu E […]
-
Page 247: Symbol ES3000
Command Line Interface 5-79 E XAMPLE : ! Enable GVRP Switch(config)# gvrp Switch(config)# ! Disable GVRP Switch(config)# no gvrp Switch(config)# show vlan gvrp Use the show vlan gvrp comman d to display VLAN information. show vl an gvrp S YNTAX D ESCRIPTION : <vlanID> VLAN ID. D EFAULT V ALUE : The show vlan gvrp command ha s no default setti[…]
-
Page 248: Symbol ES3000
ES3000 Use r Guide 5-80 show vlan port Use the show vlan port command to display VLAN information. show vl an port S YNTAX D ESCRIPTION : D EFAULT V ALUE : The show vlan port command has no default setting. C OMMAND M ODES : Privileged EXEC R EFERENCE : M ENU : E XAMPLE : Switch# show vlan port Port PVID Acceptable Frame Type GVRP —- —- ——-[…]
-
Page 249: Symbol ES3000
Command Line Interface 5-81 5.14 Quality of Service Commands mls qos Use the mls qos command to enable or disab le the QoS implemented in the system . mls qos no mls qos S YNTAX D ESCRIPTION : The mls qos comma nd has no argument. D EFAULT V ALUE : The feature is disabled by d efault. C OMMAND M ODES : Global configuratio n R EFERENCE :C i s c o M […]
-
Page 250: Symbol ES3000
ES3000 Use r Guide 5-82 E XAMPLE : ! traffic class(Queue) 1 map ping to Priority 5 Switch(config)# priority-que ue cos-map 1 5 Switch(config)# show mls qos Use the show mls qos command to display QoS information. show mls qos S YNTAX D ESCRIPTION : The show mls qos comman d has no arguments or keywords. D EFAULT V ALUE : The show mls qos command ha[…]
-
Page 251: Symbol ES3000
Command Line Interface 5-83 E XAMPLE : Switch# show priority-queue cos-map Pritority Traffic Class ——— ————- 00 10 22 31 42 52 63 73 Switch#[…]
-
Page 252: Symbol ES3000
ES3000 Use r Guide 5-84 5.15 Diffserv Commands diffserv classifier Use the diffserv classifier command to configure the class ifier for diffserv . diffserv classifier <index> [src-mac <mac> ] [dst-mac <mac> ] [vlan-id <vid> ] [dscp <ds> ] [protocol <pro> ] [src-ip <ip> ] [dst-ip <ip> ] [src-14-port &l[…]
-
Page 253: Symbol ES3000
Command Line Interface 5-85 E XAMPLE : ! Create a classifier Index:23, source MAC address: 00:00:01:02:03:04 Vlan ID is 40 Switch(config)# diffserv classifier 23 src-mac 00:00:01:02:03:04 vlan-id 40 Switch(config)# ! delete a classifier Index 23 Switch(config)# no diffserv classifier 23 Switch(config)# diffserv inprofile Use the diffserv inprofile […]
-
Page 254: Symbol ES3000
ES3000 Use r Guide 5-86 diffserv nomatch Use the diffserv nomatch command to configure nomatch action for diffserv . diffserv nomatch <index> [drop | policed-dscp <ds> | precedenc e <precede nce> | cos <cos> ] S YNTAX D ESCRIPTION : <index> No-match ID for diffserv <ds> 6-bits DSCP value in IP head er for action […]
-
Page 255: Symbol ES3000
Command Line Interface 5-87 diffserv outprofile Use the diffserv outprofile command to configure the out-profile for diffserv . diffserv outprofile <index> committed-rate <unit> burst-size <volume> [drop | dscp <ds> ] S YNTAX D ESCRIPTION : <index> Out-profile ID for diffserv <meter-id> Meter ID for out-profiler […]
-
Page 256: Symbol ES3000
ES3000 Use r Guide 5-88 E XAMPLE : ! Create a portlist Index 5, set port 3-7 . Switch(config)# diffserv por tlist 5 3-7 Switch(config)# ! delete a port-list 5 Switch(config)# no diffserv portlist 5 Switch(config)# diffserv policy Use the diffserv policy command to configure the policy for diffserv . diffserv policy <index> portlist <portli[…]
-
Page 257: Symbol ES3000
Command Line Interface 5-89 ! delete a policy Index 5 Switch(config)# no diffserv policy 5 Switch(config)# show diffserv classifier Use the show diffserv classifier command to display diffserv classifier information. show diffserv classifier S YNTAX D ESCRIPTION : The show diffserv classifier com mand has no arguments or keyword s. D EFAULT V ALUE […]
-
Page 258: Symbol ES3000
ES3000 Use r Guide 5-90 show diffserv inprofile Use the diffserv inprofile command to display the diffserv in-profile information. show diffserv inprofile S YNTAX D ESCRIPTION : The show diffserv inprofile command ha s no arguments or keywords. D EFAULT V ALUE : C OMMAND M ODES : Privileged EXEC R EFERENCE : M ENU : E XAMPLE : Switch# show diffserv[…]
-
Page 259: Symbol ES3000
Command Line Interface 5-91 show diffserv portlist Use the show diffserv portlist comman d to display diffserv portlist information. show diffserv portlist S YNTAX D ESCRIPTION : The show diffserv portlist comma nd has no arguments or keywords. D EFAULT V ALUE : C OMMAND M ODES : Privileged EXEC R EFERENCE : M ENU : E XAMPLE : Switch# show diffserv[…]
-
Page 260: Symbol ES3000
ES3000 Use r Guide 5-92 show diffserv policy Use the show diffserv policy command to display diffserv policy information. show diffserv policy [ <index> ] S YNTAX D ESCRIPTION : The show diffserv policy co mmand has no arguments or keywo rds. D EFAULT V ALUE : C OMMAND M ODES : Privileged EXEC R EFERENCE : M ENU : E XAMPLE : Switch# show diff[…]
-
Page 261: Symbol ES3000
Command Line Interface 5-93 show diffserv policy prcedence port Use this command to show diffserv policy prece dence by port information. show diffserv policy-precedence port <port num> [sort index/precede nce ] S YNTAX D ESCRIPTION : The command has no arguments or keywords. D EFAULT V ALUE : C OMMAND M ODES : Privileged EXEC R EFERENCE : M […]
-
Page 262: Symbol ES3000
ES3000 Use r Guide 5-94 5.16 802.1x Commands dot1x radius Use the dot1x nas-id command to set 802.1x admin status. dot1x radius <NASID> S YNTAX D ESCRIPTION : <NASID> String, ID for dot1x reque st to Radius server. D EFAULT V ALUE : C OMMAND M ODES : Global configuratio n R EFERENCE : M ENU : E XAMPLE : ! NAS ID «dot1x_auth» S[…]
-
Page 263: Symbol ES3000
Command Line Interface 5-95 R EFERENCE :C i s c o M ENU : E XAMPLE : ! set port-control auto on p ort 5 Switch(config)# interface fastethern et0/5 Switch(config-if)# dot1x por t-control auto Switch(config)# dot1x re-authentication Use the dot1x re-authentication co mmand to set 802.1x port re-authenticatio n. dot1x re-authentica tion no dot1x re-au[…]
-
Page 264: Symbol ES3000
ES3000 Use r Guide 5-96 dot1x timeout re-authperiod Use this command to set the numbe r of seconds betwe en re-authentication attempts. The command affects the beha vior of the s witch only if periodic re-authentica tion is en abled. dot1x timeout re-authperio d <minute> S YNTAX D ESCRIPTION : <minute> Set the number of minutes D EFAULT[…]
-
Page 265: Symbol ES3000
Command Line Interface 5-97 dot1x timeout quiet-period Use this command to set the number of seconds the switch remains in quiet state follo wing a failed authentication exchange with the clie nt. dot1x timeout quiet-period <second> S YNTAX D ESCRIPTION : <second> Set the number of seconds D EFAULT V ALUE : C OMMAND M ODES : Interface c[…]
-
Page 266: Symbol ES3000
ES3000 Use r Guide 5-98 dot1x timeout tx-period Use this command to set the number of seconds the switch waits for a response to an EAP-request/identity frame fro m the client before retransmitting the re quest. dot1x timeout tx-period <sec ond> S YNTAX D ESCRIPTION : <second> Set the number of seconds D EFAULT V ALUE : C OMMAND M ODES […]
-
Page 267: Symbol ES3000
Command Line Interface 5-99 dot1x re-authenticate Use this command to re-authenticate on an 802.1 X-authorized port. dot1x re-authentica te S YNTAX D ESCRIPTION : The dot1x re-authen ticate command has no arguments or key words. D EFAULT V ALUE : C OMMAND M ODES : Interface configuration R EFERENCE :C i s c o M ENU : E XAMPLE : ! re-authenticate on[…]
-
Page 268: Symbol ES3000
ES3000 Use r Guide 5-100 dot1x control-direction Use the dot1x control-direc tion command to impose dot1x authentication on either incoming or outgoing traffic. dot1x control-directio n <direction> C OMMAND M ODES : Interface configuration R EFERENCE :C i s c o M ENU : E XAMPLE : ! Set Control direction Both on port 5 Switch(config)# interfac[…]
-
Page 269: Symbol ES3000
Command Line Interface 5-101 show dot1x show dot1x <port-list> S YNTAX D ESCRIPTION : <port-list> Port list D EFAULT V ALUE : C OMMAND M ODES : Privileged EXEC R EFERENCE :C i s c o M ENU : E XAMPLE : Switch# show dot1x 1-2 NAS ID : dot1x_auth Port No : 1 Port Status : Authori zed OperControlDirection : Both Port Control : Force A uthor[…]
-
Page 270: Symbol ES3000
ES3000 Use r Guide 5-102 5.17 Radius Commands radius-server host Use the radius-server host comma nd to specify a RADIUS server host. radius-server host < ip -address> [timeout <s econds>] [retransmit <retrie s>] [key <string>] no radius-serv er S YNTAX D ESCRIPTION : ip-address IP address of th e RADIUS server host C OMMAND[…]
-
Page 271: Symbol ES3000
Command Line Interface 5-103 show radius-server Use the show radius-server comma nd to display Radius configure information. show radius-se rver S YNTAX D ESCRIPTION : The show radiu s-server command has no arguments or keywor ds. D EFAULT V ALUE : The show radius-server comman d has no default setting. C OMMAND M ODES : Privileged EXEC R EFERENCE […]
-
Page 272: Symbol ES3000
ES3000 Use r Guide 5-104 5.18 SNTP Commands sntp server Use the sntp server command to config ure the sntp server snto server <ip> S YNTAX D ESCRIPTION : <ip> IP address of the recipient. D EFAULT V ALUE : The hosts are not assigned by default C OMMAND M ODES : Global configuratio n M ENU : Basic Switch Configuration Menu->SNTP Conf […]
-
Page 273: Symbol ES3000
Command Line Interface 5-105 sntp daylight-saving Use this command to enable or disable dayligh t saving, if time zone is applicable. sntp daylight-saving no sntp daylight-saving S YNTAX D ESCRIPTION : This command has no arg ument. D EFAULT V ALUE : This command is disabled by default C OMMAND M ODES : Global configuratio n R EFERENCE : None M ENU[…]
-
Page 274: Symbol ES3000
ES3000 Use r Guide 5-106 E XAMPLE : !Configure timezone to Taipe i. Switch(config)# sntp timezon e 50 Switch(config)# show sntp Use the show sntp configurati on information for the interface show sntp S YNTAX D ESCRIPTION : D EFAULT V ALUE : This command has no default value C OMMAND M ODES : Privileged EXEC R EFERENCE : M ENU : E XAMPLE : Switch# […]
-
Page 275: Symbol ES3000
Command Line Interface 5-107 5.19 Sy slog Commands show log Use the show log command to display log for the switch show log S YNTAX D ESCRIPTION : D EFAULT V ALUE : The show log command has no de fault setting C OMMAND M ODES : Priviliaged EXEC R EFERENCE : M ENU : E XAMPLE : Switch# show log Entry Time(YYYY/MM/DD HH:MM :SS) Event —— ————[…]
-
Page 276: Symbol ES3000
ES3000 Use r Guide 5-108 log clear Use the log clear command to delete th e syslog log clear S YNTAX D ESCRIPTION : D EFAULT V ALUE : C OMMAND M ODES : Global configuratio n R EFERENCE : M ENU : E XAMPLE : Switch(config)# log clear Switch(config)#[…]
-
Page 277: Symbol ES3000
Command Line Interface 5-109 5.20 Power Over Ethernet Commands peth trap Use the peth trap command to con figure a PoE trap. peth trap no peth trap S YNTAX D ESCRIPTION : The peth trap comm and has no arguments or keyword s D EFAULT V ALUE : C OMMAND M ODES : Global configuratio n R EFERENCE : M ENU : E XAMPLE : !Set PETH trap on Switch(config)# pe[…]
-
Page 278: Symbol ES3000
ES3000 Use r Guide 5-110 peth disconnection-method Use the peth disconnection-method command to configure the d osconnection metho d. peth disc onnection-method <method> S YNTAX D ESCRIPTION : <method> next port — After the power budget has been exc eeded, the next po rt attempting to power up is denie d, regardless of its priority. low[…]
-
Page 279: Symbol ES3000
Command Line Interface 5-111 E XAMPLE : !Enable capacitor detection Switch(config)# peth capacit or-detection Switch(config)# peth limit Use the peth limit command to set the powe r limit on a port. peth limit <mwatt> S YNTAX D ESCRIPTION : <mwatt> Power limit 3-20 watts D EFAULT V ALUE : 15 watt C OMMAND M ODES : Interface configuratio[…]
-
Page 280: Symbol ES3000
ES3000 Use r Guide 5-112 E XAMPLE : !Set priority low oon port 3 Switch(config)# interface fastethern et0/3 Switch(config-if)# peth priority low Switch(config-if)# peth shutdown Use the peth shutdown comm and to shut down a PoE port. peth shutdown S YNTAX D ESCRIPTION : The peth shutdown comman d has no a rguments or keyw ords. D EFAULT V ALUE : C […]
-
Page 281: Symbol ES3000
Command Line Interface 5-113 show peth-conf Use the show peth-conf command to display switch Ethernet settings.. show peth-conf S YNTAX D ESCRIPTION : This comman d has no a rguments or keywor ds. D EFAULT V ALUE : C OMMAND M ODES : Prilileged EXEC R EFERENCE : M ENU : E XAMPLE : Switch# show peth-conf Power budget : 17 0 Watts Power Consumption : […]
-
Page 282: Symbol ES3000
ES3000 Use r Guide 5-114 E XAMPLE : Switch# show peth-port No. Admin. Status Cl ass Prio. Limit (W) Power (W) Vo l. (V) Cur. — —— ————— —— —— — —— ——— ——— —- 1 Up Not Powered — Low 15.4 0 0 0 2 Down Not Powered — Low 15 0 0 0 3 Up Not Powered — Low 15.4 0 0 0 4 Up Not Powered — Low 15.4 0 0 0 5 Up N[…]
-
Page 283: Symbol ES3000
Command Line Interface 5-115 5.21 Miscellaneous Commands sy stem mtu Use the system mtu command to set the mtu length. sy stem mtu 157 8 no sy stem mtu S YNTAX D ESCRIPTION : The system mtu co mmand has one argu ment for the current version that is required to be 1578. D EFAULT V ALUE : C OMMAND M ODES : Global configuratio n R EFERENCE : M ENU : E[…]
-
Page 284: Symbol ES3000
ES3000 Use r Guide 5-116[…]
-
Page 285: Symbol ES3000
Command Line Interface 5-117 5.22 Sample Configuration File ! Configurat ion file ! ! hostname switch -24+2 snmp-server location taipei snmp-server contact taipei username na me admin password software ! spanning-tree priority 30000 spanning-tree max-age 7 spanning-tree hello-time 1 spanning-tree forward-time 10 spanning-tree ! ! interface FastEthe[…]
-
Page 286: Symbol ES3000
ES3000 Use r Guide 5-118 ! interface FastEthe rnet0/2 shutdown no flow-control ! interface FastEthe rnet0/3 no flow-control ! interface FastEthe rnet0/4 speed-duple x 100-full no flow-control ! interface FastEthe rnet0/5 no flow-control ! interface FastEthe rnet0/6 no flow-control ! interface FastEthe rnet0/7 no flow-control spanning-tree port-prio[…]
-
Page 287: Symbol ES3000
Command Line Interface 5-119 ! interface FastEthe rnet0/9 no flow-control ! interface FastEthe rnet0/10 spanning-tree co st 2 spanning-tree port-prio rity 3 ! interface FastEthe rnet0/11 spanning-tree co st 2 spanning-tree port-prio rity 3 ! interface FastEthe rnet0/12 spanning-tree co st 2 spanning-tree port-prio rity 3 ! interface FastEthe rnet0/[…]
-
Page 288: Symbol ES3000
ES3000 Use r Guide 5-120 ! interface FastEthe rnet0/16 no flow-control ! interface FastEthe rnet0/17 no flow-control ! interface FastEthe rnet0/18 no flow-control ! interface FastEthe rnet0/19 no flow-control port security max -mac-count 1 port security action noaction ! interface FastEthe rnet0/20 no flow-control port security Secure port security[…]
-
Page 289: Symbol ES3000
Command Line Interface 5-121 port monitor FastEthernet0/23 ! interface FastEthe rnet0/23 no flow-control ! interface FastEthe rnet0/24 no flow-control ! interface GigabitEth ernet0/25 no flow-control ! interface GigabitEth ernet0/26 giga-port-type GBIC no flow-control ! ! vlan-type 802.1q ! interface vlan1 name Defa ult VLAN untagged 0/1 -26 ! inte[…]
-
Page 290: Symbol ES3000
ES3000 Use r Guide 5-122 tagged 0/2 forbidden 0 /3-4 ! interface vlan3 name ext VLAN untagged 0/1 4 tagged 0/15 forbidden 0 /10-13 ! ip address 172.16 .3.42 255.25 5.240.0 ! ip igmp snoo ping ip igmp snoo ping aging-time 30 0 ip default-gateway 172.16.5.111 no ip http server mac-address-table agin g-time 400 mac-address-table static 00:00:1 1: 22:3[…]
-
Page 291: Symbol ES3000
Command Line Interface 5-123 ! mls qos priority-queue cos-map 0 1 priority-queue cos-map 0 2 priority-queue cos-map 1 6 priority-queue cos-map 1 7 ! port storm-control broadcast threshold med ium ! console inactivity-timer 0 ! no telnet-server telnet-server inactivity-timer 10 ! end[…]
-
Page 292: Symbol ES3000
ES3000 Use r Guide 5-124[…]
-
Page 293: Symbol ES3000
Specifications & Pin Assignments A.1 Specifications The ES3000 Ethernet Sw itch has the following specificatio ns: Width 482.6 mm with mounting bracke ts 440 mm without mo utning brac kets Height 44 mm (1RU) Depth 256 mm W eight PoE version 8.95 lbs. (with rack brackets) PoE version 8.95 lbs. (w ithout rack b rackets) Non PoE version 7. 90lbs. […]
-
Page 294: Symbol ES3000
ES3000 Use r Guide A-2 A.2 RJ-45 Plug and RJ-45 Connector In a Fast Et hernet network, it is importa nt all 100B ASE-T c ertified Category 5 c abling use RJ-45 plugs. The RJ-45 plug accepts 4-pair UTP or shielded twisted-pair (STP) 100-ohm cable and connects into the RJ-45 connector . The RJ-45 connector is used to conn ect stations, hubs, and swit[…]
-
Page 295: Symbol ES3000
Cabling Guidelines B.1 Fast Ethernet Cable Guidelines Fast Ethernet uses UTP cable, as sp ecified in the IEEE 802.3u standard fo r 100BASE-TX.The specification requires Category 5 UTP cable consisting of e ither two-pair or fo ur -pa ir twisted insulated copper con ductors bound in a s ingle plastic sheath. Category 5 cable is certified up to 100 M[…]
-
Page 296: Symbol ES3000
ES3000 Use r Guide B-2 B.1.2 T ermination Method T o minimize cross-talk noise, mainta in the twist ratio of the cable up to the point of termination; verify untwist at any RJ-45 plug or p atch panel does not exceed 0.5 inch (1 .5 cm). B.2 Category 5 Cable Category 5 distributed cable that meets ANSI/EIA /T IA-568-A building wiring standards can be[…]
-
Page 297: Symbol ES3000
B-3 technology automatica lly senses which connection, MDI or MDI-X, is neede d and makes the right connection. B.4 Patch Panels and Cables If using patch panels, ensu re they meet the 100BASE-TX require ments. Symbol recommend s Category 5 UTP cable for patch ca bles and work area cables to ensure the UTP patch cable rating meets or exceeds the di[…]
-
Page 298: Symbol ES3000
ES3000 Use r Guide B-4 B.5.3 Length The maximum distance limitation between two piec es of equipment is 100 m, as per the original Ethernet specification . The end-to-end link is called the «channe l.» TSB-67 defin es the «Basi c Link» which is the portion of the link tha t is part of the buildi ng infrastructure. This ex cludes[…]
-
Page 299: Symbol ES3000
B-5 B.5.6 Patch Cables When installing equipment, replace old patc h panel cables that do not meet Category 5e specifications. As pointe d out in the NEXT section, this near end piece of cable is critical for successful operation. B.5.7 Optimum Performance For optimum performance of the 1000BASE-T product, it is important to fully qualify the cable[…]
-
Page 300: Symbol ES3000
ES3000 Use r Guide B-6[…]
-
Page 301: Symbol ES3000
Customer Support Symbol T echnologies prov ides its customers with prompt and ac curate customer support. Use the Symbol Support Center as the primary c ontact for any technical proble m, question or support issue invo lving Symb ol produc ts. If the Sy mbol Custo mer Support s pecialis ts cannot solve a p roblem, acc ess to al l techni cal discipl[…]
-
Page 302: Symbol ES3000
ES3000 Use r Guide C-2 North American Contacts Inside North America, contact Symbol by: Symbol T echnologies, In c. One Symbol Plaza Holtsville, New Y ork 11742-1300 T elephone: 1-631-738-2 400/1-800-SCAN 234 Fax: 1-631-738-5990 Symbol Support Center (fo r warranty and service information): telephone: 1-800-653-535 0 fax: (631) 563-5410 Email: supp[…]
-
Page 303: Symbol ES3000
C-3 W eb Support Sites MySymbol Care http://www .symbol.com/service s/msc Symbol Services Homepage http://symbol.com/serv ices Symbol Software Updates http://symbol.com/serv ices/downloads Symbol Developer Program http://software.symbol.com/devzo ne Additional Information Obtain additional information by conta cting Symbol at: 1-800-722-6234, insid[…]
-
Page 304: Symbol ES3000
ES3000 Use r Guide C-4[…]
-
Page 305: Symbol ES3000
Glossary 10BASE-T The IEEE specification for 10 Mbps Ethernet o ver Category 3, 4, or 5 twisted- pair cable. 100BASE-FX The IEEE specifica tion for 100 Mb ps Fast Ethernet over fiber-optic cable. 100BASE-TX The IEEE specificatio n for 100 M bps Fast Ether net over Ca tegory 5 twiste d-pair cabl e. 1000BASE-SX The IEEE spec ification for 1000 Mbps G[…]
-
Page 306: Symbol ES3000
ES3000 Use r Guide GL-2 Backbone The part of a network used as a primar y path for transporting traffic betwe en networ k segments. Bandwidth The information ca pacity , measured in bits p er second, tha t a channe l could transmit. Bandwidth examples includ e 10 Mbps for Et hernet, 100 Mb ps for Fast Ethe rnet, and 1000 Mbps (I Gbps) for Gigabit E[…]
-
Page 307: Symbol ES3000
GL-3 Full-dup lex A system that a llows packets to be tran smitted and r eceived at the same ti me and, in effect, doubles th e potential thro ughput of a link. Half-duplex A system that allows packets to transmitted and recei v ed, but not at the same time. Contrast wit h full-du plex. IEEE Institute of Electrical and Electronics Engineers. Th is […]
-
Page 308: Symbol ES3000
ES3000 Use r Guide GL-4 Multicast A single packet sent to a specific group o f end stations on a network. Port monit oring The ability t o monitor the traff ic passing t hrough a p ort on a device to an alyze network characte ristics and perform tro ubleshooting. Port spee d The spee d that a po rt on a dev ice uses t o communicat e with anoth er d[…]
-
Page 309: Symbol ES3000
GL-5 T raffic prioritization Giving ti me-critical data traff ic a higher quality of service over other , non-critical data traffic. Unicast A packet sent to a single end statio n on a network. VLAN Virtual LAN. A logic al asso ciation that allows users to c ommunicate as if they were physically connected to a single LAN, independent of the actual […]
-
Page 310: Symbol ES3000
ES3000 Use r Guide GL-6[…]
-
Page 311: Symbol ES3000
Numerics 1000BASE-T G igabit Ethernet Category 5 cables . . . . . . . . . . . . . . . . . . . . . . . . . B-3 NEXT . . . . . . . . . . . . . . . . . . . . . . . . . . . . . . . . . . . B-4 return loss . . . . . . . . . . . . . . . . . . . . . . . . . . . . . . . B-4 802.1x port settings . . . . . . . . . . . . . . . . . . . . . . . . 3-36, 4-23 A a[…]
-
Page 312: Symbol ES3000
ES3000 Use r Guide IN-2 guidelines . . . . . . . . . . . . . . . . . . . . . . . . . . . . . . . . B-1 length . . . . . . . . . . . . . . . . . . . . . . . . . . . . . . . . . . . B-4 patch panels . . . . . . . . . . . . . . . . . . . . . . . . . . . . . . B-3 trunk guidelines . . . . . . . . . . . . . . . . . . . . . . . . . . 3-41 twisted pair . […]
-
Page 313: Symbol ES3000
IN-3 dot1x re -authentic ate command . . . . . . . . . . . . . . . . . 5-99 dot1x re -authentic ation comman d . . . . . . . . . . . . . . . . 5-95 dot1x time out quiet- period co mma nd . . . . . . . . . . . . . 5-97 dot1x timeout re-a uthperiod comm and . . . . . . . . . . . . 5-96 dot1x time out server command . . . . . . . . . . . . . . . . . .[…]
-
Page 314: Symbol ES3000
ES3000 Use r Guide IN-4 adding groups . . . . . . . . . . . . . . . . . . . . . . . . . . . 4-34 cabling guidelines . . . . . . . . . . . . . . . . . . . . . . . . 3-41 configuration . . . . . . . . . . . . . . . . . . . . . . . . . . . . 3-41 configuring multiple links as one . . . . . . . . . . . . . 4-34 setting priority . . . . . . . . . . . . […]
-
Page 315: Symbol ES3000
IN-5 polling interval, se tting . . . . . . . . . . . . . . . . . . . . . . . . 3-26 port moni tor command . . . . . . . . . . . . . . . . . . . . . . . . . 5-36 ports configurat ion 802.1x settings . . . . . . . . . . . . . . . . . . 3 -36, 4-23 basic . . . . . . . . . . . . . . . . . . . . . . . . . . . . . . 3-29 CIST advanced . . . . . . . . . […]
-
Page 316: Symbol ES3000
ES3000 Use r Guide IN-6 radius-server host command . . . . . . . . . . . . . . . . . . . 5-102 Rapid Spanning Tree Protocol, see RSTP rate limits . . . . . . . . . . . . . . . . . . . . . . . . . . . . . . 3-69, 4-71 reboot protocol . . . . . . . . . . . . . . . . . . . . . . . . . . 3-23, 4-13 regional topology . . . . . . . . . . . . . . . . . . […]
-
Page 317: Symbol ES3000
IN-7 sntp timezone . . . . . . . . . . . . . . . . . . . . . . . . . . . . . . . 5-105 software browser versions . . . . . . . . . . . . . . . . . . . . . . . . . . 4-1 rebooting . . . . . . . . . . . . . . . . . . . . . . . . . . . . . . . 3-23 upgrades . . . . . . . . . . . . . . . . . . . . . . . 2-1, 3-22, 4-12 spanning tr ees configurat ion CI[…]
-
Page 318: Symbol ES3000
ES3000 Use r Guide IN-8 Web interface . . . . . . . . . . . . . . . . . . . . . . . . . . . . 2-1 user inte rface about . . . . . . . . . . . . . . . . . . . . . . . . . . . . . . . . . . . 3-5 logging out . . . . . . . . . . . . . . . . . . . . . . . . . . . . . . . 3-6 working with . . . . . . . . . . . . . . . . . . . . . . . . . . . . . 1-2 use[…]
-
Page 319: Symbol ES3000
[…]
-
Page 320: Symbol ES3000
Symbol Technologies, Inc. One Symbol Plaza Holtsville, New York 11742-1300 http://www.symbol.com 72E—6844 6-01 Revision A May 2 004[…]