-
Contents
-
Table of Contents
-
Bookmarks
Quick Links
Register your product and get support at
www.philips.com/welcome
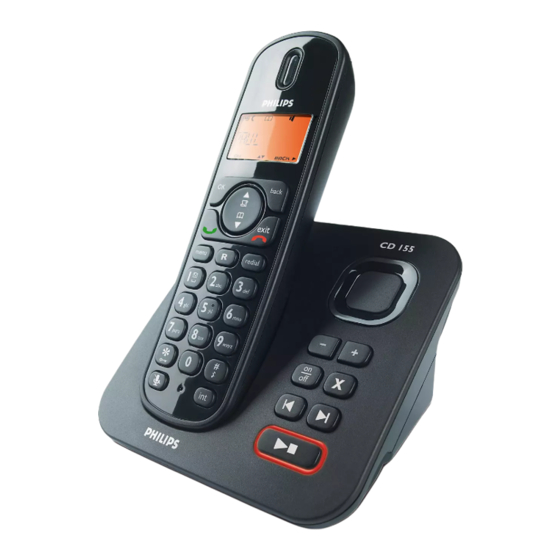
Telephone answering machine
!
Warning
Use only rechargeable batteries.
Charge the handset for 24 hours before use.
CD 155
Related Manuals for Philips CD 155
Summary of Contents for Philips CD 155
-
Page 1
Register your product and get support at www.philips.com/welcome Telephone answering machine Warning Use only rechargeable batteries. Charge the handset for 24 hours before use. CD 155… -
Page 3: Table Of Contents
Table of contents Safety information Equipment Approval Information Interference Information Hearing Aid Compatibility (HAC) FCC RF Radiation Exposure Statement Important Power requirements Conformity Electric, Magnetic and Electromagnetic Fields («EMF») 7 Recycle your batteries Service Centers Your phone What’s in the box Overview of your phone Display icons Overview of the base station 13…
-
Page 4
Unregister Reset unit Set area code Set prefix Change flash time Change the dial mode Set first ring 9.10 Default settings Telephone answering machine (TAM) 10.1 Play 10.2 Delete all messages 10.3 Switch the answering machine on/off via handset 10.4… -
Page 5: Safety Information
The REN is useful in determining the number of devices you may connect to your telephone line and still have all of these devices ring when your telephone number is called. In most (but not all)
-
Page 6: Interference Information
In case of such temporary discontinuance, the telephone company must: (1) promptly notify you of such temporary discontinuance; (2) afford you the opportunity to correct the situation; and (3) inform you of your right…
-
Page 7: Hearing Aid Compatibility (Hac)
Hearing Aid Compatibility (HAC) This telephone system meets FCC/ Industry Canada standards for Hearing Aid Compatibility. FCC RF Radiation Exposure Statement This equipment complies with FCC RF radiation exposure limits set forth for an uncontrolled environment.
-
Page 8: Important
• Do not allow the charger to come into contact with liquids. • Never use any other battery than the one delivered with the product or recommended by Philips: risk of explosion. • Always use the cables provided with the product.
-
Page 9: Conformity
113º F). • Battery life may be shortened in low temperature conditions. Conformity We, Philips declare that the product is in compliance with the essential requirements and other relevant provisions of Directive 1999/5/EC. This product can only be connected to the analogue telephone networks of the countries mentioned on the packaging.
-
Page 10: Service Centers
Philips product service centers. Please call 1-800-8-BATTERY for information on Ni-MH battery recycling and disposal bans/restrictions in your area. Philips’s involvement in this program is part of its commitment to protecting our environment and conserving natural resources. ®…
-
Page 11: Your Phone
Your phone Congratulations on your purchase and welcome to Philips! To fully benefit from the support that Philips offers, register your product at www.philips.com/welcome. What’s in the box Handset 2 AAA rechargeable NiMH batteries User manual Note *You may find in the box the line adaptor delivered separately from the line cable. In this case, you have to connect the line adaptor to the line cord first before plugging the line cord to the line socket.
-
Page 12: Overview Of Your Phone
Overview of your phone Earpiece < OK key During a call: Access the Call menu In other modes: Select the function displayed on the handset screen directly above it. Back/Clear key In text or number editing mode: Short press to delete one digit/character. Long press to delete all digits/characters.
-
Page 13
During a call: Switch from pulse dialing to tone dialing. In call log reviewing mode: Press repeatedly to view the alternate dialing sequences. Ringer off key In idle mode: Insert #. Long press to turn the ringer on/off. During a call: Insert #. Long press to insert a pause. -
Page 14: Display Icons
Display icons Status bar Indicates battery is fully charged. Indicates battery is fully discharged. Indicates that an external call is connected or held. Icon blinks when receiving an incoming call. Indicates new voice messages received. Icon blinks when there are unread messages. Displays when the call log is accessed.
-
Page 15: Overview Of The Base Station
Overview of the base station Earpiece Volume keys Increase (+) or Decrease (-) speaker volume. There are 5 levels of speaker volume. On/Off key Short press to switch on/off the answering machine. Delete key Delete current message during message playback. Long press to delete all messages when TAM is in idle mode (unread messages will not be deleted).
-
Page 16: Getting Started
Therefore, ensure that the electricity socket is easily accessible. The power adaptor and telephone line cord have to be connected correctly, as incorrect connection could damage the unit. Always use the telephone line cord supplied with the unit.
-
Page 17: Install Your Phone
Turn the bracket around and re- insert the bracket to the back of the base station. Slide the base down into place. Use the pedestral wall mounting to plug your base station. Getting started Install your phone Before using the handset, the batteries have to be installed and fully charged.
-
Page 18
The battery icon blinks during charge. The battery icon when the handset is fully charged. Note Optimal battery life is reached after 3 cycles of complete charging (over 15 hours) and discharging, allowing approximately 12 hours of talk-time and 150 hours of stand-by time. The indoor and outdoor range of the phone is up to 50 metres and 300 metres respectively. -
Page 19: Menu Structure
Menu structure The table below describes the menu tree of your phone. Press key to display the main menu. Use navigation keys < the menus and press PHONEBOOK NEW ENTRY LIST EDIT ENTRY DELETE ENTRY DELETE ALL DIRECT MEMORY PERSONAL SET HANDSET NAME HANDSET TONES LANGUAGE…
-
Page 20
ADVANCED SET CHANGE PIN REGISTRATION UNREGISTER RESET AREA CODE AUTO PREFIX FLASH TIME DIAL MODE FIRST RING ANSWER MACHINE PLAY DELETE ALL ANSWER ON/OFF RECORD OGM ANSWER MODE SETTINGS DETECT DIGIT PREFIX SHORT/MEDIUM/LONG TONE/PULSE ON/OFF During playback REPEAT/PREVIOUS/NEXT/DELETE ON/OFF ANSWER & REC PLAY OGM/ RECORD OGM/ DELETE… -
Page 21: Using Your Phone
Using your phone Make a call 5.1.1 Predialling Dial the number (maximum 24 digits). Press key. • The call is initiated. You may insert a prefix number to the beginning of your predial number, see “Set Prefix” on chapter 9.6 for more information.
-
Page 22: Answer A Call
“1-234-567-8900” again. To dial the current displayed number, press • The call is initiated. Note You need to subscribe to Caller Line Identification service to be able to see the caller’s number or name in the call log (see “Access call list” on chapter 6.7.1). When saving the call list entry to phonebook, the original incoming number will be saved instead of the current…
-
Page 23: Use More Of Your Phone
Use more of your phone Switch the handset on/off Press and hold key for more than 5 seconds to switch on/off the handset in idle mode. Keypad lock/unlock Press and hold key for 1 second to lock/unlock the keypad in idle mode. Text or number entry When you select a field in which you can enter text, you can enter the letters that…
-
Page 24: Using Your Phonebook
6.4.4 Adjust loudspeaker volume During a call, press VOLUME 1 VOLUME 5 6.4.5 Call waiting If you have subscribed to Call Waiting service, the earpiece will emit a beep tone to inform you that there is a second incoming call. The number or name of the second caller will also be displayed on your phone if you have subscribed to Caller Line Identification service (CLI).
-
Page 25
< Press to display name. Edit the name and press Edit the number and press confirm. • A validation tone is emitted. 6.5.4 Delete a phonebook entry Press in idle mode, scroll and press PHONEBOOK scroll DELETE ENTRY < press Scroll to select an entry to <… -
Page 26: Using The Redial List
is displayed on the CONFIRM? < screen. Press deletion. • A validation tone is emitted and the screen returns to previous menu. Using the redial list The redial list stores the last 5 numbers dialed. A maximum of 24 digits can be displayed for each entry.
-
Page 27
If you have not subscribed to Caller Line Identification service, there will not be any information displayed in the call log. 6.7.1 Access call list Press in idle mode to browse the call list. • The calls (missed and received) are displayed in chronological order with the most recent call at the top of the list. -
Page 28: Using The Intercom
Using the intercom Warning Intercom and call transfer is only possible with handsets registered to the same base station. This feature is only available when there are at least 2 registered handsets. It allows you to make free internal calls, transfer external calls from one handset to another and use the conference option.
-
Page 29: Handset Locating
to put the external call on hold (the caller can no longer hear you). If there are more than 2 registered handsets, the handset numbers which are available for intercom will be displayed. Scroll specific handset number you wish to <…
-
Page 30: Personal Settings
< < , press HANDSET TONES again to enter RING VOLUME When will be displayed on the screen. PHILIPS 7.2.2 and press There are 10 ring melodies available on HANDSET your handset. < 7.2.3 A single tone is emitted when a key is pressed.
-
Page 31: Change The Display Language
Change the display language Your handset can support different display languages. Press key in idle mode, scroll PERSONAL SET < , scroll < and press Scroll to your desired language < and press to confirm. • A validation tone is emitted and the screen returns to previous menu.
-
Page 32: Clock And Alarm
Clock and Alarm This feature allows you to set the date, time and alarm settings for your phone. The default date and time is respectively. 12:00 am Set date and time Press in idle mode, scroll CLOCK & ALARM < <…
-
Page 33: Set Alarm Tone
Scroll < and press DAILY If you select ON ONCE , enter the time (HH:MM) for DAILY the alarm and scroll < . Press • A validation tone is emitted and the screen returns to previous menu. Note The alarm tone and alarm icon only sound/blink for 1 minute when the alarm time is reached.
-
Page 34: Advanced Settings
Advanced settings Change Master PIN The Master PIN is used for accessing the answering machine remotely. The default Master PIN number is 0000. The maximum length of the Master PIN is 8 digits. This PIN is also used to protect the settings of your handset.
-
Page 35: Reset Unit
Note If no action is taken on the handset within 15 seconds, the unregistration procedure will be aborted and the handset returns to idle mode. To unregister a handset that does not belong to the CD150/155 range, you can only use the CD150/155 handset to unregister it.
-
Page 36: Change Flash Time
Press key in idle mode, scroll ADVANCED SET < , scroll < and press is displayed on the DETECT DIGIT < screen. Press • The last stored detect string is displayed (if any). Enter a detect string number (maximum 5 digits) and press to confirm.
-
Page 37: Default Settings
Ringer Volume LEVEL 2 Tone Melody FLICK Earpiece Volume VOLUME 2 Key Tone Language Country dependent Auto Hang Up Handset Name PHILIPS Time/Date 2008/01/01; 12:00am Time format 12 HOURS Date format MM/DD Dialing Mode Country dependent Flash Time Country dependent…
-
Page 38: Telephone Answering Machine (Tam)
10 Telephone answering machine (TAM) Your phone features an answering machine that records unanswered calls when it is activated. The answering machine can store up to 99 messages. The maximum recording time is 18 minutes. You can use the control keys on the base station to perform the basic functions of the answering machine such as paging, message playback, deleting messages and adjustment of volume on the base station.
-
Page 39: Delete All Messages
PLAY < Press to start playback • The last recorded message will start to play until the first recorded message. During message playback, you can Telephone answering machine (TAM) ANSWER MACHINE menu. PLAY key. to return to BACK <…
-
Page 40: Switch The Answering Machine On/Off Via Handset
< Press OK to delete the personalized outgoing message and change back to default OGM. Set the answer mode , by which your correspondent can ANSWER ONLY Telephone answering machine (TAM) to playback to start < BACK ANSWER &…
-
Page 41: Answering Machine Settings
If there are new messages in your answering machine, the outgoing message will start playing after 2 Telephone answering machine (TAM) rings. If there are no new messages, the outgoing message will be played after 4 rings. Hence, if you want to check if you <…
-
Page 42
From the base, You can use speaker’s volume during call screening. The lowest volume level turns call screening off. Telephone answering machine (TAM) and press SETTINGS VOICE < to confirm. to adjust the… -
Page 43: 11 Technical Data
• The colour of the LCD backlight is Amber. General telephone features • Dual mode caller name & number identification • 5 standard ringer melodies and 5…
-
Page 44: Frequently Asked Questions
12 Frequently asked questions www.philips.com/support In this chapter, you will find the most frequently asked questions and answers about your phone. Connection The handset does not switch on! • Charge the batteries: Put the handset on the base station to charge. After a few moments, the phone will switch on.
-
Page 45
I cannot change the settings of my voice mail • Operator voice mail is managed by your operator and not the phone itself. Please contact your operator should you want to change the settings. Product behaviour Keypad does not work! •… -
Page 46: 13 Index
13 Index Accessories 9 Alarm 30 Alarm tone 31 Answer a call 20 Answer an external call 26 Answering machine mode 38 Auto hang-up 29 Call in progress 21 Call log 19 Call screening 40 Charge battery 15 Clock and alarm 30 Conference call 26 Connect base station 14 Date and time 30…
-
Page 47
Ring volume 28 Save a redial number 24 Set area code 33 Store a contact 22 Switch handset on/off 21 Telephone answering machine 36 Text or number entry 21 Tones Melody 28 Transfer an external call 26 Unmute 21 Unregister 32… -
Page 49
© 2008 Koninklijke Philips Electronics N.V. All rights reserved Reproduction in whole or in part is prohibited without the written consent of the copyright owner Printed in China Document number: 3111 285 42491…

RU
Дополнительная трубка
Предупреждение
Используйте только аккумуляторы.
Заряжайте трубку в течение 24 часов перед
использованием.
!
CD1550
Зарегистрируйте свое изделие и получите поддержку на
www.philips.com/welcome
инструкцияPhilips CD155

Telephone answering machine
Warning
Use only rechargeable batteries.
Charge the handset for 24 hours before use.
!
CD155
SE155
Register your product and get support at
www.philips.com/welcome
cd155_ifu_master_uk.book Page 1 Tuesday, February 12, 2008 5:44 PM
Посмотреть инструкция для Philips CD155 бесплатно. Руководство относится к категории телефоны, 5 человек(а) дали ему среднюю оценку 7.4. Руководство доступно на следующих языках: английский. У вас есть вопрос о Philips CD155 или вам нужна помощь? Задайте свой вопрос здесь
- 1 Important
- 2 Your phone
- 3 Getting started
- 4 Using your phone
- 5 Use more of your phone
- 6 Personal settings
- 7 Clock and Alarm
- 8 Advanced settings
- 9 Telephone answering machine (TAM)
- 10 Technical data
- 11 Frequently asked questions
- 12 Index
Главная
| Philips | |
| CD155 | CD1552B/05 | |
| телефон | |
| 8712581372507 | |
| английский | |
| Руководство пользователя (PDF) |
Энергопитание
| Число поддерживаемых батарей | 2 |
| Емкость батареи | 550 mAh |
| Технология батареи | Никель-металл-гидридный (NiMH) |
| Входящее напряжение сети | 220 — 240 V |
| Частота входящего переменного тока | 50 Hz |
| Тип батареек | AAA |
| Время работы в режиме разговора | 12 h |
| Время работы в режиме ожидания | 150 h |
Экран
| Дисплей с задней подсветкой | Да |
| Цвет подсветки | Янтарный |
| Встроенный экран | Да |
| Дисплей | TN |
Характеристики телефона
| Вместимость телефонной книги | 50 записей |
| Поддержка нескольких телефонных баз | 1 |
| Отключение микрофона | Да |
| Поддержка нескольких телефонных трубок | 4 |
| Вызов | Тоновый/импульсный |
Производительность
| Время записи | 10 min |
| Тип | DECT телефон |
| Автоответчик | Да |
| Максимальная дальность в помещении | 50 m |
| Максимальная дальность вне помещения | 300 m |
Вес и размеры
| Размеры базы | 120 x 114 x 82.5 mm |
| Размеры телефонной трубки (ШхГхВ) | 162 x 48.3 x 28.7 mm |
Индикация
| Индикация заряда батареи | Да |
| Светодиодные индикаторы | Да |
Прочие свойства
| Индикатор уровня сигнала | Да |
Управление вызовами
| Вместимость списка повторного набора | 5 |
| Идентификация абонента (Caller ID) | Да |
| Записи в журнале звонков | 10 |
| Функция отложенного звонка (вызова) | Да |
| Явная переадресация вызова | Да |
Порты и интерфейсы
| Plug & Play | Да |
| Беспроводное подключение | Да |
Дизайн
| Цвет товара | Черный |
| Тип крепления | Стол |
| Встроенная антенна | Да |
Характеристики управления
| Будильник | Нет |
| Регулятор громкости | Цифровой |
Содержимое упаковки
| Количество трубок в комплекте | 2 |
показать больше
Не можете найти ответ на свой вопрос в руководстве? Вы можете найти ответ на свой вопрос ниже, в разделе часто задаваемых вопросов о Philips CD155.
Инструкция Philips CD155 доступно в русский?
Не нашли свой вопрос? Задайте свой вопрос здесь
RU
Дополнительная трубка
Предупреждение
Используйте только аккумуляторы.
Заряжайте трубку в течение 24 часов перед
использованием.
!
CD1550
Зарегистрируйте свое изделие и получите поддержку на
www.philips.com/welcome
Содержание
1
1
Важная информация
2
1.1
Требования по питанию
2
1.2
Информация о технике
безопасности
2
1.3
Соответствие
3
1.4
Использование соответствия
стандарту GAP
3
1.5
Переработка и утилизация 4
1.6
Электрические, магнитные и
электромагнитные поля
(«EMF»)
4
2
Ваш телефон
5
2.1
Содержимое упаковки
5
2.2
Описание телефона
6
2.3
Значки дисплея
9
3
Подготовка к
эксплуатации
10
3.1
Подключение зарядного
устройства
10
3.2
Установка телефона
10
3.3
Регистрация трубки
11
4
Использование
телефона
13
4.1
Совершение звонка
13
4.2
Ответ на звонок
13
4.3
Завершение вызова
13
5
Использование других
возможностей телефона 14
5.1
Использование внутренней
связи
14
6
Персональные
установки
16
6.1
Изменение имени трубки 16
6.2
Тон трубки
16
6.3
Изменение отображаемого
языка
17
6.4
Выключение/выключение
функции автоматического
завершения разговора
17
7
Дополнительные
настройки
18
7.1
Регистрация трубки
18
7.2
Отмена регистрации
18
8
Технические
характеристики
19
9
Часто задаваемые
вопросы
20
10
Предметный указатель 22
Содержание

1 важная информация, 1 требования по питанию, 2 информация о технике безопасности
1важная информация
- Изображение
- Текст
2
Важная информация
1
Важная
информация
Перед использованием телефона
прочтите данное руководство
пользователя. В нем содержится
важная информация и указания по
эксплуатации телефона.
1.1
Требования по питанию
• Данный продукт работает от сети
переменного тока с
напряжением 220-240 В. В
случае отказа питания связь
может прерваться.
• Электрическая сеть
классифицируется как опасная.
Единственный способ
отключения зарядного
устройства — отключить его от
электрической розетки.
Обеспечьте постоянный
свободный доступ к розетке.
• Согласно стандарту EN 60-950
напряжение в сети
классифицируется как TNV-3
(напряжение в сетях телефонной
связи).
• Используйте только источники
питания, указанные в
руководстве пользователя.
• Список применимых источников
питания (производитель/модель):
Electronic Sales Ltd. — IW506 или
TR506 (для CD/SE15
0)
Electronic Sales Ltd. — IW156 или
TR156 (для зарядного
устройства)
Предупреждение
Во избежание повреждений или
неполадок:
• Не допускайте соприкосновения
зарядных контактов или батареи
с металлическими предметами.
• Используйте только
прилагаемую батарею или
батарею, рекомендованную
Philips: опасность взрыва.
• Всегда используйте
прилагаемые кабели.
1.2
Информация о технике
безопасности
• В данном устройстве не
предусмотрена функция
экстренных вызовов при сбое
питания. Для экстренных вызовов
должны быть предусмотрены
другие варианты.
• Не подвергайте телефон
излишнему воздействию тепла
от нагревательного
оборудования или прямых
солнечных лучей.
• Не роняйте сам телефон или
предметы на телефон.
• Не используйте чистящие
вещества, содержащие спирт,
аммиак, бензин или абразивы,
потому что они могут повредить
аппарат.
• Не используйте данное
устройство в местах, где
существует опасность взрыва.
• Не допускайте контакта
устройства с небольшими
металлическими предметами.
!

3 соответствие, 4 использование соответствия стандарту gap
Страница 5
- Изображение
- Текст
Важная информация
3
Это может ухудшить качество
звука и повредить устройство.
• Находящиеся вблизи
включенные мобильные
телефоны могут создавать
помехи.
• Не вскрывайте устройство — его
компоненты находятся под
высоким напряжением.
• Не допускайте контакта
зарядного устройства с
жидкостями.
Температура эксплуатации и
хранения:
• пользуйтесь устройством в
месте, где температура всегда
находится в пределах от 0 до 35º
C (32 — 95º F).
• Храните устройство в месте, где
температура всегда находится в
пределах от -20 до 45º C
(-4 — 113º F).
• Ресурс батареи может
уменьшиться в условиях низких
температур.
1.3
Соответствие
Мы, компания Philips, заявляем, что
данный продукт соответствует
основным требованиям и прочим
соответствующим условиям
Директивы 1999/5/EC. Этот продукт
можно подключать только к
аналоговым телефонным сетям
стран, упомянутых на упаковке.
Заявление о соответствии можно
найти на веб-сайте
www.p4c.philips.com.
1.4
Использование
соответствия стандарту
GAP
Стандарт GAP гарантирует, что все
трубки и базовые станции DECT
TM
GAP соответствуют минимальным
действующим стандартам
независимо от их торговой марки.
Телефонная трубка и базовая
станция соответствуют GAP, что
гарантирует наличие как минимум
следующих функций:
регистрация трубки, подключение к
линии, принятие и совершение
вызовов. Дополнительные
возможности могут оказаться
недоступными, если с базовой
станцией используется другая
трубка.
Чтобы зарегистрировать новую
трубку на базовой станции
стандарта GAP другой модели и
пользоваться ею, сначала
выполните действия, описанные в
инструкциях производителя, затем
следуйте указаниям на стр. 11.
Для регистрации трубки другой
модели на базовой станции вашего
нового телефона переведите
базовую станцию в режим
регистрации (стр. 11), затем
следуйте указаниям в инструкции
производителя.

4
Важная информация
1.5
Переработка и утилизация
Инструкции по утилизации батарей:
Не выбрасывайте
батареи вместе с
бытовыми отходами.
Сведения об упаковке:
Philips помечает упаковку
стандартными символами для
содействия переработке и
надлежащей утилизации
возможных отходов.
Внесен финансовый вклад в
соответствующую
национальную систему
восстановления и переработки.
Помеченную упаковку можно
переработать.
1.6
Электрические, магнитные
и электромагнитные поля
(«EMF»)
1. Philips Royal Electronics
производит и продает изделия,
ориентированные на
пользователя, которые
обычно, как и любые
электроприборы, способны
излучать и принимать
электромагнитные сигналы.
2. Один из главных деловых
принципов Philips — принять все
необходимые меры по защите
здоровья и обеспечению
безопасности пользователей
наших изделий для
соответствия всем
применимым законным
требованиям, а также
соответствовать стандартам
EMF, действующим на момент
изготовления изделий.
3. Philips
стремится
разрабатывать, производить и
продавать изделия, не
оказывающие вредного
воздействия на здоровье.
4. Philips
подтверждает, что
согласно современным
научным данным изделия
компании безопасны при
надлежащем использовании.
5. Philips
принимает активное
участие в разработке
международных
электромагнитных стандартов
и стандартов безопасности,
позволяя Philips предвидеть
дальнейшие разработки в
области стандартизации и
внедрять их в свои товары на
ранней стадии.

Ваш телефон
5
2
Ваш телефон
Поздравляем с покупкой и приветствуем в клубе Philips!
Для получения максимальной поддержки, предлагаемой Philips,
зарегистрируйте Ваше изделие в www.philips.com/welcome.
2.1
Содержимое упаковки
Трубка
Зарядное устройство
Крышка батарейного
отсека
2 аккумуляторные
батареи ААА
аккумуляторы NiMH
Блок питания
Руководство
пользователя
Гарантия

6
Ваш телефон
2.2
Описание телефона
A
Динамик
B
Кнопка «ОК»
В других режимах: выберите
функцию, отображаемую на экране
трубки непосредственно над ней.
C
Кнопка «Назад/Очистить»
В режиме набора текста или
номера: Кратковременно нажмите
для удаления одной цифры/
символа.
В других режимах: выберите
функцию, отображаемую на экране
трубки непосредственно над ней.
D
Навигационные кнопки
В режиме ожидания: пролистайте
вверх для доступа к журналу звонков
или вниз для доступа к телефонной
книге.
Во время разговора: пролистайте
вверх/вниз для увеличения или
уменьшения громкости динамика
трубки.
В других режимах: пролистайте меню
вверх/вниз или перейдите к
предыдущей или следующей
записи.
E
Кнопка «Разговор»
В режиме ожидания: ответ на
входящий внутренний или внешний
вызов.
В режиме просмотра телефонной
книги/журнала звонков/списка
повторного набора: наберите
выбранный номер.
F
Кнопка «Завершение
разговора/Выход»
В режиме ожидания: длительно
нажмите для включения/
выключения трубки.
Во время разговора: завершите
разговор.
В других режимах: кратковременно
нажмите или нажмите для возврата
в режим ожидания.
G
Кнопка меню
В режиме ожидания: доступ к
главному меню.
<
c
:
r
e
m

Ваш телефон
7
H
Кнопка Flash
Во время разговора: включите
функцию дозвона.
I
Кнопка повторного набора
В режиме ожидания: доступ к списку
повторного набора.
В режиме прямого набора номера:
наберите последний набранный
номер.
J
Блокировка клавиатуры
В режиме ожидания: вставьте *.
длительно нажмите для
блокировки/снятия блокировки
клавиатуры.
Во время разговора: переключите с
импульсного набора на тональный
набор.
K
Кнопка отключения звонка
В режиме ожидания: вставьте #.
Длительно нажмите для
включения/отключения звонка.
Во время разговора: вставьте #.
Длительно нажмите для вставки
паузы.
В режиме редактирования текста:
переключайтесь между верхним и
нижним регистрами. Длительно
нажмите, чтобы вставить пробел.
L
Кнопка отключения
звука
Во время разговора: Отключение/
включение микрофона трубки.
M
Кнопка перевода вызова/
внутренней связи
В режиме ожидания: совершение
внутреннего вызова.
Во время разговора: удерживайте
линию и наберите другую трубку
или переключайтесь между
внешними и внутренними
вызовами. Длительно нажмите
для начала телефонной
конференции.
N
Микрофон
v
l
*
#
M
i

8
Ваш телефон
O
Крышка батарейного отсека

Комментарии
Скачать файл PDF «Philips CD 155 Инструкция по эксплуатации» (2.19 Mb)
Популярность:
5890 просмотры
Подсчет страниц:
49 страницы
Тип файла:
Размер файла:
2.19 Mb