Многие Linux пользователи уже слышали про FreeBSD, эта система использует ядро BSD, похожее на Linux, поскольку оба ядра основаны на Unix и поддерживают одни и те же стандарты POSIX. Это такая же свободная, бесплатная операционная система с открытым исходным кодом, разработанная для обеспечения максимальной безопасности и гибкости. Чаще всего она используется на серверах. Основное отличие от Linux в том, что разработкой ядра и программного обеспечения занимается одна команда разработчиков.
FreeBSD поддерживает множество различных процессорных конфигураций, от серверов до микрокомпьютеров, таких как Raspberry Pi. Как и Linux, система поставляется с множеством программ, которые можно очень просто установить с помощью портов. Всего доступно более 20 000 пакетов. В этой инструкции мы рассмотрим как выполняется установка FreeBSD 11 последней, на данный момент, версии на компьютер amd64. Будем устанавливать версию с интерфейсом командной строки, она лучше всего подходит для серверов.
Подготовка к установке
Как обычно, сначала нам нужно скачать установочный образ, и только потом может быть выполнена установка и настройка freebsd 11.
Шаг 1. Загрузка образа
На официальном сайте есть несколько версий для разных архитектур, нам нужна amd64 или x86, в зависимости от количества оперативной памяти, которую вы желаете использовать.
Мы будем устанавливать последнюю версию FreeBSD 11.1, но если позже выйдет более новая версия, то я думаю, что статья будет все еще актуальна и для нее.
Шаг 2. Запись образа на диск
Далее вам нужно записать полученный образ на диск или на флешку. Вы можете использовать один из известных вам методов для этого. Например, в Linux вы можете использовать Unetbootin или Etcher, а в Windows есть Rufus.
Далее вставьте носитель в компьютер и измените настройки BIOS так, чтобы загрузка выполнялась из вставленного носителя. Чтобы войти в BIOS, во время загрузки нажмите одну из клавишей: F2, F11, F12 перед загрузкой операционной системы. Затем перейдите на вкладку «Boot» и поставьте там ваш носитель на первое место.
Шаг 3. Меню загрузчика
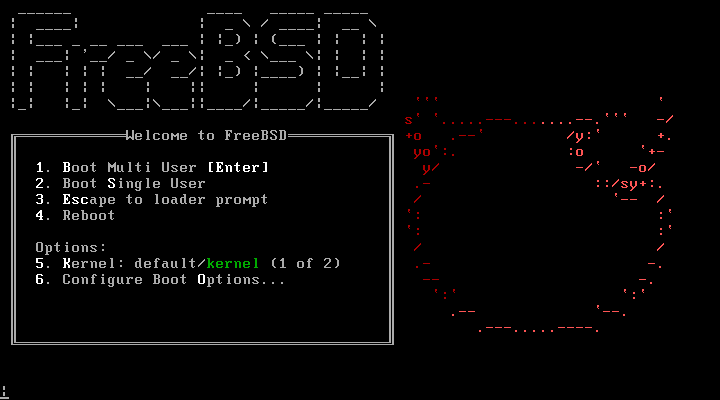
В первом меню загрузчика вам не нужно менять никаких параметров. Просто нажмите «Enter» для продолжения работы:
Шаг 4. Выбор действия
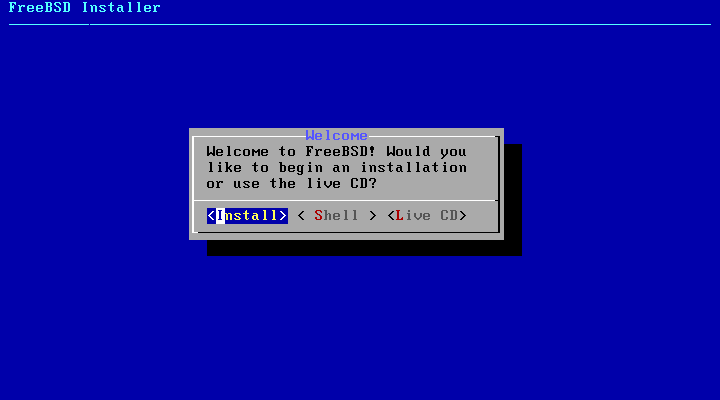
Дальше загрузиться псевдографический интерфейс, в нем выберите пункт «Install» для установки системы:

Шаг 5. Раскладка клавиатуры
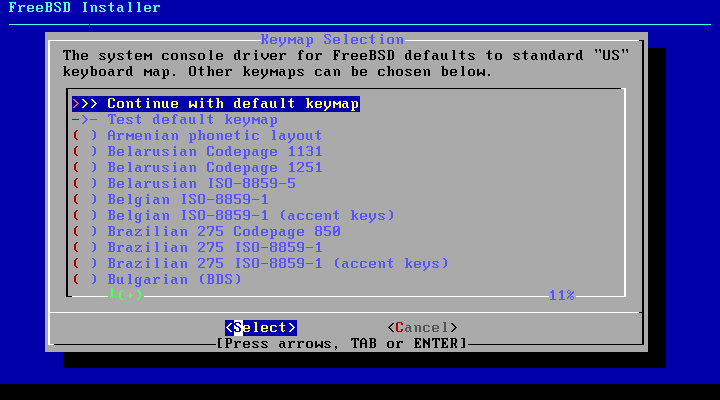
Выберите вашу раскладку клавиатуры, по умолчанию используется английская, в большинстве случаев лучше ее оставить:
Шаг 6. Имя хоста
Введите имя хоста для новой системы:

Шаг 7. Выбор программ
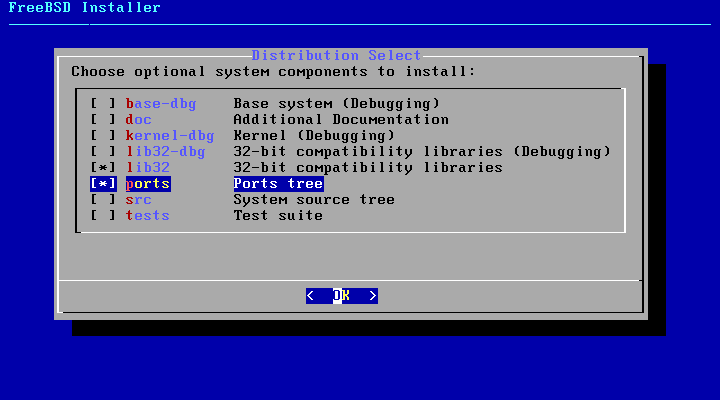
На следующем экране вам предстоит выбрать компоненты системы, которые вы хотите установить FreeBSD 11 на свой компьютер. Для того, чтобы отметить компонент нажмите «Пробел». Для сервера достаточно оставить библиотеки совместимости lib32 и Ports.

Когда завершите, нажмите «Enter».
Шаг 8. Автоматическая разметка диска
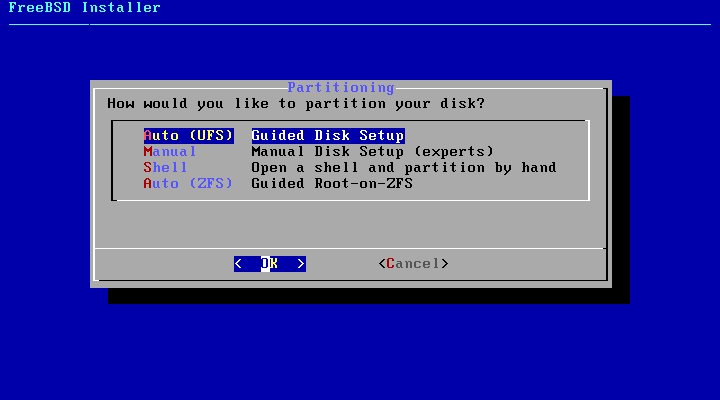
Дальше нужно выполнить разметку диска. Вы можете довериться установщику и выполнить автоматическую разметку или же сделать все вручную. Если у вас есть несколько жестких дисков, которые необходимо подключить, лучше использовать ZFS. Но мы рассмотрим на примере UFS.
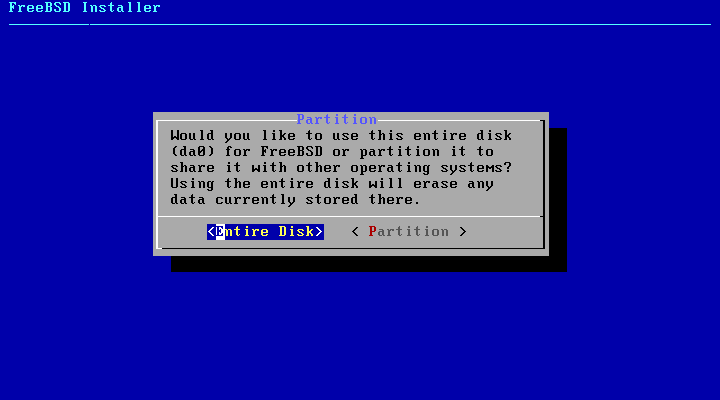
Далее вам нужно будет подтвердить использование всего диска для установки системы. Все данные на нем будут уничтожены.
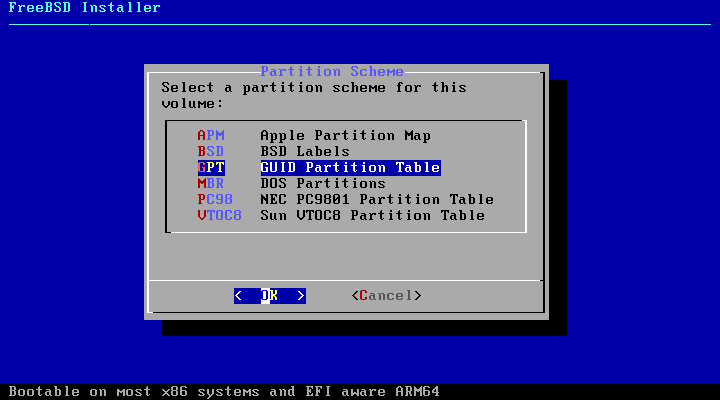
Затем выберите таблицу разделов. Если ваш диск больше 2 Тб или вы используете UEFI вместо BIOS, то вам лучше использовать GPT, в всех остальных случаях более предпочтительно MBR. Даже будет лучше если вы отключите защищенную загрузку и будете использовать MBR:
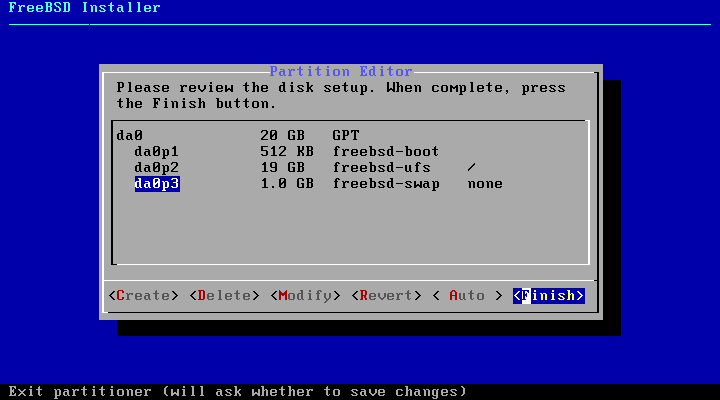
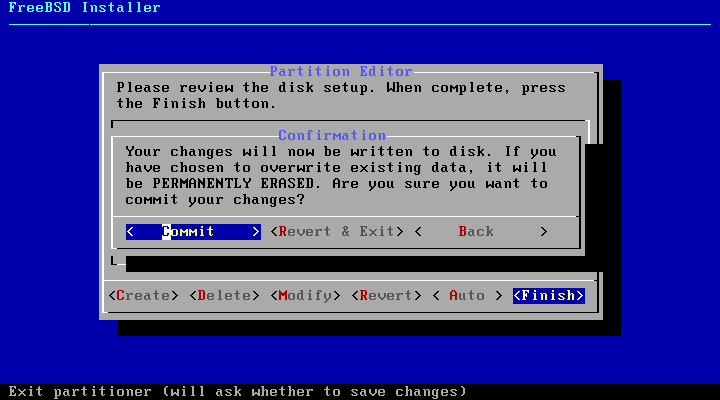
В следующем окне система покажет вам созданные разделы. В случае MBR будет создано два раздела — корень и раздел подкачки. Используйте «Tab» для выбора кнопки «Commit», а затем нажмите «Enter»:

Шаг 9. Установка FreeBSD
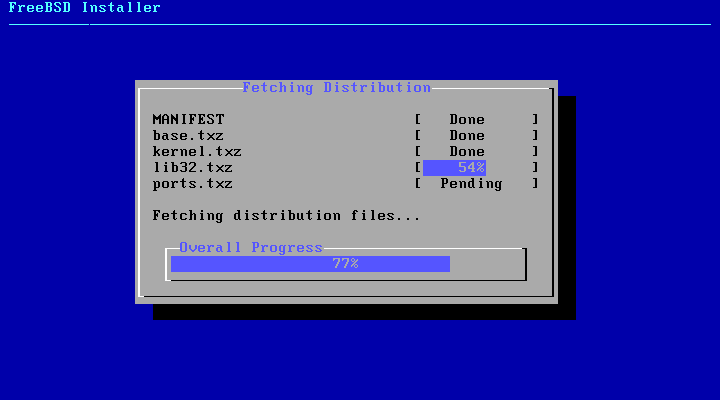
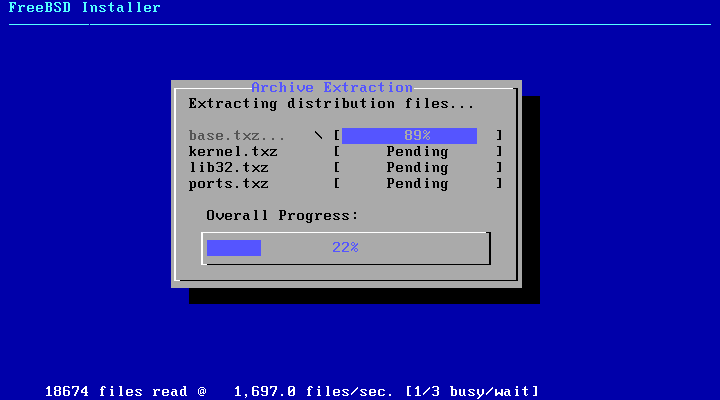
Дальше будет запущена установка FreeBSD 11 с флешки или другого носителя, в зависимости от скорости работы вашего компьютера и жесткого диска, установка может занять от 10 до 30 минут.
Шаг 10. Пароль суперпользователя
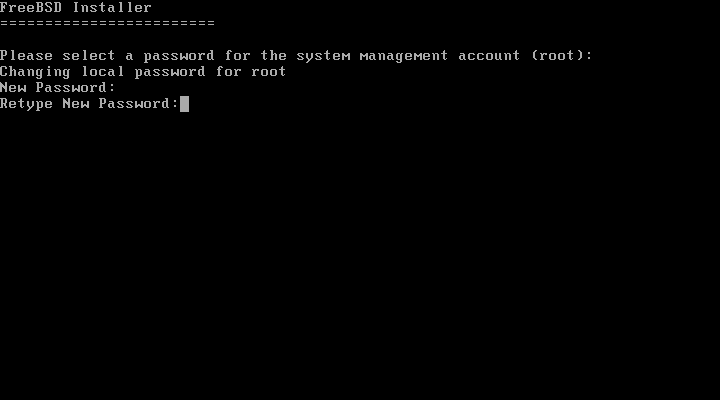
Когда установка завершится, система предложит вам ввести пароль для суперпользователя. Установщик спросит пароль два раза, но он не будет отображаться на экране:

Шаг 11. Настройка сети
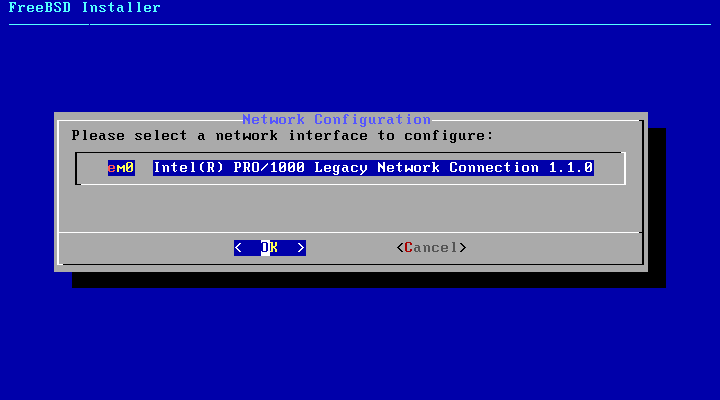
Дальше выберите сетевой интерфейс, через который вы собираетесь получать доступ в интернет. Как видите, имена сетевых интерфейсов отличаются от стандартов Linux:
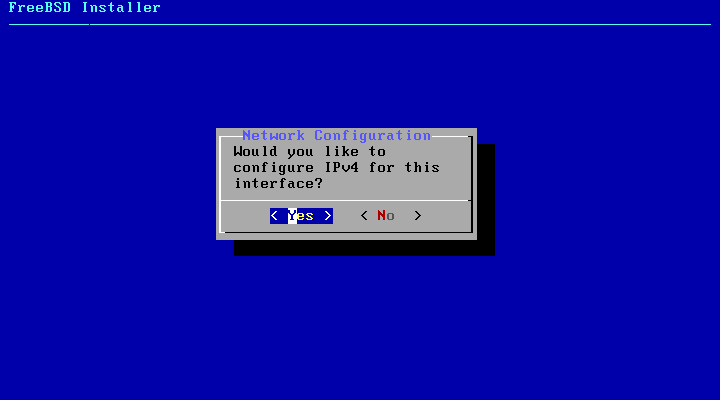
Затем выберите «Yes», чтобы выполнить настройку ip адреса IPv4:
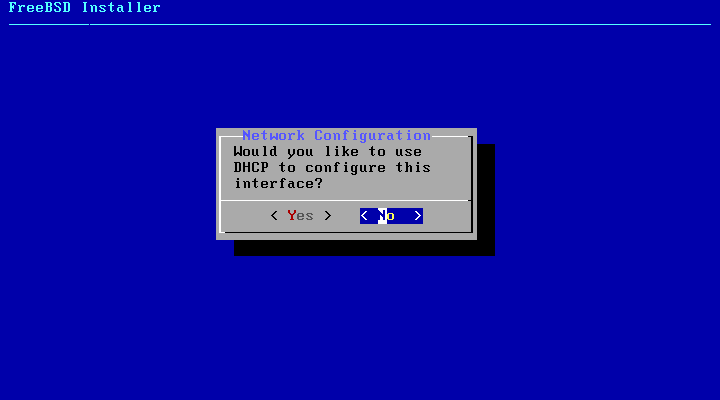
Вы можете выбрать вариант получения адреса по DHCP или настроить его вручную:
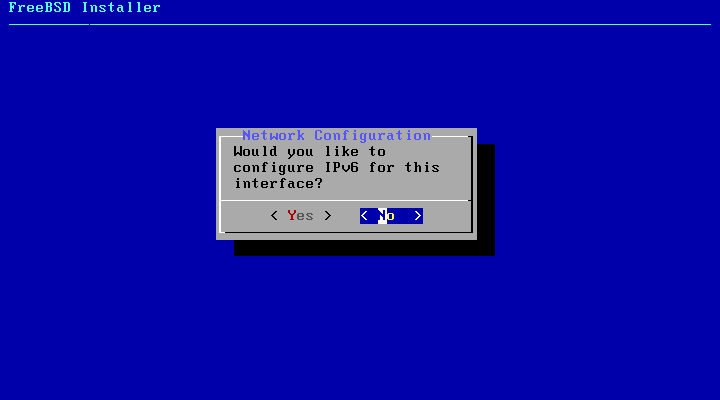
Настройку адреса IPv6 можно пропустить:
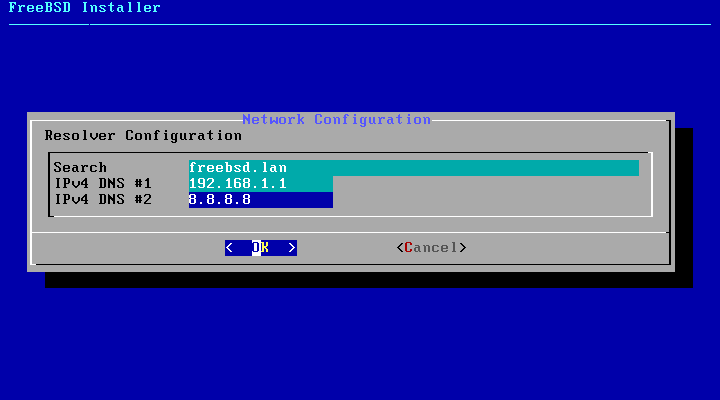
Последний этап настройки сети — настройка DNS серверов. Лучше всего добавить, кроме стандартного, DNS сервер от Google — 8.8.8.8:
Шаг 12. Регион
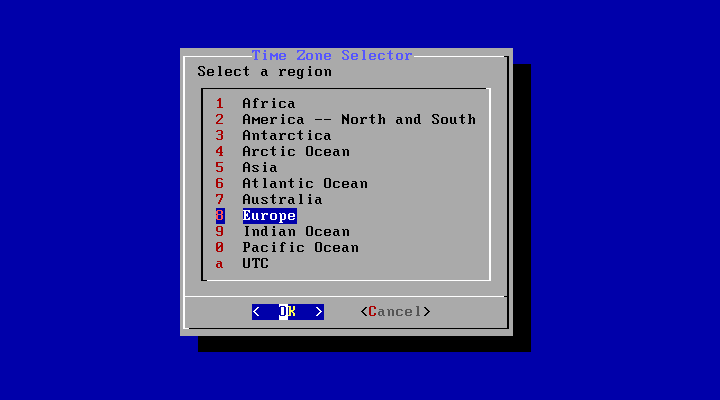
Выберите географический регион, в котором расположен ваш компьютер:
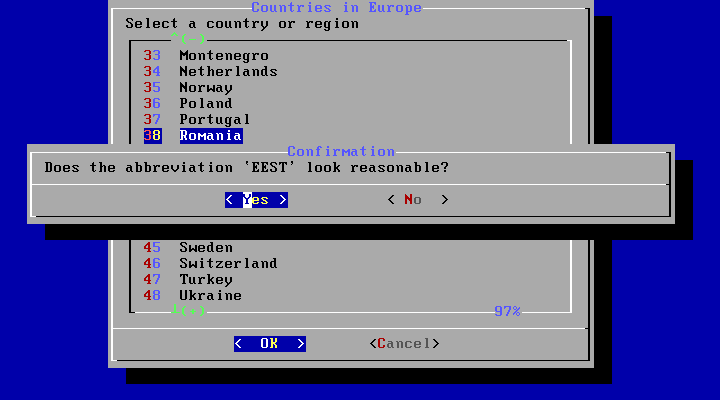
Затем выберите вашу страну:
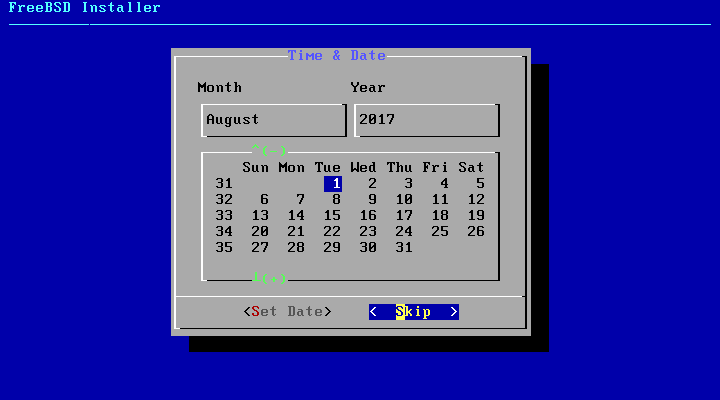
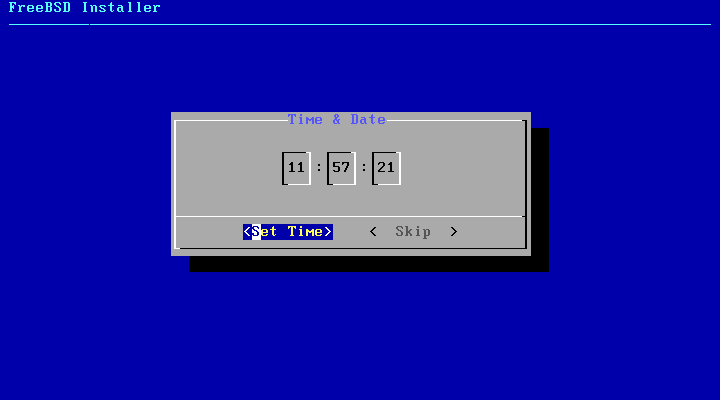
Шаг 13. Настройка даты
На следующем этапе нужно ввести текущую дату и время, если они были неверно получены из сети:

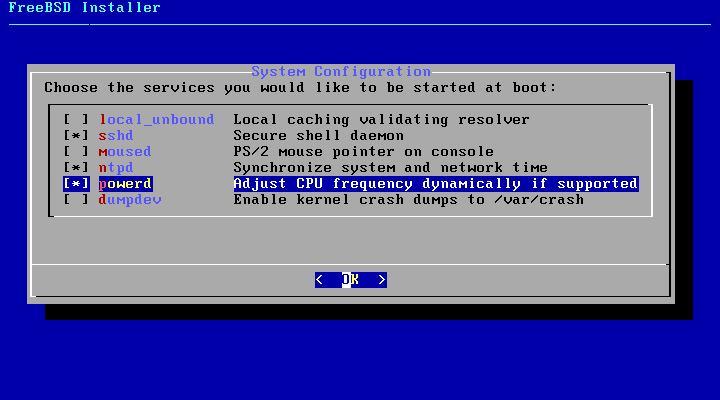
Шаг 14. Автозагрузка
Дальше нужно выбрать какие сервисы будут загружаться по умолчанию при старте системы. Например, SSH, NTP и Powerd. Последний позволяет автоматически регулировать частоту процессора в зависимости от нагрузки на систему.
Шаг 15. Дополнительные оптимизации
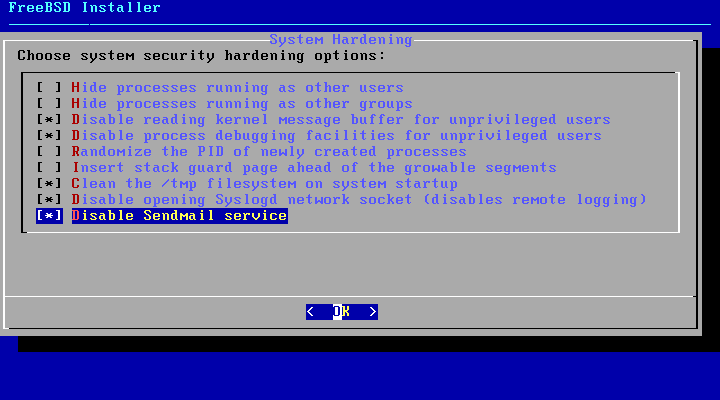
Эти опции позволяют усилить безопасность вашей системы. Отключите доступ к буферу ядра для непривилегированных пользователей. Отключите отладку, Включите очистку /tmp во время загрузки, отключите сокет Syslogd и Sendmail если вы не планируете использовать почтовый сервер:

Шаг 16. Другие пользователи
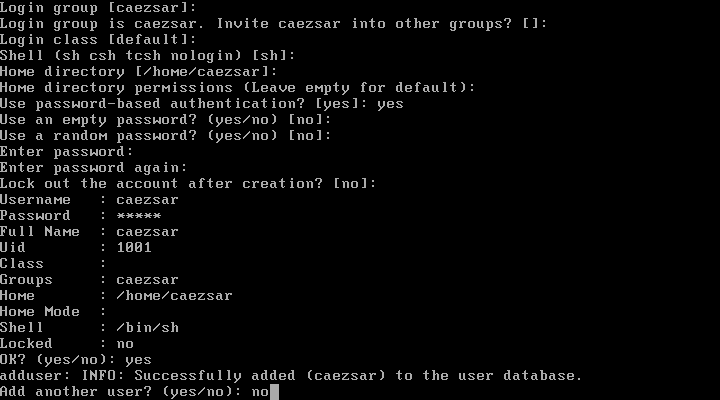
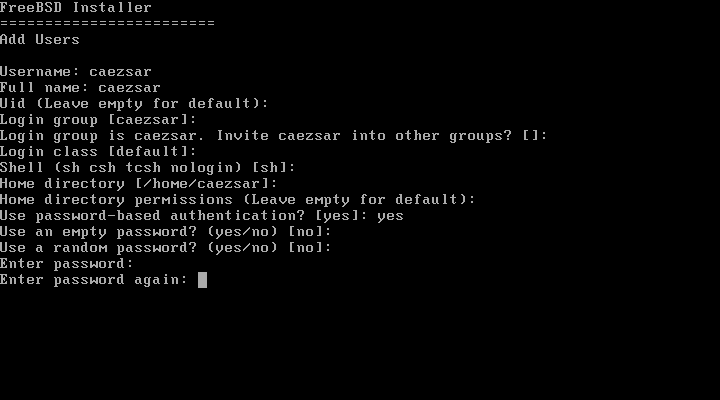
Дальше установщик спросит вас не желаете ли вы добавить к системе еще пользователей. Выберите «yes» и введите всю необходимую информацию о пользователе. Безопаснее всего оставить все поля по умолчанию, для этого достаточно нажимать «Enter»:

В качестве оболочки вы можете выбрать Bourne shell (sh) или tcsh. Когда завершите, просто наберите «Yes»:

Дальше система спросит вас хотите ли вы добавить еще пользователей, и если в этом нет необходимости, нужно ответить «no»:
Шаг 17. Завершение установки
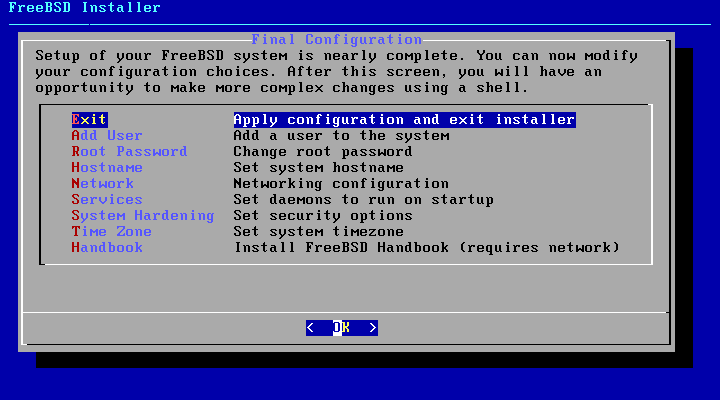
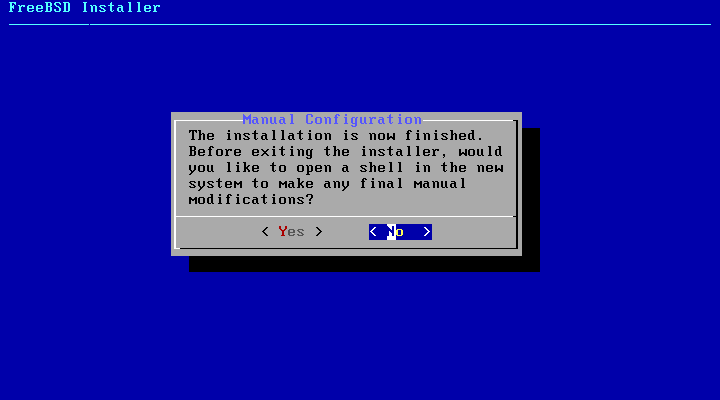
На последнем экране перед вами появится простое меню действий. Если вы не хотите ничего менять, просто выберите первый пункт — «Exit» и ответьте «no», чтобы перезапустить компьютер:

Шаг 18. Перезагрузка
Извлеките установочный носитель и нажмите «Enter»:

В меню загрузчика снова нажмите «Enter».
Шаг 19. Вход
Теперь вам осталось только ввести логин root и пароль, который вы задали во время установки:

Выводы
В этой статье мы рассмотрели как выполняется установка FreeBSD 11.1 на сервер или компьютер. Мы установили только консольную версию, но если вы собираетесь использовать систему на домашнем компьютере, то можно установить графическую оболочку и все другие компоненты из портов, так здесь называются репозитории. Надеюсь, эта информация была полезной для вас. Хотя FreeBSD все-таки отличается от Linux, у них очень много общего.
Обнаружили ошибку в тексте? Сообщите мне об этом. Выделите текст с ошибкой и нажмите Ctrl+Enter.

Статья распространяется под лицензией Creative Commons ShareAlike 4.0 при копировании материала ссылка на источник обязательна .
FreeBSD 13.2 has been released a few days. FreeBSD 13.2 edition is shipped with so many updates and features. This step by step guide explains how to download the latest FreeBSD version, how to create a FreeBSD Bootable USB and how to install FreeBSD 13.2 latest edition with screenshots.
What is FreeBSD?
FreeBSD is an Unix-like, advanced operating system that can be installed in modern Servers, Desktops, Laptops and embedded platforms.
The first version of FreeBSD was released in 1993, and today it is the most widely used open source BSD operating system.
FreeBSD is the direct descendant of BSD Unix and of course it is free. It is licensed under permissive BSD license.
Download FreeBSD 13.2
Go to the FreeBSD official download page and download the suitable version for your system’s architecture.
FreeBSD 13.2-RELEASE is available for the amd64, i386, powerpc, powerpc64, powerpc64le, powerpcspe, armv6, armv7, aarch64, and riscv64 architectures.
The FreeBSD installation requires at least 2-4 GB RAM and 8 GB hard drive space. However, you may need more Memory and disk space to run graphical desktop environments.
Create FreeBSD Bootable USB Medium
FreeBSD DVD ISO size is around 4.3 GB. So you may require 6 GB USB drive or more.
First, you need to create a bootable USB medium with the FreeBSD ISO file. There are many bootable USB creation tools available to create a bootable USB medium.
We have listed some of the tools to create bootable USB drive in Linux.
Command line bootable USB creation tools:
- How To Create Multiboot USB Drives With Ventoy In Linux
- How To Create Bootable USB Drive Using dd Command
- Bootiso Lets You Safely Create Bootable USB Drive In Linux
Graphical bootable USB creation tools:
- Create Bootable USB Drive With Ventoy WebUI In Linux
- Create Bootable USB Drives And SD Cards With Etcher In Linux
- Popsicle – Create Multiple Bootable USB Drives At Once
- Create Bootable USB Drive With USBImager In Linux
- Kindd – A Graphical Frontend To dd Command
If you wish to install and test FreeBSD on any hypervisor (Virtualbox, KVM, Vmware), just skip the media creation step and boot up the ISO image.
For demonstration purpose, I will be installing FreeBSD on Proxmox VE.
Install FreeBSD 13.2 Step By Step
Boot your system with FreeBSD bootable USB. You will be greeted with the FreeBSD Boot Loader menu.
Press 1 (number one) or press ENTER key to start the FreeBSD installation.
A few seconds, you will be prompted to choose one of the three options.
- Press ENTER to install FreeBSD on your hard drive.
- Select Shell and press to enter into command line mode. In commend line mode, you can partition the hard drives as per your choice before installing FreeBSD on it.
- The third option, Live CD will let you to try the live FreeBSD system without installing it.
Choose the «Install» option and hit ENTER to start FreeBSD installation.
Select your preferred keymap . I will go with the default keymap.
Enter a hostname for your FreeBSD system.
Choose the optional system components that you want to install on your FreeBSD system.
This is an important step. In this step, you need to choose how would you like to partition the drive. You will be prompted to choose one of the four partitioning methods as listed below.
- Auto (ZFS) — This is the default selection. If you choose this option, the drive will be automatically partitioned with ZFS filesystem.
- Auto (UFS) — This will automatically partition the disk with UFS filesystem.
- Manual — It is meant for advanced users. When you selected this method, you can create customized partitions from enu options as you wish.
- Shell — It allows the users to create customized partitions of their choice using commandline tools like fdisk, gpart etc.
Choose the partitioning method that suits you and follow the on-screen instructions to complete partitioning the drive. I will go with the default selection i.e. Auto (ZFS).
When Auto (ZFS) method is selected, you will see the main ZFS configuration menu that provides a number of options to control the creation of the pool. Configure the options according to your requirements.
Finally choose «>>> Install Proceed with Installation» option and hit ENTER to continue.
Next, we need to partition the disk drive and allocate space for each partition. FreeBSD installer provides six different partitioning methods to choose from.
Depending upon the use case, you can choose any one of the following partitioning method.
- stripe — It provides maximum storage of all connected disks, but no redundancy. If just one disk fails, the data on the pool is completely lost.
- mirror — Mirroring stores a complete copy of all data on every disk. It provides a good read performance because the data is read from all disks in parallel. On the contrary, the Write performance is slower because the data is written to all disks in the pool. Allows all but one disk to fail. To use this option, you must have at least two disks.
- raid10 — Striped mirrors. Provides the best performance, but the least storage. This option needs at least an even number of disks and a minimum of four disks.
- raidz1 — Single Redundant RAID. It requires at least three disks and allows one disk to fail concurrently.
- raidz2 — Double Redundant RAID. It requires at least four disks and allows two disks to fail concurrently.
- raidz3 — Triple Redundant RAID. It requires at least five disks and allows three disks to fail concurrently.
I have only one disk and I go with the «stripe» option.
For other partitioning methods, please head over to the Allocating Disk Space section in FreeBSD handbook.
Once the partitioning method is selected, a list of available disk drives will be listed in the next menu. You need to select the one or more devices to make up the ZFS pool.
You will now see a warning message that says the contents of the selected disk(s) will be deleted. make sure you don’t have anything important in the disk. Choose «Yes» and and hit ENTER key to continue.
FreeBSD installation will begin now. It will take a few minutes to complete.
After FreeBSD installation is completed, you will prompted to set a password to the root user.
Choose a network interface to configure.
Choose «Yes» to configure IPv4.
If you have a DHCP server in your network and want to assign IP address automatically from the DHCP to the FreeBSD system, choose Yes and hit ENTER. If you don’t have a DHCP server, simply choose «No».
I don’t have a DHCP server in my network, so I chose «No».
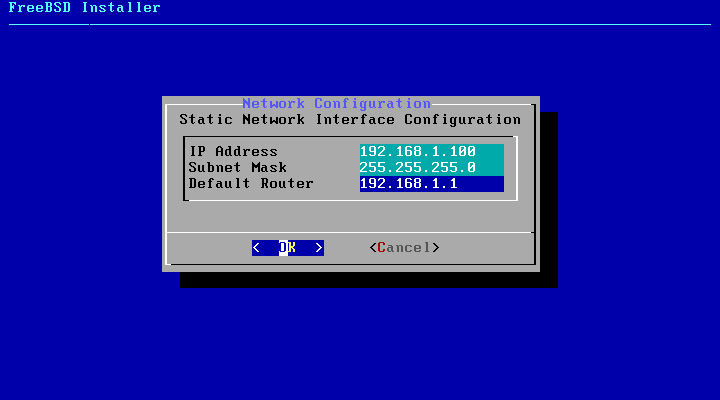
Enter the IP address, subnet mask, and gateway.
Next, you will asked if you want to configure IPv6 for the network interface. I don’t want to configure IPv6 at the moment, so I chose «No».
If you choose «yes» to configure IPv6, you need to provide the IP address, subnet and gateway as shown above.
Enter the DNS server details. Here, I’ve used the Google public DNS servers.
Select your geographical region and press ENTER.
Select your Country.
A pop up message will ask you to confirm the time zone.
Set your current date.
Set the time.
Choose the services that you’d like to be started at system reboot.
Choose the system hardening options that you’d like to apply on your FreeBSD systems.
Select «Yes» if you wish to add a new user to your system.
Enter the user details such as username, full name, password etc. Review the user details and type «yes» and press ENTER to create the user.
If you want to create more users, type «yes» and enter the details of the new user. If you don’t want to add more users, simply type «no» and press ENTER.
We reached the final stage of FreeBSD installation. You can now modify the configuration choices that you made throughout the installation process. If you don’t want make any changes, simply choose «Exit» and hit ENTER.
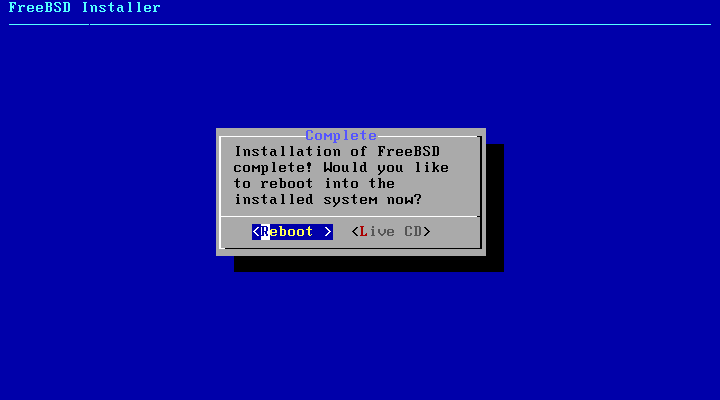
FreeBSD installation is finished! If you want to make any manual changes before completing the installation, choose «yes». If you don’t want to make any modifications, choose «no» and press ENTER.
Reboot into the newly installed FreeBSD system.
Login to the FreeBSD system as root user.
Check the install FreeBSD version using any one of the following commands:
# freebsd-version -k
# uname -mrs
# cat /etc/os-release
Update FreeBSD System
The first thing to do after installing any operating system is to apply the latest available updates.
To update FreeBSD OS, run the following command as root user:
# freebsd-update fetch install
Congratulations! We have successfully installed and updated FreeBSD 13.2 edition. In our upcoming articles, we will see how to,
- Create sudo users,
- Enable SSH,
- Set Static IP address and DNS,
- Reset or recover root user password,
- And more BSD related stuffs.
4.3. ��������� �����������
�� ��������� FreeBSD
�������� «Install» �� ���� ������������.
������� 4-4. ����� ��������� ���������

����������� �� ��������� FreeBSD �������� �� ������.
������� [ENTER], ����� ��������� � ���� ������������.
    === Platform specifics for i386
    +=====================  Installing FreeBSD  ==========================+
    |                                                                     |
    | Table of Contents:                                                  |
    |                                                                     |
    | 0.0     Quick Start:                                                |
    |         0.1     Installing FreeBSD from CDROM or the Internet.      |
    |                                                                     |
    | 1.0     Detail on various installation types:                       |
    |         1.1     Installing from a network CDROM                     |
    |         1.2     Installing from Floppies                            |
    |         1.3     Installing from a DOS partition                     |
    |         1.4     Installing from QIC/SCSI tape                       |
    |         1.5     Installing over a network using NFS or FTP          |
    |                 1.5.1   NFS Installation tips                       |
    |                 1.5.2   FTP Installation tips                       |
    |         1.6     Tips for Serial Console Users                       |
    |                                                                     |
    | 2.0     DOS User's Q&A section.                                     |
    |         2.1     How do I make space for FreeBSD?                    |
    |         2.2     Can I use compressed DOS filesystems from FreeBSD?  |
    |         2.3     Can I use DOS extended partitions?                  |
    |         2.4     Can I run DOS executables under FreeBSD?            |
    |                                                                     |
    +=====================================================================+

    �����:         Jordan K. Hubbard
    ��������� ����������:   Fri Mar 16 14:47:31 PST 2001

    0.0     ������� ������
    ---     --------------

    ��� ����������� �������� ������������ �� ��������� FreeBSD �� �����
    ����������. ���� �� ������ ������������� ���������� ������ FreeBSD,
    ����������� ������ ���������� �� �������� � ����� UPGRADE.TXT.
    ���� �� �� ������� � ������������� ������������ ��� FreeBSD,
    �������������� ����� ������ HARDWARE.TXT - � ��� ���������� ������
    ����������, ������� ������� ��� �� ��������� �������.

    ���� �� ����������� � FreeBSD �������, ��� ������� ����� ��������� ���
    ����������, ������� ��������� � ���� ������������. ����� ����������, ���
    ���������� ������� �����, �� �����, ����������� �� ��������� ������������
    ������, �������� ����� �� ���� ����, ��� �� ���� ������ ������������.
    �� ����� ������ ������� � ��������� ����������� �� ������, ���� �����
    � ��� ��������� ��������. ��� ������ ������� ����� �����������, �� �����
    ������ ����� ����� � ��� ���� � ��� ������ web-�������� ���������
    FAQ (����� ���������� �������) � �������� ������ HTML ��� ���������
    ���������� �� FreeBSD.  �� ����� ������ ������������ ������� ��� ���������
    ������ web-������ � ��������� (��������: http://www.freebsd.org), ����
    � ��� ���� ������ � ��������. ���������� �� ��������, ��������� ���,
    �� ������ ���������� ABOUT.TXT.

    ���� ��������� ������������� ��������� ������ �� �������� - � ���� ������
    ��������� � TROUBLE.TXT, ��� ���������� ������ ���������� �� ����������
    �������. ����� ���������� ��� ����� ������� ��������� ERRATA.TXT, �����
    ������ ���������, ��� ������� ��� �� �������, ������� �������� � ��� �
    ��������� ������.

    ��������������: �������� �� ��, ��� FreeBSD �������� �������������
    ��������� ������ ������, ���������� ������� ����������� ����, ���
    ��� ��������� ������ � �������� ��������� ��� ���������� �
    ����� ����� ������! ����������, �� �������� � ���� �������������
    ��������� FreeBSD, �������������� �� �������� ��� ������
    ����������! ������ �����������!

    ��� ������ FreeBSD ��������� 386 ��� ����� ����������� ���������
    (��������, ��������� ��� '286 ����������� ���), �� ������� ���� 16
    ���������� ����������� ������ ��� ��������� � 4-8 ����������
    ����������� ������ ��� ������ (� ��������� �����). ��� �����������
    �� ������� ���� 100M� ���������� ����� �� ������� ����� ���
    ����������� ���������. ���� ���������� ������� ����������
    ������������ �������� DOS ��� ��������� FreeBSD.


    0.1     ��������� FreeBSD � CDROM ��� �� ���������
    ---     ------------------------------------------

    ����� ������� ������ ��������� - � CD.  ���� � ��� ����
    �������������� CDROM �������� � ������������ FreeBSD CD ��
    Walnut Creek CDROM, ���������� 2 ������� ������ � ����
    ���������:

            1. ���� ���� ������� ������������ �����������������
               CDROM media (������ �����, ������� ����� ���� �������������
               � ���� ��������� ������������ ���������� ���, ��� ���������
               ������, � PC BIOS), � �� � ��� ������������, FreeBSD
               ������������ ����������������� CD �������� "El Torrito".
               ����� ������ ���������,  ������ �������� ������������
               CD � ���� CDROM �������� � ��������� �������.

            2. �������� ����� FreeBSD ����������� ������ �� ����������
               floppies, ��� ���� � ������ ������������ FreeBSD.  �����������
               ���� ������ "makeflp.bat'' �� DOS, ���� ����������
               floppies/README.TXT ��� ��������� ����� ���������
               ���������� �� �������� ����������������� ������ �
               ������ ������������ ��������.  ����� ������ ���������
               ���������� � ������ �������, ����� ������ ���������� �
               ��������� FreeBSD.

    ���� � ��� ��� CDROM � �� �� ������ ���������� FreeBSD �����
    ���� ��� ������ ���,  slip ��� ���������� �����, ������ �������
    ����  /floppies/boot.flp ��:

            ftp://ftp.freebsd.org/pub/FreeBSD

    ��� ����� �� ��� �������������� ������
    (http://www.freebsd.org/handbook/mirrors.html) � ���������� ��������
    ���������� ���� ���� 3. ��� ����� ������� ������������ � ������
    floppies/README.TXT, ���������� ������ ���������� �� ��������.
    ��� ������ ���� ����������� ������� ����� ������, ���������� �
    ������� 1.5 ������� ��������� �� �������������� ����������� ��
    ��������� ����� FTP ��� NFS.


    1.0     ��������� ���� ���������
    ---     ------------------------

    ��� ������ �� ���������� � ���������, �������� ��������� ����������
    �� ����. ���� �� ������� ������ �� ������������� FreeBSD,  ���
    ������������� ������������ � ������������� � Documentation
    ����, �  ����� ��������� ����� ���������� � ������ ����.

       ��������:  ���� � ��� �������� �����-���� ��������, �������
       ������� F1 ��� ��������� ������������� ������������, ����������
       ������� �������.

    ���� �� ������� ������ �� ���������� ���������� FreeBSD (�
    ���� ���� ����������), ����� ��������� Standard ��������
    ���������, ��������� � ��� ���� �������� ������ ����������
    ����� ��� ������ ������������ ������� �� ���� ���������. ����
    �� ������ ������� ���� � ��������� FreeBSD � ����� ������, ���
    ������, �������������� ������� ��������� Express ��� Custom.
    ���� �� �������������� ����� ������ ������ ������ �����, �����������
    ����� Upgrade.

    ��� ��������� FreeBSD �� ������ ������������ ���������, DOS,
    ������, CDROM, FTP, NFS � UFS � �������� ������������ �������.
    ���������� ����������, ���������� ������� ���� ���������,
    ��������� ����.


    1.1    ��������� � �������� CDROM
    ---    --------------------------

    ���� �� ������ ���������� ��������� � �������� CDROM �����,
    ���������� � ������� "������� ������". ���� � ����� �������
    ��� CDROM-��������� � �� ������� ��������������� ��������������
    CD � CDROM-��������� ������ �������, � ���� ������� � ��� ����
    ������, ���������� ��������� �������� ����������� �� ���:

    1. ���� � ��� ���� ����������� ���������� FreeBSD ��� ������
       FTP ����� � CDROM, ��� �� ��� ������: �� ������ ����������
       ��������� ������ � ���� /etc/passwd (��������� ������� vipw):

            ftp:*:99:99::0:0:FTP:/cdrom:/sbin/nologin

       ��������������:  ��� ����� ��������� ������ ������������
       ������� ���� (��� ���������) ��������� "��������� FTP ����������"
       � ������ �������, ��� �������� �������������.

       �� ������, ��� �� ����������� ���������, �������
       � ���� "Options" � ���������� "Release Name" ����� � "any".
       ����� �� ������ ������� ��� �������� FTP � �������:
       ``ftp://'' ����� ����, ��� �� �������
       "URL" � ���� ftp-������.

    2. ���� �� ������ ������������ NFS ��� �������� CDROM �����
       �� ������(�), � �������(��) ����� ����������� ���������, ���
       ���������� ������ ����� �������� ������ � ���� /etc/exports
       (�� ������ � CDROM-����������), ������� ��������
       �������������� ���:

            /cdrom          -ro             ziggy.foo.com

       ��������� ������ "ziggy.foo.com" ������������ CDROM
       �������� ����� NFS �� ����� ���������. ������ � CDROM
       ������ ����, �������,  ����� ���������������� ��� NFS ������.
       ���� �� �� ������ �����, ��� ��� ��������, ����� ���������
       ����� NFS �� ����� ������ ����� ��� ���, ���� ������ �� ��
       ���������� � rc.conf(5) � ��� ��������� ���������. ���� �����
       � ��� �� �������� ������� �������, �� ������� ������:
       cdrom-host:/cdrom ��� ���� ������� ��� NFS ���������, �����
       ������� ������ �����������, ����. wiggy:/cdrom


    1.2     ��������� � ������
    ---     ------------------

    ���� �� ����������� ���������� ��������� � ������ (� ���
    ���������������� ������������ ��� ��� ������ ��������
    ������� ����), �� ������ ������ ����� ����������� ���������
    ������ ��� ���������.

    ������� ����������� ���� ����������� �������, ��� ��� �������
    � floppies/README.TXT

    ����� ���������� ���� LAYOUT.TXT � �������� ������ ��������
    �� ������ "������ ������������", ��������� ��� ��������� �����,
    ������� ��� ����������� ��� ������ �� �������, � ��, ������� ��
    ������ ����������.

    ����� ����� ��� �����������, �� ������� ����, ������� 1.44M�
    ������, ������� ��������� ��� ����, ����� ��������� ��� �����
    � bin (�������� �����������) ����������. ���� �� �������� ���
    ������� � DOS, �� ��� ������� ������ ���� ���������������
    ��� ������ ������� MS-DOS FORMAT.  ���� �� �����������
    Windows, �������������� �������� Windows File Manager format.

    �� ��������� �������� ����������������� ��������! ���
    ��������, �������������� �� ��� ��� ����. ������ ��������
    ����� ������������� ��������� ��-�� ����� �����������������
    ���������, ��� ������ � ������� �� ��� ���� ������ ��������!

    ���� �� ����������� ������� � ������ FreeBSD ������,
    �� ����� ����� ���������������, ���� ��� �� ����������� ����������
    ������� ������ DOS �� ������ �������. �� ������ ������������
    ��������� `disklabel' � `newfs' ��� ������ �� ������� �������� �������
    UFS, ��������, � ����� ������������������ ������:

            fdformat -f 1440 fd0.1440
            disklabel -w -r fd0.1440 floppy3
            newfs -t 2 -u 18 -l 1 -i 65536 /dev/fd0

    ����� ����, ��� �� ��������������� ������� ��� DOS ��� UFS,
    ��� ���������� ����������� ����� �� ���. �������������� �����
    ������ ������� �� ����� ����� �������, ��� 5 �� ��� ���������� ��
    �������  ������� �������� 1.44��.  ����������� ��� ���� �������,
    ��������� �� ������ ������� ������� ������, ������� �� ���
    ����������, �� ��� ���, ���� ����� ������� � ��� �� ���������� ���
    �����������, ����������� ���. ������ ����������� ����� ����
    ������������� �� �������, ����.: a:binbin.inf, a:binbin.aa,
    a:binbin.ab, ...

    ��������: ���� bin.inf ������ ���������� �� ������ �������
    bin - ���������, ��������� �� ����������� ���������� ���������
    � ����� ��������, ������� ������ �������������� ������ ���
    ������ � ���������� ������������.  ��� ���������� �����������
    �� ��������, ����  >distname<.inf ������ ���������� �� ������
    ������� ������� ��������� �����������!  �� ���� ����� ������� �
    ABOUT.TXT.

    ��� ������ �� ����� �� ����� ������ �������� ����������� (Media
    screen of the install), �������� "Floppy" � ������� ����������  ���������.


    1.3     ��������� � ������� DOS
    ---     -----------------------

    ����� ������������� � ��������� � ������� MS-DOS, ��� �����
    ������ �����������  �����  �� ������������ � ���������� � ���������
    "FREEBSD" � ������� Primary DOS ("���� C:").  ��������, ��� ����,
    ����� ��������� ����������� ��������� FreeBSD �� DOS �
    �������������� ������, ������������� � CDROM, �� ������
    ������� �������������� ���������:

            C:> MD C:FREEBSD
            C:> XCOPY /S E:BIN C:FREEBSDBIN

    �����������, ��� �� ���� `E:' ��� ����������� � CD �������������.

    � ����������� �� ����, ������� ������� �� 'DISTS' �� ���������� ����������
    (��������������, ��� � ��� ���������� ��� ����� ���������� �����), ����������
    ������ �� ���� ������� (��������, ���������� CRYPT, MAN, SRC � �.�.)
    ����� �������, ��� ��� ������� ���� ��� BIN.  BIN - ����� ���� �����������
    ����� ��� ��������� ������� FREEBSD.

    ��� ������ �� ����������� ����������� ��� ����������, �� ������
    ����������� � ��������������� ������  � ����� ������� "DOS" � ��������
    ���� �������� ��������� OS FreeBSD.


    1.4    ��������� � ����� QIC/SCSI
    ---    ---------------------------

    ��� ��������� � �����, ������������ ��������� ������������, ���
    �����  ����� �������� �� ��� � ������� tar, ������� ����� ����,
    ��� �� ������� ��� ����� ��� ������������ ��� �����������,
    ������ �������� �� �� ����� ��� ������ ������� tar �������� ���������
    �������:
            cd /where/you/have/your/dists
            tar cvf /dev/rwt0 (or /dev/rsa0) dist1 .. dist2

    ����� �� ���������� � ���������, �� ������ ���������, ��� �
    ��� ���������� ����� �� ��������� ���������� (����� �� ��������
    �� ����), ����� ���������� ��� ���������� �����, ������� ��
    ��������. ��������� ����� �� �������� ������������ �������������
    �������, ���� ����� ��������� ������� ����������� ����������
    ������������� ������, ����������� ��� ������ � ���������� �����.

    ��������: ��� ��������� ����� ������ ���� � �������������
    �� �������� � ������������ ������. � ��������� ������ �����������
    �� �������.

    ������ �������� ����������� �������, ��� ��� ������� � ������� 0.1
    � ���������� �����������.


    1.5     ��������� �� ���� ��� ������ FTP ��� NFS
    ---     ----------------------------------------

    ����� ����, ��� �� ����������� ������� ���, ��� ��� ������� �
    ������ �������, �� ������ ��������� ���������� ����� ����������
    �� ���� ��������� ���� �� ���� ��������� �����:

       ���������������� ����:  SLIP / PPP
       ������������ ����:      PLIP (��������� ������ ���� ``laplink'')
       Ethernet:               ����������� Ethernet ���������� (�������
                               ������������ PCCARD ����������).

    ���������������� ����
    ---------------------

    ��������� SLIP �������� ������ � ���������� ������ �����
    ������������ ��������� ����������, ����� ��� ������
    ����������� ��� ���������� ����� COM �����. ��� �����
    ������ ���� ��������������, ������ ��� ��������� ����� SLIP
    � ��������� ������ �� ����� ����������� �������. ���� ���
    �����  ������������ ����� ����� ��� ������������ ������ � �������
    ����� ����� ����������� � ���, ����� � ��� ������� ������ �����
    ������ ��������� ��������������� PPP.


    ���� �� ����������� PPP, ��������� ������� � ��� IP ������� ������
    ��������-���������� � DNS, ��������� ��� ��� ����������� �� ����� ��
    ������ ������ ���������.  ��� ����� ����� ������������� ������
    ������������ IP ������, ���� PPP � ������������ �������� ������������
    ������� � ����� �������� ��� ���������� ����� �� ������ ISP, ���� ��
    ������������ ����� ����������.

    ��� ����� ���������� �����, ��� ������������ ���������� "�T
    ���������" ��� ������� � ������� ���� ������, ������� � ��� ����,
    ��������� ���������������� ��� ������������ ������ ��� ������ �
    ����� �������� ��������� ���������.

    ������������ ����
    -----------------

    �� ������ ���������� �������, ��������� ���������� �����
    ������������ ����. ������ ��� ������ ���������� ������ ����
    ������� ���������� ����, ��� ��� �������� ��� "laplink".
    �������� �������� ������ ����� ������������
    ���� ������� ����, ��� ������� �������� �������� �����
    ���������������� ���� (�� 50 �/���), ������� �����������
    �������� �������. ������ ��� ������������� ������������ "��������"
    IP ������ ��� ������� ������������� ������ � ���������� �����-�����
    � �� ������ ������ ������������ ������ �� RFC1918 ��� ���������
    ����� ����� (����., 10.0.0.1, 10.0.0.2, �.�.).

    ��������: ���� �� ����������� ������ Linux, � �� FreeBSD
    � �������� ������ PLIP �������, ��� ����� ���������� �������
    "link0" � ���� ��������� TCP/IP "�������������� ����� ��� ifconfig'',
    ����� ���� ������������� � PLIP-���������� LINUX, ������� �������
    ����������.

    Ethernet
    --------

    FreeBSD ������������ ����� ������� PC Ethernet �����, �
    ������� �������������� ���� (� �� ����������� ��������)
    ��������� � �������� ������� � FreeBSD Hardware Guide (������
    ���� ������������ �� ����������� ������� ��� ����������
    �������� ������ CDROM-�).  ���� �� ����������� ���� ��
    �������������� PCMCIA Ethernet ����, ��������� �����, ���
    ��� ��������� �� ����, ��� ��������� ����� �������! � ���������,
    � ��������� ����� FreeBSD �� ������������ "hot insertion" PCMCIA
    ���� �� ����� �����������.

    ��� ����� ���������� ����� ��� IP-����� � ����, �������� "netmask"
    - ������� ����� ��� ������ ������ � �������� ����� ������.
    ��� ��������� ������������� ����� ����������, ����� ��������
    �������� � ����� ���������� ������. ���� �� ������ ����������
    � ������ ����������� �� �����, � �� �� I�-������, ���  �����
    ����������� ������ ������� ���� � ����� (���� �� ����������� PPP,
    ��� IP-����� ������ ��������-����������).  ���� �� ������
    ��������� ��������� ����������� FTP ����� ������������� �� HTTP
    (������ ����), ��� ����� ����������� ����� ������ �������.
    ���� �� �� ������ ������ �� ��� �������, ����� ��� �������
    ���������� �� ����� ��������� ��������������� �� ����, ���
    ���������� � ������ ���� �����������!  ��� �������������
    ���� �������� ��������� IP-������� ��� netmask � �������� ����,
    �����������,  ������ �����, �� ������� � ������ ������.

    ��� ������ �� ���������� ����������, ����������� ����� ����
    ���������� �� NFS ��� FTP.


    1.5.1   ����������� ����������� �� NFS
    -----   ------------------------------

            NFS-��������� �������� ������: ������ ����������
            ������������ ��� �������������� ����� FreeBSD ����-������
            �� NFS ������ � ����� ������� ��� ����� � �������� ������
            NFS �������� ��� �����������.

            ���� ���� ������ ������������ ������  ������ � "privileged port"
            (��� ��� ������ ������ �� ��������� ��� ������� �������
            Sun � Linux), ��� ���������� ����� ���������� ��� ����� �
            ���� Options �� ����, ��� ����������� ����� ����������.

            ���� � ��� Ethernet-����� ������� ��������, � ������� �����
            ������ �������� ��������, �� ������ ������������ ��������������
            ����� � Options ��� ��������� ���������� �����.

            ��� ����, ����� ���� �������� ��������� �� NFS, ������ NFS
            ������ ��������� ������������ �������������  "subdir mounts".
            ��������, ���� ����������� FreeBSD ��������� � ����������:

            wiggy:/usr/archive/stuff/FreeBSD

            �� � ���� ������ wiggy ������ ��������� �����������  ����������
            /usr/archive/stuff/FreeBSD, � �� ������ /usr ���
            /usr/archive/stuff.

            �� FreeBSD � ����� /etc/exports ��� ������������� � �������
            ����� ``-alldirs''.  ������� NFS ����� ����� ������ �����
            �������� �����������. ���� �� ��������� ��������� `Permission
            Denied' �� �������, ��������, �� ������� ��������� ��������
            �� NFS �������.


    1.5.2   ������ ��������� �� FTP
    -----   -----------------------

            ��������� �� FTP ����� ���� ��������� � ������ �����������
            �����, ����������� ������������ ������ ������ FreeBSD.
            � �������� ����������� �� FTP, ������������ ���� � ������� �������
            ������, ������ ������������ FreeBSD, ������������� �� �����
            ����. ��� ��������� �������� ��������� �������� ��������� � ���
            �������.

            ���� �� ��������� ��������� � ������� ����� FTP,
            �� ���������� � ���� ����, ��� � ��� �������� � �������������
            ����� �������, �� ����� ������ ��������������� ����
            �����������  URL, ������ ``URL'' � ���� ����. URL �����
            ��������� hostname ��� IP �����, ������� ��� ����������
            ����� ������� ����� ������������ ���������:

                    ftp://192.216.191.11/pub/FreeBSD

            ���������� ��� ������ ��������� �� FTP, ������� �����
            ������������:

               o FTP:

                 � ���� ������ ������������ ����������� ����� "Active"
                 ���  ��������� ������, ������� ��������� ������� �����������
                 ���������� � ��������. �� �� ����� �������� � ������ FIREWALL
                 ���������� ������, �� ����� �������� ������ ��������� ���
                 ������ �� ������� FTP-���������, ������� �� ������������
                 ��������� �����. ���� ���������� � ��������� ������ ��
                 �������, ���������� ���� �����!

               o FTP Passive:

                 � ������ FTP "Passive" ������ �� ����� ������� ����������
                 � ��������. ��� ����� - ��������� ������� ��� �������������,
                 �������� ���������� ���������� �������, �� �����������
                 ������������� �������� ���������� �� ������������ �������
                 ������.

               o FTP ����� proxy HTTP ������:

                 ���� ����� ��������� ������� FreeBSD ������������
                 �������� HTTP ��� ���������� � proxy ��������, �������
                 ����� ��������� ��� ��������� FTP �������� � �������� FTP
                 ���������� ������������ �����������. HTTP proxy ������
                 � ������ ������ ����� ��������� �������������� �����
                 �������� � ���������� FTP �������. ������������� ������
                 �������������, ��������� ������ FIREWALL'� ������� ���������
                 ������������� ������ ���������� FTP. ��� �������� ������
                 ��� ���������� ����� ������ ����� ������������� - proxy HTTP
                 �������.

            � ������ �������, ����� proxy  FTP �� �������� ��
            HTTP, �� ������ ������ URL, ��������, ����� �������:

                    ftp://foo.bar.com:1234/pub/FreeBSD

            ��� "1234" - ����� ����� ftp �������������  �������.

    1.6     �������� ��� ������������� ������������ �������� �������
    ---     --------------------------------------------------------

    ���� �� ������ ���������� FreeBSD �� ������, ��������� ������
    ���������������� ���� (����., � ��� ��� ��� �� �� ������
    ������������ ����� VGA), ����������, �������� ���� ����������.

            1. ���������� ���������� ����� ����� �� ����� ANSI (vt100)
               ������������ ��������� ��� ���������� �������� ���������
               � ������ COM1 ����������, �� ������� �� �������������� FreeBSD.

            2. ��������� ���������� (��, ������ ���!) � ����� ����������
               ����������� ���� � �������, ���� � ������������� CDROM,
               � ����������� �� ���� ������ ������������� ��������.
               ���������� ������ ���� ���������.

            3. ���� �� �� ��������� ������� ������ �� ������ �� �����
               ���������������� �������, ����� ���������� ���������� � �����
               �������� ��������. ���� �� ������������ � CDROM,
               ����������� � ������ 5 ��� ������ �������� �������� ������.

            4. ��� �������� �������, ������ �������� ������ ���������,
               ����� ���������� ������� ������� � kern.flp � �������� �������
               � mfsroot.flp, ����� ���� �� ������ ������ ���� � �����
               ��� ���� �������� ������.

            5. ������� ������, ����� �������

                   boot -h

               � ������ �� ������ ������� ��� �� ����� �������� �������.
               ���� ��� ��� �� �����-�� ������� �� �������, ���������
               ��� serial ������, � ����� ��������� ��������� ��������
               ��������� ��� ������������� ������������� ����������.
               � �� ���������� ������ ���� ����������� ���������:
               - �������� 9600 baud,
               - 8 bit, no parity.

    2.0     ������ �������� � ������� ������������� DOS
    ---     -------------------------------------------

    2.1     ��������! � ���� ��� �����! ��� ���� ������� ��� �������?
    ---     ---------------------------------------------------------

    ���� �� ����� ������ ��� ���������� DOS, � � ��� ���� ��� ������
    ��� ���������� ����� ��� ��������� FreeBSD, ��� �� ��� ��������!
    �� ������ ����� ������� "FIPS", ����������� � ������������� tools/
    �� FreeBSD CDROM ��� �� ��������� ftp ������ FreeBSD, �������
    �������� �������.

    FIPS ��������� ��� ������� ������������ ������ DOS �� ��� ��������,
    �������� ������� ����� � �������� ��� ����������� ��������� �� ������
    ��������� ��������. ������� �� ���������������� ���� �������� DOS �
    �������������� ������� DOS 6.xx "DEFRAG" ��� ������ � Norton Disk, �����
    ���������� FIPS.  ������ � ������� FIPS �� ���������� ���� DOS ��������,
    � �������� ������ - ��������� ��� ��������� FreeBSD. ����� ����� �� ������
    ����������� � ���������� FreeBSD � ����� �������. �������� ����� ��������
    �� ��, ��� FIPS ������� ������ �������� ��� ������ DOS, ������� �� �������,
    ��� � ��� ���� ��� ��������� ������� DOS, � �� ����� ��� ������ ��� ����.
    �� ����������! �� ������ ������� ��������� ������ DOS (��������������
    �������� ��� ������ � ����������, ��� ���������� ������� ������ ����
    ������)! :)

    ��������: ��������� FIPS � ��������� ����� �� �������� � ���������
    FAT32 ��� VFAT ������������� � ����������� ������ Windows 95.
    ����� ������� ����� ��� ������� (�������� ������, ��������� ��� ���������),
    ��� ����������� ������������ ������� ���� Partition Magic 3.0. � ���������,
    ���� �� ��� ������ Windows ������ ���� ����, � �� ������ ��������������
    �S Windows c ������������, ������ ��� ������� ���������� ���������,
    ������ ����� � ���� ������ �������� �� ����� ��� ����� ������� ��������.

    2.2     ���� �� � �� FreeBSD ������������ �����, ������ � ������� DOS?
    ---     --------------------------------------------------------------

    ���. ���� �� ����������� ������� ���� Stacker(tm) ���
    DoubleSpace(tm), FreeBSD ������ ������������ �� ����� ������ ������� DOS,
    ������� �� �������� ��������. ��������� ����� �������� ������� �����
    ��������� ��� ���� ������� ���� (the stacked/dblspaced file!). �� ��������
    ���� ����, ����� ����� �� ���� �� ��������!

    ��������, ����� �����, ���� �� ��������� ��� ���� ����������� ������
    DOS � ����������� ��� ��� ��������� ����� DOS � FreeBSD.


    2.3     ���� �� � ���������� ���� ����������� ������� DOS?
    ---     --------------------------------------------------

    ��. ����������� �������� DOS �� FreeBSD ������������� � �����,
    ����� ������ ������� (slices), ��������, ��� ���� D ����� /dev/da0s5
    ���������, � ���� � - /dev/da0s6, � ��� �����. �����������, ��������������,
    ��� ���� ����������� �������� ��������� �� SCSI ����� 0. ���
    ������������� ������ IDE, �������� ``ad'' �� ``da''. � ����� ������ ��
    ���������� ����������� �������� ����� ��� ��, ��� � ����� ������
    ���� DOS, ��������:

    mount -t msdos /dev/da0s5 /dos_d


    2.4     ���� �� � ��������� DOS binaries � FreeBSD?
    ---     -------------------------------------------

    � ��������� ������ ������� ������ ��� �������� BSDI doscmd,
    ������� ������� ������� ��� � FreeBSD 3.0, ���� ����� ��� ���
    �������� ��������� ��������. ���� ��� ��������� �������� ��� ����,
    ����������, ������ �� emulation@FreeBSD.org � �������, ��� ��
    ������ �� �������������� � ����� ������!

    ���������� ����� �������� ������� "pcemu" �� ��������� ������ (ports
    collection), ������� ��������� ������ ���������� 8088 � ��������� �������
    BIOS ��� ������� �������� � ��������� ������ DOS. ��� ������� ��������
    � ������� X Window System (XFree86), ������� ������ ���� � ��� ���
    �����������.


    ---- ����� ����������� �� ��������� ---
Материал из Xgu.ru
Перейти к: навигация, поиск
| Данная страница находится в разработке. Эта страница ещё не закончена. Информация, представленная здесь, может оказаться неполной или неверной. Если вы считаете, что её стоило бы доработать как можно быстрее, пожалуйста, скажите об этом. |
- Автор: Участник:RemiZOffAlex
Содержание
- 1 Этап I. Загрузка
- 1.1 Образ CD/DVD
- 1.2 USB диск
- 1.3 PXE
- 1.3.1 Сервер
- 1.3.2 Клиент
- 2 Этап II. Разбивка диска
- 2.1 MBR
- 2.1.1 MBR-UFS
- 2.1.2 MBR-ZFS
- 2.2 GPT
- 2.2.1 GPT-UFS
- 2.2.2 GPT-ZFS
- 2.2.3 Устанавливаем необходимые параметры в файлы конфигурации
- 2.1 MBR
- 3 GPT-ZFS
- 3.1 Устанавливаем необходимые параметры в файлы конфигурации
- 4 Этап III. Установка системы
- 4.1 Установка релиза с официального сайта
- 4.1.1 Сборка и установка собственной системы из исходников
- 4.1 Установка релиза с официального сайта
- 5 Этап IV. Конфигурация системы
- 5.1 Настраиваем конфигурационные файлы
- 5.2 FreeBSD:Настройка сетевых подключений
- 5.3 SSH
- 5.4 DNS
- 5.5 NTP
- 5.6 Добавление пользователей
- 6 Этап V. Установка необходимых программных пакетов
[править] Этап I. Загрузка
Ссылка на релиз 9.1.
[править] Образ CD/DVD
Качаем с официального сайта образ диска
# fetch ftp://ftp.freebsd.org/pub/FreeBSD/releases/ISO-IMAGES/9.1/FreeBSD-9.1-RELEASE-i386-bootonly.iso
Записываем образ на диск
[править] USB диск
Качаем с официального сайта образ
# fetch ftp://ftp.freebsd.org/pub/FreeBSD/releases/ISO-IMAGES/9.1/FreeBSD-9.1-RELEASE-i386-memstick.img
Записываем образ на флешку
# dd if=FreeBSD-9.0-RELEASE-i386-memstick.img of=/dev/da0 bs=8k
[править] PXE
Способ загрузки FreeBSD по сети с использованием технологии PXE.
[править] Сервер
Каталог для загружаемой системы выбран /data/thinstation. Сюда помещаем систему, которая будет в последствии загружаться по сети. Это либо готовая сборка, либо скачанный с официального сайта и распакованный образ.
Правим следующие конфигурационные файлы:
/etc/hosts.allow
# Добавляем разрешение регистрации RPC сервисов с указанной подсети, иначе выдаст RPC: Program not registered
rpcbind : 192.168.0.0/255.255.255.0 : allow
/etc/exports
/data/thinstation -maproot=root -alldirs -network 192.168.0.0/24
/etc/rc.conf
# DHCP
dhcpd_enable="YES"                              # dhcpd enabled?
dhcpd_flags="-q"                                # command option(s)
dhcpd_conf="/usr/local/etc/dhcpd.conf"          # configuration file
dhcpd_ifaces="em1"                              # ethernet interface(s)
dhcpd_withumask="022"                           # file creation mask

# NFS
nfs_server_enable="YES"
nfsv4_server_enable="YES"

# Inetd
inetd_enable="YES"
/etc/inetd.conf
tftp dgram udp wait root /usr/libexec/tftpd tftpd -l -s /data/thinstation
/usr/local/etc/dhcpd.conf
# Добавляем путь загрузки
option root-path "192.168.0.1:/data/thinstation";
# Ну и сам загрузочник
filename "/boot/pxeboot";
Ну и все это дело запускаем:
# /etc/rc.d/nfsd start
# /etc/rc.d/inetd start
# /usr/local/etc/rc.d/isc-dhcpd start
[править] Клиент
/boot/loader.conf
boot.nfsroot.server="192.168.0.1"
boot.nfsroot.path="/data/thinstation"
vfs.root.mountfrom="nfs"
vfs.root.mountfrom.options=rw
/etc/fstab
192.168.0.1:/data/thinstation /     nfs    rw     0    0
proc                          /proc procfs rw     0    0
/etc/rc.conf
# Network
ifconfig_DEFAULT="DHCP"
# SSH
sshd_enable="YES"
[править] Этап II. Разбивка диска
| Пример разбивки:MBR | Пример разбивки:GPT | ||||||
|---|---|---|---|---|---|---|---|
| UFS | ZFS | RAID | UFS | ZFS | RAID | ||
| UFS | ZFS | UFS | ZFS | ||||
| MBR-UFS | MBR-ZFS | MBR-RAID | MBR-RAID | GPT-UFS | GPT-ZFS | MBR-RAID | MBR-RAID |
[править] MBR
| Code: sh |
# gpart create -s mbr da0 |
[править] MBR-UFS
| Code: sh |
# gpart add -t freebsd da0 # gpart set -a active -i 1 da1 # newfs -U -L FreeBSDonUSB /dev/da0s1a # mount /dev/da0s1a /mnt |
[править] MBR-ZFS
# gpart create -s mbr da1
# gpart add -t freebsd da1
# gpart set -a active -i 1 da1
# zpool create zroot /dev/da1s1
# zpool set bootfs=zroot zroot
# gpart bootcode -b /mnt2/boot/boot0 ad0
Install ZFS boot
— Export zroot, before installing boot code
Fixit# zpool export zroot
— Install the boot1 stage:
Fixit# dd if=/mnt2/boot/zfsboot of=/dev/ad0s3 count=1
This may fail with an «operation not permitted» error message, since the kernel likes to protect critical parts of the disk. If this happens for you, run:
Fixit# sysctl kern.geom.debugflags=0x10
— Install the boot2 zfs stage into the convienient hole in the ZFS filesystem on-disk format which is located just after the ZFS metadata (this is the seek=1024).
Fixit# dd if=/mnt2/boot/zfsboot of=/dev/ad0s3 skip=1 seek=1024
— Import zroot to continue the install
Fixit# zpool import zroot
[править] GPT
# gpart create -s gpt ada0
[править] GPT-UFS
| Code: script.sh |
#!/bin/sh
drive="/dev/ada0"
letter="X"

gpart create -s GPT ${drive}
gpart add -s 256 -t freebsd-boot -l boot${letter} ${drive}
gpart add -s 2G -t freebsd-swap -l swap${letter} ${drive}
gpart add -t freebsd-ufs -l disk${letter} ${drive}
newfs -O2 -U /dev/gpt/disk${letter}
tunefs -j enable /dev/gpt/disk${letter}
mount -t ufs -o rw /dev/gpt/disk${letter} /mnt
|
После установки не забываем записать загрузчик
# gpart bootcode -b /mnt/boot/pmbr -p /mnt/boot/gptboot -i 1 /dev/ada0
[править] GPT-ZFS
#!/bin/sh
# Диск для разметки (Внимание! Все данные с диска будут стерты)
drive="/dev/ada0"
# Маркер разметки
letter="X"
# Имя пула
poolname="zfssystem"
# Точка монтирования будущей системы
mountpoint="/mnt"

gpart create -s GPT ${drive}
gpart add -s 256 -t freebsd-boot -l boot${letter} ${drive}
gpart add -s 2G -t freebsd-swap -l swap${letter} ${drive}
gpart add -t freebsd-zfs -l disk${letter} ${drive}

# Создаем пул с именем zfssystem (переменная poolname) на разделе diskX и подключаем к точке монтирования /mnt
zpool create -m ${mountpoint} ${poolname} /dev/gpt/disk${letter}
zpool set bootfs=${poolname} ${poolname}
zfs set checksum=fletcher4 ${poolname}
zfs set atime=off ${poolname}
Создаем структуру папок с указанием параметров
Возможно указание сжатия некоторых директорий, таких как /usr/ports /usr/src
zfs create ${poolname}/var
zfs create ${poolname}/var/db
zfs create -o exec=off -o setuid=off ${poolname}/var/empty
zfs set readonly=on ${poolname}/var/empty
zfs create ${poolname}/var/tmp
zfs create ${poolname}/var/empty
zfs create -o compression=gzip ${poolname}/var/crash
zfs create ${poolname}/tmp
zfs create ${poolname}/usr
zfs create -o compression=gzip -o mountpoint=${mountpoint}/usr/src ${poolname}/src
zfs create -o compression=gzip -o mountpoint=${mountpoint}/usr/ports ${poolname}/ports
zfs create -o mountpoint=${mountpoint}/usr/ports/distfiles ${poolname}/distfiles
zfs create -o mountpoint=${mountpoint}/usr/home ${poolname}/home
zfs create -o mountpoint=${mountpoint}/usr/local ${poolname}/local
zfs create -o mountpoint=${mountpoint}/usr/obj ${poolname}/obj
zfs create ${poolname}/data
chmod 1777 ${mountpoint}/tmp ${mountpoint}/var/tmp
[править] Устанавливаем необходимые параметры в файлы конфигурации
Включаем ZFS
echo '# ZFS' > ${mountpoint}/etc/rc.conf
echo 'zfs_enable="YES"' > ${mountpoint}/etc/rc.conf
Настраиваем полноценный запуск ZFS
echo 'zfs_load="YES"' > ${mountpoint}/boot/loader.conf
echo 'vfs.root.mountfrom="zfs:'${poolname}'"' >> ${mountpoint}/boot/loader.conf
echo 'vm.kmem_size="1024M"' >> ${mountpoint}/boot/loader.conf
echo 'vm.kmem_size_max="1024M"' >> ${mountpoint}/boot/loader.conf
echo 'vfs.zfs.arc="512M"' >> ${mountpoint}/boot/loader.conf
echo 'vfs.zfs.arc_max="512M"' >> ${mountpoint}/boot/loader.conf
echo 'vfs.zfs.vdev.cache.size="10M"' >> ${mountpoint}/boot/loader.conf
echo 'vfs.zfs.prefetch_disable=1' >> ${mountpoint}/boot/loader.conf
Обязательно добавляем чтоб компилировать систему с поддержкой загрузочника ZFS
echo 'LOADER_ZFS_SUPPORT=YES' >> ${mountpoint}/etc/src.conf
После установки не забываем записать загрузчик
# gpart bootcode -b ${mountpoint}/boot/pmbr -p ${mountpoint}/boot/gptzfsboot -i 1 ${drive}
[править] GPT-ZFS
# gpart create -s /dev/ada0
# gpart add -s 256 -t freebsd-boot -l bootX /dev/ada0
# gpart add -s 2G -t freebsd-swap -l swapX /dev/ada0
# gpart add -t freebsd-zfs -l diskX /dev/ada0
После установки не забываем записать загрузчик
# gpart bootcode -b /mnt/boot/pmbr -p /mnt/boot/gptzfsboot -i 1 /dev/ada0
Создаем пул с именем zfssystem на разделе diskX и подключаем к точке монтирования /mnt
# zpool create -m /mnt zfssystem /dev/gpt/diskX
# zpool set bootfs=zfssystem zfssystem
# zfs set checksum=fletcher4 zfssystem
# zfs set atime=off zfssystem
Создаем структуру папок с указанием параметров
Возможно указание сжатия некоторых директорий, таких как /usr/ports /usr/src
zfs create zfssystem/var
zfs create zfssystem/var/db
zfs create -o exec=off -o setuid=off zfssystem/var/empty
zfs set readonly=on zfssystem/var/empty
zfs create zfssystem/var/tmp
zfs create zfssystem/var/empty
zfs create -o compression=gzip zfssystem/var/crash
zfs create zfssystem/tmp
zfs create zfssystem/usr
zfs create -o compression=gzip -o mountpoint=/mnt/usr/src zfssystem/src
zfs create -o compression=gzip -o mountpoint=/mnt/usr/ports zfssystem/ports
zfs create -o mountpoint=/mnt/usr/ports/distfiles zfssystem/distfiles
zfs create -o mountpoint=/mnt/usr/home zfssystem/home
zfs create -o mountpoint=/mnt/usr/local zfssystem/local
zfs create -o mountpoint=/mnt/usr/obj zfssystem/obj
zfs create zfssystem/data
chmod 1777 /mnt/tmp /mnt/var/tmp
[править] Устанавливаем необходимые параметры в файлы конфигурации
Включаем ZFS
echo '# ZFS' > /mnt/etc/rc.conf
echo 'zfs_enable="YES"' > /mnt/etc/rc.conf
Настраиваем полноценный запуск ZFS
echo 'zfs_load="YES"' > /mnt/boot/loader.conf
echo 'vfs.root.mountfrom="zfs:zfssystem"' >> /mnt/boot/loader.conf
echo 'vm.kmem_size="1024M"' >> /mnt/boot/loader.conf
echo 'vm.kmem_size_max="1024M"' >> /mnt/boot/loader.conf
echo 'vfs.zfs.arc="512M"' >> /mnt/boot/loader.conf
echo 'vfs.zfs.arc_max="512M"' >> /mnt/boot/loader.conf
echo 'vfs.zfs.vdev.cache.size="10M"' >> /mnt/boot/loader.conf
echo 'vfs.zfs.prefetch_disable=1' >> /mnt/boot/loader.conf
Обязательно добавляем чтоб компилировать систему с поддержкой загрузочника ZFS
echo 'LOADER_ZFS_SUPPORT=YES' >> /mnt/etc/src.conf
[править] Этап III. Установка системы
[править] Установка релиза с официального сайта
Через скрипт будет элегантнее
workdir="/data"
sysrelease="9.1"
address="ftp://ftp.freebsd.org/pub/FreeBSD/releases/i386/"${sysrelease}"-RELEASE/"
fetch ${address}base.txz ${address}kernel.txz -o ${workdir}
export DESTDIR=/mnt
for file in ${workdir}/base.txz ${workdir}/kernel.txz; do (cat $file | tar --unlink -xpJf - -C ${DESTDIR:-/}) ; done
[править] Сборка и установка собственной системы из исходников
Предподготовка
# mkdir /mnt/usr /mnt/usr/ports /mnt/usr/src /mnt/usr/obj
# svn checkout https://svn0.us-west.freebsd.org/base/stable/9/ /mnt/usr/src
# svn checkout https://svn0.us-west.freebsd.org/ports/head/ /mnt/usr/ports
Сборку и установку лучше производить скриптом, с использованием команды make:
#!/bin/sh

# Точка монтирования будущей системы
mountpoint="/mnt"
# Архитектура
architecture="i386"
# Путь к файлу make.conf
makeconf="/data/scripts/make.conf"
# Путь к файлу src.conf
srcconf="/data/scripts/src.conf"
# Путь к исходникам
sourcepath=${mountpoint}"/usr/src"
# Путь к obj
objpath=${mountpoint}"/usr/obj"

make -j4 buildworld TARGET_ARCH=${architecture}
TARGET=${architecture} __MAKE_CONF=${makeconf} SRCCONF=${srcconf}
MAKEOBJDIRPREFIX=${objpath} -C ${sourcepath}

make -j4 buildkernel KERNCONF=FLASH TARGET_ARCH=${architecture}
TARGET=${architecture} __MAKE_CONF=${makeconf} SRCCONF=${srcconf}
MAKEOBJDIRPREFIX=${objpath} -C ${sourcepath}

make installworld DESTDIR=${mountpoint} TARGET_ARCH=${architecture}
TARGET=${architecture} __MAKE_CONF=${makeconf} SRCCONF=${srcconf}
MAKEOBJDIRPREFIX=${objpath} -C ${sourcepath}

make installkernel KERNCONF=FLASH DESTDIR=${mountpoint}
TARGET_ARCH=${architecture} TARGET=${architecture}
__MAKE_CONF=${makeconf} SRCCONF=${srcconf}
MAKEOBJDIRPREFIX=${objpath} -C ${sourcepath}

mergemaster -m ${sourcepath} -A ${architecture} -D ${mountpoint}
Для сборки с ZFS следует внести изменения в соответствующий файл /etc/src.conf
# echo 'LOADER_ZFS_SUPPORT=YES' >> /etc/src.conf
[править] Этап IV. Конфигурация системы
[править] Настраиваем конфигурационные файлы
/etc/fstab
# Device	Mountpoint	FStype	Options	Dump	Pass#
/dev/gpt/disk0	/		ufs	rw	1	1
proc		/proc		procfs	rw	0	0
/dev/gpt/swap0	none		swap	sw	0	0
Для USB flash накопителей, чтоб не вывести их преждевременно из строя:
# Device	Mountpoint	FStype	Options		Dump	Pass#
/dev/gpt/disk0	/		ufs	rw,noatime	1	1
proc		/proc		procfs	rw		0	0
[править] FreeBSD:Настройка сетевых подключений
/etc/rc.conf
# Network
ifconfig_DEFAULT="YES"

# Firewall
firewall_enable="YES"
firewall_type="OPEN"

# SSH
sshd_enable="YES"
[править] SSH
Для запуска демона необходимо добавить в /etc/rc.conf запись
sshd_enable="YES"
[править] DNS
Настройка службы named
/etc/rc.conf
named_enable="YES"
/etc/namedb/named.conf
Обязательно раскомментировать секцию: forwarders
forwarders {
	192.168.0.1;
};
/etc/resolv.conf
nameserver 127.0.0.1
[править] NTP
Служба точного времени включается добавлением в /etc/rc.conf записи
ntpd_enable="YES"
[править] Добавление пользователей
# echo 'PASSWORD' | pw useradd USERNAME -G wheel -s /bin/tcsh -m -d /home/username -h 0
Перезагрузка
# shutdown -r now
[править] Этап V. Установка необходимых программных пакетов
Установка утилиты portmaster. Её цель — актуальная сборка/пересборка пакетов.
# make -C /usr/ports/ports-mgmt/portmaster install clean

┌────────────────────────────────────────────────────────────────────┐
│ Options for portmaster 3.14_8                                      │
│ ┌────────────────────────────────────────────────────────────────┐ │
│ │   [ ] BASH        Install programmable completions for Bash    │ │
│ │   [ ] PKGNGPATCH  Enable PKGNG support                         │ │
│ │   [ ] ZSH         Install programmable completions for zsh     │ │
│ └────────────────────────────────────────────────────────────────┘ │
├────────────────────────────────────────────────────────────────────┤
│                   <  OK  >          <Cancel>                       │
└────────────────────────────────────────────────────────────────────┘
#!/bin/sh -

workdir="/data/scripts"
portsdir="/usr/ports"

# Загрузка ПО из сети Интернет
make -C /usr/ports/ports-mgmt/portmaster/ fetch-recursive
for port in `cat ${workdir}/list_ports`
do
	make -C ${portsdir}/${port} fetch-recursive
done

# Установка ПО
make -C /usr/ports/ports-mgmt/portmaster/ install clean
rehash
for port in `cat ${workdir}/list_ports`
do
	portmaster $port
done
rehash
Пример файла list_ports
net/mpd5
databases/mysql55-server
| |
||
|---|---|---|
| Печать | CUPS • IPP • LPR • LPD | |
| Сеть | ipfw • NAT • mpd5 • squid • netgraph | |
|
||
|
| |
|---|
| FreeBSD:Способы установки |
FreeBSD is a free, powerful, robust, flexible and stable Open Source operating system based on Unix which is designed with security and speed in mind.
FreeBSD can operate on a large variety of modern CPU architectures and can power servers, desktops and some kind of custom embedded systems, the most notable being Raspberry PI SBC. As in Linux case, FreeBSD comes with a large collection of pre-compiled software packages, more than 20,000 packages, that can be simply installed in the system from their repositories, called “Ports”.
Requirements:
- Download FreeBSD 11.1 CD 1 ISO Image
This tutorial will guide you on how to install the latest version of FreeBSD on an amd64 machine. Typically this installation covers only the command line version of the operating system, which makes it best-suited for servers.
If you don’t require a custom installation, you can skip the installation process and download and run a pre-build Virtual Machine image for VMware, VirtualBox, QEMU-KVM or Hyper-V.
FreeBSD Installation Guide
1. First, get the latest FreeBSD CD 1 ISO image released from FreeBSD download page and burn it to a CD.
Place the CD image into your machine CD/DVD drive and reboot the machine into BIOS/UEFI mode or boot menu sequence by pressing a special key (usually esc, F2, F11, F12) during the power-on sequence.
Instruct the BIOS/UEFI to use the CD/DVD appropriate drive to boot from and the first screen of the installation process should be displayed on your screen.
Press [Enter] key to start the installation process.

2. On the next screen select Install option and press [Enter] to continue.
3. Select your keyboard layout from the list and press [Enter] to move forward with the installation process.

4. Next, type a descriptive name for your machine hostname and press [Enter] to continue.

5. On the next screen select what components you want to install in the system by pressing the [space] key. For a production server it’s recommended you choose only lib32 compatibility libraries and Ports tree.
Press [enter] key after you’ve made your selections in order to continue.
6. Next choose the method your hard disk will be partitioned. Select Auto – Unix File System – Guided Disk Setup and press [enter] key to move to the next screen.
In case you have more than one disk and need a resilient file system you should opt for ZFS method. However, this guide will only cover UFS file system.

7. On the next screen select to perform FreeBSD OS installation on the entire disk and press [enter] key again to continue.
However, be aware that this option is destructive and will completely wipe-out all your disk data. If the disk holds data, you should make a backup before continuing further.
8. Next, select you hard disk partition layout. In case your machine is UEFI based and the installation is performed from UEFI mode (not CSM or Legacy mode) or the disk is larger than 2TB, you must use GPT partition table.
Also, it’s recommended to disable Secure Boot option from UEFI menu if the installation is performed in UEFI mode. In case of an older hardware you’re safe to partition the disk in MBR scheme.

9. In the next screen review the automatically created partition table of your system and navigate to Finish using [tab] key to accept the changes.
Press [enter] to continue and on the new pop-up screen select Commit to start the effective installation process. The installation process can take up from 10 to 30 minutes depending on your machine resources and HDD speed.


10. After the installer extracts and writes the operating system data to your machine drive, you will be prompted to specify the password for the root account.
Choose a strong password for root account and press [enter] to continue. The password won’t be echoed on the screen.
11. On the next step, select the network interface you want to configure and press [enter] to setup the NIC.

12. Choose to use IPv4 protocol for your NIC and select to configure the network interface manually with a static IP address by negating the DHCP protocol as illustrated in the below screenshots.

13. Next, add your static network IP configurations (IP address, netmask and gateway) for this interface and press [enter] key to continue.

14. If the network equipment at your premises (switches, routers, servers, firewalls etc) is IPv4 based then is no point on configuring IPv6 protocol for this NIC. Choose No from the IPv6 prompt to continue.

15. The final network configuration for your machine involves setting-up the DNS resolver. Add your domain name for local resolving, if that’s the case, and the IP addresses of two DNS servers you run in your network, used for resolving domain names, or use the IP addresses of some public DNS caching servers. When you finish, press OK to save changes and move further.

16. Next, from the time zone selector choose the physical region where your machine is located and hit OK.

17. Select your country from the list and accept the abbreviation for your time setting.

18. Next, adjust the date and time setting for your machine if that’s the case or choose to Skip the setting in case your system time is correctly configured.

19. On the next step select by hitting the [space] key the following daemons to run system-wide: SSH, NTP and powerd.
Select powerd service in case your machine CPU supports adaptive power control. If FreeBSD is installed under a virtual machine you can skip powerd start-up service during the system boot initialization sequence.
Also, if you don’t connect into your machine remotely, you can skip SSH service automatic start-up during system boot. When you finish press OK to continue.

20. At the next screen, check the following options in order to minimally harden your system security: Disable reading kernel message buffer for unprivileged users, Disable process debugging facilities for unprivileged users, Clean /tmp filesystem on startup, Disable Syslogd network socket and Sendmail service in case you’re not planning to run a mail server.
21. Next, the installer will ask you whether you will like to add a new system user. Choose yes and follow the prompt in order to add the user information. It’s safe to leave the default settings for the user by pressing [enter] key.
You can select Bourne shell (sh) or C improved shell (tcsh) as the default shell for your user. When you finish, answer yes at the final question to create the user.
The prompt will ask you if you want to add another user in your system. If that’s not the case, answer with no in order to continue with the final stage of the installation process.


22. Finally, a new screen will provide a list of options you can choose in order to modify your system configuration. If you have nothing else to modify on your system, select the Exit option in order to complete the installation and answer with no to not open a new shell in the system and hit on Reboot to restart the machine.

23. Remove the CD image from the machine drive and press [enter] at the first prompt to start the system and logon into the console.

Congratulations! You’ve just installed FreeBSD operating system in your machine. In the next tutorial we’ll discuss some initial configurations of FreeBSD and how to manage the system further from command line.