|
Title |
File Size |
Download Links |
|
Harley-Davidson 1200 Custom 110th Anniversary Owner’s Manuals.pdf |
2.5Mb |
Download |
|
Harley-Davidson 1200 Custom Owner’s Manuals.pdf |
3.7Mb |
Download |
|
Harley-Davidson 1200 Low Owner’s Manuals.pdf |
2.3Mb |
Download |
|
Harley-Davidson 35th Anniversary Super Glide Owner’s Manuals.pdf |
2.3Mb |
Download |
|
Harley-Davidson 50th Anniversary Sportster Owner’s Manuals.pdf |
2.4Mb |
Download |
|
Harley-Davidson 883 Custom Owner’s Manuals.pdf |
2.9Mb |
Download |
|
Harley-Davidson 883 Low Owner’s Manuals.pdf |
3.3Mb |
Download |
|
Harley-Davidson 883 ROADSTER Owner’s Manuals.pdf |
3.2Mb |
Download |
|
Harley-Davidson Blackline Owner’s Manuals.pdf |
2.9Mb |
Download |
|
Harley-Davidson Breakout Owner’s Manuals.pdf |
3.4Mb |
Download |
|
Harley-Davidson Cross Bones Owner’s Manuals.pdf |
3.1Mb |
Download |
|
Harley-Davidson CVO Breakout Owner’s Manuals.pdf |
2.5Mb |
Download |
|
Harley-Davidson CVO Dyna Owner’s Manuals.pdf |
2.4Mb |
Download |
|
Harley-Davidson CVO Electra Glide 2 Owner’s Manuals.pdf |
3.2Mb |
Download |
|
Harley-Davidson CVO Fat Bob Glide Owner’s Manuals.pdf |
2.3Mb |
Download |
|
Harley-Davidson CVO Limited Owner’s Manuals.pdf |
4Mb |
Download |
|
Harley-Davidson CVO Pro Street Breakout Owner’s Manuals.pdf |
3.1Mb |
Download |
|
Harley-Davidson CVO Road Glide Custom Owner’s Manuals.pdf |
3.2Mb |
Download |
|
Harley-Davidson CVO Road Glide Owner’s Manuals.pdf |
2.8Mb |
Download |
|
Harley-Davidson CVO Road Glide Ultra Owner’s Manuals.pdf |
4Mb |
Download |
|
Harley-Davidson CVO Road King 105th Anniversary Owner’s Manuals.pdf |
2.7Mb |
Download |
|
Harley-Davidson CVO Road King Owner’s Manuals.pdf |
3.1Mb |
Download |
|
Harley-Davidson CVO Softail Convertible Owner’s Manuals.pdf |
2.7Mb |
Download |
|
Harley-Davidson CVO Softail Deluxe Owner’s Manuals.pdf |
2.9Mb |
Download |
|
Harley-Davidson CVO Softail Springer 105th Anniversary Owner’s Manuals.pdf |
2.2Mb |
Download |
|
Harley-Davidson CVO Softail Springer Owner’s Manuals.pdf |
2.2Mb |
Download |
|
Harley-Davidson CVO Street Glide Owner’s Manuals.pdf |
3.5Mb |
Download |
|
Harley-Davidson CVO Ultra Classic 105th Anniversary Owner’s Manuals.pdf |
3.4Mb |
Download |
|
Harley-Davidson CVO Ultra Classic Electra Glide Owner’s Manuals.pdf |
4.1Mb |
Download |
|
Harley-Davidson CVO Ultra Classic Owner’s Manuals.pdf |
3.4Mb |
Download |
|
Harley-Davidson CVO V-Rod Owner’s Manuals.pdf |
2.6Mb |
Download |
|
Harley-Davidson Dyna Fat Bob Owner’s Manuals.pdf |
2.3Mb |
Download |
|
Harley-Davidson Dyna Low Rider Owner’s Manuals.pdf |
2.5Mb |
Download |
|
Harley-Davidson Dyna Super Glide Custom Owner’s Manuals.pdf |
2.5Mb |
Download |
|
Harley-Davidson Dyna Super Glide Owner’s Manuals.pdf |
2.5Mb |
Download |
|
Harley-Davidson Dyna Wide Glide 105th Anniversary Edition Owner’s Manuals.pdf |
2.3Mb |
Download |
|
Harley-Davidson Dyna Wide Glide Owner’s Manuals.pdf |
2.5Mb |
Download |
|
Harley-Davidson Electra Glide Classic (EFI) Owner’s Manuals.pdf |
3.7Mb |
Download |
|
Harley-Davidson Electra Glide Classic Owner’s Manuals.pdf |
3.8Mb |
Download |
|
Harley-Davidson Electra Glide Standard (EFI) Owner’s Manuals.pdf |
3.7Mb |
Download |
|
Harley-Davidson Electra Glide Standard Owner’s Manuals.pdf |
3.4Mb |
Download |
|
Harley-Davidson Electra Glide Standard Police (EFI) Owner’s Manuals.pdf |
3.4Mb |
Download |
|
Harley-Davidson Electra Glide Standard Police Owner’s Manuals.pdf |
4.5Mb |
Download |
|
Harley-Davidson Electra Glide Ultra Classic (EFI) Owner’s Manuals.pdf |
3.8Mb |
Download |
|
Harley-Davidson Electra Glide Ultra Classic 105th Anniversary Edition (EFI) Owner’s Manuals.pdf |
3.4Mb |
Download |
|
Harley-Davidson Electra Glide Ultra Classic Low Owner’s Manuals.pdf |
4.2Mb |
Download |
|
Harley-Davidson Electra Glide Ultra Classic Owner’s Manuals.pdf |
4.5Mb |
Download |
|
Harley-Davidson Electra Glide Ultra Limited 110th Anniversary Owner’s Manuals.pdf |
3.3Mb |
Download |
|
Harley-Davidson Electra Glide Ultra Limited Owner’s Manuals.pdf |
3.8Mb |
Download |
|
Harley-Davidson Fat Bob Owner’s Manuals.pdf |
3.8Mb |
Download |
|
Harley-Davidson Fat Boy (EFI) Owner’s Manuals.pdf |
2.9Mb |
Download |
|
Harley-Davidson Fat Boy 15th Anniversary Owner’s Manuals.pdf |
2.9Mb |
Download |
|
Harley-Davidson Fat Boy Lo 110th Anniversary Owner’s Manuals.pdf |
2.9Mb |
Download |
|
Harley-Davidson Fat Boy Lo Owner’s Manuals.pdf |
3.4Mb |
Download |
|
Harley-Davidson Fat Boy Owner’s Manuals.pdf |
3.4Mb |
Download |
|
Harley-Davidson Fat Boy S Owner’s Manuals.pdf |
3.4Mb |
Download |
|
Harley-Davidson Forty-Eight Owner’s Manuals.pdf |
3.7Mb |
Download |
|
Harley-Davidson Freewheeler Owner’s Manuals.pdf |
4.1Mb |
Download |
|
Harley-Davidson Heritage Softail (EFI) Owner’s Manuals.pdf |
2.9Mb |
Download |
|
Harley-Davidson Heritage Softail Classic (EFI) Owner’s Manuals.pdf |
2.9Mb |
Download |
|
Harley-Davidson Heritage Softail Classic 110th Anniversary Owner’s Manuals.pdf |
2.9Mb |
Download |
|
Harley-Davidson Heritage Softail Classic Owner’s Manuals.pdf |
3.4Mb |
Download |
|
Harley-Davidson Heritage Softail Owner’s Manuals.pdf |
2.9Mb |
Download |
|
Harley-Davidson IRON 883 Owner’s Manuals.pdf |
2.7Mb |
Download |
|
Harley-Davidson Low Rider (EFI) Owner’s Manuals.pdf |
2.3Mb |
Download |
|
Harley-Davidson Low Rider 105th Anniversary Edition Owner’s Manuals.pdf |
2.3Mb |
Download |
|
Harley-Davidson Low Rider Owner’s Manuals.pdf |
3.8Mb |
Download |
|
Harley-Davidson Low Rider S Owner’s Manuals.pdf |
2.2Mb |
Download |
|
Harley-Davidson Night Rod Owner’s Manuals.pdf |
2.6Mb |
Download |
|
Harley-Davidson Night Rod Special 10th Anniversary Edition Owner’s Manuals.pdf |
2.8Mb |
Download |
|
Harley-Davidson Night Rod Special Owner’s Manuals.pdf |
2.8Mb |
Download |
|
Harley-Davidson Night Train (EFI) Owner’s Manuals.pdf |
2.9Mb |
Download |
|
Harley-Davidson Night Train Owner’s Manuals.pdf |
2.9Mb |
Download |
|
Harley-Davidson Nightster Owner’s Manuals.pdf |
3.5Mb |
Download |
|
Harley-Davidson Road Glide (EFI) Owner’s Manuals.pdf |
3.7Mb |
Download |
|
Harley-Davidson Road Glide 105th Anniversary Edition (EFI) Owner’s Manuals.pdf |
3.4Mb |
Download |
|
Harley-Davidson Road Glide Custom Owner’s Manuals.pdf |
3.8Mb |
Download |
|
Harley-Davidson Road Glide Owner’s Manuals.pdf |
4.5Mb |
Download |
|
Harley-Davidson Road Glide Special Owner’s Manuals.pdf |
4.5Mb |
Download |
|
Harley-Davidson Road Glide Ultra Owner’s Manuals.pdf |
4.5Mb |
Download |
|
Harley-Davidson Road King (EFI) Owner’s Manuals.pdf |
3.7Mb |
Download |
|
Harley-Davidson Road King Classic (EFI) Owner’s Manuals.pdf |
3.7Mb |
Download |
|
Harley-Davidson Road King Classic 105th Anniversary Edition (EFI) Owner’s Manuals.pdf |
3.4Mb |
Download |
|
Harley-Davidson Road King Classic Owner’s Manuals.pdf |
4.5Mb |
Download |
|
Harley-Davidson Road King Custom (EFI) Owner’s Manuals.pdf |
3.7Mb |
Download |
|
Harley-Davidson Road King Custom Owner’s Manuals.pdf |
3.4Mb |
Download |
|
Harley-Davidson Road King Owner’s Manuals.pdf |
4.5Mb |
Download |
|
Harley-Davidson Road King Police (EFI) Owner’s Manuals.pdf |
3.4Mb |
Download |
|
Harley-Davidson Road King Police Owner’s Manuals.pdf |
4.5Mb |
Download |
|
Harley-Davidson Roadster Owner’s Manuals.pdf |
3.9Mb |
Download |
|
Harley-Davidson Rocker C Owner’s Manuals.pdf |
3.1Mb |
Download |
|
Harley-Davidson Rocker Owner’s Manuals.pdf |
2.9Mb |
Download |
|
Harley-Davidson Seventy-Two Owner’s Manuals.pdf |
3.7Mb |
Download |
|
Harley-Davidson Softail Custom Owner’s Manuals.pdf |
2.9Mb |
Download |
|
Harley-Davidson Softail Deluxe (EFI) Owner’s Manuals.pdf |
2.9Mb |
Download |
|
Harley-Davidson Softail Deluxe 105th Anniversary Edition (EFI) Owner’s Manuals.pdf |
2.9Mb |
Download |
|
Harley-Davidson Softail Deluxe Owner’s Manuals.pdf |
3.4Mb |
Download |
|
Harley-Davidson Softail Deuce Owner’s Manuals.pdf |
2.5Mb |
Download |
|
Harley-Davidson Softail Slim Owner’s Manuals.pdf |
3.4Mb |
Download |
|
Harley-Davidson Softail Slim S Owner’s Manuals.pdf |
3.4Mb |
Download |
|
Harley-Davidson Softail Springer Classic Owner’s Manuals.pdf |
2.9Mb |
Download |
|
Harley-Davidson Softail Standard (EFI) Owner’s Manuals.pdf |
2.9Mb |
Download |
|
Harley-Davidson Softail Standard Owner’s Manuals.pdf |
3.1Mb |
Download |
|
Harley-Davidson Sportster 1200 Custom Owner’s Manuals.pdf |
3.5Mb |
Download |
|
Harley-Davidson Sportster 1200 Low Owner’s Manuals.pdf |
2.9Mb |
Download |
|
Harley-Davidson Sportster 1200 Owner’s Manuals.pdf |
2.9Mb |
Download |
|
Harley-Davidson Sportster 1200 Roadster Owner’s Manuals.pdf |
2.9Mb |
Download |
|
Harley-Davidson Sportster 1200R Owner’s Manuals.pdf |
2.9Mb |
Download |
|
Harley-Davidson SPORTSTER 883 CUSTOM Owner’s Manuals.pdf |
3.2Mb |
Download |
|
Harley-Davidson Sportster 883 Low Owner’s Manuals.pdf |
2.4Mb |
Download |
|
Harley-Davidson Sportster 883 Owner’s Manuals.pdf |
2.9Mb |
Download |
|
Harley-Davidson Sportster 883R Owner’s Manuals.pdf |
2.9Mb |
Download |
|
Harley-Davidson Sportster XL883 Low Owner’s Manuals.pdf |
2.9Mb |
Download |
|
Harley-Davidson Sportster XL883L Owner’s Manuals.pdf |
1.7Mb |
Download |
|
Harley-Davidson Springer Classic (EFI) Owner’s Manuals.pdf |
2.9Mb |
Download |
|
Harley-Davidson Springer Classic Owner’s Manuals.pdf |
2.5Mb |
Download |
|
Harley-Davidson Springer Softail (EFI) Owner’s Manuals.pdf |
2.5Mb |
Download |
|
Harley-Davidson Springer Softail Owner’s Manuals.pdf |
2.9Mb |
Download |
|
Harley-Davidson Street 500 Owner’s Manuals.pdf |
1.5Mb |
Download |
|
Harley-Davidson Street 750 Owner’s Manuals.pdf |
2.2Mb |
Download |
|
Harley-Davidson Street Bob (EFI) Owner’s Manuals.pdf |
2.3Mb |
Download |
|
Harley-Davidson Street Bob Limited Owner’s Manuals.pdf |
3.8Mb |
Download |
|
Harley-Davidson Street Bob Owner’s Manuals.pdf |
3.8Mb |
Download |
|
Harley-Davidson Street Bob Police Owner’s Manuals.pdf |
3.8Mb |
Download |
|
Harley-Davidson Street Bob Special Edition Owner’s Manuals.pdf |
2.1Mb |
Download |
|
Harley-Davidson Street Glide (EFI) Owner’s Manuals.pdf |
3.7Mb |
Download |
|
Harley-Davidson Street Glide 105th Anniversary Edition Owner’s Manuals.pdf |
3.4Mb |
Download |
|
Harley-Davidson Street Glide Owner’s Manuals.pdf |
4.5Mb |
Download |
|
Harley-Davidson Street Glide Special Owner’s Manuals.pdf |
4.5Mb |
Download |
|
Harley-Davidson Street Glide Trike Owner’s Manuals.pdf |
3.6Mb |
Download |
|
Harley-Davidson Street Rod Owner’s Manuals.pdf |
2.7Mb |
Download |
|
Harley-Davidson Super Glide — EFI Owner’s Manuals.pdf |
2.5Mb |
Download |
|
Harley-Davidson Super Glide Custom — EFI Owner’s Manuals.pdf |
2.5Mb |
Download |
|
Harley-Davidson Super Glide Custom 110th Anniversary Owner’s Manuals.pdf |
2.8Mb |
Download |
|
Harley-Davidson Super Glide Custom Owner’s Manuals.pdf |
2.9Mb |
Download |
|
Harley-Davidson Super Glide Owner’s Manuals.pdf |
2.3Mb |
v |
|
Harley-Davidson Super Glide Sport Owner’s Manuals.pdf |
2.5Mb |
Download |
|
Harley-Davidson SuperLow 1200T Owner’s Manuals.pdf |
3.7Mb |
Download |
|
Harley-Davidson SuperLow Owner’s Manuals.pdf |
3.7Mb |
Download |
|
Harley-Davidson Switchback Owner’s Manuals.pdf |
3.8Mb |
Download |
|
Harley-Davidson Tri Glide Ultra Classic 110th Anniversary Owner’s Manuals.pdf |
3.8Mb |
Download |
|
Harley-Davidson Tri Glide Ultra Classic Owner’s Manuals.pdf |
3.8Mb |
Download |
|
Harley-Davidson Tri Glide Ultra Owner’s Manuals.pdf |
4.1Mb |
Download |
|
Harley-Davidson Ultra Classic Electra Glide (EFI) Owner’s Manuals.pdf |
3.7Mb |
Download |
|
Harley-Davidson Ultra Classic Electra Glide Owner’s Manuals.pdf |
3.8Mb |
Download |
|
Harley-Davidson Ultra Limited Low Owner’s Manuals.pdf |
4.5Mb |
Download |
|
Harley-Davidson Ultra Limited Owner’s Manuals.pdf |
4.5Mb |
Download |
|
Harley-Davidson V-Rod Muscle Owner’s Manuals.pdf |
1.8Mb |
Download |
|
Harley-Davidson VRSAW V-Rod Owner’s Manuals.pdf |
2.6Mb |
Download |
|
Harley-Davidson VRSCA V-Rod Owner’s Manuals.pdf |
2.5Mb |
Download |
|
Harley-Davidson VRSCAW V-Rod Owner’s Manuals.pdf |
2.7Mb |
Download |
|
Harley-Davidson VRSCB V-Rod Owner’s Manuals.pdf |
2.4Mb |
Download |
|
Harley-Davidson Wide Glide (EFI) Owner’s Manuals.pdf |
2.3Mb |
Download |
|
Harley-Davidson Wide Glide Owner’s Manuals.pdf |
3.8Mb |
Download |
|
Harley-Davidson XL883 Low Owner’s Manuals.pdf |
2.9Mb |
Download |
|
Harley-Davidson XR1200 Owner’s Manuals.pdf |
3.2Mb |
Download |
|
Harley-Davidson XR1200X Owner’s Manuals.pdf |
3.6Mb |
Download |
|
Title |
File Size |
Download Links |
|
Harley Davidson Electra super Service manual 1970 to 1978.pdf |
41.2Mb |
Download |
|
Harley Davidson Electrical Diagnostics Manual 2008.pdf |
29.3Mb |
Download |
|
Harley Davidson Electrical Diagnostics Manual 2013.pdf |
6.3Mb |
Download |
|
Harley Davidson Maintenance Manual.pdf |
2.7Mb |
Download |
|
Harley Davidson Service Manual 1959 to 1969.pdf |
22.7Mb |
Download |
|
Harley Davidson Service Manual 1970 to 1978.pdf |
41.1Mb |
Download |
|
Harley Davidson Service Manual 1998.pdf |
69.6Mb |
Download |
|
Harley Davidson Softail Service Manual 2007.pdf |
200.5Mb |
Download |
|
Harley Davidson Sportster Electrical Diagnostic Manual 2013.pdf |
6.3Mb |
Download |
|
Harley Davidson Sportster Models Service Manual.rar |
46.5kb |
Download |
|
Harley Davidson Sportster service manual 2013.pdf |
46.3Mb |
Download |
|
Harley Davidson Sportster Service Manual.pdf |
24.2Mb |
Download |
|
Harley Davidson VRSC Models Service Manual 2013.pdf |
21.3Mb |
Download |
|
Harley-Davidson 883/1100/1200 Sportster Service Repair Manual & Wiring Diagrams, Troubleshooting Engine Overhaul – 1986-2003.pdf |
29.6Mb |
Download |
|
Harley-Davidson Carburetors Tuning Instructions.pdf |
292.5kb |
Download |
|
Harley-Davidson Dyna Models Repair Manual 1999-2005 .pdf |
116.8Mb |
Download |
|
Harley-Davidson Dyna Service Manual 2009.pdf |
94.9Mb |
Download |
|
Harley-Davidson Dyna Service Manual 2016.pdf |
221.7Mb |
Download |
|
Harley-Davidson Dynaglide Repair Manual 1998.pdf |
140.5Mb |
Download |
|
Harley-Davidson Dynaglide Repair Manual 1999-2005.pdf |
22.1Mb |
Download |
|
Harley-Davidson Electra super Service manual 1970 to 1978.pdf |
41.2Mb |
Download |
|
Harley-Davidson Fat Bob Service Manual.pdf |
35.6Mb |
Download |
|
Harley-Davidson FL service manual 1958 to 1959.pdf |
15.3Mb |
Download |
|
Harley-Davidson FL/F/Electra Glide/F/SuperGlide Service Manual 1970 to 1972.pdf |
19.4Mb |
Download |
|
Harley-Davidson FL/FX Service manual 1978 to 1980.pdf |
31.2Mb |
Download |
|
Harley-Davidson FLHRC Maintenance & Repair Manual Full 2006.pdf |
32.9Mb |
Download |
|
Harley-Davidson FX Models Wiring Diagrams 1980 to 1983 .pdf |
279.4kb |
Download |
|
Harley-Davidson HD Sportster Service Manual 2011.pdf |
306Mb |
Download |
|
Harley-Davidson HD.Tour.sm Service Manual 2011.pdf |
41.5Mb |
Download |
|
Harley-Davidson Manuals OEM Numbers.pdf |
51.7kb |
Download |
|
Harley-Davidson Master Cam Specs TG Service Manual.pdf |
39.6kb |
Download |
|
Harley-Davidson MX 250 Service Manual 1978.pdf |
12.8Mb |
Download |
|
Harley-Davidson Road glide Service Manual 2011.pdf |
12.7Mb |
Download |
|
Harley-Davidson Sidecar CLE TLE Service Manual 1979-1984.pdf |
20.5Mb |
Download |
|
Harley-Davidson Softail Models 2007 Service Manual.pdf |
200.7Mb |
Download |
|
Harley-Davidson Softail Parts Catalog 2016.pdf |
7.5Mb |
Download |
|
Harley-Davidson Softail Repair Manual 1984-1999.pdf |
182.8Mb |
Download |
|
Harley-Davidson Softail Repair Manual 2000-2005.pdf |
30.6Mb |
Download |
|
Harley-Davidson Softail Service Manual 2015.pdf |
37.5Mb |
Download |
|
Harley-Davidson Solo WLA Service Manual 1942.PDF |
5.2Mb |
Download |
|
Harley-Davidson Sportster Models Service Repair Manual 2009.pdf |
91.1Mb |
Download |
|
Harley-Davidson Sportster Service Manual 1986 to 2003 .pdf |
29.6Mb |
Download |
|
Harley-Davidson Sportster Service Manual 2010.pdf |
158.5Mb |
Download |
|
Harley-Davidson Sportster XL Service Manual 1959 to 1969 TG.pdf |
22.7Mb |
Download |
|
Harley-Davidson Sportster XL Service Repair Manual 1986 to 2003 TG.pdf |
30Mb |
Download |
|
Harley-Davidson Touring Parts Catalog 2015.pdf |
8.4Mb |
Download |
|
Harley-Davidson Touring Service Manual 2014.pdf |
45.3Mb |
Download |
|
Harley-Davidson Vrsca Service Manual 2003.pdf |
156.8Mb |
Download |
|
Harley-Davidson Wiring Diagram Wall Chart. SIP 2019.pdf |
18Mb |
Download |
|
Harley-Davidson XL Service manual 1970 to 1978.pdf |
41.1Mb |
Download |
|
Harley-Davidson XLH 883 /F1200 Sportster Service Manual 1998.pdf |
69.6Mb |
Download |
Harley-Davidson is a world-famous manufacturer of heavy motorcycles of American origin. The company produces high-power products, which are intended for movement on highways and
very popular among professional bikers.
The Harley-Davidson brand has become one of the most recognizable worldwide. Harley-Davidson has created a whole community of fans of this motorcycle technology, which has more
than a million people.
The story of Harley-Davidson began in 1904 when friends Arthur Davidson and William Harley created their first motorcycle model in a small workshop. It was completely manual
work, which had no analogues. Over time, a motorcycle assembly line factory began to be built on the site of the workshop.
In 1903, an engine with a capacity of 400 cc was installed on a prototype of a modern motorcycle. This model is still kept in the company’s history museum.
Until 1906, the company had already released more than 50 models of equipment. The company’s turnover grew rapidly and did not fade even during the crisis.
By 1950, Harley-Davidson motorcycles became the favorite biker models. World-famous female racer Bessie Stringfield traveled on a motorcycle almost all of the United States, which also served as
a good advertisement for the company.
In 1984, the company began developing heavy equipment and launched the world’s first engine with a volume of over 1300 cc.
In the early 2000s, Harley-Davidson opened new plants in the United States and modernized the line of tourist motor vehicles. The introduction of new production stages and design
solutions positively influenced the success of the company.
In 2013, the company released a record model with a combined type of cooling and maximum technology, which became a real dream of all professional bikers.
Currently, the company is testing new models of eco-motor vehicles based on electric type engines, which are also due to enter production in the near future.
-

2022 Harley-Davidson TOURING Service Manual Download File type: PDF File size: 94 MB Total Pages: 696+ Language: English Service Manuals: 94…
-
2021 Harley-Davidson TOURING Service Manual Download File type: PDF(paper scanned version) File size: 381 MB Total Pages: 690+ Language: Eng…
-
2019 Harley-Davidson Touring Models Service Manual Download File type: PDF File size: 27.6 MB Total Pages: 1400+ Language: English S…
-
2018 Harley-Davidson SOFTAIL Service Manual & Electrical Diagnostic Manual Download File type: PDF File size: 30 MB Total Pages: 1…
-
2020 Harley-Davidson TOURING Service Manual Download File type: PDF File size: 334 MB Total Pages: 682+ Language: English Service Ma…


![]()
4-я Красноармейская, 2А
Санкт-Петербург, 190005
Email: info@lenmoto.ru
Телефон: +7 (921) 930-81-18
Телефон: +7 (911) 928-08-06
Компания ЛенМото
Запчасти, аксессуары, экипировка, тюнинг для мотоциклов, скутеров, квадроциклов, снегоходов, багги, гидроциклов, катеров и лодочных моторов.
Подпишитесь на наши новости
Подписаться
Руководство на английском языке по эксплуатации и техническому обслуживанию мотоциклов Harley-Davidson модели 42WLA-Solo.
- Издательство: Harley-Davidson Motor Co.
- Год издания: 1941
- Страниц: 83
- Формат: PDF
- Размер: 34,4 Mb
Руководство на английском языке по техническому обслуживанию и ремонту мотоциклов Harley-Davidson модели Dyna 2003 года выпуска.
- Издательство: Harley-Davidson Motor Company
- Год издания: 2002
- Страниц: 528
- Формат: PDF
- Размер: 27,1 Mb

Руководство на английском языке по эксплуатации и техническому обслуживанию мотоциклов Harley-Davidson модели Electra Glide 1970 года выпуска.
- Издательство: Harley-Davidson Motor Co., Inc.
- Год издания: —
- Страниц: 64
- Формат: PDF
- Размер: 10,0 Mb
Руководство на немецком языке по техническому обслуживанию и ремонту мотоциклов Harley-Davidson моделей Sportsters 1959-1985, Sportster Evolution V-Twins 1986-1987, Glides & Electra Glides 1959-1984 и Evolution V-Twins 1984-1986 годов выпуска.
- Издательство: —
- Год издания: —
- Страниц: 388
- Формат: PDF
- Размер: 117,6 Mb
Руководство на английском языке по техническому обслуживанию и ремонту мотоциклов Harley-Davidson моделей Softail 2007 года выпуска.
- Издательство: —
- Год издания: —
- Страниц: 652
- Формат: PDF
- Размер: 146,6 Mb
Руководство на английском языке по техническому обслуживанию и ремонту мотоциклов Harley-Davidson модели Sportster 1959-1969 годов выпуска.
- Издательство: Harley-Davidson Motor Co., Inc.
- Год издания: 1968
- Страниц: 252
- Формат: PDF
- Размер: 23,9 Mb
Руководство на французском языке по техническому обслуживанию и ремонту мотоциклов Harley-Davidson моделей Sportster XLH 883/1200 1993-1994 годов выпуска.
- Издательство: —
- Год издания: —
- Страниц: 176
- Формат: PDF
- Размер: 35,3 Mb

Руководство на английском языке по эксплуатации и техническому обслуживанию мотоциклов Harley-Davidson моделей Touring 2007 года выпуска.
- Издательство: Harley-Davidson Motor Co., Inc.
- Год издания: —
- Страниц: 92
- Формат: PDF
- Размер: 60,4 Mb
Руководство на английском языке по эксплуатации и техническому обслуживанию мотоциклов Harley-Davidson моделей Touring 2009 года выпуска.
- Издательство: —
- Год издания: —
- Страниц: 139
- Формат: PDF
- Размер: 5,5 Mb
Руководство на английском языке по техническому обслуживанию и ремонту мотоциклов Harley-Davidson моделей Touring 2006 года выпуска.
- Издательство: —
- Год издания: —
- Страниц: 986
- Формат: PDF
- Размер: 32,9 Mb
Руководство на английском языке по техническому обслуживанию и ремонту + руководство по ремонту электрооборудования мотоциклов Harley-Davidson моделей VRSC 2008 года выпуска.
- Издательство: Harley-Davidson Motor Co., Inc.
- Год издания: 2007
- Страниц: 567+501
- Формат: PDF
- Размер: 131,2 Mb
Руководство на английском языке по техническому обслуживанию и ремонту мотоциклов Harley-Davidson модели VRSCA 2003 года выпуска.
- Издательство: Harley-Davidson Motor Company
- Год издания: 2002
- Страниц: 447
- Формат: PDF
- Размер: 139,4 Mb
Руководство на английском языке по техническому обслуживанию и ремонту мотоциклов Harley-Davidson серий Touring и FXR с двигателями Evolution 1984-1998 годов выпуска.
- Издательство: Clymer
- Год издания: —
- Страниц: 937
- Формат: PDF
- Размер: 451,3 Mb
Руководство на английском языке по техническому обслуживанию и ремонту мотоциклов Harley-Davidson моделей FLH и FLT с двигателями Twin Cam 88 и Twin Cam 103 1999-2005 годов выпуска.
- Издательство: —
- Год издания: —
- Страниц: 712
- Формат: PDF
- Размер: 140,8 Mb
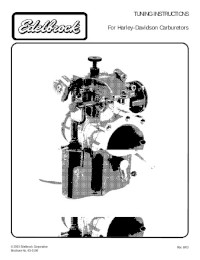
Руководство на английском языке по тюнингу карбюраторов Edelbrock для мотоциклов Harley-Davidson.
- Издательство: Edelbrock Corporation
- Год издания: 2003
- Страниц: 17
- Формат: PDF
- Размер: 292 Kb

В руководстве представлена информация об устройстве и работе всех узлов и агрегатов мотоцикла.
- Издательство: Алфамер
- Год издания: —
- Страниц: 220
- Формат: —
- Размер: —

![]()
2018 HARLEY-DAVIDSON® SERVICE MANUAL: TOURING MODELS
Foreword
Foreword
General
Manual Layout
How to Use This Service Manual
Shop Practices
Use Genuine Replacement Parts
Cleaning
Disposal and Recycling
Tools and Materials
Product Registered Marks
H-D U.S.A., LLC Trademark Information
Contents
Safety
Safety
Safety
Maintenance
FASTENER TORQUE VALUES
Fastener Torque Values in this Chapter
General
Servicing a New Motorcycle
Secure the Motorcycle for Service
Safe Operating Maintenance
Shop Practices
Disposal and Recycling
Repair and Replacement Procedures
Cleaning
Tool Safety
FUEL AND OIL
Fuel
Gasoline Blends
Engine Lubrication
Low Temperature Lubrication
MAINTENANCE SCHEDULE
General -[JPN]
ENGINE OIL AND FILTER
Check Engine Oil Level
Change Oil and Oil Filter
AIR CLEANER ELEMENT
Remove
Clean and Inspect
Install
EXHAUST SYSTEM
Leak Check
COOLANT
Cooling System
Freeze Point Test
Drain and Fill Cooling System
TIRES AND WHEELS
General
Tires

Replace Tire
Wheel Bearings
Wheel Spokes
PRIMARY CHAINCASE LUBRICANT
Change Primary Chaincase Lubricant
TRANSMISSION LUBRICANT
Check Transmission Lubricant
Change Transmission Lubricant
HYDRAULIC CLUTCH FLUID
General
Check Clutch Fluid
Replace Clutch Fluid
BRAKES
Inspect Brake Fluid
Replace Brake Fluid
Inspect Brake Lines
BRAKE PADS AND DISCS
Inspect
Replace Brake Pads
DRIVE BELT AND SPROCKETS
General
Cleaning
Inspect
Check Drive Belt Deflection
Adjust Belt Deflection
REAR SPROCKET ISOLATOR
Inspect
CABLE AND CHASSIS LUBRICATION
Chassis Lubrication
SPARK PLUGS
Prepare
Remove
Inspect
Clean
Install
Complete
STEERING HEAD BEARINGS
Check and Adjust Swing-Back
Inspect and Lubricate
REAR SUSPENSION ADJUSTMENTS
Manual Suspension Preload
BATTERY MAINTENANCE
General
Clean and Inspect
Battery
Voltage Test
Charging Battery
Battery Tender Connector
Storage
HEADLAMP ALIGNMENT
Check Headlamp Alignment
Adjust Headlamp
Adjust Auxiliary/Fog Lamps
STORAGE
General

Place in Storage
Remove from Storage
TROUBLESHOOTING
General
Engine
Lubrication System
Electrical System
Transmission
Handling
BRAKES
Chassis
FASTENER TORQUE VALUES
Fastener Torque Values in this Chapter
Specifications
Specifications
Vehicle Identification Number (VIN)
Vehicle Identification Number (VIN)
FRONT WHEEL
Remove
Install
Disassemble
Clean and Inspect
Assemble
REAR WHEEL
Prepare
Remove
Install
Complete
Disassemble
Clean and Inspect
Assemble
REAR WHEEL COMPENSATOR
Prepare
Remove
Install
Disassemble
Clean and Inspect
Assemble
Complete
WHEEL LACING: FRONT RIM
Lace Wheel: Angle Flange Hub
WHEEL LACING: 16 INCH REAR RIM
Lace Wheel: 16 In. Rear Wheel
WHEEL RUNOUT
Prepare
Inspect
Complete
Laced Wheel Rim Offset
True Laced Wheels
SEALED WHEEL BEARINGS
Inspect
Remove
Install
Tires
General

Remove
Clean, Inspect and Repair
Install
Check Tire Runout
Balance Wheel
FRONT BRAKE MASTER CYLINDER
Prepare
Remove
Install
Clean and Inspect
Complete
Disassemble
Assemble
FRONT BRAKE CALIPER
Remove
Install
REAR BRAKE MASTER CYLINDER
General
Prepare
Remove
Install
Clean and Inspect
Complete
Disassemble
Assemble
REAR BRAKE CALIPER
Remove
 Install Brake Lines
Front Brake Line: Non-ABS
Rear Brake Line: Non-ABS
Brake Line: Front Master Cylinder to ABS Module
Brake Line: ABS Module to Front Caliper
Brake Line: Rear Master Cylinder to ABS Module
 Brake Line: ABS Module to Rear Caliper BLEED BRAKES

 Fill and Bleed ABS Module
Reflex™ Linked Brakes with ABS Operation

 ABS Module FRONT FORK
Check For Oil Leak
Prepare
Remove
Install
Complete
Clean and Inspect
Disassemble
Assemble
STEERING HEAD BEARINGS
Prepare
Remove
Install
Upper Fork Bracket Complete

Disassemble
Assemble
Rear Suspension
Remove Shock Absorber
Clean and Inspect
Install Shock Absorber
Manual Adjust Shock Absorber Repair
REAR FORK
Remove
Install
Disassemble
Assemble
CLUTCH MASTER CYLINDER AND RESERVOIR
Remove
Disassemble
Cleaning and Inspection
Install
Assemble
HYDRAULIC CLUTCH HAND LEVER
Remove
Install
CLUTCH FLUID LINE
Prepare
Remove
Install
Complete
BLEED CLUTCH CONTROL SYSTEM
Drain and Fill
Bleed Hydraulic Clutch System
HANDLEBAR
Adjust
Remove
Install
Left Hand Grip
Remove Harnesses, Internally Wired Handlebar
Install Harnesses, Internally Wired Handlebar
Right Hand Grip
Handlebar Clamps and Rubber Mounts
HEATED HAND GRIPS
Mirrors
All Models Except FLHX, FLHXS
FLHX, FLHXS
SEAT
SEAT
Seat Retention Nut
Seat Bumper
SADDLEBAGS
Remove
Install
SADDLEBAG SERVICE
Repair Saddlebag
Saddlebag Support
TOUR-PAK
Removal and Installation
Tour-Pak Support

TOUR-PAK SERVICE
Tour-Pak Liner
Tour-Pak Seal
Hinges
Tour-Pak Lock
Latch Handle and Catch
Tether
Luggage Rack
Ground Plate
TOUR-PAK BACKREST
Passenger Backrest
Rubber Isolators
Passenger Backrest Flap
FAIRING LOWERS AND ENGINE GUARD
Fairing Lower: Air-Cooled
Fairing Lower: Twin-Cooled
Engine Guard
OUTER FAIRING AND WINDSHIELD: FORK MOUNTED FAIRING MODELS
Outer Fairing and Windshield
DASH PANEL: FORK MOUNTED FAIRING MODELS
Dash Panel
INNER FAIRING: FORK MOUNTED FAIRING MODELS
Rotate Inner Fairing
Remove and Install Inner Fairing Assembly
Replace Inner Fairing Shell
Fairing Vent
Upper Support Bracket
Media Compartment
INSTRUMENT BEZEL: FRAME MOUNTED FAIRING MODELS
Instrument Bezel
INSTRUMENT NACELLE: FRAME MOUNTED FAIRING MODELS
Instrument Nacelle
OUTER FAIRING AND WINDSHIELD: FRAME MOUNTED FAIRING MODELS
WINDSHIELD
Top Air Duct
Outer Fairing
INNER FAIRING: FRAME MOUNTED FAIRING MODELS
Removal
Installation
Fairing Air Duct
Inner Fairing Shell Replacement
Radio Support Bracket
STORAGE COMPARTMENTS: FRAME MOUNTED FAIRING MODELS
Storage Compartment, Door and Hinge
Air Deflectors
Fairing Air Deflectors
Mid-Frame Air Deflectors
WINDSHIELD: ROAD KING MODELS
WINDSHIELD
Windshield Window
HEADLAMP NACELLE: ROAD KING MODELS
Removal
Installation
Front Fender
Removal

Installation
REAR FENDER
Removal
Fender Repair
Installation
REAR FASCIA
Removal
Installation
Stud Plate
Rear Fascia Lamp
Rear Frame
Rear Frame
FOOTBOARDS AND FOOTRESTS
Rider Footboards
Passenger Footboard
Passenger Footrest: FLHX, FLHXS, FLTRX, FLTRXS
Passenger Footrest: Low Models
Jiffy Stand
Remove Leg
Install Leg
Jiffy Stand Bracket
Jiffy Stand Interlock Sensor
FRONT ENGINE MOUNT
Prepare
Remove
Installation
Stabilizer Link
Complete
MEDALLIONS, BADGES AND TANK EMBLEMS
Removal
Installation
Engine
FASTENER TORQUE VALUES
Fastener Torque Values in this Chapter
Specifications
Specifications
SERVICE WEAR LIMITS
Specifications
ENGINE OIL FLOW
Oil Flow
Oil Pump Operation
General
Operation
BREATHER OPERATION
Crankcase Ventilation
Oil Pressure
Oil Pressure Indicator Lamp
Oil Pressure Check
Troubleshooting
Compression Test
Cylinder Leakdown Test
Diagnose Valve Train Noise
Diagnosing Smoking Engine or High Oil Consumption
OIL COOLER AND DOWNTUBE  Prepare

Remove
Install
Complete
Disassemble Fan from Oil Cooler
Assemble Fan to Oil Cooler
Oil Check Valve
OIL COOLANT LINES
Prepare
Remove
Install
Complete
HOW TO USE THIS SECTION
Top End Repair
Bottom End Repair
Typical Symptoms
PREPARE MOTORCYCLE FOR SERVICE
Engine in Chassis
ASSEMBLE MOTORCYCLE AFTER SERVICE
 Engine in Chassis TOP END SERVICE
Engine in Chassis
 Engine Removed from Chassis CAM COMPARTMENT SERVICE
Replace Camshaft
BOTTOM END SERVICE

 Engine Removed from Chassis REMOVE ENGINE
Remove
INSTALL ENGINE
Install
UPPER ROCKER COVERS
Prepare
Remove
Install
Complete
LOWER ROCKER COVERS
Prepare
Remove
Install
 Complete BREATHERS
Prepare
Remove
Install
 Complete Rocker Arms
Prepare
Remove
Install
Complete
Clean and Inspect
Pushrods, Lifters and Covers
Prepare
Remove
Clean and Inspect

Inspect Lifters
Assemble Pushrod Cover
Install
Complete
CYLINDER HEAD
Prepare
Remove
Cleaning
Install
Complete
Disassemble
Inspect
Assemble
Valve and Seat Repair
CYLINDERS
Prepare
Remove
Clean and Inspect
Deglaze Cylinder
Install
Complete
PISTONS
Prepare
Remove
Install
Complete
Disassemble
Cleaning
Inspect
Check Piston Ring Gap
Assemble
CAM COMPARTMENT AND COMPONENTS
Prepare
Remove
Cam Component Inspection
Install
Complete
Camshaft Needle Bearings
Oil Pump
Prepare
Remove
Disassemble and Inspect
Assemble
Install
Complete
Crankcase
Prepare
Disassemble
Assemble
Sprocket Shaft Bearing Inner Race
Complete
Cylinder Studs
Repair Right Crankcase Half
Cleaning and Inspection
Repair Left Crankcase Half

Plugs and Oil Fittings
FLYWHEEL AND CONNECTING RODS
Symptoms
Inspection
Measuring Crankshaft Runout
OIL PAN
Prepare
Remove
Install
Complete
Fuel System
FASTENER TORQUE VALUES
Fastener Torque Values in this Chapter
SPECIFICATIONS: FUEL SYSTEM
Specifications
Fuel Pressure Test
Prepare
Test
Complete
Intake Leak Test
Leak Tester
Procedure
AIR CLEANER ASSEMBLY
Remove
Install
FUEL TANK
Console
Removal
Fuel Door
Installation
Vent Tube: Models Without EVAP System
Fuel Supply Check Valve/Tube
FUEL TANK TOP PLATE
Removal
Installation
Fuel Filter
Removal
Installation
FUEL PRESSURE REGULATOR
Removal
Installation
FUEL LEVEL SENDER
Removal
Installation
TWIST GRIP SENSOR (TGS)
Remove
Install
Mechanical Diagnosis
INDUCTION MODULE
Prepare
Remove
Install
Complete
Disassemble
Assemble
![]()
TEMPERATURE MANIFOLD ABSOLUTE PRESSURE SENSOR (TMAP)
Prepare
Remove
Install
Complete
HEATED OXYGEN SENSORS (HO2)
Remove
Install
Fuel Injectors
Prepare
Remove
Install
Complete
FUEL PUMP
General
Removal
Fuel Pump and Fuel Level Sender Wire Harness
Installation
EXHAUST SYSTEM
Mufflers
Prepare
Remove Exhaust System
Install Exhaust System
Complete
EVAPORATIVE EMISSIONS CONTROL SYSTEM
General
Vapor Valve
Fuel Vapor Vent Tube
Canister-to-Solenoid Tube
Charcoal Canister
Purge Solenoid
Solenoid-to-Induction Module Tube
Cooling System
FASTENER TORQUE VALUES
Fastener Torque Values in this Chapter
SPECIFICATIONS: COOLING SYSTEM
General
COOLING SYSTEM OPERATION
Operation
TESTING AND DIAGNOSTICS
Troubleshooting
Pressure Cap Test
System Pressure Test
Leak Detection Dye Test
COOLING SYSTEM REPAIR
Crimp Clamps
Coolant Bottle
Remove Upper Coolant Lines
Install Upper Coolant Lines
Coolant Downtubes
Horizontal Coolant Tube
Radiator
Coolant Pump
COOLING FAN
Drive

FASTENER TORQUE VALUES
Fastener Torque Values in this Chapter
SPECIFICATIONS: DRIVE
Specifications
PRIMARY CHAINCASE COVER
Prepare
Remove
Install
Complete
DRIVE COMPONENTS
Prepare
Remove
Install
Complete
PRIMARY CHAINCASE HOUSING
Prepare
Remove
Inspect
Mainshaft Bearing and Seal
Install
Mainshaft Bearing Inner Race
Complete
Shifter Shaft Bushing
CLUTCH: ASSIST AND SLIP
Removal and Installation
Clutch Pack Only
Complete Clutch Disassembly
HYDRAULIC CLUTCH RELEASE BEARING AND PUSHROD
Prepare
Remove
Install
Complete
Disassemble
Assemble
TRANSMISSION SPROCKET
Prepare
Remove
Clean and Inspect
Install
Complete
Drive Belt
Remove
 Install Transmission
FASTENER TORQUE VALUES
Fastener Torque Values in this Chapter
SPECIFICATIONS: TRANSMISSION
Specifications
SERVICE WEAR LIMITS
TRANSMISSION OPERATION
Power Flow
SHIFTER LINKAGE
Shifter Rod
Heel-Toe Shift Levers Shifter Rod Lever, Front

TRANSMISSION SIDE COVERS
Prepare
Remove
Install
Complete
SECONDARY CLUTCH ACTUATOR
Prepare
Remove
Install
Complete
Transmission
Prepare
Remove
Install
Complete
Disassemble
Cleaning and Inspection
Assemble
MAIN DRIVE GEAR AND BEARING
Prepare
Remove
Clean and Inspect
Install
Replace Mainshaft Seal
Complete
Replace Needle Bearings
TRANSMISSION CASE
Prepare
Remove
Install
Disassemble
Complete
Clean and Inspect
Assemble
Electrical
FASTENER TORQUE VALUES
Fastener Torque Values in this Chapter
SPECIFICATIONS: ELECTRICAL
Specifications
System Fuses and Relays
Main Fuse
System Fuses and Relays
Fuse Blocks
ELECTRONIC CONTROL MODULE (ECM)
ECM
BODY CONTROL MODULE (BCM)
Removal
Installation
ELECTRICAL CADDIES
Fairing and Steering Head Caddies
Top Caddy
Left Side Caddy
Right Side Caddy
Battery Tray
Lower Backbone Caddy

IGNITION COIL AND SPARK PLUG CABLES
Removal
Install
SPARK PLUG CABLES
 Inspect Spark Plug Cables STARTER
Removal
Install
HEADLAMP
Headlamp: All But FLTR Models

 Headlamp: FLTR Models Rear Lighting
Replace Tail Lamp Bulb
Tail Lamp Base
 Rear Fascia Lamp FENDER TIP LAMPS
Front Fender Tip Lamp
 Rear Fender Tip Lamp TOUR-PAK LIGHTS
Tour-Pak Side Lamps/Trim Strips
Tour-Pak Lights Harness

 Wrap-Around Lamp (if equipped) Turn Signal Lamps
Turn Signal Bulb Replacement: Bullet Style
Turn Signal Bulb Replacement: Flat Lens Style
Front Turn Signal Lamp
Rear Turn Signal Lamp
 Rear Turn Signal Lamps Bracket Ignition Switch and Fork Lock
Fairing Models
Road King Models
ACCESSORY SWITCHES
Fork-Mounted Fairing Models
Frame-Mounted Fairing Models
Nacelle Switches
CRANKSHAFT POSITION SENSOR (CKP)
Remove

 Installation KNOCK SENSOR (KS)
Prepare
Remove
Install
Complete
ENGINE TEMPERATURE SENSOR (ET)
Prepare
Remove
Install
Complete
ENGINE COOLANT TEMPERATURE SENSOR (ECT)
Coolant Temperature Sensor
Automatic Compression Release (ACR)
Prepare
Remove
Install Complete

Vehicle Speed Sensor (VSS)
VSS
WHEEL SPEED SENSORS
Front Wheel Speed Sensor (WSS)
Rear Wheel Speed Sensor
NEUTRAL SWITCH
Removal
Installation
Oil Pressure Switch
Removal
Install
STOP LAMP SWITCHES
Front Stop Lamp Switch
Rear Stop Lamp Switch
VOLTAGE REGULATOR
Prepare
Remove
Install
Complete
ALTERNATOR
Prepare
Remove
Cleaning and Inspection
Install
Complete
HORN
Removal
Installation
FAIRING POWER OUTLET
Removal
Installation
GAUGES AND INSTRUMENTS: FAIRING MODELS
Ambient Air Temperature Sensor
2-Inch Diameter Gauges
Speedometer/Tachometer Instrument Cluster: Fork-Mounted Fairing
Speedometer/Tachometer Instrument Cluster: Frame Mounted Fairing
GAUGES AND INSTRUMENTS: ROAD KING MODELS
Fuel Gauge
SPEEDOMETER
INDICATOR LAMPS: ROAD KING MODELS
INDICATOR LAMPS
Boom! Box Infotainment System
Radio Face Protective Film
Radio: Fork-Mounted Fairing
CB Module: Fork Mounted Fairing
GPS Antenna
Front Fairing Speakers: Fork Mounted Fairing
Radio: Frame Mounted Fairing
Front Fairing Speaker and Enclosure: Frame-Mounted Fairing
Rear Speaker Enclosures
Passenger Audio Controls
Rider Headset Connector
ANTENNA CABLES
Removal
Installation

WIRE TROUGH
Remove
Install
MAIN WIRING HARNESS
Removal: All Models (Part 1)
Removal: Road King Models (Part 2)
Removal: Fork Mounted Fairing Models (Part 2)
Removal: Frame Mounted Fairing Models (Part 2)
Removal: All Models (Part 3)
Installation: All Models (Part 1)
Installation: Road King Models (Part 2)
Installation: Fork-Mounted Fairing Models (Part 2)
Installation: Frame-Mounted Fairing Models (Part 2)
Installation: All Models (Part 3)
FAIRING HARNESS
Harness Service: Fork-Mounted Fairing
Harness Service: Frame Mounted Fairing
HANDLEBAR SWITCH PACKS
Removal
Install
Switch Pack Harness
Handlebar Switch Caps
Security System Maintenance
Fob Battery
Smart Siren (If Equipped)
Security System Antenna
SECURITY SYSTEM ACTUATION
Sidecar Configuration
Activation
Fob Assignment
AUXILIARY/FOG LAMPS AND BRACKETS
Replace Auxiliary/Fog Lamp Bulb
Auxiliary/Fog Lamp Housing
Turn Signal/Auxiliary/Fog Lamp Bracket
Adjustment
SECURITY SIREN
Removal
Installation
Personal Identification Number (PIN)
General
Changing the PIN
Wiring
WIRING DIAGRAMS
General
Wiring Diagrams
WIRE HARNESS CONNECTORS
General
Reference
GLOSSARY
Acronyms and Abbreviations
METRIC CONVERSION
Conversion Table
FLUID CONVERSION
United States System
Metric System

British Imperial System
TORQUE CONVERSION
United States System
Metric System
Backmatter
Backmatter
Backmatter
Backmatter
This manual has been created to inform Harley-Davidson technicians about the construction of Harley-Davidson products and the latest tested and approved maintenance and repair techniques.

Safety
Refer to the Safety section before performing any procedures on a vehicle.
Sections
This service manual is organized into chapters, sections and topics. Sections in chapters 4, 6, 7, 8 are laid out as follows:
Prepare
Remove
Install
Disassemble (if applicable)
Clean/Inspect (if applicable)
Assemble (if applicable)
Complete
Topics
The purpose of the Prepare topics is to to provide an outline of procedures required before beginning a specific task. Links to the necessary procedures are provided in the topic.
The Remove and Install topics allow the technician to only remove and install the component — which may be all that is required. If a component can be repaired, Disassemble, Assemble and Clean/Inspect topics are provided as appropriate.
Complete topics provide a list of procedures that need to be performed to return the vehicle to ride-ready condition. If additional removal procedures need to be performed, move to the next section without performing the Complete topics in the current section.
Procedural Steps
Each topic contains steps to complete the procedure. These steps are laid out in numeric and alpha steps.
The purpose of the numeric steps is to provide the experienced technician with high-level information to complete the procedure.
The alpha steps provide a less-experienced technician with step-by-step instructions to perform the procedure.

Cross-References and Page Numbers
A cross-reference shown as 2.2 SPECIFICATIONS refers to chapter 2 CHASSIS, heading 2.2 SPECIFICATIONS.
All pages contain a chapter number followed by a page number. For example, page 3-5 refers to page 5 in Chapter 3.
Item References and Quantities
In figure legends and tables, the number in parentheses that follows the part name indicates the quantity of that part necessary for one complete assembly.
Example:
2. Rocker cover screw (4)
In a procedure step or paragraph, the number in parentheses that follows a part name indicates the legend item of the part in the figure referenced by the text.
Example:
1. Remove rocker cover screws (2).
Acronyms and Abbreviations
Acronyms and abbreviations are used in this document. See the Acronyms and Abbreviations for a list of acronyms, abbreviations and definitions.
![]()
Removing Parts
Always use blocking or proper stands to support the part that has been hoisted. If a part cannot be removed, verify that all bolts and attaching hardware have been removed. Verify that no parts are in the way of the part being removed.
Always tag hoses, wiring or tubes to verify proper installation.
Cleaning
Thoroughly clean all parts to be reused before assembly. Clean parts promote better component operation and longer life. Seals, filters and covers used in this vehicle keep out extraneous dirt and dust. Keep these items in good condition to guarantee satisfactory operation. See Cleaning.
Checking Torques on Fasteners
Check torque using a torque wrench set to the minimum specification for that fastener. If the fastener does not rotate, the torque has been maintained. If the fastener rotates, remove it to determine if it has a threadlocking agent.
If it has a threadlocking agent, clean all material from the threaded hole. Replace the fastener with a new one or clean the original fastener threads and apply the appropriate threadlocking product. Install and tighten the fastener to specification.
If the fastener does not use a threadlocking agent, install and tighten it to specification.

 WARNING
Harley-Davidson parts and accessories are designed for Harley-Davidson motorcycles. Using non-Harley-Davidson parts or accessories can adversely affect performance, stability or handling, which could result in death or serious injury. (00001b)
To achieve satisfactory and lasting repairs, carefully follow the service manual instructions and use only genuine HarleyDavidson replacement parts.

General
Any cleaning method may be used as long as it does not result in parts damage. Thorough cleaning is necessary for proper parts inspection. Strip rusted paint areas to bare metal before priming and repainting.
Always clean around lines or covers before they are removed. When cleaning parts:
Plug, tape or cap holes and openings to keep out dirt, dust and debris.
Clean and inspect all parts as they are removed.
Cover all clean parts with clean lint-free cloth, paper or other material.
Verify that the part is clean when installed.
Cleaning Threads and Threaded Holes
Always verify cleanliness of blind holes before assembly. Tightening a screw with dirt, water or oil in the hole can cause castings to crack or break.
To attain proper clamp load, always clean fastener threads and threaded holes prior to assembly.
NOTE
Never use a thread-cutting tap or die to clean threads.
Clean all threadlocking material from fastener threads and threaded holes.
Use a wire brush or thread-chasing die to clean fastener threads.
Use a thread chaser to clean threaded holes.
Use PJ1 cleaner or equivalent to remove all traces of oil and contaminants from threads.
Clear all threaded holes with low-pressure compressed air.
Cleaning Plastic and Rubber Parts
Never use cleaners containing chlorine or ammonia on plastic parts. Chlorine will cause parts to become distorted and brittle resulting in cracks. Ammonia will cause cloudiness and brittleness in windshields and cause non-painted parts to form a white haze.
Before cleaning, protect rubber parts (such as hoses, boots and electrical insulation) from cleaning solutions. Use a grease-proof barrier material. Remove the rubber part if it cannot be properly protected.
Rust or Corrosion Removal
Remove rust and corrosion with a wire brush, abrasive cloth, sand blasting, vapor blasting or rust remover. Use buffing crocus cloth on highly polished parts that are rusted.
Bearings
Wash bearings in a non-flammable petroleum cleaning solution. Never use a solution that contains chlorine. Knock out packed lubricant by tapping the bearing against a wooden block. Wash bearings again.
 WARNING
Using compressed air to «spin dry» bearings can cause bearing to fly apart, which could result in death or serious

injury. (00505b)
Cover bearings with a clean shop towel. Allow bearings to air dry. Do not spin bearings while they are drying. Never use compressed air to dry bearings.
When dry, coat bearings with clean oil. Wrap bearings in clean paper.
Many communities maintain facilities for recycling used fluids, plastics and metals. Dispose of or recycle used oil, lubricants, fuel, coolant, brake fluid and batteries in accordance with local regulations.

WARNING
Read and follow warnings and directions on all products. Failure to follow warnings and directions can result in death or serious injury. (00470b)
Some service procedures require the use of tools designed for a specific purpose. These tools should be used when and as recommended.
When reference is made in this manual to a brand name product, tool or instrument, an equivalent product, tool or instrument may be substituted.
Special Tools
Special tools mentioned in this manual with a part number that begins with an «HD», «J» or «B» must be purchased, serviced or warrantied through a Harley-Davidson dealer.
Specific use of special tools is not discussed in this manual. Refer to the tool instruction sheet for instructions. If the tool instructions are misplaced, a copy can be obtained online at H-Dnet.com > My Toolbox > Edit > Bosch Tool Site.
LOCTITE Sealing and Threadlocking Products
Some procedures in this manual call for the use of LOCTITE products. If you have any questions regarding LOCTITE product usage or retailer/wholesaler locations, contact Loctite Corp. at www.loctite.com.
Apple, Alcantara S.p.A., Allen, Amp Multilock, Bluetooth, Brembo, City Navigator, Delphi, Deutsch, Dunlop, Dynojet, Fluke, G.E. Versilube, Garmin, Gunk, Hydroseal, Hylomar, iPhone, iPod, Kevlar, Lexan, Loctite, Lubriplate, Keps, K&N, Magnaflux, Marson Thread-Setter Tool Kit, MAXI fuse, Molex, Michelin, MPZ, Mulitilock, nano, NGK, Novus, Packard, Pirelli, Permatex, Philips, PJ1, Pozidriv, Road Tech, Robinair, S100, Sems, SiriusXM, Snap-on, Teflon, Threadlocker, Torca, Torco, TORX, Tufoil, Tyco, Ultratorch, Velcro, X-Acto and XM Satellite Radio are among the trademarks of their respective owners.
Bar & Shield, Boom!, Cross Bones, Cruise Drive, CVO, Digital Tech, Digital Technician, Digital Technician II, Dyna, Electra Glide, Evolution, Fat Bob, Fat Boy, Forty-Eight, Glaze, Gloss, H-D, H-Dnet.com, Harley, Harley-Davidson, HD, Heritage Softail, Iron 883, Low Rider, Milwaukee-Eight, Night Rod, Nightster, Night Train, Profile, Reflex, Revolution, Road Glide, Road King, Road Tech, Rocker, Screamin’ Eagle, Seventy-Two, Softail, Sportster, Street Glide, Street Rod, Sun Ray, Sunwash, Super Glide, SuperLow, Supersmart, Switchback, SYN3, TechLink, TechLink II, Tour-Pak, Tri Glide, Twin Cam 88, Twin Cam 88B, Twin Cam 96, Twin Cam 96B, Twin Cam 103, Twin Cam 103B, Twin Cam 110, Twin Cam 110B, TwinCooled, Ultra Classic, V-Rod, VRSC and Harley-Davidson Genuine Motor Parts and Genuine Motor Accessories are among the trademarks of H-D U.S.A., LLC.
All photographs, illustrations and procedures may not necessarily depict the most current model or component, but are based on the latest production information available at the time of publication.
Since product improvement is our continual goal, Harley-Davidson reserves the right to change specifications, equipment or designs at any time without notice and without incurring obligation.

Harley-Davidson service manuals are intended for use by professional, qualified and experienced technicians. Attempting the procedures found within this manual without the proper training, tools and equipment could result in death or injury to you or others. This could also damage the vehicle, or cause the vehicle to operate improperly.
Safety is always the most important consideration when performing any job.
Always have a complete understanding of the task.
Use common sense.
Use proper tools for the task.
Protect yourself and bystanders with approved eye protection.
Harley-Davidson does not evaluate or advise the technicians of every way in which service might be performed, or all possible hazardous consequences of every method, or undertaken such a broad evaluation. Before using a tool not recommended by Harley-Davidson, make sure that technician or rider safety will not be jeopardized as a result.
Warnings against the use of specific service methods which could damage the motorcycle or render it unsafe are stated in this manual. These warnings are not all-inclusive. Inadequate safety precautions could result in death or serious injury.
Safety Messages
Statements in this manual preceded by the following words are of special significance.
WARNING
WARNING indicates a potentially hazardous situation which, if not avoided, could result in death or serious injury. (00119a)
CAUTION
CAUTION indicates a potentially hazardous situation which, if not avoided, may result in minor or moderate injury. (00139a)
NOTICE
NOTICE indicates a potentially hazardous situation which, if not avoided, may result in property damage. (00140b)
NOTE
Refers to important information. It is recommended that you take special notice of these items.
Customer Safety
WARNING
The rider’s safety depends upon proper motorcycle service and maintenance. If a procedure in this manual is not within your capabilities or you do not have the correct tools, have a Harley-Davidson dealer perform the procedure. Improper service or maintenance could result in death or serious injury. (00627b)
Proper service and repair is important for the safe, reliable operation of all mechanical products. The service

procedures recommended and described in this manual are effective methods for performing service operations and are essential to your customer’s safety and the reliable and safe operation of your customer’s vehicle.
Personal Protection
WARNING
Always wear safety glasses or goggles when performing service or maintenance procedures. Flying objects or materials can cause serious eye injury or death.Wear protective gear that is appropriate to the situation. Helmets, gloves, boots and other protective clothing can prevent serious injury or death.Wear ear protection when loud noises are present. Loud noises can damage ears and cause hearing loss. (00628b)
Tool Safety
Some of these service operations require the use of tools specially designed for the purpose. Follow the manufacturer’s suggested usage and safety instructions. If using a tool other than that recommended by HarleyDavidson, be sure that the tool is appropriate for the service or maintenance procedure and is being used in accordance with the tool’s safety instructions.
Product Safety
WARNING
Read and follow warnings and directions on all products. Failure to follow warnings and directions can result in death or serious injury. (00470b)
When reference is made to a specific brand name product, tool or instrument, an equivalent product, tool or instrument may be substituted.
Some referenced or recommended products contain chemicals known to the State of California to cause cancer and birth defects or other reproductive harm as indicated on the product label or at the point of purchase.
Hazardous Materials
WARNING
Read and follow warnings and directions on all products. Failure to follow warnings and directions can result in death or serious injury. (00470b)
Keep hazardous products out of the reach of children.
Many products (oils, lubricants, solvents, sealants and cleaners, etc.) can cause death or serious injury if inhaled, absorbed, injected, ingested or improperly contacted. If hazardous contact is made with a product, follow the instructions on the product label and, if necessary, contact poison control or a medical facility.
Some products are flammable and/or explosive as indicated on the product label or at the point of purchase. Keep these products away from flame and intense heat.
Some products are corrosive as indicated on the product label. Wear appropriate protective gear to prevent skin contact. Use service covers to prevent damage to cosmetic surfaces on the motorcycle.
Some products contain chemicals known to the State of California to cause cancer and birth defects or other reproductive harm as indicated on the product label or at the point of purchase.

Fuel
WARNING
Keep gasoline away from ignition sources. Gasoline is extremely flammable and highly explosive and, if ignited, could result in death or serious injury. (00634b)
Stop the engine when refueling or servicing the fuel system.
Do not allow open flame, sparks, radiant heat or other ignition sources near gasoline.
Do not store motorcycle with gasoline in tank within the home or garage where ignition sources, such as open flames, pilot lights, sparks or electric motors are present.
Do not overfill fuel tank. Allow for fuel expansion .
Do not use gasoline as a cleaner or solvent.
Gasoline can leak or drain from loosened or improperly tightened fuel fittings or from removed fuel components.
Clean spilled gasoline immediately. Dispose of waste materials properly.
Battery
WARNING
Read and follow warnings and directions on all products. Failure to follow warnings and directions can result in death or serious injury. (00470b)
Batteries contain sulfuric acid, which could cause severe burns to eyes and skin. Wear a protective face shield, rubberized gloves and protective clothing when working with batteries. Keep batteries out of the reach of children.
Do not remove warning label attached to top of battery.
Batteries, battery posts, terminals and related accessories contain lead and lead compounds, and other chemicals known to the State of California to cause cancer, and birth defects or other reproductive harm. Wash hands after handling.
Coolant
Coolant contains toxic chemicals which could cause death or serious injuries if ingested. Do not induce vomiting. Call a physician immediately.
Irritation to skin or eyes can occur from vapors or direct contact. Flush thoroughly with water if contact is made.
Use in a well ventilated area.
Hydraulic (Brake) Fluid
Direct contact with brake fluid to the eyes can cause irritation. Flush thoroughly with water if contact is made.
Do not swallow brake fluid. Swallowing brake fluid can cause digestive discomfort. Call a physician immediately.
Brake fluid will cause cosmetic damage to painted surfaces. Always use caution and protect surfaces from spills whenever brake work is performed.
Engine Oil
Prolonged or repeated contact with used motor oil may be harmful to skin and could cause skin cancer. Promptly wash affected areas with soap and water.
Do not swallow oil. If swallowed, do not induce vomiting. Contact a physician immediately.
Direct contact with eyes can cause irritation. Flush thoroughly with water if contact is made. Contact a physician if irritation persists.
Electrical Systems
WARNING
Improper service or maintenance of the electrical system can cause damage to the electrical system. This may

result in component failure. In certain situations, a component failure during operation could lead to a loss of control, which could result in death or serious injury. (00637b)
Always use replacement fuses that are of the specified type and amperage rating.
Do NOT pull on electrical wires. Pulling on electrical wires may damage wire conductivity.
Route wires and harnesses properly to prevent chafing, stripping, pinching, crimping or cutting wires. Damaged wires can cause short circuits and component damage or failure.
Do NOT overload the vehicle’s charging system. If the electrical accessories consume more electrical current than the charging system can produce, the battery may be discharged and cause damage to the motorcycle’s electrical system.
Do NOT exceed the maximum amperage rating of the fuse or circuit breaker protecting a modified circuit.
Avoid directly heating electrical system components other than the connectors on which heat shrink work is being performed.

|
FASTENER |
TORQUE VALUE |
NOTES |
|
|
Air cleaner cover screw |
4.1–6.8 N·m |
2.6 AIR CLEANER ELEMENT, Install |
|
|
(36–60 in-lbs) |
|||
|
Apply LOCTITE 243 (blue) to the |
|||
|
threads of screw. |
|||
|
Air filter element screws |
4.5–6.8 N·m |
2.6 AIR CLEANER ELEMENT, Install |
|
|
(40–60 in-lbs) |
|||
|
Auxiliary/fog lamp flange nut: Models |
27.1–32.5 N·m |
2.22 |
HEADLAMP ALIGNMENT, |
|
with bullet style turn signal lamps |
(20–24 ft-lbs) |
Adjust Auxiliary/Fog Lamps |
|
|
Auxiliary/fog lamp flange nut: Models |
20.3–24.4 N·m |
2.22 |
HEADLAMP ALIGNMENT, |
|
with flat lens turn signal lamps |
(15–18 ft-lbs) |
Adjust Auxiliary/Fog Lamps |
|
|
Battery terminal bolt |
6.8–7.9 N·m |
2.21 |
BATTERY MAINTENANCE, |
|
(60–70 in-lbs) |
Battery |
||
|
Brake bleeder screw, front |
8.1–12.2 N·m |
2.13 |
BRAKES, Replace Brake Fluid |
|
(72–108 in-lbs) |
|||
|
Brake bleeder screw, rear |
8.5–11.5 N·m |
2.13 |
BRAKES, Replace Brake Fluid |
|
(75–102 in-lbs) |
|||
|
Brake caliper pad pin |
8.5–11.5 N·m |
2.14 |
BRAKE PADS AND DISCS, |
|
(75–102 in-lbs) |
Replace Brake Pads |
||
|
Always use new part |
|||
|
Brake caliper, front, mounting screws |
37.9–51.5 N·m |
2.14 |
BRAKE PADS AND DISCS, |
|
(28–38 ft-lbs) |
Replace Brake Pads |
||
|
metric |
|||
|
Brake caliper, rear, mounting screws |
58.3–65.1 N·m |
2.14 |
BRAKE PADS AND DISCS, |
|
(43–48 ft-lbs) |
Replace Brake Pads |
||
|
metric |
|||
|
Brake master cylinder reservoir cover |
1.4–1.7 N·m |
2.14 |
BRAKE PADS AND DISCS, |
|
screws |
(12–15 in-lbs) |
Replace Brake Pads |
|
|
Brake master cylinder, front, |
1.4–1.7 N·m |
2.13 |
BRAKES, Replace Brake Fluid |
|
reservoir cover screws |
(12–15 in-lbs) |
||
|
Brake master cylinder, rear, reservoir |
1.4–1.7 N·m |
2.13 |
BRAKES, Replace Brake Fluid |
|
cover screws |
(12–15 in-lbs) |
||
|
Clutch actuator bleeder screw |
6.3–8.5 N·m |
2.12 |
HYDRAULIC CLUTCH FLUID, |
|
(56–75 in-lbs) |
Replace Clutch Fluid |
||
|
Clutch inspection cover screws |
9.5–12.2 N·m |
2.10 |
PRIMARY CHAINCASE |
|
(84–108 in-lbs) |
LUBRICANT, Change Primary |
||
|
Chaincase Lubricant |
|||
|
Torque sequence |
|||
|
Clutch reservoir cover screws |
1.4–1.7 N·m |
2.12 |
HYDRAULIC CLUTCH FLUID, |
|
(12–15 in-lbs) |
Replace Clutch Fluid |
||
|
Engine oil drain plug |
19–28.5 N·m |
2.5 ENGINE OIL AND FILTER, |
|
|
(14–21 ft-lbs) |
Change Oil and Oil Filter |
||
|
Muffler to saddlebag support screws |
19–24.4 N·m |
2.15 |
DRIVE BELT AND |
|
(14–18 ft-lbs) |
SPROCKETS, Adjust Belt Deflection |
||
|
Primary chaincase drain plug |
19–28.5 N·m |
2.10 |
PRIMARY CHAINCASE |
|
(14–21 ft-lbs) |
LUBRICANT, Change Primary |
||
|
Chaincase Lubricant |
|||
|
Rear axle cone nut, final torque |
128.8–142.4 N·m |
2.15 |
DRIVE BELT AND |
|
(95–105 ft-lbs) |
SPROCKETS, Adjust Belt Deflection |
||
|
Rear axle cone nut, first torque |
20–27 N·m |
2.15 |
DRIVE BELT AND |
|
(15–20 ft-lbs) |
SPROCKETS, Adjust Belt Deflection |
||
|
For belt adjustment only |
|||
|
Spark plug |
10–15 N·m |
2.18 |
SPARK PLUGS, Install |
|
(89–133 in-lbs) |
|||
|
Spoke nipple |
6.2 N·m |
2.9 TIRES AND WHEELS, Wheel |
|
|
(55 in-lbs) |
Spokes |
||
|
Top caddy screws |
8.1–10.9 N·m |
2.21 BATTERY MAINTENANCE, |
|
|
(72–96 in-lbs) |
Battery |
||
|
Transmission drain plug |
19–28.5 N·m |
2.11 |
TRANSMISSION LUBRICANT, |
|
(14–21 ft-lbs) |
Change Transmission Lubricant |
||
|
Transmission filler plug/dipstick |
2.8–8.5 N·m |
2.11 |
TRANSMISSION LUBRICANT, |
|
(25–75 in-lbs) |
Check Transmission Lubricant |
||
|
Transmission filler plug/dipstick |
2.8–8.5 N·m |
2.11 |
TRANSMISSION LUBRICANT, |
|
(25–75 in-lbs) |
Change Transmission Lubricant |
||
|
Turn signal lamp to auxiliary/fog lamp |
10.9–13.5 N·m |
2.22 |
HEADLAMP ALIGNMENT, |
|
bracket screw: Bullet style turn |
(96–120 in-lbs) |
Adjust Auxiliary/Fog Lamps |
|
|
signal lamps |
|||
|
Turn signal lamp to auxiliary/fog lamp |
4.1–6.8 N·m |
2.22 |
HEADLAMP ALIGNMENT, |
|
bracket screws: Flat lens turn signal |
(36–60 in-lbs) |
Adjust Auxiliary/Fog Lamps |
|
|
lamps |
|||
|
Upper steering stem pinch screw |
29.8–35.2 N·m |
2.19 |
STEERING HEAD BEARINGS, |
|
(22–26 ft-lbs) |
Check and Adjust Swing-Back |
||
|
Upper steering stem, final torque: |
7.1 N·m |
2.19 |
STEERING HEAD BEARINGS, |
|
Fork mounted fairing models |
(63 in-lbs) |
Inspect and Lubricate |
|
|
Upper steering stem, final torque: |
21.7 N·m |
2.19 |
STEERING HEAD BEARINGS, |
|
Frame mounted fairing models |
(192 |
in-lbs) |
Inspect and Lubricate |
|
Upper steering stem, final torque: |
12.2 N·m |
2.19 STEERING HEAD BEARINGS, |
|
|
Road King models |
(108 |
in-lbs) |
Inspect and Lubricate |
|
Upper steering stem, final torque: |
12.2 N·m |
2.19 STEERING HEAD BEARINGS, |
|
|
Trike models |
(108 |
in-lbs) |
Inspect and Lubricate |
|
Upper steering stem, first torque |
47.5 N·m |
2.19 STEERING HEAD BEARINGS, |
|
|
(35 ft-lbs) |
Inspect and Lubricate |
||

 WARNING
Perform the service and maintenance operations as indicated in the regular service interval table. Lack of regular maintenance at the recommended intervals can affect the safe operation of your motorcycle, which could result in death or serious injury. (00010a)
Perform necessary set-up tasks before customer delivery. See applicable model year predelivery and set-up instructions.
The performance of new motorcycle initial service is required to keep warranty in force and to verify proper emissions systems operation. See General.

Special Tools
|
Description |
Part Number |
Qty. |
|
FAT JACK |
HD-45968 |
1 |
WARNING
Be sure to check capacity rating and condition of hoists, slings, chains and cables before use. Exceeding capacity ratings or using lifting devices that are in poor condition can lead to an accident, which could result in death or serious injury. (00466c)
Always use blocking or proper stands to support motorcycle.
Set Motorcycle Upright
1.Place motorcycle upright on a level surface or suitable lift if available.
2.Verify that motorcycle is level.
3.Secure with tie-downs.
Raise Front or Rear Wheel for Service
1. Verify that motorcycle is level.
NOTICE
When lifting a motorcycle using a jack, be sure jack contacts both lower frame tubes where down tubes and lower frame tubes converge. Never lift by jacking on cross-members, oil pan, mounting brackets, components or housings. Failure to comply can cause serious damage resulting in the need to perform major repair work. (00586d)
2.Use a FAT JACK (Part Number:HD-45968) or similar to raise the motorcycle to service a front or rear wheel.
3.Secure with tie-downs.

NOTE
Do not attempt to tighten engine head bolts or engine damage may result.
During the initial break-in period, use only GENUINE HARLEY-DAVIDSON H-D 360 MOTORCYCLE OIL 20W50. Failure to use the recommended oil results in improper break-in of the engine cylinders and piston rings.
Inspect motorcycle regularly for more maintenance needs. Routinely check components between regular maintenance intervals. Always inspect motorcycle after periods of storage before riding.
Check:
1.Tires for correct pressure, excessive wear or any signs of tire damage.
2.Drive belt tension and condition.
3.Brakes, steering and throttle for responsiveness.
4.Brake fluid level and condition. Hydraulic lines and fittings for leaks.
5.Check brake pads and discs for wear.
6.Cables for fraying, crimping and free operation.
7.Engine oil and transmission fluid levels.
8.Headlamp, auxiliary/fog lamp, tail lamp, stop lamp, horn and turn signal operation.

Repair Notes
General maintenance practices are given in this section.
NOTE
Repair = Disassembly/Assembly.
Replacement = Substitute a new part for existing component.
All special tools and torque values are noted at the point of use.
All required parts or materials can be found in the parts catalog.
Safety
Safety is always the most important consideration when performing any job.
Always have a complete understanding of the task.
Use common sense.
Use the proper tools.
Protect yourself and bystanders with approved eye protection.
Do not just do the job, do the job safely.
Removing Parts
Always consider the weight of a part when lifting. Use a hoist whenever necessary. Do not lift heavy parts by hand. If a hoist and adjustable lifting beam or sling are needed to remove some parts, verify that:
The lengths of multiple chains or cables from the hoist to the part are equal and parallel.
Slings, chains and cables are positioned directly over the center of the part.
No obstructions interfere with the lifting operation.
Parts are not left suspended.
 WARNING
Be sure to check capacity rating and condition of hoists, slings, chains and cables before use. Exceeding capacity ratings or using lifting devices that are in poor condition can lead to an accident, which could result in death or serious injury. (00466c)
Always use blocking or proper stands to support the part that has been hoisted. If a part cannot be removed, verify that all bolts and attaching hardware have been removed. Verify that no parts are in the way of the part being removed.
When removing hoses, wiring or tubes, always tag each part to verify proper installation.
Cleaning
Always clean around lines or covers before they are removed. Plug, tape or cap holes and openings to keep out dirt, dust and debris. Clean and inspect all parts as they are removed. Verify that all holes and passages are clean and open. After cleaning, cover all parts with clean lint-free cloth, paper or other material. Verify that the part is clean when installed.
![]()
Thoroughly clean all parts to be reused before assembly. Clean parts promote better component operation and longer life. Seals, filters and covers used in this vehicle keep out extraneous dirt and dust. Keep these items in good condition to guarantee satisfactory operation.
Cleaning Fastener Threads
To attain proper clamp load, always clean fastener threads and threaded holes prior to assembly.
NOTE
Never use a thread-cutting tap or die to clean threads.
Clean all threadlocking material from fastener threads and threaded holes.
Use a wire brush or thread-chasing die to clean fastener threads.
Use a thread chaser to clean threaded holes.
Use PJ1 cleaner or equivalent to remove all traces of oil and contaminants from threads.
Clear all threaded holes with low-pressure compressed air.
Always verify cleanliness of blind holes before assembly. Tightening a screw with dirt, water or oil in the hole can cause castings to crack or break.
Disassembly and Assembly
Always assemble or disassemble one part at a time. Do not work on two assemblies simultaneously. Make all necessary adjustments. Inspect your work when finished to verify that everything is done.
Operate the vehicle to perform any final check or adjustments. If all is correct, the vehicle is ready to go back to the customer.
Checking Torques on Fasteners
Check torque using a torque wrench set to the minimum specification for that fastener. If the fastener does not rotate, the fastener torque has been maintained. If the fastener rotates, remove it to determine if it has a threadlocking agent.
If it has a threadlocking agent, clean all material from the threaded hole. Replace the fastener with a new one or clean the original fastener threads and apply the appropriate threadlocking product. Install and tighten the fastener to specification.
If the fastener does not use a threadlocking agent, install and tighten it to specification.
Magnetic Parts Trays
Magnetic parts trays are common in the service facility. They are convenient and can keep parts from becoming lost during a repair procedure. However, hardened steel parts can become magnetized when held in magnetic parts trays.
Metal fragments from normal wear are usually trapped in the oil filter or by the magnetic drain plug. Magnetized parts in the engine can retain these fragments, potentially causing accelerated engine wear and damage.
Never place parts from inside the vehicle’s powertrain on a magnetic parts tray.
Help protect our environment! Many communities maintain facilities for recycling used fluids, plastics and metals. Dispose of or recycle used oil, lubricants, fuel, coolant, brake fluid and batteries in accordance with local regulations. Many HarleyDavidson parts and accessories are made of plastics and metals which can also be recycled.

Hardware and Threaded Parts
Install thread repair inserts when threaded holes in castings are stripped, damaged or not capable of withstanding specified torque.
Replace bolts, nuts, studs, washers, spacers and small common hardware if missing or damaged. Clean up or repair minor thread damage with a suitable tap or die.
Replace all damaged or missing lubrication fittings.
Use LOCTITE 565 THREAD SEALANT on pipe fitting threads.
Threadlocking Agents
Always follow specific service manual procedures when working with fasteners containing preapplied threadlocking agents when fastener replacement is recommended. When reusing fasteners containing threadlocking agents, thoroughly clean all fasteners and threaded holes. Always use the recommended threadlocking agent for the specific procedure.
Wiring, Hoses and Lines
Replace hoses, clamps, electrical wiring, electrical switches or fuel lines if they do not meet specifications.
Instruments and Gauges
Replace damaged or defective instruments and gauges.
Bearings
Always use the proper tools and fixtures when servicing bearings.
Anti-friction bearings must be handled in a special way. To keep out dirt and abrasives, cover the bearings as soon as they are removed from the package.
When bearings are installed against shoulders, always verify that the chamfered side of the bearing faces the shoulder. Lubricate bearings and all metal contact surfaces before pressing into place. Only apply pressure on the part of the bearing that makes direct contact with the mating part. Install bearings with numbered side facing out.
Only remove bearings if necessary. Removal usually damages bearings requiring replacement with new parts.
Bushings
Do not remove a bushing unless damaged, excessively worn or loose in its bore. Press out bushings requiring replacement.
When pressing or driving bushings, always apply pressure in line with the bushing bore. Use a bearing/bushing driver or a bar with a smooth, flat end. Never use a hammer to drive bushings.
Verify that all oil holes are properly aligned during installation.
 Gaskets

Always discard gaskets after removal. Replace with new gaskets. Never use the same gasket twice. Verify that gasket holes match up with holes in the mating part. Be aware that sections of a gasket may be used to seal passages.
Lip-Type Seals
Lip seals are used to seal oil or grease and are usually installed with the sealing lip facing the contained lubricant. Seal orientation, however, may vary under different applications.
Do not remove seals unless necessary. Only remove seals to gain access to other parts or if seal damage or wear dictates replacement.
Leaking oil or grease usually means that a seal is damaged. Replace leaking seals to prevent overheated bearings.
Always discard seals after removal. Do not use the same seal twice.
O-Rings
Always discard O-rings after removal. Since many O-rings are similar in size and appearance, always use new O- rings, keeping them packaged until use to avoid confusion. To prevent leaks, lubricate the O-rings before installation with the same type of lubricant as that being sealed. Verify that all gasket, O-ring and seal mating surfaces are thoroughly clean before installation.
Gears
Always check gears for damaged or worn teeth.
Remove burrs and rough spots with a honing stone or crocus cloth before installation.
Lubricate mating surfaces before pressing gears on shafts.
Shafts
If a shaft does not come out easily, check that all nuts, bolts or retaining rings have been removed. Check to see if other parts are in the way before using force to remove.
Shafts fitted to tapered splines should be very tight. If shafts are not tight, disassemble and inspect tapered splines. Discard parts that are worn. Verify that tapered splines are clean, dry and free of burrs before putting them in place. Press mating parts together tightly.
Clean all rust from the machined surfaces of new parts.
Part Replacement
WARNING
Harley-Davidson parts and accessories are designed for Harley-Davidson motorcycles. Using non-Harley- Davidson parts or accessories can adversely affect performance, stability or handling, which could result in death or serious injury. (00001b)
Always install new genuine Harley-Davidson parts and accessories. This provides best service life and maintain compliance with noise and emissions regulations.
Installing non-Harley-Davidson, off-road or competition parts can void warranty or result in an unsafe vehicle.

Protecting Rubber Parts
Before cleaning, protect rubber parts (such as hoses, boots and electrical insulation) from cleaning solutions. Use a grease-proof barrier material. Remove the rubber part if it cannot be properly protected.
Cleaning Process
Any cleaning method may be used as long as it does not result in parts damage. Thorough cleaning is necessary for proper parts inspection. Strip rusted paint areas to bare metal before priming and repainting.
Never use cleaners containing chlorine or ammonia on plastic parts. Chlorine causes parts to become distorted and brittle resulting in cracks. Ammonia causes cloudiness and brittleness in windshields and non-painted parts to form a white haze.
Rust or Corrosion Removal
Remove rust and corrosion with a wire brush, abrasive cloth, sand blasting, vapor blasting or rust remover. Use buffing crocus cloth on highly polished parts that are rusted.
Bearings
Wash bearings in a non-flammable petroleum cleaning solution. Never use a solution that contains chlorine. Knock out packed lubricant by tapping the bearing against a wooden block. Wash bearings again.
WARNING
Using compressed air to «spin dry» bearings can cause bearing to fly apart, which could result in death or serious injury. (00505b)
Cover bearings with a clean shop towel and allow to air dry. Do not spin bearings while they are drying. Never use compressed air to dry bearings.
When dry, coat bearings with clean oil. Wrap bearings in clean paper.

Air Tools
Always use approved eye protection equipment when performing any task using air-operated tools. On all power tools, use only recommended accessories with proper capacity ratings.
Do not exceed air pressure ratings of any power tools.
Placed bits against work surface before air hammers are operated. Disconnect the air supply line to an air hammer before attaching a bit. Never point an air tool at yourself or another person.
Protect yourself and bystanders with approved eye protection.
Wrenches
Never use an extension on a wrench handle.
If possible, always pull on a wrench handle and adjust your stance to prevent a fall if something suddenly releases. Always keep the wrench squarely installed on the fastener.
Never use a hammer on any wrench other than a STRIKING FACE wrench. Discard any wrench with damaged or battered points.
Never use a pipe wrench to bend, raise or lift a pipe.
Pliers/Cutters/Pry Bars
Plasticor vinyl-covered pliers handles are not intended to act as insulation. Do not use them on live electrical circuits.
Do not use pliers or cutters for cutting hardened wire unless they were designed for that purpose. Always cut at right angles.
Do not use any pry bar as a chisel, punch or hammer.
Hammers
Never strike a hammer against a hardened object, such as another hammer.
Always grasp a hammer handle firmly, close to the end.
Strike the object with the full face of the hammer.
Never work with a hammer which has a loose head or cracked handle.
Discard hammer if face is chipped or mushroomed.
Wear approved eye protection when using striking tools.
Protect yourself and bystanders with approved eye protection.
Punches/Chisels
Never use a punch or chisel with a chipped or mushroomed end. Dress mushroomed chisels and punches with a grinder.
Hold a chisel or a punch with a tool holder if possible.
When using a chisel on a small piece, clamp the piece firmly in a vise and chip toward the stationary jaw. Always wear approved eye protection when using these tools.
Protect yourself and bystanders with approved eye protection.
 Screwdrivers

Do not use a screwdriver for prying, punching, chiseling, scoring or scraping.
Use the right type of screwdriver for the job. Match the tip of a screwdriver to the fastener. Do not interchange POZIDRIV, PHILLIPS or REED AND PRINCE screwdrivers.
Screwdriver handles are not intended to act as insulation. Do not use them on live electrical circuits. Do not use a screwdriver with rounded edges because it will slip. Redress with a grinder.
Ratchets and Handles
Periodically clean and lubricate ratchet mechanisms with a light grade oil. Do not replace parts individually. Rebuild ratchets with the entire contents of service kit.
Never hammer on a ratchet or put a pipe extension on a ratchet handle for added leverage.
Always support the ratchet head when using socket extensions. Do not put your hand on the head or you may interfere with the action of its reversing mechanism.
When breaking a fastener loose, apply a small amount of pressure as a test to make sure that the ratchet’s gear wheel is engaged with the pawl.
Sockets
Never use hand sockets on power or impact wrenches. Select only impact sockets for use with air or electric impact wrenches.
Select the right size socket for the job.
Always keep the wrench or socket squarely on the fastener. Replace sockets showing cracks or wear.
Keep sockets clean.
Always use approved eye protection when using power or impact sockets.
Storage Units
Do not open more than one loaded drawer at a time. Close each drawer before opening another to prevent the cabinet from unexpectedly tipping over.
Close lids and lock drawers and doors before moving storage units. Do not pull on a tool cabinet. Always push tool cabinets in front of you.
Set the brakes on the locking casters after the cabinet has been rolled into position.

Always use a good quality unleaded gasoline. Octane ratings are usually found on the pump. Refer to Table 1.
 WARNING
Avoid spills. Slowly remove filler cap. Do not fill above bottom of filler neck insert, leaving air space for fuel expansion. Secure filler cap after refueling. Gasoline is extremely flammable and highly explosive, which could result in death or serious injury. (00028a)
 WARNING
Use care when refueling. Pressurized air in fuel tank can force gasoline to escape through filler tube. Gasoline is extremely flammable and highly explosive, which could result in death or serious injury. (00029a)
Modern service station pumps dispense a high flow of gasoline into a motorcycle fuel tank. This can cause air entrapment and pressurization.
Table 1. Octane Rating
|
SPECIFICATION |
RATING |
|
Pump Octane (R+M)/2 |
91 (95 RON) |

Your motorcycle was designed to get the best performance and efficiency using unleaded gasoline. Most gasoline is blended with alcohol and/or ether to create oxygenated blends. The type and amount of alcohol or ether added to the fuel is important.
NOTICE
Do not use gasoline that contains methanol. Doing so can result in fuel system component failure, engine damage and/or equipment malfunction. (00148a)
Gasoline/METHYL TERTIARY BUTYL ETHER (MTBE) blends are a mixture of gasoline and as much as 15 percent MTBE. Gasoline/MTBE blends use in your motorcycle is approved.
ETHANOL fuel is a mixture of ethanol (grain alcohol) and unleaded gasoline and can have an impact on fuel mileage. Fuels with an ethanol content of up to 10 percent may be used in your motorcycle without affecting vehicle performance. U.S. EPA regulations currently indicate that fuels with 15 percent ethanol (E15) are restricted from use in motorcycles at the time of this publication. Some motorcycles are calibrated to operate with higher ethanol concentrations to meet the fuel standards in certain countries.
REFORMULATED OR OXYGENATED GASOLINES (RFG) describes gasoline blends that are specifically designed to burn cleaner than other types of gasoline. This results in fewer tailpipe emissions. They are also formulated to evaporate less when filling the tank. Reformulated gasolines use additives to oxygenate the gas. Your motorcycle will run normally using this type of fuel. Harley-Davidson recommends using it whenever possible as an aid to cleaner air in our environment.
Do not use racing fuel or fuel containing methanol. Use of these fuels will damage the fuel system.
Using fuel additives other than those approved for use by Harley-Davidson may damage the engine, fuel system and other components.
Some gasoline blends might adversely affect starting, driveability or fuel efficiency. If any of these problems are experienced, try a different brand of gasoline or gasoline with a higher octane blend.

 CAUTION
Prolonged or repeated contact with used motor oil may be harmful to skin and could cause skin cancer. Promptly wash affected areas with soap and water. (00358b)
 CAUTION
If engine oil is swallowed, do not induce vomiting. Contact a physician immediately. In case of contact with eyes, immediately flush with water. Contact a physician if irritation persists. (00357d)
NOTICE
Do not switch lubricant brands indiscriminately because some lubricants interact chemically when mixed. Use of inferior lubricants can damage the engine. (00184a)
Engine oil is a major factor in the performance and service life of the engine. Use the proper grade of oil for the lowest temperature expected before the next oil change. Refer to Table 1.
This motorcycle was originally equipped with GENUINE HARLEY-DAVIDSON H-D 360 MOTORCYCLE OIL 20W50. H-D 360 is the preferred oil under normal operating conditions. If operation under extreme cold or heat are expected, refer to Table 1 for alternative choices.
If H-D 360 is not available, add oil certified for diesel engines. Acceptable designations include: CH-4, CI-4 and CJ-4. The preferred viscosities, in descending order are: 20W50, 15W40 and 10W40.
At the first opportunity, see an authorized dealer to change back to 100 percent Harley-Davidson oil.
Table 1. Recommended Engine Oils
|
TYPE |
VISCOSITY |
RATING |
LOWEST |
COLD-WEATHER |
|
|
AMBIENT |
STARTS BELOW |
||||
|
TEMPERATURE |
50 °F (10 °C) |
||||
|
Screamin’ Eagle SYN3 Full Synthetic |
SAE |
HD 360 |
Above -1 °C |
Excellent |
|
|
Motorcycle Lubricant |
20W50 |
(30.2 |
°F) |
||
|
Genuine Harley-Davidson H-D 360 |
SAE |
HD 360 |
Above 4 °C |
Good |
|
|
Motorcycle Oil |
20W50 |
(39.2 |
°F) |
||
|
Genuine Harley-Davidson H-D 360 |
SAE 50 |
HD 360 |
Above 16 °C |
Poor |
|
|
Motorcycle Oil |
(60.8 |
°F) |
|||
|
Genuine Harley-Davidson H-D 360 |
SAE 60 |
HD 360 |
Above 27 °C |
Poor |
|
|
Motorcycle Oil |
(80.6 |
°F) |
|||
 Loading…