
3
Содержание
ОБЩИЕ
СВЕДЕНИЯ
ТЕХНИЧЕСКИЕ
ХАРАКТЕРИСТИКИ
АВТОМОБИЛЯ
…………………..8
ПАСПОРТНЫЕ
ДАННЫЕ
АВТОМОБИЛЯ
…………………………………. 10
ТЕХНИКА
БЕЗОПАСНОСТИ
ПРИ
ОБСЛУЖИВАНИИ
И
РЕМОНТЕ
11
ЭКСПЛУАТАЦИЯ
И
ОБСЛУЖИВАНИЕ
12
ОБОРУДОВАНИЕ
И
ОРГАНЫ
УПРАВЛЕНИЯ
……………………….12
КЛЮЧИ
К
АВТОМОБИЛЮ
……………………………………………………… 12
ДВЕРИ
……………………………………………………………………………………… 12
ЦЕНТРАЛЬНЫЙ
ЗАМОК
………………………………………………………….. 13
КРЫШКА
БАГАЖНИКА
…………………………………………………………… 13
ПРОБКА
ЗАЛИВНОЙ
ГОРЛОВИНЫ
ТОПЛИВНОГО
БАКА
………. 13
КАПОТ
……………………………………………………………………………………… 13
РАСПОЛОЖЕНИЕ
ОРГАНОВ
УПРАВЛЕНИЯ
И
ПРИБОРОВ
……… 14
ВЫКЛЮЧАТЕЛЬ
(
ЗАМОК
)
ЗАЖИГАНИЯ
………………………………….. 14
ПУСК
ДВИГАТЕЛЯ
……………………………………………………………………. 15
КОМБИНАЦИЯ
ПРИБОРОВ
…………………………………………………….. 15
БЛОК
УПРАВЛЕНИЯ
ОТОПЛЕНИЕМ
,
ВЕНТИЛЯЦИЕЙ
И
КОНДИЦИОНИРОВАНИЕМ
………………………… 16
Выключатель
кондиционера
…………………………………………… 17
Режим
нормального
охлаждения
……………………………………17
Режим
максимального
охлаждения
……………………………….17
БЛОК
УПРАВЛЕНИЯ
ЭЛЕКТРОСТЕКЛОПОДЪЕМНИКАМИ
И
НАРУЖНЫМИ
ЗЕРКАЛАМИ
ЗАДНЕГО
ВИДА
…………………….. 17
ВНУТРЕННЕЕ
ЗЕРКАЛО
ЗАДНЕГО
ВИДА
…………………………………. 18
КЛАВИШНЫЕ
ВЫКЛЮЧАТЕЛИ
……………………………………………….. 18
Выключатель
противотуманного
света
в
задних
фонарях
…………………………………………………………….18
Выключатель
аварийной
световой
сигнализации
…………..19
Выключатель
обогрева
заднего
стекла
и
наружных
зеркал
заднего
вида
……………………………………19
РЕГУЛЯТОР
НАПРАВЛЕНИЯ
ПУЧКОВ
СВЕТА
ФАР
………………….. 19
ОСВЕЩЕНИЕ
САЛОНА
…………………………………………………………… 19
ПЛАФОН
ОСВЕЩЕНИЯ
БАГАЖНОГО
ОТДЕЛЕНИЯ
……………….. 19
ЗВУКОВОЙ
СИГНАЛ
……………………………………………………………….. 19
РУЛЕВАЯ
КОЛОНКА
……………………………………………………………….. 19
ЦЕНТРАЛЬНЫЙ
ВЫКЛЮЧАТЕЛЬ
ОСВЕЩЕНИЯ
……………………….. 19
ВЫКЛЮЧАТЕЛЬ
УКАЗАТЕЛЕЙ
ПОВОРОТА
……………………………… 20
ПЕРЕКЛЮЧАТЕЛЬ
СВЕТА
ФАР
………………………………………………… 20
ПЕРЕКЛЮЧАТЕЛЬ
ОЧИСТИТЕЛЯ
И
ОМЫВАТЕЛЯ
ВЕТРОВОГО
СТЕКЛА
…………………………………….. 20
РЕГУЛЯТОР
ЧАСТОТЫ
ЦИКЛОВ
РАБОТЫ
ОЧИСТИТЕЛЯ
ВЕТРОВОГО
СТЕКЛА
……………………………………….. 20
ВЫКЛЮЧАТЕЛЬ
ОМЫВАТЕЛЯ
ВЕТРОВОГО
СТЕКЛА
………………. 20
РЫЧАГ
ПЕРЕКЛЮЧЕНИЯ
ПЕРЕДАЧ
(
МЕХАНИЧЕСКАЯ
КОРОБКА
ПЕРЕДАЧ
)………………………………….. 20
РЫЧАГ
ВЫБОРА
ПЕРЕДАЧ
(
АВТОМАТИЧЕСКАЯ
КОРОБКА
ПЕРЕДАЧ
) ……………………………… 21
РЫЧАГ
СТОЯНОЧНОГО
ТОРМОЗА
…………………………………………. 22
ПЕРЕДНИЕ
СИДЕНЬЯ
………………………………………………………………. 22
ЗАДНЕЕ
СИДЕНЬЕ
…………………………………………………………………… 23
РЕМНИ
БЕЗОПАСНОСТИ
………………………………………………………… 23
ПОДУШКА
БЕЗОПАСНОСТИ
…………………………………………………. 23
СОЛНЦЕЗАЩИТНЫЕ
КОЗЫРЬКИ
……………………………………………. 24
ЧАСЫ
С
ЦИФРОВОЙ
ИНДИКАЦИЕЙ
……………………………………… 24
АУДИОСИСТЕМА
……………………………………………………………………. 24
ВЕЩЕВЫЕ
ЯЩИКИ
………………………………………………………………….. 24
ПРИКУРИВАТЕЛЬ
И
ПЕПЕЛЬНИЦА
…………………………………………. 25
ВЫДВИЖНОЙ
ПОДСТАКАННИК
……………………………………………. 25
ТЕХНИЧЕСКОЕ
ОБСЛУЖИВАНИЕ
………………………………………. 26
РАСПОЛОЖЕНИЕ
ОСНОВНЫХ
АГРЕГАТОВ
АВТОМОБИЛЯ
……. 26
ПЕРИОДИЧНОСТЬ
ВЫПОЛНЕНИЯ
ТЕХНИЧЕСКОГО
ОБСЛУЖИВАНИЯ
…………………………………………………………………… 26
РЕГЛАМЕНТ
ТЕХНИЧЕСКОГО
ОБСЛУЖИВАНИЯ
…………………… 28
ПРОВЕРКА
АВТОМОБИЛЯ
ПЕРЕД
ВЫЕЗДОМ
………………………… 29
ПРОВЕРКА
СОСТОЯНИЯ
КОЛЕС
И
ШИН
,
ПЕРЕСТАНОВКА
КОЛЕС
…………………………………………………………. 29
ПОПОЛНЕНИЕ
УРОВНЯ
ЖИДКОСТИ
В
БАЧКЕ
ОМЫВАТЕЛЯ
ВЕТРОВОГО
СТЕКЛА
…………………………………………. 30
ЗАМЕНА
ЩЕТОК
ОЧИСТИТЕЛЯ
ВЕТРОВОГО
СТЕКЛА
………….. 31
ПРОВЕРКА
УРОВНЯ
МАСЛА
В
ПОДДОНЕ
КАРТЕРА
ДВИГАТЕЛЯ
………………………………………………………………. 31
ЗАМЕНА
МАСЛА
В
ДВИГАТЕЛЕ
И
МАСЛЯНОГО
ФИЛЬТРА
………………………………………………………. 31
ПРОВЕРКА
УРОВНЯ
ОХЛАЖДАЮЩЕЙ
ЖИДКОСТИ
……………… 32
ЗАМЕНА
ОХЛАЖ ДАЮЩЕЙ
ЖИДКОСТИ
…………………………….. 33
ПРОВЕРКА
РАБОТОСПОСОБНОСТИ
ВАКУУМНОГО
УСИЛИТЕЛЯ
ТОРМОЗОВ
……………………………….. 34
ПРОВЕРКА
УРОВНЯ
ЖИДКОСТИ
В
БАЧКЕ
ГИДРОПРИВОДА
ТОРМОЗОВ
…………………………………………………. 34
ПРОКАЧКА
ГИДРОПРИВОДА
ТОРМОЗОВ
,
ЗАМЕНА
ТОРМОЗНОЙ
ЖИДКОСТИ
……………………………………… 34
РЕГУЛИРОВКА
СТОЯНОЧНОГО
ТОРМОЗА
……………………………. 35
ПРОВЕРКА
УРОВНЯ
РАБОЧЕЙ
ЖИДКОСТИ
В
БАЧКЕ
ГИДРОПРИВОДА
СЦЕПЛЕНИЯ
……………………………….. : 35
ПРОКАЧКА
ГИДРОПРИВОДА
СЦЕПЛЕНИЯ
,
ЗАМЕНА
ЖИДКОСТИ
………………………………………………………………36
ПРОВЕРКА
УРОВНЯ
ЖИДКОСТИ
В
БАЧКЕ
ГИДРОУСИЛИТЕЛЯ
РУЛЕВОГО
УПРАВЛЕНИЯ
…………..36
ПРОВЕРКА
УРОВНЯ
МАСЛА
В
МЕХАНИЧЕСКОЙ
КОРОБКЕ
ПЕРЕДАЧ
………………………………….36
ЗАМЕНА
МАСЛА
В
МЕХАНИЧЕСКОЙ
КОРОБКЕ
ПЕРЕДАЧ
……….. 37
Всем доброго времени суток!
Оставлю здесь в ознакомительных целях 4 книги по ремонту Accent. Для того, что бы вы могли ознакомиться с содержанием книг перед покупкой)
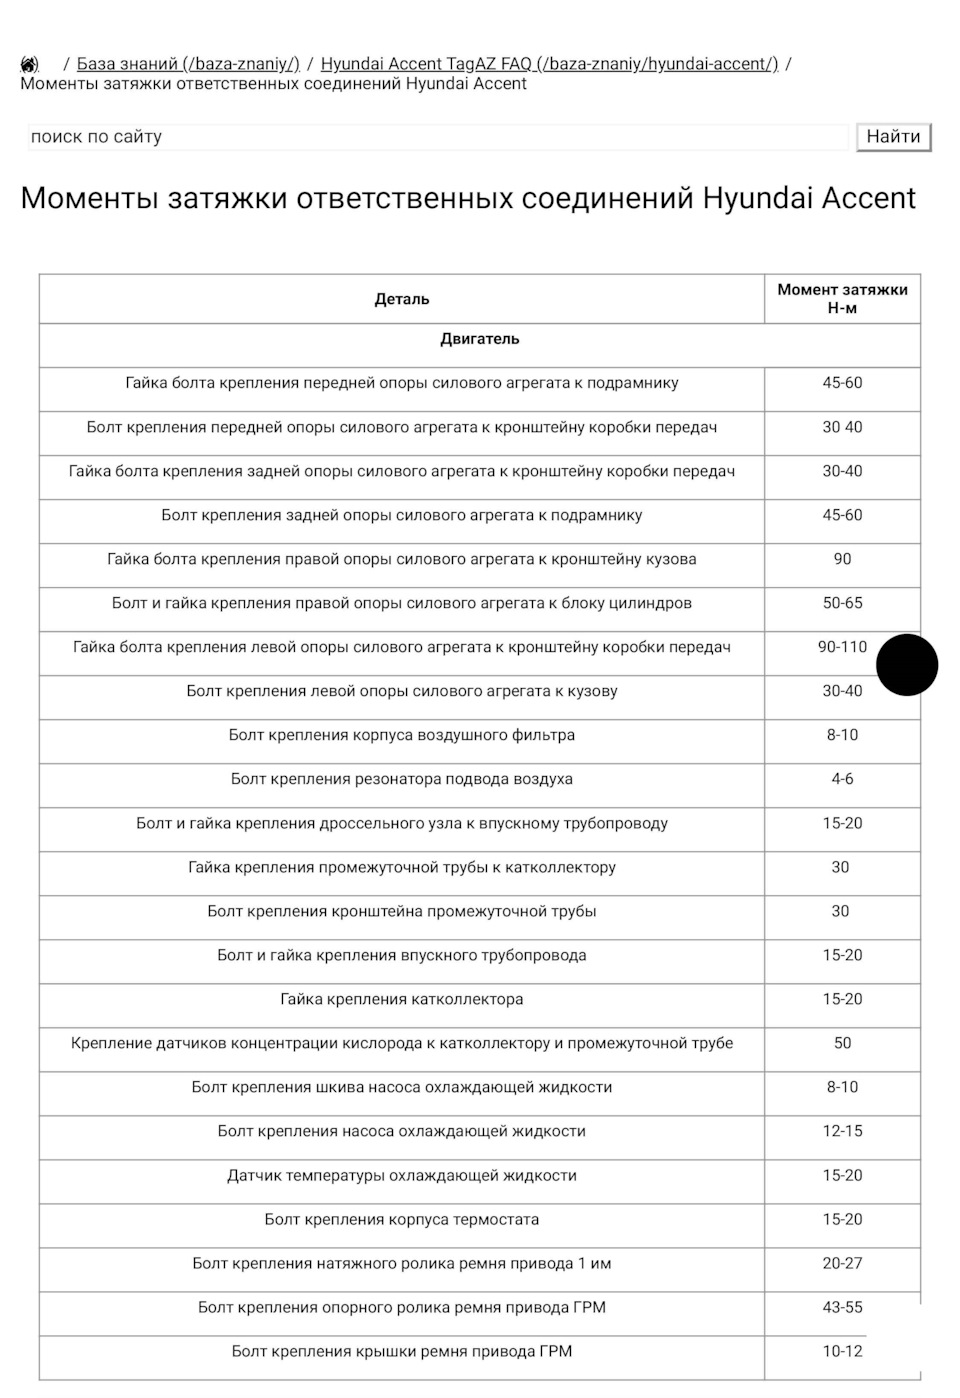
1. Моменты затяжек основных резьбовых соединений.
drive.google.com/file/d/1…hSnBOahr/view?usp=sharing
Полный размер
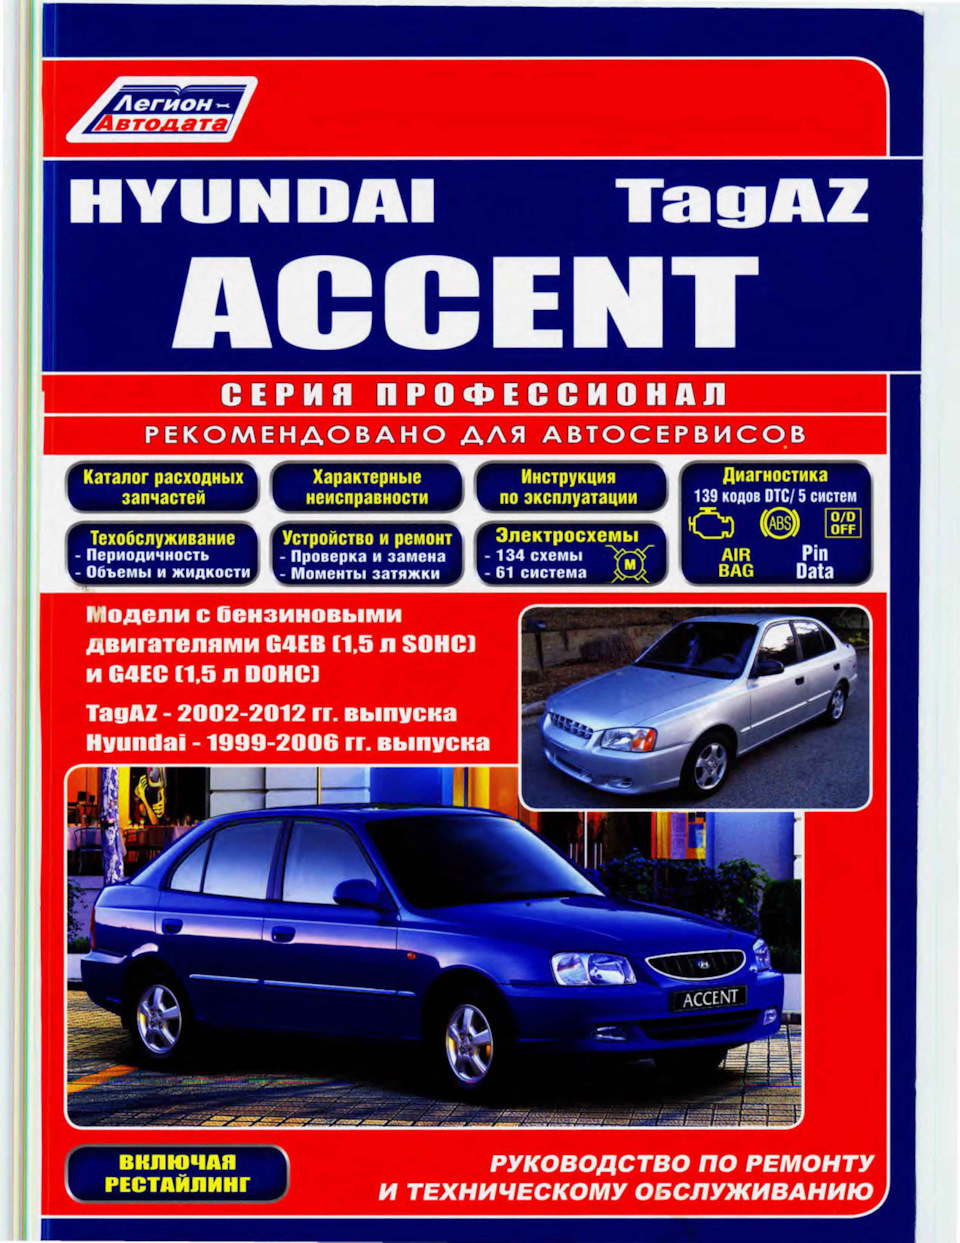
2. Hyundai Accent. Руководство по ремонту и техническому обслуживанию. Легион Автодата.
drive.google.com/file/d/1…J1jfOYqr/view?usp=sharing
Полный размер
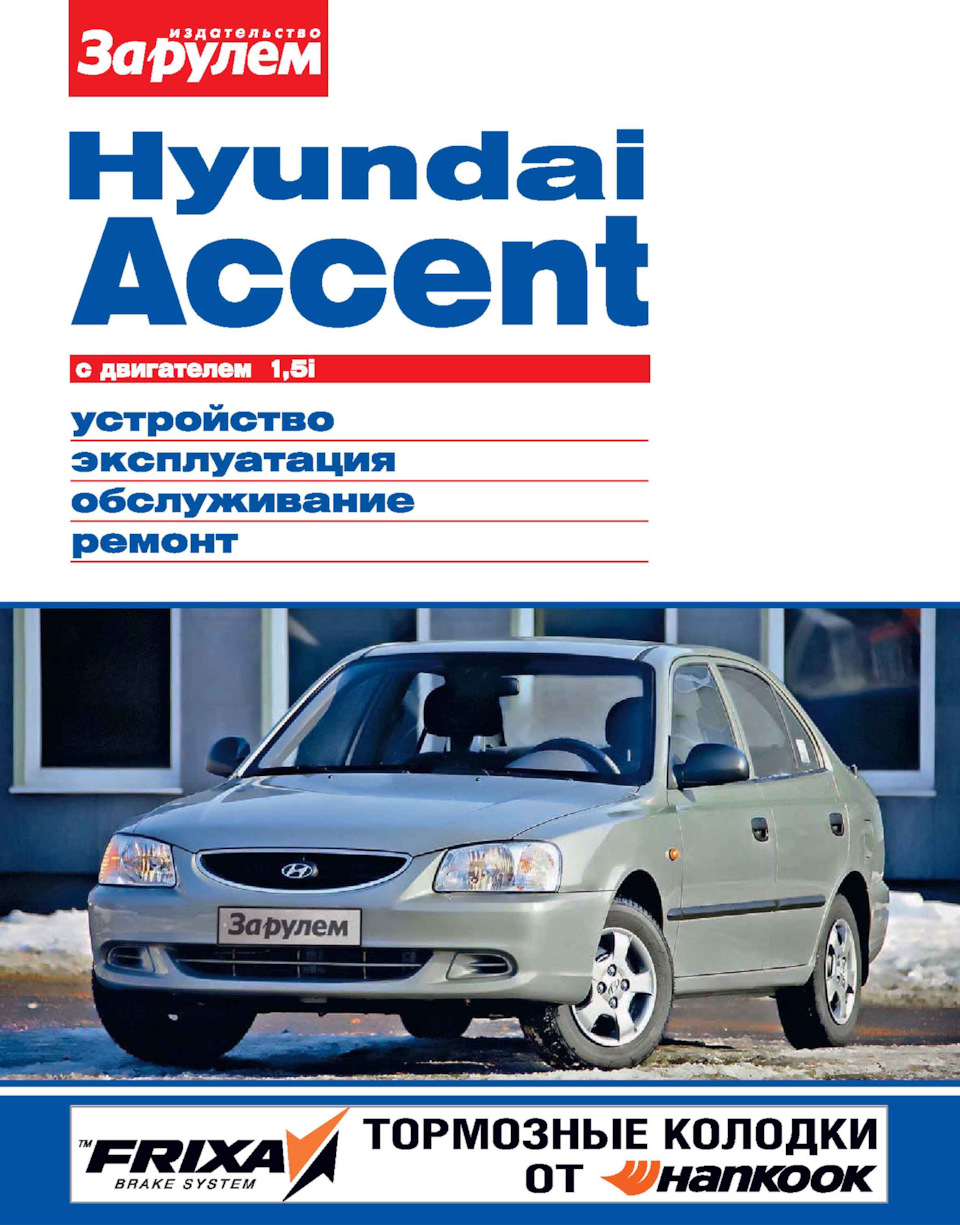
3. Hyundai Accent. Устройство. Эксплуатация. Обслуживание. Ремонт. За Рулём.
drive.google.com/file/d/1…Tc5HSQE7/view?usp=sharing
Полный размер
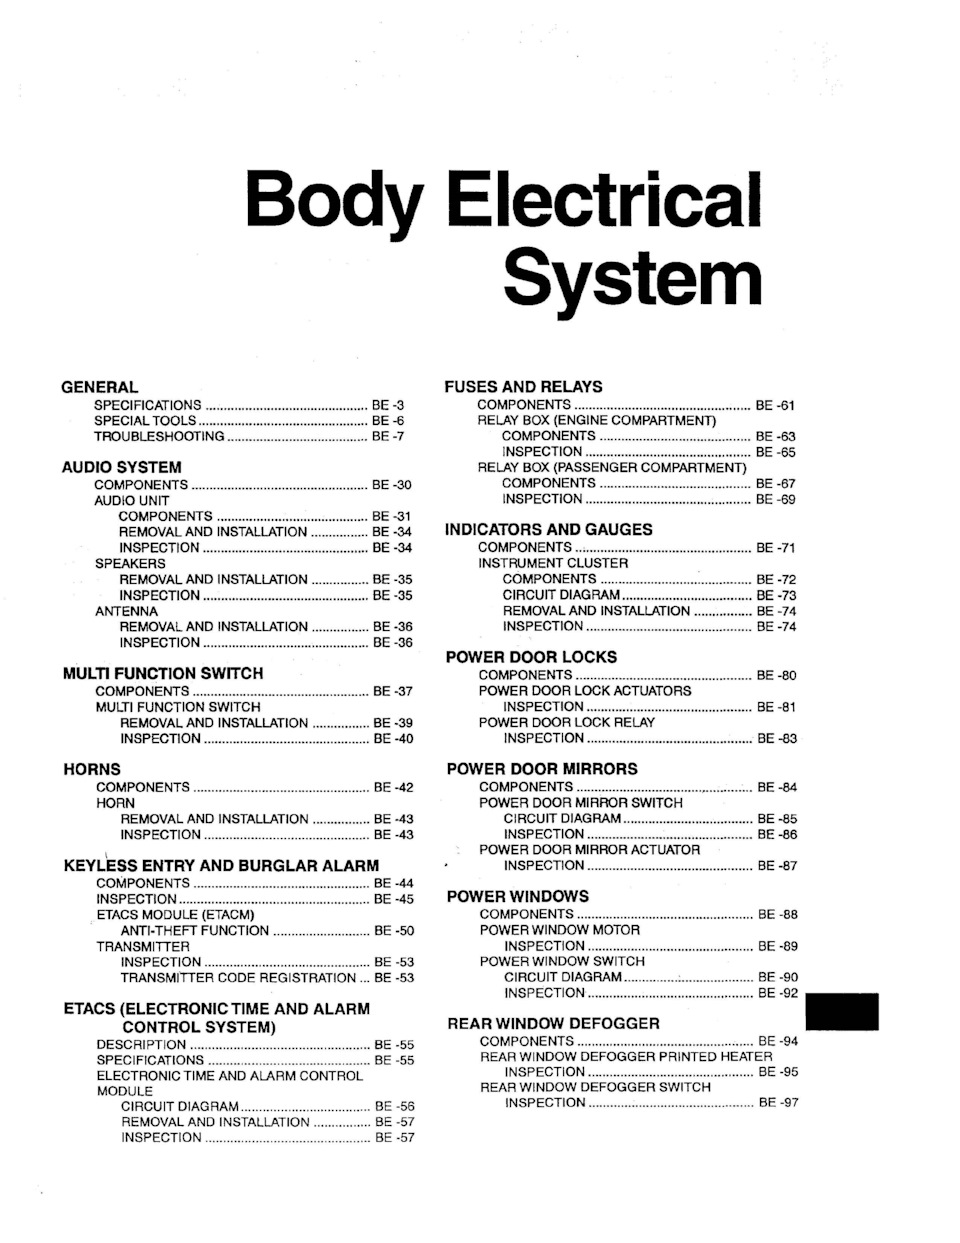
4. Hyundai Accent. Body Electrical System. Подробная книга по электрике с иллюстрациями, распиновками и схемами. На английском языке.
drive.google.com/file/d/1…CMFN6N_m/view?usp=sharing
Полный размер
- Manuals
- Brands
- Hyundai Manuals
- Automobile
- 2008 Accent
- Owner’s manual
-
Contents
-
Table of Contents
-
Bookmarks
Quick Links
Chapters
-
Table of Contents
9 -
Driving Your Hyundai
148 -
What to Do in an Emergency
173 -
Corrosion Prevention & Appearance Care
193 -
Vehicle Maintenance Requirements
200 -
Do-It-Yourself Maintenance
210 -
Consumer Information, Reporting Safety Defects & Binding Arbitration of Warranty Claims
244
Related Manuals for Hyundai 2008 Accent
Summary of Contents for Hyundai 2008 Accent
-
Page 1
2008… -
Page 2
A020A01A-AAT RESPONSIBILITY FOR MAINTENANCE The maintenance requirements for your new Hyundai are found in Section 5. As the owner, it is your responsibility to see that all maintenance operations specified by the manufacturer are carried out at the appropriate intervals. When the vehicle is used in severe driving conditions, more frequent maintenance is required for some operations. -
Page 3
All information in the Owner’s Manual is current at the time of publication. However, Hyundai reserves the right to make changes at any time as part of our policy of continual product improvement may be carried out. This manual applies to all Hyundai models and includes descriptions and expla- nations of optional as well as standard equipment. -
Page 4
Your Hyundai should not be modified in any way. Such modifications may adversely affect the performance, safety or durability of your Hyundai and may, in addition, violate conditions of the limited warranties covering the vehicle. Certain modifications may also be in violation of regulations established by the U.S. -
Page 5
A090A01A-AAT SAFETY AND VEHICLE DAMAGE WARNING This manual includes information titled as WARNING, CAUTION and NOTE. These titles indicate the following: WARNING: This indicates that a condition may result in harm, serious injury or death to you or other persons if the warning is not heeded. -
Page 6
To retrieve this information, special equipment is needed and access to the vehicle or the device that stores the data is required. Hyundai will not access information about a crash event or share it with others except:… -
Page 7
Your Owner’s Manual will introduce you to the features and operation of your new Hyundai. It is suggested that you read it carefully because the information it contains can contribute greatly to the satisfaction you receive from your new car. -
Page 8
A100A03A-AAT Guide to Hyundai Genuine Parts 1. What are Hyundai Genuine Parts? Hyundai Genuine Parts are the same parts used by Hyundai Motor Company to manufacture vehicles. They are de- signed and tested for the optimum safety, performance, and reliability to our cus- tomers. -
Page 9: Table Of Contents
TABLE OF CONTENTS FEATURES OF YOUR HYUNDAI DRIVING YOUR HYUNDAI WHAT TO DO IN AN EMERGENCY CORROSION PREVENTION & APPEARANCE CARE VEHICLE MAINTENANCE REQUIREMENTS SECTION DO-IT-YOURSELF MAINTENANCE EMISSION CONTROL SYSTEMS CONSUMER INFORMATION, REPORTING SAFETY DEFECTS & BINDING ARBITRATION OF WARRANTY CLAIMS…
-
Page 10: Instruments And Controls
INSTRUMENTS AND CONTROLS B250A01MC-AAT B250A01MC-U…
-
Page 11
1. Hood Release Lever … 1-96 2. Front Fog Light Switch (If Installed) … 1-83 3. Panel Brightness Control Knob (Rheostat Switch) … 1-81 4. Instrument Cluster … 1-60 5. Multi-Function Light Switch … 1-76 6. Horn and Driver’s Front Airbag … 1-104, 1-42 7. -
Page 12
YOUR VEHICLE AT A GLANCE B255A02MC-AAT INDICATOR SYMBOLS ON THE INSTRUMENT PANEL SRS (Airbag) Warning Light ABS Service Reminder Indicator (If Installed) O/D OFF Indicator (Automatic transaxle only) Turn Signal Indicator Lights High Beam Indicator Light Low Oil Pressure Warning Light Parking Brake/Low Brake Fluid Level Warning Light Charging System Warning Light… -
Page 13: Features Of Your Hyundai
FEATURES OF YOUR HYUNDAI Fuel Recommendations … 1-2 Breaking in Your New Hyundai … 1-3 Keys … 1-4 Door Locks … 1-4 Theft-Alarm System … 1-8 Window Glass … 1-11 Seats … 1-13 Seat Belts … 1-22 Child Restraint System … 1-31 Advanced Supplemental Restraint (AIRBAG) System …
-
Page 14: Fuel Recommendations
What About Gasohol? Gasohol (a mixture of 90% unleaded gasoline and 10% ethanol or grain alco- hol) may be used in your Hyundai. How- ever, if your engine develops driveability problems, the use of 100% unleaded gasoline is recommended. Fuels with…
-
Page 15: Breaking In Your New Hyundai
Emission Control System. B010F01A-AAT Operation in Foreign Countries If you are going to drive your Hyundai in another country, be sure to: o Observe all regulations regarding reg- istration and insurance.
-
Page 16: Keys
If you need additional keys, or if you should lose your keys, your authorized Hyundai dealer can make new keys if you can supply the key number. DOOR LOCKS B040A01A-AAT WARNING: o Unlocked doors can be dangerous.
-
Page 17
FEATURES OF YOUR HYUNDAI FEATURES OF YOUR HYUNDAI o When locking the door from outside, be careful not to lock the door with the ignition key left in the vehicle. -
Page 18
B040E04A-AAT CHILD-PROTECTOR REAR DOOR LOCK (4 Door) B040E01MC Your Hyundai is equipped with left and right side «child-protector» rear door locks. When the lock mechanism is engaged, the rear door cannot be opened from the inside. Its use is recommended when- ever there are small children in the rear seat. -
Page 19
If you pull the in- side door handle, the door can be opened and you may be ejected from the ve- hicle and can be injured or killed. FEATURES OF YOUR HYUNDAI FEATURES OF YOUR HYUNDAI B070F03O-AAT KEYLESS ENTRY SYSTEM… -
Page 20: Theft-Alarm System
FEATURES OF YOUR HYUNDAI Locking doors 1. Close all doors. 2. Push the «LOCK» button on the trans- mitter. 3. At the same time all doors lock, the turn signal light will blink once to indicate that the system is armed.
-
Page 21
4 seconds after pushing the «LOCK» button on the transmit- ter, the alarming horn will sound once to indicate that the system is armed. FEATURES OF YOUR HYUNDAI FEATURES OF YOUR HYUNDAI B070C01MC-AAT Alarm Stage The alarm will be activated if any of the following occurs while the car is parked and the system is armed. -
Page 22
FEATURES OF YOUR HYUNDAI B070D01MC-AAT Disarmed Stage UNLOCK B070D02MC-A The system will be disarmed when the following step is taken: The doors are unlocked by depressing the «UNLOCK» button on the transmitter or unlocked with the ignition key. After depressing unlock button, the haz- ard warning lights will blink twice to indi- cate that the system is disarmed. -
Page 23: Window Glass
WARNING: When opening or closing the windows, make sure your passenger’s arms, hands and body are safely out of the way. FEATURES OF YOUR HYUNDAI FEATURES OF YOUR HYUNDAI B060A02MC-AAT POWER WINDOWS (If Installed) 4 Door 3 Door…
-
Page 24
FEATURES OF YOUR HYUNDAI In automatic operation, the window will fully open even if you let go of the switch. To stop at the desired opening, pull up and release the switch. B060A02MC In order to prevent operation of the pas-… -
Page 25: Seats
SEATS B080A01MC-AAT 4 Door 3 Door FEATURES OF YOUR HYUNDAI FEATURES OF YOUR HYUNDAI Driver’s seat 1. Seat forward/rearward lock release lever 2. Seatback recliner control lever 3. Seat cushion height control lever Front passenger’s seat 4. Seat forward/rearward lock release lever 5.
-
Page 26: Adjusting Seatback Angle
FEATURES OF YOUR HYUNDAI B080A01FC-AAT ADJUSTABLE SEATS WARNING: o Never adjust the driver’s seat while the vehicle is moving. Any sudden or unexpected movement of the seat could cause you to lose control of the vehicle resulting in an accident.
-
Page 27
This should only be done when the seat is not occupied. FEATURES OF YOUR HYUNDAI FEATURES OF YOUR HYUNDAI WARNING: B080D01JM o For maximum effectiveness in case… -
Page 28: Seat Cushion Height Adjustment
FEATURES OF YOUR HYUNDAI WARNING: o Do not adjust the headrest height while the vehicle is in motion. B080F01S-AAT Seat Cushion Height Adjustment (Driver’s Seat only) B080F01MC To raise or lower the front part of the seat cushion, turn the front knob forward or rearward.
-
Page 29
B085D01TG-AAT Adjustable Headrests (If Installed) Lock Knob B090A01MC FEATURES OF YOUR HYUNDAI FEATURES OF YOUR HYUNDAI Headrests are designed to help reduce the risk of neck injuries. To raise the headrest, pull it up. To lower the headrest, push it down while pressing the lock knob. -
Page 30
FEATURES OF YOUR HYUNDAI B110A01MC-AAT Folding Rear Seatbacks (4Door) The rear seatbacks may be folded to facilitate carrying long items or to increase the luggage capacity of the vehicle. WARNING: The purpose of the fold-down rear seatbacks is to allow you to carry longer objects than could otherwise be accom- modated. -
Page 31
OMC025039 o Move the rear lap/shoulder belt to the outside so that they don’t inter- fere with the seatback when folding. FEATURES OF YOUR HYUNDAI FEATURES OF YOUR HYUNDAI OMC025040 o Move the rear lap/shoulder belt to the side so that it is clear of the seatback when returning to its up- right position. -
Page 32
FEATURES OF YOUR HYUNDAI When you return the seatback to its up- right position, always be sure it has locked into position by pushing on the top of the seatback. WARNING: When you return the rear seatback to its upright position after being folded down: Be careful not to damage the seat belt webbing or buckle. -
Page 33
B090A03MC 2. Pull the strap of the seat cushion up- ward to fold up the seat cushion. 3. Fold up the seat cushion. FEATURES OF YOUR HYUNDAI FEATURES OF YOUR HYUNDAI B090A04MC 4. Remove and put the headrest in the loops on backside of the seat cushion. -
Page 34: Seat Belts
FEATURES OF YOUR HYUNDAI B090A06MC 6. Fold down the seat back forward. When you return the seatback and seat cushion to its original position, always be sure it has locked into position by push- ing on the top of the seatback.
-
Page 35
Check the la- bel on the child restraint for this informa- tion. See page 1-31. FEATURES OF YOUR HYUNDAI FEATURES OF YOUR HYUNDAI B150C02A-AAT Larger Children Children who are too large for child re-… -
Page 36
FEATURES OF YOUR HYUNDAI B150D01A-AAT Pregnant Women The use of a seat belt is recommended for pregnant women to lessen the chance of injury in an accident. When a seat belt is used, the lap belt portion should be placed as low and snugly as possible on the hips, not across the abdomen. -
Page 37
This should be done even if no damage is visible. Addi- tional questions concerning seat belt operation should be directed to your Hyundai Dealer. FEATURES OF YOUR HYUNDAI FEATURES OF YOUR HYUNDAI B170A02MC-AAT HEIGHT ADJUSTABLE FRONT SEAT SHOULDER BELT… -
Page 38
FEATURES OF YOUR HYUNDAI To lower it, push it down while pressing the height adjuster button. Release the button to lock the anchor into position. Try sliding the height adjuster to make sure that it has locked into the position. -
Page 39
Hyundai strongly recommends that chil- dren always be seated in the rear seat. NEVER place any infant restraint system in the front seat of the vehicle. -
Page 40: Adjusting Your Seat Belt
FEATURES OF YOUR HYUNDAI When the seat belt is fully extended from the retractor to allow the installation of a child restraint system, the seat belt opera- tion changes to allow the belt to retract, but not to extend (Automatic Locking Retractor Type).
-
Page 41
B220D01MC 1. Before fastening the rear seat center belt, confirm the metal tab (A) and buckle (B) are latched together. FEATURES OF YOUR HYUNDAI FEATURES OF YOUR HYUNDAI B220D02MC 2. After confirming that (A) and (B) are latched, pull the seat belt out of the retractor and insert the metal tab (C) into the buckle (D). -
Page 42
FEATURES OF YOUR HYUNDAI B220D03MC NOTE: Confirm the metal tab and the buckle marked «CENTER» are latched together. B220D04MC There will be an audible «click» when the tab locks in the buckle. The seat belt automatically adjusts to the proper length only after the lap belt is adjusted manu- ally so that it fits snugly around your hips. -
Page 43: Child Restraint System
FEATURES OF YOUR HYUNDAI FEATURES OF YOUR HYUNDAI CHILD RESTRAINT SYSTEM B230A04A-AAT Children riding in the car should sit in the…
-
Page 44
FEATURES OF YOUR HYUNDAI For small children and babies, a child seat or infant seat must be used. Before buying a particular child restraint system, make sure it fits your car seat and seat belts, and fits your child. Follow all the instructions provided by the manufacturer when installing the child restraint system. -
Page 45
Your ve- hicle is provided with three child restraint hook holders for installing the child seat or infant seat. FEATURES OF YOUR HYUNDAI FEATURES OF YOUR HYUNDAI B230C02MC-AAT Installing a Child Restraint Seat with the «Tether Anchorage» System… -
Page 46
FEATURES OF YOUR HYUNDAI B230C02MC 2. Route the child restraint seat strap over the seatback. For vehicles with adjustable headrests, route the tether strap under the head- rest and between the headrest posts, otherwise route the tether strap over the top of the seatback. -
Page 47
The increased load caused by multiple seats may cause the tethers or an- chorage points to break, causing serious injury or death. FEATURES OF YOUR HYUNDAI FEATURES OF YOUR HYUNDAI B230D07E-AAT Securing the Child Restraint Seat with the «ISOFIX» System… -
Page 48
FEATURES OF YOUR HYUNDAI ISOFIX anchors have been provided in your vehicle. The ISOFIX anchors are located in the left and right outboard rear seating positions. Their locations are shown in the illustration. There is no ISOFIX anchor provided for the center rear seating position. -
Page 49
Always follow the child seat manufacturer’s instructions for in- stallation and use. FEATURES OF YOUR HYUNDAI FEATURES OF YOUR HYUNDAI B230F01A-AAT Child Restraint System Installation on Rear Seat Center Position… -
Page 50
FEATURES OF YOUR HYUNDAI B230G02MC-AAT Child Restraint System Installation on Outboard Rear Seats B230G02MC To install a child restraint system in the outboard rear seats, extend the shoulder/ lap belt entirely from its retractor until a «click» is felt. This will engage the seat belt… -
Page 51
B180C02MC-AAT Pre-Tensioner Seat Belt Your Hyundai vehicle is equipped with driver’s and front passenger’s pre- tensioner seat belts. The purpose of the pre-tensioner is to make sure that the seat belts fit tightly against the occupant’s body in certain frontal collisions. The pre-… -
Page 52
6 seconds when the ignition key is turned to the «ON» position, or if it illuminates while the vehicle is being driven, have an authorized Hyundai dealer inspect the advanced SRS airbag system as soon as pos- sible. WARNING: o Pre-tensioners are designed to op- erate only one time. -
Page 53
ADVANCED SUPPLEMENTAL RESTRAINT (AIRBAG) SYSTEM (SRS) B240D01MC-AAT (If Installed) FEATURES OF YOUR HYUNDAI FEATURES OF YOUR HYUNDAI 1. Driver’s front airbag 2. Passenger’s front airbag 3. Side impact airbag 4. Curtain airbag B240D01MC… -
Page 54: Passenger’s Front Airbag
Driver’s and Passenger’s Front Airbag Driver’s Front Airbag B240A01MC Your Hyundai is equipped with an ad- vanced Supplemental Restraint (Airbag) System. The indications of the system’s presence are the letters «SRS AIRBAG» embossed on the airbag pad cover in the steering wheel and the passenger’s side front panel pad above the glove box.
-
Page 55
6 seconds when the ignition key is turned to the «ON» position, or if it illuminates while the vehicle is being driven, have an authorized Hyundai dealer inspect the advanced SRS airbag system as soon as possible. WARNING:… -
Page 56
Hyundai dealer inspect the airbag system as soon as pos- sible. o Airbags can only be used once – have an authorized Hyundai dealer replace the airbag immediately after deployment. o The SRS is designed to deploy the front airbags only when an impact is… -
Page 57
If the airbags deploy, they must be replaced by an authorized Hyundai dealer. Deployed airbags WILL NOT inflate again and will provide no pro- tection in subsequent collisions. -
Page 58
FEATURES OF YOUR HYUNDAI WARNING: o Sitting improperly or out of position can result in serious or fatal injury in a crash. All occupants should sit upright with the seat back in an up- right position, centered on the seat… -
Page 59
Further opening of the covers then allows full inflation of the airbags. FEATURES OF YOUR HYUNDAI FEATURES OF YOUR HYUNDAI B240B03L A fully inflated airbag, in combination with… -
Page 60
FEATURES OF YOUR HYUNDAI Passenger’s Front Airbag B240B01MC-A CAUTION: o Do not install or place any accesso- ries (drink holder, cassette holder, sticker, etc.) on the front passenger’s panel above the glove box in a ve- hicle with a passenger’s airbag. Such… -
Page 61: Passenger Air Bag Off» Indicator
The driver’s front airbag is not affected or controlled by the Occupant Classification System. B990A01MC-A FEATURES OF YOUR HYUNDAI FEATURES OF YOUR HYUNDAI If the front passenger seat is occupied by a person that the system determines to be…
-
Page 62: Child Restraint System
FEATURES OF YOUR HYUNDAI Condition and operation in the front pas- senger occupant classification system Condition «PASSEN- detected by Front GER AIR the occupant warning passenger BAG OFF» light classification airbag indicator light system 1. Adult* Activated 2. Child* child restraint…
-
Page 63: System
— NEVER excessively recline the front passenger seatback. B990A02O — NEVER sit with hips shifted towards the front of the seat. FEATURES OF YOUR HYUNDAI FEATURES OF YOUR HYUNDAI B990A07O — NEVER lean on the center console. — NEVER lean on the door trim.
-
Page 64
FEATURES OF YOUR HYUNDAI B990A05O — NEVER place feet on the dash- board. WARNING: o A smaller-stature adult who is not seated correctly (for example: seat excessively reclined, leaning on the center console, or hips shifted for- ward in the seat) can cause a condi-… -
Page 65
6 seconds when the ignition key is turned to the «ON» position, or if it illuminates while the vehicle is being driven, have an authorized Hyundai dealer inspect the occupant classifica- tion system and the SRS airbag system as soon as possible. -
Page 66
B990B02MC-AAT Side Impact Airbag (If Installed) B990B02LZ Your Hyundai is equipped with a side impact airbag in each front seat. The purpose of the airbag is to provide the vehicle’s driver and/or the front passen- ger with additional protection than that offered by the seat belt alone. -
Page 67
Do not use any accessory seat cov- ers. Use of seat covers could reduce or prevent the effectiveness of the sys- tem. FEATURES OF YOUR HYUNDAI FEATURES OF YOUR HYUNDAI WARNING: o Do not install any accessories on the side or near the side impact airbag. -
Page 68
FEATURES OF YOUR HYUNDAI B990C01JM-GAT Curtain Airbag (If Installed) Curtain Airbag B990C01MC Curtain airbags are located along both sides of the roof rails above the front and rear doors. They are designed to help protect the heads of the front seat occu- pants and the rear outboard seat occu- pants in certain side impact collisions. -
Page 69
Any work on the SRS system, such as removing, installing, repairing, or any work on the steering wheel must be performed by a qualified Hyundai technician. Im- proper handling of the SRS system may result in serious personal injury. HSM393… -
Page 70
If the airbags inflate, they must be replaced by an authorized Hyundai dealer. o Do not tamper with or disconnect SRS wiring, or other components of the SRS system. -
Page 71
FEATURES OF YOUR HYUNDAI FEATURES OF YOUR HYUNDAI Adding Equipment to or Modifying Your Airbag-Equipped Vehicle. If you modify your vehicle by changing… -
Page 72: Instrument Cluster And Indicator Lights
FEATURES OF YOUR HYUNDAI INSTRUMENT CLUSTER AND INDICATOR LIGHTS B260A02MC-AAT Type A B260A02MC-A…
-
Page 73
8. Speedometer 9. Check Fuel Cap Warning Light 10. Coolant Temperature Gauge 11. Seat Belt Warning Light FEATURES OF YOUR HYUNDAI 12. Charging System Warning Light 13. Low Oil Pressure Warning Light 14. High Beam Indicator Light 15. SRS (Airbag) Warning Light 16. -
Page 74
FEATURES OF YOUR HYUNDAI B260B02MC-AAT Type B B260B02MC-A… -
Page 75
9. Check Fuel Cap Warning Light 10. Low Tire Pressure Telltale (If Installed) 11. TPMS (Tire Pressure Monitoring System) Malfunction Indicator (If Installed) FEATURES OF YOUR HYUNDAI 12. Door Ajar Warning Light 13. Charging System Warning Light 14. Parking Brake/Low Brake fluid Level Warning Light 15. -
Page 76: Warning And Indicator Lights
ABS. If this occurs, have your vehicle checked by your Hyundai dealer as soon as pos- sible. The normal braking system will still be operational, but without the assis- tance of the anti-lock brake system.
-
Page 77
In any instance where the oil light stays on when the engine is running, the engine should be checked by a Hyundai dealer before the car is driven again. B260H03A-AAT Parking Brake/… -
Page 78: Door Ajar Warning Light And Chime
If the light stays on while the engine is running, there is a malfunction in the electrical charging system. If the light comes on while you are driving, have the system checked by your Hyundai dealer as soon as possble. B260L02HP-GAT Door Ajar Warning Light…
-
Page 79
If it illuminates while driving, or does not illumi- nate when the ignition key is turned to the «ON» position, take your car to your nearest authorized Hyundai dealer and have the system checked. CAUTION: Prolonged driving with the Emission… -
Page 80
(See «If the engine overheats» on the page 3-4.) and the water pump drive belt. If you suspect cooling system trouble, have your cool- ing system checked by a Hyundai dealer as soon as possible. NOTE: If the red engine coolant temperature… -
Page 81
«ON» position, the Tire Pressure Monitoring System is not working porperly. If this occurs, have your vehicle checked by an authorized Hyundai dealer as soon as possible. The warning light also comes on and stays on when there is a problem with the Tire Pressure Monitoring System. -
Page 82: Instrument Cluster
Then open the hood and, after the engine has cooled, check the coolant level and the water pump drive belt. If you suspect cooling system trouble, have your cooling system checked by a Hyundai dealer as soon as possible.
-
Page 83
Type A B300A03MC-A Type B B300A02MC-A FEATURES OF YOUR HYUNDAI FEATURES OF YOUR HYUNDAI Your Hyundai’s speedometer is calibrated in miles per hour (on the outer scale) and kilometers per hour (on the inner scale). B310B01O-AAT ODOMETER/TRIP ODOMETER (Without Trip Computer) -
Page 84
FEATURES OF YOUR HYUNDAI NOTE: Federal law forbids alteration of the odom- eter of any vehicle with the intent to change the number of the odometer. The alteration may void your warranty cov- erage. 2. Trip Odometer OMC025054 Pushing in the trip switch for less than 1 second when the ignition switch is turned «ON»… -
Page 85: Trip Computer
This mode indicates the drive distance travelled since the last drive time reset. o Refer to the explanation of the trip computer (see page 1-74, Tripmeter). FEATURES OF YOUR HYUNDAI FEATURES OF YOUR HYUNDAI TRIP COMPUTER B400B01MC-AAT (If Installed)
-
Page 86
FEATURES OF YOUR HYUNDAI TRIP Switch OMC025054 Pushing in the TRIP switch for less than 1 second when the ignition switch is in «ON» position changes the display as follows; OUTSIDE TEMPERATURE TRIPMETER AVERAGE FUEL CONSUMPTION DISTANCE TO EMPTY 1. Outside Temperature (°F) -
Page 87
The trip computer may not register additional fuel if less than 1.36 gallons (6 liters) of fuel are added to the ve- hicle. FEATURES OF YOUR HYUNDAI FEATURES OF YOUR HYUNDAI B400B06MC-A o When the distance to empty is less… -
Page 88: Multi-Function Light Switch
FEATURES OF YOUR HYUNDAI MULTI-FUNCTION LIGHT SWITCH B340A01A-AAT COMBINATION TURN SIGNAL, HEADLIGHT AND LOW-BEAM SWITCH Turn Signal Operation Pulling down on the lever causes the turn signals on the left side of the car to blink. Pushing upward on the lever causes the turn signals on the right side of the car to blink.
-
Page 89
(away from you). The High Beam Indicator Light will come on at the same time. For low beams, pull the lever back toward you. FEATURES OF YOUR HYUNDAI FEATURES OF YOUR HYUNDAI B340E01A-AAT Headlight Flasher OTB048094 To flash the headlights, pull the switch lever toward you, then release it. -
Page 90: Windshield Wiper And Washer Switch
FEATURES OF YOUR HYUNDAI WINDSHIELD WIPER/WASHER SWITCH Windshield wiper/washer Type A OMC048900N Type B OMC048901N Rear window wiper/washer (If Installed) Type A OMC048908L Type B OMC048907N A : Wiper speed control · MIST – Single wipe · OFF – Off ·…
-
Page 91: Windshield Washer Operation
If there is only a light layer of snow or ice, operate the heater in the defrost mode to melt the snow or ice before using the wiper. FEATURES OF YOUR HYUNDAI FEATURES OF YOUR HYUNDAI B350B01A-AAT Windshield Washer Operation…
-
Page 92: Mist Wiper Operation
FEATURES OF YOUR HYUNDAI When the washer lever is operated, the wipers automatically make three passes across the windshield. The washer con- tinues to operate until the lever is re- leased. NOTE: o Do not operate the washer more than 15 seconds at a time or when the fluid reservoir is empty.
-
Page 93: Instrument Panel Light Control (Rheostat)
2.ON : The rear window wiper starts to operate continuously. 3.OFF FEATURES OF YOUR HYUNDAI FEATURES OF YOUR HYUNDAI INSTRUMENT PANEL LIGHT CONTROL (RHEOSTAT) B410A01A-AAT B410A01MC The instrument panel lights can be made brighter or dimmer by turning the instru- ment panel light control knob.
-
Page 94: Rear Window Defroster Switch
FEATURES OF YOUR HYUNDAI HAZARD WARNING SYS- B370A01A-AAT OMC025067 The hazard warning system should be used whenever you find it necessary to stop the car in a hazardous location. When you must make such an emer- gency stop, always pull off the road as far as possible.
-
Page 95: Digital Clock
«ready» position. Do not hold the cigarette lighter pressed in. This can damage the heating element and create a fire hazard. If it is necessary to replace the cigarette lighter, use only a genuine Hyundai re- placement or its approved equivalent.
-
Page 96: Power Outlet
FEATURES OF YOUR HYUNDAI POWER OUTLET B500D01TG-GAT OMC025106 These supply 12V electric power to oper- ate electric accessories or equipment only when the key is in the «ON» or «ACC» position. CAUTION: o Use when the engine is running and remove a plug from the power outlet after using the electric appliance.
-
Page 97: Drink Holder
Objects can be thrown out in the event of a sudden stop or an accident, possibly injuring the passengers in the ve- hicle. FEATURES OF YOUR HYUNDAI FEATURES OF YOUR HYUNDAI B450B01MC-GAT REAR DRINK HOLDER (If Installed) OMC025034 The rear drink holder is located in the rear seat armrest for holding cups or cans.
-
Page 98: Sunroof
FEATURES OF YOUR HYUNDAI SUNROOF B460A02Y-AAT (If Installed) Sun Shade 1JBA3110 Your HYUNDAI is equipped with a sliding sunshade which you can manually adjust to let in light with the sunroof closed, or to block sunlight. WARNING: Never adjust the sunshade while driv- ing.
-
Page 99
Otherwise, you could be seriously injured if the vehicle stops suddenly or if the ve- hicle is involved in an accident. FEATURES OF YOUR HYUNDAI FEATURES OF YOUR HYUNDAI CAUTION: o Do not open the sunroof in severely cold temperature or when it is cov- ered with ice or snow. -
Page 100
FEATURES OF YOUR HYUNDAI B460D01NF-AAT Manual Operation of Sunroof If the sunroof does not electrically oper- ate: OMC025022 1. Open the sunglass holder. 2. Remove the two mounting screws of the front overhead console with a (+) driver. OMC025023 3. Insert the hexagonal head wrench pro- vided with the vehicle into the socket. -
Page 101
This light produces a spot beam for convenient use as a map light at night or as a personal light for the driver and the passenger. FEATURES OF YOUR HYUNDAI FEATURES OF YOUR HYUNDAI o «DOOR» In the «DOOR» position, the map light… -
Page 102: Sunglass Holder
FEATURES OF YOUR HYUNDAI B490A02MC-AAT Interior Light B490A03MC The interior courtesy light switch has three positions. The three positions are: o «DOOR» In the «DOOR» position, the interior cour- tesy light comes on when any door is opened regardless of the ignition key…
-
Page 103: Glove Box
B500B01NF-GAT Illuminated Glove Box (If Installed) Opening the glove box will automatically turn on the light when the multi-function switch is turned to the first position. FEATURES OF YOUR HYUNDAI FEATURES OF YOUR HYUNDAI MULTI BOX B500B01MC-GAT OMC025105 The multi box is opened by pushing the…
-
Page 104
FEATURES OF YOUR HYUNDAI OUTSIDE REARVIEW MIR- B510A01A-AAT Manual Type OMC025049 The outside rearview mirrors are equipped with a remote control for your convenience. It is operated by the control lever in the bottom front corner of the window. Before driving away, always check that… -
Page 105
It is a convex mirror with a curved surface. Any ob- jects seen in this mirror are closer than they appear. FEATURES OF YOUR HYUNDAI FEATURES OF YOUR HYUNDAI B510C01A-AAT Folding the Outside Rearview Mir- rors… -
Page 106: Mirror
DAY/NIGHT INSIDE REAR- VIEW MIRROR B520A01A-AAT OMC025047 Your Hyundai is equipped with a day/ night inside rearview mirror. The «night» position is selected by flipping the tab at the bottom of the mirror toward you. In the «night» position, the glare of headlights of cars behind you is reduced.
-
Page 107: High-Mounted Rear Stop Light
B550A01S-GAT 4 Door B550A01MC 3 Door B550A01MC-1 FEATURES OF YOUR HYUNDAI FEATURES OF YOUR HYUNDAI In addition to the lower-mounted rear stop lights on either side of the car, the high mounted rear stop light in the center of the rear window or inserted in the rear spoiler also lights when the brakes are applied.
-
Page 108: Hood Release
FEATURES OF YOUR HYUNDAI HOOD RELEASE B570A01MC-GAT OMC025019 1. Pull the release knob to unlatch the hood. OMC025020 2. Pull the secondary latch lever up and lift the hood. B570A01MC 3. Pull the support rod from the hood. B570A02MC 4. Hold the hood open with the support rod.
-
Page 109
(do not use radia- tor anti-freeze) or move the vehicle to a warm place and allow the ice to melt. FEATURES OF YOUR HYUNDAI FEATURES OF YOUR HYUNDAI 4 Door B560A02MC… -
Page 110
FEATURES OF YOUR HYUNDAI WARNING: o Gasoline vapors are dangerous. Before refueling, always stop the engine and never smoke or allow sparks and open flames near the filler area. o Never operate your vehicle without a filler cap properly installed, flam-… -
Page 111: Trunk Lid/Tail Gate
See additional warnings concerning exhaust gases on page 2-2. FEATURES OF YOUR HYUNDAI FEATURES OF YOUR HYUNDAI Trunk Lid (4 Door) o The trunk lid is opened by first turning the key clockwise to release the lock, then raising the door manually.
-
Page 112
FEATURES OF YOUR HYUNDAI B540D01MC-GAT Remote Trunk Lid Release (4 Door) OMC025011 To open the trunk lid without using the key, pull up the lid release lever. To close, lower the trunk lid, then press down on it until it locks. To be sure the trunk lid is securely fastened, check by trying to pull it up again. -
Page 113: Luggage Net
Keep cars locked and keys out of the reach of children. HYUNDAI recom- mends parents teach children about the emergency trunk release lever in their vehicle and how to open the trunk lid if they are accidentally locked in the trunk.
-
Page 114: Cargo Area Cover
SUN VISOR B580A02MC-AAT B580A01MC Your Hyundai is equipped with sun visors to give the driver and front passenger either frontal or sideward shade. To re- duce glare or to shut out direct rays of the sun, turn the sun visor down.
-
Page 115
Illuminated Vanity Mirror (If Installed) OMC025100 Opening the lid of the vanity mirror will automatically turn on the mirror light. FEATURES OF YOUR HYUNDAI FEATURES OF YOUR HYUNDAI B580C01JM-AAT Sun Visor Extender (If Installed) B580C01MC Your vehicle is equipped with sun visor extenders that may be used when the visor is in the side glass position. -
Page 116: Aux Outlet
FEATURES OF YOUR HYUNDAI STEERING WHEEL TILT LEVER B600A01A-AAT (If Installed) OMC025045 To Adjust the Steering Wheel: 1. Push the lever downward to unlock. 2. Raise or lower the steering wheel to the desired position. 3. After adjustment, securely tighten the lever by pulling it upward.
-
Page 117: Heating And Cooling Control
(If Installed) 1. Side Defroster Nozzle 2. Side Ventilator 3. Windshield Defroster Nozzle 4. Center Ventilator FEATURES OF YOUR HYUNDAI FEATURES OF YOUR HYUNDAI B710B01MC-AAT Center Ventilator/Side Ventilator The center ventilators are located in the middle of the dashboard. The side venti- lators are located on each side of dash- board.
-
Page 118
FEATURES OF YOUR HYUNDAI HEATING AND VENTILA- TION B670A02A-GAT (If Installed) B670A02MC 1. Temperature control 2. Air conditioning switch (If Installed) 3. Air intake control switch 4. Air flow control 5. Fan speed control B670B01A-AAT Fan Speed Control (Blower Control) -
Page 119: Air Flow Control
Defrost and Defrost air position. The MAX A/C mode is used to cool the inside of the vehicle faster. The «OFF» mode is used to turn the blower fan off. FEATURES OF YOUR HYUNDAI FEATURES OF YOUR HYUNDAI B670D02MC Face-Level Selecting the «Face»…
-
Page 120
FEATURES OF YOUR HYUNDAI B670D03MC Bi-Level Air is discharged through the face vents and the floor vents. This makes it possible to have cooler air from the dashboard vents and warmer air from the floor out- lets at the same time. -
Page 121
The A/C will not off until the air flow control is set to the another mode other than the floor-de- frost mode and the defrost mode. FEATURES OF YOUR HYUNDAI FEATURES OF YOUR HYUNDAI B670D07MC MAX A/C-Level (If Installed) Air is discharged through the face level vents. -
Page 122: Temperature Control
FEATURES OF YOUR HYUNDAI NOTE: o The air intake control switch will change to » » mode when the ignition switch is turned «ON» with the MAX A/C mode selected. o When you change to another mode from MAX A/C, the A/C and the air intake control switch are set as shown in the following chart.
-
Page 123
«Warm». BI-LEVEL HEATING B700A02A-AAT B700B02MC Your Hyundai is equipped with bi-level heating controls. This makes it possible to have cooler air from the dashboard vents and warmer air from the floor out- lets at the same time. To use this feature: o Set the air intake control to the fresh air ) position. -
Page 124
FEATURES OF YOUR HYUNDAI DEFROSTING/DEFOGGING B720A02FC-GAT B720A01MC-A Use the heating/ventilation system to defrost or defog the windshield: To remove interior fog on the wind- shield: o Set the air flow control to the defrost ) position. (The A/C will turn on automatically and «Fresh»… -
Page 125
(If Installed) Air Conditioning Switch B740A02MC The air conditioning is turned on by push- ing the A/C button on the heating/air conditioning control panel. FEATURES OF YOUR HYUNDAI FEATURES OF YOUR HYUNDAI B740B02A-AAT Air Conditioning Operation (Cooling) B740B02MC To use the air conditioning to cool the interior: o Turn on the fan control switch. -
Page 126
FEATURES OF YOUR HYUNDAI o Set the temperature control to «Cool». («Cool» provides maximum cooling. The temperature may be moderated by moving the control toward «Warm».) o Adjust the fan control to the desired speed. For greater cooling, turn the fan… -
Page 127
) position. (The o Set the temperature control to warm. o Set the fan speed control to position «3» or «4». ) or defrost level ( FEATURES OF YOUR HYUNDAI FEATURES OF YOUR HYUNDAI B720B02MC-1 ) position. (The ), it may cause fog to form… -
Page 128: Climate Control Air Filter
FEATURES OF YOUR HYUNDAI CLIMATE CONTROL AIR FILTER B760A07A-AAT (For evaporator and blow unit) Outside air Inside of a vehicle Blower Inside air Filter Evaporator core B760A01MC The climate control air filter is located in front of the evaporator unit behind the glove box.
-
Page 129: Stereo Sound System
In addi- tion, they curve around obstructions so that they can provide better signal cover- age. FEATURES OF YOUR HYUNDAI FEATURES OF YOUR HYUNDAI FM radio station Mountains Unobstructed…
-
Page 130
WARNING: Hyundai recommends that you never use a cell phone while driving. This could result in loss of control, and an accident that may cause death, serious injury, or property damage. -
Page 131: Care Of Discs
If the surface is heavily soiled, dampen a clean soft cloth in a solution of mild neu- tral detergent to wipe it clean. FEATURES OF YOUR HYUNDAI FEATURES OF YOUR HYUNDAI CARE OF CASSETTE TAPES B860A01A-AAT…
-
Page 132
FEATURES OF YOUR HYUNDAI o We strongly recommend against the use of tapes longer than C-60 (60 minutes total). Tapes such as C-120 or C-180 are very thin and do not perform as well in the automotive environment. HLC216 B860A01MC… -
Page 133: Antenna
Your car uses the micro antenna to re- ceive both AM and FM broadcast signals. This antenna is folding and removable type. FEATURES OF YOUR HYUNDAI FEATURES OF YOUR HYUNDAI CAUTION: o Be sure to fold the micro antenna before entering a garage with a low height or installing a car cover.
-
Page 134: Audio System
FEATURES OF YOUR HYUNDAI AUDIO SYSTEM PA710A01MC-AAT RADIO, SETUP, VOLUME CONTROL (PA710) (If Installed) 1. AM Selection Button 2. FM Selection Button 3. Automatic Channel Selection Button 4. Power ON/OFF & Volume Control Button 5. SCAN Button 6. MUTE Button 7.
-
Page 135
6. MUTE Button Press to temporarily cut off the sound. FEATURES OF YOUR HYUNDAI 7. SETUP Button Press this button to turn to the SCROLL and AUDIO adjustment mode. If no action is taken for 5 seconds after pressing the button, it will return to the play mode.(After entering SETUP mode,… -
Page 136
FEATURES OF YOUR HYUNDAI CAUTION: o Do not place beverages close to the audio system. The audio system mechanism may be damaged if you spill them. o Do not strike or allow anything to impact the audio system, damage to the system mechanisms could oc- cur. -
Page 137
PA710C01MC-AAT CD (PA710) (If Installed) — Compatiable with MP3/WMA/WAVE FEATURES OF YOUR HYUNDAI 1. CD Loading Slot 2. CD Indicator 3. CD Eject Button 4. CD Selection Button 5. AUX Selection Button 6. Automatic Track Selection Button 7. Information Display Button 8. -
Page 138
FEATURES OF YOUR HYUNDAI PA710D01MC-AAT 1. CD Loading Slot Please face printed side upward and gently push in. When the ignition switch is on ACC or ON and power is off, power is automatically turned on if the CD is loaded. -
Page 139
If the enter key is not pressed within 5 seconds, then the previous folder name will be displayed again. FEATURES OF YOUR HYUNDAI NOTE: o To assure proper operation of the unit, keep the vehicle interior tem- perature within a normal range by using the vehicle’s air conditioning or heating system. -
Page 140
FEATURES OF YOUR HYUNDAI CAUTION: o Do not insert warped or poor quality discs into the CD player as damage to the unit may occur. o Do not insert anything like coins into the player slot as damage to the unit may occur. -
Page 141
PA710SA01MC-AAT RADIO, SETUP, VOLUME CONTROL (PA710S) (If Installed) FEATURES OF YOUR HYUNDAI 1. AM Selection Button 2. FM Selection Button 3. XM Selection Button 4. Automatic Channel Selection Button 5. Power ON/OFF & Volume Control Button 6. SCAN Button 7. MUTE Button 8. -
Page 142
FEATURES OF YOUR HYUNDAI PA710SB01MC-AAT 1. AM Selection Button Turns to AM mode, and toggles in the order of AM1➟AM2➟···➟AM1···when the button is pressed each time. 2. FM Selection Button Turns to FM mode and toggles FM1 and FM2 when the button is pressed each time. -
Page 143
Push PRESET button for 0.8 second or longer to save current channel to the respective button with a beep. FEATURES OF YOUR HYUNDAI CAUTION: o Do not place beverages close to the audio system. The playback mecha- nism may be damaged if you spill them. -
Page 144
FEATURES OF YOUR HYUNDAI PA710SC01MC-AAT CD (PA710S) (If Installed) — Compatiable with MP3/WMA/WAVE 1. CD Loading Slot 2. CD Indicator 3. CD Eject Button 4. CD/AUX Selection Button 5. Automatic Track Selection Button 6. Information Display Button 7. TUNE/ENTER Button 8. -
Page 145
Load to play time for these formats may be longer due to the compressed nature of these discs. FEATURES OF YOUR HYUNDAI 3.5mm STEREO MINI PLUG NOTE : o If the AUX device is not connected, you cannot switch to AUX-IN mode. -
Page 146
FEATURES OF YOUR HYUNDAI 5. Automatic Track Selection Button o Push [SEEK ] button for less than 0.8 second to play from the beginning of current song. o Push [SEEK ] button for less than 0.8 second and press again within 1 second to play the previous song. -
Page 147
Do not attempt to grab or pull the compact disc out while the disc is being pulled into the audio unit by the self-loading mechanism. Damage to the audio unit and compact disc could occur. FEATURES OF YOUR HYUNDAI… -
Page 148
DRIVING YOUR HYUNDAI Engine Exhaust can be Dangerous! … 2-2 Before Starting the Engine … 2-3 Key Positions … 2-4 Starting … 2-5 Operating the Manual Transaxle … 2-6 Automatic Transaxle … 2-9 Anti-Lock Brake System … 2-13 Good Braking Practices … 2-14 Driving for Economy … -
Page 149: Driving Your Hyundai
Hyundai dealer. o Do not run the engine in an enclosed area.
-
Page 150: Before Starting The Engine
10. Check the operation of warning lights and all bulbs when key is in the «ON» position. DRIVING YOUR HYUNDAI WARNING: o Always wear appropriate shoes when operating your vehicle. Unsuit- able shoes (high heels, ski boots, etc.) may interfere with your ability…
-
Page 151: Key Positions
DRIVING YOUR HYUNDAI TO START THE ENGINE C030A01A-AAT COMBINATION IGNITION SWITCH o If your Hyundai is equipped with a manual transaxle, place the shift lever in neutral and depress the clutch pedal fully. o If your Hyundai has an automatic transaxle, place the shift lever in «P»…
-
Page 152: Starting
The carbon monoxide gas emitted is odorless and can cause se- rious injury or death. DRIVING YOUR HYUNDAI C050B02A-AAT Normal Conditions: The Starting Procedure: 1. Insert key, and fasten the seat belt.
-
Page 153: Operating The Manual Transaxle
OPERATING THE MANUAL TRANSAXLE C070A01MC-GAT OMC035013 Your Hyundai’s manual transaxle has five forward gears and one reverse gear. This shift pattern is also imprinted on the shift knob. The transaxle is fully synchro- nized in all forward gears so shifting to either a higher or a lower gear is easily accomplished.
-
Page 154
Such over revving of the engine may possibly cause en- gine damage. DRIVING YOUR HYUNDAI C070B01A-AAT Using the Clutch The clutch should be pressed all the way to the floor before shifting, then released slowly. -
Page 155
DRIVING YOUR HYUNDAI C070D03O-AAT Good Driving Practices o Never take the car out of gear and coast down a hill. This is extremely hazardous. Always leave the car in gear. o Don’t «ride» the brakes. This can cause them to overheat and malfunction. In-… -
Page 156: Automatic Transaxle
AUTOMATIC TRANSAXLE C090A01A-AAT OMC035014 The highly efficient Hyundai automatic transaxle has four forward speeds and one reverse speed. It has a conventional shift pattern as shown in the illustration. CAUTION: Never shift into «R» or «P» position while the car is moving.
-
Page 157
DRIVING YOUR HYUNDAI C090C01A-AAT o R(Reverse): Use for backing up the vehicle. Bring the car to a complete stop before shifting the selector lever to «R» position. C090D02A-AAT o N (Neutral): In the «N» position, the transaxle is in neutral position, which means that no gears are engaged. -
Page 158
Check the automatic transaxle fluid level regularly, and add fluid as nec- essary. o See the maintenance schedule for the proper fluid recommendation. DRIVING YOUR HYUNDAI C090P01A-AAT Overdrive Switch OMC035016 When the overdrive switch is turned on, the transaxle will automatically upshift to the second, third and overdrive gears. -
Page 159
DRIVING YOUR HYUNDAI C090N07A-AAT Good Driving Practices o Never move the gear selector lever from «P» or «N» to any other position with the accelerator pedal depressed. o Never move the gear selector lever into «P» when the vehicle is in motion. -
Page 160: Anti-Lock Brake System
These conditions are normal and indicate that the anti-lock brake system is functioning properly. DRIVING YOUR HYUNDAI WARNING: ABS will not prevent accidents due to improper or dangerous driving maneu- vers. Even though vehicle control is…
-
Page 161: Good Braking Practices
If the braking action does not return to normal, stop as soon as it is safe to do so and call your Hyundai dealer for assistance. o Don’t coast down hills with the car out of gear.
-
Page 162: Driving For Economy
(see Section 5 for details). o Keep your car clean. For maximum service, your Hyundai should be kept clean and free of corrosive materials. It is especially important that mud, dirt, ice, etc. not be allowed to accumulate on the underside of the car.
-
Page 163: Winter Driving
If you are waiting (and not in traffic), turn off your engine and restart only when you’re ready to go. o Remember, your Hyundai does not require extended warm-up. After the engine has started, allow the engine to run for 10 to 20 seconds prior to plac- ing the vehicle in gear.
-
Page 164
Winter puts additional burdens on the battery system. Visually inspect the bat- tery and cables as described in Section 6. The level of charge in your battery can be checked by your Hyundai dealer or a service station. DRIVING YOUR HYUNDAI C160E01A-AAT Change to «Winter Weight»… -
Page 165
Window washer anti-freeze is available from Hyundai dealers and most auto parts outlets. Do not use engine coolant or other types of anti-freeze as these may damage the finish. C160I01A-AAT… -
Page 166
3. Drive belt: A loose or damaged drive belt may result in overheating of the engine. DRIVING YOUR HYUNDAI USE OF LIGHTS C180A01A-AAT Check your lights regularly for correct operation and always keep them clean. -
Page 167: Trailer Towing
DRIVING YOUR HYUNDAI TRAILER TOWING C190A01A-AAT C190A01MC Your Hyundai should not be used to tow a trailer. It is designed to be compact and light for good fuel economy, and is not designed as a trailer-towing vehicle. Damages or malfunctions caused by tow- ing may not be covered by the limited warranties applying to your Hyundai.
-
Page 168
DRIVING YOUR HYUNDAI Steps for Determining Correct Load Limit (1)Locate the statement «The com- bined weight of occupants and cargo should never exceed XXX pounds» on your vehicle’s placard. -
Page 169
DRIVING YOUR HYUNDAI (5)Determine the combined weight of luggage and cargo being loaded on the vehicle. That weight may not safely exceed the available cargo and luggage load capacity calcu- lated in Step 4. (6)If your vehicle will be towing a trailer, load from your trailer will be transferred to your vehicle. -
Page 170
The com- bined weight of the driver, passengers and cargo should never exceed your vehicle’s capacity weight. DRIVING YOUR HYUNDAI C190G03JM-AAT Compliance Label C190G01A The compliance label is located on the driver’s side of the center pillar outer panel. -
Page 171
DRIVING YOUR HYUNDAI This label also tells you the maximum weights that can be supported by the front and rear axles, called Gross Axle Weight Rating (GAWR). To find out the actual loads on your front and rear axles, you need to go to a weigh station and weigh your vehicle. -
Page 172
Do not leave an unsecured child restraint in your vehicle. o When you carry something in- side the vehicle, secure it. o Do not drive with a seat folded down unless necessary. DRIVING YOUR HYUNDAI… -
Page 173
WHAT TO DO IN AN EMERGENCY If the Engine Will Not Start … 3-2 Jump Starting … 3-3 If the Engine Overheats … 3-4 Tire Pressure Monitoring System (TPMS) … 3-5 Spare Tire … 3-10 If You Have a Flat Tire … 3-11 Changing a Flat Tire … -
Page 174: What To Do In An Emergency
Reconnect any that may be disconnected or loose. 3. Check the fuel line in the engine room. 4. If the engine still refuses to start, call a Hyundai dealer or seek other qualified assistance.
-
Page 175: Jump Starting
Move cautiously off the road to a safe place. 2. Turn on your emergency flashers. 3. Try to start the engine again. If your vehicle will not start, contact a Hyundai dealer or seek other qualified assis- tance. F020100AUN-EU…
-
Page 176: If The Engine Overheats
If you do not know why your battery be- came discharged (because the lights were left on, etc.), have the charging system checked by your Hyundai dealer. IF THE ENGINE OVERHEATS D030A02A-AAT If your temperature gauge indicates over-…
-
Page 177: Tire Pressure Monitoring System (Tpms)
7. Proceed with caution, keeping alert for further signs of overheating. If over- heating happens again, call a Hyundai dealer for assistance. CAUTION: Serious loss of coolant indicates there…
-
Page 178
WHAT TO DO IN AN EMERGENCY As an added safety feature, your ve- hicle has been equipped with a Tire Pressure Monitoring System (TPMS) that illuminates a low tire pressure telltale when one or more of your tires is significantly under-inflated. Accord- ingly, when the low tire pressure tell- tale illuminates, you should stop and check your tires as soon as possible,… -
Page 179
Rear Right tire is under-inflated, the low tire pressure telltale may turn on at the same time as the TPMS malfunc- tion indicator. Have the system checked by an authorized Hyundai dealer as soon as possible to deter- mine the cause of the problem. NOTE:… -
Page 180
Changing a tire with TPMS If you have a flat tire, the Low Tire Pressure telltale will turn on. Have the flat tire repaired by an authorized Hyundai dealer as soon as possible or replace the flat tire with the temporary spare tire. NOTE:… -
Page 181
CAUTION: o Do not use any tire sealant if your vehicle is equipped with a Tire Pressure Monitoring System. The liquid sealant can damage the tire pressure sensors. o In order for the system to cor- rectly monitor tires for under-in- flation, there should be a total of exactly 4 sensors fitted to each of the four driven wheel positions. -
Page 182: Spare Tire
WHAT TO DO IN AN EMERGENCY SPARE TIRE D040A02MC-AAT TEMPORARY SPARE TIRE The following instructions for the tem- porary spare tire should be observed: 1. Check inflation pressure as soon as is practical after installing the spare tire, and adjust to the specified pressure.
-
Page 183: If You Have A Flat Tire
D040B01A-AAT Handling the Spare Tire D040B01MC Remove the installation bolt to remove the spare tire. To replace the spare tire in its storage compartment, tighten the bolt firmly with your fingers until there is no more play in the spare tire. IF YOU HAVE A FLAT TIRE D050A01A-AAT If a tire goes flat while you are driving:…
-
Page 184
WHAT TO DO IN AN EMERGENCY D060K01FC-AAT Wheel Cap (If Installed) D060K02MC 1. Wrap a piece of cloth around the tip of the flat-head screwdriver to avoid scratching. 2. Insert the flat-head screwdriver into the notch of the wheel cap and pry gently to remove the wheel cap. -
Page 185
D060D01A-AAT 3. Loosen Wheel Nuts D060D02MC The wheel nuts should be loosened slightly before raising the car. To loosen the nuts, turn the wrench handle counterclockwise. When doing this, be sure that the socket is seated completely over the nut so it cannot slip off. -
Page 186
WHAT TO DO IN AN EMERGENCY Raise the car high enough so that the fully inflated spare tire can be installed. To do this, you will need more ground clearance than is required to remove the flat tire. WARNING: Do not get under the car when it is supported by the jack! This is very dangerous as the vehicle could fall and cause serious injury or death. -
Page 187
WARNING: If there is not good contact on the mounting surface between the wheel and hub, the wheel nuts could loosen and cause the loss of a wheel. Loss of a wheel may result in loss of control of the vehicle. This may cause serious injury or death. -
Page 188: If Your Vehicle Must Be Towed
IF YOUR VEHICLE MUST BE TOWED D080A01O-GAT If your vehicle has to be towed, it should be done by your Hyundai dealer or a commercial tow truck service. This will help assure that your vehicle is not dam- aged in towing. Also, professionals are generally aware of local laws governing towing.
-
Page 189
D080B01O-GAT Towing the Vehicle dolly D080B01MC Your vehicle can be towed by wheel lift type truck (1), (2) or flatbed equipment (3). CAUTION: o When towing the vehicle, take care not to cause damage to the bumper or underbody of the vehicle. D080B02MC o Do not tow with sling type truck as this may cause damage to the… -
Page 190: Emergency Towing
WHAT TO DO IN AN EMERGENCY o Automatic Transaxle: Be sure to use a towing dolly under the front wheels. CAUTION: D080B03MC A vehicle with an automatic transaxle should never be towed from the rear with the front wheels on the ground. This can cause serious damage to the transaxle.
-
Page 191
How to Use Front Towing Hook (If Installed) OMC045013 (1)Open the towing hole cover by push- ing it with your finger. OMC045014 (2)Take out the towing hook from the jack case. To mount the towing hook, ro- tate it clockwise. NOTE: The jack case is located on the spare tire in the trunk or luggage compart-… -
Page 192: If You Lose Your Keys
WHAT TO DO IN AN EMERGENCY IF YOU LOSE YOUR KEYS D120A01A-AAT If you lose your keys, many Hyundai dealers can make you a new key if you have your key number. If you lock the keys inside your car and…
-
Page 193: Corrosion Prevention & Appearance Care
CORROSION PREVENTION & APPEARANCE CARE Corrosion Protection … 4-2 To Help Prevent Corrosion … 4-3 Washing and Waxing… 4-4 Cleaning the Interior… 4-6…
-
Page 194: Corrosion Protection
By using the most advanced design and construction practices to combat corro- sion, Hyundai produces cars of the high- est quality. However, this is only part of the job. To achieve the long term corro- sion resistance your Hyundai can deliver, the owner’s cooperation and assistance is also required.
-
Page 195: To Help Prevent Corrosion
TO HELP PREVENT COR- ROSION E020A01A-AAT You can help prevent corrosion from getting started by observing the follow- ing: E020B01A-AAT Keep Your Car Clean The best way to prevent corrosion is to keep your car clean and free of corrosive materials.
-
Page 196: Washing And Waxing
Use a good quality car-washing solution and follow the manufacturer’s directions on the package. These are available at your Hyundai dealer or auto parts outlet. Don’t use strong household detergents, gasoline, strong solvents or abrasive cleaning powders as these may damage the finish.
-
Page 197
Maintaining Bumpers Special precautions must be observed to preserve the appearance of the bumpers on your Hyundai. They are: o Be careful not to spill battery electro- lyte or hydraulic brake fluid on the bumpers. If you do, wash it off imme- diately with clean water. -
Page 198: Cleaning The Interior
CORROSION PREVENTION AND APPEARANCE CARE CLEANING THE INTERIOR E040A01A-AAT To Clean the Vinyl Upholstery To clean the vinyl upholstery, first remove loose dirt and dust with a vacuum cleaner. Then apply a solution of mild soap or detergent and water using a clean sponge or soft cloth.
-
Page 199
CORROSION PREVENTION AND APPEARANCE CARE CORROSION PREVENTION AND APPEARANCE CARE ANY QUESTIONS? E050A01A-AAT If you have any questions about the care of your car, consult your Hyundai dealer. -
Page 200
VEHICLE MAINTENANCE REQUIREMENTS Maintenance Intervals … 5-2 Scheduled Maintenance … 5-4 Maintenance under Severe Usage Conditions … 5-6 Explanation of Scheduled Maintenance Items … 5-7 California Perchlorate Notice … 5-10… -
Page 201: Vehicle Maintenance Requirements
Handbook supplied with your new ve- hicle provides further information about these warranties. F010B01A-AAT Maintenance Requirements The maintenance required for your Hyundai can be divided into three main areas: o Specified scheduled procedures o General checks o Do-it-yourself maintenance F010C01A-AAT…
-
Page 202
If you choose to do your own mainte- nance and repairs, you may find it helpful to have an official Hyundai Shop Manual. A copy of this publica- tion may be purchased at your Hyundai dealer’s parts department. SCHEDULED MAINTE- NANCE REQUIREMENTS… -
Page 203: Scheduled Maintenance
VEHICLE MAINTENANCE REQUIREMENTS SCHEDULED MAINTENANCE F030A01A-AAT The following maintenance services must be performed to assure good vehicle control and performance. Keep receipts for all vehicle services to protect your warranty. Where both mileage and time are shown, the frequency of service is determined by whichever occurs first.
-
Page 204
F030C2MC-AAT R : Replace I : Inspect and, after inspection, clean, adjust, repair or replace if necessary MILES X 1000 KILOMETERS X 1000 DESCRIPTION MONTHS GENERAL ITEMS DRIVE BELT (WATER PUMP, ALTERNATOR AND A/CON) COOLANT TIMING BELT MANUAL TRANSAXLE OIL AUTOMATIC TRANSAXLE FLUID BRAKE FLUID BRAKE HOSES AND LINES… -
Page 205: Maintenance Under Severe Usage Conditions
VEHICLE MAINTENANCE REQUIREMENTS MAINTENANCE UNDER SEVERE USAGE CONDITIONS F040A02MC-AAT The following items must be serviced more frequently on cars normally used under severe driving conditions. Refer to the chart below for the appropriate maintenance intervals. R : Replace I : Inspect and, after inspection, clean, adjust, repair or replace if necessary MAINTENANCE ITEM ENGINE OIL AND FILTER AIR CLEANER FILTER…
-
Page 206: Explanation Of Scheduled Maintenance Items
F060H01A-AAT o Air Cleaner Filter A Genuine Hyundai air cleaner filter is recommended when the filter is replaced. F060J01A-AAT o Spark Plugs Make sure to install new spark plugs of the correct heat range.
-
Page 207
GENUINE ATF SP III, DIAMOND ATF SP III, SK ATF SP III or other brands meeting the SP III specification approved by Hyundai Motor Co. when adding or chang- ing fluid. Using the wrong ATF may result in damage to the ATM. -
Page 208
F070J01A-AAT o Brake Pads, Calipers and Rotors Check the pads for excessive wear, discs for run out and wear, and calipers for fluid leakage. F070K01A-AAT o Exhaust Pipe and Muffler Visually inspect the exhaust pipes, muf- fler and hangers for cracks, deterioration, or damage. -
Page 209: California Perchlorate Notice
VEHICLE MAINTENANCE REQUIREMENTS CALIFORNIA PERCHLORATE NOTICE F080A01NF-AAT Perchlorate Material-special handling may apply, See www.dtsc.ca.gov/ hazardouswaste/perchlorate. Notice to California Vehicle Dismantlers: Perchlorate containing materials, such as airbag inflators, seatbelt pretensioners and keyless remote entry batteries, must be disposed of according to Title 22 Cali- fornia Code of Regulations Section 67384.10 (a).
-
Page 210: Do-It-Yourself Maintenance
DO-IT-YOURSELF MAINTENANCE Engine Compartment … 6-2 General Checks … 6-3 Maintenance Precautions … 6-4 Checking the Engine Oil … 6-4 Checking and Changing the Engine Coolant … 6-7 Changing the Air Cleaner Filter … 6-8 Checking the Transaxle Oil (Manual) … 6-11 Checking the Transaxle Fluid (Automatic) …
-
Page 211: Engine Compartment
DO-IT-YOURSELF MAINTENANCE ENGINE COMPARTMENT G010A01MC-AAT 1. Engine coolant reservoir … 6-7 2. Engine oil filler cap … 6-6 3. Brake fluid reservoir … 6-14 4. Air cleaner filter … 6-8 5. Windshield washer fluid reservoir cap … 6-10 6. Power steering fluid reservoir (If Installed) …
-
Page 212: General Checks
Seat belt condition and operation o Sun visor operation If you notice anything that does not oper- ate correctly or appear to be functioning correctly, inspect it carefully and seek assistance from your Hyundai dealer if service is needed.
-
Page 213: Maintenance Precautions
If you lack sufficient knowledge and experience or the proper tools and equipment to do the work, have it done by an authorized Hyundai dealer. o Working under the hood with the en- gine running is dangerous. It be- comes even more dangerous when you wear jewelry or loose clothing.
-
Page 214
NOTE: o For good fuel economy, SAE 5W-20 (5W-30), ILSAC GF-3 engine oil is preferred regardless of regional op- tion and engine variation. o If SAE 5W-20, ILSAC GF-3 engine oil is not available, secondary recom- mended engine oil for corresponding temperature range can be used. -
Page 215
NOTE: o It is recommended that the engine oil and filter should be changed by an authorized Hyundai dealer. o Always dispose of used engine oil in an environmentally acceptable man- ner. It is suggested that it be placed in a sealed container and taken to a service station for reclaimation. -
Page 216: Checking And Changing The Engine Coolant
«L» and «F». If the level is low, inspect for coolant leaks and recheck the fluid level frequently. If the level drops again, visit your Hyundai dealer for an inspection and diagnosis of the reason.
-
Page 217: Changing The Air Cleaner Filter
1. Unsnap the clips around the cover. 2. When this is done, the cover can be lifted off, the old filter removed and the new filter put in its place. Genuine Hyundai replacement parts are recommended. CAUTION: o Operating your vehicle without a proper air filter in place can result in excessive engine wear.
-
Page 218: Windshield Wiper Blades
If the wipers continue to streak or smear the glass, replace them with genuine Hyundai replacement parts or their equivalent. CAUTION: o Do not operate the wipers on dry glass.
-
Page 219
DO-IT-YOURSELF MAINTENANCE To install the wiper blade HHR5050 1. Put a new wiper blade onto the wiper arm and lower the wiper blade at the level of the wiper arm as shown in the drawing. HHR5051 2. Pull up the wiper blade until you hear an audible «click»… -
Page 220: Checking The Transaxle Oil (Manual)
NOTE: It is recommended that the manual transaxle fluid should be checked by an authorized Hyundai dealer. DO-IT-YOURSELF MAINTENANCE CHECKING THE TRANSAXLE FLUID (AUTOMATIC) G110A01MC-AAT Transaxle fluid in the automatic transaxle…
-
Page 221
III, DIAMOND ATF SP III, SK ATF SP III or other brands meeting the SP III specifi- cation approved by Hyundai Motor Co.. If you are having your vehicle serviced at a facility other than a Hyundai dealer, verify that the correct ATF is used for your vehicle. WARNING:… -
Page 222: Checking The Brakes
Because brakes are essential to the safe operation of the car, it is sug- gested that they be checked and in- spected by your Hyundai dealer. The brakes should be checked and in- spected for wear at those intervals specified in the vehicle maintenance schedule in Section 5.
-
Page 223
DO-IT-YOURSELF MAINTENANCE G120D01A-AAT To Check the Fluid Level OMC055015 The fluid level in the brake fluid reservoir should be checked periodically. The level should be between the «MIN» and «MAX» marks on the side of the reservoir. If the level is at or below the «MIN» mark, care- fully add fluid to bring it up to «MAX». -
Page 224: Changing The Climate Control Air Filter
2. If the air coming out of the in-dash vents is not cold, have the air condi- tioning system inspected by your Hyundai dealer. CAUTION: Running the air conditioning system for extended periods of time with a low refrigerant level may damage the com- pressor.
-
Page 225: Checking And Replacing Fuses
(This could be caused by a short in the system drawing too much current.) If this ever happens, have a Hyundai dealer determine the cause, repair the system and replace the fusible link. The fusible links are located in a relay box for easy inspection.
-
Page 226
The fuse should be a snug fit. If it is not, have the fuse clip repaired or replaced by a Hyundai dealer. If you do not have a spare fuse, you may be able to borrow a fuse of the same or lower… -
Page 227
Hyundai dealer for diagnosis and re- pair. Never replace a fuse with anything except a fuse with the same or a lower amperage rating. -
Page 228: Checking The Battery
CHECKING THE BATTERY G210A01A-AAT OMC055018 WARNING: Batteries can be dangerous! When working with batteries, carefully ob- serve the following precautions to avoid serious injuries. The fluid in the battery contains a strong solution of sulfuric acid, which is poison- ous and highly corrosive. Be careful not to spill it on yourself or the car.
-
Page 229
DO-IT-YOURSELF MAINTENANCE WARNING: Always read the following in- structions carefully when han- dling a battery. Keep lighted cigarettes and all other flames or sparks away from the battery. Hydrogen, which is a highly combustible gas, is always present in battery cells and may explode if ignited. -
Page 230: Power Steering Fluid Level
If you desire additional information about maintaining and servicing your Hyundai, you may purchase a factory Shop Manual at your Hyundai dealer’s parts depart- ment. This is the same manual used by dealership technicians and while it is highly technical it can be useful in obtain- ing a better understanding of your car and how it works.
-
Page 231: Replacement Of Light Bulbs
Headlight Fog light OMC055021 CAUTION: o The headlight aiming should be checked by an authorized Hyundai dealer after replacing the headlight bulbs. o After heavy, driving rain or washing, headlight and taillight lenses could appear frosty. This condition is…
-
Page 232
OMC055022 5. Remove the socket cover. 6. Push the bulb spring to remove the headlight bulb. 7. Remove the protective cap from the replacement bulb and install the new bulb by matching the plastic base with the headlight hole. Reattach the bulb spring and install the socket cover. -
Page 233
DO-IT-YOURSELF MAINTENANCE Front Fog Light (If Installed) NOTE: It is recommended that the front fog light bulb be replaced by an authorized Hyundai dealer. G270D01MC-AAT Rear Combination Light 1. Open the trunk lid (4 Door) or tail gate (3 Door). -
Page 234
OMC055027 5. To replace the rear combination light, take it out from the bulb holder by turning it counterclockwise. (1) Tail Light (2) Turn Signal Light (3) Back-up Light (4) Stop/Tail Light 6. Install the new bulb. G270C01MC-GAT Luggage Compartment Light 4 Door OMC055028 3 Door… -
Page 235
DO-IT-YOURSELF MAINTENANCE G270E01A-GAT Side Repeater Light G270E01MC 1. Push the cover toward the front of vehicle and remove it. 2. Disconnect the power code. 3. Replace with a new bulb. G270G01MC-GAT Map Light (If Installed) OMC055029 1. Remove the cover with a flat-head screwdriver. -
Page 236
DO-IT-YOURSELF MAINTENANCE G270K01TG-AAT Glove Box Illuminated Light (If Installed) OMC055031 1. Open the glove box. 2. Remove the glove box illuminated light cover with a flat-head screwdriver. 3. Replace with a new bulb. -
Page 237: Bulb Wattage
DO-IT-YOURSELF MAINTENANCE BULB WATTAGE G280A02MC-AAT Part Name Headlight (High/Low) Front Turn Signal Light/ Side Marker Light Map Light (If Installed) Interior Light Front Fog Light (If Installed) Side Repeater Light (If Installed) 4 Door 3 Door Wattage Socket Type Stop/Tail Light 55/60 P43t-38 High Mounted Rear Stop Light…
-
Page 238: Fuse Panel Description
FUSE PANEL DESCRIPTION G200C01MC-AAT Engine Compartment G200C01MC NOTE: Not all fuse panel descriptions in this manual may be applicable to your vehicle. It is accurate at the time of printing. When you inspect the fuse box on your vehicle, refer to the fuse box label. FUSE RATING FUSE 125A…
-
Page 239
DO-IT-YOURSELF MAINTENANCE G200E01MC-AAT Inner Panel G200E01MC FUSE RATING FUSE Driver Power Window Switch, Assist Power Window Switch,Rear Power Window P/WDW RH Switch RH P/WDW LH Driver Power Window Switch, Rear Power Window Switch LH AUDIO Power Outside Mirror Switch, Digital Clock, Audio C/LIGHTER Cigarette Lighter, Power Outlet H/LP (LH) -
Page 240
FUSE RATING FUSE Front Fog Lamp Switch, Front Fog Lamp LH, Front Fog Lamp RH, Front Fog FR FOG LP Lamp Relay S/ROOF Sunroof Motor T/SIG LP Hazard Switch Overdrive Switch, Vehicle Speed Sensor Data Link Connector, Stop Lamp Switch, P/WDW Relay,Multipurpose Check STOP LP Connector A/BAG IND… -
Page 241: Emission Control Systems
EMISSION CONTROL SYSTEMS Emission Control System … 7-2 Catalytic Converter … 7-3…
-
Page 242: Emission Control System
EMISSION CONTROL SYSTEMS EMISSION CONTROL SYSTEM H010A01A-AAT Your Hyundai is equipped with an emis- sion control system to meet all require- ments of the U.S. Environmental Protec- tion Agency or California Air Resources Board. There are three emission control systems which are as follows.
-
Page 243: Catalytic Converter
If your engine stalls, pings, knocks, or is hard to start, have your Hyundai dealer inspect and repair the prob- lem as soon as possible. o Avoid driving with a very low fuel level.
-
Page 244
Tire Traction… 8-12 When to Replace Tires … 8-12 Tire Maintenance … 8-13 Spare Tire and Tools … 8-14 Warranties for Your Hyundai Vehicle … 8-15 Consumer Information … 8-15 Reporting Safety Defects … 8-18 Binding Arbitration of Warranty Claims … 8-18… -
Page 245: Vehicle Identification Number (Vin)
CONSUMER INFORMATION, REPORTING SAFETY DEFECTS & BINDING ARBITRATION OF WARRANTY CLAIMS VEHICLE IDENTIFICATION NUMBER (VIN) I010A01MC-AAT 1JBA5003 1JBA5005 1JBN5007A 1JBA5004 The vehicle identification number (VIN) is the number used in registering your car and in all legal matters pertaining to its ownership, etc.
-
Page 246: Engine Number
ENGINE NUMBER I010B01A-AAT OMC065001 The engine number is stamped on the engine block as shown in the drawing. CONSUMER INFORMATION, REPORTING SAFETY DEFECTS & BINDING ARBITRATION OF WARRANTY CLAIMS TIRES I020A02A-AAT TIRE INFORMATION The tires supplied on your new Hyndai are chosen to provide the best perfor- mance for normal driving.
-
Page 247
CONSUMER INFORMATION, REPORTING SAFETY DEFECTS & BINDING ARBITRATION OF WARRANTY CLAIMS Type A C190F01MC-1 Type B C190F01MC-2 Type C C190F01MC-3 Type D C190F01MC-4 These pressures were chosen to pro- vide the most satisfactory combina- tion of ride comfort, tire wear and stability under normal conditions. -
Page 248
Replace tires that are worn, show uneven wear, or are damaged. See page 8-12. o Remember to check the pressure of your spare tire. Hyundai rec- ommends that you check the spare every time you check the pressure of the other tires on your vehicle. -
Page 249: Checking Tire Inflation Pressure
CONSUMER INFORMATION, REPORTING SAFETY DEFECTS & BINDING ARBITRATION OF WARRANTY CLAIMS I035A01JM-AAT CHECKING TIRE INFLATION PRES- SURE Check your tires once a month or more. Also, check the tire pressure of the spare tire. How to Check Use a good quality gauge to check tire pressure.
-
Page 250
1. Manufacturer or Brand name o Manufacturer or Brand name is shown. 2. Tire size (example: P175/70R14) o The «P» indicates the tire is de- signed for passenger vehicles. A «T» is the designation for a tempo- rary spare tire. o Three-digit number (175): This number gives the width in millime- ters of the tire from sidewall edge… -
Page 251: Tire Terminology And Definitions
CONSUMER INFORMATION, REPORTING SAFETY DEFECTS & BINDING ARBITRATION OF WARRANTY CLAIMS 6. Maximum load rating This number indicates the maxi- mum load in kilograms and pounds that can be carried by the tire. When replacing the tires on the vehicle, always use a tire that has the same load rating as the factory installed tire.
-
Page 252: Index
Intended Outboard Sidewall: The side of an asymmetrical tire, that must always face outward when mounted on a vehicle. Kilopascal (kPa): The metric unit for air pressure. Load Index: An assigned number rang- ing from 1 to 279 that corresponds to the load carrying capacity of a tire.
-
Page 253: All Season Tires
I040B01JM-AAT ALL SEASON TIRES Hyundai specifies all season tires on some models to provide good perfor- mance for use all year round, including snowy and icy road conditions. All sea- son tires are identified by ALL SEA- SON and/or M+S (Mud and Snow) on the tire sidewall.
-
Page 254: Tire Chains
(12,000 km). If you notice that tires are wearing unevenly between rotations, have the car checked by a Hyundai dealer so the cause may be corrected. After rotating, adjust the tire pressures and be sure to check the wheel nut…
-
Page 255: Tire Balancing
I070A01A-AAT TIRE BALANCING A tire that is out of balance may affect handling and tire wear. The tires on your Hyundai were balanced before the car was delivered but may need balancing again during the years you own the car.
-
Page 256: Tire Maintenance
CONSUMER INFORMATION, REPORTING SAFETY DEFECTS & BINDING ARBITRATION OF WARRANTY CLAIMS WARNING: o Wheels that do not meet Hyundai’s specifications may fit poorly and result in damage to the vehicle or unusual handling and poor ve- hicle control.
-
Page 257: Spare Tire And Tools
Wheel nut wrench, Wrench bar Jack, Towing hook (If Installed) I110A01A-AAT SHOP MANUAL A Hyundai Shop Manual is available from your authorized Hyundai dealer. It’s writ- ten for professional technicians, but is simple enough for most mechanically- inclined owners to understand.
-
Page 258: Warranties For Your Hyundai Vehicle
Safety Administration of the U.S. Depart- ment of Transportation. It provides the purchasers and/or prospective purchas- ers of Hyundai automobiles with informa- tion on uniform tire quality grading. Your Hyundai dealer will help answer any questions you may have as you read this information.
-
Page 259
CONSUMER INFORMATION, REPORTING SAFETY DEFECTS & BINDING ARBITRATION OF WARRANTY CLAIMS Traction AA, A, B, C — The traction grades, from highest to lowest, are AA, A, B, and C. Those grades repre- sent the tire’s ability to stop on wet pavement as measured under con- trolled conditions on specified govern- ment test surfaces of asphalt and… -
Page 260
I130D04A-AAT Hyundai motor vehicles are designed and manufactured to meet or exceed all applicable safety standards. For your safety, however, we strongly urge you to read and follow all directions in this Owner’s Manual, particularly the information under the headings «NOTE», «CAUTION»… -
Page 261: Reporting Safety Defects
You will not be responsible for paying filing and hearing fees above $275.00. All other arbitration costs shall be borne by Hyundai Motor America. You are not responsible to pay any of the costs Hyundai incurs. This Binding Arbitration Agreement shall not deprive you of any remedies available to you under applicable law.
-
Page 262: Vehicle Specifications
VEHICLE SPECIFICATIONS Measurement … 9-2 Engine … 9-3 Lubrication Chart … 9-4…
-
Page 263
VEHICLE SPECIFICATIONS J010A02MC-AAT MEASUREMENT Item 4 DOOR Overall length 168.5 (4280) Overall width 66.7 (1695) Overall height 57.8 (1470) / 58 (1475)* Wheel base 98.4 (2500) Wheel tread Front 57.8 (1470) / 58.4 (1485)* Rear 57.4 (1460) / 58 (1475)* * with P175/70R14 Tire J020A01MC-AAT POWER STEERING… -
Page 264
VEHICLE SPECIFICATIONS ENGINE J070A02MC-AAT SPECIFICATIONS ITEMS 1.6 MPI Engine Type 4-Cylinder in-line DOHC Bore x Stroke 3.01 x 3.42 in. (76.5 x 87 mm) Displacement (cc) 1,599 Idle Speed (RPM) 700 ± 100 Ignition timing (Base) BTDC 5° ± 5° Firing order 1 — 3 — 4 — 2… -
Page 265: Lubrication Chart
ILSAC GF-3 or ABOVE HYUNDAI GENUINE PARTS MTF 75W/85 (API GL-4) Transaxle Manual HYUNDAI GENUINE ATF SP III, DIAMOND ATF SP III, SK ATF SP III or other Auto brands meeting the SP III specification approved by Hyundai Motor Co.. Power steering…
-
Page 266: Index
INDEX…
-
Page 267
Lane change signal … 1-76 Parking light auto off … 1-77 Turn signal operation … 1-76 Consumer Information … 8-15 Cooling Fans … 6-20 Corrosion Protection Cleaning the interior … 4-6 Protecting your Hyundai from corrosion … 4-2 Washing and waxing … 4-4… -
Page 268
Defrosting/Defogging … 1-112, 1-115 Door Central door locks … 1-7 Door locks … 1-4 Door ajar warning light and chime … 1-66 Locking and unlocking front door with a key … 1-5 Drink Holder … 1-85 Driving Economical driving … 2-15 Smooth cornering … -
Page 269
INDEX Heating and Cooling Control … 1-105 Air flow control … 1-107 Air intake control switch … 1-106 Defrosting/Defogging … 1-112 Fan speed control (Blower control) … 1-106 Temperature control … 1-110 High-Mounted Rear Stop Light … 1-95 Hood Release … 1-96 Horn … -
Page 270
Rear Seat Folding rear seatbacks … 1-18 Warning … 1-22 Rear Window Defroster Switch … 1-82 Reporting Safety Defects … 8-18 Seat Front … 1-14 Rear … 1-17 Seat Belts … 1-22 3-Point system … 1-26 Adjusting your seat belt … 1-28 Care of seat belts … -
Page 271
Vehicle Identification Number (VIN) … 8-2 Vehicle Load Limit … 2-20 Vehicle Specifications … 9-1 Warning and Indicator Lights … 1-64 Warranties for Your Hyundai Vehicle … 8-15 Windows … 1-11 Window lock … 1-12 Windshield Wiper and Washer Switch … 1-78 Adjustable Intermittent wiper operation … -
Page 272
A000A01A-AAT This Owner’s Manual should be considered a part of the car and remain with it when it is sold for the use of the next owner. ORIGINAL OWNER ADDRESS CITY DELIVERY DATE DEALER NAME ADDRESS CITY OWNER’S I.D. STATE ZIP CODE (Date Sold to Original Retail purchaser) DEALER NO. -
Page 273
Apply the parking brake, with the engine running, shift the selector lever through all ranges and return to “N” (Neutral) position. Then check the level of fluid on the dipstick. Use only HYUNDAI GENUINE ATF SP III, DIAMOND ATF SP III, SK ATF SP III or other brands meeting the SP III specification approved by Hyundai Motor Co..

Рабочее место водителя
1. Рычаг замка капота 2. Выключатель передних и задних противотуманных фар 3. Регулятор положения светового пучка фар 4. Комбинация приборов 5. Комбинированный…

Комбинация приборов, тип А
Комбинация приборов, тип А. Световые и цифровые индикаторы. Аналоговые указатели 1. Тахометр 2. Световой индикатор указателя поворотов 3. Световой индикатор незакрытых…

Комбинация приборов, тип В
Комбинация приборов, тип В. Световые и цифровые индикаторы. Аналоговые указатели 1. Тахометр 2. Световой индикатор указателя поворотов 3. Световой индикатор давления…

Контрольные и сигнальные индикаторы
Световой индикатор указателя поворотов. Мигающие зеленые стрелки на приборной панели показывают направление, которое указывают показатели поворотов. Если стрелки…

Бортовой компьютер (опция)
Бортовой компьютер — прибор, который отображает на дисплее ряд параметров (температуру наружного воздуха, пробег, время поездки, расход топлива, среднюю скорость…


Спидометр
Стрелка прибора указывает скорость движения автомобиля в километрах в час (км/час).

Тахометр
Стрелка прибора указывает частоту вращения коленчатого вала двигателя в оборотах в минуту (об/мин). Старайтесь не допускать работы двигателя на высоких оборотах (стрелка…

Одометр
Одометр показывает суммарную величину пробега автомобиля, а также используется для соблюдения периодического сервисного обслуживания.

Путевой одометр
После нажатия кнопки TRIP при включенном зажигании начинают отображаться два путевых одометра. Переход между режимами TRIP А и TRIP В осуществляется нажатием кнопки…

Ключи от автомобиля
К автомобилю прилагаются три ключа. Два «мастер-ключа» и один «сервис-ключ». При помощи «мастер-ключа» можно открыть все замки автомобиля. «Сервис- ключ» позволяет…

Иммобилайзер (опция)
Иммобилайзер — противоугонное приспособление. При помощи «мастер-ключа» можно открыть все замки автомобиля. На одну из сторон ключа нанесен символ М. «Сервис-ключ»…

Положения ключа в замке зажигания
Положение START: в этом положении происходит запуск двигателя. Положение ON: в этом положении включается зажигание. Подается питание на все приборы. Во избежание…
Пуск двигателя. Подсветка замка зажигания
Пуск двигателя Если автомобиль оборудован механической коробкой передач (далее МКПП), установите рычаг переключения передач в нейтральное положение и нажмите до конца на…

Переключатель указателей поворотов
При перемещении рычага переключателя из среднего положения вниз включаются указатели левого поворота, а при переключении рычага вверх — указатели правого поворота. После…

Переключатель света фар
Для переключения режима работы фар поверните наконечник рукоятки переключателя. В первой позиции включаются подфарники, задние габаритные фонари и подсветка панели…
Дневные габаритные огни (опция)
Ваш автомобиль Hyundai оборудован системой дневных габаритных огней. Габаритные огни в таком случае включены все время, пока работает двигатель. Это происходит и в том…

Переключатель дальнего света фар
Для включения дальнего света фар переместите рычаг переключателя от себя. При этом должен загореться контрольный индикатор дальнего света.

Подача сигналов дальним светом фар
Для кратковременного включения дальнего света потяните рычаг переключателя на себя (в нефиксируемое положение) из положения ближнего света. Подача сигналов дальним…


Регулировка работы щеток
Включение щеток на один ход Для включения щеток на один ход потяните рычаг переключателя вверх. Регулировка работы щеток в прерывистом режиме Для включения прерывистого…

Переключатель противотуманных фар
Выключатель передних противотуманных фар (опция) Передние противотуманные фонари включаются нажатием верхней клавиши. Они будут функционировать при установленном во…

Механическая коробка передач
МКП имеет классическую схему переключения передач. Схема изображена на ручке переключения передач. Коробка передач полностью синхронизирована. Перед включением задней…

Автоматическая коробка передач
АКПП имеет четыре передние и одну заднюю скорости. При переключении передач в зависимости от выбираемого диапазона нужно либо нажать педаль тормоза одновременно с…

Стояночный тормоз
Перед выходом из автомобиля всегда включайте стояночный тормоз. При включенном зажигании о включенном состоянии стояночного тормоза предупреждает соответствующий…

Освещение салона
Лампы направленного освещения (опция) Для включения направленного индивидуального освещения нажмите на выключатель. Плафон освещения салона В положении «DOOR» свет…

Система отопления и вентиляции
1. Боковые верхние дефлекторы обдува 2. Боковые дефлекторы обдува 3. Дефлекторы обдува ветрового стекла 4. Центральные дефлекторы обдува

Переключатель режима притока воздуха
При помощи этого переключателя (две клавиши) осуществляется переход между режимом подачи свежего воздуха снаружи автомобиля и рециркуляции воздуха в салоне.

Регулятор воздушного потока
Регулятор позволяет изменять направление потока воздуха. Режимы распределения потоков воздуха Режим «Максимальный уровень кондиционера» (опция) (МАХ А/С) Воздух подается…

Управление системой отопления
В обычном режиме работы системы устанавливают регулятор режима притока воздуха в положение подачи свежего воздуха, а регулятор воздушного потока — в положение «пол». Для…

Двухуровневая подача воздуха
Это режим дает возможность подавать прохладный воздух из дефлекторов приборной панели и теплый воздух на уровне пола одновременно. Установите регулятор режима притока…

Вентиляция салона
Для включения вентиляции установите регулятор режима притока воздуха в положение «свежий воздух». Для подачи воздуха только через дефлекторы приборной панели установите…

Кондиционер (опция)
Выключатель кондиционера Кондиционер включается нажатием переключателя «А/С» на панели управления системой. Охлаждение воздуха Включите вентилятор. Включите кондиционер,…


Переключатель управления подачей воздуха
Для выбора между подачей воздуха снаружи автомобиля или циркуляцией воздуха в салоне нажмите соответствующую кнопку. При включении режима должен загореться световой…

Фильтр системы вентиляции салона(опция)
Фильтр находится во впускном патрубке вентилятора за вещевым ящиком. Он предназначен для очистки воздуха, который подается в салон. 1. Воздух в салон 2. Фильтр 3….

Вещевой ящик
Вещевой ящик расположен в передней панели салона перед передним пассажиром.

Наружные зеркала заднего вида
Положение наружных зеркал заднего вида регулируется изнутри салона. Регулирование может осуществляться как механическим приводом вручную, так и электромеханическим…


Внутреннее зеркало заднего вида
Внутреннее зеркало заднего вида имеет механизм, изменяющий его положение для предотвращения ослепления водителя светом фар автомобилей, едущих сзади. Это положение…

Открывание капота
1. Для открывания капота нужно потянуть за рукоятку его замка, расположенную слева от рулевой колонки 2. Предохранительный рычаг находится слева от замка капота (если…


Крышка багажника и задние двери
Для открывания крышки багажника 4-дверной модели нужно повернуть ключ по часовой стрелке и открыть крышку вручную. Для открывания задней двери 3-дверной модели нужно при…

Дистанционное открывание крышки багажника
Рычаг дистанционного открывания крышки багажника расположен рядом с рычагом открывания лючка горловины топливного бака и помечен пиктограммой в виде автомобиля с…

Звуковой сигнал
Клавишей включения звукового сигнала является центральный элемент рулевого колеса.

Системы безопасности
Ремни безопасности с креплением в 3-х точках и блокирующим натяжным устройством Ремни безопасности с креплением в 2-х точках для среднего заднего сиденья (опция) Ремни…

Регулирование фар
Перед началом регулирования фар нужно выполнить следующие действия. 1. Отрегулировать давление во всех шинах. 2. Установить автомобиль на ровной площадке на расстоянии…


Замена ламп. Задние комбинированные фонари
1. Откройте крышку багажника. 2. Снимите крышку лючка для обслуживания задних фонарей. 3. Открутите гайки. 4. Снимите задний фонарь. 5. Поверните нужную лампу против…


Типы и мощность ламп
Применение Тип лампы Мощность, Вт Тип лампы по IEC Изображение 1. Дальний — ближний свет фар Н4 60/55 P43t-38 2. Передние указатели поворотов R21W 21 BAU15S Передние…

Блок предохранителей в моторном отсеке
Описание предохранителей, описанных в руководстве, может не соответствовать панели предохранителей вашего автомобиля. Все приведенные данные верны на момент публикации….

Блок предохранителей в салоне
Предохранитель Номинал Защищаемый компонент электрооборудования 1 RR WIPER 15A Комбинированный переключатель фар, привод заднего стеклоочистителя 2 Н/LP(LH) 10A Левая…
Технические характеристики
Габаритные размеры, мм Четырехдверный Трехдверный Длина 4280 мм 4045 мм Ширина 1695 мм 1695 мм Высота 1470 мм 1470 мм База 2500 мм 2500 мм Колея передних колес 1470 мм…
Технические характеристики. Двигатели
Бензиновые двигатели Дизельный двигатель 1,4L 1,6L 1,5L Тип двигателя 4-цилиндровый, рядный, DOHC Диаметр и ход поршня 75,5×78,1мм 76,5×87 мм 75×84,5 мм Рабочий объем…
Ссылка в разных форматах на этот раздел
TextHTMLBB Code
Руководство на английском языке по ремонту электрооборудования Hyundai Accent 2005 года выпуска.
- Автор: —
- Издательство: Hyundai Motor Company
- Год издания: 2004
- Страниц: —
- Формат: PDF
- Размер: 49,8 Mb

Мультимедийное руководство по эксплуатации и ремонту автомобиля Hyundai Accent.
- Автор: —
- Издательство: —
- Год издания: —
- Страниц: —
- Формат: —
- Размер: 87,8 Mb

Руководство по техническому обслуживанию и ремонту + каталог расходных запчастей Hyundai Accent 1999-2006 и Tagaz Accent 2002-2012 годов выпуска с бензиновым двигателем объемом 1,5 л.
- Автор: —
- Издательство: Легион-Автодата
- Год издания: 2014
- Страниц: 450
- Формат: —
- Размер: —
Руководство по эксплуатации, техническому обслуживанию и ремонту автомобилей Hyundai Accent и Hyundai Verna 2006-2011 годов выпуска с бензиновыми двигателями объемом 1,4/1,6 л.
- Автор: —
- Издательство: Легион-Автодата
- Год издания: —
- Страниц: 334
- Формат: —
- Размер: —

Руководство по техническому обслуживанию и ремонту автомобиля Hyundai Accent с 1995 года выпуска с бензиновыми двигателями объемом 1,3/1,5 л.
- Автор: —
- Издательство: Атласы автомобилей
- Год издания: 2004
- Страниц: 224
- Формат: TIF
- Размер: 35,4 Mb
Руководство по эксплуатации и ремонту автомобилей Hyundai Accent и Hyundai Verna с 2006 года выпуска с бензиновыми двигателями объемом 1,4/1,6 л.
- Автор: —
- Издательство: Монолит
- Год издания: —
- Страниц: 220
- Формат: —
- Размер: —

Руководство по эксплуатации и ремонту автомобилей Hyundai Accent и Hyundai Verna с 2006 года выпуска с дизельным двигателем объемом 1,5 л.
- Автор: —
- Издательство: Монолит
- Год издания: —
- Страниц: 262
- Формат: —
- Размер: —

Руководство по эксплуатации и ремонту автомобилей Hyundai Accent, Hyundai Solaris и Hyundai Verna с 2010 года выпуска с бензиновыми и дизельными двигателями.
- Автор: —
- Издательство: Монолит
- Год издания: —
- Страниц: 386
- Формат: —
- Размер: —
Руководство по эксплуатации и ремонту автомобилей Hyundai Accent и Hyundai Solaris с 2015 года выпуска с бензиновыми двигателями объемом 1,4/1,6 л.
- Автор: —
- Издательство: Монолит
- Год издания: —
- Страниц: 402
- Формат: —
- Размер: —

Руководство по эксплуатации и ремонту автомобилей Hyundai Accent и Hyundai Solaris с 2015 года выпуска с бензиновыми двигателями объемом 1,4/1,6 л.
- Автор: —
- Издательство: Монолит
- Год издания: —
- Страниц: 402
- Формат: —
- Размер: —

Руководство на испанском языке по техническому обслуживанию и ремонту автомобиля Hyundai Accent с 1995 года выпуска.
- Автор: —
- Издательство: —
- Год издания: —
- Страниц: 1181
- Формат: PDF
- Размер: 25,9 Mb
Руководство по эксплуатации автомобилей Hyundai Accent и Hyundai Verna.
- Автор: —
- Издательство: Hyundai Motor Company
- Год издания: 2006
- Страниц: 282
- Формат: PDF
- Размер: 11,0 Mb
Руководство по эксплуатации автомобиля Hyundai Accent.
- Автор: —
- Издательство: Hyundai Motor Company
- Год издания: —
- Страниц: 134
- Формат: PDF
- Размер: 2,4 Mb

Руководство по эксплуатации и техническому обслуживанию автомобиля Hyundai Accent.
- Автор: —
- Издательство: —
- Год издания: —
- Страниц: 299
- Формат: PDF
- Размер: 96,8 Mb
Руководство по эксплуатации, техническому обслуживанию и ремонту автомобиля Hyundai Accent с 1999 года выпуска.
- Автор: —
- Издательство: —
- Год издания: —
- Страниц: 230
- Формат: PDF
- Размер: 14,0 Mb

Руководство по эксплуатации, техническому обслуживанию и ремонту автомобиля Hyundai Accent с двигателем 1,5i.
- Автор: —
- Издательство: За рулем
- Год издания: 2005
- Страниц: 232
- Формат: PDF
- Размер: 41,7 Mb

Руководство по эксплуатации, техническому обслуживанию и ремонту автомобиля Hyundai Accent с двигателем 1,5i.
- Автор: —
- Издательство: За рулем
- Год издания: 2012
- Страниц: 232
- Формат: —
- Размер: —

Руководство по ремонту электрооборудования автомобиля Hyundai Accent.
- Автор: —
- Издательство: За рулем
- Год издания: 2010
- Страниц: 49
- Формат: PDF
- Размер: 3,4 Mb
