 10:42
10:42
Каша из топора. Ремонт Hyundai H-CDM8048
 06:33
06:33
Автомагнитола Hyundai H-CCR8187M
 07:27
07:27
Обзор автомагнитолы HYUNDAI H-CCR4702M
 07:29
07:29
HYUNDAI h-cmdn6100 Ремонт автомагнитол HYUNDAI
 08:56
08:56
Ремонт Автомагнитол HYUNDAI H-CMD4001 2ver G
 03:43
03:43
Ремонт магнитолы Hyundai h-cmd4012. Ремонт магнитолы своими руками.
 03:41
03:41
Автомагнитола GBT 4004
EXCELLENCE
by
H-CMD4006
MULTIMEDIA DVD/CD/MP3 RECEIVER WITH BUILT-IN
4” DIGITAL TFT DISPLAY
Instruction manual
МУЛЬТИМЕДИЙНЫЙ DVD/CD/MP3-РЕСИВЕР СО ВСТРОЕННЫМ
4” ЦИФРОВЫМ TFT ДИСПЛЕЕМ
Руководство по эксплуатации

Thank you for purchasing our product. For safety, it is st…
Страница 2
- Изображение
- Текст
2
Dear customer!
Thank you for purchasing our product. For safety, it is strongly recommended to read this manual carefully
before connecting, operating and/or adjusting the product and keep the manual for reference in the future.
Table of contents
Table of contents………………………………………………………………………………………………………………………………….. 2
Important safeguards ……………………………………………………………………………………………………………………………. 3
Installation/ connection…………………………………………………………………………………………………………………………. 4
Panel controls………………………………………………………………………………………………………………………………………. 8
General operation……………………………………………………………………………………………………………………………….. 13
Digital tuner ………………………………………………………………………………………………………………………………………. 16
SD cards operations ……………………………………………………………………………………………………………………………. 19
Discs operations…………………………………………………………………………………………………………………………………. 20
MP3 overview……………………………………………………………………………………………………………………………………. 26
DVD setup ………………………………………………………………………………………………………………………………………… 28
Anti-theft system ……………………………………………………………………………………………………………………………….. 31
Handling discs …………………………………………………………………………………………………………………………………… 32
Cleaning……………………………………………………………………………………………………………………………………………. 32
Troubleshooting guide ………………………………………………………………………………………………………………………… 33
Specification ……………………………………………………………………………………………………………………………………… 34

3
Important safeguards
• Using the device at temperature below -10ºС may cause the breakage of the device. BEFORE USING
PLEASE HEAT UP THE PASSENGER COMPARTMENT TO THE RECOMMENDED TEMPERATURE!
• Read carefully through this manual to familiarize yourself with this high-quality sound system.
• Disconnect the vehicle’s negative battery terminal while mounting and connecting the unit.
• When replacing the fuse, be sure to use one with an identical amperage rating. Using a fuse with a higher
amperage rating may cause serious damage to the unit.
• DO NOT attempt to disassemble the unit. Laser beams from the optical pickup are dangerous to the eyes.
• Make sure that pins or other foreign objects do not get inside the unit; they may cause malfunctions, or create
safety hazards such as electrical shock or laser beam exposure.
• If you have parked the car for a long time in hot or cold weather, wait until the temperature in the car
becomes normal before operating the unit.
• DO NOT open covers and do not repair yourself. Consult the dealer or an experienced technician for help.
• Make sure you disconnect the power supply and aerial if you will not be using the system for a long period
or during a thunderstorm.
• Make sure you disconnect the power supply if the system appears to be working incorrectly, is making an
unusual sound, has a strange smell, has smoke emitting from it or liquids have got inside it. Have a qualified
technician check the system.
• The unit is designed for negative terminal of the battery, which is connected to the vehicle metal. Please
confirm it before installation.
• Do not allow the speaker wires to be shorted together when the unit is switched on. Otherwise it may
overload or burn out the power amplifier.
• Do not install the detachable panel before connecting the wire.
• Don’t remove the detachable panel when encoding.

4
Installation/ connection
First complete the electrical connections, and then check them for correctness.
Installation opening
This unit can be installed in any dashboard having an opening as shown on the
picture. The dashboard should be 4.75 – 5.56 mm thick in order to be able to support
the unit.
1. Insert mounting collar into the dashboard, and bend the mounting tabs out with a screwdriver.
Make sure that lock lever is flush with the mounting collar (not projecting outward).
2. Secure the rear of the unit.
After fixing mounting bolt and power connector, fix the rear of the unit to the car body by rubber cushion.
3. Insert trim plate.
When you prepare to insert trim plate, please check it’s direction. Once it was up side down, it cannot be fixed.
IMPORTANT: Remove
these two screws before
installation. Otherwise,
the DVD Player will not
work

Detachable control panel Detaching the control panel …
Страница 5
- Изображение
- Текст
5
Detachable control panel
Detaching the control panel
• Turn the Power off.
• Press OPEN button release the panel.
• Pull the panel out.
Attaching the control panel
• Insert the left side of the control panel into the main unit.
• Press the control panel right side until the “click” sound is heard.
Caution:
DO NOT insert the control panel from the right side. It can damage the control panel.
The control panel can easily be damaged by shocks. After removing it, place it in a protective case and be careful
not to drop it or subject it to strong shocks.
The rear connector that connects the main unit and the control panel is an extremely important part. Be careful not
to damage it by pressing on it with fingernails, pens, screwdrivers, etc.
Note:
If the control panel is dirty, wipe off the dirt with soft, dry cloth only. And use a cotton
swab soaked in isopropyl alcohol to clean the socket on the back of the control panel.


Caution: Do not interchange the connection of the wiring…
Страница 7
- Изображение
- Текст
7
Caution: Do not interchange the connection of the wiring!!!
For some car models you may need to modify wiring of the supplied power cord. Contact your authorized car
dealer before installing this unit.
Using the ISO Connector
1. If your car is equipped with the ISO connector, then connect the ISO connectors as
illustrated.
2. For connections without the ISO connectors, check the wiring in the vehicle
carefully before connecting, incorrect connection may cause serious damage to this
unit.
3. Cut the connector, connect the colored leads of the power cord to the car battery as
shown in the color code table below for speaker and power cable connections.
Location
Function
Connector A
Connector B
1
Rear
Right(+)—Purple
2
Rear Right(-)—Purple/Black Stripe
3
Front
Right(+)—Grey
4
Battery 12V (+)/yellow
Front Right(-)—Grey/Black Stripe
5
Auto Antenna/blue
Front Left(+)—White
6
Front Left((-)—White/Black Stripe
7 ACC+/red
Rear
Left(+)—Green
8
Ground/black
Rear Left(-)—Green/Black Stripe

8
Panel controls
Front panel
1. EJECT button (
): press it to flip down the front panel and eject the CD.
2. OK button: press it in the menu to confirm settings.
3. VOL+/- buttons: press to increase/decrease volume step by step.
TUN-/TUN+ buttons: use these buttons to enter the manual tuning mode/ seek tuning mode.
▲/▼/◄/► buttons: in the menu press these buttons to navigate.
4. TFT
display
5. MODE button: Press it to select the RADIO, DISC (if there is a disc in unit), SD (if there is a SD card in
unit), AUX IN mode.
6. IR
sensor

MUTE button: press POWER button to turn the power on, press …
Страница 9
- Изображение
- Текст
9
7. POWER/MUTE button: press POWER button to turn the power on, press and hold for 2 seconds to turn the
power off.
When the power is on press it to cut down the volume output, press it again to resume volume.
8. OPEN button: press it when power is off to release the front panel.
9. AF/REG button: press it to select AF (alternative frequency) function ON or OFF.
Press and hold for 2 seconds to turn the Regional mode ON or OFF.
10. TA/EON button: press it to select TA (traffic announcement) function ON or OFF.
Press and hold for 2 seconds to turn TA EON function ON or OFF.
11. MENU button: press it to open the settings menu.
12. BAND button: press it repeatedly to select your desired radio band during RADIO mode.
13. PRESET STATION [1-6] buttons
/ buttons: use these buttons to search for the beginning of the previous/ next track/ chapter.
PLAY/PAUSE button
STOP button
/ buttons: use these buttons for backward/ forward track scanning.

press it to enter the Dual zone mode for playing DVD and R…
Страница 10
- Изображение
- Текст
10
Remote control
1. DUAL button — press it to enter the Dual zone mode for
playing DVD and Radio at the same time.
2. STANDBY button – press it to turn the power on/off.
3. OSD button — Press the OSD button to show the current
mode information on the display.
4. EJECT button — press it to eject the disc.
5. SETUP button – in DVD mode press it to open the setup
menu.
6. Cursor
▲/▼/◄/► buttons
Use the ▲/▼/◄/► buttons to select the menu item.
Use the ▲/▼ buttons to select the title, track.
Use the ◄/► buttons to show next frame; to start
manual/automatic radio station search.
7. / buttons — press them to go to previous/next
track/chapter/title.
8. ANGLE button — press it repeatedly to change the
viewing angle.
9. +/- buttons – when the monitor is opened press these buttons to adjust volume level.
10. SEL button — press it repeatedly to select the audio modes: BASS => TREBLE => BALANCE L-R =>
FADER R-F => BRIGHT => CONTRAST => COLOR => SHARP.
11. AUDIO button – in DVD mode press it to select the audio language.
In VCD mode press it to select the channel: Mono left => Mono right => Mix mono => Stereo.
12. AF button – in Radio mode press it to activate the AF function.

Комментарии
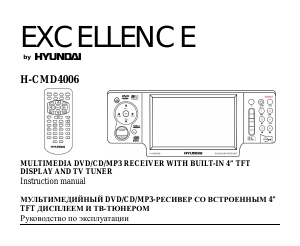
EXCELLENCE by H-CMD4006 MULTIMEDIA DVD/CD/MP3 RECEIVER WITH BUILT-IN 4” DIGITAL TFT DISPLAY Instruction manual DVD/CD/MP34” TFT
Dear customer! Thank you for purchasing our product. For safety, it is strongly recommended to read this manual carefully before connecting, operating and/or adjusting the product and keep the manual for reference in the future. Table of contents Table of
Important safeguards • • • • • • • • • • • • • • Using the device at temperature below -10º may cause the breakage of the device. BEFORE USING PLEASE HEAT UP THE PASSENGER COMPARTMENT TO THE RECOMMENDED TEMPERATURE! Read carefully through this manual to familiarize yourself with this high-quality
Installation/ connection First complete the electrical connections, and then check them for correctness. Installation opening This unit can be installed in any dashboard having an opening as shown on the picture. The dashboard should be 4.75 – 5.56 mm thick in order to be able to support the unit.
Detachable control panel Detaching the control panel • Turn the Power off. • Press OPEN button release the panel. • Pull the panel out. Attaching the control panel • Insert the left side of the control panel into the main unit. • Press the control panel right side until the “click” sound is heard.
Electrical connection 6
Caution: Do not interchange the connection of the wiring!!! For some car models you may need to modify wiring of the supplied power cord. Contact your authorized car dealer before installing this unit. Using the ISO Connector 1. If your car is equipped with the ISO connector, then connect the ISO
Panel controls Front panel 1. 2. 3. 4. 5. 6. EJECT button ( ): press it to flip down the front panel and eject the CD. OK button: press it in the menu to confirm settings. VOL+/- buttons: press to increase/decrease volume step by step. TUN-/TUN+ buttons: use these buttons to enter the manual tuning
7. 8. 9. 10. 11. 12. 13. POWER/MUTE button: press POWER button to turn the power on, press and hold for 2 seconds to turn the power off. When the power is on press it to cut down the volume output, press it again to resume volume. OPEN button: press it when power is off to release the front panel.
Remote control 1. DUAL button — press it to enter the Dual zone mode for playing DVD and Radio at the same time. 2. STANDBY button – press it to turn the power on/off. 3. OSD button — Press the OSD button to show the current mode information on the display. 4. EJECT button — press it to eject the
13. PROG/PTY button – press this button to enter the title/chapter search function. In Radio mode press it to activate the PTY function. 14. RDM/BAND button – in DVD mode press it to start random playing. In Radio mode press it to select the desired band. 15. Digit area 16. TILT button — press it
Changing the battery 1. 2. Press the catch and at the same time pull out the battery tray. Insert the 1 x lithium battery, type CR 2025 3V battery with the stamped (+) mark facing upward. Insert the battery tray into the remote control. Warning: Store the battery where children cannot reach. If a
General operation Reset the unit Operating the unit for the first time or after replacing the car battery, you must reset the unit. button and then press RESET button under the panel to restore the unit to the original factory Press the settings. Power button Press any button to turn on the unit.
Setting the sound characteristics AUDIO Press shortly and repeatedly the SEL button to select the audio setting: BASS => 1. BASS TREBLE => BALANCE => FADER => DSP. 2. TREBLE Press ▲/▼ buttons on the panel or on the RC to select the setting. 3. BALANCE Press ◄/► buttons to adjust the setting. 4.
Mode setting Change playing mode in a sequence: RADIO, DISC (if there is a disc in unit), SD (if there is a SD card in unit), AUX IN mode. If you select RADIO mode, change radio band in sequence of: FM1, FM2, FM3, AM1, AM2. On-screen display (OSD) Press the OSD button to show the current mode
Digital tuner Note: RDS (Radio Data System) service availability varies with areas. Please understand if RDS service is not available in you area, the following service is not available, either. Band selection Press MODE button to select the RADIO mode. Press the BAND button to select the desired
Preset scan Press the RPT/P.SCN button on the RC to scan all preset stations in the memory of the current band and stay on each memory stations for about 5 seconds. To stop preset scan, press this button again. AF (Alternative Frequencies) function When the radio signal strength is poor, enable or
3. 4. When PTY is selected, the radio starts to search corresponding PTY information, and stops if the corresponding PTY information is detected. If there are no keys entered for 2 seconds, previously selected PTY is searched. During 1 loop, if desired PTY is not found, NO PTY is flashed, then
SD cards operations Inserting the SD card 1. 2. 3. 4. Turn the power on. Press the OPEN button on the panel to detach it. Insert the SD card into SD slot. Then the playing mode will be changed into SD Card mode automatically. The unit will read the files automatically. To enter the SD mode
Functions The Play/pause, Previous/next track/ FR/FF functions are same as for Discs (see the Discs operations chapter of this instruction manual). Discs operations Glossary PBC (PlayBack Control) PlayBack Control is a menu recorded on the disc with SVCD or VCD2.0 format. For the discs contained
Discs for playback • • • • • • • • • • • This unit can play: DVD/SVCD/VCD/HDCD/MP3/MP4/WMA/CDDA/Picture-CD/JPEG/CD-R/-RW/DVD±R/±RW. The following file types are supported: Audio files: MP3 (*.mp3) WMA (*.wma) Video files: MP4 (*.avi, DIVX3.11/4.0/5.0/6.0 and XVID) MPEG 2(*.vob) MPEG 1(*.dat)
4. 5 Press button on the panel to eject the disc. If the disc is not removed for about 10 seconds after reject, the disc is reinserted automatically. When disc in/out, put front panel at 0 degree to avoid distortion of disc. You may also choose the operating mode usind the MODE button.
Repeat playback Press the RPT button on the RC once or more to repeat the playback: • For VCD/CD: display appears RPT ONE => RPT ALL => RPT OFF • For DVD: display appears RPT CHAP => RPT TITL => RPT OFF • For File disc: display appears RPT ONE => RPT DIR => RPT ALL => RPT OFF RPT icon will appear
PBC (Playback Control) function (for VCD only) If you insert a VCD with PBC, playback starts from the beginning of the 1st track automatically. 1. Press PBC button to activate interactive menu on screen during playback. 2. If the menu consists a list of titles, you can select a desired one using
• For VCD disc: press AUDIO on the RC repeatedly to select the following modes: R STEREO (Channel left => Channel right => Stereo). L Changing the subtitle language (for DVD only) Press SUBTITLE button on the RC to select the preferred language for the disc menu. When the selected language is
MP3 overview Notes on MP3: • MP3 is short for MPEG Audio Layer 3 and refers to an audio compression technology standard. • This product allows playback of MP3 files on CD-ROM, CD-R or CD-RW discs. • The unit can read MP3 files written in the format compliant with ISO 9660. However it does not
Notes on creating your own CD-R or CD-RW containing MP3 files: • To enjoy high quality sound, we recommend converting to MP3 files with a sampling frequency of 44.1 kHz and a fixed bit rate o f 128 kbps. • DO NOT store more than 448 MP3 files per disc. • For ISO 9660 — compliant format, the maximum
DVD setup 1. 2. 3. 4. 5. 6. 7. Press SETUP button to enter into the system setting main menu. Press the ◄/► buttons to select one of the Setup Pages: LANGUAGE => VIDEO => AUDIO => RATING.. Press OK to enter the page. Press the ▲/▼ buttons to select the setting. Press the ► button to highlight the
OSD language Select the instruction words function on or off, when you operate the DVD. DivX language With this option you can select the preferred language for the DIVX format’s disc. Video setup TV shape Select aspect ratio: 16:9 => 4:3. TV system Select this menu item to set up your preferred
DRC setup This function is to adjust the linear compression rate to obtain the different compression results of the signals. Standard set to “OFF”. Down sampling setup Select this menu item to set up your preferred filter mode. Rating setup Setting password This item is originally set as locked
Anti-theft system Remove the panel 1. 2. 3. 4. Press the PWR button to turn the power off. Press OPEN button to detach the panel. Pull the panel out. Place the panel into the case and take it with you when you leave the car. Remove the unit 1. 2. 3. Remove the panel and the trim plate. Insert both
Handling discs • • • • • • • Dirty, scratched or warped discs may cause skip ping or noise. Handle the disc only by the edges. To keep clean do not touch its surface. Discs should be stored in their cases after use to avoid scratches. Do not expose discs to direct sunlight, high humidity, high
Troubleshooting guide Symptom Cause Solution General No power The car ignition is not on. The fuse is blown. If the power supply is properly connected to the car accessory switch the ignition key to “ACC”. Replace the fuse. Disc Disc cannot be loaded. Presence of disc inside the player. Remove the
Specification General Power supply: Current consumption: Maximum power output: Compatible formats: 12 V DC max. 10 A 50 W x 4 channels DVD/SVCD/VCD/HDCD/MP3/MP4/WMA/CDDA/Picture-CD/JPEG/CD -R/ -RW/DVD±R/±RW playback Dimensions (L x W x H) / weight: 202 x 188 x 71 mm / 2 kg Working temperature
Audio specification Maximum output: Frequency response: S/N ratio(A-vtd): 2 Vrms (+/- 3 dB) 30 Hz — 18 KHz 68 dB DSP sound effect: Classic, Rock, Pop, Flat Line out Line outs: Output: 4 channel RCA line-out (2V) 1 channel Subwoofer pre-out CD max 2000 mV Specifications are subject to change without
! . , / , . ……………………………………………………………………………………………………………………………………… 36
• -10º • • • . ! , , . . . , , • . . — • , , . , . , • , • , , . . • , • , . , , , • , , . . , • • • , . . , . . , . . . 37
/ , 4,75 – 5,56 . , . 1. . , ( ). 2. . . 3. . , , , . : . CD/MP3 . 38 .
• • • OPEN, . 1. , . . , . 2. 3. , , . . , . : . — . : , . . . , , . , : , 39 . .
40
!!! : , ( . ), . ISO 1. ISO, . , 2. ISO , . 3. , . A 1 2 3 4 5 6 7 8 B (+)—(-)—/ (+)—(-)—/ (+)—((-)—/ (+)—(-)—/ 12 (+)/ / ACC+/ / 41
: : VOL +/-: TUN +/-: 1. 2. 3. , , . . , . , / . ▲/▼/◄/►: 4. 5. , . TFT(SD MODE: ) => AUX-IN. , : RADIO ( 6. 42 ) => DISC ( ) => SD
7. POWER/ MUTE , . . , , . , . 8. 9. OPEN: AF/REG: , . , ( AF ). 2 REG ( 10. / ). TA/EON: ). , TA ( 2 EON ( 11. 12. 13. , , ). MENU: B ND: , . . [1-6] / : / / PLAY/PAUSE: . , . , . STOP: / : , , . / 43 .
1. DUAL — , ( ). STANDBY . . OSD . EJECT — 2. 3. 4. , , , , . 5. SETUP – DVD , . 6. ▲/▼/◄/► ▲/▼/◄/► . ▲/▼ / . ◄/►, 7. 8. 9. / — . ANGLE – +/- — ◄/► ; RADIO . , / , / . . 44 /
10. 11. 12. 13. 14. SEL , : BASS => TREBLE => BALANCE L-R => FADER R-F => BRIGHT => CONTRAST => COLOR => SHARP. AUDIO DVD , . VCD , : Mono left => Mono right => Mix mono => Stereo. AF RADIO , / AF ( ). PROG/PTY – , . RADIO PTY ( ). RDM/B ND , . RADIO . 15. 16. TITL — , 3 17. 18. 19. . 5. OPEN MODE
24. STOP 25. SUBTITLE – 26. A-B/ ZOOM – — . , . , . , 2 27. RPT/P.SCN RADIO . 28. T — , . , . , RADIO , / . : 1. , 2. (CR 2025 3V), 3. . . . : . , . ( –6 ). . . 46
, EJECT OPEN . RESET. , . SD , . , . 47
, RESET . . , , , . POWER/MUTE, 2 STANDBY , , . . . TILT, / , . : 0 => 1 => 2 => 3 => 4 => 5 =>6. VOL +, VOL -, . . . : , , POWER/MU . . 48 MUTE VOL+/-,
• : BASS ( BALANCE ( • • • • • / ) => DSP ( ▲/▼, ◄/►, SEL, MENU, ) => TRE LE ( ) => FADER ( ). . . . . : . — 3 , • • • ) => / AUDIO 1. BASS 2. TREBLE 3. BALANCE 4. FADER 5. DSP , . DVD 2 MENU, . OK, : AUDIO ( ) => DUAL ( ) => RDS SETUP ( RDS) => EXPERT => TILT ( ) ( . 1). DVD OK, : AUDIO ( ) =>
• • ◄/►, OK, . . MENU, . MODE, ) => SD (SD : RADIO ( , BAND, ) => DISC ( , ) => AUX-IN. : FM1, FM2, FM3, 2. OSD, . 50 1,
RDS ( : RDS ) . . , MODE, B ND, RADIO ( ) : FM1, FM2, FM3, AM1, AM2. , , . / • / : . 2 / , , . , • , 2 . . А / : , . , , . . , 2 . . • 30 (18 FM, 12 AM). : — ( ). / 2 . 1~6, 51
• . : ( — ). 1~6. 5 RPT/P.SCN . , . , . AF ( ) , , . . 1. AF, 2. AF AF. AF , . AF , RDS . . . TA ( ) 2 TA/EON, . PTY ( FM1. ) , RDS, . PTY, PTY. . 52
2. PTY , . : 6 . : 3. PTY . , 2 . , . , PTY, , NO PTY 4. PTY NO . PTY. , REG — AF/PTY REG, REG, 2 ON ( . OFF ( 53 , REG. ): ):
EON ( ) EON AF TA: EON, TA . , . AF: . EON , , , . , , . . 54 EON
SDSD1. 2. 3. . OPEN , . SD- . SD. . 4. MODE. SD 1. 2. 1. 2. : SD. FAT 16/ FAT 32 — FAT 16 ( 200 — FAT 32 ( 200 : 32 / (id3tag ver 2.0) / / 6. , 500 , 500 : 32 : ), ). . 32 . — . : SD: Sharp, Samsung, SD . : SD . . : Cannon, Fuji film, Palm, Motorola, Microsoft, IBM, HP, Compaq, :8M ~1 . SD , . . :
PBC ( ) – , — , — . PBC, . . – DVD. , 1, . , 2 , 3. . , . . – . . , . 56 ,
• • • • • • • • • • • : DVD/SVCD/VCD/HDCD/MP3/MP4/WMA/CDDA/Picture-CD/JPEG/CD-R/-RW/DVD±R/±RW. : : MP3 (*.mp3) WMA (*.wma) : MP4 (*.avi, DIVX3.11/4.0/5.0/6.0 and XVID) MPEG 2(*.vob) MPEG 1(*.dat) : JPEG (*.jpg) ISO 9660 ISO 9660 + Joliet 30 . – 448. -8 . – 99. — 99 59 . MP3 : 8 48 ( ). P3 : 32 —
1. 2. 3. . , . . ( ). DISC , . MODE. 4. / , , PLAY/PAUSE, , . PLAY/PAUSE, . , 1. . , . 2. 3. , 1-9, 0, 10+ . . / / 2 : 2, 4, 8, 16, . , PLAY/PAUSE, 32. , : , . 58
R • , : • ( • ( VCD/CD ). DVD ). ALL ( : RPT ONE ( : . RPT CHAP ( . ) => RPT OFF ) => RPT TITL ( : RPT ONE () ) => RPT OFF ( ). RPT. . ) => RPT ALL ( . ) => RPT OFF => RPT DIR ( . ) => RPT A-B 1. , A-B 2. ( . , A-B ( . . 3. ( CD/VCD/MP3) RDM . Intro ( ), . , , . CD/VCD) 15 INT 59 , . ),
. , . PBC ( )( VCD VCD ) PBC, 1- . 1. , . 2. , / – 3. 4. 5. . , PLAY/ PAUSE, STOP , . , VCD. . DVD 1. PROG , ▲, ▼, ◄, ► , . . DVD . VCD 2. «PLAY» CD MP3, VCD, CD . PLAY/ PAUSE ENTER, . 60
3. 4. , PROG, • DVD «CLEAR» . R/L , : ( • ENTER. AUDIO , ). VCD :L R/L : R , STEREO ( ( ). DVD ) , . , , , . , . . SUBTITLE . , . , 5 . ( DVD ) DVD- , . — , . . , 61 ANGLE 1
ZOOM : 2 => X3 => X4 => . . 3 • • • 3: 3 MPEG 3 , 3, CD-RW. ISO 9660. . 3, , “.mp3”. 3 • • CD-ROM, CD-R 3, • • . 3 , “.mp3”, . , PC “ ” “ “ ” MP3” “ ”, . 8, • • • . 448. . , 8 , VBR, , . VBR: . 62 3.
CD-R • MP3: CD-RW, 3 • • 44,1 • 8, • . , 128 448 3 ISO 9660, , / . . ( ). CD-R • , MP3 CD-R CD-RW , . — • 3 3 , CD-R , 3. CD-RW . • • . CD-R 16 , CD-RW . . 1. ID3TAG. , . 63
DVD 1. 2. 3. 4. 5. 6. 7. SETUP, ◄/►, DVD : , ▲/▼, ►, ▲/▼, , . . . . . . OSD 5 , . . , . , . ( , ) DVD- , . , , : . 64 .
DVD DVD- , , . . DivX DivX. MENU, 4 : 16:9/4:3 : PAL . . . PAL60 , NTSC – . : , , , 4:3 , , , . : , 65 .
. “ “ : ./ .”, , .”, . . , : . 4 , . , . , . — , . , . , , 4- . 66
, . 1 2.G 3.PG 4.PG-13 – – – 13 5.PG-R 6.R 7.NC-17 8. , – 171717 . . 17 ( 67 ).
1. 2. 3. 4. , OPEN, . . , 1. 2. 3. . . — , . . • , • • PWR. ( ). , . , • . , • , . ( • ). , . , . 68 ,
• • , . — , . . ( , ), , . . , — , , , . . , . . 69
. , “ . ”. . . , . . . . . . , . . . . . RESET. — . . 30 . . , 30 . . . . . . . . 70
: : 12 10 : : ( )/ : : ESP : 50 4 DVD/SVCD/VCD/HDCD/MP3/MP4/WMA/CDDA/Picture-CD/JPEG/C D-R/ -RW/DVD±R/±RW 202 188 71 /2 -10º — +60º 40 CD, 120 3 4” 480 272 dpi 4:3/16:9 300:1 350 : : : : FM : : 87.5 – 108.0 MHz ≤1 18 MW : 522-1620 12 71
2 RMS (+/-3 ) : : — (A-vtd): DSP : : 30 – 18 68 Classic, Rock, Pop, Flat 2 CD RCA (2V) . 2000 — . . 72
EXCELLENCE
by
H-CMD4006
MULTIMEDIA DVD/CD/MP3 RECEIVER WITH BUILT-IN
4” DIGITAL TFT DISPLAY
Instruction manual
МУЛЬТИМЕДИЙНЫЙ DVD/CD/MP3-РЕСИВЕР СО ВСТРОЕННЫМ
4” ЦИФРОВЫМ TFT ДИСПЛЕЕМ
Руководство по эксплуатации
Требуется руководство для вашей Hyundai H-CMD4006 Автомагнитола? Ниже вы можете просмотреть и загрузить бесплатно руководство в формате PDF. Кроме того, приведены часто задаваемые вопросы, рейтинг изделия и отзывы пользователей, что позволит оптимально использовать ваше изделие. Если это не то руководство, которое вы искали, – свяжитесь с нами.
Ваше устройство неисправно, и в руководстве отсутствует решение? Перейдите в Repair Café для получения бесплатных ремонтных услуг.
Руководство

Рейтинг
Сообщите нам, что вы думаете о Hyundai H-CMD4006 Автомагнитола, оставив оценку продукта. Хотите поделиться вашими впечатлениями от данного изделия или задать вопрос? Вы можете оставить комментарий в нижней части страницы.
Довольны ли вы данным изделием Hyundai?
Да Нет
Будьте первым, кто оценит это изделие
0 голоса
Часто задаваемые вопросы
Наша служба поддержки выполняет поиск полезной информации по изделиям и отвечает на часто задаваемые вопросы. Если вы заметили неточность в наших часто задаваемых вопросах, сообщите нам об этом с помощью нашей контактной формы.
Что такое DAB +? Проверенный
DAB + является преемником сигнала FM и расшифровывается как Digital Audio Broadcasting. Это цифровой сигнал, который позволяет использовать больше каналов в пределах одной полосы пропускания и упрощает переключение между каналами.
Это было полезно (380)
В чем разница между FM и AM? Проверенный
FM и AM — это формы модуляции, используемые для передачи сигнала. FM — это частотная модуляция, а AM — амплитудная модуляция. AM — самая старая форма модуляции. Самая большая разница в том, что сигнал FM намного сильнее сигнала AM.
Это было полезно (198)
В автомагнитолу застрял компакт-диск, что мне делать? Проверенный
В некоторых автомобильных радиоприемниках есть функция извлечения застрявших компакт-дисков. Выключите автомобиль и одновременно нажмите кнопки включения и извлечения и удерживайте их в течение 10 секунд. Если это не помогло, заведите машину и попробуйте еще раз.
Это было полезно (187)
Какого размера автомобильный радиоприемник подходит для моей машины? Проверенный
Существует два стандартных размера автомобильных радиоприемников: 1-DIN и 2-DIN. 1-DIN — это стандартная тонкая версия, а 2-DIN — вдвое больше. Автомобильные радиоприемники 2-DIN часто имеют место для экрана для отображения навигационной информации или воспроизведения фильмов.
Это было полезно (152)
- Инструкции →
- Автотехника →
- Автомагнитолы →
- Hyundai →
- Hyundai H-CMD4006
Модель, к которой подходит эта инструкция: Hyundai H-CMD4006
Скачать инструкцию к Hyundai H-CMD4006 (892.7 Кб)
Данная инструкция написана на русском языке
Вопросы и отзывы о Hyundai H-CMD4006
Пожалуйста, если у вас есть вопрос или отзыв, напишите пару строк в форме ниже.
Если вы скачали инструкцию, но не смогли разобраться, как пользоваться той или иной функцией прибора,
напишите свой вопрос, наши специалисты постараются найти ответ на ваш вопрос.
-
21.12.2011,
Юра:
мы купили авто этой с магнитолой но без инструкции и не знаем как смотреть фильмы. подскажите пожалуйста.
Страницы и текст этой инструкции
 Инструкция автомагнитолы Hyundai Electronics H-CMD4006
 Информация отображена на картинке
 Информация отображена на картинке
 Информация отображена на картинке
 Информация отображена на картинке
Как использовать наш сайт инструкций OnlineManuals.ru
Наша цель состоит в том, чтобы предоставить вам быстрый доступ к содержанию инструкции для автомагнитолы Hyundai Electronics H-CMD4006.
С помощью онлайн просмотра, Вы можете быстро просмотреть содержимое инструкции и найти решение проблемы с автомагнитолы Hyundai Electronics H-CMD4006.
Для Вашего удобства
Если листать руководство пользователя автомагнитолы Hyundai Electronics H-CMD4006 прямо на сайте, не очень удобно для Вас, есть два возможных решения:
• Просмотр в полноэкранном режиме — легко просмотреть руководство пользователя (без загрузки его на свой компьютер), Вы можете использовать режим полноэкранного просмотра.
Для просмотра инструкции пользователя автомагнитолы Hyundai Electronics H-CMD4006 на полном экране, используйте кнопку «Открыть в Pdf-viewer».
• Загрузка на компьютер — Вы можете также скачать Инструкция автомагнитолы Hyundai Electronics H-CMD4006 на свой компьютер и сохранить его в файлах.
Многие люди предпочитают читать документы не на экране, а в печатной версии.
Возможность печати руководства пользователя также была предусмотрена на нашем сайте,
и вы можете использовать ее, нажав на иконку «печать» в Pdf-viewer.
Нет необходимости печатать все руководство автомагнитолы Hyundai Electronics H-CMD4006, можно выбрать только нужные страницы инструкции.