IKARUS anti.virus manual
IKARUS anti.virus protects your devices and data from both previously known and newly emerging malware – without any negative effect on the performance of your machine. All files and archives on your computer are evaluated, executed, simulated and monitored in a multi-layer process. Behavioural analysis also identifies malware by its malicious and unwanted behaviour or harmful characteristics. Once discovered, an intruder is immediately isolated and rendered harmless.
1. Installing IKARUS anti.virus
For complete installation instructions of IKARUS anti.virus, IKARUS anti.virus Home and IKARUS anti.virus Business, please refer to our Quick Start Guide.
2. Features of IKARUS anti.virus
Main features on IKARUS anti.virus:
- Award-winning, self-developed and reliable IKARUS Malware Scan Engine integrated for stable detection
- Proactive and reactive malware detection with multidimensional methods, behavioral analysis and exploit detection
- Updates several times a day, incl. program update
- Comprehensive virus / malware scans directly on the computer
- Available languages: German, English, Bulgarian (Securepoint: German & English)
- schedule On-Demand-Scan Profile
- Fast On-Access Scan
- Possibility to sending suspicious files to the IKARUS laboratory for further analysis
- „Business-Features“
- User-friendly cloud management for the administration of all installations in the company
- Password protection for settings
- Virus warnings and notifications
- Flexible licensing – 1/2/3/5 years
- Resource-savingvirus with one of the fastest scan.engines in the world
- Machine learning to continuously improve scanning results
2.1 Symbols and screens
Now take the time to familiarize yourself with the symbols used in IKARUS anti.virus.
![]()
You can find the standard symbol at the bottom right of your screen in the taskbar.*
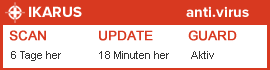
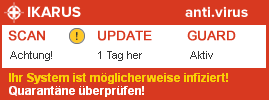
Double-click on the symbol and the configuration screen for IKARUS anti.virus opens automatically. When moving the cursor over the symbol, the pop-up shown below will appear for a few seconds on your screen.
You can also open IKARUS anti.virus here too. Simply click the required function (Scan, Update or Guard). This provides you with all the information on wether IKARUS anti.virusis running properly, when the last update was performed, when the last scan took place and wether all components of the virus protection are activated. If all three fields are white, everything is working OK.*
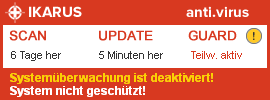
When this window appears, you can see which area is affected by the warning. In the example, one component of the guard is disabled, i.e. part of the scanning function is disabled.*
The appearance of the symbol in the taskbar may change and has different meanings accordingly:
![]()
The white cross set to a red background indicates that everything is OK, the virus protection is set to its highest level and the software is fully updated. IKARUS anti.virus is on and monitoring your PC.
![]()
When the symbol pulsates in size (like a heartbeat), this indicates that IKARUS anti.virus is currently being updated.
![]()
This symbol indicates that one of the three components (Scan, Update or Guard) is not set to the highest security level available in IKARUS anti.virus.
![]()
A rotating symbol shows that a scan is currently being performed.
![]()
If the symbol for IKARUS anti.virus appears like this, a virus has been found. In this case, follow the instructions unter 3.4 Quarantine.
Overview IKARUS anti.virus symbols
Symbols whose description is marked with * are no longer available in Windows 10
3. The four main features
3.1 Guard – Your personal minder
Guard is the monitoring component in IKARUS anti.virus. To achieve the highest level of protection against malicious software, tick all of the available checkboxes. If required, you can reduce the level of protection by unchecking one or more checkboxes.
ATTENTION: IKARUS anti.virus only offers full virus protection when all options are selected and enabled!

Figure 16: Guard
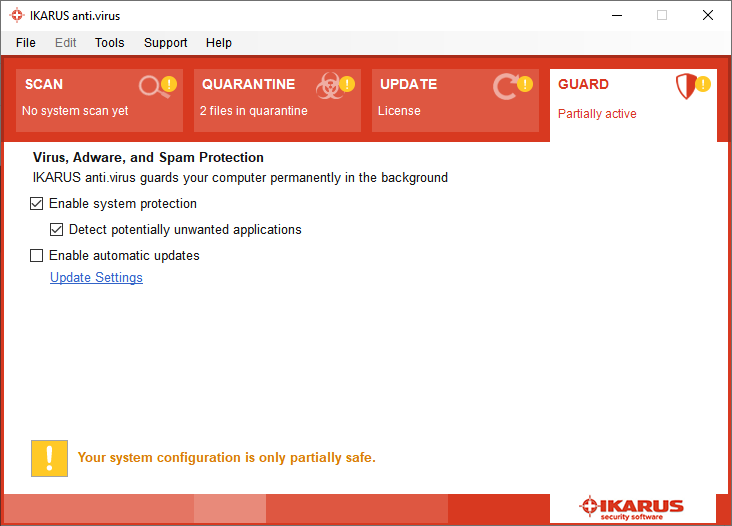
Figure 17: Guard – partly activated
You will also see a yellow symbol and the message “Your system is partly safe configured.” appears. IKARUS anti.virus is then no longer able to provide you full protection.
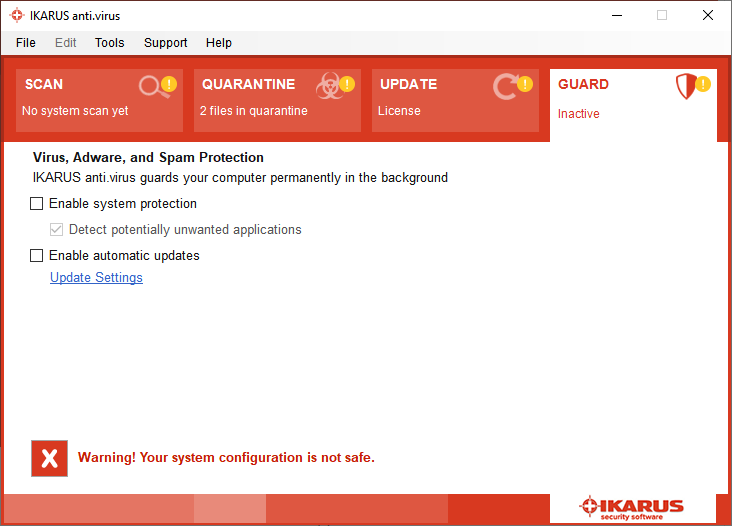
Figure 18: Guard not activated
If the Symbol turns to red your system protection is turned off and the status message is “Warning! Your system configuration is not safe.”.
If one or more areas are excluded from the scan, the appearance of the IKARUS anti.virus symbol in the taskbar will change to indicate this.
3.2 Updating IKARUS anti.virus
Your software can only provide reliable protection against viruses, worms, spyware and Trojan horses if it is up-to-date.
IKARUS anti.virus therefore contains an automatic update feature. Every 20 minutes, it checks for new updates. These are then automatically installed. The program connects to the internet if no connection is currently available.
If you do not use your computer for a long period of time, IKARUS anti.virus automatically download the latest updates when you start your PC.
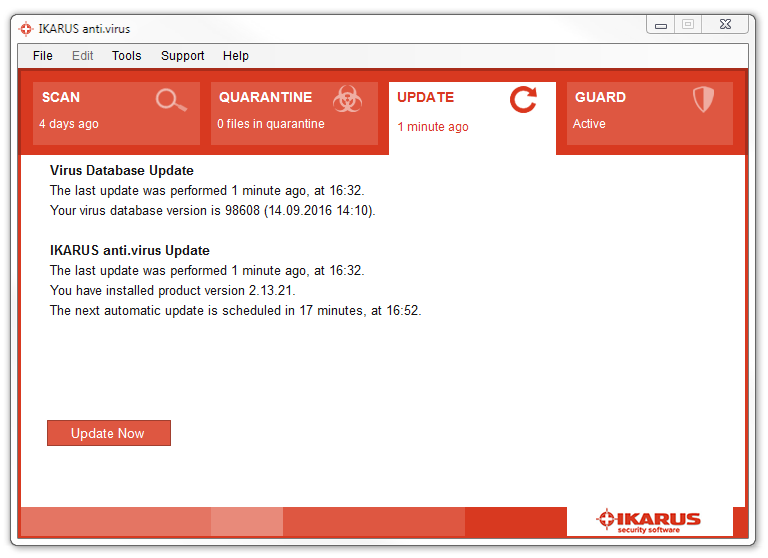
Figure 19: Update
There are two types of updates in IKARUS anti.virus: virus database updates and updates to IKARUS anti.virus itself.
Virus databases (or VDB for short) updates ensure that new malicious software is detected. The updates to IKARUS anti.virus are program updates that add new features or functions. Press ’Update now’ to check for new updates.
If the latest updates are already installed, ’All up to date’ will appear.
3.3 Scan – The virus check from IKARUS anti.virus
You can configure the scan to be performed automatically or start the scan manually in IKARUS anti.virus. You can manage and add as many scans as required.
Preset scans:
- Fast System Scan: Here, the Windows installation directory is scanned. Most malicious programs such as viruses and Trojan horses are located in this directory, and can be quickly and readily detected.
- System Partition: With this option, IKARUS anti.virus scans the drive where your operating system is installed. All archives, directories, folders and files on this drive are scanned by IKARUS anti.virus.
- Entire Computer: IKARUS anti.virus scans all drives on your computer.
- Removable Media: All external drives such as USB sticks and CD ROM drives are scanned.
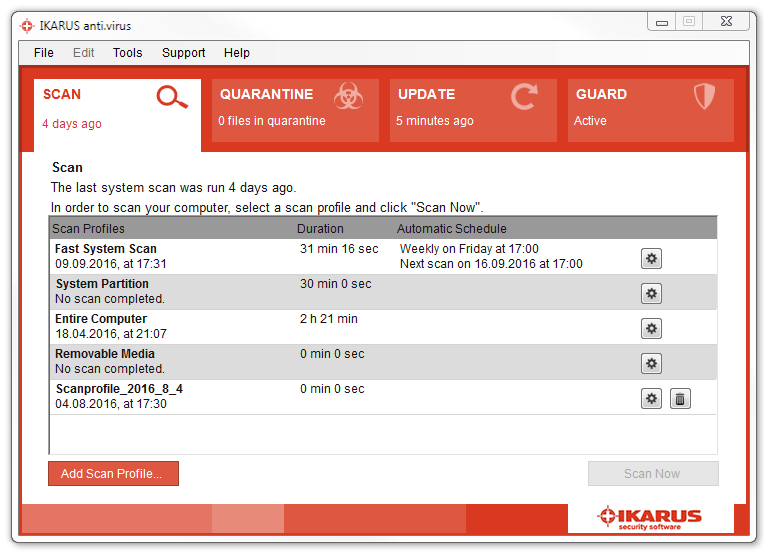
Figure 20: Scan
Individual scans are configured by pressing ”Add Scan Profile”.
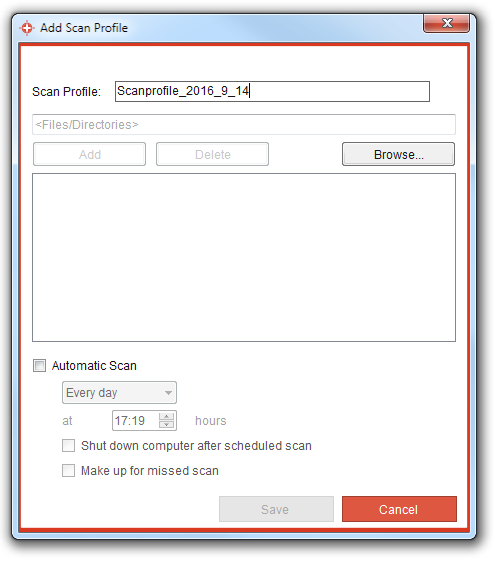
Figure 21: Add Scan Profile
You can enter any name for the scan. Press “Browse” to select the folder, files etc. that you wish to scan. You may also set the program to perform an automatic scan where required.
The automatic scan can be scheduled for any time (e.g. every Friday at 12pm) and only scans the areas selected by the user.
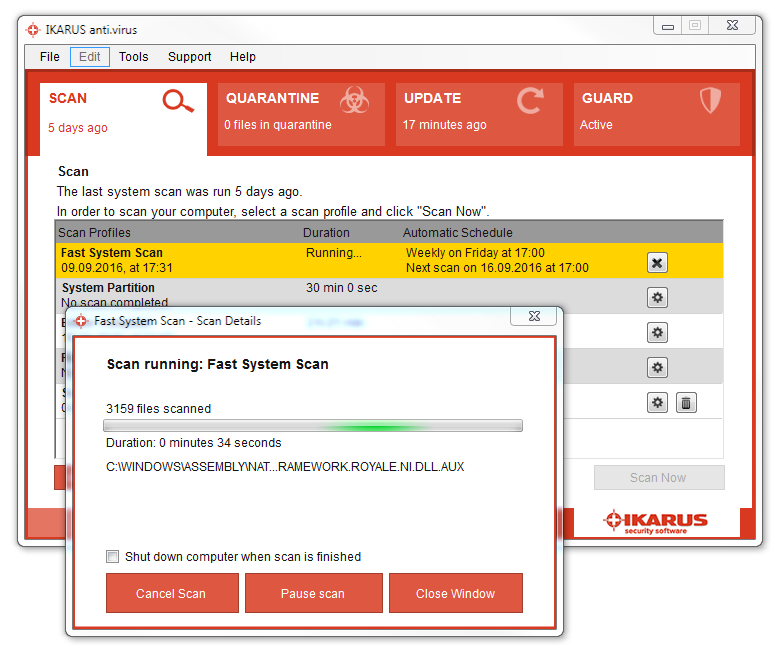
Figure 22: Scan running
To start a scan, press ‘Scan Now’. You can stop or cancel a scan at any time. The status bar and remaining time indicator provide information on how the scan is progressing. If the scan is completed and no viruses were detected, you can press ’close window’ to return to the main window. If a virus was detected, please click to Section ‘3.4 Quarantine – what to do when a virus is found’ – and read the information provided there.
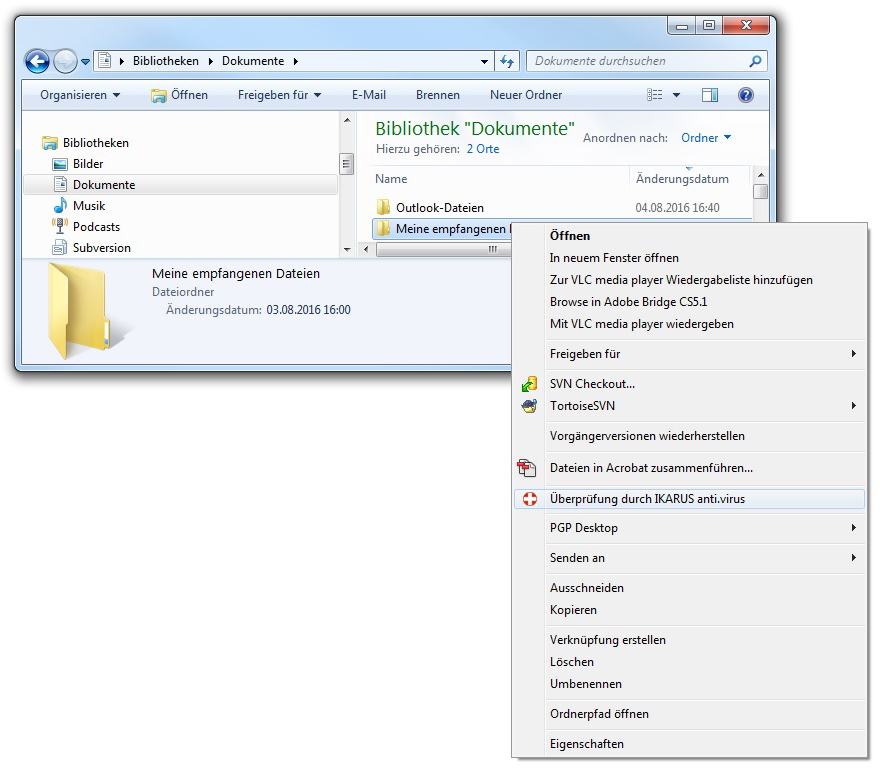
Figure 23: Start IKARUS anti.virus Scan via Explorer
Another way to start a scan is to right-click on a drive, file or folder in Windows Explorer and select “IKARUS anti.virus scan”.
3.3.1 Scan-Settings
Click scan settings in the scan window or in the menu to go to the exclusions tab.
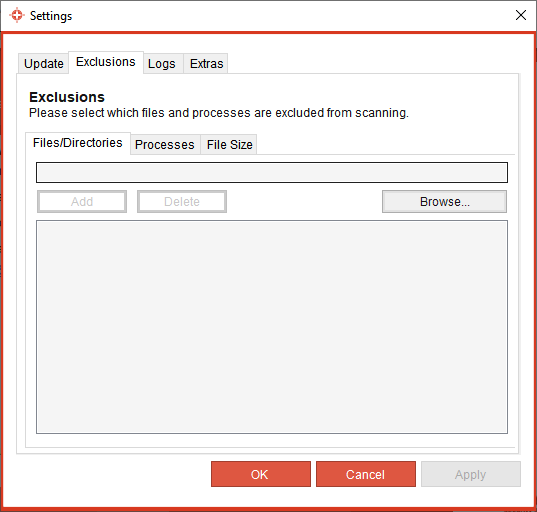
Figure 24: Exclusions
In this tab, you can specify which files and processes are not scanned by IKARUS anti.virus.
It is also possible to limit the scan to files of a certain size or smaller.
3.4 Quarantine – what to do when a virus is found?
Read here how to manage infected files in the quarantine of IKARUS anti.virus and what possibilities you have to remove a virus from your system.
3.4.1 Virus detection warning
When a virus is detected, IKARUS anti.virus provides the following warnings:
![]()
If a virus was found the yellow IKARUS anti.virus icon is shown in the taskbar.
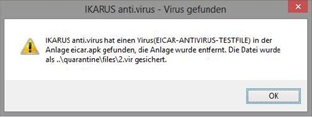
When an infected e-mail arrives in your inboy, IKARUS anti.virus detects the malicious program. A window will now appear on your screen, where IKARUS anti.virus notifies you that a virus was found and it was moved to the quarantine directory.
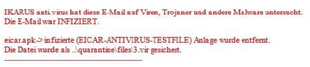
In the infected e-mail, the following text is shown when a virus is detected.
The information panel with the red bar shows a warning message in the scan window.
3.4.2 Virus detected during scan
When a scan is automatically or manually started and a virus is detected, this is indicated as follows:.
- As described above, the yellow IKARUS anti.virus icon appears in the Windows taskbar and a warning is shown in the information panel.
- In the ‘Scan Details’ windows, you will see the message ‘infected files found’ during and after the virus scan.
- The Quarantine tab opens automatically when the scan is completed.
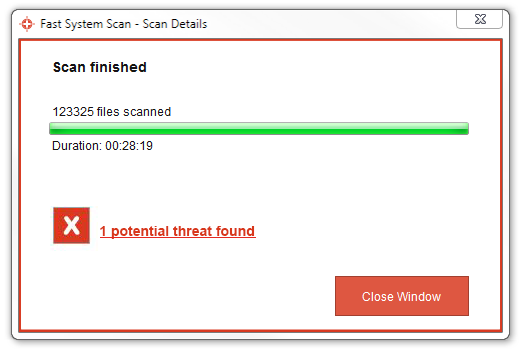
Figure 25: Scan finished – 1 potential threat found
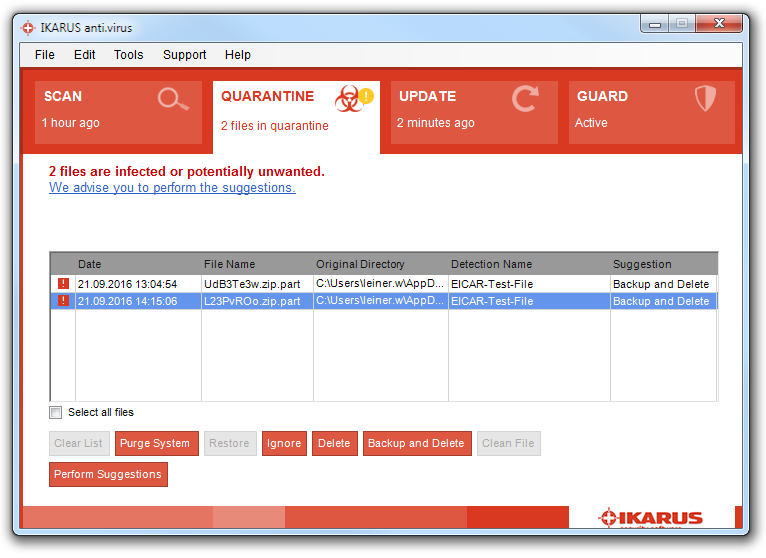
Figure 26: Quarantine – Virus found
3.4.3 Quarantine
Any viruses detected by IKARUS anti.virus are automatically moved to quarantine. Once the virus is ’quarantined’, it no longer represents a threat to your system.
Once the infected file is moved to quarantine, all access to it is denied. From this point on, the file does not represent a threat to your computer.
The Quarantine tab contains all the information you require on the virus and about ways to remove it. You can also start any of the functions in the Quarantine tab from the toolbar or in the menu under “Edit”.
The Quarantine tab in IKARUS anti.virus offers numerous options for configuring what actions to take when a virus or infected file is detected.
IKARUS anti.virus also suggests the best action to take in each case.
Press ‘Suggestion’ to carry out the actions proposed by the program.
You can also select a different option if you do not wish to follow the recommendation provided by IKARUS anti.virus:
- Purge System: Alle infizierten Dateien werden in die Quarantäne verschoben.
- Ignorieren: Die als infiziert erkannte Datei wird temporär freigegeben. Das bedeutet, dass diese Datei bis zum Neustart des Services (d.h. normalerweise bis zum Neustart des PCs) nicht mehr gemeldet wird. Dies ermöglicht Ihnen wieder den Zugriff auf diese Datei. Nach einem Neustart Ihres PCs finden Sie die Datei jedoch wieder in der Quarantäne. Nach Betätigen des Buttons werden Sie außerdem gefragt, ob Sie die infizierte Datei an IKARUS zur Analyse schicken möchten (anonym oder mit E-Mail-Adresse zur Rückmeldung)
- Löschen: Die markierte Datei wird in die Quarantäne verschoben.
- Sichern und löschen: Die infizierte Datei wird in die Quarantäne verschoben. Gleichzeitig wird eine Sicherungskopie der Datei in Ihrem IKARUS anti.virus-Verzeichnis belassen. Der Eintrag in der Quarantäne wird danach hellgrau. Wenn gewünscht, können Sie die Datei durch Klick auf den Button „Zurück verschieben” wiederherstellen.
- Datei bereinigen: Wenn möglich, wird nur das Virus selbst aus der infizierten Datei entfernt. Die Datei selbst bleibt dabei bestehen und wird nicht gelöscht. Dateien, die im Grunde nur aus einem Virus bestehen, werden zur Gänze gelöscht.
- Liste löschen: Entfernt die Einträge aus der Quarantäneliste. Mehr als 7 Tage alte Einträge werden automatisch aus der Liste entfernt.
In IKARUS anti.virus, you can check the quarantine list to see which viruses have already been detected, if any were deleted, or what actions were taken when they were detected.
Entries that appear in black indicate that a virus is in quarantine and no action has been taken. Now decide what action to take or follow the recommendations provided by IKARUS anti.virus.
Entries shown in grey indicate that a virus was deleted or saved to a back-up file. You can remove these entries from the list at any time by pressing “Clear list”.
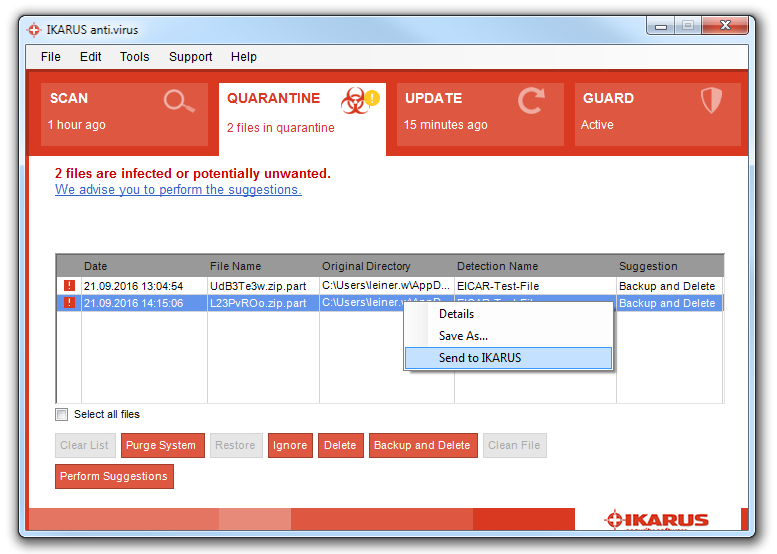
Figure 27: Right-click on the virus
If the cursor is on a virus entry in the quarantine list, you can now right-click the item. A pop-up window now appears where you can specify what actions are to be taken.
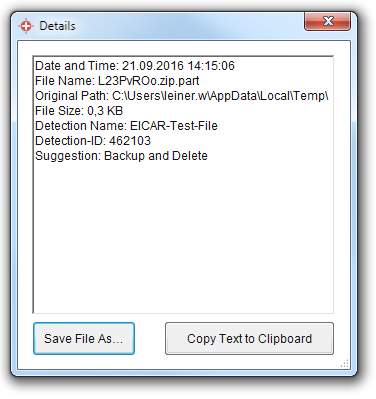
Figure 28: Virus information
To get more information on any virus in the quarantine list, simply double-click on the file name or the original directory.
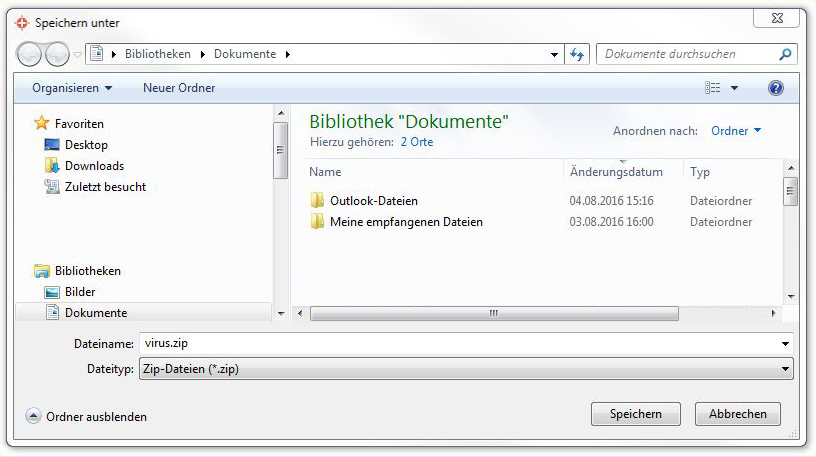
Figure 29: Save virus
If you right-click on “Save as…” a ”virus.zip” will be generated and you can send it to
IKARUS via mail.
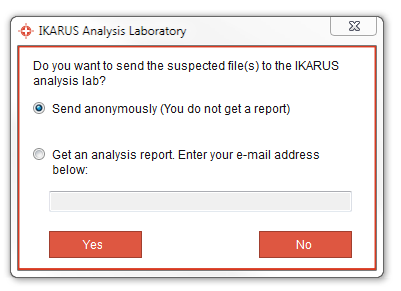
Figure 30: Send virus to IKARUS
To do this automatically just use the function “send to ikarus”. You can do this wether anonymous or with your E-Mail adress to receive further informations from IKARUS.
4. Settings
4.1 Language settings
Several interface languages are available in IKARUS anti.virus. The software determines the right language (based on your computer settings) during the installation process.
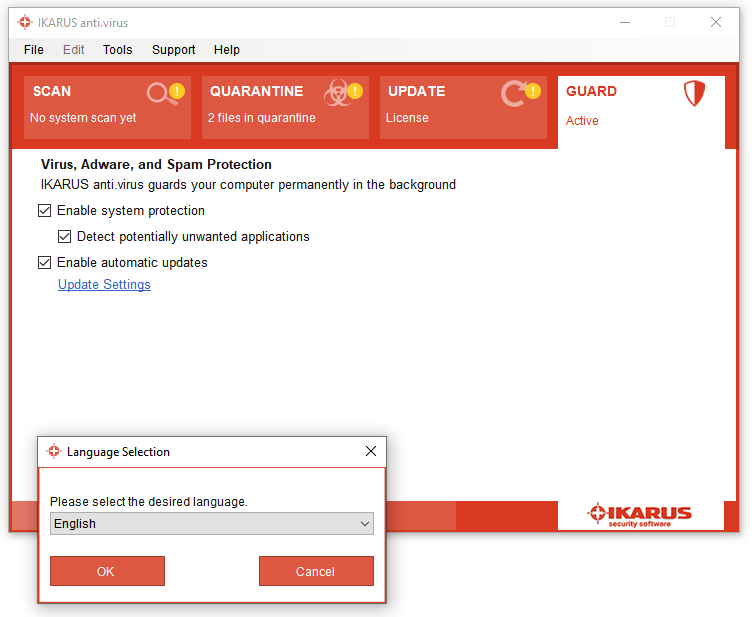
Figure 40: Language settings
The window for changing the language settings is opened under ‘Tools’ > ‘Language’ in the menu
After restarting IKARUS anti.virus, the display is available in this language.
IKARUS anti.virus supports the following languages:
- Bulgarian
- Croatian
- English
- German
- Italian
- Japanese
- Russian
4.2 Logs
Under „Tools/Logs” you can specify which logs are shown for which actions. In the log window, the previous actions carried out by utilities are displayed.

Figure 41: Logs of performed actions
These logs come in particularly handy when you need to get in touch with the IKARUS support hotline (see section 7). You can also view and check the logs to see which actions were performed by IKARUS anti.virus.
4.3 Further settings
4.3.1 Update
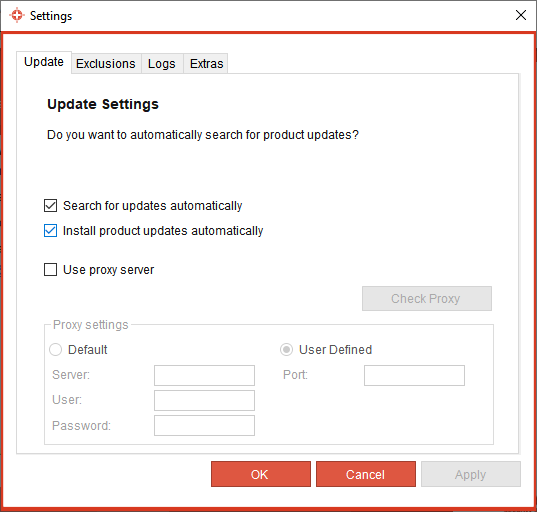
Figure 43: Update-settings
The Update tab shows the different options available for the update function.
4.3.2 Exclusions

Figure 45: Exclusions-Settings
On the Exclusions tab you can select which files and process are excluded from the IKARUS anti.virus scan. This may be quite useful in cases where you wish to exclude a service from the scan that is already using a good amount of the system resources (mp3 or holiday photos), or if you do not want one specific directory to be scanned.
4.3.3 Logs
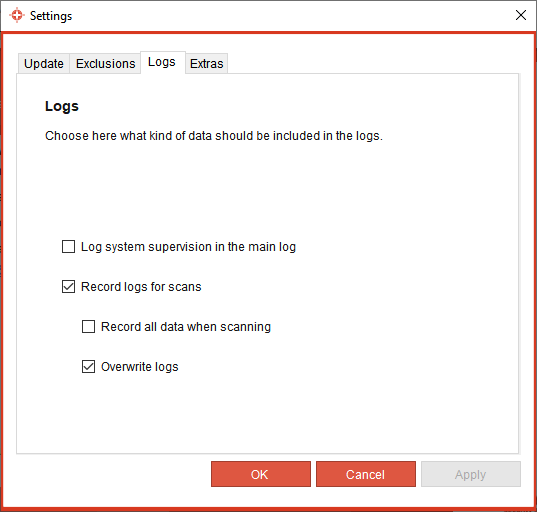
Figure 46: Logs-Settings
Select what actions are to be logged by IKARUS anti.virus on the ‘Logs’ tab.
In the ‘Extras’ tab, you can specify additional settings:
- You can specify that system monitoring is to be reactivated when your PC reboots.
- You can participate on the Quality Insurance Program. IKARUS receives statistic informations from your system to enforce the virus detection. Please recognize the License Agreement in section 8.3 for that.
- Since IKARUS anti.virus 2.2 exists the possibility to set a password protection. If this is activated, settings can only be edited after entering the password. This option is helpful if you as administrator of the computer want to prevent that non-authorized users can edit the settings. This password protection is also for enabling/disabling the System protection.
Press ‘Restore Default Settings” to reset IKARUS anti.virus to its original settings following installation. All previously changes to the settings are reset.
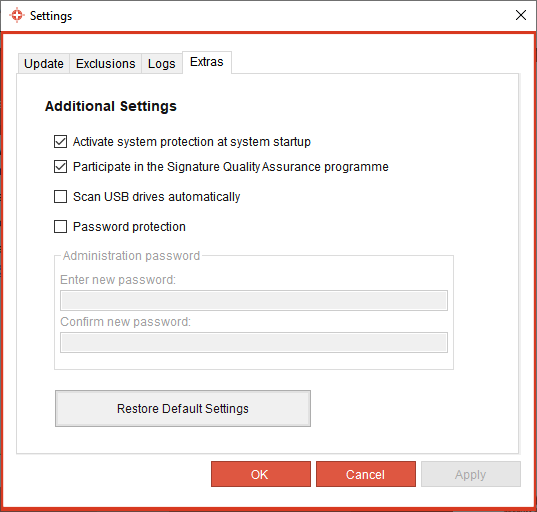
Figure 47: Extras-Settings
5. Support
For inquiries and consultation with IKARUS it is helpful to obtain detailed informations about the installed version of IKARUS anti.virus or the virus database (VDB).
To make the process as fast and efficient as possible, there are several ways to get in touch with us and send us information regarding questions you have on IKARUS anti.virus.
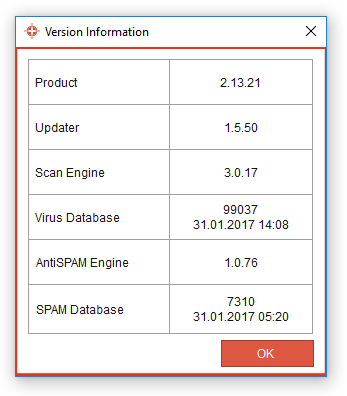
Figure 48: Support – Version information
Go to Support in the menu bar to quickly view the current version number of your IKARUS anti.virus. You will need this information when contacting our support team.
Figure 49: Support – Contact
You can also view the contact details in IKARUS anti.virus. When you write an email to this address, it is automatically sent to us with the vital version information.
Under “Support” – “Save Support Info” in the menu, you can compile the most support information and send it to us as a zip file.
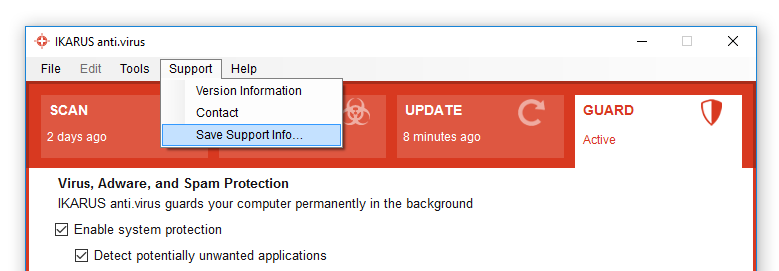
Figure 50: Support-Info
5.1 License key
The IKARUS anti.virus program comes with a special license key. This governs the length of your license and the number of installed users.
You automatically receive the license key when you purchase IKARUS anti.virus or sending the registration form to IKARUS via product activation.
Under Help in the menu, you can check, delete, add or archive your license keys.

Figure 51: IKARUS anti.virus Licenses
It is also possible to manage multiple license keys in cases, for instance, where a license key is set to expire soon and you have already received the new one. IKARUS anti.virus automatically selects the right key.
Please contact our support team if you cannot find your license key or you did not receive one.
If you have an activation key, please fill in your personal data and send the registration to IKARUS to receive a license key for IKARUS anti.virus, which will be imported into the software automatically.
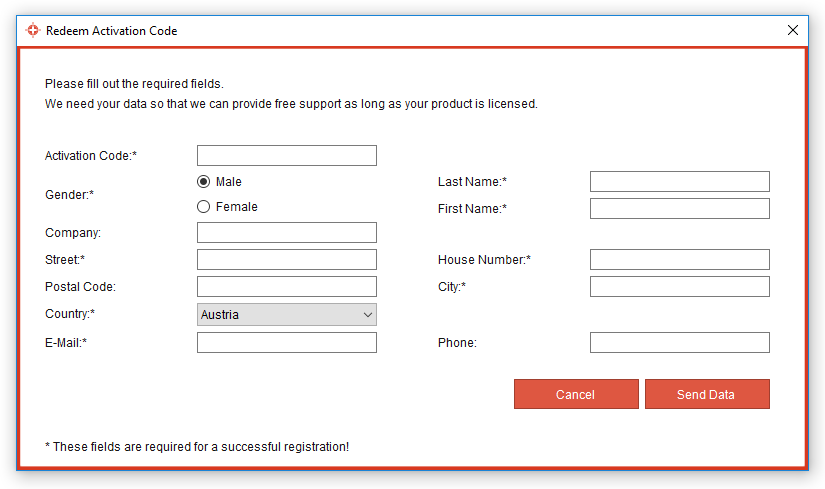
Figure 52: Activate the software via activation code
6. Further informations
Please get here information about the necessary Microsoft NET Framework and the licensing terms of IKARUS Security Software GmbH.
6.1 .NET Framework
.NET Framework is required to display IKARUS anti.virus’ graphical interface. If this program is already in- stalled on your computer, the installation of IKARUS anti.virus will be completed without interruption. If, however, this program is not already installed on your computer, this will be either automatically installed from the installation CD or, if you are not installing the program from a CD, it will be downloaded from the Microsoft website.
.NET Framework is freeware from Microsoft. There are no license fees and it requires no registration.
7. Contact
IKARUS Security Software:
Phone: +43 (0) 1 58995-0
IKARUS Security Software Support-Hotline:
Phone: +43 (0) 1 58995-400
Support times:
Monday – Thursday: 8am – 5pm (CET)
Friday: 8am – 3pm (CET)
IKARUS Security Software Sales-Hotline:
Phone: +43 (0) 1 58995-500
IKARUS Security Software via E-mail:
Office: office@ikarus.at
Sales: sales@ikarus.at
Support: support@ikarus.at

Руководство по эксплуатации автобусов Ikarus 250/256/260/280.
- Автор: —
- Издательство: Ikarus Karosszeria
- Год издания: 1990
- Страниц: 268
- Формат: PDF
- Размер: 79,0 Mb

Руководство по эксплуатации и техническому обслуживанию (дополнение — электрооборудование) автобусов Ikarus 250/256/260/280.
- Автор: —
- Издательство: Ikarus Karosszeria
- Год издания: 1989
- Страниц: 81
- Формат: PDF
- Размер: 19,1 Mb

Справочное издание с с описением конструкции автобусов ПАЗ-652/672, ЗИЛ-127/158В, ЛАЗ-695Е/697К/698, ЛиАЗ-677, КАВЗ-651А и Икарус-620 и рекомендациями по техническому обслуживанию.
- Автор: —
- Издательство: Машиностроение
- Год издания: 1969
- Страниц: 260
- Формат: DjVu
- Размер: 4,3 Mb

Руководство по эксплуатации и ремонту автобусов Икарус.
- Автор: Ф. Кертес
- Издательство: Транспорт
- Год издания: 1987
- Страниц: 210
- Формат: PDF
- Размер: 16,2 Mb

В книге описаны устройство и техническая эксплуатация автобусов Икарус моделей 556, 260, 250, 255, 180 и 280.
- Автор: —
- Издательство: Транспорт
- Год издания: 1976
- Страниц: 289
- Формат: DjVu
- Размер: 6,4 Mb

Руководство по эксплуатации и техническому обслуживанию автобусов Икарус-260/280, ЛиАЗ-5256, ПАЗ-3205, ГАЗ-3221 Газель и ГАЗ-2217 Соболь.
- Автор: А.А. Чередников
- Издательство: Транспорт
- Год издания: 1999
- Страниц: 217
- Формат: DjVu
- Размер: 4,8 Mb
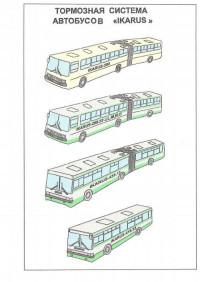
Руководство включает в себя расположение агрегатов на автобусе, схему пневмосети тормозов и подвески, базовую спецификацию пневмоагрегатов и ремкомплектов к ним автобусов Ikarus 280/415/435.
- Автор: —
- Издательство: —
- Год издания: —
- Страниц: 16
- Формат: PDF
- Размер: 41,7 Mb
- Manuals
- Brands
- iKarus Manuals
- Control Systems
- Easyfly
Manuals and User Guides for iKarus Easyfly. We have 1 iKarus Easyfly manual available for free PDF download: Quick Installation Manual
Если вы только начинаете играть, то вот вам пошаговая инструкция для начинающих в ICARUS. Ваше приключение на Икаре начнется с создания персонажа. Возможности при создании персонажа несколько ограничены, но вы сможете создать что-то свое.
Как только ваш персонаж будет создан, вы попадете на экран меню на космической станции. Здесь пока больше нечего делать: пришло время приземлиться на планете Икар и намочить ноги.
Ваша первая миссия на Икаре
Ваша самая первая миссия не вызовет особых сложностей. Однако вам придется совершить дальнюю вылазку без особых инструкций.
Во-первых, вам нужно подобрать несколько палочек, волокна и камня. Разомните клавишу «F» и разбейте листву вокруг места посадки, чтобы получить Палки и Волокно. Затем осмотритесь вокруг в поисках Камня. Создайте кирку, как только у вас будет достаточно материалов. Затем разбейте киркой несколько больших камней и сделайте Топор.
Что разблокировать на уровне 1
Продолжайте собирать материалы, пока не достигнете Уровня 1. Вы получите 3 очка технологий; потратьте их на разблокировку Деревянного лука, Каменных стрел и Каменного ножа. Потратьте свое первое очко таланта на «Выход пиломатериалов» в разделе «Ресурсы». Создайте каменный нож и деревянный лук, а затем создайте не менее 20 каменных стрел.
Первая охота
Ваша следующая цель — собрать немного Кожи и Меха, чтобы сделать Спальный мешок. Волки — ваша лучшая цель, поскольку они дадут оба материала сразу; присядьте и стреляйте по ним из лука издалека, чтобы нанести дополнительный урон. Если они побегут за вами, цельтесь в голову (стреляете ли вы из лука или используете рукопашный бой). Если вы атакуете в рукопашную, то из вашего топора получится идеальное оружие. В качестве альтернативы вы также можете охотиться кроликов.
Что разблокировать на уровне 2
Основное препятствие для изготовления спального мешка — мех; у вас, скорее всего, будет гораздо больше кожи, чем вам нужно. Продолжайте охотиться на животных, и вы в конечном итоге достигнете Уровня 2. Изучите создание Костра, Спальный мешок и Соломенную балку. Потратьте еще одно очко таланта на «Выход пиломатериалов».
Как только у вас будет хотя бы 20 меха, возвращайтесь на свою капсулу. Создайте и поставьте костер. Повалите дерево, чтобы собрать немного Дерева, положите его в раздел «Топливо» в инвентарь костра, а также все сырое мясо, которое у вас есть. Затем нажмите кнопку «Активировать», и ваша еда начнет готовиться.
Что разблокировать на уровне 3
К настоящему времени вы должны быть на Уровне 3 (или близком к нему). Если вам все еще нужен опыт, рубите деревья — они дают 300XP за каждое.
Потратьте свои 3 очка в Дереве исследований на Соломенный пол, Соломенную стену и Соломенную крышу и снова потратьте свое очко таланта на «Выход пиломатериалов».
У вас будет мало кислорода на этом этапе; соберите немного оксита, положите его на панель быстрого доступа и потребляйте, чтобы восстановить кислород. Такой способ приносит совсем немного кислорода и годится лишь первое время.
Если у вас заканчивается вода, просто подойдите к ближайшему озеру и попейте. Затем создайте простую соломенную постройку, подобную этой:

Это некрасиво, но в крайнем случае даст вам крышу над головой.
Сделайте Спальный мешок и положите его на пол. Убедитесь, что ваш костер рядом; вы не можете спать без зажженного костра возле спального места. Если вы все сделали правильно, вы выполнили миссию. Если игра не посчитает это здание подходящим укрытием, добавьте больше стен.
Что разблокировать на уровне 4
Вы можете начать сейчас, но неплохо было бы достичь как минимум 4-го Уровня, чтобы лучше подготовиться к следующей миссии. Продолжайте набирать опыт, пока не достигнете Уровня 4.
Как только вы это сделаете, разблокируйте Деревянный тряпичный факел, Деревянное копье и Тканевый нагрудный доспех, чтобы лучше экипироваться для второй миссии.
Уровень 5 и выше
При желании вы можете продолжать зарабатывать опыт, добывая ресурсы и охотясь на животных.
Если вы достигли Уровня 5, я рекомендую разблокировать Костяные стрелы, Деревянный лук и Деревянный пол и потратить ваше очко таланта на «Разрушение древесины» — способность превращать древесину в палки очень полезна на ранней стадии игре.
Если вы продвинетесь в ICARUS до Уровня 6, разблокируйте Деревянную стену, Деревянную дверь и Деревянную крышу. Это позволит вас построить полностью закрытый деревянный дом, который намного прочнее, чем все, что сделано из соломы.
Тем не менее, если на ваш дом обрушилась непогода, то не забывайте чинить его время от времени.
Что же, ICARUS — это игра о прогрессе. Теперь, когда у вас есть доступ к следующему проспекту, вы можете сразу приступить к делу. Следующие ближайшие цели — преодолеть перспективу «Живой провод: сканирование местности» и достичь 10-го Уровня, чтобы открыть Уровень 2 в дереве технологий.
Заглядывая вперед, вашим следующим шагом станет преодоление уникальных проблем других перспектив. Тратьте свои очки технологий и талантов с умом, и вы обязательно сможете преодолеть предстоящие испытания.
В этом руководстве мы представим обзор режима открытого мира в Icarus и дадим вам советы о том, как выполнять миссии и исследовать огромный открытый мир. Независимо от того, являетесь ли вы новичком в игре или просто хотите освежить свои знания, в этом руководстве каждый найдет что-то для себя. Так что пристегнитесь и приготовьтесь погрузиться в мир Икара!
Icarus — как выполнять миссии и режим открытого мира | Руководство по режиму открытого мира для начинающих
Режим открытого мира в Icarus — отличный способ исследовать игру и получить массу удовольствия. Это позволяет вам исследовать мир без каких-либо ограничений, предоставляя вам свободу идти куда угодно и делать все, что вы хотите. Вы можете исследовать мир, выполнять квесты, сражаться с врагами и даже строить собственную базу.
Самое замечательное в режиме открытого мира то, что он позволяет вам испытать игру более захватывающим образом. Вы можете не торопиться, исследуя мир и открывая новые места, а также браться за испытания и выполнять квесты. Вы также можете построить свою собственную базу и настроить ее по своему вкусу.

Режим открытого мира
Режим открытого мира в Icarus — отличный способ для игроков исследовать мир, не беспокоясь о добыче ресурсов или каждый раз перезапуская игру. Это позволяет игрокам сохранять все, что они строят в мире, и им не нужно начинать с нуля. Однако на карте есть ограниченное количество некоторых ресурсов, таких как золотая руда. Чтобы компенсировать это, игроки могут создавать глубокую добычу руды, которая даст им бесконечное количество ресурсов, когда дело доходит до руд.
Режим открытого мира также позволяет игрокам исследовать мир и находить новые области для исследования. Игроки также могут найти новые предметы и ресурсы, которые они могут использовать для создания новых предметов и оружия. Игроки также могут найти новых NPC и существ, с которыми можно взаимодействовать.
Это также отличный способ изучить игру и получить от нее максимум удовольствия. Это похоже на другие миссии, которые вы выполняли, за исключением того, что вся карта разблокирована для вас. При загрузке режима открытого мира у вас будет возможность выбрать точку сброса.
Если вы решите покинуть миссии, а затем вернуться, вы всегда будете появляться в одной и той же точке высадки. Теперь, если вы вернетесь к выбору персонажа, выйдете из игры или выйдете из нее, вам не придется заходить обратно. дом, вы выходите из системы, а затем снова входите в этот мир, вы просто появляетесь там, где стояли раньше, со всеми теми же предметами в вашем инвентаре.
Режим открытого мира в Icarus — отличное дополнение к игре, предлагающее множество различных функций, которыми могут наслаждаться игроки. Игроки могут исследовать мир, не беспокоясь о том, что их прогресс будет стёрт, они могут сражаться с врагами-боссами, приручать ездовых животных и строить самые огромные дома, какие только можно себе представить. Это отличный способ просто наслаждаться игрой и получать удовольствие, не беспокоясь о миссиях или целях.
Разработчики также заявили, что режим открытого мира не является их основным игровым режимом и не будетзамена системы миссий, которая есть в Icarus. Это отличная новость для игроков, которые обеспокоены заменой системы миссий. Разработчики также заявили, что у них есть планы по добавлению этого игрового режима в будущем, поэтому, если он вам не нравится или вы считаете, что сейчас он несбалансирован, подождите некоторое время.

Как выполнять миссии в открытом мире
Эта система представляет собой новую систему миссий, реализованную в игре. Это проще, чем традиционные миссии на карте Styx, но все же предлагает значительное количество опыта для их выполнения. Чтобы получить доступ к этим миссиям, игроки должны построить доску в своей области уровня 2 что требует от них уровня не ниже 10 или 15. После того, как доска построена, игроки могут выбирать из двух разных миссий, которые могут варьироваться от сбора, сбора, или убить что-то. В зависимости от сложности миссии игроки будут получать разное количество опыта.
Например, за сложную миссию игроки получат около 16 500 опыта, за среднюю миссию — 10 000 опыта, а за простую — 5 000 опыта. После выполнения миссии игрокам будет предоставлена возможность выбрать две новые, а также они получат награду за выполнение, которая может варьироваться от базовых ресурсов до брони. Имейте в виду, что награды не всегда велики, поэтому не ждите огромных наград за выполнение сложных миссий.
Альтернативная прокачка тоже вариант. Это отличный способ быстро и эффективно повысить уровень своего персонажа в Icarus. Это позволяет вам иметь отдельное дерево талантов и запасного персонажа на случай, если вы потеряете основного в хардкорной миссии. Текущая мета для прокачки альтов заключается в том, чтобы перейти в режим открытого мира и создать все, что может понадобиться вашему альту, например, оружие, боеприпасы и доспехи. Затем попросите их войти в этот альт и подобрать нужные им предметы. После этого они могут приступить к выполнению миссий. Некоторые миссии лучше других, например сложные, которые дают 16 и 500 XP. Эти миссии требуют, чтобы вы убили только элитного медведя и могут дать вам 20 000 XP примерно за 60 секунд.