-
Contents
-
Table of Contents
-
Bookmarks
Quick Links
Infusomat
fmS
®
Instructions for Use
Software IFME/IFMe
Related Manuals for B. Braun Infusomat fmS
Summary of Contents for B. Braun Infusomat fmS
-
Page 1
Infusomat ® Instructions for Use Software IFME/IFMe… -
Page 2
Patient Safety Attention: Consult accompanying documents! Read Instructions for Use prior to use. Application only under regularly supervision by specially trained staff. ➤ Operation Connected electrical equipment must comply ➤ Ensure the unit is properly positioned and with the relevant IEC/EN-publications secured. -
Page 3: Table Of Contents
Infusomat ® Contents Infusomat® fmS / Overview Page 4 Operation Page 6 Additional Settings Page 7 Special Functions Page 8 Alarm Conditions Page 13 Start-up Graphs and Trumpet Curves Page 15 Technical Data Page 16 Warranty / TSC* / Service / Cleaning Page 18 Ordering Page 19…
-
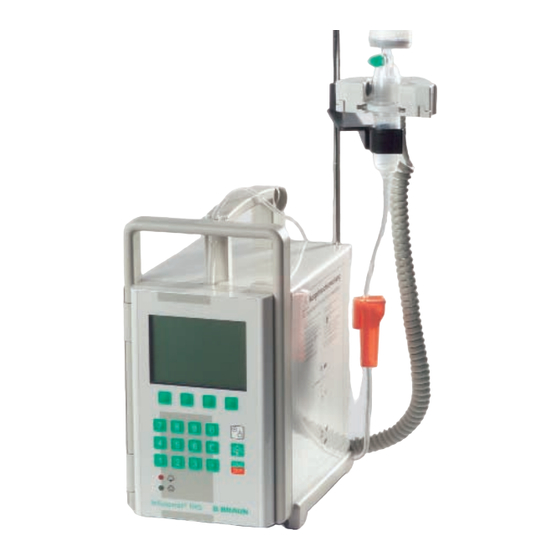
Page 4: Infusomat® Fms / Overview
Overview Handle For easy transport. Display All important information in plain text. Green background illumination only if connected to mains or a key is pushed at battery operation. Keypad for Input Correct Input/CLEAR Display reset to 000.0 Red LED indicates alarm condition Additionally «AAA.A”…
-
Page 5
Guide for Short Infusion Pole Multi-Function- Connector (MFC) Mains/Power Connection Connection for staff (protect against ingress of moisture). In case of call, ambulances mains/power failure, the pump switches to (12 V DC) and inter- battery operation. Battery operation time: face for fm anaes- >… -
Page 6: Operation
Operation Infusion upper clip 1. Ensure reliable installation Never position infusion bottle below pump level. ➤ Connect staff call. ➤ Insert spike vertically into infusion bottle. Fill lower part of drop chamber to max. 2/3. ➤ Open roller clamp. Original 2.
-
Page 7: Additional Settings
Additional Settings To Change the Delivery Rate volume has to be set. ➤ Press START/STOP. Green operating indicator goes out. ➤ Press C. Target Time (Time Pre-selection) Display reset to 000.0 ➤ Press key below TIME. ➤ Enter new delivery rate. (No setting possible, Enter target time via keypad (50 min = 50;…
-
Page 8: Special Functions
Recording the data: In connection with the software “IFME” the The protocol of events only can be transferred Infusomat fmS is equipped with a history func- to a computer via interface (MFC interface tion (memory of events). This permanent lead). For this a terminal programme installed in…
-
Page 9
Special Functions Select Special Mode SF Depending on the version, several functions may Interval bolus be deactivated. Contact service. Automatic bolus in set time interval. In case of ➤ To set special functions press key below SF manual bolus administration the interval bolus repeatedly until desired special function is is skipped. -
Page 10
Special Functions ➤ Drug Display Exit from selection: Press key below END. 9 selectable drug names can be stored (input via service program only). Check Battery Capacity Remaining battery life time is displayed, ➤ Select with key below (+). Drug is displayed, e.g. -
Page 11
Dosage Calculation (Overview) values (rate or dosage) are displayed. The dosage calculation automatically calculates ➤ First check rate displayed for plausibility, the delivery rate in ml/h. then confirm RATE. Value is displayed. Setting parameters: ➤ Start infusion. 1. Concentration Note: Dosage value with unit is displayed (down — per ml or on the right). -
Page 12
Special Functions ➤ Check entered or calculated rate for plausi- Secondary infusion bility and confirm with key below RATE. Rate is e.g. 100 ml Primary Infusion bag volume with displayed. e.g. 1000 ml delivery rate 10 ml/h bag volume with ➤… -
Page 13: Alarm Conditions
Alarms Operating alarms — audible alarm every 4 sec., — operating indicator off, — staff call. Remedy failure and restart infusion. ➤ Switch off device. Drop Alarm / Pressure Alarm ➤ Connect to mains/power or 12 V DC power Infusion bottle empty? source.
-
Page 14
The delivery rate and a drug can be entered in matically will be switched to integrated the Infusomat® fmS as «proposal” via an rechargeable battery. external computer. Both items of data must be checked on the Infusomat fmS and acknow- Charge Battery ledged. ➤ Charge battery in case of: ➤… -
Page 15: Start-Up Graphs And Trumpet Curves
Start-up Graphs and Trumpet Curves Start-up Graphs Trumpet Curves 2 (ml/h) flow deviation Delivery rate = 1 ml/h Delivery rate = 1 ml/h Epmax Epmin t (min) 120 p∆t (min) 31 50 (ml/h) flow 10 deviation Delivery rate = 25 ml/h Delivery rate = 25 ml/h 37,5 Epmax…
-
Page 16: Technical Data
Technical Data Type of unit Volumetric infusion pump Classification (acc. to IEC/EN 60601-1) defibrillator-proof, CF equipment Protection Class I; IP 22 (Moisture protection: drip protected) Class (acc. to Directive 93/42 EEC) II b Rated voltage / current 230 V AC~ (0.06 A), 50/60 Hz Mains fuse T 0.16 A or 200 V/230 V/240 V AC~ (0.06 A), 50/60 Hz…
-
Page 17
Air detector Technical sensitivity Air bubbles > 0.01 ml Alarm triggering: With air bubble size of typ. 0.3 ml (limit value 0.4 ml) or 1.5 ml/h (cumulative value of 1 h as of air bubble volume 0.01 ml) Can be set from 0.01 to 0.3 ml via service program only Can be set from 0.5 to 3.5 ml/h via service program only Accuracy of set delivery rate typ. -
Page 18: Warranty / Tsc* ) / Service / Cleaning
Warranty provided concerning waste disposal and hygiene for batteries and disposables. B. Braun provides as from the date of delivery a warranty of 2 years for every Infusomat® fmS. This covers repair or replacement of parts dama- ged as a result of design/manufacturing errors or material defects.
-
Page 19: Ordering
Ordering Art.-Nr. Infusomat® fmS 230 V 871 5548 Infusomat® fmS 200 — 240 V 871 5440 Infusomat® fmS 100 – 120 V 871 5416 Recommended accessories for Infusomat® fmS Connecting lead for potential equalisation 870 1628 MFC-Connecting lead for staff call 871 1682 MFC-Connecting lead for ambulance cars (12 V DC) 871 1674…
-
Page 20
HOSPITAL CARE B. Braun Melsungen AG P.O.Box 11 20 D-34209 Melsungen Tel. +49 (0) 56 61 – 71-0 Fax + 49 (0) 56 61 – 71-20 44 Material-No. 3891 2341, Drawing No. M671010100F04 05/01 Printed on pulp bleached 100 % chlorine-free…
Patient Safety
Read Instructions for Use prior to use. Application only under regularly supervision by specially trained staff.
Operation
➤
Ensure the unit is properly positioned and
secured.
➤
Prior to use check audible and visual alarms
during self test. Also check the device for possible
damage.
➤
If staff call is used we recommend to check the
equipment once after connecting the pump.
➤
Connect to patient only after switching on the
device. Interrupt the connection during changing
administration set(s) to prevent incorrect dose
delivery.
➤
Select cannula/catheter suitable for use with the
intended medical application.
➤
Position the infusion line free of kinks.
➤
Recommended change of disposables after 24 h
(consider national hygiene regulations).
➤
Compare displayed value with entered value.
Start infusion only if values are corresponding.
➤
Installation in medically used rooms must comply
with the appropriate regulations (e.g. VDE 0100,
VDE 0107 or IEC-publications.
➤
Possible explosion hazard if used in presence of
flammable anaesthetics!
➤
Air in line cannot be detected by the air detector
at stop-cocks, infusion ports and additional
administration set components.
Other components
➤
Variations in pressure (e.g. as caused by change
of level) can affect the accuracy of the device.
➤
Where several infusion lines are connected on
one single vascular access the possibility of their
exerting a mutual influence vice-versa cannot be
excluded.
➤
Refer to respective manufacturer’s information
for possible incompatibilities of equipment resp.
drugs.
➤
Use only compatible combinations of equipment,
accessories, working parts and disposables.
➤
It is recommended to use original Infusomat®
infusion lines only.
➤
The use of not recommended resp. incompatible
disposables may influence the technical specification.
Attention: Consult accompanying documents!
➤
Connected electrical equipment must comply
with the relevant IEC/EN-publications
(e.g. IEC/EN 60950 for data-processing equipment).
The user/operator is responsible for the system
configuration if additional equipment is connected.
The international standard IEC/EN 60601-1-1 has to
be taken into account.
Safety Standards
The Infusomat® fmS satisfies all safety standards for
medical electrical devices in compliance with
IEC/EN 60601-1 and IEC/EN 60601-2-24.
➤
The EMC-limits (electro-mangnetic compatibility)
according to IEC/EN 60601-1-2 and IEC/EN
60601-2-24 are maintained. If the equipment is
operated in the vicinity of other equipment which
may cause high levels of interference (e.g. HF surgical
equipment, nuclear spin tomography units, mobile
telephones etc.) maintain the recommended protec-
tive distances for these devices. Under certain
conditions malfunctions may occur which lead to a
device alarm with permanent alarm tone (see also
alarm conditions, page 13). Interferences may occur
e.g. at electro-magnetic fields > 10 V/m resp.
electro-magnetic discharges > 8 kV.
Special Function «without drip control»,
see page 10.

Service Manual
Infusomat® fmS
0-10
0 —
Version 2.3 English

0
This Service Manual is valid for Voltage 230 V: Ord. No.
Infusomat® fmS, German. . . . . . . . . . . . . . . . . . . . . . . . . 871 5424
Infusomat® fmS, French. . . . . . . . . . . . . . . . . . . . . . . . . . 871 5521
Infusomat® fmS, Dutch . . . . . . . . . . . . . . . . . . . . . . . . . . 871 5530
Infusomat® fmS, Italian . . . . . . . . . . . . . . . . . . . . . . . . . . 871 5564
Infusomat® fmS, Danish . . . . . . . . . . . . . . . . . . . . . . . . . 871 5432
Infusomat® fmS, Norwegian . . . . . . . . . . . . . . . . . . . . . . 871 5491
Infusomat® fmS, Swedish . . . . . . . . . . . . . . . . . . . . . . . . 871 5505
Infusomat® fmS, Finnish . . . . . . . . . . . . . . . . . . . . . . . . . 871 5513
Infusomat® fmS, Czech . . . . . . . . . . . . . . . . . . . . . . . . . . 871 5580
Infusomat® fmS, Polish . . . . . . . . . . . . . . . . . . . . . . . . . . 871 5599
Voltages 200 V / 230 V / 240 V, switchable:
Infusomat® fmS, English . . . . . . . . . . . . . . . . . . . . . . . . . 871 5440
Infusomat® fmS, English . . . . . . . . . . . . . . . . . . . . . . . . . 871 5548
Infusomat® fmS, Spanish. . . . . . . . . . . . . . . . . . . . . . . . . 871 5459
Infusomat® fmS, Portuguese . . . . . . . . . . . . . . . . . . . . . . 871 5467
Infusomat® fmS, Turkish . . . . . . . . . . . . . . . . . . . . . . . . . 871 5572
Voltages 100 V / 110 V / 120 V, switchable:
Infusomat® fmS, English . . . . . . . . . . . . . . . . . . . . . . . . . 871 5416
Infusomat® fmS, Dutch . . . . . . . . . . . . . . . . . . . . . . . . . . 871 5475
Infusomat® fmS, Spanish. . . . . . . . . . . . . . . . . . . . . . . . . 871 5483
Infusomat® fmS, Portuguese . . . . . . . . . . . . . . . . . . . . . . 871 5394
This Service Manual is available under the following part number:
Designation Part No.
Service Manual Infusomat® fmS, English . . . . . . . . . . 8713 9124
Languages of this Manual Designation Part No.Service Manual Infusomat® fmS, German . . . . . . . . . . 8713 9123
The complete Service Manual contains the following pages:
Page 0-1 to page 0-10Page 1-1 to page 1-12Page 2-1 to page 2-8Page 3-1 to page 3-10Page 4-1 to page 4-20Page 5-1 to page 5-2Page 6-1 to page 6-2Page 7-1 to page 7-4Page 8-1 to page 8-8Page 9-1 to page 9-2Page 10-1 to page 10-4Page 11-1 to page 11-2Page A-1 to page A-2
0 — 2 Infusomat® fmS 2.3 gb

0
0 — Table of Contents
Important Preliminary Remarks Service Work Page 0 — 5Technical Safety Checks Page 0 — 5Current Versions Page 0 — 5Revision Service Page 0 — 5Quality Management Page 0 — 6Checks and Repair Page 0 — 6Notes on ESD Page 0 — 6Spare Parts and Test Equipment Page 0 — 7Setting Off Page 0 — 7List of Abbreviations Page 0 — 8
Contact Persons Technical Training Page 0 — 9Entry for Technical Training Page 0 — 9Ordering of Spare Parts and Test Equipment Page 0 — 9Service Hotline Page 0 — 9Return of Spare Parts and Test Equipment Page 0 — 9Safety Officer
(§ 30 MPG) Page 0 — 9Translation Page 0 — 9
System Overview Physical Construction Page 1 — 1Operation Flow Chart Page 1 — 3Function Page 1 — 4Voltage Supply Page 1 — 5Signal Table Page 1 — 6Mains Operation Page 1 — 7Battery Operation Page 1 — 8Alarm Circuit Page 1 — 8Pump Unit Page 1 — 8Computer Interface Page 1 — 9Braun fluid manager system (fm system) Page 1 — 10Internal Assignment Page 1 — 10Accessories Page 1 — 11
Software Software Update Page 2 — 1Approved Software Versions Page 2 — 2Error Messages and Alarms Page 2 — 4Software Default Values Page 2 — 6
Service Program Structure of the Service Program Page 3 — 1Additional Functions with
Plugged Service Connector Page 3 — 2Start / Quit the Service Program Page 3 — 3Unit Data Page 3 — 3History Data Page 3 — 4Test Page 3 — 5Unit Modifications Page 3 — 6Calibration Page 3 — 9
Unit Elements Mains Fuses Page 4 — 1Battery Page 4 — 1Door Lock Page 4 — 2Pump Cover Page 4 — 3Housing and Handle Page 4 — 4
Infusomat® fmS 2.3 gb 0 — 3

Table of Contents0
Controller Board Page 4 — 5Rear Panel Page 4 — 6Front Frame Page 4 — 11Pump Unit Page 4 — 12Pressure Sensor Page 4 — 14Air Inline Sensor Page 4 — 17Operating Unit Page 4 — 18Barcode Label Page 4 — 19Frame with Seal Page 4 — 19
Checks after Repair Page 5 — 1
Maintenance Page 6 — 1
Technical Safety Check TSC Page 7 — 1
Procedural Instructions on the TSC Visual Inspection Page 8 — 1Electrical Safety
according to IEC / EN 60601-1 or VDE 0750 and VDE 0751 Page 8 — 2
Functional Inspection Page 8 — 3
Test Equipment and Special Tools Page 9 — 1
Spare Parts List Unit Elements Page 10 — 1Colours Page 10 — 2Miscellaneous Page 10 — 2Software Update Page 10 — 2
Index Page 11 — 1
Revision Documentation Revision Service-Documentation Page A — 1Current Information Page A — 1
0 — 4 Infusomat® fmS 2.3 gb

0
0 — Important Preliminary Remarks
Service Work The present manual is for your information only. The possession of this manual does not authorize the performance of service work. Service tasks may only be executed by persons, who
— have received appropriate training on the system from B. Braun
— are included in the revision service
— possess the necessary test equipment and mechanical aids, and
— fulfill the personal requirements (training and knowledge).
Technical Safety Checks The user is obliged to perform or to have performed the Technical Safety Checks on those medial products for which these checks have been prescribed by the manufacturer and to carry them out according to the indications of the manufacturer as well as the generally approved technical standards while adhering to the pe-riods stated (§ 6 MP BetreibV).
B. Braun also recommends training on the Technical Safety Checks, or to perform at least the steps indicated in the current version of the manual, as:
— the TSC requires that the instructions in the manuals are ob-served
— the manuals are a reference for measurements
— depending on the unit type, the Service Program must be called which may lead to a dangerous unit condition in case of inappropriate operation. Furthermore, a special service connector may be necessary.
Current Versions This manual version corresponds to the state when the manual was written. B Braun reserves the right to make technical modifi-cations. The state of the revision is indicated by the index number in the footer of every page.
Revision Service The possession of this manual does not automatically mean inclu-sion in the revision service. You will be included in the revision service after:
— technical training by B. Braun Melsungen or
— a written order placed with the sales department of B. Braun (fee required).
Responsibility of the Manufacturer The manufacturer, person who assembles, installs or imports the device can only be held responsible for safety, reliability and per-formance if
— mounting, enhancements, new settings, changes or repairs are carried out by duly authorized persons,
Infusomat® fmS 2.3 gb 0 — 5

Important Preliminary Remarks0
— the electrical installation in the corresponding room meets the requirements of the VDE 0107, VDE 0100 part 710 or IEC 60364-7-710 and the national standards,
— the device is used in accordance with the instructions for use and the Service Manual,
— the Technical Safety Checks are performed at regular inter-vals,
— a current manual which corresponds to the revision state is used when carrying out maintenance, repair and service,
— the service technician takes part in the revision service,
— the technician has participated in a technical training course for the specific B. Braun unit.
Quality Management B. Braun is certified in accordance with DIN EN ISO 9001 and ISO 13485. This certification also includes maintenance and serv-ice.
The unit has the CE label. The CE label confirms that the device corresponds to the “Directive of the Council for Medical Products 93/42/EC” of June 14, 1993.
Checks and Repair Training may only be performed by B. Braun. The possession of the manual does not authorize the performance of repairs. The in-structions on electrostatic sensitive components (ESD standards) must be observed.
After repair a device check or diagnosis is to be carried out.
Notes on ESD Semiconductors can be destroyed by electrostatic discharge. Es-pecially MOS components can be damaged by interference from electrostatic fields, even without discharge via contact. This type of damage is not immediately recognizable. Unit malfunctions can even occur after a longer period of operation.
Each workstation must be equipped according to the recommen-dations with the necessary static protective measures, if ESD components or boards are handled.
Each workstation must be equipped with a conductive table sur-face. The conductive surface, the soldering iron or the soldering stations must be grounded via protective resistors.
Chairs must be of antistatic design. The floor or floor mats should be of electrically conductive material.
Personnel must wear conductive wristbands which are connected to a central ground potential via protective resistors, e.g. the ground contact of a wall outlet. Furthermore it is recommended that personnel wear cotton clothing and electrically conductive shoes to prevent electrostatic charge.Fig.: 0 — 1
0 — 6 Infusomat® fmS 2.3 gb

Important Preliminary Remarks 0
Spare Parts and Test Equipment Only use original spare parts from the manufacturer. Do not tamper with assembly groups which can only be exchanged com-pletely. The spare parts required are listed in Section 9.
Service personnel are responsible for the calibration of their test equipment. Original test equipment can be calibrated at the works of B. Braun. Further information is available upon request.
Setting Off Additional notes and warnings are set off as follows:
Note
Is used for additional or special notes concerning information and working steps.
CAUTION
Is used for working steps which may result in damage to the unit, system or to a connected device.
WARNING
IS USED FOR WORKING STEPS WHICH MAY RESULT IN PERSONAL INJURY.
References to chapters are shown as follows (see “Setting Off“ ➨ pg. 0 — 
References to figures and tables are shown as follows Fig.: 2 — 3 or Table 2 — 1
References to item numbers in figures are shown as follows (Fig.: 1 — 1 / Item 1) In this case “Fig.: 1 – 1“ is the figure number and “Item 1“ the item number within the figure.
When the Service Manual is stored as pdf-file, these references are displayed green. Click with the mouse button on a reference to jump to the corresponding source.
Menu commands are described as: Menu File.
Infusomat® fmS 2.3 gb 0 — 7

Important Preliminary Remarks0
List of Abbreviations Abbreviations which are not generally known, but are used in this manual, are listed below.
CC Computer Controlled
CLR Clear
Dig Digit
ESD Electrostatic Discharge
UA Unit Alarm
FuP Function Microprocessor
KuP Control Microprocessor
LCD Liquid Crystal Display
OIL Original Infusomat Line
PCA Patient Controlled Analgesia
TSC Technical Safety Check
TEMP Temperature
0 — 8 Infusomat® fmS 2.3 gb

0
pg:0 — 10
0 — Contact Persons
Technical Training Via local representative.
Entry for Technical Training Application for a technical training course must be made via the responsible representative.
Ordering of Spare Parts and Test Equipment Please contact your local B. Braun subsidary.
International Technicians (Intercompany)Nadja Machal
Fax: +49 5661 / 75 -47 89 e-mail: [email protected]
Service Hotline Karl Tippel, Tanja Kördel Phone: +49 5661 / 71 — 35 25Fax: +49 5661 / 71 — 35 26e-mail: [email protected]: [email protected]
Return of Spare Parts and Test Equipment B. Braun Melsungen AG Schwarzenberger Weg 73-79 Wareneingang Werk C 34 212 Melsungen Germany
Safety Officer (§ 30 MPG)
Dr. Ludwig Schütz e-mail: [email protected]
Translation Brückner GmbH, Germany
Infusomat® fmS 2.3 gb 0 — 9

Contact Persons0
For your notes:
0 — 10 Infusomat® fmS 2.3 gb

11 — 12
1 — System Overview
Physical Construction The Infusomat® fmS is a compact volumetric peristaltic infusion pump.
Standard delivery rate range 0.1 to 999.9 ml/h
The unit is operated via a membrane keyboard. It is equipped with an LCD-display (liquid crystal display) for the display of the deliv-ery rate and the operating support of the user. Two control LEDs display alarms, and the running of the infusion pump.
Barcode
A barcode label is attached to the left front side of new Infuso-mat® fmS unit versions which can be retrofitted on previous de-vices. This barcode label is used to read the serial and DIANET type number via a scanner when the Infusomat® fmS is operated in an fm-system.
Fig.: 1 — 1 Unit design Infusomat® fmS
Handle
Door lock
Control LEDs
Keyboard
LCD-display
Softkeys
Guide for short pole clamp
Drop sensor socket
Flow inhibitor
Air inline sensor
Drop sensor
Mains connection
Potential equalization
fm Recessed plug
Optical
MFC-socket
interface
Peristaltic pump
Barcode label
Infusomat® fmS 2.3 gb 1 — 1

System Overview1
Infusion Lines
The Infusomat® fmS can be operated with the Original Infuso-mat® Line (OIL) and the Infusomat® Space Line. The lines are dis-tinguished by the different silicone pump segments. They have to be inserted in a different way; in addition the TSC differs.
WARNING
OPERATING THE UNIT ALTERNATELY WITH THE ORIGINAL INFU-SOMAT® LINE AND THE INFUSOMAT® SPACE LINE IS NOT RECOM-MENDED.
Note
Please observe the “Instruction for Technical Service — Adjustment to Space Line“ when using the Infusomat® Space Line for the first time.
1 — 2 Infusomat® fmS 2.3 gb

System Overview 1
Operation Flow Chart
See instructions for use for detailed information.
Fig.: 1 — 2
Switch On
Standard operation Service connectorplugged … 1
Special functions … 3
Set delivery rate Volume preselection Time preselection
Rate calculation
Start infusion
Stop infusion
Recall info
Change delivery rate …
Recall Bolus
1 See Service Program diagram2 Only when preselected time or preselected volume has expired3 Please pay attention to activation in Service Program4 Only available with IFMC5 From software IFMe, IFME on6 From software IFME on
KOR Mode 2
— Dose calculation 5
— Bolus function
— Standby function
— Drug change
— CC Mode 4
— Switch-off pres-sure
— Drop control
— Piggyback 5
— Battery capacity
— Data lock
— Alarm tone 6
— Contrast setting
— Clock5
Infusomat® fmS 2.3 gb 1 — 3

System Overview1
Function Two independent software-controlled microprocessor systems control and monitor the hardware. On the basis of their functions, they are defined respectively as a control and a function proces-sor. Both systems work with independent clock frequencies and have access to different program and data memories. All safety-relevant functions are handled by both microprocessors and the results are counter checked (CF- and FC-latch).
The input via the keyboard is fed to both processors. Additionally the acknowledgement signal of the ON/OFF key is fed to the mains power supply logic (voltage E/A-TAS). The function proces-sor has also access to this logic via E/A-INT.
Description of the voltage signals (see „Signal Table“ ➪
p. 1 — 6).
Fig.: 1 — 3 Block diagram
1 — 4 Infusomat® fmS 2.3 gb

System Overview 1
Voltage Supply The voltage supply is generated either directly from mains, via the FM connector (14 V connection to the fluid manager system), or via the MFC-connector (11 to 16 V) and as an internal supply via the internal 7.2 V NiCD battery. The mains module is available in three versions: 230 V, 220 / 230 / 240 V and 100 / 110 / 120 V. The rated voltage has a tolerance of + 10% to – 15 %.
A voltage of 11 V to 18 V is available after transformation and rectification. This voltage is fed to the battery charge circuit and the unit supply. This is also valid for an external 12 V supply from the MFC- or FM-connector. The FET V10 switches between the ex-ternal and the internal voltage supply. The transistor V10b works as an ON/OFF switch for the operating voltages UPS, UMOT and +5V. The +5V supplies the complete electronics including the double channel microprocessor system. A window comparator constantly monitors the +5V for undervoltage or overvoltage. The function is checked during switch-on. The operating voltage UPS supplies the stepper motor and the UMOT, the stepper motor drive.
The transistor V47 switches the operating voltage UMOT. In case of an alarm the motor is switched off by V47. Additionally the switching function of the transistor is checked during the switch-on test.
The circuit has two separate assembly groups with separate sup-ply voltages UBA and UBB. The ON/OFF circuit has a retriggerable delay switch-off. A follow-up charging circuit drives the transis-tor V10b.
The alarm logic (operating voltage UBB) is an RS latch. This is set when the unit is running and activates the alarm circuit. The alarm buzzer and driver are also driven by UBB. The ON/OFF circuit is activated and the voltage supply is switched on by pressing the ON/OFF key. The alarm latch is reset simultaneously. A function test of the voltage monitoring, motor circuit and alarm activation is performed. The voltage supply is maintained by cyclic self-hold-ing pulses fed to the logic. The alarm latch is also activated.
Infusomat® fmS 2.3 gb 1 — 5

System Overview1
Signal Table
Fig.: 1 — 4
Signal Meaning Signal Meaning
+5V Voltage supply electronic PKS2 Pump Head Sensor 2
5V-HT Overvoltage test PKSS Pump Head Sensor Control
5V-LT Undervoltage Test PRS Staff Call Relay Control
AK-I Battery Charge and Discharge Current PRS-F Staff Call Relay Function Channel
AK-LAD Battery Capacity ON/OFF PKSS Pump Head Sensor Control
AK-Test Battery Test PRS.RUF Staff Call Relay Control
ALA-UB Operating Voltage Alarm RDE Rate Display Enable
CS Chip Select RES Power on Reset
DI Data Input RES-F Reset Function Channel
DO Data Output RES-K Reset Control Channel
E/A-INT ON/OFF by Microprocessor RTS Return to Send (DIANET)
E/A-ST ON/OFF Status Rx Receive Data
E/A-TAS ON/OFF Key SCK Serial Data Clock
Table 1 — 1 Signal table (Part 1 of 2)
1 — 6 Infusomat® fmS 2.3 gb

System Overview 1
Mains Operation When the unit is connected to mains the unit supply voltage is switched on for the duration of the switch-off delay time. If the microprocessor recognizes a sufficient mains voltage for charg-ing, the voltage supply is maintained. In this case only a battery balance is carried out, because a key was not pressed. The current battery capacity and the battery operting hours are displayed in the LCD. The unit is switched off when the ON/OFF key is pressed for at least 2 seconds. Thereby the self-holding is triggered and the alarm latch is reset with a delay. After another 20 seconds the unit is switched off, because the pulses are missing. If the Infuso-mat® fmS is switched off in mains operation with the ON/OFF key, the internal mains voltage is still present.
EDB Electronic Occlusion Pressure TD-A0 Text Display Address 0
FMC-F FM Connection Function Channel TD-A1 Text Display Address 1
FMC-K FM Connection Control Channel TD-A2 Text Display Address 2
UEXT-N External 12V Supply (-) TD-A3 Text Display Address 3
UEXT-P External 12V Supply (+) TD-E Text Display Enable
UFM-P External 12V Supply (FM) TD-R/W Text Display Read/Write
LFCL Air Sensor Clock TD4 Text Display Data 4
LFDA Air Sensor Data TD5 Text Display Data 5
LFS Air Sensor Signal TD6 Text Display Data 6
LFSEL Air Sensor Selection TD7 Text Display Data 7
LFT Air Sensor Reset TSA Drop Sensor Output
MISO Serial Data Output Interface TSCL Drop Sensor Clock
MOSI Serial Data Input Interface TSE Drop Sensor Receiver
MOTEIN Motor ON TSR Drop Sensor Regulation
MS Motor Control TSS Drop Sensor Control
P-ENA Port Enable Tx Transmit Data
PH0 Phase 0 UBA, UBB Supply Voltage for Alarm, On/Off Logic, RTC
PH1 Phase 1 UPS Switched Operating Voltage UB
PH2 Phase 2 UPS-M UPS Measurement Line
PH3 Phase 3 UMOT Supply Voltage of Motor Drive
PKS Pump Cover Sensor UMOT-M UMOT Measurement Line
PKS1 Pump Head Sensor 1 URTC Supply Voltage Clock Module
Signal Meaning Signal Meaning
Table 1 — 1 Signal table (Part 2 of 2)
Infusomat® fmS 2.3 gb 1 — 7

System Overview1
In mains operation battery function is checked during the switch-on test. Therefor the charge and discharge current are measured and the charging of the battery is interrupted for the duration of measurement.
Battery Operation The battery function is monitored by the following data: charge current, discharge current and time, and self-discharge time. In battery operation the battery function is checked during switch-on test. The theoretical load condition is read from the clock mod-ule of the battery. Then the battery is connected to UPS and the voltage is measured. If the minimum requirements are not reached a battery alarm is activated.
Alarm Circuit The alarm generation consists of:
— Standstill of pump due to switch-off of MS (motor circuit) and UMOT (motor operating voltage)
— Audible alarm due to the drive via ALA-AK (control channel) or via ALA-UB. The alarm volume is about 65dBA.
— Optical alarm. Is displayed in the LCD- and a separate LED-display. Additionally the set rate flashes with AAA.A.
— Staff call via the MFC staff call cable.
The user must check the optical and audible alarm during the switch-on test. An alarm must be activated to test the staff call alarm of the Infusomat® fmS, e.g. open pump cover during oper-ation.
Pump Unit The pump head is driven by a stepper motor. Each full step of the motor is realized by 5 microsteps. The motor is driven by an FET output stage. The function processor controls the motor with the MS signal. A slot disc which is mounted on the pump head axle is scanned by two light barriers (PKS1 and PKS2 signal). Thereby the control microprocessor monitors the direction of rotation and speed of the pump head.
The pump head position is also determined with the PKS2 signal. The motor can therefore be accelerated during the withdrawal phase. Thus a nearly pulse-free flow is realized in the lower deliv-ery range (<100 ml/h). The total pump head cycles and running time are available in the Service Program under history data.
1 — 8 Infusomat® fmS 2.3 gb

System Overview 1
Mechanical Occlusion Pressure:
The Infusomat® fmS has a linear peristaltic pump. This pump has 12 slides which are driven by a camshaft.
When the pump cover is closed, the pump tube is squeezed (oc-clusion) by at least one of the slides, independent of the pump head position. The complete pump unit is mounted behind the front panel in the cabinet frame. The hinges and the locking bow for the pump cover are led through the front panel. The pump cov-er is automatically closed when the operating unit door is closed. The slides are pressed against the pump cover by a spring system in the pump unit. Thereby a delivery pressure is realized and me-chanically limited by the springs.
If the pressure limit is exceeded there is no volume delivery. The drop sensor activates an alarm. If one of the springs fails, the spring system will ensure that an unsafe condition cannot occur (free flow). The two remaining springs ensure an appropriately high occlusion pressure.
Electronic Occlusion Pressure:
The electronic occlusion sensor is mounted on the output side of the pump. A spring pressure loaded slide is seated on the infusion line. An increase of pressure in the infusion line leads to a deflec-tion of the coil core via the pressure slide. The depth of immersion is measured inductively. When a preset pressure threshold is reached the pump drive is switched off, and an alarm is activated. The electronic occlusion pressure is a single channel circuit. In case of a failure, the mechanically limited maximum pressure can be reached.
Motor Switch-Off by Both Processors:
Function processor: MS signal to switch off the motor drive. — Control processor: MOTEIN signal to switch off the drive of the motor operating voltage.
Computer Interface The Infusomat® fmS is equipped with a computer interface. It can be connected to the optical interface or via the MFC service con-nector. To activate the computer operation please ask for a de-tailed description from B. Braun.
Up to software version IFMC: DIANET From software version IFMe, IFME on: DianetStar
Infusomat® fmS 2.3 gb 1 — 9

System Overview1
Braun fluid manager system (fm system) The Infusomat® fmS can be operated as a stand-alone unit or in-tegrated in an intensive care unit, e.g. the B. Braun fluid manager system (fm system). It is integrated by simply snapping the unit into the system.
Mains supply and data communication are automatically con-nected. Thereby data acquisition and transmission to higher com-puter system levels are possible.
Internal Assignment
Fig.: 1 — 5
1 — 10 Infusomat® fmS 2.3 gb

System Overview 1
Accessories General Designation Ord. No.
Mounting clip for drop chamber ”TK 2000” . . . . . . . . 3477 3223
Mounting clip for drop chamber ”Intrafix air” . . . . . . 3477 3215
Drop sensor, complete . . . . . . . . . . . . . . . . . . . . . . . . . . 3450 578A
Short pole clamp . . . . . . . . . . . . . . . . . . . . . . . . . . . . . . 3450 5873
Drop chamber holder . . . . . . . . . . . . . . . . . . . . . . . . . . . 3477 3088
Mains lead (200-240V~) . . . . . . . . . . . . . . . . . . . . . . . . 3450 2718
Mains lead (100-120V~) . . . . . . . . . . . . . . . . . . . . . . . . 3450 5423
Mains lead USA / CAN . . . . . . . . . . . . . . . . . . . . . . . . . . 3450 5393
Universal clamp, complete . . . . . . . . . . . . . . . . . . . . . . 3450 5857
Pole clamp (universal clamp, rotating) . . . . . . . . . . . . 3450 9054
Infusomat® fmS 2.3 gb 1 — 11

System Overview1
For your notes:
1 — 12 Infusomat® fmS 2.3 gb

22 — 8
2 — Software
Software Update Designation Ord. No.
Update kit IFMC02003 . . . . . . . . . . . . . . . . . . . . . . . . . 3450 645A
Update kit IFMe02004 / IFME03004 . . . . . . . . . . . . . . 3450 645C
Update kit IFMe02005 / IFME03005 . . . . . . . . . . . . . . 3450 645D
Update kit IFMe02006 / IFME03006 . . . . . . . . . . . . . . 3450 645E
Update kit IFMe02007 / IFME03007 . . . . . . . . . . . . . . 3450 645F
MFC interface line . . . . . . . . . . . . . . . . . . . . . . . . . . . . . 0871 1661
The higher digit always replaces the lower digit for the revision level, e.g. IFME02007 replaces IFME02006.
Units with an old software version (e.g. IFMC02001) can be up-dated to the new software version IFME03007.
When the software group changes the unit functions are changed, too. Therefore unit users must be informed (e.g. instruct the user and exchange the instructions for use – software coding (e.g. IFME) is to be found on the cover page of the instructions for use.)
Note
Do not use an update program on Windows NT systems.
Note
Mark the unit after having updated the software! The new soft-ware version must be clearly recognizable.
Only update from old to new software versions, never in reverse order (e.g. never update from IFMC02003 to IFMC02001!).
All units used in one ward should have the same software status and basic setup to avoid operator mistakes.
Note
Software updates must be reported to B. Braun for registration. Observe the notes of the update program and the supplements!
Fig.: 2 — 1 Coding
Position 1 2 3 4 5 6 7 8 9
Digit I F M E 0 3 0 0 7
Revision level
Hardware identification
Software group
Infusomat® fmS
Infusomat® fmS 2.3 gb 2 — 1

Software2
Approved Software Versions IFMC02001
— Basic software (Must not be used any more. Please contact the Technical Service of B. Braun).
IFMC02002
— Error elimination at Bolus special function at staff call on the fm system
— Optimized air sensor evaluation
IFMC02003
— EMC optimized
— New error code FF16, defective membrane keyboard
IFMe02002
— Preselected volume and time counted down to 0
— Interface changed to DIANET Star (not compatible with Dianet)
— New special function dose calculation
— New special function Piggyback
— New special function clock
— Storage of alarms in case of malfunctions, which can be re-called in the Service Program, function 230
IFME03002
Only controller board with loudspeaker (see „Controller Board“ ➪ p. 4 — 5).
Like IFMe02002 and in addition:
— Alarm volume can be set
— History function
IFMe02003
— Dianet Star corrected
IFME03003
— Additionally History corrected
— Log of volume delivered
— New event: normal mode / piggy mode
IFMe02004 / IFME03004
— Optimized dose calculation
— New language “Hungarian” in language group E
2 — 2 Infusomat® fmS 2.3 gb

Software 2
IFMe02005 / IFME03005
— Cyclical battery test
— Retaining or deleting last dose calculation when unit is switched off, can be set in the Service Program
IFMe02006 / IFME03006
— Optimized switch-off cycle of Service Program
IFMe02007 / IFME03007
— Reset the battery capacity from 0 mAh to 1 mAH in the event of a negative battery test result.
— Reset the battery voltage acceptance thresholds from 7.55 V to 7.35 V.
Infusomat® fmS 2.3 gb 2 — 3

Software2
Error Messages and Alarms
Alarms of the function processor 80c535 are displayed in the text box of the LCD-display. Alarms of the control processor 68HC11 are displayed in the 7 segment display. The alarms help to trou-bleshoot unit malfunctions. As not all malfunctions can be con-sidered, unit malfunctions with different messages, which are not listed, can be displayed, or there may be no message.
Detected unit alarms are displayed in the text box as ”Unit Alarms” in the selected language. Additionally the error number is displayed in the text box.
Function Processor 80c535
Fig.: 2 — 2
7 segment display
Text box
Text Box Description
100 defective RAM memory
101 UMOT cannot be switched on
102 UMOT still switched on despite overvoltage
103 UMOT still switched on despite MOTEIN=0
104 UMOT still switched on despite undervoltage
105 ON/OFF key pressed longer than 14 sec
106 defective air sensor (calibration value?)
107 defective program memory
108 defective program flow
109 different number of pump head cycles
110 different keyboard gaps between 80c838 and 68hc11
111 different program versions between 80c535 and 68hc11
112 defective program flow
113 testbit!=0 out of switch-on test
116 defective program memory — text
117 defective program memory — text does not match with program
118 reset during active operation
119 defective ROM
Table 2 — 1
2 — 4 Infusomat® fmS 2.3 gb

Software 2
Control Microprocessor 68hc11
FFxx is displayed in the 7 segment display with flashing dots. FFxx is the error code.
7 Segment Display Description
FF01 dummy for test
FF02 battery not present / missing battery current
FF03 defective RAM memory
FF04 defective program memory
FF05 defective program memory
FF06 calibration data error from EEPROM
FF07 pump head cycle not plausible
FF08 failure / inaccuracy of system clock
FF09 failure 100msec system clock
FF10 reset during active operation
FF12 no dynamic pressure sensor signal (EDB)
FF16 defective membrane keyboard (from IFMC02003 on)
Table 2 — 2
Infusomat® fmS 2.3 gb 2 — 5

Software2
Software Default Values Unit No.: _______________________
1) From software IFMe, IFME on2) No longer available in software IFMe, IFME
Menu Item Default Customer Setting
Standard function User language depending on Art. No. _______________________
Alarm type single stage _______________________
Staff call static without OFF Alarm, without switch-on pulse
_______________________
Ward identification ”Ward Identification” _______________________
Drug 0 blank _______________________
Drug 1 … 9 drug 1 … 9 _______________________
Operating alarms 0 _______________________
Minimum delivery rate 0.1 ml/h _______________________
Maximum delivery rate 999.9 ml/h _______________________
Maximum air rate 1.5 ml/h _______________________
Maximum air bubble 0.30 ml _______________________
Special functions Dose calculation deactivated _______________________
Bolus deactivated _______________________
Standby activated _______________________
Drug selection deactivated _______________________
CC Mode 2) deactivated _______________________
Switch-off pressure activated _______________________
Drop control deactivated _______________________
Piggyback1) deactivated _______________________
Battery capacity deactivated _______________________
Data lock deactivated _______________________
Alarm tone 1) deactivated _______________________
Contrast deactivated _______________________
Clock 1) deactivated _______________________
SM menu Interval Bolus dose Off _______________________
Online rate setting On _______________________
Double rate entry Off _______________________
User data Switch-off pressure high _______________________
Contrast optimum contrast _______________________
CC Address2) 1 _______________________
Drug 0 _______________________
Data lock Off _______________________
Standby time 24h 00min _______________________
Drop control On _______________________
2 — 6 Infusomat® fmS 2.3 gb

Software 2
Bolus key On _______________________
Bolus rate 999.9 ml/h _______________________
Calibration data Air sensor calibration value 182 mV must not be changed
Scale factor 54 _______________________
Unit specific data DIANET type no. depending on unit _______________________
Unit No. depending on unit _______________________
Operating hours depending on unit _______________________
Battery hours depending on unit _______________________
Number of pump head cycles depending on unit _______________________
Menu Item Default Customer Setting
Infusomat® fmS 2.3 gb 2 — 7

Software2
For your notes:
2 — 8 Infusomat® fmS 2.3 gb

33 — 10
3 — Service Program
Structure of the Service Program
Fig.: 3 — 1
Service connectorplugged
Switch On
Special function(see operating flow diagram)
Standard operation(see operatingflow diagram)
Short display:software version,
user language
Service Programactivated
Group:Unit data
Group:History data
Group:Test
Group:Unit modification
Group:Calibration
Ward identification120.0
Operating hours200.0
Air inline sensor300.0
Service language400.0
Scale factor510.0
Software version100.0
Drug110.0
Serial number140.0
DIANET type no.150.0
Battery op. hours210.0
Pump headcycles220.0
Alarms230.0
Pressure sensor310.0
User language410.0
Alarm tone420.0
Staff call430.0
Special function440.0
Menu450.0
Delivery rate460.0
Air alarm470.0
Air inline sensor520.0
Pressure stage540.0
Pump data550.0
Delete dose values490
History 2)
560.0
1 From software IFMe, IFME on2 From software IFME on
Dianet modeDisplay 1)
480
Infusomat® fmS 2.3 gb 3 — 1

Service Program3
Additional Functions with Plugged Service Connector
Software Version and User Language
1. Plug service connector on MFC socket at the rear of the unit.
2. Switch on unit and keep the ON/OFF button pressed (for max. 15 s).
3. The software version and user language are displayed in the LCD-display.
4. The unit is switched on when the ON/OFF button is released.
5. ** appears in the LCD-display if the service connector is plugged.
Two LEDs are integrated in the service connector:
— green = Power supply active
— red = Alarm
The following conditions are activated:
— The operating alarms are muted.
— All special functions are accessible (including the disabled).
— The special functions are slightly modified. (Example: SM battery capacity has keys for 0 min/32 min presetting).
— The battery capacity display switches between the nominal and the actual capacity. If the maximum battery capacity is not reached ”?” will be displayed before the new nominal ca-pacity.
Contrast Setting
1. Select ”Contrast Setting” with the SM key. The softkey sym-bols will flash.
2. Set display contrast with the (+) or (-) key.
3. Return to main menu with END.
Disabling the Pressure Sensor (Occlusion Pressure Mechanical)
The electronic pressure monitoring can be deactivated to check the mechanical occlusion pressure.
1. Select ”Occlusion Pressure” with the SM key.
2. Select ”Mechanical”.
3. Return to main menu with END.
A too low pump speed is indicated in the display by ”Pressure Alarm” with underlined stars.
3 — 2 Infusomat® fmS 2.3 gb

Service Program 3
Start / Quit the Service Program Activate the Service Program
1. Plug service connector on MFC socket at the rear of the unit. — ** appears in the display.
2. Select ”Service Program” with the SM key. When the service program is activated the red alarm LED flashes. The LED dis-plays the code number of the selected group and function.
FUNCTION END Jumps to the initial function GR+ Selects group FU+ Selects function in the
activated group OK Activates the selected function or if
necessary skips to the sub-functions with NEXT
Quit the Service Program
1. Press END in the main menu. — A data storage query is acti-vated: ”Save changes? Yes / No”. Y / N terminates the Service Program. Press END to jump to the last function.
2. Switch off unit and remove service connector.
Note
Disconnect the unit from mains for at least 30 seconds after ter-mination of the Service Program (memory is deleted). Then the unit can be switched on again.
Unit Data Software Version Function 100.0
1. Select sub-functions with NEXT.
2. The current software version is displayed in the LCD-display: — User program version with date — Language with text version. Further languages with (+). — Service Program version — Service language with text version
3. Return to initial function with END.
Fig.: 3 — 2
Fig.: 3 — 3
Infusomat® fmS 2.3 gb 3 — 3

Service Program3
Drug Name Function 110.0
Memory for maximum 10 drugs and 20 characters per name.
1. Display stored drug names with NEXT key.
2. Delete displayed entry with CLR.
3. Press YES to modify a drug name: Move cursor to character with NEXT. Select new character from line 3 with << or >>.
4. Repeat procedure for each character.
5. Return to initial function with END.
Ward Identification Function 120.0
Enter and display of a ward specific unit identification. Permanent display if the unit is connected to mains and switched off.
1. Delete displayed entry with CLR. Press YES to enter modifica-tions: Move cursor to character with NEXT. Select new character from line 3 with << or >>.
2. Repeat procedure for each character.
3. Return to initial function with END.
Serial Number Function 140.0
The displayed serial number must correspond with the number on the unit type plate, as this number is used in interface mode.
1. YES activates the entry mode. Enter via the numeric key-board.
2. YES stores the changed or new number.
3. Return to initial function with END.
DIANET Type Number Function 150.0
The displayed serial number must correspond with the number on the unit type plate, as this number is used in the interface mode.
1. YES activates the entry mode. Enter via the numeric key-board.
2. YES stores the changed or new number.
3. Return to initial function with END.
History Data Operating Hour Counter Function 200.0
1. OK activates the display.
2. Return to initial function with END.
Battery Operating Hours Function 210.0
1. OK activates the display.
Fig.: 3 — 4
3 — 4 Infusomat® fmS 2.3 gb

Service Program 3
2. Return to initial function with END.
Pump Head Cycles Function 220.0
Display of the pump head cycles (delivered volume).
1. OK activates the display.
2. Return to initial function with END.
Operating Alarms Function 230.0
The last 20 operating alarms can be recalled.
They are displayed as 16 bit binary codes and each bit position can be set from 0 to 1.
1. OK activates the alarm display.
2. Display operating alarms -01 to -20 with the (+) and (-) key.
3. Delete operating alarms with CLR.
4. Return to initial function with END.
Unit alarms will also be displayed from software version IFMe, IFME on
Test Air Inline Sensor Function 300.0
After exchange check the function of the air inline sensor.
See TSI-List for permissible check values (see „Technical Safety Check TSC“ ➪ p. 7 — 1).
1. Press OK. The received signal amplitude is displayed as a measured value. (The test value with NEXT is not important).
2. Insert an infusion line filled with air and check the maximum permissible air value.
3. Insert an infusion line filled with fluid and check the mini-mum permissible water value.
4. Return to initial function with END.
Fig.: 3 — 5
0 Battery empty (battery alarm)
1 Pump cover open
2 Drop alarm
3 Air alarm
4 Occlusion alarm
5 Expired standby time
6 CC alarm (interface)
7 KOR end alarm
8 to 14 free
15 Operating alarm
Bit 15 14 13 12 11 10 9 8 7 6 5 4 3 2 1 0
Code 1 0 0 0 0 0 0 0 0 0 0 0 0 0 1 0
Example for alarm ”Pump cover open”
Infusomat® fmS 2.3 gb 3 — 5

Service Program3
Pressure Sensor Function 310.0
Test Equipment
Calibration gauge 4 mm (see „Test Equipment and Special Tools“ ➪ p. 9 — 1)
1. Push in the bottom slide of the finger pump.
2. Activate function with OK button.
3. Open unit door.
4. Note value measured by the pressure sensor (actual value).
5. Insert the 4 mm calibration gauge and close unit door.
6. The measured value read on the pressure sensor must be 5 to 15 digits above the value noted.
7. Quit function with END.
Note
If the 5 to 15 digits are not reached, the pressure sensor unit must be mechanically adjusted (see „Pressure Sensor“ ➪ p. 4 — 14).
Unit Modifications Service Language Function 400.0
English or German can be selected.
1. OK activates the function.
2. Select language with NEXT.
3. Acknowledge with YES.
4. Return to initial function with END.
User Language Function 410.0
Four user languages per language group are available (depending on software).
1. OK activates the function.
2. Select language with NEXT. The language no. and text version are displayed.
3. Acknowledge with YES.
4. Return to initial function with END.
Alarm Tone Function 420.0
Different alarm modes can be selected:
— Single stage
— A ”10 minutes off” alarm can be selected. In this mode the audible alarm is activated with a delay of 10 minutes.
3 — 6 Infusomat® fmS 2.3 gb

Service Program 3
The activation of the «10 minutes off” alarm is only permissible, if:
— the staff call is connected and
— the Infusomat® fmS has an attention label (label drawing no. M007100000F04).
1. OK activates the function.
2. Select alarm tone with NEXT.
3. Acknowledge with YES.
4. Return to initial function with END.
Staff Call Function 430.0
Different staff call modes can be selected:
— Dynamic with OFF Alarm
— Dynamic without OFF Alarm
— Static without OFF Alarm
For further details see staff call line in the instructions for use.
An additional switch-on pulse (YES/NO) can be activated for each mode to test the staff call unit.
1. OK activates the function.
2. Select staff call type with NEXT.
3. Acknowledge with YES.
4. Return to initial function with END.
Special Functions Function 440.0
Special functions can be activated in the Service Program, which are then available on the user interface. Deactivated special func-tions will not be displayed. The SM softkey will not be displayed in standard operation, if all special functions are deactivated. — Special functions to be selected, see Fig.: 1 — 2.
1. OK activates the function.
2. Select special functions with NEXT.
3. Activate / deactivate the respective function with YES/NO.
4. Return to main menu with END.
Fig.: 3 — 6
Infusomat® fmS 2.3 gb 3 — 7

Service Program3
Menu Function 450.0
The availability of menus on the user interface can be set.
— Double rate entry
— Online rate entry
— Interval Bolus
1. OK activates the function.
2. Activate / deactivate the decimal function with NEXT.
3. Acknowledge with YES.
4. Return to main menu with END.
Delivery Rate Function 460.0
The maximum and minimum delivery rates can be set. Range of adjustment of the delivery rate: 0.1 to 999.9 ml/h
1. OK activates the function.
2. Select min./max. delivery rate with NEXT.
3. Acknowledge with YES.
4. Enter value with a numeric key.
5. Acknowledge with OK.
6. Return to initial function with END.
Air Alarm Function 470.0
The air inline sensor sensitivity of the air rate alarm in ml/h (total air alarm) and of the maximum air bubble in ml (single bubble) can be adjusted. Setting range air rate: 0.5 to 3.5 ml/h Setting range air bubble: 0.01 to 0.3 ml/h
1. OK activates the function.
2. Select air rate (ml/h) or air bubble (ml) with NEXT.
3. Acknowledge with YES.
4. Enter value with a numeric key.
5. Acknowledge with OK.
6. Return to initial function with END.
3 — 8 Infusomat® fmS 2.3 gb

Service Program 3
Dianet Mode Display Function 480.0
When operated with DianetStar the respective DianetStar-mode (CA, CC, CD) with address 01, e.g. mode CA and address 01 is dis-played by: „###CA01###“.
The duration of the display after the last data transmission can be set between 0 and 255 seconds.
Deleting Dose Data Function 490.0
When this function is activated operation can be continued with the dose data of the previous therapy.
Calibration
Note
All safety relevant parameters are set by the manufacturer. If these parameters are changed, a new calibration must be per-formed with calibrated test equipment.
Scale Factor Function 510.0
The scale factor can be set in the limits 40 to 99 digits. Every digit step is equivalent to a 0.5 % modification of the delivery rate. An increase of the scale factor reduces the pump speed, and a de-crease increases the pump speed.
A test infusion line (OIL test infusion line with an Infusomat® fmSadjusted for the Original Infusomat® line, and a Space calibration line with an Infusomat® fmS set for the Infusomat® Space Line is to be used for determining the correction value (see „Test Equip-ment and Special Tools“ ➪ p. 9 — 1).
1. OK activates the function.
2. The value can be changed with the entry keyboard (see „De-livery Accuracy“ ➪ p. 8 — 6).
3. Acknowledge with YES.
4. Return to initial function with END.
5. Quit the Service Program and save changes with YES.
6. Switch on unit and check delivery rate (see „Delivery Accu-racy“ ➪ p. 8 — 6). If necessary repeat the delivery rate measurement.
Infusomat® fmS 2.3 gb 3 — 9

Service Program3
Air Inline Sensor Function 520.0
Alignment or check of the air inline sensor value (alarm threshold) (see „Air Inline Sensor“ ➪ p. 4 — 17).
1. OK activates the function.
2. Press OK again to activate the air inline sensor value.
3. The value can be changed with the entry keyboard.
4. Acknowledge with YES.
5. AIR SENSOR IS SET acknowledges the entry.
6. Return to initial function with END.
7. Quit the Service Program and save changes with YES.
Occlusion Level Function 540.0
Calibrate (see „Pressure Sensor“ ➪ p. 4 — 14).
Pump Data Function 550.0
Note
Compatibility between controller board and pump must be checked before acknowledgement. Only press YES if pump corre-sponds to controller board.
History Function 560.0 *
The history function can be activated or deactivated.
1. Press OK key twice to activate the function.
2. Select the history function with NEXT.
3. ON activates the function. The history protocol memory is in-itialized (the current software version and the serial number are registered). Press OFF key to deactivate the function. The history protocol memory is deleted.
4. Return to initial function with END.
Note
See instructions for use for detailed information.
* Only software IFME
3 — 10 Infusomat® fmS 2.3 gb

44 — 20
4 — Unit Elements
4.1 Mains Fuses Designation Ord. No.
Fuse T 0.16 A for 200 / 230 / 240 V (10 pcs.) . . . . . . . . . . . . . . . . . . . . . . . . . . . . . . . . . 3477 2847
Fuse T 0.315 A for 100 / 110 / 120 V (10 pcs.) . . . . . . . . . . . . . . . . . . . . . . . . . . . . . . . . . 3477 0534
Fuse holder . . . . . . . . . . . . . . . . . . . . . . . . . . . . . . . . . . . 3450 0979
Note
Only use recommended fuses.
Exchange
1. Press the expansion clamps at the fuse holder on the recessed mains plug with a screw driver in direction of the arrows and pull out fuse holder.
2. Replace blown fuses and press in fuse holder. Only use rec-ommended fuses.
Check
Safety check, functional check.
4.2 Battery Designation Ord. No.
Battery incl. connector 1.2 AH / 7.2 V and holder. . . . 3450 2556
Exchange
1. Switch off unit and disconnect from mains.
2. Loosen screw, open battery compartment cover and remove battery.
3. Pull off battery connector.
4. Assembly is done in reverse order.
5. After having exchanged the battery the Infusomat® fmS must be connected to mains, before switching on the unit. Thereby the charge and discharge currents are aligned.
6. Charge battery (16 h).
Note
Defective batteries must be orderly disposed of, e.g. send back to B. Braun Melsungen AG, Wareneingang.
Check
Perform switch-on test in battery operation and check the battery running time, if necessary.
Fig.: 4 — 1
Battery M4x8
Infusomat® fmS 2.3 gb 4 — 1

Unit Elements4
4.3 Door Lock Designation Ord. No.
Door lock complete with push button . . . . . . . . . . . . . 3450 5601
Spring holder for door lock . . . . . . . . . . . . . . . . . . . . . . 3450 5440
Mounting for door lock . . . . . . . . . . . . . . . . . . . . . . . . . 3477 2790
Exchange
1. Open door and unlatch the spring holder.
2. Remove countersunk screw and press out the mounting by pressing the holder for the door lock.
3. Remove door lock in an upward direction and exchange.
4. Assembly is done in reverse order.
Check
Pump unit check (only mechanical occlusion pressure).
Fig.: 4 — 2 Spring holder
S M 3×6
4 — 2 Infusomat® fmS 2.3 gb

Unit Elements 4
4.4 Pump Cover Designation Ord. No.
Pump cover with lock . . . . . . . . . . . . . . . . . . . . . . . . . . 3450 5717
Blind plug 7.1 mm (10 pcs.) . . . . . . . . . . . . . . . . . . . . . 3477 3207
Torsion spring in lever / pump cover (5 pcs.) . . . . . . . 3477 3363
Torsion spring for pump cover (5 pcs.) . . . . . . . . . . . . 3477 3355
Lever (pump cover). . . . . . . . . . . . . . . . . . . . . . . . . . . . . 3477 4092
Hinge pin for pump cover . . . . . . . . . . . . . . . . . . . . . . . 3477 3967
Hinge pin for pump cover lever. . . . . . . . . . . . . . . . . . . 3450 5725
Exchange
Tools: Pin punch 1.8 mm, pin punch 6 mm, 4 mm gauge
1. Open door and remove hinge pin with pin punch (1.8 mm) from below. Do not lose torsion spring.
2. Disassemble pump cover.
3. Insert torsion spring in new pump cover. Insert hinge pin with pin punch (6 mm) from above.
4. Check pressure sensor with 4mm gauge in the Service Pro-gram, and calibrate, if necessary.
Check
Safety check, pump unit check.
Fig.: 4 — 3
Hinge pin forpump cover lever
Hinge pin forpump cover
Torsion springPump cover
Infusomat® fmS 2.3 gb 4 — 3

Unit Elements4
4.5 Housing and Handle Designation Ord. No.
Housing labelling German . . . . . . . . . . . . . . . . . . . . . . . . . . . . . . . . . . 3450 1843 French . . . . . . . . . . . . . . . . . . . . . . . . . . . . . . . . . . . 3450 2130 Dutch . . . . . . . . . . . . . . . . . . . . . . . . . . . . . . . . . . . 3450 2149 Italian . . . . . . . . . . . . . . . . . . . . . . . . . . . . . . . . . . . 3450 2157 English . . . . . . . . . . . . . . . . . . . . . . . . . . . . . . . . . . 3450 2165 Spanish . . . . . . . . . . . . . . . . . . . . . . . . . . . . . . . . . . 3450 2173 Danish . . . . . . . . . . . . . . . . . . . . . . . . . . . . . . . . . . . 3450 2181 Norwegian . . . . . . . . . . . . . . . . . . . . . . . . . . . . . . . 3450 2190 Swedish . . . . . . . . . . . . . . . . . . . . . . . . . . . . . . . . . . 3450 2203 Finnish . . . . . . . . . . . . . . . . . . . . . . . . . . . . . . . . . . 3450 2211 Portuguese . . . . . . . . . . . . . . . . . . . . . . . . . . . . . . . 3450 2220 Czech . . . . . . . . . . . . . . . . . . . . . . . . . . . . . . . . . . . 3450 2238 Polish . . . . . . . . . . . . . . . . . . . . . . . . . . . . . . . . . . . 3450 2246 Turkish . . . . . . . . . . . . . . . . . . . . . . . . . . . . . . . . . . . 3450 2459
Foot stand complete with rubber feet . . . . . . . . . . . . . 3450 5415
Rubber feet (20 pcs.) . . . . . . . . . . . . . . . . . . . . . . . . . . . 3477 3096
Unit handle with O-rings and PT screws . . . . . . . . . . . 3450 1789
Exchange
1. Remove battery (see „Battery“ ➪ p. 4 — 1).
2. Loosen 4 screws from the foot stands and remove foot stands.
3. Remove safety seal from rear panel, break tamper-proof cap and remove screw.
4. Slidly widen the sides at the bottom of the housing and pull off to the top.
5. Assembly is done in reverse order. To do so, place unit on front side.
6. Safety seal the rear panel screw after functional check.
Check
Safety check.
Fig.: 4 — 4
PT5.0x16
4 x M4x8
O-ring
4 — 4 Infusomat® fmS 2.3 gb

Unit Elements 4
4.6 Controller Board Designation Ord. No.
Distance sleeve . . . . . . . . . . . . . . . . . . . . . . . . . . . . . . . 3450 3366
Buzzer . . . . . . . . . . . . . . . . . . . . . . . . . . . . . . . . . . . . . . . 3450 3447
Loudspeaker . . . . . . . . . . . . . . . . . . . . . . . . . . . . . . . . . . 3450 8848
Controller board with buzzer, raw material no. 3810 7651, soft-ware IFMC, can be updated to software IFMe:
Controller board with loudspeaker, volume control and history function, raw material no. 3810 7996, software IFME:
The controller boards (raw material no. 3810 7651 and 3810 7996) are completely compatible.
This allows older units to be upgraded with the new features (loudspeaker, volume control, and history function) without any problems. In this case the controller board must be ordered as new part.
Exchange
1. Remove battery (see „Battery“ ➪ p. 4 — 1).
2. Dismount cover (see „Housing and Handle“ ➪ p. 4 — 4).
3. Press snap-in pin together at the distance sleeves and remove board carefully.
4. Pull off connector (see figure).
5. Exchange board or buzzer.
Fig.: 4 — 5
Flexible cable LCD module Pressure sensor
Reed sensor
Press snap-in pin togetherLoudspeaker / Buzzer
Battery connec
Rear panel
Air inline sensor connectorCable outlet motorMotor connector
connector
connector
connector
Language Group* New Part Exchange
A Ord. No.:3450 1967 Ord.No.:3488 0844
B Ord. No.:3450 1975 Ord.No.:3488 0852
C Ord. No.:3450 1983 Ord.No.:3488 0860
D Ord. No.:3450 1991 Ord.No.:3488 0879
E Ord. No.:3450 2033 Ord.No.:3488 0887
* Language Group: A German, French, Dutch, Italian B English, Dutch, Spanish, Castellano C Danish, Norwegian, Swedish, Finnish D Spanish, Portuguese, English, Turkish E Czech, Polish, German, English
Language Group* New Part Exchange
A Ord. No.:3450 8759 Ord. No.:3488 1019
B Ord. No.:3450 8708 Ord. No.:3488 1190
C Ord. No.:3450 8716 Ord. No.:3488 1204
D Ord. No.:3450 8724 Ord. No.:3488 1212
E Ord. No.:3450 8732 Ord. No.:3488 1240
Infusomat® fmS 2.3 gb 4 — 5

Unit Elements4
6. Assembly is done in reverse order. Be careful with the optical components. Insert board in the lower guide parallel to the base plate. (Otherwise problems with the optical interface can occur.)
Note
If ”Calibration Defective” is displayed after having exchanged the controller board, check whether the correct board (risk of mix-up) was assembled.
Check
Safety check, functional check.
4.7 Rear Panel Designation Ord. No.
Rear panel with screws (M3) and seal . . . . . . . . . . . . . 3450 1860
Cover for optical interface. . . . . . . . . . . . . . . . . . . . . . . 3477 3164
Strip seal for rear panel . . . . . . . . . . . . . . . . . . . . . . . . . 3477 3142
MFC connector board . . . . . . . . . . . . . . . . . . . . . . . . . . 3450 3374
Potential equalization bolt . . . . . . . . . . . . . . . . . . . . . . 3477 0550
fm recessed plug (3 pin) . . . . . . . . . . . . . . . . . . . . . . . . 3477 3177
Screw 30×8 for fm recessed plug (20 pcs.) . . . . . . . . . 3477 3185
Plain washer 3.2 (20 pcs.) . . . . . . . . . . . . . . . . . . . . . . . 3477 3193
Power supply module 200/230/240 V. . . . . . . . . . . . . . 3450 1886
Power supply module 100/110/120 V. . . . . . . . . . . . . . 3450 1894
Power supply module 230 V . . . . . . . . . . . . . . . . . . . . . 3450 1908
Drop sensor socket incl. cable and plug . . . . . . . . . . . . 3450 1878
Fig.: 4 — 6
4 — 6 Infusomat® fmS 2.3 gb

Unit Elements 4
Fig.: 4 — 7
Pin No.
Signal Name Function
Pin 1 Uext- Input of external supply voltage, connection of shield
Pin 2 not assigned
Pin 3 GND Reference level 0V
Pin 4 Staff call Output open collector or standard 74HC level each with 220 -series resistance
Pin 5 Ub Output supply voltage
Pin 6 MFC-KAD Analog input K
Pin 7 Emergency Off Input interface
Pin 8 MFC-FAD Analog input F
Pin 9 Tx Transmit line interface
Pin 10 STB Output with 470 -series resist-ance, activation of MFC circuit
Pin 11 Rx Receive line interface
Pin 12 Uext+ Input of external supply voltage
Table 4 — 1 MFC pin assignment
Infusomat® fmS 2.3 gb 4 — 7

Unit Elements4
Exchange Rear Panel
1. Remove battery (see „Battery“ ➪ p. 4 — 1).
2. Dismount cover (see „Housing and Handle“ ➪ p. 4 — 4).
3. Pull off rear panel connectors and loosen both screws on the unit bottom.
Fig.: 4 — 8
Rear panel
M4x8
4 — 8 Infusomat® fmS 2.3 gb

Unit Elements 4
Exchange MFC Connector Board
Tools: Special socket spanner M18
1. Remove nuts at the fm recessed plug (red/blue).
2. Pull off connector to the mains power supply and drop sensor, see Fig.: 4 — 6.
3. Loosen MFC socket with special socket spanner M18.
4. Assembly is done in reverse order.
Exchange fm Recessed Plug
1. Loosen screws and nuts.
Note
The new recessed plug must be slightly moveable after assembly.
Exchange Potential Equalization Bolt
1. Remove nuts with ring spanner.
2. Exchange bolt.
Fig.: 4 — 9
M18
Fig.: 4 — 10
PT 3×8
2x M4 each2x M6
Cable, red Cable, blue
Infusomat® fmS 2.3 gb 4 — 9

Unit Elements4
Exchange Mains Module
1. Loosen 3 screws and remove the power supply unit.
Note
The voltage selection for switchable power supplies is at the fuse element.
Exchange Drop Sensor Socket
1. Loosen nut and exchange drop sensor socket.
2. Safety lock with Sicomet 50.
3. Make ground connection.
Check
Safety check, functional check.Fig.: 4 — 11
Power supply
3 X Torx M3x10
4 — 10 Infusomat® fmS 2.3 gb

Unit Elements 4
4.8 Front Frame Designation Ord. No.
Front frame without flow inhibitor and pressure spring . . . 3450 5822
Circular seal 571 mm / 45 mm . . . . . . . . . . . . . . . . . . . 3477 3126
Flow inhibitor with pressure spring . . . . . . . . . . . . . . . 3477 3258
Pressure spring for flow inhibitor (5 pcs.) . . . . . . . . . . 3477 3266
Tamper-proof caps 10 mm (50 pcs.) . . . . . . . . . . . . . . 3477 3134
Reed sensor. . . . . . . . . . . . . . . . . . . . . . . . . . . . . . . . . . . 3450 1754
Exchange
Tools: Pin punch
1. Remove battery (see „Battery“ ➪ p. 4 — 1).
2. Dismount cover (see „Housing and Handle“ ➪ p. 4 — 4).
3. Disassemble pump cover (see „Pump Cover“ ➪ p. 4 — 3).
4. Loosen countersunk screws by piercing a screwdriver through the caps and remove caps.
Note
Do not loosen the assembly screw on the lower pressure sensor board! Otherwise the pump has to be recalibrated with a 4mm gauge.
5. Press Reed sensor out of holder on the rear side, see Fig.: 4 — 13.
6. Press both snap-in pins inwards (rear side top and bottom). Then remove front frame to the front.
7. Remove flow inhibitor with pressure spring and Reed sensors and assemble in new front frame.
8. Insert the seal. Assembly is done in reverse order. Snap-in pins manually. Insert Reed sensor and fasten cables firmly with cable ties.
Check
Safety check, pump unit check.
Fig.: 4 — 12
Snap-in pin(rear side)
Reed sensor(rear side)
Snap-in pin(rear side)
Infusomat® fmS 2.3 gb 4 — 11

Unit Elements4
4.9 Pump Unit Designation Ord. No.
Finger pump (without motor) including pump, . . . . . 3450 1738 pump cover, seal membrane and boards
Finger pump (without motor and board) . . . . . . . . . . . 3450 9038 incl. pump, pump cover, and seal membrane
Membrane incl. seal . . . . . . . . . . . . . . . . . . . . . . . . . . . . 3450 5733
Motor with pinion for finger pump. . . . . . . . . . . . . . . . 3450 1924
Exchange
1. Remove battery (see „Battery“ ➪ p. 4 — 1).
2. Dismount cover (see „Housing and Handle“ ➪ p. 4 — 4).
3. Disassemble front frame (see „Front Frame“ ➪ p. 4 — 11).
4. Loosen motor screws, pull off motor connector and remove motor from pump unit.
Note
Do not loosen the assembly screw on the lower pressure sensor board! Otherwise the pump has to be recalibrated with a 4mm gauge.
5. Pull off connector from controller board.
6. Press down snap-in pins (from the inside) and tilt pump for-ward and unhinge.
7. Assembly is done in reverse order.
Note
Be sure that the cable of the Reed sensor and air inline sensor do not hinder the function of the pressure sensor and the monitoring of the motor speed (slot disc).
The complete pump unit (pump without motor, pump cover, membrane, boards) was calibrated by B.Braun. After a complete exchange the unit data and user data must be entered in the Serv-ice Program again as the data memory is on the pump board:
8. Enter unit and user data in the EEPROM.
— Serial number according to the type plate
— DIANET type number according to the type plate
If necessary enter:
— Drug name
— Ward identification
— Alarm tone
— Delivery rate min./max.
Fig.: 4 — 13
Cable tie
Motor
M3x6
Reed sensor
Pump unit
Snap-in pin
4 — 12 Infusomat® fmS 2.3 gb

Unit Elements 4
— Air alarm: air bubbles in ml and air rate in ml/h respectively
— User language
— Special functions (ON/OFF)
— Menu
— Staff call type
Note
If data is not entered, ”Calibration data faulty” may be displayed after the unit is switched on again.
9. After ending the Service Program save the data.
The counters for operating hours, battery operation and pump head cycles are reset to zero when the pump unit is exchanged. If ”Calibration data faulty” is displayed, select the Service Program and quit with ”Save? Yes”.
Check
Safety check, pump unit check.
Infusomat® fmS 2.3 gb 4 — 13

Unit Elements4
4.10 Pressure Sensor Test Equipment Ord. No.
Pressure calibration device . . . . . . . . . . . . . . . . . . . . . . 0770 5018
Calibration gauge 4 mm (for adjustment after . . . . . . 0770 1489 exchange of the pump cover)
Designation Ord. No.
Pressure sensor (cmpl.). . . . . . . . . . . . . . . . . . . . . . . . . . 3450 7353 (only delivered when a pressure calibration device is available)
Exchange
CAUTION
The pressure sensor unit is mechanically very sensitive. It must not be dismounted, which means that the pressure sensor board and the spring element must not be detached from the pressure sensor support (plastic part). Make sure that the movement of the coil core inside the coil is not hindered.
The pressure sensor consists of the light barrier board with EEP-ROM and the pressure sensor board with holder. Coil core and bending element are screwed to this holder. Both boards are con-nected via a flat cable.
1. Dismount rear panel (see „Rear Panel“ ➪ p. 4 — 6) or pump unit (see „Pump Unit“ ➪ p. 4 — 12).
2. Pull off the connecting cable to the microprocessor board.
3. Loosen and remove screw (1) of the light barrier board.
4. Loosen screw (2) of the pressure sensor and remove it togeth-er with plain washer and serrated lock washer. Then remove pressure sensor with pressure sensor board and light barrier board.
5. Fit pressure sensor with pressure sensor- and light barrier board.
Note
Make sure that the pressure sensor slide can smoothly run in the guides and that the coil core can move inside the coil.
6. Calibrate pressure sensor:
a) Switch on unit and call in the pressure sensor reading in the Service Program (see „Pressure Sensor Function 310.0“ ➪ p. 3 — 6)
b) Loosen screw (2) on the side of the pressure sensor unit (2.5 mm Allen key).
Fig.: 4 — 14
Pressure sensor with
Light barrier
Screw (1)
Screw (2)
board
pressure sensor board
Serrated lock washer
Plainwasher
Do not loosen screw
4 — 14 Infusomat® fmS 2.3 gb

Unit Elements 4
c) Push pressure sensor with pressure sensor board to the rear until stopper.
d) Move lower slide of the finger pump rearwards.
e) Note down pressure sensor value.
f) Insert 4 mm calibration gauge.
g) Push pressure sensor with pressure sensor board slightly forward.
h) Tighten screw (2). The measured value read on the pressure sensor must be 5 to 15 digits above the value noted.
Note
Pull nut slightly out of the pressure sensor housing.
i) After calibration return to the initial function with END.
j) Select SAVE NO. (Do not actuate the YES key.)
k) Switch off unit.
7. Assembly is done in reverse order.
8. Check the user data and reenter, if necessary, as data was saved in the EEPROM of the exchanged light barrier board.
9. Calibrate pressure sensor:
Note
Calibration weights are required to calibrate the pressure sensor. An alignment with infusion lines is not permitted.
a) Clean the pump front side.
b) Place the Infusomat® fmS without mains lead and drop sensor and the service connector inserted horizontally (front facing upwards) in the cellular packing of the cal-ibration device.
c) Switch on unit and call in the pressure sensor reading in the Service Program (see „Pressure Sensor Function 310.0“ ➪ p. 3 — 6).
d) Open pump cover.
e) Fasten holders for the calibration weights under the pump cover and let snap in at the locking bow.
f) Position weight 1 (100 g) for 400 mbar carefully in the holder on the pressure sensor. The weight must be placed without any friction in the holder.
g) Note down measured value.
h) Repeat steps f) and g) with weight 2 (128 g) for 800 mbar and weight 3 (166 g) for 1200 mbar.
Infusomat® fmS 2.3 gb 4 — 15

Unit Elements4
i) Remove weight and holder and do not save data.
j) Call in calibration of pressure stage (function 540) in the Service Program.
k) Enter the calibration values via the keyboard and ac-knowledge with ”yes”.
l) Quit Service Program and save data.
m) Register the changed pressure values in the unit book.
n) Check the electronic occlusion pressure (see „Pressure Cut-Off, Electronic“ ➪ p. 8 — 5).
Check
Safety check, functional check.
4 — 16 Infusomat® fmS 2.3 gb

Unit Elements 4
4.11 Air Inline Sensor Designation Ord. No.
Air inline sensor incl. connector . . . . . . . . . . . . . . . . . . 3450 193A
Exchange
1. Remove battery (see „Battery“ ➪ p. 4 — 1).
2. Dismount cover (see „Housing and Handle“ ➪ p. 4 — 4).
3. Dismount controller board (see „Controller Board“ ➪ p. 4 — 5).
4. Disassemble front frame (see „Front Frame“ ➪ p. 4 — 11).
5. Press the complete sensor from behind and out of the frame.
6. Insert new sensor and fasten cables firmly with cable ties.
Note
Shielded air inline sensors are installed from serial no. 34504 on.
Note
Be sure that the cables of the Reed sensor and air inline sensor do not hinder the function of the pressure sensor and the monitoring of the motor speed (slot disc).
Check
After exchange of the air inline sensor, please check:
— Air value
— Water value
— Calibration value (alarm threshold), adjust if necessary
Safety check, functional check.
Fig.: 4 — 15
Air inline sensor
Infusomat® fmS 2.3 gb 4 — 17

Unit Elements4
4.12 Operating Unit Designation Ord. No.
Membrane keyboard with support plate and seal . . . . 3450 1797
LCD module . . . . . . . . . . . . . . . . . . . . . . . . . . . . . . . . . . 3450 1819
Frame incl. pressure spring and magnet . . . . . . . . . . . 3450 1827
Round cord 42 mm (5 pcs.) . . . . . . . . . . . . . . . . . . . . . 3477 3347
Circular seal . . . . . . . . . . . . . . . . . . . . . . . . . . . . . . . . . . 3477 3126
Hinge unit . . . . . . . . . . . . . . . . . . . . . . . . . . . . . . . . . . . 3450 5571
Hinge pin (3 mm) . . . . . . . . . . . . . . . . . . . . . . . . . . . . . . 3450 5580
Magnet . . . . . . . . . . . . . . . . . . . . . . . . . . . . . . . . . . . . . . 3450 5849
Flex cable, preformed . . . . . . . . . . . . . . . . . . . . . . . . . . 3450 8830
Exchange
1. Remove battery (see „Battery“ ➪ p. 4 — 1).
2. Disassemble door lock.
3. Loosen countersunk screw and bridge.
4. Remove tamper-proof caps (6 pieces) on the door frame by piercing a screwdriver through the caps and loosen counter-sunk screws.
5. Unlatch zero insertion force connector and loosen flex cable.
Note
The position of the flex cable must not be changed, i.e. the pre-formed section must be in the hinge area (pivot). Mark cable, if necessary.
6. Disassemble either LCD module or support plate with mem-brane keyboard or door hinge pins respectively and exchange door frame.
7. Assembly is done in reverse order. Pay attention to the correct direction of the door hinge pin during assembly.
Note
Do not kink either of the flex cables. Push the contacts to the stopper of the zero insertion force connector and lock in same po-sition.
Check
Electrical safety, functional check, pump unit check.
Fig.: 4 — 16
Support plate Zero insertion
Cable is preformed
LCD module
force connector
Fig.: 4 — 17
Frame operating unit
Hinge pin
6 x PT2.5×14
4 — 18 Infusomat® fmS 2.3 gb

Unit Elements 4
4.13 Barcode Label Designation Ord. No.
Barcode label . . . . . . . . . . . . . . . . . . . . . . . . . . . . . . . . . 3450 9070
Exchange
1. Remove old barcode label, if existing.
2. Clean adhesion surface with an alcoholic cleaning agent and let dry.
3. Loosen barcode label from the base material and stick it on.
Note
Destroy the type plate delivered.
Check
Check that serial number and pump symbol in the plain text field of the barcode label correspond with the type plate on the pump of the Infusomat® fmS.
4.14 Frame with Seal Designation Ord. No.
Seal plate between frame and front frame (exchange not recommended) . . . . . . . . . . . . . . . . 3477 3240
Frame with seal plate . . . . . . . . . . . . . . . . . . . . . . . . . . 3450 1762
Exchange
1. Disassemble all parts as described before and exchange frame with seal plate.
Check
Electrical safety, functional check, pump unit check.
Fig.: 4 — 18
Barcode label
Infusomat® fmS 2.3 gb 4 — 19

Unit Elements4
For your notes:
4 — 20 Infusomat® fmS 2.3 gb

55 — 2
5 — Checks after Repair
Depending on the work carried out, perform the relevant check blocks (1., 2. and / or 3.).
1. Visual Inspection 2. Electrical Safetyaccording to IEC / EN 60601-1 or VDE 0750 and VDE 0751
3. Functional Inspection
❒ Infusomat® fmS: Cleanliness, completeness, damage and faults affecting safety Particularly:❒ Damage to and readability of the
labels❒ Completeness, damage and
readability of the additional labels on an Infusomat® fmS set for the Infusomat® Space Line
❒ Pump sealing diaphragm❒ Membrane keyboard❒ Rubber feet❒ Operating unit❒ Locking mechanism of the pump
cover❒ Flow inhibitor❒ Mains plug connector❒ MFC connector incl. MFC cable❒ Check voltage values
100/110/120 V = T 0.315 A 200/230/240 V = T 0.16 A
❒ Mains cable❒ Drop sensor with cable and plug
connector
❒ Mains voltage ______ V AC❒ Protective conductor
resistance incl. mains cable < 0.2 _______
❒ Insulation resistance >> 2 M _________
❒ Earth leakage current at NC 30 A ________ A
Switch on unit❒ Self-test❒ Audible alarm❒ Status displays❒ LCD lighting❒ Display (all symbols and pixels) in the
LCD display
Operation❒ Opening and closing mechanism of the
door❒ Functions of the buttons❒ Enter delivery rate, volume and time.
The values displayed in the LCD display correspond to the values entered.
❒ Staff call Test incl. MFC staff call line, if used
❒ Pump cover alarm❒ Alarm suppression
Pressure cut-off, electronic (Reference values measured with electronic pressure sensor) Delivery rate: 50 ml/h Volume: 250 ml Test without drop sensor
Note
Depending on the setting, the measurement should be performed only with one of the two lines.
❒ With original Infusomat® line❒ Pressure level, low❒ Pressure level, middle❒ Pressure level, high
❒ With Infusomat® Space line❒ Pressure level, low❒ Pressure level, middle ❒ Pressure level, high
(Part 1 of 2)
Infusomat® fmS 2.3 gb 5 — 1

Checks after Repair5
Observe the procedure information (see „Procedural Instructions on the TSC“ ➪ p. 8 — 1)!
Pressure limitation, mechanical (Reference values measured with electronic pressure sensor)❒ With original Infusomat® line
❒ Pmax ❒ Pmin
❒ With Infusomat® Space line❒ Pmax ❒ Value Pmax by min. 0.10 bar higher
than pressure level, high, electronic❒ Pmin
Safety clamp (flow inhibitor)❒ Pmin
Delivery accuracy Ambient temperature 20 … 25 °C Delivery rate: 250 ml/h Measured volume: 25 ml❒ Divergence
Drop sensor Delivery rate: 400 ml/h❒ Drop sensor alarm, occlusion ❒ Drop sensor alarm, flow
Air inline sensor Delivery rate: 250 ml/h❒ Water value ❒ Air alarm❒ Air value ❒ Threshold value
Battery testOperation mains/battery/mains:❒ Uninterrupted operationSwitch on unit without mains connection❒ Self-test is executed
1. Visual Inspection 2. Electrical Safetyaccording to IEC / EN 60601-1 or VDE 0750 and VDE 0751
3. Functional Inspection
(Part 2 of 2)
5 — 2 Infusomat® fmS 2.3 gb

66 — 2
6 — Maintenance
It is recommended every 2 years. In addition to the technical safe-ty inspection, the following assemblies/components are to be checked:
1. Check rubber feet and if necessary exchange.
2. Check easy running of the pump cover, lock mechanism and door.
3. Check easy running of the flow inhibitor, clean and if neces-sary exchange pressure springs.
4. Check seal membrane and if necessary exchange.
5. Check the drop sensor optics and spring mechanics and clean, if necessary.
6. Open unit. Internal visual inspection. Clean seal surfaces and if necessary exchange seal strip.
7. Check mechanical occlusion pressure and if necessary cali-brate.
8. Check electronic occlusion pressure and if necessary calibrate (see „Pressure Sensor“ ➪ p. 4 — 14).
9. Assemble and seal unit ready for operation.
Infusomat® fmS 2.3 gb 6 — 1

Maintenance6
For your notes:
6 — 2 Infusomat® fmS 2.3 gb

7 — 4
7 — Technical Safety Check TSC
Index d(Master – to be added to the documentation)
Checklist for Technical Safety Check – Every 24 Months
Unit: Infusomat® fmSManufacturer: B. Braun Melsungen AG
User
Observe the Service Manual and the instructions for use. All measured values are to be documented. Accessories used should be included in testing. Make exclusive use of calibrated measuring equip-ment.
Article No. Unit No. Year of Procurement Stock No.
Visual Inspection Electrical Safetyaccording to IEC / EN 60601-1 or VDE 0750 and VDE 0751
Functional Inspection
❒ Infusomat® fmS: Cleanliness, completeness, damage and faults affecting safety Particularly:❒ Damage to and readability of the
labels❒ Completeness, damage and
readability of the additional labels on an Infusomat® fmS set for the Infusomat® Space Line
❒ Pump sealing diaphragm❒ Membrane keyboard❒ Rubber feet❒ Operating unit❒ Locking mechanism of the pump
cover❒ Flow inhibitor❒ Mains plug connector❒ MFC connector incl. MFC cable❒ Check voltage values
100/110/120 V = T 0.315 A 200/230/240 V = T 0.16 A
❒ Mains cable❒ Drop sensor with cable and plug
connector
❒ Mains voltage ______ V AC❒ Protective conductor resistance
incl. mains cable < 0.2 _______
❒ Insulation resistance >> 2 M _________
❒ Earth leakage current at NC 30 A ________ A
Switch on unit❒ Self-test❒ Audible alarm❒ Status displays❒ LCD lighting❒ Display (all symbols and pixels) in the
LCD display
Operation❒ Opening and closing mechanism of the
door❒ Functions of the buttons❒ Enter delivery rate, volume and time.
The values displayed in the LCD display correspond to the values entered.
❒ Staff call Test incl. MFC staff call line, if used
❒ Pump cover alarm❒ Alarm suppression
(Part 1 of 3)
Infusomat® fmS, 2.3 gb 7 — 1Sheet 1 of 4
M670 00 00 92 F04 C 3891 2189 (GB)

Index d
(Master – to be added to the documentation)
Technical Safety Check TSC
Pressure cut-off, electronic (Reference values measured with electronic pressure sensor) Delivery rate: 50 ml/h Volume: 250 ml Test without drop sensor
Note
Depending on the setting, the measurement should be performed only with one of the two lines.
❒ With original Infusomat® line❒ Pressure level, low
(0,25 … 0.65 bar) ________ bar❒ Pressure level, middle
(0,55 … 0.95 bar) ________ bar❒ Pressure level, high
(0,90 … 1.30 bar) ________ bar❒ With Infusomat® Space line
❒ Pressure level, low (0,21 … 0.61 bar) ________ bar
❒ Pressure level, middle (0,48 … 0.88 bar) ________ bar
❒ Pressure level, high (0,83 … 1.23 bar) ________ bar
Pressure limitation, mechanical (Reference values measured with electronic pressure sensor)❒ With original Infusomat® line
❒ Pmax (1.35 … 1.76 bar) ______ bar❒ Pmin (> 0.95 bar) _______ bar
❒ With Infusomat® Space line❒ Pmax (1.30 … 1.70 bar) ______ bar❒ Value Pmax by min. 0.10 bar higher
than pressure level, high, electronic❒ Pmin (> 0.83 bar) _______ bar
Safety clamp (flow inhibitor)❒ Pmin (> 0.40 bar) _______ bar
Visual Inspection Electrical Safetyaccording to IEC / EN 60601-1 or VDE 0750 and VDE 0751
Functional Inspection
(Part 2 of 3)
M670 00 00 92 F04 C 3891 2189 (GB)
7 — 2 Infusomat® fmS, 2.3 gbSheet 2 of 4

Technical Safety Check TSC
Index d
(Master – to be added to the documentation)
Delivery accuracy Ambient temperature 20 … 25 °C Delivery rate: 250 ml/h Measured volume: 25 ml❒ Divergence (± 5%) _______ %
Drop sensor Delivery rate: 400 ml/h❒ Drop sensor alarm, occlusion ______ s
(< 5s)❒ Drop sensor alarm, flow
Air inline sensor Delivery rate: 250 ml/h❒ Water value (> 481 mV) _______ mV❒ Air alarm❒ Air value (< 78 mV) _______ mV❒ Threshold value (< 182 mV) _____ mV
Battery testOperation mains/battery/mains:❒ Uninterrupted operationSwitch on unit without mains connection❒ Self-test is executed
Visual Inspection Electrical Safetyaccording to IEC / EN 60601-1 or VDE 0750 and VDE 0751
Functional Inspection
(Part 3 of 3)
Infusomat® fmS, 2.3 gb 7 — 3Sheet 3 of 4
M670 00 00 92 F04 C 3891 2189 (GB)

Index d
(Master – to be added to the documentation)
Technical Safety Check TSC
Lines Used Accessories Used
❒ Original Infusomat line (OIL)❒ Infusomat® Space Line❒ Manufacturer: __________________
Type: __________________________❒ Manufacturer: __________________
Type: __________________________
❒ MFC staff call line❒ ____________________________❒ ____________________________❒ ____________________________❒ ____________________________
Calibrated for usage of:❒ Original Infusomat Line (OIL)❒ Infusomat® Space Line
(Note the stickers and retrofit, if necessary)
Test result: Defects found which could endanger patients, users or third parties: Yes No
Inspection performed by:
Measures to be taken: Repair ___________________
Unit handed over on:
Special features / documentation:
To:
Date / Signature:
Next deadline for TSC:
M670 00 00 92 F04 C 3891 2189 (GB)
7 — 4 Infusomat® fmS, 2.3 gbSheet 4 of 4

88 — 8
8 — Procedural Instructions on the TSC
Visual Inspection 1. Check the Infusomat® fmS and accessories for cleanliness.
2. Check the Infusomat® fmS and accessories for completeness and check configuration. Pay special attention to the follow-ing parts:
a) Check the special additional labels of the Infusomat® fmS adjusted for the Infusomat® Space Line, please see Fig.: 8 — 1.
3. Check the Infusomat® fmS and its accessories for damage and the labels for readability. Pay special attention to the fol-lowing parts:
a) Pump sealing diaphragm
b) Membrane keyboard
c) Rubber feet
d) Operating unit
e) Lock mechanism of the pump cover
f) Flow inhibitor
g) Mains plug connector
h) MFC plug connector
i) Check fuse values A fuse with T 0.315 A must be installed for devices for 100/110/120 V. A fuse with T 0.16 A must be installed for devices for 200/230/240 V.
Fig.: 8 — 1
Infusomat® fmS 2.3 gb 8 — 1

Procedural Instructions on the TSC8
Electrical Safety according to IEC / EN 60601-1 or VDE 0750 and VDE 0751
The values to be measured are specified in the TSC (see „Techni-cal Safety Check TSC“ ➪ p. 7 — 1). The measured values are to be recorded.
1. Disconnect all connection and interface cables from the de-vice.
Protective Conductor Resistance
1. Measure between the protective conductor of the mains ca-ble and the following parts:
— Potential equalization bolt
— Bolt for door lock
— Left-hand contact (when looking at the connector) of the FM connector
— Unit housing:
a) If the unit is not sealed countersunk screw at the rear of the unit.
b) If the unit is sealed, remove lacquer from one of the holes in the foot stands.
c) Document largest value.
Note
Do not use the foot stand assembly screws as alternative meas-urement points.
Insulation Resistance
1. Measurement with 500 V between the short-circuited mains connectors and the potential equalization bolt.
Earth Leakage Current
1. Measure the earth leakage current without single fault con-dition (NC = Normal Condition) incl. mains cable.
2. Measure the earth leakage current without single fault con-dition (NC = Normal Condition) incl. mains cable with re-versed polarity.
3. Document largest value.
8 — 2 Infusomat® fmS 2.3 gb

Procedural Instructions on the TSC 8
Functional Inspection Switch on Unit
1. Switch on unit and check the following details:
— Self-test
— Audible alarm One short and afterwards two short tones
— Status displays LEDs (red, green) light up for a short moment
— LCD lighting
— Display on the LC display All symbols and display pixels flash for a short moment Fig.: 8 — 2. Then „000.0ml/h“ is displayed
Operation
1. Open door. Pump cover must automatically open when the unit door is opened.
2. Insert the Original Infusomat Line (OIL). If the unit is designed for an Infusomat® Space Line, then insert an Infusomat® Space Line.
3. Close door. The door must lock smoothly and close correctly at the top and bottom.
4. Carry out infusion with intermediate bolus and press all but-tons at least once. Infusion and bolus are performed and all buttons trigger the function desired.
5. Plug MFC service connector on the MFC socket.
6. Trigger a staff call (e.g. open pump cover during operation). The red LED in the MFC service connector lights up. — if ”dynamic” is set, 1 sec. — if ”static” is set, until the alarm is acknowledged. Check the MFC staff call line if installed.
7. Press the alarm button. The current alarm is suppressed for 2 minutes.
Fig.: 8 — 2
Infusomat® fmS 2.3 gb 8 — 3

Procedural Instructions on the TSC8
Test Setup
Perform test setup with the subassemblies listed below, please see also Fig.: 8 — 3:
An electronic manometer should be used for the measurement described hereafter.
If a mechanic manometer is used instead values which are approx. 100 mbar lower are to be expected. Proceed as follows:
Note
The liquid level in the container must be approx. 80 cm above the lower edge of the device.
— Original Infusomat® Line (new, can be used for the complete TSC incl. functional check) (1 piece)
or
— Infusomat® Space Line (new, can be used for the complete TSC incl. functional check) (1 piece)
— Infusion bag or bottle, min. 500 ml (1 piece)
— Three-way valve (2 pieces for measurement with electronic manometer)
— 10 ml syringe (air buffer for measurement with electronic manometer) (syringe drawn up with air to 10 ml and piston fixed mechan-ically) (1 piece)
— 1 ml syringe for air bubble injection (1 piece)
— Electronic manometer with peak value recognition (1 piece)
— Pressure cell (option of electronic manometer) Diameter 100 mm / 160 mm, measuring range 2.5 bar / 4 bar (1 piece)
— Graduated cylinder 25 ml, +/- 0.4 ml (1 piece)
Fig.: 8 — 3 12
10 ml air
8 — 4 Infusomat® fmS 2.3 gb

Procedural Instructions on the TSC 8
Pressure Cut-Off, Electronic
The MFC service connector must not be plugged. The drop sensor must not be connected.
1. Insert the line of the test setup in the device.
2. Enter a delivery rate according to the TSC.
3. Select pressure stage according to the TSC.
4. Vent test setup, position of the three-way cocks please see Fig.: 8 — 4.
5. Start infusion and deliver first of all in to an open system (without manometer).
6. Switch over three-way cocks, please see Fig.: 8 — 5, and de-liver against the manometer. Read off maximum value on the pressure gauge upon an alarm and before an automatic pressure reduction and com-pare with the specifications in the TSC.
7. Check all pressure stages listed in the TSC and document val-ues.
Pressure Limitation, Mechanical
The drop sensor must not be connected.
1. Plug MFC service connector on the MFC plug connector.
2. Activate the occlusion pressure mechanical (see „Disabling the Pressure Sensor (Occlusion Pressure Mechanical)“ ➪ p. 3 — 2).
3. Enter a delivery rate according to the TSC.
4. Start infusion and deliver first of all in to an open system (without manometer).
5. Deliver against the manometer. Read off the corresponding value on the manometer and compare with the specifications of the TSC for Pmax and Pmin.
6. Document values. Do not reduce pressure.
Safety Clamp (Flow Inhibitor)
1. Stop infusion from the pressure limitation test mechanically and unlock the operating unit, read off value on the manometer and compare with the spec-ifications in the TSC.
Fig.: 8 — 4 12
Fig.: 8 — 5
12
Infusomat® fmS 2.3 gb 8 — 5

Procedural Instructions on the TSC8
2. Document value.
3. Pull off the MFC service connector.
WARNING
SWITCH THE DEVICE OFF AFTER THE SAFETY CLAMP WAS CHECKED SO THAT THE ELECTRONIC PRESSURE CONTROL IS RE-ACTIVATED AFTER A RESTART.
4. Switch device off.
Delivery Accuracy
Requirements:
— Mount test setup as shown in Fig.: 8 — 6.
— Ambient temperature and delivery rate according to the TSC.
1. Insert line of the test setup in the device.
2. Vent test setup. Bottom part of drop chamber must be 2/3 filled.
3. Insert cannula in empty graduated cylinder.
4. Set delivery rate according to the TSC.
5. Simultaneously start infusion and stop watch.
6. Stop the stop watch when the measured volume defined in the TSC is reached.
7. Evaluate deviation in percent according to Table 8 — 1 and record.
Fig.: 8 — 6
25 ml ± 0.4 ml
Reference height80 ± 2 cm
Measuring Time Deviation%
6 min 40.0 sec -10
6 min 18.9 sec -5
6 min 15.0 sec -4
6 min 11.1 sec -3
6 min 7.3 sec -2
6 min 3.6 sec -1
6 min 0.0 sec 0
5 min 56.4 sec 1
5 min 52.9 sec 2
5 min 49.5 sec 3
5 min 46.2 sec 4
5 min 42.9 sec 5
5 min 27.3 sec 10
Table 8 — 1
8 — 6 Infusomat® fmS 2.3 gb

Procedural Instructions on the TSC 8
The accuracy of the delivery rate can be checked using a normal infusion line when the TSC is carried out.
A test infusion line (OIL test infusion line with an Infusomat® fmSadjusted for the Original Infusomat® line, and a Space calibration line with an Infusomat® fmS set for the Infusomat® Space Line) is to be used for calibration (see „Scale Factor Function 510.0“ ➪p. 3 — 9)! (see „Test Equipment and Special Tools“ ➪ p. 9 — 1).
Drop Sensor
1. Set delivery rate according to the TSC.
2. Connect drop sensor to the device.
3. Start infusion according to the specifications of the TSC.
4. Squeeze off line above the pump. The drop sensor triggers an alarm.
5. Squeeze the drop chamber bottom part, to generate a jet. The drop sensor triggers an alarm immediately.
Air Inline Sensor
1. Plug MFC service connector on the MFC plug connector.
2. Insert a line filled with water in the device and close operat-ing unit.
3. Read off test value of the air inline sensor via the function 300.0 “Air inline sensor” in the Service Program (see „Air In-line Sensor Function 300.0“ ➪ p. 3 — 5).
4. Read off value after approximately 10 seconds and compare with the water value specifications of the TSC.
5. Document values.
6. Enter a delivery rate of 250 ml/h and a volume of 250 ml.
7. Start infusion.
8. Generate an air bubble of approx. 0.4 ml (approx. 56 mm length of line with air) in the supply line to the pump. An alarm is triggered when the air bubble is detected.
9. Insert a line filled with air in the device and close operating unit, or disconnect the line at the container and “vent” in or-der to remove the water out of the line.
10. Read off test value of the air inline sensor via the function 300.0 “Air inline sensor” in the Service Program (see „Air In-line Sensor Function 300.0“ ➪ p. 3 — 5).
11. Read off value after approximately 10 seconds and compare with the air value specifications of the TSC.
12. Read off threshold value via the function 520.0 “Air inline sensor” in the Service Program (see „Air Inline Sensor Func-tion 520.0“ ➪ p. 3 — 10).
Infusomat® fmS 2.3 gb 8 — 7

Procedural Instructions on the TSC8
13. Compare value with the threshold value specifications of the TSC.
Battery Check
1. Disconnect the device from the mains supply during opera-tion.
2. The symbol for the mains plug on the LC display goes off. An error message is not triggered and operation of the unit is continued.
3. Reconnect unit to the mains.
4. The symbol for the mains plug is displayed on the LC display. An error message is not triggered and operation of the unit is continued.
5. Switch device off.
6. Disconnect unit from mains.
7. Switch on unit. A self-test is carried out.
8 — 8 Infusomat® fmS 2.3 gb

99 — 2
9 — Test Equipment and Special Tools
For Repair / for TSC Order No.
Test equipment case Infusomat fm (complete) . . . . . 0770 1527 with: Calibration gauge 4 mm (for adjustment after exchange of the pump cover) . . . . . . . . . . . . . . . . . . . . . . . . . 0770 1489 Pin punch 1.8 mm x 160 mm (for hinge pin/ disassembly of the pump cover) . . . . . . . . . . . . . . 0770 1446 Pin punch 6 mm x 125 mm (for hinge pin/ assembly of the pump cover) . . . . . . . . . . . . . . . . . 0770 1454 Flat tool 100 x 20 mm (for assembly/ disassembly of the tube adapter) . . . . . . . . . . . . . 0770 1462 Special socket spanner M18 (for disassembly of the recessed plug). . . . . . . . . . . . . . . . . . . . . . . . . . 0770 1497 Manometer 0 — 4 bar . . . . . . . . . . . . . . . . . . . . . . . 0770 1357 Service connector (red) . . . . . . . . . . . . . . . . . . . . . 0770 0709 MFC service connector . . . . . . . . . . . . . . . . . . . . . . 3450 1215 OIL-test infusion line . . . . . . . . . . . . . . . . . . . . . . . 0770 1500
Space calibration line . . . . . . . . . . . . . . . . . . . . . . . . . . 0770 1610
Pressure calibration device . . . . . . . . . . . . . . . . . . . . . . 0770 5018
Infusomat® fmS 2.3 gb 9 — 1

Test Equipment and Special Tools9
For your notes:
9 — 2 Infusomat® fmS 2.3 gb

1010 — 4
10 — Spare Parts List
Unit Elements
Designation Order — No.
Battery
Battery incl. connector plug 1.2 Ah / 7.2 V and holder . . . . . . . . . . . . . . . . . . . . 3450 2556
Mains Fuses
Fuse T 0.16 A for 200 / 230 / 240 V (10 pcs.) . . . . . . . . . . . . . . . 3477 2847
Fuse T 0.315A for 100 / 110 / 120 V (10 pcs.) . . . . . . . . . . . . . . . 3477 0534
Fuse holder . . . . . . . . . . . . . . . . . . . . . . . . . . . . . . . . . . . 3450 0979
Housing
Housing Labelling German . . . . . . . . . . . . . . . . . . . . . . . . . . . . . . . . . . 3450 1843 French . . . . . . . . . . . . . . . . . . . . . . . . . . . . . . . . . . . 3450 2130 Dutch . . . . . . . . . . . . . . . . . . . . . . . . . . . . . . . . . . . . 3450 2149 Italian . . . . . . . . . . . . . . . . . . . . . . . . . . . . . . . . . . . 3450 2157 English . . . . . . . . . . . . . . . . . . . . . . . . . . . . . . . . . . . 3450 2165 Spanish . . . . . . . . . . . . . . . . . . . . . . . . . . . . . . . . . . 3450 2173 Danish . . . . . . . . . . . . . . . . . . . . . . . . . . . . . . . . . . . 3450 2181 Norwegian. . . . . . . . . . . . . . . . . . . . . . . . . . . . . . . . 3450 2190 Swedish . . . . . . . . . . . . . . . . . . . . . . . . . . . . . . . . . . 3450 2203 Finnish . . . . . . . . . . . . . . . . . . . . . . . . . . . . . . . . . . . 3450 2211 Portuguese . . . . . . . . . . . . . . . . . . . . . . . . . . . . . . . 3450 2220 Czech . . . . . . . . . . . . . . . . . . . . . . . . . . . . . . . . . . . . 3450 2238 Polish . . . . . . . . . . . . . . . . . . . . . . . . . . . . . . . . . . . . 3450 2246 Turkish . . . . . . . . . . . . . . . . . . . . . . . . . . . . . . . . . . . 3450 2459
Foot stand complete with rubber feet . . . . . . . . . . . . . 3450 5415
Unit handle with O-rings and PT screws . . . . . . . . . . . 3450 1789
Controller Board
Distance sleeve . . . . . . . . . . . . . . . . . . . . . . . . . . . . . . . 3450 3366
Buzzer . . . . . . . . . . . . . . . . . . . . . . . . . . . . . . . . . . . . . . . 3450 3447
Loudspeaker . . . . . . . . . . . . . . . . . . . . . . . . . . . . . . . . . . 3450 8848
Designation Order — No.
Rear Panel
Rear panel with screws (M3) and seal . . . . . . . . . . . . . 3450 1860
Cover for optical interface . . . . . . . . . . . . . . . . . . . . . . 3477 3164
Strip seal for rear panel . . . . . . . . . . . . . . . . . . . . . . . . . 3477 3142
MFC connector board . . . . . . . . . . . . . . . . . . . . . . . . . . 3450 3374
Potential equalization bolt . . . . . . . . . . . . . . . . . . . . . . 3477 0550
fm recessed plug (3 pin) . . . . . . . . . . . . . . . . . . . . . . . . 3477 3177
Screw 30×8 for fm recessed plug (20 pcs.) . . . . . . . . . 3477 3185
U Washer 3.2 (20 pcs.). . . . . . . . . . . . . . . . . . . . . . . . . . 3477 3193
Mains module 200 / 230 / 240 V . . . . . . . . . . . . . . . . . 3450 1886
Mains module 100 / 110 / 120 V . . . . . . . . . . . . . . . . . 3450 1894
Mains module 230 V . . . . . . . . . . . . . . . . . . . . . . . . . . . 3450 1908
Drop sensor socket incl. cable and plug . . . . . . . . . . . . 3450 1878
Pump Cover
Pump cover with lock . . . . . . . . . . . . . . . . . . . . . . . . . . 3450 5717
Blind plug 7.1 mm (10 pcs.) . . . . . . . . . . . . . . . . . . . . . 3477 3207
Torsion spring in lever/pump cover (5 pcs.) . . . . . . . . 3477 3363
Torsion spring for pump cover (5 pcs.) . . . . . . . . . . . . 3477 3355
Lever (pump cover). . . . . . . . . . . . . . . . . . . . . . . . . . . . . 3477 4092
Hinge pin for pump cover . . . . . . . . . . . . . . . . . . . . . . . 3477 3967
Hinge pin for pump cover lever. . . . . . . . . . . . . . . . . . . 3450 5725
Front Panel
Front panel without flow inhibitor and pressure spring. . . . . . . . . . . . . . . . . . . . . . . . . 3450 5822
Circular seal 570 mm / 45 mm . . . . . . . . . . . . . . . . . . . 3477 3126
Flow inhibitor with pressure spring . . . . . . . . . . . . . . . 3477 3258
Pressure spring for flow inhibitor (5 pcs.) . . . . . . . . . . 3477 3266
Tamper-proof caps 10 mm (50 pcs.) . . . . . . . . . . . . . . 3477 3134
Reed sensor. . . . . . . . . . . . . . . . . . . . . . . . . . . . . . . . . . . 3450 1754
Infusomat® fmS 2.3gb 10 — 1

Spare Parts List10
Designation Order — No.
Pump Unit
Finger pump (without motor) including pump, . . . . . 3450 1738 pump cover, seal membrane and boards
Finger pump (without motor and board) . . . . . . . . . . 3450 9038 incl. pump, pump cover, and seal membrane
Membrane incl. seal . . . . . . . . . . . . . . . . . . . . . . . . . . . . 3450 5733
Motor with pinion for finger pump . . . . . . . . . . . . . . . 3450 1924
Pressure Sensor
Pressure sensor (cmpl.) . . . . . . . . . . . . . . . . . . . . . . . . . 3450 7353
Air Sensor
Air sensor incl. connector . . . . . . . . . . . . . . . . . . . . . . . 3450 193A
Door Lock
Door lock complete with push button . . . . . . . . . . . . . 3450 5601
Spring holder for door lock . . . . . . . . . . . . . . . . . . . . . . 3450 5440
Mounting for door lock . . . . . . . . . . . . . . . . . . . . . . . . . 3477 2790
Operating Unit
Membrane keypad with support plate and seal. . . . . . 3450 1797
LCD module . . . . . . . . . . . . . . . . . . . . . . . . . . . . . . . . . . 3450 1819
Frame incl. pressure spring and magnet . . . . . . . . . . . 3450 1827
Flexible cable 42 mm (5 pcs.) . . . . . . . . . . . . . . . . . . . . 3477 3347
Hinge unit . . . . . . . . . . . . . . . . . . . . . . . . . . . . . . . . . . . 3450 5571
Hinge pin (3 mm) . . . . . . . . . . . . . . . . . . . . . . . . . . . . . . 3450 5580
Magnet . . . . . . . . . . . . . . . . . . . . . . . . . . . . . . . . . . . . . . 3450 5847
Designation Order — No.
Frame with Seal
Seal plate between frame and front panel (exchange not recommended) . . . . . . . . . . . . . . . . 3450 3240
Frame with seal plate . . . . . . . . . . . . . . . . . . . . . . . . . . 3450 1762
Mounting for door lock . . . . . . . . . . . . . . . . . . . . . . . . . 3477 2790
Colours
Touch-up pen RAL 7031 (grey) . . . . . . . . . . . . . . . . . . . 3450 6985
Miscellaneous
Assembly screw for display board PT 2.5×14 (10 pcs.) . . . . . . . . . . . . . . . . . . . . . . . . . 3477 3100
Screw PT 3×10 Torx (self-forming) . . . . . . . . . . . . . . . . 3450 0960
Rubber feet grey (20 pcs.) . . . . . . . . . . . . . . . . . . . . . . 3477 3096
Attention label fuse T 0.16 A (5 pcs.) . . . . . . . . . . . . . 3450 0898
Screw M 6×8 for fm recessed plug (20 pcs.) . . . . . . . . 3477 3185
U Washer 3.2 (20 pcs.) . . . . . . . . . . . . . . . . . . . . . . . . . . 3477 3193
Software Update
Update kit IFMC02003 . . . . . . . . . . . . . . . . . . . . . . . . 3450 645A
Update kit IFMe02004 / IFME03004 . . . . . . . . . . . . . . 3450 645C
Update kit IFMe02005 / IFME03005 . . . . . . . . . . . . . 3450 645D
Update kit IFMe02006 / IFME03006 . . . . . . . . . . . . . . 3450 645E
MFC interface line . . . . . . . . . . . . . . . . . . . . . . . . . . . . . 0871 1661
10 — 2 Infusomat® fmS 2.3gb

Spare Parts List 10
Designation Order — No.
Poleclamp
Pole clamp (universal clamp, rotating) . . . . . . . . . . . . 3450 9054
Universal Clamp (Poleclamp)
Universal clamp, complete . . . . . . . . . . . . . . . . . . . . . . 3450 5857
Universal clamp . . . . . . . . . . . . . . . . . . . . . . . . . . . . . . . 3450 8325
Threaded rod. . . . . . . . . . . . . . . . . . . . . . . . . . . . . . . . . . 3450 8333
Star handle body . . . . . . . . . . . . . . . . . . . . . . . . . . . . . . 3450 8384
Safety clip. . . . . . . . . . . . . . . . . . . . . . . . . . . . . . . . . . . . 3450 8341
Safety hook. . . . . . . . . . . . . . . . . . . . . . . . . . . . . . . . . . . 3450 8368
Plate (2 pcs.) . . . . . . . . . . . . . . . . . . . . . . . . . . . . . . . . . 3450 2610
Connection cap D12/4 (5 pcs.) . . . . . . . . . . . . . . . . . . . 3477 4149
Bellows (5 pcs.) . . . . . . . . . . . . . . . . . . . . . . . . . . . . . . . 3477 3274
Pressure spring (5 pcs.) . . . . . . . . . . . . . . . . . . . . . . . . . 3477 4165
Designation Order — No.
Universal Clamp
Universal clamp, complete . . . . . . . . . . . . not available any more
Threaded rod . . . . . . . . . . . . . . . . . . . . . . . . . . . . . . . . . 34 50 5903
Safety hook. . . . . . . . . . . . . . . . . . . . . . . . . . . . . . . . . . . 34 50 5865
Turning handle . . . . . . . . . . . . . . . . . . . . . . . . . . . . . . . . 34 50 5890
Rubber cover (5 pcs.) . . . . . . . . . . . . . . . . . . . . . . . . . . 34 77 3290
Bellows (5 pcs.) . . . . . . . . . . . . . . . . . . . . . . . . . . . . . . . 34 77 3274
Connection cap (5 pcs.) . . . . . . . . . . . . . . . . . . . . . . . . 34 77 3304
Pressure spring for pole fixation (5 pcs.) . . . . . . . . . . . 34 77 3282
Fig.: 10 — 1 Universal Clamp (Poleclamp)
Fig.: 10 — 2 Universal Clamp
Infusomat® fmS 2.3gb 10 — 3

Spare Parts List10
For your notes:
10 — 4 Infusomat® fmS 2.3 gb

1111 — 2
11 — Index
A
Accessories . . . . . . . . . . . . . . . . . . . . . . . . . . . . . . . . . . . . . . 1 — 11
Air inline sensor . . . . . . . . . . . . . . . . . . . . . . . . . . . . . . . . . . 4 — 17
Alarm circuit . . . . . . . . . . . . . . . . . . . . . . . . . . . . . . . . . . . . . . 1 — 8
Alarms . . . . . . . . . . . . . . . . . . . . . . . . . . . . . . . . . . . . . . . . . . . 2 — 4
Approved software versions . . . . . . . . . . . . . . . . . . . . . . . . . . 2 — 2
Assignment, internal . . . . . . . . . . . . . . . . . . . . . . . . . . . . . . . 1 — 10
B
Battery . . . . . . . . . . . . . . . . . . . . . . . . . . . . . . . . . . . . . . . . . . . 4 — 1
Battery operation . . . . . . . . . . . . . . . . . . . . . . . . . . . . . . . . . . 1 — 8
Block diagram . . . . . . . . . . . . . . . . . . . . . . . . . . . . . . . . . . . . . 1 — 4
C
Checks after repair . . . . . . . . . . . . . . . . . . . . . . . . . . . . . . . . . 5 — 1
Controller board . . . . . . . . . . . . . . . . . . . . . . . . . . . . . . . . . . . 4 — 5
Current versions . . . . . . . . . . . . . . . . . . . . . . . . . . . . . . . . . . . 0 — 5
D
Default values . . . . . . . . . . . . . . . . . . . . . . . . . . . . . . . . . . . . . 2 — 6
Door lock . . . . . . . . . . . . . . . . . . . . . . . . . . . . . . . . . . . . . . . . . 4 — 2
E
Electrical safety . . . . . . . . . . . . . . . . . . . . . . . . . . . . . . . . . . . . 8 — 2
Error messages . . . . . . . . . . . . . . . . . . . . . . . . . . . . . . . . . . . . 2 — 4
F
Frame . . . . . . . . . . . . . . . . . . . . . . . . . . . . . . . . . . . . . . . . . . . 4 — 19
Front frame . . . . . . . . . . . . . . . . . . . . . . . . . . . . . . . . . . . . . . 4 — 11
Function . . . . . . . . . . . . . . . . . . . . . . . . . . . . . . . . . . . . . . . . . . 1 — 4
Functional inspection . . . . . . . . . . . . . . . . . . . . . . . . . . . . . . . 8 — 3
H
Handle . . . . . . . . . . . . . . . . . . . . . . . . . . . . . . . . . . . . . . . . . . . 4 — 4
Housing . . . . . . . . . . . . . . . . . . . . . . . . . . . . . . . . . . . . . . . . . . 4 — 4
L
List of abbreviations . . . . . . . . . . . . . . . . . . . . . . . . . . . . . . . . 0 — 8
M
Mains fuses . . . . . . . . . . . . . . . . . . . . . . . . . . . . . . . . . . . . . . . 4 — 1
Mains operation . . . . . . . . . . . . . . . . . . . . . . . . . . . . . . . . . . . 1 — 7
Maintenance . . . . . . . . . . . . . . . . . . . . . . . . . . . . . . . . . . . . . . 6 — 1
O
Occlusion pressure,
electronic . . . . . . . . . . . . . . . . . . . . . . . . . . . . . . . . . . . . . 1 — 9
mechanical . . . . . . . . . . . . . . . . . . . . . . . . . . . . . . . . . . . . 1 — 9
Operating unit . . . . . . . . . . . . . . . . . . . . . . . . . . . . . . . . . . . . 4 — 18
P
Physical construction . . . . . . . . . . . . . . . . . . . . . . . . . . . . . . . 1 — 1
Pressure sensor . . . . . . . . . . . . . . . . . . . . . . . . . . . . . . . . . . . 4 — 14
Procedural instructions on the TSC . . . . . . . . . . . . . . . . . . . . 8 — 1
Pump cover . . . . . . . . . . . . . . . . . . . . . . . . . . . . . . . . . . . . . . . 4 — 3
Pump unit . . . . . . . . . . . . . . . . . . . . . . . . . . . . . . . . . 1 — 8, 4 — 12
R
Rear panel . . . . . . . . . . . . . . . . . . . . . . . . . . . . . . . . . . . . . . . . 4 — 6
Responsibilities . . . . . . . . . . . . . . . . . . . . . . . . . . . . . . . . . . . . 0 — 5
Revision documentation . . . . . . . . . . . . . . . . . . . . . . . . . . . . . A — 1
Revision service . . . . . . . . . . . . . . . . . . . . . . . . . . . . . . . . . . . . 0 — 5
S
Service Program . . . . . . . . . . . . . . . . . . . . . . . . . . . . . . . . . . . 3 — 1
Service Program,
activate . . . . . . . . . . . . . . . . . . . . . . . . . . . . . . . . . . . . . . 3 — 3
quit . . . . . . . . . . . . . . . . . . . . . . . . . . . . . . . . . . . . . . . . . . 3 — 3
Software update . . . . . . . . . . . . . . . . . . . . . . . . . . . . . . . . . . . 2 — 1
Spare parts list . . . . . . . . . . . . . . . . . . . . . . . . . . . . . . . . . . . 10 — 1
Special tools . . . . . . . . . . . . . . . . . . . . . . . . . . . . . . . . . . . . . . 9 — 1
T
Technical Safety Check . . . . . . . . . . . . . . . . . . . . . . . . . . . . . . 7 — 1
Technical Safety Checks . . . . . . . . . . . . . . . . . . . . . . . . . . . . . 0 — 5
Test equipment . . . . . . . . . . . . . . . . . . . . . . . . . . . . . . . . . . . . 9 — 1
TSC . . . . . . . . . . . . . . . . . . . . . . . . . . . . . . . . . . . . . . . . 0 — 5, 7 — 1
V
Visual inspection . . . . . . . . . . . . . . . . . . . . . . . . . . . . . . . . . . . 8 — 1
Voltage supply . . . . . . . . . . . . . . . . . . . . . . . . . . . . . . . . . . . . . 1 — 5
Infusomat® fmS 2.3 gb 11 — 1

Index11
11 — 2 Infusomat® fmS 2.3 gb

AA — 2
A — Revision Documentation
Revision Service-Documentation Version 2.0
This manual has been completely revised. The most important changes are listed below:
— Changed manual structure
— New TSI list
— New paragraph pressure sensor (exchange / calibration)
— New test equipment for pressure sensor
— New software
— New spare parts
— Total list of spare parts
Version 2.1
— New TSI list
— New controller board
— New software
Version 2.2
This version was approved by B. Braun on 19.04.2006.
The most important changes of this version are listed below:
— New software
— New Service Program functions
— New spare parts
— Changed occlusion pressure data
Version 2.3
This version was approved by B. Braun on 18.02.2008.
The most important changes of this version are listed below:
— New software
— Possible use of the Infusomat® Space line
— New TSC
— Revised procedural instructions on the TSC
Current Information
Infusomat® fmS 2.3 gb A — 1

Revision DocumentationA
For your notes:
A — 2 Infusomat® fmS 2.3 gb
Что такое инфузионная помпа?
Что такое инфузионная помпа?
Одноразовая эластомерная инфузионная помпа – это медицинское устройство для непрерывного введения лекарственных средств или питания через венозный катетер с постоянной или регулируемой скоростью. Главное преимущество микроинфузионной помпы – амбулаторное лечение. Система непрерывно вводить пациенту обезболивающие средства, препараты для химиотерапии, питательные растворы, парентеральное питание, и длиться это может от 12 минут до 25 суток.
Строение помпы простое и состоит из защитного корпуса, эластомерной мембраны для введения л.с. или парентерального питания, гибких трубок с зажимом и бактериальным фильтром на них, переходником типа луер лок. Некоторые модели укомплектованы регулятором скорости потока подачи лекарства в вену и болюсом для дополнительной дозы препарата, если это требуется пациенту
5 плюсов инфузионных помп
- Ускорение постоперационной реабилитации
- Иммобилизация – одна из причин задержки послеоперационного восстановления пациента. Полная автономность, малый вес и небольшие размеры помпы обеспечивают свободу передвижений. За счет чего возможна выписка пациента домой уже через 1-3 часа после операции.
- Индивидуальная настройка
- Врач подбирает для каждого пациента подходящую скорость введения необходимого лекарственного препарата, учитывая диагноз, индивидуальный болевой порог, особенности проведенной операции и других факторов.
- Эффективное лечение
- Необходимая доза инфузии с постоянной или регулируемой скоростью потока сокращает болевые ощущения и дискомфорт. Во время проведения химиотерапии сокращается возникновение побочных эффектов, таких как головокружение и тошнота.
- Надежность и безопасность
- Это подтверждается медицинскими исследованиями и клинической практикой. Помпа не влияет на частоту осложнений после операций, а в некоторых случаях частота даже снижается – например, число дыхательных осложнений уменьшается в 3,3 раза! (по данным исследования С.В. Авдеева, А.А. Завьялова и др.)
- Простота в использовании
- Пациент не забивает себе голову постоянными мыслями об источниках электропитания, т.к. они просто не требуются. Лечащий врач устанавливает необходимую скорость подачи лекарства, после чего пациент ведет привычный образ жизни в течение всего времени проведения терапии.
Область применения инфузионных помп
У инфузионных пом нет «узкой специализации» — их используют анестезиологи, реаниматологи, кардиологи, онкологи и другие специалисты. В анестезиологии и реаниматологии помпы применяют для интра- и послеоперационного обезболивания. Избавление от боли важно также в ортопедии, после операций на позвоночнике, коррекции сколиоза, и в травматологии, в том числе при эндопротезировании.
Возможности, которые дают помпы для обезболивания пациентов, особенно при длительных перевозках, ценят врачи скорой помощи. Акушеры применяют помпы для анальгезии родов и при лечении гестозов.
Онкологи и гематологи применяют помпы также для стационарной и амбулаторной химиотерапии и для лечения тромбов. В кардиологии инфузионные помпы тоже помогают справиться с тромботическими осложнениями, а еще – с профилактикой и лечением ишемии. А неврологи, помимо всего перечисленного, используют помпы для введения ноотропов, антисудорожных и анксиолитических препаратов.
Несмотря на широкие возможности микроинфузионных помп количество лекарственных препаратов, которые вводят с их помощью, также велико, и только лечащий врач, в зависимости от поставленного диагноза и состояния пациента, компетентен в подборе необходимых препаратов. Однако присутствуют и некоторые ограничения: помпы предназначены только для жидких препаратов или очень небольшой густоты, без твердых частиц, т.к. подобные вещества снижают скорость инфузии или засорить помпу.
Также помпы некоторых производителей (например, Woo Young и B.Braun) нельзя наполнять кровью, кровяными препаратами, белками, липидами и жировыми эмульсиями. Выбирая помпу, следует уделить внимание особенностям ее использования, о которых предупреждает производитель.
Например, для химиотерапии чаще используют помпы с объемом 250 — 300 мл и небольшой скоростью потока из-за агрессивности вводимых химиопрепаратов, а для анальгезии – помпы, объем которых составляет 275-400 мл. Однако подбор модели индивидуален для каждого пациента, т.е. при необходимости химиопрепарат может подаваться из помпы в 600 мл, а обезболивающее – из помпы в 100 мл.
Виды и производители помп
Конечно, есть множество фирм, изготавливающих инфузионные помпы, и потому мы перечислим самых надежных и известных производителей. Помпы делятся на одноразовые и многоразовые, а также – на изделия большого и малого объема, в соответствии с задачей, которую они решают. Помпы большого объема чаще используют для введения питательных растворов, а малого – для лекарственных препаратов.
- Микроинфузионные помпы фирмы Vogt Medical (Германия)
- Фирма производит стерильные одноразовые помпы как с постоянной скоростью потока, так и с регулируемой. Рабочий объем помп с постоянной скоростью выпускаеся двух типов – 100 мл и 275мл. Скорость инфузии 1/2/4/10 мл в час для 100-миллилитровой модели и 5/8 мл в час для 275-миллиметровой.
- Для помп, снабженных регулятором скорости, при объеме в 100 мл скорость будет переключаться по градациям 1/2/3/4 и 2/4/6/8 мл/час, а при объеме в 275 мл возможны градации — 2/4/6/8 и 4/6/8/10 мл/час.
- Модели снабженные болюсом позволяют вводить дополнительно от 0,5 до 2 мл лекарственного средства с периодичностью в 15 минут.
- Микроинфузионные помпы Accufuser (Южная Корея)
- Свыше 50 моделей помп представлено на российском рынке. Легко подобрать даже для лечения самых редких форм заболеваний. Accufuser используют для введения препаратов при химиотерапии, анальгезии и антибактериальной терапии.
Помпы можно подобрать по объему от 50 до 600 мл и по скорости подачи л.с. от 0,5 до 250 мл/ч. Минимальное время инфузии составляет 25 минут, максимальное время инфузии — 25 суток
- Инфузионные помпы Easypump II от BBraun (Германия)
- Особенностью данной помпы является мягкий защитный корпус, который по мере опустошения сжимается.
- Помпы предназначены для амбулаторного лечения, и позволяют уже через несколько часов после операции отправиться домой. Изипамп 2 носится в специальном кейсе, который можно закрепить на ремне, поясе брюк либо юбки. Объем помп составляет от 60 до 400 мл, а скорость потока варьируется от 2 до 500 мл/ч в зависимости от модели. Время инфузии может занимать от 30 минут до 135 часов.
- Микроинфузионные помпы Acti-Fine от M.Schilling (Германия)
- Продукция компании отличается широким спектром применения: от кардиологии до химиотерапии, от анальгезии до неврологии. Помпы объемом на 100 и 275 мл оснащены регулятором скорости потока с градациями от 1 до 14 мл/ч, в зависимости от модели. При этом регулятор очень прост в использовании. Также в линейке присутствует модель с болюсом для контролируемой пациентом анальгезии.

Главное преимущество инфузионных помпы — амбулаторное лечение
При применении помпы число дыхательных осложнений уменьшается в 3,3 раза

Микроинфузионные помпы не зависят от батареек и электросети

Предостережения:
- Используйте только стерильные помпы.
- Не заполняйте помпу больше максимума, заявленного на упаковке.
- Убедитесь, что лекарственный препарат совместим с используемым устройством.
Рекомендации:
- Используйте для наполнения помпы шприцы с объемом 50 мл и более.
- Для определения полного заполнения помпы, откройте зажим и проверьте, с какой скоростью капает жидкость.
Как выбрать помпу?
При выборе инфузионной помпы не стоит ориентироваться исключительно на бренд. В каталоге Стерильно.com представлена продукция компаний, которые давно зарекомендовали себя как надежные производители медицинского оборудования.
Подбирая помпу для инфузионной терапии лучше следовать рекомендациям врача, а также ориентироваться на следующие показатели:
- объем мембраны, в которую вливают препараты;
- наличие или отсутствие болюса для контролируемой пациентом анальгезии;
- наличие или отсутствие регулятора скорости потока;
- при выборе помпы с постоянной скоростью потока – обратить внимание на то, какова эта скорость: она измеряется в миллилитрах в час (например, 2 мл/час или 4 мл/час и т.д.);
- время инфузии – этот параметр важно учитывать при подборе помпы для длительного, средне- или краткосрочного введения препарата


Предложения по теме

Инфузионная помпа Изипамп 2 (LT 270-27-S)
B.Braun
4550
за штуку

Инфузионная помпа Tuoren с регулируемой скоростью потока 2/4/6/8 мл/час, без болюса, 275 мл
TUORen Medical
3220
за штуку
Инфузионная помпа Tuoren с регулируемой скоростью потока 2/5/7/10 мл/час, без болюса, 275 мл
TUORen Medical
3360
за штуку

Инфузионная помпа Изипамп 2 (LT 100-50-S)
B.Braun
4550
за штуку

Инфузионная помпа Tuoren с постоянной скоростью потока 5 мл/час, без болюса, 275 мл
TUORen Medical
2870
за штуку

Инфузионная помпа Tuoren с постоянной скоростью потока 10 мл/час, без болюса, 275 мл
TUORen Medical
2870
за штуку
Инфузионная помпа Tuoren с регулируемой скоростью потока, без болюса, 100 мл
TUORen Medical
2950
за штуку

Инфузионная помпа Изипамп 2 (ST 400-4-S)
B.Braun
4675
за штуку
Инфузионная помпа Tuoren с постоянной скоростью потока, без болюса, 100 мл
TUORen Medical
2650
за штуку
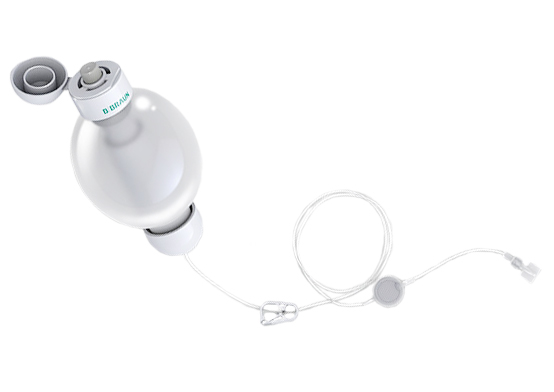
Инфузионная помпа Изипамп 2 (LT 120-30-S)
B.Braun
5369
за штуку
-15%
Микроинфузионная помпа Accufuser CT0040M
Woo Young Medical
3190 2711
за штуку

Микроинфузионная помпа Accufuser Continuous C0050L
Woo Young Medical
4990
за штуку
Микроинфузионная помпа Accufuser Continuous C0040M
Woo Young Medical
4990
за штуку

Микроинфузионная помпа Accufuser Continuous C0020L
Woo Young Medical
4990
за штуку
- About
- Blog
- Projects
- Help
-
Donate
Donate icon
An illustration of a heart shape - Contact
- Jobs
- Volunteer
- People
Bookreader Item Preview
texts
B Braun Infusomat fmS Infusion Pump Service Manual
B Braun Infusomat fmS Infusion Pump Service Manual
- Addeddate
- 2020-05-20 04:27:29
- Classification
- Clinical;Infusion and Syringe Pump;B Braun Infusion and Syringe Pump;B Braun Infusomat fmS
- Identifier
- manual_B_Braun_Infusomat_fmS_Infusion_Pump_Service_Manual
- Identifier-ark
- ark:/13960/t0cw38z5k
- Ocr
- ABBYY FineReader 11.0 (Extended OCR)
- Page_number_confidence
- 54.12
- Ppi
- 300
- Scanner
- Internet Archive Python library 1.9.0
comment
Reviews
There are no reviews yet. Be the first one to
write a review.
SIMILAR ITEMS (based on metadata)