Посмотреть инструкция для Singer Inspiration 4210 бесплатно. Руководство относится к категории швейные машины, 104 человек(а) дали ему среднюю оценку 8.3. Руководство доступно на следующих языках: английский. У вас есть вопрос о Singer Inspiration 4210 или вам нужна помощь? Задайте свой вопрос здесь
Не можете найти ответ на свой вопрос в руководстве? Вы можете найти ответ на свой вопрос ниже, в разделе часто задаваемых вопросов о Singer Inspiration 4210.
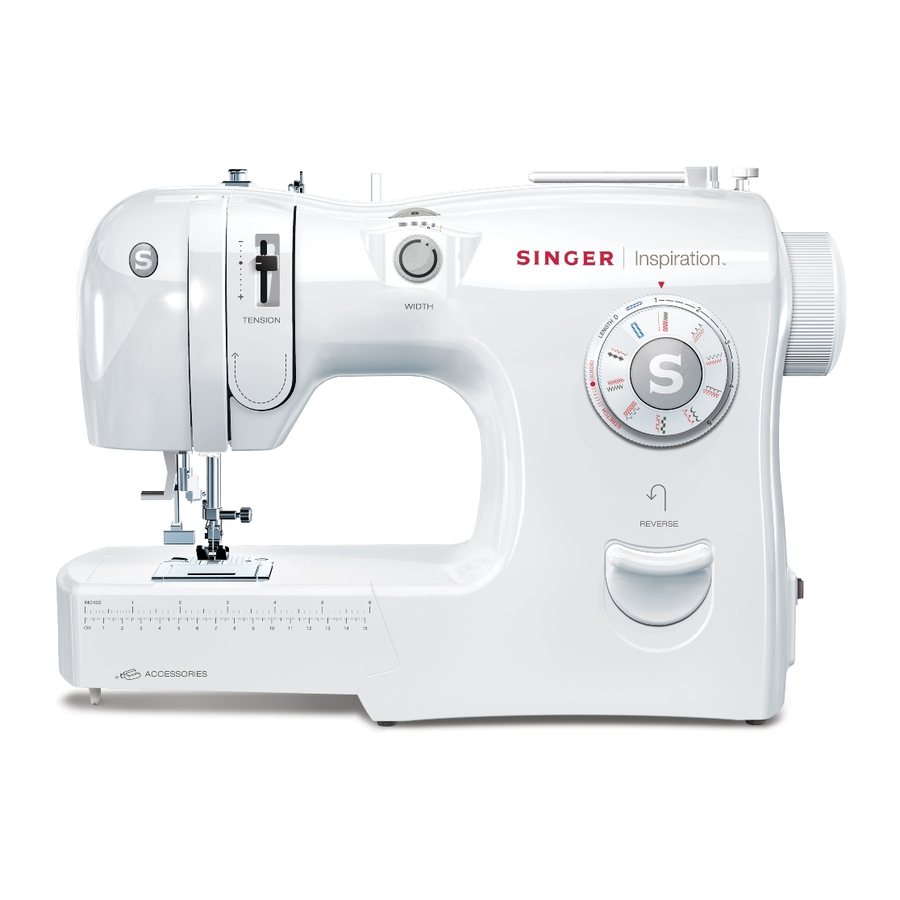
Какой вес Singer Inspiration 4210?
Какой размер иглы лучше всего использовать?
Какой срок службы у швейной иглы?
Что может повредить иглу при шитье?
Какая высота Singer Inspiration 4210?
Какая ширина Singer Inspiration 4210?
Инструкция Singer Inspiration 4210 доступно в русский?
Не нашли свой вопрос? Задайте свой вопрос здесь
-
Contents
-
Table of Contents
-
Bookmarks
Quick Links
Related Manuals for Singer Inspiration 4220
Summary of Contents for Singer Inspiration 4220
-
Page 1
Inspiration,M… -
Page 2
® A registered trademark of The Singer Company _. or i_s affltiates. Copyright © 2007. ® Une marque d_pos_e de The Singer Company Ltd. ou ses a_Pilies. Copyright _D2007. @ Una marco re_jistrada de The Sin_er Company Ltd. o sus ofiHados. -
Page 3: Table Of Contents
ITabLe of Contents 1. Important Safety Instructions …………..Page 2. Getting to Know Your Machine …………..Page 3. Learning How to Set the Machine for the Different Stitches ……Page 4. Lifting the Carrying Handle …………..Page 5. Connecting the Machine …………….. Page 6.
-
Page 4
Table des mati res 1. Consignes de s#curit# importantes ……….. page 05 2. Faites connaissance avec votre machine ……….page 09 3. Comment r#gler la machine pour les diff#rents points ……page 16 4. Relever la poign#e pour transporter la machine ……..page 20 5. -
Page 5
1. lnstrucciones importantes de seguridad ……….. Pag. 2, Conociendo su mdquina …………… Pag. 3. Aprendiendo c6mo ajustar la mfiquina para las distintas puntadas ….Pag. 4. Levantando el asa …………….Pa_. 5. Conectando la mdquina …………… Pag. 6. Aspectos bdsicos de la mdquina …………. -
Page 6
L’identification C E con[irme Io con[ormit_ aux normes. (*) Test_ dons los conditions 220-240 • Para los Territories Europeos: Esto maquina de coser Singer [ue evaluado de acuerdo con los normas Europeas y aporta los requerimientos relotivos a seguridad el#ctrfca,… -
Page 7
The wrong plate, can cause Contact your nearest authorized SINGER needle breaks. Service Center should any adjustment required. • Switch off or unplug the appliance when leavingitunattended. If the LED Luminaire is damaged, it must be… -
Page 8
Une autre plaque _ aiguille N’essayez pas d’ajuster la courroie casser l’aiguille. pourrait moteur. Si un a just•merit •st n_cessaire, adressez-vous au centre SINGER autoris_ • Eteignez ou d#branchez I’appareil quand le plus proche. vous le laissez sans surveillance. CONSERVEZ CES CONSIGNES. -
Page 9
• Apague 0 desconecte el aparato cuando se Si el Led de Iluminaci6n (brillante) se d_je de utilizar o sin atenci6n. encuentra da_ado debe reemp[azarse par el fabricante, su agente de servlcio de GUARDE ESTAS INSTRUCCIONES Singer o una persona debidamente calificada para evitar riesgos. -
Page 10
Getting to know your machine Faites connaissance avec votre machine Conocimiento de su mdquina Parts / Pi_ces / Partes P/N: 362286 359102 1. Limitador de In cantidad de hilo f. Arr_t du d_vidoir 1. Bobbin winder stop de la bobina 2. -
Page 11
Stitch width dial ))lJL Needle position selector dial Needle thread tension Stitch length selector dial Pattern selector Dial Drop Feed Lever Reverse button NeedLe position selector: The needle can be moved from the center position to either the right or left position. This is helpful ‘when inserting zippers or cording, and when topstitching. -
Page 12
FaRes connaissance avec votre machine Boutonrototif de largeur du point Boutonrotatif de Iongueurdu point situ_ derriere le s61ecteurde point Bouton de morche arri_re $_lecteur de la position de I»aiguille : I’aiguille peut _tre d_plac_e de sa position centrale vers la droite ou vers la gauche. Cette manoeuvre est pratique pour ins6rer des [ermetures _ glissi#re, des cordonnets et pour surpiquer. -
Page 13
Conociendo su Mdquina oncho Selectores de puntadQ 1I l li Se[ector de posfd6n de In a_uja Selector de tension delhilo Selector de lar_o de puntada. Selector detrds del selector de puntada Selector de puntadas Pa!onca de! impelente Bot6n de retroceso Selector gLdepdeosici6n de a u_u_q: Este selector permite que la aguja pueda moverse de la posici6n central o a la izquierda o derecha. -
Page 14: Getting To Know Your Machine
Bobbin (3 units) (*) 359838900 Canettes (3 unit_s) Bobinas (3 unidades) IMPORTANT: This machine uses only the specia| bobbin (359838900) by Singer. These bobbins are Sure Fit insertion. IMPORTANT Seules les canettes sp_ciales (359838900) de Singer sont 6 utiliser sur cette machine.
-
Page 15
Learnin_ how to set the machine for the different stitches… -
Page 16: Learning How To Set The Machine For The Different Stitches
Learning how to set the machine for the different stitches Stitch width dial Needle position selector dial Needle thread tension lever Stitch length Selector dial Patternselector dial IMPORTANT: O11111 Always set the Stitch Length to_ I I for all STRETCH stitches to ensure the stitch forms properly. Stitch Selectors for the model 4228.
-
Page 17
Comment r_gler ta machine pour/es diff_rents points… -
Page 18
Comment r_gler la machine pour les diff_rents points Cadran de largeur du point S_lect_on Manette de tension du Iil de Ion_ueur d’oiguille du point situ_ derriere s_lecteur de Codran point $#lecteur de point IMPORTANT: IIIII R6glez la Iongueur de point sur la position ,, coutures extensibles… -
Page 20
Aprendiendo a Configurar su M_quina para las Oistintas Puntadas Selector de ancho de puntada Selector de posici6n de la aguja Selector de largo depuntada Selector de tensi6n del hilo IMPORTANTE : II III Siempre ajuste el Largo de Puntada a I I I 0 para todas las puntadas en ROdO/ FLEXIBLES para asegurar que la puntada se [orme correctamente. -
Page 21: Lifting The Carrying Handle
Relever la poign#e pour transporter la machine Lifting the Carrying Handle Levantando la asa Branchement de la machine Connecting the machine Conectando la m_quina Rheostat Foot controller Controlador de veloddad Vitesse Velocidad…
-
Page 22: Connecting The Machine
Connecting the machine Branchement de la machine Conectando la M_quina For North America «This appliance has a polarized (one blade wider than the other) plus. To reduce the risk of electric shock, this plug is intended to fit in a polarized outlet only one way. If the plug does not fit fully in the outlet, reverse the plug.
-
Page 23: Machine Basics
Aspectos bdsicos de la m_quina Changing needles / Changement d’aiguille I Cambiando agujas Use only SINGER needles Utilisez des ai_uilles SINGER uniquement Utitice solamente a_ujos Sin_ter Turn handwheel counter cb_ckwise unti[ the needle is in the hishest position. Tournez le volant vers vous jusqu’_…
-
Page 24
G_n_ralit_s Machine basics Changing snap-on presser foot Changer les pieds _ enclenchement Cambiando el prensatelas de colocacion instantdnea Turn handwheel counter ctockwise until the needle is in the highest position. Tournez le volant vers vous jusqu’_ ce que I’aiguille soit dons la position la plus haute. -
Page 25
Gdndrattt_s Machine basics Aspectos b6sicos de’ la rn6quina Attachin_ snap-on presser feet Mettre en place le pied presseur _ enclenche Colocando el prensate_as de colocacibn instantdnea Turn handwheet counter clockwise until the needle is in the highest position. Tournez le volant vers vous jusqu’_ ce que I’aiguille soit clans la position la plus h,_ute. -
Page 26
G_n_ralit_s Machine basics Aspectos b6sicos de la mdqufna Changin_ screw-on presser feet or shank Changer le pied presseur sur talon visser Cambio del prensatelas a tornillo Turn handwheel counter clockwise until the needle is in the highest position. Tournez le volant vers vous jusqu’6 ce que I’ai_uille soft dons la position lo plus haute. -
Page 27
G6n6ral|t6s Machine basics Aspectos b6sicos de’ la m6quina Removing and replacing the extension table Retirer et remettre en place, le bras fibre Colocacibn y extraccibn de la cubierta removible To remove, putt Apptications extension <-_ 1.,. Applications table to the left. Pour le retirer, tirez le bras libre vers la… -
Page 28
Gdn#ralit#s Machine basics Aspectos b_sicos de la mdquina Drop feed lever Abaisse 9rifles Bajando los dientes impelentes The feed dogs control the movement of the fabric that is being sewn. They should be raised for all general sewing purposes and Lowered for darning, embroidery and monogramming. -
Page 29
Gdn_ralit_s Machine basics Aspectos b_sicos de la m6quina Adjusting thread TenSion tension Tension Teml_ Tension du f!i BaLanced stitch Point r_gulier Ajuste de la Puntada ha[once(trio tensi6n clel hilo Correction Not enough tension: I.oo’.;estitch Correction Tension insu![isonte : points laches Tensi6n insuflciente: pun_odas sueltos Correcci6n… -
Page 30
Deconsellle sur les tissus extensibles • No se recomienda paro telas eldsticos. ALways use SINGER needles for best results. Change the needle regularly (approximateLy after sewing two to three projects). Damaged fabric and poorly formed stitches are usually caused by a bent, blunt or burred needle. -
Page 31
Enf!lage de ia machine Threading the machine Ensartando la M6quina Winding the bobbin Rempl|ssage de la canette Devanondo la bobina Turn handwheel counter clockwise until the needle is in the highest position. Tournez le volant vers vow.;jusqu’_ ceque I’oiguille soil dons la position la plus haute. -
Page 32
Threading the machine En[ilage de la machine Ensartando la M6quina Pull thread out from the spool through the second thread guide. Tirez le ill de la bobine et faites-le passer par le deuxi_me guide-fil. Jale la hebro del carrete hacia el segundo guia hi[os. Place the thread to the right of the Bobbin winder disc, then swing the bobbin thread to the left going under and around the disc, putting the thread toward the Bobbin winder. -
Page 33
En[ilage de la machine Threading the machine Ensartando la M6quina Push the bobbin onto the Bobbin winder pin. Poussez la canette sur la tige du d_vidoir canette. Empuje la bobino en el poste de_ devanador de bobina. Push the bobbin winder pin to the far right position. Poussez la tige du d_vidoir compl_tement vers to… -
Page 34
Threading the machine Enfilage de ia machine Ensartando la M_quina Inserting the bobbin and removing the bobbin (useonly SINGER # 359838900 bobbins) Mettre en place et retirer la canette (Utilisez uniquement) des canettes SINGER #359838900 Colocando Y quitando la bobina… -
Page 35
En[ilage de la machine Threading the machine Ensartando la Mdquina CLose bobbin visor slide plate, leaving a 6″ thread tail. Fermez ta plaque transparente du compartiment 6 ¢anette en laissant d_passer un bout de fil de 15 cm. Cierre la placa transparente, dejando una hebra de 6 cem_.imetros. -
Page 36: Threading The Machine
Threading the machine Enfilage de la machine Ensartando la M_quina Threading the needle /Enfiler le fil d’aiguille / Enhebrado de la aguja Turn handwhee[ counter clockwise until the need|e is in the highest position. Tournez le volant vers vous jusqu’_ ce que I’aiguille salt dons la position Io plus haute.
-
Page 37
Enfilage de la machine Threading the machine Ensartando la M6quina Pull thread out from the spool through the second thread guide. Tire.z le fil de la bobine et faites-le passer clans le deuxi#me 9uide-[il. Jale el hilo de la carrete por el segundo guia hilos. -
Page 38
Threading the machine Enfilage de la machine Ensartando la Mdquina Continue to hold the thread firmly, as you thread the machine. Continuez _ tenir le fil bien fermement pendant que vous enfilez la machine. ContinUe sosteniendo el hilo con firmeza, mientras ensarta la mdquina Slide the thread behind the metal thread guide. -
Page 39
Enfilage de la machine Threading the machine Ensartando la M_quina Automatic needle threader Enfile-aiguille automattque Ensartando {a mdquina To use the Automatic needle threader; thread the machine, stopping at the needle, and set the machine as follows: Pour uti/iser I’enfile-aiguilte automatique, enfilez la machine en vous arr_tant _ I’aiguitte,… -
Page 40
Threading the machine En[ilage de la machine Ensartando la M6quina Pull the Automatic needle threader lever down, and place the thread as illustrated. Poussez la manette de l’enfile-aiguille automatique vers le baset positionnez le [il conform_ment _ Fillustration. Jale la palanca del ensartador automdtico de aguja hacia abajo y coloque el hilo coma muestra la imogen. -
Page 41
Threading the machine En[ilage de la machine Ensartando la M6quina Raising the bobbin thread Remonter le Ill de canette Sacando el hi{o de la bobina Raise presser foot tifter. Relevez le releveur de pied presseur. Levante la palanca del prensatelos. Hold needle thread Looselywith your left hand. -
Page 42
Points droits Straight Stitching Puntada Recta Stitch width Note: Any of the three needle positions can be selected when Largeur du point sewing a straight stitch. Selector de ancho de puntada Remorque ; n’importe laquelle des trois positions d’aiguille peut _tre s_lectionn_e pour la couture au point droit. -
Page 43
Points drmts Straight Stitching Puntada Recta Begin sewing. Sew 5-6 stitches, then stop. Commencer lu couture. Cousez cinq ou six points, puis arr_tez. Comience a coser Coso 5-6 puntadas, luego det#ngase. Hotd the reverse button down, and sew. The machine will sew in reverse, reinforcing stitching. -
Page 44: Basting
B_tir Basting Hilvanado .._mulu Stitch width Largeur du point Selector de ancho de puntada Note: Any of the three needle positions can be selected when sewing a straightstitch. des trois I,IJl Remorque : n’importe Ioquelle positions d’oiguille peut _tre s_lectionn_epour Io couture ou point droit, Noto: Cuaiquiera de los tres pesiciones de toa_uja puede ©…
-
Page 45
B_tir Basting Hilvanado Cousez Comlence a cOSeF. Continue sewing u_tii finished. Continuez la couture jusqu’b la fin. ContinUe cosiendo hasta terminar la costura. Turn handwheel counter clockwise until the needle is in the highest position. Tournez le volant vers vous jusqu’_ ce que I’aiguille soit clans la position la plus haute. -
Page 46
eo,ntszi,zags10 Zig-z.ag Stitching Puntada Zigzag Note: Any of the needle positions can be selected. Remarque : n’importe laque!le des trois positions d’oiguille peut _tre s#lectionn_e. Notu: Cualquiera de los tres posiciones de la aguja puede seleccionarse cuando se cose con puntada recto. -
Page 47
Points zigzags Stitching ZJgmZag Puntada Zigzag Sew. Cousez. Comience a coser. When finished, turn handwheel counter cLockwise until the needle is in the hishest position. Une [_is la couture termin_e, tournez le volant vers vous jusqu’_ ce que I’aiguille soit dons la position la plus haute. Cuando termine, gire el volante hacia usted hasta que la a_uja est_ en la posici6n md:;… -
Page 48
Boutonniere 1 _pape Buttonholes one-step 1 Ojales en un paso Stitchwidth dial Needle position: Center Lorgeur du point Position de I’aiguille: centrale Selector de uncho de puntada Selector de_o: Centro © Start with the Needle thread tension in Auto rmsition. Selectthe buttonhole icon Tensiondu [il d’oiguille Selector de tension d elhilo… -
Page 49
Boutonni#re 1 tape Buttonholes one-step Ojales en un paso Gently pull the buttonhole engagin8 [ever down and push it to the back. Abaissez d_licatement la manette de boutonniere, puis poussez levers I’arri_re. Jale con cuidado la palanca del ojal y empuje hacia atrds. -
Page 50
But’onhoos Boutonniere 1 6tape O]ales en un paso BaLancing the buttonhole _quilibrage de la boutonniere Regulacibn del ojal A perfect, weLl balanced buttonhole. Une boutonniere parfaite et @quilibr@e. Un ojal perfecto, bien regulado, density Too open De/1_t_ Muy abiertas Densidad Standard odecuada Standard… -
Page 51: Overedging
Surjeter une couture ou un bord Overedging a seam or edge Puntada tipo Overlock Stitch width Lor_eur du point Selector de ancho de puntada Needle position: Center Position de I’aiguiUe: centrale Selector de posici6n de la Set the Stitch length to melliJx ;tart with the Needle thread for all RED stitches.
-
Page 52
Surjeter une couture ou un bord Overedging a seam or edge Puntada tipo Overlook Lower the presser foot. Abaissez le pied presseur. Baje la palanca del prensatelas. Sew, guiding the fabric so that the stitch forms on the edge of the fabric. Cousez en guidont le tissu de [aqon a ce que le point se [orme sur le bord du tissu. -
Page 53: Stretch Stitches
Points extensibles Stretch Stitches Puntadas Flexibles Stitch width Lar_eur du point Selector de ancho de puntada Needle position: Center Position de I’aiguille: centrole Selector de posici6n de la a9uja: Centro Set the Stitch length to ii_OImf for all RED stitches. Start with the Needle thread R_glez la Iongueur du point sur tension…
-
Page 54
Points extensibles Stretch Stitches Puntadas Flexibles Lower the presser foot. Abaissez le pied presseur. Baje la palanca del prensatelas. Sew, aLLowing the machine to feed the fabric. Stretch stitches have a forward/backward motion. Cousez en Ioissant la machine loire avoncer le tissu. Les points extensibles sont form,s par un mouvement vers I’avont et un mouvement vers I’arri_re. -
Page 55
R glage pour ies points extensibles Adjusting stretch stitches A_ustando los puntadas _iexibles Stretch stitches are stitches with a forward and reverse motion. For best results place a stabilizer under the fabric to assist ir_ proper stitch formation. Always sew a test on a scrap of the fabric that you are using. -
Page 56
,n°,.m.t,c, Point invisible <_. Puntada pare dobladillo invisible Stitch width diaL Largeur dupoint Selector de ancho de puntodo Needle position: Center Position de I’ot¢tuille: centrole _elector de posic16n de la aguja: Centro Stitch length: from 1,5 to 2,5 Start with NeedLethread Longueur de I_int: de 1,5 _ 2.5… -
Page 57
Point invisible Blind hem stitch Puntada para dobladillo invisible Fold and pin fabric as shown. Pliez et _.pinglez le tissu conform_ment _ I’illustration. Doble y coloque alfileres en la tela como se muestra. Place the fabric under the blind hem presser foot with the fold of the fabric positioned so that the needle just piierces the fold when the needle swings to the left. -
Page 58: Twin Needle Sewing
S_lecteur de point point Selector de puntadas Largo de puntada Lon_ueur du Optional twin needle Use Singer twin needles Style #2075. See your Singer retailer Ai_uille double en option N’uti{isez que des olgui([es Singer Type d’oi_uille: #2025, Disponible dons votre magosin…
-
Page 59
Couture 6 i’aiguille jumell_e optionnelle I_ m Twin Needle Sewing with Optional Twin Needle Coser con Aguja Doble (opcional) Change to the twin needle. Mettre en place I’aiguille jumell_e Cambie a la aguja doble. Turn handwheel counter clockwise until the needle is in the highest position.. -
Page 60
Twin Needle Sewing with Optional Twin Needle €4 Couture 6 l’aiguille jumell6e optionnelle Coser con Aguja Doble (opcional) _B_m Threading for twin needle sewing Enfilage de la machine avec raiguille jumell_e Ensartando para costura con aguja doOle Insert the vertical spool pin into the opening to the left of the bobbin winder. -
Page 61
Couture _ i’aiguille jumeil_e optionneile I_ = Twin Needle Sewing with Optional Twin Needle Coser con Aguja Doble (opcional) Place one spool of thread on the verticat spool pin and the other on the horizontal spool pin. Placez une bobine de fil sur le porte- bobine vertical et une sur le porte- bobine horizontal. -
Page 62
Couture a i’mgmlle ]umeil_e Optlonneile Twin Needle Sewin_ with Optional Twin. Needle Coser con Aguja Doble (opcional) Firmly hotd both threads dose tO the spoor with your right hand, then holding the thread-ends in your [eft hand, fo[tow the thread guides. -
Page 63
Couture 6 I’aiguiile jumeli6e optionneile Twin Needle Sewing with Optional Twin Needle Coser con Aguja Doble (opcional) Passone thread through the eye of the right needle, and then pass the second thread through the eye of the teft needte. Putt 6″ of both threads under the presser foot, and to the back of the machine. -
Page 64
Twin Needle Sewing with Optional TWin Needle Couture _ l’aiguiile optionnelle jumell6o Coser con Aguja Doble (opcional) Turn handwheel counter clockwise until the needle is in the highest position. Tournez le volant vers vou_ jusqu’_ ee que I’aiguille salt clans la position Io plus haUte. Gire el volante hacia usted hasta que la aguja est# en la posici6n rods alta. -
Page 65: Entretien
Entretien Maintenance Mantenimiento Cteaning the machine Nettoyage de la machine Limpieza de la mdquina • DO NOT remove the positioning prate (A). • Ne retirez PAS la plaquette de positionnement (A). • NUNCA remueva la placa de position (A).
-
Page 66
Entretien !!Malnten_nce16 Mantenimiento Removing bobbin case Retirer le boitier de canette Retirar la caja bobina RepLacin8 bobbin case «A» under the feed do_ Remettre «‘A» sous les grilles «A» obejo de los dientes le bottler canette en place Colocar la caja bobina «B»… -
Page 67
Maintenance Maintenance Mantenimiento Performance checklist Thread balls up on Lift presser foot and re-thread the the underside of machine, holding thread firmly. the fabric Lower presser foot prior to sewing Needle does Is machine connected to electrical supply? not move Is the power and tight switched Is speed control pedal connected? Is the bobbin winder spindle pushed to the right? -
Page 68
n 16 Liste De Per[ormances Le [il s’emm_le Relevez le pied presseur et enfilez la machine _ nouveau en sous le tissu tenant [ermement le fil. Avant dlenfiler I’aiguille, abaissez pied presseur, et tirer sur le ill. S_ la machine est blen enfilee le fil devrait ressentir… -
Page 69
Entretien Maintenance Mantenimiento Guia de so[ud6n de prob[emas La ao_uja no se mueve 2Estd el cable conectado a la clavija? 2Estd e.I interruptor encendido? 2Estd el controlador conectado? 2Estd el eje devanador a la derecha? La aguja se mueve perc 2Tiene alg_n defecto ta aguja? la puntacla no se forma 2Estd i!a aguja colocada correctamente… -
Page 70
•… -
Page 72
_,_ ‘ _i__ _i_i_ii_i_ii_il i_ii!_ _ _ ! i ‘,_ i_i_’I_ _iI _!’i _i»ii,i’i_ i_i!il ¸ i_ii _ ‘ i_,_ _ _i !_’_’,_ ii,_ _ i _ i I i i_,i _ _i… -
Page 73
< ..-,1… -
Page 74
! _i_ _i_ I_ ¸ ¸ ii _ii_ _ _i _iii _!_ i_!i _i_ __ii _ i_ _’ «_ ii _ _ i¸¸ i!__iiill _i _!i ¸ _ !i__ _ ! _ _:_ i , ii_ ii i ¸ ¸ •… -
Page 78
Part Number I Pi_e N °. I Pleza N o. 360 02-023…
Скачать
Inspiration
Instruction Book
Machine à coudre
Máquina de Coser
Sewing Machine
4205 / 4210
5/10 stitches / points / puntadas
Manuel d’utilisation
Manual de Instrucciones
-
Singer 4220 Inspiration — page 1
I n s p i rat io n 4220 / 4228 20/28 A U TO Machine à coudre Máquina de Coser Stitches / Points / Puntos Sewing Machine Instruction Book Instruction Book Instruction Book Manual de Instrucciones Manuel d’Instructions …
-
Singer 4220 Inspiration — page 2
01 ® Une marque déposée de The Singer Company Ltd. ou ses af filie s . Copyright ©2007. ® Un a m ar ca r e gi s tr a da d e Th e S in g er C om p an y L td . o s us a fi l ia d os . Copyright © 2007 Singer Sewing Machine Co., Ltd. ® A registered trademark of The Singer Company Ltd. or its affiliates. Copyright © 2007. …
-
Singer 4220 Inspiration — page 3
P age 05 P age 09 P age 14 P age 20 P age 20 P age 22 P age 30 P age 41 P age 43 P age 45 P age 47 P age 50 P age 52 P age 55 P age 57 P age 64 02 Table of Contents 1. Important Safety Instructions ……………………………………………………….. 2. Getting to Know Your Machine ……………………………………………… …
-
Singer 4220 Inspiration — page 4
04 1. Instrucciones importantes de seguridad …………………………………………… 2. Conociendo su máquina …………………………………………………………….. 3. Aprendiendo c ó mo ajustar la máquina para las distintas puntadas ………………. 4. Levantando el asa ……………………………………. …
-
Singer 4220 Inspiration — page 5
06 1 Important Safety Instructions HOW T O REDUCE RISK OF FIRE, ELECTRIC SHOCK OR PERSONAL DAMAGE. WHEN USING AN ELECTRICAL APPLIANCE, BASIC SAFETY PRECAUTIONS SHOULD AL W A YS BE FOLLOWED, INCLUDING THE FOLLOWING: READ ALL INSTRUCTIONS BEFORE USING THIS APPLIANCE. This machine has been designed for domestic use. This machine should never be plugge …
-
Singer 4220 Inspiration — page 6
08 1 Instrucciones importantes de seguridad ANTES DE USAR UN AP ARA T O ELÉCTRICO, SIEMPRE DEBEN SEGUIRSE LAS INSTRUCCIONES DE SEGURIDAD, INCLUYENDO LO SIGUIENTE: LEA T ODAS LAS INSTRUCCIONES ANTES DE USAR ESTE AP ARA T O. COMO REDUCIR EL RIESGO DE INCENDIO, DESCARGA ELÉCTRICA O DAÑOS PERSONALES: Esta máquina ha sido desarrollada para uso domé …
-
Singer 4220 Inspiration — page 7
2 10 2 0 5 4 3 1 AUTO Stitch width dial Stitch length selector dial R everse button P attern selector Dial Needle thread tension Needle position selector: The needle can be moved from the center position to either the right or left position. This is helpful when inserting zippers or cording, and when topstitching. Needle thread tension knob: This c …
-
Singer 4220 Inspiration — page 8
2 0 5 4 3 1 AUTO 12 2 2 Selector de puntadas Selector de tensión del hilo Selector de largo de puntada. Selector detrás del selector de puntada Selectores Selector de ancho de puntada Botón de retroceso Conociendo su Máquina Selector de posición de la aguja Selector de posición de aguja: Este selector permite que la aguja pueda moverse de la …
-
Singer 4220 Inspiration — page 9
Learning how to set the machine for the different stitches ve at o eg s ich Re rs e sl nv e r d e t t Zz t t ig- ag sic h i t t Rc — Racs ic h PA E TT RN Multi z ig-za gs t i t c h Hone y comb stitch B l hm i c ind e st t h St ih t t ra g t s i c h St i h th s ic h ra g t s re t ct t ve d es l t t Or e g ( h e l ) si c h dg t t t Overe es t r e c h …
-
Singer 4220 Inspiration — page 10
16 Co mm en t rég le r la m ac hi ne p ou r le s diffé ren ts p oi nt s Te n s io n du fil 10 à 2 0 . . 1 0 à 20 . . 10 à 20 . . 05 à 0 . . 1 0 à 0 5 1 5 à 0 5 1. . 1. à 0 0 2. 1. à 2 0 0 . 10 à 2 0 .. 5 à 0. .1 5 5 à 0 1. . 0 0.5 à 5.0 05 à 5.0 . 1.5 à 2. 5 0.5 à 5.0 0.5 à 5.0 0. à 5.0 5 de point Longueur Largeu r de p oin t A p …
-
Singer 4220 Inspiration — page 11
18 Aprendiendo cómo preparar la máquina para las diferentes puntadas 10 à 2 0 . . 1 0 à 20 . . 10 à 20 . . 05 à 0 . . 1 0 à 0 5 1 5 à 0 5 1. . 1. à 0 0 2. 1. à 2 0 0 . 10 à 2 0 .. 5 à 0. .1 5 5 à 0 1. . 0 0.5 à 5.0 1. .5 0.5 à 5.0 0.5 à 5.0 0. à 5.0 5 0. à 5.0 5 5 à 2 Aut o Auto A uto Auto Auto A uto Auto A uto A uto Auto Auto Au …
-
Singer 4220 Inspiration — page 12
2 1 5 4 20 Re le ver l a po ig né e po ur t ra ns por te r la m ac hi ne Branchement de la machine Re le ver l a po ig né e po ur t ra ns por te r la m ac hi ne Off Apagado Arrêt On Encendido Marche V elocidad Vitesse Speed Controlador de velocidad Rh éostat F oot controller Levantando la asa Conectando la máquina Lifting the Carrying Handle C …
-
Singer 4220 Inspiration — page 13
6 22 T ournez le volant vers vous jusqu’à ce que l’aiguille soit dans la position la plus haute. Abaissez le pied presseur . Desserrez la vis du pince-aiguille et retirez l’aiguille. Pour remplacer l’aiguille, insérez l’aiguille en positionnant le côté plat de l’aiguille vers l’arrière, puis poussez l’ai …
-
Singer 4220 Inspiration — page 14
6 24 Génér alités T ournez le volant vers vous jusqu’à ce que l’aiguille soit dans la position la plus haute. Abaissez le pied presseur . Relevez le pied presseur . Alignez le pied sous le support de pied presseur . Baje la palanca del prensatelas. Alinee el pie prensatelas debajo del zanco (sujeta prensatelas) Gire el volante hacia u …
-
Singer 4220 Inspiration — page 15
26 6 Pour le retirer , tirez le bras libre vers la gauche. Applications Applications Pour le mettre en place, faites glisser le bras libre vers la droite. Appuyez pour qu’il se fixe à sa place. Génér alités Retirer et remettre en place le bras libre Colocación y extracción de la cubierta removible Aplicaciones Para retirar , deslice la c …
-
Singer 4220 Inspiration — page 16
28 6 Pour une couture de base avec un fil standard, la manette de tension doit normalement être réglée sur AUT O. Cependant, la tension peut être augmentée ou diminuée pour compenser l’ef fet de fils décoratifs, points d écoratifs, de tissus spéciaux ou de certaines techniques de couture. Génér alités T en si on du fi l Ajuste de l …
-
Singer 4220 Inspiration — page 17
30 7 T irez le fil de la bobine. Maintenez-le fermement au-dessus du premier guide-fil. Ensuite, tirez le fil vers le bas pour l’introduire dans le guide-fil. En fi la ge de l a ma ch in e Winding the bobbin Remp l iss ag e de la ca ne tt e T ournez le volant vers vous jusqu’à ce que l’aiguille soit dans la position la plus haute. R …
-
Singer 4220 Inspiration — page 18
7 32 En fi la ge de l a ma ch in e T enez l’extrémité du fil et appuyez sur le rh éostat . L’aiguille ne bouge pas mais le dévidoir de canette tourne et remplit ainsi la canette. Une fois que le fil a été enroulé une dizaine de fois autour de la canette, coupez l’extrémité du fil. Ensuite, continuez le remplissage jusqu&apos …
-
Singer 4220 Inspiration — page 19
34 7 Fermez la plaque transparente du compartiment à canette en laissant dépasser un bout de fil de 15 cm. R emoving the bobbin / Retirer la canette / Retirando la bobina En fi la ge de l a ma ch in e T ournez le volant vers vous jusqu’à ce que l’aiguille soit dans la position la plus haute. Gire el volante hacia usted hasta que la agu …
-
Singer 4220 Inspiration — page 20
7 T irez le fil de la bobine et faites-le passer dans le deuxième guide-fil. T enez fermement le fil près de la bobine de la main droite, puis en tenant l’extrémité du fil de la main gauche, faites- le passer en suivant les guide-fil. Le fil doit être bien tendu quand il passe dans les guide-fil. En fi la ge de l a ma ch in e Jale el hilo …
-
Singer 4220 Inspiration — page 21
38 39 7 7 Pour utiliser l’enfile-aiguille automatique, enfilez la machine en vous arrêtant à l’aiguille, puis réglez la machine de la façon suivante: Para usar el ensartador automático de aguja, ensarte la máquina, y deténgase en la aguja, luego ajuste la máquina como sigue: En fi la ge de l a ma ch in e Automatic needle threader …
-
Singer 4220 Inspiration — page 22
41 8 Po in ts d roi ts Largeur du point AUTO Abaissez le pied presseur . Po in ts d roi ts T ournez le volant vers vous jusqu’à ce que l’aiguille soit dans la position la plus haute. Relevez le pied presseur et mettez le tissu sous le pied presseur . Largeur du point Pour coudre des points très serrés, réglez la longueur du point sur …
-
Singer 4220 Inspiration — page 23
43 9 Bâtir Abaissez le pied presseur . T ournez le volant vers vous jusqu’à ce que l’aiguille soit dans la position la plus haute. Relevez le releveur du pied presseur et mettez le tissu sous le pied presseur . Largeur du point Pour bâtir , régler la longueur de point sur « 5 ». Longueur du point Para hilvanar ajuste el largo de pun …
-
Singer 4220 Inspiration — page 24
45 10 T ournez le volant vers vous jusqu’à ce que l’aiguille soit dans la position la plus haute. AUTO Points zigzags Abaissez le pied presseur . Baje la palanca del prensatelas Relevez le pied presseur et mettez le tissu sous le pied presseur . Largeur du point Pour coudre des points très serrés, réglez la longueur du point sur un pe …
-
Singer 4220 Inspiration — page 25
1 2 47 11 AUTO Position de l’aiguille : centrale T ension du fil d’aiguille Largeur du point Selector de posición de aguja: Centro Selector de ancho de puntada Selector de tensión del hilo Sélectionnez le symbole: Longueur du point Seleccione el icono ojal. Sélecteur de point Selector de puntadas Needle position: Center Stitch width d …
-
Singer 4220 Inspiration — page 26
49 11 Équilibrage de la boutonnière Regulación del ojal Balancing the buttonhole 1 2 3 4 Une boutonnière parfaite et équilibrée. Un ojal perfecto, bien regulado. A perfect, well balanced buttonhole. Densité standard Densidad adecuada Standard density Densité standard Densidad adecuada Standard density T rop éloignés Muy abiertas T oo open …
-
Singer 4220 Inspiration — page 27
51 12 Abaissez le pied presseur . Continuez la couture jusqu’à la fin. T ournez le volant vers vous jusqu’à ce que l’aiguille soit dans la position la plus haute. Relevez de pied presseur et retirez le tissu en le faisant glisser sous le pied presseur . Cousez en guidant le tissu de façon à ce que le point se forme sur le bord du …
-
Singer 4220 Inspiration — page 28
53 13 Abaissez le pied presseur . Continuez la couture jusqu’à la fin. T ournez le volant vers vous jusqu’à ce que l’aiguille soit dans la position la plus haute. Cousez en laissant la machine faire avancer le tissu. Les points extensibles sont formés par un mouvement vers l’avant et un mouvement vers l’arrière. Relevez …
-
Singer 4220 Inspiration — page 29
55 14 AUTO Si vous souhaitez surjeter le bord coupé, ensuite pliez l’ourlet de la profondeur désirée. Fixez-le au point de bâti. Point invisible Largeur du point Longueur du point Stitch length: from 1,5 to 2,5 Longueur de point: de 1,5 à 2.5 Sélecteur de point Position de l’aiguille: centrale Selector de posición de la aguja: Cent …
-
Singer 4220 Inspiration — page 30
AUTO Couture à l’aiguille jumell ée optionnelle Largeur du point Pour la couture à l’aiguille jumell ée , réglez la longueur du point entre «2» et «4». Longueur du point Aiguille double en option N’utilisez que des aiguilles Singer T ype d’aiguille: #2025, Disponible dans votre magasin Singer T ension du fil d’aigu …
-
Singer 4220 Inspiration — page 31
59 15 Enfilage de la machine avec l’aiguille jumell ée Couture à l’aiguille jumell ée optionnelle T ournez le volant vers vous jusqu’à ce que l’aiguille soit dans la position la plus haute. Placez la bobine de fil sur le porte-bobine horizontal. Fixez le fil dans la bonne position avec le grand ou le petit etrier de bobine, …
-
Singer 4220 Inspiration — page 32
61 15 8 9 Couture à l’aiguille jumell ée optionnelle T enez fermement les deux fils près de la bobine avec la main droite, puis en tenant les extrémités des fils de la main gauche, faites-les passer en suivant les guide-fils. Les fils doivent être tendus quand ils passent dans les guide-fils. Continuez à tenir les fils bien tendus penda …
-
Singer 4220 Inspiration — page 33
62 15 10 Faites passer un fil dans le chas de l’aiguille droite, puis faites passer l’autre fil dans le chas de l’aiguille gauche. T irez chaque fil de 15 cm, faites-les passer sous le pied presseur , puis vers l’arrière de la machine. Important : n’utiliser jamais l’enfile-aiguille automatique avec une aiguille jumel …
-
Singer 4220 Inspiration — page 34
65 16 B A B «A» sous les grif fes «B» sous la plaquette de positionnement «B» abajo de la placa posicionadora R emoving bobbin case Retirer le boîtier de canette Retirar la caja bobina “A” under the feed dog «A» abajo de los dientes Lubrication Lubrification Lubrifiez les pièces à mouvement. R eplacing …
-
Singer 4220 Inspiration — page 35
67 Entretien 16 Liste De Performances Le fil s’emmêle sous le tissu L’aiguille ne bouge pas L’aiguille bouge mais le point ne se forme pas L’aiguille casse Dif ficultés pour remplir la canette Le fil de canette casse Le fil d’aiguille casse La machine saute des points Le tissu n’est pas entraîné correctement sous l …
-
Singer 4220 Inspiration — page 36
69 68 16 Entretien Guía de solución de problemas ¿Está correcto el enhebrado de la aguja? ¿Está la tela presionada por el prensatelas firmemente? ¿Están correctos el tipo y el tamaño de la aguja para la tela? ¿Está la aguja torcida? ¿Está el cable conectado a la clavija? ¿Está el interruptor encendido? ¿Está el controlador conectad …
-
Singer 4220 Inspiration — page 37
71 70 …
-
Singer 4220 Inspiration — page 38
73 72 …
-
Singer 4220 Inspiration — page 39
75 74 …
-
Singer 4220 Inspiration — page 40
76 360102-023 P art Number / Pieza Nº. Pièce Nº. / P rinted in Brazil Impreso en Brasil P rinted in Brazil Imprimé au Brésil Eng./ Fren./ Spa. …
Смотреть руководство для Singer Inspiration 4210 ниже. Все руководства на ManualsCat.com могут просматриваться абсолютно бесплатно. Нажав кнопку «Выбор языка» вы можете изменить язык руководства, которое хотите просмотреть.

MANUALSCAT | RU
Вопросы и ответы
У вас есть вопрос о Singer Inspiration 4210, но вы не можете найти ответ в пользовательском руководстве? Возможно, пользователи ManualsCat.com смогут помочь вам и ответят на ваш вопрос. Заполните форму ниже — и ваш вопрос будет отображаться под руководством для Singer Inspiration 4210. Пожалуйста, убедитесь, что вы опишите свои трудности с Singer Inspiration 4210 как можно более детально. Чем более детальным является ваш вопрос, тем более высоки шансы, что другой пользователь быстро ответит на него. Вам будет автоматически отправлено электронное письмо, чтобы проинформировать вас, когда кто-то из пользователей ответит на ваш вопрос.
Задать вопрос о Singer Inspiration 4210
- Бренд:
- Singer
- Продукт:
- швейные машины
- Модель/название:
- Inspiration 4210
- Тип файла:
- Доступные языки:
- английский, французский, испанский