- Manuals
- Brands
- Gorenje Manuals
- Oven
- Classico
- Detailed instructions for use
-
Contents
-
Table of Contents
-
Troubleshooting
-
Bookmarks
Quick Links
GB
IE
MT
DETAILED
INSTRUCTIONS
FOR USE OF THE
ELECTRIC OVEN
www.gorenje.com
Related Manuals for Gorenje Classico
Summary of Contents for Gorenje Classico
-
Page 1
DETAILED INSTRUCTIONS FOR USE OF THE ELECTRIC OVEN www.gorenje.com… -
Page 2
Instructions for installation and connection are supplied on a separate sheet. Instructions for use are also available at our website: www.gorenje.com / < http://www. gorenje.com /> Important information Tip, note… -
Page 3: Table Of Contents
CONTENTS INTRODUCTION IMPORTANT SAFETY INSTRUCTIONS Before connecting the appliance THE ELECTRIC OVEN 10 Control unit Technical specifications PREPARING THE APPLIANCE FOR 12 BEFORE USING THE APPLIANCE FOR THE FIRST TIME THE FIRST USE COOKING STEPS 13 STEPS OF THE COOKING PROCESS (1–4) 13 Step 1: CHOOSING THE COOKING SYSTEM 15 Step 2: CHOOSING THE SETTINGS 18 Step 3: START THE COOKING PROCESS…
-
Page 4: Important Safety Instructions
IMPORTANT SAFETY INSTRUCTIONS CAREFULLY READ THE INSTRUCTIONS AND SAVE THEM FOR FUTURE REFERENCE. This appliance can be used by children aged from 8 years and above and persons with reduced physical, sensory or mental ca- pabilities or lack of experience and knowledge if they have been given supervision or instruction concerning use of the appliance in a safe way and understand the hazards involved.
-
Page 5: Before Connecting The Appliance
Means for disconnection must be incorporated in the fixed wir- ing in accordance with the wiring rules. If the supply cord is damaged, it must be replaced by the manu- facturer, its service agent or similarly qualified persons in order to avoid a hazard (only for appliances supplied with connection cord) .
-
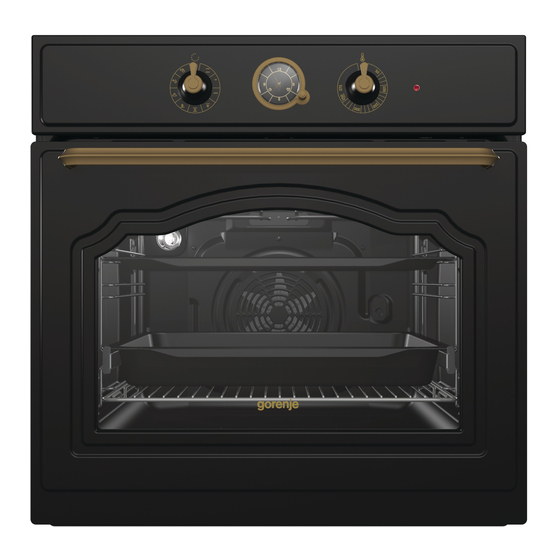
Page 6: The Electric Oven
THE ELECTRIC OVEN (DESCRIPTION OF THE OVEN AND EQUIPMENT – DEPENDING ON THE MODEL) The figure represents one of the built-in appliance models. Since the appliances for which these instructions were drawn up may have different equipment, some functions or equipment may be described in the manual that may not be present in your appliances.
-
Page 7
WIRE GUIDES The wire guides allow preparation of the food on four levels (please note that the levels/ guides are counted from the bottom up). Guides 3 and 4 are intended for grilling. TELESCOPIC PULL-OUT GUIDES Telescopic pull-out guides may be fitted for the 2nd, 3rd, and 4th level. Pull-out guides can be partly or fully extendible. -
Page 8
The DEEP BAKING TRAY is used for roasting meat and baking moist pastry. It can also be used as a drip tray. Never place the deep baking tray in the first guide during the cooking process, except when grilling food or using the roasting spit and you are only using the deep tray as a drip tray. -
Page 9
The ROTISSERIE (meat skewer) is used for roasting meat. The set consists of a skewer support, skewer with screws, and a removable handle. The appliance and some of the accessible parts tend to heat up during cooking. Use oven mitts. -
Page 10: Control Unit
CONTROL UNIT COOKING PROGRAM TEMPERATURE OVEN CONTROL SYSTEM TIMER KNOB LIGHT SELECTOR KNOB THE RED LIGHT is no when the oven heaters are activated. When the selected temperature is reached, the red light is switched off.
-
Page 11: Technical Specifications
TECHNICAL SPECIFICATIONS (DEPENDING ON THE MODEL) A Serial number B Code/ID C Type D Brand E Model F Technical data G Compliance symbols The rating plate indicating the basic information about the appliance is located at the edge of the oven and it is visible when the oven door is opened.
-
Page 12: Before Using The Appliance For The First Time
BEFORE USING THE APPLIANCE FOR THE FIRST TIME Upon receiving the appliance, remove all parts, including any transport equipment, from the oven. Clean all accessories and utensils with warm water and regular detergent. Do not use any abrasive cleaners. Before using the oven for the first time, heat it with the upper and lower heater system at 200 °C for approximately one hour.
-
Page 13: Steps Of The Cooking Process
STEPS OF THE COOKING PROCESS (1–4) STEP 1: CHOOSING THE COOKING SYSTEM Rotate the knob (left and right) to select the cooking system (see program table). Settings can also be changed during operation. SYSTEM DESCRIPTION SUGGESTED TEMPERATURE °C COOKING SYSTEMS UPPER AND BOTTOM HEATER The heaters in the bottom and in the ceiling of the oven cavity will radiate heat evenly into the oven interior.
-
Page 14
SYSTEM DESCRIPTION SUGGESTED TEMPERATURE °C TOP AND BOTTOM HEATER WITH FAN Both heaters and the fan are activated. The fan allows even circulation of hot air inside the oven. It is used for baking pastry, for defrosting, and for drying fruit and vegetables. BOTTOM HEATER AND FAN This is used for baking leavened but low-rising pastry and for preserving fruit and vegetables. -
Page 15: Step 2: Choosing The Settings
STEP 2: CHOOSING THE SETTINGS ADJUSTING THE COOKING TEMPERATURE Set the temperature knob to the position when using the oven system with the large grill and grill. ELECTRONIC TIMER OPERATION A Function selection knob 1 Oven delayed start 2 End oven operation 3 Minute minder 4 Time display Select the time settings by consecutively pressing the (A) knob.
-
Page 16
In order for the oven to operate, press the (A) knob and hold it for two seconds. Time display will stop flashing. The oven can be used without restrictions if no timer settings are made. OVEN OPERATION WITH PROGRAM TIMER SETTINGS Program timer can be used to program oven operation in two ways: A) Setting the stop time This mode allows you to set the time at which you wish the oven to stop operating. -
Page 17
SETTING THE MINUTE MINDER The clock can also be used as a minute minder which will sound an alarm upon expiry of a set amount of time. The minute minder can only be selected when the program timer is not programmed or in use. -
Page 18: Step 3: Start The Cooking Process
STEP 3: START THE COOKING PROCESS Set the system and the temperature; then, start the cooking process. STEP 4: END THE COOKING PROCESS AND SWITCHING OFF THE OVEN Turn the COOKING SYSTEM SELECTOR KNOB to position «0».
-
Page 19: Descriptions Of Systems (Cooking Modes) And Cooking Tables
DESCRIPTIONS OF SYSTEMS (COOKING MODES) AND COOKING TABLES If your desired food cannot be found in the cooking table, find information for similar food. The information displayed applies to cooking in a single level. An interval of suggested temperature is indicated. Start with a lower temperature setting and increase it if you find the food is not browned sufficiently.
-
Page 20
Standard doneness levels and recommended final core temperature for different types of meat Food core temperature Meat colour on cross- Type of food (°C) section, and colour of juices BEEF meaty red, like raw meat, Rare 40-45 little juice light red, a lot of light red Medium rare 55-60 juice… -
Page 21
UPPER AND BOTTOM HEATER The heaters in the bottom and in the ceiling of the oven cavity will radiate heat evenly into the oven interior. Roasting meat: Use enamel coated, tempered glass, clay, or cast iron pan or tray. Stainless steel trays are not suitable as they strongly reflect the heat. -
Page 22
Baking pastry Only use one level and dark baking sheets or trays. In light-coloured baking sheets or trays, the browning of the pastry will be poorer, as such equipment will reflect the heat. Always place the baking trays on the grid. If you are using the supplied baking sheet, remove the grid. -
Page 23
Is the cake done? • Pierce the cake at the top with a wooden toothpick or skewer. If there are no traces on the pick or the skewer when pulled out, the cake is done. Did the cake collapse? • Check the recipe. •… -
Page 24
LARGE GRILL, GRILL When grilling food with the large grill, the upper heater and the grill heater fitted on the ceiling of the oven cavity will operate. When grilling food, the upper heater and the grill heater fitted on the ceiling of the oven cavity will operate. -
Page 25
Grilling table – large grill Type of food Weight (g) Guide (from Temperature Cooking time the bottom) (°C) (minutes) MEAT Beefsteak, rare 180 g/piece 15-20 Beefsteak, well done 180 g/piece 18-25 Pork neck fillet 150 g/piece 20-25 Cutlets/chops 280 g/piece 20-25 Veal escalope 140 g/piece… -
Page 26
Cooking with the rotisserie (depending on the model) Maximum temperature when using the rotisserie is 240°C. Insert the skewer support into the 3rd guide from the bottom and place the deep tray into the bottom (1st) guide to serve as a drip tray. Impale the meat on the skewer and tighten the screws. -
Page 27: Tables
GRILL WITH FAN In this operating mode, the grill heater and the fan operate simultaneously. Suitable for grilling meat, fish, and vegetables. (See descriptions and tips for GRILL.) Type of food Weight Guide level Temperature Cooking time (from the (°C) (min) bottom) MEAT…
-
Page 28
HOT AIR AND BOTTOM HEATER The bottom heater, the round heater, and the hot air fan will operate. Suitable for baking pizzas, apple pies, and fruitcakes. (See descriptions and tips for UPPER and BOTTOM HEATER.) Type of food Guide (from the Temperature Cooking time bottom) -
Page 29
HOT AIR Round heater and the fan will operate. The fan installed in the back wall of the oven cavity makes sure the hot air constantly circulates around the roast or pastry. Roasting meat: Use enamel coated, tempered glass, clay, or cast iron pan or tray. Stainless steel trays are not suitable as they strongly reflect the heat. -
Page 30
Baking pastry Preheating is recommended. Biscuits and cookies can be baked in shallow baking sheets on several levels simultaneously (2nd and 3rd). Note that baking time can differ even with if the baking sheets used are the same. The biscuits in the upper baking sheet may be ready sooner than those in the lower one. -
Page 31: Tables
BOTTOM HEATER AND FAN This is used for baking leavened but low- rising pastry and for preserving fruit and vegetables. Use the second guide from the bottom and a rather shallow baking tray to allow the hot air to circulate across the upper side of the dish.
-
Page 32
TOP AND BOTTOM HEATER WITH FAN It is used for baking of all types of pastry, for defrosting, and for drying fruit and vegetables. Before placing the food into the preheated oven, wait for the light to go off for the first time. For best results, only bake on one shelf (level). -
Page 33
DEFROSTING In this mode, the air will circulate without any heaters operating. Food suitable for defrosting includes cakes with heavy cream or butter-based cream, cakes and pastry, bread and rolls, and deep-frozen fruit. In most cases, it is recommended to remove the food from the packaging (do not forget to remove any metal clamps or clips). -
Page 34: Maintenance & Cleaning
MAINTENANCE & CLEANING Be sure to unplug the appliance from the power supply and wait for the appliance to cool down. Children should not clean the appliance or perform maintenance tasks without proper supervision. Aluminium finish Clean the aluminium finish with non-abrasive liquid cleaners intended for such surfaces. Apply the cleaner onto a wet cloth and clean the surface.
-
Page 35: Conventional Oven Cleaning
CONVENTIONAL OVEN CLEANING You may use the standard cleaning procedure to clean stubborn dirt in the oven (using cleaners or an oven spray). After such cleaning, rinse the cleaner residues thoroughly. Clean the oven and the accessories after each use to prevent the dirt from burning into the surface.
-
Page 36: Using The Aqua Clean Function To Clean The Oven
USING THE AQUA CLEAN FUNCTION TO CLEAN THE OVEN Turn the COOKING SYSTEM SELECTOR KNOB to Aqua Clean. 2. Set the TEMPERATURE KNOB to 70 °C. Pour 0.6 l of water into a glass or shallow baking dish and insert it into the lower guide.
-
Page 37: Removing And Cleaning Wire And Telescopic Extendible Guides
REMOVING AND CLEANING WIRE AND TELESCOPIC EXTENDIBLE GUIDES Only use conventional cleaners to clean the guides. A Hold the guides by the bottom side and pull them towards the center of the oven cavity. B Remove them from the openings at the top.
-
Page 38: Cleaning The Oven Cavity Ceiling
CLEANING THE OVEN CAVITY CEILING (depending on the model) Upper grill heater is foldable to allow easier cleaning of the oven cavity ceiling. Before cleaning the oven, remove the trays, the grid, and the guides. Pull the heater until the cross bar is released from the supports on the left and right hand side of the oven cavity.
-
Page 39: Removing And Inserting The Oven Door (Depending On The Model)
REMOVING AND INSERTING THE OVEN DOOR (depending on the model) First, fully open the door (as far as it will go). A Rotate the stoppers all the way back (in case of conventional closing). B If the appliance is fitted with the GentleClose system, flip the door latches back to a 90°angle (Figure C If the appliance is fitted with the…
-
Page 40
DOOR LOCK (depending on the model) To open it, gently push it to the right with your thumb and pull the door outwards at the same time. When the oven door is closed, the door lock automatically returns to the initial position. -
Page 41
SOFT DOOR CLOSING (depending on the model) Oven door is fitted with a system that dampens the door closing force, starting at the 75-degree angle. It allows simple, quiet, and smooth closing of the door. A gentle push (to a 15-degree angle relative to the closed door position) is enough for the door to close automatically and softly. -
Page 42: Removing And Inserting The Oven Door Glass Pane
REMOVING AND INSERTING THE OVEN DOOR GLASS PANE Oven door glass pane can be cleaned from the inside, but it has to be removed first. Remove the oven door (see chapter «Removing and replacing the oven door»). Slightly lift the supports on the left and right side of the door (marking 1 on the support) and pull them away from the glass pane (marking 2 on the support).
-
Page 43: Replacing The Bulb
REPLACING THE BULB The bulb is a consumable and therefore not covered by warranty. Before changing the bulb, remove the trays, the grid, and the guides. (Halogen lamp: G9, 230 V, 25 W; regular bulb E14, 25 W, 230 V) Use a flat screwdriver to release the bulb cover and remove it.
-
Page 44: Troubleshooting Table
TROUBLESHOOTING TABLE Problem/error Cause The timer is not responding. Disconnect the appliance from the power mains for a few minutes (undo the fuse or switch off the main switch); then, reconnect the appliance and switch it on. The main fuse in your home Call a service technician.
-
Page 45: Disposal
DISPOSAL Packaging is made of environmentally friendly materials that can be recycled, disposed of, or destroyed without any hazard to the environment. To this end, packaging materials are labelled appropriately. The symbol on the product or its packaging indicates that the product should not be treated as normal household waste.
-
Page 48
EVP_MULTI_IL_CLASSICO en (03-19)
-
Инструкции
-
Духовые шкафы
- Gorenje

Инструкция к Gorenje BCMS598S19X
PDF, 4.09 Мб
Схема встраивания с размерами
JPEG, 268.81 Кб

Инструкция к Gorenje BO6717E03X
PDF, 1.98 Мб
Руководство по установке
PDF, 657.62 Кб
Схема встраивания с размерами
JPEG, 65.24 Кб

Инструкция к Gorenje BOS6737E03WG
PDF, 2.38 Мб
Схема встраивания с размерами
JPEG, 65.24 Кб

Инструкция к Gorenje BOS6737E06FBG
PDF, 2.38 Мб
Схема встраивания с размерами
JPEG, 65.24 Кб

Инструкция к Gorenje BO6735CLI
PDF, 2.93 Мб
Схема встраивания с размерами
JPEG, 65.24 Кб

Инструкция к Gorenje BOS6737E09WG
PDF, 2.38 Мб
Схема встраивания с размерами
JPEG, 65.24 Кб

Инструкция к Gorenje BO6717E03BG
PDF, 1.98 Мб
Руководство по установке
PDF, 657.62 Кб
Схема встраивания с размерами
JPEG, 346.12 Кб

Инструкция к Gorenje BO735E11X
PDF, 5.38 Мб
Руководство по установке
PDF, 674.7 Кб

Инструкция к Gorenje BO735E11B
PDF, 5.38 Мб
Руководство по установке
PDF, 674.7 Кб

Инструкция к Gorenje BO735E11W
PDF, 5.38 Мб
Руководство по установке
PDF, 674.7 Кб

Инструкция к Gorenje BO74SYB
PDF, 5.07 Мб
Руководство по установке
PDF, 674.7 Кб

Инструкция к Gorenje BO758ORAW
PDF, 5.81 Мб
Руководство по установке
PDF, 674.7 Кб

Инструкция к Gorenje BO737ORAB
PDF, 5.4 Мб
Руководство по установке
PDF, 674.7 Кб

Инструкция к Gorenje BO74SYW
PDF, 5.07 Мб
Руководство по установке
PDF, 674.7 Кб

Инструкция к Gorenje BO717ORAB
PDF, 4.48 Мб
Руководство по установке
PDF, 674.7 Кб

Инструкция к Gorenje BO717ORAW
PDF, 4.48 Мб
Руководство по установке
PDF, 674.7 Кб
Настоящая инструкция для духового шкафа Gorenje BO53CLB поможет Вам быстрее познакомиться с Вашим новым устройством. Просим вас внимательно прочитать руководство перед началом работы.
Обратите внимание: Противни, решетку и подобное оборудование мойте горячей водой с моющим средством.
В руководстве Gorenje BO53CLB содержатся важные сведения: указания по технике безопасности, монтаж и подключение, общие возможности установки режимов работы, панель управления, выбор и установка температуры, выбор режима работы, уровни приготовления, очистка и обслуживание, устранение неисправностей, замена лампочки духовки.