
Version 2.0
09/2011
Melitta Haushaltsprodukte
GmbH & Co. KG
D-32372 Minden
MAGY
AR
POLSKI
TÜRK
Ç
E
РУССКИЙ
Руководство по
эксплуатации
Kullanma Kılavuzu
Instrukcja obsługi
Használati utasítás
Instrucţiuni de utilizare
Οδηγίες χρήσης
ROM
Â
N
Ă
EΛΛΗΝΙΚΑ
Условия для ответа на запрос:
1. «Конкурент» отправляет в Ваш регион.
2. Товар должен быть на складе в наличии и быть готовым к отгрузке/отправке.
Мы можем отказать в продаже товара по сниженной цене если:
1. Запрошенная цена ниже себестоимости товара
2. Товар продается с уценкой (дисконт)
3. Последний товар на складе
4. Товар продается со скидкой (акция)
5. Товар уже зарезервирован за другим Клиентом
Заранее благодарны за Ваше обращение.
-
Contents
-
Table of Contents
-
Troubleshooting
-
Bookmarks
Quick Links
Version 1.0
07/2009
Bedienungsanleitung
Melitta Haushaltsprodukte
Operating Instructions
GmbH & Co. KG
Guide d’utilisation
D-32372 Minden
Gebruiksaanwijzing
Manual de Instrucciones
Návod k obsluze
Návod na použitie
Related Manuals for Melitta Caffeo Solo
Summary of Contents for Melitta Caffeo Solo
-
Page 1
Version 1.0 07/2009 Bedienungsanleitung Manual de Instrucciones Melitta Haushaltsprodukte Operating Instructions Návod k obsluze GmbH & Co. KG Guide d’utilisation Návod na použitie D-32372 Minden Gebruiksaanwijzing… -
Page 3
Dear customer, congratulations on buying a Melitta sOLO fully automatic coffeemaker. ® We would like to welcome you as a coffee lover and Melitta sOLO gourmet. ® With this Melitta sOLO quality product you will experience many special cof- ®… -
Page 4: Table Of Contents
Filling the water reservoir ………………..47 switching on ……………………47 Adjusting the amount of coffee that will be dispensed ……….48 Adjusting the brewing strength ………………48 Inserting the Melitta claris water filter …………..49 ® Preparing coffee / espresso………………50 Preparing a cup of coffee / espresso …………….50 Preparing two cups of coffee / espresso ……………51…
-
Page 5
Function settings …………………..53 Adjusting the water hardness ………………53 setting the timer for energy-saving standby mode ………….54 setting the timer for the auto-off function…………..55 Adjusting the brewing temperature …………….56 Resetting to factory settings ……………….57 Adjusting grinding fineness ………………..58 care and maintenance ………………..59 General cleaning …………………..59 cleaning the brewing unit ………………..60 Integrated cleaning program ………………61… -
Page 6: Information About These Operating Instructions
For better orientation fold out the fold-out pages on the front and back of these operating instructions. Symbols in the text of these operating instructions The symbols in these operating instructions indicate specific hazards associated with handling your Melitta sOLO, or provide useful tips. ® Warning! texts with this symbol contain information for your safety and indicate possible accident and injury hazards.
-
Page 7: Intended Use
Melitta SOLO within the operating conditions specified ® in these instructions. Nonintended use Non-intended use applies when you use the Melitta sOLO in a manner that differs ® from the use described in these operating instructions. Warning! Through non-intended use you can injure yourself or scald yourself with the hot water or steam.
-
Page 8: General Safety Instructions
– Only use this appliance if it is in faultless condition. – Never attempt to repair the appliance yourself. If repairs are necessary contact the Melitta service hotline only. ® – Do not make any changes to the appliance, its components, or to the supplied accessories.
-
Page 9: Appliance Description
Appliance description Legend for Fig. A Fig. number Explanation Drip tray with cup plate and collection container for coffee grounds (internal) as well as float (display for full drip tray) Height-adjustable coffee outlet coffee quantity regulator Button for single-cup dispensing Button for two-cup dispensing Water reservoir Bean container…
-
Page 10: Display
Display Explanation / prompt Appliance is heating up or coffee Flashing dispensing process is running. standby Illuminated the appliance is ready for operation. Illuminated change Melitta claris water filter ® Melitta claris ® water filter Flashing Filter change process is running…
-
Page 11: Starting Up
Starting up When starting the appliance for the first time, please execute the following tasks. When you have executed these tasks the appliance is ready for operation. thereafter you can prepare coffee. We recommend pouring the first two cups of coffee after first start up down the drain.
-
Page 12: Connecting
Connecting • Plug the power-supply cord into an earthing contact socket outlet with at least 10 A fuse protection. Warning! Danger of fire and danger of electric shock due to incorrect supply voltage, incorrect or damaged connections and power cord –…
-
Page 13: Filling The Water Reservoir
Filling the water reservoir • Flip up the lid of the water reservoir (Fig. A, no. ) and pull the water reservoir up and out of the appliance. • Fill the water reservoir with fresh water to the Max. mark and reinsert it in the appliance.
-
Page 14: Adjusting The Amount Of Coffee That Will Be Dispensed
Adjusting the amount of coffee that will be dispensed • turn the coffee quantity regulator (Fig. A, no. ) to variably adjust the dispensing quantity (regulator to the left: less coffee, regulator to the right: more coffee). Coffee dispensing Regulator far Regulator in Regulator far quantity…
-
Page 15: Inserting The Melitta Claris ® Water Filter
Inserting the Melitta Claris water filter ® A Melitta claris water filter for filtering out lime scale is included with the appliance. ® After starting up the appliance for the first time, please insert the water filter into the appliance. If you use the filter, you will decalcify the appliance less frequently and the water hardness will be set on hardness level 1 automatically (see page 53 in this regard).
-
Page 16: Preparing Coffee / Espresso
Melitta claris water filter should not remain dry over a longer pe- ® riod of time. consequently we recommend storing the Melitta claris ® water filter in a glass of water in the refrigerator if the device will not be used for a longer period of time.
-
Page 17: Preparing Two Cups Of Coffee / Espresso
Notes – When the appliance is started up for the first time, the grinder will grind longer than usual. – You can also adjust the cup fill quantity during the dispensing process. to dispense less coffee, turn the coffee quantity regulator to the left to the desired quantity, or turn it until the appliance stops dispensing.
-
Page 18: Switching Off And Operating Modes
Switching off and operating modes Switching off • If possible place a bowl under the outlet. • Press the On / Off button to switch off the appliance. → the appliance automatically rinses out the coffee channel, if coffee has been dispensed beforehand.
-
Page 19: Function Settings
The appliance is factory-adjusted to water hardness 4. If you have inserted the Melitta claris water filter, water hardness 1 is set ®…
-
Page 20: Setting The Timer For Energy-Saving Standby Mode
• Press the On / Off button to confirm the selected degree of water hardness. → All symbols in the display flash briefly for confirmation. The appliance is ready for operation, the standby symbol is illuminated. Note During the adjusting process, if you do not press a button within 60 se- conds the appliance automatically reverts to standby mode.
-
Page 21: Setting The Timer For The Auto-Off Function
Display Time 15 minutes (factory setting) 30 minutes 1 hour flashing • Press the On / Off button to confirm the selected time. → All symbols in the display flash briefly for confirmation. The appliance is ready for operation, the standby symbol is illuminated.
-
Page 22: Adjusting The Brewing Temperature
• Press the brewing strength button several times to select from four possible times for the timer. Display Time 1 hour (factory setting) 2 hours 4 hours 8 hours flashing • Press the On / Off button to confirm the selected time. →…
-
Page 23: Resetting To Factory Settings
Display Brewing tempera ture medium (factory setting) high • Press the On / Off button to confirm the selected brewing tempera- ture. → All symbols in the display flash briefly for confirmation. The appliance is ready for operation, the standby symbol is illuminated.
-
Page 24: Adjusting Grinding Fineness
Adjusting grinding fineness The grinding fineness level was optimally adjusted prior to delivery. Consequently, we recommend that you only readjust grinding fineness after approximately 1,000 coffee preparation processes (approximately 1 year). You can only set the grinding fineness while the grinder is running. Thus, adjust grin- ding fineness directly after coffee dispensing starts.
-
Page 25: Care And Maintenance
Care and maintenance General cleaning • Wipe off the outside of the appliance with a soft, damp cloth and an off- the-shelf dishwashing detergent. • Empty and clean the drip tray (Fig. A, no. ) regularly, at the latest however when the float projects out of the drip grate.
-
Page 26: Cleaning The Brewing Unit
Cleaning the brewing unit Prerequisite: The appliance is switched off. Note For optimal protection of your appliance, we recommend that you clean the brewing unit once a week. • Reach into the recess on the right side of the appliance (Fig. A, no. ) and pull off the cover to the right.
-
Page 27: Integrated Cleaning Program
– Only use the cleaning tabs from Melitta for automatic coffeemakers. ® these tabs are precisely matched to the Melitta sOLO. use of other ® cleaning agents can damage the appliance. Run the integrated cleaning program as follows: 1 Flip up the lid of the water reservoir (Fig.
-
Page 28
8 use the handle to pull the brewing unit out of the appliance. → the standby symbol and the symbol for cleaning will flash alternately, as long as the brewing unit is out of the machine. Caution! Danger of damaging the brewing unit –… -
Page 29
18 Flip up the lid of the water reservoir (Fig. A, no. ) and pull the water reservoir up and out of the appliance. Fill the water reservoir to the Max. mark with fresh tap water and reinsert it. 19 empty the drip tray and the coffee grounds container. 20 Re-insert the drip tray without the coffee grounds container and place the coffee grounds container under the outlet. -
Page 30: Integrated Decalcifying Program
It takes a total of approximately 25 minutes. the symbol for decalcifying flashes during the entire process. Prerequisite: The appliance is switched off. Remove the Melitta Claris ® water filter — if present — from the water reservoir (see page ).
-
Page 31
10 empty the drip tray and then reinsert it. → the standby symbol is illuminated after a brief heat-up phase. the appliance is ready for operation. 11 Reinsert the Melitta claris water filter into the appliance. ®… -
Page 32: Transport And Disposal
Melitta claris water filter should not remain dry over a longer period ® of time. consequently we recommend storing the Melitta claris water ® filter in a glass of water in the refrigerator if the device will not be used for…
-
Page 33
Transport • Dry out the appliance (see p. 66). • empty and clean the drip tray and the coffee grounds container. • empty the water reservoir and the bean container. If necessary use a vacu- um cleaner to vacuum out any beans that are hard to reach. •… -
Page 34: Troubleshooting
Troubleshooting Malfunction Cause Measure coffee only runs Grinding level too fine set the grinding level to a coar- drop-by-drop ser level clean brewing unit Decalcify if necessary If necessary execute a cleaning program Coffee does not flow Water reservoir not Fill water reservoir and ensure filled or it is not inserted that it is seated properly.
-
Page 35
Malfunction Cause Measure Buttons for single- Brewing unit is missing or Insert the brewing unit properly cup and two-cup is not inserted correctly operation flash Brewing chamber is switch off the appliance and alternately with the overfilled switch it on again via the On / Off button On / Off button (repeat if necessary) until standby mode is…
 26:44
26:44
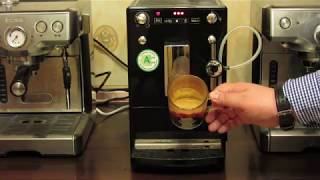
Melitta Solo & Perfect milk. Обзор отличной бюджетной кофемашины для дома.
 02:04
02:04
Melitta Caffeo Solo — обзор
 33:48
33:48
Melitta CAFFEO CI. Подробный обзор. Двойная кофемолка, правильный капучино и т.д.
 20:01
20:01
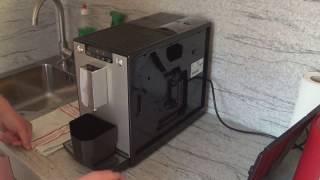
Очистка кофемашины Melitta Caffeo Solo без специальных таблеток
 16:39
16:39
Очистка кофейной машинки Melitta Caffeo Solo
 17:30
17:30
Удаление накипи кофейной машинки Melitta Caffeo Solo
 07:26
07:26
Устранение ошибки замены фильтра кофемашины Melitta Caffeo Solo
Version 2.0
09/2011
Melitta Haushaltsprodukte
GmbH & Co. KG
D-32372 Minden
MAGY
AR
POLSKI
TÜRK
Ç
E
РУССКИЙ
Руководство по
эксплуатации
Kullanma Kılavuzu
Instrukcja obsługi
Használati utasítás
Instrucţiuni de utilizare
Οδηγίες χρήσης
ROM
Â
N
Ă
EΛΛΗΝΙΚΑ

1
10
9
8
3
4
5
6
A
2
7
11
B
C
D
E

1
РУССКИЙ
Уважаемый покупатель!
Поздравляем вас с покупкой аппарата Melitta
®
CAFFEO
®
SOLO
®
.
Мы рады приветствовать еще одного гурмана кофе и ценителя аппарата
Melitta
®
CAFFEO
®
SOLO
®
.
Новый высококачественный аппарат Melitta
®
CAFFEO
®
SOLO
®
подарит вам множество незабываемых моментов за чашечкой кофе.
Наслаждайтесь вашим любимым видом кофе или эспрессо и побалуйте
себя великолепными напитками.
Для обеспечения длительного срока службы аппарата Melitta
®
CAFFEO
®
SOLO
®
внимательно прочитайте данное руководство по эксплуатации и
сохраните его в надежном месте.
Для получения дополнительной информации или при появлении
вопросов относительно аппарата обратитесь непосредственно к нам*
или посетите наш сайт в Интернете по адресу* www.melitta.ru.
Мы надеемся, что ваш новый кофейный автомат принесет вам много
радостных моментов за чашкой кофе.
Коллектив разработчиков Melitta
®
CAFFEO
®
*
(812) 677 79 39.
® Зарегистрированная торговая марка Melitta Group

Указания по данному руководству по эксплуатации …………..
Страница 4
- Изображение
- Текст
2
Содержание
1 Указания по данному руководству по эксплуатации ……………………..4
1.1 Символы в тексте руководства по эксплуатации …………………………….. 4
1.2 Использование по назначению ………………………………………………………. 5
1.3 Использование не по назначению ………………………………………………….. 5
2 Общие указания по технике безопасности …………………………………..6
3 Описание аппарата …………………………………………………………………….8
3.1 Описание рисунка A………………………………………………………………………. 8
3.2 Дисплей ……………………………………………………………………………………….. 9
4 Начало эксплуатации ………………………………………………………………..10
4.1 Установка …………………………………………………………………………………… 10
4.2 Подключение………………………………………………………………………………. 11
4.3 Заполнение контейнера для кофейных зерен ………………………………. 11
4.4 Заполнение резервуара для воды ……………………………………………….. 12
4.5 Первое включение ………………………………………………………………………. 12
4.6 Настройка получаемого количества напитка ………………………………… 13
4.7 Настройка крепости кофе ……………………………………………………………. 13
5 Включение и выключение ………………………………………………………….14
5.1 Включение аппарата …………………………………………………………………… 14
5.2 Выключение аппарата …………………………………………………………………. 14
6 Установка фильтра для воды Melitta
®
Claris
®
………………………………15
7 Приготовление эспрессо или американо ……………………………………17
7.1 Приготовление одной чашки эспрессо или американо ………………….. 17
7.2 Приготовление двух чашек эспрессо или американо …………………….. 18
8 Настройки функций …………………………………………………………………..19
8.1 Жесткость воды ………………………………………………………………………….. 19
8.2 Энергосберегающий режим …………………………………………………………. 20
8.3 Автоматическая функция выключения …………………………………………. 22
8.4 Температура приготовления ………………………………………………………… 23
8.5 Сброс настроек аппарата на заводские установки ………………………… 24
8.6 Тонкость помола …………………………………………………………………………. 25

Уход и обслуживание ……………………………………
Страница 5
- Изображение
- Текст
3
РУССКИЙ
9 Уход и обслуживание ………………………………………………………………..26
9.1 Общая чистка ……………………………………………………………………………… 26
9.2 Чистка блока заваривания …………………………………………………………… 27
9.3 Встроенная программа чистки …………………………………………………….. 28
9.4 Встроенная программа для удаления накипи ……………………………….. 32
10 Транспортировка и утилизация ………………………………………………….35
10.1 Подготовка к транспортировке, защита от низкой температуры и
меры перед периодом длительного простоя …………………………………. 35
11 Устранение неисправностей ……………………………………………………..37

1указания по данному руководству по эксплуатации, 1 символы в тексте руководства по эксплуатации
Страница 6
- Изображение
- Текст
4
1
Указания по данному руководству по
эксплуатации
Для лучшей ориентации раскройте первую и последнюю страницу руководства
по эксплуатации.
1.1 Символы в тексте руководства по эксплуатации
Символы в данном руководстве по эксплуатации указывают на специфические
опасности, возникающие при обращении с аппаратом Melitta
®
CAFFEO
®
SOLO
®
или указывают на полезные рекомендации.
Предупреждение!
Тексты с таким символом содержат информацию по технике безопасности
и указывают на возможные риски несчастных случаев и получения травм.
Осторожно!
Тексты с таким символом содержат информацию о недопустимых
операциях и указывают на возможную опасность повреждения аппарата.
Указание
Тексты с таким символом содержат дополнительную полезную
информацию по обращению с аппаратом Melitta
®
CAFFEO
®
SOLO
®
.

5русский 1.2 использование по назначению, 3 использование не по назначению
Страница 7
- Изображение
- Текст
5
РУССКИЙ
1.2 Использование по назначению
Аппарат Melitta
®
CAFFEO
®
SOLO
®
предназначен только для приготовления
кофе и эспрессо.
Использование по назначению подразумевает,
• что пользователь внимательно прочитал руководство по
эксплуатации, понял его и соблюдает приведенные в нем указания;
• что он также неукоснительно соблюдает указания по технике
безопасности;
• что он использует аппарат Melitta
®
CAFFEO
®
SOLO
®
в соответствии
с эксплуатационными требованиями, описанными в данном
руководстве.
1.3 Использование не по назначению
Использованием не по назначению является любое применение аппарата
Melitta
®
CAFFEO
®
SOLO
®
, отличающееся от описанного в данном руководстве
по эксплуатации.
Предупреждение!
В случае использования не по назначению можно получить травму или
обжечься горячей водой или паром.
Указание
Производитель не несет никакой ответственности за ущерб, возникший
вследствие использования не по назначению.

6
2
Общие указания по технике безопасности
Внимательно прочитайте данные указания. В случае несоблюдения
данных указаний возникает опасность для вашего здоровья и
функциональной исправности аппарата.
Предупреждение!
– Упаковочные материалы и мелкие детали следует хранить в
недоступном для детей месте.
– Все лица, использующие данный аппарат, сначала должны изучить
принципы его обслуживания и ознакомиться с возможными
опасностями.
– Ни в коем случае не разрешайте использовать аппарат детям или
играть рядом с ним без присмотра.
– Аппарат не предназначен для использования лицами (включая
детей) с ограниченными физическими, сенсорными или ментальными
возможностями, а также лицами, не имеющими достаточного
опыта и (или) знаний, без присмотра со стороны отвечающего
за их безопасность лица, которое должно руководить ими при
использовании аппарата.
– Используйте аппарат только в исправном состоянии.
– Ни в коем случае не пытайтесь самостоятельно отремонтировать
аппарат. При необходимости ремонта обращайтесь только по горячей
линии компании Melitta
®
.
– Не изменяйте конструкцию аппарата, его компонентов и входящих в
комплект принадлежностей.
– Ни в коем случае не погружайте аппарат в воду.
– Ни в коем случае не прикасайтесь к аппарату влажными или мокрыми
руками или ногами.
– Ни в коем случае не прикасайтесь к горячим поверхностям аппарата.
– Ни в коем случае не открывайте аппарат во время его работы.
– Ни в коем случае не открывайте правую часть кожуха во время
работы аппарата кроме тех случаев, если на это прямо указывают
инструкции, представленные в данном руководстве по эксплуатации.
– Также требуется соблюдать указания по технике безопасности,
представленные на следующей странице.

7
РУССКИЙ
Предупреждение!
– Этот аппарат предназначен для использования в домашнем
хозяйстве и подобных сферах, например: на кухнях для сотрудников в
магазинах, офисах и других коммерческих предприятиях; клиентами в
гостиницах, мотелях и других местах проживания; в пансионатах.
– Также необходимо соблюдать указания по технике безопасности,
представленные в других главах данного руководства по
эксплуатации.

8
3
Описание аппарата
3.1 Описание рисунка A
Номер
рисунка
Пояснение
1
Поддон для капель с подставкой под чашки и емкостью
для остатков кофе (внутри), а также поплавком (индикация
заполнения поддона для капель)
2
Выпускное отверстие с регулировкой по высоте
3
Регулятор количества кофе
4
Кнопка приготовления одной чашки кофе
5
Кнопка приготовления двух чашек кофе
6
Резервуар для воды
7
Контейнер для кофейных зерен
8
Кнопка крепости кофе
9
Дисплей
10
Кнопка «Вкл./Выкл.»
11
Правая часть кожуха (съемная, под ней находится регулятор
тонкости помола, блок заваривания и заводская табличка)

Комментарии
инструкцияMelitta Caffeo Solo

Version 2.0
09/2011
Melitta Haushaltsprodukte
GmbH & Co. KG
D-32372 Minden
ENGLISH
Gebruiksaanwijzing
Manual de Instrucciones
Istruzioni per l‘uso
DEUTSCHFRANÇAISNEDERLANDSESPAÑOLITALIANO
Bedienungsanleitung
Operating Instructions
Guide d’utilisation
Посмотреть инструкция для Melitta Caffeo Solo бесплатно. Руководство относится к категории кофеварки, 299 человек(а) дали ему среднюю оценку 8.5. Руководство доступно на следующих языках: английский. У вас есть вопрос о Melitta Caffeo Solo или вам нужна помощь? Задайте свой вопрос здесь
Главная
Производительность
| Вместимость в чашках | 2 чашек |
| Тип продукта | Машина для эспрессо |
| Тип кофе | Кофе в зернах |
| Размещение бытового устройства | Встроенный |
| Самоочистка | Да |
Прочие свойства
Энергопитание
Эргономика
| Встроенный экран | Нет |
| Цвет товара | Черный |
Вес и размеры
| Ширина | 200 mm |
| Глубина | 455 mm |
| Высота | 325 mm |
показать больше
Не можете найти ответ на свой вопрос в руководстве? Вы можете найти ответ на свой вопрос ниже, в разделе часто задаваемых вопросов о Melitta Caffeo Solo.
Как часто следует очищать кофеварку от накипи?
Какой лучший способ очистки кофеварки от накипи?
Как долго можно хранить кофе в зернах?
Как лучше всего хранить кофе?
Как помол сказывается на вкусе кофе?
Какая высота Melitta Caffeo Solo?
Какая ширина Melitta Caffeo Solo?
Какая толщина Melitta Caffeo Solo?
Инструкция Melitta Caffeo Solo доступно в русский?
Не нашли свой вопрос? Задайте свой вопрос здесь