2. Интерфейс администратора
В этой главе рассмотрим интерфейс (т.е. внешний вид и возможности) пользователя с ролью администратора (управляющего) на сайте Moodle.

Этот блок будет иметь разный вид для пользователей с различными ролями на сайте — гостя, пользователя, студента, ассистента, учителя, разработчика курсов и администратора.
В этой книге рассматриваются только возможности пользователя с ролью администратора.
Кроме панели настроек, для управляющего системы доступны еще некоторые функции, которые делают работу с сайтом более простой и удобной.
«Режим редактирования» позволяет прямо со страниц сайта производить настройку его элементов. Например настроить расположение и вид функциональных и информационных блоков.
Функция «Переключиться к роли…» дает возможность администратору оценить все изменения, произведенные на сайте, с точки зрения его пользователей. Т. е. в любой момент администратор может посмотреть, какой увидят ту или иную страницу сайта пользователи с различными ролями в системе.
Думаю не стоит напоминать, что администратор системы имеет полный доступ ко всем настройкам, курсам, хранилищам и т.д. — он является полным хозяином сайта.
This page is an introduction to Moodle administration. You have a new, empty Moodle site installed. What to do next?
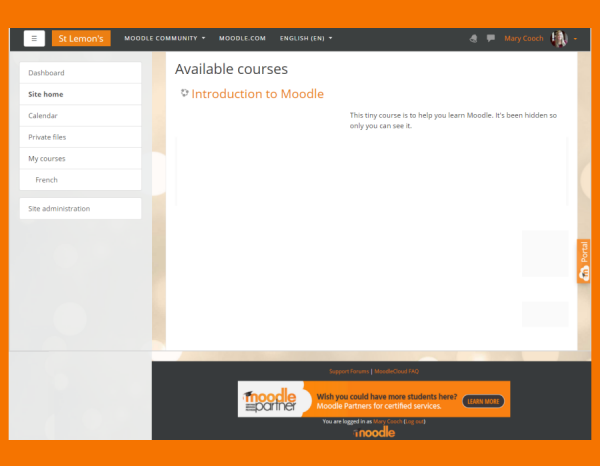
Setting up the front (home) page
- If you’re using the Boost theme, click the gear menu top right of the front page and then click ‘Edit settings’. Alternatively, click ‘Edit settings’ from the Administration block on your front page.
- Change the full name and short name if needed. (The short name shows in the navigation bar.)
- Decide what should be shown on the front page — news items, courses, course categories or none of these things? The same or different for logged in and non-logged in users? As for other settings, they can always be changed later.
For more information, see Front page settings.
Starting to set up a MoodleCloud site using the Boost theme
To add text and/or images to the central area of the front page
- Click ‘Turn editing on’ either from the gear menu (Boost theme) or the Administration block for other themes.
- Click the configuration icon (cogwheel) near the top of the screen. (If you don’t see this, check in Site administration > Front page > Front page settings that ‘Include a topic section’ is ticked.)
- Add text and/or images to the summary box.
Note: If you don’t want to use your front page for displaying courses or information about your organisation, you can display the log in page only by checking «force login» in Site administration > Security > Site security settings.
Changing the look of your site
- A new Moodle site comes with two default themes, ‘Boost’ and ‘Classic’. Both work well on mobile devices as well as desktops, and may be customised from the Themes area of Site administration.
- Find out how to add dropdown menus, footer links, Google Analytics and more in Site appearance.
- If your installation and organisation allow it, you can install a custom theme. See Installing plugins for details.
A site using a customised More theme
Adding courses
- Courses are Moodle’s learning areas, where teachers and students work together.
- You may add a new course by clicking the ‘Add a new course’ button on the front page or from the Manage courses and categories link in the Courses area of Site administration.
- If you plan to have many courses, you can upload courses in bulk via CSV file.
- If you want certain settings in your courses to be always pre-set for you when you make a new course, check out Site administration > Courses > Course default settings.
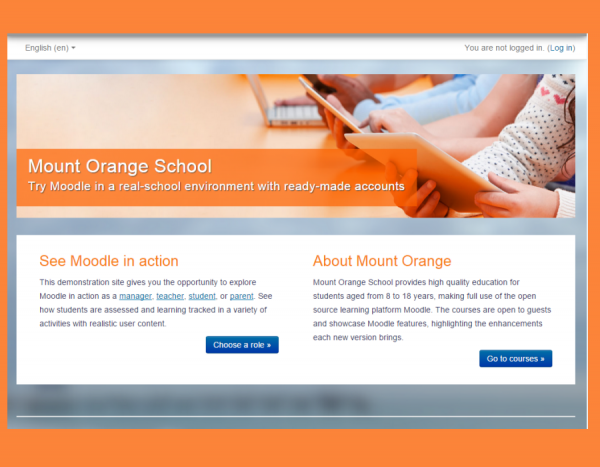
See Courses for an overview of the various aspects of courses and see courses in action with user data on the Mount Orange School demo site.
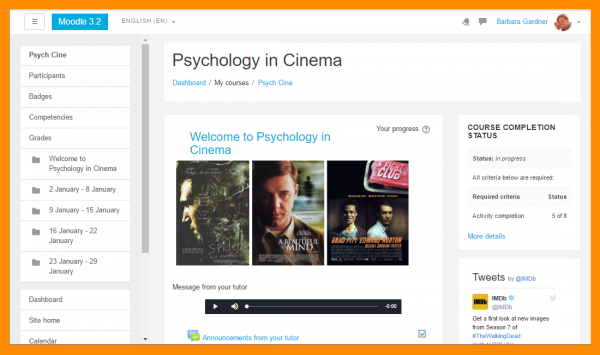
An example course with the default Boost theme
Adding users
This is a two-step process, although it can be streamlined.
Overview of adding users
Step 1: Authentication
Everyone using your site must have an account. You can allow people to create their own account using Email-based self-registration, or add new users individually or bulk create accounts via CSV file or choose from a number of other authentication methods.
For more information, see Managing accounts and Authentication.
Note: You do not yet decide who will be a teacher, student or other type of participant. If you’re wondering why, read the documentation on Assigning roles.
Step 2: Enrolment
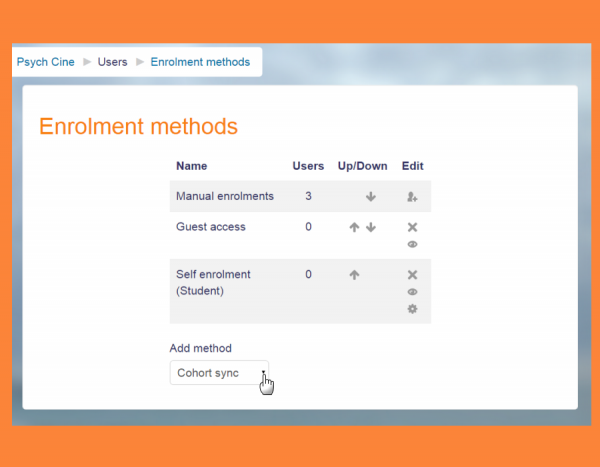
Once users have an account, they need to be enrolled in courses. (Now is the time to give them their student, teacher or other role.) You can allow them to self enrol, or you can enrol them manually yourself or choose from a number of other enrolment methods.
For more information, see Enrolments.
Note: You can create accounts and enrol users in courses at the same time if you wish by uploading users or you can explore Cohorts, site or category wide groups.
Enrolling learners into a course
File management
- Explore the process of working with files in courses so you’ll be able to advise others.
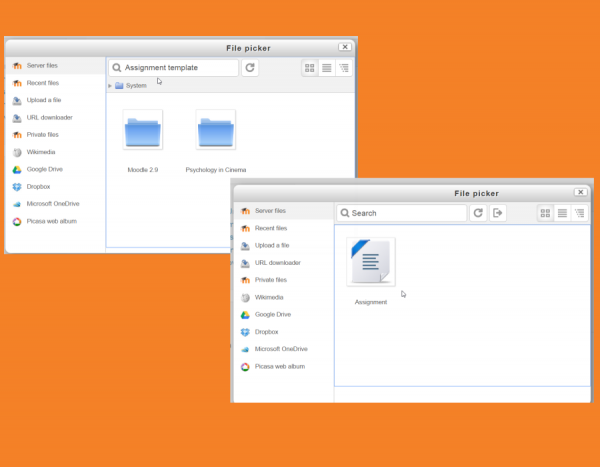
- See Managing repositories for information on allowing your users to use files from external sources (such as Google Drive, Dropbox and MS OneDrive) in their courses.
- If uploaded file size may be an issue for you, then you can add restrictions for both the user quota and the site as a whole from Administration > Site administration > Security > Site security settings. See Site security settings for more information.
Some of Moodle’s many ways of accessing files
Important default site settings
- Set your default language in Site administration > Language > Language settings. Moodle defaults to common English; if you need US English or another language, add that in Language > Language pack first then you can set it as the default.
- Set your default timezone and country in Site administration > Location > Location settings.
- Turn off public Guest access (unless you are sure you know how to use it) in Site administration > Plugins > Enrolments > Manage enrol plugins and Hide its button in Site administration > Plugins > Authentication > Manage authentication > Guest login button.
- Adjust your minimum password if you need to in Site adminstration>Security > Site security settings > Password policy.
- Verify that cron is running when you set that up during install. Your site will not work properly without it. If the message «The cli/cron.php maintenance script has not been run for at least 24 hours.» shows up in Site administration > Notifications then it is not running properly.
Admin tips and tricks
- Go through each activity in Administration > Site administration > Plugins > Activity modules and decide the most suitable default settings for your Moodle. Do the same for the gradebook, via Administration > Site administration > Grades > General settings.
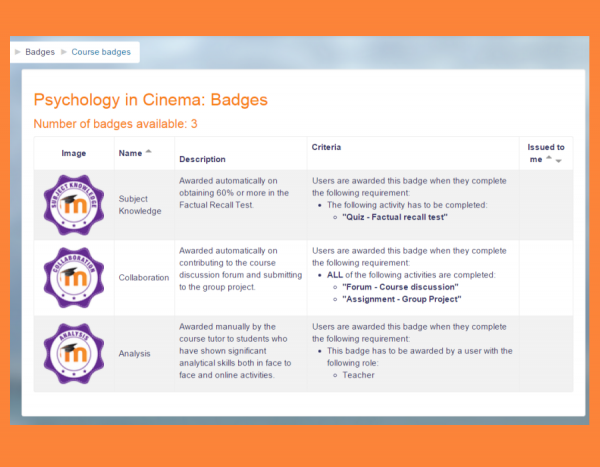
- Go to Administration > Site administration > Advanced features and review whether you want to make use of additional features such as blogs, RSS feeds, completion tracking (for both Activity completion and Course completion), conditional access, portfolios or badges.
- Consider enabling your site for Mobile app access via Site administration >Mobile app>Mobile settings»
- Provide the user interface in different languages by installing additional language packs via Site administration > Language > Language packs.
- Use wording more suitable to your users by changing Moodle’s default terms in Administration > Site administration > Language > Language customisation.
Badges -a feature to consider
3 слайд
Редактирование настроек сайта
основные характеристики сайта (язык, временная зона, настройки безопасности, настройки операционной системы, настройки сервера электронной почты, настройки отображения информации о пользователе, настройки разрешений пользователей и др.);
внешний вид сайта (название и краткое описание сайта, конфигурация первой страницы, обращение для преподавателей/студентов, настройка дизайна);
просмотр информации о программных модулях, реализующих функционал учебного процесса (Scorm, Wiki, Анкета, Глоссарий, Задание, Опрос, Пояснение, Рабочая тетрадь, Ресурс, Семинар, Тест, Урок, Форум, Чат);
установки автоматического резервного копирования и регламента его работы;
базовые настройки редактора HTML, используемого при создании курсов.
1
Администрирование СДО Moodle
2
Функции администратора Редактирование настроек сайта Добавление/Удаление/Редактировани е пользователей Назначение преподавателей/создателя курса Просмотр системных событий Резервное сохранение/восстановление
3
Редактирование настроек сайта основные характеристики сайта (язык, временная зона, настройки безопасности, настройки операционной системы, настройки сервера электронной почты, настройки отображения информации о пользователе, настройки разрешений пользователей и др.); внешний вид сайта (название и краткое описание сайта, конфигурация первой страницы, обращение для преподавателей/студентов, настройка дизайна); просмотр информации о программных модулях, реализующих функционал учебного процесса (Scorm, Wiki, Анкета, Глоссарий, Задание, Опрос, Пояснение, Рабочая тетрадь, Ресурс, Семинар, Тест, Урок, Форум, Чат); установки автоматического резервного копирования и регламента его работы; базовые настройки редактора HTML, используемого при создании курсов.
4
Добавление, удаление, редактирование пользователей Администратор имеет возможность просматривать списки пользователей системы, а также добавлять, удалять и редактировать учетные записи пользователей.
5
Назначение преподавателей, создателя курса Основной функцией администратора после установки и настройки системы является распределение прав создателей и преподавателей курса. Для получения прав на создание/ редактирование курса пользователь должен пройти процедуру регистрации в общем порядке. Также пользователь может быть добавлен администратором вручную.
6
Просмотр системных событий Активность пользователей в системе записывается в виде последовательности действий, выполняемых пользователем с указанием даты и времени совершенного действия.
7
Резервное сохранение – восстановление Отдельно выбранный курс или вся система в целом может быть сохранена в виде архива (.zip) с целью обеспечения переноса системы/курса на другую систему или обеспечения резервного сохранения на случай системного сбоя.
8
Установка Moodle под ОС Windows Распаковать пакет на диск или в папку В корневой директории запустить установочный файл setup_xampp.bat В корневой директории запустить файл xampp-control.exe Снять флаги с Apache Svc и MySQL Svc Включить с помощь кнопок Start серверы Apache и MySQL
9

