Акку-Чек Перформа
Посмотреть информацию о безопасности
Still can’t find what you need?
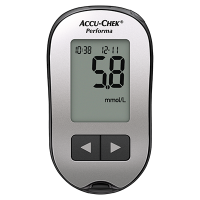
Акку-Чек Перформа
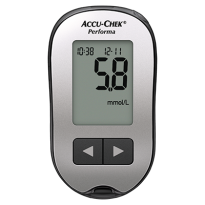
Описание
С Октября 2021 года прекращены поставки Экспресс-анализатора (глюкометра) портативного «Акку-Чек Перформа» (Accu-Chek Performa)
Инструкции
Дисплей
ЖК-дисплей
Объем капли крови
0,6 мкл
Вес
59 г с батарейкой
Время измерения
5 секунд
Размеры
94 х 52 х 21 мм
Технические характеристики
Время измерения:
5 секунд
Память:
500 результатов тестов с указанием времени и даты
Средние значения:
7, 14, 30 и 90 дней
Отметки для результатов «до и после» еды:
да
Напоминания об измерениях после еды:
да
Информирование о низком уровне сахара крови:
да, с индивидуальной настройкой
Функция будильника:
да, на 4 момента времени
Вес:
59 г (включая батарею)
Температура для проведения измерений:
+8 °C до +44 °C
Температура хранения:
от -25 °C до +70 °C
Допустимый диапазон значений :
0,6 — 33,3 ммоль /л
Принцип измерения:
электрохимический
Батарея:
1 батарея, CR 2032
Передача данных в ПК:
через ИК-порт
![]()


Мотилегаз,
Никоретте,
Регулакс

![]()
|
|
Инструкция по применению Глюкометр «Акку-Чек Перформа»
|

|
||
|
||
|
||
|
||
|
||
|
||
|
||
|


Информация о лекарственных препаратах, размещенная на AptekaMos.ru, не должна использоваться неспециалистами для самостоятельного принятия решения об их покупке и применении без консультации врача.
Свидетельство о регистрации средства массовой информации ЭЛ № ФС77-44705 выдано Федеральной службой по надзору в сфере связи, информационных технологий и массовых коммуникаций (Роскомнадзор) 21 апреля 2011 года.
• Инструкция по применению Глюкометр «Акку-Чек Перформа».
• Способ применения и дозировка, состав, побочное действие и взаимодействие Глюкометр «Акку-Чек Перформа»

- Manuals
- Brands
- Accu-Chek Manuals
- Blood Glucose Meter
- Performa Connect
- Operator’s manual
-
Contents
-
Table of Contents
-
Troubleshooting
-
Bookmarks
Quick Links
Performa
BLOOD GLUCOSE METER
Operator’s Manual
Related Manuals for Accu-Chek Performa
Summary of Contents for Accu-Chek Performa
-
Page 1
Performa BLOOD GLUCOSE METER Operator’s Manual… -
Page 3: Intended Use
For use only with the Accu‑Chek Inform II Test Strips and Accu‑Chek Performa Control Solutions. Suitable for self‑testing Note: The Accu‑Chek Performa Meter with the Accu‑Chek Inform II Test Strip was found to be safe and accurate for use in a hyperbaric chamber.
-
Page 4
The system includes: • Accu‑Chek Performa Meter with Battery • Accu‑Chek Inform II Test Strips and Code Chip • Accu‑Chek Performa Control Solutions Any object coming into contact with human blood is a potential source of infection (see: Clinical and Laboratory Standards Institute: Protection of Laboratory Workers from Occupationally Acquired Infections;… -
Page 5: Table Of Contents
Contents Chapter 1: Introduction ……………………..5 The Accu‑Chek Performa Meter ……………………5 Coding the Meter ……………………….. 7 Adjusting the Time and Date – First Time Use ………………..9 Using the Accu‑Chek Performa System ………………….11 Chapter 2: Patient Testing for Healthcare Professionals …………..13 Sample Handling……………………….13…
-
Page 6
Setting the Hypoglycaemic (Hypo) Alert ………………….41 Transferring Data Directly to a Computer or PDA Using Specialised Software and Infrared Cable ….43 Chapter 5: Maintenance and Troubleshooting ………………45 Changing the Battery ………………………..45 Cleaning the Meter ……………………….46 Maintenance and Troubleshooting …………………….47 Display Messages and Troubleshooting ………………….48 Chapter 6: Technical Information ………………….55 Product Limitations ……………………….55 Specifications …………………………55… -
Page 7: Chapter 1: Introduction
Chapter 1: Introduction The Accu‑Chek Performa Meter Infrared (IR) Window – Display – Transfers data from the Shows results, messages, and meter to a computer or PDA. results stored in memory. Power/Set Button – Right and Left Turns the meter on or off Arrow Buttons –…
-
Page 8
Golden End – Insert this end of the test strip into the meter. Yellow Window – Touch blood drop or control solution here. Test Strip Control Solution Test Strip Container Bottle (example) Code Chip Battery – Power/Set Infrared (IR) Top View (example) Button Window… -
Page 9: Coding The Meter
Coding the Meter 1. Make sure the meter is off. 2. Turn over the meter. 3. Remove the old code chip (if there is one in the meter) and discard it. Change the code chip every time a new box of test strips is opened!
-
Page 10
4. Turn over the code chip so the code number 5. Leave the code chip in the meter until a new faces away from you. Push the code chip into box of test strips is opened. Change the code the code chip slot until it stops. chip each time a new box of test strips is opened. -
Page 11: Adjusting The Time And Date — First Time Use
Adjusting the Time and Date – First Time Use The meter is preset with the time and date which may need to be adjusted to the local time zone. Setting the correct time and date in the meter is important to review the results in memory or to download the results to a computer.
-
Page 12
4. Repeat steps 2 and 3 to set the minutes, day, 5. Once the year is set, press and hold until the month, and year. The flashing field is the one that flashing test strip symbol appears. The time and is being changed. -
Page 13: Using The Accu-Chek Performa System
Using the Accu‑Chek Performa System • Only use Accu‑Chek Inform II Test Strips. • Replace the code chip every time a new box of test strips is opened. • Refer to the test strip package insert for test strip storage and system operating conditions.
-
Page 15: Chapter 2: Patient Testing For Healthcare Professionals
Chapter 2: Patient Testing for Healthcare Professionals Sample Handling Always wear gloves and follow your facility’s infection control procedures when handling blood‑contaminated items. Always adhere to the recognised procedures for handling objects that are potentially contaminated with human material. Follow the hygiene and safety policy of your laboratory or institution. Prepare the selected blood collection site per facility policy.
-
Page 16
Patients and healthcare workers are potentially at risk of becoming infected when the same blood glucose meter is used to test blood glucose in several patients. Any patient with an infection or suffering from an infectious disease and any patient who is a carrier of a multi‑resistant organism must be assigned his/her own meter. -
Page 17: Performing A Blood Glucose Test
Performing a Blood Glucose Test Before performing a blood glucose test on patients, set up the meter correctly. The meter, a test strip, and a disposable, single‑use lancet or blood collection device are required. 1. Wear protective gloves. 2. Wash or disinfect the patient’s finger and allow it to dry thoroughly. The blood drop does not spread so easily over dry skin.
-
Page 18
7. Make sure the code number on the meter display 10. Immediately after the blood drop has formed, matches the code number on the test strip touch the drop to the front edge of the yellow container. window of the test strip (do not put blood on top of the test strip). -
Page 19
12. When you see flash, you have enough blood 13. The result appears on the display. in the test strip. 14. Remove and discard the used test strip. -
Page 20: Flagging Test Results
Flagging Test Results It is possible to flag a test result with an asterisk ( ) for a special result. When the results in memory are reviewed, this flag is a reminder of a special result. 1. Perform a test. 2.
-
Page 21: Unusual Test Results
Unusual Test Results Follow facility policy for reporting or treating blood glucose results. If the blood glucose result does not reflect the patient’s clinical symptoms, or seems unusually high or low, perform a control test. If the control test confirms that the system is working properly, repeat the blood glucose test.
-
Page 22
6. Check if the code number on the meter display If they do not match, insert the correct code chip matches the code number on the test strip into the meter and test again. container. 7. If the problem does not resolve … Repeat the test with a new test strip and perform a control test. -
Page 23: Disinfecting The Meter
Disinfecting the Meter The Accu‑Chek Performa Meter may be disinfected. Disinfection is performed according to the degree of soiling (see “When to Disinfect”). What to Disinfect In the unlikely event that the meter becomes contaminated, the following parts of the meter may be disinfected: •…
-
Page 24: When To Disinfect
When to Disinfect • Each time after you have tested a patient’s blood glucose, wipe the area around the test strip slot. If you find blood on the cloth, wipe also the test strip slot itself and the display. • If there is blood on the meter, wipe the meter.
-
Page 25: Chapter 3: Control Testing For Healthcare Professionals
Chapter 3: Control Testing for Healthcare Professionals Introduction Testing control solutions with known glucose levels establishes that the operator and the system are performing acceptably. Control results must be within the defined acceptable ranges before valid patient testing is allowed. Testing Intervals Follow your facility’s policy for control testing intervals.
-
Page 26: About The Control Solutions
• Only use Accu‑Chek Performa Control Solutions. • The meter automatically recognises the Accu‑Chek Performa Control Solution. • Write the date the bottle was opened on the bottle label. The control solution is stable for 3 months from that date or until the use by date on the bottle label, whichever comes first.
-
Page 27: Performing A Control Test
Performing a Control Test The meter, a test strip, and control solution are needed. (example) 1. Insert the test strip into the 2. Make sure the code number 3. Select the control solution to meter in the direction of the on the display matches the be tested.
-
Page 28
4. Put the meter on a flat surface, 5. Remove the control bottle cap. 6. Squeeze the bottle until a tiny such as a table. Wipe the tip of the bottle with drop forms at the tip. Touch a lint‑free wipe. the drop to the front edge of the yellow window of the test strip. -
Page 29
(example) (example) (example) 7. The result appears on the 9.“OK” and the control result 8. Press and release to set the display, along with the control alternate on the display if the control level in the meter. bottle symbol and flashing “L.” result is in range. -
Page 30: Understanding Out-Of-Range Control Test Results
Understanding Out‑of‑Range Control Test Results The label on the test strip container shows the acceptable ranges for the Level 1 and Level 2 control solutions. Control results must be within the designated range on the test strip container label, or as defined by the facility, before being considered acceptable.
-
Page 31: Chapter 4: Meter Memory, Set-Up, And Downloading
Chapter 4: Meter Memory, Set‑up, and Downloading Memory Storing Control and Blood Glucose Results The meter automatically stores up to 500 blood glucose test results with the time and date of the test. Results can be reviewed at any time. They are stored from the newest to the oldest, so set the time and date correctly in the meter.
-
Page 32: Viewing Test Results
Viewing Test Results 1. Press and release either to enter memory. The most recent result appears. 2. Press and release to view previous results in order. 3. OR, press and release to look at 7‑, 14‑, or 30‑day averages in that order.
-
Page 33: Meter Set-Up
Meter Set‑up Using the Set‑up Mode The following features can be adjusted as required. Time and Date – set the time and date. Beeper – select “On” or “OFF.” Test reminder – select “On” or “OFF.” If “On” is chosen, select 1 to 4 test reminders per day. Hypo alert –…
-
Page 34: Setting The Time And Date
You are here TIME / DATE BEEPER TEST REMINDERS HYPO ALERT (hrs, min, day, (on/off) (A‑1, A‑2, A‑3, A‑4) (off, on, level) month, year) Setting the Time and Date decrease increase 1. Press and release to turn on 2. Press and hold for about 3.
-
Page 35
4. Press and release to set 5. Repeat steps 2 and 3 to set 6. To set up more options, press the hour. The minutes flash. the minutes, day, month, and and release . To exit, press and hold year. The flashing field is the until the flashing one that is being changed. -
Page 36: Setting The Beeper On/Off
You are here TIME / DATE BEEPER TEST REMINDERS HYPO ALERT (hrs, min, day, (on/off) (A‑1, A‑2, A‑3, A‑4) (off, on, level) month, year) Setting the Beeper On/Off The meter beeper is preset to “On.” Setting the beeper to “OFF” does not affect test results. The beeper prompts the operator: •…
-
Page 37
1. Press and release to turn 2. Press and hold for about 3. Press and release on the meter. The flashing 4 seconds to enter the set‑up repeatedly until the flashing test strip symbol appears. mode. “Set‑up” and the hour beeper symbol and “On”… -
Page 38
4. Press and release to switch between 5. To set up more options, press and release . To “On” or “OFF.” exit, press and hold until the flashing test strip symbol appears on the display. -
Page 39: Setting Test Reminders
You are here TIME / DATE BEEPER TEST REMINDERS HYPO ALERT (hrs, min, day, (on/off) (A‑1, A‑2, A‑3, A‑4) (off, on, level) month, year) Setting Test Reminders One to four test reminders can be set per day. The meter beeps every 2 minutes – up to 3 times. Turn off the test reminder by inserting a test strip or pressing any button.
-
Page 40
When setting the time for the test reminder function, the bell symbol remains on the display and “set‑up” flashes continuously. 2. Press and hold 1. Press and release to turn on for about 3. Press and release the meter. The flashing test 4 seconds to enter the set‑up repeatedly until the bell strip symbol appears. -
Page 41
4. Press and release 5. If “On” is selected, the hour 6. Press and release to switch between “On” and flashes. “A‑1” and the bell to select the hour. Press and “OFF.” Press and release symbol remain on the display. release to set the hour. -
Page 42
7. The minutes flash. Press and 8. Press and release to set the 9. The next reminder “A‑2” and release to select 00, minutes. “set‑up” flash on the display 15, 30, or 45. These are the with “OFF” and the bell only choices. -
Page 43: Setting The Hypoglycaemic (Hypo) Alert
You are here TIME / DATE BEEPER TEST REMINDERS HYPO ALERT (hrs, min, day, (on/off) (A‑1, A‑2, A‑3, A‑4) (off, on, level) month, year) Setting the Hypoglycaemic (Hypo) Alert The meter hypoglycaemic alert is preset to “OFF.” The alert level can be set from 3.3–4.4 mmol/L. Healthcare professionals: The hypoglycaemic level may vary from person to person.
-
Page 44
4. Press and release 5. If “On” is selected, “set‑up” 7. To exit, press and hold until switch between “On” and flash. The display the flashing test strip symbol “OFF.” Press and release shows 3.9 mmol/L (first use) appears on the display. set the option. -
Page 45: Transferring Data Directly To A Computer Or Pda Using Specialised Software And Infrared Cable
Transferring Data Directly to a Computer or PDA Using Specialised Software and Infrared Cable Downloading data is not recommended for healthcare facilities since there is no means to identify patient results. 1. Install the software according to the instructions. To transfer the results to a computer, connect the infrared meter cable according to the instructions.
-
Page 46
4. Locate the infrared (IR) window on the top of the meter. 5. Locate the IR window on either the infrared cable (computer) or PDA. Infrared (IR) Window 6. Put the meter on a flat surface. Point the two IR windows toward each other. They should be 3–10 cm apart. -
Page 47: Chapter 5: Maintenance And Troubleshooting
Chapter 5: Maintenance and Troubleshooting Changing the Battery 1. Open the battery door on the back of the meter by pushing Notes: the tab in the direction of the arrow and pulling the door up. • The meter uses one 3‑volt Remove the old battery.
-
Page 48: Cleaning The Meter
Cleaning the Meter Follow these instructions to clean or disinfect the meter: • Make sure the meter is off • Gently wipe the meter’s surface with a soft cloth slightly dampened (wring out any excess) with one of these cleaning solutions: •…
-
Page 49: Maintenance And Troubleshooting
Maintenance and Troubleshooting The meter needs little or no maintenance with normal use. It automatically tests its own systems every time it is turned on and prompts the operator for any errors. See Chapter 5, “Display Messages and Troubleshooting.” If the meter is dropped or the accuracy is in question, contact Roche. To check the display, turn off the meter, then press and hold to see the complete display.
-
Page 50: Display Messages And Troubleshooting
Display Messages and Troubleshooting Never make treatment decisions based on an error message. If you have any concerns, contact Roche. The meter will not turn on or the display is blank. Battery power is low. Change the • Battery is dead – battery soon.
-
Page 51
The meter is ready for you to insert a Blood glucose may be lower than the test strip. measuring range of the system. The meter is ready for a drop of This test result was flagged. See blood or control solution. Chapter 2 “Flagging Test Results”… -
Page 52
The meter is not coded or the code The test strip is damaged. Remove chip is not inserted. Turn off the the test strip and reinsert it or meter and recode it. replace it if damaged. Or the code chip is incorrect. Turn off the meter and insert a new code chip. -
Page 53
The blood glucose may be extremely Not enough blood or control solution high or a meter or test strip error was drawn into the test strip for has occurred. If this confirms measurement or was applied after symptoms, follow your facility the test had started. -
Page 54
The code chip is from an expired lot An electronic error occurred or, in of test strips. Ensure the code chip rare cases, a used test strip was number matches the code number removed and reinserted. Turn the on the test strip container. Make sure meter off and on, or take the battery the time and date in the meter are out for 20 seconds and reinsert it. -
Page 55
The battery is almost out of power. Change the battery now. The time and date settings may be Note: incorrect. Make sure the time and If you see any other error display, please contact date are correct and adjust if Roche. -
Page 57: Chapter 6: Technical Information
Chapter 6: Technical Information Product Limitations Please read the literature packaged with the test strips and control solutions to find the latest information on product specifications and limitations. Specifications Blood volume Refer to the test strip package insert. Sample type Refer to the test strip package insert.
-
Page 58: Electromagnetic Compatibility
Protection class Meter type The Accu‑Chek Performa Meter is suitable for continuous operation. Control solution storage conditions Refer to the control solution package insert. Electromagnetic Compatibility This meter meets the electromagnetic immunity requirements as per EN ISO 15197 Annex A. The chosen basis for electrostatic discharge immunity testing was basic standard IEC 61000‑4‑2.
-
Page 59: Product Safety Information
Product Safety Information Strong electromagnetic fields may interfere with the proper operation of the meter. Do not use this meter close to sources of strong electromagnetic radiation. To avoid electrostatic discharge, do not use the meter in a very dry environment, especially one in which synthetic materials are present. Disposing of the Meter and Batteries During blood glucose measurement the meter itself may come into contact with blood.
-
Page 60: Explanation Of Symbols
Explanation of Symbols You may encounter the following symbols on packaging, on the type plate, and in the instructions for the Accu‑Chek Performa Meter, shown here with their meaning. Consult instructions for use Caution (refer to accompanying documents)! Please refer to safety‑related notes in the instructions for use accompanying this instrument.
-
Page 61: Guarantee
The statutory provisions on rights in consumer goods sales in the country of purchase shall apply. Additional Supplies The following supplies and accessories are available from authorised Roche Diabetes Healthcare Centres, pharmacies, or medical/surgical supply dealers: Test Strips Accu‑Chek Inform II Test Strips Control Solutions Accu‑Chek Performa Control Solutions Linearity Kits Accu‑Chek Linearity Kit…
-
Page 63: Index
Index battery, error messages, 50–53 changing, 45 installing, 45 flagging test results, 18 type, 45, 55 beeper, setting, 34 blood glucose, testing, 15 guarantee, 59 button, power/set, 5–6 hyperglycaemia, 19–20 code chip, 6–7 hypoglycaemia, 19–20 computer, connecting the meter to, 43 hypoglycaemic alert, setting, 41 control solution, 24 control test, performing, 25…
-
Page 64
sample handling, 13 settings, meter, 31 supplies, 59 symbols, 58 technical information, 55 test reminders, setting, 37 test results, unusual, 19–20 test strips, Accu‑Chek Inform II, 6, 11 time and date, setting, 32 troubleshooting, 47–53 use by date, 11, 24… -
Page 67
Roche Diagnostics Limited Charles Avenue, Burgess Hill West Sussex, RH15 9RY United Kingdom Accu‑Chek Customer Careline UK Freephone number: 0800 701 000 ROI Freephone number: 1 800 709 600 calls may be recorded for training purposes www.accu‑chek.co.uk LAST UPDATE: 2010‑05… -
Page 68
Roche Diagnostics GmbH Sandhofer Strasse 116 68305 Mannheim, Germany www.accu‑chek.com ACCU‑CHEK, ACCU‑CHEK PERFORMA, ACCU‑CHEK INFORM, and SAFE‑T‑PRO are trademarks of Roche. ©2010 Roche Diagnostics. All rights reserved. 05796806001(02)‑0710…
Комплектация
Глюкометр Акку-Чек Перформа с батарейкой, 10 тест-полосок Акку-Чек Перформа, устройство для прокалывания кожи Акку-Чек Софткликс, 10 ланцетов Акку-Чек Софткликс, чехол, руководство пользователя, краткая инструкция, гарантийный талон.
Назначение
Предназначен для количественного измерения уровня глюкозы в крови.
Способ применения
Процесс измерения сахара в крови занимает несколько этапов: подготовка к исследованию, получение крови, измерение значения сахара.
Правила подготовки к исследованию:
Необходимо вымыть с мылом руки. Пальцы следует предварительно размять, совершив массирующие движения. Приготовить заранее измерительную полоску к глюкометру. Если прибор требует кодировки, нужно проверить соответствие кода на чипе активации с номером на упаковке полосок. Установить ланцет в устройство Акку Чек Софткликс, удалив предварительно защитный колпачок. Выставить соответствующую глубину прокола на Софткликс. Детям достаточно прокрутить регулятор на 1 шаг, а взрослому человеку чаще всего требуется глубина в 3 единицы.
Правила получения крови:
Палец на руке, из которого будет взята кровь, следует обработать ваткой, смоченной в спирте. Приложить Акку Чек Софткликс к пальцу или же мочке уха и нажать на кнопку, обозначающую спуск. Нужно слегка надавить на зону возле прокола, чтобы получить достаточное количество крови.
Правила выполнения анализа:
Установить приготовленную тестовую полоску в глюкометр. Прикоснуться пальцем руки/мочкой уха с каплей крови к зеленому полю на полоске и подождать результата. Если крови окажется недостаточно, будет слышно соответствующее звуковое оповещение. Запомнить значение показателя глюкозы, который появится на дисплее. При желании можно провести маркировку полученного показателя.
Условия хранения
Условия хранения без батареи: при температуре от -25 до +70°С.
Условия хранения с элементом питания: от -20 до +50°С.
Условия отпуска из аптек
Без рецепта.
-
Производитель
Roche Diabets Kea GmbH (Германия) -
Категория
Глюкометры и принадлежности к ним