
- Manuals
- Brands
- Kenwood Manuals
- Mixer
- KCC90
- Instructions manual
-
Contents
-
Table of Contents
-
Bookmarks
Available languages
-
EN
-
AR
Quick Links
TYPE KCC90
instructions
2
Related Manuals for Kenwood KCC90
Summary of Contents for Kenwood KCC90
-
Page 1
TYPE KCC90 instructions… -
Page 2
English 2 — 25 ´ ¸ ∂… -
Page 3
s t l k l 9 k q q s d d d t d d k l … -
Page 5: Table Of Contents
English contents safety 3 – 4 language selection the bowl tools and some of their uses to use your Cooking Chef 6 – 7 to use your Cooking Chef as a mixer display screen symbols explained manual mode 9 – 10 using the pre-set programmes Savoury programmes 11 –…
-
Page 6: Safety
Read these instructions carefully and retain for future reference. Remove all packaging and any labels. If the cord is damaged it must, for safety reasons, be replaced by KENWOOD or an authorised KENWOOD repairer. important note — electronic medical implants Like all induction heating products, this appliance generates short-range magnetic fields.
-
Page 7
This appliance shall not be used by children. Keep the appliance and its cord out of reach of children. Only use the appliance for its intended domestic use. Kenwood will not accept any liability if the appliance is subject to improper use, or failure to comply with these instructions. -
Page 8: Key
Kenwood Cooking Chef Display screen graphics hot temperature warning programme phase d Attachment outlets temperature selection d high speed outlet (HSO) high speed high temperature warning d slow speed outlet (SSO) text display d bowl tool socket time selection…
-
Page 9: The Bowl Tools And Some Of Their Uses
the bowl tools and some of their uses K-beater High temperature creaming beater For making cakes, biscuits, pastry, icing, fillings, éclairs and Suitable for creaming butter and sugar, choux pastry and polenta. Ideal mashed potato. for scraping mixes both hot and cold from the sides of the bowl during mixing.
-
Page 10: To Use Your Cooking Chef As A Mixer
• If the bowl temperature exceeds 60°C, for safety reasons after cooking the speed is automatically limited even if a higher speed has • Be careful when handling or touching any part of the mixer been selected. The speed will not automatically increase when when being used in the cook mode or after cooking, IN the temperature drops below 60°C.
-
Page 11: Display Screen Symbols Explained
display screen symbols explained Hot warning indicator Below 40°C — no red bar 40°C-60°C — flashing red bar Above 60°C — solid red bar Shows when mixer is being operated in high speed high temperature mode (HSHT). Shows current phase of a programme when using the pre-set programmes. Text display shows status information, programme information and error messages.
-
Page 12: Manual Mode
manual mode • Press the setting you wish to alter and use the display dial to adjust the setting. • Press the display dial to confirm. Note: • When a setting is selected, the bar underneath the corresponding display screen symbol will illuminate. •…
-
Page 13: Chocolate Tempering
temperature settings Temperature Uses 50°C Chocolate tempering 72°C — 82°C Poaching 98°C — 99°C Simmering 100°C Boiling, steaming 130°C — 140°C Sautéing vegetables 180°C Browning meat power settings Power settings Watts Uses Auto Power input varies to optimise temperature setting 1 — 2 1500W — 1200W Browning meat, sautéing vegetables, boiling water…
-
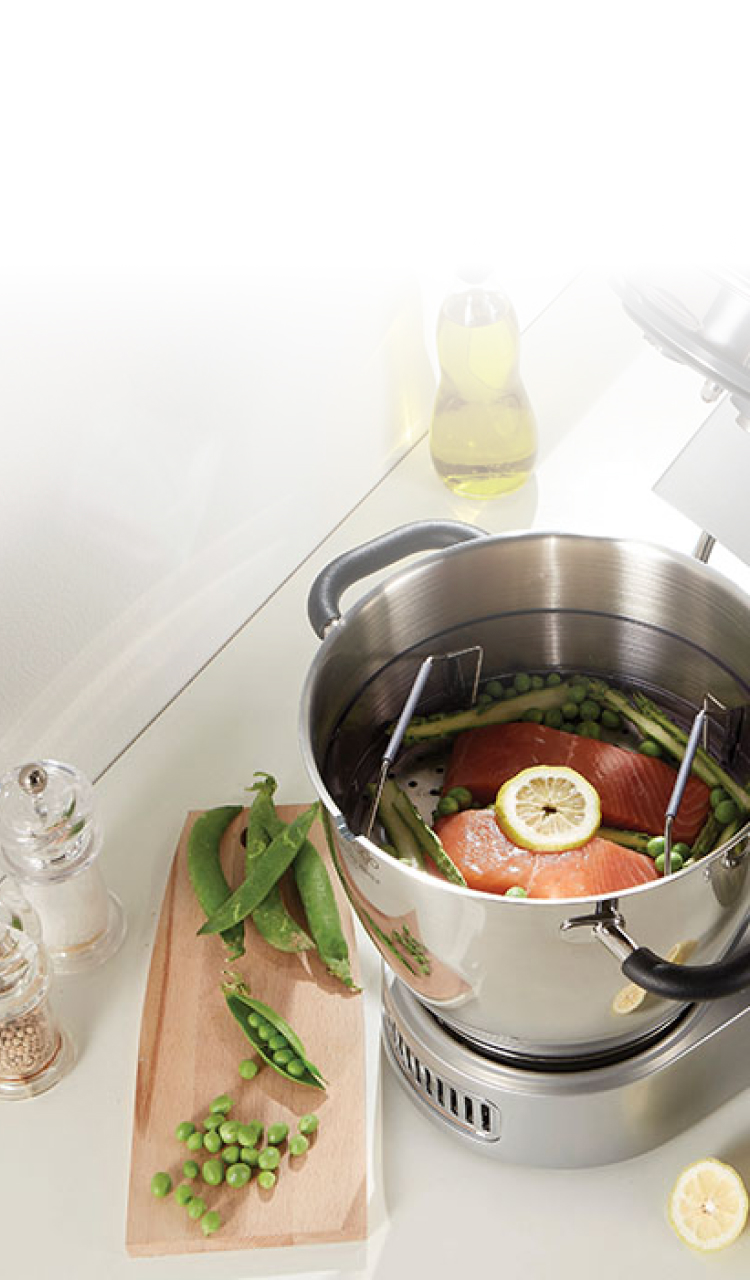
Page 21: Steam Programme
programmes STEAM Phase 1 (P1) Keep Warm Tools used Comments °C 102°C 65°C Note: – – • Refer to steamer basket instruction Auto Auto manual for recommended quantities and times – adjust the cooking time Heating stage ✓ ✗ as required. Cooking time 10mins 30mins…
-
Page 22: Adjusting The Bowl Tools
adjusting the height of the tools whisk, stainless steel K beater For best performance the whisk and K beater should be almost touching the bottom of the bowl . If necessary adjust the height using the spanner provided. 1 Unplug the appliance. 2 Raise the mixer head and insert the whisk or beater.
-
Page 23: To Fit And Use Your Splashguard Assembly
to fit and use your splashguard assembly The splashguard assembly consists of 2 pieces: the heat shield and the splashguard. The heat shield must be fitted during cooking operations otherwise the machine will not operate and «Fit heat shield» will be displayed. The heat shield is to protect the mixer head from steam produced during the cooking process.
-
Page 24: To Remove And Fit Outlet Covers
to remove and fit outlet covers High-speed outlet cover Slow-speed outlet cover 1 To remove the cover, use the grip and lift upwards. 1 To remove the cover, use the grip on the underside and pull 2 To fit, place the cover over the outlet and push downwards. outwards.
-
Page 25: Maximum Capacities And Recommended Speeds
Maximum capacities and recommended speeds The following speeds are a guide only and will vary depending upon the quantity and the temperature of the ingredients being mixed etc. Shortcrust pastry Flour weight 910g/2lb Stiff yeast dough Flour weight 350g/12oz – 1.6kg/3lb 8oz Total weight 550g/1lb 3oz –…
-
Page 26: Care And Cleaning
023 9239 2333. Have your model number (e.g. TYPE IMPORTANT INFORMATION FOR CORRECT DISPOSAL OF KCC90) and date code (5 digit code e.g. 13L35) ready. THE PRODUCT IN ACCORDANCE WITH THE EUROPEAN They are on the underside of the power unit.
-
Page 27: Troubleshooting Guide
troubleshooting guide Problem Cause Solution The machine will not operate in the heat One of the safety sensors has been Check display screen for notification of cause. mode and displays an error message activated. • Ensure the head is lowered and locked. and gives a warning beep.
-
Page 28
30 minutes without being operated and has gone into Standby mode. Display screen shows an alpha/ Appliance not functioning properly. Contact an authorised Kenwood Service numerical error code. Centre. To find up to date details of your nearest Kenwood Service Centre visit www.kenwoodworld.com or the website… -
Page 29
١ ركبي الواقي الحراري أو مخرج الغطاء. لفي مفتاح .١ تم إزالة الواقي الحراري أو إزالة غطاء المخرج .يتوقف جهاز المطبخ المتكامل خالل التشغيل » ثمO« التحكم في السرعات إلى وضع إيقاف التشغيل .يومض ضوء وضع االستعداد ببطء .أعيدي تشغيل الجهاز مرة أخرى .٢ تم رفع رأس الخالط ٢ اخفضي رأس الخالط. لفي مفتاح التحكم في السرعات » ثم أعيدي تشغيل الجهازO« إلى وضع إيقاف التشغيل ٣ ملحق المخرج تجاوز حد الوقت األقصى المسموح .مرة أخرى .للتشغيل ٣ لفي مفتاح التحكم في السرعات إلى وضع إيقاف .» ثم أعيدي تشغيل الجهاز مرة أخرىO« التشغيل اضغطي على زر وضع االستعداد مرة أخرى إلعادة تشغيل تم توصيل جهاز المطبخ المتكامل بمصدر التيار الكهربي ضوء زر وضع االستعداد مطفأ على الرغم من .الجهاز لمدة أطول من ٠٣ دقيقة دون استخدامه وبذلك دخل .توصيل الجهاز بمصدر التيار الكهربي .الجهاز في وضع االستعداد . للحصولKenwood اتصلي بمركز خدمة معتمد من قبل .الجهاز ال يعمل بشكل صحيح تعرض شاشة العرض رسالة خطأ مكتوبة باألرقام على معلومات محدثة حول أقرب مركز خدمة معتمد من .واألحرف ، يرجى زيارة موقع الويبKenwood ، أو موقع الويب المخصصwww.kenwoodworld.com .لبلدك عند االتصال بمركز خدمة العمالء، قد تحتاجين إلى إمدادهم بتفاصيل عن رقم إصدار برنامج التشغيل الحالي. يمكنك الحصول على هذه المعلومة عن طريق الضغط على زر .)» (اإلصدارVERSION« » (إعدادات) ثمSETTINGS« القائمة وتحديد… -
Page 30
دليل استكشاف المشكالت وحلها « ∞ L ∫ « ∞ ∫ ∑ « ∞ L ∂ V º « ∞ .راجعي شاشة العرض لمعرفة تنبيهات السبب U Ê . _ ± ‹ « d « º ∑ b ± √ • ¢ r ¢ ÷ ¥ F d s Ë… -
Page 31
L O l ¢ π Ø e ± d Á ≈ ∞ î c V √ ¥ π ° q ، يرىج زيارة موقع الويبKENWOOD ± W . ª b Á « ∞ ≥ c I b  d ¥ U § v ¢… -
Page 32
السعات القصوى والسرعات الموصى بها .الرسعات املوحضة مرجعية فقط وختتلف حسب مكية املكونات املراد خلطها ودرجة حرارهتا ٠١٩ غرام وزن الدقيق المعجنات ذات القشرة الهشة وزن الدقيق عجين الخبز ٠٥٣ غرام – ٦.١ كيلوغرام الوزن اإلجمالي ٠٥٥ غرام – ٦٥.٢ كيلوغرام وزن الدقيق ٠٥٢ غرام – ٦.٢ كيلوغرام )عجينة الخميرة الخفيفة (غنية بالزبد والبيض الوزن اإلجمالي ٠٨٤ غرام – ٥ كيلوغرام الوزن اإلجمالي خلطة كيك الفاكهة ٥٥.٤ كيلوغرام – خلطة ٥١ بيضة بياض البيض ١٦ العدد الوزن )(٥٠٦ غرام ٣ لتر إجمالي السعة وضع الطهي ٠٥٢ مل إجمالي السعة الزيت )* حجم البيض المستخدم = الحجم المتوسط (بوزن بين ٠٥ غرام السرعة الموصى بها الوصفة/الطريقة األداة » زيديها بالتدريج إلى السرعةMin« ابدئي بالسرعة المنخفضة مزج الزبد/السمن مع السكر… -
Page 33
إزالة وتركيب أغطية المخارج غطاء مخرج السرعة المنخفضة غطاء مخرج السرعة العالية إلزالة الغطاء، استخدمي المقبض الموجود على الجانب السفلي واسحبيه ١ .١ إلزالة الغطاء، استخدمي المقبض وارفعيه ألعلى .للخارج .لتركيب الغطاء، ضعي الغطاء على المخرج واضغطي عليه ألسفل ٢ ٢ لتركيب الغطاء، ركبي الماسكة الموجودة على الجانب العلوي للغطاء في تجويف المخرج وادفعي الغطاء ليستقر في موضع التثبيت محدثا ً صوت .طقطقة تركيب وإزالة مشبك التقليب المساعد .يمكن استخدام مشبك التقليب المساعد للمساعدة في عملية الخلط .لإلزالة، اعكسي اإلجراء السابق ٣ ١ أدخلي مشبك التقليب المساعد من جانب السلطانية مع توجيه النتوء الرأسي أوK هام – يجب عدم تركيب مشبك التقليب المساعد عند استخدام الخفاقة إلى الداخل والمشابك إلى الخارج .الخفاقة أو خطاف العجين أو مضرب الخلطات الكريمية لفي المشبك في اتجاه عكس عقارب الساعة في مقابض السلطانية ٢ تجميع مضرب الخلطات الكريمية الساخنة ركبي الخفاقة المرنة بحذر في الملحق (األداة) عن طريق إدخال قاعدة الخفاقة ١ تركيب الخفاقة المرنة .تزود الخفاقة المرنة مركبة بالفعل ويجب فكها دائما ً قبل التنظيف المرنة في الشق، ثم إدخال أحد جانبي الخفاقة في التجويف قبل تعشيق طرف .الخفاقة برفق في موضعه. -
Page 34
البرامج (الطهي STEAM تعليقات األدوات المستخدمة تدفئة مسمترة )P1( 1 املرحلة )بالبخار ٥٦ درجة ٢٠١ درجة °C – – :مالحظة • راجعي دليل تعليمات سلة التبخير لمعرفة ) (تلقائيةAuto ) (تلقائيةAuto الكميات واألزمنة الموصى بها – اضبطي زمن مرحلة التسخين .الطهي حسب الحاجة ✗ ✓ ٠٣ دقيقة ٠١ دقائق زمن الطهي كيفية تجاوز مراحل برنامج طهي .“ (مراحل وصفة التحضير) على شاشة العرضRECIPE PHASES” اضغطي مع االستمرار على قرص العرض لمدة ٥ ثوان. تظهر الرسالة ١ . وما إلى ذلك) ثم اضغطي على القرص للتأكيدP3 أوP2 أوP1( لفي قرص العرض الختيار المرحلة المطلوبة ٢ .اتبعي التعليمات الموضحة على شاشة العرض ٣ تفسير نصوص شاشة العرض .خالل برامج الطهي سابقة اإلعداد، يتم عرض رسائل مختلفة على شاشة العرض… -
Page 42
إعدادات درجة الحرارة االستخدامات درجة الحرارة تليين الشوكوالته ٠٥ درجة مئوية سلق الفاكهة ٢٧ إلى ٢٨ درجة مئوية الغلي ببطء ٨٩ إلى ٩٩ درجة مئوية الغلي، التبخير ٠٠١ درجة مئوية تحضير الخضار السوتيه ٠٣١ إلى ٠٤١ درجة مئوية تحمير اللحم ٠٨١ درجة مئوية إعدادات القدرة االستخدامات وات إعدادات القدرة تتغير قدرة اإلدخال لتتماشى على نحو مثالي مع إعداد درجة الحرارة ) (تلقائيةAuto تحمير اللحم، تحضير الخضار السوتيه، غلي الماء ٠٠٥١ إلى ٠٠٢١ وات ١ — ٢ إذابة الزبد، الصلصات ذات أساس الحليب، الغلي ببطء، الخفق على الساخن ٠٠٠١ إلى ٠٠٥ وات ٣ — ٥ تثبيت العجائن ٥٧٣ إلى ٠٥٢ وات ٦ — ٧… -
Page 43
الوضع اليدوي .• اضغطي على اإلعداد المطلوب تغييره واستخدمي قرص العرض لضبط اإلعداد .• اضغطي على قرص العرض للتأكيد :مالحظة .• عند تحديد أحد اإلعدادات، ستتم إضاءة الشريط الموجود أسفل شاشة العرض المقابلة .• تنتهي مهلة اإلعداد بعد ٤ ثوان في حالة عدم اتخاذ أي إجراء .يمكن تعيين درجة الحرارة من ٠٢ إلى ٠٨١ درجة مئوية بخطوة زيادة مقدارها ١ درجة مئوية .)» (إيقافOFF« أو بطريقة أخرى، يمكن استخدام الوحدة بدون تعيين درجة حرارة من خالل استخدام اإلعداد . لدرجة أقل من الحرارة المحيطيةCooking Chef مالحظة: لن تصل درجة حرارة جهاز (HSHT) وضع السرعة العالية ودرجة الحرارة العالية :للخلط على السرعة العالية على درجة حرارة أعلى من ٠٦ درجة مئوية » (تنبيه وضع السرعةCAUTION HSHT MODE« • اضغطي مع االستمرار لمدة ٣ ثوان. يضيء الرمز ! على شاشة العرض ويتم عرض رسالة .العالية ودرجة الحرارة العالية). كما تصدر نغمة صوتية قصيرة عن الخالط كل ٠٣ ثانية .• لفي مفتاح التحكم في السرعات إلى موضع السرعة المطلوبة، ترتفع سرعة تشغيل الخالط ببطء حتى تصل إلى السرعة المحددة .• يمكنك خفض السرعة بالطريقة العادية .»O« • إلنهاء هذا الوضع، اضغطي مع االستمرار على زر درجة الحرارة لمدة ٥ ثوان أو أعيدي مفتاح التحكم في السرعات إلى موضع اإليقاف يجب استخدام هذه الوظيفة فقط مع خفاقة البيض و/أو أداة التقليب. ينبغي عدم تجاوز سعة الطهي القصوى وهي ٣ لترات كما .ينبغي التأكد من تركيب واقي الرذاذ. يجب عدم ترك الجهاز مهم ال ً دون مالحظة .يمكن استخدام المؤقت في وضع الطهي .في حالة عدم تحديد وقت لمؤقت العد التنازلي، عندئذ سيعد المؤقت تصاعديا ً بفاصل زمني ١ ثانية تلقائيا ً أثناء تشغيل الجهاز .الحد األقصى لزمن تشغيل المؤقت هو ٨ ساعات توجد ٠١ إعدادات لفترات التقليب. -
Page 44
تفسير رموز شاشة العرض مؤشر تحذير السخونة أقل من ٠٤ درجة مئوية – ال يوجد شريط أحمر من ٠٤ إلى ٠٦ درجة مئوية – شريط أحمر وامض أعلى من ٠٦ درجة مئوية – شريط أحمر ممتلئ .(HSHT) يعرض عند تشغيل الخالط في وضع السرعة العالية درجة الحرارة العالية . يعرض المرحلة الحالية من برنامج الطهي عند استخدام البرامج سابقة اإلعداد .تعرض شاشة العرض النصي معلومات الحالة ومعلومات البرنامج المحدد ورسائل الخطأ .يعرض درجة الحرارة المحددة .» أو بين ٠٢ إلى ٠٨١ درجة مئويةOFF« يمكن تعيين درجة الحرارة من الوضع إيقاف .يعرض الوقت المحدد بالساعات والدقائق والثواني . إلى ٨ ساعات ويبدأ العد التنازلي بمجرد اختيار درجة الحرارةß يمكن تعيين الوقت من ٥ ثوان .٩ إلىß ٠ يعرض إعداد التقليب المحدد، بنطاق من .• تتم إضاءة الشرائط الخارجية تباعا ً لإلشارة إلى طول الفترة الزمنية قبل إجراء التقليب التالي .• يبدأ سهم التقليب الداخلي في الوميض ٣ ثوان قبل إجراء التقليب التالي .• في بداية عملية التقليب، قد يكون هناك ارتفاع ملحوظ في السرعة من أجل فصل أجزاء الطعام .يعرض إعداد القدرة المحدد .٧ إلىß ١ وAuto يتراوح نطاق القدرة من… -
Page 45
إذا تجاوزت درجة حرارة السلطانية ٠٦ درجة مئوية، ألسباب تتعلق بالسالمة ∞ D b « ° F • سيتم خفض سرعة الجهاز وتقييدها تلقائيا ً حتى في حالة تحديد سرعة تشغيل ö ◊ « ∞ ª b « Â ∑ ª « ß M U ¡ t √ £ L º √ Ë ∞ N U “ ∞ π s « ¡… -
Page 46
أدوات السلطانية وبعض من استخداماتها مضرب الخلطات الكريمية الساخنة K مضرب العجين مناسب الستخدامات دمج الزبد مع السكر وتحضير عجين الشو وعصيدة طحين لعمل الكيك والبسكويت والمعجنات والغطاء السكري للحلوى والحشوات وجاتوه الذرة. مثالي لكشط الخلطات سواء الباردة أو الساخنة عن جوانب السلطانية أثناء .اإلكلير والبطاطس المهروسة .عملية الخلط مضرب البيض أداة التقليب لخفق البيض والقشدة والسوفليه. ال تستخدمي خفاقة البيض مع الخلطات السميكة مناسبة لالستخدام خالل عملية الطهي للمحافظة على قوام األطعمة مثل الدجاج .(مثل خلط السمن مع السكر) – فقد يتسبب ذلك في تلفها ً والسمك والخضراوات والفاكهة. مثالية لتحمير اللحوم. مناسبة لالستخدام أيضا مناسبة للدمج مع أداة التقليب عند الخفق على درجات حرارة، على سبيل المثال .في تحضير الريسوتو والصلصات وإذابة الشوكوالته .في حالة الحلويات اإليطالية والسويسرية خطاف العجين يستخدم مع خلطات الخميرة فقط Cooking Chef استخدام جهاز Â ≥ U º K « ∞ b … I U ´ w ∞ §… -
Page 47
Kenwood منCooking Chef استكشاف جهاز الدليل العالمات الظاهرة على شاشة العرض تحذير درجة حرارة عالية مرحلة البرنامج مخارج الملحقات d اختيار درجة الحرارة d U ∞ O W « ∞ F ´ W º d « ∞ d à ± ª تحذير درجة حرارة عالية وسرعة عالية d M ª « ∞ L ´ W º d « ∞… -
Page 48
∂ q … Æ d « ¸ « ∞ ∫ § W œ ¸ ‹ d « º ∑ Ë ± D U ≤ º K « ∞ b … Æ U ´ · Ë § ≠ W ≤ E U ±… -
Page 49
عربي ∑ p ö ± ∞ º « d § ∞ L W « ∂ K O ∑ I º « ∞ L ‹ ± U b « ∑ ª ß ∞ ö Ë ‰ ∑ M U « ∞ L U ≠… -
Page 50
عربي المحتويات ٨٢ — ٧٢ لسالمت ك ٢٩ الدلي ل ٢٩ اختيار اللغة ٣٠ أدوات السلطانية وبعض من استخداماتها ٣١ — ٣٠ Cooking Chef استخدام جهاز ٣١ كخالطCooking Chef استخدام جهاز ٣٢ تفسير رموز شاشة العرض ٣٤ — ٣٣ الوضع اليدوي ٣٥ استخدام البرامج سابقة اإلعداد ٣٦ — ٣٥ برامج المشهيات ٣٥ الوجبات األساسية ٣٥ الصلصات ٤٠ — ٣٧ برامج الحلويات… -
Page 51
HEAD OFFICE: Kenwood Limited, 1-3 Kenwood Business Park, New Lane, Havant, Hampshire PO9 2NH 5720000743/1…
Посмотреть инструкция для Kenwood Cooking Chef KCC90 бесплатно. Руководство относится к категории кухонные комбайны, 7 человек(а) дали ему среднюю оценку 9. Руководство доступно на следующих языках: английский. У вас есть вопрос о Kenwood Cooking Chef KCC90 или вам нужна помощь? Задайте свой вопрос здесь
Главная
| Kenwood | |
| Cooking Chef KCC90 | KCC9060S | |
| кухонный комбайн | |
| 5011423191294, 5011423194981 | |
| английский | |
| Руководство пользователя (PDF) |
Энергопитание
| Мощность | 1500 W |
| Максимальная мощность | 1500 W |
| Входящее напряжение сети | 230 V |
| Частота входящего переменного тока | 50 Hz |
| Мощность мотора | 1500 W |
| Мощность нагревательного элемента | — W |
Вес и размеры
| Ширина | 400 mm |
| Глубина | 345 mm |
| Высота | 370 mm |
| Вес | 23500 g |
| Ширина | 400 mm |
| Глубина | 345 mm |
| Высота | 370 mm |
| Вес | 12880 g |
Свойства
| Планетарное вращение | Да |
| Корзина для приготовления на пару | Да |
| Цвет товара | Серебристый |
| Переменная скорость | Да |
| Число скоростей | — |
| Импульсная функция | Да |
| Комплектующие пригодны для мытья в посудомоечной машине | Да |
| Объем чаши | 7 L |
| Встроенные весы | Да |
| Диапазон термостата | 20 — 180 °C |
| Количество автоматических программ | 24 |
| Bluetooth | Нет |
Содержимое упаковки
| Круглая насадка для взбивания | Да |
| Шпатель | Да |
| Защита от брызг в комплекте | Да |
| Мешалка | Да |
| Вставка для тонкой шинковки | Да |
| Насадка для миксера в комплекте | Да |
| Корзина для приготовления на пару | Да |
| Шпатель | Да |
| Кулинарная книга | Да |
| Насадка для теста | Да |
| Инструмент для замешивания теста | Да |
| Краткая инструкция пользователя | Да |
Материал
| Материал миски | Нержавеющая сталь |
| Материал корпуса | Металл |
Экран
| Встроенный экран | Да |
| Тип дисплея | ЖК |
| Таймер | Да |
Дизайн
| Материал миски | Нержавеющая сталь |
| Цвет товара | Серебристый |
| Материал корпуса | Металл |
| Встроенный экран | Да |
| Вкл/Выкл переключатель | Да |
| Тип управления | Buttons, Rotary, Touch |
| Световой индикатор | Да |
| Материал лезвия | Нержавеющая сталь |
Производительность
| Переменная скорость | Да |
| Число скоростей | 8 |
| Импульсная функция | Да |
| Таймер | Да |
| Объем чаши | 6.7 L |
| Датчик температуры | Да |
| Сертификация | CE |
| Температура приготовления (макс) | 180 °C |
| количество кулинарных программ | 24 |
| Функция автоприготовления | Да |
| Легкая чистка | Да |
показать больше
Не можете найти ответ на свой вопрос в руководстве? Вы можете найти ответ на свой вопрос ниже, в разделе часто задаваемых вопросов о Kenwood Cooking Chef KCC90.
В чем разница между кухонным комбайном и измельчителем продуктов?
Можно ли наливать теплые жидкости в кухонный комбайн?
При приготовлении теста не получается сформировать шар, что мне делать?
Может ли мыть Kenwood кухонный комбайн в посудомоечной машине?
Какой вес Kenwood Cooking Chef KCC90?
Какие сертификаты Kenwood Cooking Chef KCC90 имеет?
Какая высота Kenwood Cooking Chef KCC90?
Какая ширина Kenwood Cooking Chef KCC90?
Какая толщина Kenwood Cooking Chef KCC90?
Инструкция Kenwood Cooking Chef KCC90 доступно в русский?
Не нашли свой вопрос? Задайте свой вопрос здесь
Нет в наличии
Артикул 0W20011249
Kenwood Кухонная машина KCC9040S Cooking Chef
Рассрочка на 12 месяцев от 7 082 ₽/мес.

Официальная гарантия 5 лет*

Бесплатная доставка до двери

Оплата онлайн
Насадка кухонной машины вращается в одном
направлении, а привод — в противоположном,
чтобы масса не оставалась на стенках чаши.
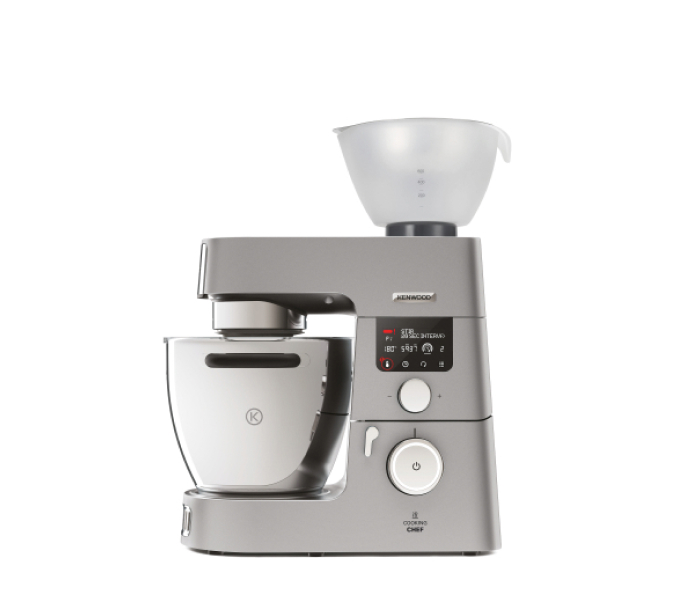
Вам доступны 25+ разнообразных кухонных насадок благодаря трём приводам: низкоскоростному, высокоскоростному и планетарному
Электронная система контролирует плавную смену скорости и защищает мотор кухонного комбайна от перегрузки
Смешивайте нежный соус в деликатном режиме или крошите лёд в импульсном — при 14 000 оборотов в минуту

Создавайте сложные ресторанные блюда с первого раза
В кухонном комбайне KCC9040S запрограммированы 24 рецепта,
в том числе — вок, бешамель, ризотто, меренги. Система автоматически регулирует скорость помешивания и температуру на каждом этапе — вам остаётся лишь добавлять ингредиенты.
Готовьте от трёх раз быстрее благодаря новейшим технологиям Kenwood

Мощный мотор
Кухонная машина мгновенно справляется с самыми сложными задачами.

Долговечность
Кухонная машина KCC9040S доказала высокую надежность на множестве независимых тестов.

Повышенная безопасность
Интеллектуальная система охлаждает мотор, а при поднятии верхней части корпуса останавливает его работу.

Индукционный нагрев
Приготовить ризотто, заварной крем, попкорн, потушить рагу можно в кухонной машине Кенвуд: чаша нагревается от 20 до 180 ºC.
Дополните интерьер английским стилем
Дизайн и конструкция кухонной машины Kenwood 9040S разработаны
в Великобритании. Классика
в современном прочтении идеально вписывается в любой интерьер.
Создавайте разнообразные блюда с шестью насадками в комплекте
Венчик для взбивания
Насыщает массу пузырьками воздуха, гарантируя отсутствие комочков. Идеально подходит для взбивания яиц, сливок и различных кремов.
Крюк для замешивания теста
Движения насадки аналогичны движению рук повара, благодаря чему тесто получается нежным
и однородным.
Насадка для помешивания
Термостойкая лопатка нежно помешивает ингредиенты в процессе приготовления,
не разрушая их структуры.
Насадка для мягких смесей
Вымешивает нежные кексы, бисквиты и топпинги, не оставляя ингредиенты на стенках чаши.
Универсальная К-образная насадка
Легко вымешивает фарш, пюре, измельчает печенье для чизкейка, готовит глазурь и начинки для пирогов.
Корзина для приготовления на пару
Насадка-пароварка приготовит мясо, овощи, морепродукты на пару, точно так же, как в обычной пароварке.
Готовьте сразу на всю семью или компанию друзей

Объём 6,7 л
Вместительная чаша позволяет приготовить обед на всю семью или компанию друзей.

Ручки по бокам
Чашу удобно снимать, устанавливать и перемещать.

Защитная крышка
Предотвращает разбрызгивание
и позволяет добавлять ингредиенты во время работы.

Нержавеющая пищевая сталь
Чаша устойчива к перепадам температуры и подходит для мытья в посудомоечной машине.
Замените всю кухонную технику одним прибором
Соковыжималка
Артикул: AWAT641B01
Мощная центробежная соковыжималка —
для получения максимального количества сока из овощей и фруктов за секунды.
11 990 ₽
Насадка для раскатки теста
Артикул: AW20011034
Раскатывает тесто разной толщины
для пельменей, лазаньи, пасты, вареников или пирогов.
4 990 ₽
Насадка для нарезки кубиками
Артикул: AW20010009
С лёгкостью нарезает овощи, сыр и мясо аккуратными кубиками размером 10×10 мм.
4 990 ₽
Универсальный мультиизмельчитель
Артикул: AWAT320B01
Острые лезвия мгновенно измельчают твёрдые продукты, кофе и специи, смешивают соусы, маринады или детское питание.
4 990 ₽
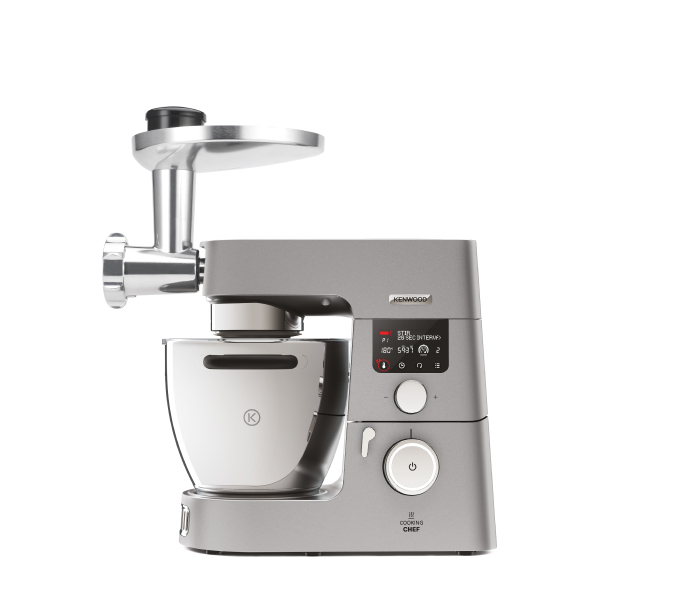
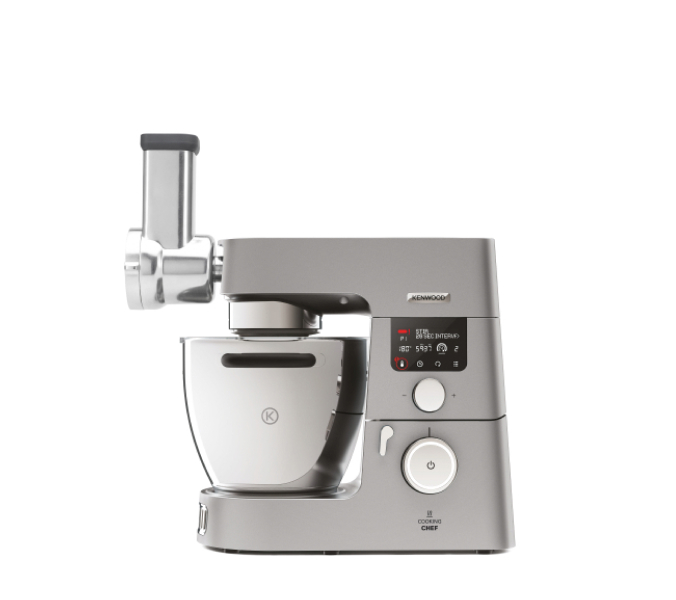
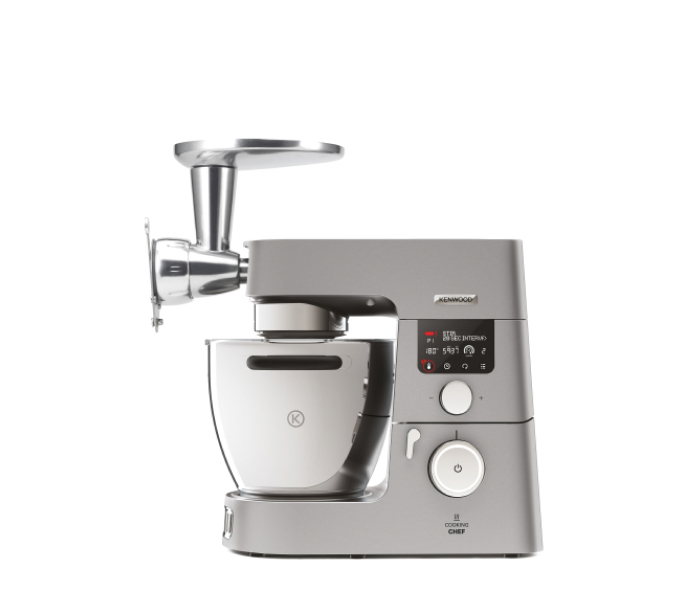
Мясорубка
Артикул: AW20011012
Мощная мясорубка с тремя решётками
для приготовления фарша, домашних колбас, сосисок и кеббе.
7 990 ₽
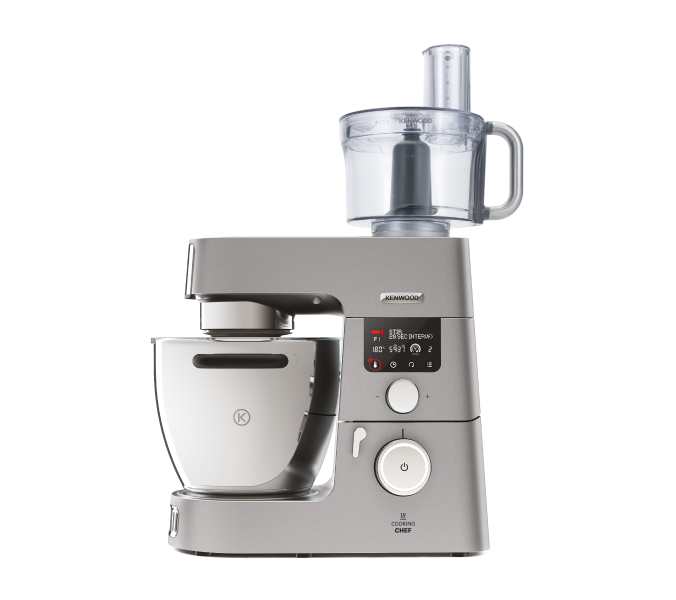
Кухонный комбайн
Артикул: AW20010010
Режет, натирает, шинкует, рубит: 6 дисков и универсальный нож-измельчитель справляются с любыми задачами.
11 990 ₽
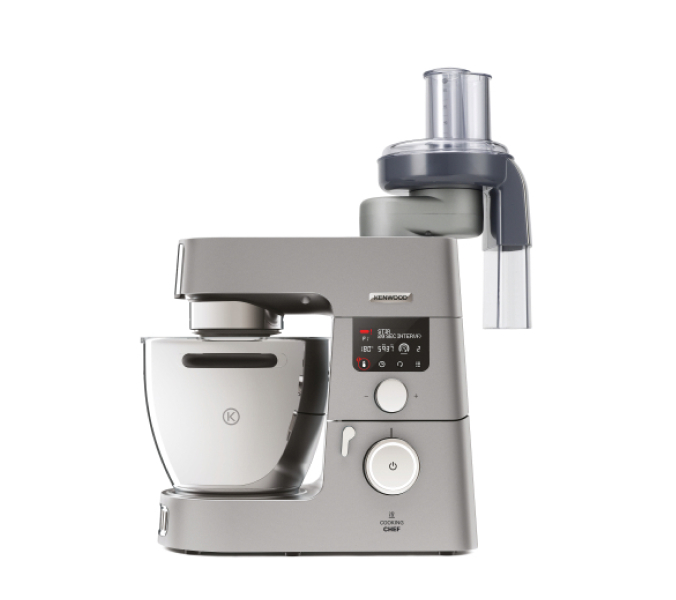
Высокоскоростная овощерезка
Артикул: AWAT340001
Быстро нарезает овощи и фрукты на кусочки различной формы благодаря 7 режущим дискам из нержавеющей стали. Справляется с большими объемами продуктов.
11 990 ₽
Насадка для равиоли
Артикул: AW20011040
Перфорированная насадка для настоящих итальянских равиоли.
14 990 ₽
Насадка для пасты
Артикул: AW20011038
Раскатывает ровное гладкое тесто шириной 22 см: для лазаньи, равиоли и тортеллини или лепёшек и питы.
14 990 ₽
Мельница для круп
Артикул: AW20010008
Мелет тонкую или грубую муку из риса,
овса, нута и множества других ингредиентов
для хлеба, каш и запеканок.
11 990 ₽
Пресс для ягод
Артикул: AW20011009
Создаёт вкуснейшие пюре и полезные ароматные соки с мякотью из мягких фруктов, ягод.
3 990 ₽
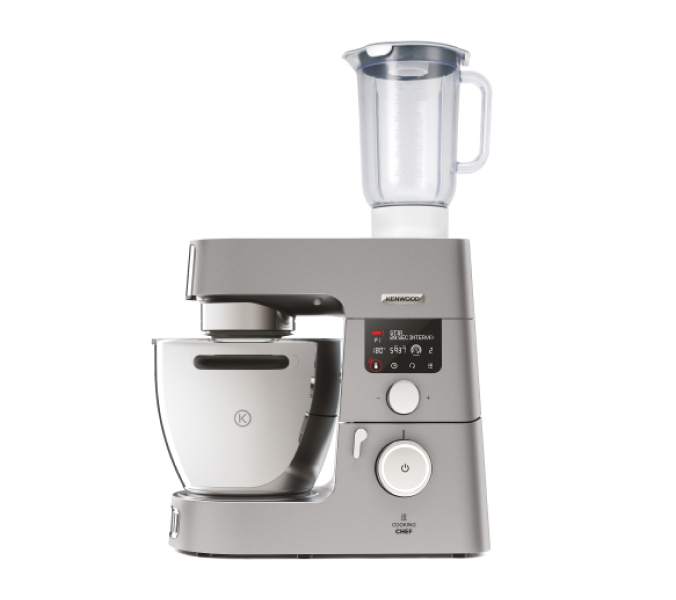
Блендер
Артикул: AW22000005
Мощный блендер с чашей из термостекла
для милкшейков, смузи, супов-пюре, кремовых десертов и детского питания.
4 990 ₽
Цитрус-пресс
Артикул: AWAT312B01
Эффективно отжимает свежие фреши
из апельсинов, грейпфрутов и лимонов.
2 990 ₽
Тёрка-ломтерезка
Артикул: AWAT641B01
Шинкует, натирает и нарезает любые продукты, от твёрдых овощей до сыров и шоколада.
11 990 ₽
Насадка для фигурной пасты
Артикул: AWAT910001
Готовит итальянские фигурные макароны любой формы — от биголи до паппарделле — а также бисквиты.
Характеристики KCC9040S

| Страна | Китай |
| Гарантия | 5 лет |
| Тип управления | Электронный |
| Количество скоростей | 10 |
| Плавная регулировка скорости | Есть |
| Импульсный режим | Есть |
| Индукционный нагрев | Есть |
| Планетарное смешивание | Есть |
| Отключение при перегрузке | Есть |
| Индикация включения | Есть |
| Индикация режима работы | Есть |
| Индикация выбранной мощности | Есть |
| Максимальная потребляемая мощность | 1500 Вт |
| Максимальная скорость вращения | 14000 об/мин |
| Количество приводов | 3 |
| Габариты | Высота — 37 см Ширина — 40 см Глубина — 34,5 см |
| Вес | 12,88 кг |
| Прорезиненные ножки | Нескользящая подошва |
| Отсек для сетевого шнура | Есть |
| Длина сетевого шнура | 1,2 м |
| Цвет | Серебристый |
| Материал | Металл |
| Насадки в комплекте | 6 |
| Универсальная К-образная насадка | Есть |
| Крюк для замешивания теста | Есть |
| Венчик для взбивания | Есть |
| Насадка для помешивания | Есть |
| Насадка для мягких смесей | Есть |
| Паровая корзина | Есть |
| Материал чаши | Нержавеющая сталь |
| Общий объём чаши | 6,7 л |
| Максимальный вес теста в чаше | 2,6 кг |
С этим товаром покупают
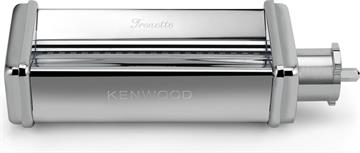
Насадка для тренетте
Насадка для приготовления тренетте Kenwood KAX983ME
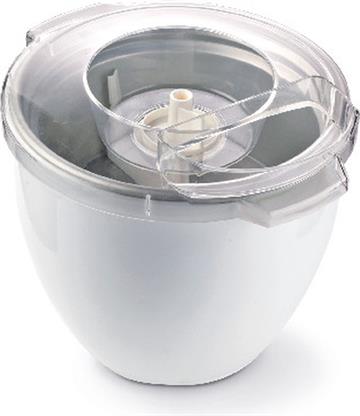
Насадка мороженица (для чаши 4,6л.)
Насадка мороженица Kenwood AT956B
Kenwood диск д/КМ спаккателли AWAT910005
Kenwood диск д/КМ спаккателли AWAT910005

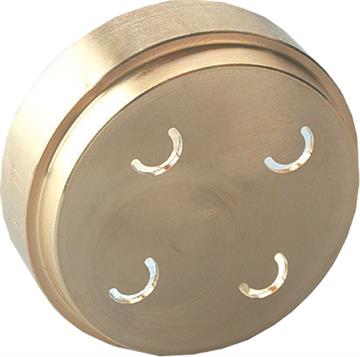
Насадка для макерони личи
Kenwood диск макерони личи AWAT910004
-66 %
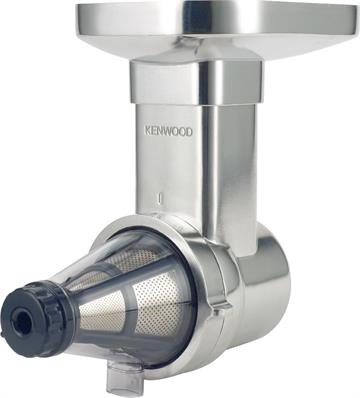
Насадка пресс для ягод и фруктов
Насадка пресс для ягод и фруктов Kenwood KAX644ME
-53 %
Насадка цитрус-пресс
Насадка Kenwood AT312
![]()
2

|
English |
2 — 25 |
|
´¸∂w |
62—94 |
3

q
5

|
2 |
1 |
|
|
6 |
||
|
3 |
4 |
|
|
7 |
||
|
s |
||
|
l |
||
|
8 |
||
|
3 4 |
9 |
|


o p q r s
t
l
m


n
n


dk
t ek l m

|
1 |
2 |
3 |
|
2 |
||
|
1 |
||
|
4 |
5 |
6/7 |
|
1 |
||
|
4 |
||
|
3 |
||
|
8 |
9 |
10 |
|
11 |
12 |
13 |

English
contents
|
safety |
3 – 4 |
|
key |
5 |
|
language selection |
5 |
|
the bowl tools and some of their uses |
6 |
|
to use your Cooking Chef |
6 – 7 |
|
to use your Cooking Chef as a mixer |
7 |
|
display screen symbols explained |
8 |
|
manual mode |
9 – 10 |
|
using the pre-set programmes |
11 |
|
Savoury programmes |
11 – 12 |
|
main meals |
11 |
|
sauce |
12 |
|
Sweet programmes |
13 – 16 |
|
chocolate tempering |
13 |
|
doughs |
13 – 14 |
|
meringue |
14 |
|
compote |
15 |
|
sauces |
15 – 16 |
|
others |
16 |
|
Slow cook programmes |
17 |
|
high |
17 |
|
low |
17 |
|
Steam programme |
18 |
|
adjusting the bowl tools |
19 |
|
to fit and use your splashguard assembly |
20 |
|
to remove and fit outlet covers |
21 |
|
to fit and remove your stir assist clip |
21 |
|
assembling the high temperature creaming beater |
21 |
|
maximum capacities and recommended speeds |
22 |
|
care and cleaning |
23 |
|
service and customer care |
23 |
|
troubleshooting guide |
24 – 25 |
2

English
safety
λRead these instructions carefully and retain for future reference.
λRemove all packaging and any labels.
λIf the cord is damaged it must, for safety reasons, be replaced by KENWOOD or an authorised KENWOOD repairer.
important note — electronic medical implants
λLike all induction heating products, this appliance generates short-range magnetic fields. If any user or person in close proximity has a pacemaker or other active implants, please consult a doctor before use, concerning any possible incompatibility to prevent any risk to health.
λSwitch off and unplug the appliance before fitting or removing tools/attachments, after use and before cleaning.
λKeep body parts, hair, jewellery and loose clothing away from moving parts and fitted attachments.
λNever put your fingers etc., into the hinge mechanism.
λNever leave the appliance on unattended.
λNever use a damaged appliance. Get it checked or repaired: see ‘service and customer care’.
λNever use an unauthorised attachment or more than one attachment at once.
λNever exceed the maximum capacities and when using the induction heater never exceed the 3 litre maximum fill level marked on the inside of the bowl.
λWhen using an attachment, read the safety and usage instructions that come with it.
λTake care when lifting this appliance as it is heavy. Ensure the head is locked and that the bowl, tools, outlet covers and cord are secure before lifting.
λNever let the cord hang down where a child could grab it.
λNever let the power unit, cord or plug get wet.
λBe careful when handling or touching any part of the appliance when being used in the cook mode or after cooking, IN PARTICULAR THE BOWL, SPLASHGUARD AND TOOLS as they will remain HOT long after the appliance has been switched off. Use the handles to remove and carry the bowl. Use oven gloves when handling the hot bowl and hot mixing tools.
λThe underside of the bowl will remain hot long after the heating has stopped. Use caution when handling and use the work surface protection mat when placing the bowl on heat sensitive surfaces.
λBe careful of steam escaping from the mixer bowl particularly when opening the lid in the splashguard or when raising the mixer head.
λIf transferring hot food from the mixer to the blender, always allow the ingredients to cool to room temperature before placing in the blender.
λOnly use the bowl and tools supplied with this appliance. Never use the bowl with any other heat source.
λNever operate the appliance in the cook mode with the bowl empty.
λNever insert anything through the air vents.
λWhen using this appliance ensure it is positioned on a level surface away from the edge. Make sure it is at least 10 cm from walls and ensure that the vents are not blocked. Do not position below overhanging cupboards.
λFor the correct and safe operation of the induction cooker ensure that the bowl base and temperature sensors are clean and dry before cooking.
λAs with all induction cooking appliances do not place credit cards, magnetic media or sensitive electronic equipment near to the appliance when in use.
3
λDo not use the appliance for deep frying foods.
λAlways ensure food is thoroughly cooked before eating.
λDo not exceed 250ml when cooking with oil.
λFood should be eaten shortly after cooking or allowed to cool quickly and then refrigerated as soon as possible.
λMisuse of your appliance can result in injury.
λThe power-supply cord is used to reduce risk resulting from becoming entangled in or tripping. Extension cords may be used if care is exercised in their use. If an extension cord is used: 1) The marked electrical rating of the extension cord should be at least as great as the electrical rating of the appliance; and 2) The cord should be arranged so that it will not drape over the countertop or tabletop where it can be pulled on by children or tripped over unintentionally. If the appliance is of the earthed type, the extension cord should be a
earthing-type 3-wire cord. The electrical rating of the appliance is listed on the bottom of the unit.
λAppliances can be used by persons with reduced physical, sensory or mental capabilities or lack of experience and knowledge if they have been given supervision or instruction concerning use of the appliance in a safe way and if they understand the hazards involved.
λChildren should be supervised to ensure that they do not play with the appliance.
λThis appliance shall not be used by children. Keep the appliance and its cord out of reach of children.
λOnly use the appliance for its intended domestic use. Kenwood will not accept any liability if the appliance is subject to improper use, or failure to comply with these instructions.
|
before plugging in |
before using for the first time |
important — UK only
•Make sure your electricity supply is the same as the one shown on the underside of the appliance.
•The wires in the cord are coloured as follows:
Green and Yellow = Earth, Blue = Neutral, Brown = Live.
•The appliance must be protected by a 13A approved (BS1362) fuse.
•WARNING: THIS APPLIANCE MUST BE EARTHED. Note:
•For non-rewireable plugs the fuse cover MUST be refitted when replacing the fuse. If the fuse cover is lost then the plug must not be used until a replacement can be obtained. The correct fuse cover is identified by colour and a replacement may be obtained from your Kenwood Authorised Repairer (see Service).
•If a non-rewireable plug is cut off it must be DESTROYED IMMEDIATELY. An electric shock hazard may arise if an unwanted non-rewireable plug is inadvertently inserted into a 13A socket outlet.
•This appliance conforms to EC Regulation 1935/2004 on materials and articles intended to come into contact with food.
• Wash the parts: see ‘care and cleaning’.
4

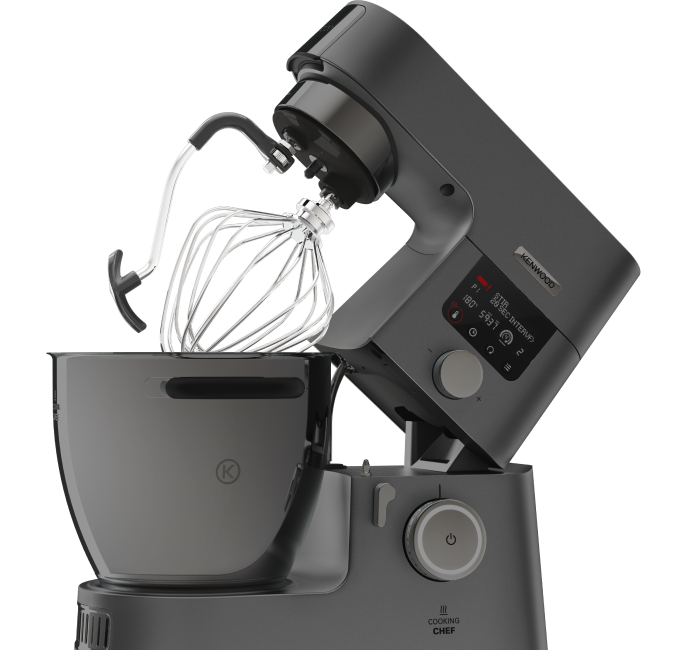
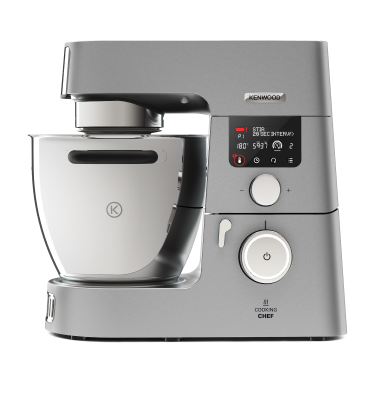
know your Kenwood Cooking Chef
Key
Attachment outlets
1 high speed outlet (HSO)
2 slow speed outlet (SSO)
3 bowl tool socket
4 stir tool socket
Mixer
5 high speed outlet cover
6 mixer head
7 slow speed outlet cover
8 cooking chef bowl
9 head — lift lever bk speed control bl standby button
bm display dial/enter button bn display screen
bo drain hole
bp bowl pedestal/induction area bq air vents
br temperature sensors bs K beater
bt high temperature creaming beater ck power whisk
cl dough hook cm stir tool
cn stir assist clip
co high temperature spatula cp heat shield
cq rubber seal (removable) cr splashguard
cs feed chute lid
ct work surface protection mat dk spanner
Display screen graphics dl hot temperature warning dm programme phase
dn temperature selection
do high speed high temperature warning dp text display
dq time selection
dr stir delay selection ds power selection
Display panel
dt temperature button ek time button
el stir setting button em menu button
en dough scraper
Note: Slow Speed outlet attachments
The slow speed outlet on your Kitchen Machine model features the Twist Connection System. It is designed to accept Twist Connection System attachments.
When purchasing new attachments for the slow speed outlet you should check compatibility with your Kitchen Machine. All Twist Connection System attachments can be identified by the product code which starts with KAX and also by the Twist logo  which
which is visible on packaging.
If you own attachments featuring the Bar Connection System  you will need to use the KAT002ME adaptor to connect these to the Twist Connection System
  on your Kitchen Machine.
For more information visit www.kenwoodworld.com/twist.
language selection
When turning on your Cooking Chef for the first time, the display screen language will default to “English”.
1 To change language press the menu button.
2 Use the display dial/enter button to select “SETTINGS” and press the display dial/enter button to confirm.
3 Use the display dial/enter button to select “LANGUAGES” and press the display dial/enter button to confirm.
4 Use the display dial/enter button to select the required language. Once the required language is selected, press the display dial/ enter button to confirm.
5 To change the language again, repeat the process.
5

the bowl tools and some of their uses
K-beater
For making cakes, biscuits, pastry, icing, fillings, éclairs and mashed potato.
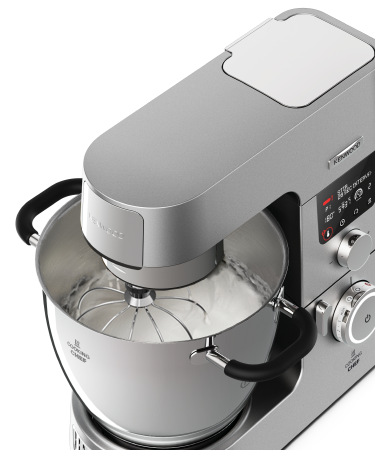
Whisk
For eggs, cream, soufflés. Do not use the whisk for heavy mixtures (e.g. creaming fat and sugar) — you could damage it. Suitable to combine with the stir tool when whisking with heat, e.g. Italian and Swiss meringues.
Dough Hook
For yeast mixtures only.
High temperature creaming beater
Suitable for creaming butter and sugar, choux pastry and polenta. Ideal for scraping mixes both hot and cold from the sides of the bowl during mixing.
Stir tool
Suitable to use during cooking to maintain the texture of food e.g. chicken, fish, vegetables and fruit. Ideal for browning meat. Also suitable for risottos, sauces and melting chocolate.
to use your Cooking Chef
IMPORTANT
•Make sure the induction area, temperature sensors and external surface of the bowl base are clean. Failure to do this will affect the heat sensor, resulting in poor cooking performance.
•Check that all the outlet covers including the heat shield are fitted. If they are not correctly fitted the heating function will not operate.
•Always use oven gloves to remove the bowl and tools after cooking.
1Connect the machine to the power supply. The display screen will illuminate.
2Turn the head-lift lever clockwise 1and raise the mixer head until it locks.
3Push the heat shield cp upwards onto the underside of the mixer head 2until fully located. The heat shield must never be used without the rubber seal cq fitted correctly.
•If using the Cooking Chef without heat, it is not necessary to fit the heat shield unless using the splashguard. Refer to ‘to fit and use your splashguard assembly’ section.
4Fit the bowl to the base – press down and turn clockwise 3.
5Select one of the following options:
Manual Cooking.
Refer to manual mode section.
Pre-set Programmes:
Refer to ‘using the pre-set programmes’ section for usage information.
•Refer to the Quick Start Guide for more recipe ideas.
6Place the required tool in the bowl tool socket 3 or stir tool socket 4 if using the stir tool, locating the pin in the groove and then turn to lock into position 4.
stir tool – when using the stir tool the stir assist clip can also be used to assist the mixing action, see ‘to fit and use your stir assist clip’. The stir tool can also be used with the whisk, e.g. making meringues. Do not use the stir tool with the dough hook.
Note: If the K-beater, whisk or creaming beater are not picking up ingredients from the bottom of the bowl refer to the “Tool Adjustment” section.
•To remove a tool, reverse step 6 above. (Always use oven
gloves to remove tools after cooking).
7To lower the mixer head, raise it slightly, then turn the head lift lever clockwise.
Lower into the locked position.
8Add the relevant ingredients to be cooked/mixed.
9Turn the speed control to the desired setting. Turn the speed control to  to use the stir settings.
6

•If the bowl temperature exceeds 60°C, for safety reasons the speed is automatically limited even if a higher speed has
been selected. The speed will not automatically increase when the temperature drops below 60°C. The speed control must be turned to the off ‘O’ position first and the desired speed reselected.
See ‘Manual Mode’ section for how to use high speed high temperature (HSHT) mode.
10Once a programme has finished, the unit will beep 3 times.
• Note: If no time has been set, the heating and stirring processes will automatically end once the timer has reached 8 hours.
11To stop or pause the mixing process, return the speed control to the off ‘O’ position. To resume operation select a speed.
IMPORTANT
•Heating will continue when the mixing process is stopped or paused.
12To stop the heating process, change the temperature to ‘OFF’. Alternatively, press the standby button.
Important – If at any time the mixer head is raised during an operation, the heating process will pause. The bowl tool will stop and will not restart when the mixer head is lowered, to re-start the mixer turn the speed control to the off ‘O’ position and then re-select a speed.
after cooking
•Be careful when handling or touching any part of the mixer when being used in the cook mode or after cooking, IN PARTICULAR THE BOWL, SPLASHGUARD AND TOOLS as they will remain HOT long after the appliance has been
switched off. Use the handles to remove and carry the bowl. Use oven gloves when handling the hot bowl and hot mixing tools.
•The underside of the bowl will remain hot long after the heating has stopped. Use caution when handling and use the work surface protection mat provided to protect heat sensitive surfaces.
hints
•Some recipes, in particular those with a high water content, will not be able to reach a cooking temperature above 100°C (as this is the boiling point of water).
•When adding ingredients to the bowl during cooking, turn the speed down and add the ingredients slowly and evenly.
•To heat sauces quickly use a continuous stir setting.
•If using the splashguard during cooking, always remove it before lifting the mixer head. Be aware of condensation formed on the splashguard and heat shield.
•When lifting the mixer head lift it slowly to allow any liquid on the underside of the heat shield to flow back into the bowl.
•Ten stir delay functions are available which enable you to select the appropriate amount of stirring for individual recipes. Some recipes will require constant stirring to stop ingredients from sticking to the bottom of the bowl, whereas others will benefit from intermittent stirring to maintain the texture of the food.
to use your Cooking Chef as a mixer
Assemble the mixer as described previously in ‘to use your Cooking Chef’. Turn the speed control to the desired setting. The speed can be changed at any time whilst the mixer is operating. Stop the mixer by returning the speed control to the off ‘O’ position.
Use the pulse (P) position for short bursts of maximum speed.
general hints
•Stop mixing and scrape down the bowl with the spatula frequently.
•Eggs at room temperature are best for whisking.
•Before whisking egg whites, make sure there is no grease or egg yolk on the whisk or bowl.
•Use cold ingredients for pastry unless your recipe says otherwise.
points for bread making important
•Never exceed the maximum capacities stated — you will overload the machine.
•If you hear the machine labouring, switch off, remove half the dough and do each half separately.
•The ingredients mix best if you put the liquid in first.
recipe
chilli marinade
200g cold clear runny honey (refrigerated overnight)
1 chilli (whole)
5ml (1tsp) crunchy peanut butter Seasoning
1Place all the ingredients into the mini chopper/mill.
2Fit the attachment to the Kitchen Machine and allow the ingredients to settle around the blade.
3Switch to pulse for 10 seconds.
4Use as required.
7
![]()
display screen symbols explained
Hot warning indicator Below 40°C — no red bar 40°C-60°C — flashing red bar Above 60°C — solid red bar
Shows when mixer is being operated in high speed high temperature mode (HSHT).
Shows current phase of a programme when using the pre-set programmes.
Text display shows status information, programme information and error messages.
Shows the selected temperature.
Temperature can be set from, “OFF”, 20°C — 180°C.
Shows the time selected in hours, minutes and seconds.
Time can be set from 5 seconds 8 hours and will count down once a temperature has been selected.
Shows the stir setting selected, ranging from 0 9.
• The outer bars will progressively light up to indicate the length of time before the next stirring action.
• The inner stir arrow will start flashing 3 seconds before the next stirring action.
• At the start of a stirring action, there may be a brief boost in speed in order to separate pieces of food.
Shows the power setting selected.
Power settings range from Auto, 1 7.
8

manual mode
• Press the setting you wish to alter and use the display dial to adjust the setting.
•Press the display dial to confirm. Note:
•When a setting is selected, the bar underneath the corresponding display screen symbol will illuminate.
•The setting will time out after 4 seconds if no action is taken.
Temperature can be set from 20°C — 180°C in 1°C increments.
Alternatively, the unit can be used without setting a temperature by selecting “OFF”.
Note: The Cooking Chef will not achieve a temperature lower than the ambient temperature.
High speed, high temperature mode (HSHT)
To mix at high speed at temperatures above 60°C:
•Press and hold for 3 seconds. The red ! will illuminate on the display screen and “CAUTION HSHT MODE” will be displayed. The mixer will also make a beeping sound every 30 seconds.
•Turn the speed control to the desired speed, the mixer will slowly increase to the selected speed.
•You can reduce the speed as normal.
•To exit this mode, press and hold the temperature button for 5 seconds or return the speed control to ‘O’.
This function MUST ONLY be used with the whisk and/or stir tool. You should not exceed the maximum cooking capacity of 3 litres and you must ensure the splashguard is fitted. The machine must not be left unattended.
The timer can be used in cooking mode.
If a countdown time is not selected, the timer will automatically count up in 1 second intervals whilst the machine is in operation.
The maximum running time is 8 hours.
There are ten stir delay settings. These are most suitable when the mixer is used in the cook mode. Please note, to use the stir settings all outlet covers must be fitted.
Power settings can be adjusted through the menu button. Power will default to Auto.
The power can be adjusted to from 250W to 1500W.
• Choose a lower power setting to gently heat ingredients.
• Choose a higher power setting to heat ingredients quickly.
stir delay settings
The stirring settings are ideal to use with the stir tool.
|
Speed |
Delay intervals |
Uses |
|
No delay |
Continuous stirring for sauces and risottos. |
|
|
(Continuous stirring) |
||
|
5 seconds |
10 seconds
Browning meat and sautéing vegetables.
20 seconds
30 seconds
40 seconds
50 seconds
|
1 minute |
Stirring stews, casseroles, broths, etc. |
2 minutes
5 minutes
9

temperature settings
|
Temperature |
Uses |
||
|
50°C |
Chocolate tempering |
||
|
72°C — 82°C |
Poaching |
||
|
98°C — 99°C |
Simmering |
||
|
100°C |
Boiling, steaming |
||
|
130°C — 140°C |
Sautéing vegetables |
||
|
180°C |
Browning meat |
||
|
power settings |
|||
|
Power settings |
Watts |
Uses |
|
|
A |
Auto |
Power input varies to optimise temperature setting |
|
|
1 — 2 |
1500W — 1200W |
Browning meat, sautéing vegetables, boiling water |
|
|
3 — 5 |
1000W — 500W |
Melting butter, dairy-based sauces, simmering, heated whisking |
|
|
6 — 7 |
375W — 250W |
Proofing doughs |
|
10

using the pre-set programmes
Select the programme
1Press the menu button.
2Turn the display dial/enter button to select “Programmes”.
3Press the display dial/enter button to confirm.
4Turn the display dial/enter button to select either “Savoury”, “Sweet”, “Slow Cook” or “Steam” programmes. See the tables below for sub-programme options.
5Press the display dial/enter button to confirm.
6Follow the instructions on the display screen.
Note: If no action is taken between phases, the machine will time out after 15 minutes.
|
SAVOURY |
Phase 1 (P1) |
Phase 2 (P2) |
Phase 3 (P3) |
Phase 4 (P4) |
Phase 5 (P5) |
Phase 6 (P6) |
Tools used |
Recipe ideas |
||
|
Wok |
Add oil |
Add meat & veg |
Add flavourings |
Additional ingredients |
||||||
|
°C |
140°C |
180°C |
160°C |
120°C |
||||||
|
– |
3 |
2 |
2 |
N/A |
N/A |
Stir fry |
||||
|
W |
Auto |
Auto |
1500W |
1500W |
||||||
|
Heating stage |
||||||||||
|
Cooking time |
3 ½mins |
2mins |
45 secs |
|||||||
|
Risotto |
Add oil |
Add veg & meat |
Add rice |
Add wine |
Add liquid |
Keep warm |
||||
|
11 |
°C |
130°C |
100°C100°C |
130°C130°C |
140°C |
99°C99°C |
75°C |
|||
|
– |
24 |
02 |
0 |
01 |
0 |
Chicken risotto |
||||
|
W |
1200W |
1000W1500W |
1200W1500W |
1500W |
1500W1200W |
Auto |
||||
|
meals |
||||||||||
|
Heating stage |
||||||||||
|
Cooking time |
2mins3mins |
1min3mins |
1min |
3mins10mins |
5mins |
|||||
|
Ragout |
Add oil |
Add meat |
Add veg |
Add liquid |
Keep warm |
|||||
|
main |
||||||||||
|
°C |
140°C |
180°C180°C |
140°C |
95°C |
80°C |
|||||
|
– |
01 |
4 |
9 |
9 |
N/A |
Beef casserole |
||||
|
W |
1200W |
1500W1500W |
1500W |
Auto |
Auto |
|||||
|
Heating stage |
||||||||||
|
Cooking time |
2mins3½mins |
10mins |
4hrs |
30mins |
||||||
|
Broth |
Add oil |
Add veg |
Add liquid |
Add meat/fish |
Keep warm |
|||||
|
°C |
140°C |
130°C130°C |
99°C |
98°C |
80°C |
|||||
|
— |
24 |
9 |
– |
9 |
N/A |
Salmon broth |
||||
|
W |
1200W |
1200W1500W |
Auto |
Auto |
Auto |
|||||
|
Heating stage |
||||||||||
|
Cooking time |
1min5mins |
10mins |
20mins |
30mins |
Note:
•Some programme phases have heating stages that allow ingredients to reach the specified temperature before the phase starts.
•HSHT (as displayed on screen) = High Speed, High Temperature mode

|
programmes |
|||||||||
|
SAVOURY |
Phase 1 (P1) |
Phase 2 (P2) |
Phase 3 (P3) |
Phase 4 (P4) |
Phase 5 (P5) |
Phase 6 (P6) |
Tools used |
Recipe ideas |
|
|
Béchamel |
Add butter |
Add flour |
Add liquid |
Keep warm |
|||||
|
°C |
80°C80°C |
110°C110°C |
99°C |
85°C |
|||||
|
– 0 |
HSHT 6HSHT 6 |
HSHT 6 |
HSHT 6 |
Béchamel sauce, |
|||||
|
W |
750W750W |
1000W750W |
750W |
500W |
N/A |
N/A |
cheese sauce, |
||
|
parsley sauce |
|||||||||
|
Heating stage |
|||||||||
|
Cooking time |
1min15secs |
1min4mins |
15mins |
30mins |
|||||
|
Traditional |
Add oil |
Add veg |
Add liquid |
Keep warm |
|||||
|
sauce |
°C |
120°C |
120°C |
110°C98°C |
80°C |
||||
|
Heating stage |
|||||||||
|
– |
3 |
22 |
9 |
N/A |
N/A |
Tomato pasta sauce |
|||
|
W |
Auto |
Auto |
1500W1500W |
Auto |
|||||
|
Cooking time |
10mins |
4mins15mins |
30mins |
||||||
|
Hollandaise |
Melt butter and |
Add yolks & liquid |
Slowly add melted |
||||||
|
remove |
butter |
||||||||
|
°C |
60°C |
72°C |
72°C |
||||||
|
12 |
2 |
HSHT 6 |
HSHT 6 |
N/A |
N/A |
N/A |
Béarnaise sauce, |
||
|
W |
Auto |
750W |
750W |
Hollandaise sauce |
|||||
|
Heating stage |
|||||||||
|
Cooking time |
10mins |
4mins |
2mins |
Note:
•Some programme phases have heating stages that allow ingredients to reach the specified temperature before the phase starts.
•HSHT (as displayed on screen) = High Speed, High Temperature mode

|
programmes |
|||||||||
|
SWEET |
Phase 1 (P1) |
Phase 2 (P2) |
Phase 3 (P3) |
Phase 4 (P4) |
Phase 5 (P5) |
Phase 6 (P6) |
Tools used |
Recipe ideas |
|
|
White/Milk chocolate |
Add |
Add |
Keep warm |
||||||
|
chocolate 1 |
chocolate 2 |
||||||||
|
tempering |
°C |
42°C42°C |
42°COFF31°C |
31°C |
|||||
|
94 |
444 |
0 |
N/A |
N/A |
N/A |
||||
|
W |
AutoAuto |
AutoAutoAuto |
1000W |
||||||
|
Heating stage |
|||||||||
|
Cooking time |
10mins20mins |
––10mins |
2hrs |
Coating truffles, |
|||||
|
chocolate |
cake decorating |
||||||||
|
Plain chocolate |
Add chocolate 1 |
Add chocolate 2 |
Keep warm |
||||||
|
°C |
47°C47°C |
47°COFF31°C |
31°C |
||||||
|
94 |
444 |
0 |
N/A |
N/A |
N/A |
||||
|
W |
AutoAuto |
AutoAutoAuto |
1000W |
||||||
|
Heating stage |
|||||||||
|
Cooking time |
10mins20mins |
––10mins |
2hrs |
||||||
|
Choux pastry |
Add water & butter |
Add flour |
Add eggs |
||||||
|
13 |
°C |
90°C |
OFF |
OFF |
|||||
|
Profiteroles, |
|||||||||
|
2 |
0 |
Speed 4 |
N/A |
N/A |
N/A |
||||
|
eclairs |
|||||||||
|
W |
Auto |
Auto |
Auto |
||||||
|
doughs |
Heating stage |
||||||||
|
Cooking time |
1min |
– |
– |
||||||
|
Standard Doughs |
Add liquid, flour & |
– |
Proofing |
Knocking back |
|||||
|
yeast |
|||||||||
|
°C |
OFF |
OFF |
28°C |
OFF |
|||||
|
0 |
Speed 1 |
OFF |
0 |
N/A |
N/A |
White bread |
|||
|
W |
OFF |
OFF |
250W |
OFF |
|||||
|
Heating stage |
|||||||||
|
Mixing time |
2mins |
8mins |
1hr |
1min |
Note:
•Some programme phases have heating stages that allow ingredients to reach the specified temperature before the phase starts.
•HSHT (as displayed on screen) = High Speed, High Temperature mode
 Loading…
You can only view or download manuals with
Sign Up and get 5 for free
Upload your files to the site. You get 1 for each file you add
Get 1 for every time someone downloads your manual
Buy as many as you need
|
Detail Specifications: 939/939830-kcc90.pdf file (31 Mar 2023) |
Accompanying Data:
Kenwood KCC90 Food Processor, Mixer PDF Instructions Manual (Updated: Friday 31st of March 2023 05:46:49 AM)
Rating: 4.4 (rated by 65 users)
Compatible devices: KAX720PL, Chef KM300, FP120 series, FP210 series, Chef and Major KMC010 series, MAJOR PRO KMP770 series, KAH740PL, Chef KMC5 series.
Recommended Documentation:
Text Version of Instructions Manual
(Ocr-Read Summary of Contents, UPD: 31 March 2023)
-
10, 7 • If the bowl temperature exceeds 60°C, for safety reasons the speed is automatically limited even if a higher speed has been selected. The speed will not automatically increase when the temperature drops below 60°C. The speed control must be turned to the off ‘O’ position first and the desired speed reselected. See ‘Manual Mode’ section …
-
50, Kenwood KCC90 — — Cooking Chef Cooking Chef �…
-
43, • • : �…
-
36, )( SWEET )P1( )P2( )P3( )P4( )P5( )P6( )( sauces )�…
-
19, Kenwood KCC90 16 programmes SWEET Phase 1 (P1) Phase 2 (P2) Phase 3 (P3) Phase 4 (P4) Phase 5 (P5) Phase 6 (P6) Tools used Recipe ideas sauces Sabayon Add egg, sugar & liquid Keep warm N/A N/A N/A N/A Sabayon °C 74°COFF 50°C HSHT Max HSHT Max HSHT Max W 750WAuto 500W Heating stage ✓ ✗ Cooking time 2mins – 15mins others Pate de Bombe Add eggs & sugar Keep…
-
49, ∞ºö±∑p يبرع l «Ædzw «∞∑FKOLU‹ «∞∑U∞OW Ë«•∑HEw °NU ≠w «∞L∑MUˉ ∞öß∑ªb«±U‹ «∞Lº∑I∂KOW «∞Ld§FOW. l √“¥Kw ±Ju≤U‹ «∞∑GKOn Ë√¥W ±KBIU‹. l ≠w •U∞W ¢Kn «∞ºKp «∞JNd°w, ¥πV «ß∑∂b«∞t _ß∂U» ±∑FKIW °U∞ºö±W ±s Æ∂q DOOWNEK √Ë ±dØe ÅOU≤W �…
-
33, �…
-
24, 21 to remove and fit outlet covers High-speed outlet cover 1 To remove the cover, use the grip and lift upwards. 2 To fit, place the cover over the outlet and push downwards. Slow-speed outlet cover 1 To remove the cover, use the grip on the underside and pull outwards. 2 To fit, locate the catch at the top of the cover into the outlet recess and push to clip into pos…
-
47, Kenwood KCC90 Kenwood Cooking Chef .”English« Cooking Chef …
Recommended Instructions:
850, Hamilton 4040S, 599, OPERATORS CS 2156C, NC-MQN09W


-
Clearly better soundZ4MK4/Z8MK4 Zone MixersGeneral Description The Cloud Z4MK4 and Z8MK4 are multi-zone, rack-mounting (3U) audio mixers. They combine simple control of background music with versatile microphone paging for up to eight separate areas. They are suitable for use in many types of premises, including pubs, bars, clubs, shops, ofces, hotels, etc.Both models have six ste …
Z4MK4 6
-
FP400015 MUK Rev 1Stand MixerGUARANTEE2YEARPlease read and keep these instructions for future use * Register online for your 2 year guarantee. See the back of this instruction book for details (UK and Ireland customers only).www.facebook.com/[email protected]/blogFor competitions, product hints and tipsand more join us atdownload thefree appFP400015 MUK …
Total Control 20
-
ESG 2 Inhaltsverzeichnis 1. Allgemeines 2. Sicherheitshinweise 2.1 Sicherheitsbewusst arbeiten 3 Installation 3.1 Lieferumfang 3.2 Leistungsmerkmale 3.3 Ersatzteile / Zubehör 4. Bedienung 4.1 Bedien- und Kontrollelemente 5. Inbetriebnahme 5.1 Befüllen des Gerätes 5.2 Flaschen- / Kanisterwechsel 6. Pflege und Wartung 7. Service/Kundendienst …
ESG 2 16
-
RemoteMix C+ is covered by a 2 year warranty to be free from defective workmanship and materials. In the event that the RemoteMix C+ needs repair, you must call us to get an authorization, and then carefully pack and ship it to us. You will pay for shipping to us and we will pay for return back to you, UPS ground. No free repairs will be made if the defect was caused by …
RemoteMix C+ 6