Инструкции
| 1 | «Английский, Немецкий» | GET0848-003A.pdf | Загрузить | 798 кб |
| 2 | «Английский, Немецкий, Русский, Украинский» | GET0848-001A.pdf | Загрузить | 1 474 кб |
| 3 | «Английский, Немецкий, Русский, Украинский» | GET0848-006A.pdf | Загрузить | 1 477 кб |
| 4 | «Английский, Русский, Украинский» | GET0848-004A.pdf | Загрузить | 1 123 кб |
| 5 | «Английский, Русский, Украинский» | GET0848-007A.pdf | Загрузить | 1 123 кб |
| 6 | «Английский, Украинский» | GET0848-005A.pdf | Загрузить | 796 кб |
| 7 | «Французский, Голландский, Итальянский, Испанский, Португальский» | GET0848-002A.pdf | Загрузить | 1 732 кб |
Инструкция по эксплуатации
Инструкция по эксплуатации (824,82 kb)
Микропрограммное обеспечение
Список совместимых устройств iPod и iPhone
С помощью данного сайта можно проверить совместимость ресивера KENWOOD и адаптера интерфейса iPod.
Выберите iPod/iPhone и ресивер KENWOOD. Отобразятся информация о совместимости и модель адаптера, необходимая для подключения.
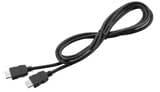
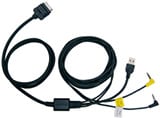
KNA-13HC Высокоскоростной HDMI-кабель
KCA-HD100 Высокоскоростной HDMI-кабель
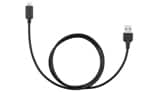
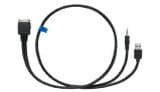
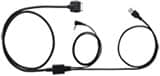
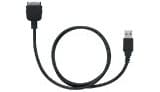
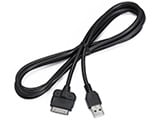
KCA-iP103 USB-кабель для подключения iPod (аудио)
Кабель Lightning/USB Кабель Lightning/USB
Bluetooth Для прослушивания музыки через Bluetooth
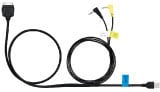
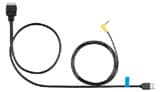
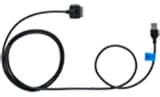
KCA-iP302 Прямой видео/аудиокабель iPhone и iPod для визуальной модели KENWOOD
KCA-iP212 Прямой видео/аудиокабель iPhone и iPod для визуальной модели KENWOOD
KCA-iP202 Прямой видео/аудиокабель iPhone и iPod для визуальной модели KENWOOD
KCA-iP22F Прямой видео/аудиокабель iPhone и iPod для визуальной модели KENWOOD
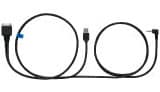
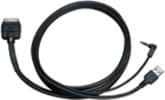
KCA-iP102 Прямой аудиокабель iPhone и iPod для аудиомодели KENWOOD
KCA-iP301V Прямой видео/аудиокабель iPhone и iPod для визуальной модели KENWOOD
KCA-iP240V Прямой видео/аудиокабель iPhone и iPod для визуальной модели KENWOOD
KCA-iP101 Прямой аудиокабель iPhone и iPod для аудиомодели KENWOOD
KCA-iP300V Прямой видео/аудиокабель iPod для визуальной модели KENWOOD
KCA-iP100 Прямой аудиокабель iPod для аудиомодели KENWOOD
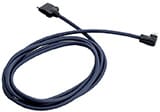
KCA-iP200 Прямой аудиокабель iPod для аудиомодели KENWOOD
KCA-iP500 Интерфейсный аудионабор iPod
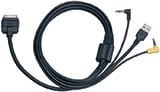
KNA-i909 Интерфейсный видео/аудиокабель iPhone 3G/iPod для навигационной модели KENWOOD (Япония)
KNA-i990 Интерфейсный видео/аудиокабель iPod для навигационной модели KENWOOD (Япония)
KNA-i770 Интерфейсный видео/аудиокабель iPod для навигационной модели KENWOOD (Япония)
KNA-i77 Интерфейсный видео/аудиокабель iPod для навигационной модели KENWOOD (Япония)
Подключение iPod/iPhone
Вы не можете подключить iPod в качестве источника.
Подключайте следующим образом:
Для прослушивания музыки и просмотра видео
KNA-13HC + KCA-iP103
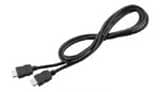  |
・Высокоскоростной HDMI-кабель
|

KNA-13HC
|
Высокоскоростной HDMI-кабель・Подключите устройство к iPod/iPhone с помощью рекомендуемого KENWOOD HDMI-кабеля и цифрового AV-адаптера Lightning фирмы Apple, кабель Lightning/USB (принадлежность iPod/iPhone).
・Требуются также настройки Bluetooth. |

KCA-HD100 + KCA-iP103
 |
・Высокоскоростной HDMI-кабель
|

KCA-HD100
|
Высокоскоростной HDMI-кабель・Подключите устройство к iPod/iPhone с помощью рекомендуемого KENWOOD HDMI-кабеля и цифрового AV-адаптера Lightning фирмы Apple, кабель Lightning/USB (принадлежность iPod/iPhone).
・Требуются также настройки Bluetooth. |

KCA-iP302
 |
Прямой видео/аудиокабель iPhone и iPod для визуальной модели KENWOOD |
KCA-iP212
 |
Прямой видео/аудиокабель iPhone и iPod для визуальной модели KENWOOD |
KCA-iP202
 |
Прямой видео/аудиокабель iPhone и iPod для визуальной модели KENWOOD |
KCA-iP22F
 |
Прямой видео/аудиокабель iPhone и iPod для визуальной модели KENWOOD |
KCA-iP301V
 |
Прямой видео/аудиокабель iPhone и iPod для визуальной модели KENWOOD |
KCA-iP240V
 |
Прямой видео/аудиокабель iPhone и iPod для визуальной модели KENWOOD |
KCA-iP300V
 |
Прямой видео/аудиокабель iPod для визуальной модели KENWOOD |
KNA-i909
 |
Интерфейсный видео/аудиокабель iPhone 3G/iPod для навигационной модели KENWOOD (Япония) |
Для прослушивания музыки
Включите модель
KCA-iP103
|
USB-кабель для подключения iPod (аудио) |
Кабель Lightning/USB
Кабель Lightning/USB・ Во избежание повреждения кабеля Lightning/USB (принадлежность iPod/iPhone) от чрезмерного нагревания не храните его в автомобиле. |
Bluetooth
 |
Для прослушивания музыки через Bluetooth.・Для подключения требуются настройки Bluetooth. |
KCA-iP102
 |
Прямой аудиокабель iPhone и iPod для аудиомодели KENWOOD |
KCA-iP101
 |
Прямой аудиокабель iPhone и iPod для аудиомодели KENWOOD |
KCA-iP100
 |
Прямой аудиокабель iPod для аудиомодели KENWOOD |
KCA-iP200
 |
Прямой аудиокабель iPod для аудиомодели KENWOOD |
KCA-iP500
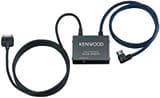 |
Интерфейсный аудионабор iPod
ЗамечанияОбщие примечания・Перед соединением KCA-iP500 с управляющим устройством KENWOOD, загрузите в ваш iPod только самую последнюю версию программного обеспечения с официального сайта Apple. ・Отображение информации зависит от возможностей дисплея головного устройства. ・В зависимости от подключенного управляющего устройства название источника может быть отображено как «»EXT-MEDIA»», «»*-MEDIA»» или CD-чейнджер («»CD-CH»» и т.д.). ・Функция DNPS (Установка названия диска) управляющего устройства невозможна с KCA-iP500. ・После подключения вашего iPod к KCA-iP500, первой песней в списке воспроизведения станет та, которую вы проигрывали при последнем использовании вашего iPod. На дисплее будет отображено «RESUMING» (Возобновление воспроизведения), поскольку правильное название песни и ее номер не могут быть указаны. |
KNA-i990
 |
Интерфейсный видео/аудиокабель iPod для навигационной модели KENWOOD (Япония) |
KNA-i770
 |
Интерфейсный видео/аудиокабель iPod для навигационной модели KENWOOD (Япония) |
KNA-i77
 |
Интерфейсный видео/аудиокабель iPod для навигационной модели KENWOOD (Япония) |
Список функций iPod
| Адаптер интерфейса iPod |
Включите модель KNA-13HC KCA-HD100 KCA-iP103 Кабель Lightning/USB Bluetooth KCA-iP302 KCA-iP212 KCA-iP202 KCA-iP22F KCA-iP102 KCA-iP301V KCA-iP240V KCA-iP101 KCA-iP300V KCA-iP100 KCA-iP200 KNA-i909 KNA-i990 KNA-i770 KNA-i77 |
KCA-iP500 |
|
|---|---|---|---|
| Основные операции | |||
| Метки iTunes | HD Radio™ *1 | ||
| RBDS FM | |||
| SiriusXM *1 | |||
| Режим контроля приложения и iPod/ Режим контроля iPod вручную |
|||
| Эквалайзер iPod | |||
| Поиск по алфавиту | |||
| Пропуск при поиске | |||
| Связанный поиск | |||
| Внешний режим |
・да = функция поддерживается и подтверждена.
нет = Функция не поддерживается приемником KENWOOD.
Внимание
Use of the Made for Apple badge means that an accessory has been designed to connect specifically to the Apple product(s) identified in the badge, and has been certified by the developer to meet Apple performance standards. Apple is not responsible for the operation of this device or its compliance with safety and regulatory standards.
Apple, iPhone, iPod, iPod classic, iPod nano, iPod touch, and Lightning are trademarks of Apple Inc., registered in the U.S. and other countries. iPod mini is a trademark of Apple Inc.
![]() К началу страницы
К началу страницы
Характеристики аудио файлов
О форматах AAC, MP3 и WMA
Воспроизводимый файл AAC/MP3/WMA (здесь и далее называемый «аудиофайлом») и формат носителя информации имеют следующее ограничение. Не соответствующий спецификации аудио файл может воспроизводиться неправильно, либо могут неправильно отображаться имена файлов и папок.
Воспроизводимый аудио файл
| MP3 | Расширение | .mp3 |
|---|---|---|
| Формат | Аудио файл MPEG 1/2 с уровнем передачи данных 3 | |
| Скорость передачи данных | 8-320 кбит/с / переменная скорость передачи в битах | |
| Частота дискретизации | 8/ 11,025/ 12/ 16/ 22,05/ 24/ 32/ 44,1/ 48 кГц | |
| Joint STEREO | ||
| Тегирование ID3 (вер.1) | Вер1.0/ 1.1 (название/ исполнитель/ альбом) | |
| Тегирование ID3 (вер.2) | Версия 2.2/ 2.3/ 2.4 (Название/ Исполнитель/ Альбом: Не поддерживает показ изображений.) | |
| WMA | Расширение | .wma |
| Формат | Файл в соответствии с Windows Media Audio (кроме файла для Windows Media Player 9 или более поздней версии, в котором реализованы новые функции) |
|
| Скорость передачи данных | 32-192 кбит/с / переменная скорость передачи в битах | |
| Частота дискретизации | 32/ 44,1/ 48 кГц | |
| Файл DRM | — | |
| Профессиональный | — | |
| Без потерь | — | |
| Голос | — | |
| Тегирование WMA (описание содержимого) | ||
| Тегирование WMA (расширенное описание содержимого) | ||
| AAC-LC | Расширение | .m4a |
| Формат | «.m4a» закодирован в формате AAC-LC. *1 | |
| Скорость передачи данных | 8-320 кбит/с | |
| Частота дискретизации | 8/ 11,025/ 12/ 16/ 22,05/ 24/ 32/ 44,1/ 48 кГц | |
| Файл DRM | — | |
| 2-канальный | ||
| Многоканальный | — | |
| Тегирование ID3 (вер.2) | — | |
| Метаданные iTunes m4a (данные о композиции) |
・Не присваивайте эти расширения другим файлам, не являющимся аудио файлами. Если присвоить это расширение файлу, который не является аудио файлом, он будет воспроизводиться и издавать громкий шум, в результате чего будут повреждены акустические системы.
・Файл с защитой от копирования не может воспроизводиться.
・Аудио файлы могут не воспроизводиться в зависимости от настроек программного обеспечения кодирования, вида устройства USB и/или условий записи.
・Данное устройство может быть несовместимо с обновленным стандартом формата сжатия и дополнительными характеристиками.
・В некоторых случаях возможен некорректный показ времени воспроизведения, что объясняется условиями записи аудио файла.
・Функция «Supreme» не применима для композиций, закодированных при переменной скорости передачи в битах.
・*1 Файл AAC соответствует файлу MPEG4 AAC (.m4a), закодированному программой iTunes.
Файловые системы воспроизводимых носителей информации
| CD-R/RW | Файловая система (Windows) | ISO 9660 Уровень 1/2 | |
|---|---|---|---|
| ISO 9660 Уровень 3 | — | ||
| Romeo | |||
| Joliet | |||
| Длинное имя файла | |||
| Файловая система (Macintosh) | — | ||
| Файловая система (UNIX) | — | ||
| Дозаписываемый | |||
| Устройство USB | Файловая система (Windows) *2 | FAT16 | |
| FAT32 | |||
| Файловая система (Macintosh) | — | ||
| Файловая система (UNIX) | — |
・Компакт-диски типа CD-RW, отформатированные программой записи быстрым способом, использоваться не могут.
・При записи максимального объема носителя CD-R/RW задается параметр «Disc at once» записывающего программного обеспечения.
・Рекомендуется использовать формат Joliet для файловой системы диска CD-R/RW. При использовании других файловых систем изображение может отображаться некорректно вследствие неподходящего рабочего режима.
・*1 При использовании дисков CD-DA/смешанных дисков с аудиофайлами данный аппарат воспроизводит только материал, записанный во время первой сессии.
・*2 Разбиение на разделы : не поддерживает (некоторые устройства USB могут иметь много разделов, невидимых в операционной системе Windows.)
・При невозможности воспроизвести диск CD-R/RW, записанный в формате CD-ROM MODE 2 (XA), перезапишите его с использованием формата записи CD-ROM MODE 1.
Ограничение структуры файла и папки
| CD-R/RW | Максимальное количество уровней каталогов | 8 |
|---|---|---|
| Максимальное количество папок | 50 | |
| Максимальное количество файлов в папке | 255 | |
| Максимальное количество файлов и папок | 512 | |
| Устройство USB | Максимальное количество уровней папок | 8 |
| Максимальное количество папок (на устройство) *1 | 255 | |
| Максимальное количество файлов (на папку) | 255 | |
| Максимальное количество файлов и папок (на устройство) | 65025 |
・Иногда воспроизведение начинается не сразу, и время ожидания зависит от условий записи (например, иерархии файлов и структуры папок).
・*1 Сюда относится корневая папка (папка верхнего уровня). Число папок, отображаемое на ПК, меньше на 1.
Максимальное количество отображаемых символов
| Имя файла/папки | 64 символа (Joliet: 32 символа) | |
|---|---|---|
| Тегирование MP3 ID3 | Вер. 1.x | 30 символов |
| Вер. 2.x | 60 символов | |
| Свойство содержимого WMA | 60 символов | |
| Сведения о композиции AAC | 60 символов |
・Количество символов зависит от размера в байтах.
・Имя файла/папки представляет собой количество символов, включая расширения.
・Данное устройство может показывать ID3 метки MP3 следующих версий: 1.0/ 1.1/ 2.2/ 2.3/ 2.4
・Тегирование AAC ID3 не может отображаться.
Порядок воспроизведения аудио файла
・Аудио файлы воспроизводятся в том порядке, в каком они были записаны программным обеспечением CD. Вы можете установить порядок воспроизведения, записав номера последовательности воспроизведения (например, от «01» до «99»), в начале имени файла.
・Аудио файлы воспроизводятся в порядке расположения имен файлов. Можно задать порядок воспроизведения файлов, пронумеровав файлы в папке. (устройство USB)
Пример
![]() К началу страницы
К началу страницы
Об устройстве USB
Примечания по поводу использования устройства USB
Данное устройство может воспроизводить аудио файлы, хранимые во флэш-памяти или на цифровом аудиоплеере с портом USB (в настоящем документе эти устройства называются устройствами USB)
Следующие ограничения распространяются на виды и использование имеющихся в продаже устройств USB.
Имеющиеся устройства USB
| Стандарт USB | USB 1.1 / USB 2.0 |
|---|---|
| Скорость передачи | Максимальная скорость (12 Мбит/с) |
| Класс USB | Класс накопителя (устройство MSC) |
| Подкласс USB | SCSI |
| Протокол | Только для передачи массивов данных |
| Источник питания | Макс. 1 А |
・Устройства USB класса массовой памяти:
Устройства USB, которые ПК может распознать как внешние устройства хранения без использования особого драйвера или программного приложения.
・Обратитесь к торговому агенту, чтобы уточнить, соответствует ли ваше устройство USB характеристикам USB класса массовой памяти.
・Использование неподдерживаемого устройства USB может привести к некорректному воспроизведению или отображению аудио файла.
Даже в случае использования устройства USB, соответствующего вышеуказанным характеристикам, аудио файлы могут не воспроизводиться корректно в зависимости от вида или состояния устройства USB.
・При использовании определенных устройств USB некоторые функции ограничены.
・Нормальный режим работы и питания не гарантируется для всех устройств USB.
О подключении устройства USB
・Не подключайте устройство USB непосредственно к соединителю USB на панели. Подключите его с помощью кабеля.
・При подключении устройства USB рекомендуется использовать CA-U1EX (макс. 500 мА: дополнительная опция).
・При использовании кабеля, не совместимого с USB, нормальное воспроизведение не гарантируется. Подключение кабеля, общая длина которого превышает 5 м, может привести к некорректному воспроизведению.
・Вы не можете подключить устройство USB через концентратор USB.
|
・Установите устройство USB в том месте, где оно не помешает вашему передвижению. ・Не оставляйте надолго устройство USB в транспортном средстве. Оно может повредиться или выйти из строя в результате действия прямого солнечного света, высокой температуры и т.д. ・Возьмите с собой резервные копии аудио файлов, используемых с данным устройством. Эти файлы можно стереть в зависимости от условий эксплуатации устройства USB. Мы не несем никакой ответственности за ущерб, понесенный в связи со стиранием хранящихся данных. ・Когда вы не используете устройство USB, крышка должна быть надета. |
![]() К началу страницы
К началу страницы

-
Contents
-
Table of Contents
-
Troubleshooting
-
Bookmarks
Quick Links
KDC-4557U
KDC-4057UB
KDC-4057UR
KDC-3457UQ
CD-RECEIVER
INSTRUCTION MANUAL
CD-RECEIVER
BEDIENUNGSANLEITUNG
© 2012 JVC KENWOOD Corporation
KDC-3357UY
KDC-3257URY
KDC-3057UG
KDC-3057UR
KDC-3057URY
KDC-317UR
GET0848-003A (EW/E0)
Related Manuals for Kenwood KDC-4057UB
Summary of Contents for Kenwood KDC-4057UB
-
Page 1
KDC-4557U KDC-3357UY KDC-3057URY KDC-4057UB KDC-3257URY KDC-317UR KDC-4057UR KDC-3057UG KDC-3457UQ KDC-3057UR CD-RECEIVER INSTRUCTION MANUAL CD-RECEIVER BEDIENUNGSANLEITUNG © 2012 JVC KENWOOD Corporation GET0848-003A (EW/E0) -
Page 2
Batteries (applicable for EU countries that have adopted separate waste EU Representative’s: collection systems) Kenwood Electronics Europe BV Products and batteries with the symbol (crossed-out wheeled bin) cannot be Amsterdamseweg 37, 1422 AC UITHOORN, The Netherlands disposed as household waste. -
Page 3
The marking of products using lasers The label is attached to the chassis/case and says that the component uses laser beams that have been classified as Class 1. It means that the unit is utilizing laser beams that are of a weaker class. There is no danger of hazardous radiation outside the unit. -
Page 4: Table Of Contents
CONTENTS BEFORE USE BEFORE USE Warning Do not operate any function that takes your attention away from safe driving. BASICS GETTING STARTED Caution Volume setting: RADIO • Adjust the volume so that you can hear sounds outside the car to prevent accident. •…
-
Page 5: Basics
BASICS Faceplate Remote control (RC-406) KDC — 3357UY (supplied for Volume knob Attach (turn/press) Loading slot Remote sensor (Do not expose to bright sunlight.) Detach Pull out the insulation sheet * Not used. when using for the first time. Detach KDC — 4557U KDC — 4057UB button KDC — 4057UR…
-
Page 6: Getting Started
Then, perform steps above to set the clock. F/W UPDATE F/W UP xx.xx YES: Starts upgrading the firmware. ; NO: Cancels (upgrading is not activated). For details on how to update the firmware, see: www.kenwood.com/cs/ce/…
-
Page 7: Radio
RADIO Default: XX LOCAL SEEK ON: Searches only FM stations with good reception. ; OFF: Cancels. Selects the tuning method for the 4 / ¢ buttons. SEEK MODE AUTO1: Automatically searches for a station. ; AUTO2: Searches for a preset station. ; MANUAL: Manually search for a station.
-
Page 8: Cd / Usb / Ipod
The source changes to USB and playback • AAC/MP3/WMA file: Select the desired folder, then a file. starts. • iPod or KENWOOD Music Editor Light (KME Light)/ KENWOOD Music Control (KMC) file * : Select the desired file from the list (PLAYLISTS,…
-
Page 9: Aux
CD / USB / iPod Preparation: Direct Music Search (using RC-406) Set the skip ratio Select [ON] for [BUILTIN AUX]. (➜ 4) KDC — 3357UY (for KDC — 4557U While listening to iPod (for Press DIRECT. KDC — 4057UB KDC — 4057UR ) or KME Light/ KMC Start listening Press the number buttons to enter a track/file…
-
Page 10: Audio Settings
AUDIO SETTINGS While listening to any source… LOUDNESS LOUD LV1/ LOUD LV2: Selects your preferred low and high frequencies boost Press the volume knob to enter [FUNCTION]. to produce a well-balanced sound at a low volume level. ; OFF: Cancels. Turn the volume knob to select [AUDIO CTRL], then press the knob.
-
Page 11: Display Settings
Although the audio files are complied with [USER]. • You cannot operate iPod if “KENWOOD” or the standards listed above, playback maybe 1 Press and hold the volume knob to enter the detailed color adjustment.
-
Page 12: Troubleshooting
TROUBLESHOOTING Symptom Remedy Symptom Remedy Sound cannot be heard. • Adjust the volume to the optimum level. “USB ERROR” appears. • Remove the USB device, turn the unit off, then turn it on • Check the cords and connections. again. •…
-
Page 13: Specifications
SPECIFICATIONS KDC — 4557U KDC — 4057UB FM Frequency Range USB Standard USB 1.1, USB 2.0 (Full speed) KDC — 4057UR KDC — 3357UY Maximum Supply Current DC 5 V KDC — 3257URY KDC — 3057UG File System FAT16/ 32 KDC — 3057UR KDC — 3057URY KDC — 317UR…
-
Page 14: Installation / Connection
Installating the unit (in-dash mounting) Warning • The unit can only be used with a 12 V DC power supply, negative ground. Do the required • Disconnect the battery’s negative terminal before wiring and wiring. (➜ 13) mounting. • Do not connect Battery wire (yellow) and Ignition wire (red) to the car chassis or Ground wire (black) to prevent a short circuit.
-
Page 15: Wiring Connection
To the terminal that is grounded when either the telephone rings or during conversation. ( ×1 ) (Mute control wire) (To connect the Kenwood navigation system, consult your navigation manual.) MUTE E Extraction key Connecting the ISO connectors on some VW/…
Смотреть руководство для Kenwood KDC-4057U ниже. Все руководства на ManualsCat.com могут просматриваться абсолютно бесплатно. Нажав кнопку «Выбор языка» вы можете изменить язык руководства, которое хотите просмотреть.

MANUALSCAT | RU
Вопросы и ответы
У вас есть вопрос о Kenwood KDC-4057U, но вы не можете найти ответ в пользовательском руководстве? Возможно, пользователи ManualsCat.com смогут помочь вам и ответят на ваш вопрос. Заполните форму ниже — и ваш вопрос будет отображаться под руководством для Kenwood KDC-4057U. Пожалуйста, убедитесь, что вы опишите свои трудности с Kenwood KDC-4057U как можно более детально. Чем более детальным является ваш вопрос, тем более высоки шансы, что другой пользователь быстро ответит на него. Вам будет автоматически отправлено электронное письмо, чтобы проинформировать вас, когда кто-то из пользователей ответит на ваш вопрос.
Задать вопрос о Kenwood KDC-4057U
- Бренд:
- Kenwood
- Продукт:
- автомагнитолы
- Модель/название:
- KDC-4057U
- Тип файла:
- Доступные языки:
- немецкий
Сопутствующие товары Kenwood KDC-4057U
Посмотреть инструкция для Kenwood KDC-4057UB бесплатно. Руководство относится к категории автомагнитолы, 1 человек(а) дали ему среднюю оценку 7.9. Руководство доступно на следующих языках: английский. У вас есть вопрос о Kenwood KDC-4057UB или вам нужна помощь? Задайте свой вопрос здесь
Не можете найти ответ на свой вопрос в руководстве? Вы можете найти ответ на свой вопрос ниже, в разделе часто задаваемых вопросов о Kenwood KDC-4057UB.
Какой вес Kenwood KDC-4057UB?
В чем разница между FM и AM?
Когда звук считается слишком громким?
Автомобильный радиоприемник не включается, что делать?
Как лучше всего выполнять чистку автомагнитола?
Инструкция Kenwood KDC-4057UB доступно в русский?
Не нашли свой вопрос? Задайте свой вопрос здесь
![]()
KDC-4557U KDC-4057UB KDC-4057UR KDC-3457UQ
KDC-3357UY KDC-3057URY KDC-3257URY KDC-317UR KDC-3057UG
KDC-3057UR
CD-RECEIVER
INSTRUCTION MANUAL
CD-RECEIVER
BEDIENUNGSANLEITUNG
|
© 2012 JVC KENWOOD Corporation |
GET0848-003A (EW/E0) |

Information on Disposal of Old Electrical and Electronic Equipment and Batteries (applicable for EU countries that have adopted separate waste collection systems)
Products and batteries with the symbol (crossed-out wheeled bin) cannot be disposed as household waste.
Old electrical and electronic equipment and batteries should be recycled at a facility capable of handling these items and their waste byproducts.
Contact your local authority for details in locating a recycle facility nearest to you. Proper recycling and waste disposal will help conserve resources whilst preventing detrimental effects on our health and the environment.
Notice: The sign “Pb” below the symbol for batteries indicates that this battery contains lead.
Entsorgung von gebrauchten elektrischen und elektronischen Geräten und Batterien (anzuwenden in den Ländern der Europäischen Union und anderen europäischen Ländern mit einem separaten Sammelsystem für solche Geräte)
Das Symbol (durchgestrichene Mülltonne) auf dem Produkt oder seiner Verpackung weist darauf hin, dass dieses Produkt nicht als normaler Haushaltsabfall behandelt werden darf, sondern an einer Annahmestelle für das Recycling von elektrischen und elektronischen Geräten und batterien abgegeben werden muss.
Durch Ihren Beitrag zur korrekten Entsorgung dieses Produktes schützen Sie die Umwelt und die Gesundheit Ihrer Mitmenschen.
Unsachgemässe oder falsche Entsorgung gefährden Umwelt und Gesundheit. Weitere Informationen über das Recycling dieses Produktes erhalten Sie von Ihrer Gemeinde oder den kommunalen Entsorgungsbetrieben.
Achtung: Das Zeichen „Pb“ unter dem Symbol fur Batterien zeigt an, dass diese Batterie Blei enthalt.
Declaration of Conformity with regard to the EMC Directive 2004/108/EC Manufacturer:
JVC KENWOOD Corporation
3-12, Moriya-cho, Kanagawa-ku, Yokohama-shi, Kanagawa, 221-0022, Japan
EU Representative’s:
Kenwood Electronics Europe BV
Amsterdamseweg 37, 1422 AC UITHOORN, The Netherlands
Konformitätserklärung in Bezug auf die EMC-Vorschrift 2004/108/EC Hersteller:
JVC KENWOOD Corporation
3-12, Moriya-cho, Kanagawa-ku, Yokohama-shi, Kanagawa, 221-0022, Japan
EU-Vertreter:
Kenwood Electronics Europe BV
Amsterdamseweg 37, 1422 AC UITHOORN, Niederlande
This Product is not installed by the manufacturer of a vehicle on the production line, nor by the professional importer of a vehicle into an EU Member State.
Dieses Produkt wird weder vom Hersteller eines Fahrzeugs während der Produktion noch von einem professionellen Importeur eines Fahrzeugs in einen EUMitgliedsstaat eingebaut.
i

The marking of products using lasers
The label is attached to the chassis/case and says that the component uses laser beams that have been classified as Class 1. It means that the unit is utilizing laser beams that are of a weaker class. There is no danger of hazardous radiation outside the unit.
Kennzeichnung von Geräten mit Laser-Abtastern
Das Etikett ist am Chassis/Gehäuse angebracht und besagt, dass sich die Komponente Laserstrahlen bedient, die als Laserstrahlen der Klasse 1 klassifiziert wurden. Dies weist darauf hin, dass sich das Gerät Laserstrahlen bedient, die einer schwächeren Klasse angehören. Das bedeutet, dass durch den sehr schwachen Laserstrahl keine Gefahr durch gefährliche Strahlungen außerhalb des Geräts besteht.
For Turkey
Bu ürün 28300 sayılı Resmi Gazete’de yayımlanan Atik Elektrikli ve Elektronik Eşyalarin Kontrolü Yönetmeliğe uygun olarak üretilmiştir.
Eski Elektrik ve Elektronik Ekipmanların İmha Edilmesi Hakkında Bilgi (ayrı atık toplama sistemlerini kullanan ülkeleri için uygulanabilir)
Sembollü (üzerinde çarpı işareti olan çöp kutusu) ürünler ev atıkları olarak atılamaz.
Eski elektrik ve elektronik ekipmanlar, bu ürünleri ve ürün atıklarını geri dönüştürebilecek bir tesiste değerlendirilmelidir. Yaşadığınız bölgeye en yakın geri dönüşüm tesisinin yerini öğrenmek için yerel makamlara müracaat edin. Uygun geri dönüşüm ve atık imha yöntemi sağlığımız ve çevremiz üzerindeki zararlı etkileri önlerken kaynakların korunmasına da yardımcı olacaktır.
ii

CONTENTS
|
BEFORE USE |
2 |
|
BASICS |
3 |
|
GETTING STARTED |
4 |
|
RADIO |
5 |
|
CD / USB / iPod |
6 |
|
AUX |
7 |
|
AUDIO SETTINGS |
8 |
|
DISPLAY SETTINGS |
9 |
|
MORE INFORMATION |
9 |
|
TROUBLESHOOTING |
10 |
|
SPECIFICATIONS |
11 |
|
INSTALLATION / CONNECTION |
12 |
How to read this manual
•Operations explained mainly using buttons on the faceplate.
•[XX] indicates the selected items.
•( XX) indicates references are available on the stated page number.
BEFORE USE
 Warning
Do not operate any function that takes your attention away from safe driving.
 Caution
Volume setting:
•Adjust the volume so that you can hear sounds outside the car to prevent accident.
•Lower the volume before playing digital sources to avoid damaging the speakers by the sudden increase of the output level.
General:
•Avoid using the USB device or iPod/iPhone if it might hinder driving safety.
•Make sure all important data has been backed up. We shall bear no responsibility for any loss of recorded data.
•Never put or leave any metallic objects (such as coins or metal tools) inside the unit, to prevent a short circuit.
•If a disc error occurs due to condensation on the laser lens, eject the disc and wait for the moisture to evaporate.
Remote control (RC-406):
•Do not leave the remote control in hot places such as on the dashboard.
•The Lithium battery is in danger of explosion if replaced incorrectly. Replace it only with the same or equivalent type.
•The battery pack or batteries shall not be exposed to excessive heat such as sunshine, fire or the like.
•Keep battery out of reach of children and in original package until ready to use. Dispose of used batteries promptly. If swallowed, contact a physician immediately.
Maintenance
Cleaning the unit: Wipe off dirt on the faceplate with a dry silicon or soft cloth.
Cleaning the connector: Detach the faceplate and clean the connector with a cotton swab gently, being careful not to damage the connector.
Handling discs:
•Do not touch the recording surface of the disc.
•Do not stick tape etc. on the disc, or use a disc with tape stuck on it.
•Do not use any accessories for the disc.
•Clean from the center of the disc and move outward.
•Clean the disc with a dry silicon or soft cloth. Do not use any solvents.
•When removing discs from this unit, pull them out horizontally.
•Remove burrs from the center hole and disc edge before inserting a disc.
Connector (on the reverse side of the faceplate)
2

BASICS
Faceplate
|
Volume knob |
|
|
(turn/press) |
Loading slot |
|
Detach |
KDC-4557U KDC-4057UB |
|
|
button |
||
|
KDC-4057UR |
KDC-3457UQ
 KDC-3357UY
KDC-3257URY
 KDC-3057UG
KDC-3057UR
 KDC-3057URY
KDC-317UR
|
To |
Do this (on the faceplate) |
|
Turn on the power |
Press L SRC. |
|
• Press and hold to turn off the power. |
Attach
Detach
How to reset
Your preset adjustments will also be erased.
Remote control (RC-406)
(supplied for KDC-3357UY )
 Remote sensor (Do not expose to bright sunlight.)
|
Pull out the |
|
|
* Not used. |
insulation sheet |
|
when using for |
|
|
the first time. |
How to replace the battery
Do this (on the remote control)
Press and hold SRC to turn off the power.
( Pressing SRC does not turn on the power. )
|
Adjust the volume |
Turn the volume knob. |
Press VOL or VOL . |
|
|
Press ATT during playback to attenuate the sound. |
|||
|
• Press again to cancel. |
|||
|
Select a source |
Press L SRC repeatedly. |
Press SRC repeatedly. |
|
|
Change the display |
Press SCRL DISP repeatedly. |
( not available ) |
|
|
information |
• Press and hold to scroll the current display information. |
||
ENGLISH | 3

GETTING STARTED
1Cancel the demonstration
When you turn on the power (or after you reset the unit), the display shows: “CANCEL DEMO” “PRESS” “VOLUME KNOB”
1Press the volume knob.
[YES] is selected for the initial setup.
2Press the volume knob again.
“DEMO OFF” appears.
2
Set the clock
1 Press the volume knob to enter [FUNCTION].
2 Turn the volume knob to select [SETTINGS], then press the knob. 3 Turn the volume knob to select [CLOCK], then press the knob.
4 Press the volume knob to select [CLOCK ADJ].
5 Turn the volume knob to adjust the hour, then press the knob.
6Turn the volume knob to adjust the minute, then press the knob.
Press 4 / ¢ to move between the hour and minute adjustment.
7Press and hold  to exit. (or)
Press and hold SCRL DISP to enter clock adjustment mode directly while in clock display screen.
Then, perform steps 5 and 6 above to set the clock.
3Set the initial settings
1 Press  SRC to enter [STANDBY].
2 Press the volume knob to enter [FUNCTION].
3 Turn the volume knob to select [INITIAL SET], then press the knob.
4Turn the volume knob to make a selection (see the table below), then press the knob.
5Press and hold  to exit.
•To return to the previous hierarchy, press  .
.
|
Default: XX |
||
|
PRESET TYPE |
NORM: Memorizes one station for each preset button in each band (FM1/ FM2/ FM3/ |
|
|
MW/ LW). ; MIX: Memorizes one station for each preset button regardless of the |
||
|
selected band. |
||
|
KEY BEEP |
ON: Activates the keypress tone. ; OFF: Deactivates. |
|
|
RUSSIAN SET |
ON: Folder name, file name, song title, artist name, album name are displayed in |
|
|
Russian (if applicable). ; OFF: Cancels. |
||
|
P-OFF WAIT |
Applicable only when the demonstration mode is turned off. |
|
|
Sets the duration when the unit will automatically turns off (while in standby mode) |
||
|
to save the battery. |
||
|
–––: Cancels ; 20M: 20 minutes ; 40M: 40 minutes ; 60M: 60 minutes |
||
|
BUILTIN AUX |
ON: Enables AUX in source selection. ; OFF: Disables. ( 7) |
|
|
CD READ |
1: Automatically distinguishes between audio file disc and music CD. ; 2: Forces to play |
|
|
as a music CD. No sound can be heard if an audio file disc is played. |
||
|
SWITCH PRE |
REAR/ SUB-W: Selects whether rear speakers or a subwoofer are connected to the |
|
|
line out terminals on the rear (through an external amplifier). |
||
|
SP SELECT |
OFF/ 5/4/ 6 × 9/6/ OEM: Selects according to the speaker size (5 inches or |
|
|
4 inches, 6×9 inches or 6 inches) or OEM speakers for optimum performance. |
||
|
F/W UPDATE |
||
|
F/W UP xx.xx |
YES: Starts upgrading the firmware. ; NO: Cancels (upgrading is not activated). |
|
|
For details on how to update the firmware, see: www.kenwood.com/cs/ce/ |
||
4

RADIO
Search for a station
1 Press L SRC to select TUNER.
2Press  repeatedly (or press *AM– / #FM+ on RC-406) to select FM1/ FM2/ FM3/ MW/ LW.
3 Press 4 / ¢ to search for a station.
•To store a station: Press and hold one of the number buttons (1 to 6).
•To select a stored station: Press one of the number buttons (1 to 6)
Direct Access Tuning (using RC-406) (for KDC-3357UY )
1 Press *AM– / #FM+ to select a band.
2Press DIRECT to enter Direct Access Tuning.
“– – – • –” (for FM) or “– – – –” (for MW/ LW) appears on the display.
3 Press the number buttons to enter a frequency. 4 Press 4 / ¢ (+) to search for a frequency.
•To cancel, press  .
.
•If no operation is done for 10 seconds after step 3, Direct Access Tuning is automatically canceled.
Other settings
1 Press the volume knob to enter [FUNCTION].
2 Turn the volume knob to select [SETTINGS], then press the knob.
3Turn the volume knob to make a selection (see the table on the right), then press the knob.
4 Press and hold  to exit.
|
Default: XX |
||
|
LOCAL SEEK |
ON: Searches only FM stations with good reception. ; OFF: Cancels. |
|
|
SEEK MODE |
Selects the tuning method for the 4 / ¢ buttons. |
|
|
AUTO1: Automatically searches for a station. ; AUTO2: Searches for a preset station. ; |
||
|
MANUAL: Manually search for a station. |
||
|
AUTO |
YES: Automatically starts memorizing 6 stations with good reception. ; NO: Cancels. |
|
|
MEMORY |
(Selectable only if [NORM] is selected for [PRESET TYPE].) ( 4) |
|
|
MONO SET |
ON: Improves the FM reception, but the stereo effect may be lost. ; OFF: Cancels. |
|
|
PTY SEARCH |
Press the volume knob to enter PTY language selection. Turn the volume knob to select the |
|
|
PTY language (ENGLISH/ FRENCH/ GERMAN), then press the knob. |
||
|
Selects the available Program Type (see below), then, press 4 / ¢ to start. |
||
|
TI |
ON: Allows the unit to temporarily switch to Traffic Information. ; OFF: Cancels. |
|
|
NEWS SET |
00M – 90M: Sets the time for receiving the next news bulletin. ; OFF: Cancels. |
|
|
AF SET |
ON: Automatically searches for another station broadcasting the same program in the |
|
|
same Radio Data System network with better reception when the current reception is |
||
|
poor. ; OFF: Cancels. |
||
|
REGIONAL |
ON: Switches to another station only in the specific region using the “AF” control. ; |
|
|
OFF: Cancels. |
||
|
ATP SEEK |
ON: Automatically searches for a station with better reception when the traffic |
|
|
information’s reception is poor. ; OFF: Cancels. |
||
|
CLOCK |
||
|
TIME SYNC |
ON: Synchronizes the unit’s time to the Radio Data System station time. ; OFF: Cancels. |
TUNER SET: Selectable only when the source is not TUNER.
TI/ NEWS SET/ AF SET/ REGIONAL/ ATP SEEK: (For details, refer to the table above.)
•[LOCAL SEEK]/ [MONO SET]/ [PTY SEARCH]/ [TI]/ [NEWS SET]/ [AF SET]/ [REGIONAL]/ [ATP SEEK] is selectable only when the source is FM.
•Available Program Type:
SPEECH: NEWS, AFFAIRS, INFO (information), SPORT, EDUCATE, DRAMA, CULTURE, SCIENCE, VARIED, WEATHER, FINANCE, CHILDREN, SOCIAL, RELIGION, PHONE IN, TRAVEL, LEISURE, DOCUMENT
MUSIC: POP M (music), ROCK M (music), EASY M (music), LIGHT M (music), CLASSICS, OTHER M (music), JAZZ, COUNTRY, NATION M (music), OLDIES, FOLK M (music)
The unit will search for the Program Type categorized under [SPEECH] or [MUSIC] if selected.
•If the volume is adjusted during reception of traffic information, alarm or news bulletin, the adjusted volume is memorized automatically. It will be applied the next time traffic information, alarm or news bulletin function is turned on.
ENGLISH | 5

CD / USB / iPod
Start playback
|
CD |
Label side |
0: Eject disc |
The source changes to CD and playback starts.
USB
USB input terminal
CA-U1EX (max.: 500 mA) (optional accessory)
The source changes to USB and playback starts.
iPod/iPhone (for KDC-4557U /
KDC-4057UB / KDC-4057UR )
USB input terminal
KCA-iP102 (optional accessory)
The source changes to iPod and playback starts.
Press and hold iPod to select the control mode while in iPod source.
MODE ON: From the iPod*1. MODE OFF: From the unit.
*1 You can still control play/pause, file selection, fast-forward or reverse files from the unit.
|
KDC-4557U |
||||||||||
|
KDC-4057UB |
: Applicable |
|||||||||
|
KDC-4057UR |
||||||||||
|
— : Not applicable |
||||||||||
|
To |
Do this |
CD USB |
iPod |
|||||||
|
Pause or resume |
Press 6 38 (or ENT 38 on RC-406). |
|||||||||
|
playback |
||||||||||
|
Select a track/file |
Press 4 / ¢ (or 4 / ¢ (+) on RC-406). |
|||||||||
|
Select a folder |
Press 1 – / 2 + (or *AM– / #FM+ on RC-406). |
*2 |
— |
|||||||
|
Reverse/Fast-forward |
Press and hold 4 / ¢ (or 4 / ¢ (+) on RC-406). |
|||||||||
|
Select a track/file |
1Press . |
|||||||||
|
from a list |
2Turn the volume knob to make a selection, then press the knob. |
•AAC/MP3/WMA file: Select the desired folder, then a file.
•iPod or KENWOOD Music Editor Light (KME Light)/ KENWOOD Music
|
Control (KMC) file*4: Select the desired file from the list (PLAYLISTS, |
*3 |
|
ARTISTS, ALBUMS, SONGS, PODCASTS*5, GENRES, COMPOSERS*5). |
•To return to the root folder (or first file), press number button 5.
•To return to the previous hierarchy, press .
.
•To cancel, press and hold .
.
|
• To skip songs at a specific ratio, press 4 / ¢. ( 7) |
— |
*4 |
*3 |
||
|
Repeat play |
Press 4 |
repeatedly. |
|||
|
• Audio CD: TRAC REPEAT, REPEAT OFF |
*3 |
||||
|
• AAC/MP3/WMA file: FILE REPEAT, FOLD REPEAT, REPEAT OFF |
|||||
|
• iPod or KME Light/ KMC file: FILE REPEAT, REPEAT OFF |
|||||
|
Random play |
Press 3 |
or repeatedly. |
|||
|
• Audio CD: DISC RANDOM, RANDOM OFF |
*3 |
||||
|
• AAC/MP3/WMA/iPod or KME Light/ KMC file: FOLD RANDOM, |
|||||
|
RANDOM OFF |
|||||
|
Press and hold 3 or to select “ALL RANDOM.” |
*2 |
*3 |
|
*2 |
Only for AAC/MP3/WMA files. |
*4 |
Only for files registered in the database created with KME Light/ |
|
*3 |
Applicable only when [MODE OFF] is selected. |
*5 |
KMC. ( 9) |
|
Only for iPod. |
6

CD / USB / iPod
Direct Music Search (using RC-406)
(for KDC-3357UY )
1 Press DIRECT.
2Press the number buttons to enter a track/file number.
3 Press 4 / ¢ (+) to search for music.
•To cancel, press  .
.
•Not available if Random Play is selected.
•Not applicable for iPod, KME Light/ KMC file. ( 9)
Select a song by name
(for KDC-4557U / KDC-4057UB / KDC-4057UR )
While listening to iPod…
1 Press  .
.
2Turn the volume knob to select a category, then press the knob.
3 Press  again.
4Turn the volume knob to select the character to be searched for.
5Press 4 / ¢ to move to the entry position.
You can enter up to three characters.
6 Press the volume knob to start searching.
7Turn the volume knob to make a selection, then press the knob.
Repeat step 7 until the desired item is selected.
•To search for a character other than A to Z and 0 to 9, enter only “*”.
•To return to the previous hierarchy, press  .
.
•To return to the top menu, press number button 5.
•To cancel, press and hold  .
.
Set the skip ratio
While listening to iPod (for KDC-4557U /
KDC-4057UB / KDC-4057UR ) or KME Light/ KMC
file…
1 Press the volume knob to enter [FUNCTION].
2Turn the volume knob to select [SETTINGS], then press the knob.
3Turn the volume knob to select [SKIP SEARCH], then press the knob.
4Turn the volume knob to make a selection, then press the knob.
0.5% (default)/ 1%/ 5%/ 10%: Sets the skip ratio when searching for a song.
(Holding 4 / ¢ skips songs at 10% regardless of the setting made.)
5 Press and hold  to exit.
Muting upon the reception of a phone call
Connect the MUTE wire to your telephone using a commercial telephone accessory. ( 13)
When a call comes in, “CALL” appears.
•The audio system pauses.
•To continue listening to the audio system during a call, press  SRC. “CALL” disappears and the audio system resumes.
When the call ends, “CALL” disappears.
• The audio system resumes.
AUX
Preparation:
Select [ON] for [BUILTIN AUX]. ( 4)
Start listening
1Connect a portable audio player (commercially available).
Auxiliary input jack
Portable audio player
3.5 mm stereo mini plug with “L” shaped connector (commercially available)
2 Press  SRC to select AUX.
3Turn on the portable audio player and start playback.
Set the AUX name
While listening to AUX…
1 Press the volume knob to enter [FUNCTION].
2Turn the volume knob to select [SETTINGS], then press the knob.
3Turn the volume knob to select [AUX NAME], then press the knob.
4Turn the volume knob to make a selection, then press the knob.
AUX (default)/ DVD/ PORTABLE/ GAME/ VIDEO/ TV
5 Press and hold  to exit.
ENGLISH | 7
 Loading…
You can only view or download manuals with
Sign Up and get 5 for free
Upload your files to the site. You get 1 for each file you add
Get 1 for every time someone downloads your manual
Buy as many as you need