149
СОДЕРЖАНИЕ
1. ОСНОВНЫЕ ПРАВИЛА БЕЗОПАСНОСТИ … 150
2. ПРЕДУПРЕЖДЕНИЯ ПО БЕЗОПАСНОСТИ 151
2.1 Символы, используемые в инструкции .151
2.2 Применение по назначению ………………151
2.3 Инструкции по применению ……………….151
3. ВВЕДЕНИЕ …………………………………….. 151
3.1 Буквы в скобках…………………………………151
3.2 Неисправности и их устранение ………….152
4. ОПИСАНИЕ …………………………………….. 152
4.1 Описание прибора …………………………….152
4.2 Описание панели управления …………….152
5. ПОДГОТОВИТЕЛЬНЫЕ ДЕЙСТВИЯ ………. 152
5.1 Проверка прибора …………………………….. 152
5.2 Установка прибора …………………………….152
5.3 Подключение прибора ………………………. 153
5.4 Первое включение прибора ……………….153
6. ВКЛЮЧЕНИЕ ПРИБОРА ……………………. 153
7. ВЫКЛЮЧЕНИЕ ПРИБОРА …………………. 154
8. НАСТРОЙКА ЖЕСТКОСТИ ВОДЫ …………. 154
9. НАСТРОЙКА ТЕМПЕРАТУРЫ ………………. 154
10. АВТОВЫКЛЮЧЕНИЕ ………………………… 154
11. ЭКОНОМИЯ ЭНЕРГИИ ………………………. 155
12. ЗВУКОВОЙ СИГНАЛ …………………………. 155
13. ЗАВОДСКИЕ ПАРАМЕТРЫ (СБРОС) ……… 155
14. ОПОЛАСКИВАНИЕ …………………………… 155
15. ПРИГОТОВЛЕНИЕ КОФЕ ……………………. 155
15.1 Регулировка кофемолки …………………….155
15.2 Советы для получения более горячего кофе
……………………………………………………….156
15.3 Приготовление кофе из кофе в зернах …156
15.4 Временное изменение вкуса кофе ………157
15.5 Приготовление кофе из предварительно
молотого кофе …………………………………..157
15.6 Индивидуальный подбор вкуса и
количества ………………………………………. 157
16. ПРИГОТОВЛЕНИЕ КАПУЧИНО ……………. 158
16.1 Очистка капучинатора после применения ..
……………………………………………………….158
17. ПОДАЧА ГОРЯЧЕЙ ВОДЫ ………………….. 158
18. ОЧИСТКА………………………………………. 159
18.1 Очистка кофемашины ………………………..159
18.2 Очистка внутреннего контура машины .159
18.3 Чистка контейнера для кофейной гущи .159
18.4 Очистка поддона для сбора капель и лотка
сбора конденсата ………………………………159
18.5 Чистка внутренней части машины ……..160
18.6 Очистка бачка для воды …………………….160
18.7 Очистка носиков узла подачи кофе ……..160
18.8 Очистка воронки для засыпки
предварительно молотого кофе …………. 160
18.9 Очистка заварочного блока ……………….. 160
19. УДАЛЕНИЕ НАКИПИ ………………………… 160
20. НАСТРОЙКА ЖЕСТКОСТИ ВОДЫ …………. 162
20.1 Измерение жесткости воды ……………….162
20.2 Настройка жесткости воды …………………162
21. ФИЛЬТР ДЛЯ СМЯГЧЕНИЯ ВОДЫ ……….. 162
21.1 Установка фильтра …………………………….162
21.2 Замена фильтра ………………………………… 162
22. ТЕХНИЧЕСКИЕ ДАННЫЕ …………………… 163
23. ТЕХНИЧЕСКИЕ ХАРАКТЕРИСТИКИ ………. 163
24. ЗНАЧЕНИЕ СВЕТОВЫХ ИНДИКАТОРОВ … 163
25. УСТРАНЕНИЕ НЕИСПРАВНОСТЕЙ ………… 166
Информация о товаре носит справочный характер и не является публичной офертой. Характеристики, комплект поставки и внешний вид товара могут отличаться от указанных или быть изменены производителем без предварительного уведомления. Перед покупкой проверяйте информацию на официальном сайте производителя.
Если вы заметили ошибку или неточность в описании товара, пожалуйста, выделите часть текста с ошибкой и нажмите кнопку «Сообщить об ошибке».

259
СОДЕРЖАНИЕ
1. ОСНОВНЫЕ ПРАВИЛА БЕЗОПАСНОСТИ … 259
2. ПРЕДУПРЕЖДЕНИЯ ПО БЕЗОПАСНОСТИ 260
2.1 Символы, используемые в инструкции .260
2.2 Применение по назначению ………………260
2.3 Инструкции по применению ……………….260
3. ВВЕДЕНИЕ …………………………………….. 260
3.1 Буквы в скобках…………………………………260
3.2 Проблемы и их устранение ………………… 260
3.3 Скачайте приложение! ……………………….261
4. ОПИСАНИЕ …………………………………….. 261
4.1 Описание прибора (стр. 3 — A) ……………..261
4.2 Описание домашней страницы (главное
окно) (стр. 2 — B) ……………………………….. 261
4.3 Описание принадлежностей ……………….261
4.4 Описание контейнера для молока ………261
4.5 Описание Mix carafe …………………………..261
5. ПОДГОТОВИТЕЛЬНЫЕ ДЕЙСТВИЯ ………. 262
5.1 Проверка прибора ……………………………..262
5.2 Установка прибора …………………………….262
5.3 Подключение прибора ………………………. 262
5.4 Первое включение прибора ……………….262
6. ВКЛЮЧЕНИЕ ПРИБОРА ……………………. 263
7. ВЫКЛЮЧЕНИЕ ПРИБОРА …………………. 263
8. НАСТРОЙКИ МЕНЮ …………………………. 263
8.1 Ополаскивание …………………………………263
8.2 Удаление накипи ………………………………263
8.3 Фильтр для воды ……………………………..263
8.4 Параметры напитков ………………………..264
8.5 Установка времени …………………………..264
8.6 Автоматическое включение ………………264
8.7 Автовыключение (режим ожидания) …264
8.8 Нагрев чашек ……………………………………265
8.9 Экономия энергии …………………………….265
8.10 Температура кофе ……………………………..265
8.11 Жесткость воды ………………………………..265
8.12 Выбор языка ……………………………………. 265
8.13 Звуковой сигнал ……………………………….265
8.14 Подсветка чашки ………………………………265
8.15 Фон ………………………………………………….265
8.16 Bluetooth ………………………………………….266
8.17 Опорожнение контура ……………………….266
8.18 Заводские параметры ………………………266
8.19 Статистика ………………………………………..267
9. ПРИГОТОВЛЕНИЕ КОФЕ ……………………. 267
9.1 Выбор вкуса кофе ………………………………267
9.2 Выбор количества кофе ……………………..267
9.3 Приготовление кофе из кофейных зерен …..
……………………………………………………….267
9.4 Приготовление кофе из предварительно
молотого кофе …………………………………..268
9.5 Регулировка кофемолки …………………….268
9.6 Советы для получения более горячего кофе
……………………………………………………….269
10. ПРИГОТОВЛЕНИЕ ГОРЯЧИХ НАПИТКОВ С
МОЛОКОМ …………………………………….. 269
10.1 Наполнение и закрепление контейнера для
молока ……………………………………………..269
10.2 Регулировка количества пены …………..269
10.3 Автоматическое приготовление напитков
на основе молока ………………………………269
10.4 Очистка контейнера для молока после
каждого применения ………………………..270
11. ФУНКЦИЯ ЧАЯ ……………………………….. 270
12. ПОДАЧА ГОРЯЧЕЙ ВОДЫ ………………….. 271
13. ПОДАЧА ПАРА ………………………………… 271
13.1 Рекомендации по использованию пара для
вспенивания молока ………………………….271
13.2 Очистка узла подачи горячей воды/пара
после использования ………………………… 271
14. ПРИГОТОВЛЕНИЕ ГОРЯЧЕГО ШОКОЛАДА 272
15. ПРИГОТОВЛЕНИЕ ХОЛОДНЫХ НАПИТКОВ ….
……………………………………………………. 273
15.1 Приготовление холодного кофе ………….273
15.2 Приготовление вспененного холодного
молока ……………………………………………..274
16. ИНДИВИДУАЛЬНЫЙ ПОДБОР НАПИТКОВ …
……………………………………………………. 275
17. СОХРАНЕНИЕ СОБСТВЕННОГО ПРОФИЛЯ 275
18. ОЧИСТКА ………………………………………. 275
18.1 Очистка кофемашины ………………………..275
18.2 Очистка внутренней системы машины .276
18.3 Чистка контейнера для кофейной гущи .276
18.4 Очистка поддона для сбора капель …….276
18.5 Чистка внутренней части машины……..277
18.6 Очистка бачка для воды …………………….277
18.7 Очистка носиков узла подачи кофе ……..277
18.8 Очистка воронки для засыпки
предварительно молотого кофе ………….277
18.9 Очистка заварочного узла ………………….277
18.10 Очистка контейнера для молока …………278
18.11 Очистка распылителя горячей воды/пара…
……………………………………………………….278
18.12 Очистка Mix Carafe (E) …………………………278
19. УДАЛЕНИЕ НАКИПИ ………………………… 279
20. НАСТРОЙКА ЖЕСТКОСТИ ВОДЫ …………. 280
20.1 Измерение жесткости воды ……………….280
20.2 Настройка жесткости воды ……………….281
21. ФИЛЬТР СМЯГЧЕНИЯ ВОДЫ ……………… 281
21.1 Установка фильтра …………………………….281
21.2 Замена фильтра …………………………………281
21.3 Удаление фильтра………………………………282
22. ТЕХНИЧЕСКИЕ ДАННЫЕ …………………… 282
23. ТЕХНИЧЕСКИЕ ХАРАКТЕРИСТИКИ ………. 282
24. СООБЩЕНИЯ НА ДИСПЛЕЕ ………………… 283
25. УСТРАНЕНИЕ НЕИСПРАВНОСТЕЙ ………… 288
- Techno Pride. Бытовая техника
- Кофемашины
- DeLonghi
-
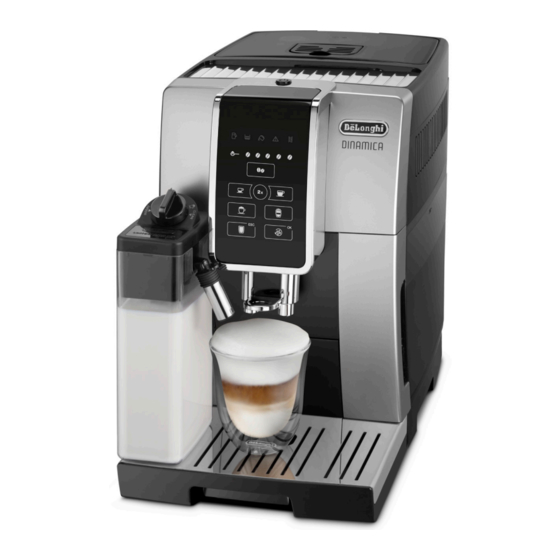
Кофемашина DeLonghi DINAMICA ECAM 350.55.B
- Инструкция для кофемашины DeLonghi DINAMICA ECAM 350.55.B
Инструкция для кофемашины DeLonghi DINAMICA ECAM 350.55.B
Бесплатная доставка
Большинство товаров доставляем бесплатно по России
Бесплатная установка
Отмеченные товары устанавливаем бесплатно на готовые коммуникации
Простой возврат или обмен
Защищаем интересы покупателей, соблюдаем законодательство РФ
Фирменная гарантия
Фирменная гарантия производителей. Официальный дилер большинства брендов
Акции и скидки
Участвуем во всех официальных акциях
-
Contents
-
Table of Contents
-
Troubleshooting
-
Bookmarks
Quick Links
ECAM35X.50
BEAN TO CUP ESPRESSO
AND CAPPUCCINO MACHINE
Instruction for Use
Instructions videos available at:
http://ecam35050.delonghi.com/
Related Manuals for DeLonghi ECAM35X.50
Summary of Contents for DeLonghi ECAM35X.50
-
Page 1
ECAM35X.50 BEAN TO CUP ESPRESSO AND CAPPUCCINO MACHINE Instruction for Use Instructions videos available at: http://ecam35050.delonghi.com/… -
Page 3
page 4… -
Page 4: Table Of Contents
CONTENTS 16.9 Cleaning the infuser ……..14 16.10 Cleaning the milk container ……15 1. INTRODUCTION ……….5 16.11 Cleaning the hot water nozzle …..15 1.1 Letters in brackets ………5 17. DESCALING ……….15 1.2 Troubleshooting and repairs ……5 18. SETTING WATER HARDNESS …… 17 2.
-
Page 5: Introduction
1. INTRODUCTION 2.2 Description of control panel Thank you for choosing this bean to cup espresso and cappuccino (page 2 — B ) machine. A number of icons on the touch screen have a double function. This We hope you enjoy using your new appliance. Take a few min- is indicated in brackets in the description.
-
Page 6: Setting Up The Appliance
D4. Milk intake tube D5. Frothed milk spout (adjustable) 3. SETTING UP THE APPLIANCE Please note: • The first time you use the appliance, rinse with hot water all removable accessories which may come into contact with water or milk. •…
-
Page 7: Turning The Appliance Off
medium high 5. Press the OK icon (B15) to confirm (or ESC (B14) to exit without making any change). The lights go off. The appliance returns to «standby» and the temperature is now programmed. 8. AUTO-OFF THE time can be changed so that the appliance switches off after The machine proceeds to run a rinse cycle;…
-
Page 8: Beep
OK again. 3) To interrupt the function manually, press OK icon (B15) to confirm (or ESC (B14) 5. Press the to exit without making any change). The lights go off. Please note: The energy saving setting is now programmed. • If the appliance is not used for more than 3-4 days, when switched on again, we strongly recommend performing Please note:…
-
Page 9: Making Coffee Using Coffee Beans
13.3 Making coffee using coffee beans 5. Preparation begins and the indicator corresponding to the selected icon blinks on the touch screen (B). Important! Please note: Do not use green, caramelised or candied coffee beans as they • To make 2 cups of «espresso» at the same time: could stick to the coffee mill and make it unusable.
-
Page 10: Preparing Coffee With Pre-Ground Coffee
13.5 Preparing coffee with pre-ground coffee 1. Place a sufficiently large cup or glass under the coffee spouts (A19); Important! 2. Press (B8) to select the desired aroma (see section • Never add pre-ground coffee when the machine is off or it “13.4 Temporarily varying the coffee aroma”);…
-
Page 11: Adjusting The Amount Of Froth
4. Place the lid back on the milk container; Dial Description Recommended for… 5. Remove the hot water spout (C6) from the nozzle (A8) (fig. position 15); No froth HOT MILK (not frothed) 6. Attach the container to the connection nozzle and push as far as it will go (fig.
-
Page 12: Cleaning The Milk Container After Use
15. DELIVERING HOT WATER 3. Release the icon: the icon blinks and the appliance starts delivering the beverage; Important! Danger of scalding. 4. Once the amount of liquid in the cup is as desired (milk Never leave the machine unattended when hot water is being and/or coffee), press the selected icon a second time: the released.
-
Page 13: Cleaning The Coffee Grounds Container
Please note: Water may find its way into the grounds container (A11) during the above rinse procedure: this is quite normal. 16.3 Cleaning the coffee grounds container When the indicator light (B2) appears on the touch screen, the container must be emptied and cleaned. The appliance can- not be used to make coffee again until the grounds container (A11) has been cleaned.
-
Page 14: Cleaning The Water Tank
16.6 Cleaning the water tank 1. Clean the water tank (A17) regularly (about once a month) and whenever the water softener filter (C4) is replaced, using a damp cloth and a little mild washing up liquid; 2. Remove the filter (C4) and rinse under running water; 3.
-
Page 15: Cleaning The Milk Container
17. DESCALING 1. Remove the lid (D2); 2. Remove the milk spout (D5) and intake tube (D4) (fig. 28); Important! • Before use, read the instructions and the labelling relative to the descaler product, which are indicated on the pack (includ- ed with certain models and/or available for purchase from authorized service centres).
-
Page 16
4. Place an empty container with a minimum capacity of 1.8 10. When the water in the tank has run out, empty the con- litres under the hot water spout (C6) and coffee spouts (A9) tainer used to collect the rinsing water; 11. -
Page 17: Setting Water Hardness
pending on the hardness of the water. Each square corre- Please note sponds to 1 level; The filter lasts about two months if the appliance is used nor- mally. If the coffee machine is left unused with the filter in- Reagent strip Water Corresponding…
-
Page 18: Replacing The Filter
19.2 Replacing the filter After two months (see date indicator) or when the appliance has not been used for 3 weeks, you should replace the filter: 1. Extract the tank (A17) and exhausted filter (C4); 2. Take the new filter out of its pack and proceed as illustrated in points 2 to 10 of the previous section.
-
Page 19: Explanation Of Lights
21. EXPLANATION OF LIGHTS LIGHTS DISPLAYED POSSIBLE CAUSE REMEDY The machine is warming up or cooling Wait down. BLINKING The coffee maker is ready for use. Proceed with selection of the desired beverage and the relative options. PERMANENTLY ALIGHT Insufficient water in the tank (A17). Fill the tank and position it correctly, pushing it fully home so that it clicks into place.
-
Page 20
LIGHTS DISPLAYED POSSIBLE CAUSE REMEDY The hot water spout is not inserted, or is Attach the water spout securely, pushing fully inserted incorrectly. home. BLINKING The milk container is not inserted Position the milk container securely, pushing correctly. fully home. The milk container has been inserted Turn the froth adjustment dial to one of the milk with the froth adjustment dial in the… -
Page 21
INDICATOR LIGHTS DISPLAYED POSSIBLE CAUSE REMEDY The coffee beans have run out Fill the beans container (A3) (fig. 9). PERMANENTLY ALIGHT The pre-ground coffee funnel is clogged Empty the funnel with the help of the brush (C5) (A2). as described in section «16.8 Cleaning the pre- ground coffee funnel». -
Page 22: Troubleshooting
INDICATOR LIGHTS DISPLAYED POSSIBLE CAUSE REMEDY Descaling has been interrupted. The procedure must be completed before the OK icon machine can be used. Press the PERMANENTLY ALIGHT (B15) to start the procedure. BLINKING 22. TROUBLESHOOTING Below is a list of some of the possible malfunctions. If the problem cannot be resolved as described, contact customer services.
-
Page 23
PROBLEM POSSIBLE CAUSE REMEDY The coffee is delivered too The coffee is ground too finely. Turn the grinding adjustment dial (A5) one slowly or a drop at a time. click clockwise towards «7» while the coffee mill is in operation (fig. 7). Continue one click at a time until coffee delivery is satisfactory. -
Page 24
De’Longhi Appliances via Seitz, 47 31100 Treviso, Italy www.delonghi.com…