Условия для ответа на запрос:
1. «Конкурент» отправляет в Ваш регион.
2. Товар должен быть на складе в наличии и быть готовым к отгрузке/отправке.
Мы можем отказать в продаже товара по сниженной цене если:
1. Запрошенная цена ниже себестоимости товара
2. Товар продается с уценкой (дисконт)
3. Последний товар на складе
4. Товар продается со скидкой (акция)
5. Товар уже зарезервирован за другим Клиентом
Заранее благодарны за Ваше обращение.
- Manuals
- Brands
- Saeco Manuals
- Coffee Maker
- aulika SUP040
- Operating instructions manual
-
Contents
-
Table of Contents
-
Troubleshooting
-
Bookmarks
Quick Links
02
Type SUP040
OPERATING INSTRUCTIONS
Read these operating instructions carefully before using the machine.
Related Manuals for Saeco aulika SUP040
Summary of Contents for Saeco aulika SUP040
-
Page 1
Type SUP040 OPERATING INSTRUCTIONS Read these operating instructions carefully before using the machine. -
Page 2: Product View
MENU • 2 •…
-
Page 3
• 3 •… -
Page 4
SAFETY REGULATIONS or feet. Do not let the power cord hang freely from tables or shelves. Never allow water to come into contact For the Safety of Others with any of the electrical parts of the ma- Ensure that children cannot play with the ma- chine: danger of short circuit! Hot water chine and/or the packaging materials. -
Page 5
alert the service provider, who will carry out a Storing the Machine safety check. If the machine is to remain inactive for a long time, turn it off and unplug it. Store the ma- Cleaning chine in a dry place, out of the reach of chil- Before cleaning the machine, the power button dren. -
Page 6: Table Of Contents
Machine Use — User Manual CONTENTS 1 GENERAL INFORMATION ……..7 8.2 Stop Functions …………26 1.1 Intended Use of the Machine ……..7 8.3 List of Accessories …………26 1.2 How to Read the Manual……….7 8.3.1 List of accessories supplied ……..26 1.3 How to Use these Operating Instructions …..7 8.3.2 List of optional accessories ……..26 8.4 Assembly-Siting …………27 1.4 Machine Identifi cation ……….7…
-
Page 7: General Information
Machine Use — User Manual Service Provider/Supply Operator: GENERAL INFORMATION Company or person responsible for normal ma- chine installation, start-up and suspension of Intended Use of the Machine service. On detecting machine failures, the Ser- This machine automatically brews: vice Provider should request the assistance of the — Coff ee and espresso coff ee using coff ee beans;…
-
Page 8: Technical Specifi Cations
Machine Use — User Manual MACHINE COMPONENTS Technical Specifi cations Note: The “key to components” includes all ma- Technical Specifi cations chine models; check which one matches your ma- Power Supply and Nominal Voltage-Power Rating chine. Certain functions may not be available. See plate attached to the back of the appliance 1 Cup-warming surface 2 Water tank…
-
Page 9: Control Panel Description
Machine Use — User Manual Control Panel Description USING THE MACHINE Note: All possible controls are described here. Before using the machine, check that the water tank and the cof- Refer to the following sections for the operating fee bean hopper are fi lled and that the machine is properly clean. modes.
-
Page 10: Filling The Coff Ee Bean Hopper
Machine Use — User Manual If the water tank is not inserted, check that no cof- Rinse and fi ll it with fresh water, making sure that the (MAX) fee beans fall into the tank compartment. If this level indicated in the tank is not exceeded. happens, remove them to avoid any malfunctions.
-
Page 11: Warm-Up And Rinsing
Machine Use — User Manual Warm-up and Rinsing • When turning off the machine, after pressing the » » button (27) (if at least one coff ee-based product has been Upon start-up, the machine activates the warm-up phase. brewed). The following icon will be displayed. Wait until it is completed.
-
Page 12: Adjusting The Dispensing Spout
Machine Use — User Manual Adjusting the Dispensing Spout Otherwise, some product might leak out of the dispensing spout. Most of the cups on the market can be used with this coff ee ma- Coff ee Brewing chine. 3.8.1. Coff ee with coff ee beans The height of the dispensing spout may be adjusted to better fi t the dimensions of the cups that you wish to use.
-
Page 13
Machine Use — User Manual “ ” button (22) is pressed, the machine returns to the main menu and discharges any inserted coff ee into the cof- fee grounds drawer. Lift the pre-ground coff ee compartment lid. Note: If no pre-ground coff ee is poured into the compartment, only water will be dispensed;… -
Page 14: Emptying The Coff Ee Grounds Drawer
Machine Use — User Manual Emptying the Coff ee Grounds Drawer Remove the drawer and empty out the coff ee grounds in a suit- able container. Only when the display shows: Note: This operation must be performed with the machine turned on and/or in stand-by mode. INSERT COFFEE The machine will indicate when the coff ee grounds drawer has GROUNDS DRAWER…
-
Page 15: Latte Macchiato
Machine Use — User Manual Note: To ensure better results when preparing a To dispense a cup of latte macchiato, perform all the steps de- cappuccino, use cold milk. scribed in section 3.10 up to step 3. Place the cup under the dispensing spout (Fig.12, page 3). We recommend using tall glasses for this type of preparation, thus moving the dispensing spout accordingly (Fig.13, page 3).
-
Page 16
Machine Use — User Manual Select the desired beverage by pressing the “ ” button SPECIAL BEVERAGES HOT WATER (24) or the “ ” button (25). LONG COFFEE HOT MILK AMERICAN COFFEE When the desired beverage has been selected, press the «… -
Page 17: Adjusting The Machine
Machine Use — User Manual Note: The brewing process can be stopped by This program allows steam to be dispensed in order to heat the beverages directly in the container. pressing the » » button (22). When the dispensing procedure is complete, remove the cup Press the “…
-
Page 18: Cleaning And Maintenance
Machine Use — User Manual CLEANING AND MAINTENANCE As some of the parts of the appliance come in contact with water and coff ee during normal use, it is important to clean the appli- ance regularly. Neglecting to regularly clean the appliance will ultimately cause it to stop working properly, and in this case repair is not covered under warranty.
-
Page 19: Cleaning The Cappuccinatore (After Each Use)
Machine Use — User Manual Cleaning the Cappuccinatore Only once the cycle is complete, press the side buttons and remove the Cappuccinatore. (After Each Use) Warning! Failure to clean the Cappuccinatore after use with milk may cause proliferation of bacteria which may be harmful for the user.
-
Page 20: Cleaning The Water Tank
Machine Use — User Manual Important note: After washing and reassembling the Cappuccinatore, it can be installed back in the machine. Use the hooks placed on the left side of the ma- chine to attach the suction tube. Remove the valve from the Cappuccinatore. Cleaning the Water Tank It is recommended to clean the water tank daily: — Remove the «INTENZA+»…
-
Page 21: Brew Group — Weekly Cleaning
Machine Use — User Manual Brew Group — Weekly Cleaning Wash the Brew Group with lukewarm water and carefully wash the upper fi lter. Before placing the Brew Group in its seat, The Brew Group should be cleaned whenever the coff ee bean hopper ensure that there is no water left in the brewing chamber.
-
Page 22
Machine Use — User Manual Ensure that the Brew Group is in the rest position; the two reference marks must match. Insert the coff ee grounds drawer and the drip tray. Close the service door. If they do not match, proceed as described in step (9). Ensure that the lever is in contact with the brew group base. -
Page 23: Machine Warnings
Machine Use — User Manual MACHINE WARNINGS This chapter describes all the warning messages that the machine may display to the user, and the actions that can and/or must be performed by the user. Help Message Displayed How to Reset the Message To restore the machine operation, close the service door.
-
Page 24
Machine Use — User Manual Help Message Displayed How to Reset the Message The machine requires a descaling cycle. When this message is displayed, it is still possible to use the machine, but its correct operation might be aff ected. Damage caused by failure to descale the machine is not covered by warranty. -
Page 25: Handling And Storage
Machine Installation — Service Provider Manual HANDLING AND INSTALLATION STORAGE All the operations described in chapter 8 must be performed exclusively by the service provider All the operations described in chapter 7 must or a specialised technician, who shall organise be performed exclusively by the service provider all the operating steps and use only suitable means to en- or a specialised technician, who shall organise…
-
Page 26: Stop Functions
Machine Installation — Service Provider Manual — Make any technical modifi cations to the machine. Cleaning brush: to re- — Immerse the machine in any kind of liquid. move the coff ee grounds — Wash the machine using a jet of water. from the service compart- — Use the machine in any manner other than as described in ment.
-
Page 27: Assembly-Siting
Machine Installation — Service Provider Manual Assembly-Siting • open the packaging; • check the condition and model of the machine; The machine should not be installed outdoors or • check the contents of the accessories bag enclosed with the in environments in which jets of water or steam machine (see «8.3.1 List of Accessories Supplied»);…
-
Page 28: Setting The Language (Upon First Use)
Machine Installation — Service Provider Manual is switched to «0». 8.10 First Use — Use After a Long Period The Service Provider makes and is responsible for the electrical of Inactivity connection of the machine. For a perfect Espresso: Rinse the coff ee circuit if using the The machine should be connected to the mains using the plug machine for the fi rst time or after a long period of inactiv- installed on the power cord, in accordance with:…
-
Page 29: Measuring And Adjusting Water Hardness
Machine Installation — Service Provider Manual 8.11 Measuring and Adjusting Water Hardness Press the » » button (21) to access. Measuring water hardness is very important in order to correctly MACHINE MENU manage the «INTENZA+» fi lter and the frequency with which the GENERAL MENU machine must be descaled.
-
Page 30: Intenza+» Water Filter
Water is a key element for a good espresso coff ee. It should there- fore always be fi ltered in a professional manner. That is why all Saeco machines can be equipped with the INTENZA+ fi lter. This fi lter is easy to use and its sophisticated technology is eff ective in preventing limescale build-up.
-
Page 31
Machine Installation — Service Provider Manual Press the » » button (21) to access. Press the » » button (21) to confi rm the introduction of the new fi lter. ACTIVATE FILTER ACTIVATE FILTER ACTIVATE FILTER? PLACE A CONTAINER UNDER THE WATER SPOUT Note: To exit the procedure, press the «… -
Page 32: Adjusting The Coff Ee Grinder
Machine Installation — Service Provider Manual 8.13 Adjusting the Coff ee Grinder 8.14 Adjusting the «Aroma» — Amount of Ground Coff ee Warning! Do not pour ground and/or instant cof- fee into the coff ee bean hopper. Do not put any The machine allows the amount of coff ee to be ground for prepar- material other than coff ee beans into the hopper.
-
Page 33
Machine Installation — Service Provider Manual Switch to programming mode as described in chapter 9. Press the » » button (25) to select the «COFFEE TEMPERA- TURE» menu. MENU BEVERAGE MENU CAPPUCCINO MACHINE MENU PREBREWING COFFEE TEMPERATURE COFFEE LENGTH MILK QUANTITY Press the «… -
Page 34
Machine Installation — Service Provider Manual Note: The restoring operation permanently de- Press the » » button (25) to select the «MILK QUANTITY» letes the stored data. To quit the procedure press menu. the » » button (22). CAPPUCCINO Press the » «… -
Page 35: Machine Programming
Machine Installation — Service Provider Manual Programming Controls Now the » » button (25) has been programmed. Whenever the button is pressed and released, the machine will brew the same When the machine menus are accessed, the buttons on the key- amount that has just been set.
-
Page 36: Beverage Menu
Machine Installation — Service Provider Manual Beverage Menu BEVERAGE MENU To manage beverage brewing. ESPRESSO To manage espresso coff ee brewing parameters. COFFEE To manage coff ee brewing parameters. CAPPUCCINO To manage cappuccino brewing parameters. LATTE MACCHIATO To manage latte macchiato brewing parameters. SPECIAL BEVERAGES To access special beverages management.
-
Page 37
Machine Installation — Service Provider Manual COUNTERS HOT WATER No. of hot water cups dispensed from the last RESET. CAPPUCCINO No. of cappuccino cups brewed from the last RESET. LATTE MACCHIATO No. of latte macchiato cups brewed from the last RESET. HOT MILK No. -
Page 38: Machine Menu
Machine Installation — Service Provider Manual Machine Menu This menu manages general machine operation and maintenance parameters. To change the machine operating settings. GENERAL MENU This function activates/deactivates the acoustic alarms. TONE To deactivate the acoustic alarms. To activate the acoustic alarms. This function manages the activation of the machine boilers in order to save ECOMODE energy.
-
Page 39
Machine Installation — Service Provider Manual GENERAL MENU This function activates/deactivates the cup-warming surface located on CUP-WARM. SURFACE the upper part of the machine. To deactivate the cup-warming surface. To activate the cup-warming surface. With this menu, the menu language and the display brightness and contrast can be set. DISPLAY MENU This setting is of fundamental importance for correctly adjusting the pa- LANGUAGE… -
Page 40
Machine Installation — Service Provider Manual WATER MENU This menu allows the correct water parameters for coff ee brewing to be set. To change the machine water hardness setting. HARDNESS With the «Hardness» function you can adjust your machine to the level of hardness of the water you use, so that the machine will indicate descaling at the right time. -
Page 41
Machine Installation — Service Provider Manual MAINTENANCE This menu allows all the functions for correct machine maintenance to be set. This function allows you to perform the Brew Group wash cycle (see sec- BREW GROUP CLEAN tion 10.4). DESCALING This function starts the descaling cycle (see section 10.6). This function manages the cleaning cycle for the Cappuccinatore, which is CAPPUCCINATORE CLEANING used to prepare milk-based beverages (see section 10.3). -
Page 42: Steam» Function Activation
Machine Installation — Service Provider Manual «STEAM» Function Activation Press the “ ” button (25) until the “ON” option is selected. STEAM These settings are valid only for activating the steam function. When the activation is complete the menu will be available, and the user will be able to activate it by following the procedure described in section 3.12.
-
Page 43
Machine Installation — Service Provider Manual Note: The message will not be displayed if a clean- Press the » » button (25) and select the «MAINTENANCE» ing cycle is run immediately after dispensing a option. milk-based product. MACHINE MENU Press the » «… -
Page 44: Cleaning And Maintenance
All the operations described in chapter 10 must Saeco detergent. be performed exclusively by the service provider Saeco detergent may be purchased at your local dealer or at au- or a specialised technician, who shall organise thorised service centres. all the operating steps and use only suitable means to en- sure strict compliance with the safety regulations in force.
-
Page 45
Machine Installation — Service Provider Manual Press the » » button (21) to confi rm. CAPPUCCINATORE CLEANING WASH THE CAPPUCCINATORE? Do not drink the solution dispensed during this procedure. The solution must be disposed of. CAPPUCCINATORE CLEANING Note: If this option is confi rmed, the cycle must PLACE A CONTAINER be completed. -
Page 46: Brew Group Cleaning With The «Coff Ee Oil Remover System
Warning: The «Coff ee Oil Remover system» has no Press the » » button (21) to start the brew group cleaning descaling properties. To descale, use the Saeco cycle. descaling solution and follow the procedure described in the «Descaling» chapter.
-
Page 47: Brew Group Lubrication
«BEVERAGE MENU» (see section 9.2). Before lubricating the brew group, clean it under running water as described in the «Brew Group — Weekly Cleaning» chapter. Lubricate the brew group guides using Saeco grease only. Having inserted the cleaning tablet, press the » » button (21) to confi rm.
-
Page 48: Descaling
This operation needs to be carried out before the appliance stops working properly, as in this case repair is not covered by warranty. Use the Saeco descaling product only. Its formula has been spe- cifi cally designed to ensure better machine performance and op- eration for its whole operating life.
-
Page 49
FILL TANK WITH remove the dispensing spout. DESCALING SOLUTION Pour the entire contents of the bottle of Saeco concentrated descaling solution into the water tank and fi ll the tank with fresh drinking water up to the level indicated by the icon. -
Page 50
Machine Installation — Service Provider Manual DESCALING EMPTY DRIP TRAY Remove any liquids from the drip tray and insert the tray back into the machine. Press the » » button (21). DESCALING INSERT THE CAPPUCCINATORE WITH Note: Use a container of at least 1.5 litres capacity. ALL THE COMPONENTS Press the «… -
Page 51: Machine Disposal
Machine Installation — Service Provider Manual Once the rinse cycle is complete, the machine carries out the warm-up and rinse cycle to be ready for product brewing. Empty the containers used to collect the liquid dispensed by the machine and reassemble the dispensing spout. The machine is now ready for use.
-
Page 52: Troubleshooting
12 TROUBLESHOOTING Machine actions Causes Solutions The machine does not turn on. The machine is not plugged in and/or the power Plug in the machine and/or switch the power but- button is positioned on “0”. ton to “I”. Coff ee is not hot enough. The cups are cold.
-
Page 53
The manufacturer reserves the right to make changes without prior notice.
This manual is also suitable for:
Aulika sup040
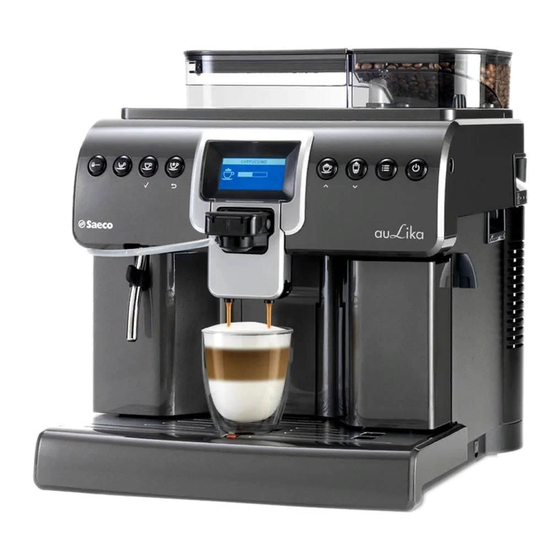
Кофемашина Saeco Aulika хорошо зарекомендовала себя еще с конца 20 века. С тех пор это один из самых распространенных кофейных аппаратов в мире. За время работы в инструкции к Saeco Aulika появились новые функции и рекомендации, так как модельный ряд постоянно совершенствуется, хотя в данной линейке всего три машины.
Описание модели
По инструкции кофемашина Саеко Аулика разрешена к пользованию в офисах, кафе. Подходит она также для бытового применения.

Отличается быстрым приготовлением эспрессо – всего за полминуты. В модельном ряду Focus, Mid, Silver можно найти разные типы кофеварок – рожковые, капельные, автоматические. Первые два стоят дешевле и подойдут для домашнего пользования. Автоматическая имеет множество функций и по стоимости доступна для многолюдного офиса или небольшого кафе.
Профессиональная модель кофемашины Saeco Aulika Top High Speed Capuccino используется только в заведениях общественного питания.
Выпускается линейка в нескольких цветах – черном, красном и серебристом. Последняя модель считается самой престижной.
К преимуществам приборов можно отнести:
- Встроенный автоматический молочный блок с быстрой скоростью работы – 35 секунд 350 мл.
- Настройки можно сделать таким образом, чтобы машина запускалась при нажатии всего одной кнопки.
- Регулировка помола во встроенной кофемолке.
- Настройки количества воды и кофейного порошка.
- Автоматическая очистка.
- Большие баки для воды и емкости для засыпки зернового кофе.
- Корпус из нержавеющей стали в модификации Mid.

- Меню на русском языке, поэтому не придется искать перевод сложных терминов.
- Все процессы отображаются на цветном дисплее.
По инструкции кофемашины Saeco Aulika Top Riri и Top HSC относятся к профессиональным. Работают как в ручном, так и автоматическом режиме – достаточно установить настройки. Данные кофемашины подключаются к платежным аппаратам, что делает их удобными при обслуживании клиентов в кафе, ресторанах.

Недостатки кофемашин могут проявиться при неправильном уходе, если аппарат работает дома. В заведениях общественного питания персонал следит за оборудованием, без которого кафе немыслимо. Можно назвать высокую стоимость машины недостатком, но он будет относительным, так как для дома не нужна очень дорогая, мощная и скоростная вещь – достаточно просто качественной кофеварки.
Особенности и возможности кофемашин
Что умеет кофемашина Saeco Aulika по инструкции:
- Выдавать нужный объем напитка, исходя из запрограммированных настроек.
- Насыпать больше или меньше кофе в зависимости от пожеланий.
- Определять изначальную величину кофейных зерен исходя из сорта и настраиваться на нужный режим помола.
- Автоматическая подача воды.
- Автоматическое приготовление капучино с помощью всасывающей трубки.
Видео: Saeco Aulika — классный обзор
У модели кофемашины Saeco Aulika Top High Speed Capuccino свои особенности:
- несколько режимов промывки;
- настройки компонентов напитков в зависимости от меню заведения;
- 4 литра бак для воды и 1 кг для кофейных зерен;
- большой дисплей для отображения функций.
Есть также подсветка кнопок, так как профессиональные кофемашины иногда работают в полной темноте, например, в ночных барах.
Saeco Aulika Focus относится к линейке Office – по инструкции эту кофеварку можно использовать как дома, так и для небольших общественных заведений. В нее включены все основные функции, в том числе приготовление сразу двух чашек кофе.

Настройка функций
Настройку функций по инструкции проводит только наладчик оборудования – это касается не только профессиональных кофемашин Saeco Aulika Top High Speed Capuccino, но и офисных моделей.
В быту иногда возникает потребность срочно заменить настройки крепости напитка в автоматической кофемашине. Остается дожидаться мастера, пока он найдет время, или самим разобраться в инструкции. Поскольку все указания даны на русском языке, то выполнить строго по пунктам рекомендации не сложно.
В русскоязычной версии программирование машины описано на странице 33.
Уход за кофеваркой в домашних условиях
Цикл ополаскивания можно запустить, приподняв устройство пуска кофе. Это делается для промывки контуров после использования машины. Периодически придется очищать контейнер для кофейных отходов – для этого машина должна быть включена или быть в режиме ожидания. Если вовремя не очистить узел, агрегат будет заблокирован – на дисплее появится предупреждающая надпись.
Каждый раз необходимо промывать и чистить насадку для капучино, чтобы молочный жир не засыхал внутри. Чтобы очистить капучинатор Saeco Aulika по инструкции:
- Снять силиконовую трубку.
- Снять кольцо.
- Повернуть и снять крышку капучинатора и снять его.
- Снять клапан.
- Отсоединить деталь, которая соединяет силиконовую трубку и капучинатор.
- Вымыть детали теплой водой.
- Собрать компоненты в обратном порядке.
После сборки капучинатора установить его обратно в кофемашину.

Чтобы машина корректно работала рекомендуется провести тест на жесткость воды и установить соответствующие настройки. В этом случае агрегат будет вовремя подавать сигнал о необходимости очистки – декальцинации.
Существуют фильтры, которые устраняют избыток солей и делают воду мягкой. Рекомендуется использовать один из вариантов: покупать бутилированную жидкость для заливки в бак или установить фильтр Интенза Плюс.
Важно! Фильтры Интенза устанавливаются по инструкции в том случае, когда кофемашина Saeco Aulika не подключена к центральному водопроводу
Декальцинация
Декальцинация кофемашины Саеко Аулика по инструкции проводится при включении соответствующего сигнала на дисплее. В домашних кофеварках это происходит после 200 чашек, если не установлен фильтр. Кофеварка с фильтром выдает сигнал реже.
Для основательной промывки от накипи применяется профессиональное средство Саеко. Для этого делается раствор и заливается в бак для воды. Далее по пунктам руководства запускается автоматический процесс очистки. Отработанную жидкость после промывания машины выливают.
Процесс декальцинации можно считать оконченным, когда контуры и бак промыты чистой водой.
Понравилась статья? Поделись с друзьями:

Всем привет!
Меня зовут Денис, и я — руководитель проекта «Напитки.NET». Рад видеть каждого из вас на его страницах. Надеюсь, что статья вам понравилась и оказалась полезной.
Являюсь заядлым любителем кофе и чая. Думаю — вы тоже 🙂 Все предложения, замечания, что ещё бы хотелось увидеть на сайте можно направлять мне ВКонтакте или Telegram (иконки ниже). Всех благ, заходите ещё 😉
Страницы и текст этой инструкции
. Страница №1") Инструкция кофемашины Saeco Aulika Top (SUP040R)
Инструкция кофемашины Saeco Aulika Top (SUP040R)
. Страница №2") Информация отображена на картинке
Информация отображена на картинке
. Страница №3") Информация отображена на картинке
Информация отображена на картинке
. Страница №4") Информация отображена на картинке
Информация отображена на картинке
. Страница №5") Информация отображена на картинке
Информация отображена на картинке
Как использовать наш сайт инструкций OnlineManuals.ru
Наша цель состоит в том, чтобы предоставить вам быстрый доступ к содержанию инструкции для кофемашины Saeco Aulika Top (SUP040R).
С помощью онлайн просмотра, Вы можете быстро просмотреть содержимое инструкции и найти решение проблемы с кофемашины Saeco Aulika Top (SUP040R).
Для Вашего удобства
Если листать руководство пользователя кофемашины Saeco Aulika Top (SUP040R) прямо на сайте, не очень удобно для Вас, есть два возможных решения:
• Просмотр в полноэкранном режиме — легко просмотреть руководство пользователя (без загрузки его на свой компьютер), Вы можете использовать режим полноэкранного просмотра.
Для просмотра инструкции пользователя кофемашины Saeco Aulika Top (SUP040R) на полном экране, используйте кнопку «Открыть в Pdf-viewer».
• Загрузка на компьютер — Вы можете также скачать Инструкция кофемашины Saeco Aulika Top (SUP040R) на свой компьютер и сохранить его в файлах.
Многие люди предпочитают читать документы не на экране, а в печатной версии.
Возможность печати руководства пользователя также была предусмотрена на нашем сайте,
и вы можете использовать ее, нажав на иконку «печать» в Pdf-viewer.
Нет необходимости печатать все руководство кофемашины Saeco Aulika Top (SUP040R), можно выбрать только нужные страницы инструкции.