- Manuals
- Brands
- Schaerer Manuals
- Coffee Maker
- Coffee Club
- Operating instructions manual
-
Contents
-
Table of Contents
-
Bookmarks
Quick Links
Schaerer Coffee Club
Operating instructions
V02 / 11.2018
Related Manuals for Schaerer Coffee Club
Summary of Contents for Schaerer Coffee Club
-
Page 1
Schaerer Coffee Club Operating instructions V02 / 11.2018… -
Page 2
Schaerer AG P.O.Box 336 Translation of the original operating instructions Allmendweg 8 English CH-4528 Zuchwil 021081 info@schaerer.com www.schaerer.com… -
Page 3: Operating Instructions
Due to the wide variety of possible options, each individual machine may differ from the devices de- picted herein. Schaerer AG is only liable for the contents of the original German document.
-
Page 4: Conditions For Use And Installation
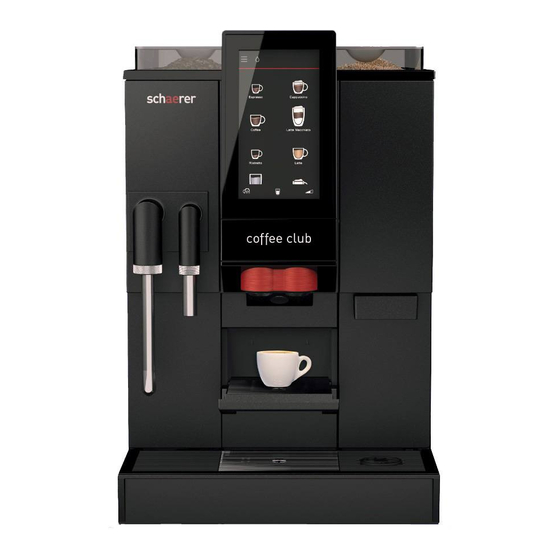
Introduction and general information Congratulations on the purchase of your Schaerer coffee machine. The Schaerer Coffee Club coffee machine is a single-cup fully-automatic machine for espresso, coffee, cappuccinos, lattes, latte macchiatos, milk foam and hot water. With the powder container available as an option, the Schaerer Coffee Club can also dispense hot chocolate with milk or milk foam.
-
Page 5: Table Of Contents
With Schaerer milk cooler ……..
-
Page 6
Table of Contents CleanLock …………..Instructions . -
Page 7
Cleaning the powder container ……….HACCP cleaning concept Maintenance and descaling Maintenance Schaerer Service SCClub operating instructions… -
Page 8
Table of Contents 10 Notifications and notes 10.1 Operation notifications 10.2 Error messages and faults 10.3 Error without error message 11 Safety and warranty 11.1 Hazards for the coffee machine 11.2 Directives 11.3 Operator responsibilities 11.4 Warranty claims Appendix: Technical data Technical data of the coffee machine Appendix: Accessories and spare parts SCClub operating instructions… -
Page 9: Safety
> Observe all safety notes. General safety notes Dangers for the operator Maximum safety is one of the most important features of Schaerer products. The effectiveness of the safety devices is only ensured as long as the following is observed: >…
-
Page 10
Safety > Under continuous supervision CAUTION this device can be used by children aged 8 and up and by persons with limited physical, sensory or mental capabilities or a lack of experience and/ or knowledge, provided they have been instructed about the safe use of the device and understand the potential hazards resulting from said use. -
Page 11
Safety In spite of the safety devices, every coffee machine carries some potential risk if used improperly. Please comply with the following instructions when handling the coffee maker in order to prevent injuries or health hazards: Risk of death due to electrocu- WARNING tion! •… -
Page 12
Safety Risk of burns/ CAUTION Danger of scalding • Hot liquid comes out of the outlets during beverage and steam dispensing. The adjacent surfaces and outlets get hot as well. > Do not touch the area under the outlets during beverage and steam dispensing. -
Page 13
Safety Risk of trapping/Risk of injury CAUTION • The coffee machine contains moving parts which could injure fingers or hands. > Always switch off the coffee machine and pull out the power plug before reaching into the coffee grinder or into the opening of the brewing unit. -
Page 14
Safety Health risk/ CAUTION Risk of irritation and burns • During cleaning, hot cleaning liquid and hot water flow out of the outlets. • The hot liquids could irritate the skin and the heat creates a risk of burns. • Hot liquids could be in the drip tray. -
Page 15: Intended Use
> The coffee machine must only be used in the correct manner. The Schaerer Coffee Club is designed to dispense beverages made of coffee and/or milk and/or powder (e.g. choco or toppings) into suitable containers. This device is intended for commercial use in hotels, restaurants and similar establishments.
-
Page 16: Conditions For Use And Installation
It must be carried out by licensed installers observing all general, national as well as locally applicable regulations. Schaerer Service may only connect the coffee machine to the prepared connections. They are neither authorised to carry out structural installation, nor are they responsible for its implementation.
-
Page 17: Introduction
Introduction Introduction Labelling of coff ee machine parts Display SCClub operating instructions…
-
Page 18
Introduction Bean hopper Second bean hopper or powder container (for example choco, topping or double powder container) (optional) Manual inlet/Tablet insert On/off switch Beverage outlet (coffee, milk and choco) Water tank Cup grid SteamJet cup warmer Removable drip tray with drip grid Grounds container Steam outlet Hot water outlet… -
Page 19
Introduction Signs and symbols in the operating instructions Personal injury safety notes WARNING If the safety notes are not observed, mild Safety notes to serious injury could occur in the event of incorrect operation. Observe the Safety chapter w f rom page 9 Personal injury safety notes CAUTION If the safety notes are not observed, mild injury… -
Page 20
Introduction Glossary Term Explanation • • Counting, selection options * Individual work steps Cursive text Description of condition of the coffee machine and/or explanations of automatic steps. Barista Personal coffee maker Choco Hot chocolate DECAF Decaffeinated coffee Beverage Dispensing of coffee, hot water or powder beverages dispensing Main water valve Stopcock, angle valve… -
Page 21: Commissioning
Commissioning Commissioning (For the first commissioning after delivery from the factory) Follow the operating instructions CAUTION > Always follow the operating instructions Important! exactly, especially the safety notes and the Note the signs and symbols in Safety chapter. the operating instructions >…
-
Page 22: Installation Location
> Check whether the coffee machine is wfrom page 107 intact. In case of doubt, do not put the coffee machine into operation and contact Schaerer Service. > Therefore, be sure to keep the original packaging in a safe place should a return delivery be necessary.
-
Page 23: Commissioning Programme
Commissioning * Unpack the Schaerer Coffee Club and set the coffee machine on a stable, horizontal surface . * Observe the technical data. Technical data wpage 107 * Plug the connection cable of the coffee machine into the respective socket.
-
Page 24: Determining The Water Hardness
This point is a step taken during the commissioning programme. For drinking water with a carbonate hardness above 5°dKH, a Schaerer water filter should be installed, as otherwise the coffee machine can be damaged due to calcification. Determining the water hardness…
-
Page 25: Operation
Operation Operation Operation safety notes Risk of burns/ CAUTION Danger of scalding Observe the Safety chapter • Hot liquid comes out of the outlets during w f rom page 9 beverage and steam dispensing. The adjacent surfaces and outlets get hot as well.
-
Page 26: Beverage Dispensing
Operation Beverage dispensing Pressing on the beverage buttons starts dispensing of the set beverages. • Illuminated button = Ready for dispensing • Unilluminated button/ = Not ready for dispensing/ red triangle in the button locked header * Set a beverage container of a suitable size below Button layout w …
-
Page 27: Connecting The Milk
Milk storage temperature w Milk and foam page 60 With Schaerer milk cooler * Use the appropriate steam nozzle for cooled milk (orange) * Remove the milk container from the cooler * Push the lid of the milk container back…
-
Page 28: Milk Lance (Optional)
Operation Milk lance (optional) Note NOTE • Clean the milk lance daily. • The milk hose must not be kinked. * Use the appropriate steam nozzle on the milk foamer * Put the milk package to the left next to the coffee machine * Open the milk lance lid * Connect the Plug&Clean adapter to the milk lance…
-
Page 29: Hot Water Dispensing
Operation Hot water dispensing * Set a beverage container of a suitable size below the hot water outlet * Tap on the hot water button Dispensing is done in line with the set dosing type. Basic Steam (optional) Risk of burns/ CAUTION Danger of scalding Observe the Safety chapter…
-
Page 30
Operation Heating up beverages * Hold a cloth in front of the steam pipe for your own The steam dispensing starts after the first tap on the steam protection button. Tapping a second time * Briefly press the steam button stops steam dispensing. -
Page 31
Operation Foaming milk > Do not overheat the milk, or the amount of milk foam will decrease * Hold a cloth in front of the steam pipe for your own protection * Briefly press the steam button This blows out the condensation. * Use a tall and narrow container with a handle * Fill the container no more than halfway * Put the steam nozzle into the container just under… -
Page 32: Cup Grid
Operation 4.10 Cup grid * Grab the handle at the top of the grounds container * Pull out the cup grid as far as it will go Base height with cup grid Max. 100 mm Base height without cup grid Max.
-
Page 33: Manual Inlet
Operation 4.12 Manual inlet The manual inlet is located at the centre on the coffee machine lid. The manual inlet is used: • As an inlet for cleaning tablets • For other types of coffee, for example decaffeinated coffee • For coffee sampling Tablet inlet •…
-
Page 34: Grounds Container
Operation 4.13 Grounds container The grounds container collects the used ground coffee. It holds coffee grounds from approx. 30 brewings. A notification appears on the display when the grounds container needs to be emptied. Dispensing of beverages is blocked if the grounds container is not in place.
-
Page 35: Drip Tray
Operation 4.15 Drip tray Danger of scalding CAUTION • Hot liquids could be in the drip tray. Observe the Safety chapter > Carefully move the drip tray. w f rom page 9 > Reinstall it carefully so that no unintended Clean the drip tray daily water leakage occurs.
-
Page 36: Mains Water Supply (Optional)
Operation 4.16 Mains water supply (optional) The mains water supply to water and waste water is only possible using a retrofit kit. With a mains water supply, the water tank IMPORTANT must only be removed if the coffee machine is switched off.
-
Page 37: Software
Software Software • When setting beverages, the same safety CAUTION notes apply as for the operation of the coffee machine. Operation safety notes > Observe all operating safety notes. w p age 25 Overview Readiness for use Page 39 Button layout w …
-
Page 38: Main Menu Functions
Software Main menu functions from page 41 Care Info Timer System Page 41 Page 55 Page 59 Page 60 Beverages Operating option Language Page 43 Page 50 Page 67 Page 64 Accounting PIN rights system Page 57 Page 56 Menu control fi elds To the main menu Confi rm the value/setting Return to the previous menu…
-
Page 39: Readiness For Use
Software Readiness for use Ready for operation display The display shown when the machine is ready for use Button layout w O perating options depends on the options of the coffee machine and page 50 individual settings. 5.2.1 Ready for operation display fields Beverage buttons All output-ready beverage buttons are illuminated.
-
Page 40: Steamjet Cup Warmer
Software 5.2.2 SteamJet cup warmer Risk of burns/ CAUTION Danger of scalding Observe the Safety chapter • Hot steam is output through the SteamJet w f rom page 9 cup warmer. At the same time, the cups and Clean the drip tray daily the adjacent surfaces are hot.
-
Page 41
Software Care Menu control fi elds w O verview page 38 Care chapter w f rom page 70 HACCP cleaning concept w f rom page 92 DS_03_04_01_01 System cleaning After system cleaning with or without switching off the System cleaning coff ee machine. -
Page 42: Cleanlock
The water hardness, the water flow and whether a water filter is used determine the Descaling chapter remaining litres until descaling is necessary. w f rom page 76 This litre specification is calculated and displayed by the Schaerer Coffee Club. SCClub operating instructions…
-
Page 43: Brewer Care
Software Brewer care After 15,000 brewing cycles, the O-ring on the Brewer care brewing unit must be changed. When the end of the service life is reached, a daily notifi cation appears as a reminder that a change is overdue. * Change the O-ring * Confi rm the change Beverages…
-
Page 44: Filling Quantity, Animation Cup Tray, Multiple Brewing And Dosing Type
Software Filling quantity, animation cup tray, multiple brewing and dosing type Filling quantity Set the desired filling quantity. The recipe is adjusted appropriately. 100% corresponds to the previously saved value. Animation cup tray The “animation cup tray” is displayed after the beverage selection, if it was previously activated under “filling quantity”…
-
Page 45
Software Multiple brewing The beverage is brewed several times as set. Up to 12 times the set quantity can be dispensed at the push of a button. Available for coffee and mixed milk beverages as well as for hot water with the “Portion control” dosing type. Dosing type The dosing type can be determined for hot water, milk foam, milk and steam. -
Page 46: Changing Recipes
Software Changing recipes Menu control fields w O verview page 38 Current recipe composition The additions contained in the recipe are shown here. The preparation order is from left to right. Additions listed under one another are prepared at the same time.
-
Page 47
Software Deleting addition Delete a marked addition from the current recipe composition. Changing addition * Mark the addition and tap on the «Change addition» symbol. Change addition menu opens. The setting options for the desired addition are displayed. The saved and the current data is displayed. The current values The values saved by Service The factory values… -
Page 48: Coffee Quality
Software Coffee quality The quality levels influence the brewing of the coffee. The higher the quality level, the more intensive is the release of the coffee’s flavouring agents. Quality levels After being pressed, the ground coffee is given Note room to swell. If very fine ground coffee is used with a very small amount After being pressed, the beverage is brewed…
-
Page 49: Text And Image
Software Text and image DI_03_05_04_00 Cappuccino Change text + picture Menu control fields w O verview Recipe number 10 Factory: 10 page 38 Text + picture Cappuccino Note The beverage name and the picture of a beverage button are adjusted here. For text adjustments: Activate the keyboard with the keyboard icon.
-
Page 50: Operating Options
Software Operating options DS_05_05_01_08 Operating elements Operating elements Self-service mode Some functions could be switched to be inactive for self-service mode. These functions and their fi elds are not shown when they are inactive. Options: • Active • Inactive Standard value: Inactive Self-service mode means the following settings are switched at the same time.
-
Page 51
Software Warm rinse field Options: • Active • Inactive Standard value: Active Active The field appears at the very bottom when the machine is ready for use. Recommended for longer breaks or espresso. Menu field Options: • Immediately • Delayed Standard value:Immediately Immediately The menu field immediately reacts after tapping on the field. -
Page 52
Software Cup size adjustment The free filling quantity selection can be activated in the operating options. The filling quantity can thus be adapted to the cup size used before beverage selection. Options: • Active • Inactive Standard value: Inactive If the cup is pushed to the right on the controller, the filling quantity increases, while pushing to the left lowers the filling quantity. -
Page 53: Button Layout
Software DS_03_06_01_01 Button layout Different standard layouts are saved here and can be Button layout selected. PostSelection PostSelection Options: • Active • Inactive Standard value: Inactive Active The selection of the coffee type and the beverage size are queried after the beverage has been selected.
-
Page 54: Beverage Pre-Selection
Software DS_03_06_01_04 Decaf factor The value for the decaf factor is entered here. Decaf factor The ground coffee quantity for decaf (descaffeinated) is determined in percent of the ground coffee quantity At a 15% decaf factor, coffee, for example, is brewed with set in the recipe.
-
Page 55: Info
The timer weekly overview is called up. All switching-on and switching-off times are shown in this overview. DS_03_07_03_01 Service Service Contact information for Schaerer Service. Serial number of the coff ee machine. DS_03_07_04_01 Care Care The last cleanings and care measures which run via coff ee machine programmes are shown here.
-
Page 56: Accounting
Software Accounting DS_03_08_00_01 Counters Counters The counters of the dispensed individual beverages and the sum of the beverages are shown here. DI_03_08_00_00 A protocol can be read out using the USB output. DI_abr Accounting Counters Cappuccino 510 5900 Cappuccino 306 3540 Chociatto 416 4200 Chociatto…
-
Page 57: Coffeemysation (App)
Bluetooth on the way to the machine. It can be used for all Schaerer Coff ee Club machines. The individual recipes are therefore not bound to just one machine. If “Accounting” is activated, the following functions can be accessed: •…
-
Page 58: Cleaning Pin
Software DS_03_09_01_01 Cleaning PIN After the valid PIN is entered, access to: Cleaning Care DS_03_09_02_01 Setting PIN Settings After the valid PIN is entered, access to: Care Timer Beverages System Operating option Language Accounting (without «deletion») DS_03_09_03_01 Accounting PIN Accounting After the valid PIN is entered, access to: Care Beverages…
-
Page 59: Timer
Software Timer DS_03_10_00_01 Time/Date Time / date The current time and data are set here. Status of button layout Status of button layout Options: • Active • Inactive Standard value: Inactive Active Button layouts can be assigned automatically For example self-service from 9 pm to 6 am.
-
Page 60: System
Software 5.10 System DS_03_11_00_01 Milk and foam The central, generally-applicable values for milk and Milk and foam milk foam are set here. These values apply for all available recipes. If special values for milk and milk foam are set in the recipes, they remain valid and are not changed.
-
Page 61: Display And Lighting
Software DS_03_11_00_02 Display and lighting Parameters relating to the display such as brightness Display and illumination and lighting at the outlet can be found in this system menu. Lighting concept Consisting of two parameters: 1. Lighting (at the outlet) Options: •…
-
Page 62
Software Active If „Automatically decreasing brightness“ is activated, the display brightness is automatically decreased 5 minutes after the last beverage dispensing process (break in operation). If the display brightness has been decreased, the display goes back to the selected brightness when the display is tapped for the first time. -
Page 63: Water Filter
Software DS_03_11_00_04 Water filter Information on water hardness and water filter service Water filter life. Note Options: • Active • Inactive No water filter is required at a water hardness of 0 to 4 °dKH. Standard value: Inactive Active A water filter is present. Measured water hardness and water filter service life (according to table) are queried, see below.
-
Page 64: Temperature
Software Temperature DS_03_11_00_07 Boiler Temperature The boiler water temperature is set here (coffee brewing water temperature). DS_03_06_01_07 Switch-off rinsing Switch-off rinsing Options: • Active • Inactive Standard value: Active Active When switching off of the coffee machine, the system cleaning must be performed if milk beverages have been dispensed since the last cleaning.
-
Page 65: Drip Tray Sensor
Bluetooth Options: • Active • Inactive Standard value: Inactive * Set Bluetooth to active here * Insert the Schaerer Bluetooth stick into the USB slot on the back. * Switch the coffee machine OFF and ON again. SCClub operating instructions…
-
Page 66: S-M-L Function
Software S-M-L function After activation, small-medium-large filling quantities S-M-L can also be configured for each beverage in the settings. To do so, first go to a beverage in settings. Choose the icon filling quantity down left and activate the [SML active] box. All sizes are activated just now.
-
Page 67: Usb
Software 5.11 USB Data exchange is possible using the USB connection. As soon as the USB stick is inserted, the functions become active. The USB connection is on the left side of the display. DS_03_13_00_01 Loading recipes Load recipes Recipes saved on the USB stick are loaded to the coff ee machine here.
-
Page 68: Haccp Export
Software HACCP export DS_03_13_00_05 The cleanings performed are logged and are HACCP export exported here to the USB stick for the HACCP certifi cate. Data backup DS_03_13_00_06 Set data such as machine data, beverage data, etc. Data back-up is saved on the USB stick here. DS_03_13_00_07 Loading data Load data…
-
Page 69: Other Settings
Other settings Other settings Setting the grind level Risk of trapping/Risk of injury CAUTION • The coffee grinder contains moving parts Observe the Safety chapter which could injure fingers. w f rom page 9 > Never reach into the grinders while the coffee machine is running and the product hoppers have been removed.
-
Page 70: Care
Care Care Care safety notes Regular cleaning is a requirement for fault-free operation of the coffee machine and for optimal coffee quality. Health risk/Hygiene CAUTION • Milk is very sensitive. Hazardous bacteria Observe the Safety chapter can grown in the milk system. w …
-
Page 71
CAUTION • All cleaning products are perfectly matched Observe the Safety chapter to the cleaning programmes. w f rom page 9 > Use only Schaerer cleaning and descaling agents. Health risk/ CAUTION Risk of irritation and burns Observe the Safety chapter •… -
Page 72: Overview Of Cleaning Intervals
Care Overview of cleaning intervals Care Cleaning programmes System cleaning Mixer rinsing Cleaning programme Milk system rinse w from page 73 Descaling x Descaling Manual cleaning w P age 76 Clean the control panel (CleanLock) w P age 78 Clean the grounds container w …
-
Page 73: Dishwasher-Safe Parts
Animated instructions w C offee machine which cleans the coffee system of the coffee machine w M ain menu with Schaerer cleaning tablets. w C are A milk system rinse and a mixer rinse are part of the w I nstructions system cleaning process.
-
Page 74: System Cleaning
Care Health risk/Risk of irritation and CAUTION burns Observe the Safety chapter • During cleaning, hot cleaning liquid and hot w f rom page 9 water flow out of the outlets. • The hot liquids could irritate the skin and the heat creates a risk of burns.
-
Page 75: Mixer Rinsing
Care 7.4.3 Mixer rinsing Health risk/Danger of scalding CAUTION • Hot rinse water flows out of the outlet Observe the Safety chapter during rinsing. w f rom page 9 > Never reach under the outlets during rinsing. NOTE Before starting operation and after the end of the business day, a rinse must be done.
-
Page 76: Descaling
Care Descaling Health risk/Risk of irritation and CAUTION burns Observe the Safety chapter • Hot cleaning liquid or descaling solution w f rom page 9 flows out of the outlet during cleaning and descaling. • The hot liquids could irritate the skin and the heat creates a risk of burns.
-
Page 77
• Rinsing any point before it is completed. The following is needed during the descaling process: • 2 bottles of Schaerer liquid descaler (0.75 litres each). • 1 bottle of water (0.75 litres). • 5 litre collection container The display messages lead through the IMPORTANT programme step-by-step. -
Page 78: Manual Cleaning
Care Manual cleaning Order numbers for the Schaerer care programme w A ccessories and spare parts page 109 7.6.1 Cleaning the control panel (CleanLock) Tap on «CleanLock», then a 15-second countdown starts. The touch display can now be cleaned. The touch display is reactivated 15 seconds after the last time it is touched.
-
Page 79: Cleaning The Collecting Tray
Care 7.6.3 Cleaning the collecting tray Remove and clean the collecting tray once a week. Low water volume in the collecting tray does not mean there are leaks; this is caused by the system design. The collecting tray is under the grounds container. Clean the collecting tray when needed.
-
Page 80: Cleaning The Drip Tray
Care 7.6.5 Cleaning the drip tray Danger of scalding CAUTION • Hot liquids could be in the drip tray. Observe the Safety chapter • If the drip tray does not correctly engage, w f rom page 9 for example after cleaning, there is a risk of burns from hot fluids.
-
Page 81: Cleaning The Housing
Care 7.6.6 Cleaning the housing • There is a risk that scratches or dents will IMPORTANT occur during cleaning. > Do not clean with abrasive agents or Observe the Warranty chapter w f rom page 106 similar. > Use only very mild cleaning products. Note >…
-
Page 82: Cleaning The Brewing Unit
Care 7.6.8 Cleaning the brewing unit Risk of trapping/Risk of injury CAUTION • The coffee machine contains moving parts Observe the Safety chapter which could injure fingers or hands. w f rom page 9 • There is a risk of crushing when removing the brewing unit >…
-
Page 83
Care * Use one hand to reach under the brewing unit into the shaft, undo the lock and hold (Figure 1) * Slowly lead the brewing unit all the way down, tip it and remove it towards the front * Remove the brewing unit and hold on tight while doing so Figure 1 Use the multi-tool from the accessories. -
Page 84
Care * Dry off the brewing unit with a cloth Let it dry completely before installing it into the coffee machine Remove ground coffee residue in the shaft * Wipe out the ground coffee towards the front or use a hoover * Insert the springs into the insertion chute (Figure 4) Pay attention to the guides. -
Page 85: Cleaning The Milk System By Hand
Health risk CAUTION • If it comes into contact with the eyes, the Schaerer milk system cleaner can cause Observe the Safety chapter w f rom page 9 serious eye injuries. > Ensure that the milk system cleaner never gets into the eyes of humans or animals.
-
Page 86
Care * Mix 5 ml of special cleaner with 0.5 litres of warm drinking water * Lay all individual parts, including the cleaning brush, into the prepared cleaning liquid All parts must be completely covered with the cleaning liquid. * After 5 hours, thoroughly clean all parts with a brush * Very thoroughly clean all parts with pure drinking water… -
Page 87: Cleaning The Milk Hose
Care Cleaning the milk hose * Put one end of the milk hose to the other parts into the cleaning liquid * Lay the rest of the milk hose into the cleaning liquid lengthwise This process prevents air bubbles from remaining in «Cleaning milk hose»…
-
Page 88: Cleaning The Mixer
Care 7.6.10 Cleaning the mixer Animated instructions w C offee machine Clean more often depending on the powder used. w M ain menu w C are w I nstructions * Carry out a mixer rinse * Open the doors * Pull the mixing bowl forwards with the handle * Lift the mixing bowl slightly so that any remaining water runs out * Pull off the mixer hose, from the mixing bowl to the…
-
Page 89: Cleaning The Bean Hoppers
Care 7.6.11 Cleaning the bean hoppers The permanently installed bean hoppers can be cleaned at regular intervals and as needed. Recommendation: monthly. Risk of injury CAUTION • Very long hair could get stuck in the grinder head and get pulled into the coffee machine.
-
Page 90: Cleaning The Powder Container
Care Bean hopper extension (optional) * Unlock the extension * Remove the extension upwards * Thoroughly wipe the extension with a damp cloth and let it dry * Put on the extension and lock 7.6.12 Cleaning the powder container The permanently installed bean hoppers can be cleaned at regular intervals and as needed.
-
Page 91
Care * Thoroughly clean the individual parts of the positioning screw with the supplied cleaning brush * Let the powder container and the individual parts dry completely * Reassemble and install the portioning screw and screw on the cap nuts Portioner with individual parts Portioning screw IMPORTANT… -
Page 92: Haccp Cleaning Concept
p age 68 When installed, maintained, cared for and cleaned properly, Schaerer coffee machines fulfil the regulations named above. If the coffee machine is not cared for and cleaned properly, the dispensing of milk beverages can present a food hygiene risk.
-
Page 93
20 must be used very quickly. If necessary, cool the cappuccinos. milk between use. Schaerer off ers various cooling • If not much milk is used, the pre-cooled milk must options (e.g. Schaerer side be cooling during operation. -
Page 94: Maintenance And Descaling
Maintenance Maintenance after notification on the display only by Service-maintenance notifications trained staff or Schaerer Service, since safety tests w N otifications and notes have to be done. page 96 The following maintenance levels exist: • Descaling, can be done by the operator/user.
-
Page 95: Schaerer Service
Maintenance and descaling Schaerer Service Important! Schaerer Service can be reached via a central address if the sales centre for a particular location is For other maintenance work and repairs, contact the not known. responsible Schaerer Service. The telephone number can be…
-
Page 96: Notifications And Notes
* Correctly reinsert the grounds container Changing the water filter * Change the water filter Observe the operating instructions of the water filter. * If necessary, call Schaerer Service Call Schaerer Service Display of the error number w E rror messages and faults…
-
Page 97: Error Messages And Faults
The beverages of the beverage buttons that remain lit can continue to be dispensed. Your Schaerer Coffee Club is equipped with a diagnosis program. Any occurring errors appear on the display. The listed error messages could also be caused by a mains fault.
-
Page 98
Boiler: * Switch the coffee machine off and back on heating time error * If the error is not fixed, call Schaerer Service Water error: Switch the coffee machine off and on again after every one of the following steps. If the error is not fixed, perform the next step. -
Page 99
If the error is not fixed, perform the next step. Warm rinsing * Clean the brewing unit w C are w B rewing unit cleaning, page 82 * If the error is not fixed, call Schaerer Service Steam boiler: Dispensing is temporarily disabled. level… -
Page 100: Error Without Error Message
Error description Instruction • No hot water dispensing, * Clean the hot water outlet but water in grounds * Call Schaerer Service (coffee dispensing is container possible) • No choco dispensing, * Stop using the Choc outlet but water in grounds * Call Schaerer Service (coffee dispensing is container.
-
Page 101
C arew C leaning the milk system by hand, page 85 * Set less powder * Set more water • Pump runs permanently, * Switch the coffee machine off and back on water in the grounds * If the error is not fixed, call Schaerer Service container SCClub operating instructions… -
Page 102: Safety And Warranty
Safety and warranty Safety and warranty 11.1 Hazards for the coffee machine Follow the instructions IMPORTANT Failure to do so will result in a loss of warranty Observe the Warranty chapter coverage in the event of damage. w f rom page 106 Follow use and installation requirements.
-
Page 103
• For drinking water with a carbonate hardness from 5°dKH and above, a Schaerer water filter should be installed, as otherwise the coffee machine can be damaged due to calcification. -
Page 104: Directives
In case of any modifications of the units that have not been approved by Schaerer, this declaration is rendered invalid. Compilation of technical documents: WMF Group GmbH.
-
Page 105: Operator Responsibilities
These measures are performed by Schaerer Service or by service staff authorised by Schaerer as part of the maintenance routine. Schaerer special cleaning System cleaning must only be done using Schaerer…
-
Page 106: Warranty Claims
(e.g. operating manual and servicing instructions). • For defects arising as a result of failure to use original Schaerer spare parts or due to incorrect assembly by the purchaser or third parties or incorrect or negligent handling.
-
Page 107: Appendix: Technical Data
Do not reuse old hose sets. Water quality For drinking water with a carbonate hardness above 5°dKH, a Schaerer water filter should be installed. Water drainage line Hose at least DN 19, minimum slope 2 cm/m…
-
Page 108
50 mm is required between the machine and sides of the building — or from parts not manufactured by Schaerer — or at least 60 mm between the machine and the rear wall. A minimum work space in front of the coffee machine of 800 mm is recommended. -
Page 109
Appendix: Technical data These specifications for the electrical connection of the machine and the standards listed apply for connection of the coffee machine in EU countries. Where appropriate, additional country-specific regulations must be complied with. Outside the EU countries, the person or organisation marketing the coffee machine must check the acceptance of the listed standards. -
Page 110: Appendix: Accessories And Spare Parts
Appendix: Accessories and spare parts Appendix: Accessories and spare parts Number Unit Designation Equipment Coffee outlet/Milk outlet/Choco outlet/Milk lance Pcs. Coffee outlet lid Pcs. Double cup coffee outlet Pcs. Choco mixer outlet (hose) Powder container Pcs. Milk hose sleeve Milk Smart Pcs.
-
Page 111
Water tank Documentation/Instructions Pcs. Documentation set: Operating instructions Schaerer Coffee Club Schaerer care programme bottle Schaerer special cleaner for the milk foamer pack Special cleaning tablets (100 pcs.) bottle Calcpure 750 ml Pcs. Pipe cleaning brush Pcs. Cleaning brush 2.5 Tube Schaerer «grease for sealing rings», Molykote…
Форум о кофемашинах — ремонт, обслуживание, использование кофемашин, выбор кофе и кофемашины

Пожалуйста, войдите или зарегистрируйтесь.
- Документация
- Кофе и кофемашины
- Карта сервисов
- Магазин запчастей
- Инструкции
- Ремонт
-
Начало
-
Помощь
-
Поиск
-
Вход
-
Регистрация
- Форум о кофемашинах — ремонт, обслуживание, использование кофемашин, выбор кофе и кофемашины
рейтинг кофемашин » Schaerer
| Обзор кофемашины | |
Кофемашина Schaerer Siena-2 FEWA Характеристики и функцииНастройкиТехническое обслуживание и уходОсновные компонентыТехнические условияДругоеДизайн и ценаОписание |
|

| Руководство пользователя, инструкция схемы для Кофемашина Schaerer Siena-2 FEWA | |||
| Имя файла | Тип файла | Размер файла | |
|
|
Инструкция для кофемашины Schaerer Siena-2 FEWA |
|
2840.5 KB |
|
|
Схема кофемашины Schaerer Siena-2 FEWA |
|
5732.0 KB |


| Вопросы для голосования | Пользователи | Специалисты | |
| Качество приготовления кофе |
|
|
Для оценки этой машины, пожалуйста, авторизуйтесь. Впервые на сайте? Зарегистрируйтесь сейчас, бесплатно! |
| Внешний вид, дизайн |
|
|
|
| Сервисное обслуживание и уход |
|
|
|
| Надежность и ремонтопригодность кофемашины |
|
|
|
| Рекомендуете купить? |
|
|
|
| Цена кофемашины |
|
|
| Новый отзыв |

|

|
Киров, ул. Карла Маркса, 84, оф. 15
Офис работает пн-пт с 8 до 17, сб с 10 до 14.
Посмотреть на карте
+7 (8332) 74-47-14
Прием звонков с 7 до 20 ч. ежедневно
Заказать звонок
Оставить заявку