
4.5
11 отзывов
72 заказа
7 733 руб.
Характеристики
- Материал
- Полиэстер
- Номер модели
- Baby678
- Тип
- Противомоскитная сетка
- Возрастной диапазон
- 7-9 М / 19-24 М / 13-18 М / 10-12 М / 2-3Y / 0-3 М / 4-6 М
- Product Name
- 4 in 1 4 in 1 Carseat stroller
- Material
- Oxford cloth+Aluminum alloy
- Frame Material
- Aluminum Alloy
- Type
- Multiple Baby Stroller
- Color
- 5 colors
- Size
- 75*48*42 cm
- Certificate Number
- 2016012201899666
- Weight
- 9.7 KG
Сопутствующие товары
- Manuals
- Brands
- Graco Manuals
- Automobile Accessories
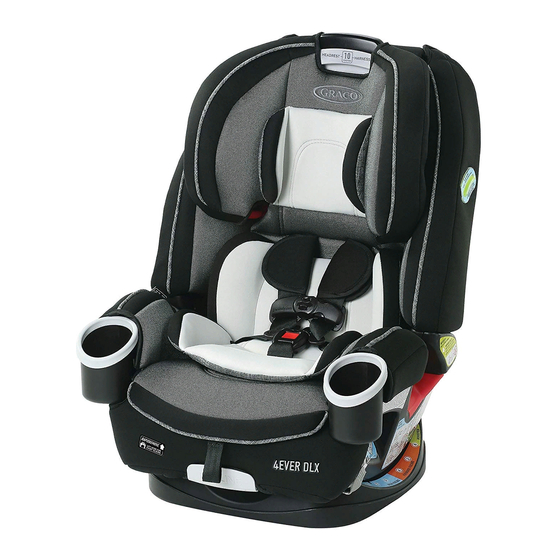
- 4Ever
- Instruction manual
-
Bookmarks
Quick Links
www.gracobaby.ca
4EVER
™
4-IN-1 CAR SEAT
Do not install or use
this child restraint until
you read, understand and
follow the instructions
in this manual and the
warnings on the car seat.
FAILURE TO PROPERLY
USE THIS CHILD
RESTRAINT INCREASES
THE RISK OF SERIOUS
INJURY OR DEATH IN A
NWL0000626785D
12/19
SUDDEN STOP OR CRASH.
Related Manuals for Graco 4EVER 4-IN-1 CAR SEAT
Summary of Contents for Graco 4EVER 4-IN-1 CAR SEAT
-
Page 1
www.gracobaby.ca 4EVER ™ 4-IN-1 CAR SEAT Do not install or use this child restraint until you read, understand and follow the instructions in this manual and the warnings on the car seat. FAILURE TO PROPERLY USE THIS CHILD RESTRAINT INCREASES THE RISK OF SERIOUS INJURY OR DEATH IN A NWL0000626785D… -
Page 2
1 Important Pages 6-25 1-A Quick Guide to Your Manual 1-B Welcome to the Graco Family 1-C Right Mode of Use 1-D Before You Begin Register This Car Seat If You Need Help Certification Aircraft Installation Car Seat’s Useful Life… -
Page 3: Rear-Facing
3 Rear-Facing Pages 32-44 3-A Rear-Facing Use 3-B Install Rear-Facing with UAS Straps 3-C Install Rear-Facing with Vehicle Seat Belt 4 Forward-Facing with Built in Harness Pages 45-57 4-A Forward-Facing with 5-Point Harness Use 4-B Install Forward-Facing with 5-Point Harness with UAS Straps 4-C Install Forward-Facing with 5-Point Harness with the Vehicle Seat Belt…
-
Page 4: Securing Child
5 Booster Pages 58-73 5-A Booster Use 5-B Install Backed Booster 5-C Install Backless Booster 6 Securing Child Pages 74-90 6-A Securing Child 5-Point Harness 6-B Securing Child Backed Booster 6-C Securing Child Backless Booster 7 Moving the UAS Strap Pages 91-94…
-
Page 5: Vehicle Information
8 Accessories Page 95 9 Vehicle Information Pages 96-106 9-A How to Remove UAS and Top Tether 9-B Choosing Vehicle Seat Location 9-C Unsafe Vehicle Seat Location 9-D Vehicle Seat Belts 10 Care & Cleaning Pages 107-111 10-A Cleaning Seat Pad 10-B Cleaning Buckle Strap 10-C Cleaning Harness and UAS Straps…
-
Page 6
1-A Quick Guide to Your Manual This car seat is for children: Rear-Facing: 1.8-18 kg (4-40 lb) 46-110 cm (18-43 in) Forward-Facing with Built in Harness : 10-30 kg (22-65 lb) 69-125 cm (27-49 in) 102-145 cm (40-57 in) Booster: 18-54 kg (40-120 lb) At least 4 years old Install Cup Holders Cup holders must be installed. -
Page 7
Align the tab on the bottom of the cup holder with the hole in the seat. Use both hands to push down hard on the cup holder. You will hear a “Click” when they are secured in place. -
Page 8
Get to Know Your Car Seat Review section 2-A to see all of the features of this car seat. What Seating Location Should I Use? The best seating location for this infant car seat is one that: • Is recommended by your vehicle owner’s manual, and •… -
Page 9
According to collision statistics, the safest place for your child in any vehicle is the back seat. The center of the back seat can be the safest during a possible side impact. Which Installation Method Should I Use? This car seat can be installed in your vehicle using either the vehicle seat belt OR the UAS system. -
Page 10
What is UAS? UAS consists of lower anchors and top tether anchors, which are built-in to your vehicle, and connecting hooks that are built-in to your car seat. Lower anchors are used INSTEAD of the vehicle’s seat belt to secure the child seat to the vehicle. -
Page 11
When Installing Rear-Facing or Forward-Facing with 5-Point Harness UAS System UAS consists of lower anchors, which are built-in to your vehicle, and connectors that are built-in your car seat. Review section 3-B, 4-B of this manual AND your vehicle owner’s manual before installing. Vehicle Seat Belt There are two types of vehicle seat belts that can be used. -
Page 12
When Installing As a Booster Vehicle Seat Belt Only use the Lap/Shoulder seat belt configuration. Review section 5-B, 5-C of this manual AND your vehicle owner’s manual. -
Page 13
Does Your Car Seat Fit Your Child Correctly? To make sure your child is secured properly, review section 3,4 and 5 to understand all of the actions you need to take to properly adjust the car seat to fit your child. For Rear-Facing and Forward-Facing with 5-Point Harness, You Need to Adjust: Harness Height, Rear-Facing (A) Harness straps at or just below the child’s… -
Page 14
For Booster, You Need to Adjust: Use Lap/Shoulder Belt Only Position Lap Belt Lap belt must go behind armrest and lie low across your child’s hips and thighs. Position Shoulder Belt Shoulder belt lies across shoulder between neck and edge of shoulder. -
Page 15
Did You Do Everything Correctly? Rear-Facing Car Seat Does Not Move More than 2.5 cm (1 in) at the Belt Path (A) Review section 3 Level Indicator’s Bubble in the Blue Zone (B) Review section 3 Harness Straps at or Just Below the Child’s Shoulders (C) Review section 6. -
Page 16
Forward-Facing with Built in Harness Use the top tether strap when using forward-facing with Built in Harness (A) When used properly, the top tether helps reduce injury in a sudden stop or crash. Review section 4 Car Seat Does Not Move More than 2.5 cm (1 in) at the Belt Path (B) Review section 4… -
Page 17
Shoulder, Between the Neck and Edge of Shoulders Review section 6 1-B Welcome to the Graco Family! Your child’s safety depends on you. No car seat can guarantee protection from injury in every situation, but proper use helps reduce the risk of serious injury or death. -
Page 18
Note: Preterm or low birth weight infants may be at special risk in a vehicle or aircraft. These infants may suffer breathing issues if improperly reclined in a car seat. Graco advises that you have your physician or hospital staff evaluate your infant and recommend… -
Page 19
1-D Before You Begin Register This Child Restraint Please fill out the prepaid registration postcard attached to the harness and mail it in today or register online at www.gracobaby.ca Child restraints could be recalled for safety reasons. You must register this restraint to be reached in a recall. -
Page 20
For future reference or if you change addresses, record the model name, model number, date of manufacture and purchase date of this car seat on the below. You can find this information either on the registration card if you still have it or on the date label located on the back of the car seat. -
Page 21
STOP using this car seat and throw it away 10 years after the date of manufacture. Look for this sticker on back of the car seat. Graco Children’s Products Inc. advises against loaning or passing along a car seat unless you know the complete history of the product. We also advise against… -
Page 22
Vehicle Seat Protection Protect vehicle seat. Use a car seat mat, towel, or thin blanket under and behind car seat. Warm Weather Use Car seat parts can get very hot in the sun or warm weather. To avoid burns, always check before putting child in car seat. -
Page 23
1-E Safety Warnings No car seat can guarantee protection from injury in every situation, but proper use helps reduce the risk of serious injury or death. READ THIS MANUAL CAREFULLY. Failure to follow these instructions and child restraint’s warnings can result in child striking the vehicle’s interior during a sudden stop or crash. -
Page 24
Review your vehicle owner’s manual for more information about air bags and car seat use. If your vehicle does not have a back seat, review your vehicle owner’s manual. Children are safer riding rear-facing and should ride rear-facing as long as possible, until they reach the maximum rear-facing height or weight rating for their car seat. -
Page 25
DO NOT use accessories or parts other than those provided by Graco except for a thin towel or mat to protect your vehicle seat or a rolled towels or pool noodles to help get your car seat level. -
Page 26
2-A Car Seat Features… -
Page 27
A Headrest/Harness Adjustment Lever B Headrest C Booster Shoulder Belt Guide D Infant Head Support E Infant Body Support F Harness Covers G Harness Straps H Chest Clip I Buckle J Harness Release Lever (under flap) K Harness Adjustment Strap L Recline Handle M Seat Base N Cup Holder… -
Page 29
A Level Indicator B Top Tether Strap C UAS Strap D Forward-Facing Belt Path E Booster Lap Belt Path F Recline Position Indicator G Rear-Facing Belt Path H Rear-Facing UAS Strap Storage (under seat) -
Page 31
A Top Tether Strap Storage B Forward-Facing UAS Strap Storage C Instruction Manual Storage… -
Page 32
3-A Rear-Facing Use Rear-Facing: 1.8-18 kg (4-40 lb) 46-110 cm (18-43 in) • Infants who weigh less than 10 kg (22 lb) and cannot walk unassisted MUST be rear-facing. • Place car seat rear-facing in the vehicle back seat. UAS Strap •… -
Page 33
• Harness straps need to be even with or just below the top of child’s shoulders and chest clip is at armpit level. • Recheck the level indicator with child in seat. NEVER place this child Vehicle Seat Lap Belt restraint rear-facing in a vehicle seating location that has an active front air bag. -
Page 34
3-B Install Rear-Facing with UAS Straps Review your vehicle’s owner manual for UAS location and use. 1. Store Top Tether Strap Attach tether hook to the plastic bar on either side of the car seat. 2. Remove UAS Strap from Storage Location Push in on the red buttons on the UAS connectors and remove from storage… -
Page 35
3. Make Sure UAS Strap is in the Rear- Facing Belt Path Marked With a Blue Label If not, See section 7 to move UAS strap. 4. Recline the Car Seat Place the car seat in 1st, 2nd or 3rd recline position. -
Page 36
5. Place Car Seat Rear-Facing in Back Seat of the Vehicle Place rear-facing in vehicle seat and center the car seat between the lower UAS anchors. The base should sit as flat as possible on the vehicle seat. 6. Extend the UAS Strap. For easier installation, extend the UAS strap to its maximum length by pressing the grey button and pulling on the strap. -
Page 37
8. Attach UAS Connectors to Vehicle’s Lower UAS Anchors. UAS strap should lie flat and not be twisted. Click! 9. Tighten the UAS Strap Press down firmly in the center of the car seat while tightening the UAS strap. You may need to tighten through the slit in the pad at the belt path as shown. -
Page 38
10. Test For Tightness Grab the sides of the seat where the UAS strap is and slide the car seat side-to-side and front-to-back. If the seat moves less than 2.5 cm (1 in), it is tight enough. 11. Check the Level Indicator Vehicle MUST be on level ground. -
Page 39
Is Everything Correct? Car Seat Does Not Move More than 2.5 cm (1 in) at the Belt Path Level Indicator’s Bubble in the Blue Zone and Vehicle on Level Ground Harness Straps at or Just Below the Child’s Shoulders. Review section 6 Chest Clip Even With Armpits Review section 6 Cannot Pinch Harness Straps at the… -
Page 40
3-C Install Rear-Facing with Vehicle Seat Belt 1. Store Top Tether and UAS Straps Attach tether hook and UAS connectors to the plastic bars as shown. 2. Recline the Car Seat Place the car seat in 1st, 2nd or 3rd recline position. -
Page 41
3. Place Car Seat Rear-Facing in Back Seat of the Vehicle Place rear-facing in vehicle seat. The base should sit as flat as possible on the vehicle seat. 4. Check the Level Indicator Vehicle MUST be on level ground. Check the level indicator on the car seat. The bubble must be completely within the blue zone. -
Page 42
Review your vehicle’s owner manual for vehicle seat belt use 5. Route the Vehicle Seat Belt Thread vehicle seat belt through the rear- facing belt path (marked with a blue label) and out the other side. Buckle it. The seat belt should lie as flat as possible and not be twisted. -
Page 43
7. Tighten the Vehicle Seat Belt Press down firmly in the center of the car seat. Pull on the shoulder belt to tighten while feeding the slack back in the retractor. 8. Test For Tightness Grab the sides of the seat where the vehicle seat belt is and slide the car seat side-to- side and front-to-back. -
Page 44
Is Everything Correct? Car Seat Does Not Move More than 2.5 cm (1 in) at the Belt Path Level Indicator’s Bubble in the Blue Zone and Vehicle on Level Ground Harness Straps at or Just Below the Child’s Shoulders. Review section 6 Chest Clip Even With Armpits Review section 6 Cannot Pinch Harness Straps at the… -
Page 45
4-A Forward-Facing with 5-Point Harness Use Forward-Facing with built in Harness: 10-30 kg (22-65 lb) 69-125 cm (27-49 in)* • Remove the infant head support and body support when forward-facing. • Place car seat forward-facing in the vehicle back seat. •… -
Page 46
* Children are safer riding rear-facing and should ride rear-facing as long as possible, until they reach the maximum rear-facing height or weight rating for their car seat. Then children should ride forward-facing, using the built-in harness system for as long as possible until they reach the maximum forward-facing weight or height for their car seat. -
Page 47
4-B Install Forward-Facing with 5-Point Harness with UAS Straps Review your vehicle’s owner manual for UAS location and use. Do not install by this method for a child weighing more than 20 kg (45 lb) 1. Remove the infant head support and body support when forward-facing. -
Page 48
4. Unhook Top Tether Strap From Storage Unhook tether and lay it in the seat. 5. Adjust the Car Seat Place the car seat in the 4th, 5th or 6th recline position. -
Page 49
6. Place Car Seat Forward- Facing in Back Seat of the Vehicle Place forward-facing in vehicle seat and center the car seat between the lower UAS anchors. The base should sit as flat as possible on the vehicle seat. 7. Extend the UAS Strap. For easier installation, extend the UAS strap to its maximum length by pressing the grey button and pulling on the strap. -
Page 50
9. Tighten the UAS Strap Press down firmly in the center of the car seat while tightening the UAS strap. You may need to tighten through the slit in the pad at the belt path as shown. 10. Attach Top Tether Strap Extend the top tether by lifting up on the tether lock and attach. -
Page 51
12. Test For Tightness Grab the sides of the seat where the UAS strap is and slide the car seat side-to-side and front-to-back. If the seat moves less than 2.5 cm (1 in), it is tight enough. See section 6-A to secure your child. -
Page 52
Is Everything Correct? Car Seat Does Not Move More than 2.5 cm (1 in) at the Belt Path Harness Straps at or Just Above the Child’s Shoulders. Review section 6 Chest Clip Even With Armpits Review section 6 Cannot Pinch Harness Straps at the Shoulder Review section 6… -
Page 53
4-C Install Forward-Facing with 5-Point Harness with Vehicle Seat Belt 1. Remove the infant head support and body support when forward-facing. 2. Store UAS Straps Attach UAS connectors to the plastic bars as shown. 3. Adjust the Car Seat Place the car seat in the 4th, 5th or 6th recline position. -
Page 54
4. Unhook Top Tether Strap From Storage Unhook tether and lay it in the seat. 5. Place Car Seat Forward- Facing in Back Seat of the Vehicle Place forward-facing in vehicle seat. The base should sit as flat as possible on the vehicle seat. -
Page 55
7. Lock the Vehicle Seat Belt In most vehicles today, slowly pull the shoulder belt all the way out and then let it go back in. You will hear a clicking sound. Slowly pull out on the belt and it should be locked. -
Page 56
9. Attach Top Tether Strap Extend the top tether by lifting up on the tether lock and attach. Consult vehicle’s owner manual for specific location. 10. Tighten the Top Tether Strap Push the car seat back while tightening the top tether strap to remove all the slack. 11. -
Page 57
Is Everything Correct? Car Seat Does Not Move More than 2.5 cm (1 in) at the Belt Path Harness Straps at or Just Above the Child’s Shoulders. Review section 6 Chest Clip Even With Armpits Review section 6 Cannot Pinch Harness Straps at the Shoulder Review section 6… -
Page 58
5-A Booster Use Booster Use With Back: 18-45 kg (40-100 lb) 102-145 cm. (40-57 in) at least 4 years old* Booster Use Without Back: 18-54 kg (40-120 lb) 110-145 cm. (43-57 in) at least 4 years old* • Place car seat forward-facing in the vehicle back seat. -
Page 59
• DO NOT position vehicle shoulder belt under the child’s arm or back. • DO NOT allow child to slouch or slide down in the booster seat. • DO NOT position vehicle belt over top of armrests. • Vehicle’s seat headrest SHOULD NOT create a gap between vehicle seat and booster seat. -
Page 60
5-B Install Backed Booster 1. Remove the infant head support and body support when forward-facing. 2. Store The Harness System A. Loosen the shoulder straps as much as possible. B. Raise the headrest to the highest position. C. Unbuckle the chest clip and the buckle strap D. -
Page 61
E. Unsnap Pad and Expose Seat Back Undo the 2 snaps in the headrest pad. F. Lift the headrest pad flap up out of the way. G. Unsnap Bottom Seat Pad Undo the 2 lower snaps. -
Page 62
H. Pull Bottom Seat Pad Back To Expose the Plastic Shell I. Open the Harness Storage Door J. Place Harness, Chest Clip, Buckle Tongues Inside Storage Compartment and Close the Door… -
Page 63
K. Store Buckle as Shown L. Replace Seat Pad Move the headrest back to its proper position for your child. -
Page 64
3. Adjust the Car Seat Place the car seat in the 6th recline position. 4. Place the Booster Seat Forward- Facing in the Back Seat of Vehicle Place forward-facing on a vehicle seat that has a lap/shoulder seat belt. The base should sit as flat as possible on the vehicle seat. -
Page 65
Graco allows the securing of the car seat with UAS in the booster mode. The child still MUST BE SECURED with the vehicle lap/shoulder seat belt. UAS can be used in the booster mode regardless of the weight of the child up to 54 kg (120 lb). -
Page 66
6. Unhook Top Tether Strap From Storage Location and Lay it in the Seat 7. Attach UAS Connector to Vehicle’s Lower UAS Anchors. UAS strap should not be twisted. Click! -
Page 67
8. Tighten the UAS Strap Remove all the slack. 9. Attach Top Tether Strap Extend the top tether by lifting up on the tether lock and attach. Consult vehicle’s owner manual for specific location. 10. Tighten Top Tether Strap Remove all the slack. -
Page 68
11. Thread the Vehicle Seat Shoulder Belt Through Seat Belt Guide on the Headrest See section 6-B to secure your child. -
Page 69
5-C Install Backless Booster 1. Remove the infant head support and body support when forward-facing. 2. Remove the Seat Back by First Loosening the Harness Straps Press down on the harness release lever while pulling out on the harness straps at the chest clip. -
Page 70
4. Make Sure UAS Straps are in the Forward-Facing Belt Path and in the Stored Position See section 7 to change positions. 5. Unsnap Bottom Seat Pad Unsnap seat pad and expose the bottom of seat base. -
Page 71
6. Lift the Red Backrest Lock Up With the car seat in the 6th recline position, lift the red backrest locks up and slide together. 7. Remove Seat Back from Seat Base Push the seat back up and lift out of base. To replace the seat back, reverse steps 4 though 6. -
Page 72
8. Relock the Red Backrest Locks Make sure they are both flat and locked into place 9. Store Splitter Plate Pull the harness adjustment strap all the way out and then store the splitter plate. 10. Store Buckle Strap… -
Page 73
11. Attach Base Pad to the Back of Base Attach the elastic straps onto base as shown. 12. Place the Booster Seat Forward- Facing in the Back Seat of Vehicle Place forward-facing on a vehicle seat that has a lap/shoulder seat belt. The base should sit as flat as possible on the vehicle seat. -
Page 74
WARNING! In cold weather, do not put snowsuits or bulky garments on your child when placing them in the car seat. Bulky clothing can prevent the harness straps from being tightened properly. To keep child warm, buckle your child in the car seat and place a blanket around the child or place the child’s coat on backwards after buckling in. -
Page 75
2. Place Your Child in the Seat Make sure their back is flat against the car seat back. 3. Place Harness Straps Over Child’s Shoulders and Buckle You will hear a “click” when buckle tongues are securely attached. Pull up on each buckle tongue to make sure it is securely attached. -
Page 76
4. Be Sure the Harness Straps Are at the Proper Height 2.5 cm (1 in ) Rear-Facing: Harness straps must be at or just below the child’s shoulders and top of head must be at least 2.5 cm (1 in) Rear-Facing below the headrest/harness adjustment handle. -
Page 77
6. Check the Buckle Position The correct slot the one that is closest to your child without being underneath your child. 7. To Adjust Buckle Strap Recline the car seat and locate the metal retainer under the car seat shell. 8. -
Page 78
9. Insert Metal Retainer in the New Buckle Strap Slot Reach underneath the car seat and pull the metal retainer through. 10. Pull Up on Buckle Strap to Make Sure it is Secured Rear-Facing: Make sure the UAS strap or vehicle belt is in front of the buckle strap when the buckle is in the inner-most position (A), and in behind when in the outer-most position (B) -
Page 79
11. Buckle the Chest Clip You will hear a “click” when the chest clip is securely buckled. 12. Pull All the Slack Out From Around the Waist Pull up on the harness strap while pushing the chest clip down. Do this to both sides. -
Page 80
13. Tighten the Harness by Pulling the Harness Adjustment Strap When you are not able to pinch any of the harness webbing at your child’s shoulder, the harness is tight enough. A snug harness should not allow any slack. It lies in a relatively straight line without sagging. -
Page 81
14. Raise the Chest Clip to Child’s Armpit Level 15. Check Tightness Again, Tighten More if Needed… -
Page 82
6-B Securing Child Backed Booster 1. Remove the head support and body support. Use only the vehicle lap and shoulder belt system when restraining the child in the booster seat. 2. Place Child In Seat Have your child sit in the booster seat, with his/her back flat against the back of the booster seat. -
Page 83
4. Buckle the Vehicle Lap/Shoulder Seat Belt Be sure the lap portion of the vehicle seat belt goes behind the armrests. Be sure the lap portion of the vehicle seat belt lies low across your child’s hips. Be sure the shoulder belt lies across your child’s shoulders, between the neck and edge of shoulder. -
Page 84
Is Everything Correct? Never Use Lap Belt Only Lap Belt Behind Armrest and Lies Low Across Hips and Thighs Shoulder Belt Lies On the Shoulder, Between the Neck and Edge of Shoulders… -
Page 85
6-C Securing Child Backless Booster Use only the vehicle lap and shoulder belt system when restraining the child in the booster seat. 1. Place Child In Seat Have your child sit in the booster seat, with his/her back flat against the back of the vehicle seat. -
Page 86
3. Buckle the Vehicle Lap/Shoulder Seat Belt Be sure the lap portion of the vehicle seat belt goes behind the armrests. Be sure the lap portion of the vehicle seat belt lies low across your child’s hips. Be sure the shoulder belt lies across your child’s shoulders, between the neck and edge of shoulder. -
Page 87
Is Everything Correct? Never Use Lap Belt Only Lap Belt Behind Armrest and Lies Low Across Hips and Thighs Shoulder Belt Lies On the Shoulder, Between the Neck and Edge of Shoulders… -
Page 88
Using Belt Positioning Clip 1. Make Sure Vehicle’s Seat Shoulder Belt Lays in the Red Zone As Shown If the vehicle’s seat shoulder belt lays outside this zone, you MUST use the belt positioning clip. 2. Attach Belt Positioning Clip Insert the loop end of the strap through the same slot as the harness adjustment strap as shown. -
Page 89
3. Push Clip and Strap Through Loop 4. Pull to Tighten Strap 5. Push Clip Through Slot In Pad 6. Attach Seat Pad to Base… -
Page 90
7. Place Child in Seat, Buckle Child In Seat and Attach Belt Positioning Clip With child’s back flat against the back of the vehicle seat, buckle child in. Then slide the clip onto the vehicle’s seat shoulder belt as shown. 8. -
Page 91
7-A Moving the UAS Strap 1. For Ease of Moving the UAS Strap A. Loosen the harness straps. B. Raise the headrest to the highest position. C. Unbuckle the chest clip. D. Unbuckle the buckle. -
Page 92
2. Unsnap Bottom Seat Pad to Expose the UAS Strap 3. Pull UAS Connectors Out of the Belt Path Openings into the Center of the Car Seat 4. Slide Entire UAS Strap Along Bar to the Desired Belt Path Openings Rear-Facing: Slide UAS strap along bar to the front of the seat. -
Page 93
5. Push the UAS Connectors Out Through the Desired Belt Path Openings on Each Side of Car Seat Rear- Rear-Facing: Make Facing sure the UAS strap or vehicle belt is in front of the buckle strap when the Forward- buckle is in the inner- Facing most position (A), and in behind when in the outer-most position (B) and… -
Page 94
6. Replace Seat Pad 7. Move the Headrest to Its Proper Position for Your Child… -
Page 95
8-A Accessories (on select models) Harness Covers Make sure that harness covers do not interfere with placement of the chest clip at armpit level. To remove, undo the fastening strips and remove. Body Support and Head Support Use only in the rear-facing mode. Body support must be used if shoulders are below the lowest harness setting. -
Page 96
9-A How to Remove UAS and Top Tether To remove the UAS from the lower anchors, push in on the red buttons and pull them off. Top Tether To remove, lift up on the tether lock to release the tension. Press in on the hook’s spring. -
Page 97
9-B Choosing Vehicle Seat Location Review your vehicle’s owner manual for Seating Locations The best seating location for this car seat is one that: • Is recommended by your vehicle owner’s manual, and • Results in a secure installation of this car seat In the event there is no available back seat and / or you have no other option than to place a child other than an infant in a rear-facing car seat in a front passenger seating position, experts recommend that you take the following… -
Page 98
9-C Unsafe Vehicle Seat Location Never install this car seat in any of the following vehicle seating locations: rear-facing or side- rear-facing with an booster mode with vehicle facing vehicle seats active front air bag lap belt only seat belt… -
Page 99
9-D Vehicle Seat Belts Review your vehicle’s owner manual for vehicle seat belt use This car seat can be installed using a vehicle seat belt. To do this, you will need to change the seat belt to a locked mode for use with car seats. With some vehicle seat belts, this is done with the latchplate;… -
Page 100
Identify Your Seat Belt Type There are two different types of vehicle seat belts that can be used with this car seat: Lap/Shoulder Belt Lap Belt Only 3 connections points. Can be used in 2 connection points. Can ONLY be all car seats modes of use. -
Page 101
Switchable. If it can still be pulled out freely, it is ELR. Note: Most vehicles manufactured after 1996 will have Switchable retractors in the back seat. If you have any questions about your retractor type, consult your vehicle owner’s manual or call Graco for assistance. -
Page 102
How to Lock Your Lap and Shoulder Vehicle Seat Belt Sliding Latch Plate and Switchable Retractor A latchplate that slides freely on the belt webbing and cannot, by itself, hold the belt snug around a car seat. When installing the car seat, route the vehicle seat belt through the proper belt path and buckle it in. -
Page 103
Locking Latchplate and ELR Retractor A latchplate that holds the lap belt snug after it has been adjusted; contains a metal bar on the underside of the hardware that “locks” the belt in position. When installing the car seat, route the vehicle seat belt through the proper belt path and buckle it in. -
Page 104
Sliding Latch Plate and ALR Retractor A latchplate that slides freely on the belt webbing and cannot, by itself, hold the belt snug around a car seat. Slowly pull the shoulder belt all the way out. Route the vehicle seat belt through the proper belt path and buckle it in. -
Page 105
Sliding Latch Plate and ELR Retractor A latchplate that slides freely on the belt webbing and cannot, by itself, hold the belt snug around a car seat. With this retractor, you will need to use the locking clip to lock the vehicle seat belt. Call us at 1-800-345-4109 to order a locking clip. -
Page 106
Lap Belt Installation — DO NOT use in Booster Mode Always review your vehicle owner’s manual for specific information about your vehicle seat belts. Locking Latch Plate and No Retractor When installing the car seat, route the lap seat belt through the proper path and buckle it in. -
Page 107
10-A Cleaning Seat Pad Headrest Pad Clean with a damp sponge using mild soap and cool water. If needed, pad may be removed for cleaning. To remove, unsnap headrest pad from plastic shell. Undo the 2 elastic straps from the back of headrest and remove the pad. -
Page 108
Seat Pad Clean with a damp sponge using mild soap and cool water. If needed, cover may be removed for cleaning. To remove, unsnap base pad from side pad. Undo the elastic straps in the rear-facing belt path. Undo the 2 elastic straps by the recline handle. -
Page 109
Pull plastic tab out of armrest. Pull the seat pad up over the bottom of the cup holder. Pull the seat pad from the arm rest and over the cup holder. Repeat of other side. Refer to seat pad care tag for washing instructions. -
Page 110
10-B Cleaning Buckle Strap Recline the car seat and locate the metal retainer. Rotate the metal retainer up through the shell and pad. From the front, pull the buckle strap out. To clean buckle, place in a cup of warm water If h and gently agitate the buckle. -
Page 111
10-C Cleaning Harness and UAS Straps Surface wash only with mild soap and damp cloth. DO NOT IMMERSE THE HARNESS STRAPS or UAS STRAP IN WATER Doing so may weaken the straps. If harness straps or UAS belt are frayed or heavily soiled, contact Customer Service at www.gracobaby.ca or 1-800-345-4109. -
Page 112: Replacement Parts
Replacement Parts To purchase parts or accessories in Canada, please contact us at the following: www.gracobaby.ca gracoconsumercareca@newellco.com 1-800-345-4109 Store instruction manual in the slot with the instruction book icon as shown.
16
SEAT4FIX
Gruppo 0+/1/2/3 (0- 36 Kg)
ISTRUZIONI D’USO
IMPORTANTISSIMO! DA LEGGERE SUBITO
IMPORTANTE: PRIMA DELL’USO LEGGERE
ATTENTAMENTE E INTEGRALMENTE QUESTO
LIBRETTO D’ISTRUZIONI PER EVITARE PERICOLI
NELL’UTILIZZO E CONSERVARLO PER OGNI FU—
TURO RIFERIMENTO. PER NON COMPROMET—
TERE LA SICUREZZA DEL VOSTRO BAMBINO
SEGUITE ATTENTAMENTE QUESTE ISTRUZIONI.
ATTENZIONE: PRIMA DELL’USO RIMUOVERE ED
ELIMINARE EVENTUALI SACCHETTI DI PLASTICA
E TUTTI GLI ELEMENTI FACENTI PARTE DELLA
CONFEZIONE DEL PRODOTTO O COMUNQUE
TENERLI LONTANI DALLA PORTATA DEI BAMBI—
NI. SI RACCOMANDA DI EFFETTUARE LO SMAL—
TIMENTO DI QUESTI ELEMENTI OPERANDO LA
RACCOLTA DIFFERENZIATA IN CONFORMITA’
ALLE LEGGI VIGENTI.
INDICE:
1. INTRODUZIONE
1.1 AVVERTENZE
1.2 DESCRIZIONE COMPONENTI
1.3 CARATTERISTICHE DEL PRODOTTO
1.4 LIMITAZIONI E REQUISITI D’USO RELATIVI AL
PRODOTTO E AL SEDILE AUTO
2. INSTALLAZIONE
2.1 INSTALLAZIONE IN AUTO DEL SEGGIOLI—
NO (con SISTEMA ISOFIX) IN DIREZIONE
CONTRARIA AL SENSO DI MARCIA: GR. 0+
(0-13 KG) e GR. 1 (9-18 KG)
2.2 INSTALLAZIONE IN AUTO DEL SEGGIOLINO
(con SISTEMA ISOFIX) IN DIREZIONE DI
MARCIA: GR. 1 (9-18 KG)
2.3 MODIFICA CONFIGURAZIONE DEL SEGGIO—
LINO DA GR. 1 (9-18 KG) A GR. 2/3 (15-36 KG)
2.4 INSTALLAZIONE IN AUTO DEL SEGGIOLI—
NO E ALLOGGIAMENTO DEL BAMBINO IN
GR.2/3 CON CINTURA A TRE PUNTI DELL’AU—
TO (15-36 KG)
2.5 INSTALLAZIONE IN AUTO DEL SEGGIOLI—
NO E ALLOGGIAMENTO DEL BAMBINO IN
GR.2/3 CON CONNETTORI ISOFIX, TOP TE—
THER E CINTURA A TRE PUNTI DELL’AUTO
(15-36 KG)
2.6 RIPRISTINO DELLE CINTURE PER UTILIZZO
NEI GR. 0+ (0-13 KG) e 1 (9-18KG)
3 ULTERIORI OPERAZIONI
3.1 RIDUTTORE
3.2 REGOLAZIONE DELL’ALTEZZA DEL POGGIA—
TESTA E DELLE CINTURE
3.3 RECLINAZIONE
3.4 ROTAZIONE
3.5 SIDE SAFETY SYSTEM
3.6 PULIZIA E MANUTENZIONE
1. INTRODUZIONE
1.1 AVVERTENZE
• Per il montaggio e l’installazione del prodotto
seguire scrupolosamente le istruzioni. Evitare
che qualcuno utilizzi il prodotto senza aver
letto le istruzioni.
• Conservare questo manuale per utilizzi futuri.
• Ogni paese prevede leggi e regolamenti di—
versi in materia di sicurezza per il trasporto
dei bambini in auto. Per questo è consigliabile
contattare le autorità locali per avere maggiori
informazioni.
• ATTENZIONE! In base alle statistiche sugli in—
cidenti, generalmente i sedili posteriori del
veicolo sono più sicuri di quello anteriore: si
consiglia pertanto di installare il Seggiolino
sui sedili posteriori. In particolare il sedile più
sicuro è quello centrale posteriore, se dotato
di cintura a 3 punti ed ancoraggi ISOFIX.
• Si raccomanda che tutti i passeggeri occupan—
ti siano informati della modalità di sgancio del
bambino in caso di emergenza.
• ATTENZIONE! GRAVE PERICOLO! In Gruppo 0+
(0-13 kg) non utilizzare mai questo Seggiolino
su un sedile anteriore dotato di airbag fronta—
le. E’ possibile installare il Seggiolino sul sedile
anteriore soltanto se l’airbag frontale è stato
disattivato: vericare con la casa automobi—
listica o sul manuale d’istruzioni dell’auto la
possibilità di disinserire l’airbag.
• Neonati prematuri nati con meno di 37 setti—
mane di gestazione possono essere a rischio
nel Seggiolino. Tali neonati possono avere
dicoltà respiratorie mentre sono seduti nel
Seggiolino auto. Consigliamo quindi di rivol—
17
gervi al vostro medico o al personale dell’o—
spedale anché possano valutare il vostro
bambino e raccomandare il Seggiolino auto
adatto prima di lasciare l’ospedale.
• Non utilizzare mai questo Seggiolino su se—
dili rivolti lateralmente o opposti al senso di
marcia.
• Installare il Seggiolino solo su sedili corretta—
mente ssati alla struttura dell’auto e rivolti
nel senso di marcia.
• Prestare attenzione a come si installa il Seg—
giolino in auto in modo da evitare che un
sedile mobile o la portiera possano interferire
con esso.
• Nessun Seggiolino può garantire la totale si—
curezza del bambino in caso d’incidente, ma
l’utilizzo di questo prodotto riduce il rischio di
lesioni gravi o di morte.
• Il rischio di seri danni al bambino, non solo
in caso d’incidente, ma anche in altre circo—
stanze (per es. brusche frenate, ecc.) aumenta
se le indicazioni riportate in questo manuale
non vengono seguite in modo scrupoloso:
vericare sempre che il Seggiolino sia aggan—
ciato correttamente al sedile.
• Nel caso in cui il Seggiolino fosse danneggia—
to, deformato o fortemente usurato, questo
deve essere sostituito, potrebbe aver perso le
caratteristiche originali di sicurezza.
• Non eettuare modiche o aggiunte al pro—
dotto senza l’approvazione del costruttore.
• Non installare accessori, parti di ricambio e
componenti non forniti dal costruttore.
• Non interporre nulla, che non sia un accesso—
rio approvato per il prodotto, né tra il sedile
auto e il seggiolino, né tra il seggiolino e il
bambino: in caso di incidente il Seggiolino
potrebbe non funzionare correttamente.
• In seguito ad un incidente anche lieve il Seg—
giolino può subire danni non sempre visibili
a occhio nudo: è pertanto necessario sosti—
tuirlo.
• Non utilizzare Seggiolini di seconda mano:
potrebbero avere subito danni strutturali non
visibili a occhio nudo, ma compromettenti la
sicurezza del prodotto.
• Non lasciare mai il bambino incustodito nel
Seggiolino per nessun motivo.
• Nel caso in cui l’auto venisse lasciata sotto il
sole, ispezionare accuratamente il Seggiolino,
prima di accomodare il bambino, vericando
che alcune parti di esso non si siano surriscal—
date: in tal caso lasciarle rareddare prima di
far sedere il bambino, in modo da evitare che
possa scottarsi.
• La fodera può essere sostituita esclusivamen—
te con una approvata dal costruttore, poiché
costituisce una parte integrante del Seggioli—
no auto. Il Seggiolino auto non deve essere
mai usato senza la fodera, per non compro—
mettere la sicurezza del bambino.
• Controllare che il nastro della cintura non ri—
sulti attorcigliato ed evitare che quest’ultimo
o parti del Seggiolino vengano pizzicate tra
le portiere o sfreghino contro punti taglienti.
Il Seggiolino non è più utilizzabile qualora la
cintura presenti tagli o slacciature.
• Quando non si trasporta il bambino, il Seg—
giolino deve essere comunque lasciato ag—
ganciato, oppure va riposto nel bagagliaio. Il
Seggiolino non agganciato può infatti costi—
tuire un pericolo per i passeggeri in caso di
incidente o di brusche frenate.
• Vericare che non vengano trasportati, in
particolare sul ripiano posteriore all’interno
del veicolo, oggetti o bagagli che non siano
stati ssati o posizionati in maniera sicura: in
caso di incidente o brusca frenata potrebbero
ferire i passeggeri.
• Fare attenzione a non lasciare sedili auto
pieghevoli o rotanti non ben agganciati, in
caso di incidente potrebbero costituire un
pericolo.
• Vericare che il poggiatesta del sedile non
interferisca con il poggiatesta del Seggiolino:
non deve spingerlo in avanti. Qualora questo
avvenga rimuovere il poggiatesta dal sedile
dell’auto sul quale viene installato il Seggio—
lino avendo cura di non appoggiarlo sulla
cappelliera.
• Assicurarsi che tutti i passeggeri della vettu—
ra utilizzino la propria cintura di sicurezza sia
per la propria sicurezza sia perché durante il
viaggio, in caso di incidente o brusca frenata,
potrebbero ferire il bambino.
• In caso di lunghi viaggi fate delle soste fre—
quenti. Il bambino si stanca molto facilmente.
Per nessuna ragione estrarre il bambino dal
18
Seggiolino auto mentre l’auto è in movimen—
to. Se il bambino ha bisogno di attenzione,
è necessario trovare un posto sicuro e acco—
stare.
• La società Artsana declina ogni responsabilità
per un uso improprio del prodotto.
1.2 DESCRIZIONE COMPONENTI
Fig. A
A. Seduta del seggiolino
B. Base del seggiolino
C. Connettori Isox
D. Pulsante di sgancio connettori Isox
E. Indicatori aggancio connettori rigidi
F. Top Tether
G. Guida cintura Top Tether
H. Side Safety System
Fig. B
I. Poggiatesta
J. Schienale
K. Anello regolazione poggiatesta
L. Spallacci
M. Cinture del Seggiolino
N. Fibbia
O. Spartigambe imbottito
P. Leva reclinazione
Q. Leva rotazione seduta
R. Nastro Regolazione cinture
S. Pulsante regolazione delle cinture
T1 Guida cintura superiore Gr. 2/3
T2 Guida cintura inferiore Gr. 2/3
U. Mini-riduttore
Fig. C
V. Nastro estrazione connettori Isox
W. Sportellino Top Tether
X. Gancio Top Tether
Y. Tasto regolazione Top Tether
Z. Indicatore di tensionamento
1.3 CARATTERISTICHE DEL PRODOTTO
GRUPPO 0+, 1, 2 e 3
CONFIGURAZIONI DI INSTALLAZIONE
POSSIBILI
Gruppo
Installazione
Tipo di omologazione
0+/1 Connettori Iso—
fix + Top Tether
SEMI-UNIVERSALE
1 Connettori Iso—
fix + Top Tether
UNIVERSALE
2/3 Cintura a 3
punti
UNIVERSALE
2/3 Cintura a 3
punti + Connet
—
tori Isofix + Top
Tether
SEMI-UNIVERSALE
AVVISO IMPORTANTE
INSTALLAZIONE IN AUTO DEL SEGGIOLI—
NO (con SISTEMA ISOFIX) IN DIREZIONE
CONTRARIA AL SENSO DI MARCIA: GR. 0+
(0-13 KG) e GR1 (9-18 KG).
Questo è un dispositivo ISOFIX di ritenuta del
bambino. E’ approvato dal Regolamento ECE
R44/04 per l’utilizzo in veicoli dotati di sistemi
di ancoraggio ISOFIX.
In questa congurazione il seggiolino è classi—
cato per uso SEMIUNIVERSALE ed è com—
patibile esclusivamente con i sedili dei veicoli
indicati nell’apposita “Lista delle autovetture”
Per l’utilizzo di un sistema ISOFIX è assoluta—
mente necessario leggere il manuale dell’au—
toveicolo prima dell’installazione del Seggio—
lino.
Il gruppo di massa e la classe di dimensio—
ne ISOFIX per cui il dispositivo è utilizzabile
in questa congurazione sono: GRUPPO
0+,GRUPPO 1, Classe D.
In caso di dubbio, contattare il produttore del
dispositivo di ritenuta oppure il rivenditore.
ATTENZIONE! Durante l’utilizzo ISOFIX, il
ssaggio degli ancoraggi inferiori non è su—
ciente. Bisogna assolutamente ssare il “Top
Tether” al punto di ancoraggio previsto dal
costruttore dell’autoveicolo.
19
AVVISO IMPORTANTE
INSTALLAZIONE IN AUTO DEL SEGGIOLI—
NO (con SISTEMA ISOFIX) IN DIREZIONE
DI MARCIA: GR. 1 (9-18 KG)
Questo è un dispositivo ISOFIX di ritenuta del
bambino. E’ approvato dal Regolamento ECE
R44/04 per l’utilizzo in veicoli dotati di sistemi
di ancoraggio ISOFIX.
In questa congurazione il seggiolino è clas—
sicato per uso UNIVERSALE. Il gruppo di
massa e la classe di dimensione ISOFIX per cui
il dispositivo è utilizzabile in questa congura—
zione sono: GRUPPO 1, classe B1.
In caso di dubbio, contattare il produttore del
dispositivo di ritenuta oppure il rivenditore.
ATTENZIONE! Durante l’utilizzo ISOFIX, il ssag—
gio degli ancoraggi inferiori non è suciente.
Bisogna assolutamente ssare il “Top Tether” al
punto di ancoraggio previsto dal costruttore
dell’autoveicolo.
AVVISO IMPORTANTE
INSTALLAZIONE IN AUTO DEL SEGGIO—
LINO E ALLOGGIAMENTO DEL BAMBINO
IN GR.2/3 CON CINTURA A TRE PUNTI
DELL’AUTO (15-36 KG)
1. Questo è un dispositivo di ritenuta bambini
“Universale”, omologato secondo Regolamen—
to ECE N°44, emendamenti serie 04. Adatto
all’impiego generale nei veicoli e compatibile
con la maggior parte, ma non tutti, i sedili di
veicolo.
2. La perfetta compatibilità è più facilmen—
te ottenibile nei casi in cui il costruttore del
veicolo dichiara nel manuale veicolare che il
veicolo prevede l’installazione di dispositivi di
ritenuta bambini “Universali” per la fascia d’età
in questione.
3. Questo dispositivo di ritenuta è stato classi—
cato “Universale” secondo criteri di omologa—
zione più severi rispetto a modelli precedenti
che non dispongono del presente avviso.
4. Adatto solamente per l’impiego nei veicoli
dotati di cintura di sicurezza a 3 punti, stati—
ca o con arrotolatore, omologata in base al
Regolamento UN/ECE N°16 o altri standard
equivalenti.
5. In caso di dubbio, contattare il produttore
del dispositivo di ritenuta oppure il rivenditore.
AVVISO IMPORTANTE
INSTALLAZIONE IN AUTO DEL SEGGIOLI—
NO E ALLOGGIAMENTO DEL BAMBINO IN
GR.2/3 CON CONNETTORI ISOFIX, TOP TE—
THER E CINTURA A TRE PUNTI DELL’AUTO
(15-36 KG)
Questo è un dispositivo di ritenuta bambini è
omologato SEMIUNIVERSALE secondo il rego—
lamento ECER44/04, ed è compatibile esclu—
sivamente con i veicoli indicati nell’apposita
“Lista delle autovetture”;
Adatto solamente per l’impiego nei veicoli
dotati di cintura di sicurezza a 3 punti, sta—
tica o con arrotolatore, omologata in base al
Regolamento UN/ECE N°16 o altri standard
equivalenti.
In caso di dubbio, contattare il produttore del
dispositivo di ritenuta oppure il rivenditore.
1.4 LIMITAZIONI E REQUISITI D’USO RELA—
TIVI AL PRODOTTO E AL SEDILE AUTO
ATTENZIONE! Rispettare scrupolosamente le
seguenti limitazioni e requisiti d’uso relativi al
prodotto e al sedile auto: in caso contrario non
è garantita la sicurezza.
• Questo Seggiolino è omologato per l’utilizzo
con bambini di peso tra 0 e 36 kg (dalla nascita
no indicativamente a 12 anni).
• Il sedile dell’auto deve essere dotato di cintu—
ra di sicurezza a 3 punti, statica o con arrotola—
tore, omologata in base al Regolamento UNI/
ECE N°16 o altri standard equivalenti (Fig. 1).
ATTENZIONE! Non installare mai il seggiolino
con la cintura dell’auto a due punti di ancorag—
gio (Fig. 2).
In Gruppo 0+ (0-13 kg) è possibile installare
il Seggiolino sul sedile anteriore soltanto se
l’airbag frontale è stato disattivato.
Non utilizzare mai questo Seggiolino su sedili
rivolti lateralmente o opposti al senso di mar—
cia (Fig. 3).
• Il prodotto è destinato esclusivamente a un
uso come Seggiolino per auto e non all’uti—
lizzo in casa.
• Può accadere che la bbia della cintura di
20
sicurezza dell’auto sia troppo lunga e superi
l’altezza prevista rispetto alla parte inferiore
della seduta (Fig. 4A-4B). In tal caso il Seggio—
lino non deve essere ssato su quel sedile ma
dovrà essere installato su un altro sedile su cui
non si presenti il problema. Per ulteriori infor—
mazioni su questo aspetto, contattare la casa
produttrice dell’auto.
ATTENZIONE! Gruppo 2/3. In caso di utilizzo
in veicoli dotati di cinture di sicurezza poste—
riori con airbag integrati (cinture gonabili),
seguire il manuale istruzioni del produttore
dell’auto.
2. INSTALLAZIONE
ATTENZIONE! Queste istruzioni si riferi—
scono, sia nel testo che nei disegni, ad
un’installazione del Seggiolino sul sedile
posteriore lato destro. Per installazioni
in altre posizioni eseguire comunque la
stessa sequenza di operazioni.
2.1 INSTALLAZIONE IN AUTO DEL SEGGIO—
LINO (con SISTEMA ISOFIX) IN DIREZIONE
CONTRARIA AL SENSO DI MARCIA: GR. 0+
(0-13 KG) e GR1 (9-18 KG)
Il seggiolino in Gruppo 0+ va installato SEM—
PRE in direzione contraria al senso di marcia,
disattivando l’Airbag.
L’installazione deve essere eseguita utilizzando
SEMPRE i connettori Isox e il Top Tether
• Agire sulla leva reclinazione (P), no a far
coincidere il pallino rosso con la posizione R
(Fig. 5)
• Agire sulla leva (Q) e ruotare la seduta di 180°,
vericando che sia bloccata e posizionata
in senso contrario alla direzione di marcia
(Fig. 6).
• Posizionare il seggiolino sul sedile dell’auto in
senso contrario alla direzione di marcia.
• Estrarre completamente i connettori rigidi
(C), tirando il nastro verso l’esterno (V) (Fig. 7).
• Per facilitare l’aggancio dei connettori Isox è
possibile utilizzare le apposite guide in dota—
zione, agganciandole ai ganci Isox dell’auto
(Fig. 
• Agganciare i connettori agli agganci presenti
tra lo schienale e la seduta (Fig. 9). Un carat—
teristico click segnalerà l’avvenuto aggancio
l’indicatore passerà dal colore rosso al verde.
• Spingere con energia il seggiolino verso lo
schienale del sedile per assicurare la massima
aderenza (Fig. 10).
• Estrarre il Top Tether (F) dallo sportellino (W)
(Fig. 11).
• Allungare il nastro del Top Tether premendo il
tasto di regolazione (Y).
• Far passare il Top Tether nel guida cinture az—
zurro (Fig. 12).
ATTENZIONE! Far passare il Top Tether tra la
parte alta dello schienale del sedile dell’auto—
veicolo e il poggiatesta. Non far passare mai il
Top Tether sopra il poggiatesta dell’auto.
ATTENZIONE! Fare riferimento al libretto di
istruzioni dell’auto per individuare il punto di
aggancio del Top Tether del Seggiolino. Tale
punto di aggancio è contrassegnato da ap—
posita etichetta (Fig. 13) e si può trovare nelle
posizioni indicate dalle gure 13A – 13B – 13C
– 13D.
ATTENZIONE! Vericare che l’ancoraggio utiliz—
zato per il Top Tether sia quello previsto. Evitare
di confonderlo con un anello previsto per s—
sare i bagagli (Fig. 14).
• Una volta individuato il punto di ancoraggio,
connettervi il gancio del Top Tether (X).
Regolare la lunghezza della cintura del Top Te—
ther tirando energicamente il nastro per met—
terlo in tensione. La conferma del corretto ten—
sionamento avviene attraverso il colore verde
dell’indicatore (Z) presente sul nastro (Fig. 15).
Avvolgere il nastro in eccedenza e assicurarlo
con apposito velcro.
Il cuscino mini-riduttore completo di cuneo
e poggiatesta va utilizzato dalla nascita no a
6 kg. Fare riferimento al paragrafo 3.1 RIDUT—
TORE
Per disinstallare il seggiolino, sganciare il Top
Tether e i connettori Isox mediante i pulsanti
di sgancio (D) (Fig. 16). Per farli rientrare com—
pletamente spingerli verso l’interno.
Completata l’installazione per alloggiare il
bambino procedere come segue:
16
SEAT4FIX
Gruppo 0+/1/2/3 (0- 36 Kg)
ISTRUZIONI D’USO
IMPORTANTISSIMO! DA LEGGERE SUBITO
IMPORTANTE: PRIMA DELL’USO LEGGERE
ATTENTAMENTE E INTEGRALMENTE QUESTO
LIBRETTO D’ISTRUZIONI PER EVITARE PERICOLI
NELL’UTILIZZO E CONSERVARLO PER OGNI FU—
TURO RIFERIMENTO. PER NON COMPROMET—
TERE LA SICUREZZA DEL VOSTRO BAMBINO
SEGUITE ATTENTAMENTE QUESTE ISTRUZIONI.
ATTENZIONE: PRIMA DELL’USO RIMUOVERE ED
ELIMINARE EVENTUALI SACCHETTI DI PLASTICA
E TUTTI GLI ELEMENTI FACENTI PARTE DELLA
CONFEZIONE DEL PRODOTTO O COMUNQUE
TENERLI LONTANI DALLA PORTATA DEI BAMBI—
NI. SI RACCOMANDA DI EFFETTUARE LO SMAL—
TIMENTO DI QUESTI ELEMENTI OPERANDO LA
RACCOLTA DIFFERENZIATA IN CONFORMITA’
ALLE LEGGI VIGENTI.
INDICE:
1. INTRODUZIONE
1.1 AVVERTENZE
1.2 DESCRIZIONE COMPONENTI
1.3 CARATTERISTICHE DEL PRODOTTO
1.4 LIMITAZIONI E REQUISITI D’USO RELATIVI AL
PRODOTTO E AL SEDILE AUTO
2. INSTALLAZIONE
2.1 INSTALLAZIONE IN AUTO DEL SEGGIOLI—
NO (con SISTEMA ISOFIX) IN DIREZIONE
CONTRARIA AL SENSO DI MARCIA: GR. 0+
(0-13 KG) e GR. 1 (9-18 KG)
2.2 INSTALLAZIONE IN AUTO DEL SEGGIOLINO
(con SISTEMA ISOFIX) IN DIREZIONE DI
MARCIA: GR. 1 (9-18 KG)
2.3 MODIFICA CONFIGURAZIONE DEL SEGGIO—
LINO DA GR. 1 (9-18 KG) A GR. 2/3 (15-36 KG)
2.4 INSTALLAZIONE IN AUTO DEL SEGGIOLI—
NO E ALLOGGIAMENTO DEL BAMBINO IN
GR.2/3 CON CINTURA A TRE PUNTI DELL’AU—
TO (15-36 KG)
2.5 INSTALLAZIONE IN AUTO DEL SEGGIOLI—
NO E ALLOGGIAMENTO DEL BAMBINO IN
GR.2/3 CON CONNETTORI ISOFIX, TOP TE—
THER E CINTURA A TRE PUNTI DELL’AUTO
(15-36 KG)
2.6 RIPRISTINO DELLE CINTURE PER UTILIZZO
NEI GR. 0+ (0-13 KG) e 1 (9-18KG)
3 ULTERIORI OPERAZIONI
3.1 RIDUTTORE
3.2 REGOLAZIONE DELL’ALTEZZA DEL POGGIA—
TESTA E DELLE CINTURE
3.3 RECLINAZIONE
3.4 ROTAZIONE
3.5 SIDE SAFETY SYSTEM
3.6 PULIZIA E MANUTENZIONE
1. INTRODUZIONE
1.1 AVVERTENZE
• Per il montaggio e l’installazione del prodotto
seguire scrupolosamente le istruzioni. Evitare
che qualcuno utilizzi il prodotto senza aver
letto le istruzioni.
• Conservare questo manuale per utilizzi futuri.
• Ogni paese prevede leggi e regolamenti di—
versi in materia di sicurezza per il trasporto
dei bambini in auto. Per questo è consigliabile
contattare le autorità locali per avere maggiori
informazioni.
• ATTENZIONE! In base alle statistiche sugli in—
cidenti, generalmente i sedili posteriori del
veicolo sono più sicuri di quello anteriore: si
consiglia pertanto di installare il Seggiolino
sui sedili posteriori. In particolare il sedile più
sicuro è quello centrale posteriore, se dotato
di cintura a 3 punti ed ancoraggi ISOFIX.
• Si raccomanda che tutti i passeggeri occupan—
ti siano informati della modalità di sgancio del
bambino in caso di emergenza.
• ATTENZIONE! GRAVE PERICOLO! In Gruppo 0+
(0-13 kg) non utilizzare mai questo Seggiolino
su un sedile anteriore dotato di airbag fronta—
le. E’ possibile installare il Seggiolino sul sedile
anteriore soltanto se l’airbag frontale è stato
disattivato: vericare con la casa automobi—
listica o sul manuale d’istruzioni dell’auto la
possibilità di disinserire l’airbag.
• Neonati prematuri nati con meno di 37 setti—
mane di gestazione possono essere a rischio
nel Seggiolino. Tali neonati possono avere
dicoltà respiratorie mentre sono seduti nel
Seggiolino auto. Consigliamo quindi di rivol—
17
gervi al vostro medico o al personale dell’o—
spedale anché possano valutare il vostro
bambino e raccomandare il Seggiolino auto
adatto prima di lasciare l’ospedale.
• Non utilizzare mai questo Seggiolino su se—
dili rivolti lateralmente o opposti al senso di
marcia.
• Installare il Seggiolino solo su sedili corretta—
mente ssati alla struttura dell’auto e rivolti
nel senso di marcia.
• Prestare attenzione a come si installa il Seg—
giolino in auto in modo da evitare che un
sedile mobile o la portiera possano interferire
con esso.
• Nessun Seggiolino può garantire la totale si—
curezza del bambino in caso d’incidente, ma
l’utilizzo di questo prodotto riduce il rischio di
lesioni gravi o di morte.
• Il rischio di seri danni al bambino, non solo
in caso d’incidente, ma anche in altre circo—
stanze (per es. brusche frenate, ecc.) aumenta
se le indicazioni riportate in questo manuale
non vengono seguite in modo scrupoloso:
vericare sempre che il Seggiolino sia aggan—
ciato correttamente al sedile.
• Nel caso in cui il Seggiolino fosse danneggia—
to, deformato o fortemente usurato, questo
deve essere sostituito, potrebbe aver perso le
caratteristiche originali di sicurezza.
• Non eettuare modiche o aggiunte al pro—
dotto senza l’approvazione del costruttore.
• Non installare accessori, parti di ricambio e
componenti non forniti dal costruttore.
• Non interporre nulla, che non sia un accesso—
rio approvato per il prodotto, né tra il sedile
auto e il seggiolino, né tra il seggiolino e il
bambino: in caso di incidente il Seggiolino
potrebbe non funzionare correttamente.
• In seguito ad un incidente anche lieve il Seg—
giolino può subire danni non sempre visibili
a occhio nudo: è pertanto necessario sosti—
tuirlo.
• Non utilizzare Seggiolini di seconda mano:
potrebbero avere subito danni strutturali non
visibili a occhio nudo, ma compromettenti la
sicurezza del prodotto.
• Non lasciare mai il bambino incustodito nel
Seggiolino per nessun motivo.
• Nel caso in cui l’auto venisse lasciata sotto il
sole, ispezionare accuratamente il Seggiolino,
prima di accomodare il bambino, vericando
che alcune parti di esso non si siano surriscal—
date: in tal caso lasciarle rareddare prima di
far sedere il bambino, in modo da evitare che
possa scottarsi.
• La fodera può essere sostituita esclusivamen—
te con una approvata dal costruttore, poiché
costituisce una parte integrante del Seggioli—
no auto. Il Seggiolino auto non deve essere
mai usato senza la fodera, per non compro—
mettere la sicurezza del bambino.
• Controllare che il nastro della cintura non ri—
sulti attorcigliato ed evitare che quest’ultimo
o parti del Seggiolino vengano pizzicate tra
le portiere o sfreghino contro punti taglienti.
Il Seggiolino non è più utilizzabile qualora la
cintura presenti tagli o slacciature.
• Quando non si trasporta il bambino, il Seg—
giolino deve essere comunque lasciato ag—
ganciato, oppure va riposto nel bagagliaio. Il
Seggiolino non agganciato può infatti costi—
tuire un pericolo per i passeggeri in caso di
incidente o di brusche frenate.
• Vericare che non vengano trasportati, in
particolare sul ripiano posteriore all’interno
del veicolo, oggetti o bagagli che non siano
stati ssati o posizionati in maniera sicura: in
caso di incidente o brusca frenata potrebbero
ferire i passeggeri.
• Fare attenzione a non lasciare sedili auto
pieghevoli o rotanti non ben agganciati, in
caso di incidente potrebbero costituire un
pericolo.
• Vericare che il poggiatesta del sedile non
interferisca con il poggiatesta del Seggiolino:
non deve spingerlo in avanti. Qualora questo
avvenga rimuovere il poggiatesta dal sedile
dell’auto sul quale viene installato il Seggio—
lino avendo cura di non appoggiarlo sulla
cappelliera.
• Assicurarsi che tutti i passeggeri della vettu—
ra utilizzino la propria cintura di sicurezza sia
per la propria sicurezza sia perché durante il
viaggio, in caso di incidente o brusca frenata,
potrebbero ferire il bambino.
• In caso di lunghi viaggi fate delle soste fre—
quenti. Il bambino si stanca molto facilmente.
Per nessuna ragione estrarre il bambino dal
18
Seggiolino auto mentre l’auto è in movimen—
to. Se il bambino ha bisogno di attenzione,
è necessario trovare un posto sicuro e acco—
stare.
• La società Artsana declina ogni responsabilità
per un uso improprio del prodotto.
1.2 DESCRIZIONE COMPONENTI
Fig. A
A. Seduta del seggiolino
B. Base del seggiolino
C. Connettori Isox
D. Pulsante di sgancio connettori Isox
E. Indicatori aggancio connettori rigidi
F. Top Tether
G. Guida cintura Top Tether
H. Side Safety System
Fig. B
I. Poggiatesta
J. Schienale
K. Anello regolazione poggiatesta
L. Spallacci
M. Cinture del Seggiolino
N. Fibbia
O. Spartigambe imbottito
P. Leva reclinazione
Q. Leva rotazione seduta
R. Nastro Regolazione cinture
S. Pulsante regolazione delle cinture
T1 Guida cintura superiore Gr. 2/3
T2 Guida cintura inferiore Gr. 2/3
U. Mini-riduttore
Fig. C
V. Nastro estrazione connettori Isox
W. Sportellino Top Tether
X. Gancio Top Tether
Y. Tasto regolazione Top Tether
Z. Indicatore di tensionamento
1.3 CARATTERISTICHE DEL PRODOTTO
GRUPPO 0+, 1, 2 e 3
CONFIGURAZIONI DI INSTALLAZIONE
POSSIBILI
Gruppo
Installazione
Tipo di omologazione
0+/1 Connettori Iso—
fix + Top Tether
SEMI-UNIVERSALE
1 Connettori Iso—
fix + Top Tether
UNIVERSALE
2/3 Cintura a 3
punti
UNIVERSALE
2/3 Cintura a 3
punti + Connet
—
tori Isofix + Top
Tether
SEMI-UNIVERSALE
AVVISO IMPORTANTE
INSTALLAZIONE IN AUTO DEL SEGGIOLI—
NO (con SISTEMA ISOFIX) IN DIREZIONE
CONTRARIA AL SENSO DI MARCIA: GR. 0+
(0-13 KG) e GR1 (9-18 KG).
Questo è un dispositivo ISOFIX di ritenuta del
bambino. E’ approvato dal Regolamento ECE
R44/04 per l’utilizzo in veicoli dotati di sistemi
di ancoraggio ISOFIX.
In questa congurazione il seggiolino è classi—
cato per uso SEMIUNIVERSALE ed è com—
patibile esclusivamente con i sedili dei veicoli
indicati nell’apposita “Lista delle autovetture”
Per l’utilizzo di un sistema ISOFIX è assoluta—
mente necessario leggere il manuale dell’au—
toveicolo prima dell’installazione del Seggio—
lino.
Il gruppo di massa e la classe di dimensio—
ne ISOFIX per cui il dispositivo è utilizzabile
in questa congurazione sono: GRUPPO
0+,GRUPPO 1, Classe D.
In caso di dubbio, contattare il produttore del
dispositivo di ritenuta oppure il rivenditore.
ATTENZIONE! Durante l’utilizzo ISOFIX, il
ssaggio degli ancoraggi inferiori non è su—
ciente. Bisogna assolutamente ssare il “Top
Tether” al punto di ancoraggio previsto dal
costruttore dell’autoveicolo.
19
AVVISO IMPORTANTE
INSTALLAZIONE IN AUTO DEL SEGGIOLI—
NO (con SISTEMA ISOFIX) IN DIREZIONE
DI MARCIA: GR. 1 (9-18 KG)
Questo è un dispositivo ISOFIX di ritenuta del
bambino. E’ approvato dal Regolamento ECE
R44/04 per l’utilizzo in veicoli dotati di sistemi
di ancoraggio ISOFIX.
In questa congurazione il seggiolino è clas—
sicato per uso UNIVERSALE. Il gruppo di
massa e la classe di dimensione ISOFIX per cui
il dispositivo è utilizzabile in questa congura—
zione sono: GRUPPO 1, classe B1.
In caso di dubbio, contattare il produttore del
dispositivo di ritenuta oppure il rivenditore.
ATTENZIONE! Durante l’utilizzo ISOFIX, il ssag—
gio degli ancoraggi inferiori non è suciente.
Bisogna assolutamente ssare il “Top Tether” al
punto di ancoraggio previsto dal costruttore
dell’autoveicolo.
AVVISO IMPORTANTE
INSTALLAZIONE IN AUTO DEL SEGGIO—
LINO E ALLOGGIAMENTO DEL BAMBINO
IN GR.2/3 CON CINTURA A TRE PUNTI
DELL’AUTO (15-36 KG)
1. Questo è un dispositivo di ritenuta bambini
“Universale”, omologato secondo Regolamen—
to ECE N°44, emendamenti serie 04. Adatto
all’impiego generale nei veicoli e compatibile
con la maggior parte, ma non tutti, i sedili di
veicolo.
2. La perfetta compatibilità è più facilmen—
te ottenibile nei casi in cui il costruttore del
veicolo dichiara nel manuale veicolare che il
veicolo prevede l’installazione di dispositivi di
ritenuta bambini “Universali” per la fascia d’età
in questione.
3. Questo dispositivo di ritenuta è stato classi—
cato “Universale” secondo criteri di omologa—
zione più severi rispetto a modelli precedenti
che non dispongono del presente avviso.
4. Adatto solamente per l’impiego nei veicoli
dotati di cintura di sicurezza a 3 punti, stati—
ca o con arrotolatore, omologata in base al
Regolamento UN/ECE N°16 o altri standard
equivalenti.
5. In caso di dubbio, contattare il produttore
del dispositivo di ritenuta oppure il rivenditore.
AVVISO IMPORTANTE
INSTALLAZIONE IN AUTO DEL SEGGIOLI—
NO E ALLOGGIAMENTO DEL BAMBINO IN
GR.2/3 CON CONNETTORI ISOFIX, TOP TE—
THER E CINTURA A TRE PUNTI DELL’AUTO
(15-36 KG)
Questo è un dispositivo di ritenuta bambini è
omologato SEMIUNIVERSALE secondo il rego—
lamento ECER44/04, ed è compatibile esclu—
sivamente con i veicoli indicati nell’apposita
“Lista delle autovetture”;
Adatto solamente per l’impiego nei veicoli
dotati di cintura di sicurezza a 3 punti, sta—
tica o con arrotolatore, omologata in base al
Regolamento UN/ECE N°16 o altri standard
equivalenti.
In caso di dubbio, contattare il produttore del
dispositivo di ritenuta oppure il rivenditore.
1.4 LIMITAZIONI E REQUISITI D’USO RELA—
TIVI AL PRODOTTO E AL SEDILE AUTO
ATTENZIONE! Rispettare scrupolosamente le
seguenti limitazioni e requisiti d’uso relativi al
prodotto e al sedile auto: in caso contrario non
è garantita la sicurezza.
• Questo Seggiolino è omologato per l’utilizzo
con bambini di peso tra 0 e 36 kg (dalla nascita
no indicativamente a 12 anni).
• Il sedile dell’auto deve essere dotato di cintu—
ra di sicurezza a 3 punti, statica o con arrotola—
tore, omologata in base al Regolamento UNI/
ECE N°16 o altri standard equivalenti (Fig. 1).
ATTENZIONE! Non installare mai il seggiolino
con la cintura dell’auto a due punti di ancorag—
gio (Fig. 2).
In Gruppo 0+ (0-13 kg) è possibile installare
il Seggiolino sul sedile anteriore soltanto se
l’airbag frontale è stato disattivato.
Non utilizzare mai questo Seggiolino su sedili
rivolti lateralmente o opposti al senso di mar—
cia (Fig. 3).
• Il prodotto è destinato esclusivamente a un
uso come Seggiolino per auto e non all’uti—
lizzo in casa.
• Può accadere che la bbia della cintura di
20
sicurezza dell’auto sia troppo lunga e superi
l’altezza prevista rispetto alla parte inferiore
della seduta (Fig. 4A-4B). In tal caso il Seggio—
lino non deve essere ssato su quel sedile ma
dovrà essere installato su un altro sedile su cui
non si presenti il problema. Per ulteriori infor—
mazioni su questo aspetto, contattare la casa
produttrice dell’auto.
ATTENZIONE! Gruppo 2/3. In caso di utilizzo
in veicoli dotati di cinture di sicurezza poste—
riori con airbag integrati (cinture gonabili),
seguire il manuale istruzioni del produttore
dell’auto.
2. INSTALLAZIONE
ATTENZIONE! Queste istruzioni si riferi—
scono, sia nel testo che nei disegni, ad
un’installazione del Seggiolino sul sedile
posteriore lato destro. Per installazioni
in altre posizioni eseguire comunque la
stessa sequenza di operazioni.
2.1 INSTALLAZIONE IN AUTO DEL SEGGIO—
LINO (con SISTEMA ISOFIX) IN DIREZIONE
CONTRARIA AL SENSO DI MARCIA: GR. 0+
(0-13 KG) e GR1 (9-18 KG)
Il seggiolino in Gruppo 0+ va installato SEM—
PRE in direzione contraria al senso di marcia,
disattivando l’Airbag.
L’installazione deve essere eseguita utilizzando
SEMPRE i connettori Isox e il Top Tether
• Agire sulla leva reclinazione (P), no a far
coincidere il pallino rosso con la posizione R
(Fig. 5)
• Agire sulla leva (Q) e ruotare la seduta di 180°,
vericando che sia bloccata e posizionata
in senso contrario alla direzione di marcia
(Fig. 6).
• Posizionare il seggiolino sul sedile dell’auto in
senso contrario alla direzione di marcia.
• Estrarre completamente i connettori rigidi
(C), tirando il nastro verso l’esterno (V) (Fig. 7).
• Per facilitare l’aggancio dei connettori Isox è
possibile utilizzare le apposite guide in dota—
zione, agganciandole ai ganci Isox dell’auto
(Fig.
• Agganciare i connettori agli agganci presenti
tra lo schienale e la seduta (Fig. 9). Un carat—
teristico click segnalerà l’avvenuto aggancio
l’indicatore passerà dal colore rosso al verde.
• Spingere con energia il seggiolino verso lo
schienale del sedile per assicurare la massima
aderenza (Fig. 10).
• Estrarre il Top Tether (F) dallo sportellino (W)
(Fig. 11).
• Allungare il nastro del Top Tether premendo il
tasto di regolazione (Y).
• Far passare il Top Tether nel guida cinture az—
zurro (Fig. 12).
ATTENZIONE! Far passare il Top Tether tra la
parte alta dello schienale del sedile dell’auto—
veicolo e il poggiatesta. Non far passare mai il
Top Tether sopra il poggiatesta dell’auto.
ATTENZIONE! Fare riferimento al libretto di
istruzioni dell’auto per individuare il punto di
aggancio del Top Tether del Seggiolino. Tale
punto di aggancio è contrassegnato da ap—
posita etichetta (Fig. 13) e si può trovare nelle
posizioni indicate dalle gure 13A – 13B – 13C
– 13D.
ATTENZIONE! Vericare che l’ancoraggio utiliz—
zato per il Top Tether sia quello previsto. Evitare
di confonderlo con un anello previsto per s—
sare i bagagli (Fig. 14).
• Una volta individuato il punto di ancoraggio,
connettervi il gancio del Top Tether (X).
Regolare la lunghezza della cintura del Top Te—
ther tirando energicamente il nastro per met—
terlo in tensione. La conferma del corretto ten—
sionamento avviene attraverso il colore verde
dell’indicatore (Z) presente sul nastro (Fig. 15).
Avvolgere il nastro in eccedenza e assicurarlo
con apposito velcro.
Il cuscino mini-riduttore completo di cuneo
e poggiatesta va utilizzato dalla nascita no a
6 kg. Fare riferimento al paragrafo 3.1 RIDUT—
TORE
Per disinstallare il seggiolino, sganciare il Top
Tether e i connettori Isox mediante i pulsanti
di sgancio (D) (Fig. 16). Per farli rientrare com—
pletamente spingerli verso l’interno.
Completata l’installazione per alloggiare il
bambino procedere come segue:
Краткое содержание страницы № 1
™
EZ Latch
Lower Anchorage
Belt System
for
Carseats Carseats
• For use in vehicles
with LATCH or ISOFIX
anchor points.
Avoid injury or death-
Read and understand
this manual!
Store instructions
for future use.
5008-10-01 50081001
Краткое содержание страницы № 2
Table Of Contents Important Information ❃ ❃ ™ Important Information……………………………….1 EZ LATCH can only be used in vehicles that are equipped with LATCH or ISOFIX anchor What Is LATCH………………………………………….2 points. Use Restrictions…………………………………………3 To properly install car seat, you will need the following: LATCH In Vehicle……………………………………….4 Original car seat instruction manual. If In
Краткое содержание страницы № 3
What is LATCH? ❃ United States Federal Motor Vehicle Safety LATCH SYSTEMS FOR VEHICLES: Standards have defined a new system for LATCH in the vehicle consists of a top tether installing car seats in vehicles. The system anchor point and two lower anchor points is called LATCH. LATCH stands for: (Fig. a). Lower Anchorage and Tether for CHildren. Some vehicle owner manuals use the term ISOFIX to identify the new car seat anchorage LATCH SYSTEMS FOR CAR SEATS: ™ system. This EZ LATCH can
Краткое содержание страницы № 4
Use Restrictions ❃ WARNING ™ Use the EZ LATCH only on Graco and Century Avoid serious injury or death: car seats manufactured after September 1, 1997 ™ DO NOT use EZ LATCH see “Manufactured On” date label on car seat. to restrain an E Ex xc ce ep pt t a as s n no ot te ed d b be el lo ow w:: occupant. Graco Snugride Base Use only with Graco and Century car seats. If base looks like this If base looks like this See Use Restrictions. DO NOT use EZ LATCH™. USE EZ LATCH™. Never attach tw
Краткое содержание страницы № 5
LATCH In Vehicle ❃ Vehicle Newer vehicles have one or more seating Typical seat in a positions with LATCH anchorage systems. Top Tether Anchor passenger vehicle. Other vehicle types Points If vehicle is equipped with LATCH, the vehicle may have different lower anchor points may be visible at the vehicle LATCH locations. seat crease. If not visible, they may be marked with the symbol below (Fig. a). See your vehicle owner’s manual for exact locations, anchor Vehicle identification, and r
Краткое содержание страницы № 6
Installing Car Seat In Vehicle ❃ ™ Follow instruction manual provided with Tighten EZ LATCH by pushing down hard 5 car seat for installation in vehicle; use the on car seat and pulling the adjustment belt ™ EZ LATCH in place of the vehicle seat belt. (Fig. d). ™ For ease of installation, extend EZ LATCH Test car seat for secure installation as 6 1 to its maximum length. described in car seat instruction manual by pulling front-to-back and left-to-right. Position car seat, rear-facing or
Краткое содержание страницы № 7
Adjustment Belt Adjustment Belt Release Button Release Button Connector Connector Vehicle Lower Anchor Points (Fig. a) (Fig. b) Adjustment Belt (Fig. c) (Fig. d) 6
Краткое содержание страницы № 8
™ EZ LATCH ❃ Removal from Vehicle 1 1 Tilt metal tab of adjuster to release tension (Fig. a), then pull webbing through adjuster to loosen belt. HINT: Press down on car seat to reduce tension ™ on EZ LATCH . (Fig. a) 2 Press and hold red release button (Fig. b). 2 3 Push connector in, lift connector up and pull out (away from anchor point) (Fig. c). 4 Repeat steps 2 and 3 with other connector. (Fig. b) 3 (Fig. c) 7
Краткое содержание страницы № 9
™ The EZ LATCH system may be used to secure Booster Car Seat ❃ a belt positioning booster car seat to the vehicle (Without Harness) to help provide stability as the child gets in or out of the car seat. The vehicle lap/shoulder belt must be used to restrain child. Follow booster car seat instruction manual. WARNING Avoid serious injury or death: ™ DO NOT use EZ LATCH across front of child. 8
Краткое содержание страницы № 10
Maintenance ❃ Periodically check belt for damage or wear. A damaged or frayed belt MUST be replaced. ™ EZ LATCH belt may be surface washed with a solution of mild soap and water. Rinse with clean water. DO NOT USE HARSH CLEANERS OR IMMERSE THE BELT IN WATER. Doing so may weaken the belt. Rinse with clean water and air dry. 9
Краткое содержание страницы № 11
Graco Children’s Products Inc. A Division of Newell Rubbermaid P.O. Box 100 Elverson, PA 19520
Краткое содержание страницы № 12
™ EZ Latch Système d’ancrage du bas pour les ceintures de siège d’auto de • Pour usage dans les véhicules avec points d’ancrage de loquet de sûreté ou ISOFIX. Évitez les blessures et la mort, lisez et comprendre ce manuel! Entreposer ces instructions pour usage futur. 5008-10-01 50081001
Краткое содержание страницы № 13
Table des matières Information Importante ❃ ❃ EZ LATCH™ peut-être seulement utilisé dans les Information Importante…………………………1 véhicules qui sont équipés avec les points d’ancrage LOQUET DE SÛRETÉ ou ISOFIX. Qu’est ce que le LOQUET DE SÛRETÉ………..2 Pour installer proprement le siège d’auto, vous Utilisez des restrictions…………………………..3 allez avoir besoin ce qui suit: LOQUET DE SÛRETÉ dans le véhicule……….4 Manuel d’instructions du siège d’auto
Краткое содержание страницы № 14
Qu’est ce que le LOQUET DE ❃ SÛRETÉ? Les critères fédéraux de sécurité du véhicule SYSTÈMES DE LOQUET DE SÛRETÉ POUR automobile aux États-Unis ont défini un VÉHICULES: nouveau système pour installer les sièges Le LOQUET DE SÛRETÉ dans un véhicule d’auto dans le véhicule. Le système se consiste en un point d’ancrage supérieur et nomme LOQUET DE SÛRETÉ. Cela signifie: deux points d’ancrages inférieurs (ill. a) Point d’ancrage inférieur et sangle de retenue pour enfant. Certains manuels
Краткое содержание страницы № 15
Restrictions à utiliser ❃ MISE EN GARDE Evitez des sérieuse blessures ou la mort: Utilisez le EZ LATCH™ seulement sur les sièges NE PAS utiliser EZ d’auto Graco et Century fabriqués après le 1 LATCH™ pour Septembre 1997 voir la date de fabrication sur retenir l’étiquette «Manufactured on» du siège d’auto. E Ex xc ce ep pt te er r c ce el lu ui i n no ot té é c ci i-d de es ss so ou us s:: Socle Snugride™ de Graco Utilisez seulement avec des sièges d’auto de Graco et Century. Voir, Rest
Краткое содержание страницы № 16
LOQUET DE SÛRETÉ dans le ❃ Un siège typique dans un véhicule à passagers. véhicule Les autres types de Points d’ancrage Les véhicules plus récents ont une ou plusieurs véhicule peuvent avoir supérieur du places assises avec les systèmes d’ancrage DE des emplacement véhicule LOQUET DE SÛRETÉ différents pour le LOQUET DE SÛRETÉ Si le véhicule est équipé d’un LOQUET DE SÛRETÉ, les points d’ancrage inférieurs du véhicule peuvent être visibles au pli du siège du véhicule. S’il n’est pas v
Краткое содержание страницы № 17
Installer le siège d’auto dans le véhicule ❃ Suivez le manuel d’instructions inclut avec le Serrer le EZ LATCH™ en poussand fort vers 5 siège d’auto pour l’installation dans le véhicule; le bas sur le siège d’auto et en tirant la utlisez le EZ LATCH™ à l’emplacement de la ceinture d’ajustement (ill. d). ceinture du véhicule. Testez le siège d’auto pour une installation 6 Pour facilité l’installation, étendre au solide tel que décrit dans le manuel 1 maximum le EZ LATCH™. d’instructions d
Краткое содержание страницы № 18
Ceinture Ceinture d’ajustement d’ajustement Bouton de Bouton de relâche relâche Connecteur Connecteur Points d’ancrage inférieurs du véhicule (ill. a) (ill. b) Ceinture d’ajustement (ill. c) (ill. d) 6
Краткое содержание страницы № 19
Pour enlever le EZ LATCH™ ❃ du véhicule 1 Inclinez l’attache métallique de l’ajusteur pour 1 dégager la tension (ill. a), ensuite tirez la sangle à travers l’ajusteur pour défaire la ceinture. CONSEIL: Appuyez en abaissant sur le siège d’auto (ill. a) pour réduire la tension sur le EZ LATCH™. Appuyez et maintenez le bouton de dégagement 2 2 rouge (ill. b). Enfoncez le connecteur, soulevez le connecteur et 3 le retirer (éloigné du point d’ancrage) (ill. c). Répétez les étapes 2 et 3 avec l
Краткое содержание страницы № 20
Le système EZ LATCH™ peut être utilisé pour Siège d’appoint ❃ assurer un siège d’appoint avec baudrier au (sans harnais) véhicule pour fournire une bonne stabilité lorsque l’enfant entre ou sort du siège d’auto. La ceinture abdominale/boudrier du véhicule doit être utilisée pour retenir l’enfant. Suivez le manuel d’instructions du siège d’appoint. MISE EN GARDE Éviter des sérieuse blessure ou la mort: NE PAS utiliser EZ LATCH™ à travers de l’enfant. 8
перейти к содержанию
![]()
ПРЕДУПРЕЖДЕНИЕ: Избегайте серьезных травм или смерти вашего ребенка. Никогда не используйте детское удерживающее устройство Fit4 без установленных на нем мягких предметов. Вы должны прочитать и понять инструкции по удалению Softgoods и инструкции в Руководстве пользователя. Если вы не понимаете эти инструкции, НЕ ПЫТАЙТЕСЬ удалить мягкие предметы, STOP и позвоните в Chicco по телефону 1-877-424-4226.
SS0031E_01
ИНСТРУКЦИИ: Снятие / установка Fit4 Adapt Softgoods
ВАЖНО: Также ознакомьтесь с инструкциями, прилагаемыми к вашему продукту.
УДАЛЕНИЕ ПРОГРАММЫ Stage 1 г .:

- Полностью ослабьте ремни безопасности. нажав кнопку освобождения ремня безопасности на передней части детского удерживающего устройства и потянув за оба ремня. Затем отстегните нагрудный зажим и пряжку ремня безопасности.

- Снимите подкладку для пахового ремня. найдя язычок и протолкнув его через пряжку ремня безопасности. Вытяните язычок через переднюю часть пряжки ремня и снимите его.

- Удалите Stage 1 Позиционер потянув плечевые ремни через боковые отверстия на накладке, и проденьте пряжку ремня через прорезь в накладке. Удалите Stage 1 Позиционер детского удерживающего устройства.

- При желании отцепите язычок крючка и петли. на внешней стороне плечевой накладки, чтобы снять ее. Повторите то же самое для другой плечевой накладки. Внимание: Наплечники можно использовать в Stages 1, 2 и 3.

- При желании снимите подушечки Comfort Flex. отсоединив крючок и петлю на обеих подушках. Затем выдвиньте подушки Comfort Flex с одной стороны подушки сиденья.

- При желании снова прикрепите подушечку для пахового ремня. Проденьте промежностный ремень через подушечку для промежностного ремня. Затем найдите выступ и протолкните его через переднюю часть пряжки ремня. Вытяните язычок через заднюю часть пряжки ремня. Примечание: подушечку для пахового ремня можно использовать вtages 1, 2 и 3.
УДАЛЕНИЕ ПРОГРАММЫ Stage 2 г .:

- Полностью ослабьте ремни безопасности. нажав кнопку освобождения ремня безопасности на передней части детского удерживающего устройства и потянув за оба ремня. Затем отстегните нагрудный зажим и пряжку ремня безопасности.

- Снимите подкладку для пахового ремня. найдя язычок и протолкнув его через пряжку ремня безопасности. Вытяните язычок через переднюю часть пряжки ремня и снимите. При желании также снимите подплечники.

- При желании снимите подушечки Comfort Flex. отсоединив крючок и петлю на обеих подушках. Затем выдвиньте подушки Comfort Flex с одной стороны подушки сиденья.

- Поднимите подголовник в самое верхнее положение. Отключите обе кнопки Snap, расположенные в нижней части Stage 1 и 2 вставка в подголовник, как показано.

- Сдвиньте обе заслонки подголовника из боковых карманов на подголовнике. Удалите Stage Вставка подголовника 1 и 2 из детского удерживающего устройства.

- Найдите и отмените верхнюю кнопку защелки на Stage 2 Боковое крыло позиционера. Под кнопкой вытяните пластиковый язычок из кармана. Повторите для другой стороны.


- Проденьте плечевые ремни через боковые отверстия. на Stage 2 Позиционер. Потяните вперед ткань сиденья и Stage 2 Позиционер, как показано. Затем просуньте руку под ткань нижней части сиденья и расстегните обе кнопки, прикрепляющие Stage 2 Позиционер на ткань дна сиденья.

- Отцепите ОБЕИ эластичные петли ниже переднего края детского удерживающего устройства, и проденьте пряжку ремня через прорезь в подкладке. Удалите Stage 2 Позиционер детского удерживающего устройства. При желании снова прикрепите подкладку для пахового ремня и подплечники для Stage 3 использования.
Чтобы снова прикрепить подкладку для пахового ремня. Проденьте промежностный ремень через подушечку для промежностного ремня. Затем найдите выступ и протолкните его через переднюю часть пряжки ремня. Вытяните язычок через заднюю часть пряжки ремня.
УДАЛЕНИЕ ПРОГРАММЫ Stage 3 и 4:

- Полностью ослабьте ремни безопасности. нажав кнопку освобождения ремня безопасности на передней части детского удерживающего устройства и потянув за оба ремня. Затем отстегните нагрудный зажим и пряжку ремня безопасности.

- Снимите подкладку для пахового ремня. найдя язычок и протолкнув его через пряжку ремня безопасности. Вытяните язычок через переднюю часть пряжки ремня и снимите его.

- Снимите подушки Comfort Flex. отсоединив крючок и петлю на обеих подушках. Затем выдвиньте подушки Comfort Flex с одной стороны подушки сиденья. Снимите подплечники, как показано. Затем поднимите подголовник в самое верхнее положение.

- Удалите ОБА из держателей стаканов. нажав оранжевую кнопку, расположенную на нижнем крае подстаканника, и приподняв, повторите для другой стороны.

- В задней части подголовника, осторожно потяните назад оба пластиковых выступа в верхней части подголовника и потяните за ткань подголовника.

- Когда детское удерживающее устройство обращено к вам, потяните вперед ткань и выведите ее из каркаса подголовника. Отпустите обе кнопки, удерживающие ткань подголовника на месте в нижней части каркаса подголовника, как показано.

- Отпустите обе кнопки с внутренней стороны подушки сиденья, как показано. Затем опустите подголовник в самое нижнее положение.

- У верхнего края спинки сиденья, осторожно потяните назад оба пластиковых язычка и поднимите ткань. Снимите ткань с верхнего края спинки сиденья.

- Когда детское удерживающее устройство обращено к вам, потяните вперед ткань. Проведите его с каркаса детского сиденья, а затем вокруг каркаса подголовника.

- С одной стороны детского удерживающего устройства откройте ЯЩИК ДЛЯ ВЕЩЕСТВА. Найдите и отцепите эластичную петлю, как показано. Вытяните край ткани вокруг оранжевой направляющей поясного ремня.

- Освободите оба эластичных ремня. расположен внутри выреза для крепления подстаканника. Повторите шаги 24 и 25 для другой стороны.

- Проденьте пряжку ремня вниз. через прорезь в подушке и потяните ТКАНЬ вверх по передней и боковым сторонам каркаса сиденья. Затем осторожно натяните ткань вокруг крышки ремня регулятора ремня безопасности и снимите нижнюю подушку сиденья. Пластиковая крышка ремня регулятора ремня НЕ снимается. Удалите ткань.
Инструкции по очистке:
Ткани можно стирать вручную с использованием мягкого мыла и воды или стирать в машине в холодной воде в деликатном режиме с использованием мягкого моющего средства. Повесьте сушиться. НЕ ОТБЕЛИВАТЬ. Дополнительные инструкции по уходу и обслуживанию см. В руководстве к вашему продукту.
НЕ снимите ремни безопасности. Свяжитесь со службой поддержки Chicco по адресу 1-877-424-4226 для помощи или дополнительной информации.СНЯТИЕ РЕМНЯ:

26.Откройте фиксатор пахового ремня и полностью откиньте сиденье (положение 1). Наклоните детское удерживающее устройство назад и найдите металлическую планку пахового ремня под сиденьем. Слегка поверните металлический стержень и протолкните уголок через прорезь. Проденьте металлический стержень в прорезь, вытягивая пряжку ремня с другой стороны. НИКОГДА не используйте детское удерживающее устройство без установленного пахового ремня.УСТАНОВКА РЕМНЯ:

- Проденьте один угол металлической планки через прорезь в отсеке для замка пахового ремня. Полностью откинув сиденье (положение 1), протяните металлический стержень через прорезь из-под сиденья. Убедитесь, что металлический стержень ровно лежит на дне сиденья, как показано. НИКОГДА не используйте детское удерживающее устройство без установленного пахового ремня.


УСТАНОВКА ПРОГРАММНОГО ОБЕСПЕЧЕНИЯ Stage 3 и 4:

- Убедитесь, что подголовник находится в самом нижнем положении, и откройте отсеки для хранения ЗАЩЕЛКИ. Поместите подушку сиденья на раму детского удерживающего устройства и проденьте пряжку ремня через соответствующий паз в подушке сиденья. Затем осторожно проведите тканью по крышке ремня регулятора ремня безопасности.

- Потяните ткань вниз и вокруг переднего края. и вставьте подголовник в верхнее отверстие в ткани. Оберните ткань вокруг задней части каркаса сиденья.

- В передней части детского удерживающего устройства Начните заправлять край ткани во внешний паз, двигаясь вверх по стороне к держателю для стакана.

- Потянув за передний эластичный ремешок, надавите на ткань, направляя ее в паз. Оберните эластичный ремешок вокруг стойки внутри выреза подстаканника. Оберните край ткани вокруг внешней рамки подстаканника, убедившись, что канавки в рамке подстаканника не закрыты тканью.

- Натяните другой эластичный ремешок. направляя ткань вниз и вокруг края держателя стакана в выемку. Оберните резинку вокруг столба и повторите с другой стороны.

- Потяните за плечевые ремни через отверстия в ткани и прикрепите нагрудный зажим и пряжку ремня безопасности.

- Прижмите ткань к внутренней стороне оранжевой направляющей поясного ремня и протолкните ее. Если это станет трудным, можно использовать тупой конец ручки или что-то подобное, чтобы подогнуть ткань по краю.
- Найдите эластичный ремешок рядом с задней частью направляющей поясного ремня, потяните за ремешок и заправьте ткань вокруг верхнего края направляющей поясного ремня. Оберните эластичный ремешок вокруг стойки внутри отделения для ремня LATCH. Закройте отделение и повторите для другой стороны.

- Заправьте ткань и прижмите ее к обоим боковым краям детского удерживающего устройства. В верхней части края детского удерживающего устройства найдите пластиковые язычки. Вдавите оба выступа в верхний край, пока они не останутся на месте под вырезами для выступов.

- Прикрепите обе кнопки к обивке сиденья, как показано. Поднимите подголовник в самое верхнее положение. Наденьте ткань подголовника на раму подголовника и вокруг нее. Заправьте края ткани в края рамы подголовника, как показано.

- На заднем крае подголовника найдите пластиковые вкладки. Вдавите их в каркас подголовника до щелчка, как показано на рисунке.

- Прикрепите обе кнопки на ткани подголовника к каркасу подголовника, как показано. При настройке для использования в Stage 4, пожалуйста, обратитесь к страницам со 112 по 117 в вашем руководстве пользователя. В противном случае потяните ремни плечевого ремня так, чтобы они лежали поверх ткани подголовника.

- Присоедините держатели стаканов к детскому удерживающему устройству. Совместите подстаканники R и L с детским удерживающим устройством, как показано. Убедитесь, что ткань заправлена вдоль кромки детского удерживающего устройства, чтобы подстаканник можно было правильно прикрепить. Совместите штифт держателя стакана и две направляющие с отверстиями на детском удерживающем устройстве, как показано. Вдавите, а затем нажмите на подстаканник до щелчка. Повторите для другой стороны.

- При желании прикрепите подушечку для пахового ремня для Stage 3 и 4 использовать. Проденьте промежностный ремень через подушечку для промежностного ремня. Затем найдите выступ и протолкните его через переднюю часть пряжки ремня. Вытяните язычок через заднюю часть пряжки ремня.

- При желании повторно прикрепите прокладки Comfort Flex. заправив подушку Comfort Flex за обивку сиденья. Затем оберните обе подушечки Comfort Flex вокруг ремней и снова прикрепите крючок и петлю на внешней стороне поясного ремня, как показано. Повторите то же самое с другой подушечкой Comfort Flex. Затем прикрепите обе стороны крючка и петли к внешней стороне плечевой подкладки, как показано. Повторите то же самое для другой плечевой накладки.
УСТАНОВКА ПРОГРАММНОГО ОБЕСПЕЧЕНИЯ Stage 2 г .:
- Полностью ослабьте ремни безопасности. нажав кнопку освобождения ремня безопасности на передней части детского удерживающего устройства и потянув за оба ремня. Затем отстегните нагрудный зажим и пряжку ремня безопасности.

- Поднимите подголовник в самое верхнее положение. Снимите подкладку пахового ремня, взяв язычок и протолкнув его через пряжку ремня. Вытяните язычок через переднюю часть пряжки ремня и снимите его.
- Сдвиньте обе заслонки подголовника в боковые карманы на подголовнике.
 Вставьте плечевые ремни в прорези для подголовников, затем прикрепите обе кнопки, расположенные в нижней части Stage Вставка подголовника 1 и 2, как показано.
 Поместите Stage 2 Позиционер на детском удерживающем устройстве. Проденьте пряжку ремня через соответствующий паз в подушке сиденья и натяните плечевые ремни через Stage 2 Позиционер и в боковые отверстия подушки сиденья.
- Вставьте пластиковый язычок в складку кармана. и прикрепите верхнюю кнопку на кнопке Stage 2 Боковое крыло позиционера. Повторите для другой стороны. Еще раз проверьте, чтобы пластиковый язычок полностью вошел в карман.

- Потяните вперед ткань сиденья и Stagэлектронной 2 Позиционер, как показано. Оберните оба ремня с кнопками вниз и под тканью сиденья. Пальцами выровняйте обе кнопки и прикрепите их к нижней стороне ткани сиденья.

- Найдите и протяните ремешок регулятора через отверстие на подушке сиденья.

- Прикрепите эластичный ремешок. на передней панели Stage 2 Позиционер, потянув эластичные ремни вниз через прорези на переднем крае дна сиденья и закрепив их вокруг обоих крючков.

- При желании прикрепите подушечку для пахового ремня для Stage 2 использования. Проденьте промежностный ремень через подушечку для промежностного ремня. Затем найдите выступ и протолкните его через переднюю часть пряжки ремня. Вытяните язычок через заднюю часть пряжки ремня.
УСТАНОВКА ПРОГРАММНОГО ОБЕСПЕЧЕНИЯ Stage 1 г .:
- Полностью ослабьте ремни безопасности. нажав кнопку освобождения ремня безопасности на передней части детского удерживающего устройства и потянув за оба ремня. Затем отстегните нагрудный зажим и пряжку ремня безопасности.

- Снимите подкладку для пахового ремня. найдя язычок и протолкнув его через пряжку ремня безопасности. Вытяните язычок через переднюю часть пряжки ремня и снимите его.

- Поместите Stage 1 Позиционер на детском удерживающем устройстве. Проденьте плечевые ремни в боковые отверстия на подушке позиционера и проденьте пряжку ремня в соответствующий паз в подушке.

- Присоедините обе подплечники. к ремням плечевого ремня с помощью выступов с крючком и петлей, как показано.

- Прежде чем опускать подголовник в самое нижнее положение, поднимите нижний край вставки подголовника. Найдите нижнюю часть подушки подголовника и сложите ее.

- Заправьте нижнюю подушку подголовника. за Stage 2 Подушка позиционера, но перед Stage 3 и 4 сиденья, как показано.

- Прикрепите подкладку для пахового ремня. Проденьте промежностный ремень через подушечку для промежностного ремня. Затем найдите выступ и протолкните его через переднюю часть пряжки ремня. Вытяните язычок через заднюю часть пряжки ремня.


 Вставьте плечевые ремни в прорези для подголовников, затем прикрепите обе кнопки, расположенные в нижней части Stage Вставка подголовника 1 и 2, как показано.
 Поместите Stage 2 Позиционер на детском удерживающем устройстве. Проденьте пряжку ремня через соответствующий паз в подушке сиденья и натяните плечевые ремни через Stage 2 Позиционер и в боковые отверстия подушки сиденья.


