- Manuals
- Brands
- Mettler Toledo Manuals
- Scale
- AX106 Comparator
- Operating instructions manual
-
Contents
-
Table of Contents
-
Bookmarks
Quick Links
Operating Instructions
METTLER TOLEDO
AX106 Comparator, AX206 Comparator
AX1005 Comparator, AX2005 Comparator
AX1004 Comparator
Related Manuals for Mettler Toledo AX106 Comparator
Summary of Contents for Mettler Toledo AX106 Comparator
-
Page 1
Operating Instructions METTLER TOLEDO AX106 Comparator, AX206 Comparator AX1005 Comparator, AX2005 Comparator AX1004 Comparator… -
Page 2
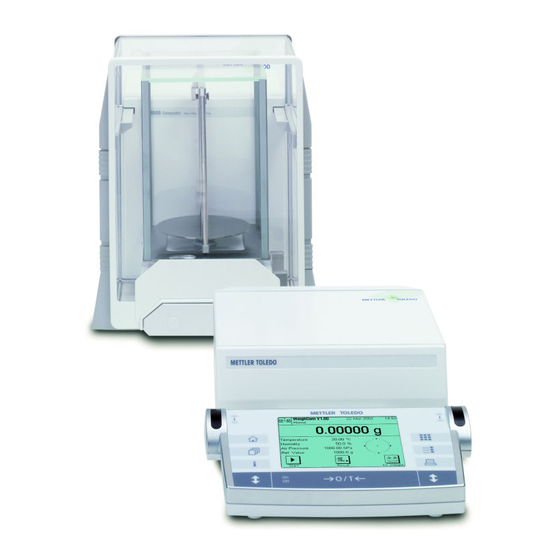
Overview of your AX106/206 mass comparator 1 Door follower handle 2 Lower door coupling element 3 Door handle 4 Upper door coupling element 5 Glass draft shield 6 Typename 7 Weighing pan 8 Inner draft shield 9 Level indicator 10 Control knobs for dial weights 11 Leveling screw 12 Socket for control unit… -
Page 3
Overview of your AX1005/2005 and AX1004 mass comparator AX1005/2005 AX1004 1 Door follower handle 2 Lower door coupling element 3 Door handle 4 Upper door coupling element 5 Glass draft shield 6 Typename 7 Weighing pan 8 Inner draft shield (AX1005/2005) 9 Level indicator 10 Control knobs for dial weights 11 Leveling screw… -
Page 4
Overview of your control unit 1 Control unit 2 Terminal (for details see Chapter 4) 3 Display 4 Operating keys 5 SmartSens sensors 6 Cover (cable compartment on underside of terminal) 7 Type name 8 Connecting socket for weighing cell 9 RS232C serial interface 10 Slot for second interface (optional) 11 Socket for AC adapter… -
Page 5: Table Of Contents
Contents Contents Getting to know your mass comparator ………………….9 Introduction …………………………9 Introducing the AX106, AX206, AX1005, AX2005 and AX1004 mass comparators ……….9 Conventions and symbols used in these operating instructions …………….9 Safety first …………………………10 Setting up the mass comparator ……………………11 Unpacking and checking the delivered items ………………..
-
Page 6
Contents 5.10 Resetting to the factory settings ……………………38 5.11 Date and time …………………………. 38 5.12 Energy-saving function and battery change date ………………..40 5.13 Balance information ……………………….41 5.14 Recording the system settings ……………………. 41 The “Weighing” Application …………………….. 42 Selecting the application …………………….. -
Page 7
Contents Technical data and accessories ……………………69 General data …………………………69 Model-specific data ……………………….70 Dimensions …………………………71 Specifications of the RS232C interface ………………….75 Accessories …………………………76… -
Page 8
Contents Leere Seite… -
Page 9: Getting To Know Your Mass Comparator
Getting to know your mass comparator In this chapter you will be given basic information about your balance. Please read right through this chapter carefully even if you already have experience with METTLER TOLEDO balances; please pay special attention to the safety warnings! Introduction Thank you for choosing a METTLER TOLEDO mass comparator.
-
Page 10: Safety First
If you ever have problems with your mass comparator, contact your METTLER TOLEDO dealer. Use only balance accessories and peripheral devices from METTLER TOLEDO; they are optimally adapted to your mass comparator.
-
Page 11: Setting Up The Mass Comparator
– Operating instructions “WeighCom” Application – Booklet «Weighing the right way with METTLER TOLEDO» – Instructions for the “METTLER TOLEDO Standard Interface Command Set” (MT-SICS), in English Please keep all parts of the packaging. This packaging provides the best guarantee of protection when transporting your balance (Chapter 2.7).
-
Page 12: Selecting A Location And Leveling The Mass Comparator
Setting up the balance Selecting a location and leveling the mass comparator Your balance is a precision instrument. Its accuracy and reliability depend on its being placed in an optimal location: Choose a position which is stable, free from vibration, and as nearly horizontal as possible.
-
Page 13: Glass Draft Shield
Setting up the balance Glass draft shield The glass draft shield of your mass comparator can be adapted to the environmental conditions and your weighing style, as well as to the type of weighing and loading. Draft shield on AX mass comparator The position of the coupling elements determines which parts (left-hand, right-hand, and upper door) of the glass draft shield can be opened.
-
Page 14: Adjusting The Reading Angle And Positioning The Terminal
Setting up the balance Adjusting the reading angle and positioning the terminal So that you can work without fatigue, the reading angle of the terminal can be adjusted. For delivery, the terminal is fastened to the control unit. So that you can arrange your workplace optimally, the terminal can be disconnected from the control unit and positioned separately.
-
Page 15: Location Change
To fasten the terminal onto the control unit again, carry out the procedure in the reverse order. Please refer to the illustration on the left: it shows how to place the cable correctly in the terminal housing. Location change Before any location change, please contact the METTLER TOLEDO organization or our distributor.
-
Page 16: Below-The-Balance Weighing
Setting up the balance Below-the-balance weighing So that weighings can be carried out below the working surface (below-the-balance weighing), your balance is provided with a special hanger. Switch off the mass comparator and unplug the cable of the AC adapter from the back of the control unit.
-
Page 17: Your First Weighing
Simple weighing Your first weighing In this chapter you will get to know the operating and display elements of your mass comparator which are necessary to carry out simple weighings. This chapter provides a first introduction to operating your mass comparator. Switching the mass comparator on and off Note: –…
-
Page 18: Settings For Work With The Mass Comparators
Simple weighing In contrast to the mechanical dial weight balances, handling Weighing range of the AX mass comparator is practically as simple as that of the standard AX balance! Thanks to the enormous electrical range, 109 g with the AX1005/ AX2005/AX1004 or 11 g with the AX106/AX206, the AT mass comparator needs only 4 dial weights.
-
Page 19
Simple weighing Weight range Setting of the dial weights Disc weight 50 g 30 g 10 g on the weighing pan AX206 Knob setting Display (Application “WeighCom”) load Manually switchable Keypad operation: key « » release 0 — 10 g 10 — 20 g 20 — 30 g 30 — 40 g… -
Page 20: Carrying Out A Simple Comparative Weighing
Simple weighing Weigh range Setting of dial weights 500 g 300 g 100 g AX2005 Knob setting Display (Application “WeighCom”) Manually switchable Keypad operation: key « » 998 -1100 g 1100 -1200 g 1200 -1300 g 1300 -1400 g 1400 -1500 g 1500 -1600 g 1600 -1700 g 1700 -1800 g…
-
Page 21: Basic Operating Concepts For The Terminal And Software
Basic operating concepts for the terminal and software Basic operating concepts for the terminal and software This chapter describes the operating and display elements on your terminal and explains the concept for operating the software on your balance. Please read right through this chapter carefully: it is the basis for all the operating steps described in subsequent chapters.
-
Page 22: The Display
Basic operating concepts for the terminal and software 5 «6» key Before leaving the factory, your balance has been programmed with 2 standard applications (for normal weighing and comparative weighing). Use this key to select the application you wish to work with. 6 «7»…
-
Page 23: The Software On Your Balance
Basic operating concepts for the terminal and software The software on your balance The software controls all the functions of your balance. It also makes it possible to adapt the balance to your specific working environment. Please read the following sections carefully; they form the basis for operating your balance. The software comprises the following levels: –…
-
Page 24
Basic operating concepts for the terminal and software The diagram below shows the interrelationships between the individual levels of the software and gives a first overview of the typical procedure for operating it. Example Work step 1. Select user profile .. -
Page 25: Typical Working Procedure
Basic operating concepts for the terminal and software Typical working procedure Following below is a brief description of the typical working procedure, leaving out details which depend on specific applications. Switch on the balance: Switch on the balance by briefly pressing the «On/Off»…
-
Page 26
Basic operating concepts for the terminal and software – System settings apply for the entire weighing system and for all applications. They are also stored in the active user profile (which is shown in the title line). Check that the desired user profile is active before you change any system settings! Note: The system settings can also be accessed from the application menu («6»… -
Page 27: System Settings
System settings System settings In this chapter you will learn how you can adapt the weighing system to your requirements. There are system settings for each user profile, as well as for the “Home” profile. As long as a particular user profile is active, its system settings apply irrespective of which application is being used.
-
Page 28: Settings For Adjustment And Test
System settings Settings for adjustment and test You can use these menus to make all the settings associated with adjusting (calibrating) your balance. In the sections below you will find information on all the possible settings for adjustment and test procedures and for recording them. 5.3.1 Displaying the adjustment history (“History”) In the “History”…
-
Page 29: Defining Adjustment And Test Reports
System settings 5.3.2 Defining adjustment and test reports In this menu, which has two pages, you can specify the information to be printed on the adjustment and test reports. By touching the appropriate buttons, you can activate the desired information. The checked items of information will be included on the reports.
-
Page 30: Profact» Fully Automatic Adjustment Function
System settings 5.3.3 “ProFACT” fully automatic adjustment function In this menu you can specify the settings for fully automatic adjustment (calibration) using the internal adjustment weight (“ProFACT”). ProFACT adjusts the balance fully automatically on the basis of pre-selected criteria. The following settings are available: “Protocol trigger”…
-
Page 31: Defining An External Adjustment Weight
System settings 5.3.4 Defining an external adjustment weight If you work with an external adjustment weight, you can define its weight and unit here. (Note: Depending on country-specific regulations, this function may not be available for certified balances). An input window appears which looks like a pocket calculator and can be used like one.
-
Page 32: Specifiying The Weighing Parameters
System settings Specifiying the weighing parameters “Weighing mode” You can use this setting to match the balance to the type of weighing. Select “Universal” weighing mode for all normal weighing processes, or “Dosing” for dispensing liquid or powdery weighing samples. With this setting the balance responds very quickly to minutest changes in weight.
-
Page 33: Smartsens» Settings
System settings “AutoZero” This switches auto-zeroing (“AutoZero”) on and off. If auto-zeroing is switched on, the balance continually corrects any zero point drift that may occur. Factory setting: “Off” (= switched off) “SmartSens” settings “SmartSens left”, “SmartSens right” You can use this setting to define the function of the left-hand and right-hand “SmartSens”…
-
Page 34: Renaming The User Profile
If no password is specified, “no password” appears in the display. Warning: Make a note of your password! If you forget it, contact your METTLER TOLEDO dealer. Factory setting:…
-
Page 35: Selecting The Door Function
System settings Selecting the door function “Door Function” The automatic door function eases your work by making the doors of the glass draft shield open or close automatically whenever specific functions require them to do so. For example, the glass draft shield opens automatically after zeroing or taring, and prompts you to put the material for weighing, or the tare weight, onto the weighing pan.
-
Page 36: Terminal Settings
(baud rate, parity, handshake, end-of- line characters, and font). The parameters are preset for the correspondingly optimal METTLER TOLEDO devices (for accessories and options, see Chapter 9). Note: No interface parameters can be defined for the “Secondary display” setting: they are preset to fixed values.
-
Page 37
System settings “Brightness” Here you can set the brightness of the display. Touch the arrow buttons to adjust the brightness in the range 0% to 100% as required. Each time one of the two arrow buttons is touched, the brightness is instantly adjusted so that the change can be seen immediately. -
Page 38: Resetting To The Factory Settings
System settings 5.10 Resetting to the factory settings Here you can reset all the settings to the factory settings. Important: Resetting affects all the settings (application-dependent settings and system settings) for the active user profile! If you select “Set”, for safety reasons you will be asked whether you really want to reset to the factory settings.
-
Page 39
System settings “Date” Sets the current date. An input window appears which looks like a pocket calculator and can be used like one. Enter the current date in format day–month–year (DD.MM.YYYY), irrespective of which date format you selected for the display. Note: You can also make this adjustment directly in weighing mode by touching the date. -
Page 40: Energy-Saving Function And Battery Change Date
System settings 5.12 Energy-saving function and battery change date “Standby” Here you can specify how long the balance can remain unused before it switches over to “Standby” mode. “Standby” mode is the same status as when the balance is switched off with the «On/Off»…
-
Page 41: Balance Information
This window displays important information about your balance, such as balance type, serial number, etc. You should always have this information ready when you contact your METTLER TOLEDO authorized representative. The date for the next service is also displayed. 5.14…
-
Page 42: The «Weighing» Application
The “Weighing” application The “Weighing” Application In this chapter we will introduce you to the “Weighing” application. You will find information for practical work with this application, and about the application-specific settings that are available (you will find information about non-application-specific system settings in Chapter 5).
-
Page 43
The “Weighing” application Touching the buttons with the arrow symbols returns you to the second menu page. “Display Unit”: Specifies the unit for displaying the results (Section 6.2.6). “Info Unit”: Specifies an additional weighing unit to be displayed as an information field in the display (Section 6.2.6). -
Page 44: Select Function Keys
The “Weighing” application 6.2.2 Select function keys Function keys make it possible for you to access certain functions and settings of the application directly. The function keys are displayed within the application at the bottom edge of the display (see Section 4.2). Touching a key initiates the corresponding function.
-
Page 45: Smarttrac» And Stopwatch
The “Weighing” application 6.2.3 “SmartTrac” and stopwatch “SmartTrac” is a graphical weighing-in aid which makes it easier for you to weigh in to a specified target value. “SmartTrac” appears in the application at the right-hand side of the display below the weighing result (Section 4.2). In this menu you can select the display mode for “SmartTrac”…
-
Page 46: Manual/Automatic Transfer Of Weight Values
The “Weighing” application “–Tol” and “+Tol”: These information fields show the tolerances on the target weight that were input using the function keys with the same name (Section 6.3.3). “n”, “x”, “s”, “s.rel”, “Sum”, “<T–”, “>T+”, “Min”, “Max” and “Diff” These information fields show the following statistical values: “n”: Cumulative number of weighings…
-
Page 47: Selecting Weighing Units
The “Weighing” application 6.2.6 Selecting weighing units In the “Display Unit” and “Info Unit” menus, you specify which weighing units you wish to work with. By choosing different units, you can have the weighing result displayed in two different weighing units simultaneously. The same selection of units is available for both the “Display Unit”…
-
Page 48: Defining The Weighing Record
The “Weighing” application 6.2.8 Defining the weighing record In this menu you specify the information to appear on the weighing reports. To make it clearer, this extensive menu is divided into 3 submenus in which you can specify the options for the title of the record, recording the individual values, and the weighing result.
-
Page 49
The “Weighing” application “ID1”, “ID2” and “ID3”: The identifications which were input using the function keys with the same names are printed out (Section 6.3.6). Options for recording the individual values In this submenu you specify the information to be printed on the record for each individual weighing result. -
Page 50: Parameters For Manual Record Printing
The “Weighing” application On the second page of the menu, the following information items for the record of the end result are available: “Diff”: Difference between the lowest and high- est weight of the weighing serie. “Sum”: Sum of all individual weights. “Visum”: Adds an extra line to the record for a signature.
-
Page 51: 6.2.10 Defining Identifications And Record Titles
The “Weighing” application 6.2.10 Defining identifications and record titles In the “Identification” menu you specify titles for the weighing records and designations for the identifications. An identical alphanumeric input field is available for all types of input (shown illustrated at right). “Title 1”…
-
Page 52: 6.2.11 Parameters For Processing Bar Code Data
The “Weighing” application 6.2.11 Parameters for processing bar code data If there is a bar code reader connected to your balance, you can specify in the “Bar code input” menu how this data should be processed. The following settings can be selected: “ID1”, “ID2”, and “ID3”: The captured data is treated as identification text and assigned to the corresponding identification (Section 6.3.6).
-
Page 53: Changing The Resolution Of The Weighing Result
The “Weighing” application Key the desired tare value in. Check the weighing unit: this is displayed to the right of the tare value. If you touch the weighing unit, the units available for selection are displayed. Note: The units are not converted automatically, i.e. if you input a value in a particular unit, this value remains, even if you change the weighing unit.
-
Page 54: The «Smarttrac» Graphical Weighing-In Aid
The “Weighing” application When one or other of the function keys for the minus or plus tolerance is touched, the window for entering the corresponding value appears. The input window is the same as for the target value. Here, too, check the unit which is displayed to the right of the tolerance value.
-
Page 55: Weighing-In And Using The Statistics
The “Weighing” application SmartTrac 4 The target value is represented by the vertical line. During weighing-in, triangular segments appear to the left and right of this line, which disappear toward the point at the top as the fine range is approached. When the fine range is reached, a pointer appears which makes precise fine-dispensing to the target value easy.
-
Page 56
The “Weighing” application Place the first sample on the weighing pan and wait until the stability detector is extinguished. Touch the “M+” function key to accept the weight into the statistics. The weight value measured is then printed out. Note: If you have activated automatic weight transfer (Section 6.2.5) the weight is accepted automatically as soon as the value becomes stable. -
Page 57: Working With Identifications
The “Weighing” application You can produce the record for the weighing results by touching the “Print” key. ——- Statistics —— Nominal 215.500 g The illustration on the left shows an example of a record. Which values are shown on -Tol 1.5 % the record depends on the settings for the weighing record (Section 6.2.8).
-
Page 58
The “Weighing” application The example on the left shows the balance display after the ID function keys, and the ID information fields, have been activated. The practical example described below is based on the designations shown in the illustration above. In the application, when you process a job for a client, and when weighing is complete, touch the “ID1”… -
Page 59: Adjusting The Balance And Checking The Adjustment
The “Weighing” application Adjusting the balance and checking the adjustment At the factory your balance was set for a manual adjustment. However, you can also carry out a manual adjustment and/or check using the internal weight, or an external weight, at any time. In the descriptions following below, it is assumed that the respective function keys for adjustment and testing (Section 6.2.2) are activated.
-
Page 60: Adjustment Using An External Weight
The “Weighing” application 6.4.2 Adjustment using an external weight By touching this function key, you start adjustment (calibration) of the balance using an external calibration weight. Note: Depending on country-specific regulations, this function may not be available on certified balances. You are prompted to load the adjustment weight onto the pan.
-
Page 61: Checking The Adjustment With The Internal Weight
The “Weighing” application 6.4.3 Checking the adjustment with the internal weight By touching this function key, you can use the internal weight to check the correct adjustment (calibration) of your balance. The checking procedure is similar to the procedure for adjustment using the internal weight (Section 6.4.1).
-
Page 62: Adjustment And Test Records (Examples)
Adjustment and test records (examples) Record of an external adjustment Record of an internal test — External adjustment — ——–– Internal test ——–– 17.Apr 2000 11:55 17.Apr 2000 11:57 METTLER TOLEDO METTLER TOLEDO User User 3 User User 3 Type AX106 Type…
-
Page 63
(Section 5.3.1). An example of an 17.Apr 2000 12:02 adjustment history record is shown on the left. METTLER TOLEDO The earliest adjustments are printed first, and the most recent adjustment is printed at User User 3 the end of the record. -
Page 64: Loading Applications Via The Internet
GmbH accepts no responsibility for any consequences of using this software. Operating principle You will find full information about your balance together with updates on the METTLER TOLEDO website at the following address: www.mt.com/ax We recommend you to put a bookmark in your web browser at this address so that in the future you can go direct to this Internet website.
-
Page 65: Loading The Application Package Onto Your Balance
Loading Applications via the Internet Loading the application package onto your balance After you have downloaded the application package from the Internet, before you can transfer it to your balance you must connect the balance to the serial interface of your computer with the RS232 cable. Note: If your balance also has additional optional interfaces, take care that the cable is always connected to the RS232C interface installed as standard! Set the interface on the balance to the following values (you will find detailed information about these settings in Chapter 5.8): for peripheral device select “Host”, then set the following communication parameters: baud rate 9600;…
-
Page 66: Backing Up And Restoring Your Balance Settings
Loading Applications via the Internet When you have made the necessary settings and checked the connection, you can start the updating process. You do this by clicking on “Start Software Update Procedure”. Follow the instructions of the e-Loader which will guide you through the updating procedure step by step.
-
Page 67: Further Important Information
Further important information Further important information Error messages occurring during normal operation Most error messages appear in plain text directly in the respective application, and usually accompanied by a text describing how to correct the error. Error messages of this type are self-explanatory and therefore not mentioned below. The following two error messages can appear instead of the weighing result: Overload The weight on the pan exceeds the weighing capacity of the balance.
-
Page 68: Cleaning And Service
Ask your METTLER TOLEDO dealer about servicing possibilities – regular servicing by an authorized service technician guarantees consistent weighing accuracy for years and prolongs the service life of your mass…
-
Page 69: Technical Data And Accessories
Technical data and accessories In this chapter you will find the most important technical data for your balance. Accessories from the METTLER TOLEDO range increase the functionality of your balance and open up additional areas of application. In this chapter you will find a list of the options currently available.
-
Page 70: Model-Specific Data
Technical data and accessories Model-specific data AX106 AX206 AX1005 AX1004 AX2005 Comparator Comparator Comparator Comparator Comparator Readability 1 µg 1µg 0.01 mg 0.1 mg 0.01 mg Maximum load 111 g 211 g 1109 g 1109 g 2109 g (min. load 998 g) Taring range 0…11 g 0……
-
Page 71: Dimensions
Technical data and accessories Dimensions AX106/206 mass comparator and inner draft shield 170.5 151.5 10.9 ∅ 87.4 94.5 305.5 352.5…
-
Page 72
Technical data and accessories External draft shield for AX106/206 mass comparator… -
Page 73
Technical data and accessories AX1005/2005/1004 mass comparator and inner draft shield (AX1005/2005) 170.5 151.5 10.9 ∅ 94.5 305.5 352.5… -
Page 74
Technical data and accessories Control unit 365.5 155.5 127.5… -
Page 75: Specifications Of The Rs232C Interface
Technical data and accessories Specifications of the RS232C interface Interface type: Voltage interface according to EIA RS-232C/DIN 66020 (CCITT V24/V.28) Max. cable length: 15 m Signal level: Outputs: Inputs: +5 V … +15 V (RL = 3 – 7 kΩ ) +3 V …
-
Page 76: Accessories
Technical data and accessories Accessories You can increase the functionality of your mass comparator with accessories from the METTLER TOLEDO range. The following options are available: Draft shield External draft shield for AX1005, AX2005 und AX1004 11115915 Cable Extension cable between cell and evaluation electronics for AX-SE and MX/UMX, length 0.6 m…
-
Page 77
Leere Seite… -
Page 78
Leere Seite… -
Page 79
Printed on 100 % chlorine-free paper. Because we care. -
Page 80
To protect your METTLER TOLEDO product’s future: METTLER TOLEDO Service assures the quality, measuring accuracy and preservation of value of all METTLER TOLEDO products for years to come. Please send for full details about our attractive terms of service. Thank you.
Предложите, как улучшить StudyLib
(Для жалоб на нарушения авторских прав, используйте
другую форму
)
Ваш е-мэйл
Заполните, если хотите получить ответ
Оцените наш проект
1
2
3
4
5
Описание
Описание весов MC-30K с функцией компаратора массы:
Устройства для точного взвешивания грузов с функцией компаратора. Оснащены дисплеями, имеющими разрядность на единицу больше разрядности экранов стандартных весов. Умеют определять массу легких порошковых или жидких материалов, размещенных на платформе в массивной таре. Для более точного взвешивания пользователь может применять автоцентируемые чашки, способные существенно снижать погрешность измерения, которая возникает по причине расположения сравниваемых масс вне центра.
На панели управления расположены жидкокристаллический дисплей и клавиатура. Клавиши работаю в двух режимах: «Нажата и отпущена» и «Нажата и удерживается». От режима зависит результат использования кнопки. Экран способен отображать не только результаты взвешивания и сохраненные данные, но и показания множества индикаторов.
Отличительные особенности:
- Оборудование этой серии успешно прошло тестирование, в результате которого было признано отвечающим требованиям класса приборов, способных эффективно подавлять негативное влияние помех от промышленных или бытовых устройств на процесс взвешивания.
- Приборы внесены в государственный реестр средств измерений.
- Поддерживают внутреннюю калибровку благодаря встроенной калибровочной гире, обладают повышенной дискретностью, имеют встроенный фильтр стабилизации, эффективно устраняющий вибрационные воздействия.
- Пользователь может выбрать до 15 единиц измерений, применять режим вычисления процентного взвешивания, определения массы животных, штучного подсчета с использованием функции ACAI.
- Устройства оснащены системой самодиагностики, интерфейсом RS-232C, автоматической системой подстройки под условия окружающей среды.
- Имеют расширенный комплект стандартных принадлежностей.
Области применения:
Весы серии МС с функцией компаратора используют для проверки и калибровки гирь разных классов, контроля содержимого жидкостей, газов, порошкообразных веществ, организации процессе взвешивания на производственных линиях. Преимущественно приборы применяют на промышленных предприятиях, а также в сфере торговли и логистики.
Технические характеристики:
| Параметр | Значение |
|---|---|
| НПВ, кг | 31 |
| НмПВ, г | 0,01 |
| Повторяемость (Стандартное отклонение), г* | 0,0015 |
| Линейность, г | плюс-минус 0,2 |
| Чувствительность к конвекции (10-30°C)** | плюс-минус 3 ppm/°C |
| Время стабилизации (в режиме Fast), с | 1,5 |
| Выборка массы тары, кг, не более | 29 |
| Количество диапазонов взвешивания | 1 |
| Тип дисплея | вакуумно-флуоресцентный |
| Калибровка | авто |
| Тип калибровки | внутренняя с использованием встроенной калибровочной массы |
| Интерфейс | RS-232 |
| Источник электрического питания | от сети 220 В, 50 Гц через адаптер |
| Диапазон рабочих температур,°C | +5…+40 |
| Относительная влажность воздуха, % | не более 85 |
| Размер рабочей платформы, мм | 270 х 210 |
| Габаритные размеры, мм | 300 х 355 х 111 |
| Масса, кг | 9,3 |
| Гарантия | 5 лет |
| Производитель | A&D Co. LTD, Япония |
| * При использование автоцентрируемой чаши повторяемость результата улучшается. ** В том случае, если не используется автоматическая самокалибровка. |
Комплект поставки MC-30K:
- Компаратор массы MC-30K — 1 шт;
- Сетевой адаптер — 1 шт;
- Простой ветрозащитный бокс — 1 шт;
- Защитный чехол для корпуса — 1 шт;
- Диск с ПО WinCT — 1 шт;
- Руководство по эксплуатации — 1 шт.
Дополнительная комплектация:
- AD-1682 — Перезаряжаемая аккумуляторная батарея;
- AD-1683 — Устройство для снятия статического заряда;
- AD-1684 — Измеритель электростатического поля;
- AD-1688 — Регистратор данных взвешивания;
- AD-1689 — Пинцет для работы с калибровочными гирями;
- AD-8121B — Компактный принтер;
- AD-8920A — Удалённый дисплей;
- AD-8922A — Устройство дистанционного управлени;
- AD-8526 — Ethernet конвертер;
- AD-8527 — Адаптер USB;
- AX-KO1710-200 — кабель RS-232C (25P-9P, 2 м);;
- AX-SW128 — Ножной выключатель;
- AX-USB-25P — USB конвертер;
- AX-MC10K/30KPAN — Автоцентрируемая чашка;
- GX-02 — Быстрый USB интерфейс с кабелем;
- GX-04 — Выход компаратора со звуковым сигналом RS-232C/токовая петля;
- GX-06 — Аналоговый выход/токовая петля;
- GX-12 — Платформа для взвешивания животных.
* опции GX-02, GX-04, GX-06, и стандартный интерфейс RS-232C не могут использоваться одновременно.
** опции GX-04 и GX-06 могут быть установлены только при производстве компараторов массы.