1) All intellectual property contained in this library — including owner’s manuals and product literature — is the sole property of KORG Inc. Duplication of contents of owner’s manuals and/or product literature in part or in whole without the permission of the Company for the purposes of sharing, mass-producing, posting online, or personal gain of any kind is prohibited by copyright law. Users are permitted to create one (1) copy for their personal non-commercial use.
2) Materials such as owner’s manuals and related product information are intended for the use of customers who purchase and use the product (End User). The Company assumes that this material is utilized by the End User. Please be aware that the Company may not be able to respond to inquiries regarding owner’s manuals made public in this library from anyone other than customers who have purchased the products.
3) This library does not provide owner’s manuals and product information for all of the products sold by the Company. Owner’s manuals or product information may not be available for all products indefinitely or at all, and may be permanently discontinued at the Company’s discretion.
4) Contents of owner’s manuals and content as found on korg.com may differ. Information on korg.com may be updated as necessary based on changes to the product specification, operating system, included contents, and so on. Additionally, owner’s manuals may be updated to reflect these and other changes with updated production of the product.
5) Company takes no responsibility for any loss including but not limited to loss of data, financial loss, or personal loss) that might arise from the use of, or the inability to use, the manual library or the specified software.
6) Please be aware that this service may be modified or terminated at any time by the Company without specific notice.
7) Contacts for questions regarding the product, as well as other addresses, phone numbers, or email addresses listed in the owner’s manuals are current as of the date the manual was produced. For the latest contact information, please refer to the Korg.com website.
 Cautions regarding the use of the product are stated at the beginning and end of each owner’s manual. Because these cautions were based on the laws and societal understandings at the time when each manual was produced, they might not be appropriate for the present time. It is advised that End User review and strictly adhere to these Cautions.
Для ознакомления с инструкцией необходимо нажать на ссылку «ЗАГРУЗИТЬ», чтобы скачать pdf файл. Если есть кнопка «ПРОСМОТР», то можно просто посмотреть документ онлайн.
Для удобства, Вы можете сохранить данную страницу с файлом руководства по эксплуатации в свой список «избранное» прямо на сайте (доступно для зарегистрированных пользователей).
Смотрите инструкцию для похожих моделей:

Вы можете задать вопрос посетителям сайта по модели KORG Krome EX 61. Если Вы являетесь её пользователем, то пожалуйста оставьте, по возможности развёрнутый отзыв:
- Manuals
- Brands
- Korg Manuals
- Musical Instrument
- Krome EX
- Supplementary manual
-
Contents
-
Table of Contents
-
Bookmarks
Quick Links
Supplementary Manual Manuel complémentaire
Guía de inicio rápido
Manual suplementario
追補マニュアル
E
F
G
S
C
J
1
Related Manuals for Korg Krome EX
Summary of Contents for Korg Krome EX
-
Page 1
Supplementary Manual Manuel complémentaire Guía de inicio rápido Manual suplementario 追補マニュアル… -
Page 3: Table Of Contents
KROME EX banks and numbers ……..2…
-
Page 4: About The Krome Ex Supplementary Manual
1,000 user patterns Multisamples Demo Songs Bank Contents Mono 0000…0532 Mono (preset) Refer to the “KROME EX Voice Name List” to see the Stereo 0000…0002 Stereo (preset) specific order in which the sounds and patterns are XL.M 0000…0194 eXtra Large Mono (preset) sorted.
-
Page 5: Selecting Programs, Combinations And Other Sounds
A–F. The corresponding button will light. Here’s how to select the new sounds added to the Select the combination bank using the BANK KROME EX. A–F buttons These instructions show how to select the banks that 1. Select “Combination Select” in Combination have been added for programs and combinations.
-
Page 6: Selecting A Drum Kit
Selecting Programs, Combinations and Other Sounds • Press the Program Bank buttons at the upper left For Save PCG-related functions corner of the Program mode P0: Play page to switch Using the Save menu command in Media mode, select banks. the program or combination bank to save.
-
Page 7: Selecting A Drum Track Pattern
Selecting Programs, Combinations and Other Sounds Customizing a drum kit Assigning a drum track pattern to a combination or song 1. On the Global mode P5: Drum Kit– Sample Setup page, select a drum kit using “Drum Kit Select.” • On the Combination mode P7: ARP/DT– Drum Track page, select the “Pattern Bank”…
-
Page 8: Selecting An Arpeggio Pattern
Selecting Programs, Combinations and Other Sounds Pattern Selecting an arpeggio pattern Assigning an arpeggio pattern to a program • On the Program mode P0: Play– Arpeggiator page, select the “Pattern.” Pattern Note: Set “Arpeggiator Assign” and “Arpeggiator Run A, B” on the Combination mode or Sequencer mode P7: ARP/DT–…
-
Page 9: Selecting Multisamples
0.01…1.48 236.8 *1: The USB-MIDI dump times listed here are for when the KROME EX is connected to a computer with a USB 2.0 port. The time required will depending on the computer system you’re using. Note: More time will be required if the song data contains SysEx events, since these must be converted.
-
Page 10: Krome Ex Midi Implementation
Appendices KROME EX MIDI IMPLEMENTATION…
-
Page 11
Appendices… -
Page 12
Appendices… -
Page 13: Krome Ex Specifications
710 Presets /100 User Patterns (per Song) Patterns/RPPR RPPR (Realtime Pattern Play/Recording): 1 set per Song. Format Korg format, SMF (formats 0 and 1) supported Load, Save, Utility Media Data Filer functionality (Save and Load MIDI System Exclusive Data)
-
Page 14
KROME EX Specifications Joystick, SW1, 2 SELECT buttons REALTIME CONTROLS (TONE/USER/ARP) Realtime controls REALTIME CONTROL: Realtime modulation Knobs 1–4 Controllers Arpeggio control Drum Track Buttons = DRUM TRACK Arpeggiator Buttons = ARP Effect On/Off Buttons = MASTER FX, TOTAL FX TouchView graphical user interface, 7-inch TFT, WVGA (800 ×… -
Page 15
Palette de sons rafraîchie et élargie ……2 Banques et numéros du KROME EX ……2 Sélection de programmes, de combinaisons… -
Page 16: Au Sujet Du Manuel Complémentaire Du Krome Ex
Sélection de banque MSB, LSB Ce manuel complémentaire décrit les fonctions mises à 000…127 Preload 00, 00 [3F, 00] jour et autres fonctions du KROME EX liées aux 000…127 Preload 00, 01 [3F, 01] programmes, combinaisons, etc. Ce manuel constitue 000…127…
-
Page 17: Sélection De Programmes, De Combinaisons
Appuyez sur un bouton clignotant ou éteint pour Voici comment sélectionner les nouveaux sons choisir parmi les banques A–F. Le bouton incorporés au KROME EX. correspondant s’allume. Ces instructions décrivent la sélection des banques Sélection de la banque de combinaisons supplémentaires de programmes et de combinaisons.
-
Page 18: Sélection D’un Kit De Batterie
Sélection de programmes, de combinaisons et d’autres sons • Utilisez les boutons de banques de programmes Fonctions liées à la sauvegarde de fichiers PCG dans le coin supérieur gauche de l’écran à la page Sélectionnez la banque de programmes ou de “P0: Play”…
-
Page 19: Sélection D’un Motif De Piste De Batterie
Sélection de programmes, de combinaisons et d’autres sons Personnalisation d’un kit de batterie Assignation d’un motif de piste de batterie à une combinaison ou un morceau 1. À la page “P5: Drum Kit– Sample Setup” du mode Global, sélectionnez un kit de batterie avec “Drum •…
-
Page 20: Sélection D’un Motif D’arpège
Sélection de programmes, de combinaisons et d’autres sons Pattern Sélection d’un motif d’arpège Assignation d’un motif d’arpège à un programme • À la page “P0: Play– Arpeggiator” du mode Program, sélectionnez “Pattern”. Pattern Remarque: Réglez “Arpeggiator Assign” et “Arpeggiator Run A, B” à la page “P7: ARP/DT– ARP Setup T01–08”…
-
Page 21: Sélection De Multi-Échantillons
KROME et le KROME EX 1. À la page “P1: Basic/Controllers– Program Basic” du mode Program, réglez “Oscillator Mode” sur Le KROME EX peut convertir et charger des fichiers Single ou Double. .PCG et .SNG (de format KROME). Pour charger dans le KROME EX des morceaux créés sur le KROME,…
-
Page 22: Caractéristiques Du Krome Ex
La liste comprend maximum 99 entrées. Vous pouvez transformer une liste de repères en morceau. 710 patterns preset/100 patterns utilisateur (par morceau) Pattern/RPPR RPPR (Realtime Pattern Play/Recording): 1 set par morceau. Format Format Korg, Compatible avec les formats SMF (formats 0 et 1)
-
Page 23
Caractéristiques du KROME EX Load, Save, Utility Support Fonction “Data Filer” (archivage et chargement de données SysEx d’autres appareils) Joystick, SW1, 2 Boutons SELECT REALTIME CONTROLS (TONE/USER/ARP) Contrôleurs REALTIME REALTIME CONTROL: Modulation en CONTROLS temps réel Commandes 1–4 Contrôleurs Pilotage des arpèges… -
Page 24
Neue und aufpolierte Sounds ……..2 KROME EX Bänke und Nummern ……. . 2 Auswahl von Programs, Combinations und weiteren Sounds . -
Page 25: Über Das Ergänzende Handbuch Des Krome Ex
001…128 Preset-GM2 Variationen 79, 01-09 [79, 01-09] g(9) Ambience und weiteren High-Definition-Sounds des KROME bietet der KROME EX zahlreiche neue Sounds g(d) Preset GM2 Drums 78, 00 [3E, 00] und Patterns wie polyphonische Synthiesounds für Combinations EDM (Electronic Dance Music), Synthie-Leads,…
-
Page 26: Auswahl Von Programs, Combinations Und
Auswahl der Bänke A–F. Der entsprechende Taster leuchtet. So wählen Sie die neuen zusätzlichen Sounds des Auswahl der Combination-Bank mit den KROME EX aus. BANK A–F-Tastern Dieser Abschnitt erläutert Ihnen, wie Sie die 1. Wählen Sie im Combination-Modus zusätzlichen Bänke für Programs und Combinations „Combination Select“.
-
Page 27: Auswahl Eines Drumkits
Auswahl von Programs, Combinations und weiteren Sounds • Drücken Sie die Program Bank-Buttons links oben Zum Speichern PCG-bezogener Funktionen in der Program-Modus-Seite „P0: Play“, um die Mit dem Menübefehl „Save“ im Media-Modus wählen Bank zu wechseln. Sie das Program oder die Combination zum Speichern aus.
-
Page 28: Auswahl Eines „Drum Track»- Pattern
Auswahl von Programs, Combinations und weiteren Sounds Personalisieren eines Drumkits „Drum Track“-Pattern einer Combination oder einem Song zuweisen 1. Wählen Sie in der Global-Modus-Seite „P5: Drum Kit– Sample Setup“ mit „Drum Kit Select“ ein • Wählen Sie in der Combination-Modus-Seite „P7: Drumkit aus.
-
Page 29: Auswahl Eines Arpeggio-Pattern
Auswahl von Programs, Combinations und weiteren Sounds Pattern Auswahl eines Arpeggio-Pattern Arpeggio-Pattern einem Program zuweisen • Wählen Sie in der Program-Modus-Seite „P0: Play– Arpeggiator“ „Pattern“ aus. Pattern Hinweis: Stellen Sie in der Combination- oder Sequencer-Modus-Seite „P7: ARP/DT– ARP Setup T01–08“ und „ARP Setup T09–16“ „Arpeggiator Assign“…
-
Page 30: Auswahl Von Multisamples
Der KROME EX kann .PCG- und .SNG-Dateien (KROME-Format) konvertieren und laden. Um im 2. Wählen Sie in der Program-Modus-Seite „P2: KROME erzeugte Songs in den KROME EX zu laden, OSC/Pitch– OSC1 Setup“ und „OSC2 Setup“ laden Sie stets beide mit dem KROME erzeugte „Bank“…
-
Page 31: Technische Daten Des Krome Ex
(Wiederholungen möglich). Cue Lists können in Songs umgewandelt werden. 710 Preset-/100 User-Pattern (je Song) Pattern/RPPR RPPR (Realtime Pattern Play/Recording): 1 Satz je Song. Format „Korg“ (Format), Unterstützt SMF (Format 0 und 1) Load, Save, Utility Datenträger „Data Filer“-Funktion (Archivieren und Laden von SysEx-Dumps anderer Geräte)
-
Page 32
Technische Daten des KROME EX Joystick, SW1, 2 SELECT-Taster REALTIME CONTROLS (TONE/USER/ARP) Echtzeitregler REALTIME CONTROL: Echtzeitmodulation Regler 1–4 Spielhilfen Arpeggio-Steuerung Schlagzeugspur Taster: DRUM TRACK Arpeggiator Taster: ARP Effekt an/aus Taster: MASTER FX, TOTAL FX TouchView, grafikfahig, beruhrungsempfindlich, 7″ TFT (WVGA Pixel),… -
Page 33
Sonidos añadidos y actualizados ……. . 2 Bancos y números del KROME EX ……. . 2 Selección de programas, combinaciones y… -
Page 34: Acerca Del Manual Suplementario Del Krome Ex
Stereo 0000…0002 Estéreo (predefinida) XL.M 0000…0194 Mono extragrande (predefinida) Consulte la “KROME EX Voice Name List” para ver el XL.St 0000…0040 Estéreo extragrande (predefinida) orden específico en el que están organizados los sonidos y patrones. Muestras de percusión Banco N.º…
-
Page 35: Selección De Programas, Combinaciones Y
Pulse un botón que parpadee o un botón apagado para seleccionar los bancos A–F. El correspondiente A continuación se explica cómo seleccionar los nuevos botón se iluminará. sonidos añadidos al KROME EX. Seleccione el banco de combinaciones Estas instrucciones muestran cómo seleccionar los mediante los botones BANK A–F bancos que han sido añadidos para programas y…
-
Page 36: Selección De Un Grupo De Percusión
Selección de programas, combinaciones y otros sonidos • Pulse los botones de bancos de programas de la Para las funciones relacionadas con guardar PCG esquina superior izquierda de la página “P0: Play” Con el comando de menú Save (guardar) en el modo del modo Program para cambiar bancos.
-
Page 37: Selección De Un Patrón De Pista De Percusión (Drum Track)
Selección de programas, combinaciones y otros sonidos Personalización de un grupo de percusión Pattern Bank Pattern No. 1. En la página “P5: Drum Kit– Sample Setup” del modo Global, seleccione un grupo de percusión mediante “Drum Kit Select”. Drum Kit Select Consulte pág.
-
Page 38: Selección De Un Patrón De Arpegio
Selección de programas, combinaciones y otros sonidos Para las funciones de conversión (Convert), Pattern copia (Copy), carga (Load) y volcado (Dump) MIDI En cada cuadro de diálogo de “Convert to Drum Track Pattern” (convertir a patrón de pista de percusión), así como en las funciones relacionadas con copia (Copy), carga (Load) y volcado (Dump) MIDI, seleccione un patrón de pista de percusión y ejecute cada función.
-
Page 39: Selección De Multimuestras
Por el contrario, el KROME no puede cargar archivos Bank Multisample Select .PCG y .SNG en formato KROME EX. Guarde los datos de canción de los archivos .SNG como un archivo MIDI estándar (formato SMF) para poder cargar los datos en el KROME.
-
Page 40
KROME EX 库和编号 ……..2 选择程序、组合和其他音色 ……. 3 为程序和组合选择库 ……..3 选择爵士鼓 ……….. 4 选择鼓音轨模式 ……..5 选择琶音模式 ……… 6 选择多样本 ……….. 7 选择鼓样本 ……….. 7 附录 ……….. 7 KROME 和 KROME EX 之间的文件交叉兼容性 ….7 KROME 声音编辑器不兼容 ……. 7… -
Page 41: 关于 Krome Ex 补充手册
000…127 初始化 00, 0A [3F, 0A] 的每种钢琴音色进行了扩展。 000…127 初始化 00, 0B [3F, 0B] 下面对 KROME EX 和 KROME 的音色、 模式等进行比较。 预设 GM2 主奏 79, 00 [38, 00] KROME 音色和模式数据比较 : EX 对比 KROME g(1)… 001…128 预设 GM2 变奏 79, 01-09 [79, 01-09]…
-
Page 42: 选择程序、组合和其他音色
选择程序、组合和其他音色 选择程序、组合和其他音色 使用 “BANK A–F” (库 A–F) 按钮选择组合 库 以下介绍如何选择 KROME EX 中新增的音色。 1. 在组合模式中选择 “Combination Select” (组合选 择) 。 这些说明介绍了如何选择已为程序和组合添加的库。 未 对所有其他音色添加库 (数据已添加到库中) , 因此库的 组合模式 “Combination Select” 选择方式与 KROME 基本相同。 下面将会列出用于选择这 些音色的相关页面。 为程序和组合选择库 使用 “BANK A–F” (库 A–F) 按钮选择程序…
-
Page 43: 选择爵士鼓
选择程序、组合和其他音色 • 在程序模式下的 P0: Play 页面中, 按下左上角的 对于保存 PCG 相关功能 “Program Bank” (程序库) 按钮以切换库。 使用媒介模式中的 “Save” (保存) 菜单命令, 选择要 保存的程序或组合库。 “Program Bank” 按钮 • 如果连续两次按下 “Program Select” (程序选择) 选择爵士鼓 (在程序、 组合或音序器模式中) 或 “Combination Select” (组合选择) (在组合模式中) , 则会显示库 向程序分配爵士鼓 和编号选择面板。 1.
-
Page 44: 选择鼓音轨模式
选择程序、组合和其他音色 自定义爵士鼓 向组合或乐曲分配鼓音轨模式 1. 在全局模式下的 P5: Drum Kit– Sample Setup 页 • 在组合模式下的 P7: ARP/DT– Drum Track 页面 面中, 使用 “Drum Kit Select” (爵士鼓选择) 选择 中, 选择 “Pattern Bank” (模式库) 和 “Pattern 一个爵士鼓。 No.” (模式编号) 。 • 在音序器模式下的 P7: ARP/DT– Drum Track 页面 Drum Kit Select 中,…
-
Page 45: 选择琶音模式
选择程序、组合和其他音色 Pattern 选择琶音模式 向程序分配琶音模式 • 在程序模式下的 P0: Play– Arpeggiator 页面中, 选择 “Pattern” (模式) 。 Pattern 注意 : 在组合模式或音序器模式下的 P7: ARP/DT– ARP Setup T01–08 和 ARP Setup T09–16 页面中, 设 置 “Arpeggiator Assign” 和 “Arpeggiator Run A, B”。 自定义琶音模式 1. 在全局模式下的 P6: Arpeggio Pattern– Setup 页 可以通过另一种方式这样做…
-
Page 46: 选择多样本
KROME EX 中时, 请务必同时加载 KROME 中创建的 .SNG OSC2 Setup 页面中, 选择 “Bank” (库) 和 文件和 .PCG 文件。 “Multisample Select” (多样本选择) 。 另一方面, KROME 无法加载 KROME EX 格式的 .PCG 文 Bank Multisample Select 件和 .SNG 文件。 请将 .SNG 文件中的乐曲数据保存为 标准 MIDI 文件 (SMF 格式) , 以便将数据加载到 KROME 中。…
-
Page 47
…………7 非対応 KROME EX MIDI Implementation ……….8 KROME EX ……. . . 10… -
Page 48: Krome Ex 追補マニュアルについて
KROME EX 追補マニュアルについて KROME EX 追補マニュアル KROME EX のバンク ナンバー について プログラム Bank Contents Bank Select MSB, LSB 000…127 00, 00 [3F, 00] KROME EX のプログラムやコンビネーションなどの拡張され プリロード 000…127 00, 01 [3F, 01] KROME プリロード た機能などについて説明しています。 オペレーショ 000…127 00, 02 [3F, 02] プリロード…
-
Page 49: プログラム、コンビネーション、その他のサウンド選択
プログラム、コンビネーション、その他のサウンド選択 点灯しているスイッチを押すとバンク ( ∼ )が プログラム、コンビネーショ 選ばれます(スイッチ点滅) 。 ン、その他のサウンド選択 点滅しているまたは消灯しているスイッチを押すと、バ ンク( ∼ )が選ばれます(スイッチ点灯) 。 追加されたサウンドの選び方を紹介します。 BANK [A] コンビネーション ・ バンクを ∼ スイッチで プログラム、コンビネーションについては、追加されたバン 選択する クの選択方法を説明します。その他のサウンドについては、 追加されたバンクはありませんので (バンク内のデータが追 Combination “Combination Select” モードの を選びます。 KROME 加されています) 、 選択方法は からほぼ 変更ありませ Combinationモード “Combination Select” ん。…
-
Page 50: ドラムキットの選択
プログラム、コンビネーション、その他のサウンド選択 Program P0: Play Program Bank Save PCG • モード ページ左上の ボタン 関連 を押して、バンクを切り替えます。 Media Save モードの メニュー・コマンドで、保存するプログ ラム、コンビネーションのバンクを選びます。 Program Bankボタン Program Combination Sequencer “Program • 、 、 モードの Select” Combination “Combination Select” 、 モードの 上 ドラムキットの選択 & で、 度続けて押すと、 バンク ナンバー・セレクト・パッ…
-
Page 51: ドラムトラック・パターンの選択
プログラム、コンビネーション、その他のサウンド選択 ドラムキットをカスタマイズする場合に コンビネーション、 ソングにドラムトラック ・ パターンを割 り当てる場合に Global P5: Drum Kit–Sample Setup “Drum モード ページの Kit Select” で選びます。 • Combination P7: ARP/DT–Drum Track モード ページの “Pattern Bank” “Pattern No. ” 、 で選びます。 Drum Kit Select • Sequencer P7: ARP/DT–Drum Track モード…
-
Page 52: アルペジオ・パターンの選択
プログラム、コンビネーション、その他のサウンド選択 Pattern アルペジオ・パターンの選択 プログラムにアルペジオ ・ パターンを割り当てる場合に • Program P0: Play–Arpeggiator “Pattern” モード ページの で 選びます。 Pattern Note: Combination Sequencer P7: ARP/DT– モード、 モードの ARP Setup T01-08 ARP Setup T09-16 ページ、 ページの “Arpeggiator Assign” “Arpeggiator Run A, B” 、 を設定してく KROME ださい。…
-
Page 53: マルチサンプルの選択
0.01…1.48 236.8 Bank Drumsample Select *1: USB-MIDI USB2.0 のダンプ所要時間は、 ポートを搭載したコ ンピューターに接続した場合の値です。 使用するコンピュー ターの環境によって異なります。 Note: ソング ・ データ内にエクスクルーシブ ・ イベントがある場 合は、 変換処理に時間がかかるため、 所要時間が長くなります。 KROME KROME EX と のファイル互換性 KROME EX KROME .PCG .SNG は、 フォーマットの ファイルと KROME ファイルを変換しながらロードすることができます。 KROME KROME へ…
-
Page 54: Krome Ex Midi Implementation
付 録 KROME EX MIDI Implementation…
-
Page 55
付 録… -
Page 56
付 録… -
Page 57: Krome Ex 仕様
KROME EX 仕様 KROME EX 仕様 0 °C ∼ +40 °C (結露させないこと) 使用温度条件 セミ ・ ウェイテッド鍵盤 ベロシティ対応 ・ アフタータッチ非対応 鍵 C7 ([C1…C6] [C3…C8] 標準 ∼ ∼ の範囲で可変 セミ ・ ウェイテッド鍵盤 ベロシティ対応 ・ アフタータッチ非対応 鍵 C7 ([C0…C6] [C2…C8] 標準 ∼ ∼…
-
Page 58
KROME EX 仕様 16MIDI トラック マスター ・ トラック トラック ソング ソング /480 分解能 40.00 300.00 1/100BPM ∼ ( 単位) テンポ 210,000 MIDI イベント 最大記憶容量 シーケンサー プリセット/ ユーザー ・ テンプレート ・ ソング テンプレート ・ ソング キュー ・ リスト。 最大 ステップで、 ソングを連続… -
Page 59
KORG USB-MIDI ドライバー動作環境 Windows7 SP1 (32bit/64bit) Windows 8.1 Update (32bit/ すべてのエディション 、 すべてのエディション 対応 64bit) 、 Windows 10 Update すべてのエディション (32bit/64bit) Windows Intel USB Host Controller ポート搭載機種 ( 社の を推奨) 対応コンピューター macOS 11 対応 以降 Macintosh macOS の動作環境を満たす ポートを搭載した Intel プロセッサの… -
Page 60
©2019 KORG INC. Published 01/2019…
инструкцияKorg Krome EX

⭫ᆆ⩪⭫ᆆ⩪
CS
1
JGFE
⭫ᆆ⩪⭫ᆆ⩪
Quick Start Guide
Guide de prise en main
Blitzstart
Guía de inicio rápido
ޛ䰞ޛ䰞
クイック・スタ
ート・ガイド
English
日本語 中文
Español EnglishFrançaisDeutsch
Посмотреть инструкция для Korg Krome EX бесплатно. Руководство относится к категории синтезаторы, 3 человек(а) дали ему среднюю оценку 9. Руководство доступно на следующих языках: английский. У вас есть вопрос о Korg Krome EX или вам нужна помощь? Задайте свой вопрос здесь
- ENGLISH
- FRANÇAIS
- DEUTSCH
- ESPAÑOL
- 中文
- 日本語
Нужна помощь?
У вас есть вопрос о Korg а ответа нет в руководстве? Задайте свой вопрос здесь Дай исчерпывающее описание проблемы и четко задайте свой вопрос. Чем детальнее описание проблемы или вопроса, тем легче будет другим пользователям Korg предоставить вам исчерпывающий ответ.
Количество вопросов: 0

Главная
Не можете найти ответ на свой вопрос в руководстве? Вы можете найти ответ на свой вопрос ниже, в разделе часто задаваемых вопросов о Korg Krome EX.
Инструкция Korg Krome EX доступно в русский?
Не нашли свой вопрос? Задайте свой вопрос здесь

- Manuals
- Brands
- Korg Manuals
- Musical Instrument
- Krome EX
- Quick start manual
-
Contents
-
Table of Contents
-
Bookmarks
Quick Links
Quick Start Guide
Guide de prise en main
Guía de inicio rápido
Blitzstart
クイック ・ スタート ・ ガイド
E
F
G
S
C
J
1
Related Manuals for Korg KROME EX
Summary of Contents for Korg KROME EX
-
Page 1
Quick Start Guide Guide de prise en main Guía de inicio rápido Blitzstart クイック ・ スタート ・ ガイド… -
Page 3: Table Of Contents
ENGLISH Contents Precautions …….2 Using the sequencer ….16 Regarding the LCD screen .
-
Page 4: Precautions
Thank you for purchasing the Korg KROME EX Music THE FCC REGULATION WARNING (for USA) Workstation. To help you get the most out of your new NOTE: This equipment has been tested and found to comply with the limits for a Class B digital device, pursuant to Part 15 of the instrument, please read this manual carefully.
-
Page 5: Data Handling
KORG Inc. or is copyrighted material used by KORG Inc. under license from a third party. You do not need permission from KORG Inc. to use the above content to produce or perform musical works, or to record and distribute such works.
-
Page 6: About This Manual
KROME. Voice Name List The Voice Name List lists all of the sounds and setups that are in the KROME EX when it is shipped from the factory, including Programs, Combinations, Multisamples, Drumsamples, Drum Kits, Arpeggio Patterns, Drum Track Patterns, Template Songs, and Effect Presets.
-
Page 7: Main Features
PCM sound data to be controlled. • The KROME EX 61 and 73 feature a Semi-Weighted Keyboard that provides a great-feeling way to play • Voicing technology developed for the KRONOS has…
-
Page 8: Front Panel
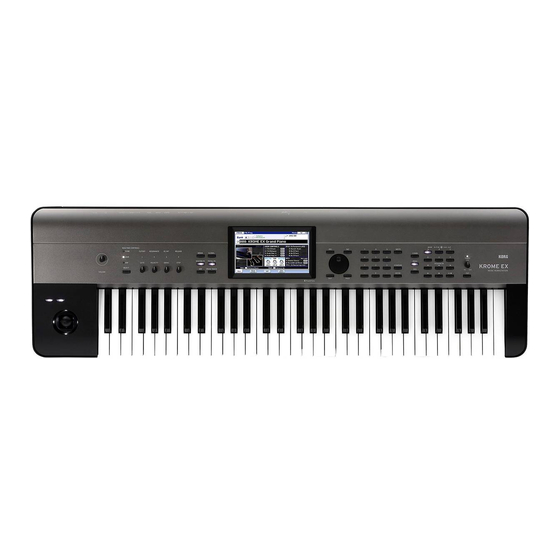
Front Panel Front Panel 15 20 10 12 * The diagram shown is for KROME EX-61 Volume DRUM TRACK 1. VOLUME knob 7. DRUM TRACK button This knob adjusts the volume of the AUDIO OUTPUT This button turns the Drum Track function on or off.
-
Page 9: Rear Panel
Rear Panel PROG/COMBI BANK Save (Write) 12. A, B, C, D, E, F buttons 20. WRITE button These buttons select program banks A–F, U-A–U-F and Use this button to save programs, combinations, global combination banks A–F (see page 12). The program settings, drum kits, or arpeggio patterns to the internal bank will switch from A–F to U-A–U-F and back, with memory (see page 20).
-
Page 10: Connecting The Keyboard And Turning
Connecting the keyboard and turning the power on AUDIO OUTPUTS 4. AUDIO OUTPUT L/MONO, R jack 7. SD card slot These are the main stereo audio outputs. Use the You can insert an SD card here, and use it to save/load VOLUME knob to adjust the volume.
-
Page 11: Turning The Power Off
Turning the power off Changing the auto power-off setting Turning the power off Changing the settings in the start-up dialog box When you’ve finished using the KROME, turn off the If the auto power-off function is enabled so that the power by pressing the power switch that’s located on power will turn off automatically, the currently the rear panel of the KROME.
-
Page 12: About The Display And The Modes
About the display and the modes About the display and the modes Display The KROME uses Korg’s TouchView graphical user interface. By pressing or dragging objects shown in the display, you can select programs or combinations, or edit For some parameters, you can press the parameter parameter values.
-
Page 13: Selecting Modes
Selecting modes * OK and Cancel buttons Sequencer mode After performing the other operations in the dialog Sequencer mode lets you record, playback, and edit box, you can execute the command by pressing the OK MIDI tracks. You can: button. To cancel without executing, press the Cancel •…
-
Page 14: Playing Sounds
Playing sounds Playing sounds 2. Use the BANK A…F buttons to select Programs Playing Programs and from other banks. Press the lit button to select banks U-A–U-F (the button Combinations will blink). Press a blinking or unlit button to select banks A–F (the Selecting Programs by bank and button will light).
-
Page 15: Using Controllers To Modify The Sound
Using controllers to modify the sound The selected program will be highlighted, and the Combination bank contents program will change. You can also use the INC/DEC Bank Contents buttons or the VALUE dial to switch programs. A…D 000…127 Preload combinations The menu shows sixteen programs at once.
-
Page 16: Performing With The Arpeggiator
Playing sounds Performing with the Using the Drum Track arpeggiator Turning the Drum Track on and off A program allows you to use a single polyphonic 1. Press the DRUM TRACK button. arpeggiator. When playing a combination or using the sequencer, you’ll be able to use two polyphonic Depending on various settings, the Drum Track may arpeggiators.
-
Page 17: Simple Program And Combination
Simple program and combination editing Category/Combination Select popup button Simple program and combination editing Adjusting the EQ and volume balance For a program, the program’s EQ and master effect return amount can be adjusted in the P0: Play– Main page. In the P0: Play–…
-
Page 18: Using The Sequencer
Using the sequencer Using the sequencer Adding another track Recording your performance Let’s add another track to the performance that you recorded using Auto Song Setup. Auto Song Setup 1. Press the Preference tab to access the P0: The Auto Song Setup feature copies the current Play/REC–…
-
Page 19: Editing Midi
Editing MIDI Correcting or adding notes Editing MIDI You can edit your performance data by moving or erasing notes, modifying a note’s duration or strength, You can modify your performance after recording, if or adding notes. you wish. For instance, you can erase misplayed notes, It’s convenient to use Track View editing when you or correct their pitch and timing.
-
Page 20: Template Songs
Using the sequencer 6. In the To Track field, select the track to use for the Template songs pattern. Note: In each of the sixteen preset Template Songs, Template songs contain sounds and effects that are track 1 is always assigned to a Drum Program. (In suitable for a specific musical style, so you can some cases, other tracks may also have Drum immediately get started creating a song simply by…
-
Page 21: Using Effects
Using effects Using effects You have a choice of 193 different digital effects. 3. “Send1” and “Send2” specify the send levels to the master effect for each track. “Send1” The KROME’s effect section consists of five insert corresponds to MFX1, and “Send2” corresponds to effects, two master effects, one total effect, and a mixer MFX2.
-
Page 22: Saving And Loading Data
Saving and loading data Saving and loading data 2. Once again press the WRITE button to perform the Saving your edits Write operation. (You can also execute by pressing the OK button or the ENTER button.) Writing other data Understanding Write and Save To write a combination, select the combination that There are two ways to store your work on the KROME: you want to write, and write it just as you did for a…
-
Page 23
Saving and loading A dialog box will appear. A dialog box will appear, containing a number of options. 6. Select the “Load [filename].PCG too” check box. When these boxes are checked, the system looks for .PCG file with the same name as the main .SNG file. 7. -
Page 24: Listening To The Demo Songs
Listening to the demo songs Listening to the demo songs Loading the demo song data Listening to the demo songs When you perform the following operation, the Here’s how to listen to the demo songs in Sequencer data stored within the KROME will be discarded mode.
-
Page 25: Playing Multiple Songs In Succession
Playing multiple songs in succession 2. Make sure that the “RPPR” check box is checked. Playing multiple songs in If this is checked, RPPR will be on. succession If this is unchecked, RPPR will be off. 3. Press C#2 or a higher key. Songs can be assigned to a cue list, and will playback The pattern that’s assigned to that key will begin in the specified order.
-
Page 26: Main Specifications
Main Specifications Main Specifications Keyboard: 61-note or 73-note Semi-Weighted Keyboard (velocity sensitive, aftertouch not supported) 88-note NH (Natural Weighted Hammer Action) keyboard (velocity sensitive, aftertouch not supported) Power supply: AC adapter connector (DC 12V, ), power switch Dimensions (width × depth × height): 61-note 1,027 ×…
-
Page 27
FRANÇAIS Contenu Précautions …….2 Utilisation du séquenceur … . 16 Remarques concernant l’écran LCD . -
Page 28: Précautions
USB ou un autre type de support. Korg Conservez ce manuel décline toute responsabilité pour tout dommage résultant de Après avoir lu ce manuel, veuillez le conserver soigneusement…
-
Page 29: Avertissement De Copyright
MIDI, données d’échantillon PCM, données audio, système d’exploitation, etc.) sont la propriété intellectuelle de KORG Inc. ou du matériel soumis au droit d’auteur et utilisé par KORG Inc. sous licence de tiers. L’utilisation du contenu mentionné ci-dessus afin de produire ou de jouer des œuvres musicales, ou…
-
Page 30: A Propos De Ce Manuel
Références au KROME EX Le KROME EX est accompagné des manuels suivants: Le KROME EX est disponible avec un clavier à 88, 73 • Guide de prise en main (version imprimée et PDF) ou 61 touches. Ces trois versions sont appelées (ce document) “KROME”…
-
Page 31: Caractéristiques Principales
été largement exploitée pour offrir jusqu’à 4Go de sons de piano que des sons de synthétiseur. données PCM de qualité exceptionnelle Le KROME EX 88 dispose d’un clavier offrant la comprenant de longs échantillons stéréo enregistrés pondération naturelle d’un mécanisme à marteaux pour chaque touche.
-
Page 32: Panneau Avant
Panneau avant Panneau avant 15 20 10 12 * L’illustration représente le KROME EX-61 Volume DRUM TRACK 1. Commande VOLUME 7. Bouton DRUM TRACK Règle le volume des sorties audio AUDIO OUTPUT L/ Ce bouton active/coupe la fonction “Drum Track”.
-
Page 33: Panneau Arrière
Panneau arrière PROG/COMBI BANK Sauvegarde (Write) 12. Boutons supérieurs A, B, C, D, E, F 20. Bouton WRITE Ces boutons sélectionnent les banques de programmes Ce bouton permet de sauvegarder des programmes, A–F, U-A–U-F et les banques de combinaisons A–F des combinaisons, des réglages globaux, des kits de (Voyez page 12).
-
Page 34: Connexion Et Mise Sous Tension Du Claviermise Sous Tension
Connexion et mise sous tension du clavierMise sous tension Sorties audio 4. Prises AUDIO OUTPUT L/MONO, R 7. Fente pour carte SD Ces prises constituent la sortie audio stéréo principale. Vous pouvez insérer une carte SD ici pour sauvegarder Réglez le niveau avec la commande VOLUME. et charger des programmes, combinaisons et des morceaux du KROME.
-
Page 35: Mise Hors Tension
Mise hors tension Changer le réglage de coupure automatique Mise hors tension de l’alimentation Quand vous avez fini d’utiliser le KROME, mettez-le Changer les réglages dans la fenêtre de démarrage hors tension en appuyant sur l’interrupteur situé en Quand la fonction de coupure automatique de face arrière.
-
Page 36: Ecran Et Modes
Ecran et modes Ecran et modes Ecran Le KROME utilise l’interface utilisateur graphique TouchView de Korg. En touchant ou en faisant glisser des objets affichés à l’écran, vous pouvez sélectionner des programmes ou Pour certains paramètres, vous pouvez toucher deux des combinaison et régler des paramètres.
-
Page 37: Sélection Des Modes
Sélection des modes * Boutons [OK] et [Cancel] Mode Sequencer Après avoir effectué une opération ou une sélection Le mode Sequencer vous permet d’enregistrer, de dans une fenêtre de dialogue, vous pouvez la reproduire et d’éditer des pistes MIDI. Vous pouvez confirmer d’une pression sur le bouton [OK].
-
Page 38: Jouer Avec Différents Sons
Jouer avec différents sons Jouer avec différents sons Vous pouvez aussi utiliser les boutons de banque dans Jouer avec des programmes et le coin supérieur gauche de l’écran pour activer la banque U. des combinaisons Pour sélectionner une banque GM, maintenez le bouton 0 enfoncé…
-
Page 39: Utilisation Des Contrôleurs Pour Modifier
Utilisation des contrôleurs pour modifier le son Le menu peut afficher 16 programmes simultanément. Contenu des banques de combinaisons Pour accéder aux autres programmes, utilisez la barre Banque Contenu de défilement. A…D 000…127 Combinaisons chargées à l’usine (Preload) Jouez sur le clavier pour écouter le programme choisi. E, F 000…127 Combinaisons initialisées 4.
-
Page 40: Jouer Avec L’arpégiateur
Jouer avec différents sons Jouer avec l’arpégiateur Fonction ‘Drum Track’ Un programme permet d’utiliser un arpégiateur Activer/couper la fonction ‘Drum polyphonique. Si vous utilisez une combinaison ou le séquenceur, vous pouvez utiliser deux arpégiateurs Track’ polyphoniques. 1. Appuyez sur le bouton DRUM TRACK. Activer/couper l’arpégiateur Selon les réglages effectués, la fonction “Drum Track”…
-
Page 41: Edition Simple De Programmes Et De
Edition simple de programmes et de combinaisons Bouton de sélection de catégorie/combinaison Edition simple de programmes et de combinaisons Réglage de l’égalisation et de la balance Pour un programme, vous pouvez régler l’égalisation et le niveau de retour de l’effet master à la page “P0: Play–…
-
Page 42: Utilisation Du Séquenceur
Utilisation du séquenceur Utilisation du séquenceur Ajouter une nouvelle piste Enregistrement Ajoutons une piste supplémentaire à l’enregistrement effectué avec “Auto Song Setup”. Auto Song Setup 1. Appuyez sur l’onglet “Preference” pour afficher la La fonction “Auto Song Setup” copie le programme ou page “P0: Play/REC–…
-
Page 43: Edition Midi
Edition MIDI Corriger ou ajouter des notes Edition MIDI Vous pouvez modifier votre enregistrement en déplaçant ou en supprimant des notes, en changeant Vous pouvez modifier votre enregistrement si vous le leur durée ou leur dynamique ou en ajoutant des souhaitez.
-
Page 44: Modèles De Morceau
Utilisation du séquenceur 6. Sous “To Track”, sélectionnez la piste à utiliser Modèles de morceau pour le pattern. Remarque: Pour chacun des 16 modèles preset Les modèles de morceau contiennent des sons et des (“Template Songs”), la piste 1 est assignée à un effets pour différents styles de musique et vous programme de batterie (“Drum”).
-
Page 45: Utilisation Des Effets
Utilisation des effets Utilisation des effets Vous avez le choix parmi 193 effets numériques 3. Utilisez “Send1” et “Send2” pour régler le niveau différents. de départ de chaque piste vers les effets master. “Send1” correspond à MFX1 et “Send2” à MFX2. Le KROME dispose de 5 effets d’insertion, 2 effets master et 1 effet total auxquels s’ajoute une section A cette page, “Send1”…
-
Page 46: Sauvegarde Et Chargement De
Sauvegarde et chargement de données Sauvegarde et chargement de données • Spécifier la banque et le numéro de la mémoire de Sauvegarder vos destination: Touchez le bouton de menu de programmes, modifications utilisez les onglets pour sélectionner une banque puis choisissez un numéro dans la liste. Touchez le bouton [OK] pour retourner à…
-
Page 47
Sauvegarde externe et chargement Pour créer un nouveau dossier, accédez au niveau Chargement de données désiré pour créer ce dossier et utilisez la commande “Create Directory” du menu “Media–Utility”. Vous pouvez charger tout le contenu de la mémoire en 5. A la page “Media–Save”, appuyez sur le bouton de une fois, incluant les données de sons (programmes, combinaisons etc.) et les données de morceaux. -
Page 48: Ecouter Des Morceaux De
Ecouter des morceaux de démonstration Ecouter des morceaux de démonstration Charger les données des Ecouter des morceaux de morceaux de démo démonstration Quand vous effectuez l’opération suivante, les Voici comment écouter les morceaux de démonstration données sauvegardées dans le KROME sont en mode Sequencer: remplacées par les données de programmes et de 1.
-
Page 49: Lecture De Listes De Morceaux
Lecture de listes de morceaux 2. Vérifiez que la case “RPPR” est cochée. Lecture de listes de morceaux Si cette case est cochée, la fonction RPPR est active. Si cette case n’est pas cochée, la fonction RPPR est Vous pouvez assigner des morceaux à une liste de coupée.
-
Page 50: Caractéristiques Principales
Caractéristiques principales Caractéristiques principales Clavier: Clavier semi-pondéré à 61 ou 73 (sensible au toucher; sans aftertouch) Clavier NH à 88 touches offrant la pondération naturelle d’un mécanisme à marteaux (sensible au toucher; sans aftertouch) Alimentation: Prise pour adaptateur secteur (DC 12V, Interrupteur d’alimentation Dimensions (largeur ×…
-
Page 51
DEUTSCH Inhalt Vorsichtsmaßnahmen ….. . 2 Verwendung des Sequenzers..16 LCD-Bildschirm ……2 Aufzeichnen Ihres Spiels . -
Page 52: Vorsichtsmaßnahmen
Vielen Dank für Ihre Entscheidung zu einer KROME EX Hinweis zur Entsorgung (Nur EU) Music Workstation von Korg. Bitte lesen Sie sich diese Wenn Sie das Symbol mit der „durchgekreuzten Anleitung vollständig durch, um bei der Bedienung alles Mülltonne“ auf Ihrem Produkt, der dazugehörigen Bedienungsanleitung, der Batterie oder dem Batteriefach richtig zu machen.
-
Page 53: Copyright-Hinweis
Rhythmusbegleitungsmuster, MIDI-Daten, PCM-Sampledaten, Audiodaten, Betriebssystem usw.) sind urheberrechtlich geschütztes Eigentum von KORG Inc. oder urheberrechtlich geschütztes Material Dritter, für das KORG Inc. eine Lizenz erworben hat. Sie benötigen keine Erlaubnis von KORG Inc., mithilfe der oben genannten Inhalte Werke zu produzieren,…
-
Page 54: Über Diese Anleitung
Die Anleitungen und ihr Zweck Verweisungen auf den KROME EX Der KROME EX wird mit folgenden Dokumenten Der KROME EX ist lieferbar als 88-, 73- und 61-Taster. geliefert: In der Dokumentation sind mit „KROME“ alle • Blitzstart (gedrucktes Dokument und PDF) Ausführungen gemeint.
-
Page 55: Die Wichtigsten Funktionen
EDS-Klangerzeugung mit der Möglichkeit Spielhilfen kombiniert, bis zu zehn Mal mehr PCM-Klangdaten anzusteuern. • Der KROME EX bietet eine leicht gewichtete 61er- bzw. 73er-Tastatur, die sich sowohl für Klavier- als • Die Voicing-Technologie des KRONOS ist ebenfalls auch für Synthesizerparts eignet.
-
Page 56: Frontplatte
Frontplatte Frontplatte 15 20 10 12 * Die Abbildung oben zeigt einen KROME EX-61 Lautstärke DRUM TRACK 1. VOLUME-Regler 7. DRUM TRACK-Taster Hiermit stellen Sie die Lautstärke für die Buchsen Hiermit schalten Sie die „Drum Track“-Funktion ein AUDIO OUTPUT L/MONO, R und den und aus.
-
Page 57: Rückseite
Rückseite Ferner können Sie mit diesen Tastern die Program- Außerdem erlaubt dieser Taster das Sichern von Songs Bank für ein Timbre (Combination) oder eine Song- auf einem externen Datenträger (siehe Seite 21). Spur wählen. Um eine GM-Bank zu wählen, müssen Sie das Sequenzer Zehnertastenfeld (siehe „16“, S.
-
Page 58: Anschlüsse Und Einschalten
Anschlüsse und Einschalten Audio-Ausgänge 4. AUDIO OUTPUT L/MONO-, R-Buchse 7. SD-Kartenschacht Dies sind die Stereo-Tonausgänge. Mit dem VOLUME- Hier kann eine SD-Karte angeschlossen werden, auf Regler kann die Lautstärke eingestellt werden. der sich die Programs, Combinations und Songs des KROME speichern lassen. (Siehe Seite 20) Pedale 5.
-
Page 59: Ausschalten
Ausschalten Ändern der Ausschaltfrist Ausschalten Ändern der Frist im Dialogfenster beim Hochfahren Drücken Sie nach dem Spielen den Netzschalter auf Wenn die Energiesparfunktion aktiv ist (was also der Rückseite, um den KROME auszuschalten. bedeutet, dass sich das Instrument irgendwann ausschaltet), erscheint beim Einschalten ein Bedenken Sie, dass beim Ausschalten alle noch Dialogfenster, in dem die Ausschaltfrist angezeigt nicht gespeicherten Program-, Combination- und…
-
Page 60: Modi
Über die Display-Anzeige und die Modi Über die Display-Anzeige und die Modi Display Der KROME enthält das grafikfähige und druckempfindliche „TouchView“-Display von Korg. Die im Display angezeigten Objekte kann man drücken oder ziehen, um Programs oder Combinations Wenn man bestimmte Parameter zwei Mal bzw.
-
Page 61: Modusanwahl
Modusanwahl * [OK]- und [Cancel]-Button Sequencer-Modus Im Sequencer-Modus können Sie MIDI-Parts Nach Ausführen einer Funktion oder Anwahl eines aufzeichnen, abspielen und editieren. Hier bieten sich Befehls können Sie sie/ihn mit dem [OK]-Button folgende Möglichkeiten: bestätigen. Wenn Sie es sich anders überlegt haben, drücken Sie den [Cancel]-Button.
-
Page 62: Klänge Spielen
Klänge spielen Klänge spielen Sie können auch mit den Bank-Tastern links oben im Spielen von Programs und Display auf Bank U umschalten. Um eine GM-Bank zu wählen, müssen Sie den Combinations Zifferntaster 0 gedrückt halten, während Sie –, 1~9 oder (.) betätigen. Damit wählen Sie die GM-Bank, eine GM-Variation g(1)~g(9) oder die GM-Schlagzeug- Bank/Nummer-Anwahl von Programs (A) Programs g(d).
-
Page 63: Verwendung Der Spielhilfen
Verwendung der Spielhilfen 4. Mit dem [Jump to Sub]-Button kann ein „Sub Verwendung der Spielhilfen Category/Prog Select“-Menü mit untergeordneten Kategorien aufgerufen werden. Wählen Sie mit den Reitern links eine untergeordnete Joystick, SW1 und SW2 Kategorie. Der Joystick (siehe Seite 6) und die Taster SW1/SW2 Wählen Sie ein Program (siehe Schritt 3 oben).
-
Page 64: Verwendung Des Arpeggiators
Klänge spielen Verwendung des Arpeggiators Verwendung der ‘Drum Track’- Funktion Innerhalb eines Programs steht jeweils ein polyphoner Arpeggiator zur Verfügung. Die Combinations und der Sequenzer bieten dagegen zwei polyphone Ein-/Ausschalten der ‘Drum Track’- Arpeggiators. Funktion Ein-/Ausschalten des Arpeggiators 1. Drücken Sie den DRUM TRACK-Taster. 1.
-
Page 65: Einfache Editierung Von Programs Und
Einfache Editierung von Programs und Combinations „Category/Combination Select“-Listenpfeil Einfache Editierung von Programs und Combinations Einstellen der Klangregelung und Lautstärkebalance Im Falle eines Programs kann man die Klangregelung und den Rückwegpegel der Master-Effekte auf der Seite „P0: Play– Main“ einstellen. Auf der Seite „P0: Play– Mixer & Drum Track“ können Sie die Lautstärke der Oszillatoren 1 und 2 sowie der A.Piano A.Bass…
-
Page 66: Verwendung Des Sequenzers
Verwendung des Sequenzers Verwendung des Sequenzers Hinzufügen einer weiteren Spur Aufzeichnen Ihres Spiels Als nächstes wollen wir den mit „Auto Song Setup“ aufgezeichneten Part um einen weiteren ergänzen. Auto Song Setup 1. Drücken Sie den [Preference]-Reiter, um zur „P0: Die „Auto Song Setup“-Funktion kopiert die aktuellen Play/REC–…
-
Page 67: Editieren Von Midi-Daten
Editieren von MIDI-Daten Korrigieren oder Hinzufügen von Noten Editieren von MIDI-Daten Bei Bedarf können Sie die aufgezeichneten Noten verschieben, überflüssige Noten löschen, die Nach einer Aufnahme können Sie den aufgezeichneten Notendauer und sogar die Anschlagwerte korrigieren. Part bei Bedarf noch ändern. So lassen sich Die Funktionen des „Track View“-Bereichs erlauben überflüssige Noten entfernen und falsche oder zu früh/ das Löschen, Verschieben oder Kopieren von Daten in…
-
Page 68: Song-Vorlagen
Verwendung des Sequenzers 6. Wählen Sie mit „To Track“ die Spur, die das Song-Vorlagen Schlagzeug-Pattern abspielen soll. Anmerkung: Bei den 16 Song-Vorlagen spricht Spur 1 Song-Vorlagen („Templates“) ordnen den Spuren immer ein „Drum“-Program an. (Ab und zu passende Klänge und Effekte zu und stehen für verwenden aber auch noch weitere Spuren ein mehrere Musikstile zur Verfügung.
-
Page 69: Verwendung Der Effekte
Verwendung der Effekte Verwendung der Effekte Sie können jeweils aus 193 verschiedenen Digital- Effekten wählen. Der KROME bietet 5 Insert- und 2 Master- Effektprozessoren, 1 Total-Effekt und eine Mixerfunktion für das Routing der Effekte. Alle Prozessoren sind mit Stereo-Ein- und -Ausgängen ausgestattet.
-
Page 70: Sichern Und Laden Von Daten
Sichern und Laden von Daten Sichern und Laden von Daten Drücken Sie den Program-Listenpfeil und wählen Speichern Ihrer Änderungen Sie mit den Reitern eine Bank und mit den Feldern den gewünschten Zielspeicher. Drücken Sie das [OK]-Feld, um zum vorigen Der Unterschied zwischen ‘Write’ und Dialogfenster zurückzukehren.
-
Page 71
Sichern und Laden von Daten 5. Drücken Sie auf der „Media–Save“-Seite die Laden von Daten Menüpfeilstaste, um das Menü zu öffnen und wählen Sie den „Save All“-Befehl. Bei Bedarf können Sie mit einem Ladevorgang den gesamten internen Speicherinhalt austauschen Mit diesem Befehl sichern Sie eine „.PCG“- und (Programs, Combinations usw.) und Songs laden. -
Page 72: Anhören Der Demosongs
Anhören der Demosongs Anhören der Demosongs Laden der Demosong-Daten Anhören der Demosongs Wenn Sie wie nachstehend beschrieben vorgehen, Die Demosongs können Sie sich im Sequencer-Modus anhören. werden die im KROME gespeicherten Daten überschrieben, weil für die Demosongs die Werks- 1. Wählen Sie mit dem SEQ-Taster den Sequencer- Programs und -Combinations benötigt werden.
-
Page 73: Abspielen Mehrerer Song Nacheinander
Abspielen mehrerer Song nacheinander 2. Markieren Sie das Kästchen „RPPR“. Abspielen mehrerer Song Wenn es markiert ist, kann die RPPR-Funktion verwendet werden. nacheinander Wenn es nicht markiert ist, steht die RPPR-Funktion Wenn man mehrere Songs einer „Cue List“ zuordnet, nicht zur Verfügung. werden sie in der gewünschten Reihenfolge abgespielt.
-
Page 74: Technische Daten
Technische Daten Technische Daten Tastatur: 61er- oder 73er-Leicht gewichtete Tastatur (anschlagdynamisch, aber ohne Aftertouch) 88er NH-Tastatur (Natural Weighted Hammer Action), anschlagdynamisch, aber ohne Aftertouch Stromversorgung: Anschluss für das AC-Netzteil (DC 12V, Netzschalter Abmessungen (Breite × Tiefe × Höhe): 61er-Tastatur 1.027 × 313 × 93mm 73er-Tastatur 1.191 ×…
-
Page 75
ESPAÑOL Contenido Precauciones ……. 2 Utilizar el secuenciador ….16 Respecto a la pantalla LCD . -
Page 76: Precauciones
USB o en Nunca coloque ningún recipiente con líquido cerca de este un soporte similar. Tenga en cuenta que Korg no acepta equipo, podría causar un cortocircuito, fuero o descarga ningún tipo de responsabilidad por cualquier daño que pueda eléctrica.
-
Page 77: Aviso De Copyright
KORG Inc. con copyright, o es material con copyright de terceros que KORG Inc. utiliza bajo licencia. No es necesario el permiso de KORG Inc. para utilizar el contenido anteriormente mencionado para producir o interpretar obras musicales, ni tampoco para grabar y…
-
Page 78: Acerca De Este Manual
Referencias al KROME EX El KROME EX se entrega con los siguientes manuales. El KROME EX está disponible en los modelos de 88, 73 • Guía de inicio rápido (impresa en PDF) y 61 teclas. Los manuales se refieren a todos los (este documento) modelos, sin hacer distinciones, como “el KROME”.
-
Page 79: Características Generales
• Utiliza la increíble tecnología de voz desarrollada para KRONOS, lo que proporciona un total de 4GB • El KROME EX 61 y 73 incluye un teclado con de datos PCM de alta calidad, que incluyen semicontrapeso que permite tocar cualquier pieza, muestras estéreo de larga duración capturadas para…
-
Page 80: Panel Frontal
Panel frontal Panel frontal 15 20 10 12 * La ilustración representa el KROME EX-61 Volumen DRUM TRACK 1. Mando VOLUME 7. Botón DRUM TRACK Este mando ajusta el volumen de las salidas AUDIO Este botón activa y desactiva la función “Drum Track”.
-
Page 81: Panel Posterior
Panel posterior PROG/COMBI BANK Guardar (Write) 12. Botones A, B, C, D, E, F 20. Botón WRITE Estos botones seleccionan los bancos de programa A–F, Utilice este botón para guardar programas, U-A–U-F y los bancos de combinación A–F (consulte la combinaciones, ajustes globales, kits de percusión o página 12).
-
Page 82: Conectar El Teclado Y Activar El Equipo
Conectar el teclado y activar el equipo Salidas de audio 4. Jacks AUDIO OUTPUT L/MONO, R 7. Ranura para tarjeta SD Son las salidas principales de audio estéreo. Utilice el Puede insertar una tarjeta SD aquí y utilizarla para mando VOLUME para ajustar el volumen. guardar/cargar programas, combinaciones o datos de las canciones del KROME (consulte la página 20).
-
Page 83: Desactivar El Equipo
Desactivar el equipo Cambiar el ajuste de desactivación Desactivar el equipo automática Cuando termine de utilizar el KROME, desactívelo Cambiar los ajustes en el cuadro de diálogo inicial pulsando el conmutador de alimentación situado en el Si la función de desactivación automática está activada panel posterior del KROME.
-
Page 84: Acerca De La Pantalla Y Los Modos
Acerca de la pantalla y los modos Pantalla El KROME utiliza el interface de usuario gráfico TouchView de Korg. Si pulsa o arrastra los objetos que se visualizan en la pantalla, podrá seleccionar programas o Para algunos parámetros, puede pulsar el parámetro combinaciones o editar valores de los parámetros.
-
Page 85: Seleccionar Modos
Seleccionar modos * Campos [OK] y [Cancel] Modo Sequencer Cuando haya definido las operaciones necesarias en el El modo Sequencer permite grabar, reproducir y editar cuadro de diálogo, puede ejecutar el comando pistas MIDI. Puede: pulsando el campo [OK]. Para cancelar sin ejecutarlo, •…
-
Page 86: Reproducir Sonidos
Reproducir sonidos Reproducir sonidos También puede utilizar los botones de bancos de la Reproducir Programas y esquina superior izquierda de la pantalla para cambiar a un banco U. Combinaciones Para seleccionar un banco GM, mantenga pulsada la tecla numérica 0 y pulse uno de los botones -, 1–9 o (.). El banco GM, las variaciones GM g(1)–g(9) o los Seleccionar Programas por banco y programas de percusión GM g(d) se seleccionarán…
-
Page 87: Utilizar Controladores Para Modificar
Utilizar controladores para modificar el sonido El menú muestra dieciséis programas a la vez. Para ver Utilizar controladores para otros programas, utilice la barra de desplazamiento para desplazarse por la lista. modificar el sonido Toque el teclado para escuchar el sonido del programa que ha seleccionado.
-
Page 88: Interpretar Con El Arpegiador
Reproducir sonidos Interpretar con el arpegiador Utilizar la función “Drum Track” Un programa le permite utilizar un único arpegiador polifónico. Cuando interprete una combinación o utilice el secuenciador, podrá utilizar dos arpegiadores Activar y desactivar la función “Drum polifónicos. Track” Activar/desactivar el arpegiador 1.
-
Page 89: Edición Sencilla De Programas Y
Edición sencilla de programas y combinaciones Botón emergente de selección de Categoría/Combinación Edición sencilla de programas y combinaciones Ajustar el balance del volumen y el ecualizador Para un programa, puede ajustar el ecualizador y la cantidad de retorno del efecto master en la página “P0: Play–…
-
Page 90: Combinaciones
Utilizar el secuenciador Utilizar el secuenciador Añadir otra pista Grabar su interpretación Vamos a añadir otra pista a la interpretación que ha grabado utilizando “Auto Song Setup”. Auto Song Setup 1. Pulse la ficha “Preference” para acceder a la La función “Auto Song Setup” copia el Programa o página “P0: Play/REC–…
-
Page 91: Editar Midi
Editar MIDI Corregir o añadir notas Editar MIDI Puede editar los datos de su interpretación moviendo o borrando notas, modificando la duración o la Si lo desea, puede modificar su interpretación después intensidad de una nota, o añadiendo notas. de grabarla. Por ejemplo, puede borrar notas mal Resulta útil emplear la edición “Track View”…
-
Page 92: Canciones De Plantilla
Utilizar el secuenciador 6. En el campo “To Track”, seleccione la pista que Canciones de plantilla desea utilizar para el patrón. Nota: En cada una de las 16 canciones de plantilla Las canciones de plantilla contienen sonidos y efectos predefinidas, la pista 1 siempre se asigna a un adecuados para un estilo musical concreto, de forma Programa de percusión.
-
Page 93: Utilizar Efectos
Utilizar efectos Utilizar efectos Puede seleccionar entre 193 efectos digitales diferentes. 3. “Send1” y “Send2” especifican los niveles de envío al efecto maestro para cada pista. “Send1” La sección de efectos del KROME cuenta con cinco corresponde a MFX1 y “Send2” corresponde a efectos de inserción, dos efectos master, un efecto total y un mezclador que controla el direccionamiento entre MFX2.
-
Page 94: Guardar Y Cargar Datos
Guardar y cargar datos Guardar y cargar datos 2. Pulse de nuevo el botón WRITE para realizar la Guardar las ediciones operación de almacenamiento. (También puede realizarla pulsando el campo [OK] o el botón ENTER). Diferencia entre “Write” y “Save” Almacenar otros datos Existen dos formas de guardar el trabajo en KROME: Para almacenar una combinación, selecciónela y…
-
Page 95
Guardar y cargar Aparecerá un cuadro de diálogo. 5. Pulse el campo [Load] iluminado en rojo de la parte inferior de la página. (También puede utilizar el comando de menú “Load Selected”.) Se visualizará un cuadro de diálogo con distintas opciones. -
Page 96: Escuchar Las Canciones De Demostración
Escuchar las canciones de demostración Escuchar las canciones de demostración Cargar los datos de la canción Escuchar las canciones de de demostración demostración Al realizar la siguiente operación, los datos Así es como puede escuchar las canciones de demostración en el modo Sequencer. almacenados en el KROME se descartarán y se sobrescribirán con el programa predefinido y los 1.
-
Page 97: Reproducir Una Sucesión De Canciones
Reproducir una sucesión de canciones 2. Compruebe que la casilla de verificación “RPPR” Reproducir una sucesión de está marcada. Si está marcada, RPPR está activado. canciones Si está desmarcada, RPPR está desactivado. Las canciones se pueden poner en cola en una lista, y 3.
-
Page 98: Especificaciones Principales
Especificaciones principales Especificaciones principales Teclado: Teclado con semicontrapeso de 61 o 73 notas (sensible a la velocidad, sin aftertouch) Teclado “Natural Weighted Hammer Action” NH de 88 notas (sensible a la velocidad, sin aftertouch) Alimentación: Jack de alimentación para el adaptador de CA (DC 12V, conmutador de alimentación Dimensiones (anchura ×…
-
Page 99
目录 注意事项 ….2 使用 Drum Track ..14 有关 LCD 屏幕… .2 简单程序和组合编辑… -
Page 100: 注意事项
感谢您购买 Korg KROME EX Music Workstation。 为了帮助 用户重要提示 您全面了解您的新乐器, 请仔细阅读本手册。 本产品严格按照产品使用国家的生产标准和电压要求制造。 如果您通过网路、邮件或者电话销售购买本产品,您必须核 实本产品是否适于在您所在的国家使用。 注意事项 警告:在本产品适用国家之外的其他国家使用本产品极其危 险,同时制造商和经销商将不再履行质量担保。 使用场所 请妥善保存您的购买收据作为购买凭证,否则您的产品将不 能享有制造商或经销商的质量担保。 在以下地方使用本乐器将导致乐器故障: • 阳光直接照射下 • 极端温度或湿度条件下 国家强制性产品认证 (CCC) 基于下一标准, 实施安全型式试验 • 有过量灰尘、肮脏的地方 GB8898-2011 • 经常产生振动的地方 《音频、 视频及类似电子设备安全要求》 • 接近磁场的地方 电磁兼容试验 电源 GB13837-2012 请将指定的交流电源适配器连接到电压正确的交流电插座上。…
-
Page 101: 版权警告
版权警告 • 本专业设备仅用于你自己拥有版权,已获得版权持有人许可 公开演奏、录制、演奏、销售和复制,或根据版权法构成 “ 合理使用 ” 活动的作品。 如果你不是版权持有人,未经版权持有人许可,或没有对作 品从事合理使用,你可能违反版权法,并可能承担损害的赔 偿和处罚。 KORG 对于使用 KORG 产品所进行的任何侵权行为不承担任何 责任。 • 内置于该产品中或包含在该产品中的内容不得提取、记录或 以类似于其原始状态的形式存储,不得在互联网上公开或发 布。 该产品的内容 (如声音程序、风格数据、伴奏模式、MIDI 数据、PCM 样本数据、音频数据、操作系统等)是 KORG 公司 的受版权保护的财产,或是由 KORG 公司在第三方许可下使 用的受版权保护的资料。 无需从 KORG 公司获得许可,即可使用上述内容制作,表演, 记录以及发布这些音乐作品。…
-
Page 102: 关于本手册
关于本手册 本手册中的惯例 手册和使用指南 KROME EX 引用 KROME EX 随机附带以下手册。 KROME EX 拥有 88 键、73 键和 61 键型号。这些手册 • 入门指南 (印刷品) (本文档) 无区别地将所有型号指代为 “KROME”。本手册前面板 和后面板图示显示的是 61 键型号,但是同样适用于其 • 补充手册 (PDF) 他型号。 • Voice Name List (PDF) 随机附带的印刷版仅适用于 入门指南。 示例屏幕显示 本手册示例屏幕中显示的参数仅供解释说明之用,可能 入门指南…
-
Page 103: 主要特点
鼓轨道是一种使用 KROME 高品质鼓声的内置鼓机功能。 Synthesis-eXpanded)是全新设计的声音引擎,实现 有 710 种模式。 合成、转调、效果器功能和专家认可的 EDS 声音引 擎品质,同时可以允许控制 PCM 声音数据相比多十 实现丰富表现力演出的键盘和控制器 倍的数据。 • KROME EX 61 和 73 拥有半重键盘,以一种美好的感 • 现已充分应用 KRONOS 研发的音频技术,为您奉献 觉演奏从钢琴声到合成器声音等各种声音。 总计达 4GB 的高品质 PCM 数据,其中包括了每个 KROME EX 88 配有 NH (逐级配重键盘技术)键盘, 键的长立体声采样。从声音的起音到延迟,精心设 当您演奏存在细微表现力差异的声音时,例如钢琴…
-
Page 104: 前面板
前面板 前面板 15 20 10 12 * 图示为型号 KROME EX-61 音量 DRUM TRACK 1.VOLUME 旋钮 7.DRUM TRACK 按钮 该旋钮可以调节 AUDIO OUTPUT L/MONO、R 输出的音 该按钮能够打开 / 关闭 DRUM TRACK 功能。 量,以及耳机插孔的音量。 该按钮也能指示鼓轨道的运行状态。 (未亮:关闭,闪 烁:等待触发器,亮起:打开。请参阅第 14 页。 ) SW1、2 和摇杆 效果器按钮 2.SW1、SW2 按钮…
-
Page 105: 后面板
后面板 PROG/COMBI BANK 保存 (写入) 12.A、B、C、D、E、F 按钮 20.WRITE 按钮 这些按钮可以选择程序库 A–F、U-A–U-F 和组合库 使用该按钮可以将程序、组合、全局设置、爵士鼓或者 A–F (请参阅第 12 页) 。每次连续按 BANK 按钮后, 琶音器模式保存至内部内存 (请参阅第 20 页) 。 程序库将不断往返从 A-F 切换到 U-A–U-F。 您也可以使用该按钮将歌曲保存至媒介 您也可以使用这些按钮选择组合中的音质程序库,或歌 (请参阅第 21 页) 。 曲中的轨道程序库。 如果您希望选择 GM 库,请使用数字键 (请参见 音序器…
-
Page 106: 连接电源并打开电源
连接电源并打开电源 AUDIO OUTPUT 4.AUDIO OUTPUT L/MONO、R 插孔 7.SD 卡槽 它们是主立体声音频输出。 使用 VOLUME 旋钮调节音量。 您可以在这里插入 SD 卡,用它保存 / 加载 KROME 程 序、组合或歌曲数据。 (请参阅第 20 页) PEDAL 5.ASSIGNABLE PEDAL 插孔、ASSIGNABLE 8.USB 连接器 (用于连接至计算机) SWITCH 插孔、DAMPER 插孔 您可以将计算机连接至该连接器。您的 KROME 可以只 您可以将踏板、脚踏开关和脚踏板连接至这些插孔。这 使用单根 USB 线缆直接向计算机发送 MIDI 信息或接 可以让您控制更多的功能和效果器。…
-
Page 107: 关闭电源
关闭电源 更改自动关机设置 关闭电源 在启动对话框中更改设置 使用 KROME 完毕后按 KROME 后面板上的电源开关关闭 如果启用了自动关机功能以便自动关闭电源,系统启动 电源。 后显示屏上将立即显示当前指定的自动关机时间。 当您关闭电源后,所有程序、组合或您编辑的全局 设置都将返回至其原始状态。如果您希望保留编辑 结果,您必须保存 (写入)编辑的设置。 同样,当您关闭电源时歌曲数据也将会丢失。如果 您希望稍后再次使用歌曲数据,您必须在关闭电源 之前进行保存,然后在需要的时候再次载入。 (请 参阅第 20 页上的 “ 保存您的数据 ”。 ) 如果启用了 KROME 的自动关机功能,在没有任何 用户输入之后一段时间电源将自动关闭。这种自动 1. 显示该消息时,按对话框中的 Change Setting 按 关机也会造成未保存的数据丢失。 钮。 如果在数据写入内部内存期间关机,则内存中的数 显示屏中将显示以下对话框。 据可能会被损坏。执行任何程序时切勿关闭电源。…
-
Page 108: 关于显示屏和模式
关于显示屏和模式 关于显示屏和模式 对于某些参数,您可以连续按两次参数或长按然后放开 显示屏 手指,以此访问可以在其中编辑值的屏幕编辑板。 e:弹出按钮 KROME 使用 Korg 的 TouchView 图形用户界面。 通过在显示屏内按压或拖放对象,您可以选择程序或组 当您按弹出按钮时,可用参数值将显示为弹出菜单或标 合,或者编辑参数值。我们将在这里说明这些对象的名 签分隔的菜单。 称和功能。 f:菜单命令按钮 a:模式按钮 * 菜单 b:当前页面 f:菜单命令按钮 按下该按钮时,显示屏上将显示菜单命令列表。 e: 根据当前选定的页面的不同,显示的菜单命令也有所不 弹出 同。 按钮 当您按菜单之外的显示屏时,或者当您按 EXIT 按钮时 菜单将关闭。 菜单命令按钮 菜单 c:标签 d:参数 a:模式按钮 这显示了当前选定的模式。 * 对话框…
-
Page 109: 选择模式
选择模式 • 录制样式,并使用 RPPR (实时模式播放 / 录制)将 选择模式 它们分配到单独的键。 • 创建按照您指定顺序播放多歌曲的监听列表。您也 KROME 提供非常多的功能,例如播放或编辑程序和组 可以将这些歌曲合并为单首歌曲。 合,录制和播放歌曲,以及管理媒体。这些功能被群组 为 “ 模式 ”。KROME 拥有五种模式。若要访问这些模 • 创建 Drum Track 模式 式,只需按相应的模式按钮 (请参阅第 6 页) 。 “Global” (全局)模式 “Program” (程序)模式 全局模式允许您调整整个 KROME 的整体设置,编辑爵 程序是 KROME 的基本声音。 士鼓和琶音器模式。在全局模式中您可以:…
-
Page 110: 播放声音
播放声音 播放声音 按类别选择程序 (B) 播放程序和组合 有其他的方式可以选择程序,但是我们在这里介绍如何 按照类别,例如键盘、手风琴、低音或鼓声音选择程 按库和编号选择程序 (A) 序。 以下是如何选择程序的说明。 1. 在 LCD 屏幕中,按 “Category/Program Select” 有关程序模式的特点和功能,请参阅 第 11 页上的 (类别 / 程序 / 选择)弹出按钮。 ““Program” (程序)模式 ”。 屏幕上将出现 “Category/Program Select” 弹出按 1. 按前面板上的 PROG 按钮 (LED 将亮起)进入程序 钮。 模式。…
-
Page 111: 使用控制器修改声音
使用控制器修改声音 4. 如果您希望按子类别选择程序,则按 “Jump to 使用控制器修改声音 Sub” 按钮访问 Sub Category/Prog Select 菜单。 按左侧标签选择子类别。 摇杆、SW1 和 SW2 按步骤 3 所述选择程序。 若要确认您的选择,则按 OK 按钮。若要取消选择,则 摇杆 (请参阅第 6 页)和 SW1/SW2 (请参阅第 6 页) 按 Cancel 按钮。您将会返回主类别。 位于 KROME 前面板的左侧,是您在演奏过程中可以使 用的控制器。您可以使用这些控制器编辑声音。 5. 如果您对选定程序满意,则按 OK 按钮关闭菜单。 对于每个程序或组合,每个控制器所产生的效果也会有…
-
Page 112: 使用琶音器演奏
播放声音 使用琶音器演奏 使用 Drum Track 程序允许您使用单个复调琶音器。播放组合或使用音序 打开和关闭 Drum Track 器时,您将能够使用两个复调琶音器。 1. 按 DRUM TRACK 按钮。 关闭 / 打开琶音器 根据各种设置的不同,Drum Track 可能会立即开始播 1. 选择您要播放的程序或组合。 放,或者等待您开始弹奏键盘时播放。如果该按钮的 LED 在不断亮起继而熄灭,就说明它正在等待您开始演 2. 按 ARP 按钮点亮 LED。 奏。 琶音器将开启。 2. 使用 TEMPO 旋钮或 TAP 按钮调节节奏 (请参阅 3.
-
Page 113: 简单程序和组合编辑
简单程序和组合编辑 简单程序和组合编辑 调节 EQ 和音量平衡 对于程序,可以在 P0:Play– Main 页面中调节该程 序的 EQ 和主音效返回量: 在 P0:Play– Mixer & Drum Track 页面中,您可以调 节振荡器 1 和 2 的音量平衡和鼓轨道。您也可以在这 里调节鼓轨道程序的 EQ。 使用音调调节 KROME 的音调调节功能拥有有用的程序参数,可以在显 2. 我们来尝试下更改程序分配,以便播放管风琴而不 示屏中使用按钮和滑块编辑这些参数。您可以使用这些 是钢琴。 参数有效编辑声音。 按音质 1 Category/Timbre Program 弹出按钮访问列 1. 访问程序模式 P0:Play– Tone Adjust 页面。按 表。…
-
Page 114: 使用音序器
使用音序器 使用音序器 添加其他轨道 录制您的演奏 我们来将您使用自动声音设置录制的另一个轨道添加至 演奏中。 自动声音设置 1. 按 Preference 标签访问 P0:Play/REC– 自动声音设置功能会将当前的程序或组合复制到歌曲, Preference 页面。在右侧,清空 “Multi REC” 选 然后使系统处于准备录制模式。起音时,您可以使用该 框。 功能立即开始录制。若要从程序模式开始录制: 注意: 自动歌曲设置会将其打开以便在组合中录制程序 选择您进行录制所使用的程序。如有需要,您可以打开 的 Drum Track 或多渠道。 ARP 或 DRUM TRACK 按钮添加琶音器或爵士鼓演奏。 1. 按住 ENTER 按钮时按 SEQUENCER REC ( ) 按钮。…
-
Page 115: 编辑 Midi
编辑 MIDI 纠正和添加音符 编辑 MIDI 您可以通过移动或擦除音符、修改音符的持续时间或强 度,或者添加音符的方式编辑您的演出数据。 如有需要,您可以在录制后编辑演奏。例如,您可以擦 除错误的音符,或者纠正它们的音调和时间节奏。 当您尝试以整个轨道或成组测量进行擦除、移动或复制 数据时,使用 Track View 编辑会很方便。 纠正和调整时间 1.(按 PAGE 按钮,然后在 Page Select 中按 P6: 通过 Quantization 完成时间纠正。这会根据您选择的 Track Edit。 )然后按 Track View 标签访问 P6: 方案记录您弹奏的音符并将它们排列至最近的节拍或节 Track Edit– Track View 页面。 拍部分。也可以用于添加 “ 摇摆 ” 感觉。我们开始尝 2.
-
Page 116: 模板歌曲
使用音序器 6. 在 To Track 字段中选择该模式使用的轨道。 模板歌曲 注意: 在这十六个预置的每一个模板歌曲中,轨道 1 始终分配至鼓程序。 (在某些情况下,其他轨道也有鼓 模板歌曲包含适合特定音乐样式的声音和效果器,因此 程序。 ) 可以使用适当的模板立即开始创造音乐。除了预置的模 板之外,您可以创建包含您最常用声音的您自己的模板 7. 在 Measure 字段中,设置您希望使用模式的测量。 声音。 在这 710 个每一个预置模式名称之后,系统将部分显 十六个预置模板歌曲 (P00–P15)包含轨道参数设置, 示音乐模式和最适合的鼓程序的名称。 例如程序、音量和声像定位,以及效果器、琶音器、轨 通过加载鼓程序和相应地预置模式,您可以立即设置鼓 道参数和节奏设置。 轨道以匹配模板歌曲。 请注意模板歌曲不包含歌曲轨道和样式等的 MIDI 数 8. 若要加载模式,则按 OK 按钮。 据。 在加载模式后,Measure 将自动计数。您之后可以按照…
-
Page 117: 使用效果器
使用效果器 使用效果器 您可以选择 193 种不同的数字效果器。 3. “Send1” 和 “Send2” 指定每个轨道发送至主效果 器的音量。 “Send1” 对应 MFX1, “Send2” 对应于 KROME 效果器部分包含五种插入效果器、两种主效果 MFX2。 器、一种总效果器和控制这些效果器处理程序之间过渡 的混音。每个效果器都提供立体声输入和输出。 在该页中, 仅当 “Bus (IFX/Output) Select” 设置为 L/R 或 Off 时才能够选择 “Send1” 和 “Send2”。 您可以通过动态转调 (Dmod)自由控制效果器,您可以 在演奏时使用 KROME 的控制器实时控制这些效果器, 如果 “Bus (IFX/Output) Select” 设置为 IFX1–5, 通过公共…
-
Page 118: 保存和加载数据
保存和加载数据 保存和加载数据 写入其他数据 保存您的数据 若要写入组合,选择您要写入的组合,然后按照您对程 序执行的操作进行写入。在相应页面写入其他数据,例 如琶音器模式。 理解写入和保存 注意: 除了可以使用 WRITE 按钮之外,您也可以在页 有两种方式在 KROME 上保存您的工作:写入和保存。 面菜单中使用写入命令。只能使用写入命令写入效果器 注意: 写入或保存之前如果您关机,您修改的数据将会 预设值。 丢失。请确保将重要数据保存至内存或 SD 卡。 “ 写入 ” 是指将数据保存至 KROME 自己的内存中。您 可以为程序、组合、琶音器模式、爵士鼓和全局设置使 保存和加载 用写入操作。 注意: 无法将歌曲数据写入内存。 将数据保存至 SD 卡 “ 保存 ” 是指将数据保存在 SD 卡上。您可以使用保 您在…
-
Page 119
保存和加载 显示屏中将显示某个对话框。 7. 使用 “Select .SNG Allocation” 指定如何加载歌 曲,或者是否要擦除现有歌曲。 Append 会加载内存中已有歌曲之后三个歌曲编号的歌 曲。 Clear 将从内存中擦除所有歌曲,加载歌曲保存处准确 编号的歌曲。 8. 按 OK 按钮加载数据。 加载或保存数据期间,切勿关闭电源或移除 SD 卡。 加载 Programs、Combinations、Songs、Drum Kits 或用户 Arpeggio 模式时,应确保已关闭 6. 按文本编辑按钮 (T) ,为文件输入名称。 (未选中)Global Basic Setup 页面上的 Memory Protect 设置。如果打开了该设置,您将无法加载 所有文件将使用相同的名称,但是带有显示数据类型的 数据。… -
Page 120: 聆听演示歌曲
聆听演示歌曲 聆听演示歌曲 加载演示歌曲数据 聆听演示歌曲 执行以下操作时,存储在 KROME 内的数据将被丢 以下是如何在音序器模式中聆听歌曲的说明: 弃,并由预设程序和组合数据,以及演示歌曲数据 1. 按 SEQ 按钮 (LED 将亮起)进入音序器模式。 所覆盖。如果您不希望丢失所编辑的或创建的数 2. 访问 P0:Play/REC– Program T01–08 页面。 据,您应在继续前将其保存至 SD 卡 (市售) 。 如果未显示该页面,则需要多按几次 EXIT 按钮。 1. 按 GLOBAL 按钮 (LED 将亮起)进入全局模式。 2. 访问 Global P0:Basic Setup 页面。 如果显示了其他页面,则按…
-
Page 121: 顺序播放多首歌曲
顺序播放多首歌曲 2. 请确保已选中 “RPPR” 选框。 顺序播放多首歌曲 如果选定了,则 RPPR 将开启。 可以将歌曲分配至监听列表,然后按照指定顺序播放。 如果未选定,则 RPPR 将关闭。 您也可以指定每首歌曲重复播放的次数。以下是如何播 3. 按 C#2 或更高的键。 放分配至监听列表中的演示歌曲的说明。 分配至该键的模式将开始播放。例如鼓模式或低音乐句 1. 访问 P11:Cue List 页面。 等的模式可以被分配至七十二个键的每个键 C#2–C8 按 PAGE 按钮访问 Seq Page Select 页面。 按显示屏中 (在插图中显示为可分配模式) 。未分配的键将正常播 的 “P11 Cue List”。 放。…
-
Page 122: 主要规格
主要规格 主要规格 键盘: 61 音符或 73 音符半重键盘 (支持力度感应、不支持键盘触后感) 88 音符 NH (逐级配重键盘技术)键盘 (支持力度感应、不支持键盘触后感) 电源: AC 适配器连接器 (DC 12V、 ) ,电源开关 尺寸 (宽 × 长 × 高) : 61 键 1027 × 313 × 93 mm 73 键 1191 × 313 × 93 mm 88 键…
-
Page 123
日本語 クイック・スタート・ガイド 目 次 ……2 ….16 安全上のご注意… -
Page 124: 安全上のご注意
KROME このたびはコルグ・ミュージック・ワークステーション (クローム) をお買い上げいただきまして、まことに ありがとうございます。本製品を末永くご愛用いただくためにも、この取扱説明書をよくお読みになって正しい方法で ご使用ください。 ・ 修理、 部品の交換などで、 取扱説明書に書かれ 安全上のご注意 ていること以外は絶対にしない。 ・ AC アダプターのコードを無理に曲げたり、 発 熱する機器に近づけたりしない。 また、 ACアダ ご使用になる前に必ずお読みください プターのコードの上に重いものをのせない。 ここに記載した注意事項は、 製品を安全に正しくご使用いた コードが破損し、 感電や火災の原因になります。 だき、 あなたや他の方々への危害や損害を未然に防ぐための ・ 大音量や不快な程度の音量で長時間使用しない。 ものです。 大音量で長時間使用すると、 難聴になる可能性 注意事項は誤った取り扱いで生じる危害や損害の大きさ、 ま があります。 万一、 聴力低下や耳鳴りを感じた たは切迫の程度によって、 内容を 「警告」 、 「 注意」 の2つに分け ら、…
-
Page 125: ディスプレイについて
・ 付属の AC アダプターは、 他の電気機器で使用 ディスプレイについて しない。 付属のAC アダプターは本製品専用です。 他の 機器では使用できません。 本製品のディスプレイは、 非常に高い技術で作られた精密機 器であり、品質には十分に注意を払っておりますが、次の内 ・ 他の電気機器の電源コードと一緒にタコ足配 容については、ディスプレイの特性から生じる状態であり、 線をしない。 故障ではありません。あらかじめご了承ください。 本製品の定格消費電力に合ったコンセントに 接続してください。 • ディスプレイの一部に黒点(点灯しない点)や輝点(常 に点灯する点)がある。 ・ スイッチやツマミなどに必要以上の力を加え • 表示内容によっては、 ディスプレイの明るさにムラが生じる。 ない。 • 表示内容によっては、横縞の陰が見える。 故障の原因になります。 • 表示内容によっては、ちらつきやモアレを生じる。 ・ 外装のお手入れに、 ベンジンやシンナー系の液 体、 コンパウンド質、 強燃性のポリッシャーは 使用しない。…
-
Page 126: 取扱説明書について
取扱説明書の表記 取扱説明書について KROME EX の名称表記 KROME EX KROME EX-88 には、 鍵モデルの 、 鍵モデル 取扱説明書の構成と使用法 KROME EX-73 KROME EX-61 の 、 鍵モデルの があります。 KROME EX には以下の取扱説明書が付属されています。 KROME この取扱説明書で と表記するときは、これらの総称 • クイック・スタート・ガイド(印刷版、 ) (本書) になります。 • (PDF) 追補マニュアル ディスプレイ表示 • KROME オペレーション・ガイド(…
-
Page 127: 主な特長
主な特長 主な特長 キーボード・プレイヤー、そして音楽クリ 表現力豊かな演奏が可能な鍵盤とコントロー エーターのための新領域サウンド ラー • KROME EDS-X (Enhanced Definition Synthesis- • KROME EX-61 の音源システム および では、セミ・ウェイテッド鍵盤を eXpanded) は、プロの現場でも評価の高い 音源システ 採用し、ピアノ音色からシンセサイザー音色まで、自然な ムのシンセシス、モジュレーション、エフェクト群の機能 タッチで演奏できます。 KROME EX-88 性やクオリティを余すところなく継承し、 さらに十数倍に では、 (ナチュラル・ウェイテッド・ハ 及ぶ情報量の サウンドを制御可能にした新開発音源 ンマー・アクション)鍵盤を採用し、ピアノやエレピなど システムです。 細かいニュアンスが表現可能なサウンドにおいて威力を発 揮します。 • KRONOS の開発で培われたボイシング・テクノロジーを 惜しみなく投入し、全鍵ステレオ・ロング・サンプリン…
-
Page 128: フロント・パネル
フロント・パネル フロント・パネル 15 20 10 12 *図はKROME EX–61です。 ボリューム ドラムトラック 1. [VOLUME] 7. [DRUM TRACK] ノブ スイッチ AUDIO OUTPUT L/MONO 、 端子とヘッドホン端子から出力 ドラムトラック機能をオンまたはオフにします。 する音量を調節します。 また、 ドラムトラックの動作状態を表示します。 (消灯:オ p.14 フ、点滅:トリガー待機中、点灯:オン) (→ 参照) SW1, 2, ジョイスティック エフェクト ・ スイッチ 2. [SW1] 、…
-
Page 129: リア・パネル
リア・パネル また、コンビネーションのティンバー・プログラムのバンク シーケンサー や、 ソングのトラック・プログラムのバンクを切り替えます。 Sequencer このセクションのスイッチは モードでのレコー プログラムの バンクを選択する場合は、テン・キー OG p.54 p.12 Bank/Program Select ディング プレイバックなどで使用します (→ 参照) 。 (→下記 、 参照) または メニュー ] (REC) p.13 スイッチはレコーディング以外に、プログラム、 (→ 参照)を使用します。 コンビネーションのオート・ソング・セットアップ機能を使 p.16 用するときにも使用します。 (→ 参照) バリュー ・ コントローラー 21. [ ] (PAUSE) ] (<<REW) スイッチ…
-
Page 130: 接続して電源を入れる
接続して電源を入れる AUDIO OUTPUT MIDI 4. AUDIO OUTPUT L/MONO, R 6. MIDI IN , MIDI OUT 端子 端子 端子 [VOLUME] MIDI ステレオのオーディオ出力です。音量は ノブで調 ノート・データなどの演奏情報やサウンド設定などを で 整します。 送受信します。 PEDALS SDカード 5. ASSIGNABLE PEDAL , ASSIGNABLE 7. SD 端子 カード ・ スロット SWITCH , DAMPER KROME 端子…
-
Page 131: 電源を切る
電源を切る KROME • ヘッドホンでモニターする場合は、 本体の左手前 オート ・ パワー ・ オフ設定を変更する 側にあるヘッドホン端子に接続します。このヘッドホン 起動完了直後のダイアログで変更する AUDIO OUTPUT L/MONO 端子からはステレオ・アウト ( 、 オート・パワー・オフ機能によって電源が自動的に切れるよ と同様)と同じ信号を聞くことができます。 うに設定されている場合、起動完了直後にオート・パワー・ KROME の電源スイッチを入れます。本体リア・パネルの オフによる終了時間が表示されます。 [POWER] スイッチを押します。 オート・パワー・オフ機能が有効なとき、起動完了時に オート・パワー・オフによって電源が切れる時間が表示 されます。このダイアログが表示されないときは、オー ト・パワー・オフ機能が無効で、自動的に電源が切れな いように設定されています。 (→「オート・パワー・オフ 機能」参照) 外部出力機器の電源を入れ、適切な音量に設定します。 [VOLUME] 鍵盤を演奏しながら、徐々に ノブを適度な音量 このメッセージが表示されている間に、ダイアログの になるまで右に回します。 Change Setting ボタンを押します。…
-
Page 132: ディスプレイとモードについて
ディスプレイとモードについて ディスプレイとモードについて ラッグして値を変えたり、押すことによってオン オフを切 り替えたりするものがあります。 ディスプレイ KROME のディスプレイは、 タッチ ・ パネル式のタッチビュー ・ システムを採用しています。 ディスプレイに表示されるオブジェクトを押したり、 ドラッ グしたりすることで、プログラムやコンビネーションの選択 や、パラメーターの値を設定します。ここではディスプレイ その他、連続して二度押す、または長押しして離すと、エ のオブジェクトの名称や機能について説明します。 OG p.6 ディット・パッド(→ 参照)が表示され、そこで値を 変えられるパラメーターがあります。 a: モード ・ ボタン f: メニュー ・ コマンド ・ ボタン b: カレント ・ ページ表示 ポップアップ ・ ボタン ポップ…
-
Page 133: モードを選択する
モードを選択する * テキスト ・ エディット ・ ボタン 最大 基のインサート・エフェクト、 基のマスター・エ フェクト、 基のトータル・エフェクトを設定します。 このボタンを押すと、 テキスト ・ エディット ・ ダイアログが表 示されます。 Sequencer ( シーケンサー) モード この画面で、 テキスト (プログラム、 コンビネーション、 ソング ソングのレコーディング プレイバック、エディットなどを の各ネーム等) をリネームします。 行います。 Cancel • * ボタン、 ボタン マルチトラック・シーケンサーで、 ソングをレコーディ ングおよびプレイバックします。…
-
Page 134: 演奏する
演奏する 演奏する BANK [A] 別のバンクのプログラムを選択するときは、 〜 スイッチを押します。 プログラム、コンビネーションを選ぶ 点灯中のスイッチを押すとバンク 〜 が選ばれます (スイッチ点滅) 。 プログラムをバンク、ナンバーから選ぶ 点滅中または消灯中のスイッチを押すとバンク 〜 が選 ばれます(スイッチ点灯) 。 プログラムは次の手順で選択します。 Bank ディスプレイ左上の ボタンでもバンク に切り替え Program Program モードの特長や機能などについては、 「 (プ ることができます。 p.11 ログラム)モード」 (→ )をご覧ください。 バンクを選ぶには、テン・キー を押しながら 、 [PROG] フロント・パネルにある スイッチを押すとスイッ 〜…
-
Page 135
コントローラーを使ってサウンドに変化をつける 選んだプログラムが反転表示になり、プログラムが切り [INC][DEC] [VALUE] 替わります。 スイッチや ダイヤルでも コントローラーを使ってサウンドに変 切り替わります。 化をつける メニューには一度に 個のプログラムが表示されます。 スクロール・バーでリストをスクロールすることで、他 のプログラムを表示させることができます。 ジョイスティック、 、 鍵盤を弾いて、選んだプログラムの音を確認することが KROME のフロント・パネルの左側にあるジョイスティック できます。 (→ ) 、 、 (→ )は演奏用のコントローラーで “Jump to Sub” サブ・カテゴリーから選ぶときは、 ボタン す。 これらのコントローラーを使用してサウンドに変化をつ Sub Category/Prog Select を押して、 メニューを表示しま けることができます。 す。 コントローラーによるサウンド変化は、… -
Page 136: アルペジエーターによる演奏
演奏する アルペジエーターによる演奏 ドラムトラックを使用する プログラムでは つのポリフォニック ・ アルペジエーターが使 用できます。 コンビネーションとシーケンサーでは つのポリ ドラムトラックをオン オフする フォニック ・ アルペジエーターが使用できます。 [DRUM TRACK] スイッチを押します。 設定によって、ドラムトラックによる演奏がすぐに始ま アルペジエーターをオン オフする るものがあり、 鍵盤を弾くと同時に演奏が始まります。 こ のスイッチの が点滅しているときは、 鍵盤による演奏 演奏するプログラムまたはコンビネーションを選びます。 を待っている状態です。 [ARP] スイッチを押して を点灯させます。 [TEMPO] [TAP] ノブ、 スイッチでテンポを調整します。 アルペジエーターがオンになります。 (→ 参照) 鍵盤を押さえます。 アルペジオ演奏が始まります。…
-
Page 137: プログラム、コンビネーションの簡易エ ディット
プログラム、コンビネーションの簡易エディット Category/Combination Select ポップアップ ・ ボタン プログラム、コンビネーションの簡易 エディット や音量バランスを調節する P0: Play–Main プログラムでは、 ページのディスプレイで、 プ ログラムの とマスター・エフェクトのリターン量を調節 することができます。 P0: Play–Mixer & Drum Track ページではオシレーター 、 、 ドラムトラックの音量バランスを調節できます。 ここではド A.Piano A.Bass ラムトラック・プログラムの も調節できます。 Category/Timbre Program ポップアップ ・ ボタン ピアノの代わりにオルガンが鳴るようにしてみましょう。 トーン・アジャストを使う Category/Timbre Program ティンバー…
-
Page 138: シーケンサーを使う
シーケンサーを使う シーケンサーを使う 別のトラックにレコーディングする 演奏をレコーディングする オート・ソング・セットアップでレコーディングした演奏に、 別の音色で演奏を重ねて (レコーディングして) みましょう。 オート・ソング・セットアップ Preference P0: Play/REC– Preference タブを押して ページを “Multi REC” 表示します。 右側の チェック・ボックスをオフ オート・ソング・セットアップは、現在選択しているプログ にします。 ラムやコンビネーションをソングにコピーし、自動的にレ Note: “Multi REC” オート・ソング・セットアップは を自動 コーディング待機状態にする機能です。 的にオンにし、プログラムのドラムトラックや、コンビ プログラムやコンビネーションを演奏していて、 曲のイメー ネーションをマルチ・トラックでレコーディングします。 ジやフレーズが浮かんだときに、この機能を使ってレコー ディングをすぐに始めることができます。 Program ここでは モードを選んでいる状態からの手順を説明 します。レコーディングするプログラムを選び、必要に応じ [ARP] [DRUM TRACK] て…
-
Page 139: レコーディングした演奏を修正する
レコーディングした演奏を修正する 音の修正や追加 レコーディングした演奏を修正する 音の移動や消去、音の長さや強さの変更、音を追加するなど の編集をするには、トラック・ビュー・エディットやピア ノ・ロール・エディットを使用します。 レコーディング後に演奏データを修正することができます。 例えば、弾き損じた音を消去したり、音程やタイミングを修 トラックや小節単位で消去や移動、コピーを行うときはト 正したりします。 ラック・ビュー・エディットで作業すると便利です。 [PAGE] Page Select P6: Track Edit ( スイッチを押して の を タイミングの修正 Track View P6: Track Edit– 押します)そして タブを押して タイミングの修正はクォンタイズで行います。 クォンタイズ Track View ページに入ります。 は、演奏した音のタイミングを、設定したビート(拍)に合 わせる機能です。完全に合わせるだけでなく、細かい演奏の ツールを使用して、先頭小節および後尾小節を決めて編 ノリを残すことができます。また、演奏したデータに対して 集範囲を設定します。 「スウィング」感を付け足すこともできます。では、レコー ツールを使用して、移動やコピー、消去を行います。…
-
Page 140: テンプレート・ソング
シーケンサーを使う “Track” で、パターンを使うトラックを選択します。 テンプレート・ソング Note: 16 種類のテンプレート・ソングそれぞれのトラック は常にドラムス・プログラムがアサインされています。 テンプレート・ソングは、音楽スタイルにマッチしたサウン (トラック 以外にも別のドラムス・プログラムがアサイ ドやエフェクトがセットになったもので、それらを使ってす ンされているものもあります。 ) ぐに曲作りを始めることができます。また、プリセットだけ “Measure” で、パターンの演奏を開始させたい小節位置を でなく、よく使う設定やサウンドなどをオリジナルのテンプ 指定します。 レート・ソングとして保存しておくこともできます。 種類のプリセット・パターンについては、そのパター あらかじめ用意された 種類( 〜 )のプリセット・ ンの音楽スタイルとそれに適したドラムス・プログラム データには、 プログラム、 ボリュームやパンなどのトラック・ 名が略称で表示されます。 パラメーター設定と、エフェクト、アルペジエーター、ドラ ドラム用のトラックにプリセット・パターンをロードす ムトラックやテンポ等の設定情報が含まれています。 ることで、テンプレート・ソングに適したドラムトラッ Note: MIDI テンプレート・ソングには のノート・データやパ クの設定を簡単に行うことができます。 ターンは含まれません。 ボタンを押して、ドラム・パターンをロードします。…
-
Page 141: エフェクトを使う
エフェクトを使う エフェクトを使う KROME “Send1” “Send2” は、サウンドに歪みやうねり、残響といったさまざ 、 では、マスター・エフェクトへのセン “Send1” MFX1 まな音響効果を与えるフル・デジタル・エフェクトを、 ド ・ レベルをトラックごとに設定します。 が “Send2” MFX2 種類搭載しています。 系統のインサート・エフェクト、 系 に、 が に対応します。 統のマスター・エフェクト、 系統のトータル・エフェクト “Send1” “Send2” “Bus (IFX/Output) このページの 、 は、 それぞれに割り当てて、接続を設定することで、とても複雑 Select” を または に設定したときのみ設定できます。 な効果を得ることができます。 “Bus (IFX/Output) Select” IFX1 を…
-
Page 142: データを保存(ライトとセーブ) 、読み込む(ロード
データを保存(ライトとセーブ) 、読み込む(ロード) データを保存(ライトとセーブ) 、読み込む(ロード) • ライト先のバンク、ナンバー指定: Program ポップアップ・ボタンを押して、タブでバンク エディットしたデータを保存する を選び、リストからナンバーを選びます。 ボタンを押します。元のダイアログに戻ります。 ライトとセーブについて [WRITE] もう一度 スイッチを押すとライトが実行されます [ENTER] ( ボタンまたは スイッチを押しても実行されま KROME のデータの保存方法には、 ライトとセーブの 種類が す) 。 あります。 その他のデータのライト Note: ライトやセーブで保存される前に電源を切ると、それ らのデータは失われます。 大切なデータは必ず本体や カー コンビネーションでも同様の手順でライトすることができま ドに保存してください。 す。アルペジオ・パターンなど、サウンド以外のデータをラ イトするには、該当するページで行います。詳しくは KROME Write 本体のメモリーに保存することをライト( )と p.115 をご覧ください。…
-
Page 143
セーブとロード Media-Save Load ページでメニュー・コマンド・ボタンを押し、 ディスプレイのページ下にある ボタンを押します。 “Save All (PCG & SEQ)” を選びます。 このとき、ダイアログが表示され、ロード・オプション .PCG .SNG このコマンドを実行すると、 と ファイルを一度 を設定できます。 にセーブします。ダイアログが表示されます。 一緒にプログラム等をロードするときは、 “Load [ ファイル ].PCG too” 名 のチェック・ボックスにチェックを入れます。 .SNG これらのチェック・ボックスにチェックが入ると、 .PCG ファイルをロードするときに同名の ファイルも同時 にロードされます。 “Select .SNG Allocation” でソング・データのロード方法と 現在メモリー上にあるソング・データを消去するかどう かを指定します。 Append の場合は、メモリー上にあるソング・データを消… -
Page 144: デモ・ソングを聴く
デモ・ソングを聴く デモ・ソングを聴く Meter Tempo デモ・ソングをロードする Song Select Popup KROME 以下の操作を行うと、 本体に保存されているデー Track Select タはプリセットのプログラムやコンビネーション・デー タとデモ・ソング・データで上書きされ、消えてしまい Category Program ます。これまでにエディットしたり新規作成したりした Select, & Popup データを消したくない場合は、 カード 市販 にセーブ Play/Mute/Rec してください。 Solo [GLOBAL] Global スイッチを押して( 点灯) 、 モードに Track 1 入ります。 Track 2 Global P0: Basic Setup ページを表示します。…
-
Page 145: Rppr で演奏する
RPPR で演奏する SEQUENCER [ ] (START/STOP) スイッチを押します。 主な仕様 リストにアサインされたソングを順番に聴くことができ ます。途中で演奏を止めるときは、もう 度 鍵盤部 (START/STOP) スイッチを押します。 鍵、 鍵 セミ・ウェイテッド鍵盤 ベロシティ対応・アフタータッチ非対応 鍵 (ナチュラル・ウェイテッド・ハンマー・アクショ ン)鍵盤(ベロシティ対応・アフタータッチ非対応) RPPR で演奏する 電源 Sequencer RPPR モードでは、 (リアルタイム・パターン・プ DC 12V アダプター電源端子( 、 ) 、 レイ レコーディング)機能を使用できます。 POWER スイッチ RPPR 機能は、プリセット・パターンやユーザー・パターン 外形寸法 幅…
-
Page 146: 保証規定(必ずお読みください
保証規定(必ずお読みください) 保証規定 アフターサービス (必ずお読みください) 本保証書は、 保証期間中に本製品を保証するもので、 付属品 ■保証書 類 (ヘッドホンなど) は保証の対象になりません。 保証期間内 本製品には、 保証書が添付されています。 に本製品が故障した場合は、 保証規定によって無償修理いた お買い求めの際に、 販売店が所定事項を記入いたしますの します。 で、 「 お買い上げ日」 、 「 販売店」 等の記入をご確認ください。 記 1. 本保証書の有効期間はお買い上げ日より 1 か年です。 入がないものは無効となります。 なお、 保証書は再発行致しませんので、 紛失しないように大 2. 次の修理等は保証期間内であっても有償となります。 切に保管してください。 • 消耗部品 (電池、 スピーカー、 真空管、 フェーダーなど) の 交換。…
-
Page 148
Por favor guarde su recibo como prueba de compra ya que de otro modo el producto puede verse privado de la garantía del fabricante o distribuidor. www.korg.com ©2018 KORG INC. Published 12/2018 Printed in China…
Parameter Guide
E 4
ii
About this manual
The manuals and how to use them
The KROME comes with the following manuals.
• Video Manual (approximately 60 minutes)
• Quick Start Guide (printed and PDF)
• Operation Guide (PDF)
• Parameter Guide (PDF)
• Voice Name List (PDF)
All of these manuals are on the included accessory disc.
A printed copy is included only for the Quick Start
Guide.
Video Manual
This video illustrates the main functionality of the
KROME.
Quick Start Guide
This provides a simple explanation of the KROME’s functions. To begin, please watch the Video Manual and read the Quick Start Guide.
Operation Guide
Put simply, the Operation Guide is designed to answer the question, “How do I do this?”
It explains the names and functions of each part of the
KROME, basic operation, an overview of each mode, how to edit sounds, record on the sequencer, and so on.
This guide also explains the basics of effects, the
Arpeggiator, Drum Track, and Drum Kits.
Finally, it also contains a troubleshooting guide as well as supplemental information such as a list of specifications.
Parameter Guide
The Parameter Guide is designed to answer the question,
“What does this do?”
Organized by mode and page, the Parameter Guide includes information on each and every parameter in the
KROME.
Voice Name List
The Voice Name List lists all of the sounds and setups that are in the KROME when it is shipped from the factory, including Programs, Combinations, Multisamples,
Drumsamples, Drum Kits, Arpeggio Patterns, Drum Track
Patterns, Template Songs, and Effect Presets.
PDF versions
The KROME PDF manuals are designed for easy navigation and searching. They include extensive PDF contents information, which generally appears on the side of the window in your PDF reader and lets you jump quickly to a specific section. All cross ‐ references are hyper ‐ links, so that clicking on them automatically takes you to the source of the reference.
Conventions in this manual
References to the KROME
The KROME is available in 88 ‐ key, 73 ‐ key, and 61 ‐ key models. The manuals refer to all models without distinction as “the KROME.” The front panel and rear panel illustrations in the manual show the 61 ‐ key model, but they apply identically to the other models.
Abbreviations for the manuals: QS, OG, PG, VNL
In the documentation, references to the manuals are abbreviated as follows.
QS:
Quick Start Guide
OG:
Operation Guide
PG:
Parameter Guide
VNL:
The Voice Name List
Symbols, , , Note, Tips
These symbols respectively indicate a caution, a
MIDIrelated explanation, a supplementary note, or a tip.
Example screen displays
The parameter values shown in the example screens of this manual are only for explanatory purposes, and may not necessary match the values that appear in the Display of your instrument.
MIDI-related explanations
CC# is an abbreviation for Control Change Number.
In explanations of MIDI messages, numbers in square brackets [ ] always indicate hexadecimal numbers.
* All other product and company names are trademarks or registered trademarks of their respective holders.
Table of Contents
Table of Contents
About this manual. . . . . . . . . . . . . . . . . . . . . . . . . ii
Program mode . . . . . . . . . . . . . . . . . 1
PROG Page Select . . . . . . . . . . . . . . . . . . . . . . . . . 1
PROG P0: Play. . . . . . . . . . . . . . . . . . . . . . . . . . . . . 2
0–1: Main . . . . . . . . . . . . . . . . . . . . . . . . . . . . . . . . . . . 2
0–3: Mixer & Drum Track . . . . . . . . . . . . . . . . . . . . . 5
0–5: Arpeggiator. . . . . . . . . . . . . . . . . . . . . . . . . . . . . . . . . . .6
0–7: Tone Adjust. . . . . . . . . . . . . . . . . . . . . . . . . . . . . 7
PROG P1: Basic/Controllers . . . . . . . . . . . . . . .12
1–1: Program Basic . . . . . . . . . . . . . . . . . . . . . . . . . . 12
1–2: Note ‐ On/Scale. . . . . . . . . . . . . . . . . . . . . . . . . . . . . . . .14
1–3: Controllers Setup . . . . . . . . . . . . . . . . . . . . . . . . . . . . .16
PROG P2: OSC/Pitch . . . . . . . . . . . . . . . . . . . . . .17
2–1: OSC1 Setup . . . . . . . . . . . . . . . . . . . . . . . . . . . . 17
2–2: OSC1 Velocity . . . . . . . . . . . . . . . . . . . . . . . . . . 19
2–3: OSC1 Pitch. . . . . . . . . . . . . . . . . . . . . . . . . . . . . 20
2–5: OSC2 Setup . . . . . . . . . . . . . . . . . . . . . . . . . . . . 22
2–6: OSC2 Velocity . . . . . . . . . . . . . . . . . . . . . . . . . . 22
2–7: OSC2 Pitch. . . . . . . . . . . . . . . . . . . . . . . . . . . . . 23
2–10: Pitch EG . . . . . . . . . . . . . . . . . . . . . . . . . . . . . . . . . . .23
PROG P3: Filter . . . . . . . . . . . . . . . . . . . . . . . . . . .26
3–1: Filter1 . . . . . . . . . . . . . . . . . . . . . . . . . . . . . . . . . 26
3–2: Filter1 Keyboard Track . . . . . . . . . . . . . . . . . . 28
3–3: Filter1 Modulation . . . . . . . . . . . . . . . . . . . . . . 29
3–4: Filter1 LFO Mod. . . . . . . . . . . . . . . . . . . . . . . . 30
3–5: Filter1 EG. . . . . . . . . . . . . . . . . . . . . . . . . . . . . . 31
3–6: Filter2 . . . . . . . . . . . . . . . . . . . . . . . . . . . . . . . . . 34
3–7: Filter2 Keyboard Track . . . . . . . . . . . . . . . . . . 34
3–8: Filter2 Modulation . . . . . . . . . . . . . . . . . . . . . . 34
3–9: Filter2 LFO Mod. . . . . . . . . . . . . . . . . . . . . . . . 34
3–10: Filter2 EG. . . . . . . . . . . . . . . . . . . . . . . . . . . . . 34
PROG P4: Amp/EQ . . . . . . . . . . . . . . . . . . . . . . . .35
4–1: Amp1/Driver1. . . . . . . . . . . . . . . . . . . . . . . . . . 35
4–2: Amp1 Modulation . . . . . . . . . . . . . . . . . . . . . . . . . . . .36
4–3: Amp1 EG . . . . . . . . . . . . . . . . . . . . . . . . . . . . . . 38
4–5: Amp2/Driver2. . . . . . . . . . . . . . . . . . . . . . . . . . 40
4–6: Amp2 Modulation . . . . . . . . . . . . . . . . . . . . . . 40
4–7: Amp2 EG . . . . . . . . . . . . . . . . . . . . . . . . . . . . . . 40
4–10: EQ . . . . . . . . . . . . . . . . . . . . . . . . . . . . . . . . . . . 41
PROG P5: LFO . . . . . . . . . . . . . . . . . . . . . . . . . . . .42
5–1: OSC1 LFO1 . . . . . . . . . . . . . . . . . . . . . . . . . . . . 42
5–2: OSC1 LFO2 . . . . . . . . . . . . . . . . . . . . . . . . . . . . . . . . . .44
5–5: OSC2 LFO1 . . . . . . . . . . . . . . . . . . . . . . . . . . . . 44
5–6: OSC2 LFO2 . . . . . . . . . . . . . . . . . . . . . . . . . . . . 44
5–10: Common LFO . . . . . . . . . . . . . . . . . . . . . . . . . . . . . .45
PROG P6: AMS/Common Key Track
(AMS Mixer/Common Keyboard Track). . . . 46
6–1: OSC1 AMS Mix1 . . . . . . . . . . . . . . . . . . . . . . . .46
6–2: OSC1 AMS Mix2 . . . . . . . . . . . . . . . . . . . . . . . . . . . . . 51
6–4: OSC 2 AMS Mix1 ,
6–5: OSC 2 AMS Mix2 . . . . . . . . . . . . . . . . . . . . . . .51
6–9: Common KeyTrk 1
(Common Keyboard Track 1) . . . . . . . . . . . . . . . . .51
6–10: Common KeyTrk 2
(Common Keyboard Track 2) . . . . . . . . . . . . . . . . .52
PROG P7: ARP/DT (Arpeggiator/Drum Track) .
53
7–1: ARP Setup. . . . . . . . . . . . . . . . . . . . . . . . . . . . . .53
7–2: ARP Scan Zone. . . . . . . . . . . . . . . . . . . . . . . . . .55
7–4: Drum Track Pattern. . . . . . . . . . . . . . . . . . . . . .55
7–5: Drum Track Program . . . . . . . . . . . . . . . . . . . . . . . . . 56
PROG P8: Routing/IFX (Insert Effect) . . . . . . 58
8–1: Routing . . . . . . . . . . . . . . . . . . . . . . . . . . . . . . . .58
8–2: Insert FX Setup. . . . . . . . . . . . . . . . . . . . . . . . . . . . . . . 59
8–3: IFX1 . . . . . . . . . . . . . . . . . . . . . . . . . . . . . . . . . . .60
8–4: IFX2, 8–5: IFX3, 8–6: IFX4,
8–7: IFX5 . . . . . . . . . . . . . . . . . . . . . . . . . . . . . . . . . . .60
PROG P9: MFX/TFX/LFO (Master/Total Effect/
LFO) . . . . . . . . . . . . . . . . . . . . . . . . . . . . . . . . . . . . 61
9–1: Routing . . . . . . . . . . . . . . . . . . . . . . . . . . . . . . . .61
9–2: MFX1 . . . . . . . . . . . . . . . . . . . . . . . . . . . . . . . . . .62
9–3: MFX2, 9–4: TFX . . . . . . . . . . . . . . . . . . . . . . . . .62
9–5: Common FX LFO. . . . . . . . . . . . . . . . . . . . . . . . . . . . . 63
Program: Menu Command . . . . . . . . . . . . . . . 64
Combination mode . . . . . . . . . . . . 69
COMBI Page Select . . . . . . . . . . . . . . . . . . . . . . 69
COMBI P0: Play . . . . . . . . . . . . . . . . . . . . . . . . . . 70
0–1: Program T01–08,
0–2: Program T09–16 . . . . . . . . . . . . . . . . . . . . . . . . .70
0–3: Mixer T01–08,
0–4: Mixer T09–16 . . . . . . . . . . . . . . . . . . . . . . . . . . .73
0–5: ARPEGGIATOR A,
0–6: ARPEGGIATOR B. . . . . . . . . . . . . . . . . . . . . . . . . . . . 74
0–7: Tone Adjust . . . . . . . . . . . . . . . . . . . . . . . . . . . . . . . . . 75
Controls. . . . . . . . . . . . . . . . . . . . . . . . . . . . . . . . . . . . . . . . . 76
COMBI P1: Controllers . . . . . . . . . . . . . . . . . . . 78
1–1: Controllers Setup . . . . . . . . . . . . . . . . . . . . . . . .78
COMBI P2: EQ . . . . . . . . . . . . . . . . . . . . . . . . . . . 79
2–1: EQ Trim T01–08,
2–2: EQ Trim T09–16 . . . . . . . . . . . . . . . . . . . . . . . . .79
2–3: EQ Gain T01–08,
2–4: EQ Gain T09–16 . . . . . . . . . . . . . . . . . . . . . . . . . . . . . . 80
iii
Table of Contents iv
COMBI P3: Timbre Param (Timbre Parameters)
81
3–1: MIDI T01–08,
3–2: MIDI T09–16 . . . . . . . . . . . . . . . . . . . . . . . . . . . 81
3–3: OSC T01–08,
3–4: OSC T09–16. . . . . . . . . . . . . . . . . . . . . . . . . . . . 81
3–5: Pitch T01–08,
3–6: Pitch T09–16 . . . . . . . . . . . . . . . . . . . . . . . . . . . 82
3–7: Scale T01–08,
3–8: Scale T09–16 . . . . . . . . . . . . . . . . . . . . . . . . . . . 83
COMBI P4: Zone/Delay . . . . . . . . . . . . . . . . . . . 84
4–1: Key Zone T01–08,
4–2: Key Zone T09–16
(Keyboard Zones T01–08, T09–16). . . . . . . . . . . . . 84
4–3: Vel Zone T01–08,
4–4: Vel Zone T09–16
(Velocity Zones T01–08, T09–16) . . . . . . . . . . . . . . 85
4–5: Delay T01–08,
4–6: Delay T09–16. . . . . . . . . . . . . . . . . . . . . . . . . . . 86
COMBI P5: MIDI Filter . . . . . . . . . . . . . . . . . . . . 87
5–1: <1> T01–08,
5–2: <1> T09–16 . . . . . . . . . . . . . . . . . . . . . . . . . . . . . 87
5–3: <2> T01–08,
5–4: <2> T09–16 . . . . . . . . . . . . . . . . . . . . . . . . . . . . . . . . . . 88
5–5: <3> T01–08,
5–6: <3> T09–16 . . . . . . . . . . . . . . . . . . . . . . . . . . . . . 88
5–7: <4> T01–08,
5–8: <4> T09–16 . . . . . . . . . . . . . . . . . . . . . . . . . . . . . . . . . . 89
5–9: <5> T01–08,
5–10: <5> T09–16 . . . . . . . . . . . . . . . . . . . . . . . . . . . . 89
5–11: <6> T01–08,
5–12: <6> T09–16 . . . . . . . . . . . . . . . . . . . . . . . . . . . . 90
COMBI P7: ARP/DT (Arpeggiator/Drum Track)
91
7–1: Setup T01–08,
7–2: Setup T09–16. . . . . . . . . . . . . . . . . . . . . . . . . . . 91
7–3: Arpeggiator A,
7–4: Arpeggiator B . . . . . . . . . . . . . . . . . . . . . . . . . . . . . . . 92
7–5: ARP Scan Zone . . . . . . . . . . . . . . . . . . . . . . . . . . . . . . 93
7–7: Drum Track. . . . . . . . . . . . . . . . . . . . . . . . . . . . 93
COMBI P8: Routing/IFX (Insert Effect). . . . . . 95
8–1: Routing1 T01–08,
8–2: Routing1 T09–16. . . . . . . . . . . . . . . . . . . . . . . . 95
8–3: Insert FX Setup . . . . . . . . . . . . . . . . . . . . . . . . . 96
8–4: IFX1 . . . . . . . . . . . . . . . . . . . . . . . . . . . . . . . . . . . . . . . 97
8–5: IFX2, 8–6: IFX3, 8–7: IFX4,
8–8: IFX5 . . . . . . . . . . . . . . . . . . . . . . . . . . . . . . . . . . . . . . . 97
8–9: FX Control T01–08,
8–10: FX Control T09–16 . . . . . . . . . . . . . . . . . . . . . . . . . . 98
COMBI P9: MFX/TFX/LFO (Master/Total Effect/
LFO). . . . . . . . . . . . . . . . . . . . . . . . . . . . . . . . . . . . . 99
9–1: Routing . . . . . . . . . . . . . . . . . . . . . . . . . . . . . . . 99
9–2: MFX1 . . . . . . . . . . . . . . . . . . . . . . . . . . . . . . . . . 99
9–3: MFX2, 9–4: TFX . . . . . . . . . . . . . . . . . . . . . . . 100
9–5: Common FX LFO . . . . . . . . . . . . . . . . . . . . . . . . . . . 100
Combination: Menu Command. . . . . . . . . . .101
Sequencer mode . . . . . . . . . . . . . 105
An overview of Sequencer mode . . . . . . . . .105
SEQ Page Select . . . . . . . . . . . . . . . . . . . . . . . . .108
SEQ P0: Play/REC . . . . . . . . . . . . . . . . . . . . . . . .109
0–1: Program T01–08,
0–2: Program T09–16 . . . . . . . . . . . . . . . . . . . . . . . . 109
0–3: Mixer T01–08,
0–4: Mixer T09–16 . . . . . . . . . . . . . . . . . . . . . . . . . . . . . . .113
0–5: Arpeggiator A,
0–6: Arpeggiator B. . . . . . . . . . . . . . . . . . . . . . . . . . 114
0–7: Tone Adjust . . . . . . . . . . . . . . . . . . . . . . . . . . . . . . . .115
0–8: Preferences . . . . . . . . . . . . . . . . . . . . . . . . . . . . . . . . .116
0–9: Play Loop T01–08,
0–10: Play Loop T09–16 . . . . . . . . . . . . . . . . . . . . . 119
Controls. . . . . . . . . . . . . . . . . . . . . . . . . . . . . . . . . . . . . . . .120
SEQ P1: Controllers. . . . . . . . . . . . . . . . . . . . . .122
1–1: Setup . . . . . . . . . . . . . . . . . . . . . . . . . . . . . . . . . 122
SEQ P2: EQ. . . . . . . . . . . . . . . . . . . . . . . . . . . . . .123
2–1: Trim T01–08,
2–2: Trim T09–16 . . . . . . . . . . . . . . . . . . . . . . . . . . .123
2–3: EQ T01–08,
2–4: EQ T09–16 . . . . . . . . . . . . . . . . . . . . . . . . . . . . . . . . . .124
SEQ P3: Track Param (Track Parameters) . .125
3–1: MIDI T01–08,
3–2: MIDI T09–16. . . . . . . . . . . . . . . . . . . . . . . . . . . 125
3–3: OSC T01–08,
3–4: OSC T09–16 . . . . . . . . . . . . . . . . . . . . . . . . . . .126
3–5: Pitch T01–08,
3–6: Pitch T09–16 . . . . . . . . . . . . . . . . . . . . . . . . . . . . . . . .127
3–7: Scale T01–08,
3–8: Scale T09–16 . . . . . . . . . . . . . . . . . . . . . . . . . . . . . . . .128
SEQ P4: Zones/Delay . . . . . . . . . . . . . . . . . . . .129
4–1: Key Zone T01–08,
4–2: Key Zone T09–16
(Keyboard Zones T01–08, T09–16) . . . . . . . . . . . . 129
4–3: Vel Zone T01–08,
4–4: Vel Zone T09–16
(Velocity Zones T01–08, T09–16) . . . . . . . . . . . . . . . . . . .130
4–5: Delay T01–08,
4–6: Delay T09–16 . . . . . . . . . . . . . . . . . . . . . . . . . . . . . . .131
SEQ P5: MIDI Filter . . . . . . . . . . . . . . . . . . . . . .133
5–1: <1> T01–08,
5–2: <1> T09–16 . . . . . . . . . . . . . . . . . . . . . . . . . . . . 133
5–3: <2> T01–08,
5–4: <2> T09–16. . . . . . . . . . . . . . . . . . . . . . . . . . . . . . . . . .134
5–5: <3> T01–08,
5–6: <3> T09–16 . . . . . . . . . . . . . . . . . . . . . . . . . . . . 134
5–7: <4> T01–08,
5–8: <4> T09–16 . . . . . . . . . . . . . . . . . . . . . . . . . . . . 135
5–9: <5> T01–08,
5–10: <5> T09–16 . . . . . . . . . . . . . . . . . . . . . . . . . . .135
5–11: <6> T01–08,
5–12: <6> T09–16. . . . . . . . . . . . . . . . . . . . . . . . . . . . . . . . .136
Table of Contents
SEQ P6: Track Edit . . . . . . . . . . . . . . . . . . . . . . 137
6–1: Track Edit . . . . . . . . . . . . . . . . . . . . . . . . . . . . 137
6–2: Track View . . . . . . . . . . . . . . . . . . . . . . . . . . . . . . . . .138
6–3: Track Name. . . . . . . . . . . . . . . . . . . . . . . . . . . 142
SEQ P7: ARP/DT (Arpeggiator/DrumTrack) . . .
143
7–1: ARP Setup T01–08,
7–2: ARP Setup T09–16 . . . . . . . . . . . . . . . . . . . . . 143
7–3: Arpeggiator–A,
7–4: Arpeggiator–B . . . . . . . . . . . . . . . . . . . . . . . . . . . . . .144
7–5: ARP Scan Zone . . . . . . . . . . . . . . . . . . . . . . . . 145
7–7: Drum Track . . . . . . . . . . . . . . . . . . . . . . . . . . . 145
SEQ P8: Routing/IFX (Insert Effect). . . . . . . 148
8–1: Routing1 T01–08,
8–2: Routing1 T09–16. . . . . . . . . . . . . . . . . . . . . . . 148
8–3: Insert FX Setup . . . . . . . . . . . . . . . . . . . . . . . . 149
8–4: IFX1 . . . . . . . . . . . . . . . . . . . . . . . . . . . . . . . . . . . . . . .150
8–5: IFX2, 8–6: IFX3, 8–7: IFX4,
8–8: IFX5 . . . . . . . . . . . . . . . . . . . . . . . . . . . . . . . . . 150
8–9: FX Control T01–08,
8–10: FX Control T09–16 . . . . . . . . . . . . . . . . . . . . 150
SEQ P9: MFX/TFX/LFO (Master/Total Effect/
LFO) . . . . . . . . . . . . . . . . . . . . . . . . . . . . . . . . . . . 152
9–1: Routing . . . . . . . . . . . . . . . . . . . . . . . . . . . . . . 152
9–2: MFX1 . . . . . . . . . . . . . . . . . . . . . . . . . . . . . . . . . . . . . .153
9–3: MFX2, 9–4: TFX. . . . . . . . . . . . . . . . . . . . . . . . 153
9–5: Common FX LFO . . . . . . . . . . . . . . . . . . . . . . . . . . . .154
SEQ P10: Pattern/RPPR . . . . . . . . . . . . . . . . . 155
10–1: Pattern Edit . . . . . . . . . . . . . . . . . . . . . . . . . . 155
10–2: Pattern Name . . . . . . . . . . . . . . . . . . . . . . . . . . . . . .157
10–3: RPPR Setup . . . . . . . . . . . . . . . . . . . . . . . . . . . . . . . .157
SEQ P11: Cue List . . . . . . . . . . . . . . . . . . . . . . . 160
11–1: Cue List . . . . . . . . . . . . . . . . . . . . . . . . . . . . . 160
Sequencer: Menu Command . . . . . . . . . . . . 163
System Exclusive events supported in
Sequencer mode . . . . . . . . . . . . . . . . . . . . . . . 191
KROME sequencer file formats . . . . . . . . . . . . . . . . . . . .192
Global mode . . . . . . . . . . . . . . . . . 193
Global Page Select . . . . . . . . . . . . . . . . . . . . . 193
Global P0: Basic Setup . . . . . . . . . . . . . . . . . . 194
0–1: Basic . . . . . . . . . . . . . . . . . . . . . . . . . . . . . . . . . 194
0–2: System Preference . . . . . . . . . . . . . . . . . . . . . . . . . . .196
Global P1: MIDI . . . . . . . . . . . . . . . . . . . . . . . . 198
1–1: MIDI Basic . . . . . . . . . . . . . . . . . . . . . . . . . . . . 198
1–2: MIDI Routing . . . . . . . . . . . . . . . . . . . . . . . . . 200
Global P2: Controllers . . . . . . . . . . . . . . . . . . 202
2–1: Foot Controllers . . . . . . . . . . . . . . . . . . . . . . . 202
2–2: MIDI CC# Assign . . . . . . . . . . . . . . . . . . . . . . . . . . . .202
Global P3: Scales . . . . . . . . . . . . . . . . . . . . . . . 203
3–1: Scales . . . . . . . . . . . . . . . . . . . . . . . . . . . . . . . . .203
Global P4: Category . . . . . . . . . . . . . . . . . . . . 204
4–1: Program Main . . . . . . . . . . . . . . . . . . . . . . . . .204
4–2: Program Sub. . . . . . . . . . . . . . . . . . . . . . . . . . .204
4–3: Combination Main,
4–4: Combination Sub . . . . . . . . . . . . . . . . . . . . . . .204
Global P5: Drum Kit. . . . . . . . . . . . . . . . . . . . . 205
5–1: Sample Setup . . . . . . . . . . . . . . . . . . . . . . . . . .206
5–2: Sample Parameters . . . . . . . . . . . . . . . . . . . . . . . . . . 207
5–3: Driver/EQ . . . . . . . . . . . . . . . . . . . . . . . . . . . . .208
5–4: Velocity Split . . . . . . . . . . . . . . . . . . . . . . . . . .209
5–5: Voice/Mixer . . . . . . . . . . . . . . . . . . . . . . . . . . .210
Global P6: Arpeggio Pattern . . . . . . . . . . . . 211
6–1: Pattern Setup . . . . . . . . . . . . . . . . . . . . . . . . . . . . . . . 211
Arpeggio Pattern Edit. . . . . . . . . . . . . . . . . . . . . . . . . . . . 213
Tool Tablet . . . . . . . . . . . . . . . . . . . . . . . . . . . . . . . . . . . . . 214
Global: Menu Command . . . . . . . . . . . . . . . . 216
Media mode . . . . . . . . . . . . . . . . . . 223
Media: File . . . . . . . . . . . . . . . . . . . . . . . . . . . . . 225
0–1: Load . . . . . . . . . . . . . . . . . . . . . . . . . . . . . . . . . .225
0–2: Save . . . . . . . . . . . . . . . . . . . . . . . . . . . . . . . . . . . . . . . 226
0–3: Utility . . . . . . . . . . . . . . . . . . . . . . . . . . . . . . . . . . . . . 226
0–8: Media Information. . . . . . . . . . . . . . . . . . . . . .226
Media: Menu Command . . . . . . . . . . . . . . . . 227
Effect Guide . . . . . . . . . . . . . . . . . . 235
Overview . . . . . . . . . . . . . . . . . . . . . . . . . . . . . . 235
Effects in each mode . . . . . . . . . . . . . . . . . . . . . . . .235
Dynamic modulation (Dmod) and Tempo
Synchronization. . . . . . . . . . . . . . . . . . . . . . . . . . . . . . . . . 236
Common FX LFOs. . . . . . . . . . . . . . . . . . . . . . . . . . . . . . . 237
FX Control Buses . . . . . . . . . . . . . . . . . . . . . . . . . . . . . . . . 238
Effect I/O. . . . . . . . . . . . . . . . . . . . . . . . . . . . . . . . . . . . . . . 239
Insert Effects (IFX1–IFX5) . . . . . . . . . . . . . . . 240
In/Out . . . . . . . . . . . . . . . . . . . . . . . . . . . . . . . . . . . .240
Routing . . . . . . . . . . . . . . . . . . . . . . . . . . . . . . . . . . .240
Mixer . . . . . . . . . . . . . . . . . . . . . . . . . . . . . . . . . . . . . . . . . . 243
Controlling the Insert Effects via MIDI . . . . . . . . . . . . . 244
Master Effects (MFX1, 2) . . . . . . . . . . . . . . . . 245
In/Out . . . . . . . . . . . . . . . . . . . . . . . . . . . . . . . . . . . .245
Routing . . . . . . . . . . . . . . . . . . . . . . . . . . . . . . . . . . .245
Mixer . . . . . . . . . . . . . . . . . . . . . . . . . . . . . . . . . . . . .246
Controlling the Master Effects via MIDI . . . . . . .247
Total Effect (TFX) . . . . . . . . . . . . . . . . . . . . . . . 248
In/Out . . . . . . . . . . . . . . . . . . . . . . . . . . . . . . . . . . . .248
Routing . . . . . . . . . . . . . . . . . . . . . . . . . . . . . . . . . . .248
Mixer . . . . . . . . . . . . . . . . . . . . . . . . . . . . . . . . . . . . .248
Using MIDI to control the Total Effect . . . . . . . . .248
v
Table of Contents vi
Outputs . . . . . . . . . . . . . . . . . . . . . . . . . . . . . . . .248
Main Outputs . . . . . . . . . . . . . . . . . . . . . . . . . . . . . 248
Effect/Mixer Block Diagrams . . . . . . . . . . . . .249
Dynamics (Dynamic) . . . . . . . . . . . . . . . . . . . .251
000: No Effect . . . . . . . . . . . . . . . . . . . . . . . . . . . . . 251
001: Stereo Compressor. . . . . . . . . . . . . . . . . . . . . 251
002: Red Comp . . . . . . . . . . . . . . . . . . . . . . . . . . . . 251
003: Stereo Limiter . . . . . . . . . . . . . . . . . . . . . . . . . . . . . . 252
004: Multiband Limiter . . . . . . . . . . . . . . . . . . . . . 253
005: St.MasteringLimtr (Stereo Mastering Limiter) . . 253
006: Stereo Gate . . . . . . . . . . . . . . . . . . . . . . . . . . . 253
EQ and Filters (EQ/Filter) . . . . . . . . . . . . . . . .255
007: St.Parametric4EQ (Stereo Parametric 4 ‐ Band
EQ) . . . . . . . . . . . . . . . . . . . . . . . . . . . . . . . . . . . . . . 255
008: St. Graphic 7EQ (Stereo Graphic 7 ‐ Band EQ) .
255
009: St.Exciter/Enhncr (Stereo Exciter/Enhancer)256
010: Stereo Isolator . . . . . . . . . . . . . . . . . . . . . . . . . 256
011: St. Wah/Auto Wah (Stereo Wah/Auto Wah) . . . . 257
012: St. Vintage Wah (Stereo Vintage/Custom Wah)
258
013: VOX Wah . . . . . . . . . . . . . . . . . . . . . . . . . . . . 258
014: St. Random Filter (Stereo Random Filter). . . . . . . 259
015: Multi Mode Filter (Stereo Multi Mode Filter) . . . 260
016: St. Sub Oscillator (Stereo Sub Oscillator) . . 260
017: Talking Modulator. . . . . . . . . . . . . . . . . . . . . 261
018: Stereo Decimator . . . . . . . . . . . . . . . . . . . . . . 261
019: St. Analog Record (Stereo Analog Record) . . . . . 262
Overdrive, Amp models, and Mic models (OD
Amp Mic) . . . . . . . . . . . . . . . . . . . . . . . . . . . . . . .263
020: OD/Hi.Gain Wah (Overdrive/Hi.Gain Wah) . .
263
021: St. Guitar Cabinet (Stereo Guitar Cabinet) . . . . . . 264
022: St. Bass Cabinet (Stereo Bass Cabinet) . . . . . . . . . 264
023: Bass Amp Model . . . . . . . . . . . . . . . . . . . . . . . . . . . 265
024: Bass Amp+Cabinet (Bass Amp Model+Cabinet) . 265
025: TrebleBST (Treble Booster) . . . . . . . . . . . . . . 266
026: Tube PreAmp Model (Tube PreAmp Modeling)
266
027: St. Tube PreAmp (Stereo Tube PreAmp
Modeling) . . . . . . . . . . . . . . . . . . . . . . . . . . . . . . . . 266
028: Mic Model+PreAmp (Mic Modeling + PreAmp)
267
Chorus, Flanger, and Phaser (Cho/Fln Phaser)
268
029: Stereo Chorus . . . . . . . . . . . . . . . . . . . . . . . . . 268
030: Vintage Chorus. . . . . . . . . . . . . . . . . . . . . . . . 268
031: Black Chorus. . . . . . . . . . . . . . . . . . . . . . . . . . . . . . . 269
032: EP Chorus . . . . . . . . . . . . . . . . . . . . . . . . . . . . 269
033: St.HarmonicChorus (Stereo Harmonic Chorus) . 269
034: St. Biphase Mod. (Stereo Biphase Modulation)
270
035: Multitap Cho/Delay (Multitap Chorus/Delay)
270
036: Ensemble . . . . . . . . . . . . . . . . . . . . . . . . . . . . . 271
037: Polysix Ensemble . . . . . . . . . . . . . . . . . . . . . . . . . . . 271
038: Stereo Flanger. . . . . . . . . . . . . . . . . . . . . . . . . . 271
039: Vintage Flanger . . . . . . . . . . . . . . . . . . . . . . . .272
040: St. Random Flanger (Stereo Random Flanger) . . .272
041: St. Env. Flanger (Stereo Envelope Flanger) . . . . . .273
042: Stereo Phaser . . . . . . . . . . . . . . . . . . . . . . . . . .273
043: Small Phaser . . . . . . . . . . . . . . . . . . . . . . . . . . . 274
044: Orange Phaser . . . . . . . . . . . . . . . . . . . . . . . . .274
045: Black Phaser . . . . . . . . . . . . . . . . . . . . . . . . . . . . . . . .274
046: U ‐ VIBE . . . . . . . . . . . . . . . . . . . . . . . . . . . . . . . 274
047: St. Random Phaser (Stereo Random Phaser). . .
275
048: St. Env. Phaser (Stereo Envelope Phaser) . . . . . . .276
Modulation and Pitch Shift (Mod./P.Shift).277
049: Stereo Vibrato. . . . . . . . . . . . . . . . . . . . . . . . . . 277
050: St. Auto Fade Mod. (Stereo Auto Fade
Modulation) . . . . . . . . . . . . . . . . . . . . . . . . . . . . . . . 277
051: 2Voice Resonator . . . . . . . . . . . . . . . . . . . . . . .278
052: Doppler . . . . . . . . . . . . . . . . . . . . . . . . . . . . . . .279
053: Scratch . . . . . . . . . . . . . . . . . . . . . . . . . . . . . . . .279
054: Grain Shifter . . . . . . . . . . . . . . . . . . . . . . . . . . . 280
055: Stereo Tremolo . . . . . . . . . . . . . . . . . . . . . . . . . 281
056: TEX Treml (TEX Tremolo) . . . . . . . . . . . . . . . 281
057: St. Env. Tremolo (Stereo Envelope Tremolo) . . . .281
058: Stereo Auto Pan . . . . . . . . . . . . . . . . . . . . . . . . 282
059: St. Phaser + Trml (Stereo Phaser + Tremolo) . . . . .283
060: St. Ring Modulator (Stereo Ring Modulator) . .
283
061: Detune . . . . . . . . . . . . . . . . . . . . . . . . . . . . . . . .284
062: Pitch Shifter . . . . . . . . . . . . . . . . . . . . . . . . . . . . . . . .285
063: Pitch Shifter BPM. . . . . . . . . . . . . . . . . . . . . . .285
064: Pitch Shift Mod. (Pitch Shift Modulation) . .286
065: Organ Vib/Chorus (Organ Vibrato/Chorus)286
066: Rotary Speaker. . . . . . . . . . . . . . . . . . . . . . . . . 287
067: St.EP Tone+Trml (Stereo EP Tone+Tremolo). . . . .288
Delay. . . . . . . . . . . . . . . . . . . . . . . . . . . . . . . . . . .289
068: L/C/R Delay . . . . . . . . . . . . . . . . . . . . . . . . . . .289
069: Stereo/CrossDelay . . . . . . . . . . . . . . . . . . . . . . . . . . .289
070: St. Multitap Delay (Stereo Multitap Delay) . . . . . .290
071: St. Mod Delay (Stereo Modulation Delay). .290
072: St. Dynamic Delay (Stereo Dynamic Delay) . . . . .291
073: St. AutoPanningDly (Stereo Auto Panning Delay). . .
292
074: Echo Plus. . . . . . . . . . . . . . . . . . . . . . . . . . . . . . . . . . .293
075: Tape Echo . . . . . . . . . . . . . . . . . . . . . . . . . . . . .293
076: Auto Reverse . . . . . . . . . . . . . . . . . . . . . . . . . .293
077: Sequence BPM Dly (Sequence BPM Delay) . . . . . .294
078: L/C/R BPM Delay. . . . . . . . . . . . . . . . . . . . . . . . . . . .295
079: Stereo BPM Delay . . . . . . . . . . . . . . . . . . . . . . 295
080: St.BPM Mtap Delay (Stereo BPM Multitap Delay). . .
296
081: St.BPM Mod. Delay (Stereo BPM Modulation Delay)
296
082: St.BPMAutoPanDly (Stereo BPM Auto Panning
Delay) . . . . . . . . . . . . . . . . . . . . . . . . . . . . . . . . . . . .297
083: Tape Echo BPM . . . . . . . . . . . . . . . . . . . . . . . .297
Reverb and Early Reflections (Reverb ER) .299
084: Reverb Hall. . . . . . . . . . . . . . . . . . . . . . . . . . . . 299
085: Reverb SmoothHall . . . . . . . . . . . . . . . . . . . . .299
086: Reverb Wet Plate . . . . . . . . . . . . . . . . . . . . . . 299
087: Reverb Dry Plate . . . . . . . . . . . . . . . . . . . . . . 299
088: Reverb Room. . . . . . . . . . . . . . . . . . . . . . . . . . 299
089: Reverb BrightRoom . . . . . . . . . . . . . . . . . . . . 299
090: Reverb2 Spring . . . . . . . . . . . . . . . . . . . . . . . . 300
091: Reverb2 Hall . . . . . . . . . . . . . . . . . . . . . . . . . . 300
092: Reverb2 Plate . . . . . . . . . . . . . . . . . . . . . . . . . 300
093: Reverb2 Room. . . . . . . . . . . . . . . . . . . . . . . . . 300
094: Early Reflections. . . . . . . . . . . . . . . . . . . . . . . 300
Mono-Mono Serial (Mono-Mono) . . . . . . . . 301
095: P4EQ ‐ Exciter (Parametric 4 ‐ Band EQ ‐ Exciter)
301
096: P4EQ ‐ Wah (Parametric 4 ‐ Band EQ ‐ Wah/Auto
Wah). . . . . . . . . . . . . . . . . . . . . . . . . . . . . . . . . . . . . . . . . . .301
097: P4EQ ‐ Cho/Flng (Parametric 4 ‐ Band EQ ‐
Chorus/Flanger) . . . . . . . . . . . . . . . . . . . . . . . . . . . 302
098: P4EQ ‐ Phaser (Parametric 4 ‐ Band EQ ‐ Phaser)
302
099: P4EQ ‐ Mt. Delay (Parametric 4 ‐ Band EQ ‐ Multitap
Delay). . . . . . . . . . . . . . . . . . . . . . . . . . . . . . . . . . . . . . . . . .303
100: Comp ‐ Wah (Compressor ‐ Wah/Auto Wah) . . . .303
101: Comp ‐ Amp Sim (Compressor ‐ Amp Simulation) . .
304
102: Comp ‐ OD/HiGain (Compressor ‐ Overdrive/
Hi.Gain) . . . . . . . . . . . . . . . . . . . . . . . . . . . . . . . . . . . . . . . .304
103: Comp ‐ P4EQ (Compressor ‐ Parametric 4 ‐ Band EQ)
305
104: Comp ‐ Cho/Flng (Compressor ‐ Chorus/Flanger) . . .
305
105: Comp ‐ Phaser (Compressor ‐ Phaser) . . . . . . . . . .306
106: Comp ‐ Mt. Delay (Compressor ‐ Multitap Delay) . . .
306
107: Limiter ‐ P4EQ (Limiter ‐ Parametric 4 ‐ Band EQ) 307
108: Limiter ‐ Cho/Flng (Limiter ‐ Chorus/Flanger)
307
109: Limiter ‐ Phaser . . . . . . . . . . . . . . . . . . . . . . . 308
110: Limiter ‐ Mt.Delay (Limiter ‐ Multitap Delay) . . .308
111: Exciter ‐ Comp (Exciter ‐ Compressor) . . . . . . . . . .309
112: Exciter ‐ Limiter . . . . . . . . . . . . . . . . . . . . . . . . . . . . .309
113: Exciter ‐ Cho/Flng (Exciter ‐ Chorus/Flanger) . . . .310
114: Exciter ‐ Phaser. . . . . . . . . . . . . . . . . . . . . . . . . . . . . .310
115: Exciter ‐ Mt.Delay (Exciter ‐ Multitap Delay) . . . .311
116: OD/HG ‐ Amp Sim (Overdrive/Hi.Gain ‐ Amp
Simulation) . . . . . . . . . . . . . . . . . . . . . . . . . . . . . . . . . . . . .311
117: OD/HG ‐ Cho/Flng (Overdrive/Hi.Gain ‐ Chorus/
Flanger) . . . . . . . . . . . . . . . . . . . . . . . . . . . . . . . . . . . . . . . .312
118: OD/HG ‐ Phaser (Overdrive/Hi.Gain ‐ Phaser). . .312
119: OD/HG ‐ Mt.Delay (Overdrive/Hi.Gain ‐ Multitap
Delay). . . . . . . . . . . . . . . . . . . . . . . . . . . . . . . . . . . . . . . . . .313
120: Wah ‐ Amp Sim (Wah ‐ Amp Simulation) . . . . . . .313
121: Decimator ‐ Amp (Decimator ‐ Amp Simulation).314
122: Decimator ‐ Comp (Decimator ‐ Compressor).
314
123: AmpSim ‐ Tremolo (Amp Simulation ‐
Tremolo) . . . . . . . . . . . . . . . . . . . . . . . . . . . . . . . . . 314
124: Cho/Flng ‐ Mt.Dly (Chorus/Flanger ‐ Multitap Delay)
315
125: Phaser ‐ Cho/Flng (Phaser ‐ Chorus/Flanger) . . . .315
126: Reverb ‐ Gate . . . . . . . . . . . . . . . . . . . . . . . . . . . . . . .316
Mono/Mono Parallel (Mono//Mono) . . . . . 317
127: P4EQ // P4EQ (Parametric 4 ‐ Band EQ // Parametric 4 ‐
Band EQ) . . . . . . . . . . . . . . . . . . . . . . . . . . . . . . . . . . . . . . .319
Table of Contents
128: P4EQ // Comp (Parametric 4 ‐ Band EQ //
Compressor) . . . . . . . . . . . . . . . . . . . . . . . . . . . . . . .319
129: P4EQ // Limiter (Parametric 4 ‐ Band EQ //
Limiter) . . . . . . . . . . . . . . . . . . . . . . . . . . . . . . . . . . .319
130: P4EQ // Exciter (Parametric 4 ‐ Band EQ // Exciter)319
131: P4EQ // OD/HG (Parametric 4 ‐ Band EQ //
Overdrive/Hi.Gain) . . . . . . . . . . . . . . . . . . . . . . . . .319
132: P4EQ // Wah (Parametric 4 ‐ Band EQ // Wah) . .
319
133: P4EQ // Cho/Flng (Parametric 4 ‐ Band EQ // Chorus/
Flanger) . . . . . . . . . . . . . . . . . . . . . . . . . . . . . . . . . . . . . . . . 320
134: P4EQ // Phaser (Parametric 4 ‐ Band EQ //
Phaser). . . . . . . . . . . . . . . . . . . . . . . . . . . . . . . . . . . .320
135: P4EQ // BPM Dly (Parametric 4 ‐ Band EQ //
Multitap BPM Delay) . . . . . . . . . . . . . . . . . . . . . . .320
136: Comp // Comp (Compressor // Compressor) . . . . 320
137: Comp // Limiter (Compressor // Limiter). . .320
138: Comp // Exciter (Compressor // Exciter) . . .320
139: Comp // OD/HG (Compressor // Overdrive Hi.Gain)
321
140: Comp // Wah (Compressor // Wah) . . . . . . .321
141: Comp // Cho/Flng (Compressor // Chorus/
Flanger) . . . . . . . . . . . . . . . . . . . . . . . . . . . . . . . . . . .321
142: Comp // Phaser (Compressor // Phaser). . . . . . . . . 321
143: Comp // BPM Dly (Compressor // Multitap
BPM Delay). . . . . . . . . . . . . . . . . . . . . . . . . . . . . . . .321
144: Limiter // Limiter . . . . . . . . . . . . . . . . . . . . . . .321
145: Limiter // Exciter . . . . . . . . . . . . . . . . . . . . . . . . . . . . 322
146: Limiter // OD/HG (Limiter // Overdrive/
Hi.Gain). . . . . . . . . . . . . . . . . . . . . . . . . . . . . . . . . . .322
147: Limiter // Wah . . . . . . . . . . . . . . . . . . . . . . . . .322
148: Limiter // Cho/Fl (Limiter // Chorus/Flanger) . . . . 322
149: Limiter // Phaser. . . . . . . . . . . . . . . . . . . . . . . .322
150: Limiter // BPM Dl (Limiter // Multitap BPM
Delay) . . . . . . . . . . . . . . . . . . . . . . . . . . . . . . . . . . . .322
151: Exciter // Exciter. . . . . . . . . . . . . . . . . . . . . . . . . . . . . 323
152: Exciter // OD/HG (Exciter // Overdrive/
Hi.Gain). . . . . . . . . . . . . . . . . . . . . . . . . . . . . . . . . . .323
153: Exciter // Wah . . . . . . . . . . . . . . . . . . . . . . . . . .323
154: Exciter // Cho/Fl (Exciter // Chorus/Flanger). . . . . 323
155: Exciter // Phaser . . . . . . . . . . . . . . . . . . . . . . . .323
156: Exciter // BPM Dl (Exciter // Multitap BPM
Delay) . . . . . . . . . . . . . . . . . . . . . . . . . . . . . . . . . . . .323
157: OD/HG // OD/HG (Overdrive/Hi.Gain // Overdrive/
Hi.Gain) . . . . . . . . . . . . . . . . . . . . . . . . . . . . . . . . . . . . . . . 324
158: OD/HG // Wah (Overdrive/Hi.Gain // Wah) . . .
324
159: OD/HG // Cho/Fln (Overdrive/Hi.Gain //
Chorus/Flanger) . . . . . . . . . . . . . . . . . . . . . . . . . . . .324
160: OD/HG // Phaser (Overdrive/Hi.Gain // Phaser) . 324
161: OD/HG // BPMDly (Overdrive/Hi.Gain //
Multitap BPM Delay) . . . . . . . . . . . . . . . . . . . . . . .324
162: Wah // Wah . . . . . . . . . . . . . . . . . . . . . . . . . . . .324
163: Wah // Cho/Flng (Wah // Chorus/Flanger) . . . . . . 325
164: Wah // Phaser . . . . . . . . . . . . . . . . . . . . . . . . . .325
165: Wah // BPM Dly (Wah // Multitap BPM Delay)
325
166: Cho/Fl // Cho/Fl (Chorus/Flanger // Chorus/Flanger)
325
167: Cho/Fl // Phaser (Chorus/Flanger // Phaser) 325
168: Cho/Fl // BPMDly (Chorus/Flanger // Multitap
BPM Delay). . . . . . . . . . . . . . . . . . . . . . . . . . . . . . . .325
vii
viii
Table of Contents
169: Phaser // Phaser . . . . . . . . . . . . . . . . . . . . . . . 326
170: Phaser // BPMDly (Phaser // Multitap BPM
Delay). . . . . . . . . . . . . . . . . . . . . . . . . . . . . . . . . . . . 326
171: BPM Dl // BPM Dl (Multitap BPM Delay //
Multitap BPM Delay). . . . . . . . . . . . . . . . . . . . . . . 326
Double Size. . . . . . . . . . . . . . . . . . . . . . . . . . . . .327
172: St. Mltband Limiter (Stereo Multiband Limiter)
327
173: PianoBody/Damper (PianoBody/Damper
Simulation) . . . . . . . . . . . . . . . . . . . . . . . . . . . . . . . . . . . . 327
174: Vocoder . . . . . . . . . . . . . . . . . . . . . . . . . . . . . . . . . . . 328
175: OD/HyperGain Wah (Overdrive/Hyper Gain Wah)
328
176: GuitarAmp + P4EQ (Guitar Amp Model + Parametric
4 ‐ Band EQ) . . . . . . . . . . . . . . . . . . . . . . . . . . . . . . . . . . . . 329
177: G.Amp Clean Combo . . . . . . . . . . . . . . . . . . 329
178: G.Amp California. . . . . . . . . . . . . . . . . . . . . . 329
179: G.Amp Tweed . . . . . . . . . . . . . . . . . . . . . . . . 329
180: G.Amp Modded OD . . . . . . . . . . . . . . . . . . . . . . . . 330
181: BassTubeAmp+Cab. (Bass Tube Amp Model +
Cabinet) . . . . . . . . . . . . . . . . . . . . . . . . . . . . . . . . . . . . . . . 330
182: EP Cabinet/Drive . . . . . . . . . . . . . . . . . . . . . . 331
183: St. Mic + PreAmp (Stereo Mic Modeling +
PreAmp) . . . . . . . . . . . . . . . . . . . . . . . . . . . . . . . . . 331
184: Multitap Cho/Delay (Multitap Chorus/Delay)
331
184: St. Pitch Shifter (Stereo Pitch Shifter) . . . . . . . . . . 332
185: St. PitchShift BPM (Stereo Pitch Shifter BPM) . . . 333
186: Rotary SpeakerOD (Rotary Speaker Overdrive) . 333
188: L/C/R Long Delay . . . . . . . . . . . . . . . . . . . . . 334
189: St/Cross Long Delay (Stereo/Cross Long Delay). 334
190: Hold Delay . . . . . . . . . . . . . . . . . . . . . . . . . . . . . . . . 335
191: LCR BPM Long Dly (L/C/R BPM Long Delay)
336
192: St. BPM Long Dly (Stereo BPM Long Delay) . . . . 336
193: Early Reflections. . . . . . . . . . . . . . . . . . . . . . . 337
Appendices . . . . . . . . . . . . . . . . . . 339
Alternate Modulation Sources (AMS) . . . . .339
Alternate Modulation Overview . . . . . . . . . . . . . 339
AMS (Alternate Modulation Source) List. . . . . . . . . . . 340
Alternate Modulation settings . . . . . . . . . . . . . . . . . . . . 342
Dynamic Modulation Sources (Dmod) . . . .346
Dynamic Modulation Source List . . . . . . . . . . . . . . . . . 346
Controller Assignments . . . . . . . . . . . . . . . . .348
SW1/2 Assignments . . . . . . . . . . . . . . . . . . . . . . . . 348
Realtime Controls Knobs 1–4 Assignments . . . . 348
Knobs 1–4 . . . . . . . . . . . . . . . . . . . . . . . . . . . . . . . . 349
Foot Switch Assignments . . . . . . . . . . . . . . . . . . . 349
Foot Pedal Assignments . . . . . . . . . . . . . . . . . . . . 350
System exclusive messages affected by Create
Excl Data, Erase Excl Data, and Event Edit .352
MIDI transmission when the KROME’s controllers are operated . . . . . . . . . . . . . . . . .354
KROME and MIDI CCs . . . . . . . . . . . . . . . . . . . .356
Responses to standard MIDI controllers . . . . . . .356
Parameters controlled by MIDI CCs #70 ‐ 79 . . . . . . . . .358
MIDI applications . . . . . . . . . . . . . . . . . . . . . . .359
About MIDI . . . . . . . . . . . . . . . . . . . . . . . . . . . . . . . 359
Settings when connected to a MIDI device or computer. . . . . . . . . . . . . . . . . . . . . . . . . . . . . . . . . . 359
Messages transmitted and received by the KROME . .360
Compatibility with the M50 . . . . . . . . . . . . . .369
MIDI Implementation . . . . . . . . . . . . . . . . . . .370
Program mode
PROG Page Select
You can select Program mode pages in several ways.
1. Press the PAGE button.
Alternatively, press the mode button on the upper left side of the display, and then press the right side of the menu.
“Page Select” shows an abbreviated name for each page.
The page prior to pressing the PAGE button is shown in light blue.
2. Select the desired page in the display.
Other ways to select pages
• Hold down the PAGE button and press numeric keys 0–9 to jump to the corresponding page.
For example, hold down the PAGE button and press numeric key 4 to jump to the P4: Amp/EQ page.
• Press the EXIT button to return to the Play page. If something other than the main page is selected, press the
EXIT button to access the main page.
Page
P0: Play
P1: Basic/
Controllers
P2: OSC/Pitch
P3: Filter
P4: Amp/EQ
P5: LFO
P6: AMS/
Common
KeyTrack
Main content
Select and play programs. (see p.2)
Oscillator and Drum track level settings.
(see p.5)
Simple drum track editing. (see p.6)
Simple arpeggiator editing. (see p.6)
Tone Adjust settings. (see p.8)
Basic program settings, such as voice
assign mode. (see p.12)
SW1, 2, and knob settings. (see p.16)
Oscillator selection and pitch settings. (see p.17)
Filter 1, 2(tone) settings. (see p.26)
Amp 1, 2 (volume) settings. (see p.35)
Amp 1, 2 driver and pan settings. (see p.40)
3 ‐
band parametric EQ settings. (see p.41)
LFO settings. (see p.42)
AMS Mixer settings. (see p.46)
Common keyboard tracking settings. (see p.52)
P7: Arpeggiator/
Drum Track
Arpeggiator settings. (see p.53)
Drum track settings. (see p.55)
P8: Routing/IFX
P9: MFX/TFX/
LFO
Oscillator output bus and master effect
send level settings. (see p.58)
Insert effect routing, selection, and
settings. (see p.59)
Master effect routing, selection, and
settings. (see p.62)
Total effect selection and settings. (see p.62)
Common FX LFO settings (see p.63)
1
2
Program mode
PROG P0: Play
This is the main Program mode page. Here, you can:
• Select a program to play.
• Select patterns and programs for the Drum Track.
• Adjust the oscillator and drum track levels.
• Make simple edits for the Arpeggiator.
• Adjust the Realtime Contorols.
• Use the Tone Adjust function to make simple edits for program parameters
All MIDI data in Prog P0: Play is transmitted and received on the global MIDI channel
MIDI Channel
(Global 1–1a).
Tip:
Auto Song Setup
The Auto Song Setup feature copies the current Program or
Combination into a Song, and then puts the KROME in record ‐ ready mode.
If inspiration for a phrase or song strikes you while you’re playing, you can use Auto Song Setup to start recording
immediately. For more information, please see “Auto Song
Setup” on page 106.
0–1: Main
0–1a
0–1b
0–1e
0–1
Menu
0–1c
0–1d
0–1a: Program Select
Bank (Bank Select) [A…F, GM, g(1)…g(9), g(d)]
This is the Bank containing the current Program.
Press the BANK A–F button to select a bank.
• To select the GM bank, use the numeric keys.
GM: While holding down [0], press [ ‐ ]. g(1)–g(9): While holding down [0], press a variation number [1]–[9]. If the bank contains no variation programs, the basic GM sound set will be selected. (An
“*” symbol is shown at the beginning of the program name.) g(d): While holding down [0], press [.].
Mode
Category Popup
Page Menu Stop Watch
Tempo
Bank
Program Select Popup Program Select
Program Select
[A…F: 0…127, GM, g(1)…g(9), g(d): 1…128]
Here you can select a program.
To switch programs
• Choose
Program Select
, use the numeric keys 0–9 to enter a program number, and press the ENTER button.
• Choose
Program Select
, and turn the VALUE dial or use the INC/DEC buttons.
• Press the Program Select Popup to view and select from the Bank/Program Select menu organized by bank.
• Press the Category Popup to view and select from the
Category/Program Select menu organized by category.
• You can use a foot switch to select programs. (see “Foot
Switch Assign” on page 202 and “List of Foot Switch assignments” on page 349)
• You can select programs by transmitting a MIDI Program
Change from a connected external MIDI device.
Bank/Program Select menu:
1. Press the popup button at the left of Program Select to open the Bank/Program Select menu.
2. Press one of the tabs on the left to select a specific bank.
The Variation button is active if Bank GM is selected; pressing it will switch the banks in the following order:
GM
→ g(1)
→ g(2)
→
…
→ g(8)
→ g(9)
→
GM.
3. From the list, You can touch a Program’s name directly, or use the INC and DEC buttons.
Use the scroll bar to view information not currently shown.
Note:
If you want to find a sound by its program name, use
the Find function (see p.2).
4. Press the OK button to confirm your choice, or press the Cancel button to exit without switching Programs.
Bank/Program Select menu
Tab
Scroll bar
Find (search function)
Here’s how to search for a program by part of its name.
1. In the Bank/Program Select menu or the Category/Program Select menu, select the tab that you want to search.
Note:
The programs in the selected tab will be the target for searching.
2. Press the Find button on the lower left side to open the dialog box.
PROG P0: Play 0–1: Main
Find menu
4. To select from a sub-category, press the Jump to Sub button.
Press one of the left tabs to select a sub ‐ category.
Note:
Only Sub ‐ categories that are assigned to Programs can be selected from the tabs.
To confirm your selection, press the OK button. If you decide to cancel, press the Cancel button. You will return to the main categories.
Sub category tab
3. Press the “T” button, and enter the desired search text in the text field. When you’ve entered the text, press the
OK button.
4. If the “Ignore Case” check box is selected, the search will not distinguish between uppercase and lowercase.
5. Press the Find button to search for the text that you entered.
6. Use the Prev. and Next buttons to find the previous or next sound.
7. Press the OK button to select a program in the list.
If you press the Cancel button, the selection will be cancelled.
8. Press the OK button to execute, or press the Cancel button to cancel your selection.
Category [00…17/00…07]
Here, you can select programs by main category and sub ‐ category. All programs are classified into eighteen main categories, and each category is classified into eight sub ‐ categories. You can use these main categories and sub ‐ categories to find and select programs. Here you can select a program by its main category and sub ‐ category.
Category/Program Select menu:
1. Press the Category popup button (above the Program
Select parameter) to open the Category/Program Select menu.
2. Press one of the tabs on the left or right to select the desired category.
Note:
Only Categories and Sub ‐ categories that are assigned to programs can be selected from the tabs.
3. Select a program from the list. You can touch a Program’s name directly, or use the INC and DEC buttons.
Use the scroll bar to browse through all Programs in the
Category.
You can search for a program by a portion of its name (see p.2).
Category/Program Select menu
Category tab
Scroll bar
5. Press the OK button to confirm your choice, or press the Cancel button to exit without changing the Program.
Note:
You can assign a category to a Program in the
Write
Program
dialog.
(Tempo) [40.00… 300.00, EXT]
This is the tempo for the current Program, which applies to the arpeggiator, tempo ‐ synced LFOs, and tempo ‐ synced effects.
040.00…300.00
allows you to set a specific tempo in BPM, with 1/100 BPM accuracy. In addition to using the standard data entry controls, you can use the TEMPO knob to adjust the bpm, or just play a few quarter ‐ notes on the TAP button.
EXT is displayed if the
MIDI Clock
(Global 1–1a) is set to
External MIDI
or
External USB
. This is also shown if the
MIDI Clock
setting is Auto and MIDI clock data is being received from an external device. If the tempo source is EXT, the arpeggiator etc. will synchronize to MIDI clock data from an external MIDI device.
Mode
This indicates the mode that’s currently selected.
When you press this button, the mode menu will appear. In the mode menu, press the name of the desired mode. If you select the same mode where you were prior to accessing the mode menu, the Page Select menu of that mode will appear. If you press the area to the right of the mode name, the page select menu for the corresponding mode will appear.
To close the menu, press the Close button or the EXIT button.
If you accessed this menu from Global or Media mode, it will include an item named Return. Pressing Return will take you back to the mode and page where you were prior to selecting Global or Media mode.
When accessed from
Program, Combination, or Sequencer mode
When accessed from
Global or Media mode
Scroll bar
3
4
Program mode
Stop Watch
When you press the button on the upper right side of the display, the screen will show the amount of time that has elapsed since the power was turned on. You can use the
START/STOP button and RESET button to measure a duration.
• START/STOP: Starts/stops the stopwatch.
• RESET: Resets the stopwatch to 000:00:00.
0–1b: Program Information
The following information for the selected program is displayed:
OSC Pictures
This shows a graphic for the oscillator. In the case of double oscillators or double drums, the
Octave
(footage of the oscillator’s basic pitch) is also shown.
If you want to change the oscillator’s graphic, double ‐ click the graphic, and change the setting in the menu. You can also set this in P1 ‐
Program Basic “OSC Picture” (see p.12).
SW1, SW2
These are the functions controlled by the SW1, SW2 switches.
0–1c: Controls
This indicates the settings of the REALTIME CONTROLS knobs (the name of the operable parameters and their current value), and the 3 ‐ band EQ settings.
The currently selected REALTIME CONTROLS knob functions and the EQ settings are shown. Use the SELECT button to select the function controlled by the knobs.
The functions of the TONE CONTROLS knobs are fixed.
You can assign various functions to the USER CONTROLS knobs. A MIDI control change is assigned to each function.
When you move a knob, it sends out the corresponding
MIDI CC.
Unless otherwise noted, “scaling” means that the parameters are at their programmed values when the controller is at 64, at their minimum when the controller is at
0, and at their maximum when the controller is at 127. For another look at this, please see the diagram below.
CC parameter scaling
99
Parameter
Value
As Programmed
00
0 64
CC Value
127
TONE CONTROLS
CUTOFF (Filter Cut Off) [000…127]
This knob scales the cutoff frequencies of Filters A and B, and transmits and receives MIDI CC #74.
RESONANCE (Filter Resonance) [000…127]
This knob scales the resonance of Filters A and B, and transmits and receives MIDI CC #71.
EG INTENSITY (Filter EG Intensity) [000…127]
This knob scales the effect of the Filter EG on the cutoff frequencies of Filters A and B. It also transmits and receives
MIDI CC#79.
RELEASE (EG Release) [000…127]
This knob scales the release time of the Filter and Amp EGs, and transmits and receives MIDI CC#72.
USER CONTROLS
1…4
[000…127]
You can set Realtime Controls USER knobs 1–4 to a wide variety of modulation functions, using the P1: Basic/
Controllers– Controllers Setup page.
Many of the functions scale a particular set of Program parameters. All of the settings also correspond to MIDI messages usually CCs.
ARP CONTROLS
The functions of knobs 1–4 are fixed. The knobs will control the duration of the arpeggiated notes, their velocity, the pitch range, and the length of the arpeggio pattern.
GATE [–64…+00…+63]
Adjusts the duration (gate time) of the arpeggiated notes
(See “Gate” on page 54).
VELOCITY [–64…+00…+63]
Adjusts the velocity of the arpeggiated notes (See “Velocity” on page 54).
SWING [–64…+00…+63]
Adjusts the degree of shuffle for the arpeggio pattern (See
“Swing” on page 54).
STEP [–64…+00…+63]
This changes the length and resolution of the arpeggio pattern.
Turning the knob toward the left will shorten the pattern’s length (
Length
) in units of one half. Turning the knob toward the right will shorten the interval between arpeggiated notes (
Resolution
) in units of one half. When the knob is in the center (12 o’clock), the number of steps and the speed will be as specified by the
Length
and
Resolution
(See “Resolution*” on page 54).
EQ (Low, Mid [Hz], Mid, High)
This indicates the 3 ‐ band EQ settings. You can edit the values.
Low [-18.00…+00.0…+18.0]:
Adjusts the gain of the 80 Hz low ‐ shelving EQ in 0.5 dB steps.
Mid [Hz] [100…10.0k]:
Adjusts the center frequency of the mid ‐ sweepable EQ.
Mid [-18.00…+00.0…+18.0]:
Adjusts the gain of the mid ‐ sweepable EQ in 0.5 dB steps.
High [-18.00…+00.0…+18.0]:
Adjusts the gain of the 10 kHz high shelving EQ in 0.5 dB steps.
PROG P0: Play 0–3: Mixer & Drum Track
0–1d: Effect
IFX 1, 2, 3, 4, 5
MFX 1, 2 [000…127]
TFX
Here you can view the effects that are assigned to the insert effects, master effects, and total effect.
For the master effects you can adjust the send amounts.
The MASTER FX and TOTAL FX buttons respectively turn master effects 1/2 and the total effect on/off (see Global).
Changing the
Enable MFX1&2
and
Enable TFX
settings will respectively transmit the control change messages CC#94 (effect control 4) or CC#95 (effect control 5). The transmitted value will be 0 for off, and
127 for on.
0–1e: Velocity Meter
This meter shows the note ‐ on velocity value.
• This indicates the note ‐ on velocity values on the global
MIDI channel, produced by the keyboard, MIDI IN, or arpeggiator. (If multiple note ‐ on messages are received simultaneously, the highest velocity will be displayed.)
• The meter will respond even if Key Zone or Vel Zone settings are set so that the note does not actually sound.
• This meter indicates the note ‐ on velocity value; it does not respond to changes in the Volume knob setting, nor to changes in the level of the audio signal produced by the
Filter, Amp, EG, LFO, EQ, or effects.
V
0–1: Menu Command
• 0:
Write Program
see p. 64
• 1:
Exclusive Solo
see p. 64
• 2:
Auto Song Setup
see p. 65
For more information, please see “Program: Menu
Command” on page 64.
0–3: Mixer & Drum Track
0–1a
0–3a
0–3
Menu
0–3b
0–3a: OSC/DrumTrack Mixer
Here, you can adjust the volume and change the Play/Mute and Solo On/Off settings of oscillators 1 and 2 and the drum track.
OSC Play/Mute:
OSC1 Play/Mute
Play:
Oscillator 1 will sound.
Mute:
Oscillator 1 will be muted (silent).
[Play, Mute]
OSC2 Play/Mute
Play:
Oscillator 2 will sound.
[Play, Mute]
Mute:
Oscillator 2 will be muted (silent).
Note:
OSC2 Play/Mute cannot be set for a program whose
Oscillator Mode
is Single or Drums.
DRUM Track Play/Mute 1
Play:
The drum track will sound.
Mute:
The drum track will be muted (silent).
[Play, Mute]
OSC Solo:
OSC1 Solo
Switches the Solo status on/off for oscillator 1.
[Off, On]
OSC2 Solo
Switches the Solo status on/off for oscillator 2.
[Off, On]
DRUM Track Solo
Switches the Solo status on/off for the drum track.
[Off, On]
Note:
Solo applies to oscillators 1 and 2, the drum track.
Note:
OSC2 Solo cannot be set for a program whose
Oscillator Mode
is Single or Drums.
Note:
The Solo On/Off setting is not saved when you write the program.
Exclusive Solo [Off, On]
The menu’s
Exclusive Solo
parameter also affects the way that Solo works. If
Exclusive Solo
is off (unchecked),
Multiple Solos will be active, allowing you to turn Solo on/ off for more than one of the items: oscillators 1 and 2, and the drum track. Each time you press a Solo button, the solo setting will toggle on and off.
If
Exclusive Solo
is on (checked), only one of the applicable items can be soloed. In this mode, pressing a Solo button automatically disables any previous solos.
Tip:
You can also toggle
Exclusive Solo
by holding
ENTER
and pressing
2
on the numeric keypad.
5
6
Program mode
OSC Volume:
OSC 1 Volume
This slider adjusts the volume of Oscillator 1.
[000…127]
OSC 2 Volume
This slider adjusts the volume of Oscillator 2.
[000…127]
DRUM Track Volume
Adjusts the volume of the drum track.
[000…127]
Velocity Meter
This meter shows the note ‐ on velocity value of the global
MIDI channel and the drum track’s
Prog MIDI Ch
(see p.5).
0–3b: Drum Track
The Drum Track provides an easy way for you to play back a rhythm section using the KROME’s high ‐ quality drum programs and a rich variety of drum patterns.
Pattern Bank [Preset, User]
Pattern No.
[P000…605, U000…999]
Select the pattern you want to use in the drum track. You can create user patterns in Seq P10: Pattern/RPPR– Pattern Edit.
Drum Track Program
[A…F: 000…127, GM, g(1)…g(9), g(d): 001…128]
Select the program that will play the drum track pattern.
Note:
Only programs of the Drums category can be selected.
The MIDI channel of the drum track is specified by the
Global P1: MIDI– MIDI Basic page DrumTrack
Prog
MIDI Ch
. MIDI message transmission for a pattern is specified by
Prog MIDI Out
. Program changes are not transmitted or received.
High Gain [–18.0…+00.0…+18.0dB]
This controls the gain of the 10 kHz High Shelf EQ, in increments of 0.5 dB.
Mid Frequency [100Hz…10kHz]
This sets the center frequency for the Mid sweep EQ.
Mid Gain [–18.0…+00.0…+18.0dB]
This controls the gain of the Mid Sweep EQ, in increments of
0.5 dB.
Low Gain [–18.0…+00.0…+18.0dB]
This controls the gain of the 80 Hz Low Shelf EQ, in increments of 0.5 dB.
Note:
These parameters can also be set from P7: ARP/DT
(Arpeggiator/Drum Track).
V
0–3: Menu Command
• 0:
Write Program
see p. 64
• 1:
Exclusive Solo
see p. 64
• 2:
Auto Song Setup
see p. 65
For more information, please see “Program: Menu
Command” on page 64.
0–5: Arpeggiator
0–1a
0–5a
0–5b
0–5
Menu
Arpeggiator parameters are edited in P7: ARP/DT
(Arpeggiator/Drum Track), but major parameters can be edited here as well. When you are playing in Prog P0: Play, you can edit the arpeggiator in realtime, such as changing the arpeggio pattern etc.
To write (save) the edited content, use
Write Program
. You can also use the TEMPO knob, TAP button and the arpeggio control (ARP) knobs GATE, VELOCITY, SWING, and STEP to edit the arpeggio in realtime.
0–5a: ARP CONTROLS
ARP CONTROLS
This shows the value of each parameter for the ARP
assignments of the REALTIME CONTROLS knobs (see p.4
and p.54).
GATE [–64…+00…+63]
VELOCITY
SWING
see p.4, p.54
STEP
see p.4
[–64…+00…+63]
[–64…+00…+63]
[–64…+00…+63]
0–5b: Arpeggiator
Pattern [P0…P4, U000 (INT)…U0899(INT),
U0900(USER)…U1027(USER)]
Arpeggio Pattern Preview
This shows a graphic of the steps of the user arpeggio pattern.
Resolution [
,
, , , , , , ]
Octave [1, 2, 3, 4]
Sort
Latch
[Off, On]
[Off, On]
Key Sync.
[Off, On]
Keyboard [Off, On]
Make settings for the program arpeggiator. For more information, please see “PROG P7: ARP/DT (Arpeggiator/
Drum Track)” on page 53.
Note:
These parameters can also be set from P7: ARP/DT
(Arpeggiator/Drum Track).
PROG P0: Play 0–7: Tone Adjust
V
0–5: Menu Command
• 0:
Write Program
see p. 64
• 1:
Exclusive Solo
see p. 64
• 2:
Auto Song Setup
see p. 65
• 3:
Copy Arpeggiator
see p. 66
For more information, please see “Program: Menu
Command” on page 64.
0–7: Tone Adjust
0–7a
0–7b
Relative Tone Adjust parameter scaling
99
Parameter
Value
0–7c
0–7
Menu
The Tone Adjust function assigns important program parameters and easy ‐ edit parameters to the switches and sliders in the display for quick edits of selected parameters.
Tip:
In Combination and Sequencer modes, Tone Adjust also lets you edit Program parameters without the need to save a different version of the original Program. For more
information on Tone Adjust in these modes, please see “0–
7c: Tone Adjust” on page 75 and page 115.
Absolute (Abs), Relative (Rel), Meta parameter
There are three kinds of Tone Adjust parameters: Absolute,
Relative, and Meta.
Absolute
parameters usually edit a single Program parameter, such as
Oscillator 1 Drive
. The Program and
Tone Adjust parameters mirror one another; when you change one, the other will change to match.
Relative
parameters typically adjust two or more Program parameters simultaneously. For instance,
F/A EG Attack
Time
affects a total of six Program parameters. The value of the Relative parameter shows the amount of change to these underlying Program parameters.
If the Relative parameter is set to 0 (the slider in the display is at the center position), the value of the corresponding program parameter will not change.
The definitions of higher and lower settings can vary, depending on the specific parameter. Unless noted otherwise, they work as follows:
When the Relative parameter is at +99 (the maximum), the
Program parameters are all at their maximum as well.
Similarly, when the Relative parameter is at –99 (the minimum), the Program parameters are at zero.
As Programmed
00
–99 0
Relative Tone Adjust Value
+99
A few of the Program parameters controlled by Relative
Tone Adjust are bipolar, meaning that they can be either positive or negative (instead of just positive). When these
Program parameters are set to negative values, the Tone
Adjust parameter may behave differently from the description above.
For instance, if the EG Intensity is set to a negative value,
Relative Tone Adjust values will range from 0 to –99, the inverse of the diagram above. EG Sustain works differently; if it’s set to a negative value, Tone Adjust values range from
0 down to the programmed value, and then up to +99, as shown below.
Relative Tone Adjust parameter scaling: EG Sustain
99
Parameter
Value
00
As Programmed
–99
–99 0
Relative Tone Adjust Value
+99
Meta
parameters don’t affect Program parameters directly.
Instead, they affect the way that other Tone Adjust parameters work. For instance,
Multisample Min #
and
Max #
set the minimum and maximum values of the Tone
Adjust
Multisample
parameter.
Saving Tone Adjust Edits
Tone Adjust edits are saved in two different ways, depending on whether the parameter is
Relative
or
Absolute
. (For more information, please see “Absolute
(Abs), Relative (Rel), Meta parameter” below.)
Edits to
Relative
parameters affect the sound immediately, but don’t change the underlying Program parameter settings until the Program is saved. When the Program is saved, the KROME calculates the combined effects of Tone
Adjust and dedicated CC modulation (from the Real Time knobs, for instance), and saves the results into the Program parameters directly. At that point, all of the Relative parameters are reset to 0.
Edits to
Absolute
parameters are immediately reflected in the corresponding on ‐ screen parameters, and vice ‐ versa.
Tone Adjust and MIDI SysEx
The Tone Adjust edits all send and receive MIDI System
Exclusive messages. You can use this to record and play back Tone Adjust edits with a sequencer, including the built ‐ in sequencer.
7
8
Program mode
Note:
System exclusive messages are not Tone Adjust parameters; they are linked to the actual value. For example, if a slider in the display is assigned to control filter resonance, and you move this slider while recording to the sequencer, the slider movement will be recorded, but the change in filter resonance will not be recorded. This means that if you later reassign the Tone Adjust parameter to control
LFO1 Speed
, playing back the sequencer will cause the LFO speed (not the filter resonance) to change.
Interaction between Tone Adjust and MIDI CCs
A number of the Common Tone Adjust parameters can affect parameters which are also modulated by dedicated
MIDI CCs. The specific CC numbers are noted in the descriptions for the individual Tone Adjust parameters. For more information, please see “Tone Adjust Parameters” on page 10.
Tone Adjust and the CCs work independently. It’s possible, for instance, for Tone Adjust to reduce the value of a parameter, and then for a CC to increase it again.
Tone Adjust scales the parameter first, and then the CC scales the result of the Tone Adjust.
0–7a: Program Select & Tempo
Bank (Bank Select) [A…F, GM, g(1)…g(9), g(d)]
Program Select [A…F: 000…127, GM, g(1)…g(9), g(d): 001…128]
(Tempo) [040.00…300.00, EXT]
This area displays information about the program selected for editing: the program bank/number/ name, and the
tempo used to control the arpeggiator etc. For more information, please see “0–1a: Program Select” on page 2.
0–7b: Selected parameter information
Selected parameter information
This status line shows detailed, read ‐ only information about the currently selected Tone Adjust parameter.
Control Assignment Value Type Stored Value
Control [SW1…8, SL1…8]
This is the controller in the display to which the Tone Adjust parameter is assigned.
SW:
Switch
SL:
Slider
Assignment
This shows the full name of the parameter assigned to the controller. You can change this using the Assign parameter, below.
Value
This shows the current value of the parameter. The range of values will vary depending on the parameter assigned to the control.
Type [Rel, Abs, Meta]
This shows the type of parameter, which relates to how edits to the parameter are adjusted and saved. For more information, please see “Absolute (Abs), Relative (Rel), Meta parameter” on page 7.
Stored Value
This shows the original value of the parameter, before the effects of Tone Adjust. It applies only to Tone Adjust parameters which control a single Program parameter.
If you un ‐ assign a
Relative
parameter from a control, it will revert to this value.
0–7c: Tone Adjust
Here, you can assign Tone Adjust parameters to switches and sliders in the display.
Switches 1…8
Tone Adjust switches in the display act a little differently than sliders.
When a switch is assigned to a
Relative
parameter, or an
Absolute
parameter with more than two states:
Switch On
=
On Value
(see below)
Switch Off
= the Program’s stored value
When a switch is assigned to a two ‐ state
Absolute
parameter, such as
Hold
, the switch status directly reflects the parameter value:
Switch On
=
On
Switch Off
=
Off
Assign
On/Off
Value
Assign
This lets you assign a Tone Adjust parameter to the displayed switch. For a full list of the available choices, please see “Common Tone Adjust Parameters” and “Tone
Adjust Parameters” below.
On Value [Depends on parameter]
The parameter is set to this value when the switch is On.
When the switch is assigned to a two ‐ state
Absolute
parameter, such as
Hold
, this will always be the same as the
Switch Status
(see below).
Switch Status [Off, On]
This simply shows whether the switch is On or Off.
Sliders 1…8
Assign
This lets you assign a Tone Adjust parameter to the displayed slider. For a full list of the available choices, please see “Common Tone Adjust Parameters” and “Tone Adjust
Parameters” below.
Assign
Value
PROG P0: Play 0–7: Tone Adjust
Per ‐ Oscillator parameters apply to OSC1 and 2 individually, and are marked as such: OSC1 and OSC2.
Each slider can be assigned to only one parameter, and each parameter can be assigned to only one slider.
To swap a parameter from one slider to another, you’ll need to first un ‐ assign it from the old slider, and then assign it to the new slider.
Value
This shows the current value of the parameter. The range of values will depend on the parameter assigned to the slider.
Common Tone Adjust Parameters
These parameters affect both Oscillators 1 and 2.
Unless otherwise noted, all of the Common Tone Adjust parameters are
Relative
.
Note:
At the right of each parameter, the (value range and
CC#) are shown in parentheses.
Off.
This means that the Tone Adjust control has no effect.
Filter Cutoff. (–99…+99, CC#74)
This scales the cutoff frequency of all of the filters at once. It affects both Filters A and B.
Filter Resonance
.
(–99…+99, CC#71)
This scales the resonance of all of the filters at once. It affects both Filters A and B.
Filter EG Intensity
.
(–99…+99, CC#79)
This scales the effect of the Filter EG on the cutoff frequency.
It affects Filters A and B simultaneously.
–99
means no modulation.
+99
means maximum.
Modulation is in the same direction, positive or negative, as the original Program. For instance, if the original Program’s
EG Intensity was set to –25, then setting the Tone Adjust to
+99 moves the EG Intensity to –99.
Amp Velocity Intensity
.
(–99…+99)
This scales the effect of velocity on the Amp level.
–99
removes the velocity modulation entirely.
+99
means maximum modulation in the same direction, positive or negative, as the original Program.
F/A EG Attack Time
.
(–99…+99, CC#73)
This scales the attack times of the Filter and Amp EGs, along with other related parameters.
When the value is +1 or more, this also affects the Amp EG’s
Start and Attack Levels, Start Level AMS, and Attack Time
AMS, as described below:
Between values of +1 and +25, the Start Level, Start Level
AMS, and Attack Time AMS will change from their programmed values to 0. Over the same range, the Attack
Level will change from its programmed value to 99.
F/A EG Decay Time
.
(–99…+99, CC#75)
This scales the decay and slope times of the Filter and Amp
EGs. It interacts with CC# 75.
F/A EG Sustain Level
.
(–99…+99, CC#70)
This scales the sustain levels of the Filter and Amp EGs.
F/A EG Release Time
.
(–99…+99, CC#72)
This scales the release times of the Filter and Amp EGs.
Filter EG Attack Time
.
(–99…+99)
This scales the attack times of the Filter EGs.
Filter EG Decay Time
.
(–99…+99)
This scales the decay and slope times of the Filter EGs.
Filter EG Sustain Level
.
(–99…+99)
This scales the sustain levels of the Filter EGs.
Filter EG Release Time
.
(–99…+99)
This scales the release times of the Filter EGs.
Amp EG Attack Time
.
(–99…+99)
This scales the attack times of the Amp EGs.
Amp EG Decay Time
.
(–99…+99)
This scales the decay and slope times of the Amp EGs.
Amp EG Sustain Level
.
(–99…+99)
This scales the sustain levels of the Amp EGs.
Amp EG Release Time
.
(–99…+99)
This scales the release times of the Amp EGs.
Pitch EG Attack Time
.
(–99…+99)
This scales the attack times of the Pitch EG.
Pitch EG Decay Time
.
(–99…+99)
This scales the decay and slope times of the Pitch EG.
Pitch EG Sustain Level
(N/A).
(–99…+99)
This scales the sustain levels of the Pitch EG.
Pitch EG Release Time
.
(–99…+99)
This scales the release times of the Pitch EG.
Pitch LFO1 Intensity
.
(–99…+99, CC#77)
This scales the effect of LFO1 on the Pitch.
–99
removes the LFO modulation entirely.
+99
means maximum modulation in the same direction, positive or negative, as the original Program.
LFO1 Speed
.
(–99…+99, CC#76)
This scales LFO1’s frequency. When the LFO is in MIDI/
Tempo mode, this adjusts the Base Note. For more information, please see “Frequency” on page 42.
LFO1 Fade
.
(–99…+99)
This scales LFO1’s fade ‐
in time. For more information, please see “Fade” on page 43.
LFO1 Delay
.
(–99…+99, CC#78)
This scales LFO1’s delay time ‐ the time between note ‐ on
and the onset of the LFO. For more information, please see
“Delay” on page 43.
This parameter interacts with CC# 78.
LFO1 Stop
.
(PROG/Off/On, Absolute)
This
Absolute
parameter controls whether LFO1 is stopped
or running. For more information, please see “Stop” on page 42.
The
PROG
setting restores the Program’s original values.
For example, if you set this to PROG when the oscillator 1
LFO is stopped and oscillator 2 is playing, the original setting of the parameter will be used.
LFO2 Speed
.
(–99…+99)
This scales LFO2’s frequency. When the LFO is in MIDI/
Tempo mode, this adjusts the Base Note. For more information, please see “Frequency” on page 42.
LFO2 Fade
.
(–99…+99)
This scales LFO2’s fade ‐
in time. For more information, please see “Fade” on page 43.
LFO2 Delay
.
(–99…+99)
This scales LFO2’s delay time ‐ the time between note ‐ on
and the onset of the LFO. For more information, please see
“Delay” on page 43.
LFO2 Stop
.
(PROG/Off/On, Absolute)
This
Absolute
parameter controls whether LFO2 is stopped
or running. For more information, please see “Stop” on page 42.
Common LFO Speed
.
(–99…+99)
This scales the Common LFO’s frequency. When the LFO is in MIDI/Tempo mode, this adjusts the Base Note.
Unison
.
(Off/On, Absolute)
This
Absolute
parameter turns
Unison
on and off. For more information, please see “Unison” on page 13.
Number Of Voices
.
(2…6, Absolute)
This
Absolute
parameter sets the number of Unison voices.
If
Unison
is not
On
, this parameter has no effect. For more
9
Program mode
10
information, please see “Number of Voices” on page 13.
Detune
.
(00…99, Absolute)
This
Absolute
parameter sets the amount of detuning between the Unison voices. If
Unison
is not
On
, this
parameter has no effect. For more information, please see
“Detune” on page 13.
Thickness
.
(Off/01…09, Absolute)
This
Absolute
parameter sets the pattern of detuning between the Unison voices. If
Unison
is not
On
, or if
Detune
is set to
0
, this parameter has no effect. For more information, please see “Thickness” on page 13.
Tone Adjust Parameters
Macro parameters
The following three parameters affect both Oscillator 1 and
Oscillator 2.
Note:
In the list below, at the right of each parameter, the value range and edit type are shown in parentheses.
Pitch Stretch
.
(–12…+12, Relative)
This special control increases the Oscillator
Tune
parameter while lowering the
Transpose
parameter. The result is that the pitch stays the same, but the mapping of the samples to the keys changes. You can use this to create interesting shifts in timbre.
Hold
.
(Off/On, Absolute)
This lets you turn Hold on and off. For more information, please see “Hold” on page 14.
Reverse
.
(PROG/Off/On, Absolute)
This turns Reverse on/off for multisamples that allow the reverse setting for both oscillators.
PROG
restores the
Program’s original settings. Reverse plays the waveform from end to start; the effect is only noticeable with unlooped samples.
Per-Oscillator parameters
These parameters affect each Oscillator separately. In the list, the parameters for Oscillator 1 appear first, with each name prefaced by OSC1; the parameters for Oscillator 2 appear next, prefaced by OSC2.
Unless otherwise specified, all of the Per ‐ Oscillator parameters are
Absolute
.
Note:
In the list below, the items in parentheses are (value, edit type) respectively.
Tune
.
(–1200…+1200, Relative)
This
Relative
parameter adds to or subtracts from the
Oscillator’s Tune setting, as described under “Tune” on page 17.
Transpose
.
(–60…+60, Relative)
This
Relative
parameter adds to or subtracts from the
Oscillator’s Transpose setting, as described under
“Transpose” on page 17.
Note:
as with
Transpose
, below, this is a simple addition or subtraction, as opposed to the more complex “scaling” function.
MS/DKit Select
.
(PROG/0…540, Absolute)
In Single or Double Programs, this lets you select a new
Multisample for the Oscillator. In Drum Programs, it lets you select a different Drum Kit.
In general, it’s best to use this in conjunction with the
MS
Type
and
MS/DKit Bank
parameters, as described below.
PROG
restores the Program’s original Multisamples (or the
Drum Kit, for a Drum Program), including all velocity ranges and
Reverse
and
Start Offset
settings.
You can also limit the range of the control by using the
Min
#
and
Max #
parameters, described below.
For Single and Double Programs:
MS/DKit Select
overrides all of the Multisample Velocity zones, so that the newly selected Multisample plays over the entire velocity range.
By default, you can select from the same Bank as the original
Program’s MS1.
You can use the
MS/DKit Bank
parameter, described below, to change these defaults as desired.
For Multisamples only:
You can use the Tone Adjust
Reverse
and
Start Offset
parameters to modify the newly selected Multisample. By default, the
Reverse
is set to
Off
, and its
Start Offset
is set to
0
.
For Drum Programs:
By default, you can select from the same Bank as the original
Program’s Drum kit. You can use the
MS Bank
parameter, described below, to select a different Bank.
MS Bank. (Mono, Stereo…, Meta)
This Meta ‐ parameter modifies the
MS/Dkit Select
parameter, so that you can select Multisamples from any
Bank you like.
MS/DKit Min #
.
(0…540, Meta)
This Meta ‐ parameter sets a minimum value for the
MS/Dkit
Select
parameter. You can use this in conjunction with the
MS/DKit Max #
parameter, below, so that front panel value dial selects only from a small set of choices. This is particularly convenient with the internal, in which similar
Multisamples are grouped together. For instance, this makes it easy to select between a group of bells, or a set of electric basses.
MS/DKit Max #
.
(0…540, Meta)
This Meta ‐ parameter sets a maximum value for the
MS/
Dkit Select
parameter. Please see
MS/DKit Min #
, above, for more information.
Start Offset
.
(0ff, 1th…8th, Absolute)
This allows you to change the Start Offset of the
Multisample specified by the
MS Select
parameter. It applies only when:
The Program is a Single or Double (not a Drum Kit)
For more information, please see “Offset (Start Offset)” on page 18.
Drive
.
(0…99, Absolute)
This controls the Oscillator’s
Drive
parameter, as described
under “Drive” on page 35.
Low Boost
.
(0…99, Absolute)
This controls the Oscillator’s
Low Boost
parameter, as
described under “Low Boost” on page 35.
Pitch Slope
.
(–1.0…2.0, Absolute)
This controls the Oscillator’s
Pitch Slope
parameter, as
described under “Pitch Slope” on page 20.
LFO 1 Waveform
.
(Triangle…Rad6, Absolute)
This selects the waveform for the Oscillator’s
LFO 1
, as described under “Waveform” on page 42.
LFO 2 Waveform
.
(Triangle…Rnd6, Absolute)
This selects the waveform for the Oscillator’s
LFO 2
, as described under “Waveform” on page 42.
Amp LFO 1 Intensity
.
(–99…+99, Absolute)
This controls the depth and direction of Amp modulation
from LFO1, as described under “Intensity (LFO1)” on page 38.
Amp LFO 2 Intensity
.
(–99…+99, Absolute)
This controls the depth and direction of Amp modulation
from LFO2, as described under “Intensity (LFO1)” on page 38.
Filter LFO 1 Intensity to A
.
(–99…+99, Absolute)
This controls the depth and direction of Filter A cutoff
PROG P0: Play 0–7: Tone Adjust
modulation from LFO1, as described under “Intensity to A” on page 30.
Filter LFO 1 Intensity to B
.
(–99…+99, Absolute)
This controls the depth and direction of Filter B cutoff
modulation from LFO1, as described under “Intensity to B” on page 31.
Filter LFO 2 Intensity to A
.
(–99…+99, Absolute)
This controls the depth and direction of Filter A cutoff
modulation from LFO2, as described under “Intensity to A” on page 30.
Filter LFO 2 Intensity to B
.
(–99…+99, Absolute)
This controls the depth and direction of Filter B cutoff
modulation from LFO2, as described under “Intensity to B” on page 31.
Pitch LFO 1 AMS Intensity
.
(–12.00…+12.00, Absolute)
You can use an AMS source, such as aftertouch, to modulate the depth of pitch modulation (vibrato) from LFO1. This controls the intensity of that AMS modulation. For more
information, please see “Intensity” on page 21.
Pitch LFO 2 AMS Intensity
.
(–12.00…+12.00, Absolute)
This is similar to
Pitch LFO 1 AMS Intensity
, above.
Default Tone Adjust Settings
You can use the Tone Adjust function to edit all of the important program parameters on this single page. Most of the preset sounds use the default layout shown below. You can customize these default settings for each program.
For details on the Tone Adjust function, please see “0–7b:
Selected parameter information” on page 8.
Tone Adjust parameters
This applies to common tone adjust parameters and tone adjust parameters following the “0–7b: Selected parameter information” on page 8.
Default Tone Adjust Settings
Controller
Slider1
Slider2
Slider3
Slider4
Slider5
Slider6
Slider7
Slider8
SW1
SW2
SW3
SW4
SW5
SW6
SW7
SW8
Default settings
[OSC1] Transpose
[OSC2] Transpose
[OSC1] Tune
[OSC2] Tune
[OSC1]MS/DKit Select
Filter Cutoff
Filter Resonance
Filter EG Intensity
[OSC1&2] Pitch Stretch
[OSC1] Filter LFO1 Int A
[OSC1] Amp LFO Int
[OSC1] Drive
F/A EG Attack Time
F/A EG Decay Time
F/A EG Sustain Level
F/A EG Release Time
V
0–7: Menu Command
• 0:
Write Program
see p. 64
• 1:
Exclusive Solo
see p. 64
• 2:
Auto Song Setup
see p. 65
• 3:
Copy Tone Adjust
see p. 65
• 4:
Reset Tone Adjust
see p. 65
For more information, please see “Program: Menu
Command” on page 64.
11
Program mode
PROG P1: Basic/Controllers
12
1–1: Program Basic
1–1a
1–1b
1–1
Menu
This page contains all of the basic settings for the Program.
Among other things, you can:
• Set up the Program to be a Single, a Double, a Drum Kit, or a Double Drum Kit.
• Set the Program to play polyphonically or monophonically.
1–1a: Oscillator Mode
Oscillator Mode
[Single, Double, Drums, Double Drums]
Specifies the Program’s oscillator assignment; whether it will use one or two oscillators, or a drum kit.
Single:
The program will use
one oscillator
(Oscillator 1,
Filter 1, Amplifier 1). In this case, the program will normally have a
maximum of 120-note polyphony
.
Double:
The program will use
two oscillators
(Oscillator 1/
2, Filter 1/2, Amplifier 1/2). In this case the program will normally have a
maximum of 60-note polyphony
.
Drums:
The program will use
one oscillator
(as when Single is selected), but Oscillator 1 will be assigned a drum kit instead of a multisample. In this case the program will normally have a
maximum of 120-note polyphony
.
Double Drums:
The Program will use two oscillators to play two Drum Kits. In this case the Program will normally have a maximum of 60 ‐ note polyphony.
OSC Picture 1, 2 [MS Names…]
Here you can specify a graphic for oscillators 1 and 2 that will be shown in the main P0 Play page.
To open the menu, press the popup button or press the preview area twice in succession.
To choose the graphic, press the graphic view at the bottom of the menu or the left or right graphics in the upper part. To confirm your selection, press the OK button or press the upper middle graphic twice in succession.
OSC Picture 2 is unavailable if the
Oscillator Mode
is Single or Drums.
1–1b: Voice Assign Mode
Voice Assign Mode [Poly, Mono]
Select the basic voice allocation mode. Depending on which one you select, various other options will appear, such as
Poly Legato
(
Poly
mode only) and
Unison
(
Mono
mode only).
Poly:
The program will play polyphonically, allowing you play chords.
Mono:
The program will play monophonically, producing only one note at a time.
Poly Legato [Off, On]
Poly Legato is available when the
Voice Assign Mode
is set to
Poly
.
Legato means to play note so that they are smooth and connected; the next note is played before the last note is released. This is the opposite of playing detached.
On (checked):
When you play a legato phrase, only the first note of that phrase (and within approximately the first
30msec) will use the normal multisample start point specified by
Start Offset
(Prog 2–1a); all subsequent notes will use the legato start point specified for each multisample.
Note:
This is a useful way to simulate the percussive attack of a tonewheel ‐ type organ.
Off (unchecked):
Notes will always use the setting of the
Start Offset
, regardless of whether you play legato or detached.
With some Multisamples,
Poly Legato
may not have any effect.
Single Trigger [Off, On]
Single Trigger is available when the
Voice Assign Mode
is set to
Poly
.
On (checked):
When you play the same note repeatedly, the previous note will be silenced before the next note is sounded, so that the two do not overlap.
Off (unchecked):
When you play the same note repeatedly, the notes will overlap.
Mono Legato [Off, On]
This is available when the
Voice Assign Mode
is set to
Mono
.
Legato means to play notes so that they are smooth and connected; the next note is played before the last note is released. This is the opposite of playing detached.
When
Mono Legato
is On, the first note in a legato phrase will sound normally, and then subsequent notes will have a smoother sound, for more gentle transitions between the notes.
The
Mode
parameter, below, switches between two different
Mono Legato effects, each of which achieves this smoothness in a different way. See the description of that parameter for more details.
On (checked):
When you play with legato phrasing, the notes within a legato phrase will sound smoother, according to the setting of the
Mode
parameter, below.
Off (unchecked):
Legato phrasing will produce the same sound as detached playing.
PROG P1: Basic/Controllers 1–1: Program Basic
Mode [Normal, Use Legato Offset]
This parameter is available only when
Mono Legato
is
On
.
Normal:
When you play legato, the multisample, envelopes, and LFOs will not be reset; only the pitch of the oscillator will change. This setting is particularly effective for wind instruments and analog synth sounds.
With this option, the pitch may occasionally be incorrect, depending on which multisample you play, and where on the keyboard you play.
Use Legato Offset:
When you play legato, the second and subsequent notes will use the legato start point specified for each multisample, rather than the
Start Offset
(Start Offset
2–1a) setting.
This is effective when used with a multisample for which you’ve assigned a specific legato offset point. For example, you might use it to control the attack of a breathy, slow ‐ attack sax sound. On some multisamples, this will have no effect.
Envelopes and LFOs will still be reset, as they are with detached playing.
Priority [Low, High, Last]
Priority is available when the
Voice Assign Mode
is set to
Mono
.
This parameter determines what happens when more than one note is being held down.
Low:
The lowest note will sound. Many vintage, monophonic analog synths work this way
High:
The highest note will sound.
Last:
The most recently played note will sound.
Unison
Unison can be used in
Mono
mode.
[On, Off]
On (checked):
When Unison is on, the Program uses two or more stacked, detuned voices to create a thick sound.
Use the
Number of Voices
and
Detune
parameters to set the number of voices and amount of detuning, and the
Thickness
parameter to control the character of the detuning.
Off (unchecked):
The Program plays normally.
Number of Voices [2…6]
This controls the number of detuned voices that will be played for each note when using
Unison
. It applies only when
Unison
is
On
.
Detune
Detune is available when
Unison
is
On
.
[00…99 cents]
This parameter sets the tuning spread for the Unison voices, in cents (1/100 of a semitone). The
Thickness
parameter, below, controls how the voices are distributed across the detune amount. When
Thickness
is
Off
, the voices are distributed evenly, centered around the basic pitch.
For instance, let’s say that the
Number of voices
parameter is set to
3
,
Detune
is set to
24
, and
Thickness
is
Off
:
Voice one will be detuned down by 12 cents, voice two will not be detuned, and voice three will be detuned up by 12 cents.
Voice Detune
1
2
3
–12
0
+12
1
2
3
4
As another example, let’s say that
Detune
is still set to
24
and
Thickness
is still
Off
, but
Number of voices
is set to
4
:
Voice one will still be detuned down by 12 cents, voice two will be detuned down by 4 cents, voice three will be detuned up by 4 cents, and voice 4 will be detuned up by 12 cents.
Voice Detune
–12
–4
+4
+12
Thickness
Thickness is available when
Unison
is
On
.
[Off, 01…09]
This parameter controls the character of the detuning for the unison voices.
Off:
Unison voices will be evenly distributed across the
Detune range, as shown above.
01–09:
Unison voices will be detuned in an asymmetric way, increasing the complexity of the detune, and changing the way in which the different pitches beat against one another.
This creates an effect similar to vintage analog synthesizers, in which oscillators would frequently drift slightly out of tune. Higher numbers increase the effect.
V
1–1: Menu Command
• 0:
Write Program
see p. 64
• 1:
Exclusive Solo
see p. 64
• 2:
Auto Song Setup
see p. 65
• 3:
Copy Oscillator
see p. 65
• 4:
Swap Oscillator
see p. 65
For more information, please see “Program: Menu
Command” on page 64.
13
Program mode
14
1–2: Note-On/Scale
1–2a
1–2
Menu
1–2c
1–2b
1–2d
Here, you can make the following settings.
• Make keyboard split settings for OSC1, OSC2, and Hold.
• Enable/disable the half ‐ damper function.
• Select the basic scale of the program.
1–2a: Key Zone
You can create keyboard splits by setting top and bottom key limits for Oscillators 1 and 2. Also, you can control the keyboard range over which the
Hold
parameter takes effect.
Note:
You can also set the note values and velocity values by holding down an edit cell or the ENTER button and playing a key (see OG p.10).
OSC 1 Bottom [C–1…G9]
This sets the lowest key on which Oscillator 1 will play.
OSC 1 Top [C–1…G9]
This sets the highest key on which Oscillator 1 will play.
OSC 2 Bottom [C–1…G9]
This sets the lowest key on which Oscillator 2 will play.
OSC 2 Top [C–1…G9]
This sets the highest key on which Oscillator 2 will play.
Hold [On, Off]
Hold is like permanently pressing down on the sustain pedal. In other words, notes continue to sound as if you were holding down the key ‐ even after you lift your fingers from the keyboard.
Unless the
Sustain Level
is set to
0
in Amp EG 1 (and Amp
EG 2 in a Double Program), the sound will play for the entire length of the multisample(s).
On (checked):
The
Hold
function is enabled for the range set by the
Hold Bottom
and
Hold Top
parameters, below.
Off (unchecked):
Notes will play normally. This is the default setting.
Using Hold with Drum Kits
Hold
can be especially useful for drum programs, since it lets the drum samples ring out naturally. In general, when you set the
Oscillator Mode
to
Drums
, it’s good to set
Hold
to
On
.
Once you’ve turned on
Hold
for a drum program, the function is controlled on a note ‐ by ‐ note basis according to settings within the selected Drum Kit.
If a key’s
Enable Note Off Receive
parameter (Global 5–4a) is unchecked, the note will be held.
If the key’s
Enable Note Off Receive
parameter is checked, it will not be held.
If you turn off
Hold
in the Program, no keys will be held ‐ regardless of their
Enable Note Off Receive
setting.
Using Hold with Acoustic Pianos
Hold is also useful for simulating the top octaves of an acoustic piano, in which notes always sustain until they fade out naturally, regardless of how long you hold the key.
The
Hold Bottom
and
Hold Top
parameters are designed for exactly this purpose. They let you limit the effect of the
Hold parameter to a specific range of the keyboard.
Hold Bottom [C–1…G9]
This sets the lowest key affected by the Hold function.
Hold Top [C–1…G9]
This sets the highest key affected by the Hold function.
1–2b: Half-Damper Control
A half ‐ damper pedal is a special type of continuous foot pedal, such as the Korg DS ‐ 1H. In comparison to a standard footswitch, half ‐ damper pedals offer more subtle control of sustain, which can be especially useful for piano sounds.
The KROME will automatically sense when a half ‐ damper is connected to the rear ‐ panel DAMPER input. For proper operation, you will also need to calibrate the pedal, using the
Half Damper Calibration
command in the Global menu.
The off and full ‐ on positions of the half ‐ damper work just like a standard footswitch. In conjunction with the
Enable
Half-Damper
parameter, below, intermediate positions allow a graduated control of sustain, similar to the damper pedal of an acoustic piano.
Enable Half-Damper [On, Off]
When this is
On
(checked), Half ‐ Damper pedals, normal sustain pedals, and MIDI CC# 64 will all modulate the Amp
EG, as described below.
When this is
Off
(un ‐ checked), the pedals and MIDI CC#64 will still hold notes as usual, but will not modulate the Amp
EG.
Half-Damper Pedal and Release Time
The amount of modulation depends on whether the Amp
EG
Sustain Level
is set to
0
(as is the case with most acoustic piano sounds), or set to
1
or more. The modulation is continuous, from 1x (no change) to 55 times longer; the table below shows a selection of representative points.
Half-Damper modulation of Amp EG Release Time
0
32
64
80
96
127
CC#64 Value
1x
2.1x
3.2x
5.9x
22.3x
55x
Multiply Amp EG Release Time by…
If Sustain = 0 If Sustain = 1 or more
1x
2.1x
3.2x
1–2c: OSC1/2 Note-On Control
OSC1 Delay [0000ms…5000ms, KeyOff]
This specifies the time from when you press a key until oscillator 1 actually begins to sound.
This is most useful in Double Programs, for delaying one oscillator in relation to the other.
KeyOff
is a special setting. Instead of delaying the sound by a particular amount of time, the sound will play as soon as you release the key. You can use this to create the “click” heard when a harpsichord note is released, for instance.
PROG P1: Basic/Controllers 1–2: Note-On/Scale
In general, when you use the
KeyOff
setting, it’s also best to set the oscillator’s Amp EG
Sustain Level
to
0
.
Mode [Key, Key + Damper]
Normally, you play notes simply by pressing keys on the keyboard. In special cases, however, you can set this parameter so that you must first be holding down the damper pedal, and then press a key, in order to play a note.
For instance, this can be useful when modeling the behavior of a piano soundboard.
Key
is the normal mode.
When you select
Key + Damper
, notes will only sound if the damper pedal is being held down. When the damper pedal is released, all notes will be stopped even if they are still being held down.
OSC2 Delay [0000ms…5000ms, KeyOff]
Mode [Key, Key + Damper]
This specifies the time from when you press a key until oscillator 2 actually begins to sound.
See
OSC1 Delay
and
Mode
, above.
1–2d: Scale
Type
[Equal Temperament…User Octave Scale15]
Selects the basic scale for the Program.
Note that for many of the scales, the setting of the
Key
parameter, below, is very important.
Equal Temperament:
This is the most widely used scale by far, in which each semitone step is spaced at equal pitch intervals.
Equal Temperament allows easy modulation, so that a chord progression played in the key of C sounds roughly the same as the same progression played in F#. Sacrificed, however, is some of the purity of individual intervals offered by the scales below.
Pure Major:
In this temperament, major chords of the selected key will be perfectly in tune.
Pure Minor:
In this temperament, minor chords of the selected key will be perfectly in tune.
Arabic:
This scale includes the quarter ‐ tone intervals used in
Arabic music.
Pythagoras:
This scale is based on ancient Greek music theory, and is especially effective for playing melodies. It produces completely pure fifths, with one exception, at the expense of detuning other intervals– thirds in particular.
As much as Pythagoras might have liked to do so, it’s not possible to make all the fifths pure while also keeping the octave in tune. For the sake of the octave, one of the fifths the interval from the sharp fourth degree to the sharp first degree is made quite flat.
Werkmeister
(Werkmeister III)
:
This scale was one of the many temperament systems developed towards the end of the Baroque period. These “Well ‐ Tempered” tunings were aimed at allowing relatively free transposition although you’ll still notice that the different keys maintain their own distinct characteristics, unlike Equal Temperament.
J.S. Bach was referring to these new scales in his title, “The
Well ‐ Tempered Clavier.” As such, this group are particularly appropriate for late baroque organ and harpsichord music.
Kirnberger
(Kirnberger III)
:
This is a second “Well ‐
Tempered” tuning, dating from the early 18th century.
Slendro:
This is an Indonesian gamelan scale, with five notes per octave.
When
Key
is set to
C
, use the C, D, F, G and A notes. Other keys will play the normal equal ‐ tempered pitches.
Pelog:
This is another Indonesian gamelan scale, with seven notes per octave.
When
Key
is set to
C
, use the white keys. The black keys will play the equal tempered pitches.
Stretch:
This tuning is used for acoustic pianos.
User All Notes Scale:
This is a user ‐ programmed scale with different settings for all 128 MIDI notes. You can set up this scale in Global mode (Global 3–1b).
User Octave Scale 00–15:
These are user ‐ programmed scales with settings for each of the 12 notes in an octave. You can set them up in Global mode (Global 3–1a).
Key (Scale Key)
Selects the key of the specified scale.
[C…B]
This setting does not apply to the
Equal Temperament
,
Stretch
, and
User All Notes
scales.
If you’re using a scale other than Equal Temperament, the combination of the selected scale and the
Key
setting may skew the tuning of the note. For example, A above middle C might become 442 Hz, instead of the normal 440 Hz. You can use the Global Mode’s
Master
Tune
(Global 0–1a) parameter to correct this, if necessary.
Random [0…7]
This parameter creates random variations in pitch for each note. At the default value of
0
, pitch will be completely stable; higher values create more randomization.
This parameter is handy for simulating instruments that have natural pitch instabilities, such as analog synths, tape ‐ mechanism organs or acoustic instruments.
V
1–2: Menu Command
• 0:
Write Program
see p. 64
• 1:
Exclusive Solo
see p. 64
• 2:
Auto Song Setup
see p. 65
• 3:
Copy Oscillator
see p. 65
• 4:
Swap Oscillator
see p. 65
For more information, please see “Program: Menu
Command” on page 64.
15
16
Program mode
1–3: Controllers Setup
1–8a
1–8b
1–8
Menu
Here you can specify the SW1 and SW2 switch and front panel 1–4 knobs of the program when Realtime Controls
USER is selected.
1–3a: Panel Switch 1/2 Assign
SW1 (SW1 Assign) [Off, …, JS-Y Lock]
This assigns the function of SW1. For more information, please see “List of SW 1/2 assignments” on page 348.
Note:
If you change the function setting, the status is reset to off.
Note:
The on/off status of the SW1, SW2 switches is memorized when you save the program.
Mode (SW1 Mode) [Toggle, Momentary]
This specifies the on/off operation when you press the SW1 switch.
Toggle:
The state will alternate between On and Off each time you press the SW1 switch.
Momentary:
The state will remain On only while you continue holding down the SW1 switch.
SW2 (SW2 Assign) [Off, …, JS-Y Lock]
Mode (SW2 Mode) [Toggle, Momentary]
This assigns the function of SW2. The functions that can be assigned to SW2 are the same as for SW1, with the substitution of SW2 Mod. (CC#81) instead of the SW1’s SW1 Mod. (CC#80).
1–3b: Realtime Controls Knob Assign
Here you can select the functions (mainly types of control change) that are assigned to knobs 1–4 when
Control
Assign
(0–8b) Realtime Controls USER is selected. (See
“Realtime Controls Knobs 1–4 Assignments” on page 348)
The functions you assign here are active when you use the
SELECT button to select USER, and operate knobs 1–4.
USER [1]
USER [2]
USER [3]
USER [4]
[Off, …, MIDI CC#95, CC#102…119]
[Off, …, MIDI CC#95, CC#102…119]
[Off, …, MIDI CC#95, CC#102…119]
[Off, …, MIDI CC#95, CC#102…119]
V
1–3: Menu Command
• 0:
Write Program
see p. 64
• 1:
Exclusive Solo
see p. 64
• 2:
Auto Song Setup
see p. 65
For more information, please see “Program: Menu
Command” on page 64.
PROG P2: OSC/Pitch 2–1: OSC1 Setup
PROG P2: OSC/Pitch
These pages control the first and most basic elements of sounds: the Multisamples that the oscillators play, and the pitch at which it plays them. For instance, you can:
• Select Multisamples for Single and Double Programs, or
Drum Kits for Drums and Double Drums Programs.
• Set up velocity splits, crossfades, and layers for Single and
Double Programs.
• Set the basic pitch of the sound, including the octave, fine tuning, and so on.
• Control pitch modulation using a variety of controllers such as LFO, pitch EG, and the joystick.
Note that when the
Oscillator Mode
is set to
Single
or
Drums
, only Oscillator 1’s filters are active; the pages for
Oscillator 2’s filters will be grayed out.
Multisamples, and Drum Kits
Multisamples and Drum Kits allow you to play samples in different ways.
• Multisamples lay out one or more samples across the keyboard. For instance, a very simple guitar Multisample might have six samples one for each string.
• As the name suggests, Drum Kits are optimized for playing drum samples.
Velocity splits, crossfades, and layers
Each oscillator has eight velocity zones that allow different keyboard velocities to switch the multisample or drum sample that is actually sounded.
For each zone, you can specify the threshold (boundary value) and crossfade (how velocity will smoothly fade between the samples of adjacent zones). This allows you to create velocity ‐ switched or layered sounds, such as the following examples.
• Velocity splits in which the zones are cleanly separated at their threshold
• Velocity crossfades in which the zones will smoothly crossfade beyond their threshold.
• Velocity layers in which additional sounds are added for a velocity region above a specified threshold.
Note:
If the
Oscillator Mode
is Drums or Double Drums, the velocity zone settings already specified for the drum kit will be applied, and will not be shown in the screen. The velocity zones for a drum kit can be edited in Global P5 Drum Kit
(see p.205). Pressing the Jump to Drum Kit Edit button
shown in the screen will take you directly to Global P5.
2–1: OSC1 Setup
2–1a
2–1b
2–1
Menu
Velocity Split
Program’s sounds are based on multisamples, and this page lets you set up all of the basic multisample ‐ related settings.
Among other things, you can:
• Select Multisamples for the Oscillator (in a Single or
Double Program), or select the Drum Kit for a Drum
Program
• Set the Oscillator’s basic pitch
2–1a: OSC1 Frequency
“Oscillator Mode” Single, Double
OSC1 Frequency
Octave [–2[32′], –1[16′], +0[8′], +1[4′]]
This sets the basic pitch of the Oscillator, in octaves. The default is +0[8′]. The standard octave of a multisample is +0
[8′].
Transpose [–12…+12]
This adjusts the pitch in semitones, over a range of ±1 octave.
Tune [–1200…+1200]
This adjusts the pitch in cents, over a range of ±1 octave. A cent is 1/100 of a semitone.
Frequency Offset [–10.0Hz … +10Hz]
This adjusts the pitch by increments of 0.1 Hz.
Frequency
Offset
is different from
Tune
in that, when used to detune the two oscillators, it can create a constant beat frequency across the range of the keyboard.
2–1b: Multisamples
Use the slider on the left to check the settings of each drum sample shown in abbreviated form. Drag the slider to view the settings.
1: Multisample 1
If you want to create a simple setup with only a single
Multisample, just set up Multisample1 as desired, and then set the
Threshold Velocity
to 1 and the
Crossfade
(Crossfade Range)
to Off.
Multisample On/Off
Specifies whether the multisample 1 will sound.
It will sound if this is On.
[Off, On]
17
Program mode
Bank [Mono, Stereo, XL, M, XL, St]
This is displayed if
Multisample On/Off
is On.
You can choose between looking at mono and stereo
Multisamples.
Mono, Stereo:
Conventional monaural or stereo multisamples.
XL.M (eXtra Large Mono), XL.St (eXtra Large Stereo):
High ‐ capacity monaural or stereo multisamples.
Note that stereo Multisamples will require twice as many voices as mono Multisamples.
Multisample select
This specifies a multisample.
[List of Multisample]
Some multisamples have an upper limit; notes played above that limit will not sound.
When you press the
Multisample Select
popup button, the multisample list will appear, allowing you to select a multisample from the list.
Use the tabs to select a category, and select a multisample within the category.
You can search for a multisample by a portion of its name
(see p.2).
Press the OK button to confirm the selection, or the Cancel button to cancel.
Depending on the multisample, high
Level
settings may cause distortion when playing many notes at a time. If this occurs, lower the
Level
.
2…8: (Multisample 2…8)
These are the multisample settings for the Multisample 2–8.
The parameters are exactly the same as those for
Multisample 1.
Velocity Split
This shows the velocity zones for the oscillator’s eight multisamples and for each oscillator.
The meter to the left indicates the note ‐ on velocity. This allows you to verify the multisamples and oscillators that
will sound at each velocity (See “0–1e: Velocity Meter” on page 5.).
2–1c: OSC1 (Drum Kit Frequency)
“Oscillator Mode” Drums, Double Drums
2–1
Menu
2–1c
2–1d
18
Rev (Reverse) [Off, On]
This plays the selected multisample in reverse without looping it.
Note:
If an individual sample within the multisample is already set to reverse, it will play in reverse without this setting.
On (checked):
The multisample will play in reverse.
For velocity zones that are not selected (shown as one line),
“Rev” On is indicated as [R].
Off (unchecked):
The multisample will play normally.
Offset (Start Offset) [Off, 1st…8th]
In addition to simply starting playback from the beginning,
Multisamples can have up to 8 different pre ‐ programmed alternate starting points.
The
Start Offset
specifies whether to use the normal start point (
Off
), or to use one of the alternate start points (
1st–
8th
).
Some Multisamples may have fewer than 8 pre ‐ programmed points, in which case only the available points can be selected.
Level [000…127]
This sets the basic volume level of the multisample. The
Amp section can modify this basic level extensively with envelopes, LFOs, keyboard tracking, and other modulation;
for more information, please see “PROG P4: Amp/EQ” on page 35.
Octave [–2[32′], –1[16′], +0[8′], +1[4′]]
This adjusts the pitch in octave units. When using a drum kit, set the Octave to
8′
.
When editing a drum program, you must set this parameter to
8′
. With other settings, the sounds of the drum kit will be assigned to the wrong notes of the keyboard.
Transpose [–12…+12]
This adjusts the location of the instruments in the selected drum kit. Unless you need to change this, leave it at
0
.
Tune
This adjusts the pitch in one ‐ cent units.
[–1200…+1200]
The pitch of each drum kit can be adjusted in Global P5:
Drum kit.
Freq. Offset (Frequency Offset)
[–10.0Hz … +10Hz]
This adjusts the pitch by increments of 0.1 Hz.
Frequency
Offset
is different from
Tune
in that, when used to detune the two oscillators, it can create a constant beat frequency across the range of the keyboard.
PROG P2: OSC/Pitch 2–2: OSC1 Velocity
2–1d: Drum Kit
These parameters appear when the
Oscillator Mode
is set to
Drums or Double Drums.
Drum Kit [000…031 (INT), 032…047 (USER),
048…056 (GM)]
This selects a drum kit.
Jump to Drum kit Edit Page button
Pressing this button will take you directly to Global P5:
Drum Kit where you can edit the drum kit selected by Drum
Kit Select
. Even if
Oscillator Mode
is set to Double Drums, you will hear only the kit that was selected. If the GM drum kit was selected, the last ‐ selected drum kit will be selected.
As desired, use “Copy Drum Kit” to copy the GM drum kit to the USER bank.
V
2–1: Menu Command
• 0:
Write Program
see p. 64
• 1:
Exclusive Solo
see p. 64
• 2:
Auto Song Setup
see p. 65
• 3:
Copy Oscillator
see p. 65
• 4:
Swap Oscillator
see p. 65
For more information, please see “Program: Menu
Command” on page 64.
2–2: OSC1 Velocity
2–2a
2–2b
2–2
Menu
2–2a
Note:
You can also set the note value and velocity value by holding down the edit cell or the ENTER button and playing a note on the keyboard (see OG p.10).
2–2b: Multisample Velocity Zone
Here you can specify the velocity zone for each of the oscillator’s eight multisamples.
Threshold Velocity [001…127]
This sets the lowest velocity at which the Multisample will sound. Multisample1’s
Threshold Velocity
can be equal to, but not lower than, that of Multisample2.
Crossfade (Crossfade Range) [Off, 001…127]
This sets the range of velocities over which Multisample1 will fade into Multisample2, going up from the
Threshold
Velocity
.
For instance, if the
Threshold Velocity
is set to 64, and the
Crossfade
is set to 20, MS2 will start to fade in at velocities of 84 and below.
When velocities are within the
Crossfade
, the Oscillator will use twice as much polyphony as it would normally.
Note:
You can only fade between two zones at once.
Note:
You can touch and drag to change this value (See “*
EG, Velocity Split” on page 6 of the Operation guide.»).
This shows the velocity zone.
Select
Xfade Range = 20
Curve = Linear
Bottom Velocity = 64
84
Here you can make the following settings.
• Velocity zone for oscillator 1
• The multisample’s velocity split and crossfade settings
2–2a: OSC 1 Velocity Zone
Velocity can be used to switch between sounding oscillators
1 and 2. Here you can specify the velocity zone for oscillator
1.
This velocity zone setting takes priority over the velocity settings of multisamples 1–8. The status of the settings is indicated by the graph on the right side of the screen. This lets you make settings while comparing them with the velocity split graph.
Bottom [001…127]
This sets the lowest velocity at which the Oscillator 1 will sound.
Top [001…127]
This sets the highest velocity at which the Oscillator 1 will sound.
Note:
The
OSC1 Top
velocity must be greater than the
OSC1 Bottom
velocity.
Curve [Linear, Power, Layer]
This controls the volume curve of the crossfade.
Linear
and
Power
(short for Equal Power) let you fine ‐ tune the way that the two Multisamples mix together; one or the other may be more appropriate for a given pair of Multisamples.
Layer
, true to its name, lets you layer the two Multisamples together without any crossfading.
Linear
means that the two samples will each be at 50% of their full volume in the middle of the crossfade. Sometimes, this may create a dip in the volume level; if so, try using
Power
instead.
Power
, short for Equal Power, means that the two samples will each be at around 70% of their full volume in the middle of the crossfade. Sometimes, this may create a bump in the volume level, in which case you might try selecting
Linear
instead.
Layer
means that the two Multisamples will be layered together, both at full volume, for the entire range of the crossfade.
19
Program mode
Crossfade Curves
Linear
MS2
Volume
Power
Volume
Xfade
Velocity
MS2
Xfade
Velocity
MS1
MS1
Layer
MS2
MS1
Volume
Xfade
Velocity
Velocity Split Zone
This specifies the velocity zone for each of the oscillator’s eight multisamples. The meter shows the note ‐ on velocity value.
Velocity Split
This shows the velocity zones for the oscillator’s eight multisamples and for each oscillator.
The meter at the left indicates the note ‐ on velocity. This allows you to verify the multisamples and oscillators that
will sound at each velocity (See “0–1e: Velocity Meter” on page 5.).
2–2c: OSC1 Velocity
“Oscillator Mode” Drums, Double Drums
2–1
Menu
2–2c
Top [001…127]
This sets the highest velocity at which the Oscillator 1 will sound.
The
OSC1 Top
velocity must be greater than the
OSC1
Bottom
velocity.
Note:
You can also set the note value and velocity value by holding down the edit cell or the ENTER button and playing a note on the keyboard (see OG p.10).
Velocity Split
This shows the velocity zone for the oscillator.
The meter on the left shows the note ‐ on velocity values for the global MIDI channel. This lets you verify the
multisamples that will sound at each velocity (See “0–1e:
Velocity Meter” on page 5.).
Jump to Drum kit Edit Page button
See “Jump to Drum kit Edit Page button” on page 19.
V
2–2: Menu Command
• 0:
Write Program
see p. 64
• 1:
Exclusive Solo
see p. 64
• 2:
Auto Song Setup
see p. 65
• 3:
Copy Oscillator
see p. 65
• 4:
Swap Oscillator
see p. 65
For more information, please see “Program: Menu
Command” on page 64.
2–3: OSC1 Pitch
2–3a
2–3b
2–3c
2–3
Menu
2–3d
20
Velocity can be used to switch between the drum kits sounded by oscillators 1 and 2. Here you can specify the velocity zone for oscillator 1. The status of the settings will be indicated in the graph on the right side of the screen. This lets you edit settings while comparing them with the velocity split graph.
Bottom [001…127]
This sets the lowest velocity at which the Oscillator 1 will sound.
This page contains all of the settings for Oscillator 1’s pitch modulation. For example, you can:
• Specify pitch bend controlled by the joystick X (or an incoming pitch bend message) set to independent Bend
Up and Bend Down, or controlled by an incoming message CC#16 (the ribbon control message etc).
• Use Pitch Slope to control how the pitch changes when you play up and down the keyboard.
• Assign AMS modulation for pitch.
• Set up initial amounts of pitch modulation from the Pitch
EG and LFO1/2, as well as AMS modulation of LFO and
EG amounts.
• Set up Portamento.
2–3a: Pitch
Pitch Slope [–1.0…+2.0]
Normally, this should be set to the default of
+1.0
.
PROG P2: OSC/Pitch 2–3: OSC1 Pitch
Pitch Slope, pitch, and note
Pitch
+2
+1
2oct
1oct
1oct
0
–1
C4 C5 Note on keyboard
Positive (+)
values cause the pitch to rise as you play higher on the keyboard, and
negative (–)
values cause the pitch to fall as you play higher on the keyboard.
When this is set to
0
, playing different notes on the keyboard won’t change the pitch at all; it will be as if you’re always playing C4. This can be useful for special effects sounds, for instance.
Ribbon [–12…+12]
Specify in semitones how the pitch will change when CC#16 is received.
With a positive (+) setting, the pitch will rise when the value of CC#16 is higher than the center value of 64. With a negative (–) setting, the pitch will fall.
JS (+X) [–60…+12]
Specify in semitones how the pitch will change when the joystick is moved to the right (or when a pitch bend message is received). For normal pitch bend, set this to a positive value.
For example, if you set this to
+12
and move the joystick all the way to the right, the pitch will rise one octave above the original pitch.
JS (–X) [–60…+12]
Specify in semitones how the pitch will change when the joystick is moved to the left (or when a pitch bend message is received). For normal pitch bend, set this to a negative value.
For example, if you set this to
–60
and move the joystick all the way to the left, the pitch will fall five octaves below the original pitch. You can use this to create guitar ‐ style downward swoops.
AMS (Pitch) [List of AMS Sources]
This selects a AMS source to control the pitch. For a list of
AMS sources, please see “AMS (Alternate Modulation
Source) List” on page 340.
Intensity [–12.00…+12.00]
This controls the depth and direction of the pitch modulation, in semitones.
For example if you set
AMS (Pitch)
to
JS+Y: CC#01
and then move the joystick in the +Y direction, the pitch will rise if this parameter is set to a
positive (+)
value, or fall if this parameter is set to a
negative (–)
value.
2–3b: Pitch EG
Intensity [–12.00…+12.00]
This controls the initial effect of the Pitch EG on Oscillator
1’s frequency, in half ‐ steps, before any AMS modulation.
The Pitch EG’s shape can swing all the way from +99 to –99.
When the
Intensity
is set to a
positive (+)
value, positive values from the EG raise the pitch, and negative values lower the pitch.
When the
Intensity
is set to a
negative (–)
value, the effect of the EG is reversed; positive EG values mean lower pitches, and negative EG values mean higher pitches.
AMS (Pitch EG) [List of AMS Sources]
This selects any AMS modulation source to scale the amount of the Pitch EG.
For a list of AMS sources, please see “AMS (Alternate
Modulation Source) List” on page 340.
Intensity [–12.00…+12.00]
This controls the depth and direction of the pitch EG AMS modulation. The AMS modulation and the initial Intensity are added together to determine the Pitch EG’s final effect.
With
positive (+) values
, greater modulation will increase the effect of the Pitch EG, as shown in example
B
below.
With
negative (–) values
, greater modulation will introduce the opposite effect of the Pitch EG–like inverting the polarity of the envelope. You can use this in several different ways:
• You can set an initial positive amount with the Intensity parameter, and then reduce this amount with AMS. In this case, the final effect of the EG is simply diminished, and not actually inverted, as shown in example
C
.
• You can also set the AMS Intensity amount to be greater than the initial Intensity. In this case, the EG will have a positive effect with low modulation amounts, and an inverted effect at higher modulation amounts as shown in example
D
.
Pitch EG AMS
A. Original EG B. Intensity = +6.00
Change to Pitch
C. Intensity = –3.00
D. Intensity = –24.00
Change to Pitch
2–3c: Portamento
Portamento lets the pitch glide smoothly between notes, instead of changing abruptly.
Enable [Off, On]
On (checked):
Turns on Portamento, so that pitch glides smoothly between notes.
Off (unchecked):
Turns off Portamento. This is the default state.
Fingered [Off, On]
This parameter allows you to control Portamento through your playing style. When it’s enabled, playing legato will turn on Portamento, and playing detached will turn it off again.
This option is only available when Portamento
Enable
is turned on.
On (checked):
Turns on Fingered Portamento.
Off (unchecked):
Turns off Fingered Portamento.
Mode [Rate, Time]
Rate
means that Portamento will always take the same amount of time to glide a given distance in pitch ‐ for instance, one second per octave. Put another way, gliding
21
Program mode
22
several octaves will take much longer than gliding a half ‐ step.
Time
means that Portamento will always take the same amount of time to glide from one note to another, regardless of the difference in pitch. This is especially useful when playing chords, since it ensures that each note in the chord will end its glide at the same time.
Time [000…127]
This controls the portamento time. Higher values mean longer times, for slower changes in pitch.
This option is only available when Portamento
Enable
is turned on.
Assigning SW1 or SW2 to Portamento On/Off
You can turn portamento on/off by using the two assignable switches SW1 and SW2.
To do so:
1. Go to the Prog P1: Basic/Controllers– Controllers Setup page.
2. Under Panel Switch Assign, set either SW1 or SW2 to
Porta.SW (CC#65).
Now, the selected switch will enable and disable
Portamento.
If you assign portamento to SW1/2, MIDI portamento controller #65 will be transmitted each time you use the switch. You can also turn portamento on/off by receiving MIDI controller #65.
2–3d: LFO1/2
LFO1 and LFO2 can both control the pitch. You can control the strength of each LFO’s modulation in three different ways:
• Set an initial amount of LFO modulation, using the
LFO1
Int.
,
LFO2 Int.
parameters.
• Use
JS +Y Int.
to adjust the amount of LFO produced by
JS+Y operations.
• Use any AMS source to scale the amount of the LFO.
The results are added together to produce the total LFO effect.
LFO1
LFO1 Int. (LFO1 Intensity) [–12.00…+12.00]
This controls the initial effect of the LFO on the pitch, in semitones, before any
JS+Y Int.
or AMS modulation.
Negative (–)
settings will invert the phase of the LFO.
JS+Y Int. (LFO1 JS+Y Intensity) [–12.00…+12.00]
Specify the depth of pitch modulation produced by OSC1
LFO1 when the joystick is moved in the +Y (away) direction
(or when CC#1 is received). (Joystick control in the +Y direction is called “JS +Y.”)
This parameter sets the maximum amount of LFO modulation added by JS+Y, in semitones.
As this value is
increased
, moving the joystick in the +Y direction will cause the OSC1 LFO1 to produce deeper pitch modulation.
Negative (–)
settings will invert the phase of the LFO. You can also use this to reduce the initial amount of the LFO, as set by
LFO1 Int.
, above. For example:
1. Set LFO1 Int. to +7.00.
The LFO will now have a fairly strong effect on the pitch, bending it by a perfect 5th.
2. Set JS+Y Int. Intensity to –7.00.
Now, if you move the joystick up, the effect of the LFO will fade away. When the joystick is all the way at the top of its range, the LFO will be completely cancelled out.
AMS (LFO1) [List of AMS Sources]
This selects any AMS modulation source to scale the amount of the LFO applied to pitch.
For a list of AMS sources, please see “AMS (Alternate
Modulation Source) List” on page 340.
Intensity [–12.00…+12.00]
This controls the depth and direction of the
AMS (LFO1)
modulation for pitch.
With a setting of
0
, modulation will not be applied. With a setting of
12.00
, the OSC1 LFO1 will apply a maximum of
+/–1 octave of pitch modulation.
For example if
AMS (LFO1)
is set to
JS+Y: CC#01
and you move the joystick in the +Y direction, pitch modulation from
OSC1 LFO1 will be applied in positive phase if this is a
positive (+)
value, or applied in negative phase if this is a
negative
(–)
value.
LFO1 Int.
,
JS+Y Int.
, and
AMS (LFO1)
settings are summed to determine the depth and direction of pitch modulation produced by OSC1 LFO1.
LFO2:
The parameters for LFO2 are identical to those for LFO1. For more information, please see the descriptions under LFO1, above.
V
2–3: Menu Command
• 0:
Write Program
see p. 64
• 1:
Exclusive Solo
see p. 64
• 2:
Auto Song Setup
see p. 65
• 3:
Copy Oscillator
see p. 65
• 4:
Swap Oscillator
see p. 65
For more information, please see “Program: Menu
Command” on page 64.
2–5: OSC2 Setup
On this page you can specify the basic oscillator pitch for oscillator 2, and assign the multisamples.
It is available when the
Oscillator Mode
is set to
Double
or
Double Drums
; if not, the page will be grayed out.
The parameters are identical to those for Oscillator 1, as
described under “2–1: OSC1 Setup” on page 17.
2–6: OSC2 Velocity
On this page you can specify the velocity zones for oscillator
2 itself and for the multisamples.
It is available when the
Oscillator Mode
is set to
Double
or
Double Drums
; if not, the page will be grayed out.
The parameters are identical to those for Oscillator 1, as
described under “2–2: OSC1 Velocity” on page 19.
PROG P2: OSC/Pitch 2–7: OSC2 Pitch
2–7: OSC2 Pitch
This page controls the pitch settings for Oscillator 2.
It is available when the
Oscillator Mode
is set to
Double
or
Double Drums
; if not, the page will be grayed out.
The parameters are identical to those for Oscillator 1, as
described under “2–3: OSC1 Pitch” on page 20.
2–10: Pitch EG
2–10a
2–10b
2–10c
2–10
Menu
The Pitch EG, or Envelope Generator, lets you create complex, time ‐ varying changes to the pitch of Oscillators 1 and 2. The parameters on this page control the shape of the
EG. For instance, you can:
• Create the basic EG shape by setting the levels and times of each segment.
• Control the curvature of each EG segment, for subtle control over the modulation time of the EG.
• Set up complex modulation of EG levels and times.
• Set up an AMS source, such as an LFO, to restart the EG.
To control how much effect the EG has on the pitch, use the
Pitch EG parameters on the P2: OSC/Pitch– OSC1 Pitch page
and OSC2 Pitch page, as described under “2–3b: Pitch EG” on page 21.
Differences from the other EGs
The Pitch EG is different from the Filter and Amp EGs in several ways:
• The single Pitch EG is shared by both Oscillator 1 and
Oscillator 2.
• The Sustain level is always 0.
• The Level modulation has two AMS sources instead of one, and the Time modulation has one AMS source instead of three.
Pitch EG is also an AMS source
You can use the Pitch EG as an AMS source to modulate other parameters, just like the keyboard tracking and LFOs.
Simply select the Pitch EG in the AMS list for the desired parameter.
2–10a:EG Reset
AMS (EG Reset AMS) [List of AMS Sources]
This selects an AMS source to reset the EG to the start point.
For instance, you can use a tempo ‐ synced LFO to trigger the
EG in a repeating rhythm. This reset is in addition to the initial note ‐ on, which always causes the EG to start.
For a list of AMS sources, please see “AMS (Alternate
Modulation Source) List” on page 340.
Threshold [–99…+99]
This sets the AMS level which will trigger the EG reset.
Among other things, you can use this to adjust the exact point in an LFO’s phase at which the EG will be reset, effectively controlling its “groove” against other rhythmic effects.
When the threshold is
positive
, the EG triggers when passing through the threshold moving upwards. When the threshold is
negative
, the EG triggers when passing through the threshold moving downwards.
23
24
Program mode
Note:
For several LFO waveform types, or if the LFO cycle is fast, the LFO output may not always keep up with high values such as +99 or –99.
In this case, setting the
Threshold
to these values may cause inconsistent behavior, or may mean that the EG will not reset at all. If this happens, reduce the
Threshold
until the
EG triggers consistently.
2–10b:Envelope
Pitch EG
Attack
Level
Break
Level
Sustain Level
(Always 0)
Start
Level
Release
Level
Change to
Pitch
Time
Attack
Time
Decay
Time
Slope
Time
Release
Time
Note-on or reset
The envelope moves to a specified level over the specified time, and then moves to the next specified level over the specified time. It produces a modulation signal corresponding to this movement.
The parameters below let you set four levels, the amount of time it takes to go from each of the levels to the next, and the shape (from linear to curved) of each transition.
Level
Each of the four levels can be either positive or negative.
Positive
levels will make the pitch (or other AMS destination) go up from its programmed value;
negative
levels will make it go down.
Note that, unlike the Filter and Amp EGs, the Pitch EG’s
Sustain Level is always 0.
Start
This sets the initial level at note ‐ on.
[–99…+99]
Attack
This sets the level at the end of the Attack time.
[–99…+99]
Break [–99…+99]
Break, short for Break Point, sets the level at the end of the
Decay time.
Release [–99…+99]
This sets the level at the end of the Release time.
Time
Higher values mean longer times, as shown below:
EG Value
50
60
70
80
10
20
30
40
90
99
Actual Time
10 ms
44 ms
104 ms
224 ms
464 ms
944 ms
1.8 seconds
3.8 seconds
10.9 seconds
87.3 seconds
Attack [00…99]
This sets how long the EG takes to move from the Start level to the Attack level.
For the fastest possible attack time, you can set the Start level to +99; in this case, the EG will start instantaneously at its maximum value.
Decay [00…99]
This sets the time it takes to move from the Attack level to the Break level.
Slope [00…99]
This sets how long the EG takes to move from the Break level to the Sustain level (which for the Pitch EG is always 0).
Once it reaches the Sustain, the EG will stay there until note ‐ off, unless it is reset via AMS.
Release [00…99]
This sets how long it takes the EG to move from the Sustain level to the Release level.
Note:
You can touch and drag to change this value
(See “* EG, Velocity Split” on page 6 of the Operation guide.).
Curve
For the sake of simplicity, most of the diagrams in this manual show envelopes as being made out of straight lines.
In actuality, though, envelopes are more likely to be made out of curves.
In other words, each segment’s level will change quickly at first, and then slow down as it approaches the next point.
This tends to sound better than straight, linear segments.
Classic analog synth envelopes made these curved shapes naturally. The KROME goes a step further than vintage synths, however, and lets you control the amount of curvature separately for each of the four envelope segments.
Pitch EG Curve
Curve = 0 (Linear)
Curve = 10 (Exp/Log)
Curve = 0 (Linear) Curve = 10 (Exp/Log)
When you change the curvature, the EG times remain the same. However, greater curvature will tend to sound faster, because the value changes more quickly at the beginning.
Different curve settings for up and down
You may find that different amounts of curvature are suitable for segments which go up and segments which go down.
For instance, a curve of 3 is a good default setting for upward segments, such as Attack. On the other hand, a curve of 6 or more is good for downward segments, such as
Decay and Release.
Attack [0L (Linear), 1…9, 10E (Exp/Log)]
This sets the curvature of the Attack segment ‐ the transition from the Start level to the Attack level.
PROG P2: OSC/Pitch 2–10: Pitch EG
Decay [0L (Linear), 1…9, 10E (Exp/Log)]
This sets the curvature of the Decay segment ‐ the transition from the Attack level to the Break level.
Slope [0L (Linear), 1…9, 10E (Exp/Log)]
This sets the curvature of the Slope segment ‐ the transition from the Break level to the Sustain level (which for the Pitch
EG is always 0).
Release [0L (Linear), 1…9, 10E (Exp/Log)]
This sets the curvature of the Release segment ‐ the transition from the Sustain level to the Release level.
2–10c:EG Level/Time Modulation
Level
These settings let you use two different AMS sources to control the Level parameters of the EG. For each of the two
AMS sources, the Start, Attack, Decay, and Break levels each have their own modulation intensities.
By using different settings for each of the three levels, you can cause both subtle and dramatic changes to the EG shape, as shown below.
Note:
Once the EG has started a segment between two points, that segment can no longer be modulated. This includes both the time of the segment, and the level reached at the end of the segment.
For instance, if the EG is in the middle of the Decay time, you can no longer modulate either the Decay time or the
Break level.
This also means that modulating the Start level, Attack level, or Attack time will not affect notes that are already sounding, unless the EG is then re ‐ started via EG Reset.
Pitch EG Level Modulation
Br (Break) [–99…+99]
This controls the depth and direction of the AMS modulation for the Break level.
AMS2
This selects the second AMS source for controlling the EG’s
Level parameters. The Start, Attack, Decay, and Break levels share this source, but each has its own modulation intensity.
The parameters ofAMS2 are identical to those of AMS1, above.
Time
These settings let you use an AMS source to control the Time parameters of the EG. The Attack, Decay, and Slope times share this AMS source, but each has its own modulation intensity.
Pitch EG Time Modulation
AMS=Velocity, Intensity = a positive (+) value
Note-on Note-on Note-on
“Attack”= +
“Decay”= +
“Slope”= +
Softly played note.
Original Shape.
“Attack”= +
“Decay”= +
“Slope”= +
Strongly played note.
Times are longer.
Reaches Sustain more slowly.
“Attack”= –
“Decay”= –
“Slope”= –
Strongly played note.
Times are shorter.
Reaches Sustain more quickly.
Original Shape Positive AMS on Start,
Attack, and Break
Negative AMS on Start,
Attack, and Break
Positive AMS on Start and Break,
Negative AMS on Attack
AMS1
AMS1 [List of AMS Sources]
This selects the first AMS source to control the EG’s Level parameters.
For a list of AMS sources, please see “AMS (Alternate
Modulation Source) List” on page 340.
St (Start) [–99…+99]
This controls the depth and direction of the AMS modulation for the Start level.
For example, if you set the
AMS1
source to Velocity and set
St
to
+99
, the Start level will increase as you play harder. If you instead set
St
to
–99
, the Start level will decrease as you play harder.
At (Attack) [–99…+99]
This controls the depth and direction of the AMS modulation for the Attack level.
AMS
AMS [List of AMS Sources]
This selects the AMS source to control the EG’s Time parameters. Velocity and Keyboard Track can both be useful here, for instance.
For a list of AMS sources, please see “AMS (Alternate
Modulation Source) List” on page 340.
At (Attack) [–99…+99]
This controls the depth and direction of the AMS modulation for the Attack time.
For example, if you set the
AMS
source to Velocity and set
Attack
to +99, the Attack time will get much longer at higher velocities. If you instead set
Attack
to –99, the Attack time will get much shorter at higher velocities.
When the AMS source is at its maximum value for instance, when
Velocity
is at 127 a setting of +8 will make the Attack time almost twice as long, and a setting of –8 will cut the
Attack time almost in half.
Dc (Decay) [–99…+99]
This controls the depth and direction of the AMS modulation for the Decay time.
Sl (Slope) [–99…+99]
This controls the depth and direction of the AMS modulation for the Slope time.
V
2–10: Menu Command
• 0:
Write Program
see p. 64
• 1:
Exclusive Solo
see p. 64
• 2:
Auto Song Setup
see p. 65
• 3:
Copy Oscillator
see p. 65
• 4:
Swap Oscillator
see p. 65
For more information, please see “Program: Menu
Command” on page 64.
25
26
Program mode
PROG P3: Filter
Filtering can make subtle or dramatic changes to the oscillator’s timbre. Each oscillator has two multimode resonant filters, A and B, as well as a dedicated filter envelope and keyboard tracking generator.
These pages let you control all aspects of the filters. Among other things, you can:
• Make basic settings for each oscillator’s filters, including routing, modes, cutoff, resonance, etc.
• Set up filter modulation, including keyboard tracking, the filter envelope, LFO modulation, and AMS control.
Note that when the
Oscillator Mode
is set to
Single
, only
Oscillator 1’s filters are active; the pages for Oscillator 2’s filters will be grayed out.
When 24 dB/oct is selected, only the controls for Filter A are active; the controls for Filter B will be grayed out.
Serial and Parallel Routing
Oscillator Filter A (Low Pass) Filter B (High Pass)
3–1: Filter1
3–1a
3–1
Menu
Oscillator
Low Pass
:
12dB/oct
Filter A (Low Pass)
Filter B (High Pass)
3–1c
3–1b
Low Pass
:
This page contains all of the basic settings for Oscillator 1’s
Filter A and Filter B. For example, you can:
• Set up the filters to produce a single 12 dB/oct filter, dual
12 dB/oct filters in either serial or parallel routing, or a single 24 dB/oct filter.
• Set each of the two filters to Low Pass, High Pass, Band
Pass, or Band Reject modes.
• Set the cutoff, resonance, and input and output levels of each filter, including modulation of resonance and output level.
3–1a: Filter Routing
Filter Routing
[Single, Serial, Parallel, 24dB(4Pole)]
Each oscillator has two filters, Filter A and Filter B. This parameter controls whether one or both of the filters are used, and if both are used, it controls how they are connected to each other.
Single.
This uses only Filter A as a single 2 ‐ pole, 12 dB/ octave filter (6 dB for Band Pass and Band Reject). When this option is selected, the controls for Filter B will be grayed out.
Serial.
This uses both Filter A and Filter B. The oscillator first goes through Filter A, and then the output of Filter A is processed through Filter B.
Parallel.
This also uses both Filter A and Filter B. The oscillator feeds both filters directly, and the outputs of the two filters are then summed together.
24dB/oct.
This merges both filters to create a single 4 ‐ pole,
24 dB/octave filter (12 dB for Band Pass and Band Reject). In comparison to Single, this option produces a sharper roll ‐ off beyond the cutoff frequency, as well as a slightly more delicate resonance. Many classic analog synths used this general type of filter.
3–1b: Filter A
Filter Type
[Low Pass (12dB/oct), High Pass (12dB/oct),
Band Pass (6dB/oct), Band Reject (6dB/oct)]
The filter will produce very different results depending on the selected filter type. The selections will change slightly according to the selected
Filter Routing
, to show the correct cutoff slope in dB per octave.
Low Pass (12dB/oct).
This cuts out the parts of the sound which are
higher
than the cutoff frequency. Low Pass is the most common type of filter, and is used to make bright timbres sound darker.
High Pass (12dB/oct).
This cuts out the parts of the sound which are
lower
than the cutoff frequency. You can use this to make timbres sound thinner or more buzzy.
Band Pass (6dB/oct).
This cuts out all parts of the sound, both highs and lows, except for the region around the cutoff frequency. Since this filter cuts out both high and low frequencies, its effect can change dramatically depending on the cutoff setting and the oscillator’s multisample.
With low resonance settings, you can use the Band Pass filter to create telephone or vintage phonograph sounds. With higher resonance settings, it can create buzzy or nasal timbres.
Band Reject (6dB/oct).
This filter type also called a notch filter–cuts only the parts of the sound directly around the cutoff frequency. Try modulating the cutoff with an LFO to create phaser ‐ like effects.
PROG P3: Filter 3–1: Filter1
Filter Types and Cutoff Frequency
Low Pass
High Pass
Band Pass
Band Reject
Bypass
This lets you bypass Filter A completely.
If
Bypass
is
Off
, Filter A functions normally.
When
Bypass
is
On
, Filter A will have no effect.
[Off, On]
Frequency [00…99]
This controls the cutoff frequency of Filter A, in increments of 1/10 of an octave. The specific effect of the cutoff frequency will change depending on the selected
Filter
Type
.
Trim [00…99]
This adjusts the volume level at the input to the filter. If you notice that the sound is distorting, especially with high
Resonance
settings, you can turn the level down here, or at the
Output
.
Resonance [00…99]
Resonance emphasizes the frequencies around the cutoff frequency.
When this is set to 0, there is no emphasis, and frequencies beyond the cutoff will simply diminish smoothly.
At medium settings, the resonance will alter the timbre of the filter, making it sound more nasal, or more extreme.
At very high settings, the resonance can be heard as a separate, whistling pitch.
To make the resonance track the keyboard pitch, please see
“Key Follow” on page 29.
Resonance
AMS (Resonance) [List of AMS Sources]
This selects a AMS source to control the Resonance amount.
For a list of AMS sources, please see “AMS (Alternate
Modulation Source) List” on page 340.
AMS Int.
[–99…+99]
This controls the depth and direction of the Resonance modulation.
For example, if Velocity has been selected, changes in keyboard velocity will affect the resonance. With positive (+) values, the resonance will increase as you play more strongly, and as you play more softly the resonance will approach the level specified by the
Resonance
setting. With negative (–) values, the resonance will decrease as you play more strongly, and as you play more softly the resonance will approach the level specified by the
Resonance
setting.
The resonance level is determined by adding the
Resonance
and
AMS Int.
values.
Output [00…99]
This controls the output level of Filter A. You can use this to balance the volumes of Filters A and B when the
Routing
is set to Parallel, or to turn down the volume to avoid clipping later in the signal chain.
AMS (Output AMS) [List of AMS Sources]
This selects a modulation source to control the output level
of Filter A. For a list of AMS sources, please see “AMS
(Alternate Modulation Source) List” on page 340.
AMS Int.
[–99…+99]
This controls the depth and direction of the output level modulation.
3–1c: Filter B
Filter B is available when the
Filter Routing
is set to
Serial
or
Parallel
. Otherwise, the parameters in this section will be grayed out.
The parameters for Filter B are identical to those for Filter A.
For more information, please see the descriptions under
Filter A, above.
V
3–1: Menu Command
• 0:
Write Program
see p. 64
• 1:
Exclusive Solo
see p. 64
• 2:
Auto Song Setup
see p. 65
• 3:
Copy Oscillator
see p. 65
• 4:
Swap Oscillator
see p. 65
For more information, please see “Program: Menu
Command” on page 64.
Low resonance value High resonance value
27
Program mode
3–2: Filter1 Keyboard Track
3–2
Menu
3–2a
Keyboard Track Shape and Intensity
Intensity = +99 (Original Shape)
28
This page contains the settings for Oscillator 1’s filter keyboard track. Among other things, you can:
• Set up complex keyboard tracking shapes, and control how the tracking affects filter cutoff.
Filter B is available when the
Filter Routing
is set to
Serial
or
Parallel
. Otherwise, the parameters for Filter B will be grayed out.
3–2a: Keyboard Track
Most acoustic instruments get brighter as you play higher pitches. At its most basic, keyboard tracking re ‐ creates this effect by raising the lowpass filter cutoff frequency as you play higher on the keyboard. Usually, some amount of key tracking is necessary in order to make the timbre consistent across the entire range.
The KROME keyboard tracking can also be much more complex, since it allows you to create different rates of change over up to four different parts of the keyboard. For instance, you can:
• Make the filter cutoff increase very quickly over the middle of the keyboard, and then open more slowly or not at all in the higher octaves.
• Make the cutoff increase as you play lower on the keyboard.
• Create abrupt changes at certain keys, for split ‐ like effects.
How it works: Keys and Ramps
The keyboard tracking works by creating four ramps, or slopes, between five keys on the keyboard. The bottom and top keys are fixed at the bottom and top of the MIDI range, respectively. You can set the other three keys named
Key
Low
,
Center
, and
Key High
to be anywhere in between.
The four Ramp values control the rate of change between each pair of keys. For instance, if the
Lo Cent (Low-Center)
Ramp is set to 0, the value will stay the same between the
Key Low
key and the
Center
key.
The Key value will be the break point, and the slope of the lower and higher regions on the keyboard is specified by the
Ramp.
At the
Center
key (the main hinge), the keyboard tracking has no effect.
Intensity to A [–99…+99]
This controls how much the keyboard tracking will affect
Filter A’s cutoff frequency. The overall effect of the Keyboard
Track is a combination of this Intensity value and the overall
Keyboard Track shape.
With
positive values (+)
, the effect will be in the direction specified by keyboard tracking; if the ramp goes up, the filter cutoff will
increase
.
With
negative values (–),
the effect will be in the opposite direction; if the ramp goes up, the filter cutoff will decrease.
Intensity = –99 (Inverted)
Low Break Key Center Key High Break Key
Intensity to B [–99…+99]
This controls how much the keyboard tracking will affect
Filter B’s cutoff frequency.
Key
Key Low [C–1…G9]
This specifies the note at which the two sloped lines in the lower range will be connected.
Center [C–1…G9]
This specifies the note that will be the break point for the center of keyboard tracking. At this key, the keyboard tracking has no effect on the filter cutoff, or on any AMS destinations.
Key High [C–1…G9]
This specifies the note at which the two sloped lines in the upper range will be connected.
Note:
You can also set the note value and velocity value by holding down the edit cell or the ENTER button and playing a note on the keyboard (see OG p.10).
Ramp
Positive ramp values mean that the keyboard tracking output increases as you play farther from the
Center Key
; negative ramp values mean that it decreases.
Because of this, the meanings of positive and negative ramp settings will change depending on whether the ramp is to the left or right of the
Center Key
.
Btm Lo (Bottom-Low) and Lo Cent (Low-Center)
: negative ramps make the keyboard tracking’s output go down as you play lower on the keyboard, and positive ramps make the output go higher.
Cent Hi (Center-High) and Hi Top (High-Top)
: negative ramps make the keyboard tracking’s output go down as you play higher on the keyboard, and positive ramps make the output go up.
The effect on the filter cutoff is a combination of the ramp values, as set below, and the
Intensity to A (B)
parameters.
When
Intensity to A (B)
is set to +99, a ramp of 50 changes the filter frequency by 1 octave for every octave of the keyboard, and a ramp of +99 changes the frequency by 2 octaves for every octave of the keyboard.
PROG P3: Filter 3–3: Filter1 Modulation
Btm Lo (Bottom-Low) [–Inf, –99…+99, +Inf]
This sets the slope between the bottom of the MIDI note range and the
Key Low
key. For normal key track, use negative values.
Lo Cent (Low-Center) [–Inf, –99…+99, +Inf]
This sets the slope between the
Key Low
and
Center
keys.
For normal key track, use negative values.
Cent Hi (Center-High) [–Inf, –99…+99, +Inf]
This sets the slope between the
Center
and
Key High
keys.
For normal key track, use positive values.
Hi Top (High-Top) [–Inf, –99…+99, +Inf]
This sets the slope between the
Key High
key and the top of the MIDI note range. For normal key track, use positive values.
+Inf and –Inf ramps
+Inf and –Inf are special settings which create abrupt changes for split ‐ like effects. When a ramp is set to +Inf or
–Inf, the keyboard tracking will go to its extreme highest or lowest value over the span of a single key.
+Inf and –Inf Ramps
Ramp = +Inf
For more information, please see “Program: Menu
Command” on page 64.
3–3: Filter1 Modulation
This page contains the settings for Oscillator 1’s filter modulation. Among other things, you can:
• Control the effect of the Filter Envelope on filter cutoff.
• Assign AMS modulation for filter cutoff.
Filter B is available when the
Filter Routing
is set to
Serial
or
Parallel
. Otherwise, the parameters for Filter B will be grayed out.
3–3
Menu
3–3a
3–3b
Ramp = –50
Ramp = –Inf
Key Low Center Key High
Note:
if you set the
Cent Hi
ramp to +Inf or –Inf, the
Hi Top
parameter will be grayed out. Similarly, if you set the
Lo
Cent
ramp to +Inf or –Inf, the
Btm Lo
ramp will be grayed out.
Key Follow
To create the classic Key Follow effect, in which the filter frequency tracks the pitch of the keyboard:
1. Set the Filter Frequency to 30.
2. Set the Keyboard Track Intensity to +99.
3. Set the Btm Lo and Lo Cent ramps to –50.
4. Set the Cent Hi and Hi Top ramps to +50.
5. Set the Center Key to C4.
The settings for the
Key Low
and
Key High
keys don’t matter in this case.
Filter Keyboard Track is also an AMS source
You can use the filter keyboard tracking as an AMS source to modulate other parameters, just like the envelopes and
LFOs. Simply select
Filter KTrk
in the AMS list for the desired parameter.
V
3–2: Menu Command
• 0:
Write Program
see p. 64
• 1:
Exclusive Solo
see p. 64
• 2:
Auto Song Setup
see p. 65
• 3:
Copy Oscillator
see p. 65
• 4:
Swap Oscillator
see p. 65
3–3a: Filter EG
The Filter EG modulates the Filter A and B cutoff frequencies over time. You can control how strongly the EG will affect the filters in three different ways:
• Set an initial amount of EG modulation, using the
Intensity to A
and
B
parameters.
• Use velocity to scale the amount of the EG applied to the filter.
• Use any AMS source to scale the amount of the EG applied to the filter.
You can use all three of these at once, and the results are added together to produce the total EG effect.
To set up the EG itself, including attack and release times,
levels, and so on, please see “3–5: Filter1 EG” on page 31.
Velocity to A [–99…+99]
This lets you use velocity to scale the amount of the Filter EG applied to Filter A.
Velocity control of Filter EG
In all examples below, Intensity to A = +50
A. Original EG B. Velocity to A = +50
Original
Original
C. Velocity to A = –25 D. Velocity to A = –99
With
positive (+) values
, playing more strongly will increase the effect of the Filter EG, as shown in example
B
above.
With
negative (–) values
, playing more strongly will introduce the opposite effect of the Filter EG–like inverting the polarity of the envelope. You can use this in several different ways:
29
Program mode
30
• You can set an initial positive amount with the Intensity to A/B parameters, and then reduce this amount with velocity. In this case, the final effect of the EG is simply diminished, and not actually inverted, as shown in example
C
above.
• You can also set the Velocity to A/B amounts so that they are greater than the initial amounts of Intensity to A/B. In this case, the EG will have a positive effect at low velocities, and an inverted effect at high velocities as shown in example
D
.
Velocity to B [–99…+99]
This lets you use velocity to scale the amount of the Filter EG applied to Filter B. For more information, please see
“Velocity to A” above.
Intensity to A [–99…+99]
This controls the initial effect of the Filter EG on Filter A’s cutoff frequency, before any velocity or AMS modulation.
The Filter EG’s shape can swing all the way from +99 to –99.
Positive values increase the cutoff frequency, and negative values decrease the cutoff frequency. For instance, please see
the graphic “Velocity control of Filter EG” above. The EG
shape in example
A
rises up at first, and then falls below 0 towards the end.
When
Intensity to A
is set to a
positive (+)
value, the EG’s effect will match its shape. When the EG rises above 0, the cutoff frequency will increase.
With
negative (–)
values
,
the effect will be in the opposite direction; when the EG rises above 0, the filter cutoff will decrease.
Intensity to B [–99…+99]
This controls the initial effect of the Filter EG on Filter B’s cutoff frequency, before any velocity or AMS modulation.
For more information, please see “Intensity to A” above.
AMS (Filter EG AMS) [List of AMS Sources]
This selects any AMS modulation source to scale the amount of the Filter EG applied to Filters A and B. The two filters share a single AMS source, with separate intensity settings.
Otherwise, the AMS modulation will work in the same way as the
Velocity to A
parameter, described above.
For a list of AMS sources, please see “AMS (Alternate
Modulation Source) List” on page 340.
Int to A (AMS Intensity to A) [–99…+99]
This controls the depth and direction of the EG AMS modulation for Filter A.
Int to B (AMS Intensity to B) [–99…+99]
This controls the depth and direction of the EG AMS modulation for Filter B.
3–3b: Filter A/B Modulation
This section lets you assign any two AMS sources to control
Filter A, and another two AMS sources to control Filter B.
This modulation is added to the basic Filter A and B cutoff frequencies, as set on the Filter 1 page.
Filter A
AMS1 (Filter A AMS1) [List of AMS Sources]
This selects the first modulation source for controlling Filter
A’s cutoff frequency. For a list of AMS sources, please see
“AMS (Alternate Modulation Source) List” on page 340.
Intensity (AMS1 Intensity)
This controls the depth and direction of AMS1.
[–99…+99]
AMS2 (Filter A AMS2) [List of AMS Sources]
This selects the second modulation source for controlling
Filter A’s cutoff frequency. For a list of AMS sources, please
see “AMS (Alternate Modulation Source) List” on page 340.
Intensity (AMS2 Intensity)
This controls the depth and direction of AMS2.
[–99…+99]
Filter B
The parameters for Filter B are identical to those for Filter A.
For more information, please see the descriptions under
Filter A, above.
V
3–3: Menu Command
• 0:
Write Program
see p. 64
• 1:
Exclusive Solo
see p. 64
• 2:
Auto Song Setup
see p. 65
• 3:
Copy Oscillator
see p. 65
• 4:
Swap Oscillator
see p. 65
For more information, please see “Program: Menu
Command” on page 64.
3–4: Filter1 LFO Mod.
LFO1, LFO2, and the Common LFO can all modulate Filter
A and B’s cutoff frequencies. You can control the strength of each LFO’s modulation independently for each filter, in three different ways:
• Set an initial amount of LFO modulation, using the
Intensity to A
and
B
parameters.
• Use JS ‐ Y to scale the amount of the LFO.
• Use any AMS source to scale the amount the LFO.
You can use each of these methods for each of the three
LFOs, and do so separately for both Filter A and Filter B.
The results are added together to produce the total LFO effect.
3–4
Menu
3–4a
3–4b
3–4a: LFO 1/2
LFO1
Intensity to A [–99…+99]
This controls the initial effect of the LFO on Filter A’s cutoff frequency, before any JS ‐ Y or AMS modulation.
Negative (–)
settings will invert the phase of the LFO. You can produce interesting effects by using the same LFO to modulate two different parameters (such as Filter A and
Filter B), but with one set to a positive intensity, and the other set to a negative intensity.
PROG P3: Filter 3–5: Filter1 EG
LFO modulation of Filter Cutoff
Low setting High setting
Intensity to B [–99…+99]
This controls the initial effect of the LFO on Filter B’s cutoff frequency, before any JS ‐ Y or AMS modulation.
JS–Y Intensity to A [–99…+99]
This adjusts the depth by which the LFO will modulate the cutoff frequency of filter A when you move the joystick from the center in the –Y direction (toward yourself) (or when
CC#2 is received). (Joystick control in the –Y direction is called “JS –Y”.)
Negative (–)
settings will invert the phase of the LFO. You can also use this to reduce the initial amount of the LFO, as set by
Intensity to A
, above. For example:
1. Set Intensity to A to +50.
The LFO will now have a fairly strong effect on the filter cutoff.
2. Set JS-Y Intensity to A to –50.
Now, if you move the joystick down, the effect of the LFO will fade away. When the joystick is all the way at the bottom of its range, the LFO will be completely cancelled out.
JS–Y Intensity to B (LFO1) [–99…+99]
This lets you use JS ‐ Y to scale the amount of the LFO applied to Filter B.
AMS (LFO1) [List of AMS Sources]
This selects any AMS modulation source to scale the amount of the LFO applied to Filters A and B. The two filters share a single AMS source, but with separate intensity settings.
For a list of AMS sources, please see “AMS (Alternate
Modulation Source) List” on page 340.
Intensity to A (LFO1) [–99…+99]
This controls the depth and direction of the LFO1 AMS modulation for Filter A.
For example, if
AMS
is set to
JS+Y: CC#01
,
positive
settings mean that YS+Y will increase the amount of LFO1 applied to
Filter A.
Intensity to B (LFO1) [–99…+99]
This controls the depth and direction of the LFO1 AMS modulation for Filter B.
LFO 2
The parameters for LFO2 are identical to those for LFO1. For more information, please see the descriptions under LFO1, above.
3–4b: Common LFO
The parameters for the Common LFO are identical to those for LFO1. For more information, please see the descriptions under LFO1, above.
Note that while LFO1 and LFO2 are separate for each voice, the Common LFO is shared by all voices in the Program.
This makes it useful when you want all of the voices to have an identical LFO effect.
V
3–4: Menu Command
• 0:
Write Program
see p. 64
• 1:
Exclusive Solo
see p. 64
• 2:
Auto Song Setup
see p. 65
• 3:
Copy Oscillator
see p. 65
• 4:
Swap Oscillator
see p. 65
For more information, please see “Program: Menu
Command” on page 64.
3–5: Filter1 EG
3–5a
3–5b
3–5
Menu
The Filter EG, or Envelope Generator, lets you create complex, time ‐ varying changes to the cutoff frequencies of
Filters A and B. The parameters on this page control the shape of the EG. Among other things, you can:
• Create the basic EG shape by setting the levels and times of each segment.
• Control the curvature of each EG segment, for subtle control over the modulation shape of the EG.
• Set up complex modulation of EG levels and times.
• Set up an AMS source, such as an LFO, to restart the EG.
To control how much effect the EG has on the filters, use the
Filter EG parameters on the P3: Filter– Modulation page, as
described under “3–3a: Filter EG” on page 29.
Filter EG is also an AMS source
You can use the Filter EG as an AMS source to modulate other parameters, just like the keyboard tracking and LFOs.
Simply select the Filter EG in the AMS list for the desired parameter.
3–5a: EG Reset
AMS [List of AMS Sources]
This selects an AMS source to reset the EG to the start point.
For instance, you can use a tempo ‐ synced LFO to trigger the
EG in a repeating rhythm. This reset is in addition to the initial note ‐ on, which always causes the EG to start.
For a list of AMS sources, please see “AMS (Alternate
Modulation Source) List” on page 340.
Threshold [–99…+99]
This sets the AMS level which will trigger the EG reset.
Among other things, you can use this to adjust the exact point in an LFO’s phase at which the EG will be reset, effectively controlling its “groove” against other rhythmic effects.
When the threshold is
positive
, the EG triggers when passing through the threshold moving upwards. When the threshold is
negative
, the EG triggers when passing through the threshold moving downwards.
Note:
With some LFO shapes, and with faster LFO speeds, the LFO may not always reach the extreme values of +99 or –
31
Program mode
32
99. In this case, setting the
Threshold
to these values may cause inconsistent behavior, or may mean that the EG doesn’t reset at all. If this happens, reduce the
Threshold
until the EG triggers consistently.
3–5b: Envelope
Filter EG
Attack
Level
Break
Level
Sustain
Level
Start
Level
Release
Level
Change to
Time
Attack
Time
Decay
Time
Slope
Time
Release
Time
Note-on or reset
An envelope creates a modulation signal by moving from one level to another over a specified time, and then moving to another level over another period of time, and so on.
The parameters below let you set five levels, the amount of time it takes to go from each of the levels to the next, and the shape (from linear to curved) of each transition.
Level
Each of the five levels can be either positive or negative.
Positive
levels will make the cutoff frequency (or other AMS destination) go up from its programmed value;
negative
levels will make it go down.
Start
This sets the initial EG level at note ‐ on.
[–99…+99]
Attack
This sets the level at the end of the Attack time.
[–99…+99]
Break [–99…+99]
Break, short for Break Point, sets the level at the end of the
Decay time.
Sus (Sustain) [–99…+99]
This sets the level at the end of the Slope time. Once it reaches the Sustain level, the EG will stay there until note ‐ off, unless it is reset via AMS.
Release [–99…+99]
This sets the level at the end of the Release time.
Time
Higher values mean longer times, as shown below:
EG Value
50
60
70
80
10
20
30
40
90
99
Actual Time
10 ms
44 ms
104 ms
224 ms
464 ms
944 ms
1.8 seconds
3.8 seconds
10.9 seconds
87.3 seconds
Attack [00…99]
This sets how long the EG takes to move from the Start level to the Attack level.
For the fastest possible attack time, you can set the Start level to +99; in this case, the EG will start instantaneously at its maximum value.
Decay [00…99]
This sets the time it takes to move from the Attack level to the Break level.
Slope [00…99]
This sets how long the EG takes to move from the Break level to the Sustain level. Once it reaches the Sustain level, the EG will stay there until note ‐ off (unless it is reset via
AMS).
Release [00…99]
This sets how long it takes the EG to move from the Sustain level to the Release level.
Note:
You can touch and drag to change this value
(See “* EG, Velocity Split” on page 6 of the Operation guide.).
Curve
For the sake of simplicity, most of the diagrams in this manual show envelopes as being made out of straight lines.
In actuality, though, envelopes are more likely to be made out of curves.
In other words, each segment’s level will change quickly at first, and then slow down as it approaches the next point.
This tends to sound better than straight, linear segments.
Classic analog synth envelopes made these curved shapes naturally. The KROME goes a step further than vintage synths, however, and lets you control the amount of curvature separately for each of the four envelope segments.
Filter EG Curve
Curve=0L (Linear)
Curve=10E (Exp/Log)
Curve=0L (Linear) Curve=10E (Exp/Log)
When you change the curvature, the EG times remain the same. However, greater curvature will tend to sound faster, because the value changes more quickly at the beginning.
Different curve settings for up and down
You may find that different amounts of curvature are suitable for segments which go up and segments which go down.
For instance, a curve of 3 is a good default setting for upward segments, such as Attack. On the other hand, a curve of 6 or more is good for downward segments, such as
Decay and Release.
Attack [0L (Linear), 1…9, 10E (Exp/Log)]
This sets the curvature of the Attack segment ‐ the transition from the Start level to the Attack level.
Decay [0L (Linear), 1…9, 10E (Exp/Log)]
This sets the curvature of the Decay segment ‐ the transition from the Attack level to the Break level.
PROG P3: Filter 3–5: Filter1 EG
Slope [0L (Linear), 1…9, 10E (Exp/Log)]
This sets the curvature of the Slope segment ‐ the transition from the Break level to the Sustain level.
Release [0L (Linear), 1…9, 10E (Exp/Log)]
This sets the curvature of the Release segment ‐ the transition from the Sustain level to the Release level.
3–5c: EG Level/Time Modulation
Level
These settings let you use any AMS source to control the
Level parameters of the EG. The Start, Attack, and Break levels share a single AMS source, but can each have different modulation intensities.
By using different settings for each of the three levels, you can cause both subtle and dramatic changes to the EG shape, as shown below.
Once an EG segment begins, it can’t be modulated
Once the EG has started a segment between two points, that segment can no longer be modulated. This includes both the time of the segment, and the level reached at the end of the segment.
For instance, if the EG is in the middle of the Decay time, you can no longer modulate either the Decay time or the
Break level.
As another example, let’s say that you’ve assigned the
Common LFO to modulate Break Level. The LFO may be moving all the time, but the Break Level is only affected by the LFO’s value at the instant that the Decay segment starts.
After that, the level is fixed.
Finally, this also means that modulating the Start level,
Attack level, or Attack time will not affect notes that are already sounding, unless the EG is then reset via AMS.
Filter EG Level Modulation
Original Shape Positive AMS on Start,
Attack, and Break
Negative AMS on Start,
Attack, and Break
Positive AMS on Start and Break,
Negative AMS on Attack
AMS [List of AMS Sources]
Selects an AMS source to control the EG’s Level parameters.
For a list of AMS sources, please see “AMS (Alternate
Modulation Source) List” on page 340.
St (Start) [–99…+99]
This controls the depth and direction of the AMS modulation for the Start level.
For example, if you set the
AMS
source to Velocity and set
St (Start)
to +99, the Start level will increase as you play harder. If you instead set
St (Start)
to –99, the Start level will decrease as you play harder.
At (Attack) [–99…+99]
This controls the depth and direction of the AMS modulation for the Attack level.
Br (Break) [–99…+99]
This controls the depth and direction of the AMS modulation for the Break level.
Time
These settings let you use three different AMS sources to control the Time parameters of the EG. For each of the three
AMS sources, the Attack, Decay, Slope, and Release times each have their own modulation intensities.
Filter EG Time Modulation
AMS=Velocity, Intensity = a positive (+) value
Note-on Note-on Note-on
“Attack”=+, “Decay”=+,
“Slope”=+, “Release”=+
Softly played note.
Original Shape
“Attack”=+, “Decay”=+,
“Slope”=+, “Release”=+
Stongly played note.
Times are longer.
Reaches Sustainmore slowly.
“Attack”=–, “Decay”=–,
“Slope”=–, “Release”=–
Stongly played note.
Times are shorter.
Reaches Sustainmore quickly.
AMS1 [List of AMS Sources]
Selects the first AMS source to control the EG’s Time parameters. Velocity and Keyboard Track can both be useful here, for instance.
For a list of AMS sources, please see “AMS (Alternate
Modulation Source) List” on page 340.
At (Attack) [–99…+99]
This controls the depth and direction of the AMS modulation for the Attack time.
For example, if you set the
AMS
source to Velocity and set
At (Attack)
to +99, the Attack time will get much longer at higher velocities. If you instead set
At (Attack)
to –99, the
Attack time will get much shorter at higher velocities.
When the AMS source is at its maximum value for instance, when
Velocity
is at 127 a setting of +8 will make the Attack time almost twice as long, and a setting of –8 will cut the
Attack time almost in half. (See page 342)
Dc (Decay) [–99…+99]
This controls the depth and direction of the AMS modulation for the Decay time.
Sl (Slope) [–99…+99]
This controls the depth and direction of the AMS modulation for the Slope time.
Rl (Release) [–99…+99]
This controls the depth and direction of the AMS modulation for the Release time.
AMS2 and AMS3
These select the second and third AMS sources, respectively, for controlling the EG’s Time parameters. Each has its own intensities for Attack, Decay, Slope, and Release. The parameters of both AMS2 and AMS3 are identical to those of
AMS1, above.
33
34
Program mode
V
3–5: Menu Command
• 0:
Write Program
see p. 64
• 1:
Exclusive Solo
see p. 64
• 2:
Auto Song Setup
see p. 65
• 3:
Copy Oscillator
see p. 65
• 4:
Swap Oscillator
see p. 65
• 5:
Sync Both EGs
see p. 66
For more information, please see “Program: Menu
Command” on page 64.
3–6: Filter2
This page controls Oscillator 2’s basic filter 2 settings. It is available only when the
Oscillator Mode
is set to
Double
or
Double Drums
; if not, the page will be grayed out.
The parameters are identical to those for Oscillator 1, as
described under “3–1: Filter1” on page 26.
3–7: Filter2 Keyboard Track
This page contains the settings for Oscillator 2’s keyboard track. Among other things, you can:
• Set up complex keyboard tracking shapes, and control how the tracking affects filter cutoff.
• Control the effect of the Filter Envelope on filter cutoff.
• Assign AMS modulation for filter cutoff.
Filter B is available when the
Filter Routing
is set to
Serial
or
Parallel
. Otherwise, the parameters for Filter B will be grayed out.
3–8: Filter2 Modulation
This page controls Oscillator 2’s filter modulation. It is available when the
Oscillator Mode
is set to
Double
or
Double Drums
; if not, the page will be grayed out.
The parameters are identical to those for Oscillator 1, as
described under “3–3: Filter1 Modulation” on page 29.
3–9: Filter2 LFO Mod.
This page controls Oscillator 2’s LFO filter modulation. It is available when the
Oscillator Mode
is set to
Double
or
Double Drums
; if not, the page will be grayed out.
The parameters are identical to those for Oscillator 1, as
described under “3–4: Filter1 LFO Mod.” on page 30.
3–10: Filter2 EG
This page controls Oscillator 2’s Filter EG. It is available when the
Oscillator Mode
is set to
Double
or
Double
Drums
; if not, the page will be grayed out.
The parameters are identical to those for Oscillator 1, as
described under “3–5: Filter1 EG” on page 31.
PROG P4: Amp/EQ 4–1: Amp1/Driver1
PROG P4: Amp/EQ
Oscillators 1 and 2 have separate controls for volume (also called “amplitude,” or “amp” for short); pan; and Drive; as well as dedicated amp envelopes and keyboard tracking generators. Additionally, both Oscillators share a three ‐ band
EQ.
These pages let you control all of these related parameters.
Among other things, you can:
• Set up the Driver circuit, which adds saturation and bass boost to the timbre.
• Set the pan position and pan modulation.
• Control amp level and modulation, including keyboard tracking, the amp envelope, LFO modulation, and AMS control.
• Set up the three ‐ band Track EQ.
Note that when the
Oscillator Mode
is set to
Single
, only
Oscillator 1’s amp, pan, and drive parameters are active; the pages for Oscillator 2 will be grayed out.
4–1: Amp1/Driver1
4–1a
4–1
Menu
4–1b
4–1c
This page controls the basic settings for the Amp/EQ section.
Here, you can:
• Set up the Driver circuit.
• Set the initial volume level.
• Control the pan position and pan modulation.
4–1a: Driver
The Driver adds saturation and overdrive to the sound, for everything from subtle fattening to drastic distortion. Unlike an overdrive effect, the Driver processes each voice individually, so the timbre stays the same regardless of how many voices are being played.
The two main parameters,
Drive
and
Low Boost
, work together to create the overall Driver effect.
Drive
contributes edge and bite, and
Low Boost
provides the body as well as boosting the bass.
Bypass [Off, On]
On (checked):
the Driver is completely removed from the signal path.
Drive [00…99]
This controls the amount of edge and bite in the timbre. Low settings will produce mild saturation, and higher settings create more obvious distortion.
Often, it’s useful to increase the
Low Boost
along with the
Drive
.
Note:
Even when the
Drive
amount is set to 0, the Driver circuit still affects the timbre. If your goal is a completely pristine sound, use the Bypass control instead.
AMS (Drive) [List of AMS Sources]
This selects an AMS modulation source to control the
Drive
amount.
For a list of AMS sources, please see “AMS (Alternate
Modulation Source) List” on page 340.
Intensity [–99…+99]
This controls the depth and direction of the AMS modulation for Drive.
Low Boost [00…99]
This low ‐ frequency EQ controls the body character of the sound. The specific EQ frequencies affected will change with the
Drive
setting.
Higher amounts increase the bass boost, and will also intensify the effect of the
Drive
parameter.
AMS [List of AMS Sources]
This selects an AMS modulation source to control the
Low
Boost
amount.
For a list of AMS sources, please see “AMS (Alternate
Modulation Source) List” on page 340.
Intensity [–99…+99]
This controls the depth and direction of the AMS modulation for
Low Boost
.
4–1b: Amp Level
Amp Level [000…127]
This controls the basic volume level of Oscillator 1, before keyboard tracking, velocity, and other modulation.
Mixer, DrumTrack and volume
You can control the Oscillator volume directly from the sliders in the 0–3 Mixer & Dram Track page. This is a separate parameter, in addition to
Amp Level
.
MIDI and volume
You can control the Program’s overall volume via MIDI using both Volume (CC#7) and Expression (CC#11).
When used one at a time, the two controllers work in exactly the same way: a MIDI value of 127 is equal to the
Amp Level
setting, and lower values reduce the volume.
If both CC#7 and CC#11 are used simultaneously, the one with the lower value determines the maximum volume, and the one with the higher value scales down from that maximum.
This is controlled on the global MIDI channel (Global 1–1a).
35
36
Program mode
4–1c: Pan
Pan [Random, L001…C064…R127]
This controls the stereo pan of Oscillator 1. A setting of
L001
places the sound at the far left,
C064
in the center, and
R127
to the far right.
When this is set to
Random
, the pan position will be different for each note ‐ on.
You can also control pan via MIDI Pan (CC#10).
A CC#10 value of 0 or 1 places the sound at the far left,
64 places the sound at the location specified by the
Pan
parameter, and 127 places the sound at the far right.
This is controlled on the global MIDI channel (Global 1–
1a).
Note:
Random cannot be selected via a MIDI control change.
You’ll need to select it here.
AMS (Pan) [List of AMS Sources]
This selects an AMS source to modulate Pan.
For a list of AMS sources, please see “AMS (Alternate
Modulation Source) List” on page 340.
Intensity [–99…+99]
This controls the depth and direction of the AMS modulation for Pan.
For example, if
Pan
is set to C064 and
AMS
is set to Note
Number,
positive (+)
intensities will cause the sound to move toward the right as you play higher than C4, and toward the left as you play lower than C4.
Negative (–)
intensities will have the opposite effect.
Use DKit Setting [Off, On]
This option is available only when the
Oscillator Mode
is set to
Drums
or
Double Drums
.
Unlike standard Programs, Drum Kits can have a different pan setting for every note. This parameter lets you choose whether to use the Drum Kit pan settings, or to use the
Program’s pan setting instead.
On (checked):
The Program will use the Drum Kit’s per ‐ note pan settings; pan AMS will still apply (Global 5–5b). This is the default setting.
Off (unchecked):
The Program will ignore the Drum Kit’s settings, and use the Program pan instead.
All keys of the drum kit will use the
Pan
setting.
V
4–1: Menu Command
• 0:
Write Program
see p. 64
• 1:
Exclusive Solo
see p. 64
• 2:
Auto Song Setup
see p. 65
• 3:
Copy Oscillator
see p. 65
• 4:
Swap Oscillator
see p. 65
For more information, please see “Program: Menu
Command” on page 64.
4–2: Amp1 Modulation
4–2a
4–2b
4–2
Menu
This page contains the settings for Oscillator 1’s Amp level modulation. Among other things, you can:
• Set up complex keyboard tracking shapes to control the
Amp level.
• Assign AMS modulation for the Amp level.
• Control the effect of the LFOs on the Amp level.
The total effect of the modulation can increase the volume to a maximum of two times louder than the
Amp Level
setting.
4–2a: Keyboard Track
Keyboard tracking lets you vary the volume as you play up and down the keyboard. Usually, some amount of key tracking is necessary in order to make the volume consistent across the entire range.
KROME’s keyboard tracking can be fairly complex, if desired. You can create different rates of change over up to four different parts of the keyboard. For instance, you can:
• Make the volume increase very quickly over the middle of the keyboard, and then increase more slowly or not at all in the higher octaves.
• Make the volume increase as you play lower on the keyboard.
• Create abrupt changes at certain keys, for split ‐ like effects.
Key:
Key Low [C–1…G9]
This specifies the note that will be the break point connecting the two sloped lines in the low region.
Center [C–1…G9]
This specifies the note that will be the break point in the center of keyboard tracking. At this key, the keyboard tracking has no effect on the volume, or on any AMS destinations.
Key High [C–1…G9]
This specifies the note that will be the break point connecting the two sloped lines in the high region.
Note:
You can also set the note value and velocity value by holding down the edit cell or the ENTER button and playing a note on the keyboard (see OG p.10).
Ramp:
Positive ramp values mean that the keyboard tracking output increases as you play farther from the
Center
Key; negative ramp values mean that it decreases.
Because of this, the meanings of positive and negative ramp settings will change depending on whether the ramp is to the left or right of the
Center
Key.
PROG P4: Amp/EQ 4–2: Amp1 Modulation
Ramp
–Inf
–99
–95
–48
–25
00
+25
+50
+99
+Inf
Btm Lo (Bottom-Low) and Lo Cent (Low-Center)
: negative ramps make the keyboard tracking’s output go down as you play lower, and positive ramps make the output go higher.
Cent Hi (Center-High) and Hi Top (High-Top)
: negative ramps make the keyboard tracking’s output go down as you play higher, and positive ramps make the output go up.
Differences from other Keyboard Tracks
There are several differences between the Amp keyboard tracking and the Filter and Common keyboard tracking.
For example, the results of the
Ramp
values are different. As shown in the graphic “Amp Keyboard Tracking,” below, negative slopes are more steep than positive slopes.
Also, the amp does not have separate control of Intensity.
Instead, Intensity is always fixed at the maximum amount, allowing keyboard tracking to change the volume from complete silence to twice as loud as the programmed level.
Btm Lo (Bottom-Low) [–Inf, –99…+99, +Inf]
This sets the slope between the bottom of the MIDI note range and the
Key Low
key. For normal key track, use negative values.
Lo Cent (Low-Center) [–Inf, –99…+99, +Inf]
This sets the slope between the
Key Low
and
Center
keys.
For normal key track, use negative values.
Cent Hi (Center-High) [–Inf, –99…+99, +Inf]
This sets the slope between the
Center
and
Key High
keys.
For normal key track, use positive values.
Hi Top (High-Top) [–Inf, –99…+99, +Inf]
This sets the slope between the
Key High
key and the top of the MIDI note range. For normal key track, use positive values.
Change in level
Silent in one half ‐ step
Silent in one whole ‐ step
Silent in one octave
Silent in two octaves
Silent in four octaves no change x2 in four octaves x2 in two octaves x2 in one octave x2 in one half ‐ step
Amp Keyboard Tracking
Ramp values:
+Inf and –Inf ramps
+Inf and –Inf are special settings which create abrupt changes for split ‐ like effects. When a ramp is set to +Inf or
–Inf, the keyboard tracking will go to its extreme highest or lowest value over the span of a single key.
When a ramp is set to +Inf, the keyboard tracking will go to its highest value (double the programmed volume) over a single half ‐ step.
Similarly, when a ramp is set to –Inf, the keyboard tracking will go to its lowest value (complete silence) over a single half ‐ step.
Note:
If you set the
Cent Hi (Center-High)
ramp to +Inf or
–Inf, the
Hi Top (High-Top)
parameter will be grayed out.
Similarly, if you set the
Lo Cent (Low-Center)
ramp to +Inf or –Inf, the
Btm Lo (Bottom-Low)
ramp will be grayed out.
Amp KTrk is also an AMS source
You can use the keyboard tracking as an AMS source to modulate other parameters, just like the envelopes and
LFOs. Simply select Amp KTrk in the AMS list for the desired parameter.
4–2b: Amp Modulation
You can modulate the Amp level by both velocity and an
AMS source.
This modulation scales the basic Amp level and Amp EG level parameters. The resulting volume is determined by multiplying the volume changes of the amp EG by other values such as
AMS. If these original levels are low, the maximum volume available with modulation will also be reduced.
Velocity Intensity [–99…+99]
With
positive (+)
values, the volume will increase as you play harder.
With
negative (–)
values, the volume will decrease as you play harder.
Velocity modulation of Amp level, with Amp EG
Volume
Time
Low velocity
Time
High velocity
+99 +50 +25
Louder x2
Change to
Volume
No change
Silence
Ramp values: –99 –97 –95 –48
Low Break: D1 Center: G2 High Break: C4
–25
37
Program mode
38
AMS [List of AMS Sources]
This selects any AMS modulation source to control the
Amp1 level. For a list of AMS sources, please see “AMS
(Alternate Modulation Source) List” on page 340.
Intensity [–99…+99]
This controls the depth and direction of the modulation.
For example, if
AMS
is set to
JS+Y: CC#01
,
positive (+)
values of this parameter will make the volume increase when move the joystick in the +Y direction.
Note that if the other modulation settings have already raised the volume to its maximum level (double the
Amp
Level
and Amp EG level settings), the volume cannot be increased any further.
LFO 1/2
You can modulate the Amp level with both LFO1 and LFO2.
LFO1
Intensity (LFO1) [–99…+99]
This controls the depth and direction of LFO1’s effect on the oscillator’s volume.
Negative (–)
values will invert the LFO waveform.
AMS (LFO1) [List of AMS Sources]
This selects an AMS modulation source to scale the amount of the LFO1 applied to the Amp level.
For a list of AMS sources, please see “AMS (Alternate
Modulation Source) List” on page 340.
Intensity [–99…+99]
This controls the depth and direction of the LFO1 AMS modulation for the Amp level.
LFO2
The parameters for LFO2 are identical to those for LFO1. For more information, please see the descriptions under LFO1, above.
V
4–2: Menu Command
• 0:
Write Program
see p. 64
• 1:
Exclusive Solo
see p. 64
• 2:
Auto Song Setup
see p. 65
• 3:
Copy Oscillator
see p. 65
• 4:
Swap Oscillator
see p. 65
For more information, please see “Program: Menu
Command” on page 64.
4–3: Amp1 EG
4–3a
4–3b
4–3c
4–3
Menu
These parameters let you create time ‐ varying changes in the volume of oscillator 1.
4–3a: EG Reset
AMS [List of AMS Sources]
This selects an AMS source to reset the EG to the start point.
For instance, you can use a tempo ‐ synced LFO to trigger the
EG in a repeating rhythm. This reset is in addition to the initial note ‐ on, which always causes the EG to start.
For a list of AMS sources, please see “AMS (Alternate
Modulation Source) List” on page 340.
Note:
Once the Amp EG is in its Release segment, it cannot be reset. (Otherwise, the sound might keep playing forever!)
Threshold [–99…+99]
This sets the AMS level which will trigger the EG reset.
Among other things, you can use this to adjust the exact point in an LFO’s phase at which the EG will be reset, effectively controlling its “groove” against other rhythmic effects. When the threshold is
positive
, the EG triggers when passing through the threshold moving upwards.
When the threshold is
negative
, the EG triggers when passing through the threshold moving downwards.
Note:
With some LFO shapes, and with faster LFO speeds, the LFO may not always reach the extreme values of +99 or –
99. In this case, setting the
Threshold
to these values may cause inconsistent behavior, or may mean that the EG doesn’t reset at all. If this happens, reduce the
Threshold
until the EG triggers consistently.
4–3b: Envelope
These parameters specify how the amp 1 EG will change over time.
Amp EG
Start
Level
Attack
Level
Break
Level
Sustain
Level
Volume
Time
Attack
Time
Decay
Time
Slope
Time
Note-on or reset
Release
Time
Note-off
Level
Start
This sets the initial volume level at note ‐ on.
Attack
This sets the level at the end of the Attack time.
[00…99]
[00…99]
PROG P4: Amp/EQ 4–3: Amp1 EG
Break [00…99]
Break, short for Break Point, sets the level at the end of the
Decay time.
Sustain [00…99]
This sets the level at the end of the Slope time. Once it reaches the Sustain level, the EG will stay there until note ‐ off
(unless it is reset via AMS).
Time
Higher values mean longer times, as shown below.
80
90
99
40
50
60
70
EG Value
10
20
30
Actual Time
10 ms
44 ms
104 ms
224 ms
464 ms
944 ms
1.8 seconds
3.8 seconds
10.9 seconds
87.3 seconds
Attack [00…99]
This sets how long the EG takes to move from the Start level to the Attack level.
For the fastest possible attack time, you can set the Start level to +99; in this case, the EG will start instantaneously at its maximum value.
Decay [00…99]
This sets the time it takes to move from the Attack level to the Break level.
Slope [00…99]
This sets how long the EG takes to move from the Break level to the Sustain level. Once it reaches the Sustain level, the EG will stay there until note ‐ off (unless it is reset via
AMS).
Release [00…99]
This sets how long it takes the EG to move from the Sustain level to silence.
Curve
For the sake of simplicity, most of the diagrams in this manual show envelopes as being made out of straight lines.
In actuality, though, envelopes are more likely to be made out of curves.
In other words, each segment’s level will change quickly at first, and then slow down as it approaches the next point.
This tends to sound better than straight, linear segments.
Classic analog synth envelopes made these curved shapes naturally. The KROME goes a step further than vintage synths, however, and lets you control the amount of curvature separately for each of the four envelope segments.
When you change the curvature, the EG times remain the same. However, greater curvature will tend to sound faster, because the value changes more quickly at the beginning.
Amp EG Curve
Curve=0L (Linear)
Curve=10E (Exp/Log)
Curve=0L (Linear) Curve=10E (Exp/Log)
Different curve settings for up and down
You may find that different amounts of curvature are suitable for segments which go up and segments which go down.
For instance, a curve of 3 is a good default setting for upward segments, such as Attack. On the other hand, a curve of 6 or more is good for downward segments, such as
Decay and Release.
Attack [0L (Linear), 1…9, 10E (Exp/Log)]
This sets the curvature of the Attack segment ‐ the transition from the Start level to the Attack level.
Decay [0L (Linear), 1…9, 10E (Exp/Log)]
This sets the curvature of the Decay segment ‐ the transition from the Attack level to the Break level.
Slope [0L (Linear), 1…9, 10E (Exp/Log)]
This sets the curvature of the Slope segment ‐ the transition from the Break level to the Sustain level.
Release [0L (Linear), 1…9, 10E (Exp/Log)]
This sets the curvature of the Release segment ‐ the transition from the Sustain level to the Release level.
4–3c: EG Level/Time Modulation
Level
These settings let you use any AMS source to control the
Level parameters of the EG. The Start, Attack, and Break levels share a single AMS source, but can each have different modulation intensities.
By using different settings for each of the three levels, you can cause both subtle and dramatic changes to the EG shape, as shown below.
Once an EG segment begins, it can’t be modulated
Once the EG has started a segment between two points, that segment can no longer be modulated. This includes both the time of the segment, and the level reached at the end of the segment.
For more information, please see “Once an EG segment begins, it can’t be modulated” on page 33.
39
Program mode
Amp EG Level Modulation
Volume
Time
Original Shape
Volume
Time
Positive AMS on Start,
Attack, and Break
Volume Volume
Time
Negative AMS on Start,
Attack, and Break
Time
Positive AMS on Start and Break,
Negative AMS on Attack
AMS [List of AMS Sources]
This selects an AMS source to control the EG’s Level parameters.
For a list of AMS sources, please see “AMS (Alternate
Modulation Source) List” on page 340.
St (Start) [–99…+99]
This controls the depth and direction of the AMS modulation for the Start level.
For example, if you set the AMS source to Velocity and set
St
(Start)
to +99, the Start level will increase as you play harder.
If you instead set
St (Start)
to –99, the Start level will decrease as you play harder.
At (Attack) [–99…+99]
This controls the depth and direction of the AMS modulation for the Attack level.
Br (Break) [–99…+99]
This controls the depth and direction of the AMS modulation for the Break level.
Time
These settings let you use three different AMS sources to control the Time parameters of the EG. For each of the three
AMS sources, the Attack, Decay, Slope, and Release times each have their own modulation intensities.
Amp EG Time Modulation
AMS=Velocity, Intensity = a positive (+) value
Note-on Note-off Note-on Note-off Note-on Note-off higher velocities. If you instead set
At (Attack)
to –99, the
Attack time will get much shorter at higher velocities.
When the AMS source is at its maximum value for instance, when
Velocity
is at 127 a setting of +8 will make the segment time almost twice as long, and a setting of –8 will cut the segment time almost in half.
Dc (Decay) [–99…+99]
This controls the depth and direction of the AMS modulation for the Decay time.
Sl (Slope) [–99…+99]
This controls the depth and direction of the AMS modulation for the Slope time.
Rl (Release) [–99…+99]
This controls the depth and direction of the AMS modulation for the Release time.
AMS2 and AMS3
These select the second and third AMS sources, respectively, for controlling the EG’s Time parameters. Each has its own intensities for Attack, Decay, Slope, and Release. The parameters of both AMS2 and AMS3 are identical to those of
AMS1, above.
V
4–3: Menu Command
• 0:
Write Program
see p. 64
• 1:
Exclusive Solo
see p. 64
• 2:
Auto Song Setup
see p. 65
• 3:
Copy Oscillator
see p. 65
• 4:
Swap Oscillator
see p. 65
For more information, please see “Program: Menu
Command” on page 64.
4–5: Amp2/Driver2
This page controls Oscillator 2’s basic level, pan, and driver settings. It is available when the
Oscillator Mode
is set to
Double
or
Double Drums
; if not, the page will be grayed out.
The parameters are identical to those for Oscillator 1, as
described under “4–1: Amp1/Driver1” on page 35.
40
“Attack”= +, “Decay”= +,
“Slope”= +, “Release”= +
Softly played note.
Original Shape.
“Attack”= +, “Decay”= +,
“Slope”= +, “Release”= +
Strongly played note.
Times are longer.
Reaches Sustain more slowly.
“Attack”=–, “Decay”=–,
“Slope”=–, “Release”=–
Strongly played note.
Times are shorter.
Reaches Sustain more quickly.
AMS1 [List of AMS Sources]
Selects the first AMS source to control the EG’s Time parameters. Velocity and Keyboard Track can both be useful here, for instance.
For a list of AMS sources, please see “AMS (Alternate
Modulation Source) List” on page 340.
At (Attack) [–99…+99]
This controls the depth and direction of the AMS modulation for the Attack time.
For example, if you set the AMS source to Velocity and set
At (Attack)
to +99, the Attack time will get much longer at
4–6: Amp2 Modulation
This page controls Oscillator 2’s amp modulation. It is available when the
Oscillator Mode
is set to
Double
or
Double Drums
; if not, the page will be grayed out.
The parameters are identical to those for Oscillator 1, as
described under “4–2: Amp1 Modulation” on page 36.
4–7: Amp2 EG
This page controls Oscillator 2’s amp EG. It is available when the
Oscillator Mode
is set to
Double
or
Double
Drums
; if not, the page will be grayed out.
The parameters are identical to those for Oscillator 1, as
described under “4–3: Amp1 EG” on page 38.
4–10: EQ
4–10a
4–10
Menu
This three ‐ band EQ, with sweepable mid, is shared by both of the Program’s oscillators 1, 2.
In Combinations and Sequencers, each timbre and track has its own individual EQ. You can import the Program’s EQ settings into Tracks and Timbres by using the Combination and Sequencer
Auto Load Program EQ
options.
4–10a:3 Band Parametric EQ
Bypass [On, Off]
On (checked):
All of the EQ will be disabled, including the
Input Trim
.
Bypass is useful for comparing the results of the EQ with the original signal.
Input Trim [00…99]
This controls the volume level going into the EQ. The setting corresponds to the volume; 50 corresponds to –12 dB, and 25 corresponds to –24 dB.
High settings of the
Low
,
Mid
, and
High Gain
controls can cause substantial increases in the overall level. You can compensate for this by turning down the input trim.
Low Gain [–18.0…+00.0…+18.0[dB]]
This controls the gain of the 80 Hz Low Shelf EQ, in increments of 0.5 dB.
Mid Freq (Mid Frequency) [100(Hz)…10.00k(Hz)]
This sets the center frequency for the Mid sweep EQ.
Mid Gain [–18.0…+00.0…+18.0[dB]]
This controls the gain of the Mid Sweep EQ, in increments of
0.5 dB.
High Gain [–18.0…+00.0…+18.0[dB]]
This controls the gain of the 10 kHz High Shelf EQ, in increments of 0.5 dB.
V
4–10: Menu Command
• 0:
Write Program
see p. 64
• 1:
Exclusive Solo
see p. 64
• 2:
Auto Song Setup
see p. 65
• 3:
Copy Oscillator
see p. 65
• 4:
Swap Oscillator
see p. 65
For more information, please see “Program: Menu
Command” on page 64.
PROG P4: Amp/EQ 4–10: EQ
41
Program mode
42
PROG P5: LFO
Each of the Oscillators 1, 2 has two LFOs, which you can use to modulate the filter, amp, pitch, and many other parameters.
The two Oscillators also share a single Common LFO, similar to the global LFO on some vintage analog synths.
These pages let you set up all of the parameters for all five
LFOs.
5–1: OSC1 LFO1
5–1a
5–1b
5–1c
5–1
Menu
This page has all of the controls for the first LFO of
Oscillator 1. For instance, you can:
• Select the LFO’s basic waveform, and modify it with the
Shape
parameter.
• Control the LFO’s frequency, and assign AMS controllers to modulate the frequency.
• Use the
Key Sync
parameter to choose whether the LFO runs separately for each voice, or is synchronized across all of the voices
• Use the
Fade
and
Delay
parameters to control how long the LFO waits to start after note ‐ on, and whether it starts abruptly or fades in slowly.
• Set the LFO to sync to MIDI tempo.
5–1a: OSC 1 LFO 1
Waveform [Triangle…Random6 (Continuous)]
This selects the basic LFO waveform, as shown in the graphic below.
Most of the waveforms should be self ‐ explanatory, but a few will benefit from more details:
Guitar
is intended for guitar vibrato, and its shape is specifically tuned for this purpose. The waveform is positive ‐ only, so that when used for pitch, it will only bend up, and not down.
Random1 (S/H)
generates traditional sample and hold waveforms, in which the level changes randomly at fixed intervals of time.
Random2 (S/H)
randomizes both the levels and the timing.
LFO waveform
Triangle
Saw
Square
Sine
Guitar
Exponential
Triangle
Exponential
Saw Down
Exponential
Saw Up
Step Triangle-4
Step Triangle-6
Step Saw-4
Step Saw-6
Random3 (S/H)
generates a pulse wave with random timing. It’s the opposite of traditional sample and hold; the timing varies, but the levels don’t.
Random4–6 (Continuous)
are smoothed versions of
Random 1–3, with ramps instead of steps. You can use them to create more gentle random variations.
Phase [–180…+180, Random]
This controls the phase of the waveform at the start of the note, in steps of 5 degrees.
If
Key Sync
is Off, the Start Phase will apply only to the first note of the phrase.
Frequency [00…99]
This controls the speed of the LFO, before any modulation.
Higher values mean faster speeds, as shown in the table below.
By using AMS modulation, you can also get speeds much faster and much slower than are available through this basic setting.
Frequency Value Frequency in Hz
40
50
60
70
00
10
20
30
80
90
99
99 + Fine 99
0.014 Hz
0.112 Hz
0.422 Hz
0.979 Hz
1.79 Hz
2.84 Hz
4.14 Hz
5.69 Hz
7.49 Hz
9.53 Hz
26.25 Hz
32 Hz
Stop [Off, On]
On (checked):
Instead of the LFO operating normally, it will ignore the
Frequency
setting. The LFO will maintain the initial value (determined by the combination of
Waveform
,
Phase
,
Shape
, and
Offset
) until the note ‐ off.
Since the value will change only at note ‐ on, using a Random waveform will produce a fixed value that changes randomly at each note ‐ on (or at the first note ‐ on).
Off (unchecked):
The LFO will operate normally.
Shape [–99…+99]
Shape adds curvature to the basic waveform. As you can see in the graphic below, this can make the waveforms either more rounded or more extreme. It can also be useful to emphasize certain value ranges, and de ‐ emphasize others.
For example, let’s say that you are using a triangle LFO to modulate filter cutoff. If
Shape
emphasizes the high value range, the filter will spend more time at the higher
Random1
(S/H)
Random2
(S/H)
Random3
(S/H)
Random4
(Continuous)
Random5
(Continuous)
Random6
(Continuous)
PROG P5: LFO 5–1: OSC1 LFO1
frequencies. If it emphasizes the low range, the filter will spend more time at the lower frequencies.
LFO Shape
+99
0
–99
Shape = 0 (original waveform)
Shape = +99
Shape = –99
Note:
Shape does
not
affect the Square and Random3 waveforms, since their values are always either +99 or –99.
When these are selected,
Shape
is grayed out.
AMS (Shape) [List of AMS Sources]
This selects a AMS source for controlling the LFO’s Shape.
Modulating the shape can dramatically alter the effect of the
LFO try it out!
For a list of AMS sources, please see “AMS (Alternate
Modulation Source) List” on page 340.
AMS Int (Intensity) [–99…+99]
This controls the depth and direction of the
AMS (Shape)
modulation.
Key Sync.
[Off, On]
On (checked):
When Key Sync is
On
, the LFO starts each time you press a key, and an independent LFO runs for each note. This is the normal setting.
Off (unchecked):
When Key Sync is
Off
, the LFO starts from the phase determined by the first note in the phrase, so that the LFOs for all notes being held are synchronized together. The
Fade
and
Delay
settings will only apply to the first note’s LFO.
Note that even if Key Sync is Off, each note’s LFO speed may still be different if you modulate the Frequency by note number, velocity, key scaling, or other note ‐ specific AMS sources.
Offset [–99…+99]
By default, almost all of the LFO waveforms are centered around 0, and then swing all the way from –99 to +99. This parameter lets you shift the LFO up and down, so that for instance it’s centered on 50, and then swings from –49 to
+149.
For example, let’s say that you’re using an LFO for vibrato. If the
Offset
is
0
, the vibrato will be centered on the note’s original pitch, bending it both up and down.
If the
Offset
is
+99
, on the other hand, the vibrato will only raise the pitch above the original note.
Offset settings and pitch change produced by vibrato
Pitch
The one exception to this is the Guitar waveform, which is designed to emulate bending a string on a guitar so that the pitch only goes up, and not down. Because of this, the waveform is centered on 50, and not on 0. Of course, you can always use a negative
Offset
to shift it back down below 0 again!
Since Offset affects the output values of the LFO, it’s important to note that it affects the signal after the Shape function, as shown below:
How the LFO signal is affected by Shape and Offset
Waveform Shape
Fade [00…99]
The LFO can fade in gradually, instead of simply starting immediately at full strength. This parameter specifies the time from when the LFO begins to play until it reaches its maximum amplitude.
If the
Delay
parameter is being used, then the fade will begin after the delay is complete.
When
Key Sync
is
Off
, the fade will apply only to the first note in the phrase.
LFO Fade and Delay
Delay Fade
Note-on
Delay [00…99]
This sets the time from note ‐ on until the LFO starts.
When
Key Sync
is
Off
, the delay applies only to the first note of the phrase.
+33
+16
–16
–33
+99
+82
+66
+49
–49
–66
–82
–99
Intensity
5–1b: Frequency Modulation
You can use two alternate modulation sources (AMS) to adjust the speed of the LFO.
AMS1 (Frequency) [List of AMS Sources]
This selects the first AMS source for the LFO1’s frequency.
For a list of AMS sources, please see “AMS (Alternate
Modulation Source) List” on page 340.
Note that you can use LFO2 to modulate LFO1’s frequency.
Intensity [–99…+99]
This sets the initial amount of
AMS1 (Frequency)
. The
Int
Mod AMS
then adds to this initial amount.
When AMS is at its maximum value (for example by moving the joystick fully away from yourself), the AMS affects the frequency as shown below:
Change to LFO Frequency
64x
32x
16x
8x
4x
2x
1/2x
1/4x
1/8x
1/16x
1/32x
1/64x
Faster
Slower
43
44
Program mode
Int Mod AMS (Intensity Mod AMS)
[List of AMS Sources]
This selects a secondary AMS source to scale the intensity of
AMS1.
For a list of AMS sources, please see “AMS (Alternate
Modulation Source) List” on page 340.
Intensity [–99…+99]
This controls the depth and direction of the
Int Mod AMS
.
Even if the main AMS1 Intensity is set to 0,
Int Mod AMS
can still control the final amount of AMS A over the full +/–
99 range.
For example, if
AMS1
is set to the
Pitch EG
, and
Int Mod
AMS
is set to
JS+Y:CC#01
,
positive
settings mean that YS+Y will increase the intensity of the Pitch EG modulation of
LFO Frequency.
AMS2 (Freq. AMS2) [List of AMS Sources]
This selects the second AMS source for the LFO1’s
frequency. For a list of AMS sources, please see “AMS
(Alternate Modulation Source) List” on page 340.
Intensity [–99…+99]
This controls the amount of modulation from
AMS2 (Freq.
AMS2)
.
5–1c: Frequency MIDI/Tempo Sync.
MIDI/Tempo Sync.
[Off, On]
When MIDI/Tempo Sync is
On
, the LFO will synchronize to the system tempo, as set by either the Tempo knob or MIDI
Clock. The LFO speed will be controlled by the
Base Note
and
Times
parameters, below. All settings for
Frequency
and
Frequency Modulation
will be ignored.
When MIDI/Tempo Sync is
Off
, the
Frequency
and
Frequency Modulation
settings will determine the speed of the LFO, and the tempo settings will have no effect.
Base Note (Sync. Base Note) [ … ]
This sets the basic speed of the LFO, relative to the system tempo. The values range from a 32nd note to a whole note, including triplets.
Times (Sync. Times) [01…32]
This multiplies the length of the
Base Note
. For instance, if the
Base Note
is set to a sixteenth note, and
Times
is set to
03
, the LFO will cycle over a dotted eighth note.
V
5–1: Menu Command
• 0:
Write Program
see p. 64
• 1:
Exclusive Solo
see p. 64
• 2:
Auto Song Setup
see p. 65
• 3:
Swap LFO 1&2
see p. 66
For more information, please see “Program: Menu
Command” on page 64.
5–2: OSC1 LFO2
This is Oscillator 1’s second LFO. Its parameters are exactly
the same as those for the first LFO, as described under “5–1:
OSC1 LFO1” on page 42–except that LFO1 cannot modulate
LFO2.
5–5: OSC2 LFO1
This page controls Oscillator 2’s first LFO. It is available when the
Oscillator Mode
is set to
Double
or
Double
Drums
; if not, the page will be grayed out.
The parameters are identical to those for Oscillator 1, as
described under “5–1: OSC1 LFO1” on page 42.
5–6: OSC2 LFO2
This page controls Oscillator 2’s second LFO. It is available when the
Oscillator Mode
is set to
Double
or
Double
Drums
; if not, the page will be grayed out.
Its parameters are exactly the same as those for the first LFO,
as described under “5–1: OSC1 LFO1” on page 42–except
that LFO1 cannot modulate LFO2.
PROG P5: LFO 5–10: Common LFO
5–10: Common LFO
5–8a
5–8b
5–8c
5–8
Menu
This is a single, Common LFO, global for all voices in the
Program like the modulation LFOs in some vintage analog synths.
Differences from LFO1/2
The Common LFO starts running as soon as you select the
Program, and only resets when you tell it to do so explicitly via the Reset Source control, below. This is different from
LFO1/2’s
Key Sync
parameter, which resets whenever all notes are released.
The Common LFO’s persistence can be handy if you want to create a constant rhythm with an LFO, and then play
“underneath” that rhythm without re ‐ triggering it. For instance, you can use a MIDI controller in your sequencer to reset the Common LFO every few bars, regardless of what notes are being played.
The Common LFO has most of the same controls as LFO1/2.
However, it does not include the
Delay
,
Fade
, and
Key Sync
settings, since these only make sense for per ‐ voice LFOs.
5–10a:Common LFO
Waveform [Triangle…Random6 (Continuous)]
This selects the basic LFO waveform. For a complete list of the waveforms and more details, please see the entry under
LFO1 “Waveform” on page 42.
Phase [–180…+180, Random]
The
Reset AMS
, described above, lets you reset the
Common LFO. This is the phase from which the LFO will start when it is reset.
Frequency [00…99]
This controls the speed of the LFO, before any modulation.
Higher values mean faster speeds. For a complete description, please see the entry under LFO1 “Frequency” on page 42.
Stop [Off, On]
On (checked):
Instead of the LFO operating normally, it will ignore the
Frequency
setting. Instead, the LFO simply generates a single value when the Program is selected, and then holds that value until you select another Program, or until you reset the LFO via AMS.
Note:
This is different from LFO1/2, in which the value is reset with every note ‐ on.
You can use this in conjunction with the Random waveforms to create static, random modulation, with the value changing only when you first select the Program.
Off (unchecked):
When Stop is
Off
, the LFO will function normally.
Shape [–99…+99]
Shape adds curvature to the basic waveform. For more details, please see the entry under LFO1 “Shape” on page 42.
Note:
Shape does
not
affect the Square and Random3 waveforms, since their values are always either +99 or –99.
AMS (Shape) [List of AMS Sources]
This selects a AMS source for controlling the LFO’s Shape.
Modulating the shape can dramatically alter the effect of the
LFO try it out!
For a list of AMS sources, please see “AMS (Alternate
Modulation Source) List” on page 340.
AMS Int (AMS Intensity) [–99…+99]
This controls the depth and direction of the
AMS (Shape)
modulation.
Reset AMS [List of AMS Sources]
This selects an AMS source to reset the LFO to the Start
Phase
. The LFO resets when the AMS value passes the halfway mark: +50 for most AMS sources, or 64 for MIDI controllers.
To create an effect similar to the per ‐ voice LFO’s
Key Sync.
setting, set this to
Gate 2+ Damper
.
Offset [–99…+99]
By default, almost all of the LFO waveforms are centered around 0, and then swing all the way from –99 to +99. This parameter lets you shift the LFO up and down, so that for instance it’s centered on 50, and then swings from –49 to
+149.
For a complete description, please see the entry under LFO1
“Offset” on page 43.
5–10b:Frequency Modulation
These parameters are identical to the Frequency Modulation settings for LFO1, as described under “5–1b: Frequency
Modulation” on page 43.
5–10c:Frequency MIDI/Tempo Sync
These parameters are identical to the Frequency MIDI/
Tempo Sync for LFO1, as described under “5–1c: Frequency
MIDI/Tempo Sync.” on page 44.
V
5–10: Menu Command
• 0:
Write Program
see p. 64
• 1:
Exclusive Solo
see p. 64
• 2:
Swap LFO 1&2
see p. 66
For more information, please see “Program: Menu
Command” on page 64.
45
Program mode
46
PROG P6: AMS/Common Key Track
(AMS Mixer/Common Keyboard Track)
Each Oscillator has two AMS Mixers, which are simple but powerful tools for combining and modifying AMS signals.
The two Oscillators also share two Common keyboard tracking generators, in addition to the dedicated keyboard tracking for the Filter and Amp.
These pages let you control all of these modulation sources.
Note that when the
Oscillator Mode
is set to
Single
, only
Oscillator 1’s AMS Mixers are active; the pages for Oscillator
2 will be grayed out.
Quantize
turns smooth transitions into discrete steps. For more information, please see “Quantize” on page 49.
Gate Control
uses a third AMS source to switch between
two AMS inputs (or a fixed value). For more information, please see “Gate Control” on page 49.
A+B
AMS Mixer, Type = A+B
Amt A
6–1: OSC1 AMS Mix1
AMS A
Output
6–1
Menu
AMS B
6–1a
6–1b
The AMS Mixers combine two AMS sources into one, or process an AMS source to make it into something new.
For instance, they can add two AMS sources together, or use one AMS source to scale the amount of another. You can also use them to change the shapes of LFOs and EGs in various ways, modify the response of realtime controllers, and more.
You can select the output of the AMS mixers as an AMS source in the same way as an LFO or EQ.
This also means that the original, unmodified inputs to the
AMS Mixers are still available as well. For instance, if you use LFO1 as an input to an AMS Mixer, you can use the processed version of the LFO to control one AMS destination, and the original version to control another.
Finally, you can cascade the two AMS Mixers together, by using AMS Mixer 1 as an input to AMS Mixer 2.
Amt B
A+B merges two AMS sources into one. This can be handy when you need to add one more modulation source to a parameter, but you’ve already used up all of the available
AMS slots.
For instance, let’s say that you’re using an LFO to modulate
Filter Resonance
, and then you decide that it would be interesting to scale that parameter with an EG as well.
Resonance has only a single AMS input, but you can easily merge the LFO and the EG together using the A+B AMS
Mixer:
1. Assign the LFO to AMS A.
2. Assign the EG to AMS B.
3. Assign the AMS Mixer as the Filter Resonance AMS source.
AMS Mixer A+B example
AMS A: LFO
AMS B: EG
6–1a: AMS Mixer 1
Mixer Type [A+B, Amt AxB, Offset, Smoothing,
Shape, Quantize, Gate Control]
This controls the type of processing performed by AMS
Mixer 1. Each of the Mixer Types is discussed in detail over the next several pages.
A+B
adds two AMS sources together. For more information, please see “A+B” on page 46.
Amt Ax B
scales the amount of one AMS source with the
other. For more information, please see “Amt AxB” on page 47.
Offset
adds or subtracts a constant value to or from an AMS
source. For more information, please see “Offset” on page 47.
Smoothing
specifies the smoothness of movement between two values. You can use this to smooth sudden changes such as an
abrupt movement of the joystick or sharp angle of the LFO. For more information, please see “Smoothing” on page 48.
Shape
adds curvature to the AMS input. For more information, please see “Shape” on page 48.
A+B Output
AMS A
This selects the first AMS input.
[List of AMS Sources]
For a list of AMS sources, please see “AMS (Alternate
Modulation Source) List” on page 340.
AMS A Amount [–99…+99]
This controls the depth and direction of the AMS A input.
AMS B
This selects the second AMS input.
[List of AMS Sources]
For a list of AMS sources, please see “AMS (Alternate
Modulation Source) List” on page 340.
AMS B Amount [–99…+99]
This controls the depth and direction of the AMS B input.
PROG P6: AMS/Common Key Track (AMS Mixer/Common Keyboard Track) 6–1: OSC1 AMS Mix1
Amt AxB
AMS Mixer, Type =Amt A x B
AMS A
AMS B
Output
Amt B Amt A
This Mixer Type uses AMS B to scale the amount of AMS A.
For instance, you can control the amount of LFO1 with the
Filter EG, or control the amount of the Pitch EG with the joystick.
AMS Mixer Amt AxB example
AMS A: LFO
AMS B: EG
Amt A*B Output
AMS A [List of AMS Sources]
This selects the first AMS source, which can then be scaled by AMS B.
For a list of AMS sources, please see “AMS (Alternate
Modulation Source) List” on page 340.
AMS A Amount [–99…+99]
This controls the initial amount of AMS A, before modulation from AMS B. Input from AMS B then adds to this initial amount.
Even if Amount A is set to 0, AMS B can still control the final amount of AMS A over the full +/–99 range.
AMS B [List of AMS Sources]
This selects the second AMS source, to scale the amount of
AMS A.
For a list of AMS sources, please see “AMS (Alternate
Modulation Source) List” on page 340.
AMS B Amount [–99…+99]
This controls the depth and direction of the AMS B modulation of AMS A.
For example, if
AMS A
is set to LFO1 and
AMS B
is set to the Filter EG,
positive
settings mean that the EG will increase the amount of LFO1.
Tip
: use SW 1/2 to turn an AMS source on and off
You can use Amt AxB to “gate” an AMS source:
1. Set AMS A to the desired source, and set the AMS A
Amount to 0.
2. Set AMS B to SW1 or 2, and AMS B Amount to +99.
Now, SW1 or 2 will turn AMS A on and off.
Offset
AMS Mixer, Type = Offset
Amt A
AMS A Output
This simple processor adds a constant offset to the input, and also allows you to double the gain of an AMS source.
For instance, you can use this to convert a bipolar LFO (both negative and positive) to a unipolar LFO (positive only). To do this:
1. Select the LFO as the AMS A input.
2. Set the AMS A Amount to 50.
This cuts the overall level of the LFO in half, so that instead of swinging between –99 and +99, it only swings between
–50 and +50.
3. Set the AMS A Offset to 50.
This adds 50 to the LFO level, so that it now swings between
0 and +99, as shown below.
AMS Mixer Offset examples
AMS A: LFO
+99
0
–99
+99
0
–99
Offset = +50, Amount = 50
+99
0
–99
Clipped at Output
Offset = –99, Amount = +199
AMS A [List of AMS Sources]
This selects the AMS source to be offset.
For a list of AMS sources, please see “AMS (Alternate
Modulation Source) List” on page 340.
AMS A Amount
This controls the basic level of AMS A.
[–199…+199]
+199 doubles the original signal level, while –199 doubles the original signal level and inverts the phase. The values are clipped only at the output; internally, they can be greater than the normal range of –99 to +99.
AMS A Offset [–199…+199]
This controls the amount of offset for AMS A.
Setting Offset to +199 shifts an AMS input of –99 all the way to +99. In conjunction with high
AMS A Amount
values, this can be useful for creating clipped shapes, such as shown in the last of the “AMS Mixer Offset examples” above.
47
48
Program mode
Smoothing
This Mixer Type smooths out the AMS input, creating more gentle transitions between values. You have separate control of the amount of smoothing during the attack (when the signal is increasing) and decay (when it’s decreasing).
The higher the Attack and Decay settings, the more the input will be smoothed.
Low settings provide subtle controller smoothing, creating more gradual aftertouch, for instance. Higher settings create auto ‐ fade effects, transforming a quick gesture into a longer fade ‐ in and/or fade ‐ out event.
Smoothing can also be used to alter the shape of programmable mod sources, such as LFOs and EGs. For instance, you can turn a “blip” into a simple envelope shape, as shown below.
AMS Mixer Smoothing examples
Original AMS A: Smoothing with Long Attack and Short Decay:
Smoothing with Short Attack & Long Decay:
AMS A [List of AMS Sources]
This selects the AMS source to be smoothed.
For a list of AMS sources, please see “AMS (Alternate
Modulation Source) List” on page 340.
AMS A Attack [00…+99]
This controls the attack time of the smoother, or how long it takes the smoother to reach a new, higher value.
Higher Attack settings mean longer times.
Depending on how quickly the AMS input value is changing, high Attack settings may mean that the value is never quite reached, as shown in “AMS Mixer Shape examples” above.
AMS A Decay [00…+99]
This controls the decay time of the smoother, or how long it takes the smoother to reach a new, lower value.
Higher Decay settings mean longer times.
Shape
This Mixer Type adds curvature to the AMS input. This applies deformation to the AMS input. You can use this to customize a controller curve, such as the exponential curve of the joystick or the logarithmic curve of velocity control. It can also alter the shape of programmable modulation sources, such as EGs and LFOs.
Note:
Shape only affects AMS signals which already have some amount of slope, such as EGs, triangle and sine LFOs, and so on. It does not affect signals which only contain abrupt transitions, such as square waves.
AMS A [List of AMS Sources]
This selects the AMS input source to be shaped.
For a list of AMS sources, please see “AMS (Alternate
Modulation Source) List” on page 340.
Shape [–99…+99]
This controls the amount of curvature, and whether the curves are concave or convex. As you can see in the graphic examples, the shape will tend to emphasize certain value ranges, and de ‐ emphasize others.
For example, let’s say that you are using a triangle LFO, through
Shape
, to modulate filter cutoff. If Shape emphasizes the high value range, the filter will spend more time at the higher frequencies. If it emphasizes the low range, the filter will spend more time at the lower frequencies.
Mode [Symmetric, Asymmetric]
This selects whether the Shape parameter will produce one or two curves. The graphic “AMS Mixer Shape examples” may help to visualize how this works.
Asymmetric
will produce a single curve, extending from
–99 to +99.
Symmetric
will produce two matching curves extending outwards from 0 to –99 and +99, respectively.
Bipolar and Unipolar AMS sources
To understand Shape, it helps to understand the difference between
bipolar
and
unipolar
AMS sources.
Bipolar
sources can swing all the way from –99 to +99, with
0 in the middle. Most LFOs are bipolar, for instance; so is
Pitch Bend.
Generally, bipolar AMS sources will work better with the
Asymmetric
mode, but
Symmetric
may also produce interesting results.
Unipolar
sources only go from 0 to 99, with 50 in the middle. MIDI controllers, such as JS+Y (CC#1), are all unipolar. In practice, EGs are usually programmed to be unipolar, even though the Filter and Pitch EGs do allow both positive and negative levels.
With unipolar sources, it’s almost always better to use the
Symmetric
mode. The
Asymmetric
mode can cause offsets and other strange results.
PROG P6: AMS/Common Key Track (AMS Mixer/Common Keyboard Track) 6–1: OSC1 AMS Mix1
AMS Mixer Shape examples
Bipolar Triangle Wave
Asymmetric
+99
0
–99
Symmetric
+99
0
–99
+99
0
–99
Bipolar Sawtooth Wave
Asymmetric Symmetric
+99
0
–99
Unipolar Triangle Wave
Asymmetric
(not recommended)
Symmetric
Shape = 0 (original waveform)
Shape = +99
Shape = –99
Quantize
This Mixer Type changes the input from a continuous signal into a series of discrete steps. Instead of moving smoothly between values, it will snap immediately from one value to another.
You can use this to change the shape of LFOs or EGs, or to force a controller to land on a few specific values.
AMS Mixer Quantize examples
Unipolar (e.g., JS+Y)
Original
AMS A
+99
0
–99
Bipolar (e.g., LFO)
Quantize
Steps = 8
+99
0
–99
Quantize
Steps = 16
+99
0
–99
AMS A [List of AMS Sources]
This selects the AMS input source to be quantized.
For a list of AMS sources, please see “AMS (Alternate
Modulation Source) List” on page 340.
Number Of Steps [2…32]
This controls the severity of the effect. The lower the number of steps, the more “steppy” the output will be.
For instance, when this is set to 2, there will be “steps” at 0,
50, and 99. With a bipolar AMS input, there will also be steps at –50 and –99.
As another example, when it is set to 5, there will be steps at
0, 20, 40, 60, 80, and 99 (as well as –20, –40, –60, –80, and –99 for bipolar inputs).
Tip: Quantized Joystick Pitch Bend
You can use the joystick to create quantized pitch bends that simulate sliding across the frets of a guitar, or jump ‐ bend sounds caused by differences in the length of the tube of a trumpet. To do so:
1. Select the AMS Mixer as the Oscillator Pitch AMS input.
2. Set the Pitch AMS Intensity to any exact half-step value, such as +5.00, +7.00, etc.
3. Set the JS(+X), JS(–X) amount to 0.00.
4. In the AMS Mixer, select the JS X as AMS A.
5. Set the Number Of Steps to the same number you used in Step 2.
Now, playing the joystick will create quantized pitch bends.
JSX will still produce smooth pitch bends, as usual, so you can use both techniques together.
Gate Control
AMS Mixer, Type = Gate Control
Control
Fixed Value
AMS
Below
Fixed Value
AMS
At & Above
This Mixer Type lets you set up two different AMS sources
(or fixed AMS amounts), and then switch between the two using a third AMS source.
It’s similar to an audio gate with a side ‐ chain, but with even more flexibility since you get to choose what happens when the gate is closed (below the threshold), as well as when it’s open (above the threshold).
You can also choose whether the gate will be able to open and close continuously in response to the control source, or whether it only opens or closes at the beginning of the note, and then stays that way over the note’s entire duration.
You can use the Gate to:
• Use a foot ‐ switch (or other controller) to apply pitch ‐ bend or other effects to some notes, but not to others
• The parameter will be applied when the controller reaches a specific threshold. For example, the velocity value could control the filter resonance only if the velocity value exceeds 90.
• Use the joystick, switches, or controllers to change between two separate LFOs (or other AMS sources).
49
Program mode
50
Gate Control:
Source [List of AMS Sources]
This selects the AMS source to control the gate.
Control At Note-On Only [Off, On]
When this is enabled (checked), the value of the
Control
Source
at note ‐ on will select the output (
Below Threshold
or
At & Above Threshold
). The selected output will then remain active throughout the duration of the note, regardless of any subsequent change in the
Control Source’s
value.
Note that the output value itself can continue to change; only the selection of
Below
or
At & Above
is fixed.
Threshold [–99…+99]
This sets the value of the
Control Source
at which the gate opens or closes.
Gate Output:
If the value of the
Control Source
is less than the
Threshold
, the Gate outputs the preset value or AMS source selected under
Below Threshold
.
If the value of the
Control Source
is greater than or equal to the
Threshold
, the Gate outputs the preset value or AMS source selected in the
At & Above Threshold
parameter.
Below Threshold [Fixed Value, AMS A]
This selects whether
Below Threshold
uses a preset value, or the selected AMS source.
Fixed Value [–99…+99]
This lets you set a specific value to be used when the
Control Source
is less than the
Threshold
. This only applies when
Below Threshold
is set to
Fixed Value
.
AMS A [List of AMS Sources]
This lets you set an AMS source to pass through the Gate when the
Control Source
is less than the
Threshold
. This only applies when
Below Threshold
is set to
AMS A
.
At & Above Thresh (At & Above Threshold)
[Fixed Value, AMS B]
This selects whether
At & Above Threshold
uses a preset value, or the selected AMS source.
Fixed Value [–99…+99]
This lets you set a specific value to be used when the
Control Source
is greater than or equal to the
Threshold
.
This only applies when
At & Above Threshold
is set to
Fixed Value
.
AMS B [List of AMS Sources]
This lets you set an AMS source to pass through the Gate when the
Control Source
is greater than or equal to the
Threshold
. This only applies when
At & Above Threshold
is set to
AMS B
.
Tips on using the Gate
Selective pitch-bend, using a switch
You can use
Control At Note-On Only
to apply an effect to some notes, but not others, based on the state of an AMS source at the start of the note. For instance:
1. Set the Control Source to Foot SW: CC#82
2. Set Control At Note-On Only to On (checked).
3. Set the Threshold to 50.
4. Set Below Threshold to a Fixed Value of +00.
5. Set At & Above Threshold to AMS B: JS X.
6. On the OSC Pitch page, assign the AMS Mixer to the pitch AMS.
7. Turn off the foot switch, and while holding down a chord, move the joystick in the X-direction. The pitch will not change.
(If the pitch changes, go to the OSC Pitch page and set Pitch
JS (+X
) and
JS (–X)
to +00.)
8. Turn on the foot switch, and add a new note to the previous chord.
9. Move the joystick in the X-direction; pitch bend will be applied only to the newly-played note.
The new note will bend, but the original chord (played before you pressed on the foot ‐ switch) will not.
Selective pitch-bend, using only the joystick
You can also use a single AMS source as both the Control
Source and a value source:
1. Set the Control Source to JS X.
2. Set Control At Note-On Only to On (checked).
3. Set the Threshold to 00.
4. Set Below Threshold to AMS A: JS X.
5. Set At & Above Threshold to a Fixed Value of 00.
6. On the OSC Pitch page, assign the AMS Mixer to the pitch AMS and set the intensity.
7. With the joystick in the center, play a chord, and hold it through step 9.
8. Bend the joystick to the left, and then play a new note above the chord.
(If the pitch changes, go to the OSC Pitch page and set Pitch
JS (+X)
and
JS (–X)
to +00.)
9. Use the joystick to bend the pitch of the new note.
The new note will bend, but the original chord (played before you bent the joystick down) will not. This method is particularly good for bending the top note of a chord up to pitch.
Generating a static value
Sometimes, it can be handy to have a preset value as an
AMS source. The Gate is one way to create this. To do so:
1. Set both Below Threshold and At & Above Threshold to Fixed Value, and enter the same value into each.
Now, the AMS mixer will always generate this static value.
V
6–1: Menu Command
• 0:
Write Program
see p. 64
• 1:
Exclusive Solo
see p. 64
• 2:
Auto Song Setup
see p. 65
• 3:
Copy Oscillator
see p. 65
• 4:
Swap Oscillator
see p. 65
For more information, please see “Program: Menu
Command” on page 64.
PROG P6: AMS/Common Key Track (AMS Mixer/Common Keyboard Track) 6–2: OSC1 AMS Mix2
6–2: OSC1 AMS Mix2
This is the second AMS Mixer for Oscillator 1. The parameters are exactly the same as those for AMS Mixer 1, as described under “6–1a: AMS Mixer 1” on page 46.
6–9: Common KeyTrk 1
(Common Keyboard Track 1)
6–9
Menu
6–9a
6–4: OSC 2 AMS Mix1 ,
6–5: OSC 2 AMS Mix2
This page controls the two AMS Mixers for Oscillator 2.
These are available only when the
Oscillator Mode
is set to
Double
or
Double Drums
; if not, the page will be grayed out.
The parameters are identical to those for Oscillator 1, as
described under “6–1: OSC1 AMS Mix1” on page 46.
The two Oscillators share two Common keyboard tracking generators, in addition to each Oscillator’s dedicated keyboard tracking for the Filter and Amp. You can use these
Common keytracks as AMS sources for modulating most
AMS destinations.
The Common Keyboard Track parameters are shared by the entire Program, but the actual AMS values are calculated individually for each voice.
What does Keyboard Tracking do?
At its most basic, keyboard tracking lets you vary the modulation amount as you play up and down the keyboard.
This can be useful for making the timbre consistent across the entire range, or adjusting parameters according to pitch.
The KROME keyboard tracking can be fairly complex, if desired. You can create different rates of change over up to four different parts of the keyboard. For instance, you can:
• Make the modulation increase very quickly over the middle of the keyboard, and then increase more slowly or not at all in the higher octaves.
• Make the modulation increase as you play lower on the keyboard.
• Create abrupt changes at certain keys, for split ‐ like effects.
Common Keyboard Tracking
At the Center Key, the AMS value is always 0.
AMS
+99
Ramp = +99
0
Ramp:
+99
–99
Ramp = –50
–99
AMS
Ramp:
+99
+50
00
–50
–99
Low Break Center High Break
For more information, please see “3–2: Filter1 Keyboard
Track” on page 28.
51
Program mode
52
6–9a: Keyboard Track 1
Key
Low Break [C–1…G9]
This specifies the note that will be the break point connecting the two sloped lines in the low region.
Center [C–1…G9]
This specifies the note that will be the break point in the center of keyboard tracking. At this
key
, the keyboard tracking has no effect on the AMS destinations.
High Break [C–1…G9]
This specifies the note that will be the break point connecting the two sloped lines in the high region.
Note:
You can also set the note value and velocity value by holding down the edit cell or the ENTER button and playing a note on the keyboard (see OG p.10).
Ramp
Positive ramp values mean that the keyboard tracking output increases as you play farther from the
Center
Key; negative ramp values mean that it decreases.
Because of this, the meanings of positive and negative
Ramp
settings will change depending on whether the ramp is to the left or right of the
Center
Key.
Bottom-Low and Low-Center
: negative ramps make the keyboard tracking’s output go down as you play lower on the keyboard, and positive ramps make the output go higher.
Center-High and High-Top
: negative ramps make the keyboard tracking’s output go down as you play higher on the keyboard, and positive ramps make the output go up.
Bottom-Low [–Inf, –99…+99, +Inf]
This sets the slope between the bottom of the MIDI note range and the
Low Break
key. For normal key track, use negative values.
Low-Center [–Inf, –99…+99, +Inf]
This sets the slope between the
Low Break
and
Center
keys.
For normal key track, use negative values.
Center-High [–Inf, –99…+99, +Inf]
This sets the slope between the
Center
and
High Break
keys. For normal key track, use positive values.
High-Top [–Inf, –99…+99, +Inf]
This sets the slope between the
High Break
key and the top of the MIDI note range. For normal key track, use positive values.
The table below shows how the
Ramps
affect the AMS output:
Ramp value
–Inf
–99
–50
0
+50
+99
+Inf
AMS change
goes to –99 in 1 half ‐ step
–20 per octave
–10 per octave no change
+10 per octave
+20 per octave goes to +99 in 1 half ‐ step
+Inf and –Inf ramps
+Inf and –Inf are special settings which create abrupt changes for split ‐ like effects. When a ramp is set to +Inf or
–Inf, the keyboard tracking will go to its extreme highest or lowest value over the span of a single key.
+Inf and –Inf Ramps
Ramp = +Inf
Ramp = –50
Ramp = –Inf
Key Low Center Key High
Note:
If you set the
Center-High
ramp to +Inf or –Inf, the
High-Top
parameter will be grayed out. Similarly, if you set the
Low-Center
ramp to +Inf or –Inf, the
Bottom-Low
ramp will be grayed out.
V
6–9: Menu Command
• 0:
Write Program
see p. 64
• 1:
Exclusive Solo
see p. 64
• 2:
Auto Song Setup
see p. 65
• 3:
Copy Oscillator
see p. 65
• 4:
Swap Oscillator
see p. 65
For more information, please see “Program: Menu
Command” on page 64.
6–10: Common KeyTrk 2
(Common Keyboard Track 2)
Here you can make settings for the second common keyboard track.
For more information, please see “6–9: Common KeyTrk 1
(Common Keyboard Track 1)” on page 51.
PROG P7: ARP/DT (Arpeggiator/Drum Track) 7–1: ARP Setup
PROG P7: ARP/DT (Arpeggiator/Drum Track)
Here you can make settings for the arpeggiator used by the program.
You can make settings so that when you select a program, these arpeggiator settings will automatically switch to the arpeggiator settings that are memorized in the selected program. (Global P0: 0–1c Load ARP when changing
“Program” on page 195)
The arpeggiator can be switched on/off by the ARP button.
When on, the key LED will light up.
The settings of the ARP button, TEMPO, arpeggio control
(ARP) GATE, VELOCITY, SWING and STEP knobs can be saved for each program.
Note: The parameters below that are marked with “*” can also be edited in “P0: Play ‐ Arpeggiator.”
These settings will be valid when “Load ARP when changing”
Program
(Global 0–1c) is checked.
You can control the arpeggiator from an external sequencer, or record note data generated by the arpeggiator onto an external sequencer. (See OG page 96)
Note:
Pattern
,
Resolution
,
Octave
,
Sort
,
Latch
,
Key Sync.
,
Keyboard
, and
(Tempo)
can also be set from the P0: Play,
Arpeggio page.
7–1b: Arpggiator Setup
Pattern* [P0…P4, U0000(INT)…U0899(INT),
U0900(USER)…U1027(USER)]
Selects the arpeggio pattern.
P0…P4
Preset/User No
U0000(INT)…U0899(INT)
Contents
Preset arpeggio patterns
Preloaded arpeggio patterns
U0900(USER)…U1027(USER) User arpeggio patterns
Note:
U0000(INT)
–
U1027(USER)
are rewritable. Use Global
P6: Arpeggio Pattern to create arpeggio patterns.
Example: Preset pattern
The way in which the pattern is played will depend on settings such as
Octave
and
Sort.
P0–P4 in the following diagrams show how the arpeggio will be played when
Octave
is set to 1, and
Sort
is checked. P4: RANDOM is only one possibility.
P0: UP
UP
7–1: ARP Setup
7–1a
7–1b
7–1
Menu
P1: DOWN
DOWN
P2: ALT1
ALT1
7–1a: Tempo
(Tempo)* [040.00…300.00, EXT]
Sets the tempo, expressed as beats per minute.
You can also adjust this by turning the front panel TEMPO knob. Alternatively, you can set the tempo by pressing the
TAP button at the desired interval.
When
MIDI Clock
(Global P1: 1–1b) is set to either
External MIDI
or
External USB
, this parameter will indicate
EXT
, and the arpeggiator will synchronize to the MIDI Clock received from an external MIDI device.
If
MIDI Clock
is set to Auto, this indication will be shown only if MIDI clock data is being received from an external device. When the EXT indication is shown, the arpeggiator etc. will synchronize to MIDI clock data from the external MIDI device.
P3: ALT2
ALT2
P4: RANDOM
RANDOM
Octave* [1, 2, 3, 4]
Specifies the number of octaves in which the arpeggio will be played.
If a user arpeggio pattern is selected, the range of the arpeggio will depend on the
Octave Motion
(Global P6:
6–1b) setting.
53
Program mode
54
Octave: 4
UP
Resolution* [ , , , , , , , ]
Specifies the timing resolution of the arpeggio. The notes of the arpeggio will be played at the interval you specify:
, ,
, , , , , or . The speed of the arpeggio pattern is determined by the Arpeggiator
(Tempo)
and the
Resolution
.
Turning the arpeggio control ARP STEP knob toward the right will shorten the spacing of the arpeggiated notes
(
Resolution
) in increments of halving the spacing. Turning the knob toward the left will shorten the length of the pattern (
Length
) in increments of halving the length. When the knob is in the center position (12 o’clock), the values will be as specified by the
Length
and
Resolution
settings
(Global P6: Arpeggio Pattern ‐ Setup page).
Gate [000…100(%), Step]
Specifies the length (gate time) of each note in the arpeggio.
000–100(%):
Each note will be played with the specified gate time.
Step:
This is available when a user arpeggio pattern
U0000(INT)–U1027(USER)
is selected for
Pattern
. When this is selected, the gate time specified for each step will be used.
The gate time can also be controlled by the arpeggio control
(ARP) GATE knob. Rotating the knob toward the left will shorten the gate time, and rotating it toward the right will lengthen the gate time. When the knob is at the 12 o’clock position, the gate time will be as specified here.
Velocity [001…127, Key, Step]
Specifies the velocity of the notes in the arpeggio.
001–127:
Each note will sound with the specified velocity value.
Key:
Each note will sound with the velocity value at which it was actually played.
Step:
This is available when an user arpeggio pattern
U0000(INT)–U1027(USER)
is selected for
Pattern
. When this is selected, the velocity specified for each step will be used.
The velocity can also be controlled by the arpeggio control
(ARP) VELOCITY knob. Rotating the knob toward the left will decrease the velocity, and rotating it toward the right will increase the velocity. When the knob is at the 12 o’clock position, the velocity will be as specified here.
When a preload user arpeggio pattern is selected, setting the
Gate
or
Velocity
to Step will add a sense of groove to the arpeggio pattern.
Swing [–100…+100(%)]
This parameter shifts the timing of the odd ‐ numbered notes of the arpeggio.
When Resolution =
Step 1 2 3 4 5 6 7 8 9
–50
Swing
–25 +25 +50
This can also be controlled by the arpeggio control (ARP)
SWING knob. Turning the knob toward the left will adjust the timing in the “ ‐ ” direction, and turning it toward the right will adjust the timing in the “+” direction.
Sort* [Off, On]
This specifies the order in which the notes you press will be arpeggiated.
On (checked):
Notes will be arpeggiated in the order of their pitch, regardless of the order in which you pressed them.
Off (unchecked):
Notes will be arpeggiated in the order in which you pressed them.
Sort
OFF, UP
Sort
ON, UP
Latch* [Off, On]
Specifies whether or not the arpeggio will continue playing after you take your hand off of the keyboard.
On (checked):
The arpeggio will continue playing after you remove your hand from the keyboard.
Off (unchecked):
The arpeggio will stop when you remove your hand from the keyboard.
Key Sync.* [Off, On]
Specifies whether the arpeggio pattern will begin when you press a key, or whether it will always follow the
(Tempo)
(Prog 0–1a).
On (checked):
The arpeggio pattern will start playing from the beginning when a note ‐ on occurs from a condition where no keys are pressed. This setting is suitable when you are playing in realtime and want the arpeggio to play from the beginning of the measure.
Off (unchecked):
The arpeggio pattern will always play according to the
(Tempo)
.
Keyboard* [Off, On]
This specifies whether the notes you play on the keyboard will be sounded as usual in addition to being sounded as part of the arpeggio.
On (checked):
The notes you play will be sounded on their own, in addition to being sounded as part of the arpeggio.
For example if you simultaneously press two or more notes, they will be sounded as usual in addition to being played as arpeggiated notes.
Off (unchecked):
Only the arpeggiated notes will be heard.
Note:
You can use the menu command
Copy Arpeggiator
to copy arpeggiator settings from another program or
combination (see page 66).
Arpeggio Pattern Preview
This shows a graphic of the steps of the user arpeggio pattern.
V
7–1: Menu Command
• 0:
Write Program
see p. 64
• 1:
Exclusive Solo
see p. 64
• 2:
Auto Song Setup
see p. 65
• 3:
Copy Arpeggiator
see p. 66
For more information, please see “Program: Menu
Command” on page 64.
7–2: ARP Scan Zone
7–2a
7–2b
7–2c
PROG P7: ARP/DT (Arpeggiator/Drum Track) 7–2: ARP Scan Zone
7–2
Menu
• 2:
Auto Song Setup
see p. 65
• 3:
Copy Arpeggiator
see p. 66
For more information, please see “Program: Menu
Command” on page 64.
7–4: Drum Track Pattern
7–4a
7–4
Menu
7–2a: Arpeggiator Tempo
(Tempo) [040.00…300.00, EXT]
For more information, please see “ (Tempo)*” on page 53.
7–2b: Zone Map
This shows the Scan Zone.
Key zone of arpeggiator
Velocity zone of arpeggiator
C–1 G9
7–2c: Scan Zone
This shows the
Scan Zone
setting.
Top Key [C–1…G9]
Bottom Key [C–1…G9]
These parameters specify the range of notes (keys) for which the arpeggiator will function.
Top Key
is the upper limit, and
Bottom Key
is the lower limit.
The arpeggiator will operate when you play keys within the specified range. Keys outside of this range can be played in the normal manner, and will not be affected by the arpeggiator on/off.
For example if you set
Pattern
to P0: UP, check
Latch
, set
Top Key
to B3, and
Bottom Key
to C ‐ 1, playing a note B3 or lower will trigger the arpeggiator. Since
Latch
is on, the arpeggio will continue even after you release the keys. You can use the C4 and higher keys to play conventionally along with the arpeggio sounded by the B3 and lower keys. To change the arpeggio, play keys in the range of B3 and below.
Top Velocity [001…127]
Bottom Velocity [001…127]
Specifies the range of velocities for which the arpeggiator will function.
Top Velocity
is the upper limit, and
Bottom
Velocity
is the lower limit.
The arpeggiator will operate when you play notes with a velocity (playing strength) that is within the specified range.
Notes played with a velocity outside this range will be sounded normally, without regard to the arpeggiator on/off.
Note:
You can also set the note value and velocity value by holding down the edit cell or the ENTER button and playing a note on the keyboard (see OG p.10).
V
7–2: Menu Command
• 0:
Write Program
see p. 64
• 1:
Exclusive Solo
see p. 64
7–4b
Here you can select a drum track pattern and specify how it will sound.
In Program mode, the drum track patterns are triggered on the Global MIDI channel. The MIDI transmit channel is specified by the DrumTrack
Prog
MIDI Ch
(Global P1: MIDI– MIDI Basic). Use the
DrumTrack
Prog MIDI Out
(Global P1: MIDI– MIDI
Basic) setting to specify whether the pattern will transmit MIDI note data. The default setting is channel
10.
The drum track program will not transmit or receive
MIDI program changes.
7–4a: Drum Pattern
Pattern [Preset, User]
[(Preset): P000…605, (User): U000…U999]
This selects the drum pattern.
P000
Preset/User No.
P000…P605
U000…U999
Contents
Off
Preset drum patterns
For user/preloaded drum patterns
• U000–U999 can be written. Patterns you create in
Sequencer mode can be converted into user drum
patterns. (See page 188)
Shift [–24…+00…+24]
This transposes the drum pattern in semitone steps. This means that the instruments of the drum kit will change.
55
Program mode
56
7–4b: Trigger
Trigger Mode [Start Immediately, Wait KBD Trig]
Start Immediately:
When you press the DRUM TRACK button to turn it on (LED lit), the drum track pattern will start according to the
Sync
setting. When you turn it on, the drum track pattern will stop.
Wait KBD Trig:
When you press the DRUM TRACK button to turn it on (LED lit), the drum pattern will wait to start.
When you play the keyboard, or when a MIDI note ‐ on is received, the drum pattern will start according to the
Sync
setting.
If you’ve selected
Start Immediately
, the DRUM
TRACK button will always be saved in the OFF state.
Sync [Off, On]
Off:
The drum pattern will not synchronize to the currently ‐ running arpeggiator, but will start immediately.
On:
The drum pattern will synchronize to the currently ‐ running arpeggiator.
Note:
Use P7–1: Arpeggiator Setup
Key Sync
to specify whether the arpeggiator will synchronize to the currently ‐ running drum pattern.
Latch [Off, On]
This specifies whether the drum track will continue playing even after you take your hand off the keyboard.
This setting is available if
Trigger Mode
is set to Wait KBD
Trig.
Off:
The pattern will stop when you take your hand off the keyboard (i.e., when all notes are off).
On:
The pattern will continue playing until the DRUM
TRACK button is turned off (LED unlit), regardless of whether you are performing via the keyboard or via MIDI.
Zone:
Keyboard
Bottom [C–1…G9]
Top [C–1…G9]
This is valid if
Trigger Mode
is set to
Wait KBD Trig
.
It specifies the range of keys that will start the drum pattern.
Velocity
Bottom [001…127]
Top [001…127]
This is valid if
Trigger Mode
is set to
Wait KBD Trig
.
It specifies the range of velocities that will start the drum pattern.
Note:
You can also set the note value and velocity value by holding down the edit cell or the ENTER button and playing a note on the keyboard (see OG p.10).
V
7–4: Menu Command
• 0:
Write Program
see p. 64
• 1:
Exclusive Solo
see p. 64
• 2:
Auto Song Setup
see p. 65
• 3:
Copy Drum Track
see p. 65
• 4:
Erase Drum Track Pattern
see p. 66
For more information, please see “Program: Menu
Command” on page 64.
7–5: Drum Track Program
7–5a
7–5b
7–5
Menu
7–5c
7–5a: Drum Track Parameters
Program Select [Drum Category Programs]
Here you can select the drum program that will be used by the drum track.
Note:
Only programs of the Drum category can be selected.
If data is loaded or a system exclusive message is received so that the selected program is no longer a
Drum category program, it will be replaced with the first program of the Drum category.
The drum track program will not transmit or receive
MIDI program changes.
Volume [000…127]
This adjusts the volume of the drum track program.
Play/Mute [Mute, Play]
This mutes the drum track program. The setting will alternate each time you press the Play/Mute button.
Mute:
The drum track program will not be heard (Mute).
Play:
The drum track program will be heard (Play).
Using the Mixer & Drum Track page to make Drum
Track settings
You can use the P0–3: Mixer & Drum Track page to edit the
Play/Mute
,
Solo On/Off
, and
Volume
settings of the drum
track. (See “0–3a: OSC/DrumTrack Mixer” on page 5.)
Detune [–1200…+1200]
This adjusts the pitch in one ‐ cent steps. One cent is 1/100th of a semitone.
The pitch of each drum kit is specified in Global P5: Drum
Kit.
You can control this using RPNs.
7–5b: EQ
Auto Load Program EQ [Off, On]
On (checked):
When you switch the drum track program, the 3 ‐ band EQ values specified for the program will automatically be loaded. Normally you will leave this checked.
You are free to edit the 3 ‐ band EQ values that are automatically loaded. You will be making changes based on the settings of the original program.
Off (unchecked):
The 3 ‐ band EQ values specified for the program will not be loaded when you switch the drum track program.
Bypass [On, Off]
When Bypass is checked, all of the EQ will be disabled, including the
Input Trim
.
PROG P7: ARP/DT (Arpeggiator/Drum Track) 7–5: Drum Track Program
Bypass can be convenient for comparing the results of the
EQ with the original signal.
Input Trim [00…99]
This controls the volume level going into the EQ. This setting corresponds to the volume; a value of 50 corresponds to –6 dB, and a setting of 25 corresponds to –12 dB.
High settings of the
Low
,
Mid
, and
High Gain
controls can cause substantial increases in the overall level. You can compensate for this by turning down the input trim.
High Gain [–18.0…+00.0…+18.0[dB]]
This controls the gain of the 10 kHz High Shelf EQ, in increments of 0.5 dB.
Mid Frequency [100Hz…10k(Hz)]
This sets the center frequency for the Mid sweep EQ.
Mid Gain [–18.0…+00.0…+18.0[dB]]
This controls the gain of the Mid Sweep EQ, in increments of
0.5 dB.
Low Gain [–18.0…+00.0…+18.0[dB]]
This controls the gain of the 80 Hz Low Shelf EQ, in increments of 0.5 dB.
7–5c: Bus
Bus Select [Dkit, L/R, IFX1…5, Off]
This specifies the bus that will output the drum track program.
Dkit:
The
Bus (IFX/Output) Select
,
FX Control Bus
,
Send1
(to MFX1)
, and
Send2 (to MFX2)
settings (Global 5–5b) for each key of the drum kit used by the selected drum track program will be valid. Choose this setting if you want to apply separate insert effects to each drum instrument.
Note:
When making Dkit settings, you will normally use
IFX. Patch
to specify the output destination.
L/R:
Output to the L/R bus.
IFX1, 2, 3, 4, 5:
Output to the IFX1–5 bus.
Off:
The sound will not be output to the L/R bus, or IFX1–5 bus. Use the Off setting if you have connected the drum track program output in series to a master effect. Use
Send1
(to MFX1)
or
Send2 (to MFX2)
to adjust the send level.
FX Control Bus [Off, 1, 2]
This sends the output of the drum track program to the FX
Control bus (two mono channels FX Ctrl1, 2).
The FX Control bus is used when you want to use another audio signal to control the input of an effect. You can use the two FX Control buses (two mono channels) to freely control
the effects in a variety of ways. For more information, please see “FX Control Buses” on page 238.
Send 1 [000…127]
Send 2 [000…127]
These specify the send level at which the output of the drum track program will be sent to each master effect.
Send 1:
Send the signal to master effect 1.
Send 2:
Send the signal to master effect 2.
If
Bus (IFX/Output) Select
is set to IFX1–5, the send levels to the master effects are set by the post ‐ IFX1–5
Send1
and
Send2
(Prog 8–2a).
You can use CC#93 to control
Send 1
, and CC#91 to control
Send 2
.
IFX. Patch:
IFX1
IFX2
IFX3
IFX4
[L/R, IFX1…5, Off]
[L/R, IFX1…5, Off]
[L/R, IFX1…5, Off]
[L/R, IFX1…5, Off]
IFX5 [L/R, IFX1…5, Off]
Here, you can patch the
Bus (IFX/Output) Select
setting specified for each key of the drum kit, temporarily changing its connection destination from the originally specified insert effect to some other destination. This can be executed only if the drum track program’s
Bus (IFX/Output) Select
is set to DKit and the
Bus (IFX/Output) Select
(Global 5–5b) for each key of the drum kit is set to IFX1–5.
As the patch destination, choose an insert effect or L/R,
IFX1–5, or Off as the output bus.
Note:
If you want to return the drum kit to its previous state, change these settings to IFX1
→
IFX1, IFX2
→
IFX2,
IFX3
→
IFX3, IFX4
→
IFX4, and IFX5
→
IFX5.
For the preloaded kits, snare sounds are normally sent to
IFX1, kick sounds to IFX2, and other sounds to IFX3. In such cases if you set
Bus Select
to Dkit, these sounds will be sent to IFX1, IFX2, and IFX3, but IFX1 and IFX2 are set for normal
(non ‐ drum) programs. In such cases, you can use
IFX.Patch
to route these drum sounds to unused IFX; for example, you might send the snare sounds to IFX3, kick sounds to IFX4,
and other sounds to IFX5. For more information, please see
“Effect Guide” on page 235.
V
7–5: Menu Command
• 0:
Write Program
see p. 64
• 1:
Exclusive Solo
see p. 64
• 2:
Auto Song Setup
see p. 65
• 3:
Copy Drum Track
see p. 65
• 4:
Erase Drum Track Pattern
see p. 66
For more information, please see “Program: Menu
Command” on page 64.
57
Program mode
58
PROG P8: Routing/IFX (Insert Effect)
Here, you can make settings for the insert effects. For instance, you can:
• Send the output of a oscillator to an insert effect
• Route a sound to an insert effect
• Make detailed settings for insert effects
• Make common LFO settings for effects
For more information, please see “Effect Guide” on page 235.
8–1: Routing
8–1a
8–1b
8–1
Menu
8–1c
8–1c: Use Dkit Setting
Use DKit Setting [Off, On]
This is shown if
Oscillator Mode
(Prog 1–1a) is set to
Drums
or
Double Drums.
If
Oscillator Mode
is set to
Single
or
Double
, this setting is ignored.
On (checked):
The
Bus (IFX/Output) Select
,
FX Control
Bus
,
Send 1
, and
Send 2
settings (Global 5–5b) for each key of the selected drum kit will be used. Check this if you want to apply an individual insert effect to each drum instrument.
Tip:
In most preloaded drumkits, the drum instruments have the same
Bus (IFX/Output) Select
settings according to their type, as follows.
Snares
→
IFX1
Kicks
→
IFX2
Other
→
IFX3
Off (unchecked):
The
Bus (IFX/Output) Select
(Prog 8–1b),
FX Control Bus
(Prog 8–1b),
OSC MFX Send
(Prog 8–1d) settings will be used. All drum instruments will be sent to the specified bus.
8–1d
8–1a: Routing Map
This graphic shows an overview of the insert effects.
Here you can view the status of the input bus to the insert effect
Bus (IFX/Output) Select
, the effect you’re editing, and its on/off status and chain status.
This page lets you adjust the routing of the oscillators to the insert effects. To adjust the other settings shown in this
graphic, please see “8–2: Insert FX Setup” on page 59.
8–1b: Bus Select (All OSCs to)
Bus (IFX/Output) Select [L/R, IFX1…5, Off]
This specifies the output bus for oscillators 1 and 2.
L/R:
The oscillators will be output to the L/R bus. Normally you will choose L/R.
IFX1…5:
Output to the IFX1–5 busses.
Off:
The oscillator will not be output from the L/R bus, or
IFX1–5 busses. Choose the Off setting if you want the program oscillator output of the timbre to be connected in series to a master effect. Use
Send1 (to MFX1)
and
Send2 (to
MFX2)
to specify the send levels.
FX Control Bus [Off, 1, 2]
Sends the output of the oscillator 1, 2 to an FX Control bus
(two ‐ channel mono FX Ctrl 1 or 2).
Use the FX Control busses when you want a separate sound to control the audio input of an effect. You can use two FX
Control busses (each is a two ‐ channel mono bus) to control effects in various ways.
For more information, please see “FX Control Buses” on page 238.
8–1d: OSC MFX Send
OSC1:
OSC1 Send1 (to MFX1) [000…127]
Sets the volume (send level) at which the output of oscillator
1 will be sent to master effect 1. This applies only when
Bus
(IFX/Output) Select
(Prog 8–1b) is set to
L/R
or
Off
.
If
Bus (IFX/Output) Select
is set to
IFX1
–
IFX5
, the send levels to master effects 1 and 2 are set by
Send 1
and
Send 2
(Prog 8–2a) after passing through IFX1–5.
OSC1 Send2 (to MFX2) [000…127]
Sets the volume (send level) at which the output of oscillator
1 will be sent to master effect 2. For more information, please see “OSC1 Send1 (to MFX1)” on page 58.
OSC2:
OSC2 Send1 (to MFX1) [000…127]
OSC2 Send2 (to MFX2) [000…127]
Sets the volume (send level) at which the output of OSC2 will be sent to master effects 1 and 2. These parameters will be valid when
Oscillator Mode
is set to Double or
Double
Drums
and
Bus (IFX/Output) Select
is set to L/R or Off.
CC#93 controls OSC 1/2’s Send 1 level, and CC#91 controls the Send 2 level. These are controlled on the global
MIDI Channel
(Global 1–1a). The actual send level is determined by multiplying these values with the send levels of each oscillator.
V
8–1: Menu Command
• 0:
Write Program
see p. 64
• 1:
Exclusive Solo
see p. 64
• 2:
Auto Song Setup
see p. 65
• 3:
Copy Insert Effect
see p. 66
• 4:
Swap Insert Effect
see p. 67
For more information, please see “Program: Menu
Command” on page 64.
PROG P8: Routing/IFX (Insert Effect) 8–2: Insert FX Setup
8–2: Insert FX Setup
8–2a
8–2
Menu
8–2a: Insert Effect
Here, you can choose the type of each insert effect 1 through
5, its on/off status, chaining, and adjust the post ‐ IFX mixer settings.
For insert effects, the direct sound (Dry) is always stereo ‐ in and out. The input/output configuration of the effect sound
(Wet) depends on the effect type.
For more information, please see “Insert Effects (IFX1–
IFX5)” on page 240.
Insert Effect:
IFX1…4
[000…193]
IFX5 [000…171]
This selects the effect type for insert effect.
IFX5 cannot use double ‐ size effects (172–193). If you use a double ‐ size effect, the next insert effect will be unavailable.
For example if you select a double ‐ size effect for IFX1, you won’t be able to use IFX2.
Category/IFX Select menu
When you press the popup button, the Category/IFX Select menu will appear, letting you select effects by category. Use the tabs to select a category, and then select an effect within that category. Press the OK button to execute your selection, or press the Cancel button to cancel.
IFX1…5: IFX On/Off [Off, On]
Switches the insert effect on/off.
If this is off, the input will simply be passed to the output.
(When 000:No Effect is selected, there’s no difference between On and Off.)
The setting will alternate between on and off each time you press the button.
Separately from this setting, you can use MIDI CC #92
(on the global
MIDI Channel
(Global 1–1a)) to turn all insert effects off. A value of 0 turns them off, and values of 1–127 restore the original setting.
Chain:
IFX1: Chain to
IFX2: Chain to
[IFX2…IFX5]
[IFX3…IFX5]
IFX3: Chain to [IFX4…IFX5]
You can chain up to five insert effects together in series, to create more complex effects. Set up the chain using this parameter, and then enable it using the
Chain
check box, below.
Effects must be chained in ascending numeric order. For example, IFX1 can be chained to any of IFX2 through IFX5, and IFX2 can be chained to IFX3 through IFX5.
You can chain two or more effects into the same down ‐ stream effect. For instance, both IFX1 and IFX2 can be chained to IFX5.
Effects can also join a chain in the middle. For instance, you can chain IFX3 to IFX4 to IFX5, and then chain IFX2 to IFX5 as well.
The
Pan:#8
,
Bus (Bus Select)
,
Ctrl (FX Control Bus)
, and
Send1
/
2
settings apply only to the last effect in the chain.
However, any effect in the chain can be sent to the FX
Control buses.
IFX1: Chain
IFX2: Chain
[Off, On]
[Off, On]
IFX3: Chain [Off, On]
IFX4: Chain [Off, On]
This enables the chain, as set up by the
Chain to
parameter, above.
Pan:#8:
Pan: #8 (Post IFX PanCC#8) [L000…C064…R127]
Specifies the panning immediately after the insert effect.
You can use CC#8 to control this.
Bus Sel.:
Bus Sel. (Bus Select) [Off, L/R]
Specifies the bus to which the signal will be sent immediately after the insert effect.
L/R:
The signal will be sent to the L/R bus, which passes through TFX and then goes to the AUDIO OUTPUT L/R outputs. This is the default setting.
Off:
The signal will not be sent directly to the L/R outputs.
This setting is useful if you want to:
Use
Send 1
or
2
to route the signal entirely through the master effects, without sending the dry signal to the outputs.
Use the
FX Control Bus
to route the signal to an effects side ‐ chain, such as a gate or vocoder, without being heard directly at the outputs.
FX Ctrl:
FX Ctrl (FX Control Bus) [Off, 1, 2]
Sends the post ‐ IFX signal to the FX Control busses. For more information, please see “FX Control Bus” on page 58.
If you’re using
Ctrl (FX Control Bus)
as an input signal for Vocoder etc., a feedback loop will occur if you output to the same bus as specified here, and oscillation will occur. Set this with care to avoid creating a loop.
Send1/2:
Send1 [000…127]
Send2 [000…127]
These adjust the level at which the post ‐ IFX signal is sent to master effects 1 and 2. This is valid if
Bus (Bus Select)
is set to L/R or Off.
You can use CC#93 to control the Send 1 level, and
CC#91 to control the Send 2 level. The global MIDI channel specified by
MIDI Channel
(Global 1–1a) is used for these messages.
59
Program mode
V
8–3a
8–2: Menu Command
• 0:
Write Program
see p. 64
• 1:
Exclusive Solo
see p. 64
• 2:
Auto Song Setup
see p. 65
• 3:
Copy Insert Effect
see p. 66
• 4:
Swap Insert Effect
see p. 67
For more information, please see “Program: Menu
Command” on page 64.
8–3: IFX1
8–3
Menu
60
8–3a: Insert Effect 1 (IFX1)
Here you can edit the parameters of the insert effect you selected in the P8: Routing/IFX– Insert FX Setup page.
Effect dynamic modulation (Dmod) is controlled on the global
MIDI Channel
(Global 1–1a). For more information, please see “Dynamic Modulation Source
List” on page 346.
IFX1 On/Off [Off, On]
This turns the insert effect on and off. It is linked with the on/off setting in the Insert FX Setup page.
P (Effect Preset)
[P00, P01…15, U00…15, —————]
Effect Presets let you easily store and recall all of the settings for an individual effect. You can store up to 16 user presets for each effect type, in addition to 15 re ‐ writable factory presets.
The same presets appear in all of the modes (Program,
Combination, and Sequencer).
Note that edits to effects parameters are automatically stored with the Program you don’t need to store them as an
Effect Preset. Presets just make it easier to re ‐ use your favorite settings.
For instance, you can save an Effect Preset while working on a particular Program, and then later use the same Effect
Preset in a different Program, Combination, or Song.
P00: Initial Set:
These are the default settings that are recalled when you select an effect type in the Insert FX Setup page. You can’t save your own settings here.
P01…P15:
Preset data is saved in this area. We recommend that you store your settings in U00–U15.
U00…U15:
These are areas in which you can store your own settings.
—————:
This shows that no Effect Preset has been selected. You’ll see this if you’ve just selected an effect, written a Program, or selected a new Program. Selecting this setting from the menu will not have any effect.
Note:
Programs save the effects parameter settings, but they don’t save the number of the selected Effect Preset. If you select an Effect Preset, and then save the Program, the Effect
Preset setting will revert to “
—————.”
Using Effect Presets
1. Select an effect in the Insert FX Setup page.
2. The P00: Initial Set settings will be recalled.
P (Effect Preset)
will indicate ‐‐‐‐‐‐‐‐ .
3. Use “P (Effect Preset)” to select an effect preset: P00–
P15 or U00–U15.
The stored parameters will be recalled. Note that this will overwrite all parameters of the effect.
4. Edit the recalled parameters as desired.
5. If you’ve come up with settings you like and want to save them as a new preset, use the Write FX Preset menu command.
IFX1 Parameters:
IFX1 Parameters
This tab shows the parameters for IFX1, as selected on the
Insert FX Setup page.
For details on the specific parameters of each effect, please
see “Insert Effects (IFX1–IFX5)” on page 240.
V
8–3: Menu Command
• 0:
Write Program
see p. 64
• 1:
Exclusive Solo
see p. 64
• 2:
Auto Song Setup
see p. 65
• 3:
Copy Insert Effect
see p. 66
• 4:
Swap Insert Effect
see p. 67
• 5:
Write FX Preset
see p. 67
For more information, please see “Program: Menu
Command” on page 64.
8–4: IFX2, 8–5: IFX3, 8–6: IFX4,
8–7: IFX5
Here you can edit the effect parameters for the insert effects selected in the Insert FX Setup page.
The parameters for IFX2–IFX5 are the same as for IFX1.
PROG P9: MFX/TFX/LFO (Master/Total Effect/LFO) 9–1: Routing
PROG P9: MFX/TFX/LFO (Master/Total Effect/LFO)
Here, you can make settings for the master effects and total effect. For instance, you can:
• Route a sound to an master effects and total effect
• Make common LFO settings for effects
• Make detailed settings for master effects and total effect
For more information, please see “Effect Guide” on page 235.
9–1: Routing
9–1a
9–1b
9–1
Menu
Here you can specify the type of master effects and total effect, and turn them on/off.
The master effects are sent to the L/R bus. The total effect is inserted into the L/R bus.
9–1a: MFX1, 2
The master effect does not output the direct sound (Dry).
Adjust the
Return 1
and
Return 2
return levels to return the signal to the L/R bus and mix it with the L/R bus signal.
The master effects are stereo ‐ in/out, but depending on the
selected effect type, the output may be monaural. For more information, please see “In/Out” on page 240.
MFX1:
MFX1 [000…193]
This selects the effect type for master effect 1. You can use any of the available effects, without limitation. If you choose
000:No Effect, the output from the master effect is muted.
Category/MFX Select menu
When you press the popup button, the Category/MFX Select menu will appear, letting you select effects by category. Use the tabs to select a category in the menu, and then select an effect within that category. Press the OK button to execute your selection, or press the Cancel button to cancel.
MFX1 On/Off [Off, On]
Switches the master effect 1 on/off. When off, the output will be muted. This will alternate between on and off each time it is pressed.
Tip: An easy way to disable the master effects is to turn off the front panel MASTER FX button. MFX 1/2 will be temporarily disabled, and will stay off even if you switch programs or modes. When you turn the switch on, the master effects will be enabled, and you will obtain the effects specified by the program or combination.
Note: The MASTER FX button is linked with Global P0 ‐ 1
Effect Global SW
Enable MFX1&2
(see p.5).
Separately from the settings here, you can use control change #94 to turn master effects 1 and 2 off. A value of
0 turns them off, and values of 1–127 restore the original setting. The global MIDI channel specified by
MIDI Channel
(Global 1–1a) is used for this message.
Return 1 [000…127]
This specifies the return level from the master effect to the L/
R bus.
Note:
The L/R bus is sent to TFX, and then output to the main L/MONO and R output jacks.
MFX2:
MFX2
MFX2 On/Off
[000…171]
[Off, On]
Return 2 [000…127]
These parameters specify the effect type for master effect 2, its on/off status, and the return level from master effect 2 to
the L/R bus. For more information, please see “MFX1:” above.
MFX2 cannot use double ‐ size effects (172–193).
Additionally, if you select a double ‐ size effect for MFX1, you won’t be able to use MFX2.
Chain:
Chain On/Off [Off, On]
On (checked):
Chain (series connection) will be turned on for MFX1 and MFX2.
Chain Direction [MFX1…MFX2, MFX2…MFX1]
Specifies the direction of the connection when MFX1 and
MFX2 are chained.
MFX1
→
MFX2:
Connect from MFX1 to MFX2.
MFX2
→
MFX1:
Connect from MFX2 to MFX1.
Chain Level [000…127]
When chain is On, this sets the level at which the sound is sent from the first master effect to the next master effect.
If you select a double ‐ size effect, the
Chain
settings will be ignored.
9–1b: TFX
These are the parameters for the total effect, which is placed at the final stage of the L/R bus. After passing through the total effect, the sound is output to AUDIO OUTPUT L/
MONO and R.
For the total effect, the direct sound (Dry) is always stereo ‐ in/out. The input/output configuration of the effect sound
(Wet) will depend on the selected effect type.
The total effect is stereo ‐ in and stereo ‐ out, but the output may be monaural depending on the type of effect you select.
For more information, please see “In/Out” on page 240.
TFX:
TFX
This selects the effect type for total effect.]
TFX cannot use double ‐ size effects (172–193).
[000…171]
Category/TFX Select menu
When you press the popup button, the Category/TFX Select menu will appear, letting you choose effect types by category. Use the tabs to select an effect category in the
61
62
Program mode
menu, and then choose an effect within that category. Press the OK button to execute your choice, or press the Cancel button to cancel.
TFX On/Off [Off, On]
This turns total effect on/off. If this is off, the input will be passed directly through. The setting will alternate between on/off each time you press this.
Tip: An easy way to disable the total effect is to turn off the front panel TOTAL FX button. TFX will be temporarily disabled, and will stay off even if you switch programs or modes. When you turn the switch on, the total effect will be enabled, and you will obtain the effect specified by the program or combination.
Note:
The TOTAL FX button is linked with Global P0 ‐ 1
Effect Global SW
Enable TFX
(see p.5).
Alternatively, you can send control change #95 to turn the total effect off. A value of 0 turns the total effect off, and values of 1–127 restore the original setting. The global MIDI channel specified by
MIDI Channel
(Global 1–1a) is used for this message.
9–1c: Master Volume
Master Volume [000…127]
This specifies the final level of the audio output that has passed through total effect, and output from AUDIO
OUTPUT L/MONO and R.
V
9–1: Menu Command
• 0:
Write Program
see p. 64
• 1:
Exclusive Solo
see p. 64
• 2:
Auto Song Setup
see p. 65
• 3:
Copy MFX/TFX
see p. 67
• 4:
Swap MFX/TFX
see p. 67
• 5:
Write FX Preset
see p. 67
For more information, please see “Program: Menu
Command” on page 64.
9–2: MFX1
9–2a
9–2
Menu
9–2a: MFX1
Here you can edit the parameters of the effect you choose for
MFX1 in the P9: MFX/TFX/LFO– Routing page.
Effect dynamic modulation (Dmod) is controlled on the global
MIDI Channel
(Global 1–1a). For more information, please see “Dynamic Modulation Source
List” on page 346.
MFX1 On/Off [Off, On]
This turns master effect 1 on/off. It is linked with the on/off setting in the P9: MFX/TFX/LFO– Routing page.
The setting will alternate between On and Off each time you press this.
Alternatively, you can use CC#94 to turn Master effects
1/2 off. CC#95 will turn the Total effect off. A value of 0 is Off, and a value of 1–127 selects the original setting.
This is controlled on the global MIDI channel specified by
MIDI Channel
(Global 1–1a).
P (Effect Preset)
[P00, P01…15, U00…15, —————]
This selects the effect preset. For more information, please see “P (Effect Preset)” on page 60.
MFX1 Parameters
Here, you can edit the parameters of the master effect selected in the P9: MFX/TFX/LFO– Routing page.
For details on the master effects, please see “Master Effects
(MFX1, 2)” on page 245.
V
9–2: Menu Command
• 0:
Write Program
see p. 64
• 1:
Exclusive Solo
see p. 64
• 2:
Auto Song Setup
see p. 65
• 3:
Copy MFX/TFX
see p. 67
• 4:
Swap MFX/TFX
see p. 67
• 5:
Write FX Preset
see p. 67
For more information, please see “Program: Menu
Command” on page 64.
9–3: MFX2, 9–4: TFX
These pages let you edit the parameters of Master Effect 2 and Total Effect. To select different effects types, use the P9:
MFX/TFX/LFO– Routing page.
The parameters for MFX2, TFX is the same as for MFX1. For more information, please see “9–2: MFX1” on page 62.
PROG P9: MFX/TFX/LFO (Master/Total Effect/LFO) 9–5: Common FX LFO
9–5: Common FX LFO
9–5a
9–5b
9–5
Menu
The two Common FX LFOs allow you to synchronize LFO ‐ based modulation for multiple effects, such as phasers, flangers, filters, and so on.
The Common LFOs control only the frequency, MIDI synchronization, and reset options; each individual effect still has its own settings for the LFO waveform and phase.
Within the individual effects, you can choose whether to use one of the Common LFOs, or to use the individual effect’s frequency, sync, and/or reset settings instead. This is done via the effect’s
LFO Type
parameter; select
Individual
to use the effect’s settings, or
Common 1
or
2
to use the Common
LFOs.
Common FX LFO
Common FX LFO1
LFO Type = Common1
Stereo Flanger
Frequency[Hz]
Reset
Waveforem = Triangle
Generate original LFO waveform
Stereo Phaser
Waveforem = Sine
Stereo Auto Pan
Waveforem = Sine
Dmod (Dynamic Modulation) is controlled on the global MIDI channel specified in Global mode P1.
9–5a: Common FX LFO1
Sync (Reset) [Off, On]
This specifies whether the Common FX LFO will be reset.
If this is on, operating the
Source
(below) will reset the phase of the LFO.
Source (Dmod Source) [List of Dmod Sources]
If
Sync (Reset)
is on, this selects the Dmod source that will reset the Common LFO. For a complete list of Dmod
sources, please see “Dynamic Modulation Source List” on page 346.
This will be off when the modulation source specified by
Source
has a value below 64, and on when the value is above 64. The LFO will be reset when this value rises from a level below 64 to a level higher than 64.
Frequency [0.02…20.00 (Hz)]
This specifies the frequency of the Common FX LFO. Higher values make the LFO faster.
MIDI/Tempo Sync [Off, On]
Off (unchecked):
The speed of the Common FX LFO will be determined by the
Frequency
setting.
On (checked):
The speed of the Common FX LFO will be determined by the
BPM
,
Base Note
, and
Times
settings (see below).
BPM
Base Note
[MIDI, 40.00…300.00]
[ ,
3
, ,
3
, ,
3
, ,
3
, , ]
Times [01…32]
The frequency of the Common FX LFO will be the length of the
Base Note
note value multiplied by the
Times
value, relative to the tempo specified by the
BPM
value. If
BPM
is set to MIDI, this will operate according to the
(Tempo)
(Prog 0–1a) setting. If
MIDI Clock
(Global 1–1a) is set to
External, this will follow the MIDI clock of the master device.
9–5b: Common FX LFO2
The parameters are identical to those for Common FX LFO1, as described under “9–5a: Common FX LFO1” above.
V
9–5: Menu Command
• 0:
Write Program
see p. 64
• 1:
Exclusive Solo
see p. 64
• 2:
Auto Song Setup
see p. 65
• 3:
Copy MFX/TFX
see p. 67
• 4:
Swap MFX/TFX
see p. 67
For more information, please see “Program: Menu
Command” on page 64.
63
64
Program mode
Program: Menu Command
ENTER + 0–9: shortcuts for menu commands
Each page has a set of menu commands, which provide access to different utilities, commands, and options, depending on the page you’re currently on. You can use the menu commands entirely from the touch ‐ screen, by pressing the menu button in the upper right ‐ hand corner of the screen and then selecting an option from the menu that appears.
Even though each page may have its own unique menu commands, the menus are standardized as much as possible. For instance, WRITE is almost always the first menu item in Program, Combination, and Sequencer modes.
You can take advantage of this standardization by using a shortcut to access any of the first ten menu items:
1. Hold down the ENTER button.
2. Press a number (0–9) on the numeric keypad to select the desired menu command, starting with 0.
For instance, press 0 for the first menu command, 1 for the second, and so on.
If the menu command just toggles an option on and off
(such as Exclusive Solo), then you’re done. If the command calls up a dialog box, the dialog will appear on the display, and you can proceed just as if you’d selected the command from the touch ‐ screen.
Tip:
While this command is open, the ENTER button will operate as the OK button and the EXIT button will operate as the Cancel button.
Procedure for menu commands
1. Select the menu command.
2. Make settings in the dialog box.
For details on the content of each dialog box, refer to the explanation of each command.
3. To execute, press the OK button. To cancel without executing, press the Cancel button.
Write Program
This command writes an edited Program into the KROME internal memory. It is available on every page in Program mode.
Write Program lets you:
• Save your edits
• Rename the Program
• Assign the Program to a Category
• Copy the Program to a different Bank and number
Be sure to
Write
any Program that you wish to keep. An edited Program cannot be recovered if you do not write it before turning off the power or selecting another
Program.
Note:
You can also access and execute this command by pressing the WRITE button.
1. The upper line of the dialog shows the Bank, number, and Program name.
If you wish to modify the program name, press the text edit button to move to the text edit dialog box, and enter the desired program name.
2. In Category and Sub Category, specify the category of the program that you are writing.
The category can be used to find this Program when selecting a program in Program, Combination, or Sequencer modes.
Note:
You can edit these category names in the Global P4:
Category page. For more information, please see “4–1:
Program Main” and “4–2: Program Sub” on page 204.
3. Press “To Program” to specify the destination Bank and number.
You can also use the BANK A–F buttons to select a bank.
You cannot save to banks G–g(d). If you’ve edited a program from banks G–g(d) and want to save it, save the edited program to a bank A–F.
Exclusive Solo
The behavior of the Solo function will alternate each time you select
Exclusive Solo
.
The Solo function can operate in one of the following two ways.
• Multiple Solo
The specified OSC1, OSC2, or drum track will be soloed. The solo on/off setting will alternate each time you press the Solo button.
• Exclusive Solo
Only one source ‐ OSC1, OSC2, or the drum track ‐ will be soloed.
Note:
Solo operations can be performed in the P0–3: Mixer &
Drum Track page of each mode.
Note:
The Solo function applies to each mode. All sources are handled as a single group. In the case of Exclusive Solo, all other sources will be off if even one source is being soloed.
1. Use the menu to select Exclusive Solo.
When you select this item, a check mark will be added at the left of
Exclusive Solo
in the menu. The check mark will appear or disappear each time you select this item.
No check mark:
Multiple Solo
Check mark:
Exclusive Solo
Alternatively, you can turn this setting on/off by holding down the ENTER button and pressing numeric key 1.
Program: Menu Command Auto Song Setup
Auto Song Setup
This command automatically copies the settings of the program or combination to a song, and enables the record ‐
standby condition (See “Tip: Auto Song Setup” on page 2.).
Note: You can also access and execute this command by pressing the REC (
) button.
Copy Tone Adjust
Tone Adjust tab of the play page.
This command replaces the current Tone Adjust settings with those of any other Program, Combination Timbre, or
Song Track.
Copy Oscillator
Copy Oscillator
is available on all of the tabs under the
OSC/Pitch, Filter, Amp/EQ, AMS/Common KeyTrack pages.
This command is used to copy the settings from one oscillator to another.
1. Use the From field to select the copy-source mode, bank, and number.
You can use the front ‐ panel BANK buttons to select the desired bank.
2. In the Timbre field (if you’ve selected a Combination) or Track field (if you’ve selected a Song), select the
Timbre or Track to copy from.
3. Select either All or Assignments Only to specify the
Tone Adjust parameters you want to copy.
All:
This copies both the Tone Adjust parameter assignments and values.
Assignments Only:
This copies only the Tone Adjust parameter assignments, without the values.
Reset Tone Adjust
Tone Adjust tab of the play page.
This command resets the Tone Adjust settings for all of the displayed Switches and Sliders to their default values.
1. Use the From field to select the oscillator that you want to copy.
2. Use Program to select the bank and number of the copy-source program.
You can press a BANK SELECT button to select the desired bank.
3. In To, specify the copy destination oscillator.
Swap Oscillator
Swap Oscillator
is available on all of the tabs under the
OSC/Pitch, Filter, Amp/EQ, AMS/Common KeyTrack pages.
This command exchanges the settings of oscillators 1 and 2.
Note:
This can be selected only if
Oscillator Mode
(Prog 1–
1a) is Double or Double Drums.
Copy Drum Track
Copy Drum Track
is available on the DrumTrk Pattern tab or DrumTrk Program tab of the ARP/DT page.
This command copies settings from the specified program, combination/timbre, or song.
1. Use the To field to specify how the Switches 1–8 and
Sliders 1–8 parameters will be reset.
All Off:
All will be reset to Off.
Default Setting:
The parameters will be reset to the default values.
1. Use the From field to select the mode, bank, and number of the desired copy-source. You can press a BANK button to select the desired bank.
2. If you execute this command in Program mode, and select Program in From, the additional field Program
Settings too will appear.
On (checked):
The parameter settings of the Drum Track
Pattern page and Drum Track Program page will be copied.
Off (unchecked):
The parameter settings of the Drum Track
Pattern page will be copied.
If you execute this command in Combination or Sequencer mode, the parameter settings of the Drum Track Program page will be copied. However, the
MIDI Channel
setting will not be copied.
65
Program mode
Erase Drum Track Pattern
Erase Drum Track
is available on the DrumTrk Pattern tab or DrumTrk Program tab of the ARP/DT.
This erases the drum track pattern you specify.
1. Select the user drum track pattern you want to erase.
2. If you check All Drum Track Patterns, all user drum track patterns will be erased.
Sync Both EGs
Sync Both EGs
is available on the Filter 1/2 EG and Amp 1/2
EG pages.
This option allows you to edit the EGs of Oscillator 1 and
Oscillator 2 together. When it is checked, editing the Filter
EG of either Oscillator 1 or 2 will change both Filter EGs simultaneously. Similarly, editing the Amp EG of either
Oscillator will change both Amp EGs.
This option is available when the
Oscillator Mode
is set to
Double or Double Drums
.
1. Select Sync Both EGs.
The display will indicate “SYNC BOTH EG’s” and the two
EGs will be synchronized.
1. Use the From field specify the source of the arpeggio settings (mode, bank, number) that you wish to copy.
2. If you are copying from Combination, or Song, specify whether you wish to copy from A or B.
Copy Insert Effect
Copy Insert Effect
is available on all of the IFX pages.
This command copies effects settings from within the current Program, from other Programs, Combinations, or
Songs.
To execute the Copy Insert Effect command, press the OK button. To cancel, press the Cancel button.
If you’re copying from a master effect, the result will not be identical due to differences in the routing and level settings of the master effects.
66
2. If you no longer want the EGs to be synchronized, select Sync Both EGs once again.
The indication will disappear from the display.
Swap LFO 1&2
Swap LFO 1 & 2
is available on all of the LFO pages, except for the Common LFO tab.
This command copies the settings of LFO1 to LFO2, and vice ‐ versa.
Note:
If LFO2 is being used to modulate LFO1, this command will erase that modulation routing.
Copy Arpeggiator
Copy Arpeggiator
is available on the Arp A tab and Arp B tab of Play/REC Control page or Setup tab, Arp A tab, Arp B tab, Scan Zone tab of the ARP/DT page.
This command can be used to copy arpeggio settings from another location to the current program.
From (Mode) [Program, Combination, Song]
This selects whether you’ll copy from a Program, a
Combination, or a Song.
From (Bank and Number) [Bank and Number]
For Programs and Combinations, this selects the Bank and
Number from which to copy. When this parameter is selected, you can also use the front ‐ panel BANK buttons to select Banks.
(Effects slot select) [IFX 1…5, MFX 1&2, TFX]
Select which of the effects you wish to copy.
You can also copy from a master effect and total effect.
All [check-box]
When this is enabled, the settings of all insert effects (the contents of the Insert FX page and the effect parameters of
IFX1–5, but not
Ctrl Ch
) will be copied.
To
This selects the insert effect copy destination.
[IFX 1…5]
Post IFX Mixer Settings [check-box]
When this is checked, the
Pan
,
Bus (Bus Select)
,
Ctrl (FX
Control Bus)
, and
Sends 1
and
2
settings that follow the copy source insert effect will also be copied.
When this is not checked, only the effect type and its parameters will be copied.
Program: Menu Command Swap Insert Effect
Copying 000: No Effect
Copying a single effect set to “000: No Effect” will not work: no data will be copied.
If either
All
or
All used
is selected, and “000: No Effect” exists within a chain, it will be copied. However, if the entire chain consists of “000: No Effect,” nothing will be copied.
Swap Insert Effect
Swap Insert Effect
is available on all of the IFX pages.
This command exchanges the effects, and their internal parameters, between two IFX slots.
All of the parameters shown on the IFX 1–5 pages will be copied.
Other IFX slot parameters will not be affected, including
Pan, Sends 1 and 2, Chain, AUX Bus, and FX Control Bus.
Swap MFX/TFX
Swap MFX/TFX
is available on all of the MFX/TFX/LFO pages.
This command swaps (exchanges) settings between MFX1,
MFX2, TFX.
1. Use Source 1 and Source 2 to select the master effect(s) or total effect(s) that you want to swap.
Write FX Preset
Write FX Preset
is available on all of the effects parameter editing pages, including IFX 1–5, MFX 1 and 2, and TFX.
This command saves the edited effect into the KROME’s internal memory.
1. In Source 1 and Source 2, select each of the insert effects that you wish to swap.
Copy MFX/TFX
Copy MFX/TFX
is available on all of the MFX/TFX/LFO pages.
This command lets you copy any desired effect settings from
Program, Combination, or Song.
1. Press the text edit button to open the text edit dialog box, and input a name for the effect preset.
2. Use the To field to select the writing destination. We recommend that you use U00–U15.
1. Use the From field to select the copy source mode, bank, and number.
You can also use the BANK buttons to select the desired bank.
2. Select the effect that you want to copy.
You can copy from an insert effect by selecting IFX1–5.
If you copy from an insert effect, the result may not be exactly the same, due to differences in routing and level settings.
If you select MFX1 or MFX2, the
Return
level will be copied at the same time.
You can copy settings from a total effect by selecting TFX.
If you check
All MFXs
, all master effect settings will be copied.
If you check
TFX
, all total effect settings will be copied.
Master Volume settings will not be copied.
3. In To, specify the copy destination master effects or total effect.
67
68
Program mode
Combination mode
COMBI Page Select
You can use the following ways to select the pages in
Combination mode.
1. Press the PAGE button to access “Page Select.”
Alternatively, press the mode button on the upper left side of the display, and then press the right side of the menu.
“Page Select” shows an abbreviated name for each page.
The page in which you were prior to pressing the PAGE button is shown in light blue.
2. Select the desired page in the display.
Other ways to select pages
• Hold down the PAGE button and press a numeric keys,
0–9, to specify a page number; you will move to the corresponding page.
For example if you want to access the P3: Timbre Param page, hold down the PAGE button and press numeric key 3.
• Pressing the EXIT button will take you to the P0: Play page. If a page other than the Program T01–08 page is selected, pressing the EXIT button will take you to the
Program T01–08 page.
Page
P0: Play
P1: Controllers
P2: EQ
P3: Timbre Param
P4: Zone/Delay
P5: MIDI Filter
Main content
Select and play combinations. (see p.70)
Program selection for each timbre. (see p.71)
Pan and volume settings etc. for each
timbre. (see p.73)
Simple arpeggiator editing. (see p.74)
Editing from the Tone Adjust (see p.75)
SW1, 2, and knob function settings. (see p.78)
EQ settings for each timbre. (see p.79)
Various parameter settings for each timbre (MIDI channel, OSC selection,
Pitch setting, etc.) (see p.81)
Key split and layer settings.
(Key zone and velocity zone) (see p.84)
Time delay from note ‐ on to beginning of
sound. (see p.86)
MIDI transmit/receive filter settings. (see p.87)
P7: Arpeggiator/
Drum Track
Arpeggiator settings. (see p.92)
Drum track settings. (see p.93)
P8: Routing/IFX
P9: MFX/TFX/
LFO
Oscillator output bus and master effect
send level settings. (see p.95)
Insert effect routing, selection, and
settings. (see p.97)
Master effect routing, selection, and
settings. (see p.99)
Total effect selection and settings. (see p.100)
Common FX LFO settings (see p.100)
69
70
Combination mode
COMBI P0: Play
This is the main page of Combination mode. Among other things, you can:
• Select combinations
• Select a program for each timbre, and specify its Play/
Mute and Solo On/Off status.
• Edit the Arpeggiator in simple ways
• Use the Tone Adjust function to make simple edits for program parameters
Tip:
Auto Song Setup
The Auto Song Setup feature copies the current Program or
Combination into a Song, and then puts the KROME in record ‐ ready mode.
If inspiration for a phrase or song strikes you while you’re playing, you can use this function to start recording immediately.
For more information, please see “Auto Song Setup” on page 106.
0–1: Program T01–08,
0–2: Program T09–16
0–1a
0–1b
0–1
Menu
This is the main page for selecting and playing
Combinations. You can also set the Program, Play/Mute, and
Solo On/Off for each of the Timbres 1–8 and 9–16.
0–1(2)a:Combination Select
Bank [A…D]
This indicates the currently selected combination bank.
• Press one of the BANK A–D buttons to select the desired bank.
Each bank contains rewritable combination program areas for 128 combinations (a total of 512).
Bank
A, B, C
D
No.
000…127
000…127
Description
Preloaded combinations
User combinations
Note:
Pressing one of the BANK A–F buttons while the
Program Select
parameter is selected will change the timbre program bank (rather than the combination bank).
Mode Category Popup
Page Menu
Stop Watch
Tempo
Bank
Combination Select Popup
Combination Select
Combination Select
Here you can select the desired Combination.
[000…127]
To switch combinations
• Choose
Combination Select
, use numeric keys 0–9 to input the desired combination number, and press the
ENTER button.
• Choose
Combination Select
and turn the VALUE dial or use the INC
/
DEC buttons.
• If the “0–1a: Combination Select” parameter is selected, the BANK A–D buttons will switch combination banks.
• Press the Combination Select Popup to view and select from the Bank/Combination Select menu organized by bank.
• Press the Category Popup to view and select from the
Category/Combination Select menu organized by category.
• You can use a foot switch to select combinations.
For more information, please see the Global parameter
“Foot Switch Assign” on page 202. For a list of the
functions that can be assigned to the footswitch, please
see “Foot Switch Assignments” on page 349.
• You can transmit MIDI program changes from a connected external MIDI device.
Bank/Combination Select menu:
1. Press the popup button located at the left of “Combination Select” to access the Bank/Combination Select menu.
2. Press one of the tabs at left or right to select a bank.
3. Select a combination from the list. You can directly press your choice within the list, or use the INC/DEC buttons.
If the screen cannot display all of the available items, use the scroll bar.
Note:
If you want to search for a sound by its combination
name, use the Find function (see p.2).
4. Press the OK button to execute, or press the Cancel button to cancel your selection.
Bank/Combination Select menu
Tab
Scroll bar
COMBI P0: Play 0–1: Program T01–08, 0–2: Program T09–16
Category [00…17/00…07]
Here, you can select the combination category.
All programs are classified using eighteen main categories and eight sub ‐ categories. You can select a category, and then select a combination within that category. When you press the popup button, the Category/Combination Select menu will appear.
Category/Combination Select menu:
You can select combinations by category and sub ‐ category.
All combinations are organized into up to eighteen categories, and each category is further organized into eight sub ‐ categories. You can use these categories and sub ‐ categories to select combinations.
1. Press the Category popup button (above the Combination Select parameter) to open the Category/Combination Select menu.
2. Press one of the tabs on the left and right to select the desired category.
Note:
You cannot select the category tab of a category to which no combinations have been assigned.
3. Select a combination from the list. You can directly press your choice within the list, or use the INC/DEC buttons.
If there are more combinations than can be shown in the screen, use the scroll bar to see the remaining combinations.
Note:
If you want to search for a sound by its combination
name, use the Find function (see p.2).
Category/Combination Select menu
Category tab
Sub-category tab
Scroll bar
4. To select from a sub-category, press the Jump to Sub button to access SubCategory/Program Select.
Press one of the left tabs to select a sub ‐ category.
Note:
Sub ‐ categories not assigned to any programs cannot be selected from the tabs.
Press the OK button to confirm your selection, or press the
Cancel button to cancel it. You will return to the main categories.
5. Press the OK button to execute, or press the Cancel button to cancel your selection.
Note:
The category of each combination can be specified in the “Write Combination” dialog box.
(Tempo) [40.00… 300.00, EXT]
This is the tempo for the current Combination, which applies to tempo ‐ synced LFOs and effects, arpeggiator, and tempo ‐ synced effects.
040.00…300.00
allow you to set a specific tempo in BPM, with 1/100 BPM accuracy. In addition to using the standard data entry controls, you can use the TEMPO knob to adjust the bpm, or just play a few quarter ‐ notes on the TAP button.
If
MIDI Clock
(Global 1–1a) is set to
External MIDI
or
External USB, EXT
is shown. This is also shown if
MIDI
Clock
is Auto and MIDI clock data is being received from an external device. If tempo is EXT, arpeggiator etc. will synchronize to MIDI clock data from an external MIDI
device. For more information, please see “MIDI Clock (MIDI
Clock Source)” on page 199.
Mode, Stop Watch
See “a: Mode button” on page 4 of the Operation guide.
See “l: Stopwatch button” on page 5 of the Operation guide.
0–1(2)b: Timbre Program Select
Selected Timbre Info
This area shows information on the timbre selected for editing.
T:
Timbre number/program bank/number/name,
Ch:
MIDI channel/number.
Select Timbre Info
Timbre No.
Category/Timbre
Program Select
Bank/Timbre
Program Select
Program Select
Play/Mute
Solo On/Off
Timbre Number
This indicates the timbre number. Below each timbre number are shown various parameters which you can edit for that timbre.
Timbre 01 (Timbre Number):
Category (Timbre Program) [00…17/00…07]
Here, you can select the program used by each timbre by program category and sub ‐ category. All programs are organized into up to eighteen categories and eight sub ‐ categories.
Press this popup button to get the Category/Timbere
Program Select menu, then select the desired category and sub ‐ category, and finally select the desired program.
Category/Timbre Program Select menu:
Here you can select the program for each timbre by main category and sub ‐ category. All programs are classified into a maximum of eighteen main categories, and each category is classified into eight sub ‐ categories. You can select programs using these main categories and sub ‐ categories.
• Press
Category
and use the Category/Timbre Program
Select menu to select a program.
For the procedure, please see “Category/Combination Select menu:” above.
71
Combination mode
72
Program Select
[A…F: 000…127, GM, g(1)…g(9), g(d): 001…128]
Here, you can select the program used by each timbre. The lower line displays part of the program name.
To switch the program of a timbre
• Choose
Program Select
, use numeric keys 0–9 to input the program number, and press the ENTER button.
• Choose
Program Select
and turn the VALUE dial or use the INC/DEC buttons.
• If the
Program Select
parameter is chosen, the BANK A–F buttons will switch program banks. (If Timbre Program
Select is selected, the BANK button LED of the program bank selected for that timbre will light up.)
You can use the numeric keys to switch the GM bank (see p.2).
• From the Bank/Program Select menu you can view and select programs arranged by bank.
• From the Category/Program Select menu you can view and select programs by category.
• You can choose a program by transmitting MIDI program changes from a connected external MIDI device.
The KROME’s combinations and timbre programs can be switched from an external MIDI device by using
MIDI bank select and MIDI program change messages.
By default, the combination bank and number will change when a bank select or program change message that matches the KROME’s global MIDI channel is
received. (Global MIDI channel; see p.198 Global 1
‐ 1a
“MIDI Channel (Global MIDI Channel)”)
However, if the channel of the incoming message is different than the KROME’s global MIDI channel, the program bank and number will change only for timbres that match the MIDI channel of the message.
Tip: Even for the global MIDI channel, you can change the setting from the default so that the timbre program
rather than the combination will be switched. (see p.201 Global 1
‐ 2b MIDI Filter “Combination Change”)
Tip: Switching the timbre program in response to MIDI
reception can be disabled for specific timbres. (see p.87
MIDI Filter 5 ‐ 1c/5 ‐ 2c “Enable Program Change”)
When you switch combinations by operating the
KROME, the bank and number of the combination you select are transmitted as bank select and program change messages on the global MIDI channel.
At this time, if any of the timbres have the timbre status
EXT or EX2, the bank and number of their timbre programs will be transmitted as bank select and program change messages on the timbre channel. (Timbre Status;
see p.81 Timbre Param 3
‐ 1c/3 ‐ 2c “Status”)
Bank/Timbre Program Select menu:
• Press the popup button located at the left of
Program
Select
, and choose a program from the Bank/Program
Select menu.
For the procedure, please see “Bank/Program Select menu:” on page 2.
Play/Mute
This setting mutes a timbre.
Play:
The timbre will produce sound.
Mute:
The timbre will be muted (silent).
[Play, Mute]
Solo On/Off
Turns the Solo function on/off for each timbre.
[On, Off]
The Solo function operates differently depending on the setting of the
Exclusive Solo
menu command.
If
Exclusive Solo is off
, you can turn Solo on for more than one timbre. The setting will alternate each time you press the Solo On/Off button.
If
Exclusive Solo is on
, pressing a Solo button will turn Solo on for only that timbre.
Note:
The Solo On/Off status is not preserved when you write the combination.
Exclusive Solo
The menu’s
Exclusive Solo
parameter also affects the way that Solo works. When
Exclusive Solo
is
Off
(unchecked), you can solo multiple Timbres at once.
When
Exclusive Solo
is
On
(checked), only one Timbre can be soloed at a time. In this mode, pressing a Solo button automatically disables any previous solos.
Tip:
You can also toggle
Exclusive Solo
by holding
ENTER
and pressing
1
on the numeric keypad.
Velocity Meter
This meter shows the note ‐ on velocity value.
• This indicates the note ‐ on velocity values on the MIDI channel of each timbre, produced by the keyboard, MIDI
IN, arpeggiator, or drum track. (If multiple note ‐ on messages are received simultaneously, the highest velocity will be displayed.)
• The meter will respond even if Key Zone or Vel Zone settings are set so that the note does not actually sound.
• This meter indicates the note ‐ on velocity value; it does not respond to changes in the Volume knob setting, nor to changes in the level of the audio signal produced by the
Filter, Amp, EG, LFO, EQ, or effects.
Timbre 02…08, 09…16 (Timbre Number):
Here you can specify the program, Play/Mute status, and
Solo On/Off status for timbres 2–8 and 9–16. These are the same as for timbre 01. For more information, please see
“Timbre 01 (Timbre Number):” above.
V
0–1(2): Menu Command
• 0:
Write Combination
see p. 101
• 1:
Exclusive Solo
see p. 64
• 2:
Auto Song Setup
see p. 65
• 3:
Copy from Program
see p. 101
For more information, please see “Combination: Menu
Command” on page 101.
COMBI P0: Play 0–3: Mixer T01–08, 0–4: Mixer T09–16
0–3: Mixer T01–08,
0–4: Mixer T09–16
0–3a
0–3b
0–3
Menu
This is the main page for selecting and playing
Combinations.
You can also set the pan, and volume for each of the Timbres
1–8 and 9–16. For more information, please see “0–1:
Program T01–08, 0–2: Program T09–16” on page 70.
0–3(4)a: Combination Select
For more information, please see “0–1(2)a: Combination
Select” on page 70.
0–3(4)b: Pan, Volume
Selected Timbre Info
This area shows information on the timbre selected for editing.
For more information, please see “0–1(2)b: Timbre Program
Select” on page 71.
Timbre 01 (Timbre Number):
Category
This indicates the category.
[Category Name]
Pan [RND, L001…C064…R127]
This specifies the pan of each timbre.
L001…C064…R127:
A setting of L001 is far left and R127 is far right. A setting of C064 will reproduce the pan setting of the Program mode.
OSC1
Left Center
OSC2
Right
OSC1:
Amp1 Pan=L001
OSC2:
Amp2 Pan=R127
Pan (CC#10)
C064
L032
L001
R096
R127
Right
OSC1
Left Center
OSC2
Right
OSC1:
Amp1 Pan=L032
OSC2:
Amp2 Pan=R096
Pan (CC#10)
C064
L032
L001
R096
R127
Right
Left Center Left Center
OSC1
Left
Left
Center
Center
OSC2
Right
OSC1:
Amp1 Pan=C064
OSC2:
Amp2 Pan=C064
Pan (CC#10)
C064
L032
L001
R096
R127
Right
If a mono insert effect is in use, the settings you make here will be ignored. In this case, the
Pan: #8
parameter in P8:
Routing/IFX–Insert FX Setup page will adjust the panning of
the sound after the insert effect (“Mixer” on page 243).
RND:
The oscillator pan will change randomly at each note ‐ on.
If
Status
(Combi 3–1(2)c) is set to INT, CC#10 (pan) messages can be received to control the setting. CC#10 values of 0 or 1 will place the sound at far left, 64 at center, and 127 at far right. (exclude RND) Pan can be controlled by messages received on the
MIDI Channel
(Combi 3–1(2)c).
Volume [000…127]
Adjusts the volume of each timbre 1–8.
The volume of each timbre is determined by multiplying this volume value with the MIDI volume
(CC#7) and expression (CC#11).
If
Status
(Combi 3–1(2)c) has been set to INT, incoming
MIDI CC#7 or CC#11 messages will control the volume of a timbre. (However these messages will not affect the setting of this parameter.)
If
Status
is EXT or EX2, the value of this parameter will be transmitted as MIDI CC#7 when the combination is changed. However this will not be transmitted by a timbre that is set to the same MIDI channel as the global
MIDI channel. This message is transmitted on the
MIDI
Channel
(Combi 3–1(2)c) specified for each timbre.
Hold Balance [Off, On]
On (checked):
When any one of the volume sliders is moved, the volume of the other timbres will change as well.
The volume balance of timbres 1–16 will be maintained. This is useful when you wish to adjust the overall volume.
Timbre 02…08 (Timbre Number):
Here you can specify the program etc. for each Timbre 2 through 8. These are the same as for timbre 01. For more information, please see “Timbre 01 (Timbre Number):” above.
V
0–3(4): Menu Command
• 0:
Write Combination
see p. 101
• 1:
Exclusive Solo
see p. 64
• 2:
Auto Song Setup
see p. 65
• 3:
Copy from Program
see p. 101
For more information, please see “Combination: Menu
Command” on page 101.
73
74
Combination mode
0–5: ARPEGGIATOR A,
0–6: ARPEGGIATOR B
0–5a
0–5b
0–5c
0–5
Menu
Here, you can make arpeggiator settings for the combination. A combination can run two arpeggiators simultaneously.
Arpeggiator parameters can be edited in P7: ARP/DT, but certain major parameters can be edited in these pages as well. You can edit these parameters in realtime, for example, by changing the arpeggio pattern while playing in Combi
P0: Play.
You can also use the TEMPO knob and the arpeggio control
(ARP) GATE knob, VELOCITY knob, SWING knob, and
STEP knob to control the arpeggiator in realtime.
To save the edits you make, use
Write Combination
.
0–5(6)a: Combination Select, Tempo
Bank, Combination Number & Name
These are the bank, number, and name of the current
Combination. Here, you can also select a combination.
For more information, please see “0–1(2)a: Combination
Select” on page 70.
(Tempo) [040.00…300.00, EXT]
For more information, please see “ (Tempo)” on page 71.
0–5(6)b: ARP Controls
This shows the value of each parameter for the ARP assignments of the REALTIME CONTROLS knobs.
[GATE] [–64…+00…+63]
[VEL. (Velocity)]
[SWING]
see p.6, p.54
[STEP]
see p.6
[–64…+00…+63]
[–64…+00…+63]
[–64…+00…+63]
0–5(6)c: Arpeggiator Run A/B,
Timbre assign
Arpeggiator Run A, B
When the ARP button is on, the arpeggiator(s) you checked here will run if they are assigned to a timbre by
Arpeggiator
Assign
(7–1(2)c).
When the arpeggiator is on, these check boxes let you turn A and B on/off.
This parameter can also be set from P7: Arpeggiator/Drum
Track page
Arpeggiator Run A, B
.
Timbre assign
This indicates the arpeggiator A and B assignment status for each timbre 1–8. These settings are made in
Arpeggiator
Assign
(7–1(2)c).
0–5(6)d: Arpeggiator A (B)
Pat (Pattern) [P0…P4, U0000(INT)…U0899(INT),
U0900(USER)…U1027(USER)]
Octave
Resolution
[1, 2, 3, 4]
[
, ,
, , , , , ]
[Off, On] Sort
Latch
Key Sync.
[Off, On]
[Off, On]
Keyboard [Off, On]
Set the various parameters of the combination arpeggiator.
For more information, please see “COMBI P7: ARP/DT
(Arpeggiator/Drum Track)” on page 91.
These parameters can also be set from 7–3(4): Arpeggiator
A(B) Setup.
V
0–5(6): Menu Command
• 0:
Write Combination
see p. 101
• 1:
Exclusive Solo
see p. 64
• 2:
Auto Song Setup
see p. 65
• 3:
Copy from Program
see p. 101
• 4:
Copy Arpeggiator
see p. 103
For more information, please see “Combination: Menu
Command” on page 101.
COMBI P0: Play 0–7: Tone Adjust
0–7: Tone Adjust
0–7a
0–7b
0–7c
0–7
Menu
Tone Adjust provides two important features simultaneously:
• You can use the Tone Adjust parameters to edit the most important program parameters.
• It lets you modify Programs for use within a specific
Combination including everything from subtle tweaks
(like changing LFO speeds) to dramatic changes (such as selecting a different Multisample). Any changes that you make are stored with the Combination, and do not alter the original Program.
Each of the sixteen Timbres has its own set of tone adjust parameters.
For more information, see:
• “Absolute (Abs), Relative (Rel), Meta parameter” on page 7
• “Tone Adjust and MIDI SysEx” on page 7
• “Interaction between Tone Adjust and MIDI CCs” on page 8
Saving Tone Adjust Edits
In Program mode, when you make edits via Tone Adjust and then save the results, the Program data is changed just
as if you’d edited the internal parameters directly. For more information, please see “Saving Tone Adjust Edits” on page 7.
In Combination mode, however, all Tone Adjust edits are stored within the Combination; the Program itself is not changed. This lets you alter the way that a Program sounds in one specific Combi without affecting the way that it sounds in Program mode, or in any other Combinations or
Songs.
0–7a: Combination Select, Tempo
Bank, Combination Number & Name
These are the bank, number, and name of the current
Combination. Here you can also select a combination.
For more information, please see “0–1(2)a: Combination
Select” on page 70.
(Tempo) [040.00…300.00, EXT]
For more information, please see “ (Tempo)” on page 71.
0–7b: Timbre select, Selected parameter information
Timbre select
Timbre [1…16]
This selects the timbre that will be controlled via the Tone
Adjust parameters. You can switch back and forth between the different timbres as much as you like, without losing your edits.
Auto Load (Auto Load PRG) [Off, On]
When you first load a Program into a Timbre, this parameter determines whether or not the Program’s Tone Adjust settings will be loaded as well.
The parameter settings assigned to the sliders and switches in the display and the on/off settings assigned to the
Absolute parameters will be loaded.
Once the Program has been loaded, you can change any or all of the Tone Adjust settings as desired, including both assignments and values. All such edits are stored in the
Combination, without affecting the original Program.
If
Auto Load PRG
is
On
, Tone Adjust settings will be automatically loaded along with the Program.
If
Auto Load PRG
is
Off
, the Tone Adjust settings of the replacement program will not be loaded; the program settings prior to replacement will remain.
Selected parameter information
This status line shows detailed, read ‐ only information about the currently selected Tone Adjust parameter.
Control Assignment Value Type Stored Value
Control [SW1…8, SL1…8]
This is the switch or slider in the display that is assigned to
Tone Adjust parameters.
Assignment [List of Tone Adjust assignments]
This is the full name of the parameter assigned to the switch or slider in the display. You can change this using the
“Assign” parameter, below.
Value
This shows the current value of the parameter. The range of values will vary depending on the parameter assigned to the switch or slider.
Type [Rel, Abs, Meta]
This shows the type of the parameter, which relates to how
edits to the parameter are saved. For more information, please see “Absolute (Abs), Relative (Rel), Meta parameter” on page 7.
Stored Value
This shows the original value of the parameter, before the effects of Tone Adjust. It applies only to Tone Adjust parameters which control a single Program parameter.
If you un ‐ assign a parameter from a control, it will revert to this value.
0–7c: Tone Adjust
Here, you can assign Tone Adjust parameters to the switches and sliders in the display.
Switches 1…8
Tone Adjust switches act a little differently than switches in the display.
When a switch is assigned to a
Relative
parameter, or an
Absolute
parameter with more than two states:
Switch On =
On Value
(see below)
Switch Off = the Program’s stored value
75
Combination mode
76
When a switch is assigned to a two ‐ state
Absolute
parameter, such as
Hold
, the switch status directly reflects the parameter value:
Switch On =
On
Switch Off =
Off
Assign
On/Off
Value
Assign
This assigns Tone Adjust parameters to the switches in the display. For a full list of the available choices, please see
“Common Tone Adjust Parameters” on page 9 and “Tone
Adjust Parameters” on page 10.
On Value [Depends on parameter]
The parameter is set to this value when the switch is On.
When the switch is assigned to a two ‐ state
Absolute
parameter, such as
Hold
, this will always be the same as the
Switch Status
(see below).
Switch Status [Off, On]
This simply shows whether the switch is On or Off.
Sliders 1–8
Assign
This assigns Tone Adjust parameters to the sliders in the display. For a full list of the available choices, please see
“Common Tone Adjust Parameters” on page 9 and “Tone
Adjust Parameters” on page 10.
Assignments are exclusive
Per ‐ Oscillator parameters apply to OSC1 and 2 individually, and are marked as such: OSC1 and OSC2.
Each slider can be assigned to only one parameter, and each parameter can be assigned to only one slider.
To swap a parameter from one slider to another, you’ll need to first un ‐ assign it from the old slider, and then assign it to the new slider.
Value
This shows the current value of the parameter. The range of values will vary depending on the parameter assigned to the slider.
V
0–7: Menu Command
• 0:
Write Combination
see p. 101
• 1:
Exclusive Solo
see p. 64
• 2:
Auto Song Setup
see p. 65
• 3:
Copy from Program
see p. 101
• 4:
Copy Tone Adjust
see p. 102
• 5
Reset Tone Adjust
see p. 103
For more information, please see “Combination: Menu
Command” on page 101.
Controls
REALTIME CONTROLS lets you use knobs [1]–[4] to modify the parameters of the combination or the effects. You can also use these knobs to control the arpeggiators. When you use a knob, the display will show the controller’s function and value. Use the SELECT button to change the knob functions.
In TONE, the functions assigned to knobs 1–4 are fixed.
In USER, you can assign a variety of modulation functions to knobs 1–4. To assign functions, use the P1: Controllers
Setup page (page 78).
Realtime Controls
The Realtime Controls TONE knob functions (CUTOFF – EG
RELEASE) are fixed. You can assign a variety of functions to
Realtime Controls USER knobs 1–4 (USER [1]–USER [4]).
MIDI control changes are assigned for each function.
When you move a knob, it sends out the corresponding
MIDI CC.
This will control timbres on the global MIDI channel.
Most of these functions adjust (scale) the parameter settings of the timbre programs. Unless otherwise noted, “scaling” means that the parameters are at their programmed values when the controller is at 64, at their minimum when the controller is at 0, and at their maximum when the controller is at 127. For another look at this, please see the diagram below.
CC parameter scaling
99
Parameter
Value
As Programmed
00
0 64
CC Value
127
TONE [Cut Off]: Flt Fc (Cutoff) [000…127]
This knob scales the cutoff frequencies of Filters A and B, and transmits and receives MIDI CC #74.
TONE [RESONANCE]: Flt Reso (Resonance)
[000…127]
This knob scales the resonance of Filters A and B, and transmits and receives MIDI CC #71.
TONE [EG INTENSITY]: Flt EG (Filter EG Intensity)
[000…127]
This knob scales the effect of the Filter EG on the cutoff frequencies of Filters A and B. It also transmits and receives
MIDI CC#79.
TONE [RELEASE]: EG Rel (EG Release) [000…127]
This knob scales the release time of the Filter and Amp EGs, and transmits and receives MIDI CC#72.
USER [1]…[4] [000…127]
These are the current values and assigned functions (MIDI
CC) for the Realtime Controls USER knobs.
In the P1: Controllers– Controllers Setup page you can assign a variety of modulation functions to Realtime
Controls USER knobs 1–4.
Many of the functions scale a particular set of Program parameters. All of the settings also correspond to MIDI messages usually CCs.
Arpeggiator
Arpeggio control lets you use the four knobs to control the two arpeggiators in realtime.
The functions of knobs 1–4 are fixed. The knobs will control the duration of the arpeggiated notes, their velocity, the pitch range, and the length of the arpeggio pattern.
ARP [GATE] [–64…+00…+64]
Adjusts the duration (gate time) of the arpeggiated notes
(See “Gate” on page 54).
ARP [VELOCITY] [–64…+00…+64]
Adjusts the velocity of the arpeggiated notes (See “Velocity” on page 54).
ARP [SWINGH] [–64…+00…+64]
Adjusts the degree of shuffle for the arpeggio pattern (See
“Swing” on page 54).
ARP [STEP] [–64…+00…+64]
This affects the length and resolution of the arpeggio pattern.
Turning the knob toward the left will shorten the pattern’s length (
Length
) in units of one half. Turning the knob toward the right will shorten the interval between arpeggiated notes (
Resolution
) in units of one half. When the knob is in the center (12 o’clock), the number of steps and the speed will be as specified by the
Length
and
Resolution
(See “Resolution*” on page 54).
COMBI P0: Play Controls
77
78
Combination mode
COMBI P1: Controllers
1–1: Controllers Setup
1–1a
1–1b
1–1c
1–1
Menu
Here, you can assign the functions performed by SW1 and
SW2, and by knobs 1–4 when Realtime Controls USER is selected.
Note:
The Panel Switch Assign setting of the program assigned to each timbre will have no effect.
1–1a: Combination, Tempo
Bank, Combination Number & Name
These are the bank, number, and name of the current
Combination.
For more information, please see “0–1(2)a: Combination
Select” on page 70.
(Tempo) [040.00…300.00, EXT]
For more information, please see “ (Tempo)” on page 71.
1–1b: Panel Switch 1/2 Assign
SW (SW1 Assign) [Off, …, JS-Y Lock]
This assigns the function of SW1. For more information, please see “List of SW 1/2 assignments” on page 348.
Note:
If you change the function setting, the status is reset to off.
Note:
If the on/off status of the front panel SW1, SW2 switches is memorized when you save the combination.
Mode (SW1 Mode) [Toggle, Momentary]
This specifies the on/off operation when you press the SW1 switch.
Toggle:
The state will alternate between On and Off each time you press the SW1 switch.
Momentary:
The state will remain On only while you continue holding down the SW1 switch.
SW2 (SW2 Assign) [Off, …, JS-Y Lock]
Mode (SW2 Mode) [Toggle, Momentary]
This assigns the function of SW2. The functions that can be assigned to SW2 are the same as for SW1, with the substitution of SW2 Mod. (CC#81) instead of the SW1’s SW1
Mod. (CC#80).
1–1c: Realtime Controls Knob Assign
Here you can select the functions (mainly types of control change) that are assigned to knobs 1–4 when the SELECT
button has selected USER (See “Realtime Controls Knobs 1–
4 Assignments” on page 348)
The functions you assign here are active when you use the
SELECT button to select USER, and operate knobs 1–4.
USER [1]
USER [2]
USER [3]
USER [4]
[Off, …, MIDI CC#119]
[Off, …, MIDI CC#119]
[Off, …, MIDI CC#119]
[Off, …, MIDI CC#119]
V
1–1: Menu Command
• 0:
Write Combination
see p. 101
• 1:
Exclusive Solo
see p. 64
• 2:
Auto Song Setup
see p. 65
• 3:
Copy from Program
see p. 101
For more information, please see “Combination: Menu
Command” on page 101.
COMBI P2: EQ 2–1: EQ Trim T01–08, 2–2: EQ Trim T09–16
COMBI P2: EQ
2–1: EQ Trim T01–08,
2–2: EQ Trim T09–16
2–1a
2–1b
2–1c
2–1
Menu
Here, you can set the signal level that enters the EQ of timbres 1–8 and 9–16.
2–1(2)a: Combination Name, Tempo
Bank, Combination Number & Name
These are the bank, number, and name of the current
Combination.
For more information, please see “0–1(2)a: Combination
Select” on page 70.
(Tempo) [040.00…300.00, EXT]
For more information, please see “ (Tempo)” on page 71.
2–1(2)b: Timbre Info
Select Timbre Info
Timbre Number
Timbre Category
Selected Timbre Info:
This area displays information about the timbre selected for editing –
T:
timbre number/program bank/number/name,
Ch:
MIDI channel number.
Timbre Number:
This indicates the timbre number. The various parameters below each timbre number make settings for the corresponding timbre.
Timbre Category:
This shows the abbreviated category name of the Program assigned to the Timbre.
2–1(2)c: Trim
Timbre 01 (Timbre Number):
Auto Load Prog EQ [Off, On]
When you first load a Program into a Timbre, this parameter determines whether or not the Program’s EQ settings will be loaded as well.
Once the Program has been loaded, you can change any or all of the EQ settings as desired. All such edits are stored in the Combination, without affecting the original Program.
Regardless of this setting, subsequent edits to the Program’s
EQ in Program mode will not affect the Combination.
On (checked):
When you switch the timbre’s program, the current EQ settings will be cleared, and the 3 ‐ band EQ values specified by the program will be loaded automatically. Normally you will leave this checked. The timbre’s program can be switched by using
Program Select
(Combi 0 ‐ 1(2)b) or by receiving a MIDI program change.
You are free to edit the 3 ‐ band EQ settings that have been automatically loaded. Make adjustments for each timbre relative to the settings of the program, and then save the combination.
Off (unchecked):
The Program’s EQ settings won’t be loaded. Use this if you’ve set up the EQ in a specific way, and then want it to stay unchanged while you try out different Programs.
Bypass [On, Off]
If this is
On (checked)
, all of the EQ will be disabled, including
Input Trim
. Bypass is useful for comparing the results of the EQ with the original signal.
Input Trim [00…99]
This controls the volume level going into the EQ. Note that this parameter uses a linear scale; 50 is equivalent to –6 dB,
25 is the same as –12 dB, and so on.
High settings of the Low, Mid, and High Gain controls can cause substantial increases in the overall level. You can compensate for this by turning down the input trim.
Timbre 02…08, 09…16 (Timbre Number):
Here, you can make settings for timbres 2–8 and 9–16. They are the same as for timbre 1. For more information, please
see “Timbre 01 (Timbre Number):” above.
V
2–1(2): Menu Command
• 0:
Write Combination
see p. 101
• 1:
Exclusive Solo
see p. 64
• 2:
Auto Song Setup
see p. 65
• 3:
Copy from Program
see p. 101
For more information, please see “Combination: Menu
Command” on page 101.
79
80
Combination mode
2–3: EQ Gain T01–08,
2–4: EQ Gain T09–16
2–3a
2–3b
2–3c
2–3
Menu
These parameters adjust the three ‐ band EQ (with sweepable mid range) for timbres 1–8 and 9–16.
2–3(4)a: Combination Name, Tempo
2–3(4)b: Timbre Info
For more information, please see “2–1: EQ Trim T01–08, 2–2:
EQ Trim T09–16” on page 79.
2–3(4)c: 3 Band Parametric EQ
Timbre 01 (Timbre Number):
High Gain [dB] [–18.0…+00.0…+18.0]
This controls the gain of the 10 kHz High Shelf EQ, in increments of 0.5 dB.
Mid Freq [Hz] (Mid Frequency) [100…10k]
This sets the center frequency for the Mid sweep EQ.
Mid Gain [dB] [–18.0…+00.0…+18.0]
This controls the gain of the Mid Sweep EQ, in increments of
0.5 dB.
Low Gain [dB] [–18.0…+00.0…+18.0]
This controls the gain of the 80 Hz Low Shelf EQ, in increments of 0.5 dB.
Timbre 02…08, 09…16 (Timbre Number):
These parameters adjust the three ‐ band EQ (with sweepable mid range) for timbres 2–8 and 9–16. They are the same as
for timbre 1. For more information, please see “Timbre 01
(Timbre Number):” above.
V
2–3(4): Menu Command
• 0:
Write Combination
see p. 101
• 1:
Exclusive Solo
see p. 64
• 2:
Auto Song Setup
see p. 65
• 3:
Copy from Program
see p. 101
For more information, please see “Combination: Menu
Command” on page 101.
COMBI P3: Timbre Param (Timbre Parameters) 3–1: MIDI T01–08, 3–2: MIDI T09–16
COMBI P3: Timbre Param (Timbre Parameters)
3–1: MIDI T01–08,
3–2: MIDI T09–16
3–1a
3–1b
3–1c
3–1
Menu
Here, you can make MIDI settings for timbres 1–8 and 9–16.
3–1(2)a: Combination Name, Tempo
3–1(2)b: Timbre Info
For more information, please see “2–1: EQ Trim T01–08, 2–2:
EQ Trim T09–16” on page 79.
3–1(2)c: MIDI
Timbre 01 (Timbre Number):
Status [Off, INT, EXT, EX2]
This sets whether the Timbre controls the internal sounds, or external MIDI devices.
When controlling external MIDI devices, you can choose between using the internal Bank Select numbers (as set by the front ‐ panel buttons), or using custom Bank Select settings to match the external device.
Off:
Use this to disable the Timbre. With this setting, the
Timbre’s Program will not sound, and MIDI data will not be transmitted.
INT:
The timbre will sound, and will also sound in response to MIDI messages from an external MIDI device. MIDI data will not be transmitted.
EXT:
The timbre will not sound even if it receives messages from a controller, but MIDI data will be transmitted to external devices.
EX2:
Use this to play an external MIDI device, with custom ‐ set
Bank Select
via the
Bank Select (When Status=EX2) LSB
and
MSB
parameters, on the
MIDI
tab of the
Timbre
Parameters
page. In all other ways, this is the same as EXT.
INT
MIDI IN/
USB B
Tone generator
EXT, EX2
MIDI OUT/
USB B
MIDI Channel [01…16, Gch]
Sets the MIDI transmit/receive channel for each timbre.
Gch:
The timbre will use the channel that has been selected as the global
MIDI Channel
(Global 1–1a).
When
Status
is INT, MIDI messages will be received on the channel you specify here. If this setting is the same as the global MIDI channel, the internal tone generator will sound according to the internal settings. If this is set to EXT or EX2, playing the KROME will transmit MIDI messages on the
MIDI channel specified here. (Messages will also be transmitted simultaneously on the global MIDI channel.)
Bank Select (When Status = EX2) MSB [000…127]
Bank Select (When Status = EX2) LSB [000…127]
Specifies the bank number that will be transmitted when
Status
is set to EX2. The upper line is the MSB, and the lower line is the LSB. This setting has no effect if
Status
is other than EX2.
Timbre 02…08, 09…16 (Timbre Number):
These are the MIDI ‐ related settings for timbres 2–8 and 9–
16. They are the same as for timbre 1. For more information,
please see “Timbre 01 (Timbre Number):” above.
3–1(2): Menu Command
• 0:
Write Combination
see p. 101
• 1:
Exclusive Solo
see p. 64
• 2:
Auto Song Setup
see p. 65
• 3:
Copy from Program
see p. 101
For more information, please see “Combination: Menu
Command” on page 101.
3–3: OSC T01–08,
3–4: OSC T09–16
3–3a
3–3b
3–3c
3–3
Menu
These settings specify how timbres 1–8 and 9–16 will be played.
3–3(4)a: Combination Name, Tempo
3–3(4)b: Timbre Info
For more information, please see “2–1: EQ Trim T01–08, 2–2:
EQ Trim T09–16” on page 79.
81
82
Combination mode
3–3(4)c: OSC
Timbre 01 (Timbre Number):
Force OSC Mode [PRG, Poly, MN, LGT]
This lets you override the Program’s stored Voice Assign
Mode settings, if desired.
PRG:
The Program’s stored Prog P1: Basic/Controllers–
Program Basic
Voice Assign Mode
settings will be used.
Poly:
The timbre will play polyphonically, regardless of the
Program’s settings.
MN (Mono):
The timbre will play monophonically, regardless of the Program’s settings.
LGT (Legato):
The timbre will sound monophonically, and will play legato according to the Program’s
Mode
setting
(Prog 1–1b).
With the MN or LGT settings, the Program’s
Priority
setting
(Prog 1–1b) will determine the priority of the note that sounds when you play two or more notes.
OSC Select [BTH, OS1, OS2]
Specifies whether the timbre’s program will play OSC1,
OSC2, or both.
For programs whose
Oscillator Mode
(Prog 1–1a) is Double or Double Drums, this setting lets you specify that only
OSC1 or OSC2 will sound.
BTH (Both):
OSC1 and 2 will sound as specified by the settings of the program.
OS1:
Only OSC1 will sound.
OS2:
Only OSC2 will sound. Programs will not sound if
Oscillator Mode
is set to Single or Drums.
Portamento [PRG, Off, 001…127]
Make portamento settings for each timbre.
PRG:
Portamento will be applied as specified by the program settings.
Off:
Portamento will be off, even if the original program settings specified Portamento to be on.
001…127:
Portamento will be applied with the portamento time you specify here, even if it is turned off by the program settings.
If the
Status
(Combi 3–1(2)c) is set to INT, CC#05
(portamento time) and CC#65 (portamento switch) messages will be received and will control and change these settings. (If the setting is PRG, CC#05, portamento time will not be received.) These messages will be received on the MIDI channel specified for each timbre by
MIDI Channel
(Combi 3–1(2)c).
Timbre 02…08, 09…16 (Timbre Number):
Here you can make voice assignment settings for timbres 2–
8 and 9–16. The settings are the same as for timbre 1. For
more information, please see “Timbre 01 (Timbre
Number):” above.
V
3–3(4): Menu Command
• 0:
Write Combination
see p. 101
• 1:
Exclusive Solo
see p. 64
• 2:
Auto Song Setup
see p. 65
• 3:
Copy from Program
see p. 101
For more information, please see “Combination: Menu
Command” on page 101.
3–5: Pitch T01–08,
3–6: Pitch T09–16
3–5a
3–5b
3–5c
3–5
Menu
Here, you can make pitch ‐ related settings for timbres 1–8 and 9–16.
3–5(6)a: Combination Name, Tempo
3–5(6)b: Timbre Info
For more information, please see “2–1: EQ Trim T01–08, 2–2:
EQ Trim T09–16” on page 79.
3–5(6)c: Pitch
Timbre 01 (Timbre Number):
Transpose [–60…+00…+60]
Adjusts the pitch of each timbre in semitone steps.
12 units equal one octave.
When
Status
(Combi 3–1(2)c) is INT, this parameter will affect the pitches sounded by the KROME. When
Status
is EXT, this parameter will affect the note numbers of the MIDI note messages that are transmitted.
For example if you make settings of +04 and +07 respectively for two timbres that are set to EXT, playing the C key will transmit a C note number on the global
MIDI channel, and at the same time will also transmit E and G note numbers on the MIDI channels of those timbres.
Detune (Use BPM Adjust in Menu)
[–1200…+0000…+1200]
Adjusts the pitch of each timbre in one ‐ cent units.
+0000:
Normal pitch.
Note:
You can also use the
Detune BPM Adjust
menu command to alter a loop’s tempo via detuning. Since this will alter the pitch of the loop along with the tempo, it’s generally suited only to un ‐ pitched percussive loops.
Transpose
and
Detune
can be controlled via MIDI RPN messages. The way that this works depends on whether or not the Timbre uses a Drum Program.
If the Timbre does not use a Drum Program for example, if it uses a Single or Double Program then
MIDI RPN Coarse Tune will control
Transpose
, and
RPN Fine Tune will control
Detune
.
If the Timbre uses a Drum Program, MIDI RPN Coarse
Tune and Fine Tune will be combined to control
Detune
. The overall range is ±1 octave for coarse tune and fine tune together.
COMBI P3: Timbre Param (Timbre Parameters) 3–7: Scale T01–08, 3–8: Scale T09–16
Bend Range [PRG, –24…+00…+24]
Specifies the maximum amount of pitch change (in semitones) that will occur when the pitch bender is operated.
PRG:
The pitch range specified by the program will be used.
–24…+24:
This setting will be used regardless of the setting in the program.
The MIDI RPN Pitch Bend Change message can be received to control this and change the setting.
(However it will not be received if this parameter is set to PRG.) This message is received on the MIDI channel for each timbre set by
MIDI Channel
(Combi 3–1(2)c).
Timbre 02…08, 09…16 (Timbre Number):
These are the pitch ‐ related settings for timbres 2–8 and 9–16.
The settings are the same as for timbre 1. For more information, please see “Timbre 01 (Timbre Number):” above.
V
3–5(6): Menu Command
• 0:
Write Combination
see p. 101
• 1:
Exclusive Solo
see p. 64
• 2:
Auto Song Setup
see p. 65
• 3:
Copy from Program
see p. 101
• 4:
Detune BPM Adjust
see p. 103
For more information, please see “Combination: Menu
Command” on page 101.
3–7: Scale T01–08,
3–8: Scale T09–16
3–7a
3–7b
3–7c
3–7
Menu
Off (unchecked):
The scale specified by
Type (Combi’s
Scale)
(Combi 3–7(8)c) will be used.
Timbre 02…08, 09…16 (Timbre Number):
Here, you can make settings for the scale of each timbre 2–8 and 9–16. The settings are the same as for timbre 1. For more
information, please see “Timbre 01 (Timbre Number):” above.
Scale:
This specifies the scale that the combination will use. For more information, please see “1–2d: Scale” on page 15.
Type (Combi’s Scale)
[Equal Temperament…User Octave Scale15]
Selects the scale.
Key
Selects the tonic key of the selected scale.
[C…B]
Random [0…7]
As this value is increased, an increasingly random deviation will be added to the pitch at each note ‐ on.
If
Status
(Combi 3–1(2)c) is INT, this setting will affect the pitch produced by the KROME. If
Status
is EXT, this setting will affect the note number of the note messages transmitted via MIDI.
V
3–7(8): Menu Command
• 0:
Write Combination
see p. 101
• 1:
Exclusive Solo
see p. 64
• 2:
Auto Song Setup
see p. 65
• 3:
Copy from Program
see p. 101
For more information, please see “Combination: Menu
Command” on page 101.
Here, you can make settings for the scale of timbres 1–8 and
9–16.
3–7(8)a: Combination Name, Tempo
3–7(8)b: Timbre Info
For more information, please see “2–1: EQ Trim T01–08, 2–2:
EQ Trim T09–16” on page 79.
3–7(8)c: Scale
Timbre 01 (Timbre Number):
Use Program’s Scale [Off, On]
Timbre can use the scale that is specified by
Scale
(Prog 1–
2b).
On (checked):
The scale specified by the program will be used.
83
84
Combination mode
COMBI P4: Zone/Delay
4–1: Key Zone T01–08,
4–2: Key Zone T09–16
(Keyboard Zones T01–08, T09–16)
4–1a
4–1b
4–1c
4–1d
4–1
Menu
These settings specify the keyboard range in which timbres
1–8 and 9–16 will sound.
The top/bottom key parameters specify the range of notes in which timbres 1–8 and 9–16 will sound, and the top/bottom slope parameters specify the range over which the original volume will be reached.
Key Split:
By setting timbres of different sounds to ranges that do not overlap, you can play different sounds in different ranges of the keyboard.
Layer:
By setting the ranges to overlap, you can play two or more sounds with a single note.
Positional Cross-fade:
If you set the slopes (the grayed portion) to overlap, the sounds will overlap, and the proportion of the overlap will change according to the keyboard location.
4–1(2)a:Zone Map
This area indicates the note and velocity ranges in which each timbre will sound.
The display uses lines to indicate the range of notes and velocities that will sound, and show the slope portion.
4–1(2)b: Combination Name, Tempo
4–1(2)c: Timbre Info
For more information, please see “2–1: EQ Trim T01–08, 2–2:
EQ Trim T09–16” on page 79.
4–1(2)d:Keyboard Zones
Timbre 01 (Timbre Number):
Top Key [C–1…G9]
Specifies the top key (upper limit) of the notes that will sound each timbre.
Top Slope [00, 01, 02, 03, 04, 06, 08, 10,
12, 18, 24, 30, 36, 48, 60, 72]
Specifies the range of keys (12 is one octave) over which the volume will be reached starting from the top key.
0:
The volume will be at the original level from the top key.
12:
The volume will increase gradually as you play downward, and will reach the original volume one octave below the top key.
72:
The volume will increase gradually as you play downward, and will reach the original volume six octaves below the top key.
Bottom Slope [00, 01, 02, 03, 04, 06, 08, 10,
12, 18, 24, 30, 36, 48, 60, 72]
Specifies the range of keys (12 is one octave) over which the volume will be reached starting from the bottom key.
0:
The volume will be at the original level from the bottom key.
12:
The volume will increase gradually as you play upward, and will reach the original volume one octave above the bottom key.
72:
The volume will increase gradually as you play upward, and will reach the original volume six octaves above the bottom key.
Bottom Key [C–1…G9]
Specifies the bottom key (lower limit) of the notes that will sound each timbre.
How volume will change according to keyboard location
Volume
Key
Bottom Slope
Top Slope
Bottom Key Top Key
Note:
You can also set the note values and velocity values by holding down an edit cell or the ENTER button and playing
Zone Map
Key zone display
Bottom Slope
Bottom Key
Timbre 1
Timbre 16
C–1
E1
Top Slope
Top Key
G9
Velocity zone display
Top
Velocity
1 16
Timbre
Top
Slope
Bottom
Slope
Bottom
Velocity
COMBI P4: Zone/Delay 4–3: Vel Zone T01–08, 4–4: Vel Zone T09–16 (Velocity Zones T01–08, T09–16)
a key (see OG p.10).
It is not possible to set the bottom key above the top key of the same timbre. Nor is it possible for the top and bottom slopes to overlap.
Timbre 02…08, 09…16 (Timbre Number):
These are the key zone settings for timbres 2–8 and 9–16.
They are the same as for timbre 1. For more information,
please see “Timbre 01 (Timbre Number):” above.
V
4–1(2): Menu Command
• 0:
Write Combination
see p. 101
• 1:
Exclusive Solo
see p. 64
• 2:
Auto Song Setup
see p. 65
• 3:
Copy from Program
see p. 101
For more information, please see “Combination: Menu
Command” on page 101.
4–3: Vel Zone T01–08,
4–4: Vel Zone T09–16
(Velocity Zones T01–08, T09–16)
4–3a
4–3b
4–3c
4–3d
4–3
Menu
4–3(4)d: Velocity Zones
Timbre 01 (Timbre Number):
Top Velocity [001…127]
Specifies the maximum velocity value that will sound each timbre.
Top Slope [000…120]
Specifies the number of velocity steps over which the original volume will be reached, starting from the Top
Velocity.
0:
The volume will be at the original value from the top velocity.
120:
The volume will decrease as the velocity approaches the top velocity.
Bottom Slope [000…120]
Specifies the number of velocity steps over which the original volume will be reached, starting from the Bottom
Velocity.
0:
The volume will be at the original value from the bottom velocity.
120:
The volume will decrease as the velocity approaches the bottom velocity.
Bottom Velocity [001…127]
Specifies the minimum velocity value that will sound each timbre.
How volume will change according to keyboard location
Volume
Sets the Top/Bottom Velocity parameters to specify the range of velocities that will sound for each timbre 1–8 and 9–
16, and set the Top/Bottom Slope parameters to specify the range over which the volume will change.
Velocity switch:
If you set different velocity zones for multiple timbres so that they do not sound together, you can play separate sounds by varying playing dynamics.
Layer:
If you set two or more timbres to velocity zones that overlap, the sounds will be heard together.
Velocity Cross-fade:
If the slope ranges (gray line) overlap, different sounds will be sounded together, and your playing dynamics will determine the proportion of each sound.
It is not possible to set the bottom velocity greater than the top velocity for the same timbre, nor can the top slope and the bottom slope overlap.
4–3(4)a: Zone Map
This area indicates the note and velocity ranges in which each timbre will sound.
For more information, please see “4–1(2)a: Zone Map” on page 84.
4–3(4)b: Combination Name, Tempo
4–3(4)c: Timbre Info
For more information, please see “2–1: EQ Trim T01–08, 2–2:
EQ Trim T09–16” on page 79.
Velocity
Bottom Slope
Top Slope
Bottom Velocity Top Velocity
Note:
You can also set the note values and velocity values by holding down an edit cell or the ENTER button and playing a key (see OG p.10).
Timbre 02…08, 09…16 (Timbre Number):
These are the velocity zone settings for timbres 2–8 and 9–
16. They are the same as for timbre 1. For more information,
please see “Timbre 01 (Timbre Number):” above.
V
4–3(4): Menu Command
• 0:
Write Combination
see p. 101
• 1:
Exclusive Solo
see p. 64
• 2:
Auto Song Setup
see p. 65
• 3:
Copy from Program
see p. 101
For more information, please see “Combination: Menu
Command” on page 101.
85
86
Combination mode
4–5: Delay T01–08,
4–6: Delay T09–16
4–5a
4–5b
4–5c
This specifies the time (delay) from when the timbres 1–8 and 9–16 receive a note ‐ on until the sound begins.
4–5(6)a: Combination Name, Tempo
4–5(6)b: Timbre Info
For more information, please see “2–1: EQ Trim T01–08, 2–2:
EQ Trim T09–16” on page 79.
4–5(6)c: Delay
Timbre 01 (Timbre Number):
Delay Time [ms] [0000…5000ms, KeyOff]
Specifies the time (delay time) from note ‐ on until the timbre begins to produce sound, in units of ms (1/1000th of a second). This setting is available if
MIDI/Tempo Sync
. is set to Off.
KeyOff:
The note will begin sounding at note ‐ off. In this case, the sound will not die away if the sustain level of the program’s amp EG is other than 0. This setting is used when creating harpsichord sounds.
Normally you will set this to 0000.
MIDI/Tempo Sync.
[Off, On]
The time (delay time) from note ‐ on until the timbre produces sound will be specified in note length units relative to the (
Tempo)
.
On (checked):
Specify the delay time in terms of a
Base
Note
and
Times
relative to the
Tempo
. For example if
Base
Note
= ,
Times
= 01, and
Tempo
= 60 BPM, the delay time will be equivalent to 1000 ms.
Off (unchecked):
The delay time will be set by the
Delay
Time
setting.
Base Note
Times
[ , , , , , , , , , ]
[01…32]
It specifies the time (delay time) from note ‐ on until the timbre begins to produce sound, in terms of a note value relative to the (
Tempo)
(Combi 0–1(2)a).
Use
Base Note
to specify the desired note value, and use
Times
to extend that note value by the specified multiple.
For example if you set
Base Note
to a quarter note ( ) and
Times
to 02, that timbre will sound with a delay of a half note ( ). Even if you change (
Tempo)
(Combi 0–1(2)a), the delay time will always be a half note ( ). If you use these parameters to specify a delay of a half note ( ). In this case, a
Tempo
of 60.00 BPM will produce a 2000 ms delay, and a
Tempo
of 120.00 BPM will produce a 1000 ms delay.
4–5
Menu
Timbre 02…08, 09…16 (Timbre Number):
These are the delay time settings for timbres 2–8 and 9–16.
They are the same as for timbre 1. For more information,
please see “Timbre 01 (Timbre Number):” above.
V
4–5(6): Menu Command
• 0:
Write Combination
see p. 101
• 1:
Exclusive Solo
see p. 64
• 2:
Auto Song Setup
see p. 65
• 3:
Copy from Program
see p. 101
For more information, please see “Combination: Menu
Command” on page 101.
COMBI P5: MIDI Filter 5–1: <1> T01–08, 5–2: <1> T09–16
COMBI P5: MIDI Filter
These settings allow you to apply filters to the MIDI data that will be transmitted and received by each timbre 1–16.
For example even if two timbres are being played by the same MIDI channel, you can make settings so that the damper pedal will apply to one but not the other.
On (checked):
Transmission and reception or reception
(After Touch) of MIDI data is enabled.
If
Status
(Combi 3–1(2)c) is INT, the effects of the checked items will be applied to the timbre’s program when the controllers of the KROME are operated or when MIDI data is received. (Effect Dynamic Modulation is not affected by these settings.)
In the case of EXT or EX2, operating a controller on the
KROME will transmit MIDI data on the channel of that timbre. MIDI transmission/reception settings for the entire
KROME can be made in
MIDI Filter
(Global 1–2b).
The MIDI Filter <4> and <5> contain MIDI filters for assignable controllers (whose function can be set by the user), and if these are assigned to MIDI control changes, the filter settings will affect those control changes. In this case, if the same control change has been assigned in MIDI Filter pages <1>–<3>, the settings in MIDI Filter pages <1> through
<3> will take priority. Also, if the same control change is assigned to two or more controllers in the MIDI Filter pages
<4> and <5>, checking any one of them will enable that control change.
Off (unchecked):
Transmission and reception of MIDI data is disabled.
Note:
MIDI CC# = MIDI control change message numbers.
Enable Damper [Off, On]
Specifies whether or not MIDI CC#64 hold (damper pedal) messages will be transmitted and received.
Enable Portamento SW [Off, On]
Specifies whether or not MIDI CC#65 portamento on/off messages will be transmitted and received.
Timbre 02…08, 09…16 (Timbre Number):
These are the MIDI Filter1 settings for timbres 2–8 and 9–16.
They are the same as for timbre 1. For more information,
please see “Timbre 01 (Timbre Number):” above.
V
5–1(2): Menu Command
• 0:
Write Combination
see p. 101
• 1:
Exclusive Solo
see p. 64
• 2:
Auto Song Setup
see p. 65
• 3:
Copy from Program
see p. 101
For more information, please see “Combination: Menu
Command” on page 101.
5–1: <1> T01–08,
5–2: <1> T09–16
5–1a
5–1b
5–1c
5–1
Menu
5–1(2)a: Combination Name, Tempo
5–1(2)b: Timbre Info
For more information, please see “2–1: EQ Trim T01–08, 2–2:
EQ Trim T09–16” on page 79.
5–1(2)c: MIDI Filter1
Timbre 01 (Timbre Number):
Enable Program Change [Off, On]
Specifies whether or not MIDI program change messages will be transmitted and received.
Enable After Touch [Off, On]
Specifies whether or not MIDI after touch messages will be received.
87
Combination mode
5–3: <2> T01–08,
5–4: <2> T09–16
5–3a
5–3b
5–3c
5–3
Menu
5–5: <3> T01–08,
5–6: <3> T09–16
5–5a
5–5b
5–5c
5–5
Menu
88
5–3(4)a: Combination Name, Tempo
5–3(4)b: Timbre Info
For more information, please see “2–1: EQ Trim T01–08, 2–2:
EQ Trim T09–16” on page 79.
5–3(4)c: MIDI Filter2
Timbre 01 (Timbre Number):
Enable JS X as AMS [Off, On]
Specifies whether or not MIDI pitch bend messages (the X axis of the joystick) will be received to control the AMS effect assigned to JS X. (This is not a filter for MIDI pitch bend message reception.) For more information, please see
“Alternate Modulation Sources (AMS)” on page 339.
Enable JS+Y [Off, On]
Specifies whether MIDI CC#1 (the +Y axis of the joystick, or a Realtime Controls knob assign setting) will be transmitted and received.
Enable JS–Y [Off, On]
Specifies whether MIDI CC#2 (the –Y axis of the joystick, or a Realtime Controls knob assign setting) will be transmitted and received.
Enable Ribbon CC#16 [Off, On]
Specifies whether or not MIDI CC#16 (specified as the assignment of a Realtime Controls knob) will be transmitted or received.
Timbre 02…08, 09…16 (Timbre Number):
These are the MIDI Filter2 settings for timbres 2–8 and 9–16.
They are the same as for timbre 1. For more information,
please see “Timbre 01 (Timbre Number):” above.
V
5–3(4): Menu Command
• 0:
Write Combination
see p. 101
• 1:
Exclusive Solo
see p. 64
• 2:
Auto Song Setup
see p. 65
• 3:
Copy from Program
see p. 101
For more information, please see “Combination: Menu
Command” on page 101.
Here, you can specify whether the effect of knobs 1–4 (when the SELECT button selection is Realtime Controls TONE) will be transmitted and received. The MIDI control messages assigned to knobs 1–4 when Realtime Controls
TONE is selected are fixed.
5–5(6)a: Combination Name, Tempo
5–5(6)b: Timbre Info
For more information, please see “2–1: EQ Trim T01–08, 2–2:
EQ Trim T09–16” on page 79.
5–5(6)c: MIDI Filter3
Timbre 01 (Timbre Number):
Enable Realtime Controls–CUTOFF [Off, On]
Enables or disables transmission and reception of MIDI
CC#74 (the KROME’s filter cutoff frequency). This is assigned to knob 1 when Realtime Controls TONE is selected.
Enable Realtime Controls–RESONANCE [Off, On]
Enables or disables transmission and reception of MIDI
CC#71 (the KROME’s filter resonance level). This is assigned to knob 2 when Realtime Controls TONE is selected.
Enable Realtime Controls–EG INTENSITY [Off, On]
Enables or disables transmission and reception of MIDI
CC#79 (the KROME’s filter EG intensity). This is assigned to knob 3 when Realtime Controls TONE is selected.
Enable Realtime Controls–RELEASE [Off, On]
Enables or disables transmission and reception of MIDI
CC#72 (the KROME’s filter/amp EG release time). This is assigned to knob 4 when Realtime Controls TONE is selected.
Timbre 02…08, 09…16 (Timbre Number):
These are the MIDI Filter3 settings for timbres 2–8 and 9–16.
They are the same as for timbre 1. For more information,
please see “Timbre 01 (Timbre Number):” above.
V
5–5(6): Menu Command
• 0:
Write Combination
see p. 101
• 1:
Exclusive Solo
see p. 64
• 2:
Auto Song Setup
see p. 65
• 3:
Copy from Program
see p. 101
For more information, please see “Combination: Menu
Command” on page 101.
5–7: <4> T01–08,
5–8: <4> T09–16
5–7a
5–7b
5–7c
5–7
Menu
COMBI P5: MIDI Filter 5–7: <4> T01–08, 5–8: <4> T09–16
5–9: <5> T01–08,
5–10: <5> T09–16
5–9a
5–9b
5–9c
5–9
Menu
Here, you can enable or disable transmission and reception for the functions of knobs 1–4 when the SELECT button is set to Realtime Controls USER. Use the P1: Controllers–
Controllers Setup page to assign the functions that knobs 1–
4 will perform when Realtime Controls USER is selected.
5–7(8)a: Combination Name, Tempo
5–7(8)b: Timbre Info
For more information, please see “2–1: EQ Trim T01–08, 2–2:
EQ Trim T09–16” on page 79.
5–7(8)c: MIDI Filter4
Timbre 01 (Timbre Number):
Enable Realtime Controls USER 1
Enable Realtime Controls USER 2
Enable Realtime Controls USER 3
Enable Realtime Controls USER 4
[Off, On]
[Off, On]
[Off, On]
[Off, On]
These settings enable or disable transmission and reception of the MIDI messages assigned to knobs 1–4 when Realtime
Controls USER is selected.
Timbre 02…08, 09…16 (Timbre Number):
These are the MIDI Filter4 settings for timbres 2–8 and 9–16.
They are the same as for timbre 1. For more information,
please see “Timbre 01 (Timbre Number):” above.
V
5–7(8): Menu Command
• 0:
Write Combination
see p. 101
• 1:
Exclusive Solo
see p. 64
• 2:
Auto Song Setup
see p. 65
• 3:
Copy from Program
see p. 101
For more information, please see “Combination: Menu
Command” on page 101.
5–9(10)a: Combination Name, Tempo
5–9(10)b: Timbre Info
For more information, please see “2–1: EQ Trim T01–08, 2–2:
EQ Trim T09–16” on page 79.
5–9(10)c: MIDI Filter5
Timbre 01 (Timbre Number):
Enable SW1
Enable SW2
[Off, On]
[Off, On]
These settings specify whether SW1 Mod (CC#80) and SW2
Mod (CC#81) will be transmitted and received if they are assigned to the SW1 and SW2 buttons.
Note:
If Portamento SW (CC#65) is assigned to SW1 or SW2, the Enable Portamento SW setting on the MIDI <1> page will take priority.
Note:
The functions of SW1 and SW2 are assigned on the P1:
Controllers Setup page (see p.78).
Enable Foot Switch [Off, On]
Specifies whether or not the effect of the ASSIGNABLE
SWITCH will be transmitted and received. The function is assigned in Global P2: Controllers– Foot Controllers page.
This filter setting is valid when a MIDI control change is assigned.
Enable Foot Pedal [Off, On]
Specifies whether or not the effect of the ASSIGNABLE
PEDAL will be transmitted and received. The function is assigned in Global P2: Controllers– Foot Controllers page.
This filter setting is valid when a MIDI control change is assigned.
Timbre 02…08, 09…16 (Timbre Number):
These are the MIDI Filter5 settings for timbres 2–8 and 9–16.
They are the same as for timbre 1. For more information,
please see “Timbre 01 (Timbre Number):” above.
5–9(10): Menu Command
• 0:
Write Combination
see p. 101
• 1:
Exclusive Solo
see p. 101
• 2:
Auto Song Setup
see p. 65
• 3:
Copy from Program
see p. 101
For more information, please see “Combination: Menu
Command” on page 101.
89
90
Combination mode
5–11: <6> T01–08,
5–12: <6> T09–16
5–11a
5–11b
5–11a
5–11
Menu
5–11(12)a: Combination Name, Tempo
5–11(12)b: Timbre Info
For more information, please see “2–1: EQ Trim T01–08, 2–2:
EQ Trim T09–16” on page 79.
5–11(12)c: MIDI Filter6
Timbre 01 (Timbre Number):
Enable Other Control Change Messages [Off, On]
Specifies whether or not MIDI control messages not covered in the preceding items MIDI Filter will be transmitted and received.
Enable Waveform SysEx [Off, On]
This enables or disables reception of MIDI system exclusive messages that freely switch the multisample used by an oscillator while the program is sounding.
Timbre 02…08, 09…16 (Timbre Number):
These are the MIDI Filter6 settings for timbres 2–8 and 9–16.
They are the same as for timbre 1. For more information,
please see “Timbre 01 (Timbre Number):” above.
V
5–11(12): Menu Command
• 0:
Write Combination
see p. 101
• 1:
Exclusive Solo
see p. 101
• 2:
Auto Song Setup
see p. 65
• 3:
Copy from Program
see p. 101
For more information, please see “Combination: Menu
Command” on page 101.
COMBI P7: ARP/DT (Arpeggiator/Drum Track) 7–1: Setup T01–08, 7–2: Setup T09–16
COMBI P7: ARP/DT (Arpeggiator/Drum Track)
These parameters specify how the arpeggiator will function within the combination. Two arpeggiators can run simultaneously.
This offers a variety of possibilities, such as applying separate arpeggio patterns to two sounds that have been assigned as a keyboard split, or using velocity to switch between two arpeggio patterns.
7–1: Setup T01–08,
7–2: Setup T09–16
7–1a
7–1b
7–1c
7–1
Menu
7–1(2)a: Combination Name, Tempo
Combination Name
For more information, please see “2–1(2)a: Combination
Name, Tempo” on page 79.
(Tempo) [040.00…300.00, EXT]
For more information, please see “ (Tempo)” on page 71.
7–1(2)b: Timbre Info
Selected Timbre Info
For more information, please see “Selected Timbre Info” on page 71.
7–1(2)c: Arpeggiator Assign,
Arpeggiator Run
Arpeggiator Assign [Off, A, B]
Assigns arpeggiator A or B to each timbre 1–8 and 9–16.
When the ARP button is on, the arpeggiator specified for each timbre will operate according to
Arpeggiator Run A, B
and these settings.
Off:
The arpeggiator will not operate.
A:
Arpeggiator A will operate. Use the settings in the
Arpeggiator A page to select the arpeggio pattern and to set parameters.
B:
Arpeggiator B will operate. Use the settings in the
Arpeggiator B page to select the arpeggio pattern and to set parameters.
If the
Status
(Combi 3–1(2)c) of the timbre is
INT
, each timbre 1–16 will be sounded by the note data generated by the assigned arpeggiator, regardless of the
MIDI
Channel
(Combi 3–1(2)c) setting of the timbre. If a timbre is set to
EXT
or
EX2
, MIDI note data will be transmitted on the
MIDI Channel
of that timbre.
In this case, arpeggiator A (or B) will be triggered
(operated) by all MIDI channels specified for the
MIDI
Channel
parameter of any timbre 1–16 assigned to arpeggiator A or B.
If Local Control (Local Control On, Global P1: 1–1a) is
OFF, the keyboard will not trigger the arpeggiator.The arpeggiator will be triggered via MIDI IN. Turn Local
Control OFF if you have recorded only the trigger notes on an external sequencer, and wish to playback the external sequencer to trigger the KROME’s arpeggiator.
If you want to record the note data generated by the arpeggiator to an external sequencer, turn Local
Control ON, and turn off the echo back function on your external sequencer.
You can control the arpeggiator from an external sequencer, or use an external sequencer to record
arpeggio note data. (See page 367)
Example 1)
Set the
MIDI Channel
(Combi 3–1(2)c) of timbres 1 and 2 to
Gch
, and set
Status
(Combi 3–1(2)c) to
INT
. Assign arpeggiator A to timbre 1 and arpeggiator B to timbre 2, and check
Arpeggiator Run A, B
(Combi 0–5(6)a).
• When the ARP button is off, timbres 1 and 2 will sound simultaneously (layered) when you play the keyboard.
• When the ARP button is turned on, timbre 1 will be played by arpeggiator A, and timbre 2 will be played by arpeggiator B.
Trigger
= Gch
Arpeggiator
A
Pattern — A
Arpeggiator
Assign
A Timbre 1
B
Timbre 2
MIDI Ch=Gch Status=INT
MIDI Ch=Gch Status=INT
Pattern — A
Pattern — B
Trigger
= Gch
Arpeggiator
B Pattern — B
Example 2)
The
MIDI Channel
(Combi 3–1(2)c) of timbres 1, 2, 3, 4, and 5 are set respectively to
Gch
,
Gch
,
02
,
Gch
, and
03
.
Their
Status
(Combi 3–1(2)c) is set respectively to
INT
,
Off
,
INT
,
Off
, and
INT
. Assign arpeggiator A to timbres
2 and 3, assign arpeggiator B to timbres 4 and 5, and check
Arpeggiator Run A, B
(Combi 0–5(6)a).
• When the ARP button is off, playing the keyboard will sound only timbre 1. (Timbres 2 and 4 are receiving the
Gch
, but they will not sound since their
Status
is
Off
.)
• When you turn on the ARP button, arpeggiator A will play timbres 2 and 3, and arpeggiator B will independently play timbres 4 and 5. (Arpeggiators A and
B are triggered by note data received from any MIDI channel of an assigned timbre. However, in this example, they are being triggered from the
Gch
.)
When you play the keyboard, arpeggiator A will play timbres 2 and 3, but only timbre 3, whose
Status
is
INT
will sound from the keyboard. Similarly, arpeggiator B will play timbres 4 and 5, but only timbre 5, whose
Status
is
INT
will sound from the keyboard.
In this way, you can make settings so that a timbre is silent when the arpeggiator is off, and sounds only when the arpeggiator is on.
This type of setting is used in preloaded combinations which sound the drums only when the arpeggiator is on.
Trigger
= Gch, Ch2
Trigger
= Gch, Ch3
Arpeggiator
A
Arpeggiator
B
Pattern — A
Pattern — B
Arpeggiator
Assign
Off
Timbre 1
A
A
Timbre 2
Timbre 3
B
B
Timbre 4
Timbre 5
MIDI Ch=Gch Status=INT
MIDI Ch=Gch Status=Off
MIDI Ch=2ch Status=INT
MIDI Ch=Gch Status=Off
MIDI Ch=3ch Status=INT
Sounded by normal keyboard playing
Does not sound
Pattern — A
Does not sound
Pattern — B
91
92
Combination mode
Arpeggiator Run A, B [Off, On]
When the ARP button is on, the arpeggiator(s) checked here will run if they are assigned to a timbre by
Arpeggiator
Assign
.
V
7–1(2): Menu Command
• 0:
Write Combination
see p. 101
• 1:
Exclusive Solo
see p. 101
• 2:
Auto Setup Song
see p. 101
• 3:
Copy from Program
see p. 101
• 4:
Copy Arpeggiator
see p. 103
For more information, please see “Combination: Menu
Command” on page 101.
7–3: Arpeggiator A,
7–4: Arpeggiator B
7–3a
7–3b
7–3
Menu
7–3(4)a: Combination Name, Tempo
For more information, please see “2–1: EQ Trim T01–08, 2–2:
EQ Trim T09–16” on page 79.
For more information, please see “ (Tempo)” on page 71.
7–3(4)b: Arpeggiator-A(B) Setup
Pattern* [P0…P4, U0000(INT)…U0899(INT),
U0900(USER)…U1027(USER)]
Octave*
Resolution*
[1, 2, 3, 4]
[
,
, , , , , , ]
[000…100%, Step] Gate
Velocity
Swing
Sort*
Latch*
Key Sync.*
[001…127, Key, Step]
[–100…+100%]
[Off, On]
[Off, On]
[Off, On]
Keyboard* [Off, On]
These parameters are the arpeggiator settings for the combination.
For more information, please see “PROG P7: ARP/DT
(Arpeggiator/Drum Track)” on page 53.
*
These parameters can also be set from “0–5(6)d:
Arpeggiator A (B)”.
V
7–3(4): Menu Command
• 0:
Write Combination
see p. 101
• 1:
Exclusive Solo
see p. 101
• 2:
Auto Setup Song
see p. 101
• 3:
Copy from Program
see p. 101
• 4:
Copy Arpeggiator
see p. 103
For more information, please see “Combination: Menu
Command” on page 101.
COMBI P7: ARP/DT (Arpeggiator/Drum Track) 7–5: ARP Scan Zone
7–5: ARP Scan Zone
These settings specify the note and velocity ranges that will trigger arpeggiators A and B.
7–5a
7–5
Menu
7–5b
7–5c
7–7: Drum Track
7–7a
7–7b
7–7
Menu
7–5a: Combination Name, Tempo
For more information, please see “Combination Select” on page 70.
For more information, please see “ (Tempo)” on page 71.
7–5b: Zone Map
This shows the Scan Zone for each arpeggiator, A and B.
Key zone of arpeggiator B
Key zone of arpeggiator A
Velocity zone of arpeggiator A
Velocity zone of arpeggiator B
C–1 G9
7–5c: Scan Zone A/B
A: , B:
Top Key [C–1…G9]
Bottom Key [C–1…G9]
Specifies the range of notes (keys) that will trigger arpeggiator A/B.
Top Key
specifies the upper limit, and
Bottom Key
specifies the lower limit.
Top Velocity [001…127]
Bottom Velocity [001…127]
Specifies the range of velocities that will trigger arpeggiator
A/B.
Top Velocity
specifies the upper limit, and
Bottom
Velocity
specifies the lower limit.
Specifies the range of notes (keys) and velocities that will trigger arpeggiator A/B.
Note:
You can also set the note values and velocity values by holding down an edit cell or the ENTER button and playing a key (see OG p.10).
V
7–5: Menu Command
• 0:
Write Combination
see p. 101
• 1:
Exclusive Solo
see p. 101
• 2:
Auto Setup Song
see p. 101
• 3:
Copy from Program
see p. 101
• 4:
Copy Arpeggiator
see p. 103
For more information, please see “Combination: Menu
Command” on page 101.
Here, you can select a drum track pattern and specify how it will sound.
Note:
In Combination mode (unlike Program mode) there is no dedicated timbre for the drum track. You can assign the drum track program to be any timbre 1–16. The drum track program will be played when the drum track’s MIDI channel Output matches the timbre’s
MIDI Channel
.
In Combination mode, the drum track patterns are triggered on the Global MIDI channel.
MIDI transmission and reception for the drum track
In Combination mode, the Drum Track function transmits and receives on the following MIDI channels.
Receive:
If you’re controlling the triggering by playing the keyboard, the drum track will receive on the global MIDI channel.
Transmit:
The drum track will transmit on the MIDI channel specified by the Drum Pattern
Output
setting of each combination.
Set this to match the MIDI channel of the timbre you’ve specified for the drum program.
If the timbre’s
Status
is EXT or EX2, the note data etc. of the
Drum Track pattern will be transmitted.
If local control (“Local Control On Global P1:1 ‐ 1a) is on, playing the KROME’s keyboard will not make the internal sound generator produce sound, nor can the keyboard trigger the arpeggiator or drum track. However, they can be triggered by note ‐ on messages from MIDI IN.
7–7a: Drum Pattern
Pattern [Preset, User]
[(Preset): P000…P605, (User): U000…U999]
This selects the drum pattern.
Preset/User No.
P000
P000…P605
U000…U999
Contents
Off
Preset drum patterns
For user/preloaded drum patterns
• U000–U999 can be written. Patterns you create in
Sequencer mode can be converted into user drum
patterns (see page 188).
Shift [–24…+00…+24]
This transposes the drum pattern in semitone steps. This means that the instruments of the drum kit will change.
93
94
Combination mode
MIDI Channel
Output [01…16, Gch]
This specifies the MIDI channel that will transmit the MIDI data of the drum pattern. The drum pattern will trigger the program of the timbre that is set to this same MIDI channel.
Gch:
The data will be sent to the channel specified by the global MIDI channel
MIDI Channel
setting (Global 1–1a).
Whether the pattern data will be output to an external device will depend on the
Status
setting of the timbre that matches the
Output
MIDI channel.
7–7b: Trigger
Trigger Mode [Start Immediately, Wait KBD Trig]
Start Immediately:
When you press the DRUM TRACK button to turn it on (LED lit), the drum pattern will start according to the
Sync
setting. When you turn it off (LED dark), the drum pattern will stop.
Wait KBD Trig:
When you press the DRUM TRACK button to turn it on (LED lit), the drum pattern will wait to start.
When you play the keyboard, or when a MIDI note ‐ on is received, the drum pattern will start according to the
Sync
setting.
If you’ve selected
Start Immediately
, the DRUM
TRACK button will always be saved in the OFF state.
Sync [Off, On]
Off:
The drum pattern will not synchronize to the currently ‐ running arpeggiator, but will start immediately.
On:
The drum pattern will synchronize to the currently ‐ running arpeggiator.
Note:
Use P7–3(4)c: Arpeggiator ‐ A(B) Setup
Key Sync
to specify whether the arpeggiator will synchronize to the currently ‐ running drum pattern.
Latch [Off, On]
This specifies whether the drum track will continue playing even after you take your hand off the keyboard.
This is valid if
Trigger Mode
is
Wait KBD Trig
.
Off:
If the DRUM TRACK button is on (LED blinking), the pattern will start when you play the keyboard (note ‐ on). The pattern will stop when you release the keyboard (note ‐ off).
On:
If the DRUM TRACK button is on (LED blinking), the pattern will start when you play the keyboard (note ‐ on). The pattern will continue when you release the keyboard (note ‐ off). The pattern will stop when you turn the DRUM
TRACK button off (LED dark).
Zone:
Keyboard
Bottom
Top
[C–1…G9]
[C–1…G9]
This is valid if
Trigger Mode
is set to
Wait KBD Trig
.
It specifies the range of keys that will start the drum pattern.
Velocity:
Bottom [001…127]
Top [001…127]
This is valid if
Trigger Mode
is set to
Wait KBD Trig
.
It specifies the range of velocities that will start the drum pattern.
V
7–7: Menu Command
• 0:
Write Combination
see p. 101
• 1:
Exclusive Solo
see p. 64
• 2:
Auto Setup Song
see p. 101
• 3:
Copy from Program
see p. 101
• 4:
Copy Drum Track
see p. 65
• 5:
Erase Drum Track Pattern
see p. 66
For more information, please see “Combination: Menu
Command” on page 101.
COMBI P8: Routing/IFX (Insert Effect) 8–1: Routing1 T01–08, 8–2: Routing1 T09–16
COMBI P8: Routing/IFX (Insert Effect)
Example: Inserting a single IFX into multiple timbre
You can also specify the bus routing for the program used by each of the timbres, 1–16. For instance, you can:
• Send the output of a timbre to an insert effect
• Route a sound to an insert effect
• Make detailed settings for insert effects
• Make common LFO settings for effects
For more details on the Insert Effects, please see the “Effect
Guide” on page 235.
Example: Inserting a separate IFX into each timbre, and then inserting an IFX at the final stage
8–1: Routing1 T01–08,
8–2: Routing1 T09–16
8–1a
8–1b
8–1c
8–1d
8–1
Menu
Example: Sharing a portion of a timbre’s IFX chain with another timbre
DKit:
This can be selected only if the timbre’s program is a drum program (
Oscillator Mode
Drums or Double Drums).
Specifies the bus to which the program oscillator(s) used by timbres 1–8 and 9–16 will be sent. You can also set the send levels to the master effects from this page.
8–1(2)a: Routing Map
This shows the status of the insert effects.
This area shows the insert effect routing (
Bus (IFX/Output)
Select
), the name of the assigned effect, the on/off status, chaining, and the output bus that follows the insert effect.
The type of insert effect, the on/off status, and the chain settings can be edited in the 8–3: Insert FX Setup page.
8–1(2)b: Combination Name
8–1(2)c: Timbre Info
For more information, please see “2–1: EQ Trim T01–08, 2–2:
EQ Trim T09–16” on page 79.
8–1(2)d: Routing
Bus (IFX/Output) Select [DKit, L/R, IFX1…5, Off]
This specifies the output bus for the timbre’s program oscillator.
L/R:
Output to the L/R bus.
IFX1…5:
Output to the IFX1–5 buses.
Off:
The timbre will not be output from the L/R bus, or
IFX1–5 buses. Choose the Off setting if you want the program oscillator output of the timbre to be connected in series to a master effect. Use
Send1 (to MFX1)
and
Send2 (to
MFX2)
to specify the send levels.
Tip:
You can create a wide variety of routings by using each timbre’s
Bus (IFX/Output) Select
and the
Chain to
and
Chain
settings (Combi 8–3b) that follow the insert effect.
The
Bus (IFX/Output) Select
,
FX Control Bus
,
Send1
, and
Send2
(Global 5–5b) settings for each key of the selected
Dkit will be used. Check this setting if you want to apply an individual insert effect to each drum instrument.
Tip:
In most preloaded drumkits, the drum instruments have the same
Bus (IFX/Output) Select
settings according to their type, as follows.
Snares
→
IFX1
Kicks
→
IFX2
Other
→
IFX3
If you want to edit these routings, use the
Drum kit IFX
Patch
menu command. For more information, please see
“DrumKit IFX Patch” on page 104.
95
Combination mode
96
Send1 (MFX1)
Send2 (MFX2)
[000…127]
[000…127]
For each timbre, these parameters set the send level to master effects 1 and 2. These settings are valid when
Bus
(IFX/Output) Select
is set to L/R or Off. When IFX 1–5 are selected, the send levels to master effects 1 and 2 are set by the
Send1
and
Send2
parameters of the Insert FX Setup page, after the sound has passed through IFX1–5.
Control change CC#93 can be used to control the Send 1 level, and CC#91 to control the Send 2, and modify their respective settings. These messages will be received on the MIDI channel specified for each timbre in the P2:
MIDI channel page.
The actual send levels are determined by multiplying this value with the send level
Send1
and
Send2
(Prog
8–1d) for each oscillator of the program selected for the timbre.
V
8–1(2): Menu Command
• 0:
Write Combination
see p. 101
• 1:
Exclusive Solo
see p. 101
• 2:
Auto Setup Song
see p. 101
• 3:
Copy Insert Effect
see p. 66
• 4:
Swap Insert Effect
see p. 67
• 5:
DrumKit IFX Patch
see p. 104
For more information, please see “Combination: Menu
Command” on page 101.
8–3: Insert FX Setup
8–3a
8–3b
8–3
Menu
8–3a: Combination Name
For more information, please see “2–1: EQ Trim T01–08, 2–2:
EQ Trim T09–16” on page 79.
8–3b: Insert Effect
Here, you can choose the type of each insert effect 1 through
5, its on/off status, chaining, and adjust the post ‐ IFX mixer settings. For insert effects, the direct sound (Dry) is always stereo ‐ in and out. The input/output configuration of the effect sound (Wet) depends on the effect type.
For detailed explanations of the individual effects, please
see the “Effect Guide” on page 235.
The following parameters are the same as in Program mode.
For more information, please see “8–2: Insert FX Setup” on page 59.
However, unlike in Program mode, you can use a different
MIDI channel to modulate each effect, if desired. This includes the post ‐ IFX
Pan: #8
,
Send1
, and
Send2
settings, as well as the effect’s dynamic modulation (Dmod). To set the
MIDI channel, use the
Ch
parameter on the IFX 1–5 page
(Combi 8–4a).
Insert Effect:
IFX1…4
IFX5
IFX1…5: IFX On/Off
[000…193]
[000…171]
[Off, On]
Chain:
IFX1: Chain to
IFX2: Chain to
IFX3: Chain to
IFX1: Chain
IFX2: Chain
IFX3: Chain
IFX4: Chain
[IFX2…IFX5]
[IFX3…IFX5]
[IFX4…IFX5]
[Off, On]
[Off, On]
[Off, On]
[Off, On]
Pan:#8:
Pan: #8 (Post IFX PanCC#8) [L000…C064…R127]
Bus:
Bus (Bus Select)
Ctrl (FX Control Bus)
[Off, L/R]
[Off, 1, 2]
Send1/2:
Send1
Send2
[000…127]
[000…127]
For more information, please see “8–2: Insert FX Setup” on page 59.
V
8–3: Menu Command
• 0:
Write Combination
see p. 101
• 1:
Exclusive Solo
see p. 64
• 2:
Auto Setup Song
see p. 101
• 3:
Copy Insert Effect
see p. 66
• 4:
Swap Insert Effect
see p. 67
For more information, please see “Combination: Menu
Command” on page 101.
COMBI P8: Routing/IFX (Insert Effect) 8–4: IFX1
8–4: IFX1
8–1
–4a
8–1
–4
Menu
This page lets you edit the detailed parameters of the five insert effects. Use the tabs at left to select IFX1 through IFX5.
To select different effects types, use the Insert FX Setup
page. For more information, please see “8–3: Insert FX
Setup” on page 96.
8–4a: Insert Effect 1 (IFX1)
IFX1 On/Off [Off, On]
Turns the insert effect on/off. This is linked with the on/off setting in the P8: Routing/IFX– Insert FX Setup page.
Ch (Control Channel) [Ch01…16, G ch, All-R]
This parameter specifies the MIDI channel that will be used to control effect dynamic modulation (Dmod), pan following the insert effect (CC#8), Send 1, and Send 2.
The channel number of the timbre routed through this IFX will be followed by a “*” displayed at the right of Ch01–16.
If two or timbres with different MIDI channel settings are routed through the same IFX, this parameter specifies which of these channels will be used to control the effect.
G ch:
The global
MIDI Channel
(Global 1–1a) will be used to control the effect. Normally you will set this to G ch.
All-R (All Routed):
The channel of any timbre routed through this effect can be used to control the effect.
(Channels of each routed timbre will be indicated by “*”.)
Drum Kits and the MIDI Control Channel
If a Timbre is using a Drum Kit, and the Timbre’s
Bus (IFX/
Output) Select
(Combi 8–1(2)d) is
DKit
, this effects the
MIDI Control Channel as well. In this case, the Timbre’s
MIDI channel will be used to control any effect whose
Ch
is set to All ‐ R, regardless of the
Bus (IFX/Output) Select
(Global 5–5b) settings or the settings of the
Drum kit IFX
Patch
menu command.
P (Effect Preset)
[P00, P01…15, U00…15, —————]
Effect Presets let you easily store and recall all of the settings for an individual effect. You can store up to 16 user presets for each effect type, in addition to 15 re ‐ writable factory presets.
The same presets appear in all of the modes (Program,
Combination, Sequencer).
Note that edits to effects parameters are automatically stored with the Combi you don’t need to store them as an
Effect Preset. Presets just make it easier to re ‐ use your favorite settings.
For instance, you can save an Effect Preset while working on a particular Combination, and then later use the same Effect
Preset in a different Program, Combination, or Song.
P00: Initial Set:
These are the default settings that are recalled when you select an effect type in the Insert FX Setup page. You can’t save your own settings here.
P01…P15:
Preset data is saved in this area. We recommend that you store your settings in U00–U15.
U00…U15:
These are areas in which you can store your own settings.
—————:
This shows that no Effect Preset has been selected. You’ll see this if you’ve just selected an effect, written a combination, or selected a new Combination.
Selecting this setting from the menu will not have any effect.
Note:
Combis save the effects parameter settings, but they don’t save the number of the selected Effect Preset. If you select an Effect Preset, and then save the Combination, the
Effect Preset setting will revert to “
—————.”
For more information, please see “Using Effect Presets” on page 60.
IFX1 Parameters:
IFX1 Parameters
Here, you can set the effect parameters of the insert effect you chose in the Insert FX Setup page.
For more details, please see “Insert Effects (IFX1–IFX5)” on page 240.
V
8–4: Menu Command
• 0:
Write Combination
see p. 101
• 1:
Exclusive Solo
see p. 64
• 2:
Auto Setup Song
see p. 101
• 3:
Copy Insert Effect
see p. 66
• 4:
Swap Insert Effect
see p. 67
• 5:
Write FX Preset
see p. 104
For more information, please see “Combination: Menu
Command” on page 101.
8–5: IFX2, 8–6: IFX3, 8–7: IFX4,
8–8: IFX5
Here you can edit the effect parameters for insert effects 2–5 selected in the Insert FX Setup page.
For more information, please see “8–4: IFX1” above.
97
98
Combination mode
8–9: FX Control T01–08,
8–10: FX Control T09–16
8–9a
8–9
Menu
8–9b
8–9c
8–9d
Here you can specify the program oscillator output bus, and effect control bus for timbres 1–8 and 9–16.
8–9(10)a: Routing Map,
8–9(10)b: Combination Name,
8–9(10)c: Timbre Info
For more information, please see “8–1: Routing1 T01–08, 8–
2: Routing1 T09–16” on page 95.
8–9(10)d: Routing2
Bus (IFX/Output) Select [DKit, L/R, IFX1…5, Off]
This specifies the output bus for the timbre’s program oscillator. This is the same parameter as in the 8–1: IFX ‐
Routing 1 T01–08 and T09–16 pages.
For more information, please see “Bus (IFX/Output) Select” on page 95.
FX Control Bus [Off, 1, 2]
Sends the output of the timbre to an FX Control bus (two ‐ channel mono FX Ctrl 1 or 2).
Use the FX Control buses when you want a separate sound to control the audio input of an effect. You can use two FX
Control buses (each is a two ‐ channel mono bus) to control effects in various ways.
For more information, please see “FX Control Buses” on page 238.
V
8–9(10): Menu Command
• 0:
Write Combination
see p. 101
• 1:
Exclusive Solo
see p. 64
• 2:
Auto Setup Song
see p. 101
• 3:
Copy Insert Effect
see p. 66
• 4:
Swap Insert Effect
see p. 67
• 5:
DrumKit IFX Patch
see p. 104
For more information, please see “Combination: Menu
Command” on page 101.
COMBI P9: MFX/TFX/LFO (Master/Total Effect/LFO) 9–1: Routing
COMBI P9: MFX/TFX/LFO (Master/Total Effect/LFO)
Here, you can make settings for the master effects and the total effect. For instance, you can:
• Route a sound to the master effects and the total effect
• Make detailed settings for master effects and total effect
For more information, please see “Effect Guide” on page 235.
9–1c: TFX
TFX:
TFX
TFX On/Off
[000…171]
[Off, On]
For more information, please see “PROG P9: MFX/TFX/LFO
(Master/Total Effect/LFO)” on page 61.
9–1: Routing
9–1a
9–1b
9–1
Menu
9–1d: Master Volume
Master Volume [000…127]
For more information, please see “9–1c: Master Volume” on page 62.
9–1c
9–1d
V
9–1: Menu Command
• 0:
Write Combination
see p. 101
• 1:
Exclusive Solo
see p. 64
• 2:
Auto Setup Song
see p. 101
• 3:
Copy MFX/TFX
see p. 67
• 4:
Swap MFX/TFX
see p. 67
For more information, please see “Combination: Menu
Command” on page 101.
• Here you can specify the type of master effects 1, 2 and total effect, and turn them on/off.
• The master effects are sent to the L/R bus. The total effect is inserted into the L/R bus.
These parameters are the same as in Program mode. For more information, please see “9–1: Routing” on page 61.
9–1a: Combination Name
These are the bank, number, and name of the current
Combination. For more information, please see “0–1(2)a:
Combination Select” on page 70.
9–1b: MFX1, 2
MFX1:
MFX1
MFX1 On/Off
Return 1
[000…193]
[Off, On]
[000…127]
MFX2:
MFX2
MFX2 On/Off
Return 2
[000…171]
[Off, On]
[000…127]
Chain:
Chain On/Off [Off, On]
Chain Direction [MFX1
→
MFX2, MFX2
→
MFX1]
Chain Level [000…127]
For more information, please see “9–2: MFX1” on page 62.
9–2: MFX1
9–2a
9–2
Menu
Here, you can edit the parameters of the effect you selected for MFX1 in the P9: MFX/TFX/LFO– Routing page.
9–2a: MFX1
MFX1 On/Off [Off, On]
This turns master effect 1 on/off. This is linked with the on/ off setting in the P9: MFX/TFX/LFO– Routing page.
Ch (Control Channel) [Ch01…16, G ch]
Specifies the MIDI channel that will control dynamic modulation (Dmod) for the master effect.
Ch01…Ch16:
The specified MIDI channel will be used for control.
G ch:
The global
MIDI Channel
(Global 1–1a) will be used for control. Normally you will use the G ch setting.
P (Effect Preset)
[P00, P01…15, U00…15, —————]
With Effect Presets, you can easily store and recall all of the settings for an individual effect. You can store up to 16 user presets for each effect type, in addition to 15 re ‐ writable factory presets.
99
100
Combination mode
The same presets appear in all of the modes (Program,
Combination, Sequence).
Note that edits to effects parameters are automatically stored with the Combination you don’t need to store them as an Effect Preset. Presets just make it easier to re ‐ use your favorite settings.
For instance, you can save an Effect Preset while working on a particular Combination, and then later use the same Effect
Preset in a different Program, Combination, or Song.
P00: Initial Set:
These are the default settings that are recalled when you select an effect type in the P9: MFX/TFX/
LFO– Routing page. You can’t save your own settings here.
P01…P15:
Preset data is saved in this area. We recommend that you store your settings in U00–U15.
U00…U15:
These are areas in which you can store your own settings.
—————:
This shows that no Effect Preset has been selected. You’ll see this if you’ve just selected an effect, written a Combination, or selected a new Combination.
Selecting this setting from the menu will not have any effect.
Note:
Combinations save the effects parameter settings, but they don’t save the number of the selected Effect Preset. If you select an Effect Preset, and then save the Combination, the Effect Preset setting will revert to “
—————.”
For more details, please see “Using Effect Presets” on page 60.
MFX1 Parameters
Here, you can set the effect parameters of the insert effect you chose in the P9: MFX/TFX/LFO– Routing page.
For details on the master effects, please see the “Effect
Guide” on page 235.
V
9–2: Menu Command
• 0:
Write Combination
see p. 101
• 1:
Exclusive Solo
see p. 64
• 2:
Auto Setup Song
see p. 101
• 3:
Copy MFX/TFX
see p. 67
• 4:
Swap MFX/TFX
see p. 67
• 5:
Write FX Preset
see p. 104
For more information, please see “Combination: Menu
Command” on page 101.
9–3: MFX2, 9–4: TFX
These pages let you edit the parameters of Master Effect 2 and the Total Effect. To select different effects types, use the
P9: MFX/TFX/LFO– Routing page.
The parameters for MFX2, TFX is the same as for MFX1. For
more information, please see “9–2: MFX1” above.
9–5: Common FX LFO
9–5a
9–5b
9–5
Menu
The two Common FX LFOs allow you to synchronize LFO ‐ based modulation for multiple effects, such as phasers, flangers, filters, and so on.
The Common LFOs control only the frequency, MIDI synchronization, and reset options; each individual effect still has its own settings for the LFO waveform and phase.
Within the individual effects, you can choose whether to use one of the Common LFOs, or to use the individual effect’s frequency, sync, and/or reset settings instead. This is done via the effect’s
LFO Type
parameter; select
Individual
to use the effect’s settings, or
Common 1
or
2
to use the Common
LFOs.
9–5a: Common FX LFO1
Ctrl Ch (Control Channel) [Ch01…Ch16, G ch]
Specifies the MIDI channel that will control dynamic modulation (Dmod) for Common LFO 1 and 2.
G ch:
The global
MIDI channel
(Global 1–1a) will be used for control. This is the default.
Sync (Reset)
Source (Dmod Source)
Frequency
MIDI/Tempo Sync
[Off, On]
[List of Dmod Sources]
[0.02…20.00 (Hz)]
[Off, On]
BPM
Base Note
Times
[MIDI, 40.00…300.00]
[ ,
3
, ,
3
, ,
3
, ,
3
, , ]
[01…32]
These parameters are the same as in Program mode. For more information, please see “9–5: Common FX LFO” on page 100.
9–5b: Common FX LFO2
These parameters are the same as for Common FX LFO1.
V
9–5: Menu Command
• 0:
Write Combination
see p. 101
• 1:
Exclusive Solo
see p. 64
• 2:
Auto Setup Song
see p. 101
• 3:
Copy Insert Effect
see p. 66
• 4:
Swap Insert Effect
see p. 67
For more information, please see “Combination: Menu
Command” on page 101.
Combination: Menu Command Write Combination
Combination: Menu Command
ENTER + 0–9: shortcuts for menu commands
Each page has a set of menu commands, which provide access to different utilities, commands, and options, depending on the page you’re currently on. You can use the menu commands entirely from the touch ‐ screen, by pressing the menu button in the upper right ‐ hand corner of the screen and then selecting an option from the menu that appears.
Even though each page may have its own unique menu commands, the menus are standardized as much as possible. For instance, WRITE is almost always the first menu item in Program, Combination, and Sequencer modes.
You can take advantage of this standardization by using a shortcut to access any of the first ten menu items:
1. Hold down the ENTER button.
2. Press a number (0–9) on the numeric keypad to select the desired menu command, starting with 0.
For instance, press 0 for the first menu command, 1 for the second, and so on.
If the menu command just toggles an option on and off
(such as Exclusive Solo), then you’re done. If the command calls up a dialog box, the dialog will appear on the display, and you can proceed just as if you’d selected the command from the touch ‐ screen.
Tip:
While this command is open, the ENTER button will operate as the OK button and the EXIT button will operate as the Cancel button.
Procedure for menu commands
1. Select the menu command.
2. Make settings in the dialog box.
For details on the content of each dialog box, refer to the explanation of each command.
3. To execute, press the OK button. To cancel without executing, press the Cancel button.
If you use
Category
, or
Sub Category
to specify a category for the combination you are writing, you will be able to select that combination by its category or sub category in
Combi P0: Play.
The names of the combination categories can be edited in P4:
Category– Combination Main and Combination Sub page.
Exclusive Solo
This command is available on every page in Combination mode. When
Exclusive Solo
is
On
, only one Timbre is soloed at a time; when it is
Off
, multiple Timbres can be soloed together.
For more information, please see “Exclusive Solo” on page 64.
Auto Setup Song
This command automatically copies the settings of the program or combination to a song, and enables the record ‐ standby status (See “Tip: Auto Song Setup” on page 70.).
Copy from Program
This command is available on every page in Combination mode. It copies Effects settings from a selected Program to the current Combination. This lets the Program sound the same as it did in Program mode.
Write Combination
This command writes an edited Combination into the
KROME internal memory. It is available on every page in
Combination mode.
This lets you:
• Save your edits
• Rename the Combination
• Assign the Combination to a Category
• Mark the Combination as a Favorite
• Copy the Combination to a different Bank and number
Be sure to
Write
any Combination that you wish to keep. If you turn off the power, or select another Combination before writing an edited Combination, it cannot be recovered.
Note:
You can also access and execute this command by pressing the WRITE button.
1. Use Program to select the copy-source program.
2. Select the IFXs used, MFXs, and TFX options to specify which, if any, of the Program’s effects settings to copy.
IFXs:
The settings of all insert effect settings (the contents of the Insert FX setup page and the IFX1–5 effect parameters) of the copy ‐ source program will be copied.
MFXs:
All master effect settings of the copy ‐ source program will be copied.
TFX:
All total effect settings of the copy ‐ source program will be copied.
101
102
Combination mode
About the Bus (IFX/Output) Select (Combi 8–1(2)d, 8–3b) setting
• Regardless of the
IFXs used
,
MFXs
, and
TFX
settings, will be set to DKit if the copy ‐ source program’s
Use DKit
Setting
is checked. In conjunction with this, the
Drum Kit
IFX Patch
setting will be reset to the default setting.
• If
IFXs
is checked, the
Bus (IFX/Output) Select
setting of the copy ‐ source program will be copied. If the copy ‐ destination timbre
Bus (IFX/Output) Select
was set to
IFX1–IFX5, it will automatically be set to L/R. If you check
IFX-All used
, the routing will be automatically set to match the copy ‐ source program.
• If
IFXs used
is unchecked, then the copy ‐ source
Bus (IFX/
Output) Select
setting will be ignored. or if the
Bus (IFX/
Output) Select
of the copy ‐ source program and copy ‐ destination timbre is set to IFX1–IFX5, it will automatically be set to L/R.
3. If you check “Arp,” the Program’s arpeggiator settings will also be copied.
If this is On (checked), the arpeggiator settings of the copy ‐ source program will be copied to the “Arp” you specify in step 8, and that arpeggiator’s
Arpeggiator Run
setting will be turned on and assigned to the copy ‐ destination timbre
(“Arpeggiator Assign”).
4. If you check “with Drum Track,” the Drum Track Pattern settings of the copy-source program will also be copied.
If this is On (checked), the Drum Track Pattern settings of the copy ‐ source program will be copied to the “Drum
Track” you specify in step 9.
The MIDI channel specified for the Drum Track copy ‐ destination timbre will be used.
5. Use the To field to specify the copy-destination timbre.
The parameters for each timbre will be initialized. The copy ‐ source program will be assigned to
Program
(see “0–1(2)b:
Program Select” on page 72).
• The
MIDI Channel
(Combi 3–1(2)c) setting will not change if “Arp” is checked. If “Arp” is unchecked,
MIDI
Channel
will be automatically set to G ch.
• The
Bank Select (When Status=EX2)
(Combi 3–1(2)c) setting will not change.
• The
Status
(Combi 3–1(2)c) setting will automatically be set to INT.
• The P1: Basic/Controllers– Controllers Setup settings of the copy ‐ source program will be copied.
6. Use the “Arp” field to select the copy-destination arpeggiator; either A, B, C, or D.
7. Use the “Drum Track” to specify the destination timbre to which the drum track program will be copied.
Copy Tone Adjust
This command replaces the Tone Adjust settings of the selected Timbre (Combination mode) or Track (Sequencer mode) with those of any other Program, Timbre, or Track.
1. Select the Timbre (Combination mode) or Track
(Sequencer mode) whose Tone Adjust settings you want to replace.
For a timbre, access the Combi P0: Play– Tone Adjust page, and select the
Timbre
.
For a track, access the Seq P0–2: Play/REC– Tone Adjust page, and select the
Track
.
2. Select “Copy Tone Adjust” to open the dialog box.
3. Use the From field to select the Program, Combination, or Song from which to copy.
You can also use the front ‐ panel BANK buttons to select the desired bank.
4. If you’ve selected a Combination or Song, select a specific Timbre or Track as well.
5. Choose either All or Assignments Only to select the
Tone Adjust parameters that you want to copy.
All:
This copies both the Tone Adjust parameter assignments and values.
Assignments Only:
This copies only the Tone Adjust parameter assignments, without the values.
Combination: Menu Command Reset Tone Adjust
Reset Tone Adjust
Reset Tone Adjust
is available on the Tone Adjust tab of the play page.
This command affects only the selected Timbre or Track, as opposed to the entire Combination or Song. It resets the
Tone Adjust settings for all of the Track/Timbre’s, Switches, and Sliders to their default values.
Copy Arpeggiator
Copy Arpeggiator
is available on the ARP Setup T01–08–
Scan Zone tabs of the ARP/DT page.
This command can copy arpeggiator settings from another location to the current Combi.
1. Select the Timbre (Combination mode) or Track
(Sequencer mode) to reset.
For a timbre, access the Combi P0: Play– Tone Adjust page, and select the
Timbre
.
For a track, access the Seq P0–2: Play/REC– Tone Adjust page, and select the
Track
.
2. Select “Reset Tone Adjust” to open the dialog box.
3. Use the To field to specify how the Tone Adjust parameters will be reset.
All Off:
All parameters will be reset to Off.
Default Setting:
The parameters will be reset to the default settings for the corresponding program type.
Copy Drum Track
This command copies the drum track settings of the specified Program, Combination, or Song.
For more information, please see “Copy Drum Track” on page 65.
Erase Drum Track Pattern
This erases the drum track pattern you specify.
For more information, please see “Erase Drum Track
Pattern” on page 66.
1. In From, select the source (mode, bank, number) of the arpeggiator you wish to copy.
If you are copying from a Combination or Song, select either
A
or
B
, if you wish to copy settings from only one arpeggiator, or select
A&B
if you wish to copy the settings of both arpeggiators.
2. If you are copying from a Program, or are copying either A or B from a Combination, or Song, select either
A or B as the To copy destination.
Detune BPM Adjust
Detune BPM Adjust
is available on the Pitch tab of the
Timbre Parameters page.
This command changes a loop’s tempo by changing the
Timbre’s
Detune
parameter. The multisample data itself is not altered. Since this alters the pitch of the loop along with the tempo, it’s generally intended for un ‐ pitched percussive loops.
Note:
Using
Detune BPM Adjust
will over ‐ write any previous
Detune
settings.
1. Go to the Pitch tab of the Timbre Parameters page.
2. Select the Detune parameter for the desired Timbre.
Detune BPM Adjust
is available only when the
Detune
parameter has been selected. Otherwise, the menu selection will be grayed out.
3. In From, specify the loop’s original BPM value.
Ignore any previous changes from using Detune BPM adjust.
4. In To, specify the desired BPM value.
The appropriate
Detune
value will be calculated automatically from these two values.
For example, if you set
From
to 60 bpm and
To
to 120 bpm,
Detune
will be set to +1200 (one octave up).
Note:
Since this command does not affect the multisample data itself, and always over ‐ writes the previous
Detune
amount, using it repeatedly has no cumulative effect.
103
Combination mode
Copy Insert Effect
Copy Insert Effect
is available on all of the IFX pages.
This command copies effects settings from Program,
Combination, or Song. For more information, please see
“Copy Insert Effect” on page 66.
Note:
The slot’s MIDI control channel, as specified by the
Ch
parameter on the P8: Routing/IFX– IFX1–5 pages, will not be copied.
Swap Insert Effect
Swap Insert Effect
is available on all of the IFX pages.
This command swaps (exchanges) insert effect settings. For more information, please see “Swap Insert Effect” on page 67.
Note:
The slot’s MIDI control channel, as specified by the
Ch
parameter on the P8: Routing/IFX– IFX1–5 pages, will not be swapped.
DrumKit IFX Patch
This patches the
Bus (IFX/Output) Select
settings for each key of a drum kit, temporarily changing the insert effect connection destinations.
You can execute this command if the program assigned to the timbre is a drum program and
Bus (IFX/Output) Select
is set to
DKit
. The
Bus (IFX/Output) Select
setting (Global
5–5b) of each key in the drum kit must be set to one of IFX1–
5.
1. In the Routing1 page or Routing2 page, select the timbre for which you want to make settings. (Select a timbre parameter or Timbre Number.)
2. Select “DrumKit IFX Patch” to open the dialog box.
Swap MFX/TFX
Swap MFX/TFX
is available on all of the MFX/TFX/LFO pages.
This command swaps (exchanges) insert effect settings. For more information, please see “Swap MFX/TFX” on page 67.
Note:
The slot’s MIDI control channel, as specified by the
Ch
parameter on the P9: MFX/TFX/LFO– MFX1 and TFX page, will not be copied.
Write FX Preset
Write FX Preset
is available on all of the effects parameter editing pages, including IFX 1–5, MFX 1 and 2, and TFX.
This command saves the edited effect into the KROME’s internal memory.
For more information, please see “Write FX Preset” on page 67.
104
3. In the DrumKit “IFX” popup, select the output bus to which you want to patch the signal: an insert effect or
L/R or Off.
Note:
To restore the condition of the drum kit, execute
IFX1
→
IFX1, IFX2
→
IFX2, IFX3
→
IFX3, IFX4
→
IFX4,
IFX5
→
IFX5 (see page 95).
Copy MFX/TFX
Copy MFX/TFX
is available on all of the MFX/TFX/LFO pages.
This command copies effect settings from Program,
Combination, or Song. For more information, please see
“Copy MFX/TFX” on page 67.
Note:
The slot’s MIDI control channel, as specified by the
Ch
parameter on the P9: MFX/TFX/LFO– MFX1 and TFX page, will not be copied.
Sequencer mode
An overview of Sequencer mode
Sequencer Mode lets you record and play back MIDI data on sixteen MIDI tracks and one master track (containing tempo data, etc.), using the internal sound generator or external sound modules.
The dual arpeggiator, drum track function, RPPR function; the sophisticated effects, controllers, and the numerous other functions of the KROME can be used together to give you a wide range of possibilities for music production or live performance.
When you turn off the power, the Sequencer mode settings, the songs you’ve recorded, the cue list, and the user pattern data will disappear. If you need to keep this data, you must save it to an SD card or a data filer
(via MIDI Data Dump) before powering ‐ off.
If you wish to save the programs, track parameters, and effects, settings etc. selected for a song as a template song, use the menu command
Save Template Song
.
When you initially power up the KROME, it will not contain any cue list and song data, so if you wish to playback a song on the sequencer, you must first load
data (See “Load Preload/Demo Data” on page 216.).
MIDI sequencer
• The sequencer can record a maximum of 210,000 MIDI events, up to 128 songs, and as many as 999 measures per song.
• Up to
20 cue lists
can be created.
A cue list is an arrangement of up to 99 songs that will be played as a chain. You can specify the number of times that each song will repeat. A cue list can also be converted into a single song.
• Timing resolution is a maximum of /480.
• There are sixteen tracks for MIDI performance data, and a master track that controls the time signature and tempo.
• The arpeggiator can be used during playback or recording.
• You can perform or record using the Drum Track function.
• The RPPR (Realtime Pattern Play/Recording) function can be used during playback or recording.
• A three ‐ band EQ is provided on each MIDI track.
• For each song, you can use five stereo insert effects, two stereo master effects, and one stereo total effect.
• Sixteen different template songs are built ‐ in, and contain program and effect settings suitable for various musical styles. Up to sixteen original templates that you create can be saved as user template songs.
• A track play loop function lets you loop specified measures independently for each track.
• Preset patterns ideal for drums are built in. In addition, you can create up to 100 user patterns for each song.
These patterns can be used as musical data within a song, or can be played by the drum track or the drum track and/or RPPR function.
MIDI recording features
• Various methods of recording are supported, including realtime recording, in which your performance on the keyboard and controllers (including MIDI control events) is recorded as you play, and step recording, in which the timing, length, and velocity of each note can be specified in the display as you input the pitches from the keyboard.
• The musical data and control events that you recorded can be edited in various ways (including event editing and many other edit commands).
• MIDI System Exclusive (SysEx) messages can be recorded and played back. SysEx messages received from an external MIDI device or parameter changes produced by editing track parameters or effect parameters can be recorded in real ‐ time on any desired track.
Parameter-related features
• When the
Status
of a track is set to INT or BTH, an external sequencer can be used to play the KROME as a multi ‐ timbral tone generator. When the
Status
of a track is set to BTH, EXT, or EX2, the sequencer of KROME can play external tone generators.
•
Tone Adjust
parameters let you make temporary adjustments to the sound of the program used by a track, while leaving the original program unchanged. While creating a song, you can use this capability to make changes in realtime by (for example) softening the tone of the bass sound or sharpening the attack of the strings without having to return to Program mode to edit the program itself.
• KROME’s AMS (Alternate Modulation) capability lets you use control changes for Realtime Controls of the parameters of the programs used in a program. Its MIDI
Sync abilities let you synchronize the LFO speed to changes in the tempo.
• Dmod (Dynamic Modulation) functionality lets you control effect parameters in realtime. You can also use
MIDI Sync to synchronize the LFO speed or delay time to changes in the tempo.
• The MIDI clock master can be set to Internal, External, or
Auto, allowing synchronized performance with an external MIDI device.
Editing and operation features
• The Auto Song Setup function lets you instantly set up program or combination settings of Program mode or
Combination mode as a song, so that you can start recording simply by pressing the START/STOP ( button. Since performances using the Drum Track function or Arpeggiator in Program or Combination
) mode are seamlessly integrated with song production, any inspiration or ideas for phrases and songs that occur to you while playing can be immediately be turned into a song.
• Program and Combination settings can be copied to a song.
• Sequencer data such as a song that you create can be saved in the KROME’s native format, or transmitted as a
MIDI data dump.
• A song you created can be converted into SMF (Standard
MIDI File) data. SMF songs can also be loaded.
• The
Play/Rec/Mute
and
Solo On/Off
buttons let you instantly play/mute any desired track on the fly.
• You can rewind or fast ‐ forward MIDI Tracks while listening to the sound.
105
Sequencer mode
106
• You can assign names not only to the song, but also to each pattern and track.
• The LOCATE button lets you move quickly to a desired location.
• You can convert user pattern data for use in the drum track. The converted pattern can be used as a drum track pattern in each mode. This data will remain even after the power is turned off (unlike user patterns in Sequencer mode).
• You can drag within the display to specify a range of measures, or to move, copy, or delete. This lets you edit in a more intuitive way (Track View editing).
• In the piano roll screen, you can now edit data such as note, velocity, and control change. By selecting an event and dragging it you can modify the pitch or timing, delete it, or add a new event (Piano Roll editing).
• You can edit MIDI system exclusive data.
• Note ‐ on velocity values are shown in realtime using a meter. This is a convenient way to verify the timbre or track that is currently sounding.
Setup parameters & Musical data
Each song consists of MIDI tracks 1–16, a master track, various song parameters such as the song name, settings for the arpeggiator, drum track function, effect settings, RPPR function parameters, and 100 user patterns.
Up to 128 such songs can be created in the KROME.
MIDI tracks 1–16 each consist of “track parameters” that specify the starting state of the track, and “playback data.”
The master track consists of tempo and time signature data.
MIDI tracks 1–16
Setup parameters
Bank/Program No.*, Play/Rec/Mute, Pan*, Volume*
Track Play Loop, Loop Start Measure, Loop End Measure,
Play Intro, EQ (Bypass, Low Gain, Mid Frequency, Mid
Gain, High Gain) Status, MIDI Channel, Bank Select (When
Status=EX2), Force OSC Mode, OSC Select, Portamento*,
Transpose**, Detune**, Bend Range**, Use Program’s Scale,
Delay (Mode, Time, Base Note, Times), MIDI Filter,
Keyboard Zone, Velocity Zone, Track Name, Bus (IFX/
Output) Select, FX Control Bus, Send1(MFX1)*,
Send2(MFX2)*, Drum Kit IFX Patch
Musical data
Note On/Off
Program Change ( including Bank Select)
Pitch Bend
After Touch
Control Change
Pattern No.
Exclusive Message
Master track
Setup parameters/Musical data
Time signature*, Tempo*
* When you change the setting during realtime ‐ recording, this will be recorded as musical data (Program change and Control change messages). This allows the starting settings to be modified during the playback.
** Musical data (MIDI RPN data) can be used to change the starting settings during playback.
Other parameters: You can adjust parameters during realtime recording and record these changes as MIDI
System Exclusive messages. This means that the settings at the start of playback can change as the song pro ‐ gresses.
• For details on Control Change messages and RPN, please
see “Control change” on page 361, and “Using RPN
(Registered Parameter Numbers)” on page 365.
• For details on MIDI System Exclusive messages, please
see “System Exclusive events supported in Sequencer mode” on page 191.
The Global mode “SEQ Mode” setting
In Sequencer mode, you will normally use the internal sequencer as the master that controls the internal sound generator or external MIDI sound modules. However, you can also use the KROME as a multi ‐ timbral sound module that can simultaneously play multiple tracks of performance data from an external MIDI sequencer. (Normally, you’ll use
Combination mode if you want to use the KROME as a master keyboard.)
You can switch the KROME’s setting as appropriate for these two purposes. This setting is made in Global P1: MIDI–
MIDI Basic page SEQ Mode
Track MIDI Out
.
“for Master” is the appropriate setting if you want to use the
KROME’s internal sequencer to control an external sound module, or use the KROME in Sequencer mode as a master keyboard. In this case when you switch songs on the
KROME, tracks whose
Status
is set to EXT or BTH can transmit MIDI messages such as program changes to set up your external MIDI sound module.
“for External ‐ Sequencer” is the appropriate setting if you want to use the KROME as a multi ‐ timbral sound module for your external sequencer. When you switch songs on the
KROME, MIDI messages such as program changes will not be transmitted (by tracks whose
Status
is EXT or BTH). This ensures that echo ‐ back from your external MIDI sequencer will not cause KROME tracks of the corresponding MIDI channel to switch their program, pan, or volume settings.
Auto Song Setup
The Auto Song Setup function copies the settings of a program or combination to a song, and puts you in record ‐ ready mode. Then you can simply press the START/STOP (
) button to begin recording immediately. This lets you seamlessly move from playing a program or combination to producing a song. For example, if you’ve been using the drum track or arpeggiator and have come up with a phrase or an idea, this function lets you easily turn your inspiration into a song.
Procedure (example: Combination mode)
1. Enter Combination mode.
2. In P0: Play page, select the desired combination and edit the Arpeggiator etc. as desired.
Note:
If you want to save the edited state of the combination, use the
Write Combination
menu commands.
3. Press the REC (
) button. Alternatively, select the page menu command “Auto Song Setup.”
The
Setup to Record
dialog box will appear.
4. To execute the Auto Song Setup function, press the
REC (
) button or the OK button. If you decide not to execute, press the Cancel button.
You will automatically move to Sequencer mode, and the settings of the combination will be copied to the song.
The first unused song will be the copy ‐ destination song.
Contents automatically copied from a combination
The copied contents will be the same as when you execute the menu command
Copy From Combi
with the following
settings in the dialog box. (see p.166)
•
IFXs
,
MFXs
,
TFX
checked
•
Auto Adjust Arp setting for Multi REC
checked
Contents automatically copied from a program
The copied contents will be the same as when you execute the menu command
Copy From Program
with the following
settings in the dialog box. (see p.101)
•
IFXs
,
MFXs
,
TFX
checked
•
Arp
checked
•
To
set to Track 01
•
Arp
set to A
•
with Drum Track
checked
•
To: Drum Track
set to Track 10
• Check Recording Setup
Multi REC
• Set the
Play/Rec/Mute
setting to REC for tracks 01 and 10
(see p.112).
5. The KROME will automatically enter record-ready mode, and the metronome will sound according to the
Metronome setting (Seq 0–8c).
6. Press the START/STOP ( ) button to begin realtime recording. To stop recording, press the START/
STOP ( ) button once again.
The Compare function
When you perform realtime recording, step recording, or track editing, this function allows you to make before ‐ and ‐ after comparisons.
If you continue editing when the COMPARE button is lit, the switch will go dark. This now becomes the musical data that will be selected when the COMPARE button is dark.
Operations for which Compare is available
In general, track and pattern event data can not be returned to its original state.
Comparing song parameters is possible only during song editing (when executing a menu command).
• Recording to a MIDI track
• Track Edit
All commands except for the menu commands
Memory
Status
,
Exclusive Solo
,
FF/REW Speed
and
Set Location
of the P6: Track Edit– Track Edit page.
• Recording to a pattern
• Pattern Edit
All commands except for the menu commands
Memory
Status
,
Exclusive Solo
,
Convert to Drum Trk Pattern
,
Erase Drum Track Pattern
, and
FF/REW Speed
of the
P10: Pattern/RPPR– Pattern Edit page.
• Song Edit
P0–P5 pages: menu commands
Delete Song
and
Copy
From Song
The program will not be affected by the Compare, and will not return to its prior state.
Operations for which Compare is not available
• Editing song parameters
• Menu commands other than those listed under
“Operations for which Compare is available” above.
An overview of Sequencer mode
107
108
Sequencer mode
SEQ Page Select
You can use the following ways to select the pages in
Sequencer mode.
1. Press the SEQ button, and then press the MENU button to access “Page Select.”
“Page Select” shows an abbreviated name for each page.
The page shown in grey is the page selected just prior to pressing the PAGE button.
2. Select the desired page in the display.
Other ways to select pages
• Hold down the PAGE button and press one of the numeric keys, 0–9, to specify a page number and to access the corresponding page.
For example, if you want to access the P3: Track Param page, hold down the PAGE button and press numeric key 3.
• Pressing the EXIT button will take you to the P0–1: Play/
REC page. If a page other than the Program T01–08 page is selected, pressing the EXIT button will take you to the
Program T01–08 page.
Page
P0: Play/REC
P1: Controllers
P2: EQ
P3: Track Param
P4: Zone/Delay
P5: MIDI Filter
P6: Track Edit
Main content
Song selection, playback, and recording.
(see p.109)
Program selection for each track. (see p.111)
Pan and volume settings etc. for each
track. (see p.113)
Simple arpeggiator editing. (see p.114)
Tone Adjust editing. (see p.115)
Recording method selection. (see p.116)
Track playback loop settings. (see p.119)
SW1, 2, and knob settings. (see p.122)
EQ settings for each track. (see p.141)
Various parameter settings for each track
(MIDI channel, OSC selection, Pitch
setting, etc.) (see p.125)
Key split and layer settings.
(Key zone and velocity zone) (see p.129)
Time delay from note ‐ on to beginning of
sound. (see p.131)
MIDI transmit/receive filter settings. (see p.133)
Step recording.
Piano roll edit.
Event recording.
Copy, delete, and other track editing. (see p.137)
P7: Arpeggiator/
Drum Track
Arpeggiator settings. (see p.143)
Drum track settings. (see p.146)
P8: Routing/IFX
P9: MFX/TFX/
LFO
P10: Pattern/
RPPR
P11: Cue List
Oscillator output bus and master effect
send level settings. (see p.148)
Insert effect routing, selection, and
settings. (ssee p.148)
Master effect routing, selection, and
settings. (see p.152)
Total effect selection and settings. (see p.152)
Common FX LFO settings (see p.154)
Pattern recording and editing. (see p.155
RPPR settings. (see p.158)
Converting a pattern to a drum track
pattern. (see p.188)
Cue list settings.
Consecutive playback of multiple songs.
Converting to a song. (see p.160)
SEQ P0: Play/REC 0–1: Program T01–08, 0–2: Program T09–16
SEQ P0: Play/REC
0–1: Program T01–08,
0–2: Program T09–16
0–1a
0–1b
0–1
Menu
Transport Popup
Here, you can make basic settings for MIDI track recording and playback, and can select the program that will be used by each track.
0–1(2)a: Location, Meter, Tempo, Tempo
Mode, Song Select, Track Select,
Reso, RPPR
Location [001:01.000…999:16.479]
This display shows the current position in the song.
From the left, the numbers are the measure (001–999), beat
(01–16), and clock (000–479). When you modify these values, the current location will change.
During playback and recording, the number of remaining measures will be displayed when you approach the end of the song (the last 9 measures or fewer).
The song position bar will show the position of the current measure.
When
MIDI Clock
(Global 1–1a) is set to
Internal
(or
Auto
, if no MIDI clocks are being received), the
KROME will transmit Song Position Pointer messages when the
Location
is changed.
Also, if the
MIDI Clock
parameter is set to
External
MIDI
(or
Auto
, if MIDI clocks are currently being received), and
Receive Ext. Realtime Commands
(Global 1–1a) is on, the
Location
will change in response to received Song Position Pointer messages.
The range in which the beat and clock can be modified will depend on the currently specified time signature.
Song
Select
Popup
Location
Meter
Song Select
Tempo
Tempo Mode
Track Select
Song Position
Resolution RPPR
Meter [**/**, 1/4…16/4, 1/8…16/8, 1/16…16/16]
This is the time signature at the current location of the song.
The time signature can be changed at each measure.
**/**:
This will be displayed when you press the REC ( ) button. Specify this when you wish to use the time signature that is already recorded for that measure, and wish to record without changing the time signature.
Set
Track Select
to a Track from 01–16, press the REC ( ) button, and specify the time signature here.
When you press the START/STOP ( ) button to begin recording, the time signature you specify will be recorded on the Master Track and on previously recorded tracks.
Be aware that if you press the START/STOP ( ) button during the pre ‐ count to stop recording, the time signature will not be recorded.
Normally, you will specify the time signature when you record the first track, and select **/** when recording subsequent tracks.
Recording from measure 2 of track 2
Track 1 when Meter = **/**
1 (4/4) 2 (3/4) 3 (4/4)
Track 2 1 (4/4)
Recording
Track 1
Track 2 when Meter =7/8
1 (4/4) 2 (3/4) 3 (4/4) 3 (4/4)
1 (4/4) Recording
Track 1
Track 2
1 (4/4) 2 (3/4)
1 (4/4) 2 (3/4)
3 (4/4)
3 (4/4)
Track 1
Track 2
1 (4/4) 2 (7/8)
1 (4/4) 2 (7/8)
3 (7/8)
3 (7/8)
4 (7/8)
4 (7/8)
Changing the time signature in the middle of a song
Changing the time signature before data is recorded:
If you know the location at which you wish to change time signatures, use the
Insert Measure
menu command to specify and insert the time signature wherever desired, and then record your musical data.
Changing the time signature after data has been recorded:
If you wish to change the time signature in the middle of a song which already contains musical data, use
Track Select
to specify the Master Track (or any Track 01–16 which contains data), and use the
Event Edit
menu command to modify the time signature of the Bar event.
If the number of beats in a measure increases when you modify the time signature, rests will be inserted in the portion that was added. Conversely if the number of beats decreases, that portion will not be played. However if you return to the original time signature, the data that had been hidden will once again be played. (The data itself will not be erased.)
Rest is inserted
Not played
109
Sequencer mode
110
(Tempo) [040.00…300.00, EXT]
This specifies the tempo of the song. This tempo applies to song playback, arpeggiator and drum track function, etc.
040.00…300.00:
When the
Tempo Mode
is Manu (Manual), this tempo will be used for recording and playback. When
Tempo Mode
is REC, this tempo will be recorded on the master track.
EXT:
This will appear when
MIDI Clock
(Global 1–1a) is set to either External MIDI, External USB or Auto. The tempo of the internal sequencer will synchronize with MIDI Clock messages received from an external sequencer or other MIDI device.
If
MIDI Clock
(Global 1–1a) is set to
Internal
, the above tempo setting (040.00–300.00) is used. If you’ve selected
Auto, operation will automatically switch from Internal to
External if MIDI Clock data is received from an external
MIDI device. This indication will appear.
Note:
You can also adjust this by turning the TEMPO knob.
Alternatively, you can set the tempo by pressing the TAP button at the desired interval.
Note:
If Tempo is selected as an alternate modulation source,
= 120.00 will be the base value.
To record tempo changes
First, set
Track Select
to a MIDI Track.
Press the REC ( ) button to enter recording ‐ standby mode, you will be able to select REC.
Set
Tempo Mode
to REC, start recording, and change the
(Tempo)
value either by turning the TEMPO knob, or using numeric keys 0–9 to enter a value and then pressing the
ENTER button. You can also vary the tempo by hitting the
TAP button at the desired timing.
This cannot be selected when the Preferences page item
Recording Setup
is set to Loop All Tracks.
When you change the
(Tempo)
value while recording, the tempo changes will be recorded, causing the tempo to change as the song progresses.
Tempo changes can also be created using the
Event Edit
or
Create Control Data
menu commands.
Note:
If you wish to record only the tempo changes, set
Recording Setup
(Seq 0–8b) to Overdub, and the tempo will be recorded on the master track without being affected by the musical data of
Track Select
.
Tempo Mode [Auto, Manual, REC]
Auto:
The tempo will follow the tempo of the Master Track.
The tempo of the master track can be specified by using the
Event Edit
menu command, with the Master Track chosen in
Track Select
, or by the REC operation described below.
When Auto is selected, it will not be possible to modify the
(Tempo)
setting while a song is playing or recording (or during standby).
Manu (Manual):
The
(Tempo)
setting will be used.
REC:
Tempo changes will be recorded on the Master Track.
Song Select [000…127]
Select the song that you want to record or play back.
Either select the song name from the popup menu, or use numeric keys 0–9 to specify the song number and then press the ENTER button.
Creating a new song
Choose a number from the popup menu whose song name is blank, or use the numeric keys 0–9 to specify the song number and press the ENTER button to open the dialog box.
Then select
Set Length
to specify the number of measures in the song, and press the OK button.
Note:
If you want to change the length of a song after creating it, use the menu command
Set Song Length
. When creating a new song, you can specify the length to be somewhat longer than necessary, and after you have finished recording and editing, use
Set Song Length
to specify the correct length.
A Song Select message is transmitted when you switch songs on the KROME. You can switch songs on the
KROME remotely, by sending a Song Select message from an external MIDI device.
If
Track MIDI Out
(Global P1: MIDI– MIDI Basic) is set to “for Master,” and the song is switched, tracks whose track status (
Status
3–1(2)a) is EXT, EX2, or BOTH will transmit Bank Select, Program Change, Volume,
Panpot, Portamento, Send 1/2, Post IFX Pan, and Post
IFX Send 1/2 messages on the MIDI channel of that track. These messages will not be transmitted if
Track
MIDI Out
is set to “for External Sequencer.”
Track Select [Track01…Track16, Master Track]
Track 01–Track 16:
Select the MIDI track that you want to record. This is also where you make your selection when editing a MIDI track in P6: Track Edit.
When
Multi REC
is off, this also selects the record ‐ enabled track.
When
Multi REC
(Seq 0–8b) is on, the
Play/Rec/Mute
buttons (Seq 0–1(2)b) select the record ‐ enabled tracks, regardless of the
Track Select
setting.
Use
Track Name
(Seq 6–2) to give the track a descriptive name.
If other tracks are set to the same MIDI channel as the selected track, and their
Status
is set to INT or BTH, they’ll be controlled by the keyboard as well.
Additionally, other tracks set to the same MIDI channel as the selected track, and their Status set to EXT, EX2, or
BTH, will transmit MIDI to external devices. For another look at this, please see the table below.
MIDI Channel
Same as the selected MIDI
Track
Status
OFF
INT
EXT
EX2
BTH
Keyboard plays Internal
Sounds
No
Yes
No
No
Yes
Keyboard
Transmits MIDI
Out
No
No
Yes
Yes
Yes
Different from the selected MIDI
Track
Any setting
No No
If you’ve selected Master Track, the settings of the most recently selected MIDI track will be used.
Master Track:
Select the master track if you want to use the
P6: Track Edit menu commands to edit the master track. You cannot perform realtime recording or step recording on the master track by itself.
SEQ P0: Play/REC 0–1: Program T01–08, 0–2: Program T09–16
Resolution (Realtime REC Quantize Resolution)
[Hi,
3
, ,
3
, ,
3
, , ]
With realtime ‐ recording, the timing of the MIDI data you play can be corrected.
Hi (High Resolution):
Timing will not be corrected. Data will be recorded at the maximum resolution ( /480).
3
– :
Data will be corrected to the nearest interval of the specified timing as it is recorded. For example if you select
3
, data will be corrected to the nearest 32nd ‐ note triplet interval. If you select , data will be corrected to the nearest quarter note interval.
With a setting of
Because all the MIDI data being recorded will be corrected to the specified timing resolution, coarse settings of this parameter will cause continuous controllers such as pitch bend to be recorded in “stair ‐ step” fashion.
In such cases, use a setting of Hi to record, and then use the
Quantize
menu command to correct only the desired type of data (notes etc.). To avoid a stiff feel, avoid recording at a low resolution to begin with.
RPPR [Off, On]
This turns the RPPR (Realtime Pattern Play/ Recording) function on/off. RPPR lets you assign a pattern to each note of the keyboard, so that the pattern will playback (or be recorded) when you press the appropriate key.
On (checked):
The RPPR function will be on. If a pattern has been assigned to each key in the P5: RPPR Setup page, pressing that key will perform the assigned pattern. For
more information, please see “10–3: RPPR Setup” on page 157.
Mode, Stop Watch
See “a: Mode button” on page 4 of the Operation guide.
See “l: Stopwatch button” on page 5 of the Operation guide.
Transport
The transport panel will appear when you slide the “<” popup button (located on the lower right side of the display) toward the left. This lets you control transport operations such as playback and recording from within the display. To hide the transport panel, press and move the “>” popup button toward the right.
Set Location
LOCATE
REC
START/STOP
PAUSE <<REW
FF>>
0–1(2)b: Track Program Select
Select Track Info
Track No.
Category/Track
Program Select
Bank/Track
Program Select
Program Select
Play/Mute
Velocity Meter
Solo On/Off
Selected Track Info
This page displays information about the track you’re editing.
T:
indicates the MIDI track number/program bank/ number/name.
Ch:
indicates the MIDI channel number, and
RPPR (Assign):
indicates the key number that will start the
RPPR assigned to the track.
RPPR (Assign) will not show all of the assignments if there are many RPPR assignments. The P10: Pattern/RPPR–
Pattern Edit page lets you see all of the assignments.
Track Number:
As expected, this indicates the track number. Below each track number are its corresponding track parameters.
Track Category:
This shows the abbreviated category name of the Program assigned to the track.
Track 01 (Track Number):
This shows the MIDI track number. The parameters below this let you set the parameters for the track.
Category (Track Program) [00…17/00…07]
Here, you can select a category and sub ‐ category to choose the MIDI track’s program. All programs are organized into up to 18 categories and 8 sub ‐ categories. Choose the desired category and sub ‐ category to select the program you desire.
Press this popup button to access the Category/Program
Select menu, and choose a program.
Category/Track Program Select menu:
Here, you can select the program for each track by main category and sub ‐ category. All programs are classified into a maximum of eighteen main categories, and each category is classified into eight sub ‐ categories. You can select programs using these main categories and sub ‐ categories.
• Press
Category
and use the Category/Track Program
Select menu to select a program.
For the procedure, please see “Category/Program Select menu:” on page 3.
111
Sequencer mode
112
Program Select [A…F: 000…127
GM, g(1)…g(9), g(d): 001…128]
Selects the program that will be used by each MIDI track.
The lower line displays part of the program name.
The program you select here will be used when the song is played or recorded from the beginning. If the program is changed while recording, the program change will be recorded as MIDI data, and the program will change during playback. You can also change the program manually during playback. However, the program will change at any point where program change data is already recorded.
If the
Status
(Seq 3–1(2)c) is either INT or BTH, programs can be selected by receiving MIDI program change messages. Also, when the song is changed or when the song returns to the beginning, tracks whose
Status
is EXT, EX2 or BTH will transmit the bank and program numbers via MIDI. Tracks whose
Status
is
EX2 will show Bank as “–” and will transmit the bank number that was selected in the
Bank Select
(Seq 3–
1(2)c) parameter. (See Global P1: MIDI, SEQ Mode
“Track MIDI Out” on page 200)
Various ways to change the program for a track
• Choose
Program Select
, use numeric keys 0–9 to input a program number, and press the ENTER button.
• Choose
Program Select
, and turn the VALUE dial or use the INC/DEC buttons.
• If you’ve chosen
Program Select
, the front ‐ panel BANK
A–F buttons will change the program bank for the selected track. The BANK button for the bank containing the selected program will light up.
You can use the numeric keys to switch the GM bank (see p.2).
• Use the Bank/Program Select menu to view and select programs by bank.
• Use the Category/Program Select menu to view and select programs by category.
• Transmit MIDI program change messages from a connected external MIDI device (if the track
Status
is INT or BTH).
• You can also use the above methods to
switch programs while a song is playing
. If you switch programs while recording, the program change data will be recorded, and the program will switch at that point in the song during playback. You can also use the menu command
Event
Edit
to add program change data to a track.
Play/Rec/Mute [Play, Rec, Mute]
Use this to mute a MIDI track, or to select the recording tracks for multi ‐ track recording.
During playback, or for single ‐ track recording (normal recording), you can only select Play or Mute for tracks— with the exception of the recording track. For multi ‐ track recording, tracks can be set to Play, Rec, or Mute.
Each time you press the Play/Rec/Mute button, it will toggle between those functions.
Play:
The track will play.
Rec:
For single track recording, the selected track will be set to REC when you press the REC ( ) button. REC cannot be manually selected.
For multi ‐ track recording (the Preferences page
Multi REC
is on), select REC for the tracks that you wish to record.
Mute:
The track will be muted (silent).
Solo On/Off
Turns the Solo function on/off for each track.
[On, Off]
Only tracks with Solo On will sound. Other tracks will be muted.
The setting will alternate on/off each time you press the Solo button.
The operation will depend on the
Exclusive Solo
setting.
Exclusive Solo off:
Multiple tracks can be soloed. The solo setting of each track will change each time you press its Solo
On/Off button.
Exclusive Solo on:
When you press a Solo On/Off button, only that track will be soloed.
If MIDI tracks whose
Status
(Seq 3–1(2)c) is BTH, EXT, or EX2 are muted by Mute or by the Solo function, note on/off messages will not be transmitted on the MIDI channel selected for those tracks.
Solo
settings are not saved with the song.
Exclusive Solo
The menu’s
Exclusive Solo
parameter also affects the way that Solo works. When
Exclusive Solo
is
Off
(unchecked), you can solo multiple Tracks at once. The solo setting of each track will change each time you press its Solo On/Off button.
When
Exclusive Solo
is
On
(checked), only one Track can be soloed at a time. In this mode, pressing a Solo button automatically disables any previous solos.
Tip:
On most pages, you can also toggle
Exclusive Solo
on/ off by holding down the ENTER button and pressing numeric key 1.
Velocity Meter
This meter shows the note ‐ on velocity value.
• This indicates the note ‐ on velocity values on the MIDI channel of each track, produced by the keyboard, MIDI
IN, arpeggiator, drum track, or sequencer. (If multiple note ‐ on messages are received simultaneously, the highest velocity will be displayed.)
• The meter will respond even if Key Zone or Vel Zone settings are set so that the note does not actually sound.
• This meter indicates the note ‐ on velocity value; it does not respond to changes in the Volume knob setting, nor to changes in the level of the audio signal produced by the
Filter, Amp, EG, LFO, EQ, or effects.
Track 02…08, 09…16 (Track Number):
Here, you can specify the program, Play/Mute status, and
Solo On/Off status for Tracks 2–8 and 9–16. These are the same as for Track 01. For more information, please see
“Track 01 (Track Number):” above.
V
0–1(2): Menu Command
• 0:
Memory Status
see p. 163
• 1:
Exclusive Solo
see p. 64
• 2:
Rename Song
see p. 163
• 3:
Delete Song
see p. 163
• 4:
Copy From Song
see p. 163
• 5:
Load Template Song
see p. 163
• 6:
Save Template Song (Save as User Template Song)
see p. 164
• 7:
FF/REW Speed
see p. 164
• 8:
Set Location (Set Location for Locate Key)
see p. 164
• 9:
GM Initialize
see p. 165
• 10:
Copy from Combination
see p. 166
• 11:
Copy from Program
see p. 167
For more information, please see “Sequencer: Menu
Command” on page 163.
SEQ P0: Play/REC 0–3: Mixer T01–08, 0–4: Mixer T09–16
0–3: Mixer T01–08,
0–4: Mixer T09–16
0–3a
0–3b
0–3
Menu
Here, you can set the pan and volume of each MIDI track.
0–3(4)a:Location, Meter, Tempo, Tempo
Mode, Song Select, Track Select,
Reso, RPPR
For more information, please see “0–1: Program T01–08, 0–2:
Program T09–16” on page 109.
Selected Track Info
Track Number
Track Category
0–3(4)b: Pan, Volume
The pan and volume that you specify here will be used when you play back or record from the beginning of the song. If you change the settings during recording, the changes will be recorded as MIDI data, and pan and volume will change during playback. You can also change the settings during playback. However, when the song reaches a location where pan or volume data was recorded, the settings will change accordingly.
Selected Track Info
This area shows information on the MIDI track selected for editing.
For more information, please see “0–1(2)b: Track Program
Select” on page 111.
Track 01 (Track Number):
Category
This indicates the category.
[Category Name]
Pan [RND, L001…C064…R127]
Here, you can set the pan of each MIDI track.
L001…C064…R127:
A setting of L001 is far left and R127 is far right. A setting of C064 will reproduce the oscillator pan setting of the Program mode.
If a mono insert effect is in use, the settings you make here will be ignored. In this case, the
Pan: #8
parameter in P8:
Routing/IFX– Insert FX Setup page will adjust the panning
of the sound after the Insert Effect. For more information, please see “Mixer” on page 243.
OSC1
Left
Left
Center
Center
OSC2
Right
OSC1:
Amp1 Pan=L001
OSC2:
Amp2 Pan=R127
Pan (CC#10)
C064
L032
L001
R096
R127
Right
OSC1
Left
Left
Center
Center
OSC2
Right
Pan (CC#10)
C064
L032
OSC1:
Amp1 Pan=L032
OSC2:
Amp2 Pan=R096
L001
R096
R127
Right
OSC1
Left
Left
Center
Center
OSC2
Right
Pan (CC#10)
C064
L032
L001
OSC1:
Amp1 Pan=C064
OSC2:
Amp2 Pan=C064
R096
R127
Right
RND:
The pan position will change randomly at each note ‐ on.
If
Status
(Seq 3–1(2)c) is INT or BTH, CC#10 Pan can be received to control the panning. When receiving CC#10, a value of 0 or 1 is far left, 64 is center, and 127 is far right. When you change the song or return to the beginning of the song, tracks whose
Status
is EXT, EX2 or BTH will transmit the pan you specify here as a MIDI message (except for RND). (See Global P1: MIDI, SEQ
Mode “Track MIDI Out” on page 200)
Volume [000…127]
Here, you can set the volume of each MIDI track.
When
Status
(Seq 3–1(2)c) is INT or BTH, CC#7 Volume can be received to control the volume. The volume of a track is determined by multiplying the MIDI Volume
(CC#7) and Expression (CC#11) values. When you change the song or return to the beginning of the song, tracks whose
Status
is EXT, EX2 or BTH will transmit the volume you specify here as a MIDI Volume
message. (See Global P1: MIDI, SEQ Mode “Track MIDI
Out” on page 200)
Track 02…08, 09…16 (Track Number):
For more information, please see “Track 01 (Track
Number):” above.
V
0–3(4): Menu Command
• 0:
Memory Status
see p. 163
• 1:
Exclusive Solo
see p. 64
• 2:
Rename Song
see p. 163
• 3:
Delete Song
see p. 163
• 4:
Copy From Song
see p. 163
• 5:
Load Template Song
see p. 163
• 6:
Save Template Song (Save as User Template Song)
see p. 164
• 7:
FF/REW Speed
see p. 164
• 8:
Set Location (Set Location for Locate Key)
see p. 164
• 9:
GM Initialize
see p. 165
• 10:
Copy from Combination
see p. 166
• 11:
Copy from Program
see p. 167
For more information, please see “Sequencer: Menu
Command” on page 163.
113
114
Sequencer mode
0–5: Arpeggiator A,
0–6: Arpeggiator B
Here, you can make arpeggiator settings for the song. A song can run two arpeggiators simultaneously.
Arpeggiator parameters can be edited in P7: Arpeggiator/
Drum Track, but certain major parameters can be edited in these pages as well. You can edit these parameters in realtime, for example by changing the arpeggio pattern while playing in Sequencer P0–1:Play/REC.
You can also use the TEMPO knob and the arpeggio control
(ARP) GATE knob, VELOCITY knob, SWING knob, and
STEP knob to control the arpeggiator in realtime.
0–5a
0–5
Menu
0–5b
0–5c
0–5d
0–5(6)a: Track Select, Tempo, RPPR
Track Select
(Tempo)
[Track01…16, Master Track]
[040.00…300.00, EXT]
RPPR [Off, On]
Here, you can select the track, specify the tempo that will control the song or arpeggiator etc., and turn RPPR on/off.
For more information, please see “0–1(2)a: Location, Meter,
Tempo, Tempo Mode, Song Select, Track Select, Reso, RPPR” on page 109.
0–5(6)b: Arp Controls
This shows the value of each parameter for the ARP assignments of the REALTIME CONTROL knobs. The arpeggio controls allow you to use the four knobs to control the two arpeggiators in real time.
[GATE] [–64…+00…+63]
[VEL.](Velocity)
[SWING]
see p.54, p.121
[STEP]
see p.121
[–64…+00…+63]
[–64…+00…+63]
[–64…+00…+63]
0–5(6)c: Arpeggiator Run, Track assign
Arpeggiator Run A, B
When the ARP button is on, the arpeggiator(s) you checked here will run if they are assigned to a timbre by
Arpeggiator
Assign
(7–1(2)c).
When the arpeggiator is on, these check boxes let you turn A and B on/off.
This parameter can also be set from P7: ARP/DT page
Arpeggiator Run A, B
.
Track assign
This indicates the arpeggiator A and B assignment status for each track 1–8. These settings are made in
Arpeggiator
Assign
(Seq 7–1(2)c).
0–5(6)d: Arpeggiator A (B)
Pat (Pattern) [P0…P4, U0000(INT)…U0899(INT),
U0900(USER)…U1027(USER)]
Octave
Reso (Resolution)
[1, 2, 3, 4]
[
,
, , , , , , ]
[Off, On] Sort
Latch
Key Sync.
Keyboard
[Off, On]
[Off, On]
[Off, On]
Arpeggio Pattern Preview
Set the various parameters of the combination arpeggiator.
For more information, please see “COMBI P7: ARP/DT
(Arpeggiator/Drum Track)” on page 91.
These parameters can also be set from 7–3(4): Arpeggiator
A(B) Setup.
V
0–5(6): Menu Command
• 0:
Memory Status
see p. 163
• 1:
Exclusive Solo
see p. 64
• 2:
Rename Song
see p. 163
• 3:
Delete Song
see p. 163
• 4:
Copy From Song
see p. 163
• 5:
Load Template Song
see p. 163
• 6:
Save Template Song (Save as User Template Song)
see p. 164
• 7:
FF/REW Speed
see p. 164
• 8:
Set Location (Set Location for Locate Key)
see p. 164
• 9:
GM Initialize
see p. 165
• 10:
Copy from Combination
see p. 166
• 11:
Copy from Program
see p. 167
• 12:
Copy Arpeggiator
see p. 167
For more information, please see “Sequencer: Menu
Command” on page 163.
SEQ P0: Play/REC 0–7: Tone Adjust
0–7: Tone Adjust
0–7a
0–7b
0–7c
0–7
Menu
Tone Adjust provides two important features:
• The Tone Adjust parameter lets you edit the principal
Program parameters.
• It lets you modify Programs, including everything from subtle tweaks (like changing LFO speeds) to dramatic changes (such as selecting a different Multisample). Any changes that you make are stored with the Song, and do not alter the original Program.
Each of the sixteen tracks has its own set of tone adjust parameters.
For more information, see:
• “Absolute (Abs), Relative (Rel), Meta parameter” on page 7
• “Tone Adjust and MIDI SysEx” on page 7
• “Interaction between Tone Adjust and MIDI CCs” on page 8
Saving Tone Adjust Edits
In Program mode, when you make edits via Tone Adjust and then save the results, the Program data is changed just
as if you’d edited the internal parameters directly. For more information, please see “Saving Tone Adjust Edits” on page 7.
In Sequencer mode, however, all Tone Adjust edits are stored within the Song; the Program itself is not changed.
This lets you alter the way that a Program sounds in one specific Song without affecting the way that it sounds in
Program mode, or in any other Combis or Songs.
0–7a: Track Select, Tempo, RPPR
For more information, please see “0–1: Program T01–08, 0–2:
Program T09–16” on page 109.
0–7b: Track Select, Selected parameter information
Track select
Track [1…16]
This selects the track whose Tone Adjust parameters you wish to adjust. You can switch back and forth between the different tracks as much as you like, without losing your edits.
Auto Load (Auto Load PRG) [Off, On]
When you first load a Program into a track, this parameter determines whether or not the Program’s Tone Adjust settings will be loaded as well.
These settings include the parameters assigned to each slider and switch in the display, along with the on/off state assigned to Absolute parameters.
The resulting effect of Tone Adjust settings that were saved in Program mode is saved with the program, regardless of the
Auto Load PCG
setting. The program will sound according to its settings, regardless of whether Tone Adjust settings were saved.
Once the Program has been loaded, you can change any or all of the Tone Adjust settings as desired. All such edits are stored in the Song, without affecting the original Program.
If
Auto Load PRG
is
On
, Tone Adjust settings will be automatically loaded along with the Program.
If
Auto Load PRG
is
Off
, the Tone Adjust settings of the program will not be loaded; the program settings prior to editing the Tone Adjust settings will remain.
Selected parameter information
This status line shows detailed, read ‐ only information about the currently selected Tone Adjust parameter.
Control Assignment Value Type Stored Value
Control [SW1…8, SL1…8]
This is the switch or slider in the display that is assigned to
Tone Adjust parameters.
Assignment [List of Tone Adjust assignments]
This is the full name of the parameter assigned to the switch or slider in the display. You can change this using the
Assign
parameter, below.
Value
This shows the current value of the parameter. The range of values will vary depending on the parameter assigned to the switch or slider.
Type [Rel, Abs, Meta]
This shows the type of the parameter, which relates to how
edits to the parameter are saved. For more information, please see “Absolute (Abs), Relative (Rel), Meta parameter” on page 7.
Stored Value
This shows the original value of the parameter, before the effects of Tone Adjust. It applies only to Tone Adjust parameters which control a single Program parameter.
If you un ‐ assign a parameter from a control, it will revert to this value.
0–7c: Tone Adjust
Here, you can assign Tone Adjust parameters to the switches and sliders in the display.
Switches 1…8
Tone Adjust switches act a little differently than sliders in the display.
When a switch is assigned to a
Relative
parameter, or an
Absolute
parameter with more than two states:
Switch On =
On Value
(see below)
Switch Off = the Program’s stored value
When a switch is assigned to a two ‐ state
Absolute
parameter, such as
Hold
, the switch status directly reflects the parameter value:
Switch On =
On
Switch Off =
Off
115
Sequencer mode
116
Assign
On/Off
Value
Assign
This assigns Tone Adjust parameters to the switches in the display. For a full list of the available choices, please see
“Common Tone Adjust Parameters” on page 9 and “Tone
Adjust Parameters” on page 10.
On Value [Depends on parameter]
The parameter is set to this value when the switch is On.
When the switch is assigned to a two ‐ state
Absolute
parameter, such as
Hold
, this will always be the same as the
Switch Status
(see below).
Switch Status [Off, On]
This simply shows whether the switch is On or Off.
Sliders 1–8
Assign
This assigns Tone Adjust parameters to the sliders in the display. For a full list of the available choices, please see
“Common Tone Adjust Parameters” on page 9 and “Tone
Adjust Parameters” on page 10.
Assignments are exclusive
Per ‐ Oscillator parameters apply to OSC1 and 2 individually, and are marked as such: OSC1 and OSC2.
Each slider can be assigned to only one parameter, and each parameter can be assigned to only one slider.
To swap a parameter from one slider to another, you’ll need to first un ‐ assign it from the old slider, and then assign it to the new slider.
Value
This shows the current value of the parameter. The range of values will vary depending on the parameter assigned to the control.
V
0–7: Menu Command
• 0:
Memory Status
see p. 163
• 1:
Exclusive Solo
see p. 64
• 2:
Rename Song
see p. 163
• 3:
Delete Song
see p. 163
• 4:
Copy From Song
see p. 163
• 5:
Load Template Song
see p. 163
• 6:
Save Template Song (Save as User Template Song)
see p. 164
• 7:
FF/REW Speed
see p. 164
• 8:
Set Location (Set Location for Locate Key)
see p. 164
• 9:
GM Initialize
see p. 165
• 10:
Copy from Combination
see p. 166
• 11:
Copy from Program
see p. 167
• 12:
Copy Tone Adjust
see p. 167
• 13:
Reset Tone Adjust
see p. 167
For more information, please see “Sequencer: Menu
Command” on page 163.
0–8: Preferences
0–8a
0–8b
0–8c
0–8
Menu
Here, you can specify the realtime recording method, adjust levels and make other settings for audio recording, and adjust the metronome settings.
0–8a: Location, Meter, Tempo, Tempo
Mode, Song Select, Track Select,
Reso, RPPR
For more information, please see “0–1: Program T01–08, 0–2:
Program T09–16” on page 109.
Selected Track Info:
This displays information about the currently selected MIDI track. (See 0–1(2)a)
0–8b: Recording Setup
Selects the method of realtime recording.
Overwrite
When recording for the first time, you will normally select this method.
If you use this method to record on a track on which data has already been recorded, all previous data will be replaced from the measure at which you began recording through all subsequent measures.
With this method, the newly recorded data overwrites musical data previously recorded on that track.
Normally you will use this method to record, and then modify the results by using other types of realtime recording or MIDI event editing.
1. Use Track Select to choose the track that you want to record.
2. Set the Recording Setup to Overwrite.
3. In “Location,” specify the location at which you wish to begin recording.
4. Press the REC ( ) button, and then press the START/
STOP ( ) button.
If the
Metronome Setup
is still set to the default settings, the metronome will sound for a two ‐ measure pre ‐ count, and then recording will begin.
Play the keyboard and move the controllers (such as the joystick) to record your performance.
5. When you finish playing, press the START/STOP ( button.
)
Recording will end, and the location will return to the point at which you begin recording.
SEQ P0: Play/REC 0–8: Preferences
If you press the PAUSE ( ) button instead of the START/
STOP ( ) button, recording will pause. When you press the PAUSE ( ) button once again, recording will resume. When you are finished, press the START/STOP (
) button to stop recording.
Overdub
Select this method when you wish to add data to a previously ‐ recorded track.
With this method, the newly recorded musical data is added to the existing data.
When you perform overdub recording on a previously ‐ recorded track, the newly recorded data will be added to the previously ‐ recorded data.
It is best to select this mode if you will be recording additional control data, recording a drum pattern, or recording the tempo in the master track. With this mode, data can be added without erasing the existing performance data.
1. Use Track Select to choose the track that you want to record.
2. Set the Recording Setup to Overdub.
3. For the rest of the procedure, please see steps 3–5 of
“Overwrite.”
Manual Punch In
Select this method when you wish to use the REC ( ) button or a foot switch to re ‐ record selected portions of a previously ‐ recorded track.
While the song is playing, you can press the REC ( ) button or a connected pedal switch at the desired location to start or stop recording. With this method, the musical data previously on the track is overwritten by the newly recorded data.
1. Use Track Select to select the track that you want to record.
2. Set the Recording Setup to Manual Punch In.
3. In “Location,” specify a location several measures earlier than the point at which you wish to begin recording.
4. Press the START/STOP ( ) button.
Playback will begin.
5. At the point at which you wish to begin recording, press the REC ( ) button.
Recording will begin. Play the keyboard and operate controllers such as the joystick to record your performance.
6. When you finish recording, press the REC ( ) button.
Recording will end (playback will continue).
Note:
Instead of pressing the REC ( ) button in steps 5 and 6, you can use a foot switch connected to the
ASSIGNABLE SWITCH jack.
Set the Global P2: Controllers page
Foot Switch Assign
to
Song Punch In/Out.
7. Press the START/STOP ( ) button.
Playback will stop, and you will return to the location that you specified in step 3.
Auto Punch In
Select this method when you wish to automatically re ‐ record selected portions of a previously ‐ recorded track.
Recording will occur only over the specified area, rewriting it with the newly recorded data.
First you must specify the area that will be re ‐ recorded.
Then recording will automatically start and end within the specified area. With this method, the musical data previously on the track is overwritten by the newly recorded data.
1. Use Track Select to choose the track that you want to record.
2. Set the Recording Setup to Auto Punch In.
3. In “M (Auto Punch In Start Measure), “M (Auto Punch
In End Measure)” specify the area that you wish to record.
For example, if you specify M005–M008, recording will occur only from measure 5 to measure 8.
4. In “Location,” specify a location several measures before the point at which you wish to begin recording.
5. Press the REC ( ) button, and then press the START/
STOP ( ) button.
Playback will begin.
When you reach the starting location you specified in step 3, recording will begin. Play the keyboard and operate controllers such as the joystick to record your performance.
When you reach the ending location you specified in step 3, recording will end. (Playback will continue.)
6. Press the START/STOP ( ) button.
Playback will stop, and you will return to the location you specified in step 4.
Auto Punch In Start Measure
Auto Punch In End Measure
[M001…M999]
[M001…M999]
When
Recording Setup
is set to Auto Punch In, specify the measures at which recording will start and end.
Loop All Tracks
Select this method when you wish to repeatedly record a specified area of a track, and continue adding data. This is suitable for creating drum patterns, etc.
If
Multi REC
available.
is
checked
, this parameter will not be
This method lets you continue recording as you add musical data.
The specified region can be recorded repeatedly. This is ideal when recording drum phrases, etc.
Use
Track Select
to select the track that you want to record.
1. Set the Recording Setup to Loop All Tracks.
2. If Multi REC is checked, it will not be possible to select
Loop All Tracks.
3. In “M (Loop Start Measure), “M (Loop End Measure)” specify the area that you wish to record.
For example, if you specify M004–M008, recording will occur repeatedly (as a loop) from measure 4 to measure 8.
117
Sequencer mode
118
4. In “Location,” specify a location several measures earlier than the point at which you wish to begin recording.
5. Press the REC ( ) button, and then press the START/
STOP ( ) button.
Playback will begin. When you reach the starting location you specified in step 3, recording will begin. Play the keyboard and operate controllers such as the joystick to record your performance.
When you reach the ending location you specified in step 3, you will return to the starting location, and continue recording.
6. The musical data that is loop-recorded will be added to the previously-recorded data.
You can also erase specific data while you continue loop recording. This is useful if, for example, you need to delete a mistake without interrupting the flow of the recording.
If you press the REC ( ) button during loop recording, all musical data will be removed from the currently selected track as long as you continue pressing the switch.
By checking the
Remove Data
check box you can erase only the specified data. During loop recording, press the note that you wish to delete, and only the data of that note number will be deleted from the keyboard as long as you continue pressing that note.
Similarly, bender data will be deleted as long as you tilt the joystick in the X (horizontal) direction, and aftertouch data will be deleted as long as you apply pressure to the keyboard.
When you are once again ready to record musical data, uncheck the
Remove Data
check box.
7. Press the START/STOP ( ) button.
Playback will end, and you will return to the recording start location that you specified in step 4.
If Loop All Tracks is selected, normal playback will be looped as well.
Loop Start Measure
Loop End Measure
[M001…M999]
[M001…M999]
Specifies the range of measures over which recording will repeat when
Recording Setup
is set to Loop All Tracks.
Remove Data [Off, On]
Use this to delete unwanted MIDI data that you recorded while using Loop All Tracks. This is available when
Recording Setup
is set to Loop All Tracks.
On (checked):
You can delete unwanted MIDI data while recording with Loop All Tracks. During recording, press the key (note number) that corresponds to the MIDI note data you wish to delete. All occurrences of that note number will be deleted for the time that you continue holding down the key.
Controller data can also be erased in a similar way. For example while you move and hold the joystick in the X
(horizontal) direction, bender data will be erased. This applies to Joystick+Y (CC#01)/–Y (CC#02), Joystick X (Pitch
Bend), and Damper (CC#64).
Also, you can press and hold down the REC ( ) button to delete all MIDI data for as long as the key is held.
Multi REC [Off, On]
On (checked):
Multi ‐ track recording setup is enabled. Select this if you want to record two or more tracks simultaneously.
Use MIDI multi ‐ track recording if you want to simultaneously record multiple MIDI tracks of different channels, such as when recording the output of the drum track, arpeggiator or RPPR functions, or when recording the output of an external multi ‐ track sequencer.
If the Multi REC box is checked, the
Play/Rec/Mute
status of the track you select in
Track Select
will be set to REC; press the
Play/Rec/Mute
button of the track(s) you want to record so that they indicate REC. (The button indication will change in the order of Play
→
Rec
→
Mute.)
Regardless of the
Track Select
(Seq 0–1(2)a) setting, data will be recorded on the MIDI tracks that are set to REC.
MIDI data will be routed to the tracks with a corresponding
MIDI channel.
For details on how to record from the arpeggiator or an external multi ‐ track sequencer onto multiple tracks of
different MIDI channels, please see “Synchronizing the playback of the Arpeggiator, Drum Track function or sequencer” on page 367.
Note:
If you’re recording data from an external multi ‐ track sequencer, set
MIDI Clock
(Global 1–1a) to External MIDI so that the KROME will synchronize to your external sequencer. Tempo changes cannot be recorded.
Off (unchecked):
Single track recording setup will be selected. Recording will occur on the track selected by
Track
Select
.
Multi REC.
cannot be selected if
Recording Setup
is set to Loop All Tracks.
1. Make the desired Recording Setup settings.
You can record using Overwrite, Overdub, Manual Punch
In, or Auto Punch In.
2. In “Recording Setup,” check “Multi REC.”
3. Use “Location” to specify the measure at which recording will begin.
4. Press the REC ( ) button.
5. For the track you want to record, press Play/Rec/Mute to make it indicate Rec.
6. Press the START/STOP ( ) button.
With the default settings for
Metronome Setup
, the metronome will sound for a two ‐ measure pre ‐ count, and then recording will begin. Now you can perform on the keyboard and controllers, and use the arpeggiator or RPPR functions if desired.
7. Press the START/STOP ( ) button.
Playback will stop, and you will return to the location specified in step 3.
SEQ P0: Play/REC 0–9: Play Loop T01–08, 0–10: Play Loop T09–16
0–8c: Metronome Setup
Here, you can make metronome settings.
Sound [Only REC, REC & Play, Off]
Only REC:
The metronome will sound only during recording.
REC & Play:
The metronome will sound during recording and playback.
Off:
The metronome will not sound during playback or recording. However, the pre ‐ count metronome will sound before recording begins.
Level
Sets the volume of the metronome.
[000…127]
Bus (Output) Select [L/R, L, R]
Selects the output destination of the metronome sound.
L/R:
Output from AUDIO OUTPUT L/Mono and R.
L:
Output from AUDIO OUTPUT L/Mono.
R:
Output from AUDIO OUTPUT R.
Precount [Measure] [0…2]
Specifies the pre ‐ count that will occur before recording begins.
With a setting of 0, recording will begin the instant you press the START/STOP ( ) button (after first pressing the REC ( ) button).
V
0–8: Menu Command
• 0:
Memory Status
see p. 163
• 1:
Exclusive Solo
see p. 64
• 2:
Rename Song
see p. 163
• 3:
Delete Song
see p. 163
• 4:
Copy From Song
see p. 163
• 5:
Load Template Song
see p. 163
• 6:
Save Template Song (Save as User Template Song)
see p. 164
• 7:
FF/REW Speed
see p. 164
• 8:
Set Location (Set Location for Locate Key)
see p. 164
• 9:
GM Initialize
see p. 165
• 10:
Copy from Combination
see p. 166
• 11:
Copy from Program
see p. 167
For more information, please see “Sequencer: Menu
Command” on page 163.
0–9: Play Loop T01–08,
0–10: Play Loop T09–16
0–9a
0–9b
0–9
Menu
When playing or recording a song, you can independently loop the MIDI tracks.
0–9(10)a: Location, Meter, Tempo, Tempo
Mode, Song Select, Track
Select, Reso, RPPR
For more information, please see “0–1: Program T01–08, 0–2:
Program T09–16” on page 109.
0–9(10)b: Play Loop
Selected Track Info
This displays information about the currently selected MIDI
track. For more information, please see “0–1(2)b: Track
Program Select” on page 111.
Track 01 (Track Number):
Category
Indicates the category.
[Category Name]
Track Play Loop
Specifies looping for a MIDI track.
[Off, On]
On (checked):
That track will loop between
Loop Start
Measure
and
Loop End Measure
.
Loop Start Measure
Specifies the first measure of the loop.
[001…999]
Loop End Measure
Specifies the last measure of the loop.
[001…999]
Play Intro [Off, On]
On (checked):
After the measures before the specified
Loop
Start Measure
are played once, the region of
Loop Start
Measure
–
Loop End Measure
will be played repeatedly.
For example, you can use this on a drum track to make it play a fill ‐ in and then begin looping.
Off (unchecked):
Playback will begin from the
Loop Start
Measure
, and will begin looping immediately.
This will be valid if
Track Play Loop
is checked and
Loop Start Measure
is set to other than 001.
119
Sequencer mode
120
Example)
When “Play Intro” is checked
Track 1 will loop as follows.
M001 – M002 – M003 – M004 – M003 – M004 –M003 –
M004…
When “Play Intro” is not checked
Track 1 will loop as follows.
M003 – M004 – M003 – M004 – M003 – M004 – M003 –
M004…
In this way, you can use
Track Play Loop
to make the realtime recording process more efficient.
Track 02…08, 09…16 (Track Number):
For more information, please see “Track 01 (Track
Number):” above.
V
0–9(10): Menu Command
• 0:
Memory Status
see p. 163
• 1:
Exclusive Solo
see p. 64
• 2:
Rename Song
see p. 163
• 3:
Delete Song
see p. 163
• 4:
Copy From Song
see p. 163
• 5:
Load Template Song
see p. 163
• 6:
Save Template Song (Save as User Template Song)
see p. 164
• 7:
FF/REW Speed
see p. 164
• 8:
Set Location (Set Location for Locate Key)
see p. 164
• 9:
GM Initialize
see p. 165
• 10:
Copy from Combination
see p. 166
• 11:
Copy from Program
see p. 167
For more information, please see “Sequencer: Menu
Command” on page 163.
Controls
REALTIME CONTROLS lets you use knobs [1]–[4] to modify the parameters of the track’s program or the effects.
You can also use these knobs to control the arpeggiators.
When you use a knob, the display will show the controller’s function and value. Use the SELECT button to change the knob functions.
In TONE, the functions assigned to knobs 1–4 are fixed.
In USER, you can assign a variety of modulation functions to knobs 1–4. To assign functions, use the P1: Controllers
Setup page (see p.122).
Realtime Controls
The Realtime Controls TONE knob functions (TONE
[CUTOFF]–TONE [RELEASE]) are fixed. You can assign a variety of functions to Realtime Controls USER knobs 1–4
(USER [1]–USER [4]). MIDI control changes are assigned for each function.
When you move a knob, it sends out the corresponding
MIDI CC.
When you operate a knob, the corresponding MIDI control change message will be transmitted on the
Track Select
MIDI channel.
Most of these functions adjust (scale) the parameter settings of the track programs. Unless otherwise noted, “scaling” means that the parameters are at their programmed values when the controller is at 64, at their minimum when the controller is at 0, and at their maximum when the controller is at 127. For another look at this, please see the diagram below.
CC scaling of parameters
99
Parameter
Value
As Programmed
00
0 64
CC Value
127
TONE [CUTOFF]: Flt Fc (Cutoff ) [000…127]
This slider scales the cutoff frequencies of Filters A and B, and transmits and receives MIDI CC #74.
TONE [RESONANCE]: Flt Reso (Resonance)
[000…127]
This slider scales the resonance of Filters A and B, and transmits and receives MIDI CC #71.
TONE [EG INT]: Flt EG (Filter EG Intensity)
[000…127]
This slider scales the effect of the Filter EG on the cutoff frequencies of Filters A and B. It also transmits and receives
MIDI CC#79.
TONE [RELEASE]: EG Rel (EG Release) [000…127]
This slider scales the release time of the Filter and Amp EGs, and transmits and receives MIDI CC#72.
USER [1]…USER[4] [000…127]
You can set Realtime Controls USER knobs 1–4 to a wide variety of modulation functions, using the P1: Controllers–
Controllers Setup page.
Many of the functions scale a particular set of Program parameters. All of the settings also correspond to MIDI messages usually CCs.
Arpeggiator Controls
Arpeggio control lets you use the four knobs to control the two arpeggiators in realtime.
The functions of knobs 1–4 are fixed. The knobs will control the duration of the arpeggiated notes, their velocity, the swing, and the step.
ARP [GATE] [–64…+00…+63]
Adjusts the duration (gate time) of the arpeggiated notes
(See “Gate” on page 54).
ARP [VELOCITY] [–64…+00…+63]
Adjusts the velocity of the arpeggiated notes (See “Velocity” on page 54).
ARP [SWING] [–64…+00…+63]
Adjusts the degree of shuffle for the arpeggio pattern (See
“Swing” on page 54).
ARP [STEP] [–64…+00…+63]
This affects the length and resolution of the arpeggio pattern.
Turning the knob toward the left will shorten the pattern’s length (
Length
) in units of one half. Turning the knob toward the right will shorten the interval between arpeggiated notes (
Resolution
) in units of one half. When the knob is in the center (12 o’clock), the number of steps and the speed will be as specified by the
Length
and
Resolution
(See “Resolution*” on page 54).
SEQ P0: Play/REC Controls
121
122
Sequencer mode
SEQ P1: Controllers
1–1: Setup
1–1a
1–1b
1–1c
1–1
Menu
Here, you can assign the functions performed by SW1 and
SW2, and by knobs 1–4 when Realtime Controls USER is selected.
When you operate these knobs during recording, the MIDI messages assigned to them will be recorded.
Note:
The Panel Switch Assign setting of the program assigned to each track will have no effect.
1–1a: Track Select, Tempo, RPPR, Track
Info, Selected Track Info
Track Select
(Tempo)
[Track01…16, Master Track]
[040.00…300.00, EXT]
RPPR [Off, On]
Here, you can select the track, specify the tempo that will control the arpeggiator etc., and turn RPPR on/off.
For more information, please see “0–1(2)a: Location, Meter,
Tempo, Tempo Mode, Song Select, Track Select, Reso, RPPR” on page 109.
Selected Track Info
This area shows detailed information about its track assignments.
For more information, please see “Selected Track Info” on page 111.
1–1b: Panel Switch 1/2 Assign
SW (SW1 Assign) [Off, …, JS-Y Lock]
This assigns the function of SW1. For more information, please see “List of SW 1/2 assignments” on page 348.
Note:
If you change the function setting, the status is reset to off.
Note:
If the on/off status of the SW1, SW2 switches is memorized when you save it.
Mode (SW1 Mode) [Toggle, Momentary]
This specifies the on/off operation when you press the SW1 switch.
Toggle:
The function will alternate between on and off each time you press the SW1 switch.
Momentary:
The function will be on only while you continue holding down the SW1 switch.
SW2 (SW2 Assign)
Mode (SW2 Mode)
[Off, …, JS-Y Lock]
[Toggle, Momentary]
This assigns the function of SW2. The functions that can be assigned to SW2 are the same as for SW1, with the substitution of SW2 Mod. (CC#81) instead of the SW1’s SW1
Mod. (CC#80).
1–1c: Realtime Controls Knob Assign
Here, you can assign the functions (mainly types of control change) that knobs 1–4 will have when RealTime Controls
USER. (See “Realtime Controls Knobs 1–4 Assignments” on page 348.)
The functions you assign here are active when you use the
SELECT button to select USER, and operate knobs 1–4.
USER [1]
USER [2]
USER [3]
USER [4]
[Off, …, MIDI CC#119]
[Off, …, MIDI CC#119]
[Off, …, MIDI CC#119]
[Off, …, MIDI CC#119]
V
1–1: Menu Command
• 0:
Memory Status
see p. 163
• 1:
Exclusive Solo
see p. 64
• 2:
Rename Song
see p. 163
• 3:
Delete Song
see p. 163
• 4:
Copy From Song
see p. 163
• 5:
Load Template Song
see p. 163
• 6:
Save Template Song (Save as User Template Song)
see p. 164
• 7:
FF/REW Speed
see p. 164
• 8:
Set Location (Set Location for Locate Key)
see p. 164
• 9:
GM Initialize
see p. 165
• 10:
Copy from Combination
see p. 166
• 11:
Copy from Program
see p. 167
For more information, please see “Sequencer: Menu
Command” on page 163.
SEQ P2: EQ 2–1: Trim T01–08, 2–2: Trim T09–16
SEQ P2: EQ
2–1: Trim T01–08,
2–2: Trim T09–16
2–1a
2–1b
2–1c
2–1
Menu
Here, you can set the signal level that enters the EQ of tracks
1–8 and 9–16.
2–1(2)a: Track Select, Tempo, RPPR
Track Select
(Tempo)
[Track01…16, Master Track]
[040.00…300.00, EXT]
RPPR [Off, On]
Here, you can select the track, specify the tempo that will control the arpeggiator etc., and turn RPPR on/off.
For more information, please see “0–1(2)a: Location, Meter,
Tempo, Tempo Mode, Song Select, Track Select, Reso, RPPR” on page 109.
2–1(2)b: Track Info
For more information, please see “0–1(2)b: Track Program
Select” on page 111.
2–1(2)c: Trim
Track 01 (Track Number):
Auto Load Prog EQ [Off, On]
When you first load a Program into a Track, this parameter determines whether or not the Program’s EQ settings will be loaded as well.
Once the Program has been loaded, you can change any or all of the EQ settings as desired. All such edits are stored in the Song, without affecting the original Program.
Regardless of this setting, subsequent edits to the Program’s
EQ in Program mode will not affect the Song.
On
: the Program’s EQ settings will be loaded automatically along with the Program. This is the default setting.
Off
: the Program’s EQ settings won’t be loaded. Use this if you’ve set up the EQ in a specific way, and then want it to stay unchanged while you try out different Programs.
Bypass [Off, On]
If this is
On (checked)
, all of the EQ will be disabled, including
Input Trim
. Bypass can be convenient for comparing the results of the EQ with the original signal.
Input Trim [00…99]
This controls the volume level going into the EQ. Note that this parameter uses a linear scale; 50 is equivalent to –6 dB,
25 is the same as –12 dB, and so on.
High settings of the
Low
,
Mid
, and
High Gain
(Seq 2–3(4)a) controls can cause substantial increases in the overall level.
You can compensate for this by turning down the input trim.
Track 02…08, 09…16 (Track Number):
Here, you can set the parameters for MIDI tracks 2–8 and 9–
16. They are the same as for track 1. For more information, please see “Track 01 (Track Number):” above.
V
2–1(2): Menu Command
• 0:
Memory Status
see p. 163
• 1:
Exclusive Solo
see p. 64
• 2:
Rename Song
see p. 163
• 3:
Delete Song
see p. 163
• 4:
Copy From Song
see p. 163
• 5:
Load Template Song
see p. 163
• 6:
Save Template Song (Save as User Template Song)
see p. 164
• 7:
FF/REW Speed
see p. 164
• 8:
Set Location (Set Location for Locate Key)
see p. 164
• 9:
GM Initialize
see p. 165
• 10:
Copy from Combination
see p. 166
• 11:
Copy from Program
see p. 167
For more information, please see “Sequencer: Menu
Command” on page 163.
123
Sequencer mode
2–3: EQ T01–08,
2–4: EQ T09–16
2–3a
2–3b
2–3c
2–3
Menu
124
Here, you can adjust the settings for the mid ‐ sweepable three ‐ band EQ for each MIDI track.
2–3(4)a: Track Select, Tempo, RPPR
2–3(4)b: Track Info
For more information, please see “2–1: Trim T01–08, 2–2:
Trim T09–16” on page 123.
2–3(4)c: 3 Band Parametric EQ
Track 01 (Track Number):
High Gain [dB] [–18.0…+00.0…+18.0]
This controls the gain of the 10 kHz High Shelf EQ, in increments of 0.5 dB.
Mid Freq [Hz] (Mid Frequency) [100…10k]
This sets the center frequency for the Mid sweep EQ.
Mid Gain [dB] [–18.0…+00.0…+18.0]
This controls the gain of the Mid Sweep EQ, in increments of
0.5 dB.
Low Gain [dB] [–18.0…+00.0…+18.0]
This controls the gain of the 80 Hz Low Shelf EQ, in increments of 0.5 dB.
Track 02…08, 09…16 (Track Number):
These parameters adjust the three ‐ band EQ (with sweepable mid range) for MIDI tracks 2–8 and 9–16. They are the same as for track 1. For more information, please see “Track 01
(Track Number):” above.
V
2–3(4): Menu Command
• 0:
Memory Status
see p. 163
• 1:
Exclusive Solo
see p. 64
• 2:
Rename Song
see p. 163
• 3:
Delete Song
see p. 163
• 4:
Copy From Song
see p. 163
• 5:
Load Template Song
see p. 163
• 6:
Save Template Song (Save as User Template Song)
see p. 164
• 7:
FF/REW Speed
see p. 164
• 8:
Set Location (Set Location for Locate Key)
see p. 164
• 9:
GM Initialize
see p. 165
• 10:
Copy from Combination
see p. 166
• 11:
Copy from Program
see p. 167
For more information, please see “Sequencer: Menu
Command” on page 163.
SEQ P3: Track Param (Track Parameters) 3–1: MIDI T01–08, 3–2: MIDI T09–16
SEQ P3: Track Param (Track Parameters)
3–1: MIDI T01–08,
3–2: MIDI T09–16
3–1a
3–1b
3–1c
3–1
Menu
Here, you can make MIDI ‐ related settings for each MIDI track.
3–1(2)a:Location, Meter, Tempo, Tempo
Mode, Song Select, Track Select,
Reso, RPPR
3–1(2)b:Track Info
For more information, please see “0–1(2)a: Location, Meter,
Tempo, Tempo Mode, Song Select, Track Select, Reso, RPPR” on page 109.
For more information, please see “2–1: Trim T01–08, 2–2:
Trim T09–16” on page 123.
3–1(2)c: MIDI
Track 01 (Track Number):
Status [Off, INT, BTH, EXT, EX2]
This sets whether the Track controls the internal sounds, external MIDI devices, or both.
When controlling external MIDI devices, it also allows you to choose the internal Bank Select numbers (as set by the front ‐ panel buttons), or use custom Bank Select settings to match the external device.
Off:
Use this to disable the Track. With this setting, the Track’s
Program will not sound, and MIDI data will not be transmitted.
INT:
The track will sound when you play back the performance data recorded on the MIDI track. If you use
Track Select
(Seq 0–1(2)a) to select a MIDI track that is set to
INT, the KROME’s sound generator will produce sound when played. MIDI data will not be transmitted to an external device.
BTH:
Both INT and EXT are operative. When the musical data recorded in the MIDI track is played back, or when you select a
MIDI track that is set to BTH and play the controllers of the
KROME, the internal tone generator of the KROME will sound, and MIDI data will also be transmitted to an external device.
EXT:
When the musical data recorded in the MIDI track is played back, or when you select a MIDI track that is set to
EXT and play the controllers of the KROME, MIDI data will be transmitted to an external device, but the internal tone generator of the KROME will not sound.
When you select another song or return to the beginning of the song, the program change, volume, panpot, portamento, sends 1 and 2, post IFX pan, and post IFX sends 1 and 2 of each MIDI track set to EXT will be transmitted via MIDI.
(See Global P1: MIDI, SEQ Mode “Track MIDI Out” on page 200)
EX2:
This enables you to specify a particular MIDI Bank
Select message for the Track, instead of automatically using the Bank of the selected KROME Program. Use the parameters below, labeled
Bank Select MSB (When Status
=EX2)
, to set the Bank Select message as desired. In other respects this is the same as EXT, described above.
MIDI data is transmitted and received on the MIDI channel that is specified separately for each MIDI track by the
MIDI Channel
.
Recorded data
Play Internal Sounds
Status
INT O
EXT, EX2 X
BTH O
internal
Sounds
X
O
O
MIDI Out
Received MIDI data
O
X
O
internal
Sounds
‐‐
‐‐
‐‐
MIDI Out
MIDI Channel [01…16]
Specifies the MIDI channel that the MIDI track will use to transmit and receive musical data. The MIDI channel you specify here will be the receive channel when
Status
is INT, the transmit channel when it is EXT or EX2, and the receive/ transmit channel when it is BTH. Tracks set to INT which have the same MIDI channel will sound and be controlled identically when they receive MIDI data or data from the sequencer tracks.
Bank Select MSB (When Status=EX2) [000…127]
Bank Select LSB (When Status=EX2) [000…127]
When
Status
is set to EX2, this sets the bank number that will be transmitted. When
Status
is other than EX2, this setting has no effect.
Track 02…08, 09…16 (Track Number):
These are the MIDI ‐ related settings for MIDI tracks 2–8 and
9–16. They are the same as for track 1. For more information, please see “Track 01 (Track Number):” above.
V
3–1(2): Menu Command
• 0:
Memory Status
see p. 163
• 1:
Exclusive Solo
see p. 64
• 2:
Rename Song
see p. 163
• 3:
Delete Song
see p. 163
• 4:
Copy From Song
see p. 163
• 5:
Load Template Song
see p. 163
• 6:
Save Template Song (Save as User Template Song)
see p. 164
• 7:
FF/REW Speed
see p. 164
• 8:
Set Location (Set Location for Locate Key)
see p. 164
• 9:
GM Initialize
see p. 165
• 10:
Copy from Combination
see p. 166
11:
Copy from Program
see p. 167
For more information, please see “Sequencer: Menu
Command” on page 163.
125
126
Sequencer mode
SEQ P3: Track Param (Track Parameters) 3–5: Pitch T01–08, 3–6: Pitch T09–16
127
128
Sequencer mode
SEQ P4: Zones/Delay 4–1: Key Zone T01–08, 4–2: Key Zone T09–16 (Keyboard Zones T01–08, T09–16)
SEQ P4: Zones/Delay
4–1: Key Zone T01–08,
4–2: Key Zone T09–16
(Keyboard Zones T01–08, T09–16)
4–1
Menu
4–1a
4–1b
4–1c
4–1d
Here, you can specify the key zones in which MIDI tracks 1–
8 and 9–16 will sound.
The top/bottom key settings specify the zone in which MIDI tracks 1–8 and 9–16 will sound, and the top/bottom slope settings specify the key range over which the volume will change starting from the top/bottom key.
For more information, please see “4–1: Key Zone T01–08, 4–
2: Key Zone T09–16 (Keyboard Zones T01–08, T09–16)” on page 129.
These settings do not affect MIDI transmission/ reception. All note data that is received will be recorded into the internal sequencer, and all note data from the internal sequencer or from the keyboard will be transmitted.
4–1(2)a: Zone Map
This area indicates the note and velocity ranges in which each MIDI track (1–16) will sound.
The display uses lines to indicate the range of notes and velocities that will sound, and show the slope portion in a different color.
4–1(2)b: Track Select, Tempo, RPPR
4–1(2)c: Track Info
For more information, please see “2–1: Trim T01–08, 2–2:
Trim T09–16” on page 123.
4–1(2)d: Keyboard Zones
Track 01 (Track Number):
Top Key [C–1…G9]
Specifies the top key (upper limit) of the notes that will sound for each MIDI track.
Top Slope [00, 01, 02, 03, 04, 06, 08, 10,
12, 18, 24, 30, 36, 48, 60, 72]
Specifies the range of keys (12 is one octave) over which the volume will be reached starting from the top key.
0:
The volume will be at the original level from the top key.
12:
The volume will increase gradually as you play downward, and will reach the original volume one octave below the top key.
72:
The volume will increase gradually as you play downward, and will reach the original volume six octaves below the top key.
Bottom Slope [00, 01, 02, 03, 04, 06, 08, 10,
12, 18, 24, 30, 36, 48, 60, 72]
Specifies the range of keys (12 is one octave) over which the volume will be reached starting from the bottom key.
0:
The volume will be at the original level from the bottom key.
12:
The volume will increase gradually as you play upward, and will reach the original volume one octave above the bottom key.
72:
The volume will increase gradually as you play upward, and will reach the original volume six octaves above the bottom key.
Bottom Key [C–1…G9]
Specifies the bottom key (lower limit) of the notes that will sound for each MIDI track.
How volume will change according to keyboard location
Volume
Bottom Slope
Bottom Key
Top Slope
Top Key
Key
Zone Map
Key zone display
Bottom Key
Bottom Slope Top Slope
Top Key
MIDI
Track 1
MIDI
Track16
C–1 E1
Velocity zone display
Top Velocity
G9
1 16
MIDI Track
Top Slope
Bottom Slope
Bottom Velocity
129
Sequencer mode
130
Note:
You can also set the note values and velocity values by holding down an edit cell or the ENTER button and playing a key (see OG p.10).
It is not possible to set the bottom key above the top key of the same track. Nor is it possible for the top and bottom slopes to overlap.
Track 02…08, 09…16 (Track Number):
These are the key zone settings for MIDI tracks 2–8 and 9–
16. They are the same as for track 1. For more information, please see “Track 01 (Track Number):” above.
V
4–1(2)
:
Menu Command
• 0:
Memory Status
see p. 163
• 1:
Exclusive Solo
see p. 64
• 2:
Rename Song
see p. 163
• 3:
Delete Song
see p. 163
• 4:
Copy From Song
see p. 163
• 5:
Load Template Song
see p. 163
• 6:
Save Template Song (Save as User Template Song)
see p. 164
• 7:
FF/REW Speed
see p. 164
• 8:
Set Location (Set Location for Locate Key)
see p. 164
• 9:
GM Initialize
see p. 165
• 10:
Copy from Combination
see p. 166
• 11:
Copy from Program
see p. 167
For more information, please see “Sequencer: Menu
Command” on page 163.
4–3: Vel Zone T01–08,
4–4: Vel Zone T09–16
(Velocity Zones T01–08, T09–16)
4–3
Menu
4–3a
4–3b
4–3c
4–3d
Here, you can set the Top/Bottom Velocity parameters to specify the range of velocities that will be sounded by MIDI tracks 1–8 and 9–16, and Top/Bottom Slope specify the range over which the volume will be adjusted.
For more information, please see “4–3: Vel Zone T01–08, 4–4:
Vel Zone T09–16 (Velocity Zones T01–08, T09–16)” on page 130.
These settings do not affect MIDI transmission/ reception. All note data that is received will be recorded into the internal sequencer, and all note data from the internal sequencer or from the keyboard will be transmitted.
It is not possible to set the bottom velocity greater than the top velocity for the same track. Nor can the top slope and the bottom slope overlap.
4–3(4)a: Zone Map
This area indicates the note and velocity ranges in which each MIDI track will sound.
For more information, please see “4–1(2)a: Zone Map” on page 129.
4–3(4)b: Track Select, Tempo, RPPR
4–3(4)c: Track Info
For more information, please see “2–1: Trim T01–08, 2–2:
Trim T09–16” on page 123.
4–3(4)d: Velocity Zones
Track 01 (Track Number):
Top Velocity [1…127]
Specifies the maximum velocity value that will sound each track.
Top Slope [0…120]
Specifies the number of velocity steps over which the original volume will be reached, starting from the Top
Velocity.
0:
The volume will be at the original value from the top velocity.
120:
The volume will decrease as the velocity approaches the top velocity.
Bottom Slope [0…120]
Specifies the number of velocity steps over which the original volume will be reached, starting from the Bottom
Velocity.
SEQ P4: Zones/Delay 4–5: Delay T01–08, 4–6: Delay T09–16
0:
The volume will be at the original value from the bottom velocity.
120:
The volume will decrease as the velocity approaches the bottom velocity.
Bottom Velocity [1…127]
Specifies the minimum velocity that will be sounded by each
MIDI track 1–16.
How volume will change according to keyboard location
Volume
4–5: Delay T01–08,
4–6: Delay T09–16
4–5a
4–5b
4–5c
4–5
Menu
Velocity
Bottom Slope
Top Slope
Bottom Velocity Top Velocity
Note:
You can also set the note values and velocity values by holding down an edit cell or the ENTER button and playing a key (see OG p.10).
Track 02…08, 09…16 (Track Number):
These are the velocity zone settings for MIDI tracks 2–8 and
9–16. They are the same as for track 1. For more information, please see “Track 01 (Track Number):” above.
V
4–3(4)
:
Menu Command
• 0:
Memory Status
see p. 163
• 1:
Exclusive Solo
see p. 64
• 2:
Rename Song
see p. 163
• 3:
Delete Song
see p. 163
• 4:
Copy From Song
see p. 163
• 5:
Load Template Song
see p. 163
• 6:
Save Template Song (Save as User Template Song)
see p. 164
• 7:
FF/REW Speed
see p. 164
• 8:
Set Location (Set Location for Locate Key)
see p. 164
• 9:
GM Initialize
see p. 165
• 10:
Copy from Combination
see p. 166
• 11:
Copy from Program
see p. 167
For more information, please see “Sequencer: Menu
Command” on page 163.
This specifies the time (delay) from when the MIDI tracks 1–
8 and 9–16 receive a note ‐ on message until the sound begins.
4–5(6)a: Track Select, Tempo, RPPR
4–5(6)b: Track Info
For more information, please see “2–1: Trim T01–08, 2–2:
Trim T09–16” on page 123.
4–5(6)c: Delay
Track 01 (Track Number):
Delay Time [ms] [0000…5000ms, KeyOff]
Specifies the time (delay time) from note ‐ on until the MIDI track begins to produce sound, in units of ms (1/1000th of a second). This setting is available if
MIDI/Tempo Sync.
is set to Off.
KeyOff:
The note will begin sounding at note ‐ off. In this case, the sound will not die away if the sustain level of the program’s amp EG is other than 0. This setting is used when creating harpsichord sounds.
Normally you will set this to 0000.
MIDI/Tempo Sync.
[Off, On]
The time (delay time) from note ‐ on until the track produces sound will be specified in note length units relative to the
(
Tempo)
.
On (checked):
Specify the delay time in terms of a
Base
Note
and
Times
relative to the
Tempo
. For example if
Base
Note
= ,
Times
= 01, and
Tempo
= 60 BPM, the delay time will be equivalent to 1000 ms.
Off (unchecked):
The delay time will be set by the
Delay
Time
setting.
Base Note [ , , , , , , , , , ]
Times [01…32]
It specifies the time (delay time) from note ‐ on until the track begins to produce sound, in terms of a note value relative to the (
Tempo)
(Seq 0–1(2)a).
Use
Base Note
to specify the desired note value, and use
Times
to extend that note value by the specified multiple.
For example if you set
Base Note
to a quarter note ( ) and
Times
to 02, that track will sound with a delay of a half note
( ). Even if you change (
Tempo)
(Seq 0–1(2)a), the delay time will always be a half note ( ). If you use these parameters to specify a delay of a half note ( ). In this case, a
Tempo
of 60.00 BPM will produce a 2000 ms delay, and a
Tempo
of 120.00 BPM will produce a 1000 ms delay.
131
132
Sequencer mode
Track 02…08, 09…16 (Track Number):
These are the delay time settings for MIDI tracks 2–8 and 9–
16. They are the same as for track 1. For more information, please see “Track 01 (Track Number):” above.
V
4–5(6)
:
Menu Command
• 0:
Memory Status
see p. 163
• 1:
Exclusive Solo
see p. 64
• 2:
Rename Song
see p. 163
• 3:
Delete Song
see p. 163
• 4:
Copy From Song
see p. 163
• 5:
Load Template Song
see p. 163
• 6:
Save Template Song (Save as User Template Song)
see p. 164
• 7:
FF/REW Speed
see p. 164
• 8:
Set Location (Set Location for Locate Key)
see p. 164
• 9:
GM Initialize
see p. 165
• 10:
Copy from Combination
see p. 166
• 11:
Copy from Program
see p. 167
For more information, please see “Sequencer: Menu
Command” on page 163.
SEQ P5: MIDI Filter 5–1: <1> T01–08, 5–2: <1> T09–16
SEQ P5: MIDI Filter
Here, you can select whether or not to apply filtering to the
MIDI data received by MIDI tracks 1–16. For example even if two tracks are receiving the same MIDI channel, one can be set to respond to damper pedal activity while the other does not.
These MIDI filter settings have no effect on the MIDI messages that have already been recorded.
These settings affect the MIDI messages that are transmitted when you adjust program, pan, volume, portamento and send 1/2 parameters of a track whose
Status
(Seq 3–1(2)c) is set to BTH, EXT, or EX2.
On (checked):
Reception of MIDI data is enabled. Tracks whose
Status
(Seq 3–1(2)c) is INT or BTH will receive these types of MIDI messages on their respective channels. The type of effects that are checked will be applied to the program of each track when the KROME’s controllers are operated or when MIDI data is received. (The effect dynamic modulation function is not affected by these settings.)
Settings that regulate MIDI transmission/reception of the
KROME itself are made in MIDI Filter (Global 1–2b).
If the user ‐ assignable controllers that can be filtered in the
MIDI Filter 1–4 and 2–5 pages are set to MIDI control changes, filtering will be performed for these control changes. In this case, any control change filtering that is being performed in the MIDI Filter 1–1 to 1–3 pages will be given priority. Furthermore, if the same control change is assigned to multiple controllers for which there are filter settings in the MIDI Filter 1–4 and 2–5 pages, checking any one of these will enable that control change.
Off (unchecked):
Reception of MIDI data is disabled.
Note:
MIDI CC# = MIDI control change message numbers.
Enable After Touch [Off, On]
Specifies whether or not MIDI after touch messages will be received.
Enable Damper [Off, On]
Specifies whether or not MIDI CC#64 hold (damper pedal) messages will be received.
Enable Portamento SW [Off, On]
Specifies whether or not MIDI CC#65 portamento on/off messages will be received.
Track 02…08, 09…16 (Track Number):
These are the MIDI Filter 1 settings for MIDI tracks 2–8 and
9–16. They are the same as for track 1. For more information, please see “Track 01 (Track Number):” above.
V
5–1(2)
:
Menu Command
• 0:
Memory Status
see p. 163
• 1:
Exclusive Solo
see p. 64
• 2:
Rename Song
see p. 163
• 3:
Delete Song
see p. 163
• 4:
Copy From Song
see p. 163
• 5:
Load Template Song
see p. 163
• 6:
Save Template Song (Save as User Template Song)
see p. 164
• 7:
FF/REW Speed
see p. 164
• 8:
Set Location (Set Location for Locate Key)
see p. 164
• 9:
GM Initialize
see p. 165
• 10:
Copy from Combination
see p. 166
• 11:
Copy from Program
see p. 167
For more information, please see “Sequencer: Menu
Command” on page 163.
5–1: <1> T01–08,
5–2: <1> T09–16
5–1a
5–1b
5–1
Menu
5–1c
5–1(2)a: Track Select, Tempo, RPPR
5–1(2)b: Track Info
For more information, please see “2–1: Trim T01–08, 2–2:
Trim T09–16” on page 123.
5–1(2)c: MIDI Filter 1
Track 01 (Track Number):
Enable Program Change [Off, On]
Specifies whether or not MIDI program change messages will be received.
133
Sequencer mode
134
5–3: <2> T01–08,
5–4: <2> T09–16
5–3a
5–3b
5–3c
5–3
Menu
5–3(4)a: Track Select, Tempo, RPPR
5–3(4)b: Track Info
For more information, please see “2–1: Trim T01–08, 2–2:
Trim T09–16” on page 123.
5–3(4)c: MIDI Filter 2
Track 01 (Track Number):
Enable JS X as AMS [Off, On]
Specifies whether or not MIDI pitch bend messages (the X axis of the joystick) will be received to control the AMS effect assigned to JS X. (This is not a filter for MIDI pitch
bend message reception.) For more information, please see
“Alternate Modulation Sources (AMS)” on page 339.
Enable JS+Y [Off, On]
Specifies whether or not MIDI CC#1 (the +Y axis of the joystick, or a Realtime Controls knob assign setting) will be received.
Enable JS–Y [Off, On]
Specifies whether or not MIDI CC#2 (the –Y axis of the joystick, or a Realtime Controls knob assign setting) will be received.
Enable Ribbon CC#16 [Off, On]
Specifies whether or not MIDI CC#16 (specified as the assignment of a Realtime Controls knob) will be transmitted or received.
Track 02…08, 09…16 (Track Number):
These are the MIDI Filter 2 settings for MIDI tracks 2–8 and
9–16. They are the same as for track 1. For more information, please see “Track 01 (Track Number):” above.
V
5–3(4)
:
Menu Command
• 0:
Memory Status
see p. 163
• 1:
Exclusive Solo
see p. 64
• 2:
Rename Song
see p. 163
• 3:
Delete Song
see p. 163
• 4:
Copy From Song
see p. 163
• 5:
Load Template Song
see p. 163
• 6:
Save Template Song (Save as User Template Song)
see p. 164
• 7:
FF/REW Speed
see p. 164
• 8:
Set Location (Set Location for Locate Key)
see p. 164
• 9:
GM Initialize
see p. 165
• 10:
Copy from Combination
see p. 166
• 11:
Copy from Program
see p. 167
For more information, please see “Sequencer: Menu
Command” on page 163.
5–5: <3> T01–08,
5–6: <3> T09–16
5–5a
5–5b
5–5c
5–5
Menu
Here, you can specify whether the effect of knobs 1–4 when the SELECT button has selected Realtime Controls TONE will be transmitted and received. The MIDI control messages assigned to knobs 1–4 when Realtime Controls
TONE is selected are fixed.
5–5(6)a: Track Select, Tempo, RPPR
5–5(6)b: Track Info
For more information, please see “2–1: Trim T01–08, 2–2:
Trim T09–16” on page 123.
5–5(6)c: MIDI Filter 3
Track 01 (Track Number):
Enable Realtime Controls–CUTOFF [Off, On]
Enables or disables reception of MIDI CC#74 (the KROME’s filter cutoff frequency), which is assigned to knob 1 when
Realtime Controls TONE is selected.
Enable Realtime Controls–RESONANCE [Off, On]
Enables or disables reception of MIDI CC#71 (the KROME’s filter resonance level), which is assigned to knob 2 when
Realtime Controls TONE is selected.
Enable Realtime Controls–EG INTENSITY [Off, On]
Enables or disables reception of MIDI CC#79 (the KROME’s filter EG intensity), which is assigned to knob 3 when
Realtime Controls TONE is selected.
SEQ P5: MIDI Filter 5–7: <4> T01–08, 5–8: <4> T09–16
Enable Realtime Controls–RELEASE [Off, On]
Enables or disables reception of MIDI CC#72 (the KROME’s filter/amp EG release time), which is assigned to knob 4 when Realtime Controls TONE is selected.
Track 02…08, 09…16 (Track Number):
These are the MIDI Filter 3 settings for MIDI tracks 2–8 and
9–16. They are the same as for track 1. For more information, please see “Track 01 (Track Number):” above.
V
5–5(6)
:
Menu Command
• 0:
Memory Status
see p. 163
• 1:
Exclusive Solo
see p. 64
• 2:
Rename Song
see p. 163
• 3:
Delete Song
see p. 163
• 4:
Copy From Song
see p. 163
• 5:
Load Template Song
see p. 163
• 6:
Save Template Song (Save as User Template Song)
see p. 164
• 7:
FF/REW Speed
see p. 164
• 8:
Set Location (Set Location for Locate Key)
see p. 164
• 9:
GM Initialize
see p. 165
• 10:
Copy from Combination
see p. 166
• 11:
Copy from Program
see p. 167
For more information, please see “Sequencer: Menu
Command” on page 163.
5–7: <4> T01–08,
5–8: <4> T09–16
5–7a
5–7b
5–7
Menu
5–7(8)c: MIDI Filter4
Track 01 (Track Number):
Enable Realtime Controls–USER [1]
Enable Realtime Controls–USER [2]
Enable Realtime Controls–USER [3]
Enable Realtime Controls–USER [4]
[Off, On]
[Off, On]
[Off, On]
[Off, On]
These settings enable or disable reception of the MIDI messages assigned to knobs 1–4 when Realtime Controls
USER is selected.
Track 02…08, 09…16 (Track Number):
These are the MIDI Filter 4 settings for MIDI tracks 2–8 and
9–16. They are the same as for track 1. For more information, please see “Track 01 (Track Number):” above.
V
5–7(8): Menu Command
• 0:
Memory Status
see p. 163
• 1:
Exclusive Solo
see p. 64
• 2:
Rename Song
see p. 163
• 3:
Delete Song
see p. 163
• 4:
Copy From Song
see p. 163
• 5:
Load Template Song
see p. 163
• 6:
Save Template Song (Save as User Template Song)
see p. 164
• 7:
FF/REW Speed
see p. 164
• 8:
Set Location (Set Location for Locate Key)
see p. 164
• 9:
GM Initialize
see p. 165
• 10:
Copy from Combination
see p. 166
• 11:
Copy from Program
see p. 167
For more information, please see “Sequencer: Menu
Command” on page 163.
5–7c
5–9: <5> T01–08,
5–10: <5> T09–16
5–9a
5–9b
5–9
Menu
Here, you can enable or disable transmission and reception for the functions of knobs 1–4 when the SELECT button is set to Realtime Controls USER. Use the P1: Controllers–
Controllers Setup page to assign the functions that knobs 1–
4 will perform when Realtime Controls USER is selected.
5–7(8)a: Track Select, Tempo, RPPR
5–7(8)b: Track Info
For more information, please see “2–1: Trim T01–08, 2–2:
Trim T09–16” on page 123.
5–9c
5–9(10)a: Track Select, Tempo, RPPR
5–9(10)b: Track Info
For more information, please see “2–1: Trim T01–08, 2–2:
Trim T09–16” on page 123.
135
136
Sequencer mode
5–9(10)c: MIDI Filter
Track 01 (Track Number):
Enable SW1
Enable SW2
[Off, On]
[Off, On]
These settings specify whether SW1 Mod (CC#80) and SW2
Mod (CC#81) will be transmitted and received if they are assigned to the SW1 and SW2 buttons.
Note:
If Portamento SW (CC#65) is assigned to SW1 or SW2, the Enable Portamento SW setting on the MIDI <1> page will take priority.
Note:
The functions of SW1 and SW2 are assigned on the P1:
Controllers Setup page (see p.122).
Enable Foot Switch [Off, On]
Specifies whether or not the effect of the ASSIGNABLE
SWITCH will be received. The function is assigned in Global
P2: Controllers– Foot Controllers page.
This filter setting is valid when a MIDI control change is assigned.
Enable Foot Pedal [Off, On]
Specifies whether or not the effect of the ASSIGNABLE
PEDAL will be received. The function is assigned in Global
P2: Controllers– Foot Controllers page.
This filter setting is valid when a MIDI control change is assigned.
Track 02…08, 09…16 (Track Number):
These are the MIDI Filter 5 settings for MIDI tracks 2–8 and
9–16. They are the same as for track 1. For more information, please see “Track 01 (Track Number):” above.
V
5–9(10): Menu Command
• 0:
Memory Status
see p. 163
• 1:
Exclusive Solo
see p. 64
• 2:
Rename Song
see p. 163
• 3:
Delete Song
see p. 163
• 4:
Copy From Song
see p. 163
• 5:
Load Template Song
see p. 163
• 6:
Save Template Song (Save as User Template Song)
see p. 164
• 7:
FF/REW Speed
see p. 164
• 8:
Set Location (Set Location for Locate Key)
see p. 164
• 9:
GM Initialize
see p. 165
• 10:
Copy from Combination
see p. 166
• 11:
Copy from Program
see p. 167
For more information, please see “Sequencer: Menu
Command” on page 163.
5–11: <6> T01–08,
5–12: <6> T09–16
5-11a
5-11b
5-11c
5-11
Menu
5–11(12)a: Track Select, Tempo, RPPR
5–11(12)b: Track Info
For more information, please see “2–1: Trim T01–08, 2–2:
Trim T09–16” on page 123.
5–11(12)c: MIDI Filter3
Track 01 (Track Number):
Enable Other Control Change Messages [Off, On]
Specifies whether or not MIDI control messages not covered in the preceding MIDI Filter items will be received.
Enable Waveform SysEx [Off, On]
This enables or disables reception of MIDI system exclusive messages that freely switch the multisample used by an oscillator while the program is sounding.
Track 02…08, 09…16 (Track Number):
These are the MIDI Filter 6 settings for MIDI tracks 2–8 and
9–16. They are the same as for track 1. For more information, please see “Track 01 (Track Number):” above.
V
5–11(12)
:
Menu Command
• 0:
Memory Status
see p. 163
• 1:
Exclusive Solo
see p. 64
• 2:
Rename Song
see p. 163
• 3:
Delete Song
see p. 163
• 4:
Copy From Song
see p. 163
• 5:
Load Template Song
see p. 163
• 6:
Save Template Song (Save as User Template Song)
see p. 164
• 7:
FF/REW Speed
see p. 164
• 8:
Set Location (Set Location for Locate Key)
see p. 164
• 9:
GM Initialize
see p. 165
• 10:
Copy from Combination
see p. 166
• 11:
Copy from Program
see p. 167
For more information, please see “Sequencer: Menu
Command” on page 163.
SEQ P6: Track Edit 6–1: Track Edit
SEQ P6: Track Edit
6–1: Track Edit
6–1a
6–1b
6–1
Menu
6–1c
Here, you can edit MIDI tracks 1–16, and the master track.
When editing a MIDI track, you can move, insert, and delete individual note events or control change data, or copy, move, insert, and delete measures or tracks. You can also perform Step Recording in this page.
When editing the master track, you can edit the tempo and the time signature.
Note:
To perform track editing (or step editing), use
Track
Select
to select the track you want to edit, and use
From
Measure
and
To End of Measure
parameters to specify the region that you want to edit. Then choose a command from the menu, and execute the edit. For details on the specific
commands, please see “Sequencer: Menu Command” on page 163.
6–1a: Location, Meter, Tempo, Tempo
Mode, Song Select, Track Select,
Reso, RPPR
6–1b: Track Info
(“0–1(2)a: Location, Meter, Tempo, Tempo Mode, Song
Select, Track Select, Reso, RPPR” on page 109)
(“2–3: EQ T01–08, 2–4: EQ T09–16” on page 124)
V
6–1: Menu Command
• 0:
Memory Status
see p. 163
• 1:
Exclusive Solo
see p. 64
• 2:
Step Recording
see p. 168
• 3:
Event Edit
see p. 169
• 4:
Piano Roll
see p. 171
• 5:
Set Song Length
see p. 176
• 6:
Erase Track
see p. 176
• 7:
Copy Track
see p. 176
• 8:
Bounce Track
see p. 177
• 9:
Erase Measure
see p. 177
• 10:
Delete Measure
see p. 177
• 11:
Insert Measure
see p. 178
• 12:
Repeat Measure
see p. 178
• 13:
Copy Measure
see p. 179
• 14:
Move Measure
see p. 179
• 15:
Create Control Data
see p. 180
• 16:
Erase Control Data
see p. 181
• 17:
Quantize
see p. 181
• 18:
Shift/Erase Note
see p. 182
• 19:
Modify Velocity
see p. 183
• 20:
FF/REW Speed
see p. 164
• 21:
Set Location (Set Location for Locate Key)
see p.
164
• 22:
Create Exclusive Data
see p. 183
• 23:
Erase Exclusive Data
see p. 184
For more information, please see “Sequencer: Menu
Command” on page 163.
6–1c: Track data Map, From Measure, To
End of Measure
Track data Map
This area shows the presence or absence of performance data, and indicates the edit range, etc. The currently selected
Track will be highlighted.
From Measure
To End of Measure
[001…999]
[001…999]
Specifies the range of measures that you wish to edit (or copy from) or step ‐ record.
Locations move in synchronization
Measure no.
MIDI Track
MIDI data
Patterns used
Master Track
Use
From Measure
to specify the starting measure, and
To
End of Measure
to specify the ending measure.
Link From Measure current location [Off, On]
If this check box is selected, the
From Measure
setting will be linked to the current location, and the location of the displayed track will also change. The location will change to follow this even during playback or recording.
Master track data
From Measure To End of Measure
137
Sequencer mode
138
Track View area select
The bar at left indicates the four tracks shown in the track view area (in this example, tracks 1–4).
Scroll button
Setup
Press this button to open the Track View Setup dialog box.
( Track View Setup)
Tool box
Displays note events in a one-octave range
( Track View Setup)
Selected region
Velocity indication
( Track View Setup)
Pattern
Scroll button
Track view area
Displays the values for the control message name indicated in the left of the screen ( Track View Setup)
SEQ P6: Track Edit 6–2: Track View
Note:
When selecting, the upper line FROM MEASURE or
To END of MEASURE will briefly turn blue, and will indicate the selected measure number.
End point select tool
Use this to specify the last measure (To END of MEASURE) of the range of measures that you want to edit.
Choose this tool, and then press a measure in a track to specify the ending measure (and the track). Continue holding down the starting measure, drag to the left, and release at the end of the desired selection. While dragging, you can drag across a scroll button to scroll through the measures while maintaining the selection.
If more than one measure is selected even though you actually wanted to select only one measure, simply continue pressing for approximately one second; the single measure you’re pressing will be selected.
Note:
When selecting, the upper line FROM MEASURE or
To END of MEASURE will briefly turn blue, and will indicate the selected measure number.
Example)
Using the Start Point Select tool to specify a region
1. Press the tool.
2. Press the desired starting measure for the track in which you want to select a region.
You can scroll the measure display by dragging your finger onto or across a scroll bar.
The edit region will be selected and highlighted.
Move tool
Use this to move the measures of the region you’ve specified.
Use the or tool to select the region that you want to move, and then choose this tool. Press the move ‐ destination measure or drag the selected region of measures to move them.
If data exists at the move ‐ destination, the Drag Move dialog box will appear, allowing you to select whether to overwrite or keep the data at the destination.
Note:
This operation is equivalent to executing the
Move
Measure
menu command with
Mode
set to Stay (see p.179).
Example)
Moving the events of measures 1–2 to measures 5–6
1. Press the tool.
2. Drag over measures 1–2 to specify the edit region.
1
1
2
3. Press the tool.
4. Press measure 5 (the move-destination measure). Alternatively, drag the edit region to measure 5.
2 Scroll button
3. While continuing to press, drag to the last measure of the desired range, and release your finger.
You can scroll the measure display by dragging your finger onto or across a scroll bar.
The edit region will be selected and highlighted.
4 3
5. In this example, an event exists in the move-destination measure, so the Drag Move dialog box will appear.
Overwrite will overwrite the source data over the destination data (replacing the destination data with the source data).
Merge will combine the source and destination data.
Press the OK button to execute the move.
If there are no events in the move ‐ destination measures, this dialog box will not appear; the move will occur immediately.
Scroll button
3
Example)
Using the End Point Select tool to specify a region
1. Press the tool.
2. Press the desired ending measure for the track in which you want to select a region.
3. While continuing to press, drag to the first measure of the desired range, and release your finger.
139
Sequencer mode
If you choose Overwrite
If you choose Merge
The destination is overwritten by the source data
The two sets of data are combined
Copy tool
Use this to copy the events of the selected measures.
Use the or tool to select the region that you want to copy, and then choose this tool. Press the copy ‐ destination measure or drag the selected region of measures to the desired copy ‐ destination. The data at the copy ‐ destination will always be overwritten.
Note:
This operation is equivalent to executing the
Copy
Measure
menu command (see p.179).
Example)
Copying the events of measures 1–2 to measures 3–4
1. Press the tool.
2. Drag over measures 1–2 to specify the edit region.
1
Example)
Moving the data of an entire track
1. Return the location to the beginning.
2. Press the tool.
3. Press the left side of measure 1 in the track you want to move.
2
2
3. Press the tool.
4. Press measure 3 (the copy-destination measure). Alternatively, drag the edit region to measure 3.
3
4. While continuing to press, drag to the move-destination track, and release.
4
The copy will be executed.
3
140
4
If the move ‐ destination measures contain events, the Drag
Move dialog box will appear.
Overwrite will overwrite the source data over the destination data (replacing the destination data with the source data). Merge will combine the source and destination data. Press the OK button to execute the move.
If there are no events in the move ‐ destination measures, this dialog box will not appear; the move will occur immediately.
5
5. If desired, you can press another copy-destination to copy the data repeatedly.
Example) Copying the data of an entire track
You can copy the data of an entire track to another track.
Refer to “Example”) Moving the data of an entire track.” In step 2, choose the tool.
Erase tool
Use this to erase the events from the selected measures.
Choose this tool, and press the measures you want to erase.
The events of those measures will be erased.
This operation is equivalent to executing the
Erase Measure
command with
Kind
set to All (See “Erase Measure” on page 177.).
Example) Erasing events
1. Press the tool.
SEQ P6: Track Edit 6–2: Track View
2. Press the first measure containing the events you want to erase, and drag to the last measure. If desired, you
can select measures in adjacent tracks for erasure (See
“Track No.”). Alternatively, you can press individual
measures one at a time and erase them.
Example) Erasing all data from a track
You can erase all data from an entire track.
Press the tool, and then press the left side of the first measure of the track you want to erase. The data will be erased.
Piano Roll jump
You can jump to Piano Roll editing by pressing this button when a track 1–16 is selected.
Note:
This operation is equivalent to selecting the
Piano
Roll
menu command (See “Piano Roll” on page 171.).
Note:
If you press this button or select the
Piano Roll
menu command to open the Piano Role dialog box for a track that contains no events, a track of the same length as the song (64 measures by default) will be created before the Piano Roll dialog box opens.
If you’ve selected the master track, this button will take you to event editing.
Scroll buttons
By pressing these buttons you can move to tracks or measures that are not currently displayed. Even without pressing directly on one of these buttons, you can scroll the display by dragging across a scroll button from inside the track view area.
The horizontal direction in which the scroll buttons operate will depend on the
Play Scroll
setting in the Track View
Setup dialog box.
Setup button
When you press the Setup button, the Track View Setup dialog box will appear, allowing you to specify how information will be displayed in the track view area.
Track View Setup dialog box
C4, C5, and C6 (different octaves) will be shown on the same dot line (at the C position).
All Notes:
One dot line will be shown as one octave. For example, note events C4, E4, and G4 (all in the same octave) will be shown on the same dot line.
C-1
~
…G#8
~
:
Only the note events of the selected octave will be shown. Each dot line will show one note.
Auto:
If most of the displayed note events are within one octave, they will be displayed using one dot line per note. If the notes extend more than one octave, they will be displayed using All Notes.
shows:
Specifies the track information that is shown at the left edge and bottom of each track view area.
Names [Off, On]
If this check box is selected, track names and the type of selected control event will be shown at the left of the track view screen.
Velocity [Off, On]
If this check box is selected, the velocity values of note events will be shown. In the case of a chord, the highest value will be shown.
and [none, PolyAfter, CC#000…CC#119 (*Y),
Program, AfterT, Bend, Exclusive]
This selects the information (such as control changes) that will be shown. If you don’t want any of these to be shown, choose “none.”
Green: Control Change, Poly After, After Touch
The location of an event is indicated by a solid line or solid color, and by a shaded area for the duration that the effect continues. The shaded area is not shown if the location containing the event is not displayed in the track view area.
• Yellow: Pitch bend
• : System exclusive message
• Red: Program change
Data exists No data
The settings in this dialog box will be initialized when you turn off the power.
Track No.
This specifies the order of the displayed tracks. Normally,
Track01–Track16 are shown for 01–16. You can use this to change the order if the tracks you want to see are far apart.
Note Display
[oct.Layer, All Notes, C-1
~
…G#8
~
, Auto]
This specifies how note events will be displayed.
octLayer: Note events of all octaves will be displayed together in a one ‐ octave region. For example, note events
Time Scale [Close, Wide]
This specifies the scale for the time axis of the track view area.
Close:
For example, the screen will show 4 or 5 measures of a 4/4 time signature.
Wide:
For example, the screen will show 8 or 9 measures of a 4/4 time signature.
Play Scroll [Sweep, Crawl]
This specifies how the track view area will scroll during playback.
Sweep:
When the location bar (the vertical yellow line) reaches the end of the track view area, the next measure and the location bar will move to the left.
Crawl:
The track view area will move measure by measure.
The location bar will stay in a fixed location.
141
142
Sequencer mode
Note:
This setting also specifies how movement will occur when you press the display scroll buttons in the left/right direction while editing.
6–2: Menu Command
• 0:
Memory Status
see p. 163
• 1:
Exclusive Solo
see p. 64
• 2:
Step Recording
see p. 168
• 3:
Event Edit
see p. 169
• 4:
Piano Roll
see p. 171
• 5:
Set Song Length
see p. 176
• 6:
Erase Track
see p. 176
• 7:
Copy Track
see p. 176
• 8:
Bounce Track
see p. 177
• 9:
Erase Measure
see p. 177
• 10:
Delete Measure
see p. 177
• 11:
Insert Measure
see p. 178
• 12:
Repeat Measure
see p. 178
• 13:
Copy Measure
see p. 179
• 14:
Move Measure
see p. 179
• 15:
Create Control Data
see p. 180
• 16:
Erase Control Data
see p. 181
• 17:
Quantize
see p. 181
• 18:
Shift/Erase Note
see p. 182
• 19:
Modify Velocity
see p. 183
• 20:
FF/REW Speed
see p. 164
• 21:
Set Location (Set Location for Locate Key)
see p.
164
• 22:
Create Exclusive Data
see p. 183
• 23:
Erase Exclusive Data
see p. 184
For more information, please see “Sequencer: Menu
Command” on page 163.
6–3: Track Name
6–2a
6–2b
6–2c
6–2
Menu
6–3c: Track Names
T01…T16
Here, you can rename the MIDI tracks.
[Track name]
Press the text edit button to open the dialog box, and input the desired characters. You can enter up to 24 characters.
For more information, please see “Editing names” on page 91 of the Operation guide.
V
6–3: Menu Command
• 0:
Memory Status
see p. 163
• 1:
Exclusive Solo
see p. 64
• 2:
Step Recording
see p. 168
• 3:
Event Edit
see p. 169
• 4:
Piano Roll
see p. 171
• 5:
Set Song Length
see p. 176
• 6:
Erase Track
see p. 176
• 7:
Copy Track
see p. 176
• 8:
Bounce Track
see p. 177
• 9:
Erase Measure
see p. 177
• 10:
Delete Measure
see p. 177
• 11:
Insert Measure
see p. 178
• 12:
Repeat Measure
see p. 178
• 13:
Copy Measure
see p. 179
• 14:
Move Measure
see p. 179
• 15:
Create Control Data
see p. 180
• 16:
Erase Control Data
see p. 181
• 17:
Quantize
see p. 181
• 18:
Shift/Erase Note
see p. 182
• 19:
Modify Velocity
see p. 183
• 20:
FF/REW Speed
see p. 164
• 21:
Set Location (Set Location for Locate Key)
see p. 164
• 22:
Create Exclusive Data
see p. 183
• 23:
Erase Exclusive Data
see p. 184
For more information, please see “Sequencer: Menu
Command” on page 163.
Here, you can assign a name to each track.
6–3a: Location, Meter, Tempo, Tempo
Mode, Song Select, Track Select,
Reso, RPPR
6–3b: Track Info
For more information, please see “0–1(2)a: Location, Meter,
Tempo, Tempo Mode, Song Select, Track Select, Reso, RPPR” on page 109.
SEQ P7: ARP/DT (Arpeggiator/DrumTrack) 7–1: ARP Setup T01–08, 7–2: ARP Setup T09–16
SEQ P7: ARP/DT (Arpeggiator/DrumTrack)
Here, you can specify how the arpeggiator will operate in
Sequencer mode. These settings can be made for each song.
In Sequencer mode (as in Combination mode), you can run the two arpeggiators simultaneously.
This allows you to apply different arpeggio patterns to two sounds that have been split across the keyboard, or use velocity to switch between two different arpeggio patterns, etc.
In Sequencer mode, the musical data generated by the arpeggiator during song track or pattern realtime ‐ recording can be recorded.
When doing so, you can modify the arpeggio pattern or parameters while you record, or use the REALTIME
CONTROLS SELECT button to select ARP and use the knobs to vary the arpeggio pattern.
It is not possible to set independent tempos for the arpeggiator and the sequencer.
When
MIDI Clock
(Global P1: 1–1a) is
Internal
, the arpeggiator can be synchronized to the internal sequencer.
• When you turn on the arpeggiator and press the START/
STOP ( ) button, the arpeggiator will synchronize with the sequencer.
• When you press the START/STOP ( ) button, the arpeggiator and sequencer will both stop. If you wish to stop only the arpeggiator, press the ARP button to turn off.
When the arpeggiator
Key Sync
is off, you can turn on the
ARP button and play the keyboard to start the arpeggiator during the pre ‐ count before realtime recording begins. That way, the arpeggiator performance will be recorded from the beginning of the pattern when recording starts.
When
MIDI Clock
is set to External MIDI or External
USB, clock messages transmitted from an external MIDI device can perform the same type of control.
Even in this case, you can start/stop using the KROME’s
START/STOP ( ) button.
7–1: ARP Setup T01–08,
7–2: ARP Setup T09–16
7–1a
7–1b
7–1c
7–1
Menu
7–1(2)a: Location, Meter, Tempo, Tempo
Mode, Song Select, Track Select,
Reso, RPPR
7–1(2)b: Track Info
For more information, please see “0–1(2)a: Location, Meter,
Tempo, Tempo Mode, Song Select, Track Select, Reso, RPPR” on page 109.
7–1(2)c: Arpeggiator Assign, Arpeggiator
Run A, B
Arpeggiator Assign [Off, A, B]
This individually assigns arpeggiator A or arpeggiator B to each track 1–8, 9–16. When the ARP button is turned on, the arpeggiator specified for each track will run, subject to the
Arpeggiator Run A, B
settings and the settings made here.
Off:
Neither arpeggiator will operate.
A:
Enables Arpeggiator A. Use the Arpeggiator A page to select the arpeggio pattern and set the parameters.
B:
Enables Arpeggiator B. Use the Arpeggiator B page to select the arpeggio pattern and set the parameters.
For tracks that you wish to record in real time, select either arpeggiator A or B. If you specify an arpeggiator for two or more tracks, the arpeggiator will play each of the tracks you specify.
You can set A and B to two different MIDI channels, and control one from the keyboard and the other from an external MIDI device connected to MIDI IN. You can also use multi ‐ track recording (Multi REC) to simultaneously record the note data that is generated from the two arpeggiators.
Example 1)
On tracks 1 and 2, set
MIDI Channel
(Seq 3–1(2)c) to
01
and
Status
(Seq 3–1(2)c) to INT. Assign arpeggiator A to track 1 and arpeggiator B to track 2, and check
Arpeggiator Run A,
B
. In
Track Select
, choose Track01.
With the ARP button off, play the keyboard and tracks 1 and
2 will sound simultaneously.
When you turn on the ARP button and play the keyboard, arpeggiator A will operate for track 1 and arpeggiator B will operate for track 2.
Trigger
= Ch1
Arpeggiator
A
Pattern — A
Arpeggiator
Assign
A Track1 MIDI Ch=1ch Status=INT
B Track2 MIDI Ch=1ch Status=INT
Pattern — A
Pattern — B
Trigger
= Ch1
Arpeggiator
B Pattern — B
Example 2)
For tracks 1, 2 and 3, set the
MIDI Channel
(Seq 3–1(2)c) to
01
,
02
, and
03
respectively, and set
Status
(Seq 3–1(2)c) to
INT. Assign arpeggiator A to tracks 1 and 2, and arpeggiator
B to track 3. Check the
Arpeggiator Run A, B
setting.
• In
Track Select
, choose Track01.
Playing the keyboard when the ARP button is
off
will play the sound assigned to track 1.
Playing the keyboard when the ARP button is
on
will cause arpeggiator A to operate for tracks 1 and 2, and produce sound for both tracks.
• In
Track Select
, choose Track02.
Playing the keyboard when the ARP button is off will play the sound assigned to track 2.
Playing the keyboard when the ARP button is on will cause arpeggiator A to operate for tracks 1 and 2, and produce sound for both tracks.
• In
Track Select
, choose Track03.
Playing the keyboard when the ARP button is off will play the sound assigned to track 3.
Playing the keyboard when the ARP button is on will cause arpeggiator B to operate for track 3, and play the sound assigned to track 3.
143
Sequencer mode
144
• Alternatively, you could choose Track01 in
Track Select
to run arpeggiator A for tracks 1 and 2, and use an external MIDI device connected to the KROME’s MIDI IN to send note data to MIDI channel 3 to play arpeggiator B.
Trigger
= Ch1, Ch2
Trigger
= Ch3
Arpeggiator
A
Arpeggiator
B
Pattern — A
Pattern — B
Arpeggiator
Assign
A Track1 MIDI Ch=1ch Status=INT
A
B
Track2
Track3
MIDI Ch=2ch
MIDI Ch=3ch
Status=INT
Status=INT
Pattern — A
Pattern — A
Pattern — B
The arpeggiator cannot be triggered by the notes played by the sequencer.
If the track
Status
(Seq 3–1(2)c) is set to INT or BTH, tracks 1–16 to which arpeggiator A or B are assigned will be sounded by the note data generated by the arpeggiator, regardless of the
MIDI Channel
(Seq 3–
1(2)c) setting of that track. If the track
Status
is set to
BTH, EXT, or EX2, the track will transmit MIDI note data on the
MIDI Channel
of that track.
In this case, arpeggiator A or B will be triggered by the
MIDI Channel
of any track 1–16 to which the corresponding arpeggiator is assigned.
If the
Local Control On
(Global P1: 1–1a) is turned OFF, the arpeggiator will not be triggered by note data from the keyboard. It will be triggered by note data received at MIDI IN. If you wish to record just the trigger notes on an external sequencer and run the KROME’s arpeggiator in this way, turn Local Control OFF.
If you want the note data generated by the arpeggiator to be recorded on the external sequencer, turn Local
Control ON, and turn off the echo back function of the
external sequencer. (see p.368)
Arpeggiator Run A, B [Off, On]
When the ARP button is on, the arpeggiator(s) that are checked here will function for the track(s) to which they are assigned by
Arpeggiator Assign
.
When the arpeggiator is on, A and B can be turned on/off independently.
V
7–1(2): Menu Command
• 0:
Memory Status
see p. 163
• 1:
Exclusive Solo
see p. 64
• 2:
Rename Song
see p. 163
• 3:
Delete Song
see p. 163
• 4:
Copy From Song
see p. 163
• 5:
Load Template Song
see p. 163
• 6:
Save Template Song (Save as User Template Song)
see p. 164
• 7:
FF/REW Speed
see p. 164
• 8:
Set Location (Set Location for Locate Key)
see p. 164
• 9:
GM Initialize
see p. 165
• 10:
Copy from Combination
see p. 166
• 11:
Copy from Program
see p. 101
• 12:
Copy Arpeggiator
see p. 66
For more information, please see “Sequencer: Menu
Command” on page 163.
7–3: Arpeggiator–A,
7–4: Arpeggiator–B
7–3a
7–3b
7–3c
7–3
Menu
7–3(4)a: Location, Meter, Tempo, Tempo
Mode, Song Select, Track Select, Reso,
RPPR
7–3(4)b: Track Info
For more information, please see “0–1(2)a: Location, Meter,
Tempo, Tempo Mode, Song Select, Track Select, Reso, RPPR” on page 109.
7–3(4)c: Arpeggiator–A(B) Setup
Pattern* [P0…P4, U0000(INT)…U0899(INT),
U0900(USER)…U1027(USER)]
Octave*
Resolution*
[1, 2, 3, 4]
[ , , , , , , , ]
[000…100%, Step] Gate
Velocity
Swing
Sort*
Latch*
Key Sync.*
[001…127, Key, Step]
[–100…+100%]
[Off, On]
[Off, On]
[Off, On]
Keyboard* [Off, On]
These are the arpeggiator parameters for the song.
For more information, please see “PROG P7: ARP/DT
(Arpeggiator/Drum Track)” on page 53.
* These parameters can also be set from “0–5(6)c:
Arpeggiator A (B)”.
V
7–3(4): Menu Command
• 0:
Memory Status
see p. 163
• 1:
Exclusive Solo
see p. 64
• 2:
Rename Song
see p. 163
• 3:
Delete Song
see p. 163
• 4:
Copy From Song
see p. 163
• 5:
Load Template Song
see p. 163
• 6:
Save Template Song (Save as User Template Song)
see p. 164
• 7:
FF/REW Speed
see p. 164
• 8:
Set Location (Set Location for Locate Key)
see p. 164
• 9:
GM Initialize
see p. 165
SEQ P7: ARP/DT (Arpeggiator/DrumTrack) 7–5: ARP Scan Zone
• 10:
Copy from Combination
see p. 166
• 11:
Copy from Program
see p. 101
• 12:
Copy Arpeggiator
see p. 103
For more information, please see “Sequencer: Menu
Command” on page 163.
7–5: ARP Scan Zone
These settings specify the note and velocity ranges that will operate arpeggiators A and B.
7–5
Menu
7–5a
7–5b
7–5c
7–5d
V
7–5: Menu Command
• 0:
Memory Status
see p. 163
• 1:
Exclusive Solo
see p. 64
• 2:
Rename Song
see p. 163
• 3:
Delete Song
see p. 163
• 4:
Copy From Song
see p. 163
• 5:
Load Template Song
see p. 163
• 6:
Save Template Song (Save as User Template Song)
see p. 164
• 7:
FF/REW Speed
see p. 164
• 8:
Set Location (Set Location for Locate Key)
see p. 164
• 9:
GM Initialize
see p. 165
• 10:
Copy from Combination
see p. 166
• 11:
Copy from Program
see p. 101
• 12:
Copy Arpeggiator
see p. 66
For more information, please see “Sequencer: Menu
Command” on page 163.
7–5a: Location, Meter, Tempo, Tempo
Mode, Song Select, Track Select,
Reso, RPPR
7–5b: Track Info
For more information, please see “0–1(2)a: Location, Meter,
Tempo, Tempo Mode, Song Select, Track Select, Reso, RPPR” on page 109.
7–5c: Zone Map
This shows the Scan Zone for each arpeggiator, A and B.
For more information, please see “7–5b: Zone Map” on page 93.
7–5d: Scan Zone
A:, B:
Top Key [C–1…G9]
Bottom Key [C–1…G9]
Specifies the range of notes (keys) that will operate arpeggiator A (B).
Top Key
specifies the upper limit, and
Bottom Key
specifies the lower limit.
Top Velocity [001…127]
Bottom Velocity [001…127]
Specifies the range of velocities that will operate arpeggiator
A (B).
Top Velocity
specifies the upper limit, and
Bottom
Velocity
specifies the lower limit.
Specifies the range of notes (keys) and velocities that will operate arpeggiator A/B.
Note:
You can also set the note and velocity values by holding down an edit cell or the ENTER button and playing a key (see OG p.10).
7–7: Drum Track
7–7a
7–7b
7–7
Menu
The parameters for the Drum Track function are structured in the same way as in Combination mode. Assign the Drum
Track program to the desired track 1–16.
However, while a combination triggers the Drum Track pattern on the global MIDI channel, a song triggers the
Drum Track pattern on the MIDI channel specified by Drum
Pattern
Input
. Normally you’ll set this to Tch. With the Tch setting, the MIDI channel of the track selected by
Track
Select
will automatically be used as the trigger channel.
In Sequencer mode you can use the Drum Track function while realtime ‐ recording a song track or pattern.
The note ‐ on/off data transmitted by the Drum Track pattern can be recorded as events in a track or pattern.
You can’t use note data from the internal sequencer as a trigger to start patterns for the Drum Track function.
When you’ve used the Drum Track function with a program or combination to come up with an idea for a song, you can then use the Auto Song Setup function to immediately start realtime ‐
recording (see p.106).
MIDI transmission and reception for the drum track
In Sequencer mode, the Drum Track function transmits and receives on the following MIDI channels.
Receive:
The drum track will receive on the MIDI channel specified by the Drum Pattern
Input
setting of each song.
Normally you’ll set this to Tch and use the KROME’s keyboard to control the triggering.
Transmit:
The drum track will transmit on the MIDI channel specified by the Drum Pattern
Output
setting of each song.
145
Sequencer mode
146
Set this to match the MIDI channel of the MIDI track for which you’ve assigned the drum program.
If the track’s
Status
is BTH, EXT, or EX2, note data etc. of the
Drum Track pattern will be transmitted.
If local control (“Local Control On Global P1:1 ‐ 1a) is on, playing the KROME’s keyboard will not make the internal sound generator produce sound, nor can the keyboard trigger the arpeggiator or drum track. However, they can be triggered by note ‐ on messages from MIDI IN.
7–7a: Drum Pattern
Pattern [Preset, User]
[(Preset): P000…605, (User): U000…U999]
This selects the drum pattern.
Preset/User No.
P000
P000…605
U000…U999
Contents
Off
Preset drum patterns
For user/preloaded drum patterns
• U000–U999 can be store user patterns. Patterns you create in Sequencer mode can be converted into user drum
patterns. (see p.188)
Shift [–24…+00…+24]
This transposes the drum pattern in semitone steps. This means that the instruments played by the pattern will change.
MIDI Channel
Input [01…16, Tch]
This specifies the MIDI channel that will trigger the drum pattern.
Tch:
The MIDI channel that triggers the drum pattern will automatically be set to the MIDI channel (Seq 3–1(2)c) of the track chosen in
Track Select
(Seq 0–1(2)a).
If
Trigger Mode
is Wait KBD Trig, and you set
Track Select
to a track for which the MIDI channel you specify here is selected, the keyboard will trigger the drum pattern. MIDI
IN messages of the matching MIDI channel will also trigger the drum track.
Output [01…16, Tch]
This specifies the MIDI channel that will transmit the MIDI data of the drum pattern. The drum pattern will sound using the program of the track that is assigned to this MIDI channel.
Tch:
The MIDI channel output will automatically be set to match the MIDI channel (Seq 3–1(2)c) of the track selected by
Track Select
(Seq 0–1(2)a).
Whether the pattern data will be output to an external device will depend on the
Status
setting of the track that matches the
Output
MIDI channel.
7–7b: Trigger
Trigger Mode [Start Immediately, Wait KBD Trig]
Start Immediately:
When you press the DRUM TRACK button to turn it on (LED lit), the drum pattern will start according to the
Sync
setting. When you press ON/OFF again, the drum pattern will stop.
Wait KBD Trig:
When you press the DRUM TRACK button to turn it on (LED lit), the drum pattern will wait to start. If you set
Track Select
to a track that matches the MIDI
Channel
Input
setting, and play the keyboard, or receive a
MIDI note ‐ on on the same MIDI channel, the drum pattern will start according to the
Sync
setting.
If you’ve selected
Start Immediately
, the DRUM
TRACK button will always be saved in the OFF state.
Sync [Off, On]
Off:
The drum pattern will not synchronize to the currently ‐ running arpeggiator, but will start immediately.
On:
The drum pattern will synchronize to the currently ‐ running arpeggiator.
Note:
Use P7–3(4)c: Arpeggiator ‐ A(B) Setup
Key Sync
to specify whether arpeggiator will synchronize to the currently ‐ running drum pattern.
Latch
This is valid if
Trigger Mode
is
Wait KBD Trig
.
[Off, On]
Off:
If the DRUM TRACK button is on (LED blinking), the pattern will start when you play the keyboard (note ‐ on). The pattern will stop when you release the keyboard (note ‐ off).
On:
If the DRUM TRACK button is on (LED blinking), the pattern will start when you play the keyboard (note ‐ on). The pattern will continue when you release the keyboard (note ‐ off). The pattern will stop when you turn the DRUM
TRACK button off (LED dark).
Zone:
Keyboard
Bottom
Top
[C–1…G9]
[C–1…G9]
This is valid if
Trigger Mode
is set to
Wait KBD Trig
.
It specifies the range of keys that will start the drum pattern.
Velocity:
Bottom
Top
[001…127]
[001…127]
This is valid if
Trigger Mode
is set to
Wait KBD Trig
.
It specifies the range of velocities that will start the drum pattern.
Note:
You can also set the note and velocity values by holding down an edit cell or the ENTER button and playing a key (see OG p.10).
V
7–7: Menu Command
• 0:
Memory Status
see p. 163
• 1:
Exclusive Solo
see p. 64
• 2:
Rename Song
see p. 163
• 3:
Delete Song
see p. 163
• 4:
Copy From Song
see p. 163
• 5:
Load Template Song
see p. 163
• 6:
Save Template Song (Save as User Template Song)
see p. 164
• 7:
FF/REW Speed
see p. 164
• 8:
Set Location (Set Location for Locate Key)
see p. 164
• 9:
GM Initialize
see p. 165
• 10:
Copy from Combination
see p. 166
• 11:
Copy from Program
see p. 101
• 12:
Copy Drum Track
see p. 65
• 13:
Erase Drum Track Pattern
see p. 66
For more information, please see “Sequencer: Menu
Command” on page 163.
SEQ P7: ARP/DT (Arpeggiator/DrumTrack) Synchronizing the Drum Track function
Synchronizing the Drum Track function
The Trigger “Sync” parameter
The trigger timing of a drum track will depend on the setting of its Trigger
Sync
parameter.
On (checked):
The trigger timing will be quantized to the nearest beat relative to the base tempo.
Off (unchecked):
If
Trigger Mode
is Start Immediately, triggering will occur at the moment you press the DRUM
TRACK button. If this is set to Wait KBD Trig, triggering will occur at the moment you play the keyboard.
Synchronizing the drum track with the arpeggiator function, Sequencer mode songs, patterns, and RPPR performance
If you want the Drum Track pattern to play or be recorded in synchronization with the currently ‐ operating arpeggiator function, currently ‐ playing song, pattern, or RPPR performance, turn Trigger
Sync
on.
Trigger
Sync Off:
If the
Trigger Mode
setting is Start
Immediately, the Drum Track pattern will be triggered the moment you press the DRUM TRACK button. If this is set to
Wait KBD Trig, the Drum Track pattern will be triggered the moment you play the keyboard. It will not synchronize to the currently ‐ operating arpeggiator function or to the currently ‐ playing song, pattern, or RPPR.
Trigger
Sync On:
Triggering will synchronize to the currently ‐ playing song, pattern or RPPR performance at the beginning of the next measure. Triggering will synchronize to the currently ‐ operating arpeggiator (in Sequencer mode if the song or pattern is stopped) on the next beat.
Note:
If you want to synchronize the arpeggiator to the currently ‐ running Drum Track function, set the
Key Sync
parameter (Prog/Combi/Seq P7).
Note:
If you want to synchronize the RPPR pattern performance to the currently ‐ running Drum Track function, set the
Sync
parameter (Seq P10: Pattern/RPPR– RPPR Setup page) to Beat or Measure.
Sync settings
Key 1 on Key 2 on Key 1 off
Song
Patterns 1 and 2 are set to
Mode=Manual, and have identical Sync settings
Sync: Off
Pattern 1
Pattern 2
Sync: Beat
Pattern 1
Pattern 2
Sync: Measure
Pattern 1
Pattern 2
• If you want the Drum Track function to start simultaneously with the beginning of recording, press the
DRUM TRACK button during the pre ‐ count before recording (if the
Trigger Mode
is set to Start Immediately) or play the keyboard (if
Trigger Mode
is Wait KBD Trig).
The Drum Tracks will not be triggered immediately, but will be triggered in synchronization with the sequencer the moment recording starts.
Slave operation
The KROME’s sequencer can be made to run in synchronization with the clock and realtime commands received from an external sequencer. Connect the MIDI OUT of your external MIDI device to the KROME’s MIDI IN, or connect the KROME’s USB port to your computer’s USB port.
Connect the KROME’s MIDI IN to your external MIDI device’s MIDI OUT, or connect the KROME’s USB connector to your computer’s USB port.
Set
MIDI Clock
(Global, see p.199) to External MIDI or
External USB. The KROME will synchronize to
MIDI Clock
and realtime command messages it receives from the connected MIDI device.
Note:
If the KROME is set to
MIDI Clock
= Auto, it will also synchronize to the external MIDI device in the same way if
MIDI realtime clock messages are being received from the external device.
Synchronization to MIDI clock
The arpeggiator will synchronize to the tempo coming from an external MIDI clock source.
Synchronization with MIDI realtime commands
In Sequencer mode, the KROME will respond to Song Start,
Continue, and Stop messages that it receives just as it does when using the front panel START/STOP ( ) button to control song playback and recording. The arpeggiator also will be controlled in the same way. (See
“Synchronization with song stop” above)
Master operation
The KROME sequencer’s clock data and start/stop operations can be used to synchronize and control an external sequencer.
Connect the KROME’s MIDI OUT to your external MIDI device’s MIDI IN, or connect the KROME’s USB connector to your computer’s USB port.
Set
MIDI Clock
(Global 1–1a) to Internal. The connected external MIDI device will synchronize to the KROME’s
MIDI Clock.
Note:
The same applies if
MIDI Clock
=Auto and MIDI
Clock messages are being transmitted. For details, please see
“MIDI Clock (MIDI Clock Source)” on page 199.
Synchronization via MIDI clock
The connected external MIDI device will synchronize to the
MIDI clock of the KROME.
Synchronization with song stop
Synchronization with a song in Sequencer mode
• When you press the START/STOP ( ) button, the
Drum Track function and the sequencer will stop.
147
Sequencer mode
148
SEQ P8: Routing/IFX (Insert Effect)
You can also specify the bus routing for the program used by each MIDI track 1–16. For instance, you can:
• Send the output of a track to an insert effect
• Route a sound to an insert effect
• Make detailed settings for insert effects
• Make common LFO settings for effects
For details on Insert Effects, please see “Effect Guide” on page 235.
8–1: Routing1 T01–08,
8–2: Routing1 T09–16
8–1a
8–1b
8–1c
8–1d
8–1
Menu
Specifies the bus to which the program oscillator(s) used by
MIDI tracks 1–8 and 9–16 will be sent. You can also set the send levels to the master effects from this page.
8–1(2)a: Routing Map
This area shows the insert effect routing (
Bus Select
), the name of the assigned effect, the on/off status, chaining, and the output bus that follows the insert effect. The type of insert effect, the on/off status, and the chain settings can be edited in the 8–3: Insert FX Setup page.
Tip:
In most preloaded drumkits, the drum instruments have the same
Bus (IFX/Output) Select
settings according to their type, as follows.
Snares
→
IFX1
Kicks
→
IFX2
Other
→
IFX3
If you want to edit these routings, use the
DrumKit IFX
Patch
menu command. For more information, please see
“DrumKit IFX Patch” on page 104.
Send1 (MFX1)
Send2 (MFX2)
[000…127]
[000…127]
For each track, these parameters set the send level to master effects 1 and 2. These settings are valid when
Bus (IFX/
Output) Select
is set to L/R or Off. When IFX 1–5 are selected, the send levels to master effects 1 and 2 are set by the
Send1
and
Send2
parameters of the IFX page, and are applied after the sound has passed through IFX1–5.
The Send 1 and 2 setting you specify here are used during playback or recording from the beginning of the song. If you modify these settings during recording, your changes will be recorded as performance data; the send amounts will change accordingly during playback. You can also modify these settings during playback. However if Send 1 and 2 data has been recorded, the settings will change according to the recorded data.
If
Status
(Seq 3–1(2)c) is either INT or BTH, CC#93 and
CC #91 can control send 1 and 2 respectively and change their settings. When you switch songs or return to the beginning of a song, tracks whose
Status
is EXT, EX2 or
BTH will transmit these settings via MIDI. This data will be transmitted on the MIDI channel of each track as set by
MIDI Channel
(Seq 3–1(2)c). The actual send level is determined by multiplying the value of these parameters with the send level settings of the program used by the track (
Send1
and
Send2
, Prog 8–1d). (See Global P1:
MIDI, SEQ Mode “Track MIDI Out” on page 200)
8–1(2)b: Track Select, Tempo, RPPR
8–1(2)c: Track Info
For more information, please see “2–1: Trim T01–08, 2–2:
Trim T09–16” on page 123.
8–1(2)d: Routing1
Bus (IFX/Output) Select [DKit, L/R, IFX1…5, Off]
This specifies the output bus for the track program’s oscillator(s).
L/R:
Output to the L/R bus.
IFX1, 2, 3, 4, 5:
Output to the IFX1–5 buses.
Off:
The track will not be output from the L/R bus, or IFX1–
5 buses. Choose the Off setting if you want the program’s oscillator output of the track to be connected in series to a master effect. Use
Send1 (to MFX1)
and
Send2 (to MFX2)
to specify the send levels.
Tip:
You can create a wide variety of routings by using each track’s
Bus (IFX/Output) Select
and the
Chain to
and
Chain
settings (Seq 8–3b) that follow the insert effect.
DKit:
You can select this only if the specified program is a drum program (
Oscillator Mode
Drums or Double Drums).
The
Bus (IFX/Output) Select
,
FX Control Bus
,
Send1
, and
Send2
settings (Global 5–5b) for each key of the selected drum kit will be used. Check this setting if you want to apply an individual insert effect to each drum instrument.
V
8–1(2): Menu Command
• 0:
Memory Status
see p. 163
• 1:
Exclusive Solo
see p. 64
• 2:
Copy Insert Effect
see p. 66
• 3:
Swap Insert Effect
see p. 67
• 4:
DrumKit IFX Patch
see p. 104
• 5:
FF/REW Speed
see p. 164
• 6:
Set Location (Set Location for Locate Key)
see p. 164
• 7:
Put Effect Setting to Track
see p. 184
For more information, please see “Sequencer: Menu
Command” on page 163.
SEQ P8: Routing/IFX (Insert Effect) 8–3: Insert FX Setup
8–3: Insert FX Setup
8–3a
8–3b
8–3
Menu
8–3a: Track Select
For more information, please see “2–1: Trim T01–08, 2–2:
Trim T09–16” on page 123.
8–3b: Insert Effect
Here you can choose the type of each insert effect 1 through
5, its on/off status, chaining, and adjust the post ‐ IFX mixer settings. For insert effects, the direct sound (Dry) is always stereo ‐ in and out. The input/output configuration of the effect sound (Wet) depends on the effect type. For descriptions of the individual effects, please see “Effect
Guide,” beginning on page 235.
The following parameters are the same as in Program mode.
For more information, please see “8–2: Insert FX Setup” on page 592.
However, unlike in Program mode, insert effect dynamic modulation (Dmod) and the post ‐ IFX
Pan: #8
,
Send 1
, and
Send 2
are controlled on the MIDI channel specified by
Ch
(Seq 8–4(5)(6)(7)(8)a). The control changes used are the same as in Program mode.
The pan (CC#8), send 1 and 2 settings you make here will be used when the song is played or recorded from the beginning. If you change the settings while recording a
MIDI track, the changes will be recorded as part of the musical data, and the settings will change when the data is played back. You can also change these settings during playback. However if pan (CC#8), send 1, or 2 data has been recorded, the settings will change accordingly.
If
Status
(Seq 3–1(2)c) is either INT or BTH, CC#8,
CC#93, and CC#91 can be received to control the pan following the insert effect, send 1, or send 2 respectively, and change their settings. When you switch songs or return to the beginning of the song, tracks whose
Status
is BTH, EXT, or EX2 will transmit these settings via MIDI. This data will be transmitted on the MIDI channels specified in the IFX 1–5 pages
(Seq 8–4(5)(6)(7)(8)a). (See Global P1: MIDI, SEQ Mode
“Track MIDI Out” on page 200)
Insert Effect:
IFX1…4
IFX5
IFX1…5: IFX On/Off
[000…193]
[000…171]
[Off, On]
Chain:
IFX1: Chain to
IFX2: Chain to
IFX3: Chain to
IFX1: Chain
IFX2: Chain
IFX3: Chain
IFX4: Chain
[IFX2…IFX5]
[IFX3…IFX5]
[IFX4…IFX5]
[Off, On]
[Off, On]
[Off, On]
[Off, On]
Pan:#8:
Pan: #8 (Post IFX PanCC#8) [L000…C064…R127]
Bus:
Bus (Bus Select)
Ctrl (FX Control Bus)
[Off, L/R]
[Off, 1, 2]
Send1/2:
Send1
Send2
[000…127]
[000…127]
For more information, please see “8–2: Insert FX Setup” on page 59.
V
8–3
:
Menu Command
• 0:
Memory Status
see p. 163
• 1:
Exclusive Solo
see p. 64
• 2:
Copy Insert Effect
see p. 66
• 3:
Swap Insert Effect
see p. 67
• 4:
FF/REW Speed
see p. 164
• 5:
Set Location (Set Location for Locate Key)
see p. 164
• 6:
Put Effect Setting to Track
see p. 184
For more information, please see “Sequencer: Menu
Command” on page 163.
149
Sequencer mode
150
8–4: IFX1
8–4a
8–4
Menu
Here, you can edit the parameters of the insert effect 1 you selected in the P8: Routing/IFX– Insert FX Setup page.
8–4a: Insert Effect 1 (IFX1)
IFX On/Off [Off, On]
Turns the insert effect on/off. This is linked with the On/Off setting in the P8: Routing/IFX– Insert FX Setup page.
Ch (Control Channel) [Ch01…16, All-R]
This specifies the MIDI channel that will control dynamic modulation (Dmod) for the insert effect.
Ch01…Ch16:
The insert effect will be controlled on the specified MIDI channel.
All-R:
The channel of any track routed through this effect can be used to control the effect. (Channels of each routed track will be indicated by “*”.)
Drum Kits and the MIDI Control Channel
If a Track is using a Drum Kit, and the Track’s
Bus (IFX/
Output) Select
(Seq 8–1(2)d) is
DKit
, this affects the
MIDI Control Channel as well. In this case, the Track’s
MIDI channel will be used to control any effect whose
Ch
is set to All ‐ R, regardless of the
Bus (IFX/Output)
Select
(Global 5–5b) settings or the settings of the
DrumKit IFX Patch
menu command.
P (Effect Preset)
[P00, P01…15, U00…15, —————]
Effect Presets let you easily store and recall all of the settings for an individual effect. You can store up to 16 user presets for each effect type, in addition to 15 re ‐ writable factory presets.
The same presets appear in all of the modes (Program,
Combination, Sequencer).
Note that edits to effects parameters are automatically stored with the Song–you don’t need to store them as an
Effect Preset. Presets just make it easier to re ‐ use your favorite settings.
For instance, you can save an Effect Preset while working on a particular Song, and then later use the same Effect Preset in a different Program, Combination, or Song.
P00: Initial Set:
These are the default settings that are recalled when you select an effect type in the Insert FX Setup page. You can’t save your own settings here.
P01…P15:
Preset data is saved in this area. We recommend that you store your settings in U00–U15.
U00…U15:
These are areas in which you can store your own settings.
—————:
This shows that no Effect Preset has been selected. You’ll see this if you’ve just selected an effect or selected a new Song. Selecting this setting from the menu will not have any effect.
Note:
Songs save the effects parameter settings, but they don’t save the number of the selected Effect Preset. If you select an Effect Preset, save the Song to media, and then re ‐ load the Song, the Effect Preset setting will revert to “
———
——.”
For more information, please see “Using Effect Presets” on page 60.
IFX1 Parameters:
IFX Parameters
Here, you can set the effect parameters of the insert effect you chose in the P8–3: Insert FX Setup page.
For more information, please see “Insert Effects (IFX1–
IFX5)” on page 240.
V
8–4
:
Menu Command
• 0:
Memory Status
see p. 163
• 1:
Exclusive Solo
see p. 64
• 2:
Copy Insert Effect
see p. 66
• 3:
Swap Insert Effect
see p. 67
• 4:
Write FX Preset
see p. 184
• 5:
FF/REW Speed
see p. 164
• 6:
Set Location (Set Location for Locate Key)
see p. 164
• 7:
Put Effect Setting to Track
see p. 184
For more information, please see “Sequencer: Menu
Command” on page 163.
8–5: IFX2, 8–6: IFX3, 8–7: IFX4,
8–8: IFX5
Here, you can edit the effect parameters for insert effects 2–5 selected in the Insert FX Setup page.
For more information, please see “8–4: IFX1” above.
8–9: FX Control T01–08,
8–10: FX Control T09–16
8–9a
8–9b
8–9c
8–9d
8–9
Menu
Here, you can specify the buses, and effect control bus, for the outputs of tracks 1–8 and 9–16.
8–9(10)a: Routing Map
8–9(10)b: Track Select, Tempo, RPPR
8–9(10)c: Track Info
For more information, please see “8–1(2)a: Routing Map” on
page 148 and “2–1: Trim T01–08, 2–2: Trim T09–16” on page 123.
SEQ P8: Routing/IFX (Insert Effect) 8–9: FX Control T01–08, 8–10: FX Control T09–16
8–9(10)d: Routing2
Bus (IFX/Output) Select [L/R, IFX1…5, Off]
This specifies the output bus for the oscillator(s). This is the same parameter as in the 8–1: IFX–
Routing 1 T01–08 and T09–16 pages.
For more information, please see “Bus (IFX/Output) Select” on page 148.
FX Control Bus [Off, 1, 2]
Sends the output of the track to an FX Control bus (two ‐ channel mono FX Ctrl 1 or 2).
Use the FX Control buses when you want a separate sound to control the audio input of an effect. You can use two FX
Control buses (each is a two ‐ channel mono bus) to control effects in various ways.
For more information, please see “FX Control Buses” on page 238.
V
8–9(10)
:
Menu Command
• 0:
Memory Status
see p. 163
• 1:
Exclusive Solo
see p. 64
• 2:
Copy Insert Effect
see p. 66
• 3:
Swap Insert Effect
see p. 67
• 4:
DrumKit IFX Patch
see p. 104
• 5:
FF/REW Speed
see p. 164
• 6:
Set Location (Set Location for Locate Key)
see p. 164
• 7:
Put Effect Setting to Track
see p. 184
For more information, please see “Sequencer: Menu
Command” on page 163.
151
152
Sequencer mode
SEQ P9: MFX/TFX/LFO (Master/Total Effect/LFO)
Here, you can adjust the settings for the master effects and the total effect. For instance, you can:
• Route a sound to the master effects and the total effect
• Make detailed settings for the master effects and the total effect
For more information, please see “Effect Guide” on page 235.
9–1c: TFX
TFX:
TFX
TFX On/Off
[000…171]
[Off, On]
For more information, please see “PROG P9: MFX/TFX/LFO
(Master/Total Effect/LFO)” on page 61.
9–1: Routing
9-1a
9-1b
9-1
Menu
9–1d: Master Volume
Master Volume [000…127]
For more information, please see “9–1c: Master Volume” on page 62.
9-1c
9-1b
9-1d
• Here, you can specify the type of master effects and total effect, and turn them On/Off.
• The master effects are sent to the L/R bus. The total effect is inserted into the L/R bus.
These parameters are the same as in Program mode.
For more information, please see “9–1: Routing” on page 61.
V
9–1: Menu Command
• 0:
Memory Status
see p. 163
• 1:
Exclusive Solo
see p. 64
• 2:
Copy Insert Effect
see p. 66
• 3:
Swap Insert Effect
see p. 67
• 4:
FF/REW Speed
see p. 164
• 5:
Set Location (Set Location for Locate Key)
see p. 164
• 6:
Put Effect Setting to Track
see p. 184
For more information, please see “Sequencer: Menu
Command” on page 163.
9–1a: Track Select
For more information, please see “2–1: Trim T01–08, 2–2:
Trim T09–16” on page 123.
9–1b: MFX1, 2
MFX1:
MFX1
MFX1 On/Off
Return 1
[000…193]
[Off, On]
[000…127]
MFX2:
MFX2
MFX2 On/Off
Return 2
[000…171]
[Off, On]
[000…127]
Chain:
Chain On/Off [Off, On]
Chain Direction [MFX1
→
MFX2, MFX2
→
MFX1]
Chain Level [000…127]
For more information, please see “9–2: MFX1” on page 62.
SEQ P9: MFX/TFX/LFO (Master/Total Effect/LFO) 9–2: MFX1
9–2: MFX1
9–2a
9–2b
9–2
Menu
Here, you can edit the parameters of the effect you selected for MFX1 in the P9: MFX/TFX/LFO– MFX1 page.
9–2a: MFX1
MFX1 On/Off [Off, On]
This turns master effect 1 on/off. This is linked with the on/ off setting in the P9: MFX/TFX/LFO– Routing page.
Ch (Control Channel) [Ch01…16, G ch]
Specifies the MIDI channel that will control dynamic modulation (Dmod) for the master effect.
Ch01…Ch16:
The specified MIDI channel will be used for control.
G ch:
The global
MIDI Channel
(Global 1–1a) will be used for control. Normally you will use the G ch setting.
P (Effect Preset)
[P00, P01…15, U00…15, —————]
Effect Presets let you easily store and recall all of the settings for an individual effect. You can store up to 16 user presets for each effect type, in addition to 15 re ‐ writable factory presets.
The same presets appear in all of the modes (Program,
Combination, Sequence).
Note that edits to effects parameters are automatically stored with the Combination–you don’t need to store them as an Effect Preset. Presets just make it easier to re ‐ use your favorite settings.
For instance, you can save an Effect Preset while working on a particular Combination, and then later use the same Effect
Preset in a different Program, Combination, or Song.
P00: Initial Set:
These are the default settings that are recalled when you select an effect type in the P9: MFX/TFX/
LFO– Routing page. You can’t save your own settings here.
P01…P15:
Preset data is saved in this area. We recommend that you store your settings in U00–U15.
U00…U15:
These are areas in which you can store your own settings.
—————:
This shows that no Effect Preset has been selected. You’ll see this if you’ve just selected an effect or selected a new Song. Selecting this setting from the menu will not have any effect.
For more details, please see “Using Effect Presets” on page 60.
MFX1 Parameters
Here, you can set the effect parameters of the effect you chose in the P9: MFX/TFX/LFO– Routing page.
For details on the individual effects, please see the “Effect
Guide” on page 235.
V
9–2: Menu Command
• 0:
Memory Status
see p. 163
• 1:
Exclusive Solo
see p. 64
• 2:
Copy Insert Effect
see p. 66
• 3:
Swap Insert Effect
see p. 67
• 4:
Write FX Preset
see p. 184
• 5:
FF/REW Speed
see p. 164
• 6:
Set Location (Set Location for Locate Key)
see p. 164
• 7:
Put Effect Setting to Track
see p. 184
For more information, please see “Sequencer: Menu
Command” on page 163.
9–3: MFX2, 9–4: TFX
These pages let you edit the parameters of Master Effect 2 and the Total Effect. To select different effects types, use the
P9: MFX/TFX/LFO– Routing page.
The parameters of MFX2, TFX are the same as for MFX1. For more information, please see “9–2: MFX1” above.
153
Sequencer mode
9–5: Common FX LFO
8–2
–8a
8–2
–8
Menu
8–2
–8b
154
The two Common FX LFO 1, 2 allow you to synchronize
LFO ‐ based modulation for multiple effects, such as phasers, flangers, filters, and so on.
The Common LFOs control only the frequency, MIDI synchronization, and reset options; each individual effect still has its own settings for the LFO waveform and phase.
Within the individual effects, you can choose whether to use one of the Common LFOs, or to use the individual effect’s frequency, sync, and/or reset settings instead. This is done via the effect’s
LFO Type
parameter; select
Individual
to use the effect’s settings, or
Common 1
or
2
to use the Common
LFOs.
9–5a: Common FX LFO1
Ctrl Ch (Control Channel) [Ch01…Ch16, Gch]
Specifies the MIDI channel that will control dynamic modulation (Dmod) for Common LFO 1 and 2.
Gch:
The global
MIDI channel
(Global 1–1a) will be used for control. This is the default setting.
Sync (Reset)
Source (Dmod Source)
Frequency
MIDI/Tempo Sync
[Off, On]
[List of Dmod Sources]
[0.02…20.00 (Hz)]
[Off, On]
BPM
Base Note
Times
[MIDI, 40.00…300.00]
[ ,
3
, ,
3
, ,
3
, ,
3
, , ]
[01…32]
These parameters are the same as in Program mode.
For more information, please see “9–5a: Common FX LFO1” on page 63.
9–5b: Common FX LFO2
These parameters are the same as for Common FX LFO1. For more information, please see “9–5a: Common FX LFO1” above.
V
9–5
:
Menu Command
• 0:
Memory Status
see p. 163
• 1:
Exclusive Solo
see p. 64
• 2:
Copy Insert Effect
see p. 66
• 3:
Swap Insert Effect
see p. 67
• 4:
FF/REW Speed
see p. 164
• 5:
Set Location (Set Location for Locate Key)
see p. 164
• 6:
Put Effect Setting to Track
see p. 184
For more information, please see “Sequencer: Menu
Command” on page 163.
SEQ P10: Pattern/RPPR 10–1: Pattern Edit
SEQ P10: Pattern/RPPR
Here, you can record and edit patterns, assign patterns to tracks of a song, and make RPPR (Realtime Pattern Play/
Recording) settings. You can also convert drum track patterns for use in Program, or other modes.
• You can use preset patterns, and user patterns.
Preset patterns provide patterns that are suitable for drum tracks; you can select these patterns from any song.
There are one hundred user patterns for each song; you can create and store your own patterns as desired.
• You can create the desired performance data for a track by using the menu commands
Put To Track
or
Copy To
Track
to place or copy patterns into a track. For more
information, please see “Put To Track” on page 187.
• The RPPR function lets you assign patterns to different keys and then trigger these patterns by pressing notes on the keyboard and record the result onto the track in
realtime. For more information, please see “10–3: RPPR
Setup” on page 157.
• You can create user drum track patterns.
User patterns in Sequencer mode can be converted using the menu command
Convert to Drum Trk Pattern
. For
more information, please see “Convert to Drum Trk
Pattern” on page 188.
Note:
User patterns in Sequencer mode are not saved internally; you must save them on an SD card, and load them each time after powering ‐ on. If you convert user patterns to user drum track patterns, they will be preserved in internal memory even when the power is turned off, meaning that you can manage them along with programs and combinations.
10–1: Pattern Edit
10-1a
10-1b
10-1c
10-1
Menu
Here, you can record and edit patterns, and assign them to tracks of a song. The following types of pattern operations are available.
• User patterns can be recorded in real ‐ time (as well as recorded from performances generated by the arpeggiator), step ‐ recorded, or created using the Get
From MIDI Track command or Copy Pattern command.
You can also copy a preset pattern to a user pattern and edit it. (You can’t directly edit a preset pattern.)
• Preset patterns and user patterns can be placed in or copied into a track.
• You can convert user patterns to drum track patterns.
10–1a: Location, Song Select, Track
Select
Location [01…99]
Displays the current measure location of the selected pattern.
Song Select
Selects a song.
[000…127: name]
The user pattern will be created in the song you select.
Track Select [Track01…16, Master Track]
Selects the track that will be used to record/play the pattern data. The pattern data will be recorded/played using the settings of the track you select. The area at the right displays the program bank, number, and name for the selected track.
Settings of the Master Track will be ignored. The most recently selected Track 01–16 will be used.
10–1b: Pattern (Pattern Bank), Pattern
Select, Tempo, Metronome, Reso,
Remove Data
Location
Popup
Song Select
Track
Select
Pattern
Bank
Tempo
Metronome
Resolution
Pattern Select
Remove
Data
How to record a user pattern
1. Use Song Select to select the song in which you want to create a user pattern.
2. Use Track Select to choose the sound that you will record.
The pattern you record will play back according to the sound you chose in
Track Select
.
3. Use Pattern Bank and Pattern Select to select the User pattern and the desired pattern number.
4. Select the menu command Pattern Parameter, and in the dialog box, specify the number of measures and the time signature of the pattern.
5. Check the tempo in “ ”.
6. If you want to record in realtime, set Reso to specify the resolution, and press the REC ( ) button and then the
START/STOP ( ) button to begin recording.
When you finish recording to the end of the measures specified by the
Pattern Parameter
, you will return to the first measure, and can continue recording while adding
more material. For more information, please see “Loop All
Tracks” on page 117.
If you want to perform step recording, select the menu command
Step Recording (Loop Type)
to open the dialog box, and record. For more information on step recording
procedure, please see “Step Recording” on page 168 and
“Step Recording (Loop Type)” on page 186.
7. After recording, use the menu commands as desired to edit the pattern or the events in the pattern.
155
156
Sequencer mode
Control data in pattern recording
To record control data in a pattern, you should restore the control data to its normal value within the pattern.
If you fail to restore the normal value, unnecessary control data may remain in a “stuck” position when you place the pattern in a song or use the RPPR function to play the pattern. However, the following control data will be automatically reset to the following values when the song or RPPR function finishes playing the pattern, or when playback is halted.
Controller
Modulation 1 (CC#01)
Modulation 2 (CC#02)
Expression (CC#11)
Ribbon controller (CC#16)
Damper switch (CC#64)
Sostenuto switch (CC#66)
Soft switch (CC#67)
EG sustain level (CC#70)
Resonance level (CC#71)
EG release time (CC#72)
EG attack time (CC#73)
Low pass filter cutoff (CC#74)
EG decay time (CC#75)
LFO1 speed (CC#76)
LFO1 depth (pitch) (CC#77)
LFO1 delay (CC#78)
Filter EG intensity (CC#79)
SW1 modulation (CC#80)
SW2 modulation (CC#81)
Channel aftertouch
Pitch bender
Reset value
00 (zero)
00 (zero)
127 (max)
64 (center)
00 (zero)
00 (zero)
00 (zero)
64 (center)
64 (center)
64 (center)
64 (center)
64 (center)
64 (center)
64 (center)
64 (center)
64 (center)
64 (center)
00 (zero)
00 (zero)
00 (zero)
00 (zero)
Pattern (Pattern Bank)
Selects the type of pattern.
[Preset, User]
If Preset is selected, it will not be possible to record. You will be able to select and execute the
Copy Pattern
,
Bounce
Pattern
,
Put To Track
, and
Copy To Track
menu commands.
Pattern Select
Selects a pattern.
[P000…605, U00…U99]
User patterns can be renamed in the P10: Pattern/RPPR–
Pattern Name page.
(Tempo) [040.00…300.00, EXT]
Specifies the playback tempo of the pattern. For more
information, please see “ (Tempo)” on page 110.
Metronome [Only REC, REC & Play, Off]
Specifies whether the metronome will sound during
recording or playback. For more information, please see “0–
8c: Metronome Setup” on page 119.
Reso (Realtime REC Quantize Resolution)
[Hi,
3
… ]
Specifies how the timing of the data being recorded into the
pattern will be corrected. For more information, please see
“Resolution (Realtime REC Quantize Resolution)” on page 111.
Remove Data [Off, On]
On (checked):
Unwanted performance data can be removed during pattern recording. The procedure is the same as explained in
Remove Data
of Loop All Tracks. For more information, please see “Remove Data” on page 118.
10–1c: USED IN SONG TRACK,
USED IN RPPR
USED IN SONG TRACK
This area indicates the pattern usage status for the patterns selected for the track.
USED IN RPPR
This area indicates the RPPR in which the selected pattern is used. The assigned key and the specified track are shown.
V
10–1: Menu Command
• 0:
Memory Status
see p. 163
• 1:
Exclusive Solo
see p. 64
• 2:
Step Recording (Loop Type)
see p. 186
• 3:
Event Edit
see p. 169
• 4:
Piano Roll
see p. 186
• 5:
Pattern Parameter
see p. 186
• 6:
Erase Pattern
see p. 186
• 7:
Copy Pattern
see p. 186
• 8:
Bounce Pattern
see p. 187
• 10:
Put To Track
see p. 187
• 11:
Copy To Track
see p. 188
• 12:
Convert to Drum Trk Pattern
see p. 188
• 13:
Load Drum Track Pattern
see p. 188
• 14:
Erase Drum Track Pattern
see p. 189
• 15:
FF/REW Speed
see p. 164
For more information, please see “Sequencer: Menu
Command” on page 163.
10–2: Pattern Name
SEQ P10: Pattern/RPPR 10–2: Pattern Name
10-2
Menu
10–3: RPPR Setup
10-3a
10-3b
10-3
Menu
10-2a
10–2a: Location, Song Select, Track
Select
10–2b: Pattern, Pattern Select, Tempo,
Metronome, Reso, Remove Data
For more information, please see “10–1a: Location, Song
Select, Track Select” on page 155 and “10–1b: Pattern
(Pattern Bank), Pattern Select, Tempo, Metronome, Reso,
Remove Data” on page 155.
10–2c: User Pattern Names
Pattern name [U00…U99]
Here, you can rename the pattern. Press the text edit button to open the dialog box, and input the name. You can enter up to 24 characters. See “Editing names” on page 117 of the
Operation guide.
V
10–2: Menu Command
• 0:
Memory Status
see p. 163
• 1:
Exclusive Solo
see p. 64
• 2:
Step Recording (Loop Type)
see p. 186
• 3:
Event Edit
see p. 169
• 4:
Piano Roll
see p. 186
• 5:
Pattern Parameter
see p. 186
• 6:
Erase Pattern
see p. 186
• 7:
Copy Pattern
see p. 186
• 8:
Bounce Pattern
see p. 187
• 9:
Get From Track
see p. 187
• 10:
Put To Track
see p. 187
• 11:
Copy To Track
see p. 188
• 12:
Convert to Drum Trk Pattern
see p. 188
• 13:
Load Drum Track Pattern
see p. 188
• 14:
Erase Drum Track Pattern
see p. 189
• 15:
FF/REW Speed
see p. 164
For more information, please see “Sequencer: Menu
Command” on page 163.
Here, you can adjust the settings for the RPPR (Realtime
Pattern Play/Recording) function. RPPR lets you assign patterns to individual keys, and then play back patterns simply by pressing individual notes on the keyboard. This performance can be recorded in real ‐ time.
For each song, you can assign either a preset pattern or a user pattern to each of the 72 keys in the range C#2–C8. For each key, you can specify the pattern, track number, and how the pattern will be played.
Keys used to play patterns via RPPR cannot be used for the arpeggiator. If RPPR is on, keys to which a pattern is not assigned will play the program of the track that’s selected in
Track Select
. In this case, the arpeggiator will operate if Arpeggiator A, or B is active, and assigned to the track. Notes generated by the arpeggiator will not trigger the RPPR function.
When Local Control is OFF (
Local Control On
Global
1–1a), the keyboard will not trigger RPPR pattern playback, except via notes received at the MIDI IN that match the currently selected track’s channel. If you have recorded only the trigger notes on an external sequencer and wish to use the playback from the external sequencer to trigger RPPR patterns on
KROME, set Local Control OFF.
If you want the note data generated by RPPR to be recorded by the external sequencer, set Local Control
ON, and turn off the echo back function of the external
sequencer. See “Local Control On settings” on page 359.
In the RPPR Setup page, RPPR is turned on automatically. This will be the same result as when the
RPPR check box (Seq 0–1(2)a) in each page is checked.
10–3a: Song Select, Track Select, Tempo
Song Select [000…127: name]
Selects the desired song. The RPPR settings will be assigned to the song you select here.
(Tempo) [040.00…300.00, EXT]
Specifies the playback tempo of the patterns. (Seq 0–1(2)a)
Track Select [Track01…16, Master Track]
When you play a key that is not assigned to RPPR, it will sound using the settings of the track that’s selected in
Track
Select
. Use this to select the track that you want to play together with RPPR, or to audition a pattern before you assign it. The program bank, number, and name of the selected track is shown at the right.
Each RPPR pattern will begin playing when you press the assigned key, regardless of the
Track Select
setting. It will sound using the settings of the track selected in
Track
Name
.
The Master Track setting is ignored. The last ‐ selected
Track 01–16 will be used.
157
Sequencer mode
158
Keyboard & Assigned Graphics
This shows the selected key, and the keys to which a pattern has been assigned by the RPPR function. See diagram below.
Non-assignable keys
Assigned keys
Not assigned keys
Key range
Selected key
C4
Key range
10–3b: RPPR Setup
KEY (Key Select) [C#2…C8]
Specifies the key to which you want to assign an RPPR pattern.
The following parameters will apply to the key that you select here.
Note:
You can also set the note and velocity values by holding down an edit cell or the ENTER button and playing a key (see OG p.10).
Assign [Off, On]
On (checked):
When you play the key specified by
KEY
, the pattern selected in
Pattern
will be triggered.
Off (unchecked):
That key will sound the currently selected track at the corresponding pitch, just as in normal Sequencer mode.
Mode [Once, Manual, Endless]
Specifies the way in which the pattern assigned to the specified
KEY
will be played.
Once:
When you press the key, the complete pattern will play once to the end and then stop.
Manual:
The pattern will continue repeating as long as you continue holding the key, and will stop as soon as you release the key.
Endless:
The pattern will continue repeating even after you release the key. To stop the pattern playback, press any note below C2, or press the same key once again.
Key-on
START
Once
Manual
START
Endless
START
Key-off
STOP
STOP
Same key, or C2
Key-on
STOP
Shift [–12…+12]
Adjusts the playback pitch of the pattern for the specified
KEY
in semitone steps over a range of ±1 octave.
With a setting of 0, the pattern will be played at its original pitch.
Sync [Off, Beat, Measure, SEQ]
Specifies the way in which the pattern playback will be synchronized when you press the specified
KEY
.
Off:
The pattern will begin playing at the moment you press the note.
Beat:
The pattern will synchronize to the beat of the other patterns that are already in play. This setting is suitable when you wish to play phrase patterns in unison.
Measure:
The pattern will synchronize to the measures of the pattern that was started by the first key. This setting is suitable for rhythm, bass or drum patterns.
SEQ:
The pattern will synchronize to the measures of the sequencer song.
Sync settings
Key 1 on Key 2 on Key 1 off
Song
Patterns 1 and 2 are set to
Mode=Manual, and have identical Sync settings
Sync: Off
Pattern 1
Pattern 2
Sync: Beat
Pattern 1
Pattern 2
Sync: Measure
Pattern 1
Pattern 2
Sync: SEQ
Pattern 1
Pattern 2
• When Beat or Measure are selected, pattern playback will begin when you press the first key. The second and subsequent patterns that are triggered from the keyboard will synchronize to the pattern that was started by the first key; with a setting of Beat they will synchronize in steps of a beat, and with a setting of Measure they will synchronize in steps of a measure.
• When SEQ is selected, the pattern will play back in synchronization with the measures of the sequencer song.
The pattern will synchronize with the currently ‐ playing song, so you must start the song before you play notes on the keyboard.
• Beat, Measure, and SEQ will cause the pattern to start immediately if you play the key within a thirty ‐ second note of the timing of the respective beat or measure, but if you play the key later than this, the start of the pattern will be delayed by a beat.
• Set this to SEQ if you want pattern playback by RPPR to be synchronized to the currently ‐ running arpeggiator.
Note:
If you want the arpeggiator performance to synchronize to the currently ‐ running RPPR playback, turn
Off the arpeggiator’s
Key Sync
. The arpeggiator will synchronize to the beat based on the RPPR playback timing.
Note:
If you want the drum track pattern performance to synchronize to the currently ‐ running RPPR playback, turn
On the drum track function’s
Sync
(in each mode, the Drum
Track page Trigger). The drum track will be triggered at intervals of one measure at the RPPR playback timing.
Stopping RPPR pattern playback
You can stop all currently ‐ running RPPR pattern playback by pressing C2 or any lower key.
Pattern playback will stop immediately for keys whose
Sync
parameter is set to Off, but pattern playback for other keys will stop at the beginning of the beat or measure. You can immediately stop pattern playback for keys whose
Sync
is
On by pressing C2 or a lower key twice in rapid succession.
Pattern Bank [Preset, User]
Pattern [P000…605, U00…99]
Selects the RPPR pattern for the key selected in
KEY
. If the selected user pattern contains no musical data, there will be no sound when you press that key.
Track [Track 01…16]
Selects the track that will be used for the RPPR pattern selected for the
KEY
. When you play the key, the pattern will be played according to the settings of the track you select here. You can make track settings in the P0: Play/REC–P5:
MIDI Filter pages.
When you record in real time with the RPPN function turned on, the data will be recorded on the track you select here. For more information, please see “Recording an RPPR performance”.
Information
shows the bank, name, and number of the program that’s selected for
Track
.
Information
This area shows the bank, name, and number of the program that’s selected for the track.
Revert
When you press this button, the
Pattern (Pattern Bank)
,
Pattern Select
, and
Track
settings of the last ‐ edited
KEY
for which
Assign
was
checked
will be copied to these parameters of the currently selected
KEY
.
V
10–3: Menu Command
• 0:
Memory Status
see p. 163
• 1:
Exclusive Solo
see p. 64
For more information, please see “Sequencer: Menu
Command” on page 163.
SEQ P10: Pattern/RPPR 10–3: RPPR Setup
159
160
Sequencer mode
SEQ P11: Cue List
The cue list allows playback of multiple songs in succession.
You can specify a number of repetitions for each song.
The KROME allows you to create twenty cue lists. A single cue list can hold up to 99 songs.
Each unit in a cue list is called a “step,” and you can specify a song number and a repeat (number of repetitions) for each step.
For example you could create each part of a song (intro, melody A, melody B, break, solo backing, ending etc.) as an individual song, and use a cue list to play the intro twice, melody A four times, melody B four times, the break twice, melody A four times … etc. to produce the entire song. In cases when you wish to change the structure of the song, this Cue List function can help you work more efficiently.
The menu command
Convert to Song
lets you transform the songs in a cue list into a single song.
For example, you can use a cue list to create the backing, convert the cue list to a song, and then add solo phrases on unused tracks.
11–1: Cue List
11-1a
11-1b
11-1
Menu
11-1c
11–1a: Location, Meter, , Tempo Mode,
Cue List Select, Track Select
Location [0001:01.000…9999:16.191]
This displays the current location within the selected cue list.
From the left, the numbers indicate the measure, beat, and clock. Each can be set separately, and this will change the current location within the cue list.
The range of the beat and clock will depend on the time signature of the corresponding song.
When
MIDI Clock
(Global 1–1a) is
Internal
, a Song
Position Pointer message will be transmitted each time you change the location within the cue list. If
MIDI
Clock
is set to
External MIDI
or
External USB
, Song
Position Pointer messages from the specified source will cause the location to change.
Meter (Time Signature) [1/4…16/16]
This displays the time signature of the currently ‐ playing song.
(Tempo) [040.00…300.00]
Specifies the tempo at which the song in the cue list will be
played). For more information, please see “ (Tempo)” on page 110.
Tempo Mode [Auto, Manu]
Auto:
Playback will follow the tempo specified by each song in the cue list. It will not be possible to change the
(Tempo)
setting during playback.
Manu (Manual):
Tempo specified in the song will be ignored, and playback will use the tempo specified above for
(Tempo)
.
Cue List Select [C00…C19: name]
Selects the cue list that you wish to play.
When using a cue list to play songs, you must first load the necessary data into internal memory, either from media, or by a MIDI data dump from an external sequencer.
Selecting a cue list in this page will cause a Song Select message (corresponding to the cue list number) and
Song Position Pointer message to be transmitted. When a Song Select message is received from the specified source, the cue list will be switched.
Track Select [Track01…Track16: name]
Selects the track that you wish to play manually from the keyboard along with the playback of the cue list.
While a cue list is playing, you can play along using the track settings and musical data of the song selected by the current
Step
(Seq 11–1b).
The track selected here can be specified independently for each song in the cue list.
When you are playing back different songs in succession, and want to play along using the same program on the keyboard, set
Track Select
(Seq 0–1(2)a) to the same track and program for each step.
At the right you can view the program bank, program number, and name of the program selected for
Track Select
.
Location Meter
Tempo Mode
Tempo
Cue List
Select
Track
Select
STEP/
SONG/
Length
Step [Measure] Song (Cue Edit-Song)
Repeat Load FX?
11–1b: Cue List
Selected Step Information
This shows information on the currently selected or playing
Step
.
Step [01…99/01…99]
The selected step number is shown at the left, and the total number of steps (not including the last step) is shown at the right.
Song [000…127]
This shows the number and name of the song for the currently selected step.
Length [000…999]
This shows the number of measures in the song for the currently selected step.
SEQ P11: Cue List What to do when playing back a cue list and the songs do not transition smoothly
Step, Song, Repeat, Load FX?
Step [Measure] [01…100 (M0001…M9999)]
This displays the step number and its starting measure.
Step
indicates each step number. The
Step
indicated by the symbol is the currently ‐ selected or currently ‐ playing step.
This can be directly selected by
Song
(Seq 11–1b) or
Current
Step
(Seq 11–1c). When stopped, pressing the START/STOP
( ) button will cause playback to begin from this step.
Measure
indicates the starting measure of each step. This cannot be edited.
Song (Cue Edit-Song)
[S000…S127: name/End, Continue to Step01]
S000…S127:
Specifies a song for each step. This cannot be edited during playback.
End
and
Continue to Step01
can be specified only for the last step of the cue list.
End:
Playback will stop at the last step of the cue list.
Continue to Step01:
At the last step of the cue list, playback will return to
Step 01
and the cue list will continue playing endlessly. To stop, press the START/STOP ( ) button.
The song position bar at the bottom indicates the location of the current measure within the song of this step.
Repeat [01…64, FS]
Specifies the number of times that the song of this step will be repeated.
FS:
A foot switch connected to the rear panel can be used to specify the point at which the song will stop repeating. When you press the foot switch, the current repetition of the song will finish playing. Playback will then advance to the next step. Set
Foot Switch Assign
(Global 2–1a) to
Cue Repeat Control
.
Load FX? (Cue Edit-Load Fx) [Off, On]
Specifies whether the effects specified by the song assigned to each step will be used.
On (checked):
The effect settings of the song specified for the current step will be used. When playback moves to the next step, the effect settings will also change.
Off (unchecked):
The effect settings will not change.
Depending on the effect settings, a certain amount of time may be required to switch effects. In this case, playback will not be smooth from song to song.
If you want to transition smoothly from song to song inside of a cue list, check
Load FX?
in
Step 01
. For the remaining steps, do not check
Load FX?
With these settings, the effects will be set before playback begins, so there will be no time lag to interrupt the smooth transition between songs.
Although it is not possible to change the effect types in the middle of a cue list, you can use the dynamic modulation function or MIDI control changes (effect control) to apply reverb more deeply to certain songs, or raise the LFO speed for other songs, etc.
When using a cue list to construct a song, we recommend this method. When you execute the
Convert to Song
menu command, the effect settings of the
Step 01
song will be specified at the beginning of the song that is created by the conversion.
Even when
Load FX?
is not checked, there may be a time lag in the transition from one song to the next, depending on the musical data in the song. There may also be cases in which the musical data at the transition between songs does not play at the correct timing. To fix this, you can edit the musical data of the song, or convert the cue list to a single song. If you use
Convert to Song
to convert the cue list to a song, there will be no time lag at the transition, and the musical data will play at the correct timing.
11–1c: Insert, Cut, Copy, Current Step
Insert
When you press the
Insert button
, the step data that was temporarily saved in the buffer by the
Copy button
or
Cut button
will be inserted at the
Current Step
. (If copy or cut has not been executed, default data will be inserted.)
Cut
When you press the
Cut button
, the
Current Step
will be cut, and its data will be saved temporarily in the buffer. If you
Insert
immediately after you cut, the data will return the state in which it was before you cut.
Copy
When you press the
Copy button
, the data of the
Current
Step
will be saved temporarily in the buffer.
Press the
Insert button
to insert the copied step into the
Current Step
.
Current Step [01…100]
Selects the step that will be inserted, cut or copied.
If you wish to play back from a step in the middle of the cue list, select the desired step here, and press the START/STOP
( ) button.
See “Creating and playing a Cue List” on page 74 of the
Operation guide.
What to do when playing back a cue list and the songs do not transition smoothly
Different effect settings from song to song, and dense amounts of playback data within the song, may cause a time lag between songs or create timing problems during transitions in cue ‐ list playback. In such cases, use
Convert to
Song
to transform the cue list into a single song. When you play back this song, there will be no time lag at the transition, and the data will play at the correct timing.
If the effect settings differ between songs, and you want to smooth the transition between songs, check
FX
for Step 01.
This way, the effect settings will be made before playback begins, and there will be no time lag when cue list playback is started or when switching from song to song. Although it will not be possible to change effect types within the cue list, you can use dynamic modulation or MIDI control changes such as Effect Control to control the effects within the cue list, for example applying reverb more deeply on certain songs, or raising the LFO speed for a specific song. We recommend this method if you will be using a cue list to construct the song.
When you execute the menu command
Convert to Song
, the effect settings of the
Step
01 song will be specified for the song that results from the conversion.
Even if
FX
is not checked, there may be cases in which a time lag in the transition between songs, depending on the musical data of the song. Also, there may be cases in which the musical data is not played at the correct timing at song transitions. If this occurs, you can edit the musical data of the song, or convert the cue list to a song for playback. If you use
Convert to Song
to convert the cue list to a song, there will be no time lag during playback at the transitions, and the musical data will be played at the correct timing.
When you complete a cue list and convert it into a song, the track settings (e.g., program, pan, volume) of each song will be converted into performance data so that they will be reproduced correctly. However, it may not be possible for the playback result of a cue list to be
161
162
Sequencer mode
converted to a song if settings such as the MIDI channel do not match.
Using a foot switch to switch the Step
You can use a foot switch to switch the Step.
If you set
Repeat
to
FS
, a foot switch connected to the
ASSIGNABLE SWITCH jack will control the timing at which the song stops repeating. Set
Foot Switch Assign
(Global P2: Controllers page) to Cue Repeat Control.
Converting a cue list into a song
Although it is not possible to record additional material onto tracks in a cue list, you can convert a cue list to a song, and then record solos etc. on vacant tracks. You will also need to convert a cue list to a song if you wish to save it to external media as SMF data.
1. Select the menu command “Convert to Song”.
A dialog box will appear.
2. In “To Song,” specify the destination song number for the converted data.
The cue list name will automatically be assigned as the song name of the converted data. (For details and cautions regarding
Convert to Song
, please see “Convert to Song
(Convert Cue List to Song)” on page 189.)
In the dialog box that appears, it is not necessary to specify
Set Length
when selecting a new song as the conversion destination. The number of measures in the converted song will be used. Press the OK button, and the Convert Cue List dialog box will appear.
V
11–1: Menu Command
• 0:
Memory Status
see p. 163
• 1:
Exclusive Solo
see p. 64
• 2:
Rename Cue List
see p. 189
• 3:
Delete Cue List
see p. 189
• 4:
Copy Cue List
see p. 189
• 5:
Convert to Song (Convert Cue List to Song)
see p.
189
• 6:
Copy Song
see p. 190
• 7:
FF/REW Speed
see p. 164
• 8:
Set Location (Set Location for Locate Key)
see p. 164
For more information, please see “Sequencer: Menu
Command” on page 163.
3. Press the OK button.
The cue list will be converted into a song. Access the P0–1:
Play/REC page, select the song number that you specified as the conversion destination, and check the results.
Sequencer: Menu Command Memory Status
Sequencer: Menu Command
Tip:
While this command is active, the ENTER button will operate as the OK button and the EXIT button will operate as the Cancel button.
Procedure for menu commands
1. Select the menu command.
2. Make settings in the dialog box.
For details on the content of each dialog box, refer to the explanation of each command.
3. To execute, press the OK button. To exit without executing, press the Cancel button.
Memory Status
This displays the remaining amount of sequencer memory.
It is available on every page in Sequencer mode.
Exclusive Solo
This specifies how the Solo function will operate. Each time you select
Exclusive Solo
, the setting will alternate between
multiple solo and exclusive solo. For more information, please see “Exclusive Solo” on page 64.
It is available on every page in Sequencer mode.
Rename Song
Rename Song
is available on all of the tabs under the Play/
REC, Play/REC Control, Controllers, EQ, Track Param,
Zone/Delay, MIDI Filter 1, MIDI Filter2, and Drum Track pages.
Here, you can rename the selected song. A name of up to 24 characters can be input.
For more information, please see “Editing names” on page 91 of the Owner’s manual.
Copy From Song
Copy From Song
is available on all of the tabs under the
Play/REC, Play/REC Control, Controllers, EQ, Track Param,
Zone/Delay, MIDI Filter 1, MIDI Filter2, and Drum Track pages.
This command copies all of the setting data and musical data from the specified song to the currently selected song.
1. In From, specify the copy source song number.
2. Select the data that you wish to copy.
All:
will copy all setting data and musical data (track events and patterns, etc.).
Without Track/Pattern Events:
will copy only the setting data of songs, except for Play Loop and RPPR data.
Be aware that if you execute
All
, all setting data and musical data of the currently selected song will be erased and rewritten by the data from the copy source song. If you execute
Without Track/Pattern Events
, song setting data
(but not Play Loop and RPPR) will be rewritten.
Load Template Song
Load Template Song
is available on all of the tabs under the
Play/REC, Play/REC Control, Controllers, EQ, Track Param,
Zone/Delay, MIDI Filter 1, MIDI Filter2, and Drum Track pages.
This command loads a template song.
The built ‐ in sequencer contains sixteen different
preset template songs
(P00–15) that contain settings for programs and effects appropriate for various musical styles. You are also free to create your own favorite settings for programs, track parameters, and effects, and save them as one of sixteen
user template songs
(U00–15). For more information, please see “Save Template Song (Save as User
Template Song)” on page 164.
Delete Song
Delete Song
is available on all of the tabs under the Play/
REC, Play/REC Control, Controllers, EQ, Track Param,
Zone/Delay, MIDI Filter 1, MIDI Filter2, and Drum Track pages.
This command deletes the currently selected song.
When you execute this command, the musical data, setting data, and patterns etc. of the currently selected song will be erased, and the memory area allocated to that song will be freed.
If in step 2 you checked
Copy Pattern to Track too?
and pressed the OK button, the
Copy Pattern To Track
dialog
1. In From, specify the template song that you wish to load.
2. If you check Copy Pattern to Track too?, the Copy Pattern To Track dialog box will appear automatically after
Load Template Song has been executed.
If you execute
without checking
this, only the template song you specified in step 2 will be loaded.
When you execute, song settings other than Play Loop and
RPPR will be copied.
box will appear.
163
164
Sequencer mode
FF/REW Speed
FF/REW Speed
is available on every pages, except for the
Pattern/RPPR page RPPR Setup tab.
This allows you to set the speed at which fast ‐ forward or rewind will occur when you press the FF button or REW button.
This dialog box is the same as in the menu command
Copy
To Track
.
3. In To Track, select the copy destination track.
In
Measure
, specify the beginning measure of the copy destination.
Note:
Track 1 of all sixteen preset template contains a drum category program. (In preset template songs P02, P04, P08, and P15 drum category programs are specified for multiple tracks.)
The pattern names of the preset patterns indicate the musical genre and part of the optimal drum category program.
By loading the drum track for these preset template songs and the corresponding preset patterns, you can efficiently set up a drum track that is suited to each preset template song.
When you execute,
Measure
will count up automatically.
You may then copy patterns as well. To exit the command, press the
Exit button
.
For details on how to copy preset patterns to a song along with the preset template song, please see “Using template songs” on page 58 of the Operation guide.
Save Template Song
(Save as User Template Song)
Save Template Song
is available on all of the tabs under the
Play/REC, Play/REC Control, Controllers, EQ, Track Param,
Zone/Delay, MIDI Filter 1, MIDI Filter2, and Drum Track pages.
This command saves the program selections, track parameters, and effect settings etc. of the current song as a user template song U00–15. The settings you save here can also be loaded in Song Play mode.
1. In Speed, specify the speed (relative to the playback tempo) at which fast-forward and rewind will occur.
The Speed setting is in multiples of the playback tempo. A setting of 1 is the same speed as the playback tempo.
Settings of 2–4 respectively correspond to double, triple, or quadruple speed of the playback tempo.
Note:
Fast ‐ forward and rewind speeds may be slower in regions with dense performance data. Fast ‐ forward and rewind speeds will differ between regions where the performance data is dense or sparse.
2. If Ignore Tempo is checked, the playback tempo and note length will be ignored, and fast-forward and rewind occurs.
If this item is
unchecked
, fast ‐ forward and rewind will be performed at the speed you specify for
Speed
.
Set Location
(Set Location for Locate Key)
Set Location
is available on every pages, except for the
Pattern RPPR page.
When you press the LOCATE button, you will move to the location specified here.
1. In To, specify the user template song (U00–15) in which the data will be saved.
Be aware that when you execute this command, all settings of the destination Template will be erased and rewritten with the current settings.
Note:
The Play Loop and RPPR settings are not saved. If you want to save these settings and the user patterns, execute
Save SEQ
in Media mode and save them to an SD card.
1. In Location, specify the location to which you will move when you press the LOCATE button.
From the left, the values are Measure (001–999), Beat (01–
16), and Tick (000–479).
If you specify
001:01.000
, you will move to the beginning of the song when you press the LOCATE button.
Note:
When this dialog box is not open, you can hold down the ENTER button and press the LOCATE button to set the current location as the
Set Location
value.
Sequencer: Menu Command GM Initialize
GM Initialize
GM Initialize
is available on all of the tabs under the Play/
REC, Play/REC Control, Controllers, EQ, Track Param,
Zone/Delay, MIDI Filter 1, MIDI Filter2, and Drum Track pages.
This command transmits a GM System On message to the
Sequencer mode, resetting all tracks to the GM settings. For more information, please see “GM Initialize” on page 165.
GM Initialize List
Page Parameter
P0
P2
P3
Program T01–08, T09–16
Mixer T01–08, 09–16
EQ Trim T01–08, T09–16
EQ Gain T01–08, T09–16
MIDI T01–08, T09–16
OSC T01–08, T09–16
Pitch T01–08, T09–16
Program Select
Play/Mute, Solo
Pan
Volume
Auto Load Prog EQ
Bypass
Input Trim
High Gain [dB]
Mid Frequency [Hz]
Mid Gain [dB]
Low Gain [dB]
Status
MIDI Channel
Bank Select MSB/LSB
Force OSC Mode
OSC Select
Portamento
Transpose
Detune
Bend Range
Use Program’s Scale Scale T01–08, T09–16
Key Zone T01–08, T09–16
Vel Zone T01–08, T09–16
P4
Delay T01–08, T09–16
MIDI Tempo Sync.
Time
P5 MIDI Filter1, 2
P7
P8
P9
Arpeggiator
Drum Track
Routing1 T01–08, T09–
16
Insert FX Setup
Various parameters
Various parameters
Bus (IFX/Output) Select
Send1 (MFX1)
Send2 (MFX2)
IFX1…5
Pan: #8
FX Control Bus
Send1/2
Other parameter
Routing2 T01–08, T09–
16
Common FX LFO
FX Control Bus
Routing
Other parameters
MFX1
MFX2
Chain
Chain Direction
Level
Return1
Return 2
Other MFX parameters ‐
TFX
Master Level
‐
‐
In Sequencer mode, when a GM System On message is received from an external device, or if a GM System On message is recorded in the sequence data, the KROME will be reset to settings appropriate for GM just as if you had executed this command. However, in these cases, the various P9: MFX/TFX/LFO parameters will not be reset.
‐
‐
‐
L/R
0
40
‐
‐
Off
‐
‐
‐
‐
‐
‐
‐
‐
‐
‐
‐
Track 1–9, 11–16
G001
‐
C064
100
On
Off
99
+00.0
3.20k
+00.0
+00.0
‐
‐
000
‐
‐
Off
+00
+0000
+02
‐
C–1…G9 (Slope=000)
001…127 (Slope=000)
Off
0000
On
Track 10
‐
‐
‐
‐
‐
0
40
000
‐
‐
Off
+00
+0000
+02
‐
On
‐
‐
L/R
C–1…G9
001…127
Off
0000 g(d)001
‐
C064
100
On
Off
99
+00.0
3.20k
+00.0
+00.0
‐
‐
Off
‐
‐
‐
‐
‐
‐
‐
‐
‐
‐
‐
Setting remains unchanged
Setting remains unchanged
Setting remains unchanged
Setting remains unchanged
Setting remains unchanged
Setting remains unchanged
Setting remains unchanged
Setting remains unchanged
Setting remains unchanged
Setting remains unchanged
Setting remains unchanged
Setting remains unchanged
Setting remains unchanged
Setting remains unchanged
Stereo Chorus
Reverb Smooth Hall
Off
1
→
2
127
127
50
Setting remains unchanged
Setting remains unchanged
Setting remains unchanged
165
Sequencer mode
166
Copy from Combination
Copy From Combi
is available on all of the tabs under the
Play/REC, Play/REC Control, Controllers, EQ, Track Param,
Zone/Delay, MIDI Filter 1, MIDI Filter2, and Drum Track pages.
This command copies the parameters of the specified combination to the setting data of the currently selected song.
Note:
Only the timbres used by the combination will be copied. Timbres in the combination whose Status is Off will not be copied. If any timbres are set to Mute, the corresponding tracks of the song will be set to a
Status
of
Off.
If the recorded performance is not reproduced correctly during playback
If you use the menu command
Copy From Combi
to copy the settings of a combination, and then perform multi ‐ track recording with the arpeggiator turned on, there may be cases in which the performance during recording is not reproduced correctly during playback.
Multiple tracks that are set to the same MIDI channel are combined into a single stream of performance data during recording. If there is a track with the same MIDI channel as the track being played by the arpeggiator, the data played by the arpeggiator will be combined with the performance data that was played manually, and all of this data will be sounded by each track of the same channel (if
Status
is INT).
In such cases, you can solve the problem by creating a track that will drive the arpeggiator on a different MIDI Channel.
If the recorded performance is not reproduced by the playback, check the following conditions.
These settings can be executed automatically if you check
Auto adjust Arp setting for Multi REC
in the menu command
Copy From Combi
. Normally, you will check this to execute the settings. In this case, these adjustments will not be necessary, but you can verify here that the automatic adjustments have been made.
• SEQ P7: ARP/DT– ARP Setup T01–08 and T09–16 page
Arpeggiator Run
A, B, and
Arpeggiator Assign
settings
1. In Combination, select the copy source destination.
2. Use the IFXs
,
MFXs and TFX check boxes to specify whether you want the effect settings of the combination to be copied as well.
IFXs:
All insert effect settings of the copy ‐ source combination (the contents of the Insert FX Setup page and the IFX1–5 effect parameters) will be copied.
MFXs:
All master effect settings of the copy ‐ source combination will be copied.
TFX:
All total effect settings of the copy ‐ source combination will be copied.
3. Specify the desired Auto adjust Arp setting for Multi
REC setting.
You have the option of checking the
Auto adjust Arp setting for Multi REC
. As necessary, this function will adjust the
MIDI channel etc. of any tracks that need to be changed, and/or add new tracks, in order to ensure that when you perform multi ‐ recording with the arpeggiator on, the same sound will be reproduced during recording as during playback.
Note:
This function makes adjustments depending on the
ARP state of the combination. When you copy a combination that was written with the arpeggiator turned off, it is assumed that you will leave the arpeggiator off in the song. If you want to use the arpeggiator in the song, you should write the combination with the arpeggiator turned on, and then copy it to the song.
If this is
checked
, the MIDI channels etc. of the tracks will be corrected.
Multi REC
(Seq 0–8b) and
PLAY/MUTE/REC
(Seq 0–1(2)a) will also be set automatically.
In addition,
Recording Setup
,
Overwrite
(Seq 0–8b) will be selected. (Note that the automatically ‐ set
Multi REC
and
PLAY/MUTE/REC
will be reset when you re ‐ select the song.)
Note:
For details on the data that will be adjusted, see below.
The content described here will be corrected automatically.
Depending on the settings of the combination, it may be necessary to make additional changes to the track settings in addition to the settings here.
• SEQ P3: Track Param– MIDI Ch T01–08 and T09–16 page
MIDI Channel
settings
If
Arpeggiator Run
A and B are checked, and the arpeggiator is assigned to a track, make sure that
MIDI
Channel
(Global P1: MIDI) is set to other than 01.
Make sure that the global MIDI channel (Global P1: MIDI,
MIDI Channel
) is set to 01.
Arpeggiator Run
If either “A” or “B” are checked
MIDI Channel a
01 only
01 02, 01 03, etc.
Correction
Correction required
No correction required
Sequencer: Menu Command Copy from Program
01 only
If both “A” and “B” are checked
01 02, 01 03, etc.
01 02 03, etc.
Correction required
Correction required for only one
No correction required/
Correction required b a. If the
MIDI Channel
of multiple tracks operated by the arpeggiator is set only to 01, refer to the lines for “01 only.” If the
MIDI Channel
settings are 01 and one other channel, such as 01 and 02, then refer to the lines for “01
02, etc.” If the
MIDI Channel
settings are 01 and multiple other MIDI channels, such as 01 and 02 and 03, then refer to the line for “01 02 03, etc.” b. Correction is necessary only if the tracks operated by a single arpeggiator are using only
MIDI Channel
01. In some cases, correction may also be necessary if the two arpeggiators use the same MIDI channel.
Depending on the combination settings, it may also be necessary to change the track settings as well.
The preceding illustration shows the example of copying the combination “B109: Echo Jamm” with
Auto adjust Arp setting for Multi REC
un ‐ checked in
Copy From Combi
.
Select a new song, and execute the copy to see the result.
(For more about the arpeggiator settings in this
combination, see page 91.)
Using these settings as an example, determine whether correction is necessary, and if so, what needs to be corrected.
Arpeggiator Run
A and B are checked, and
MIDI Channel
01 and 02 are selected. Correction is necessary for one of the arpeggiators. If you perform multi ‐ track recording with these settings, the MIDI channels of T01, 02, and 03 are the same, so the high ‐ register guitar/piano/pad (T02, T03, and
T05), the low ‐ register bass (T01), and the gutar riff played by arpeggiator B (T02) will have their performance data combined into one stream, and the performance will not be reproduced at playback. (T16 is a dummy track used to trigger arpeggiator A.)
1. So that the bass played by arpeggiator B can be recorded separately, change the MIDI channel of T02.
Select the SEQ P3: Track Param– MIDI T01–08 page, and change the T02
MIDI Channel
to 03.
2. Add settings for triggering arpeggiator B.
Select the SEQ P3: Track Param– MIDI T09–16 page, and for track 8 (or any unused track), turn
Status
Off, and set the
MIDI Channel
to 01. (T08 will be a dummy track used to trigger arpeggiator A.)
3. Select the SEQ P7: ARP/DT– ARP Setup T09–16 page.
Set the track 8 Assign to B.
This will produce the following settings.
Track
Assign
Status
MIDI Ch.
T01 T02 T03 T04 T05 T06 T07 T08 T16
Off B Off A Off Off Off B A
INT INT INT INT INT INT Off Off Off
01 03
01
02 01 01 10 01 01
This completes the corrections. In the Sequencer P0: Play/
REC– Preference page, set
Track Select
to any track whose
MIDI channel is 01. Check the
Multi REC
check box and perform multi ‐ track recording.
Copy from Program
Copy from Program
is available on all of the tabs under the
Play/REC, Play/REC Control, Controllers, EQ, Track Param,
Zone/Delay, MIDI Filter 1, MIDI Filter2, and Drum Track pages.
This command copies settings from the program you specify to the currently selected song.
This is the same function as in Combination mode; for
details, please see “Copy from Program” on page 101.
This command in Sequencer mode differs from its behavior in Combination mode in that the channels assigned to the tracks of the song will be preserved regardless of the
with
Arp
setting of the copy ‐ destination track’s
MIDI Channel
.
(See step 4.)
Copy Tone Adjust
Tone Adjust tab of the play/REC page.
For more information, please see “Copy Tone Adjust” on page 65.
Reset Tone Adjust
Tone Adjust tab of the PLAY/REC page.
For more information, please see “Reset Tone Adjust” on page 65.
Copy Drum Track
Copy Drum Track
is available on the Drum Track tab of the
ARP/DT page.
This command copies the drum track settings of the specified Program, Combination, or Song.
For more information, please see “Copy Drum Track” on page 65.
Erase Drum Track Pattern
Erase Drum Track
is available on the Drum Track tab of the
ARP/DT page.
This erases the drum track pattern you specify.
For more information, please see “Erase Drum Track
Pattern” on page 66.
Detune BPM Adjust
Detune BPM Adjust
is available on the Pitch tab of Track
Pram page.
When the program selected for a track uses a phrase, or rhythm loop multisample, you can use this command to change the BPM of the phrase or rhythm. The BPM can be adjusted by modifying the pitch. This command is available when the
Detune
setting of that track is selected. When you execute this command, the selected
Detune
value will be adjusted.
For more information, please see “Detune BPM Adjust” on page 103.
Copy Arpeggiator
Copy Arpeggiator
is available on the Arp A tab and Arp B tab of Play/REC Control page or Setup tab, Arp A tab, Arp B tab, Scan Zone tab of the ARP/DT page.
This command can be used to copy arpeggio settings from another location to the current program.
For more information, please see “Copy Arpeggiator” on page 66.
167
Sequencer mode
Step Recording
Step Recording
is available on all of the tabs of the Track
Edit page.
Step recording allows you to specify the length and velocity of each note numerically, and to input the pitches from the keyboard. You can use the
Rest button
and
Tie button
to input a rest or tie.
If you use step recording to input data into a track that already contains sequence data, all data will be erased from the
From Measure
and subsequent measures. If after inputting, you decide to revert to the prior data, use the Compare function.
To input data with a continuously ‐ changing value such as pitch bend, it is best to use
Create Control Data
. To input individual data events such as program changes, use
Event
Edit
.
1. Use Track Select to select the track into which you wish to input data, and use From Measure (Seq 6–1c) to specify the measure at which you wish to begin input.
2. Select “Step Recording” to open the dialog box.
Time signature
Location within the measure (beat, clock)
Note number
Velocity
Length (beats, clocks)
3. In Meter, set the time signature.
This will show the time signature that has already been set for the measure.
If you change the time signature setting, the time signature data of the measures you record will change, and all tracks will change to the time signature you specified.
4. In Step Time, specify the length (in terms of a note value) of the basic interval at which you will input data.
From the popup menu at the left, select the note length in a range of (whole note) through (32nd note).
If you want the selected note value to be a dotted note or a triplet, use the popup menu at the right to select a dot
“
. (Dot)
” or triplet “
3 (Triplet)
.” To use the unmodified value of the selected note, choose “– (Normal).”
The following table shows the number of clocks represented by each
Step Time
selection.
With the PAUSE ( ) button pressed, you can hold down the ENTER button and play a note on the keyboard to specify the velocity value. If you set Note Velocity to
Key
, the actual velocity at which you played the key will be input.
7. Input the note events described below by playing notes on the keyboard or by pressing the buttons in the lower part of the dialog box.
• Inputting notes
When you press a key on the keyboard, that note number will be input as a note of the length specified in step 4.
When you press a chord on the keyboard, those note numbers will be input as chords of the length specified in step 4. Since each of the note numbers you press before releasing all of the keys will be input at the same location, the notes will be input as a chord even if they are actually played at different times.
Each time you press and release the keyboard, the location will advance by the length specified in step 4.
• Inputting rests
Press the
Rest button
to input a rest of the length specified in step 4.
• Inputting a tie
If you press the
Tie button
without pressing the keyboard, the previously ‐ input note will be tied, and lengthened by the amount specified in step 4.
If you press the
Tie button
while holding down a note, the note you are playing will be tied, and lengthened by the amount specified in step 4.
You can even input notes as shown in the following diagram.
Step Time = Step Time = Step Time =
Tie
On
Press E and C
Off
Release E (continue holding C)
ON
Press G
• Deleting a note or rest
To delete a note or rest, press the
StepBack button
. The location will move backward by the amount specified in step 4, and the data in that interval will be deleted.
• Auditioning the next note before input
If you wish to make sure of the next note before you actually input it, press the PAUSE ( ) button (the LED will light up). Now when you press a key, you will hear sound but the note will not be input. Press the PAUSE ( ) button once again (the LED will go dark) to cancel the pause mode and resume input.
8. When you are finished with step recording, press the
Done button.
If you press the COMPARE button, you will return to the condition of before you began step recording.
(0:060) (0:120) (0:240) (1:000) (2:000) (4:000)
(0:090) (0:180) (0:360) (1:240) (3:000) (6:000)
3
(0:040) (0:080) (0:160) (0:320) (1:160) (2:320)
168
5. In Note Duration, specify the length that the note will actually be held, relative to the Step Time.
In general,
100%
will be tenuto,
85%
will be normal, and
50%
will be staccato.
6. Use Note Velocity to specify the velocity value (keyboard playing strength) of the note data.
Sequencer: Menu Command Event Edit
Event Edit
Event Edit
is available on all of the tabs of the Track Edit page.
Here, you can edit individual events of MIDI data that were input.
1. Use Track Select to select the track that you wish to edit, and use From Measure (Seq 6–1c) field to specify the measure at which you wish to begin editing.
If you selected
Track 01–16
in
Event Edit
, selecting this command will open the Set Event Filters dialog box.
If you selected
Master Track
in
Track Select
, this dialog box will not appear.
• Inserting an event
Select the location
Beat Tick
at which you wish to insert an event, and press the
Insert button
to insert an event.
• Deleting an event
Select the event that you wish to delete, and press the
Cut button
to delete the event.
• Moving an event
You can use the
Cut button
and
Insert button
to move an event (as in “cut and paste”).
Use the
Cut button
to delete the event that you wish to move, then use the
Insert button
to insert it at the desired location.
You can also move an event by modifying its
Beat Tick
value.
• Copying an event
Select the event that you wish to copy, and press the
Copy button
. Then select the copy destination and press the
Insert button
to insert the event at that location.
• Playing back an event
When you press the Play button, a dialog box will open and the song will begin playing. Use this to audition the edits you’ve made in Event Edit.
In the
Set Event Filters
dialog box you can select the types of events (musical data) that will appear and can be edited in the event edit window.
For
Note
you can set
Bottom
and
Top
to specify the range of notes available for editing. Normally you will leave these set at
C–1
and
G9
.
Control Change
lets you specify the control change number.
Normally you will leave this set at
All
.
You can also check various other events (
Pitch Bend
,
Program Change
,
After Touch
,
Poly After Touch
, and
Exclusive
).
2. Press the OK button to open the Event Edit dialog box.
3. In the upper part of the dialog box, Measure and Index show the measure that you are editing and the events of the index numbers within the measure.
You can touch the scroll bar located at the right to move to the event that you wish to edit.
4. Select the event that you wish to edit, and use the
VALUE controller etc. to modify its value(s).
• By modifying the value of the
Beat Tick
location within the measure, you can move the event within the measure.
• You can edit each event by modifying its data value(s).
When you select a note event, it will sound.
5. You can press the buttons located at the bottom of the dialog box to edit events as follows.
• Playback will begin from the measure specified by
Measure
.
• Playback will occur according to the settings of the song.
(The song will play back in the same way as in the P01–1:
Play/REC page, etc.)
If you want to play back only the track you’re editing, exit
“Event Edit” and solo the desired track. Alternatively, mute the other tracks. The track being edited is indicated by a blue rectangle.
• If you press the Excl. Solo button, the exclusive solo function will turn on.
Off: Multiple solo operation
The solo on/off state will change each time you press a solo button. You can turn solo on for multiple tracks.
On: Exclusive solo operation
Solo will be on for only one of the sixteen tracks.
This setting is linked with the “Exclusive Solo” menu com ‐ mand.
If the menu command
Panel–SW Solo Mode On
is checked, switches 1–8 will control solo on/off if you’ve selected
Control Assign
MIXER T1–8 or T9–16, even while using Event Edit Play.
• If you’ve edited the
Meter
, the change will not be reflected in the playback until you exit Event Edit.
• When you press the Exit button, playback will stop and you will return to the Event Edit dialog box.
• Editing system exclusive messages
You can edit KROME parameter change messages and universal system exclusive messages.
For the applicable parameters, refer to the table on p.634.
*Dump/Ext* is shown in the following cases.
• Exclusive dump data
• Parameter change messages not supported by the
KROME, such as messages from an external MIDI device
169
Sequencer mode
170
• Parameter change messages of other than Sequencer mode
*Unavailable* is shown in the following cases.
• KROME parameter change messages that cannot be realtime ‐ recorded by the KROME, such as MIDI Channel,
Status, or Key/Vel Zone. (This corresponds to parameters
not in the table on page 191. Such cases may arise when
the parameter cannot be realtimerecorded by operating a parameter on the KROME, but can be recorded when received via MIDI.)
• KROME parameter change messages for which there is no supported parameter, due to an input mistake or some other reason
Note:
• IFX1, 2, 3, 4, 5, MFX1, MFX2, and TFX effect parameters
• Tone adjust
These parameter names and displayed values are the parameter names and values for the corresponding effect.
(Effect parameters consisting of “Parameter” and a
“numeral” (e.g., Parameter71) are parameters not used by the currently selected effect.)
If you’re recording parameter change messages to switch the effect type, the parameter names will not be the corresponding parameter names for the effect that is originally selected at song playback; rather, the display will show the parameters for the currently selected effect. Be aware of this when switching effects, and when controlling their parameters.
The BinEdit button will be available when an exclusive message is selected. Pressing this button will open the
Binary Editor dialog box.
Here, a system exclusive message starting with F0 can be edited in hexadecimal form. Use this when you want to enter and edit a system exclusive message for an external device.
The KROME’s system exclusive messages have the following format.
F0: Exclusive status
42: Korg ID
3n: n=0…F Global MIDI channel
00: Model ID byte 1
01: Model ID bytes 2
15: Model ID bytes 3 ff: function ID
([41][04]: Sequencer mode parameter change)
…
F7: End of exclusive
• When you press the Test button, the currently ‐ edited system exclusive message will be transmitted from the
MIDI OUT connector, USB MIDI connector, and EX ‐ FW connector (if optionally installed). Use this when you want to check the operation of an external device.
• Index [D] in the information box indicates the position of the selected data within the message as a number of bytes from the beginning of the message. Taking the starting F0 as zero, this is shown as 1, 2, 3, … etc. (a decimal value).
Size [D] is a decimal value indicating the number of bytes in the currently edited system exclusive. 16[D] indicates that the message is sixteen bytes.
• Press the OK button to apply the settings.
• Use the data entry buttons to enter data as hexadecimal values. The values 8, 9, A, B, C, D, E, and F are valid only when entering the lower digit, where these values are permitted.
• You can use the Insert button and Cut button to insert or delete byte data.
• Press the OK button to apply the settings and return to the event edit page.
6. When you are finished event editing, press the Done button. If you press the COMPARE button you will return the data to the condition in which it was before you began event editing.
The following table shows the types of musical data that can be edited by
Event Edit
and the range of their values.
C–1…G9 *
2
(Note data)
BAR (displayed only)
(Measure line)
V: 1…127 *
2
(Velocity)
PAFT
(Polyphonic after touch)
C–1…G9
(Note number)
CTRL
(Control change)
PROG
(Program change)
AFTT
(After Touch)
BEND
(Pitch bend)
EXCL *
3
(Exclusive)
C: 0…119
(Control change number)
Bank:A…E
000…127,
GM, g(1)..g(9) g(d), ––
–,
(Program bank)
0…127
(value)
–8192…+8191
(value)
Meter: 1/4…16/16 *1
(Time signature)
L: 000.000…15984.000
(Length: beats, clocks)
0…127
(Value)
0…127
(Value)
P: 0…127,
1…128 (GM, g(1)…g(d))
(Program number)
*1: Be aware that because the time signature is recorded in the master track, modifying it within any track will affect all tracks at the same measure, causing them all to play back with the modified time signature.
Note:
*2: You can also enter the note data and velocity values by holding down the ENTER button and playing a key.
*3: You cannot change Exclusive events into a different type of event (e.g., a Note or Control Change event).
Nor can you change any other type of event into an
Exclusive event.
Pattern numbers will be displayed in locations in which a pattern has been “put” (placed). At the end of the track there will be an indication of
Track End
.
Sequencer: Menu Command Piano Roll
Piano Roll
The Piano Roll dialog box provides a detailed graphic view of event data such as notes, velocities, and control changes.
Here you can also modify, delete, or create these events.
1. Use “Track Select” to select the track that you want to edit, and use “From Measure” (Seq 6-1c) to specify the starting measure that you want to edit. Alternatively, use the Track View page (Seq 6-2) to specify the track and measures for editing.
2. From the menu commands, choose “Piano Roll” or choose the tool in the Track View page; the Piano
Roll window will appear. (See illustration below.)
3. The note view area in the upper part of the dialog box and the control view area in the lower part will show the events that can be edited.
The events are shown in one of the following ways. For details, refer to the explanation of each item.
• Press note view area select, and use the VALUE controllers to operate it.
• Choose the tool and drag.
• Enter
Meas
and
#
in the event list.
• Use the Zoom buttons to zoom the display in/out.
4. Choose the desired editing tool from the tool box, and edit the data. For details, refer to “Editing notes” or
“Editing control data.”
Note:
If you decide to cancel an editing operation, press the
Undo button. This takes you back to the state prior to the most recent operation. The Redo operation cancels the Undo operation. If you want to return to the state prior to entering the piano roll dialog box, press the Done button to stop editing, and then press the COMPARE button.
5. To play back the events, press the Play button. A dialog box will open, and the song will begin playing. Use this to hear the results of your editing.
6. Press the Done button when you’re finished editing.
Note view area
Here you can edit, delete, or add note events.
The selected note event
The vertical axis of the grid indicates pitch, and the horizontal axis is the location (of the measures). The grid interval for the horizontal axis is specified by the Piano Roll
Setup
Grid Resolution
parameter.
For note events, the vertical axis indicates the pitch, and the length of the bar indicates the duration of the note. The left edge of the bar is the beginning of the event.
Measures in which a pattern has been put are shaded in purple.
Note view area select
Here you can change the range of pitches that are displayed.
Press this object and operate the VALUE controllers (VALUE dial, IND/DEC buttons, etc.) change the range of displayed pitches. You can also move the bar by dragging it up or down.
This will be released when you select an event list item or the control view select section.
Control view area
This shows velocity or control data, and allows you to edit, delete, or add this data.
Control view area select
This selects the data shown in the control view area. Choose from the following.
Vel:
Velocity
PAft:
Polyphonic aftertouch
CC#000…119:
Control change 000–119
Aft:
Aftertouch
Bnd:
Pitch bend
If you select a note in the note view area, velocity will be shown automatically.
* Program changes and exclusive events are not shown.
Note events
Note view area
Note view area select
Control view select
Control view area
Tool box
View area height select
Style select
Zoom
Event list
Press the Setup button to open the Piano Roll Setup dialog box.
( Piano Roll Setup)
Plays back the song. Pressing this button will open the Piano
Roll Edit Play dialog box.
( Piano Roll Edit Play)
Press when you’re finished
Piano Roll editing.
171
172
Sequencer mode
Toolbox
Select Event tool
Use this to select an event in the note view area or control view area. You can move an event by dragging it.
Length Edit tool: Only for Note view
Use this tool to modify the length of a note; press the event and drag it.
Put Event tool
Use this to create an event.
If you press inside the note view area, a note will be added.
The
Grid Resolution
setting in Piano Roll Setup specifies the length of the inserted note. The note will be inserted with a velocity of 100.
If you press inside the control view area, a control event specified by the control view select
Ctrl
setting will be created. You can create continuous data by dragging.
However, PAft (polyphonic aftertouch events) cannot be created.
You can’t create events in a measure where a pattern has already been placed.
Erase Event tool
Use this to erase an event.
If you press inside the note view area, the note will be erased.
If you press control data in the control view area, that data will be erased. If velocity is displayed, the note event will be deleted at the same time.
Limited to Erase, you can erase multiple events in a single operation. Drag to enclose the events you want to erase
(they will light blue), and then release; the events in the specified region will be erased. However, PAft (polyphonic aftertouch events) cannot be erased.
Grab tool
You can move the displayed region by dragging over the note view area or control view area.
Style Select tool
Use this to switch the note event display between the conventional type and a type suitable for a drum kit.
View control
Zoom
Use these buttons to zoom in/out the data shown in the note view area or control view area.
From the left, these buttons zoom ‐ in (magnify) the vertical axis, zoom ‐ out (shrink) the vertical axis, zoom ‐ in (magnify) the horizontal axis, and zoom ‐ out (shrink) the horizontal axis.
Vertical zoom ‐ in/out will zoom centered on the selected event.
Horizontal zoom ‐ in/out will zoom based on the measure shown at the far left.
Scroll
Use these buttons to scroll the note view area.
View area height select
Pressing these buttons will change the displayed size of the note view area and the control view area.
Editing notes
Note:
If you decide to cancel a change, press the Done button to finish editing, and then press the COMPARE button. You will return to the state prior to opening the
Piano Roll dialog box.
Moving a note
1. Press the tool.
2. Press the note event that you want to move.
The note will light blue. Continue pressing, and event information will be displayed in the upper left (or upper right).
2 1
3. Continuing to press the note, drag it up/down/left/ right.
Dragging vertically will change the note’s pitch, and dragging horizontally will change its location.
3
3
Sequencer: Menu Command Piano Roll
Moving a note to a precise location
• You can use the Piano Roll Setup
Snap to Grid
or
Move
Note Resolution
settings to easily specify a precise location. For example if you want to move a note to a precise timing interval such as , use
Grid Resolution
to specify the unit and turn
Snap to Grid
on. When you drag a note event, it will snap to the grid. ( See “Piano
Roll Setup dialog box” on page 175.)
Editing a value in the event list
• Choose the tool, and then press the note event that you want to move. In the event list below, use the VALUE controllers to enter the desired value.
Note data and velocity values can also be entered by holding down the ENTER button and playing a note on the keyboard.
3. Continuing to press the note, drag it left/right.
The note length will change.
If the Piano Roll Setup
Snap to Grid
setting is on, the length will change in increments of the
Grid Resolution
when you drag it.
3
Changing the length of a note
1. Press the tool.
2. Press near the right end of the note event whose length you want to change.
The note will be highlighted. Continue pressing, and event information will be displayed in the upper left (or upper right).
2 1
Entering a note
1. Press the tool.
2. Press the location at which you want to enter the note.
• A note will be entered. Continue pressing, and event information will be displayed in the upper left; you can drag the note to the desired location. The note will be entered with a velocity of 100.
• To specify the length of the notes that are entered, set the desired
Grid Resolution
in the Piano Roll Setup dialog box.
• To align the note to a precise location, set the desired
Grid Resolution
in the Piano Roll Setup dialog box, and turn
Snap to Grid
on.
2
1
Note:
If you select a note event and it turns light blue, a square will be shown at the right end. The note will turn green if you press this square.
Erasing a single note
1. Press the tool.
2. Press the note that you want to erase. The data will be erased.
173
174
Sequencer mode
Erasing multiple notes
Limited to the Erase operation, you can select multiple events and erase them in a single operation.
1. Press the tool.
2. Drag to enclose the region of notes that you want to erase. The notes to be erased
will be highlighted
.
When you release, the data will be erased.
2 1
4. Drag up/down to change the value.
Alternatively, you can enter the desired value in the event list.
4
Editing control data
Editing a data value
1. Press the tool.
2. Choose the data that will be shown in the control view area. If you’ve selected note events, this area will show velocity data.
2
1
Creating continuously changing data values
1. Press the tool.
2. Choose the data that will be shown in the control view area.
3. Drag over the region whose values you want to change.
The path on which you drag is shown by a line. When you release, the values will change to fit that line.
2 3 1
3. Press the square at the top of the data that you want to edit.
The indication will be highlighted. Continue pressing, and event information will be displayed in the upper left.
3
Sequencer: Menu Command Piano Roll
Entering data
1. Press the tool.
2. Choose the data that will be shown in the control view area.
3. Drag over the region in which you want to enter data.
The path on which you drag is shown by a line. When you release, values will be entered to fit that line.
2 3
1
The following table shows the types of data and the available values that you can edit in “Piano Roll: Event
Edit.”
BAR (displayed only)
(Measure line)
C–1…G9 *
(Note data)
V: 1…127 *
(Velocity)
PAFT
(Polyphonic after touch)
C–1…G9
(Note number)
CTRL
(Control change)
AFTT
(After Touch)
BEND
(Pitch bend)
C: 0…119
(Control change number)
0…127
(value)
–8192…+8191
(value)
Meter: 1/4…16/16
(Time signature)
L: 000.000…15984.000
(Length: beats, clocks)
0…127
(Value)
0…127
(Value)
* Note data and velocity values can also be entered by holding down the ENTER button and playing a note on the keyboard.
Undo, Redo button
You can press the Undo button to cancel the most recent edit. The Redo button returns to the edited state. These buttons allow you to return only to the state prior to the single most recent operation.
Setup button
Press the Setup button to access the Piano Roll Setup dialog box, where you can make settings such as the resolution when editing in the note view area.
Piano Roll Setup dialog box
Erasing data
1. Press the tool.
2. Choose that data that will be shown in the control view area.
3. Press on the data that you want to erase, or drag across the region that you want to erase. When you release, the data will be erased.
Event list
Use
Meas
(Measure) and
#
(Index) to display the measure that you want to edit and the desired index number within that measure.
If you change
#
to choose control data such as AFTT or
CC#01 in the lower area, the control view select value will also change, and those values will be shown in the control view area.
When you select an event in the note/control view area, the event will turn light blue and that value will be shown in the event list. If you use “#” to select a different event, the selected event will be shown in dark blue, and the light blue event will turn red.
Select the event that you want to edit, and use the VALUE controllers to enter the desired values.
• By editing the
BT
(Beat Tick) location within the measure, you can move an event within that measure.
• You can edit each type of event data. When you select a note event, it will sound.
Move Note Resolution [Free, , , , , ]
When you drag a note event horizontally, it will move in units of the resolution you specify here. For example if you set this to , dragging an event at location BT:1.001 toward the right will successively move it to locations 2.01, 3.001,
4.001, etc. This adjustment will not occur if you choose the
Free setting.
This setting is valid if
Snap to Grid
is Off.
Snap to Grid [Off, On]
On:
When you drag a note event horizontally, it will snap to the resolution specified by
Grid Resolution
. For example if
Grid Resolution
is set to , dragging an event at location
BT:1.001 toward the right will move it to locations 2.000,
3.000, 4.001, etc. The locations to which you can move a note will be limited to precise quarter ‐ note intervals.
A dotted grid is displayed in the note/control view area according to the
Grid Resolution setting
.
Off:
Notes will not snap to the grid. They will move at the resolution specified by
Move Note Resolution
.
175
176
Sequencer mode
Grid Resolution [ , , , , ]
This specifies the resolution of the grid. If
Snap to Grid
is
On, notes will snap to the resolution you specify here.
Note events created by the Put Event tool will also have the resolution and length specified here.
Play Scroll [Sweep, Crawl]
This specifies how the note/control view area will scroll during playback.
Sweep:
When the location bar reaches the end of the view area, the next measure and the location bar will move to the left edge.
Crawl:
The view area will scroll measure by measure. The location bar will not move.
Play button
When you press the Play button, a dialog box will open, and the song will begin playing back.
Playback will start from the beginning of the measure shown in the note/control view area.
Piano Roll Edit Play
Set Song Length
Set Song Length
is available on all of the tabs of the Track
Edit page.
This command changes the length of the specified song.
When it is executed, the length of the master track will change, and the number of measures played will change.
1. In Length, specify the length of the song.
All data following the measure specified by
Length
will be deleted.
Erase Track
Erase Track
is available on all of the tabs of the Track Edit page.
This command erases the data from the specified track.
However, it is not possible to erase the master track by itself.
1. In Track Select, select the track that you wish to erase.
2. Select “Erase Track” to open the dialog box.
Solo buttons
Each track will play back according to the Play/Mute and
Solo settings in P0 Program T01–08 and T09–16. The solo track(s) can also be switched using the sixteen Solo buttons in the Piano Roll Edit Play dialog box. The upper row controls tracks 1–8 and the lower row controls tracks 9–16.
The track being edited is enclosed in a frame.
Excl.Solo button
This turns Exclusive Solo on.
Off:
Multiple Solo operation
Each time you press a solo button, the Solo setting of that track will turn on or off. You can turn Solo on for multiple tracks.
On:
Exclusive Solo operation
Solo can be turned on for only one of the 16 tracks at a time.
This setting is linked with the
Exclusive Solo
menu command.
Play button
When you press the Stop button, playback will stop and
Piano Roll Edit Play will close. The note/control view area will show the beginning of the measure at which you stopped.
Exit button
When you press the Exit button, playback will stop and
Piano Roll Edit Play will close. You will return to the measure in the note/control view area where you started playback.
3. Select the track whose data you want to erase.
If you don’t check
All Tracks,
the data will be erased only from the tracks you specify in
Track Select
.
If you check
All Tracks,
the musical data of all tracks will be erased.
Copy Track
Copy Track
is available on all of the tabs of the Track Edit page.
This command copies musical data from the copy source track to the specified track.
Be aware that the track data of the copy ‐ destination will be erased when you execute the Copy Track operation.
1. Use Track Select to select the MIDI track (Track 01–16) that you want to copy.
2. Select “Copy Track” to open the dialog box.
3. Use the From field to select the copy-source track, and
To to select the copy-destination.
(By default, the track you choose in
Track Select
will be specified for
From
.)
Sequencer: Menu Command Bounce Track
Bounce Track
Bounce Track
is available on all of the tabs of the Track Edit page.
This command combines the musical data of the source and destination tracks, and places the combined data in the bounce destination. All musical data in the source track will be erased.
If MIDI control data exists in both the source track and destination track, unexpected results may occur during playback after the bounce command is executed. To prevent this from happening, use
Event Edit
or
Erase Control Data
to edit the MIDI control data of the two tracks before you use Bounce Track.
1. Use Track Select to select the MIDI track (Track 01–16) that you want to bounce.
2. Select “Bounce Track” to open the dialog box.
3. Use the From field to select the source track, and To to select the destination track.
(By default, the track you choose in
Track Select
will be specified for
From
.)
In the case of
Bounce Track
, the source track data will be set to “zero”.
Erase Measure
Erase Measure
is available on all of the tabs of the Track Edit page.
This command erases the specified type(s) of musical data from the specified range of measures.
The Erase Measure command can also be used to remove only a specific type of data. Unlike the Delete Measure command, executing the Erase Measure command does not cause the subsequent measures of musical data to be moved forward.
1. Use Track Select to select the MIDI track (Track 01–16), master track that contains the measures of data you want to erase.
2. Select “Erase Measure” to open the dialog box.
After Touch
will erase both channel pressure and poly key pressure data,
Pitch Bend
will erase pitch bend data,
Program Change
will erase program change data, and
Exclusive
will erase exclusive data.
5. Specify the track(s) on which you want to execute the command.
If you execute with
All Tracks
unchecked, the command will be executed only on the data of the track you selected in
Track Select
”
If you check
All Tracks,
the command will be executed on the data of all tracks.
Example: If measures 2–3 are erased, measures 2–3 will be blank.
Before Erase
1 2 3 4 5
After Erase
1 2 3 4 5
No data
If control data extends across measures that were erased and measures that were not erased, only the data within the specified range will be removed.
However if note data extends across two or more measures, deleting any of the intervening measures will delete that note data from the following measures as well.
Note:
Note data can also be erased using
Shift/Erase Note
.
Use this command when you wish to erase a specific range of notes, or to erase notes from a specific
Beat.Tick
.
Note:
Control Change data can also be erased using
Erase
Control Data
. Use this when you wish to erase a specific type of control change, or to erase control change data from a specific
Beat.Tick
range.
Delete Measure
Delete Measure
is available on all of the tabs of the Track
Edit page.
This command deletes the specified measures.
When the Delete Measure command is executed, the musical data following the deleted measures will be moved towards the beginning of the sequence.
1. Use Track Select to select the MIDI track (Track 01–16) that contains the measures you want to delete.
2. Select “Delete Measure” to open the dialog box.
3. In From Measure select the first measure to be erased, and in To End of Measure select the last measure to be erased.
(By default,
From Measure
and
To End of Measure
will be set to the range that you specified in the Track Edit page.)
4. If you are erasing MIDI data, use Kind to specify the type of data that will be erased.
All
will erase all types of data in that track,
Note
will erase note data,
Control Change
will erase control change data,
3. In From Measure, select the first measure that you wish to delete, and in To End of Measure, select the last measure that you wish to delete.
(By default,
From Measure
and
To End of Measure
will be the range that you specified in the Track Edit page.)
4. Specify the track(s) on which you want to execute the command.
If you execute with
All Tracks
unchecked, the command will be executed only on the data of the track you selected in
Track Select
.
If you check
All Tracks
, the command will be executed on the data of all tracks.
177
Sequencer mode
Example: When measures 3–5 are deleted, measures 6–8 are moved forward.
Before
Delete
1 2 3 4 5 6 7 8
After
Delete
1 2 3 4 5
Example:
If in step 4 you uncheck
All Tracks
and execute this operation, the measures will not be deleted from the master track. Time signature and tempo data will remain unchanged, and the time signature and tempo of the measures that were moved forward as a result of the Delete operation will change.
When measures 2 and 3 (3/4 time) of track 2 are deleted, the measures that were at 4 and 5 are moved forward, and their time signature will change to 3/4.
Track 1 1 (4/4) 2 (3/4) 3 (3/4) 4 (4/4) 5 (4/4)
Before Delete
Track 2 1 (4/4) 2 (3/4) 3 (3/4) 4 (4/4) 5 (4/4)
After Delete
Track 2
1 (4/4) 2 (3/4) 3 (3/4)
Track 1 1 (4/4) 2 (3/4) 3 (3/4) 4 (4/4) 5 (4/4)
If in step 4 you check
All Tracks
and execute this operation, the specified measures of musical data will be deleted from all tracks including the master track, and the time signature and tempo will also move forward by the number of measures that were deleted.
If control data extends across a line between measures that were deleted and measures that were not deleted, only the data within the range being deleted will be erased.
Insert Measure
Insert Measure
is available on all of the tabs of the Track
Edit page.
This command inserts the specified number of measures into the specified track.
When you execute the Insert Measure command, the musical data following the insert location will be moved backward.
If you insert measures between note events that are connected by a tie, a note ‐ off will be created immediately before the inserted measure, and the subsequent portion will be deleted.
1. Use Track Select to select the MIDI track (Track 01–16) in which you want to insert data.
2. Select “Insert Measure” to open the dialog box.
time signature of the inserted measures will change, and the specified time signature will apply to all tracks for those measures.
6. Specify the track(s) for which you want to execute the command.
If you execute with
All Tracks
unchecked, the measures will be inserted into the track that’s selected in
Track Select
. Be aware that at this time, the playback data that follows the insert location will move toward the end of the song according to the number of inserted measures, but the time signature and tempo will not move.
If you check
All Tracks
, the measures will be inserted into all tracks including the Master Track. The playback data in subsequent measures will play just as it did before this command was executed.
Time signature = **/**
Track 1 1 (4/4) 2 (4/4)
Before Insert
Track 2
1 (4/4) 2 (4/4)
3 (3/4)
3 (3/4)
4 (5/4) 5 (2/4)
4 (5/4) 5 (2/4)
Insert two measures
Track 2 1 (4/4)
2 (4/4) 3 (3/4) 4 (5/4) 5 (2/4)
After Insert
Track 1 1 (4/4) 2 (4/4) 3 (3/4) 4 (5/4) 5 (2/4)
Measures 4 and 5 will use the previously specified time signature.
Time signature = 7/8
Before Insert
Track 1
1 (4/4) 2 (4/4)
Track 2 1 (4/4) 2 (4/4)
3 (3/4) 4 (5/4) 5 (2/4)
3 (3/4) 4 (5/4) 5 (2/4)
Insert two measures
After Insert
Track 2
1 (4/4) 2 (7/8) 3 (7/8) 4 (5/4) 5 (2/4)
Track 1 1 (4/4) 2 (7/8) 3 (7/8) 4 (5/4) 5 (2/4)
Measures 2 and 3 will be 7/8, and measures 4 and 5 will be the previously specified time signature.
Repeat Measure
Repeat Measure
is available on all of the tabs of the Track
Edit page.
This command repeatedly inserts the specified measures for the specified number of times.
When you execute the Repeat Measure command, the measures will be inserted following the measure specified by
To End of Measure
, and musical data following the inserted data will be moved backward. It is convenient to use this command when you have a song that you play back with
Track Play Loop
(Seq P0–9(10)b) turned on, and wish to expand it into musical data.
1. Use Track Select to choose the MIDI track (Track 01–16) that you want to insert data into.
2. Select “Repeat Measure” to open the dialog box.
178
3. In At Measure, specify the measure location at which the data will be inserted.
(The measure you specified in Track Edit page
From
Measure
will be set as a default.)
4. In Length, specify the number of measures that will be inserted.
5. In Meter, specify the time signature of the measures that will be inserted.
If you want the inserted measures to match the existing time signature, specify **/**. With any setting other than **/**, the
3. In From Measure and To End of Measure, specify the range of measures that will be repeated.
(By default,
From Measure
and
To End of Measure
will be set to the range you specified in the Track Edit page.)
Sequencer: Menu Command Copy Measure
4. In Times, specify the number of repetitions.
For example if you set
From Measure
to
001
,
To End of
Measure
to
004
, and
Times
to
2
, the musical data of measures 1–4 will be inserted into measures 5–8. The result will be that measures 1–4 will be played twice.
5. Specify the track(s) on which you want to execute the command.
If you execute with
All Tracks
unchecked, the performance data will be inserted into the track you specified in
Track
Select
. Be aware that in this case, the performance data following the insert position will move backward (i.e., toward the end of the song) by the number of inserted measures, but the time signature and tempo will not move.
If you execute with
All Tracks
checked, the performance data will be inserted into all tracks, including the master track. The performance data following the inserted measures will play back in the same way as it did before.
Copy Measure
Copy Measure
is available on all of the tabs of the Track Edit page.
This command copies the measures of musical data specified as the
From
source to the beginning of the measure specified as the
To
location.
When you execute the Copy Measure command, the existing track data at the copy destination will be rewritten.
1. Select the copy source song.
2. Select “Copy Measure” to open the dialog box.
3. In From: Track select the copy source track.
(By default, this will be the track you selected in
Track
Select
.)
If you execute with
All Tracks
unchecked, only the selected track will be copied. Note that the time signature and tempo will not be copied.
If you check
All Tracks
, the musical data of all tracks including the master track will be copied.
4. In From Measure and To End of Measure, specify the range of copy source measures.
(By default,
From Measure
and
To End of Measure
will be the range that you specified in the Track Edit page.)
5. Use To: “Song” to specify the copy-destination song,
“Track” (if All Tracks is unchecked) to specify the copydestination track, and Measure to specify the starting measure at which the copied data will be inserted.
Example: When you copy measures 5–7 of track 1 to the third measure of track 2, measures 3–5 of track 2 will be rewritten.
Track 1
(source)
1 (4/4) 2 (4/4) 3 (4/4) 4 (3/4) 5 (3/4) 6 (3/4) 7 (4/4)
Track 2
(destination)
1 (4/4) 2 (4/4) 3 (4/4) 4 (3/4) 5 (3/4) 6 (3/4) 7 (4/4)
Move Measure
This command moves the specified measures of performance data to another measure.
1. Select “Move Measure” to open the dialog box.
2. In From: Track select the move source track.
(By default, this will be the track you selected in
Track
Select
.)
If
All Tracks
unchecked, only data from the selected track will be moved.
If you check
All Tracks
, musical data of all tracks including the master track will be moved.
3. In From Measure and To End of Measure, specify the range of measures that will be moved.
(By default,
From Measure
and
To End of Measure
will be the range that you specified in the Track Edit page.)
4. In To: Track (if All Tracks is unchecked) to specify the move-destination track, and Measure to specify the measure at which the data will be inserted.
If you execute this with
Mode
Stay, playback data located after the move ‐ source measures and playback data located after the move ‐ destination measures will not move; it will stay where it is.
If you execute this with
Mode
Shift, playback data located after the move ‐ source measures will move toward the beginning of the song by the number of measures that were moved. Playback data located after the move ‐ destination measures will move toward the end of the song by the number of measures that were moved.
5. Set “Overlap” to specify what will happen if there is data in the move-destination measures and you’ve specified “Mode” Stay. If you choose Merge, the movesource data and move-destination data will be combined. If you choose Overwrite, the move-source data will overwrite (replace) the move-destination data.
Be aware that time signature and tempo data will not be moved.
6. To execute the Move Measure command, press the OK button. To cancel, press the Cancel button.
179
180
Sequencer mode
Example Move measures 3-4 of track 1 to measures 3-4 of track 2.
Mode: Stay
Before Move
Track 1
1 (Tr1) 2 (Tr1) 3 (Tr1) 4 (Tr1) 5 (Tr1)
Track 2
1 (Tr2) 2 (Tr2) 3 (Tr2) 4 (Tr2) 5 (Tr2)
After Move Overlap: Merge
Track 1
1 (Tr1) 2 (Tr1)
Track 2
1 (Tr2)
5 (Tr1)
2 (Tr2)
No data
3 (Tr1+2)
No data
4 (Tr1+2) 5 (Tr2)
After Move Overlap: Overwrite
Track 1
1 (Tr1) 2 (Tr1)
Track 2
1 (Tr2) 2 (Tr2)
No data
3 (Tr1)
No data
4 (Tr1)
5 (Tr1)
5 (Tr2)
Mode: Shift
Before Move
Track 1
1 (Tr1) 2 (Tr1) 3 (Tr1) 4 (Tr1) 5 (Tr1)
Track 2
1 (Tr2) 2 (Tr2) 3 (Tr2) 4 (Tr2) 5 (Tr2)
After Move
Track 2
1 (Tr2) 2 (Tr2) 3 (Tr1) 4 (Tr1) 5 (Tr2) 6 (Tr2) 7 (Tr2)
Track 1
1 (Tr1) 2 (Tr1) 3 (Tr1)
No data No data
Create Control Data
Create Control Data
is available on all of the tabs of the
Track Edit page.
This command creates the specified type of data (control change, aftertouch, pitch bend, or tempo) in the selected region of a track.
1. In Track Select, select the MIDI track on which you wish to perform the Create Control Data command.
If you wish to modify tempo data, select
Master Track
as the track. In this case, the step 4 item
Kind
will be set to
Tempo
.
2. Select “Create Ctrl Data” to open the dialog box.
3. Specify the range into which the control data will be inserted.
In
From Measure
and
To End of Measure
, specify the measures, and in
Beat.Tick,
specify the beat and clock. (By default,
From Measure
and
To End of Measure
will be set to the range you specified in the Track Edit page.)
4. Set “Kind” to the type of musical data (event) that you wish to create.
Control change:
Control change data will be inserted. In this case, use
#
to specify the control change number.
After Touch:
Aftertouch data will be inserted.
Pitch Bend:
Pitch bend data will be inserted.
Tempo:
Tempo data will be inserted (if you’ve selected the master track).
5. In Start Value, select the starting value of the control data. In End Value, select the ending value of the control data.
By default, the
Start Value
will be set to the value of the existing data at the start location. If you wish to create control data that changes smoothly from the starting location, you can leave the
Start Value
unchanged, and set only the
End Value
.
Example: The controller is aftertouch. Starting location is 3:48, ending location is
4:24, and end value is set to 100. This will cause the aftertouch value to begin changing from 3:48, and reach a value of 100 at 4:24.
Start location End location
After touch
127
100
End Value
0
Previous data
Start Value default value
Location
3:00 3:24 3:48 3:72 4:00 4:24 4:48
When you execute Create Control Data, a large amount of sequencer memory will be consumed. For this reason it may not be possible to execute this command if there is a limited amount of memory remaining. In such cases, first use
Quantize
to quantize the data and remove unnecessary control data. Alternatively, you could quantize the data that was inserted by the Create Control Data command.
Sequencer: Menu Command Erase Control Data
Erase Control Data
Erase Control Data
is available on all of the tabs of the Track
Edit page.
This command erases data such as control changes, after touch, pitch bend, or tempo in the specified range.
1. In Track Select, select the track from which you wish to erase control data.
If you wish to erase tempo data, select
Master Track
. In this case, the
Kind
item in step 4 will be
Tempo
.
2. Select “Erase Ctrl Data” to open the dialog box.
Quantize
Quantize
is available on all of the tabs of the Track Edit page.
This command corrects the timing of MIDI data of the type you specify (note data, control change, aftertouch, pitch bend, program change, etc.) in the track.
When you execute the Quantize operation, the musical data will be affected as follows:
• When you execute Quantize on note data, the timing of the note ‐ on will be corrected, but the length (duration of the note) will not be affected.
• If the Quantize resolution is set to
Hi
, the timing will be adjusted to units of the base resolution ( /480), so note data will not be affected. However, continuous controller data such as joystick or after touch which occupies a large amount of memory will be processed so that two or more data events of an identical type existing at a single interval of the timing resolution will be combined into a single event, thus conserving memory.
Similarly, two or more identical data events existing at the exact same time will be combined into one, also conserving memory.
1. In Track Select, specify the track.
2. Select “Quantize” to open the dialog box.
3. Specify the range from which you wish to erase control data.
In
From Measure
to
To End of Measure
specify the measures, and in
Beat.Tick
specify the beat and clock. (By default,
From Measure
and
To End of Measure
will be the range that was specified in the Track Edit page.)
4. Set “Kind” to the type of musical data (event) that you wish to erase.
Control change:
Control change data will be erased. In this case, use
#
to specify the control change number.
After Touch:
Aftertouch data will be erased.
Pitch Bend:
Pitch bend data will be erased.
Tempo:
Tempo data will be erased. (If you’ve selected the master track)
Note:
If you wish to erase all control change data from specified measures, you can also use
Erase Measure
and set
Kind
to
Control Change
. However, this
Erase Control Data
command allows you to specify the range using
Beat.Tick
, and also to erase only specific types of control change data.
3. Specify the range that will be quantized.
In
From Measure
and
To End of Measure
, specify the measures. In
Beat.Tick
specify the beat and clock. (By default,
From Measure
and
To End of Measure
will be the range that you specified in the Track Edit page.)
4. In Kind, select the type of musical data (events) that you wish to quantize.
All:
Quantization will be applied to all performance MIDI data.
Note:
Quantization will be applied only to note data. Use
Bottom
and
Top
to specify the range of notes.
Bottom
specifies the lowest note that will be affected, and
Top
specifies the highest note. You can use this when you want to quantize only a specific note or notes (for example, just the snare sounds of a drum track). If you want to quantize all notes, set these parameters
C–1
and
G9
respectively.
Control Change:
Quantization will be applied to control changes. If you want to quantize only a specific control change, specify the number (
No.
). If you want to quantize all control changes, select
All
.
After Touch:
Quantize both Channel Pressure and
Polyphonic Key Pressure messages.
Pitch Bend:
Pitch bend data will be quantized.
Program Change:
Program change data will be quantized.
5. In Resolution, specify the timing resolution to which the data will be corrected.
181
182
Sequencer mode
By setting a lower resolution you can save more memory, but the timing of the playback may not be acceptable.
6. In Offset, specify the number of clock ticks by which the data will be moved forward or backward relative to the standard timing.
A setting of
240
will be , and
120
will be . Positive (+) settings will adjust the data forward, and negative (–) settings will adjust the data backward. This allows you to simulate “pushing” or “dragging” the beat.
7. In Intensity, specify the degree of sensitivity to which the timing will be corrected; i.e., how close to the locations specified by steps 5 and 6 the data will be moved.
With a setting of
0
, no correction will take place. With a setting of
100
, the data will be moved all the way to the timing intervals specified by steps 5 and 6.
8. Use Swing to add a sense of swing to the rhythm. For example, this provides an easy way to give a slight shuffle groove to a “square” 16-beat rhythm.
Settings other than 0% will add a sense of swing by adjusting the position of the notes at even ‐ numbered beats relative to the specified
Resolution
. With a setting of
+100%
, these notes will be moved one third of the way toward intervals of the specified
Resolution
. With a setting of
+300%
, notes of even ‐ numbered beats will be moved all the way to the next even ‐ numbered beat.
* By varying the
Offset
and
Intensity
settings you can create quantize effects such as the following.
Original
Quantize Resolution =
Offset = 0, Intensity = 100%
Quantize Resolution =
Offset = 0, Intensity = 50%
Quantize Resolution =
Offset = +120, Intensity = 100%
Quantize Resolution =
Offset = +120, Intensity = 75%
Quantize Resolution =
Offset = –60, Intensity = 100%
–60 –60 –60
* By varying the
Swing
settings you can create effects such as the following.
When “Resolution” = beat 1
“Swing” = 0%
“Swing” = +100%
“Swing” = –100%
–100% beat 2
0%
+100% beat 3
+200%
“Swing” = +200%
“Swing” = +300%
+300% beat 4
Shift/Erase Note
Shift/Erase Note
is available on all of the tabs of the Track
Edit page.
This command shifts (moves) or erases specified note numbers in a selected track and over a range of measures.
1. In Track Select, choose the MIDI track on which you wish to execute the Shift/Erase Note command.
2. Select “Shift/Erase Note” to open the dialog box.
3. Specify the range in which you wish to shift or erase note numbers.
In
From Measure
and
To End of Measure
, specify the measures. In
Beat.Tick
, specify the beat and clock. (By default,
From Measure
and
To End of Measure
will be the range that you specified in the Track Edit page.)
4. Specify the range of notes that you wish to shift or erase.
Note Range: Bottom
specifies the lower limit, and
Top
specifies the upper limit. If you wish to edit all notes, set
Bottom
to
C–1
and
Top
to
G9
.
• Shifting notes
5. In Shift Note, specify the amount by which you wish to move the note.
The amount of shift is set in semitone steps over a range of
–127
to
+127
.
+1
will shift the note a semitone upward.
6. Select either Replace to move the note numbers, or Create to generate additional notes.
For example if you are editing a track that uses a drum program, you can use
Replace
to exchange the current snare sound for a different snare sound assigned to a different key, or use
Create
to add a sound effect at a different note # to the snare sound. Alternatively, you can use
Create
to add an octave doubling to an existing guitar phrase, etc.
7. To execute the Shift Note command, press the OK button. To cancel, press the Cancel button.
• Erasing notes
8. Check Erase Note.
If you wish to erase all note data in the specified range of measures, you can also use the
Erase Measure
command and set
Kind
to
Note
. However, this Shift/Erase Note command lets you specify the
Beat.Tick
range, and to erase only specific ranges of note data.
Sequencer: Menu Command Modify Velocity
Modify Velocity
Modify Velocity
is available on all of the tabs of the Track
Edit page.
This command modifies the velocity values of notes in the specified area so that they will change over time according to a selected curve.
1. In Track Select, specify the track whose velocity will be modified.
2. Select “Modify Velocity” to open the dialog box.
Create Exclusive Data
This command creates universal system exclusive messages or KROME parameter change messages in the specified region of a MIDI track.
1. Use Track Select to specify the MIDI track in which you want to create exclusive data.
2. Choose Create Excl Data to open the dialog box.
3. Specify the range in which note velocity will be modified.
From Measure
and
To End of Measure
specify the measure, and
Beat.Tick
specify the beat and clock. (By default,
From
Measure
and
To End of Measure
will be set to the range that you specified in the Track Edit page.)
4. Specify the range of notes that will be affected by the
Modify Velocity command.
Note Range: Bottom
is the lower limit, and
Top
is the upper limit. If you wish to edit all notes, set
Bottom
to
C–1
and
Top
to
G9
.
5. In Velocity Start Value, specify the value at which the velocity data will start, and in End Value, specify the final velocity value.
6. In Intensity, specify the degree to which the velocity data will be adjusted toward the curve you specify in step 7.
With a setting of
0
[%], the velocity will not change. With a setting of
100
[%], the velocity will be exactly as described by the curve.
7. Curve lets you select from six types of curve to specify how the velocity will change over time.
* The six curves are as follows.
For a Start Velocity of 1 and End Velocity of 127
Curve 1
127 127
Curve 2
Velocity Velocity
127
Velocity
Curve 3
1
Start
Measure
End
Measure
1
Start
Measure
End
Measure
1
Start
Measure
End
Measure
127
Velocity
1
Start
Curve 4
Measure
End
Measure
127
Velocity
1
Start
Curve 5
Measure
End
Measure
Rndm
127
Velocity
RANDOM
1
Start
Measure
End
Measure
3. Specify the region into which you want to insert universal system exclusive messages or KROME parameter change messages.
Use
From Measure
and
To Measure
to specify the measures, and
Beat.Tick
to specify the beat and clock. (By default,
From Measure
and
To Measure
will be set to the region you specified in the Track Edit page.)
4. Use Kind to specify the type of universal system exclusive message or KROME parameter change message that you want to create.
For more information, please see “Universal system exclusive” on page 365.
5. Use Start Value to specify the starting value of the universal system exclusive message or KROME parameter change message, and End Value to specify the ending value.
6. Press the OK button to execute the Create Exclusive
Data operation. If you decide not to execute, press the
Cancel button.
Example: The parameter is EQ High Gain. Starting location is 3:48, ending location is 4:24, and end value is set to +12.0. This will cause the EQ High Gain value to begin changing from 3:48, and reach a value of +12.0 at 4:24.
Start location End location
EQ High Gain
+18.0
+12.0
End Value
0
Previous data
-18.0
Start Value default value
Location
3:00 3:24 3:48 3:72 4:00 4:24 4:48
183
184
Sequencer mode
Erase Exclusive Data
This command erases (deletes) universal system exclusive messages or KROME parameter change messages from the specified region.
1. Use Track Select to specify the MIDI track from which you want to erase exclusive data.
2. Choose Erase Excl Data to open the dialog box.
3. Specify the region from which you want to erase universal system exclusive messages or KROME parameter change messages.
Note:
Use
From Measure
and
To Measure
to specify the measures, and
Beat.Tick
to specify the beat and clock. (By default,
From Measure
and
To Measure
will be set to the region you specified in the Track Edit page.)
4. Use Kind to specify the type of universal system exclusive message or KROME parameter change message that you want to erase.
For more information, please see “Universal system exclusive” on page 365.
5. Press the OK button to execute the Erase Exclusive Data operation. If you decide not to execute, press the Cancel button.
If you want to erase all universal system exclusive messages or KROME parameter change messages from specified measures in a single operation, you can use
Erase Measure
with
Kind
set to Exclusive; however in that case, you won’t be able to use
Beat.Tick
when specifying the range for erasure.
Copy Insert Effect
Copy Insert Effect
is available on all of the IFX pages.
For more information, please see “Copy Insert Effect” on page 66.
However, the MIDI control channel specified in
Ctrl Ch
of the IFX 1–5 page will not be copied.
Swap Insert Effect
Swap Insert Effect
is available on all of the IFX pages.
For more information, please see “Swap Insert Effect” on page 67.
However, the MIDI control channel specified in
Ctrl Ch
of the IFX 1–5 page will not be swapped.
DrumKit IFX Patch
For more information, please see “DrumKit IFX Patch” on page 104.
Copy MFX/TFX
Copy MFX/TFX
is available on all of the MFX/TFX/LFO pages.
For more information, please see “Copy MFX/TFX” on page 67.
However, the MIDI control channel specified in
Ctrl Ch
of the MFX 1–TFX page will not be copied.
Swap MFX/TFX
Swap MFX/TFX
is available on all of the MFX/TFX/LFO pages.
For more information, please see “Swap MFX/TFX” on page 67.
However, the MIDI control channel specified in
Ctrl Ch
of the MFX 1–TFX page will not be swapped.
Write FX Preset
Write FX Preset
is available on all of the effects parameter editing pages, including IFX 1–5, MFX 1 and 2, and TFX.
For more information, please see “Write FX Preset” on page 67.
Put Effect Setting to Track
Put Effect Setting to Track
is available on all of the IFX and
MFX/TFX/LFO pages.
This command inserts effect settings into a track as exclusive events. You can use this to make the effect settings change during a song.
When you use System Exclusive messages to change effect settings, a certain amount of time will be required for the effect to switch. Also, if a note is playing, the sound may not change smoothly. You should take into account the timing of the musical data when choosing where to insert System Exclusive messages .
Note:
If you switch effects during a song, you should also use this command to insert an effect change at the beginning of the track (
Measure
001,
Beat.Tick
01.000) to select the effect that will be used from the beginning.
1. Use P8: Routing/IFX or P9: MFX/TFX/LFO to edit the effect settings that you want to insert (IFX1–IFX5,
MFX1, MFX2, TFX), and determine the song, track, measure, beat, and clock at which you will insert the exclusive event.
The illustration below shows the example of switching IFX4
(used by track 2) at the beginning of measure 9.
2. Select “Put Effect Setting to Track” to open the dialog box. (The values in the dialog box are settings for the example described in step 1.)
Sequencer: Menu Command Put Effect Setting to Track
3. Use Effect to select the desired effect.
4. Use To: Song to specify the song into which the settings will be inserted, Track to specify the insert-destination track, Measure to specify the measure and Beat.Tick to specify the beat and clock at which the settings will be inserted.
The inserted events are only the effect type and effect parameters. Settings such as effect on/off and bypass must be recorded in real time.
Note:
Turn back the Location, and play the song to verify that the effect is switched as you intend.
You can also use the P6: Track Edit menu command
Event
Edit
to verify that a parameter change System Exclusive message (Exclusive) has been inserted.
Note:
If a pattern had been inserted at the same location
(where you inserted the exclusive data), that pattern will be expanded to note data.
Using “Put Effect Setting to Track” to switch effects
The
Put Effect Setting to Track
menu command inserts effect settings into a track as exclusive event data. We’ll explain this using two methods as examples.
1) Inserting effect settings at the beginning and in the middle of a song
We’ll set things so that MIDI track 2 uses the insert effect
(IFX3) 035: Stereo Phaser from measures 1 through 8, and switches to 032: Stereo Flanger from measure 9.
Use the menu command
Put Effect Setting to Track
to insert a MIDI parameter change System Exclusive message.
1. In P0–1: Play/REC– Program T01–08, select the desired program for MIDI track 2.
If you set
Track Select
to Track 02, you’ll be able to monitor it.
2. In P8: Routing/IFX– Routing T01–08, send MIDI track 2 to IFX3.
3. Specify the effect that you want to use from measure 1.
In P8: Routing/IFX– Insert FX Setup, select 035: Stereo
Phaser for IFX3. Press the On/Off button to turn on the IFX3.
In P8:Routing/ IFX– IFX3, set the parameters as desired.
4. Make sure that you’ve selected Track 02 in Track Select, and record as desired.
5. In the P8: Routing/IFX page, select the menu command
Put Effect Setting to Track to access the dialog box.
6. Specify the location at which the exclusive message for the effect will be inserted.
Effect
: IFX3
To:
Song
: 000
Track
: 03
Measure
: 001
Beat.Tick
: 01.000
7. Press the OK button.
8. Specify the effect that you want to use for measure 9 and following.
Go to the P8: Routing/IFX– Insert FX setup, and choose 032:
Stereo Flanger for IFX3.
In the P8: Routing/IFX– IFX3, set the parameters as desired.
9. In the P8: Routing/IFX, choose the Put Effect Setting to
Track menu command to open the dialog box.
10. Specify the location at which the exclusive message for the effect will be inserted.
Effect
: IFX3
To:
Song
: 000
Track
: 03
Measure
: 009
Beat.Tick
: 01.000
11. Press the OK button.
12. When you play back after executing these commands, the effect on track 3 will change to 032: Stereo Flanger at measure 9.
13. If you press the COMPARE button (it will light up) and play back, the playback will occur as it did before you executed Put Effect Setting to Track.
14. In the P6: Track Edit– Track Edit page, set Track Select to Track 03, and choose the Event Edit menu command to access the event edit screen. (In the Set Event Filters dialog box, check Exclusive.)
Notice that a MIDI parameter change System Exclusive message is inserted at the beginning and at measure 9 of track 3.
2) Using the song’s own effect settings from the beginning of the song, and inserting effect settings from elsewhere into the middle of the song
In this example, we’ll apply an insert effect (IFX3) to MIDI track 3, and set our parameters so that it uses 035: Stereo
Phaser from the beginning of the song. At measure 9, we’ll insert a MIDI parameter change System Exclusive message to make IFX3 switch to the 032: Stereo Flanger effect settings that were created for a different song.
1. Select a desired program for MIDI track 3, and send it to IFX3.
Make the following settings for MIDI track 3.
Track Select
: Track 03 (P0)
Bus (IFX/Output) Select
: IFX3 (P8)
In the P0–1: Play/REC– Program T01–08 page, assign a program to track 3. Then use the P8: Insert Effect page to route track 3 to the effect, and make effect settings.
2. Make sure that you’ve selected Track 03 in Track Select, and record on it.
3. On a separate song you copied, make the effect settings that you want start using at measure 9.
1) Create song S001.
185
Sequencer mode
2) Use the
Copy From Song
menu command to copy from
S000.
In song 001, make the effect settings that you want to use from measure 9. Go to the P8: Routing/IFX– Insert FX Setup, and choose 032: Stereo Flanger for IFX3.
In the P8: Routing/IFX– IFX3, set the parameters as desired.
4. Select “Put Effect Setting to Track” to open the dialog box.
5. Insert the effect settings you created in song 001 into song 000.
Effect
: IFX3
To:
Song
: 000
Track
: 03
Measure
: 009
Beat.Tick
: 01.000
6. Press the OK button to execute the command.
7. After execution, select song 000 and play it back. The effect for track 3 will change to 032: Stereo Flanger at measure 9.
8. In song 000, you can press the COMPARE button (it will light up) and play back to hear the song as it was before you executed Put Effect Setting to Track.
You can use the COMPARE button to compare the state of the track before and after execution.
Note:
In the P6: Track Edit– Track Edit page of song 000, set
Track Select
to Track 03 and choose the
Event Edit
menu command to access the Event Edit screen. (In the Set Event
Filters dialog box, check
Exclusive
.)
Notice that a MIDI parameter change System Exclusive message is inserted at measure 9 of track 3.
Step Recording (Loop Type)
Here, you can perform step recording into a pattern.
This is available when a user pattern is selected.
1. In Pattern (Pattern Bank) and Pattern Select, specify the pattern.
By default, the pattern length is one measure. If you wish to change the number of measures in the pattern, set the
Pattern Parameter
.
2. Select “Step Recording (Loop Type)” to open the dialog box.
Event Edit
Here, you can edit individual events of the musical data in a pattern.
Use
Pattern
and
Pattern Select
to specify the pattern, and then select this command.
The remaining steps are the same as when Event Editing a
track. For more information, please see “Event Edit” on page 169.
Piano Roll
This is the piano roll dialog box for entering a pattern. The
Piano Roll dialog box provides a detailed graphic view of event data such as notes, velocities, and control changes.
Here you can also modify, delete, or create these events.
Pattern Parameter
This command specifies the number of measures and the time signature of the selected pattern.
1. Use Pattern and Pattern Select to specify the pattern.
2. Select “Pattern Parameter” to open the dialog box.
3. In Length, specify the number of measures in the pattern.
4. In Meter, specify the time signature of the pattern.
However, this time signature is only temporary, and when you “put” or “copy” the pattern in a track of a song, the pattern will play according to the time signature of that measure.
Erase Pattern
This command erases the data from the selected pattern.
1. Use Pattern and Pattern Select to specify the pattern.
2. Select “Erase Pattern” to open the dialog box.
Time signature
186
Location within the measure (beat, clock) Note number
Velocity
Length
(beats, clocks)
3. The remaining steps are the same as when step recording on a track.
Refer to steps 3 and following in
Step Recording
(see “Step
Recording” on page 168). However, step recording a pattern
differs from step recording a track in that when you reach the end of the pattern, you will return to the beginning and continue recording, in this way continuing to add more data.
3. If you check All Patterns, all user patterns in the song will be erased.
If
All Patterns
is
not checked
, only the pattern specified in step 1 will be erased.
Copy Pattern
This command copies the settings and musical data of the selected pattern to another pattern.
User patterns belong to a particular song, but you can use the Copy Pattern command to use the same pattern in another song.
Although preset patterns cannot be edited, you can copy a preset pattern to a user pattern. There, you can edit and save
Sequencer: Menu Command Bounce Pattern
it as a user pattern. Be aware that when you execute the
Copy Pattern operation, the pattern settings and musical data of the copy destination will be erased.
1. In From (Song***): Pattern, specify the copy source pattern. (By default, this will be the song and pattern that was selected in the Pattern Edit page.)
2. In To: Song and Pattern, specify the copy destination song and pattern.
For
Pattern
, only user patterns
U00–U99
can be specified.
Bounce Pattern
This command combines the musical data of a source pattern and a destination pattern, and places the combined musical data in the destination. The time signature and length of the pattern following execution will be according to the settings of the destination pattern. Unlike the Track
Bounce operation, the musical data of the bounce source will not be erased.
If MIDI control data exists in the selected pattern and in the bounce destination pattern, the resulting playback following the bounce operation may produce unexpected results. We recommend that you use
Event Edit
to prepare the MIDI control data of the two patterns before executing the Bounce
Pattern command.
1. Pattern and Pattern Select to specify the bounce source pattern.
2. Select “Bounce Pattern” to open the dialog box.
4. In Song, select the “get” source song.
5. In Track, select the “get” source track.
6. In Measure, specify the first measure of the “get” source.
Put To Track
This command places a pattern into a track.
Unlike the
Copy to Track
, this command only places the pattern number in the song, so that when playback reaches that point, the pattern will be recalled. The musical data of the pattern will not actually exist in the track.
By creating patterns that contain frequently ‐ used phrases or drum patterns, and then placing them on the tracks, you can conserve memory.
Be aware that when you edit a pattern, all locations in the song where that pattern has been placed will be affected.
When you execute the Put to Track command, the musical data will be affected as follows.
• Musical data previously existing at the “put” destination will be erased.
• The pattern that you “put” will playback according to the time signature that is specified by the measures of the
“put” destination.
• Control data such as pitch bend etc. previously existing in the track will be reset immediately before the measure at which the pattern was “put.” If you wish to use control data such as pitch bend in the measures in which a pattern is “put,” you must first write the control data into
the pattern (see “Control data in pattern recording” on page 156).
To delete a pattern that has been placed in a track you can use
Erase Measure
, specifying the area in which the pattern was “put,” and setting
Kind
to
All
.
Example: Pattern 20 has been Put at measures 2, 4, and 6 of track 10. When those measures are reached, pattern 20 is called and its data is played.
Track 10
(Drums)
1 2 3 4 5 6
3. In From (Song***) Pattern, select the bounce source pattern. (By default, the song and pattern that are selected in the Pattern Edit page will be chosen.)
4. In To: Song and Pattern, select the bounce destination song and pattern. For Pattern, only user patterns U00–
U99 can be specified.
Get From Track
This command takes musical data from a track and loads it into the specified pattern.
1. Use Pattern and Pattern Select to specify the pattern.
2. In Pattern Parameter, specify the pattern length of the
“get” destination.
3. Select “Get From Track” to open the dialog box.
Pattern 20
1. Select “Put To Track” to open the dialog box.
2. In Pattern and Pattern Select, select the “put” source pattern. (By default, this will be the pattern selected in the Pattern Edit page)
3. In To: Track, select the “put” destination track.
187
188
Sequencer mode
4. In Measure, specify the first measure of the “put” destination.
When you execute the command,
Measure
will automatically update. If you wish to, you can continue
“putting” the pattern. To exit the command, press the
Exit button
.
Copy To Track
This command copies the specified area of musical data from the specified pattern to a track as musical data.
Unlike the Put To Track command, this command actually writes the musical data of the pattern into the track, so that you can edit the copied data in the track. Even if you later edit the copy source pattern, the musical data of the song will not be affected.
When you execute the Copy to Track command, the musical data will be affected as follows.
• Musical data previously existing in the copy destination measures will be erased.
• The musical data that is copied will play back according to the time signature specified at the copy destination measures.
Example: Copy the musical data of pattern 41 to measure 2.
Before Copy
2 3
After Copy
1
Pattern 41
1 2 3
4
4
The procedure is the same as for the Put to Track command.
For more information, please see “Put To Track” on page 1879.
Convert to Drum Trk Pattern
This command converts a user pattern into a user drum track pattern. This conversion lets you use a user pattern in the drum track of the various modes. The drum track pattern you convert here will be preserved in the KROME’s memory even when the power is turned off, so you can manage it together with the programs and combinations.
Preparing a user pattern
You’ll first need to prepare the user pattern that you want to convert to a Drum Track pattern.
To create a user pattern, you can realtime ‐ record it in the Seq
P10: Pattern/RPPR– Pattern Edit page, or step ‐ record it (see
OG p.71, and page 198).
Alternatively, performance data from a track can be imported into a pattern, meaning that performance data you’ve created in a track or SMF data you’ve loaded in
Media mode can be used as a user pattern. To do this, execute the
Get From Track
menu command in the Seq P10:
Pattern/RPPR– Pattern Edit page (see p.155).
Converting to a Drum Track pattern
1. Press the SEQ button to enter Sequencer mode.
2. Access the Seq P10: Patern/RPPR– Pattern Edit page.
3. Use Pattern and Pattern Select to select the conversionsource pattern.
4. Select “Convert to Drum Trk Pattern” to open the dialog box.
5. Use the To Drum Track Pattern Select field to specify the destination user drum track pattern number. When you execute this command, the data will be overwritten onto the copy-destination number.
6. If you check the All Patterns available in Song *** item, all patterns in the song that contain note events will be copied, starting at the number you specified in step 3.
7. If you execute with Note Only checked, only the note events will be copied.
Press the OK button or the ENTER button to execute. If you decide not to execute, press the Cancel button or the EXIT button.
As described in “Drum Track function settings in Program mode” on page 100 of the Operation guide, set the Drum
Track
Pattern Bank
to User, and set
Pattern No.
to the user
Drum Track pattern you converted. Then play the Drum
Track pattern.
Song
Drum Track
Track/RPPR
100
User
Pattern
Convert to
Drum Track Pattern
Sequencer memory
(Not saved internally; save on SD card.)
Preset
Pattern
User
Drum Track
Pattern
Program
/Combination
Drum Track
Internal memory (saved inside the M50)
If there is insufficient drum pattern memory or insufficient pattern locations, an error message of “Not enough Drum Track pattern memory” or “Not enough
Drum Track pattern locations available” will appear, and the command cannot be executed.
Tip:
It’s a good idea to convert drum patterns that you use frequently. Use
Load Drum Track Pattern
to load them.
Load Drum Track Pattern
This command loads a user drum track pattern into a user pattern.
If you want to edit a user drum track pattern, you must first load it into a pattern in the song, and then edit it. After editing, you can use
Convert to Drum Trk Pattern
to save it as a user drum track pattern.
Sequencer: Menu Command Erase Drum Track Pattern
the track and effect settings of the song specified for
Step 01
will be copied to the beginning of the resulting song, and all track and effect settings of subsequent songs will use the set ‐ tings of the song for
Step 01
.
Settings of the Tone Adjust function will not be reflected in this conversion.
1. Select the cue list (C00–C19) that you want to convert to a song.
2. Select “Convert to Song” to open the dialog box.
1. Use Select Range From (Drum Track) and To (Drum
Track) to specify the copy-source user drum track pattern.
The user drum track patterns between
From
and
To
will be loaded. If you want to load only one pattern, set
From
and
To
to the same pattern number.
When you execute this command, the data will be overwritten onto the copy ‐ destination number.
2. Use Load to (Song ***) to specify the load-destination user pattern number.
Erase Drum Track Pattern
This erases the drum track pattern you specify.
For more information, please see “Erase Drum Track
Pattern” on page 66.
Rename Cue List
This command renames the selected cue list. A name of up to 24 characters can be input. For more information, please see “Editing names” on page 91 of the Owner’s manual.
Delete Cue List
This command deletes the currently selected cue list.
When you execute this command, the data of the currently selected cue list will be deleted.
Copy Cue List
This command copies the settings of another cue list to the currently selected cue list.
1. In From, specify the copy source cue list.
When you execute, the setting data of the selected cue list will be deleted, and replaced by the copy ‐ source data.
Convert to Song
(Convert Cue List to Song)
This command converts a cue list consisting of multiple songs to a single song. Although it is not possible to record additional tracks into a cue list, you can convert the cue list to a song, and then record solos etc. onto open tracks.
You will need to convert a cue list to a song if you wish to write it to an SD card as SMF data. During the conversion,
3. In To Song, specify the conversion destination song number.
If you select a new song, a confirmation dialog box will appear.
Press the OK button to create a new song, into which the cue list will be converted.
If you selected a song that already contains settings and performance data, executing this command will erase the data of that song and replace it with the data that was converted from the cue list. Use this command with caution.
After executing this command, you can press the
COMPARE button to return to the state prior to execution.
The
Convert to Song
command converts a cue list to a song as described below.
• Song/Track parameter settings for Step 01
Song/Track parameters will use the settings of the
Step
01
song.
The MIDI channel of each track will be assigned according to the settings of the
Step 01
song. If
Step 02
and following songs have different settings, it may not be possible to achieve an acceptable playback result after conversion. As far as possible, try to keep the
MIDI channel assignments consistent between songs you intend to use in a play list that will be converted into a song.
The following track parameters will not be reflected in the conversion. As with the MIDI channels, we recommend that you keep these settings consistent between all songs in the cue list.
SOLO ON/OFF, Status, MIDI Channel, Bank Select (When
Status=EX2), Force OSC Mode, OSC Select, Use Program’s Scale,
MIDI Filter, Key Zone, Velocity Zone, Delay, and the track EQ settings
• Converting Song/Track parameters into track events
Second and subsequent repeats of the
Step 01
song, and the settings of
Step 02
and following songs will all be converted into track events (musical data).
The following data will be converted.
Track1–16
Master Track
Program Select, Pan, Volume, Portamento,
Detune, Bend Range
Tempo, Meter
If
Pan
(Seq 0–3(4)b) is
RDN
, it will be converted to
C064
.
If
Portamento
(Seq 3–3(4)c) is
PRG
, or if
Bend Range
(Seq 3–5(6)c) is
PRG
or a
negative value
, these will not be reflected in the conversion.
In the case of a drum program,
Detune
(3–5(6)c) will be divided into RPN Fine Tuning and Coarse Tuning, and
189
Sequencer mode
190
converted to these events. For example, if the
Detune
setting of
+600
, Fine Tuning will be 00 and Coarse
Tuning will be 6. Fine Tuning will modify the playback pitch (Detune). Coarse Tuning will change the notes that are played back (Transpose). In cases other than a drum program, the pitch setting will be applied by shifting the note numbers in the track and adding an
RPN Fine Tuning event.
• PLAY/MUTE (P0–1(2): Program T01–08, T09–16 Play/Rec/
Mute)
The
Play/Mute
track parameters will be reflected in the song.
Solo On/Off
will not be reflected.
• Track Play Loop (P0–9(10): Ply Loop T01–08, T09–16 page)
If
Track Play Loop
is on, the area from
Loop Start
to
Loop End
will be expanded as far as the last measure in the master track.
(Example)
If
Track Play Loop
is
M005–M008
, and the master track contains 10 measures, the data will be expanded from the beginning of the track as
M005
,
6
,
7
,
8
,
M005
,
6
,
7
,
8
,
M005
,
6
.
• Play Intro (P0–9(10): Ply Loop T01–08, T09–16 page)
If
Track Play Loop
is on, the data will be developed according to the Play Loop setting until the last measure of the master track.
If
Play Intro
is checked, the data from the beginning of the track until
Loop End
will be developed, and then the data from
Loop Start
until
Loop End
will be developed until the last measure of the master track.
For example if
Track Play Loop
is
M005–M008
and the master track ends at measure 10, checking
Play Intro
will cause the data to be developed from the beginning of the track as
M001
,
2
,
3
,
4
,
5
,
6
,
7
,
8
,
M005
,
6
,
7
,
8
,
M005
,
6
.
If
Play Intro
is not checked, please see the example in
Track Play Loop
.
• Patterns
Patterns in the
Step 01
song will be copied as patterns of the converted song.
If there is a second or subsequent repeat for
Step 01
, or if the tracks of
Step 02
and subsequent songs contain pat ‐ terns, they will be expanded into track events (musical data).
• Transpose
If the
Transpose
(Seq 3–5(6)c) of the tracks in
Step 02
and subsequent songs differ from the settings of the
Step 01
song, the note numbers of the note data will be shifted.
Example)
If
Step 01
,
Transpose
= +1 and
Step 02
,
Transpose –1
, the actual note numbers of the
Step 02
track note data will be shifted downward by 2.
•
Repeat FS (Foot Switch)
→
“Repeat” 1
If
Repeat
is set to
FS (Foot Switch)
, it will be converted as
Repeat 1
.
When you execute
Convert to Song
to convert a cue list to a song, the repeat settings within the cue list and the pattern and track play loop settings of the songs used by the cue list will all be converted into events such as note data. For this reason, the amount of data will increase significantly, and in some cases there may not be enough internal memory to perform the conversion. In particular if the cue list uses long songs, or if numerous repeats have been specified, or if many patterns are used by the songs, you should try executing the
Convert to Song
command from time to time as you create the cue list, in order to verify the amount of memory that will be required for the conversion.
A cue list that is longer than 999 measures cannot be con ‐ verted into a song.
Copy Song
This command copies a portion (a number of measures) of the song specified by
Step
, and makes it into a song. This is convenient when you want to modify the structure or development of the songs in a cue list.
For example if you have an eight ‐ measure song and want to repeat measures 5–8, you can use this command to create a four ‐ measure song out of that portion. Then you can assign the resulting song to a step in a cue list, and repeat it.
1. In Current Step, or Song select the desired step.
2. Select “Copy Song” to open the dialog box.
3. In From Measure, specify the first measure in the copy source song. In To End of Measure, specify the last measure.
4. In To Song, specify the song into which the data will be converted.
If you select a new song, a dialog box will ask you for confirmation. Press the OK button to create a new song and copy the data to that song.
If you select an existing song that already contains settings and/or musical data, executing this command will erase the data of that song and rewrite it with the data from the copy source. Before you execute, be sure that you will not be losing important data.
5. If you check Replace to original Song in Cue List and execute this command, the Current Step song will be replaced by the newly created song.
If you execute
without checking
this box, the newly created song can be selected later for the desired step of the cue list.
System Exclusive events supported in Sequencer mode Copy Song
System Exclusive events supported in Sequencer mode
You can record and play back System Exclusive events, and edit tracks that contain System Exclusive events.
SysEx messages that can be recorded in real-time
The following exclusive messages can be recorded in real ‐ time:
• Exclusive messages received from an external MIDI device
• Parameter changes in Sequencer mode (see table below)
• Master Volume universal exclusive messages assigned to the foot pedal or a Realtime Controls knob
Parameter change messages that you can realtime-record in Sequencer mode
Front panel/Page
ARP
Front panel Drum Track
Realtime Controls
P0: Play/REC, Arp
A/B
P1: Controllers
P2: EQ
P3: Track Param
P4: Zone/Delay
P7: ARP/DT
P8: Routing/IFX
Program, Mixer
Tone Adjust
Controllers Setup
EQ Trim
OSC
Pitch
Scale
Delay
ARP Setup
Arpeggiator A/B
ARP Scan Zone
Drum Track
Routing1/2
Insert FX Setup
IFX 1–5
Common FX LFO
Routing
P9: MFX/TFX/
LFO MFX 1/2
TFX
Parameter
ARP button, SELECT button, REALTIME CONTROLS 1–4 knobs (GATE, VELOCITY, SWING,
STEP )
DRUM TRACK button
SELECT button, REALTIME CONTROLS 1–4 knobs (TONE [CUTOFF], [RESONANCE],
[SWING], [STEP], USER [1], [2], [3], [4])
Program Select
,
Pan
,
Volume
,
PLAY/MUTE
,
Solo On/Off
*1
All “Tone Adjust” parameters
All “Panel Switch Assign,” “Realtime Controls knob Assign” parameters
Auto Load Prog EQ
,
Bypass
,
Input Trim
,
High Gain
,
Mid Frequency
,
Mid Gain
,
Low Gain
Force OSC Mode
,
OSC Select
,
Portamento
Transpose
,
Detune
,
Bend Range
Use Program’s scale
,
Type
,
key
,
Random
Delay Time [ms]
,
MIDI/Tempo Sync.
,
Base Note
,
Times
All parameters
All parameters
All parameters
All “Drum Track” parameters
Bus (IFX/Output) Select
,
Send1
,
Send2
,
Fx Control Bus
IFX,
IFX On/Off
,
Chain to
,
Chain
,
Pan
,
Bus Sel
,
FX Control Bus
,
Send1
,
Send2
All effect parameters
All “Common FX LFO 1, 2” parameters
MFX,
MFX On/Off
,
Chain
,
Chain Direction
,
Chain Level
,
Return 1
,
Return 2
, TFX,
TFX On/Off
,
Master Volume
All effect parameters
All effect parameters
*1:
Solo On/Off
is always controlled by events in the track, regardless of the play/mute status of that track.
The maximum amount of exclusive data that can be recorded at once is approximately 320 Kbytes. This size will decrease if other events exist within the same measure.
You cannot simultaneously record exclusive messages received from an external MIDI device and parameter changes produced by editing.
The events that will be recorded are controlled by the
Global P1: MIDI– MIDI Basic settings SEQ Mode
Param. MIDI Out
. For Control Change, only control change messages will be recorded. For SysEX ‐ Param
Change, only parameter changes and exclusive
messages will be recorded (see “Param. MIDI Out” on page 200).
Realtime recording will not record parameter edits that you perform by executing menu commands in the various pages, nor changes you make by using the
Effect Preset function to recall effect parameters.
191
192
Sequencer mode
KROME sequencer file formats
The KROME sequencer supports both the proprietary
KROME Song format, and Standard MIDI Files.
If you like, you can convert data between the two formats, simply by loading the data in one format and then saving it in the other.
For details, please see “22) Load Standard MIDI File” on
page 230, and “Save SEQ” on page 232.
KROME Song format
This is the native KROME sequencer format, which is required to ensure that all KROME ‐ specific data is saved correctly.
Standard MIDI Files
You can also load and save Standard MIDI Files (SMF), for compatibility with other sequencers. Note that some
KROME ‐ specific data may not be maintained when in SMF files.
GM, XG, and GS System Exclusive Data
The KROME sequencer can record System Exclusive messages, including XG or GS data. For details, please see
“System Exclusive events supported in Sequencer mode” on page 191.
Note that GM, XG, and GS exclusive messages do not affect the KROME when they are played back.
Global mode
In Global mode, you can make settings that affect the entire instrument, such as master tuning, MIDI, and memory protect.
You can also edit user scales, drum kits, and user arpeggio pattern setups.
If you want the settings you make in Global mode to be backed up when the power is turned off, you must write them into memory. From P5: Drum Kit, you’ll be able to select the menu command
Write Drum Kits
.
From P6: Arpeggio Pattern, you’ll be able to select
Write Arpeggio Patterns
. From the other pages of
Global mode, you’ll be able to select
Write Global
Setting
.
These commands can also be selected by pressing the
WRITE button.
Global Page Select
• Press the GLOBAL button to access Global mode.
You can use the following ways to select the pages in Global mode.
1. Press the PAGE button to access “Page Select.”
The page accessed prior to pressing the PAGE button is shown in grey.
Page
P0: Basic Setup
P1: MIDI
P2: Controllers
P3: Scales
P4: Category
Main content
Basic overall settings. (see p.194)
MIDI settings for KROME. (see p.198)
Controller settings such as the pedals
connected to the rear panel. (see p.202)
CC# assignments for Arpeggio
controllers. (see p.202)
Scale settings created by the user. You can specify 16 types of octave scale, and one full ‐
range scale. (see p.203)
Edit category names for programs and
combinations. (see p.204)
P5: Drum Kit
Edit drum kits. (see p.205)
P6: Arpeggio
Pattern
Creating Arpeggio pattern. (see p.211)
2. Select the desired page in the display.
Other ways to select pages
• Hold down the PAGE button and press numeric keys 0–6 to specify a page number; you will access the corresponding page.
For example, if you want to access the P3: Scales page, hold down the PAGE button and press numeric key 3.
• Press the EXIT button to return to the P0: Basic Setup page. If something other than the Basic page is selected, press the [EXIT] button to access the Basic page.
193
Global mode
Global P0: Basic Setup
194
0–1: Basic
0–1a
0–1b
0–1
Menu
0–1c
Here, you can make master tune settings, turn all effects on/ off, and make on/off settings for the arpeggiator and drum track.
0–1a: Basic
Master Tune
[–50cent (427.47Hz)…+50cent (452.89Hz)]
This adjusts the overall tuning of the entire KROME in one ‐ cent units (semitone = 100 cents), over a range of ±50 cents.
With a setting of 0, the frequency of A4 will be 440 Hz.
The A4 pitch given here is when Equal Temperament is selected as the scale. If a different scale is selected, A4 may not be 440 Hz.
Key Transpose [–12…+00…+12]
This adjusts the pitch in semitone steps over a ±1 octave range.
This setting is applied at the location (PreMIDI or PostMIDI) specified by
Convert Position
(Global 1–1a).
MIDI note number transmitted by the KROME
KeysTranspose
61 keys
73 keys
88 keys
–12
24…84
(C1…C6)
12…84
(C0…C6)
9…96
(A–1…C7)
0
36…96
(C2…C7)
24…96
(C1…C7)
21…108
(A0…C8)
+12
48…108
(C3…C8)
36…108
(C2…C8))
33…120
(A1…C9)
Note:
If
Convert Position
is set to PreMIDI, the MIDI note numbers transmitted from the KROME will be affected by
Key Transpose
setting.
Master Tune
can be controlled by the MIDI universal
System Exclusive message Master Fine Tuning (F0, 7F, nn, 04, 03, vv, mm, F7: nn=MIDI channel, vv/mm= value).
Key Transpose
can be controlled by the MIDI universal
System Exclusive message Master Coarse Tuning (F0,
7F, nn, 04, 04, vv, mm, F7: nn=MIDI channel, vv/ mm=value).
These messages are received on the global MIDI channel specified by
MIDI Channel
(Global 1–1a).
In Program, Combination, and Sequencer modes, MIDI
RPN messages can be received to control the tuning and transposition of the program or timbre
(Combination mode) or track (Sequencer mode).
Incoming MIDI RPN Fine Tune messages will make relative adjustments to the tuning specified by the
Master Tune
setting.
MIDI RPN Coarse Tune messages will make relative adjustments to the pitch specified by the
Key
Transpose
setting. In Program mode, these messages will be received on the global MIDI channel specified by
MIDI Channel
(Global 1–1a), and in other modes they will be received on the MIDI channel specified for each timbre or track. (
Transpose
,
Detune
, Combi 3–
5(6)c, Seq 3–5(6)c)
Velocity Curve [1…9]
This specifies the way in which the volume and/or tone will change in response to variations in keyboard playing dynamics (velocity).
The curves you can select will depend on the
Convert
Position
(Global 1–1a) setting. If the setting is PreMIDI, the curve is applied immediately after the keyboard. If the setting is PostMIDI, the curve is applied immediately before the sound generator.
In the case of PreMIDI, your keyboard playing dynamics are modified as shown by transmission curves 1–9 (lower left diagram), and reception is fixed at curve 4 linear (diagram at lower right).
In the case of PostMIDI, your keyboard playing dynamics are transmitted according to transmission curve 4 linear
(lower left diagram), and will be interpreted according to reception curve 1–9 (lower right diagram).
If you’re using the KROME as a MIDI sound module, and want to adjust the overall brightness of the sound, set
Convert Position
(Global 1–1a) to PostMIDI and select the appropriate velocity curve.
For a setting of
PreMIDI
Velocity (KBD
→
MIDI Out)
127
For a setting of
PostMIDI
Velocity (MIDI In
→
TG)
MAX
1
Soft
KBD
8
7
6
5
4
3
2
1
9
Strong
Transmitted Table
Curve 1–9
Curve 4
Velocity effect
1
8
7
6
5
4
3
2
1
9
Received Table
Curve 4
Curve 1–9
127
TG
MIDI
PreMIDI PostMIDI
Global Convert Position
1, 2, 3:
Strongly played notes will be affected.
4 (Normal):
The normal curve
5, 6:
Produces an effect even if you do not play very strongly.
7:
This curve produces a relatively consistent effect for softly played notes.
8:
This curve produces an even more consistent effect.
Each curve has its own characteristics, so you should select the curve that best suits your own playing style and the results you want to obtain.
9:
Compared with the standard curve #4, this curve softens the response of gently ‐ played notes. This allows velocity control with broader dynamics for sounds such as acoustic piano. This setting is particularly recommended for the
KROME ‐ 88.
Global P0: Basic Setup 0–1: Basic
Aftertouch Curve (MIDI IN) [1…8]
This specifies the way in which incoming aftertouch data will affect the volume or tone when
Convert Position
(Global 1–1a) is set to PostMIDI.
This setting has no effect when
Convert Position
(Global 1–1a) is set to PreMIDI.
This curve is applied immediately before the tone generator.
The
aftertouch Curve
setting selects the curve that is applied to the incoming aftertouch.
After Touch (MIDI In
→
TG)
MAX
Aftertouch effect
5
7
4
6
3
2
1
8:RANDOM
0 127
1, 2:
This curve produces change when strong aftertouch pressure is applied.
3 (Normal):
The normal curve.
4, 5:
This curve produces change even when light pressure is applied.
6, 7:
These curves produce change in 24 or 12 steps. Curve number 7 allows change over twelve steps, so when using aftertouch to modify the pitch, you can set the range of modification to one octave, and use aftertouch to vary the pitch in semitone steps.
8:
This is a random curve. Use this when you wish to create special effects, or to use aftertouch to apply unpredictable modulation.
With a setting of aftertouch, the setting you make here will be applied immediately before the KROME’s internal tone generator, meaning that it will affect the data received via MIDI, but will not affect the transmitted data.
0–1b: Effect Global SW
Enable IFX 1–5 [Off, On]
Off (unchecked):
All insert effects IFX1–5 will be off.
On (checked):
The P8: Insert Effect settings for each
IFX On/
Off
in Program, Combination, and Sequencer modes will be valid.
Enable MFX1&2 [Off, On]
Off (unchecked):
Master Effect1 and 2 (MFX1, 2) will be off.
On (checked):
The P9: MFX/TFX/LFO setting
MFX1 On/Off
, and
MFX2 On/Off
, in Program, Combination, and
Sequencer modes will be valid.
This on/off setting is linked with the front panel MASTER
FX button.
Enable TFX [Off, On]
Off (unchecked):
Total effect (TFX) will be off.
On (checked):
The P9: MFX/TFX/LFO setting
TFX On/Off
, in Program, Combination, and Sequencer modes will be valid.
This on/off setting is linked with the front panel TOTAL FX button.
These settings will always be turned on when you power ‐ on the KROME.
When
Enable IFX, Enable MFX1&2
, or
Enable TFX
settings are switched, control change messages CC#92
(effect control 2), CC#94 (effect control 4), and CC#95
(effect control 5) will be transmitted respectively. The transmitted data will be 0 for off, and 127 for on.
0–1c: ARP/Drum Track
All ARP/DT Off [Off, On]
On (checked):
All arpeggiator and Drum Track functions will be off. The arpeggiator will not operate even if the ARP button is on. The Drum Track function will not operate even if the DRUM TRACK button is on.
Off (unchecked):
The arpeggiator settings and ARP button settings in Program, Combination, and Sequencer modes will be used. The Drum Track function will operate according to the settings in each mode and the state of the
DRUM TRACK button.
Load ARP when changing:
Program [Off, On]
On (checked):
When you switch programs, the arpeggiator settings stored in that program will be used. Normally you will use the On setting.
Off (unchecked):
The arpeggiator settings will not change even if you switch programs. Use this setting if you want to switch Program sounds without changing the phrases from the arpeggiator.
Combination [Off, On]
On (checked):
When you switch combinations, the arpeggiator settings stored in that combination will be used.
Normally you will use the On setting.
Off (unchecked):
The arpeggiator settings will not change even if you switch combinations. Use this setting if you want only to switch combination sounds without changing the phrases from the arpeggiator.
Mode, Stop Watch
See “a: Mode button” on page 4 of the Operation guide.
See “l: Stopwatch button” on page 5 of the Operation guide.
V
0–1: Menu Command
• 0:
Write Global Setting
see p. 216
• 1:
Load Preload/Demo Data
see p. 216
• 2:
Change all bank references
see p. 216
• 3:
Display Setup
see p. 216
• 4:
Touch Panel Calibration
see p. 217
• 5:
Half Damper Calibration
see p. 217
• 6:
Update System Software
see p. 218
For more information, please see “Global: Menu Command” on page 216.
195
Global mode
196
0–2: System Preference
0–2a
0–2
Menu
0–2b
Here, you can make overall settings for the entire system such as bank map, and memory protect.
0–2a: System Preference
Bank Map [KORG, GM(2)]
This specifies the mapping of programs and combinations relative to Bank Select control change messages (CC#0 upper byte and CC#32 lower byte).
The bank select messages shown in the table below will be received (R) and transmitted (T) for Program banks A–F,
GM, g(1)…g(9), g(d) and Combination banks A–D.
Bank
C
D
E
F
A
B
GM, g(1)…g(9) g(d)
Bank Map: KORG
00. 00 R/T
00. 01 R/T
00. 02 R/T
00. 03 R/T
00. 04 R/T
00. 05 R/T
121. 00 R/T, 56. 00 R
121. 01…09 R/T
120. 00 R/T, 62. 00 R
Map: GM(2)
63. 00 R/T
63. 01 R/T
63. 02 R/T
63. 03 R/T
63. 04 R/T
63. 05 R/T
121. 00 R/T, 56. 00 R, 00. 00 R
121. 01…09 R/T
120. 00 R/T, 62. 00 R
Power-On Mode [Reset, Memorize]
Specifies the condition at power ‐ on.
Reset:
The KROME will be in Program mode P0: Play, and
Program A000 will be selected.
Memorize:
The location (mode and page) which you most recently accessed when you last powered ‐ off the KROME will be recalled. If you were in Program or Combination mode, the program or combination bank/number at power ‐ off will be recalled.
Before turning off the power, be sure to write your data or save it in Media mode. This function does not memorize the contents of any parameters that were edited.
Auto Power-Off
[30 minutes, an hour, 4 hours, Disabled]
The KROME will automatically turn off its own power a certain length of time after its keyboard, display, buttons, or knobs were last used. (With the factory settings, the power will turn off in approximately four hours.)
* Moving the VOLUME knob is not considered usage for this purpose. Even if you use these knobs, the power will still turn off when the specified time has elapsed if no other user input has been performed.
Even when songs or demo songs are being played back consecutively, the power will automatically turn off if the specified time elapses without any sound at all being produced.
Here you can specify the time when auto power ‐ off will occur. You can also prevent the power from turning off.
When the power turns off, the settings you had been editing will be lost. You should save any settings that you want to keep.
30 minutes, an hour, 4 hours:
The power will automatically turn off if the specified time elapses without any user input being performed on the KROME’s keyboard or buttons. The available settings are 30 minutes, 1 hour, and 4 hours.
If you’ve chosen one of these settings, a dialog box will appear when the system starts up, informing you of the length of time after which auto power ‐ off will occur.
If you want to change the auto power ‐ off setting, press the
Change Setting button in this dialog box and change the setting as desired.
Several minutes before the power turns off, a dialog box will appear with a count ‐ down indicating the time until the power turns off. If you don’t want the power to turn off, press the KROME’s display or keyboard, or use a button or knob. Auto power ‐ off will be reset, and the same message will appear once again if no user input is performed for the specified length of time.
Disable:
Auto power ‐ off will be disabled. The power will not turn off automatically.
Changes you make to this setting are always saved.
There is no need to execute
Write Global Setting.
Beep Enable [Off, On]
On (checked):
A beep will be heard when you press an object in the display.
Off (unchecked):
No beep will be heard.
Animation [Off, On]
On (checked):
Enables an animation effect when displaying menus, pads, or dialog boxes.
Off (unchecked):
Disables the animation effect.
Global P0: Basic Setup 0–2: System Preference
In some cases, the animation will be disabled automatically when large amounts of performance data is being processed by the drum track or sequencer.
Value Edit Pop-up [Off, On]
On (checked):
A popup will appear when you hold down or press twice on an edit cell, knob, or slider.
Off (unchecked):
A popup will not appear.
REALTIME CONTROLS Pop-up [Off, On]
On (checked):
A popup will appear when you operate the front panel REALTIME CONTROLS knob.
Off (unchecked):
A popup will not appear.
In some cases, popup display will be disabled automatically when large amounts of performance data is being processed by the drum track or sequencer.
0–2b: Memory Protect
Program [Off, On]
This setting protects the internal program memory.
On (checked):
Internal program memory will be protected, and the following write operations cannot be performed.
• Writing a program
• Loading preloaded program data
• Loading program data from media
• Receiving program data via MIDI data dump
Off (unchecked):
Data can be written to internal program memory.
Combination [Off, On]
This setting protects the internal combination memory.
On (checked):
Internal combination memory will be protected, and the following write operations cannot be performed.
• Writing a combination
• Loading preloaded combination data
• Loading combination data from media
• Receiving combination data via MIDI data dump
Off (unchecked):
Data can be written to internal combination memory.
Song
This setting protects the internal song memory.
[Off, On]
However, when the power is turned off, the song data in song memory will be lost regardless of this setting.
On (checked):
Internal song memory will be protected, and the following write operations cannot be performed.
• Recording to the sequencer
• Loading preloaded song data
• Loading song data from media
• Receiving song data via MIDI data dump
Off (unchecked):
Data can be written to internal song memory.
Drum Kit [Off, On]
This setting protects the internal drum kit memory.
On (checked):
Internal drum kit memory will be protected, and the following write operations cannot be performed.
• Writing a drum kit
• Loading preloaded drum kit data
• Loading drum kit data from media
• Receiving drum kit data via MIDI data dump
Off (unchecked):
Data can be written to internal drum kit memory.
Arpeggio User Pattern [Off, On]
This setting protects the internal user arpeggio pattern memory.
On (checked):
Internal user arpeggio pattern memory will be protected, and the following write operations cannot be performed.
• Writing a user arpeggio pattern
• Loading preload arpeggio pattern data
• Loading user arpeggio pattern data from media
• Receiving user arpeggio pattern data via MIDI data dump
Off (unchecked):
Data can be written to internal user arpeggio pattern memory.
V
0–2: Menu Command
• 0:
Write Global Setting
see p. 216
• 1:
Load Preload/Demo Data
see p. 216
• 2:
Change all bank references
see p. 216
• 3:
Display Setup
see p. 216
• 4:
Touch Panel Calibration
see p. 217
• 5:
Half Damper Calibration
see p. 217
• 6:
Update System Software
see p. 218
For more information, please see “Global: Menu Command” on page 216.
197
Global mode
Global P1: MIDI
1–1: MIDI Basic
1–1a
1–1
Menu
Here, you can make MIDI ‐ related settings that affect the entire KROME.
Note:
To transmit MIDI exclusive dump data, you’ll use the menu commands of this P1: MIDI page.
1–1a: MIDI Setup
198
Basic:
MIDI Channel (Global MIDI Channel)
Sets the global MIDI channel.
[1…16]
The global MIDI channel is used in the following cases.
• When transmitting and receiving performance data in
Program mode (Prog P0: Play).
• When selecting combinations via MIDI in Combination mode (Combi P0: Play).
• When triggering the drum track (with
Trigger Mode
set to Wait KBD Trig) in Program or Combination mode.
• When controlling timbres or effects that have been set to
Gch in various modes
• When transmitting and receiving System Exclusive messages
MIDI received
In Program mode (P0: Play), MIDI data is received on the global MIDI channel, but in Combination mode (P0: Play) or
Sequencer mode, MIDI data is received on the MIDI channel specified for each timbre or track.
In Combination mode (P0: Play), program changes received on the global MIDI channel will switch the combination
(Global 1–2b: MIDI Filter).
Use the global MIDI channel to switch IFX 1–5 (CC#92),
MFX1&2 (CC#94) and TFX (CC#95) on/off.
To control the pan following IFX, sends 1/2, MFX 1/2 and
TFX, use the global MIDI channel when in the Program mode; while in the Combination, or Sequencer modes, use the channel specified separately by
Ctrl Ch
for IFX1–5,
MFX1&2, and TFX. By setting
Ctrl Ch
to Gch, you can control these parameters from the global MIDI channel.
MIDI output when playing the KROME
In Program mode, this data will be transmitted on the global
MIDI channel. In Combination mode, data will be transmitted simultaneously on the global MIDI channel and on the MIDI channels of timbres whose
Status
(Combi 3–
1(2)c) is set to EXT or EX2.
In Sequencer mode, musical data will be transmitted on the channel specified for the currently selected track (Seq 3–
1(2)c) (whose
Status
is BTH, EXT, or EX2).
Note Receive (Note Receive Filter) [All, Even, Odd]
This setting specifies whether even ‐ numbered, odd ‐ numbered, or all note numbers will be sounded when note data is received from the KROME’s keyboard or from an external MIDI device. By connecting the KROME to another
KROME and setting one instrument to Even and the other to
Odd, you can effectively double the polyphony by dividing the notes between the two instruments.
All:
All note numbers will be received. Normally you will leave this set to All.
Even:
Even ‐ numbered notes (C, D, E, F#, G#, A#) will sound.
Odd:
Odd ‐ numbered notes (C#, D#, F, G, A, B) will sound.
This setting has no effect on the MIDI data that is received.
Using a KROME to play another connected KROME unit
MIDI OUT
MIDI IN
ODD
Another KROME
EVEN
Playing two connected KROME units from an external keyboard
MIDI IN
MIDI OUT
MIDI IN
MIDI OUT
MIDI Patchbay
MIDI keyboard etc.
MIDI IN
KROME
ODD
Another KROME
EVEN
Local Control On [Off, On]
Local Control On (checked):
The KROME’s knobs, and the keyboard, joystick, SW1, and SW2 will control the KROME’s sound generator. Leave this setting checked if you’re playing the KROME by itself.
Local Control Off (unchecked):
The KROME’s knobs, the keyboard, joystick, SW1, and SW2 will be disconnected from the KROME’s sound generator.
This means that operating the KROME (playing its keyboard and using the joystick, or playing back the sequencer) will not sound its internal tone generator.
Turn
Local Control
Off if loop ‐ back from an external sequencer causes duplicate notes.
Local
Control
OFF
MIDI IN
ON
Trigger
Arpeggiator
Sequencer
Record
Tone generator
Local
Control
OFF
ON
MIDI OUT
If
Local Control
is Off, MIDI transmission/reception will occur normally. Playing the keyboard will cause the corresponding note data to be transmitted, and received note data will play the KROME’s internal sounds.
Note:
Even if Local Control is On, notes played back by the internal sequencer will not trigger the arpeggiator.
Convert Position [PreMIDI, PostMIDI]
This setting specifies the location at which the Transpose and Velocity Curve settings will be applied. This setting will affect the MIDI data that is transmitted and received, and the data that is recorded on the internal sequencer.
When using the KROME’s keyboard to play the internal tone generator, the Transpose, Velocity Curve, and aftertouch
Global P1: MIDI 1–1: MIDI Basic
Curve settings will always take effect regardless of this setting.
PreMIDI:
Velocity Curve, and Transpose will be applied to the data that is transmitted from the KROME’s keyboard.
This means that the Velocity Curve, and Transpose settings will affect the data that is transmitted from MIDI OUT when the KROME’s keyboard is played, and the data that is recorded on the internal sequencer.
MIDI data received from MIDI IN or the data played back by the internal sequencer will not be affected.
Velocity
Curve
MIDI IN
Record
Sequencer
Play
Velocity
Curve=4
Aftertouch
Curve=3
No
Transpose
KROME
Transpose
Note number change
Transmitted Table
MIDI OUT
Scale
Tone generator
Received Table
PostMIDI:
Velocity Curve, aftertouch Curve, and Transpose will be applied to data before it enters the tone generator.
This means that the Velocity Curve, aftertouch Curve, and
Transpose settings will affect the data that is sent to the internal tone generator when you play the KROME’s keyboard, when the internal sequencer is played back, or when data is received from MIDI IN.
This setting will not affect the data that is transmitted from
MIDI OUT or recorded on the internal sequencer when you play the KROME’s keyboard or play back the sequence.
KROME
Velocity
Curve=4
No
Transpose
MIDI IN
Record
Sequencer
Play
Scale
MIDI OUT
Transmitted Table
Velocity
Curve
Aftertouch
Curve
Transpose
Pitch change
Received Table
Tone generator
MIDI Clock:
MIDI Clock (MIDI Clock Source)
[Internal, External MIDI, External USB, Auto]
Use this setting to synchronize the KROME’s arpeggiator and internal sequencer with an external MIDI device (e.g., sequencer or rhythm machine) and computer.
Internal:
The arpeggiator and the internal sequencer will operate according to the internal clock.
Select the Internal setting when using the KROME by itself, or when you want the KROME to be the master (controlling device) so that connected external MIDI devices will synchronize to the KROME MIDI Clock.
External MIDI:
The arpeggiator and internal sequencer will operate in synchronization to the MIDI Clock input from an external MIDI device.
External USB:
The arpeggiator and internal sequencer will operate in synchronization with the MIDI Clock from a computer (for example a sequencer or DAW application), connected to the USB connector.
Auto:
Normally the operation will be the same as the
Internal setting. If external MIDI Clock messages are received from the MIDI IN or USB connector, the KROME will automatically switch to External MIDI and External
USB.
Note:
If you select Auto when an external MIDI sequencer and computer is connected, the KROME will automatically switch to Internal operation if the external sequencer is not transmitting MIDI Clock messages, allowing the arpeggiator to operate and parameters for which MIDI/Tempo Sync is turned on to function.
Note:
If after receiving a MIDI Clock, Start, or Continue message from the MIDI IN or USB connector, no new MIDI
Clock message is received within an interval of 500 ms, or if you start the KROME’s sequencer from the front panel without having received a MIDI Clock, Start, or Continue message from the MIDI IN and USB connector, the KROME will automatically switch to Internal operation.
Receive Ext. Realtime Commands [Off, On]
Off (unchecked):
Even if
MIDI Clock
is set to External
MIDI, or if set to Auto and the KROME is synchronized to external MIDI Clock messages, MIDI Common messages and Realtime messages (Song Position Pointer, Start,
Continue, Stop) will not be received. (Song Select messages will be received.)
Note:
Use this setting if the above messages from an external
MIDI sequencer are inadvertently resetting the KROME’s song settings.
On (checked):
The above Common messages (including
Song Select) and Realtime messages will be received.
This parameter cannot be set if
MIDI Clock
is Internal.
199
Global mode
200
SEQ Mode:
Track MIDI Out
[for Master, for External Sequencer]
This setting specifies what will be transmitted via MIDI when you switch songs in Sequencer mode.
for Master:
Normally in Sequencer mode, the internal sequencer can record or play back a performance on the
KROME’s keyboard. In this case, tracks that are set to EXT or
BTH will control external MIDI sound modules. You can make settings in a song so that when you select that song on the KROME, tracks that are set to EXT or BTH will transmit program changes or other MIDI messages* to set up your external MIDI sound modules.
for External Sequencer:
Choose this setting if you want to use the KROME in Sequencer mode as a multi ‐ timbral sound module driven by an external sequencer. With this setting, even the tracks that are set to EXT or BTH will not transmit program changes or other MIDI messages* when you switch songs on the KROME. In this case, echo ‐ back from the external MIDI sequencer will not switch programs or other parameters to the identical settings on each track that is set to the same MIDI channel.
* Applicable parameters
• Program Select: CC#00 bank select (LSB), CC#32 bank select (MSB), program change
• Pan: CC#10 pan
• Volume: CC#7 volume
• Portamento: CC#65 portamento On/Off, CC#5 portamento time
• Send 1/2: CC#93 send 1 level, CC#91 send 2 level
• (Post FX) Pan: CC#8 post insert effect pan
Param. MIDI Out
[Control Change, SysEx-Param Change]
This setting specifies whether control changes or System
Exclusive messages will be transmitted when you edit a parameter in Sequencer mode.
Control Change:
Data for the edited parameter will be transmitted as a control change.
SysEx-Param Change:
Data for the edited parameter will be transmitted as a parameter change.
Note:
For these to operate,
Enable Control Change
or
Enable Exclusive
(Global P1: MIDI– MIDI Routing) must be checked respectively.
* Applicable parameters
• Pan: CC#10 pan
• Volume: CC#7 volume
• Send 1/2: CC#93 send 1 level, CC#91 send 2 level
Drum Track:
Drum track programs in Program mode will be triggered on the global MIDI channel if
Trigger Mode
is set to Wait KBD
Trig. The MIDI transmit channel is specified by the Drum
Track
Prog MIDI Ch
. Use the Drum Track
Prog MIDI Out
to specify whether the MIDI note data of the pattern will be transmitted.
Drum track programs do not transmit or receive MIDI program changes.
Prog MIDI Ch [01…16]
This specifies the MIDI channel for drum track transmission and reception in Program mode. If
Prog MIDI Out
is checked, drum pattern note data will be transmitted on this
MIDI channel. The default setting is channel 10.
Prog MIDI Out [Off, On]
On (checked):
The note data of the drum track pattern will be transmitted on the channel specified by
Prog MIDI Ch
.
Off (unchecked):
The note data of the drum track pattern will not be transmitted.
V
1–1: Menu Command
• 0:
Write Global Setting
see p. 216
• 1:
Dump Program
see p. 218
• 2:
Dump Combination
see p. 218
• 3:
Dump Drum Kit
see p. 218
• 4:
Dump Arpeggio Pattern
see p. 218
• 5:
Dump Global Setting
see p. 218
• 6:
Dump Sequencer
see p. 218
• 7:
Dump Drum Track Pattern
see p. 218
For more information, please see “Global: Menu Command” on page 216.
1–2: MIDI Routing
1–2a
1–2b
1–2
Menu
Here, you can make MIDI Routing and MIDI Filter settings for the entire KROME.
Note:
To transmit MIDI exclusive dump data, you’ll use the menu commands of the P1: MIDI page.
1–2a: MIDI Routing
ARP Controllers MIDI Out
[Control Change, SysEx-Param Change]
This specifies the MIDI messages that will be transmitted when you operate the ARP button or when you operate knobs 1–4 with ARP selected by SELECT swtich.
Control Change:
Operating the ARP button or knobs 1–4 will transmit the MIDI control change messages that are assigned in Global P2–2: Controllers (
SW) – ARP ON/OFF
and (
ARP CONTROL) GATE
–
(ARP CONTROL) STEP
.
SysEx-Param Change:
Operating the ARP button or knobs
1–4 will transmit MIDI System Exclusive parameter change messages for the parameters (arpeggiator on/off,
Gate
,
Velocity
,
Swing
,
Step
) assigned to the button and knobs.
1–2b: MIDI Filter
Enable Program Change [Off, On]
On (checked):
Program changes will be transmitted and received.
In Program mode (P0: Play), the program will be switched when a program change message is received on the global
MIDI channel specified by
MIDI Channel
(Global 1–1a).
When you switch programs, a program change message will be transmitted on the global MIDI channel.
Global P1: MIDI 1–2: MIDI Routing
In Combination mode (P0: Play), the combination will be switched when a program change message is received on the global MIDI channel. However, it is possible to set the
Enable Combination Change
parameter so that the combination is not switched. When a program change is received on the channel specified for each timbre by
MIDI
Channel
(Combi 3–1(2)c), the program of that timbre will be switched. However, the program changes for each timbre will be affected by the setting of the
Enable Program
Change
parameter (Combi 5–1(2)c).
When you switch combinations, a program change message will be transmitted on the global MIDI channel, and also transmitted simultaneously on the channel of timbres whose
Status
(Combi 3–1(2)c) is set to EXT or EX2.
In Sequencer mode, incoming program change messages on a channel that corresponds to a track whose
Status
(Seq 3–
1(2)c) is set to INT or BTH will switch programs on that track.
When you select a song or play back sequencer data, program changes will be transmitted on the channels of tracks whose
Status
is set to BTH, EXT, or EX2.
Off (unchecked):
Program changes will not be transmitted or received.
Bank Change [Off, On]
On (checked):
The Bank Select control change message will be transmitted together with program change messages.
This is valid when
Enable Program Change
is checked.
Off (unchecked):
Bank Select messages will not be transmitted or received.
When recording on the internal sequencer, bank select messages will be recorded regardless of this setting.
However for playback, this setting will apply.
Combination Change [Off, On]
On (checked):
When in Combi P0: Play, an incoming program change message on the global MIDI channel set by
MIDI Channel
(Global 1–1a) will switch combinations.
This is valid when
Enable Program Change
is checked.
An incoming program change on a channel other than the global MIDI channel will switch the program of any timbre that matches that MIDI channel.
Off (unchecked):
An incoming program change message on the global MIDI channel will switch the program of any timbre whose
MIDI Channel
(Combi 3–1(2)c) matches the global MIDI channel. The combination will not be switched.
The program changes for each timbre will be affected by the setting of the
Enable Program Change
parameter (Combi 5–
1(2)c).
Enable After Touch [Off, On]
On (checked):
MIDI aftertouch messages will be transmitted and received.
Off (unchecked):
MIDI aftertouch messages will neither be transmitted nor received.
This setting has no effect when you use the internal sequencer to playback sequence data that was recorded with aftertouch data; i.e., aftertouch will be transmitted via MIDI.
Performing on the KROME’s keyboard will transmit neither channel aftertouch nor polyphonic aftertouch. However, since the KROME does support aftertouch as an Alternate
Modulation Source (AMS), it can receive aftertouch to control.
Enable Control Change [Off, On]
On (checked):
Control change messages will be transmitted and received.
Off (unchecked):
Control change messages will neither be transmitted nor received.
This setting has no effect when you use the internal sequencer to play back sequence data that was recorded with control change data; i.e., the control changes previously recorded into the sequencer will be transmitted via MIDI.
Enable Exclusive [Off, On]
On (checked):
System Exclusive data will be transmitted and received.
Check this if you want to edit the KROME from a connected computer, or if you want to allow bi ‐ directional editing.
Off (unchecked):
System Exclusive data will not be transmitted. Normally you will leave this unchecked.
However, System Exclusive data will be transmitted and received while the menu commands (
Dump Program
–
Dump Drum Track Pattern
) of this page are displayed.
V
1–2: Menu Command
• 0:
Write Global Setting
see p. 216
• 1:
Dump Program
see p. 218
• 2:
Dump Combination
see p. 218
• 3:
Dump Drum Kit
see p. 218
• 4:
Dump Arpeggio Pattern
see p. 218
• 5:
Dump Global Setting
see p. 218
• 6:
Dump Sequencer
see p. 218
• 7:
Dump Drum Track Pattern
see p. 218
For more information, please see “Global: Menu Command” on page 216.
201
Global mode
Global P2: Controllers
2–1: Foot Controllers
2–1
Menu
2–2: MIDI CC# Assign
2–2a
2–1a
2–2
Menu
202
2–1a: Foot Switch & Pedal/Damper
Foot Switch Assign [List of Foot Switch Assign]
Selects the function that will be controlled by a pedal switch
(such as the optional Korg PS ‐ 1 or PS ‐ 3) connected to the
ASSIGNABLE SWITCH jack.
For a complete list of possible assignments, please see “Foot
Switch Assignments” on page 349.
Foot Pedal Assign [List of Foot Pedal Assign]
Selects the function that will be controlled by a foot volume pedal (XVP ‐ 10 or EXP ‐ 2 option [sold separately]) connected to the ASSIGNABLE PEDAL jack.
For a complete list of possible assignments, please see “Foot
Pedal Assignments” on page 350.
Damper Polarity [(–) KORG Standard, (+)]
Set this to match the polarity of the damper pedal connected to the DAMPER jack. If the polarity does not match, operating the damper pedal will not produce the correct result. If no damper pedal is connected, set this to (–) KORG
Standard.
(–) KORG Standard:
Use this setting for “open ‐ type” damper pedals, such as the optional Korg DS–1H.
(+):
Use this setting for “closed ‐ type” pedals.
Foot Switch Polarity [(–) KORG Standard, (+)]
Set this to match the polarity of the footswitch connected to the ASSIGNABLE SWITCH jack. If the polarity does not match, operating the damper pedal will not produce the correct result. If no damper pedal is connected, set this to (–)
KORG Standard.
(–) KORG Standard:
Use this setting for “open ‐ type” footswitches, such as the optional Korg PS–1 or PS ‐ 3.
(+):
Use this setting for “closed ‐ type” pedals.
V
2–1: Menu Command
• 0:
Write Global Setting
see p. 216
For more information, please see “Global: Menu Command” on page 216.
2–2a: ARP Controllers
This specifies the MIDI messages that will be transmitted when you operate the ARP button or when you operate knobs 1–4 with ARP selected by SELECT button.
Here, you can assign control change messages to the arpeggiator switches and knobs 1–4 when ARP is selected by the SELECT button.
When you operate a switch or knobs 1–4 when ARP is selected by the SELECT button, the assigned control change message will be transmitted from the MIDI OUT connector.
The assigned control change messages can also be received from an external MIDI device connected to the MIDI IN connector, and used to control the corresponding arpeggiator.
The default settings of each parameter are as shown in the display above.
(SW) – ARP (ON/OFF) [Off, 000…119]
Assigns a control change message sent by the ARP button.
The default setting is CC#14.
(ARP CONTROL) GATE [Off, 000…119]
Assigns the control change message sent by knob 1 when
ARP is selected by the SELECT swtich. The default setting is
CC#22.
(ARP CONTROL) VELOCITY [Off, 000…119]
Assigns the control change message sent by knob 2 when
ARP is selected by the SELECT swtich. The default setting is
CC#23.
(ARP CONTROL) SWING [Off, 000…119]
Assigns the control change message sent by knob 3 when
ARP is selected by the SELECT swtich. The default setting is
CC#24.
(ARP CONTROL) STEP [Off, 000…119]
Assigns the control change message sent by knob 4 when
ARP is selected by the SELECT swtich. The default setting is
CC#25.
V
2–2: Menu Command
• 0:
Write Global Setting
see p. 216
• 1:
Reset Controller MIDI Assign
see p. 220
For more information, please see “Global: Menu Command” on page 216.
Global P3: Scales 3–1: Scales
Global P3: Scales
3–1: Scales
3–1a
3–1
Menu
3–1b
Keyboard Lock
Here, you can make settings for sixteen different User
Octave Scales and one User All Notes Scale.
The user scales you create here can be selected from the following pages.
• Prog P1: Basic/Controllers– Note ‐ on/Scale
• Combi P3: Timbre Param– Scale T01–08/T09–16
• Seq P3: Track Param– Scale T01–08/T09–16
Note:
To edit a scale, use the Program mode page listed above to select the scale that you want to edit, and then move to this page.
Note:
The key can also be selected by holding down the
ENTER button and playing a note. Alternatively, you can press the Keyboard Lock button and play a note to select the key. Select the scale that you want to edit.
Note:
By executing the
Copy Scale
menu command, you can copy the settings of a preset scale (other than Stretch) or of another user scale, and then edit the settings of the copied scale.
If you wish to keep an edited user scale after the power is turned off, be sure to write (save) your settings.
Press the page menu or the WRITE button to access the
Write Global Setting
menu command and save your settings.
3–1a: User Octave Scale
User Octave Scale [User Octave Scale 00…15]
Selects the User Octave Scale that you want to edit.
Tune [–99…+99]
Makes pitch settings for each note in the octave.
When you adjust the pitch of each note in the octave (C–B) in one ‐ cent steps, your settings will be applied to all octaves.
This adjustment is relative to equal temperament.
A setting of
–99
lowers the pitch approximately a semitone below normal pitch.
A setting of
+99
raises the pitch approximately a semitone above normal pitch.
3–1b: User All Notes Scale
Tune [–99…+99]
Makes independent pitch settings for each of the 128 notes.
Adjust the pitch of each of the 128 notes (C–1 – G9) in one ‐ cent steps. This adjustment is relative to equal temperament.
A setting of
–99
lowers the pitch approximately a semitone below normal pitch.
A setting of
+99
raises the pitch approximately a semitone above normal pitch.
Use the horizontal scroll bar to move to the key range that you want to set, and select the key that you want to specify.
Keyboard Lock [Off, On]
If this is On, you can use the KROME’s keyboard to select keys of the scale. Select the key for User Octave Scale or User
All Notes Scale, and then use the keyboard to make your selection.
V
3–1: Menu Command
• 0:
Write Global Setting
see p. 216
• 1:
Copy Scale
see p. 220
For more information, please see “Global: Menu Command” on page 216.
203
Global mode
Global P4: Category
Programs, and Combinations are organized into categories and sub ‐ categories.
Categories make it easy to find a particular type of instrument, such as keyboard, bass, or drums, or a specific type of sound, such as arpeggios or gated patterns.
Each main category also has up to 8 sub ‐ categories, for finer degrees of organization. For instance, the Program keyboard category has sub ‐ categories for acoustic pianos, real electric pianos, synth electric pianos, and clavs and harpsichords.
Wherever you can select Programs or Combinations by bank and number, you can also select them from the category pop ‐ up.
When shipped from the factory, there are 16 preset Program and Combination categories, with 2 more left open for your use (initially named User16 and User17).
On these pages, you can:
• Change the names of any of the categories and sub ‐ categories, including both the factory and user categories
• Add sub ‐ categories to the factory categories (up to the limit of 8 Per category.
You can assign a Program or Combination to a category and sub ‐ category during the Write process. For more
information, please see “Write Program” on page 64, and
“Write Combination” on page 101.
To save changes to category names, you’ll need to write the Global settings.
Press the page menu or the WRITE button to access the
Write Global Setting
menu command and save your settings.
Note:
Drum track programs in Program mode are selected from programs assigned here to program main category
“15” (default setting Drums).
4–1: Program Main
4–1
Menu
For more information, please see “Global: Menu Command” on page 216.
4–2: Program Sub
4–2a
4–2
Menu
4–2a: Program Sub
Main Category [00…17]
Here, you can select the main category for which you will edit sub ‐ category names.
00…07:
Sub Category Edit [Text Editor]
Here, you can edit the sub ‐ category names for programs.
First, select
Main Category
to access the category that includes the sub ‐ category name that you want to edit. After choosing the main category, press the text edit button adjacent to the sub category name that you want to edit. The text edit dialog box will open, and you can enter a name.
You can enter up to 24 characters. (See OG p.117)
You can name each of the eight categories.
V
4–2: Menu Command
• 0:
Write Global Setting
see p. 216
For more information, please see “Global: Menu Command” on page 216.
4–1a
204
4–1a: Program Main
00…17:
Main Category Edit [Text Editor]
Here, you can edit the main category names for programs.
Press the text edit button to open the text edit dialog box, and enter a name. You can enter up to 24 characters. (See OG p.117)
You can name each of the eighteen categories.
V
4–1: Menu Command
• 0:
Write Global Setting
see p. 216
4–3: Combination Main,
4–4: Combination Sub
This page lets you assign the main category and sub ‐ category names to Combinations. For more information,
please see “4–1: Program Main,” “4–2: Program Sub” above.
V
4–3, 4: Menu Command
• 0:
Write Global Setting
see p. 216
For more information, please see “Global: Menu Command” on page 216.
Global P5: Drum Kit 4–3: Combination Main, 4–4: Combination Sub
Global P5: Drum Kit
Here, you can create drum kits by assigning a drum instrument (drum sample) to each key.
A drum kit you edit here can be used in the same way as a multisample oscillator (when
Oscillator Mode
is Single or
Double) and processed through the filter, amp, and effects etc. To do this, set the
Oscillator Mode
to Drums or Double
Drums in the Program mode P1: Basic/Controllers– Program
Basic page, and selecting the drum kit as an oscillator in the
P2: OSC/Pitch– OSC1 Setup page and OSC2 Setup page.
Getting ready to edit
• Make sure that in the Global P0: Basic Setup ‐ System
Preference page, Memory Protect
Drum Kit
is off
(unchecked). If this is checked, you won’t be able to save.
• When you wish to edit a drum kit, enter Program mode, select a program that uses a drum kit (i.e., whose
Oscillator Mode
is Drums or Double Drums), and then move to this page. A program that uses a drum kit will already have filter, amp, and effect settings etc. suitable for drum sounds.
• You must set
Octave
(Prog 2–1a) to
+0[8′]
. With any setting other than +0[8′], the key locations and drum sounds will not correspond correctly.
Moving to the Global P5: Drum Kit page
• In the Program mode P2: OSC/Pitch OSC1 Setup or OSC2
Setup page, press the Jump to Drum Kit Edit button.
You will jump to Global P5: Drum Kit. The drum kit selected in
Drum Kit Select
of OSC1 or 2 will be selected.
If
Oscillator Mode
is set to Double Drums, only the selected drum kit will produce sound. If a GM drum kit is selected, the last ‐ selected drum kit will be selected. Use
“Copy Drum kit” to copy the GM drum kit to the USER bank as necessary.
If you want to edit a drum kit that is assigned to OSC2 of Double Drums, use the Jump to Drum Kit Edit button of OSC2 to select this page.
• If you moved from another program or mode, the OSC1 drum kit that was selected most recently for the program will be recalled.
• Even if a program with an
Oscillator Mode
of Single or
Double is selected in Program mode, the program will sound using its own filter and amp settings etc.
• Effects will sound according to the settings of the program you selected.
Editing a Drum Kit
For detailed step ‐ by ‐ step instructions on creating drum kits, please see “Editing a Drum Kit” on page 106 of the
Operation guide.
If
Enable Exclusive
(Global 1–2b) is checked, the drum kit can be edited using exclusive data.
Saving Drum Kits
Press the page menu or the WRITE button to access the
Write Drum Kits
dialog box, and execute the save operation; all drum kits will be saved.
Unlike when editing a program or combination, your edited content will temporarily remain even if you select a different drum kit, but will be lost when you turn off the power.
If you want to keep the settings of an edited drum kit even after power ‐ off, you must execute
Write Drum
Kits
.
Editing a drum kit will affect all programs that use the edited drum kit. When editing a preloaded drum kit, it’s a good idea to copy the drum kit to an empty area in the user bank before editing it.
205
Global mode
206
5–1: Sample Setup
5–1a
5–1b
C4 key
KEY
: The selected key is shown in blue.
You can select a key by holding down the ENTER switch and playing the desired note.
5–1
Menu
Velocity Split
Here, you can select a drum kit and specify Drumsample 1–
8 as the drum samples assigned to each key. Here, you can also edit drum sample parameters for each Drumsample.
5–1a: Drum Kit, Key Select, Assign
Drum Kit Select [00(INT)…47(USER)]
Selects the drum kit that you wish to edit.
No. (Bank)
00(INT)…31(INT)
32(USER)…47(USER)
Contents
KROME preloaded drum kits
User drum kits
KEY [C–1…G9]
Selects the key to which the drum sample (and its settings) will be assigned.
If you check
Assign
for the key you select here, the
Drumsample 1–8, Voice Assign Mode, and Mixer parameters (see below) will be used.
Assign [Off, On]
On (checked):
The drum samples you assigned for
Drumsample 1–8 will sound. Normally you will check this parameter.
Off (unchecked):
The selected drum samples will be invalid, and the drum samples of the key to the right will sound. At this time, the pitch will be a semitone lower than the pitch of the key to the right. Uncheck this parameter when you wish to play a drum sample at differing pitches.
Drum Kit, Key Select, Assign
Drum Kit
KEY Assign
5–1b: Drumsample
You can specify up to eight drum samples.
By dragging the slider at the left, you can select the velocity zone to be edited. You can also make this selection by directly pressing the desired zone.
1: (Drumsample1)
These are the settings for the first (High) velocity zone.
If you want to create a simple setup using only one drum sample, make the appropriate settings in Drumsample 1, and then set
Threshold Velocity
to 1 and
Xfd
to Off.
Drumsample 1 On/Off [Off, On]
On (checked):
Check this if you want to use Drumsample 1.
The selected drum sample will sound.
Off (unchecked):
Drumsample 1 will not be used. The drum sample will not sound.
Note:
Normally, you will start by using Drumsample 1
(before using Drumsample 1–8). If you don’t want to switch drum samples by velocity, turn on only Drumsample 1. If you’re using multiple velocity ‐ switched drum samples, make settings as follows.
One velocity zone
Drumsample 1: On, Drumsample 2–8: Off
Two velocity zones
Drumsample 1, 2: On, Drumsample 3–8: Off
Eight velocity zones
Drumsample 1–8: On
Bank [Mono, Stereo, XL.M, XL.St]
Drumsample Select
[List of installed Drumsample]
Specify the Drumsample 1 drum sample by bank and drum sample number.
Bank selects either Mono or Stereo drum samples. However, stereo drum samples will use twice as many voices as mono drumsamples.
Mono, Stereo:
Conventional monaural or stereo drum samples.
XL.M (eXtra Large Mono), XL.St (eXtra Large Stereo)
:
High ‐ capacity monaural or stereo drum samples.
When you press the
Drumsample Select
popup button a drum sample list will appear, allowing you to choose drum samples from the list.
Use the tabs to choose a category, and then choose a drum sample from within the category. Press the OK button to execute, or press the Cancel button to cancel.
It is not possible to edit the category names of drum samples, or to re ‐ assign the category.
If you choose “Bank” Mono:
Mono drum samples will be displayed. The L ‐ channel or R ‐ channel of the stereo drum samples selectable via Bank:
Stereo can also be selected as mono drum samples. In these cases, –L or –R is shown following the drum sample of the same name.
If you choose “Bank” Stereo:
Only stereo drum samples will be displayed.
Rev (Reverse) [Off, On]
This lets you play the selected drum sample backwards, without looping. However, some preset drum samples cannot be reverse ‐ played, and consequently, they cannot be selected.
On (checked):
The drum sample will play back in reverse.
Global P5: Drum Kit 5–2: Sample Parameters
The location at which reverse playback starts and ends is already specified for each drum sample.
For unselected velocity zones (shown as a single line),
Rev
On is indicated as [R].
Off (unchecked):
The drum sample will play back normally.
Offset (Start Offset) [Off, 1st…8th]
In addition to simply starting playback from the beginning, drum samples can have up to 8 different pre ‐ programmed alternate starting points. However, you can’t select drum samples for which start and offset are not specified.
With drum samples, the Start Offset specifies whether to use the normal start point (
Off
), or to use one of the alternate start points (
1st–8th
).
Some drum samples may have fewer than 8 pre ‐ programmed points, in which case only the available points can be selected.
L (Amp Level)
Specifies the volume.
[–99…+99]
Keys for which a value of
+99
is specified will sound at a volume twice as high as the amp level of the program which uses that drum kit. Keys for which a value of 0 is specified will sound at the volume of the amp level of the program which uses that drum kit. Keys for which a value of
–99
is specified will not sound.
2…8: (Drumsample2…8)
These are the settings for the Drumsample 2–8 velocity zones.
The parameters for Drumsample 8 are exactly the same as those for Drumsample 1, as described above.
The parameters for Drumsample 8 are also similar to those for Drumsample 1, except that Drumsample 8 has no settings for
Threshold Vel.
(which is always fixed at 1),
Xfd
, or
Curve
.
Velocity Split
This indicates the velocity zones of the oscillator’s eight multisamples.
The meter on the left indicates the note ‐ on velocity values.
This lets you verify the multisamples(s) that will be sounded
by each velocity (See “0–1e: Velocity Meter” on page 5.).
5–1c: Return to OSC
This button will be shown if you jumped to Global P5: Drum
Kit by pressing the Program mode Jump to Drum Kit Edit button. You can press this button to jump back to the original page.
V
5–1: Menu Command
• 0:
Write Drum Kits
see p. 220
• 1:
Rename Drum Kit
see p. 220
• 2:
Copy Drum Kit
see p. 220
• 3:
Copy Key Setup
see p. 220
• 4:
Swap Key Setup
see p. 220
For more information, please see “Global: Menu Command” on page 216.
5–2: Sample Parameters
5–1a
5–2a
5–2
Menu
Here, you can adjust the transpose, tune, attack, decay, filter cutoff, and resonance settings for each drum sample. These are offsets that are added to the settings of the program.
5–2a: Parameters
(Drumsample Parameters)
1: (Drumsample 1)
Drumsample 1 On/Off [Off, On]
This parameter is linked with “5–1b: Drumsample”
Drumsample 1.
On (checked):
Check this if you want to use Drumsample 1.
The selected drum sample will sound.
Off (unchecked):
Drumsample 1 will not be used. The drum sample will not sound.
Transpose [–64…+63]
Adjusts the pitch in semitone steps.
+12
is one octave up, and
–12
is one octave down.
Tune [–99…+99]
This adjusts the pitch in cents, over a range of ±1 octave. A cent is 1/100 of a semitone.
Attack (Amp EG Attack) [–64…+63]
Adjusts the attack time of the volume (Amplifier). The attack time for each key is determined by adding this value to the amp EG Attack Time of the program that uses this drum kit.
Decay (Amp EG Decay) [–64…+63]
Adjusts the decay time of the volume (Amplifier). The decay time for each key is determined by adding this value to the amp EG Decay Time of the program that uses this drum kit.
Cutoff (Filter Cutoff) [–64…+63]
Adjust the cutoff frequency of the filter. The cutoff frequency for each key and drum sample is determined by adding this value to the filter
Frequency
(Prog 3–1b) of the program that uses this drum kit.
Reso (Filter Resonance) [–64…+63]
This adjusts the filter resonance. This offset value for each key and drum sample is applied to the filter
Resonance
(Prog 3–1b) of the programs that use this drum kit.
2…8: (Drumsample2…8)
Here, you can edit the sample parameters for Drumsample
2–8. For more information, please see “1: (Drumsample 1)” above.
V
5–2: Menu Command
• 0:
Write Drum Kits
see p. 220
207
208
Global mode
• 1:
Rename Drum Kit
see p. 220
• 2:
Copy Drum Kit
see p. 220
• 3:
Copy Key Setup
see p. 220
• 4:
Swap Key Setup
see p. 220
For more information, please see “Global: Menu Command” on page 216.
V
5–3: Menu Command
• 0:
Write Drum Kits
see p. 220
• 1:
Rename Drum Kit
see p. 220
• 2:
Copy Drum Kit
see p. 220
• 3:
Copy Key Setup
see p. 220
• 4:
Swap Key Setup
see p. 220
For more information, please see “Global: Menu Command” on page 216.
5–3: Driver/EQ
5–1a
5–3
Menu
5–3a
Here, you can adjust the drive and the gain of the three ‐ band EQ for each drum sample. These are offsets that are added to the settings of the program.
5–3a: Driver/EG
1: (Drumsample 1)
Drumsample 1 On/Off [Off, On]
This parameter is linked with “5–1b: Drumsample”
Drumsample 1.
On (checked):
Check this if you want to use Drumsample 1.
The selected drum sample will sound.
Off (unchecked):
Drumsample 1 will not be used. The drum sample will not sound.
Drive [–99…+99]
This adjusts the drive level. This offset value for each key and drum sample is applied to the driver
Drive
(Prog 4–1a) setting of the programs that use this drum kit.
Low Boost (Driver Low Boost) [–99…+99]
This adjusts the low boost level of the driver. This low boost setting for each key and drum sample is applied to the driver
Low Boost
(Prog 4–1a) setting of the programs that use this drum kit.
3 Band Parametric EQ [dB]
Low
Mid
[–36.0…+36.0]
[–36.0…+36.0]
High [–36.0…+36.0]
These parameters adjust the gain for each band of the three ‐ band parametric EQ. The gain settings for each key and drum sample are applied to the
LowGain
,
MidGain
, and
HighGain
(Prog 4–8a) settings of the programs that use this drum kit.
2…8: (Drumsample2…8)
Here, you can edit the sample parameters for Drumsample
2–8. For more information, please see “1: (Drumsample 1)” above.
Global P5: Drum Kit 5–4: Velocity Split
5–4: Velocity Split
5–1a
5–4a
5–4
Menu
Linear
means that the two samples will each be at 50% of their full volume in the middle of the crossfade. Sometimes, this may create a dip in the volume level; if so, try using
Power
instead.
Power
, short for Equal Power, means that the two samples will each be at around 70% of their full volume in the middle of the crossfade. Sometimes, this may create a bump in the volume level, in which case you might try selecting
Linear
instead.
Layer
means that the two drum samples will be layered together, both at full volume, for the entire range of the crossfade.
Crossfade Curves
Use
Threshold Vel.
and
Crossfade
to specify the velocity zones sounded by Drumsample 1–8.
5–4a: Velocity Split
1: (Drumsample1)
Drumsample 1 On/Off [Off, On]
This parameter is linked with “5–1b: Drumsample”
Drumsample 1.
On (checked):
Check this if you want to use Drumsample 1.
The selected drum sample will sound.
Off (unchecked):
Drumsample 1 will not be used. The drum sample will not sound.
Threshold Velocity [1…127]
This sets the lowest velocity at which the drum sample will sound. Drumsample 1’s
Threshold Velocity
can be equal to, but not lower than, than that of Drumsample 2.
You can change the
Threshold Velocity
value by touching the graphic at the right and dragging it (See “* EG, Velocity
Split” on page 6 of the Operation guide.»).
Crossfade (Crossfade Range) [Off, 1…127]
This specifies the velocity range starting at
Threshold
Velocity
over which Drumsample 1 will fade ‐ out and
Drumsample 2 will fade ‐ in.
For instance, if the
Threshold Velocity
is set to 64, and the
Crossfade
is set to 20, Drumsaple 2 will start to fade in at velocities of 84 and below.
When velocities are within the
Crossfade
, the Oscillator will use twice as much polyphony as it would normally.
Note:
You can only fade between two zones at once.
Select
Crossfade
/Curve
Threshold
Velocity
Xfade
Range
Curve (Crossfade Curve) [Linear, Power, Layer]
This controls the volume curve of the crossfade.
Linear
and
Power
(short for Equal Power) let you fine ‐ tune the way that the two drum samples mix together; one or the other may be more appropriate for a given pair of drum samples.
Layer
, true to its name, lets you layer the two drum samples together without any crossfading.
Volume
Volume
Velocity
Velocity
Volume
Velocity
2…8: (Drumsample2…8)
Here, you can edit the sample parameters for Drumsample
2–8. For more information, please see “1: (Drumsample1)” above.
The parameters for Drumsample 8 are also similar to those for Drumsample 1, except that Drumsample 8 has no settings for Theshold (which is always fixed at 1), Crossfade, or Curve.
V
5–4: Menu Command
• 0:
Write Drum Kits
see p. 220
• 1:
Rename Drum Kit
see p. 220
• 2:
Copy Drum Kit
see p. 220
• 3:
Copy Key Setup
see p. 220
• 4:
Swap Key Setup
see p. 220
For more information, please see “Global: Menu Command” on page 216.
209
Global mode
5–5: Voice/Mixer
5–1a
5–5a
5–5
Menu
210
Specify the voice assign, pan, and effect routing etc. for each key of the drum kit.
5–5a: Voice Assign Mode
Single Trigger [Off, On]
On (checked):
Even when the same key (note) is played repeatedly, the previous note will be halted before the new note is begun, so that the notes will not overlap. Normally you will leave this unchecked.
Exclusive Group (Exclusive Assign) [Off, 001…127]
001–127:
This allows you to assign keys to any of 127 groups.
Keys assigned to the same group will be treated as a single group, and will be played monophonically with last ‐ note priority. For example you might assign closed and open hi ‐ hat sounds to the same group so that two or more hi ‐ hat sounds can not sound simultaneously.
Off:
Keys will not be grouped. This is the default setting.
Enable Note On Receive [Off, On]
On (checked):
Note ‐ on messages will be received. Normally you will check this, but you can uncheck it if you do not want specific notes to sound.
Enable Note Off Receive [Off, On]
On (checked):
Note ‐ off messages will be received. Normally you will uncheck this. This parameter is valid when
Hold
(Prog 1–2a) is checked (Hold On). In the case of a drum program, you will normally select Hold On. In this case if
Enable Note Off Receive
is checked, note ‐ off messages will be received, and the sound will stop (the release segment of the EG will begin) when the key is released.
5–5b: Mixer
In Program mode, Drum kits will sound using the settings of the selected program.
Pan
is valid if
Use
DKit Setting
(Prog 4–1c) is checked.
Bus (IFX/Output)
Select
,
FX Control Bus
, and
Send 1/2
are valid if
Use
DKit Setting
(Prog 8–1c) is checked. Be aware that while editing a drum kit, the edited results will not be reflected unless these settings have been made.
Pan [Random, L001…C064…R127]
Specifies the panning for each key.
L001
places the sound at far left, and
R127
places the signal at far right. With a setting of
Random
, the drum sample will be panned randomly at each note ‐ on.
Bus (IFX/Output) Select [L/R, IFX 1…5, Off]
For each key, specify the bus to which the sound will be sent.
For example, you might send Snare sounds to IFX1 and Kick sounds to IFX2 to apply separate insert effects, and send the remaining sounds to L/R without applying insert effects.
Tip:
In most of the preloaded drum kits, the following types of drum instrument have the same
Bus (IFX/Output) Select
settings.
Snares
→
IFX1
Kicks
→
IFX2
Other
→
IFX3
FX Control Bus [Off, 1, 2]
For each key, you can select whether the signal will be sent to FX Control bus (stereo two ‐ channel) FX Ctrl1 or 2.
Normally you will leave this off, but you can use this setting if you want to control an effect by playing a specific key.
You can use this with the following effects:
Vocoders:
174: Vocoder
Compressor and gate-type effects:
003: Stereo Limiter
006: Stereo Gate
Example: Gated Reverb
This is an example of applying a gated reverb to a specific snare sound. When using a gate effect on reverb, you may not be able to control the gating timing correctly if you use the extended reverberant sound to control the gate.
Normally, you will control the gate using sound from before reverb is applied.
For the key for which you’ve selected the snare sample, set
Bus (IFX/Output) Select
to IFX4. Also use
FX Control Bus
to send the signal to FX Control Bus 1. In IFX5: Stereo Gate, choose FX Control 1 as the Envelope
Source
. Now you can use a signal other than the input (reverberant sound) to control the gate.
Gated Reverb Example
Global P5: Drum Kit
KEY: D3
(Snare)
Bus Select
: IFX4
FX Control Bus: 1
IFX4
084: Reverb Hall
Program P4, P8: Use DKit Setting = On
Chain to
: IFX4
IFX5
006: Stereo Gate
Envelope Source
: FX Control 1
(FX Control Bus1)
Bus Select
: L/R
Send1 (to MFX1) [000…127]
Send2 (to MFX2) [000…127]
For each key, specify the send levels to master effects 1 and
2.
These settings are valid when
Bus (IFX/Output) Select
is set to L/R or Off. If
Bus (IFX/Output) Select
is set to IFX1–5, the send level to master effects 1 and 2 will be determined by the Program, Combination, or Sequencer mode P8: Routing/
IFX–Insert FX Setup page parameters
Send1
and
Send2
which are located after the sound passes through IFX1–5.
V
5–5: Menu Command
• 0:
Write Drum Kits
see p. 220
• 1:
Rename Drum Kit
see p. 220
• 2:
Copy Drum Kit
see p. 220
• 3:
Copy Key Setup
see p. 220
• 4:
Swap Key Setup
see p. 220
For more information, please see “Global: Menu Command” on page 216.
Global P6: Arpeggio Pattern 6–1: Pattern Setup
Global P6: Arpeggio Pattern
Here, you can create user arpeggio patterns.
In this page, the KROME will continue to sound as it did before entering Global mode.
If you entered Global mode from Program mode:
Your editing will apply to the arpeggio pattern that is selected by the program. Even if the previously selected program’s arpeggiator is turned off, it can be turned on by the ARP button.
If you entered Global mode from Combination mode:
Your editing will apply to the arpeggio pattern that is selected by the combination. Even if the previously selected combination’s arpeggiator is turned off, it can be turned on by the ARP button.
However, it is not possible to turn on an arpeggiator for which the
Arpeggiator Run
(Combi P0: 0–5(6)a, P7: 7–1(2)c) parameter A or B is not checked. Additionally, the arpeggiator will not operate if it has not been assigned to a timbre in
Arpeggiator Assign
(Combi P7: 7–1(2)c).
If you entered Global mode from Sequencer mode:
Your editing will apply to the arpeggio pattern specified for the selected song. Even if you entered Global mode from settings in which the arpeggiator was turned off, you can use the ARP button to turn it on.
However, it is not possible to turn on an arpeggiator for which the
Arpeggiator Run
(Seq P7: 7–1(2)c) parameter A or
B is not checked. Additionally, the arpeggiator will not operate if it has not been assigned to a track in
Arpeggiator
Assign
(Seq P7: 7–1(2)c).
In each of the above cases, you can modify the settings of the arpeggio pattern even if the arpeggiator is not turned on.
When editing a pattern, it is a good idea to turn on the arpeggiator and make sure that it is the pattern that you wish to edit.
If you want the edited user arpeggio pattern settings to be backed up even when the power is turned off, you must write them into memory. Select the
Write
Arpeggio Pattern
menu command to access the Write
Arpeggio Pattern dialog box. Alternatively, press the
WRITE button to access the
Update Arpeggio Patterns
dialog box. Then press the OK button to write the edited data.
When you edit a user arpeggio pattern, your edits will affect all programs and combinations that use the edited pattern. If you want to edit one of the preload arpeggio patterns, it’s a good idea to copy that arpeggio pattern to an unused area in the user bank before you edit it.
For details on creating an arpeggio pattern, see OG p.91.
6–1: Pattern Setup
6–1a
6–1b
6–1c
6–1
Menu
6–1a: Arpeggio Select, , Pattern, Length
Arpeggio Select [A, B]
If the KROME was previously in Combination or Sequencer mode and you want to edit an arpeggio pattern, you must select either arpeggiator A or B as the pattern to edit. Your editing will apply only to the selected one. B will not be displayed if the previous mode was Program mode.
(Tempo) [040.00…300.00, EXT]
Specifies the tempo.
This can also be adjusted by the TEMPO knob. You can also use the [TEMPO] knob to adjust the tempo. If
MIDI Clock
(Global 1 ‐ 1a) is set to Auto and MIDI clock data is being received from an external device, or if External MIDI or
External USB is selected, this parameter’s value is shown as
EXT, and the arpeggiator will synchronize to the incoming
MIDI clock data from the external MIDI device.
Pattern [P0: UP…P4: RANDOM,
U0000(INT)…U1027(USER)]
Selects the pattern that you want to edit.
P0: UP…P4: RANDOM
U0000(INT)…U0899(INT)
U0900(USER)…U1027(USER)
Preset arpeggio patterns
Preloaded arpeggio patterns
User arpeggio patterns
Note:
If you want to edit an arpeggio pattern (such as a preloaded arpeggio pattern) that is also used by another program, it is a good idea to use the menu command
Copy
Arpeggio Pattern
to copy the arpeggio pattern to an unused number U0900(USER)…U1027(USER), and then to edit the copy.
Note:
If you want to edit the arpeggio pattern name, execute the menu command
Rename Arpeggio Pattern
.
Length (Pattern Length) [01…48]
Specifies the length of the arpeggio pattern. The arpeggio pattern will play the number of steps you specify here at the note value interval specified by
Resolution
, and will then begin again. This is not valid for preset arpeggio patterns
P0–P4.
Arpeggio Pattern Preview
This shows a graphic representation of the steps in the user arpeggio pattern.
If Arpeggio Tone Mode is set to Fixed Note, the step graphics are shown as hollow circles.
(Arpeggio Pattern Edit Jump)
This opens the Arpeggio Pattern Edit dialog box.
211
212
Global mode
6–1b: Octave, Resolution, Sort, Latch,
Key Sync., Keyboard
Octave
Resolution
[1, 2, 3, 4]
[ , , , , , , , ]
[Off, On] Sort
Latch
Key Sync.
[Off, On]
[Off, On]
Keyboard [Off, On]
For more information, please see “7–1: ARP Setup” on page 53.
Pattern
, (Tempo),
Octave
,
Resolution
,
Sort
,
Latch
,
Key Sync.
, and
Keyboard
are parameters that can be set in Program, Combination, Song, and Song Play modes, but you can also set them here.
If you move here from Program or Combination mode and set these parameters, you must return to the origi ‐ nal mode and write them. These parameters cannot be written by the
Write Arpeggio Patterns
command in this page.
6–1c: Arpeggio Pattern Setup
These parameters are not valid for preset patterns P0–
P4.
Arpeggio Tone Mode [Normal, Fixed Note]
This selects the
Tone
type of the arpeggio pattern.
Normal:
This is the conventional arpeggiator type. Each
Tone in the arpeggio will play based on the note number of the keys that you are pressing on the keyboard.
Fixed Note:
The note number of each tone is fixed. The note numbers played on the keyboard will be ignored, and the arpeggio will sound using specified pitches. Note numbers from the keyboard will only control the trigger timing of the arpeggiator. Fixed Note mode is ideal for arpeggio patterns that you are using as drum patterns.
In the P6: User Arpeggio, Pattern Edit page, the Tone indicators will be “
” when Normal is selected here, or “
” when Fixed Note is selected.
Arpeggio Type [As Played…Up&Down]
Specifies the relationship between the arpeggio notes specified from the keyboard and the Tone at each step.
As Played:
If there are more Tones in a step than arpeggio notes specified (notes played on the keyboard), those steps will not sound.
As Played (Fill):
If there are more Tones in a step than arpeggio notes specified (notes played on the keyboard), the last ‐ played note (
Sort
is Off), or the highest note (
Sort
is On) will sound for those steps.
Running Up:
If there are more Tones in a step than arpeggio notes specified (notes played on the keyboard), the arpeggio will return to the first note (if
Sort
is Off), or the lowest note
(if
Sort
is On) and sound it.
Up&Down:
If there are more Tones in a step than arpeggio notes specified (notes played on the keyboard), the arpeggio will return in reverse direction from the last arpeggio note back toward the first.
Example)
If you set
Length
to 04,
Step No.
01 to Tone0,
Step No.
02 to Tone1,
Step No.
03 to Tone2,
Step No.
04 to Tone3, and simultaneously play three notes to produce an arpeggio, the following results will be produced depending on the
Arpeggio Type
.
As Played:
0
→
1
→
2
→
rest
→
0
→
1
→
2
→
rest
→
0 …
As Played (Fill):
0
→
1
→
2
→
2
→
0
→
1
→
2
→
2
→
0 …
Running Up:
0
→
1
→
2
→
0
→
0
→
1
→
2
→
0
→
0 …
Up&Down:
0
→
1
→
2
→
1
→
0
→
1
→
2
→
1
→
0 …
Octave Motion [Up, Down, Both, Parallel]
Specifies the operation when
Octave
is set to 2–4 octaves.
Up:
Notes will repeatedly ascend within the specified range of octaves.
Down:
Notes will repeatedly descend within the specified number of octaves.
Both:
Notes will repeatedly ascend and descend within the specified number of octaves.
Parallel:
The notes of the specified octaves will sound simultaneously.
Fixed Note Mode
[Trigger As Played, Trigger All Tones]
When the
Arpeggio Tone Mode
is Fixed Note, specifies the condition that will trigger the Tones.
Trigger As Played:
The
Tones
will be triggered according to the number of keys pressed.
Trigger All Tones:
Pressing a single key will trigger all
Tones
.
Example)
We will use an
Arpeggio Tone Mode
Fixed Note pattern on drums. Tone 0 is assigned a note number that will sound a kick, Tone 1 a snare, and Tone 2 a hi ‐ hat.
With a setting of Trigger As Played and
ArpeggioType
is
As Played, pressing one key will sound only Tone 0
(kick). Pressing two keys will sound Tone 0 (kick) and
Tone 1 (snare). Pressing three keys will sound all three
Tones 0–2 (kick, snare, hi ‐ hat). If the
Velocity
of each
Tone is set to Key, each Tone will be sounded at the veloc ‐ ity with which each key was played.
With a setting of
Trigger All Tones
, playing one key is sufficient to sound all three; Tone 0 (kick), Tone 1 (snare), and Tone 2 (hi ‐ hat). If the
Velocity
of each Tone is set to
Key, the Tones will be sounded at the corresponding velocity each time a key is pressed.
(Fixed Notes) Setup
This opens the Fixed Notes dialog box. Here you can specify the notes that will be used when
Arpeggio Tone Mode
is set to Fixed Note.
Global P6: Arpeggio Pattern Arpeggio Pattern Edit
Arpeggio Pattern Edit
Here you can input Tones 0 ‐‐ 11 for each Step 01–48. There can be up to 48
steps
, and the
tones
represent the notes of the scale (a maximum of 12 notes) that you can press simultaneously at each step. If the
Sort
check box (Global 6 ‐
1a) is selected, the notes you press simultaneously will be sorted from low to high, and assigned to 0, 1, … 11. If the
Sort
check box is not selected, the notes will be assigned to 0,
1, …11 in the order in which you press them.
These parameters are not valid for preset patterns P0–
P4.
6-1f
6-1g
6-1h
6-1i
6-1k
6-1j
6-1f: Tempo, Length, Zoom Scroll, VIEW,
Overview
(See “6–1a: Arpeggio Select, , Pattern, Length” on page 211.)
Length (Pattern Length)
(See “Length (Pattern Length)” on page 213.)
[01…48]
Zoom Scroll
Use these to move the zoomed area horizontally (Steps) or vertically (Tones), in increments of half the area. To make approximate movements, touch and drag the overview. To make fine adjustments, use the zoom scroll buttons.
VIEW [32, 26, 42, 48]
This specifies an approximate limit for the area of the overview display. If you set this appropriately for the selected
Length
and
Resolution
, it may be easier to select the zoom area.
Overview
The arpeggio pattern is shown as
symbols. The region that is zoomed in the touch grid is highlighted. To select this, use the zoom scroll buttons located above, or touch and drag the overview.
6–1g: Resolution
See “Resolution*” on page 54.
6-1h: Touch Grid
Tone Panel
You can insert or delete Tones by pressing the tone panel grid in the upper part of this area. Use the Tone Input Mode
(6 ‐ 1i) buttons to select the input method.
On the left, tone numbers are shown if
Arpeggio Tone
Mode
is Normal, or note names are shown if the
Arpeggio
Tone Mode
is Fixed Note.
Parameter Panel
The parameter panel in the lower part of this area shows a graphic representation of the selected step parameter (6 ‐ 1j).
You can touch and drag to edit this.
You can select a step by pressing the panel.
Step Parameters Select button
This button selects the specific step parameter that will be shown in the parameter panel below.
Each time you press the button, the displayed step parameter will cycle through the following choices: Pitch
(Pitch Offset)
→
Gate
→
Vel. (Velocity)
→
Flam
→
Pitch …
6-1i: Tone Input Mode
Use these buttons to select the mode you’ll use to enter notes in the tone panel.
Alternate mode
Tones will be inserted or deleted.
Pen mode
Tones will be inserted.
Eraser mode
Tones will be deleted.
Tool mode
Opens the Tool Tablet, allowing you to specify a region and delete, insert, or copy data.
6-1j: Step Parameters
Step (Step Number)
Use this to select the step that you want to edit.
[01…48]
If
Step
is selected, you can also enter tones by pressing the numeric keys. [0]–[9] correspond to tones 0 ‐‐ 9, [ ‐ ] corresponds to tone 10, and [.] corresponds to tone 11. The numeric keys will enter tones as prescribed by the tone input mode you selected.
If the “ ” button at the left is on, this field will be synchronized with the step of the arpeggiator when it is running.
Pitch Offset [–48…+48]
For each step, the pitch corresponding to the
Tone
can be raised or lowered in semitone steps. This lets you make settings for the same tone in each step to create a melody, or to make settings for two or more tones in each step to play parallel chords.
Gate [Off, 001…100%, Legato]
Off: Even if a tone has been entered, it will not sound at that step. You can also use this to stop a legato tone that was previously sounding.
Legato: The tone will continue sounding until the same tone is played again (including Gate: Off) or the pattern returns to its beginning.
The Legato setting is valid if the
Gate
parameter (Prog P7: 7 ‐
1b, Combi P7:7 ‐ 3(4)c, Seq P7:7 ‐ 3(4)c) of each program, combination, or song is set to Step. If you specify Legato, make sure that the
Gate
of the previous mode is set to Step.
213
Global mode
214
Velocity [001…127, Key]
Key:
The Tone of the step will sound with the velocity at which the key was played.
001–127:
The specified velocity value will always be used.
This setting is valid when the Program, Combination, or
Song parameter
Velocity
(Program P7: 7–1b, Combination
P7: 7–3(4)c, Sequencer P7: 7–3(4)c) is set to
Step
.
When making this setting, make sure that
Velocity
is set to
Step
in the previous mode before entering this page.
Flam [–99…+99]
Specifies how the note timing will be skewed when two or more
Tones
are specified in the same step.
00:
All
Tones
will sound simultaneously.
+01–+99:
The timing of the notes will be skewed in the order of the Tone number. (When
Sort
is ON, from low note to high note. When
Sort
is O
FF
, in the order in which keys were pressed.)
–01– –99:
The timing of the notes will be skewed in the opposite direction as “+.”
To simulate chords strummed on a guitar, try setting “+” values for odd ‐ numbered steps and “–” values for even ‐ numbered steps.
This is not valid for preset patterns P0–P4.
6-1k: Fixed Note Setup
This button opens the Fixed Notes dialog box. Here you can select the notes used when
Arpeggio Tone Mode
is set to
Fixed Note.
Tool Tablet
To open the tool tablet, press the tool mode button in the tone input mode area. This tablet contains an Area Tools tab and a Copy Tools tab.
6-1l
6-1m
6-1l: Tempo, Length, VIEW, Overview
(See “6 ‐ 1f: Tempo, Length, Zoom Scroll, VIEW, Overview” on page 213.)
6-1m: Area Tools/Copy Tools
Select an area [01…48, 00…11]
Use
Select an area
to specify the area where you want to execute a command. The parameters to the left and right specify the range of steps, and the parameters above and below specify the range of tones.
You can also select an area by touching and dragging in the overview.
Undo, Redo
These buttons undo or redo a command you executed. Undo will cancel the result of the command that you previously executed. Redo will once again execute the command that was cancelled by Undo. These actions also affect tone input in Arpeggio Pattern Edit.
Close
Press the Close button to close the tool tablet.
Area Tools
Erase
Erases all tones in the selected area. (The various step parameter values will be preserved.)
Fill
Inserts all tones in the selected area. (The various step parameter values will be preserved.)
Invert
Inverts the inserted/deleted state of the tones in the selected area. (The various step parameter values will be preserved.)
Unlike the commands listed above, executing the following commands will cause tones to move. Normally you’ll execute the following commands on a specified region of tones 00 ‐‐ 11.
Space
Inserts blank space in the selected area. Step parameters will be set to their default values.
When the blank space is inserted, tones following that location will move to the right.
If the
with step parameters
option is selected, the step parameter values will also move.
Global P6: Arpeggio Pattern Tool Tablet
Delete
Deletes the selected region.
Data to the right of the selected region will move toward the left to fill the gap.
If the
with step parameters
option is selected, the step parameter values will also move.
<<, >>
Cycles the tones within the selected region.
If the
with step parameters
option is selected, the step parameter values will also be cycled.
with step parameters
If this option is selected, the step parameters will also be affected when you execute the
Space
,
Delete
,
<<
, or
>>
commands.
Copy Tools
The first half will move upward.
External:
Local:
Copy
Copies the selected region to the copy buffer.
Cut
Copies the selected region to the copy buffer, and then deletes it.
Paste
This command is available if there is data in the copy buffer.
Specify a region, and then paste (overwrite) the data from the copy buffer.
If the
w/ step param
(with step parameter) option is selected, the step parameter values will also be pasted.
The data from the copy buffer will be pasted so that the lower left point of the region specified when copying will be at the lower left point of the region you specify before executing the Paste command.
w/step parameters (with step parameters)
If this option is selected, the step parameters will also be copied when you execute the
Paste
command.
limit by selected
If this option is selected, the data from the copy buffer will be pasted only to the extent of the region you specify before executing the Paste command.
If this option is cleared, all of the data from the copy buffer will be pasted.
Example) Moving the tones of the first and second beats
1. In “Select an area,” specify the area as 11/00 (vertical) –
01/16 (horizontal), and then press the Cut button.
2. Specify the area as 11/01 (vertical) – 01/16 (horizontal), and then press the Paste button.
Here you can copy the settings of a different user arpeggio pattern.
By using
limit by selected
, you can create patchwork edits that are more sophisticated than simply using
Copy
Arpeggio Pattern
.
(Copy From)
Selects the copy ‐ source arpeggio pattern.
* This function is not available if the copy ‐ source arpeggio pattern is the same as the currently ‐ edited pattern.
limit by selected
If this option is selected, only the specified region of the copy ‐ source arpeggio pattern will be copied.
If this option is cleared, the entire pattern will be copied just as when using
Copy Arpeggio Pattern
.
Inserts the selected arpeggio pattern.
V
6–1: Menu Command
• 0:
Write Arpeggio Patterns
see p. 221
• 1:
Rename Arpeggio Pattern
see p. 221
• 2:
Copy Arpeggio Pattern
see p. 221
For more information, please see “Global: Menu Command” on page 216.
215
216
Global mode
Global: Menu Command
Tip:
In each page, you can access (or switch on/off) up to the first ten menu commands by holding down the ENTER button and pressing the corresponding numeric key, 0–9.
Tip:
While this command is open, the ENTER button will operate as the OK button and the EXIT button will operate as the Cancel button.
Procedure for menu commands
1. Select the menu command.
2. Make settings in the dialog box.
For details on the content of each dialog box, refer to the following explanations of each command.
3. To execute, press the OK button. To cancel without executing, press the Cancel button.
Write Global Setting
Write Global Setting
is available on all of the tabs under the
Basic Setup, MIDI, Controllers, Scales, and Category pages.
This command writes Global mode settings (except for
Drum Kits and Arpeggio Patterns).
Note:
You can also access and execute this command by pressing the WRITE button.
Note:
To save the drum kit, execute the P5 menu command.
(“Write Drum Kits”)
Note:
To save the arpeggio pattern, execute the P6 menu
command. (“Write Arpeggio Patterns”)
The Effect Global SW setting will not be saved.
Load Preload/Demo Data
Load Preload/DemoData
is available on the Basic Setup page.
This command loads the preloaded data and demo song data into the KROME.
Before you can load this data, you must navigate to
Memory Protect
(Global 0–1b) and un ‐ check the protect setting for the type of data you want to load. If you execute this operation with the protect setting checked, the display will indicate “Memory Protected,” and the data will not be loaded.
Kind
All (Preload PCG and Demo Songs)
All Preload PCG
All Demo Songs
Program
Combination
Drum Kit
Arpeggio Pattern
Global Setting
Content
All PCG (Program, Combination, Global settings, drum kit, , arpeggio pattern), and demo song data
All PCG data
All demo song data
Program data
Combination data
Drum kit data
Arpeggio pattern data
Global setting data
2. If you selected Program, Combination, Drum Kit, or
Arpeggio Pattern as the Kind, specify the range of data that you want to load.
All:
load all data
Bank:
load an individual bank
Single:
load one item of data
3. If you’re loading Bank or Single, use To to specify the loading-destination.
Change all bank references
Change all bank references
is available on the Basic Setup page.
This command changes all program banks specified for timbres in combinations or tracks of songs.
1. If you wish to change bank references for combinations, check Combination.
If you wish to change bank references for songs, check
Song
.
2. In Program Bank, specify the replacement for each bank.
If you change two or more different banks to the same bank, it will not be possible to use this function to change them back to different banks. Be careful that the change destination banks do not overlap.
Display Setup
This lets you adjust the brightness of the display.
1. Choose Display Setup to open the dialog box.
1. Use Kind to select the type of data you want to load.
2. Adjust the Brightness as desired.
Brightness: 0…10 (10 is the default)
Global: Menu Command Touch Panel Calibration
Touch Panel Calibration
If your input in the display is not detected as you expect, or if the edit cell moves to a location in the display other than where you pressed, you should calibrate the display as follows.
To ensure optimal calibration, touch the center of each symbol (calibration target) shown in the corners of the display as accurately as you can.
1. Choose “Touch Panel Calibration” to access the dialog box.
If you’re unable to choose this command from the page menu, you can access it by holding down the ENTER button in P0 and pressing the 3 button.
2. Lightly press the center of the target that appears in the upper left of the screen.
If you decide to cancel the operation, press the EXIT but ‐ ton.
When your touch on the target has been detected, the tar ‐ get will move.
3. Lightly press the center of the target that appears in the lower right of the screen.
If you decide to cancel the operation, press the EXIT but ‐ ton.
When you touch a target, a ball ‐ shaped symbol will appear.
The closer the center of the ball is to the center of the tar ‐ get, the more accurately calibration was performed. You can press the target again as many times as you like.
5. If desired, you can press the Redo button to return to step 2 and perform the calibration again.
6. If you are satisfied with the touch response, press the
OK button (or the ENTER button) to end the procedure.
7. Press the EXIT button, and you will return to the state prior to executing the calibration function.
If in steps 2 or 3 you pressed a screen location that was significantly distant from the center of the “+” target, the detection points for the Redo button and OK button will also be skewed. If you’re unable to press these buttons successfully, try pressing the area around them.
Alternatively, press the EXIT button to exit the procedure, and then perform the
Touch Panel
Calibration
operation once again.
Half Damper Calibration
Half Damper Calibration
is available on the Basic Setup page.
If a damper pedal that supports half damper (the DS–1H option) is connected to the DAMPER jack, here’s how you can adjust the sensitivity if the damper effect is not applied appropriately.
Since the half ‐ damper pedal is highly sensitive, please use the optional DS–1H. Other pedals may not produce the appropriate effect, or may be impossible to calibrate correctly.
1. Connect a half-damper pedal to the DAMPER jack.
2. Select “Half Damper Calibration” to open the dialog box.
3. Press the half-damper pedal, and then release your foot from the pedal.
4. Press the Done button.
If the adjustment could not be performed correctly, an error message will be displayed. Please perform the procedure once again.
When your touch on the target has been detected, the touchscreen will be calibrated, and the screen will ask you to verify the result.
4. Touch the three targets to verify that calibration was successful.
217
218
Global mode
Update System Software
Update System Software
is available on the Basic Setup page.
Here, you can update the KROME system.
You can download the latest system file onto your computer from the Korg website (http://www.korg.com/). For details, please see the Korg website.
Before you begin the system update, you should back up your important data on an SD card.
1. Insert the SD card containing the system file into the
SD card slot of the KROME.
Note:
For details on how to copy the system file to your SD card, please see the explanation on the download page of the Korg website.
2. Access the Global P0: Basic Setup page.
3. Select “Update System Software” to open the dialog box.
4. Press the OK button to execute the update.
A dialog box will ask you for confirmation. Press the OK button to begin updating the system software.
Note:
If an error message of “File/path not found” appears, press the OK button and proceed again from step 1.
While the system is being updated, do not touch the
KROME’ switches, and never turn off the power. If the power is accidentally turned off while the system is being loaded, the KROME may become inoperable. If this occurs, please contact your local Korg distributor.
5. When the update has been completed, a dialog box with the following message will appear.
The system update has now been installed. To complete the process, you must now restart the KROME. Please turn the power off, and then on again.
6. Power-off the KROME. Wait for several seconds, and then turn the power on again.
After you turn the power off, wait for several seconds before you restart the KROME.
The system version number is shown in the lower center of the opening screen. Verify that it matches the new system software version.
Dump:
Dump Program
Dump Combination
Dump Drum Kit
Dump Arpeggio Pattern
Dump Global Setting
Dump Sequencer
Dump Drum Track Pattern
These commands are available on the MIDI page.
These commands allow the KROME internal data to be transmitted to another KROME, MIDI data filer, or computer in the form of MIDI System Exclusive data.
Select the desired command (please see the following table), and a dialog box will appear.
Then, select the bank or timbre etc. of the data to be dumped, and press the OK button.
Dump Program
Dump
Combination
Dump Drum Kit
Dump Arpeggio
Pattern
Dump Global setting
Dump Sequencer
Dump Drum Track
Pattern
Programs of all banks, programs of one bank, one program
Combinations of all banks, combinations of one bank, one combination
All drum kits, one drum kit
All arpeggio patterns, one arpeggio pattern
Global settings (except for the Drum Kits and Arpeggio Patterns of Global mode)
All song data and cue list data
All drum track user pattern, one drum track user pattern
Sending SysEx data dumps
Do not touch the KROME’s switches or turn off the power while SysEx data is being transmitted.
Sending a data dump
1. Connect the KROME to the device that will receive the data dump.
If you want to transmit the data to a computer that is able to receive SysEx messages, connect the KROME’s USB connector to your computer’s USB connector.
If you want to transmit the data to another KROME or to a
MIDI data filer, connect the KROME’s MIDI OUT connector to the MIDI IN connector of the receiving device.
2. Select Global P1: MIDI page.
3. The following illustration shows the dialog box that will appear when Dump Program is selected.
If To dump one bank select
Bank
, or to dump one program select
Single
.
Global: Menu Command Dump Drum Track Pattern
4. Use the To field to select the output connector that will transmit the data.
MIDI OUT:
MIDI OUT connector
USB:
USB connector
5. Press the OK button to transmit the data.
While the data is being transmitted, the display will indicate
“Now Transmitting MIDI Data.”
The size of the data and the time required for transmission will depend on the type of data.
The following table shows the size of each data dump, and the time required (MIDI).
Type of data to be dumped
Data size
(Bytes)
Time required
MIDI (Sec.)
Program All
Program Bank
Program Single
Combination All
Combination Bank
Combination Single
Drum Kit All
Drum Kit Single
Arpeggio Pattern All
Arpeggio Pattern Single
Global Setting
Sequencer
Drum Track Pattern All
1653756
275626
2177
1537848
384462
3027
1378234
28723
498163
508
19835
23505…
1955439
50060…
795060
529.2
88.2
0.7
492.1
123
1
44.1
9.2
159.4
0.2
6.4
7.5…625.7
16.0…254.4
0.04…3.93
0.06…1.59
Drum Track Pattern
Single
60…740080
0.02…236.8
0.01…1.48
*1: The USB ‐ MIDI dump times listed here are for when the
KROME is connected to a computer with a USB 1.1 port.
The time required will change depending on the computer system you’re using.
Note:
More time will be required if the song data contains
System Exclusive events, since these must be converted.
When performing a data dump from the KROME onto a MIDI data filer, do not transmit multiple data dumps together. If multiple data is saved together, then when the data is re ‐ transmitted from the data filer, the
KROME will have less than the required time to write the data into memory, and will be unable to receive all of the data correctly.
Time required
USB-MIDI
(Sec.)
*1
3.25
0.54
0.01
3.01
0.75
0.01
2.7
0.06
0.98
0.01
0.04
Receiving SysEx data dumps
Do not touch the KROME’s switches or turn off the power while SysEx data is being received.
Before receiving MIDI data, we recommend that you close any open dialog box or menu, with the exception of the Media mode menu command
Save Exclusive
(Receive and Save MIDI System Exclusive Data)
dialog box. Also, data dumps cannot be received while in the Sequencer mode P6: Track Edit ‐ Track View page.
Please move to another page, such as P0, before receiving a data dump.
After a data dump is received, the KROME will require approximately one second to process the data and write it into memory. During this time, the display will show the message, “Now writing into internal memory.”
While this message is shown, you must under no circumstances turn off the power of the KROME. If the power is turned off during this time, the KROME may fail to operate correctly when the power is turned on again.
In this case, hold down the EXIT button together with
PAGE button, and turn on the power. However, this will initialize the contents of memory.
Transmission and reception of any other MIDI data is also impossible during this time. When receiving multiple data dumps in succession, you must allow enough time between each data dump for the message to disappear from the screen. (see table below)
Processing time (MIDI) for writing into memory
Type of data dumped
All Programs
All Combinations
All Drum Kits
All Arpeggio Pattern
Global Setting
Sequencer
Drum Track Pattern
Processing time for writing into memory
Approximately 1 second (each bank received)
Approximately 1 second (each bank received)
Approximately 1 second
Approximately 1 second
Approximately 1 second
Approximately 1 second
Approximately 1 second
MIDI cannot be transmitted or received while data is being written into internal memory. Also, transmission of Active Sensing (FEh) from the MIDI OUT connector and USB connector will be halted.
Receiving a data dump
1. Connect the KROME with the device that will transmit the data dump.
If you’re transmitting data from a computer, connect the
KROME’s USB connector to your computer’s USB connector.
If you’re transmitting data from another KROME or from a
MIDI data filer, connect the target KROME’s MIDI IN connector to the MIDI OUT connector of the transmitting device.
2. Set the MIDI channel of the transmitting device to match the KROME’s global MIDI channel MIDI Channel (Global 1–1a).
If you want the KROME to receive data that was previously transmitted to a MIDI device, you must set the global MIDI channel of the KROME to the same global MIDI channel that was used when the data was transmitted.
To set the MIDI channel of the transmitting device, please see the owner’s manual for that device.
3. Either check Enable Exclusive (Global 1–2b), or display one of the menu commands of this page.
When one of these menu commands is displayed, data dumps can be received regardless of the
Enable Exclusive
setting.
4. Transmit the data from the other device. For the procedure, please see the owner’s manual for the device you are using.
While the data is being received, the display will indicate
“Now receiving MIDI data.”
219
Global mode
220
Reset Controller MIDI Assign
Reset Controller MIDI Assign
is available on the MIDI CC#
Assign tab of the Controllers page.
This automatically assigns the MIDI control change messages for each controller of the P2: Controllers– MIDI
CC# Assign page.
Note:
You can also access and execute this command by pressing the WRITE button.
Rename Drum Kit
Rename Drum Kits
is available on the Drum Kit page.
This renames a drum kit.
For more information, please see “Editing names” on page 117 of the Operation guide.
Copy Drum Kit
Copy Drum Kits
is available on the Drum Kit page.
This command copies the settings of another drum kit to the currently ‐ edited drum kit.
Note:
Drum kits 48 (GM)–56 (GM) cannot be edited, but you may copy them to another drum kit and then edit them.
1. Set the To field to the desired reset method.
All Off:
All settings will be Off.
Default Setting:
The controlllers will all be set to Off; the X–
Y control will be set to its default CCs.
CC Default:
The parameters will be reset to the typical settings, including the standard settings for the controlllers.
If you want to use the controllers with an external MIDI device, we recommend using this setting.
(You are also free to assign different MIDI control change messages to the controllers, if you wish.)
The default values are shown in the table below.
Reset Controller MIDI Assign Default
Controllers to
ARP Controllers
On/Off
Knob 1
Knob 2
Knob 3
Knob 4
Default Setting CC Default
CC#14
CC#22
CC#23
CC#24
CC#25
(CC#14)
(CC#22)
(CC#23)
(CC#24)
(CC#25)
Copy Scale
Copy Scale
is available on the Scales page.
This command copies data from a preset scale to a user scale or copies a user scale to another user scale location. For details on the preset scales, please see
Type
(Prog 1–2d).
Select the copy source drum kit (
From
).
When you execute
Copy Drum Kit
, the settings of the currently selected drum kit will be overwritten.
Copy Key Setup
Copy Key Setup
is available on the Drum Kit page.
This command copies the settings of an individual key to another key. You can also copy settings from two or more contiguous keys at once.
1. Use the From field to select the copy-source scale.
If you select Pure Major or Pure Minor, specify the
Key
(located at the right) as well.
Stretch cannot be selected if
To
is User All Notes Scale.
2. In To, selects the copy destination scale.
Write Drum Kits
Write Drum Kits
is available on the Drum Kit page.
This saves all drum kits 00 (INT)–47 (USER).
You must write an edited drum kit if you want to keep it.
Edited drum kits cannot be recovered if you turn off the power before saving them.
1. In the From Key fields, select the range of keys that you wish to copy.
2. In theTo Key field, select the copy destination key. If you selected two or more keys in the From Key field, their settings will be copied to the keys starting at the
To Key and continuing upward.
Swap Key Setup
Swap Key Setup
is available on the Drum Kit page.
This command exchanges (swaps) the settings of one key with the settings of another key.
Use Source Key 1 and Source Key 2 to specify the keys whose settings you want to swap.
Write Arpeggio Patterns
Write Arpeggio Patterns
is available on the Arpeggio page.
This command writes user arpeggio patterns U0000(INT)–
U1027(USER).
Note:
You can also access and execute this command by pressing the WRITE button.
Pattern
,
(Tempo)
,
Octave
,
Resolution
,
Sort
,
Latch
,
Key Sync
, and
Keyboard
are parameters that are set in
Program, Combination, and Song. The Write operation executed here does not save these parameters.
If you move here from Program or Combination mode and set these parameters, you must return to the original mode and write them.
Rename Arpeggio Pattern
Rename Arpeggio Pattern
is available on the Arpeggio page.
This command renames the selected user arpeggio pattern.
Preset patterns P0–P4 cannot be renamed.
For more information, please see “Editing names” on page 117 of the Operation guide.
Copy Arpeggio Pattern
Copy Arpeggio Pattern
is available on the Arpeggio page.
This command copies the settings of another user arpeggio pattern to the currently selected arpeggio pattern.
It is not possible to copy from a preset arpeggio pattern P0–
P4.
Global: Menu Command Write Arpeggio Patterns
Select the copy source arpeggio pattern
From
.
Be aware that when you execute
Copy Arpeggio
Pattern
, all settings of the currently selected arpeggio pattern will be overwritten.
221
222
Global mode
Media mode
In this mode, you can save internal memory data to an inserted SD card, or load data from media into internal memory. You can also copy or delete files, or format media.
The following media can be used.
SD cards
SD and SDHC memory cards supporting MS ‐ DOS format
FAT16 or FAT32 are supported.
SDXC memory cards are not supported.
For more information about handling the SD card, please see the “Inserting/removing a card in the SD card slot” section on page 118 of the Operation Guide.
Files, directories, and icons
The KROME manages data on media in a hierarchical man ‐ ner, using files and directories. The contents of a file
(whether it is a file or a directory) are indicated not only by the name, but also graphically, by an icon. Files and directo ‐ ries have differently shaped icons.
The KROME collectively refers to files and directories recog ‐ nizable by MS ‐ DOS (readable by an MS ‐ DOS computer), as
“DOS files” and “DOS directories.” Different types of DOS file are distinguished by the extension added to their file ‐ name.
In the case of a DOS file with an extension other than listed below, selecting
Load selected
to access the dialog box will cause the file to be considered to be a Standard MIDI File
(SMF). However, you can’t load files that are not in SMF format 0/1.
Extension
.PCG
.SNG
.MID
.EXL
Type
Programs, combinations, drum kits, global settings, arpeggio patterns, drum track patterns (dedicated
KROME format)
Song, cue list (dedicated KROME format)
Standard MIDI File (SMF format 0/1)
MIDI Exclusive data
When KROME data is saved, one of these filename extensions will be added automatically, according to the type of data. If these filename extensions are modified on a computer, the file will be treated as an undefined file when it is reloaded back into the KROME, and will be handled as a
Standard MIDI File.
Files handled by the KROME have the shown in the structure (see next page). Since .PCG and .SNG files can be opened to divide their contents, they are displayed as directory icons.
223
224
Media mode
Files that can be loaded
DOS files
.PCG file
All programs 1 program bank A…F
1 program
All combinations
1 combination bank A…D
1 combination
All drum kits
User
1 drum kit bank INT, USER
All user arpeggio patterns
1 user arpeggiopattern bank INT, USER
1 drum kit
All drum track patterns
Global settings
1 drum track pattern
DOS directory
Undefined DOS file
DOS files
.SNG file Cue list
1 song
(S000-127)
All track
1 user pattern
(U00–99)
.MID file
.EXL file
Media: File 0–1: Load
Media: File
0–1: Load
0–1b
0–1c
0–1
Menu
0–1a
Here, you can load the selected file or directory into internal memory. Use the
Open button
and
Up buttons
to select the desired file or directory, and press the Load button to load it.
You can also load data by using the
Load selected
menu command.
0–1a: Media Select, Command buttons
SD Card
This shows the type and volume label of the inserted device.
Volume label:
No Label:
Media that has no volume label
Unformatted:
Media that has not been formatted
No Media:
Media is not inserted in the card slot.
The volume label display will depend on the inserted media and the page.
Open
When you press the Open button, the directory will open, and the current directory will move one level downward.
This can be used when a directory has been selected in the directory window.
Up
When you press the Up button, the directory will move one level upward.
Load
This command loads the file or directory that was selected in the “Directory Window” (Media 0–1c) into the internal memory.
When you press the Load button, a dialog box will appear.
The specific contents of the dialog box will depend on the file you are loading. This is the same function as the
Load selected
menu command.
For more information, please see “Load selected” on page 227.
PCG Preview
If you selected just a single program, combination, or drum kit from within a .PCG file (i.e., from an opened bank), you can listen to the sound directly from the media without having to load the file. If you’ve selected a combination, the timbres in the combination will use the KROME’s internal programs. In the case of a user drum kit, the sound parameters of the program that was selected before entering
Media mode will be used.
0–1b: Current Directory
Current Directory
The directory currently selected for processing is referred to as the “current directory.”
The display will show the full path name of the directory. A slash “/” character is used as the delimiter between directory levels. To change the current directory, use the Open button and Up button (Media 0–1a).
0–1c: Directory Window
This shows file information for the current directory. You can select a file or directory in this window.
Type File Size Date
Type
The icon indicates the type of file.
For details on how the icons correspond to the different file types, please see the diagram “Files that can be loaded” on page 224.
Files and directories with this symbol are locked, and cannot be overwritten, copied, or deleted. Use the
Lock/Unlock selected
menu command to lock or unlock a file or directory.
Note:
If the write protect switch of the media itself is enabled, the Lock symbol will be shown for all files and directories.
File
This is the low ‐ level DOS file name.
Size
This is the size of the file, in bytes.
Date
This is the date and time at which the file was saved. From the left, this is shown as day, month, year, hours and min ‐ utes.
However since the KROME does not contain an internal cal ‐ endar or clock, you must use Utility menu command
Set
Date/Time
to set the date and time before saving the file.
Mode, Stop Watch
See “a: Mode button” on page 4 of the Operation guide.
See “l: Stopwatch button” on page 5 of the Operation guide.
V
0–1: Menu Command
• 0:
Hide unknown files
see p. 227
• 1:
Lock/Unlock selected
see p. 227
• 2:
Sort
see p. 227
• 3:
Load selected
see p. 227
For more information, please see “Media: Menu Command” on page 227.
225
226
Media mode
0–2: Save
0–1b
0–1c
0–2
Menu
0–3: Utility
0–1b
0–1c
0–3
Menu
0–1a
Here, you can save various data types from internal memory to media.
Use the
Open button
and
Up button
to move to the desired directory (i.e., change the current directory), and then select the desired menu command.
When you execute a Save operation, the data will be saved in the same level of the hierarchy as the files that are displayed.
The KROME does not contain an internal calendar or clock, you must use Utility menu command
Set Date/
Time
to set the date and time before saving the file.
V
0–2: Menu Command
• 0:
Hide unknown files
see p. 227
• 1:
Lock/Unlock selected
see p. 227
• 2:
Sort
see p. 227
• 3:
Save All (PCG & SEQ)
see p. 231
• 4:
Save PCG
see p. 232
• 5:
Save SEQ
see p. 232
• 6:
Save to Standard MIDI File
see p. 232
• 7:
Save Exclusive
see p. 232
For more information, please see “Media: Menu Command” on page 227.
0–1a
Here, you can rename, copy, or delete the selected media or file, create a new directory, format, and set the date and time.
After selecting media or a file, select the desired menu command.
V
0–3: Menu Command
• 0:
Hide unknown files
see p. 227
• 1:
Lock/Unlock selected
see p. 227
• 2:
Sort
see p. 227
• 3:
Rename
see p. 233
• 4:
Copy
see p. 233
• 5:
Delete
see p. 234
• 6:
Create Directory
see p. 234
• 7:
Set Date/Time
see p. 234
• 8:
Format
see p. 234
For more information, please see “Media: Menu Command” on page 227.
0–8: Media Information
0–8a
0–1a
The MEDIA screen shows information about the media.
0–8a: Media Information
Volume Label:
The volume label of the media.
Format Type:
The type of format. If not formatted, this will indicate “Unformatted.”
Total Size:
The capacity of the media (in bytes).
Free Size:
The free capacity of the media (in bytes).
Write Protect:
The write protect status of the media. This will indicate “On” if protected, or “Off” if not protected.
Media: Menu Command Hide unknown files
Media: Menu Command
Tip:
In each page, you can access (or switch on/off) up to the first ten menu commands by holding down the ENTER button and pressing the corresponding numeric key 0–9.
Tip:
While this command is open, the ENTER button will operate as the OK button and the EXIT button will operate as the Cancel button.
Procedure for menu commands
1. Select the menu command.
2. Make settings in the dialog box.
For details on the content of each dialog box, refer to the explanation of each command.
3. To execute, press the OK button. To cancel without executing, press the Cancel button.
0–1: Load Menu Command
Hide unknown files
Hide unknown files
is available on the Load tab, Save tab, and Utility tab.
If you select
Hide unknown files
, a check mark will appear at the left of “Hide unknown files.” In this state, undefined files will not be shown in the directory window. However, this is valid only if there are DOS files in the current directory.
Lock/Unlock selected
Lock/Unlock selected
is available on the Load tab, Save tab, and Utility tab.
This locks/unlocks the file or directory that’s selected in the directory window (Media 0–1c). If you lock the file or directory, the lock icon (“
Lock
”) will appear, and overwriting, copying, or deleting will not be possible.
1. In the directory window (Media 0–1c), select the file or directory that you want to lock or unlock.
2. Select Lock/Unlock selected; the selected file or directory will alternately be locked or unlocked.
Sort
Sort
is available on the Load tab, Save tab, and Utility tab.
This function sorts the files in the current directory.
Use Type to select how the files will be sorted, and use
Order to specify the direction.
Type
No order
Name
Order
‐‐‐
Name
(Directory
First)
Ascent
Descent
Ascent
Descent
Unsorted
Sort in alphabetical order, first directories and then files
Sort in reverse alphabetical order, first directories and then files
Sort alphabetically
Sort in reverse alphabetical
Type
Size
Date
Order
Ascent
Descent
Ascent
Descent
Sort in ascending order of size
Sort in descending order of size
Sort in ascending order of date
Sort in descending order of date
Load selected
Load selected
is available on the Load tab.
This loads the file or directory selected in the directory window (Media 0–1c) into internal memory.
1. In the directory window (Media 0–1c), select the file or directory that you want to load.
2. Select Load selected.
A dialog box will appear. The dialog box that appears will depend on the file you are loading. For more information,
please see page 228.
Specify the various items as necessary.
Note:
You can also access the same dialog box by pressing the Load button instead of
Load selected
.
If a file to be loaded cannot be found
If a necessary file cannot be found in the current directory or in a lower directory when loading .PCG, or .SNG files, a dialog box like the following (Where is a …) will appear.
This dialog box will appear in the following cases.
• When loading a .PCG file that was split across two or more volumes of media, when the first volume has been loaded and the second media volume is now required.
• When loading a .PCG file simultaneously with a .SNG file, if the identically ‐ named .SNG file is not found in the current directory after loading the .PCG file.
If this dialog box appears, take the following action.
1. Select the directory that contains the file indicated by
“Where is a…”
If the specified file is located on another media volume, exchange media. Then press the directory window in the display to make the KROME recognize the media, and select the appropriate directory.
It is not possible to open .PCG, or .SNG files in the
“Where is a …” dialog box. The Open button cannot be used for .PCG, or .SNG files.
2. Press the Select button to resume loading.
Loading will be aborted if you press the Cancel button. If you want to abort the loading process, press the OK button.
If you press the Skip button, the indicated file will be skipped, and the next file will be loaded.
Except for special situations such as when the media containing the indicated file has been damaged or cannot be found, you should use the Select button to continue the loading process.
227
228
Media mode
1) Load .PCG
Data in the .PCG file will be loaded.
3) Load Program Bank [Bank A…F]
All program data of the selected bank will be loaded into the bank you specify.
1. If a SNG file of the same filename exists in the .PCG, you can select the “Load ******** .SNG too” check box.
If this file does not exist in the current directory, load it as described in the above procedure “If a file to be loaded cannot be found” on page 227.
2. If “Load ******** .SNG too” is checked, you can use
“Select .SNG Allocation” to specify how song data within the .SNG file will be loaded.
Append
: The multi data will be loaded starting at the number that follows the last song data in memory. The song data within the .SNG file that is being loaded will be packed into the available locations. (See diagram below)
Select this method when you wish to load song data from media without erasing the song data that is already in memory. Cue list data will not be loaded.
Clear:
Erases all cue list data and song data from internal memory, and load the cue list data together with the state of the song data as it was when saved (See diagram below).
Select this when you want to reproduce the saved state immediately after power ‐ on, etc.
.SNG Allocation
.SNG file to load
SNG000
SNG001
Append
SNG003
SNG005
Internal memory of the M50 after loading
SNG000
SNG002
SNG003
SNG004
SNG005
SNG006
SNG007
Internal memory of the M50 before loading
SNG000
SNG002
SNG003
Clear
SNG000
SNG001
SNG003
SNG005
SNG000
SNG001
SNG003
SNG005
SNG000
SNG002
SNG003
In To, select the loading destination bank.
4) Load a Program
Data for the selected program will be loaded into the program number you specify.
1. If you wish to load a program other than the one already selected, use the source Program (upper field) to select the program that you wish to load.
Note:
The selected program can be played from the keyboard even before you load it. This is convenient when
you want to audition the program before loading. For more information, please see “PCG Preview” on page 225.
2. In To Program, (lower field) select the bank and program into which the data will be loaded. When you press the popup button, the Bank/Program Select window will appear.
5) Load Combinations
All combinations in the .PCG file will be loaded.
6) Load Combination Bank [Bank A…D]
All combinations in the selected bank will be loaded into the bank you specify.
2) Load Programs
All program data from a .PCG file will be loaded.
In To, select the loading destination bank.
7) Load a Combination
This loads the selected Combination into a specified Bank and number in internal memory.
Media: Menu Command Load selected
1. If you wish to load a combination other than the one already selected, use Combination (upper field) to select the combination that you wish to load.
Note:
The selected combination can be played from the keyboard even before you load it. This is convenient when you want to audition the combination be
fore loading it. For more information, please see “PCG
Preview” on page 225.
2. In “To Combination” (lower field), select the bank and combination into which the data will be loaded.
When you press the popup button, the
Bank/Combination
Select
window will appear.
Load Drum Kits
All drum kits in the .PCG file will be loaded.
9) Load Drum Kit
[000–031(INT), 032–047(USER)]
This command loads all drum kit data from the selected drum kit bank into the drum kit bank that you specify as the load ‐ destination.
12) Load Arpeggio Pattern
[U0000-0899(INT), U0900-1027(USER)]:
All user arpeggio pattern data in the selected user arpeggio pattern bank will be loaded into the user arpeggio pattern bank you specify as the loading destination.
In
To
, select the loading destination user arpeggio pattern bank.
If you execute this command with U0900–1027(USER) specified as the loading destination for the selected user arpeggio pattern bank 0000–0899(INT), user arpeggio patterns 0000–0127 will be loaded. If you select 0000–
0899(INT) as the loading destination for U0900–1027(USER), the data will be loaded into user arpeggio patterns 0000–
0127.
13) Load an Arpeggio Pattern
The selected user arpeggio pattern data will be loaded into the user arpeggio pattern number that you specify as the loading destination.
In To, select the loading destination bank.
If you’ve selected (USER) as the load ‐ destination for the selected drum kit bank (INT), 000–015 will be loaded. If you’ve selected (INT) as the load ‐ destination for
(USER), the data will be loaded into 000–015.
10) Load a Drum Kit
The selected drum kit will be loaded into the drum kit number you specify as the loading destination.
1. If you wish to load a drum kit other than the one already selected, use Drum Kit (upper field) to re-select the drum kit you wish to load.
Note:
The selected drum kit can be played from the keyboard even before you load it. This is convenient when
you want to audition drum kits before loading. For more information, please see “PCG Preview” on page 225.
2. In To Drum Kit (lower field), select the loading destination drum kit.
11) Load Arpeggio Patterns
All user arpeggio pattern data in the .PCG file will be loaded.
1. If you wish to load a user arpeggio pattern other than the currently selected one, use “Arp Pattern” (upper field) to re-select the user arpeggio pattern that you wish to load.
The selected user arpeggio pattern can be played from the keyboard even before you load it. This is convenient when you want to audition the user arpeggio pattern you wish to load.
2. In “To Arp Pattern” (lower field) specify the loading destination user arpeggio pattern.
14) Load Drum Track Patterns
This command loads all drum track user patterns from the
.PCG file.
15) Load a Drum Track Pattern
This command loads the selected single drum track user pattern data into the drum track user pattern location that you specify as the load ‐ destination.
229
Media mode
1. If you want to load a pattern other than the selected pattern, use “Pattern” (the upper field) to re-select the pattern that you want to load.
2. Use the “To Pattern” field (the lower field) to specify the load-destination pattern.
16) Load Global Setting
Global setting data in the .PCG file will be loaded.
This includes Global mode parameters other than drum kits and arpeggeio patterns.
Memory protect and Effect Global SW settings will not be loaded.
17) Load .SNG
All data in the .SNG file will be loaded.
20) Load Tracks
The event data of all tracks in the selected song will be loaded into the song you specify as the loading destination.
However, it is not possible to specify an uncreated song as the loading destination.
In Song, specify the loading destination song.
21) Load Pattern Data
The selected user pattern will be loaded into a user pattern of the selected loading destination song. However, it is not possible to specify an uncreated song as the loading destination.
230
1. Use Select .SNG Allocation to specify how the song data from the .SNG file will be loaded.
Append:
The song will be loaded after the last song data that already exists in internal memory. At this time, the song data in the .SNG file being loaded will be packed forward.
(See diagram in “.SNG Allocation” on page 228)
Select this when you want to add song data from media without erasing the song data that currently exists in internal memory. Cue list data will not be loaded.
Clear:
All cue list data and song data currently existing in internal memory will be erased, and the cue list and song data will be loaded in the state in which it was saved (See diagram in “.SNG Allocation” on page 228).
Select this when you want to reproduce the saved state immediately after power ‐ on, etc.
2. If a .PCG file of the same filename exists in the current directory, you can select the “Load ********.PCG too” check box.
See step 1 of the “1) Load .PCG” on page 228.
18) Load Cue Lists
The cue list data in the .SNG file will be loaded.
19) Load a Song
Data for the selected song will be loaded into the song number you specified as the load destination.
1. If you wish to load a song other than the selected song, use Song (upper field) to re-select the song to be loaded.
2. In To Song (lower field), select the loading destination song.
1. If you wish to load a user pattern other than the one already selected, use “Pattern” (upper field) to re-select the user pattern that you wish to load.
2. In “To Song” and “Pattern” (lower field), select the loading destination song and user pattern.
22) Load Standard MIDI File
The selected Standard MIDI File will be loaded into the song number you select as the loading destination.
1. In Song
,
select the loading destination song.
2. If you turn “Exclusive” Off (unchecked), any System
Exclusive messages or Universal Exclusive messages included in the SMF data will not be loaded.
If this is On (checked), System Exclusive messages and
Universal Exclusive messages included in the SMF data will be loaded as System Exclusive events.
The GS/XG sound maps and messages are not supported. Depending on the content of the data, it may not play back correctly, but the data itself will be maintained if
Exclusive
is checked.
If you select an undefined file and choose
Load selected
, the file will be assumed to be a Standard MIDI
File, and the
Load Standard MIDI File
dialog box will appear. When you execute loading, the file will be loaded into the song that was specified as the loading
Media: Menu Command Save All (PCG & SEQ)
destination. However if the file format is inappropriate, the operation will be invalid and an error message will be displayed.
The program bank and program numbers loaded into the song will follow the
Bank Map
(Global 0–2a) setting. If
Bank Map
is KORG, bank A will be selected for bank select 00.00 (MSB. LSB). If
Bank Map
is GM(2), bank G will be selected.
23) Load and Transmit MIDI Exclusive Data
All data in the .EXL file will be loaded, and transmitted from
MIDI OUT or the USB connector.
0–2: Save Menu Command
Cautions regarding Save
When saving combinations with
Save All (PCG &
SEQ)
,
Save PCG
, or
Save SEQ
, you should also try to save the programs used by each timbre or track (and the drum kits used by the program), user arpeggio patterns, and drum track user patterns at the same time.
Similarly, when saving programs, you should also save the drum kits, user arpeggio patterns, and drum track user patterns used by the program at the same time.
If the data being saved does not fit on one volume of media
When saving a .PCG, or .SNG file, and the data does not fit on one volume of media, the display will read “No space available on media”.
If the .EXL file contains two or more Exclusive data items, use Transmit Interval Time to specify the time interval that will be inserted between each item of Exclusive data.
If you are transmitting the data to another KROME, the required time interval will depend on the type of data. After transmitting all program data, you must allow an interval of approximately 1 second. For details please see the Global mode section on
Dump Program
–
Dump Drum Track
Pattern
(see p.218). For other MIDI devices, please see their
owner’s manual.
Either delete unneeded files to create free space on the media before saving, or save the data to other media.
Save All (PCG & SEQ)
Save All (PCG & SEQ)
is available on the Save tab.
This command saves all programs, combinations, drum kits, global settings, user arpeggio pattern, and drum track user patterns from internal memory to media as a .PCG file.
Songs and cue lists are saved to media as a .SNG file.
This command is valid only when the current directory is a
DOS directory.
1. Use the text edit button to move to the text input dialog box, and specify the filename. (See OG page 117)
For example, if you specify NEWFILE and execute the save command, files named NEWFILE.PCG, and NEWFILE.SNG will be saved to the media.
2. Select the bank(s) that you want to save.
Programs, combinations, drum kits, and user arpeggio patterns can be saved in units of banks. Information on the bank to be saved is displayed below each Selection button.
Banks that are checked will be saved.
If you want to modify the selections, press the Selection button to open the dialog box, and check the check boxes for the data you want to save.
231
232
Media mode
Example: when the Selection button for Program is pressed
If you press the All button, all banks will be checked.
If you press the Nothing button, all banks will be unchecked.
Press the OK button to change the selections as specified, or press the Cancel button to discard your changes.
To specify whether “Global Settings,” and “Drum Track
User Pattern” will be saved, use the check box in step 1.
If “No space available on medium” dialog box will appear.
Either delete unneeded files to create free space on the media before saving, or save the data to other media.
When you save, files will be created in the current directory.
Save PCG
Save PCG
is available on the Save tab.
This command saves all programs, combinations, drum kits, global settings, user arpeggio pattern, and drum track user patterns from internal memory to media as a .PCG file.
This command is valid only when the current directory is a
DOS directory.
1. Use the text edit button to move to the text input dialog box, and specify the filename. (See OG page 117)
For example if you specify NEWFILE and execute the save command, files named NEWFILE.PCG and NEWFILE.SNG will be saved to the media.
2. Select the bank(s) that you want to save.
For the procedure, please see “0–2: Save All” step 3.
Save SEQ
Save SEQ
is available on the Save tab.
This command saves all songs and cue lists from internal memory as a .SNG file.
This command is valid only when the current directory is a
DOS directory.
Use the text edit button to move to the text input dialog box, and specify the filename. (
See OG page 117
)
For example, if you specify NEWFILE and execute the save command, a file named NEWFILE.SNG will be saved to the media.
Save to Standard MIDI File
Save to Standard MIDI File
is available on the Save tab.
This command saves the selected song from internal memory to storage media as a .MID file (Standard MIDI
File).
This command is valid only when the current directory is a
DOS directory.
1. In Song, choose the song that you wish to save.
2. If Exclusive is On (checked), System Exclusive events and Universal Exclusive events included in the song data will be saved as Exclusive messages.
If this is
Off (unchecked)
, System Exclusive events and
Universal Exclusive events included in the song data will not be saved.
3. Use the text edit button to move to the text input dialog box, and specify the filename.
By default, the first eight characters (uppercase) of the song name will be assigned automatically.
4. Use the radio buttons to specify the format.
Format 0
will save sixteen channels of MIDI data together in a single track.
Format 1
will save each MIDI channel to a separate track.
The song data you save here can be played back on a device that supports Standard MIDI Files. However if you intend to play back the data on the KROME, we recommend that you use “Save SEQ” to save the data, since this will be more easily recreated.
Save Exclusive
Save Exclusive
is available on the Save tab.
Accumulates the received Exclusive data in internal memory, and then saves the data to media as an .EXL file.
This command is valid only when the current directory is a
DOS directory.
1. When you select Save Exclusive, the KROME will wait for Exclusive data to be received. The following dialog box will appear.
Media: Menu Command Rename
0–3: Utility Menu Command
Rename
Rename
is available on the Utility tab.
This command renames the selected file or directory.
This command is valid only when a DOS file or a DOS directory is selected.
1. Select the file or directory whose name you want to edit.
2. Select “Rename” to open the dialog box.
2. Transmit the Exclusive data that you wish to save to the
KROME.
While the data is being received, the display will indicate
“Status=RECEIVING MIDI DATA.”
When reception ends, the size of the received data and the size of the remaining free area will be rewritten. The display will change to “Status=AWAITING MIDI DATA,” and you can continue transmitting Exclusive data to the KROME.
During reception, the Cancel button and the OK button cannot be pressed.
3. Use the text edit button to move to the text input dialog box, and specify the filename. (See OG page 117)
3. Press the text edit button to access the text input dialog box, and modify the name (See OG page 117).
Copy
Copy
is available on the Utility tab.
This command copies the selected file or directory.
This command is valid only when a DOS file or a DOS directory is selected.
1. Select the file or directory that you want to copy.
2. Select “Copy” to open the dialog box.
3. Copy will show the name of the selected file or directory.
If you wish to change the file or directory that will be copied, use the text edit button to move to the text input dialog box, and specify the filename that you wish to copy.
(
See OG page 117
)
Using [*/? ]as a Wildcard:
When you use the text edit button to access the text input dialog box and specify the name of the file or directory to be copied, you can use “*” and “?” characters as wildcards. For example, if in the above example you specify
PRELOAD1.*
(instead of
PRELOAD1.PCG
), all filenames of PRELOAD1. with any filename extension will be copied at the same time: i.e.,
PRELOAD1.PCG, PRELOAD1.SNG, …
Example)
PRELOAD1.* : PRELOAD1.PCG, PRELOAD1.SNG, …
PRELOAD?.PCG : PRELOAD1.PCG, PRELOAD2.PCG,
PRELOAD3.PCG, …
When wildcards are used, only files will be subject to copying. Directories will not be copied.
4. Use the Open button and Up button to select the copy destination directory.
233
234
Media mode
5. If you wish to copy the file or directory with a different name, use the text edit button (in the lower field) to access the text input dialog box, and specify the new name for the file or directory to be copied.
If you’re using wildcards to copy multiple files simultaneously, you won’t be able to change file names.
Note:
If you decide not to copy, press the
Abort button
.
Delete
Delete
is available on the Utility tab.
This command deletes the selected file or directory.
This command is valid only if a DOS file or directory is selected.
1. Select the file or directory that you want to delete.
2. Select “Delete” to open the dialog box.
3. Delete will indicate the name of the selected file or directory.
If you wish to change the file or directory that is to be deleted, use the text edit button to access the text input dialog box, and specify the name of the file or directory that you wish to delete. (
See OG page 117
)
Using [*/? ]as a Wildcard:
When you use the text edit button to access the text input dialog box and specify the name of the file to be deleted, you can use the “*” or “?” characters as wildcards. This allows you to simultaneously delete multiple files with identical filenames and different extensions, or files whose names are partially identical (see
“Copy” on page 233).
When wildcards are used, only files will be subject to deletion. Directories will not be deleted.
Create Directory
Create Directory
is available on the Utility tab.
This command creates a new directory within the current directory.
Use the text edit button to access the text input dialog box, and specify the name of the new directory (
See OG page 117
).
Set Date/Time
Set Date/Time
is available on the Utility tab.
This is the date and time at which the file was saved.
The KROME does not contain an internal calendar or clock, you must use Utility menu command
Set Date/
Time
to set the date and time before saving the file.
Year
1980–2079
Month
1–12
Day
Hour
1–31
0–23
Minute
0–59
Second
0–59
Format
Format
is available on the Utility tab.
This command formats the media that’s inserted in the
KROME. The volume label (a name for the entire media) you specify will be assigned to the media. The volume label you assign here will be displayed in the
SD Card
(Media 0–
1a). The volume label can be a maximum of eleven characters.
After formatting, it is not possible to press the
COMPARE button to undo formatting.
1. Make sure that the media you want to format is inserted.
2. Select “Format” to open the dialog box.
3. In Volume Label, use the text edit button to access the text input dialog box, and specify the volume label (See
OG page 117).
The previously ‐ specified volume label will be displayed. If no volume label had been specified for the media, or if a non ‐ DOS media was inserted, this will indicate
NEW
VOLUME
.
4. Specify the initialization format.
Quick Format:
Normally you should use Quick Format to initialize the media.
Full Format:
All blocks in the media will be erased.
Normally there is no need for you to execute Full Format.
You should execute Quick Format instead.
Effect Guide
Overview
The KROME provides five insert effects, two master effects, and a total effect, together with a mixer section that controls the routing of these effects.
For each of these effect processors, you can choose from 193 different types of effects, grouped into the following categories:
Classification of 193 effects
Effect type
Dynamics:
000…006
EQ/Filter:
007…019
Overdrive/
Amp/Mic:
020…028
Chorus/
Flanger/
Phaser:
029…048
Modulation/
Pitch Shift:
049…067
Delay:
038…083
Reverb/ER:
084…094
Mono ‐ Mono
Serial:
095…126
Mono//Mono
Parallel:
127…171
Double Size:
172…193
Contents
Effects which control volume, such as compressors, limiter, and gates
Effects which control frequency content, such as
EQ, multi ‐ mode filter, exciter, and wah
Overdrive and amp modeling effects such as guitar/bass amps and mics
Pitch and phase modulation effects such as chorus and flanger
Other modulation effects such as tremolo and rotary speaker, and pitch shifters
Delays
Reverb and early reflections
Mono & Mono chain effects that internally connect two mono effects in series
Mono & Mono parallel effects that allow two mono effects to be applied to L and R independently
Double size effects
Effects in each mode
Effect Preset
Effect Presets let you easily store and recall all of the settings for an individual effect. You can store up to 16 user presets for each effect type, in addition to 15 re ‐ writable factory presets.
The same presets appear in all of the modes (Program,
Combination, and Sequencer).
Note that edits to effects parameters are automatically stored with the Program–you don’t need to store them as an
Effect Preset. Presets just make it easier to re ‐ use your favorite settings.
For instance, you can save an Effect Preset while working on a particular Program, and then later use the same Effect
Preset in a different Program, Combination, or Song.
Program mode
Oscillator1 Filter1 Driver1
Oscillator2 Filter2 Driver2
Drum Track
Amplifier1
Amplifier2
EQ
P00: Initial Set:
These are the default settings that are recalled when you select an effect type in the Insert FX Setup page. You can’t save your own settings here.
P01…P15:
Preset data is saved in this area.
We recommend that you store your settings in U00–U15.
U00…U15:
These are areas in which you can store your own settings.
—————:
This shows that no Effect Preset has been selected. You’ll see this if you’ve just selected an effect, written a Program, or selected a new Program. Selecting this setting from the menu will not have any effect.
Note:
Programs save the effects parameter settings, but they don’t save the number of the selected Effect Preset. If you select an Effect Preset, and then save the Program, the Effect
Preset setting will revert to “
—————
.”
For more information, please see “Using Effect Presets” on page 60.
Program mode
With Programs, you can use insert effects to process the final sound in the same way that you use the Filter, Driver,
Amplifier, and EQ (equalizer) to process the sound from the oscillators (OSC 1 & 2). Then the master effects are used to create overall ambience such as reverb, and use the total effect to make final adjustments. All of these settings can be made independently for each program.
Combination, Sequencer mode
In Combination and Sequencer modes, you can use the track EQ and insert effects to process the program sound of each timbre/ track. You can then use the master effects to create overall ambience, and use the total effect to make final adjustments.
In Combination mode you can make these settings for each combination, and in Sequencer mode you can make them for each song.
In Sequencer mode, you can switch between effects or modify the effect parameters and record these changes, so that effects will switch automatically or effect parameters will be modified automatically as the song plays back.
EQ
Send
Master Effect 1, 2
Insert Effect 1–5
Return
Total Effect
OUTPUT
L/MONO, R
Combination mode, Sequencer mode
Send
Master Effect 1, 2
Insert Effect 1–5
Return
Total Effect
OUTPUT
L/MONO, R
Timbre 1 /MIDI Track 1
Timbre 16 /MIDI Track 16
EQ
EQ
235
Effect Guide
Dynamic modulation (Dmod) and Tempo Synchronization
Dynamic modulation (Dmod)
Dynamic modulation lets you control certain effects parameters in real ‐ time, using either the built ‐ in controllers or MIDI. These effect parameters are marked with the logo
.
For more information, please see “Dynamic Modulation
Sources (Dmod)” on page 346.
Tempo Synchronization
You can synchronize some effects parameters, such as LFO speeds and delay times, to the system tempo. This lets you sync the effects to Program LFOs, Drum Track, Arpeggiator, the internal sequencer, or an external MIDI clock.
These effects parameters are marked with the logo .
Synchronizing LFOs
Most effects with LFOs, such as 011: Stereo Wah/Auto Wah, can be synchronized to tempo. This applies to the individual effects LFOs, and also the Common FX LFO.
To set up LFOs to synchronize to tempo:
1. Set MIDI Sync to On.
2. Set the BPM as desired.
To synchronize to the system clock, set
BPM
to MIDI.
To set the LFO to a specific tempo, separate from the system clock, set
BPM
to the desired tempo (between 40.00 and
300.00 BPM).
3. Use the Base Note and Times (x) parameters to set the rhythmic value of the LFO.
For instance, if you set
Base Note
to 1/8 and
Times (x)
to 2, each cycle of the LFO will last for a quarter ‐ note (two eighth ‐ notes).
BPM/MIDI Sync: LFO
LFO
3. Set the BPM as desired.
To synchronize to the system clock, set
BPM
to MIDI.
To set the delays to a specific tempo, separate from the system clock, set
BPM
to the desired tempo (between 40.00 and 300.00 BPM).
If the combination of the tempo,
Base Note
, and
Times (x)
settings in conjunction would exceed the maximum delay time, a warning such as “Time Over? >OVER!” will appear in the display. If this happens, just reduce the delay time.
Note that the maximum delay time depends on which delay effect you’re using. For instance, the maximum delay time for 079: Stereo BPM Delay is 2,730msec, while the maximum delay time for 192: St. BPM Long Dly is 5,460msec.
Dynamic modulation to control an effect parameter in realtime
As an example, let’s set up dynamic modulation to control an effect parameter in realtime.
1. As described in the procedure for “Program Effects settings” on page 79 of the Operatin guide, set IFX1 to 078:
L/C/R BPM Delay. Verify that you’re hearing a delay effect.
2. Access the Prog P8: Routing/IFX– IFX1 page.
Now, we can set the Dmod to change the delay level via the
Joystick
3. Set Input Level Dmod to +100.
4. Set Source to JS+Y: #01.
The delay sound will disappear.
The input level to the effect can be controlled by the joystick.
As you move the joystick away from yourself, the delay sound will gradually increase.
236
Synchronizing Delay Times
Delays with
BPM
in their title will sync to tempo.
For instance, you might set up effect 078: Stereo BPM Delay as follows:
1. Set L Delay Base Note to 1/8, and Times (x) to 1
2. Set R Delay Base Note to 1/16, and Times (x) to 3
This means that the left channel will be delayed by an eighth ‐ note, and the right channel will be delayed by a dotted eighth ‐ note (three sixteenth ‐ notes).
BPM/MIDI Sync: Delay Time
Dry Wet
Lch
Dry Wet
Rch
In addition, we can use Dmod to change the feedback level via SW1
5. In the P1: Basic/Controllers– Controllers Setup page, set the SW1 function to SW1 Mod.CC#80, and the Mode to
Toggle.
Choose P8: Routing/IFX page. Set the Feedback Src to SW1:
#80, and set Amt to +30.
When you move the joystick away from yourself and press the SW1 switch, the feedback level will increase, and the
Overview Common FX LFOs
delay sound will continue for a longer time. The
Amt
setting specifies the feedback level that will be in effect when the
SW1 switch is pressed. If
Amt
is set to –10, pressing the SW1 switch will reduce the feedback level to 0.
Finally, we can use the MIDI/Tempo Sync function to synchronize the delay time to the arpeggiator tempo.
6. Set BPM to MIDI.
7. For L, C, and R, set the Delay Base Note and Times as desired.
For this example, set
Delay Base Note
to and
Times
to x1 so that the effect will be easily understandable. The delay time will repeat at an interval of a 8th note.
8. Rotate the TEMPO knob, and the delay time will change.
When you (push the joystick away from yourself and) press the SW1 switch, the feedback level will rise, and the delays will become longer.
9. When you turn on the ARP button, arpeggiator will begin playing.
Select any desired arpeggiator. When you rotate the TEMPO knob, the delay time will change in synchronization with the changing tempo of the arpeggiator.
Depending on the specific delay effect, you may hear some unexpected noise if you change the tempo while the delay is sounding. This is because the delay sound becomes discontinuous, and is not a malfunction.
For some effects, you can synchronize the LFO frequency to the tempo. Set the effect parameters
MIDI
Sync
to On, and
BPM
to MIDI. For details, please see
“Tempo Synchronization” on page 236.
Common FX LFOs
Normally, LFO ‐ based effects–such as choruses, flangers, phasers, filters, and auto ‐ pan–each have their own independent LFO. The KROME effects support this standard mechanism, but add a new one: Common FX
LFOs.
The two Common FX LFOs allow you to synchronize multiple LFO ‐ based effects together. They’re available in most LFO ‐ based effects, in addition to the individual LFOs, providing:
• Master sources of frequency and phase for all LFO ‐ based effects
• LFO speed set by either frequency or tempo
• Reset from Dmod sources, for either realtime performance or synchronizing to a down ‐ beat in a sequence
When using the Common FX LFOs, you can still control the
LFO phase individually for each effect, and often change the waveform individually as well.
You can edit the Common FX LFO parameters on the P8–
Common FX LFO pages of Program, Combination,
Sequencer modes.
Common FX LFO
LFO Type = Common1
Stereo Flanger
Common FX LFO1
Frequency[Hz]
Reset
Waveforem = Triangle
Phase Offset = 0 [deg]
Generate original LFO waveform
Stereo Phaser
Waveforem = Sine
Phase Offset = 0 [deg]
Stereo Auto Pan
Waveforem = Sine
Phase Offset = +90 [deg]
237
238
Effect Guide
FX Control Buses
The FX Control Buses lets you create effects “sidechains.”
Sidechains let you control an effect with one audio signal
(the sidechain), while the effect processes a completely different audio signal.
This is convenient for use with vocoders and limiters, gates, etc. You can use a voice ‐ type timbre to modulate a synth ‐ type input, or use a drum track etc. to create rhythmic vocoder effects. Limiter or gate ‐ type effects are often used to control an input using a different sound.
KROME includes two true ‐ stereo FX Control Buses, which can be used with the following effects:
Vocoder
174: Vocoder
Limiter, and gate effects
003: Stereo Limiter
006: Stereo Gate
Example: Gated Reverb (Program mode)
If you process reverberant sound through a gate effect, the gating may not occur as desired since the reverb extends the duration of the sound. Normally, you will use the un ‐ reverberated sound to control the gate, as shown in the diagram. Use
Bus (IFX/Output) Select
to send OSC1 and 2 to IFX1 and also via
FX Control Bus
to 1. Set the IFX2: Stereo
Gate
Envelope Source
to FX Control 1. This lets you control the gate using a different signal than the input (in this example, the reverberated sound).
Gated Reverb (Program)
OSC1&2
Bus Select
: IFX1
FX Control Bus
: FX Ctrl1
IFX1
084: Reverb Hall
Chain to
: IFX2
IFX2
006: Stereo Gate
Envelope Source
: FX Control1
Bus Select
: L/R
(FX Control Bus1)
Example: Limiter (Combination)
Compressor ‐ type effects use the level of the audio input to control the level gain of the audio output.
For these effects, the envelope detection source can be either the audio input itself (the usual method) or FX Control Bus 1 or 2.
The example shown in the diagram is of a split combination in which the level of timbre 1 (Pad, played from the low key range) is being controlled by timbre 2 (Guitar, with IFX2
OD/Hi ‐ Gain Wah inserted, played from the high key range).
You can make settings so that when you play the guitar sound, the volume of the pad will decrease automatically.
Send the post ‐ IFX2 signal via
FX Control Bus
to FX Ctrl1, and set the IFX1: Stereo Limiter
Envelope Source
parameter to FX Control 1.
Limiter (Combination)
Program
A
Program
B split
Timbre1
: Pad
Bus Select
: IFX1
Timbre2
: Guitar
Bus Select
: IFX2
IFX2
020: OD/
Hi.Gain Wah
IFX1
003: Stereo Limiter
Envelope Source
: FX Control 1
Ctrl Bus
(FX Control Bus)
: 1
Bus Select
: L/R
(FX Control Bus1)
Bus Select
: L/R
Example: Vocoder (Combination)
Vocoder effects produce their distinctive sound by using an audio signal (the modulator) to modulate a different audio signal (the carrier).
As shown in the illustration, using the output of timbre 1 as the carrier and the voice ‐ type output of timbre 2 as the modulator allows you to create distinctive “talking” effects.
Vocoder (Combination)
Timbre1
: Pad
Bus Select
: IFX1
Timbre2
: Voice
FX Control Bus
: 1
(Carrier)
IFX1
174: Vocoder
Modulator Source
: FX Control1
(Modulator)
(FX Control Bus1)
Bus Select
: L/R
Example: Rhythmic Vocoder (Program)
Vocoder effects produce their distinctive sound by using one audio signal (the modulator) to modulate a different audio signal (the carrier).
You can also use a drum pattern or similar signal as the modulator, producing a rhythm vocoder effect.
In the example shown in the diagram, a drum pattern generated by Arpeggiator and Drum Track function is sent to the FX Control bus and used as the modulator for the vocoder.
For oscillator 1 (the carrier), set
Bus (IFX/Output) Select
to
IFX1, sending the signal to IFX1: Vocoder. For drum track we’re using as the modulator), set
FX Control Bus
to 1, sending the signal to FX Ctrl1 bus. For IFX1: Vocoder, set
“Modulator Source” to FX Control 1 so that the drum track signal will be the modulator for the vocoder.
Rhythmic Vocoder (Program)
Drum pattern/
Drum Track
OSC1
: Synth/
Single wave
Bus Select
: IFX1
Drum
Track
FX Control Bus
: 1
(Carrier)
IFX1
174: Vocoder
Modulator Source
: FX Control1
(Modulator)
(FX Control Bus1)
Bus Select
: L/R
Effect I/O
To achieve the best tonal quality, signals sent to the effects should be at the maximum level below clipping. Also, use the
Wet/Dry
parameter for the Insert Effects, Total Effect and the
Wet/Dry
or
Return 1, 2
parameter for the Master Effects to adjust the effect output level.
If the input level is too low, the SN ratio may decrease.
On the other hand, if the input level is too high, clipping may occur.
The following table shows the parameters related to the level settings:
Program mode
Input
Output
OSC 1/2 Volume, Drum Track Volume (P0)
OSC1/2 MS1, 2, 3, 4, 5, 6, 7, 8 Level (P2)
Filter1/2 Trim (P3)
Filter1/2 Output (P3)
Driver1/2 Drive (P4)
Amp1/2 Amp Level (P4)
EQ Input Trim (P4)
Send1/2 (P8)
Effect Trim parameter
*1
(P8, P9)
Effect Wet/Dry parameter (P8, P9)
Return1, 2 (P9)
Master Volume (P9)
Combination mode/Sequencer mode
Input
Output
Volume (P0)
Timbre/Track EQ Input Trim (P2)
Send1/2 (P8)
Effect Trim parameter
*1
(P8, P9)
Effect Wet/Dry parameter (P8, P9)
Return1, 2 (P9)
Master Volume (P9)
*1
Some effects may not have these parameters.
Overview Effect I/O
239
Effect Guide
Insert Effects (IFX1–IFX5)
In/Out
Insert Effects (IFX 1–5) have a stereo input and a stereo output. If you set the
Wet/Dry
parameter to Dry (no effect), the input signal will be passed through, in stereo, without being processed by the effect. If you select Wet (effect applied), the processed signal will be output in one of the following ways:
Wet
Mono In — Mono Out
Mono In — Stereo Out
Stereo In — Stereo Out
+
Effect
+
Effect
Effect
Effect
Mono–Mono Parallel Effects
127: P4EQ // P4EQ —171: BPM Dl // BPM Dl
Pan
Mono In/Out Effect
Mono In/Out Effect
Pan
These effects are typically stereo ‐ in/stereo ‐ out, but they have a special structure. The L channel and R channel of the stereo input each have their own independent mono effect.
Each mono output can then be panned to the desired position in the stereo field.
• Track1: Piano,
Pan
=L001,
Bus (IFX/Output) Select
=IFX1
• Track2: E.Piano,
Pan
=R127,
Bus (IFX/Output) Select
=IFX1
So that you don’t mix the sound of the two tracks that are being input, set the P0: Play/REC
Pan
parameter to L001 and
R127 respectively.
Example: IFX1: 134: P4EQ // Phaser
Track 1: Piano is sent to the L channel P4EQ, and Track 2:
E.Piano is sent to the R channel Phaser. Use the P8: Routing/
IFX– IFX1 page
Pan
parameter to set the output position of each sound. In this example, both are set to C064. See the diagram below.
IFX1: 134: P4EQ // Phaser
240
Input/output variations for each effect are shown in upper
left of the block diagrams starting on page 320.
If you select
000: No Effect
, stereo input signals are output in stereo without being processed.
Pressing the On/Off button of IFX1–IFX5 in the P8: Routing/
IFX– Insert FX Setup pages in each mode will toggle between On and Off. When Off is selected, the effect will be bypassed, and the stereo input signal will be output in stereo without being processed.
The KROME can also turn IFX1–IFX5 off separately from the setting of the On/Off button by receiving MIDI control change message CC#92. Value 0 will turn them off, and value 1–127 will turn them on.
You can also use “Effect Global SW” (Global 0–1b) to turn IFX1–5 on and off. This MIDI control is performed on the global
MIDI channel
(Global 1–1a).
Double-size effects
Double ‐ size effects (172: St.Mltband Limiter – 193: Early
Reflections) use twice as much space as other effects.
You can use double ‐ size effects for insert effects IFX1–IFX4 and master effect MFX1. However, the effect of the number that follows it will be unavailable. For example if you’ve selected a double ‐ size effect for IFX1, you won’t be able to use IFX2. If you’ve selected a double ‐ size effect for MFX1, you won’t be able to use MFX2.
An example of when a double-size effect is selected for IFX1 and
IFX4
Routing
You can use up to five channels (IFX 1–5) for the Insert
Effects in any mode.
Program mode
Use
Bus (IFX/Output) Select
(Prog 8–1b) to set the destination bus of the oscillator output.
L/R:
Send the output to the L/R bus. Instead, it is sent to
AUDIO OUTPUT L/MONO and R after the TFX.
IFX1…5:
The signal is sent to Insert Effects IFX 1–5.
Off:
The output will not be sent to the L/R bus, or IFX1–5 buses. Choose the Off setting if you want to connect the oscillator output to a master effect in series. Use
Send1 (to
MFX1)
and
Send2 (to MFX2)
to adjust the send level.
Use
Send1 (to MFX1)
and
Send2 (to MFX2)
(Prog 8–1d) to specify the send level for the Master Effects. This setting is effective if
Bus (IFX/Output) Select
(Prog 8–1b) is set to L/R or Off.
If
Bus (IFX/Output) Select
is set to IFX1–5, use
Send1
and
Send2
(Prog 8–2a) to specify the send level of the post ‐ IFX signal.
Send1 responds to CC#93, and Send2 responds to
CC#91. At this time, the actual send level uses the value of the Send 1 and 2 settings for Oscillators 1 and 2, multiplied by the Send 1 and 2 values received via
MIDI.
Insert Effects (IFX1–IFX5) Routing
In the example shown in the next diagram, Oscillators 1 and
2 outputs being sent to IFX1.
If you are connecting the Insert Effects in series,
check
the
Chain
box (Prog 8–2a). Use
Chain to
(Prog 8–2a) to specify the destination to which the signal will be chained.
If you check the IFX1 checkbox, the output of IFX1 will be sent to the input of the IFX you specify in
Chain to
. Effects can be chained only in ascending order of their number; for example IFX1 can be chained to IFX2 through IFX5, and
IFX2 can be chained to IFX3 through IFX5. You can create a chain of up to five insert effects in series, IFX1 through IFX5.
When the Insert Effects are connected in series, the values of the
Pan: CC#8
,
Bus
,
Send1
, and
Send2
parameters for the post ‐ IFX signal will be used.
In the example shown in the next diagram, the
Chain
check box is checked, and each
Chain to
parameter is set to the subsequent effect, creating a series connection of IFX1
→
IFX2
→
IFX3
→
IFX4
→
IFX5. The post ‐ IFX5 settings for
Pan:
CC#8
,
Bus
,
Send1
, and
Send2
will be used.
sound to IFX2 to apply EQ, and other sounds to AUDIO
OUTPUT L/MONO and R without applying any Insert
Effects.
Tip:
In most of the preloaded drum kits, the following types of drum instrument have the same
Bus (IFX/Output) Select
settings.
Snares
→
IFX1
Kicks
→
IFX2
Other
→
IFX3
If you de ‐ select the box, all drum instrument outputs are sent to the bus specified by
Bus (IFX/Output) Select
(Prog
8–1b). You may apply any Insert Effects to all drum instruments, regardless of the Drum kit settings.
Combination and Sequencer modes
Use
Bus (IFX/Output) Select
(Combi/Seq 8–1(2)d) for timbres (Combination) and tracks (Sequencer) to select an
Insert Effect to apply to the corresponding timbres and tracks. You can route multiple timbres and tracks to a single
Insert Effect.
Tip:
You can use each timbre/track’s
Bus (IFX/Output)
Select
, post ‐ IFX
Chain to
and
Chain
parameters (Combi/
Seq 8–3b) to create a variety of routings.
Example:
Inserting one IFX into two or more timbres
Example:
Inserting a separate IFX into each timbre, and inserting another IFX later
Example:
Sharing part of a timbre’s IFX chain with another timbre
Settings for drum programs
If you have selected “Drums” for
Oscillator Mode
(Prog 1–
1a) of a Program, the
Use DKit Setting
box (Prog 8–1c) becomes available. For more information, please see next diagram.
As with Program mode, select L/R, IFX1–5, or Off for each timbre and track.
Send1 (to MFX1)
and
Send2 (to MFX2)
become available if
Bus (IFX/Output) Select
has been set to L/R or Off. If you’ve set
Bus (IFX/Output) Select
to IFX1–5, use
Send1
and
Send2
(Combi/Seq 8–3b) following the insert effect to adjust the send levels.
Send1 responds to CC#93, and Send2 responds to
CC#91. At this time, the actual send level uses the value of the Send 1 and 2 settings for Oscillators 1 and 2 of the
Programs (selected for the timbres and tracks), multiplied by the Send 1 and 2 values received via
MIDI.
The following diagram shows an example of Combination mode. The Timbre 1 output is sent to IFX1 and the Timbre 2 output is sent to IFX2 according to the
Bus (IFX/Output)
Select
setting. Other timbres are sent to L/R. The output signal passes through the TFX, then goes to AUDIO
OUTPUT L/MONO and R.
If you check this box,
Bus (IFX/Output) Select
,
FX Control
Bus
,
Send1
, and
Send2
(Global 5–5b) for each key of the selected Drum kit becomes effective. For example, you can send a snare sound to IFX1 to apply the Gate effect, a kick
241
Effect Guide
If you want to revert to the original settings of the drum kit, execute
Drum Kit IFX Patch
with the settings IFX1
→
IFX1,
IFX2
→
IFX2, IFX3
→
IFX3, IFX4
→
IFX4, and IFX5
→
IFX5.
In the following diagram, Drum Program is assigned to
Timbre 1, and normal Programs are assigned to Timbres 2 and 3.
Bus (IFX/Output) Select
is set to DKit for Timbre 1,
IFX1 for Timbre 2, and IFX2 for Timbre 3. With Timbre 1, the
Bus (IFX/Output) Select
(Global 5–5b) for Drum kit setting becomes effective.
In the next diagram, IFX1’s
Chain
check box is checked and
Chain to
set to IFX2, sending the output of IFX1 to IFX2.
Timbre 1 is being processed by IFX1: Stereo Compressor and
IFX2: 038: Stereo Flanger effects. Timbre 2 is being processed by the IFX2: 038: Stereo Flanger effect. The Routing Map area of the next diagram shows these settings. (With these settings, IFX3–5 are not being used.)
DrumKit IFX Patch dialog
242
Drum Programs in Combination and Sequencer modes
If you’ve selected a drum program (
Oscillator Mode
=
Drums or
Double Drums
) for a timbre (in Combination mode) or track (in Sequencer mode), the DKit setting will be available as a choice for
Bus (IFX/Output) Select
(see the following diagram).
If
Bus (IFX/Output) Select
is set to DKit, of each key in the drum kit, letting you specify the bus to which each drum instrument will be sent. For example you can send snare sounds to IFX1, kick sounds to IFX2, and other drum sounds to L/MONO and R.
If this check box is
unchecked
, all drum instruments will be output according to the
Bus (IFX/Output) Select
setting of each timbre/track (Combi/Seq 8–1(2)d). This lets you apply an insert effect to all of the drum instruments in that drum kit.
Drum Kit IFX Patch
If
Bus (IFX/Output) Select
is set to DKit, you’ll be able to select the menu command
DrumKit IFX Patch
.
This option allows you to change the routing of the Insert
Effects temporarily by changing
Bus (IFX/Output) Select
for each key.
For example, assume that the Drum kit key assignment is set so that a snare sound is routed to IFX1 and a kick sound is routed to IFX2 etc., IFX1–3. In this case, if you wish to assign
IFX 1 and 2 to the Programs used by other timbres and tracks, you can view the routing so that these Drum kit sounds are routed to IFX3 and IFX5 respectively.
Patching is possible only if the
Bus (IFX/Output) Select
(Global 5–5b) setting of each key in the drum kit is assigned to an insert effect. The state of these settings is also shown in the Routing Map. Make the desired settings for
DrumKit
IFX Patch
, and press the OK button to execute.
Use the
DrumKit IFX Patch
menu command if you want the drum program to use effects other than timbres 2 and 3.
Choose
DrumKit IFX Patch
from the page menu, and temporarily send the drum kit IFX1 to IFX3, IFX2 to IFX4, and IFX3 to IFX5. Executing with these settings will temporarily change the effects to which the drum kit is being sent (see the following diagram).
Insert Effects (IFX1–IFX5) Mixer
Mixer
In Program, Combination, and Sequencer modes, the P8–
Insert FX Setup page lets you set the
Pan: CC#8
(post ‐ IFX panning),
Bus Sel
. (Bus Select
)
,
Ctrl Bus
(FX control bus), and the
Send1
and
Send2
levels to the master effects.
If you have checked the
Chain
to connect the Insert Effects in series, these parameters
Pan: CC#8
–
Send2
for the post ‐
IFX (last Insert Effect in the chain) signal become effective.
Pan: CC#8
This parameter enables you to set the pan of the post ‐ IFX signal.
If you are using the stereo ‐ in/stereo ‐ out Insert Effects, set this parameter to “C064” to enable the
Pan
settings for the oscillators (Prog 4–1c, 4–5), timbres (Combi 0–3(4)b), tracks
(Seq 0–3(4)b).
If you are using mono ‐ in/stereo–out or mono ‐ in/mono–out
Insert Effects, the
Pan
settings for the oscillators, timbres, and tracks are ignored, and they are set to Center. Use the
Pan: CC#8
parameter (Prog 8–2a, Combi/Seq 8–3b) to set the pan. “L000” is hard left, and “R127” is hard right.
• For more about effect types such as stereo ‐ in/stereo ‐ out,
see “In/Out” on page 240.
You can control these parameters via CC#8.
Bus Sel. (Bus Select)
This parameter enables you to specify the destination bus for the post ‐ IFX signals.
L/R
is a common setting to send signals to the Total Effect
(TFX) before they are routed to the AUDIO OUTPUT L/
MONO and R outputs.
If set to
Off
, the signal will not be sent to the L/R bus.
Choose this setting if you want to use the
Send1
or
Send2
levels to route the signal through a master effect in series
(i.e., not as a send effect).
FX Ctrl (FX Control Bus)
This specifies the FX Control bus that follows the insert effect. The FX Control buses (FX Control 1, 2) are mono two ‐ channel buses.
The KROME provides two (mono two ‐ channel) effect control buses, giving you a wide range of ways to control effects.
FX Control buses can be used with vocoder, limiter, and gate ‐ type effects.
For details on the effects that be used with FX Control buses,
see “FX Control Buses” on page 238.
As an example, here’s how you can use the FX Control bus following an insert effect.
Example: Gated Reverb
When using a gate effect with a reverberant sound, using the reverberant sound to control the gate may not produce the desired results because the reverb extends the duration of the sound. Normally, you will use the un ‐ reverberated sound to control the gate, as shown in the diagram below.
In this example, we send the sound from the OSC etc. to
IFX1 and process it through an equalizer. IFX1 is sent via
Chain
to IFX2 and also sent via
Ctrl Bus
(FX Control Bus) to
1. The Envelope
Source
of IFX3: Stereo Gate is set to FX
Control 1. This allows the gat to be triggered by a signal other than its input (the reverberant sound).
Gated Reverb Example
OSC1&2
Timbre/Track
Bus Select
: IFX1
IFX1
008: St.Graphic
7EQ
Chain to
: IFX2
FX Control Bus
: 1
IFX2
084: Reverb Hall
(FX Control Bus1)
Chain to
: IFX3
IFX3
006: Stereo Gate
Envelope Source
: FX Ctrl1
Bus Select
: L/R
Send1, Send2
These parameters enable you to set the send level of the signals routed to Master Effects MFX1 and MFX2. The signal is sent in stereo to master effects MFX1 and MFX2. This is valid when
Bus (Bus Select)
is L/R or Off.
If you are not using any Insert Effects, use
Send1
and
Send2
of the P8: Routing/IFX– Routing page in Program,
Combination, Sequencer, and Song play modes to set the
Master Effect send level.
Send1
responds to CC#93 and
Send2
responds to
CC#91.
Insert Effect = Stereo In – Stereo Out
OSC1
Left
Left
Center
Center
OSC2
OSC1: Amp1 Pan = L001
Right
OSC2: Amp2 Pan = R127
Post IFX Pan: CC#8
C064
L032
L001
R096
R127
Right
Left
Left
Center
Center
OSC1: Amp1 Pan = L032
Right
OSC2: Amp2 Pan = R096
Post IFX Pan: CC#8
C064
L032
L001
R096
R127
Right
OSC1
Left
Left
Insert Effect = Mono In — Stereo Out
Mono In — Mono Out
Center
Center
OSC2
OSC1: Amp1 Pan = L001
Right
OSC2: Amp2 Pan = R127
Post IFX Pan: CC#8
C064
L032
L001
R096
R127
Right
243
244
Effect Guide
Controlling the Insert Effects via MIDI
Using the Dynamic Modulation (Dmod) function enables you to control all effect parameters in real ‐ time during performance from the controllers of the KROME or a connected MIDI sequencer. You can also control the
Pan:
CC#8
,
Send1
, and
Send2
parameters in the same way.
Program mode
You can control the parameters on the global
MIDI channel
(Global 1–1a).
Combination mode
The P8: Routing/IFX– IFX1–5 page lets you specify the control channel
Ch
(Control Channel) for IFX1–5. You can choose from CH01–16, Gch, or All ‐ R (All Routed).
Ch01–16:
Select this when you want to control each insert effect from a different channel. An “*” symbol will be displayed at the right of the MIDI channel Ch01–16 of the timbre that is routed to each insert effect. If the routed timbres have different MIDI channel settings, this parameter is used to specify the channel that will control the insert effect.
Gch:
Select this option if you wish to control the parameters on the global
MIDI channel
(Global 1–1a). This is a common setting.
All-R:
Select this option to control the parameters on all the channels (channels 1–16 that have a “*” mark) that are routed to the corresponding Insert Effects.
If you’ve selected a drum program for a Combination mode timbre or a Sequencer mode track, and set its
Bus
(IFX/Output) Select
to
DKit
(8–1(2)d), the MIDI channel of that timbre/track will be valid if any one of
IFX1–5 is set to All ‐ R, regardless of the drum kit’s
Bus
(IFX/Output) Select
(Global 5–5b) setting or the menu command
DrumKit IFX Patch
setting.
Sequencer mode
Use
Ch
parameters of the P8: Routing/IFX– IFX1 – IFX5 pages to set up the control channels for IFX1–5. Select an appropriate option from Ch01–16 and All Routed.
Ch01–16:
Select this when you want to control each insert effect from a different channel. An “*” symbol will be displayed at the right of the MIDI channel Ch01–16 of the track that is routed to each insert effect. If two or more tracks with differing MIDI channels Ch01–16 are being sent to a single insert effect, this parameter is used to specify the one track that will control the insert effect.
All R:
Select this option to control the parameters on all the channels (channels 1–16 that have a “*” mark) that are routed to the corresponding Insert Effects.
All R
is a typical option. If you wish to control the parameters on a single channel, you may select it from Ch01–16.
Note:
Since Sequencer mode lets you record and play exclusive messages and edit tracks that include System
Exclusive events, you can use them to switch effects or modify effect parameter values during song playback.
Master Effects (MFX1, 2) In/Out
Master Effects (MFX1, 2)
In/Out
Separately from the setting of this On/Off button, MFX1 and MFX2 can be switched off by receiving a MIDI control change CC#94. Value 0 will turn them off, and value 1–127 will turn them on. You can also use the front panel MFX button or
Effect Global SW
(Global 0–
1b) to turn MFX1 and 2 on and off. This MIDI control is performed on the global
MIDI channel
(Global 1–1a).
Double-size effects
Double ‐ size effects (172: St.Mltband Limiter – 193: Early
Reflections) use twice as much space as other effects.
You can use a double ‐ size effect for master effect MFX1. If you’ve selected a double ‐ size effect, MFX2 won’t be available for use.
The I/Os of Master Effects MFX1 and MFX2 are stereo ‐ in/ stereo ‐ out.
Send1
and
Send2
determine the send level to the
Master Effects. (For Send1 and 2, see “Routing” and
“Mixer.”)
Master effects will not output the Dry (unprocessed) signal specified in
Wet/Dry
(P9: MFX/TFX/LFO– MFX1, 2 page).
Only the Wet (processed) signal will be output. The output signals from the Master Effects are routed to the L/R bus with the output level specified by
Return1
and
Return2
.
These output signals are mixed with the output signals from the bus specified by
Bus
(P8: Routing/IFX– Routing page in each mode) L/R, or with the output signals from the bus specified by
Bus (IFX/Output) Select
(“Insert FX Setup” page in each mode) L/R, then routed to the Master EQ.
Selecting “000: No Effect” will mute the output. The processed signal will be output in one of the following ways, according to the type of effects 001–193.
Wet
Mono In — Mono Out
Mono In — Stereo Out
Stereo In — Stereo Out
+
Effect
+
Effect
Effect
Effect
Mono–Mono Parallel
127: P4EQ//P4EQ–171: BPM Dl//BPM Dl
Mono In/Out Effect
Mono In/Out Effect
Pan
Pan
These effects are typically stereo ‐ in/stereo ‐ out, but they have a special structure. The L channel and R channel of the stereo input each have their own independent mono effect.
Each mono output can then be panned to the desired position in the stereo field. Normally, you will use these as insert effects, but you can also use them as master effects.
For details, see “Mono–Mono Parallel Effects” on page 240.
Input/output variations for each effect are shown in upper
left of the block diagrams starting on page 320.
Pressing the On/Off button for MFX1 and 2 of the P9: MFX/
TFX/LFO–Routing page in each mode will toggle between
On and Off. When Off is selected, the output signals will be muted.
Routing
If you are not using any Insert Effects in any mode, the
Master Effects send levels are determined by the
Send1 (to
MFX1)
and
Send2 (to MFX2)
parameters specified independently for the oscillators (Program mode), timbres
(Combination mode), tracks (Sequencer mode).
For example, since you can adjust the master effect send levels for each timbre/track, you can make settings so that reverb is applied deeply to the piano, lightly to the strings, and not at all to the bass.
If you’re using insert effects, use the post ‐ IFX
Send1
and
Send2
to adjust the send amounts.
Program mode
Use the
Send1 (to MFX1)
and
Send2 (to MFX2)
parameters of the P8: Routing/IFX– Routing page, or the
Send1
and
Send2
parameters of the P8: Routing/IFX– Insert FX Setup page for the post ‐ IFX1–5 signals, to set the Master Effect send level.
If you have set
Bus (IFX/Output) Select
to L/R or Off,
Send1
(to MFX1)
and
Send2 (to MFX2)
of the “Routing” page are effective. These parameters can be set for oscillators 1 and 2 individually.
If you have set
Bus (IFX/Output) Select
to IFX1–5,
Send1
and
Send2
of the “Insert FX” page for the post ‐ P8: Routing/
IFX– IFX1–5 signals are effective. If you are using the Insert
Effects in chain (series), the
Send1
and
Send2
parameters for the post ‐ IFX (last IFX) are effective.
Send1 responds to CC#93 and Send2 responds to CC#91 on the global
MIDI channel
(Global 1–1a). At this time, the actual send level uses the value of the Send 1 and 2 settings for Oscillators 1 and 2, multiplied by the Send 1 and 2 values received via MIDI.
If you have selected “Drums” for
Oscillator Mode
(Prog 1–
1a) of a Program, the
Use DKit Setting
box (Prog 8–1b)
245
Effect Guide
becomes available. If you check this box, Send1 and Send2 levels for each key of the selected Drum kit become effective.
If
Bus (IFX/Output) Select
(Global 5–5b) is set to L/R or Off for a drum instrument key,
Send1 (to MFX1)
and
Send2(toMFX2)
(Global 5–5b) become effective.
If
Bus (IFX/Output) Select
is set to IFX1–5, the post ‐ IFX1–5
Send1
and
Send2
(Prog 8–5a) become effective.
If this is unchecked,
Send1 (to MFX1)
and
Send2 (to MFX2)
(Prog 8–1d), and the post IFX1–5
Send1
and
Send2
(Prog 8–
2a) will be valid for all drum instruments, in the same way as when
Oscillator Mode
is Single or Double.
Combination and Sequencer modes
Use
Send1 (to MFX1)
and
Send2 (to MFX2)
(P8: “Routing” page) for timbres (Combination) and tracks (Sequencer) to set the Send1 and 2 levels for each timbre and track. As with
Program mode, if
Bus (IFX/Output) Select
is set to L/R or
Off,
Send1 (to MFX1)
and
Send2 (to MFX2)
become effective.
The actual levels use these Send1 and 2 level values, multiplied by the send level values of oscillators 1 and 2 of the Prog P8: Routing/IFX – Routing page.
Send level
For example if you set the program’s OSC1
Send1 (to MFX1)
to 127,
Send2 (to MFX2)
to 064, OSC2
Send1 (to MFX1)
to
064,
Send2 (to MFX2)
to 127, and the combination’s
Send1
(to MFX1)
to 064 and
Send2 (to MFX2)
to 127, the actual send levels of the combination will be as follows.
OSC1 Send1=127 (100%) *064 (50%)=064 (50%)
OSC1 Send2=064 (50%) *127 (100%)=064 (50%)
OSC2 Send1=064 (50%) *064 (50%)=032 (25%)
OSC2 Send2=127 (100%) *127 (100%)=127 (100%)
If IFX1–5 is selected for
Bus (IFX/Output) Select
, use the
Send1
and
Send2
parameters for the post ‐ IFX signals.
Send1 responds to CC#93, and Send2 responds to
CC#91. If
Send1 (to MFX1)
and Send2 (MFX2)” for each timbre/track are effective, the parameter will be controlled on the MIDI channels set for the corresponding timbres and tracks. If the
Send1
and
Send2
parameters for the post ‐ IFX1–5 signals are effective, they can be controlled on the MIDI channels assigned to IFX1–5.
An example for Combination mode is given below. In the following diagram,
Bus (IFX/Output) Select
is set so that
Timbre 1 is routed to IFX1, Timbre 2 to IFX2, Timbres 3 and
4 to IFX3, Timbres 5–16 to L/R.
(At this time, the actual send levels use these Send 1 and 2 values multiplied by the Send1 and 2 settings for Program oscillators 1 and 2.)
Bus Select
“DKit” is valid if you’ve selected a drum track for a Timbre (Combination) or Track (Sequencer).
If you select
DKit
, the
Bus (IFX/Output) Select
(Global 5–
5b) settings for each key become effective, and each drum instrument sound will be routed to the corresponding buses.
At this time, the actual send levels use these Send 1 and 2 values, multiplied by the Send1 and 2 settings for each
Drum kit key.
If a drum kit’s
Bus (IFX/Output) Select
is set to L/R or Off, the levels will be these Send 1 and 2 settings multiplied by the send levels you specify in Prog P8: Routing/IFX –
Routing page for OSC1
Send1 (to MFX1)
and
Send2 (to
MFX2)
(Prog 8–1d), just as in other cases (
Oscillator Mode
Single or Double).
If
Bus (IFX/Output) Select
is set to IFX1–5, use
Send1
and
Send2
for the post ‐ IFX signal.
In Media mode, effects will use the settings of the mode in which you previously were.
2
Mixer
The input levels to the master effects are determined by the send levels. In the P9: MFX/TFX/LFO– Routing page of each mode, you can specify the output level and chaining (series connection) between the two master effects.
3
4
1
246
In this case, use
Send1
and
Send2
for the post ‐ IFX1 (001:
Stereo Compressor) signal to set the send level of the Timbre
1 routed to the Master Effect. (In this example they are set to
032 and 127.) In the same way, use
Send1
and
Send2
for the post ‐ IFX2 signal to set the send levels of Timbres 2, and use the
Send1
and
Send2
parameters for the post ‐ IFX3 signal to set the send levels of Timbres 3 and 4. For Timbres 5–8, the settings of
Send1 (to MFX1)
and
Send2 (to MFX2)
will be effective (for Timbres 9–16, use the Routing 1 T09–16 page).
1. Return1, Return2
These adjust the amount of signal that is returned from the master effects MFX1 and MFX2 outputs to the L/R bus.
The left ‐ side value of the
Wet/Dry
parameter for the MFX1 or 2 effect is the output level of that master effect. (In other words if
Wet/Dry
is 25:75, the output level is 75%. It is 100% if Wet, and 0% if Dry.) The
Wet/Dry
value multiplied by the
Return1
or
Return2
value is sent to the L/R bus and mixed with the P8 : Routing/IFX – Routing page
Bus (IFX/Output)
Select
L/R or Insert FX Setup page
Bus
L/R output.
For example, with MFX1
Wet/Dry
set to 50:50 (50%) and
Return1
set to 64 (50%), the resultant effect level will be 25%.
Master Effects (MFX1, 2) Controlling the Master Effects via MIDI
The effect level is maximum (100%) when
Wet/Dry
is set to
“Wet” and
Return1
is set to 127.
2. Chain check box
Press this box to chain MFX1 and MFX2 to each other.
In the example shown in the preceding page, the output of
MFX1:029: Stereo Chorus is added to the input of MFX2:084:
Reverb Hall.
3. Chain Direction
If you have checked the
Chain
box, you can set the direction of the connection here. You can also visually confirm the direction on the display.
4. Chain Level
This parameter determines the level of signals routed from one MFX to the other MFX in a chain connection.
Controlling the Master Effects via MIDI
In the same way as for insert effects, parameters of the master effects can also be controlled in realtime via Dynamic
Modulation (Dmod) from the KROME’s controllers or an external MIDI device during performance or from the sequencer.
Program mode
Effect parameters are controlled on the global
MIDI channel
(Global 1–1a).
Combination and Sequencer modes
In Combination and Sequencer modes, the control channel for MFX1 and MFX2 are specified by the
Ch
(Control
Channel) setting in the MFX1 and 2 pages. You can choose
Ch01–16 or Gch.
Ch01–16:
Select this option if you wish to control the parameters for each Master Effect on different channels.
Gch:
Select this option if you wish to control the parameters on the global
MIDI channel
(Global 1–1a). This is the normal setting.
Note:
Since Sequencer mode lets you record and play exclusive messages and edit tracks that include System
Exclusive events, you can use them to switch effects or modify effect parameter values during song playback.
247
Effect Guide
Total Effect (TFX)
In/Out
The total effect TFX is stereo ‐ in and stereo ‐ out. The Dry
(unprocessed) side of the
Wet/Dry
parameter sends the stereo input sound directly to the stereo output. The way in which the Wet (processed) side is output depends on the type of effect, as follows.
Mono In — Mono Out
Mono In — Stereo Out
+
Effect
Wet
Stereo In — Stereo Out
+
Effect
Effect
Effect
Mono–Mono Parallel
127: P4EQ // P4EQ —171: BPM Dl // BPM Dl
For more information, please see “Mono–Mono Parallel
Effects” on page 240.
If you select 000:No Effect, the stereo input will be passed to the stereo output without any processing.
Input/output variations for each effect are shown in upper
left of the block diagrams starting on page 320.
You can switch the effects on/off using the MFX1 or 2 ON/
OFF buttons or the P9:MFX/TFX/LFO– Routing settings in each mode. When off, the effect will be bypassed. The stereo input will be passed to the stereo output without any processing, just as if 000:No Effect is selected.
Separately from this On/Off button, MIDI control change CC#95 can be received to turn TFX off. A control change value of 0 turns them off, and a value of 1–127 restores them to the prior setting. You can also use the front panel TFX button or
Effect Global SW
(Global 0–
1b) to turn off TFX in the same way. This is controlled on the global
MIDI channel
(Global 1–1a).
Double-size effects
Double ‐ size effects (172: St.Mltband Limiter – 193: Early
Reflections) can’t be used for the total effect.
Select
is set to L/R, the signal will be output from the
AUDIO OUTPUT L/MONO and R jacks.
The sound from MFX1 and 2 is routed through TFX, and then output to AUDIO OUTPUT L/MONO and R.
Mixer
MASTER (Master Volume)
This sets the level of the final output after passing through the total effect.
Using MIDI to control the Total
Effect
In the same way as for Insert and Master Effects, the Total
Effect can be controlled in realtime via Dynamic Modulation
(Dmod). You can use either the built ‐ in KROME’s controllers or an external MIDI device, during live performance or from a sequencer.
Program mode
Effect parameters are controlled on the global
MIDI channel
(Global 1–1a).
Combination and Sequencer modes
In Combination and Sequencer modes, the control channel for TFX is specified by the
Ch
(Control Channel) setting in the TFX page. You can choose Ch01–16 or Gch.
Ch01–16:
Choose from these settings if you want to control each total effect on a separate channel.
Gch:
Choose this setting if you want to control the total effect on the global
MIDI channel
(Global 1–1a).
Note:
In Sequencer mode, you can record and play back exclusive messages, and edit tracks that include System
Exclusive events. This lets you switch effects or vary the value of effect parameters while a song plays.
Routing
The total effect TFX ia placed immediately before the
AUDIO OUTPUT L/MONO and R outputs. Effect (TFX) is available in all modes.
Outputs
Main Outputs
The main L/MONO and R outputs of the KROME are output from the AUDIO OUTPUT L/MONO, R jacks, and the headphone jack.
248
If the
Bus (IFX/Output) Select
setting for an oscillator
(Program mode), timbre (Combination mode), track
(Sequencer mode), or the post ‐ insert
Bus (IFX/Output)
Effect/Mixer Block Diagrams
Program mode
Effect/Mixer Block Diagrams Main Outputs
Bus Select = L/R
249
250
Effect Guide
Combination mode, Sequencer mode
Bus Select = Off
Dynamics (Dynamic) 000: No Effect
Dynamics (Dynamic)
000: No Effect
Select this option when you do not use any effects. The
Insert Effect/Total Effect section outputs unprocessed signals and the Master Effect section mutes the output.
001: Stereo Compressor
This effect compresses the input signal to regulate the level and give a “punchy” effect. It is useful for guitar, piano, and drum sounds. This is a stereo compressor. You can link left and right channels, or use each channel separately.
Stereo In — Stereo Out
Left
EQ Trim
Compressor
Envelope Select
Envelope — Control
Envelope — Control
Compressor
EQ Trim
LEQ
LEQ
HEQ
HEQ
Right
Wet / Dry
Output Level
Output Level
Wet / Dry
a e f g
Envelope
Select b
Sensitivity c
Attack d EQ Trim
L/R Mix,
L/R Individually
1…100
1…100
0…100
Determines whether the left and right channels are linked or used separately
Sets the sensitivity
Sets the attack level
Sets the EQ input level
Pre LEQ Fc
Pre HEQ Fc
Low,
Mid-Low
High,
Mid-High
Output Level 0…100
Src
Amt
Off…Tempo
–100…+100
Selects the cutoff frequency (low or mid-low) of the low-range equalizer
Selects the cutoff frequency
(high or mid-high) of the highrange equalizer
Pre LEQ Gain
[dB]
Pre HEQ Gain
[dB]
–15.0…+15.0
Sets the gain of the Low EQ
–15.0…+15.0
Sets the gain of the High EQ
Sets the output level of the compressor
Selects the modulation source for the compressor output level
Sets the modulation amount for the compressor output level h
Wet/Dry
Src
Amt
Dry, 1 : 99…
99 : 1, Wet
Off…Tempo
–100…+100
Sets the balance between the effect and the dry input
Selects a modulation source for
Wet/Dry
Sets the modulation amount for
Wet/Dry
a: Envelope Select
This parameter selects whether the left and right channels are linked to control both signals simultaneously, or whether each channel is controlled independently.
b: Sensitivity g: Output Level (Level)
The
Sensitivity
parameter sets the sensitivity of the compressor. If this parameter is set to a higher value, lower level sounds will be boosted. With a higher Sensitivity, the overall volume level is higher. To adjust the final volume level, use the
Output Level
parameter.
Compressor — Sensitivity
Level
Wet
Sensitivity=100
Sensitivity=40
Dry
Time
c: Attack
This parameter controls the attack level.
Compressor — Attack
Level
Attack=80
Attack=20
Wet
Dry
Time
002: Red Comp
When playing chords on an electric piano or similar instrument, it’s helpful to use a compressor to keep each note smooth and well ‐ balanced. In addition to a distinctive percussive accent, it will also provide a long sustain. This effect models a popular compressor with a clean sound that’s perfect for pop and funk music.
Wet: Mono In — Mono Out / Dry: Stereo In — Stereo Out
Left
Wet / Dry
+
Envelope — Control
Compressor
Output Level
Right
Wet / Dry
a Sensitivity b Attack
Level c Src
Amt
Wet/Dry d Src
Amt
1…100
1…100
0…100
Off…Tempo
–100…+100
Dry, 1 : 99…
99 : 1, Wet
Off…Tempo
–100…+100
Sets the sensitivity
Sets the attack level
p.251
p.251
Sets the output level of the compressor
p.251
Selects the modulation source for Level
Sets the modulation amount for
Level
Sets the balance between the effect and the dry input
Selects the modulation source for Wet/Dry
Sets the modulation amount for
Wet/Dry
251
003: Stereo Limiter
The Limiter regulates the input signal level. It is similar to the Compressor, except that the Limiter compresses only signals that exceed the specified level to lower unnecessary peak signals. The Limiter applies a peaking ‐ type EQ to the trigger signal (which controls the degree of the Limiter effect), allowing you to set any band width to be covered.
This effect is a stereo limiter. You can link left and right channels, or use each channel individually.
Stereo In — Stereo Out
Left
Side PEQ
+
Envelope Select
Envelope Source
Envelope — Control
Envelope — Control
Gain Adjust
Limiter
Trigger Monitor
Wet / Dry
Limiter
Gain Adjust
Right
Wet / Dry
FX Control BUS 1
FX Control BUS 2
a b c
Envelope
Source
FX Ctrl Trim
Envelope
Select
Input,
FX Control 1,
FX Control 2
0…100
L/R Mix,
L Only, R
Only, L/R
Individually
Selects the trigger source to use: the input signal, FX Control Bus
1, or FX Control Bus 2
p.252
Sets the trigger input level from
FX Control Bus 1/2
Selects from linking both channels, controlling only from left channel, only from the right channel, or controlling each channel individually
p.252
Ratio
1.0 : 1…
50.0 : 1,
Inf : 1
Sets the signal compression ratio
p.252
d e
Threshold
[dB]
Attack
Release
Gain Adjust
[dB]
–40…0
1…100
1…100
–Inf,
–38…+24
Sets the level above which the compressor is applied
p.252
Sets the attack time
Sets the release time
p.252
p.252
Sets the output gain
p.252
f g h i
Src
Amt
Side PEQ
Insert
Trigger
Monitor
Side PEQ
Cutoff [Hz]
Q
Gain [dB]
Wet/Dry
Src
Amt
Off…Tempo
–63…+63
Off, On
Off, On
20…12.00k
0.5…10.0
–18.0…+18.0
Dry, 1 : 99…
99 : 1, Wet
Off…Tempo
–100…+100
Selects the modulation source for the output gain
Sets the modulation amount of the output gain
Toggles between on/off of the trigger signal’s EQ
p.252
Switches between effect output monitor and trigger signal monitor
p.252
Sets the EQ center frequency for the trigger signal
p.252
Sets the EQ bandwidth for the trigger signal
p.252
Sets the EQ gain for the trigger signal
p.252
Sets the balance between the effect and the dry input
Selects a modulation source for
Wet/Dry
Sets the modulation amount for
Wet/Dry
a: Envelope Source
By selecting FX Control 1 or FX Control 2 you can use the signal of FX Control Bus 1 or 2 as the trigger signal.
For instance, you might use a different, unprocessed sound as the trigger, or apply a limiter triggered by a different timbre (Combination) or track (Sequence). For more
information, please see “FX Control Buses” on page 238.
252 b: Envelope Select
When L/R Mix is selected for this parameter, the left and right channels are linked to control the Limiter using the mixed signal. If L Only (or R Only) is selected, the left and right channels are linked, and the Limiter is controlled via only the left (or right) channel.
With L/R individually, the left and right channels control the
Limiter individually.
c: Ratio d: Threshold [dB] f: Gain Adjust [dB]
This parameter sets the signal compression
Ratio
.
Compression is applied only when the signal level exceeds the
Threshold
value.
Adjust the output level using the
Gain Adjust
parameter, since compression causes the entire level to be reduced.
Limiter — Threshold / Ratio
Ratio=1.0 : 1
Output Level
Threshold
Ratio=2.0 : 1
Ratio=4.0 : 1
Ration=Inf : 1
Louder
Input Level
Level
Dry
Ratio=1.0 : 1
Ratio=2.0 : 1
Ratio=4.0 : 1
Threshold
Ratio=Inf : 1
Time
e: Attack e: Release
These parameters set the attack time and release time. A higher attack time will cause the compression to be applied more slowly.
Limiter — Attack / Release
Threshold
Dry
Wet
Ratio=Inf : 1
Attack=1
Release=1
Wet
Ratio=Inf : 1
Attack=100
Release=100
Release
Attack
g: Trigger Monitor
Setting this parameter On will cause the trigger signal to be output, instead of the effect sound. Use this parameter to check the trigger signal with EQ applied. Usually, set this to
Off.
g: Side PEQ Insert h: Side PEQ Cutoff [Hz] h: Q h: Gain [dB]
These parameters are used to set the EQ applied to the trigger signal.
The Limiter determines whether the compression is applied or not, based on the post ‐ EQ trigger signal. Setting the
Dynamics (Dynamic) 004: Multiband Limiter
equalizer allows you to set the Limiter to respond to any frequency band.
004: Multiband Limiter
This effect applies the Limiter to the low range, mid range, and high range of the input signal. You can control dynamics for each range to adjust the sound pressure of the low range, mid range, and high range in a different way from the EQ.
Wet: Mono In — Mono Out / Dry: Stereo In — Stereo Out
Left
Right
+
Band-Pass Filters
Low
Mid
Limiter
Envelope — Control
Low Offset
Limiter
High
Envelope — Control
Mid Offset
Limiter
Envelope — Control
High Offset
Gain Adjust
Wet / Dry
Wet / Dry
a Ratio b
Threshold
[dB] c Attack d Release e
Low Offset
[dB] f g
Mid Offset
[dB]
High Offset
[dB]
Gain Adjust
[dB] h Src i
Amt
Wet/Dry
Src
Amt
1.0 : 1…50.0 : 1,
Inf : 1
–40…0
1…100
1…100
–40…0
–40…0
–40…0
Sets the signal compression ratio
p.252
Sets the level above which the compressor is applied
p.252
Sets the attack time
Sets the release time
p.252
p.252
Gain of the low-range trigger signal
p.253
Gain of the mid-range trigger signal
p.253
Gain of the high-range trigger signal
p.253
–Inf,
–38…+24
Sets the output gain
p.252
Off…Tempo
–63…+63
Dry, 1 : 99…
99 : 1, Wet
Off…Tempo
–100…+100
Selects the modulation source for the output gain
Sets the modulation amount of the output gain
Sets the balance between the effect and the dry input
Selects a modulation source for
Wet/Dry
Sets the modulation amount for
Wet/Dry
e: Low Offset [dB] f: Mid Offset [dB] g: High Offset [dB]
These parameters set the gain of the trigger signal.
For example, if you do not want to apply compression to the high range, reduce the
High Offset
value down below the
Threshold
level. In this way, the high range limiter will not respond, and compression will not be applied.
005: St.MasteringLimtr (Stereo
Mastering Limiter)
This is a stereo limiter that is optimized for mastering songs.
Stereo In — Stereo Out
Left
Wet / Dry
Out Ceiling
Limiter
+
Envelope — Control
Limiter
Out Ceiling
Right
Wet / Dry
a b c
Threshold
[dB]
Out Ceiling
[dB]
Release
[msec]
Wet/Dry d
Src
Amt
–30.0…0.0
–30.0…0.0
Sets the level above which the compressor is applied
Sets the output gain
p.252
0.50…1000.0
Sets the release time
Dry, 1 : 99…
99 : 1, Wet
Off…Tempo
–100…+100
p.252
Sets the balance between the effect and the dry input
Selects a modulation source for
Wet/Dry
Sets the modulation amount for
Wet/Dry
006: Stereo Gate
This effect mutes the input signal when it falls below a specified level. You can also invert the on/off status of the gate, or use note ‐ on/off messages to turn the gate on/off directly.
Stereo In — Stereo Out
Left
Envelope Source
Side PEQ
+
D -mod
Envelope Select
Delay
Envelope — Control
Envelope — Control
Delay
Right
FX Control BUS 1
FX Control BUS 2
Gate
Gain Adjust
Trigger Monitor
Wet / Dry
Gate
Gain Adjust
Wet / Dry
a b c
Envelope
Source
Src
Threshold d e f
Polarity
Attack
Release
Delay Time
[msec]
Side PEQ
Insert
Trigger
Monitor
D-mod,
Input,
FX Control 1,
FX Control 2
Fx Ctrl Trim 0…100
Envelope
Select
L/R Mix,
L Only,
R Only
Off…Tempo
0…100
+, –
1…100
1…100
0…100
Off, On
Off, On
Selects the source to control the gate: D-mod control, or use the input signal or FX Control Bus 1 or 2 as a trigger
p.252
Sets the trigger input level from
FX Control Bus 1/2
Selects the control signal: left and right linked, left only, or right only
p.252
Selects the source that will control the gate when Envelope
Src = D-mod
Sets the level at which gating is applied
p.254
Switches the polarity of gating
p.254
Sets the attack time
Sets the release time
p.254
p.254
Sets the delay time for the gate input
p.254
Switches the trigger signal equalizer on/off
p.252
Switches between monitoring the effect output and the trigger signal
p.252
253
254
Side PEQ
Cutoff [Hz] g
Q
Gain [dB]
Wet/Dry h Src
Amt
20…12.00k
0.5…10.0
–18.0…+18.0
Dry, 1 : 99…
99 : 1, Wet
Off…Tempo
–100…+100
Sets the center frequency of the equalizer for the trigger signal
p.252
Sets the bandwidth of the equalizer for the trigger signal
p.252
Sets the gain of the equalizer for the trigger signal
p.252
Sets the balance between the effect and the dry input
Selects a modulation source for
Wet/Dry
Sets the modulation amount for
Wet/Dry
c: Threshold d: Attack d: Release
Threshold
specifies the level at which gating occurs when
Envelope Select
is set to L/R Mix, L Only, or R Only.
Attack
and
Release
specify the attack time and release time of the gate.
Gate — Threshold
Output Level
Threshold
Louder
Input Level
Gate — Attack / Release
Threshold
Dry
Wet
Attack=1
Release=1
Wet
Attack=100
Release=100
Attack Release
c: Polarity
This inverts the polarity of the gate on/off operation. With the “–” setting, the gate will close when the input signal exceeds the specified level. The direction in which the modulation source opens or closes the gate will also be reversed.
e: Delay Time [msec]
This sets the delay time for the input to the gate. When using shorter Attack Time settings, you can lengthen the Delay
Time so that the sound is input after the gate opens.
EQ and Filters (EQ/Filter) 007: St.Parametric4EQ (Stereo Parametric 4-Band EQ)
EQ and Filters (EQ/Filter)
007: St.Parametric4EQ (Stereo
Parametric 4-Band EQ)
This is a stereo 4 ‐ band parametric equalizer. You can select peaking type or shelving type for Band 1 and 4. The gain of
Band 2 can be controlled by dynamic modulation.
Stereo In — Stereo Out
Left
Trim
Band1 Band2 Band3 Band4
PEQ PEQ PEQ PEQ
LEQ HEQ
Wet / Dry
Trim
LEQ
PEQ PEQ PEQ
HEQ
PEQ
Right
D -mod
Wet / Dry
a b i c d e f g h
Trim
Band1 Type
Band4 Type
0…100
Peaking,
Shelving-Low
Peaking,
Shelving-
High
Sets the input level
Selects the type of Band 1
Selects the type of Band 4
p.255
p.255
Band2
Dynamic
Gain Src
Off…Tempo
Selects the modulation source of the Band 2 gain
p.255
Amt [dB]
Band1 Cutoff
[Hz]
Q
Gain [dB]
Band2 Cutoff
[Hz]
Q
Gain [dB]
Band3 Cutoff
[Hz]
Q
Gain [dB]
Band4 Cutoff
[Hz]
Q
Gain [dB]
Wet/Dry
Src
Amt
–18.0…+18.0
20…1.00k
Sets the modulation amount of
Band 2 gain
p.255
Sets the center frequency of
Band 1
0.5…10.0
Sets the bandwidth of Band 1
p.255
–18.0…+18.0
Sets the gain of Band 1
50…10.00k
0.5…10.0
Sets the center frequency of
Band 2
Sets the bandwidth of Band 2
p.255
–18.0…+18.0
Sets the gain of Band 2
300…10.00k
Sets the center frequency of
Band 3
0.5…10.0
Sets the bandwidth of Band 3
p.255
–18.0…+18.0
Sets the gain of Band 3
500…20.00k
Sets the center frequency of
Band 4
0.5…10.0
Sets the bandwidth of Band 4
p.255
–18.0…+18.0
Sets the gain of Band 4
Dry, 1 : 99…
99 : 1, Wet
Sets the balance between the effect and the dry input
Off…Tempo
–100…+100
Selects a modulation source for
Wet/Dry
Sets the modulation amount for
Wet/Dry
b: Band1 Type c: Band4 Type
Selects a filter type for Band 1 and 4.
Parametric 4EQ — Band1, Band4 Type
+Gain
3dB
Band4 Type=Shelving High
Band4 Type=Peaking
0dB
–Gain
Band1 Cutoff
Band1 Type=Shelving Low
Band1 Type=Peaking
3dB
Band4 Cutoff
Parametric 4EQ — Band2 Gain Mod
D
-mod
+15dB
+6dB
0dB
Band2 Cutoff
Band2 Cutoff
+6dB
0dB
–9dB
D
-mod
Band2 Gain[dB]= +6.0
Band2 Gain Mod Amount[dB]= –15.0
Band2 Gain[dB]= +6.0
Band2 Gain Mod Amount[dB]= +9.0
e, f, g, h: Q
These parameters set the bandwidth of each equalizer. The higher the value, the narrower the band becomes.
d: Band2 Dynamic Gain Src d: Amt [dB]
You can control the gain of Band 2 using the modulation source.
008: St. Graphic 7EQ (Stereo
Graphic 7-Band EQ)
This is a stereo 7 ‐ band graphic equalizer. The bar graph of the gain setting for each band gives you a clear, visual idea of frequency responses. You can select a center frequency setting for each band from twelve types, according to the sound.
Stereo In — Stereo Out
Left
Wet / Dry
Trim
Band1 Band2 Band3 Band4 Band5 Band6 Band7
Trim
Band1 Band2 Band3 Band4 Band5 Band6 Band7
Right
Wet / Dry
a Type b
Trim c
Band1 [dB] d
Band2 [dB] e Band3 [dB] f Band4 [dB] g Band5 [dB] h Band6 [dB] i Band7 [dB]
Wet/Dry j Src
Amt
1:Wide 1,
2:Wide 2,
3:Wide 3,
4:Half Wide 1,
5:Half Wide 2,
6:Half Wide 3,
7:Low,
8:Wide Low,
9:Mid,
10:Wide Mid,
11:High,
12:Wide High
Selects a combination of center
frequencies for each band p.255
0…100
Sets the input level
–18.0…+18.0
Sets the gain of Band 1
–18.0…+18.0
Sets the gain of Band 2
–18.0…+18.0
Sets the gain of Band 3
–18.0…+18.0
Sets the gain of Band 4
–18.0…+18.0
Sets the gain of Band 5
–18.0…+18.0
Sets the gain of Band 6
–18.0…+18.0
Sets the gain of Band 7
Dry, 1 : 99…
99 : 1, Wet
Off…Tempo
–100…+100
Sets the balance between the effect and the dry input
Selects a modulation source for
Wet/Dry
Sets the modulation amount for
Wet/Dry
a: Type
This parameter selects a combination of center frequencies for each band. The center frequency of each band is shown in the right of the screen.
255
256
You can configure a 21 ‐ Band Graphic EQ ranging from 80
Hz to 18 kHz if you route three Graphic 7 ‐ Band EQ effects in series, with a setting of 7:Low, 9:Mid, and 11:High for each
EQ.
c: Enhancer Delay L [msec] d: Enhancer Delay R [msec]
These parameters set the delay time for the Enhancer left and right channel. Specifying a slightly different delay time for the left and right channel will add a stereo image, depth, and width to the sound.
009: St.Exciter/Enhncr (Stereo
Exciter/Enhancer)
This effect is a combination of the Exciter, which adds a punch to the sound and the Enhancer, which adds spread and presence.
Stereo In — Stereo Out
Left
LEQ HEQ
EQ Trim
Exciter
Wet / Dry
EQ Trim
Exciter
Delay
Depth
Delay
Enhancer
Right
D -mod
Wet / Dry
a b
Exciter Blend
Src
Amt
Emphasis
Frequency
Src
Amt
–100…+100
Off…Tempo
–100…+100
0…70
Off…Tempo
–70…+70
Sets the intensity (depth) of the
Exciter effect
p.256
Selects the modulation source of the Exciter intensity
Sets the modulation amount of the Exciter intensity
Sets the frequency to be emphasized
p.256
Selects the modulation source of the frequency to be emphasized
Sets the amount of modulation of the frequency to be emphasized c d
Enhancer
Delay L
[msec]
Enhancer
Delay R
[msec]
0.0…50.0
0.0…50.0
Sets the delay time for the
Enhancer left channel
Sets the delay time for the
Enhancer right channel
p.256
p.256
e
Enhancer
Depth
Src
Amt
0…100
Off…Tempo
–100…+100
Sets the determines to what degree the Enhancer effect is applied
Selects the modulation source of the Enhancer width
Sets the modulation amount of the Enhancer width
Sets the 2-band EQ input level f EQ Trim g h i
0…100
Pre LEQ Fc
Pre HEQ Fc
Low,
Mid-Low
High,
Mid-High
Selects the cutoff frequency (low or mid-low) of the low-range equalizer
Selects the cutoff frequency
(high or mid-high) of the highrange equalizer
Pre LEQ Gain
[dB]
Wet/Dry
–15.0…+15.0
Sets the gain of the Low EQ
Pre HEQ Gain
[dB]
–15.0…+15.0
Sets the gain of the High EQ
Dry, 1 : 99…
99 : 1, Wet
Src
Amt
Off…Tempo
–100…+100
Sets the balance between the effect and the dry input
Selects a modulation source for
Wet/Dry
Sets the modulation amount for
Wet/Dry
a: Exciter Blend
This parameter sets the depth (intensity) of the Exciter effect.
Positive values give a frequency pattern (to be emphasized) different from negative values.
b: Emphasis Frequency
This parameter sets the frequency to be emphasized. Higher values will emphasize lower frequencies.
010: Stereo Isolator
This is a stereo effect that separates the input signal into low, mid, and high ‐ frequency bands, and controls the volume of each band independently. For example you can separately boost or cut the kick, snare, and hi ‐ hat sounds from a drum signal in realtime.
Stereo In — Stereo Out
Left
Trim
Isolator
Trim
Low
Mid
High
Low
Mid
High
Wet / Dry
Right
D -mod
D -mod
D -mod
Wet / Dry
a Trim 0…100
b Low/Mid [Hz] 100…500
c d e f g
Mid/High
[Hz]
2000…6000
Low Gain [dB]
–Inf,
–59…+12
Src
Amt
Off…Tempo
–72…+72
Mid Gain [dB]
–Inf,
–59…+12
Src
Amt
High Gain
[dB]
Src
Amt
Wet/Dry
Src
Amt
Off…Tempo
–72…+72
–Inf,
–59…+12
Off…Tempo
–72…+72
Dry, 1 : 99…
99 : 1, Wet
Off…Tempo
–100…+100
Sets the input level
Sets the frequency at which the low and mid bands are divided
Sets the frequency at which the mid and high bands are divided
Sets the low-frequency gain
Selects the source that will modulate low-frequency gain
Sets the amount by which the low-frequency gain will be modulated
Sets the mid-frequency gain
Selects the modulation source for mid-frequency gain
Sets the amount by which the mid-frequency gain will be modulated
Sets the high-frequency gain
Selects the modulation source for high-frequency gain
Sets the amount by which the high-frequency gain will be modulated
Sets the balance between the effect and the dry input
Selects a modulation source for
Wet/Dry
Sets the modulation amount for
Wet/Dry
EQ and Filters (EQ/Filter) 011: St. Wah/Auto Wah (Stereo Wah/Auto Wah)
011: St. Wah/Auto Wah (Stereo
Wah/Auto Wah)
This stereo wah effect allows you to create sounds from vintage wah pedal simulation to auto ‐ wah simulation, and much broader range settings.
Stereo In — Stereo Out
Left
+
Envelope Sens
Envelope Shape
Response
D -mod
LFO
Sweep Mode
Auto
D-mod
LFO
Wah
Wah
Right
Wet / Dry
Wet / Dry
a b e
Frequency
Bottom
Frequency
Top
0…100
0…100
Sweep Mode
Auto,
D-mod,
LFO
Src
Response c
Envelope
Sens
Envelope
Shape
LFO
Frequency
[Hz] d
Src
Amt
MIDI Sync
BPM
Base Note
Off…Tempo
0…100
0…100
–100…+100
0.02…20.00
Off…Tempo
–20.00…
+20.00
Off, On
MIDI,
40.00…
300.00
…
Times
LFO Type f g
Common
LFO Offset
[deg]
Resonance
Low Pass
Filter x1…x32
Individual,
Common1,
Common2
–180…+180
0…100
Off, On
Output Level 0…100
h i
Src
Amt
Wet/Dry
Src
Amt
Off…Tempo
–100…+100
Dry, 1 : 99…
99 : 1, Wet
Off…Tempo
–100…+100
Sets the lower limit of the wah center frequency
p.257
Sets the upper limit of the wah center frequency
p.257
Selects the control from autowah, modulation source, and
LFO
p.257
Selects the modulation source for the wah when Sweep
Mode=D-mod
Sets the response speed when
Sweep Mode = Auto or D-mod
Sets the sensitivity of auto-wah
p.257
Sets the sweep curve of autowah
p.257
Sets the speed of the LFO p.257
Selects a modulation source for
LFO speed
Sets the modulation amount of
LFO speed
When this is on, the LFO speed is set by BPM, Base Note, and
Times, instead of Frequency
p.257
MIDI syncs to the system tempo;
40–300 sets the tempo manually for this individual effect
p.257
Selects the type of notes that specify the LFO speed
p.257
Sets the number of notes that specify the LFO speed
p.257
Selects either (individual) LFO,
Common FX LFO1, or Common
LFO2
p.257
Sets the phase offset when Type
= Common 1 or Common 2
p.257
Sets the resonance amount
Switches the wah low pass filter on and off
Sets the output level of the effect sound
Selects the modulation source that will control the effect output level
Sets the modulation amount of the effect output level
Sets the balance between the effect and the dry input
Selects a modulation source for
Wet/Dry
Sets the modulation amount for
Wet/Dry
a: Frequency Bottom a: Frequency Top
The sweep width and direction of the wah filter are determined by the
Frequency Top
and
Frequency Bottom
settings.
Frequency
Frequency
Top=75
Bottom=25
Woo
Zero
Higher
Wah
Bottom=60
Wah
Top=30
Max
D -mod
Zero
Higher
Sweep Mode=D-mod
Woo
Max
D -mod
Sweep Mode=Auto
Frequency
Top=75
Wah
Frequency
Bottom=75
Wah Wah
Envelope
Bottom=25
Woo Woo
Top=25
Envelope Time
Woo
Envelope
Time
b: Sweep Mode
This parameter changes the wah control mode. Setting
Sweep Mode
to Auto will select an auto ‐ wah that sweeps according to envelope changes in the input signal level.
Auto ‐ wah is frequently used for funk guitar parts and clav sounds.
When
Sweep Mode
is set to D ‐ mod, you can control the filter directly via the modulation source in the same way as a wah pedal.
When
Sweep Mode
is set to LFO, the effect uses LFO to sweep in cycle.
c: Envelope Sens
This parameter sets the sensitivity of auto ‐ wah. Increase the value if the input signal is too low to sweep. Reduce the value if the input signal is so high that the filter is stopped temporarily.
c: Envelope Shape
This parameter determines the sweep curve for auto ‐ wah.
Envelope Shape
Level
Envelope value = 0…+100 value = 0…–100
Time
d: LFO Frequency [Hz] e: MIDI Sync
When
MIDI Sync
=Off, the LFO speed uses the LFO
Frequency parameter setting. When
MIDI Sync
=On, the
LFO speed follows the
BPM
,
Base Note
, and
Times
settings.
e: BPM e: Base Note e: Times
One cycle of LFO sweep is obtained by multiplying the length of a note ( … ) (selected for
Base Note
, in relation to the tempo specified in
BPM
, or the MIDI Clock tempo if
BPM
is set to MIDI) by the number specified in the Times parameter.
f: LFO Type f: Common LFO Offset [deg]
If
Type
is set to Common 1 or Common 2, modulation will be applied using the Common FX LFO rather than the LFO within the effect itself. Since this lets you use the same LFO for multiple effects, it’s useful when you want to apply various types of modulation in synchronization.
257
258
Common LFO Offset
specifies the phase difference relative to the Common FX LFO. For more information, please see
“Common FX LFOs” on page 237.
012: St. Vintage Wah (Stereo
Vintage/Custom Wah)
This effect simulates the tonal character of a vintage wah pedal. You can customize the tone and range settings.
Stereo In — Stereo Out
Left
Wet / Dry
+
Envelope Sens
Response
D -mod
LFO
Sweep Mode
Auto
D-mod
LFO
Shape / Invert
Wah
Wah
Mode
Preset Setting
Custom Parameters
Right
Wet / Dry
b f
Mode a
Shape
Invert
Frequency
Bottom
Frequency
Top
Resonance
Bottom
Preset,
Custom
–100…+100
Off, On
0…100
0…100
0…100
c
Resonance
Top
0…100
Sweep Mode
Auto,
D-mod,
LFO d e
Src
Manual
Envelope
Sens
Response
LFO
Frequency
[Hz]
Src
Off…Tempo
0…100
0…100
0…100
0.02…20.00
Selects either preset or custom settings
p.258
Sets the curve of the sweep
p.258
Inverts the polarity of the sweep
Sets the lower limit of the wah center frequency when Mode =
Custom
p.258
Sets the upper limit of the wah center frequency when Mode =
Custom
p.258
Sets the lower limit of resonance amount when Mode=Custom
p.258
Sets the upper limit of resonance amount when Mode=Custom
p.258
Selects the control from autowah, modulation source, and
LFO
p.257
Selects the modulation source for the wah when Sweep
Mode=D-mod
Sets the center frequency when
Sweep Mode=D-mod and
Source=Off
Sets the auto-wah sensitivity
Sets the speed of response when
Sweep Mode=Auto or D-mod
Sets the speed of the LFO p.257
g h
Amt
MIDI Sync
BPM
Base Note
Times
LFO Type
Common
LFO Offset
[deg]
Off…Tempo
–20.00…
+20.00
Off, On
MIDI,
40.00…
300.00
…
x1…x32
Individual,
Common1,
Common2
–180…+180
Selects a modulation source for
LFO speed
Sets the modulation amount of
LFO speed
When this is on, the LFO speed is set by BPM, Base Note, and
Times, instead of Frequency
p.257
MIDI syncs to the system tempo;
40–300 sets the tempo manually for this individual effect
p.257
Selects the type of notes that specify the LFO speed
p.257
Sets the number of notes that specify the LFO speed
p.257
Selects either (individual) LFO,
Common FX LFO1, or Common
LFO2
p.257
Sets the phase offset when Type
= Common 1 or Common 2
p.257
j i
Output Level 0…100
Src
Amt
Wet/Dry
Src
Amt
Off…Tempo
–100…+100
Dry, 1 : 99…
99 : 1, Wet
Off…Tempo
–100…+100
Sets the output level of the effect sound
Selects the modulation source that will control the effect output level
Sets the modulation amount of the effect output level
Sets the balance between the effect and the dry input
Selects a modulation source for
Wet/Dry
Sets the modulation amount for
Wet/Dry
a: Shape
This parameter specifies the sweep curve of the wah. It applies to all control via auto ‐ wah, modulation source, and
LFO, and lets you adjust subtle nuances of the wah effect.
a: Mode b: Frequency Bottom b: Frequency Top c: Resonance Bottom c: Resonance Top
If Mode=Preset, this simulates a vintage wah pedal. In this case, internally fixed values are used for Frequency Bottom/
Top and Resonance Bottom/Top, and these settings will be ignored. The settings for Frequency Bottom/Top and
Resonance Bottom/Top are valid if Mode=Custom.
013: VOX Wah
This models the legendary VOX V847 and V848 Clyde
McCoy wah pedals. Its distinctive tone, sounding as though it were wrung from the throat, made this pedal a favorite of many pro musicians.
Wet: Mono In — Mono Out / Dry: Stereo In — Stereo Out
Left
Wet / Dry
Right
+
Auto Sensitivity
Envelope
D -mod
Auto
Attack / Polarity
Pedal(D-mod)
Mode
Wah
Wet / Dry
f j a b c d Mode e g
Type
Open
Close
Pedal Source
V847, V848
1…100
1…100
Pedal, Auto
0…100
Pedal Manual 0…100
Auto Sensitivity
Amt
0…100
i h Auto Polarity Up, Down
Auto Attack
Wet/Dry
0…10
Dry, 1 : 99…
99 : 1, Wet
Src Off…Tempo
–100…+100
Selects the type of wah
Sets the lower limit of the wah center frequency
p.257
Sets the upper limit of the wah center frequency
p.257
Switches between pedal wah and auto-wah
Specifies the modulation source that will use the pedal wah
Sets the center frequency for the pedal wah when the modulation source is not moved
Sets the auto-wah sensitivity
Specifies whether the auto-wah sweep is normal or inverted
Sets the auto-wah’s attack speed
Sets the balance between the effect and the dry input
Selects a modulation source for
Wet/Dry
Sets the modulation amount for
Wet/Dry
EQ and Filters (EQ/Filter) 014: St. Random Filter (Stereo Random Filter)
014: St. Random Filter (Stereo
Random Filter)
This stereo band pass filter uses a step ‐ shape waveform and random LFO for modulation. You can create a special effect from filter oscillation.
Stereo In — Stereo Out
Left
Wet / Dry
Filter
Filter
Right
Wet / Dry
LFO Phase
LFO: Step-Tri/Random
LFO
Waveform a
LFO Phase
[degree]
LFO
Frequency
[Hz] b
Src c
LFO Step
Frequency
[Hz] d e f g
Src
Amt h
Amt
Amt
MIDI Sync
BPM
Base Note
Times
Step Base
Note
Times
LFO Type
(Step)
Common
LFO Offset
[deg]
Manual
Depth
Src
Amt –100…+100 j i Resonance 0…100
Wet/Dry
–Wet…
–1 : 99, Dry,
1 : 99…Wet
Src Off…Tempo
Amt
Step-Tri,
Random
–180…+180
0.02…20.00
Off…Tempo
–20.00…
+20.00
0.05…50.00
–50.00…
+50.00
Off, On
MIDI,
40.00…
300.00
…
x1…x32
…
x1…x32
Individual,
Common1,
Common2
–180…+180
0…100
Off…Tempo
–100…+100
0…100
Off…Tempo
–100…+100
Selects the LFO Waveform p.259
Sets the LFO phase difference between the left and right
p.259
Sets the speed of the LFO p.259
Selects the modulation source used for both LFO speed and step speed
Sets the modulation amount of
LFO speed
Sets the LFO step speed (speed that changes in steps
p.259
Sets the modulation amount of
LFO step speed
When this is on, the LFO speed is set by BPM, Base Note, and
Times, instead of Frequency
p.257
MIDI syncs to the system tempo;
40–300 sets the tempo manually for this individual effect
p.259
Selects the type of notes that specify the LFO speed
p.259
Sets the number of notes that specify the LFO speed
p.259
Selects the type of notes to specify the LFO step speed
p.259
Sets the number of notes to specify the LFO step speed
p.259
Selects either (individual) LFO,
Common FX LFO1, or Common
LFO2 to control the LFO step speed
p.257
Sets the phase offset when Type
= Common 1 or Common 2
p.257
Sets the filter center frequency
Selects the modulation source for the filter center frequency
Sets the modulation amount for the filter center frequency
Sets the modulation depth of filter center frequency
Selects the modulation source of filter modulation
Sets the modulation amount of filter modulation
Sets the resonance amount
Sets the balance between the effect and the dry input
p.259
Selects a modulation source for
Wet/Dry
Sets the modulation amount for
Wet/Dry
a: LFO Phase [degree]
Offsetting the left and right phases alters how modulation is applied to the left and right channels, creating a swelling affect.
LFO Phase
0 +90 +180 [degree]
–180 –90 0 [degree]
a: LFO Waveform b: LFO Frequency [Hz] c: LFO Step Frequency [Hz]
When
LFO Waveform
is set to Step ‐ Tri, LFO is a step ‐ shape, triangle waveform. The
LFO Frequency
parameter sets the original triangle waveform speed. Changing the
LFO Step
Frequency
parameter enables you to adjust the width of the steps.
When
LFO Waveform
is set to Random, the
LFO Step
Frequency
parameter uses a random LFO cycle.
Random Filter LFO
LFO Frequency
Step Frequency
Step-Tri
Step Frequency
Random
d: BPM e: Step Base Note e: Times
The width of an LFO step, or a cycle of random LFO, is obtained by multiplying the length of a note ( … ) (selected for
Step Base Note
, in relation to the tempo specified in
BPM
, or the MIDI Clock tempo if
BPM
is set to MIDI) by the number specified in the
Times
parameter.
i: Wet/Dry
The effect sound’s phase will be reversed when you set this parameter in the range of values from –Wet to –1:99.
259
260
015: Multi Mode Filter (Stereo
Multi Mode Filter)
This is a multi ‐ mode filter with four types; low pass, high pass, band pass, and band reject. You can use LFO or dynamic modulation to vary the cutoff frequency or resonance.
Stereo In — Stereo Out
Left
Multimode Filter Driver
Output
Wet / Dry
Trim
LPF
HPF
BPF
BRF
Trim
Filter Type
Multimode Filter Driver
Output
Right
Wet / Dry
LFO Phase
LFO Shape
LFO: Tri / Sine
b d f a c e g h i
Type
Trim
LPF, HPF, BPF,
BRF
0…100
Selects the type of filter
Cutoff 0…100
Sets the input level
Sets the cutoff frequency (center frequency)
Src
Amt
Resonance
Off…Tempo
–100…+100
0…100
Selects the modulation source of the cutoff
Sets the modulation amount of the cutoff
Sets the resonance amount
Src
Amt
Off…Tempo
–100…+100
Selects the source that will modulate the amount of resonance
Sets the amount by which the resonance will be modulated
LFO
Waveform
Triangle, Sine Selects the LFO Waveform
Phase [deg]
Depth
–180…+180
0…100
Sets the LFO phase difference between the left and right
p.259
Sets the depth to which the LFO will modulate the cutoff frequency
LFO
Frequency
[Hz]
0.02…20.00
Sets the speed of the LFO p.259
Src
Amt
MIDI Sync
BPM
Base Note
Times
LFO Type
Common
LFO Offset
[deg]
Drive SW
Off…Tempo
–20.00…
+20.00
Off, On
MIDI,
40.00…
300.00
…
x1…x32
Individual,
Common1,
Common2
–180…+180
Off, On
Output Level 0…100
Drive Gain
Low Boost
0…100
0…100
Selects a modulation source for
LFO speed
Sets the modulation amount of
LFO speed
When this is on, the LFO speed is set by BPM, Base Note, and
Times, instead of Frequency
p.257
MIDI syncs to the system tempo;
40–300 sets the tempo manually for this individual effect
p.257
Selects the type of notes that specify the LFO speed
p.257
Sets the number of notes that specify the LFO speed
p.257
Selects either (individual) LFO,
Common FX LFO1, or Common
LFO2
p.257
Sets the phase offset when Type
= Common 1 or Common 2
p.257
Switches distortion on/off within the filter
Sets the output level
Sets the distortion amount
Sets the amount of low-range boost
Wet/Dry j
Src
Amt
Dry, 1 : 99…
99 : 1, Wet
Off…Tempo
–100…+100
Sets the balance between the effect and the dry input
Selects a modulation source for
Wet/Dry
Sets the modulation amount for
Wet/Dry
016: St. Sub Oscillator (Stereo
Sub Oscillator)
This effect adds very low frequencies to the input signal. It is very useful when simulating a roaring drum sound or emphasizing powerful low range. This effect is different from the equalizer in that you can add very low range harmonics. You can also adjust the oscillator frequency to match a particular note number, for use as an octaver.
Stereo In — Stereo Out
Left
Envelope Sens
D -mod
Note No.
Envelope Sens
Envelope Shape
Pre LPF
Fixed Frequency
Note Interval, Fine
Fixed
Sine Oscillator
OSC Mode
Pitch
Note (Key Follow)
Pre LPF
Envelope Shape
Right
Wet / Dry
Wet / Dry
a b
OSC Mode
Note Interval
Note Fine
Note (Key
Follow), Fixed
–48…0
–100…+100
Determines whether the oscillator frequency follows the note number or whether it is fixed
p.260
Sets the pitch difference from the note number when OSC
Mode=Note (Key Follow)
p.260
Fine adjustment of the oscillator frequency
p.260
Fixed
Frequency
[Hz]
10.0…80.0
Sets the oscillator frequency when OSC Mode=Fixed c d e f
Src
Amt
Envelope Pre
LPF
Envelope
Sens
Envelope
Shape
Wet/Dry
Src
Amt
Off…Tempo
–80…+80
1…100
0…100
–100…+100
Dry, 1 : 99…
99 : 1, Wet
Off…Tempo
–100…+100
Selects the modulation source for the oscillator frequency when
OSC Mode=Fixed
Sets the oscillator frequency modulation amount when OSC
Mode=Fixed
Sets the upper limit of the frequency range for which very low harmonics are added
p.260
Sets the sensitivity with which very low harmonics are added
Sets the oscillator’s volume envelope curve
Sets the balance between the effect and the dry input
Selects a modulation source for
Wet/Dry
Sets the modulation amount for
Wet/Dry
a: OSC Mode b: Note Interval b: Note Fine
The
OSC Mode
parameter selects the oscillator operation mode. When Note (Key Follow) is selected, the oscillator’s frequency is determined based on the note number, allowing you to use it as an octaver. The
Note Interval
parameter sets the pitch offset from the original note number by semitone steps. The
Note Fine
parameter allows you to fine ‐ tune in steps of cents.
d: Envelope Pre LPF
This parameter sets the upper limit of the frequency range to which very low harmonics are added. Adjust this parameter
EQ and Filters (EQ/Filter) 017: Talking Modulator
if you do not want to add lower harmonics to the higher range.
017: Talking Modulator
This effect adds an unusual character, like a human voice, to the input signal. Modulating the tone via dynamic modulation, you can create an interesting effect that sounds as if the guitar or synthesizer is talking.
Wet: Mono In — Mono Out / Dry: Stereo In — Stereo Out
Left
Wet / Dry
+
Talking Modulator
A I U E O
Right
D -mod
LFO
Sweep Mode
D-mod
LFO
Voice Top: A
Voice Center: I
Voice Bottom: U
Wet / Dry
a b f c d e
Sweep Mode D-mod, LFO
Src
Voice Top
Voice Center
Voice Bottom A, I, U, E, O
Formant Shift –100…+100
Resonance
Off…Tempo
A, I, U, E, O
A, I, U, E, O
0…100
Switches between modulation source control and LFO control
Manual Voice
Control
Bottom,
1…49, Center,
51…99, Top
Voice pattern control
Selects the modulation source that controls the voice pattern
Selects a vowel sound at the top end of control
p.261
Selects a vowel sound in the center of control
p.261
Selects a vowel sound at the bottom end of control
p.261
Sets the frequency to which the effect is applied
p.261
Sets the Level of resonance of the voice pattern
p.261
LFO
Frequency
[Hz]
0.02…20.00
Sets the speed of the LFO p.257
g
Src Off…Tempo
h j i
Amt
MIDI Sync
BPM
Base Note
Times
LFO Type
Common
LFO Offset
[deg]
Wet/Dry
Src
Amt
–20.00…
+20.00
Off, On
MIDI,
40.00…
300.00
…
x1…x32
Individual,
Common1,
Common2
–180…+180
Dry, 1 : 99…
99 : 1, Wet
Off…Tempo
–100…+100
Selects a modulation source for
LFO speed
Sets the modulation amount of
LFO speed
When this is on, the LFO speed is set by BPM, Base Note, and
Times, instead of Frequency
p.257
MIDI syncs to the system tempo;
40–300 sets the tempo manually for this individual effect
p.257
Selects the type of notes that specify the LFO speed
p.257
Sets the number of notes that specify the LFO speed
p.257
Selects either (individual) LFO,
Common FX LFO1, or Common
LFO2
p.257
Sets the phase offset when Type
= Common 1 or Common 2
p.257
Sets the balance between the effect and the dry input
Selects a modulation source for
Wet/Dry
Sets the modulation amount for
Wet/Dry
c: Voice Top d: Voice Center e: Voice Bottom
These parameters assign vowels to the top, center, and bottom position of the controller.
E.g.: When “Voice Top”=A, “Voice Center”=I, and “Voice
Bottom”=U:
If
Sweep Mode
is set to D ‐ mod is selected as the modulation source, moving your finger from the right to left of will change the sound from “a” to “i,” then “u.”
If Sweep Mode is set to LFO, the sound will change cyclically from “a” to “i,” “u,” “i,” then “a.”
Voice Bottom
A
Voice Center
Talking Modulator Control
Voice Top
A
I
U
E
O
D -mod
JS X
JS +Y
JS –Y etc…
– Max
Zero
Zero
+ Max
+ Max
f: Formant Shift
This parameter adjusts the frequency level to which the effect is applied. If you wish to apply the effect to a higher ‐ range sound, set this parameter to a higher value; to apply the effect to a lower ‐ range sound, set this to a lower value.
f: Resonance
This parameter sets the intensity of resonance for the voice pattern. A larger value will add more character to the sound.
018: Stereo Decimator
This effect creates a rough sound like a cheap sampler by lowering the sampling frequency and data bit length. You can also simulate noise unique to a sampler (aliasing).
Stereo In — Stereo Out
Left
Pre LPF Resolution
Decimator
High Damp Output Level
Wet / Dry
D -mod
LFO
Sampling Frequency
Decimator
High Damp Output Level Pre LPF Resolution
Right
Wet / Dry
Pre LPF a
High Damp
[%]
Sampling
Frequency
[Hz] b
Src
Off, On
0…100
1.00k…
48.00k
Off…Tempo
–48.00k…
+48.00k
Amt
LFO
Frequency
[Hz] c
Src
0.02…20.00
Amt
Off…Tempo
–20.00…
+20.00
MIDI Sync Off, On d
BPM
Base Note
Times
MIDI,
40.00…
300.00
…
x1…x32
Selects whether the harmonic noise caused by a decrease in sampling frequency is generated or not
p.262
Sets the ratio of cut of the high range
Sets the sampling frequency
Selects the modulation source of the sampling frequency
Sets the modulation amount of the sampling frequency
Sets the speed of the LFO
Selects a modulation source for
LFO speed
Sets the modulation amount of
LFO speed
When this is on, the LFO speed is set by BPM, Base Note, and
Times, instead of Frequency
MIDI syncs to the system tempo;
40–300 sets the tempo manually for this individual effect
Selects the type of notes that specify the LFO speed
Sets the number of notes that specify the LFO speed
261
262
f e
LFO Type
Common
LFO Offset
[deg]
Depth
Src
Amt
Amt
Individual,
Common1,
Common2
–180…+180
0…100
Off…Tempo
–100…+100 g Resolution 4…24
Output Level 0…100
Off…Tempo
h
Src
Amt i
Wet/Dry
Src
–100…+100
Dry, 1 : 99…
99 : 1, Wet
Off…Tempo
–100…+100
Selects either (individual) LFO,
Common FX LFO1, or Common
LFO2
p.257
Sets the phase offset when Type
= Common 1 or Common 2
p.257
Sets the depth of the sampling frequency LFO modulation
Selects the LFO modulation source of the sampling frequency
Sets the LFO modulation amount of the sampling frequency
Sets the data bit length
Sets the output level
p.262
p.262
Selects the modulation source for the output level
Sets the modulation amount of the output level
Sets the balance between the effect and the dry input
Selects a modulation source for
Wet/Dry
Sets the modulation amount for
Wet/Dry
a: Pre LPF
If a sampler with a very low sampling frequency receives very high ‐ pitched sound that could not be heard during playback, it could generate pitch noise that is unrelated to the original sound. Set
Pre LPF
to On to prevent this noise from being generated.
If you set the
Sampling Frequency
to about 3 kHz and set
Pre LPF
to Off, you can create a sound like a ring modulator.
g: Resolution h: Output Level
If you set a smaller value for the
Resolution
parameter, the sound may be distorted. The volume level may also be changed. Use
Output Level
to adjust the level.
019: St. Analog Record (Stereo
Analog Record)
This effect simulates the noise caused by scratches and dust on analog records. It also reproduces some of the modulation caused by a warped turntable.
Stereo In — Stereo Out
Left
EQ Trim
Pre EQ
Analog Record
Simulation
Wet / Dry
EQ Trim
Pre EQ
Right
Wet / Dry
a Speed [RPM] 33 1/3, 45, 78 Sets the r.p.m. of a record b Flutter 0…100
Sets the modulation depth
p.262
c
Noise Density 0…100
Noise Tone 0…100
Noise Level 0…100
Sets the noise density
Sets the noise tone d
Src
Amt
Off…Tempo
–100…+100
Sets the noise level
Selects the modulation source for the noise level
Sets the modulation amount of the noise level e
Click Level
Src
Amt
0…100
Off…Tempo
–100…+100
Sets the click noise level
p.262
Selects the modulation source for the click noise level
Amt f EQ Trim
Pre EQ Cutoff
[Hz] g
Q
Gain [dB] h
Wet/Dry
Src
–100…+100
0…100
300…10.00k
Sets the EQ center frequency
0.5…10.0
–18.0…+18.0
Dry, 1 : 99…
99 : 1, Wet
Off…Tempo
Sets the modulation amount of the click noise level
Sets the EQ input level
Sets the EQ band width
Sets the EQ gain
Sets the balance between the effect and the dry input
Selects a modulation source for
Wet/Dry
Sets the modulation amount for
Wet/Dry
b: Flutter
This parameter enables you to set the depth of the modulation caused by a warped turntable.
e: Click Level
This parameter enables you to set the level of the click noise that occurs once every rotation of the turntable. This simulation reproduces record noise, and the noise generated after the music on a vinyl record finishes.
Overdrive, Amp models, and Mic models (OD Amp Mic) 020: OD/Hi.Gain Wah (Overdrive/Hi.Gain Wah)
Overdrive, Amp models, and Mic models (OD Amp Mic)
020: OD/Hi.Gain Wah
(Overdrive/Hi.Gain Wah)
This distortion effect utilizes an Overdrive mode and a Hi ‐
Gain mode. Controlling the wah effect, the 3 ‐ band EQ, and the amp simulation will allow you to create versatile distortion sounds. This effect is suitable for guitar and organ sounds.
Wet: Mono In — Mono Out / Dry: Stereo In — Stereo Out
Left
+
Pre Low-cut
Wah
Mode: Overdrive / Hi-Gain
Drive
3 Band PEQ
Driver Amp Simulation
Output Level
Direct Mix
Right
D -mod
Wet / Dry
Wet / Dry
a
Wah
Src
Sw
Off, On
Off…Tempo
Toggle,
Moment
Switches Wah on/off
p.263
Selects the modulation source that switches the Wah on and off
Selects the switching mode for the modulation source that switches the Wah on and off
p.263
b c d e f g h j i
Wah Sweep
Range
Wah Sweep
Src
Drive Mode
Drive
Pre Low-cut
Output Level 0…50
Src
Amt
Low Cutoff
[Hz]
Gain [dB]
Mid1Cutoff
[Hz]
Q
Gain [dB]
Mid2 Cutoff
[Hz]
Q
Gain [dB]
Direct Mix
Speaker
Simulation
Wet/Dry
Src
Amt
–10…+10
Off…Tempo
Overdrive, Hi-
Gain
1…100
0…10
Off…Tempo
–50…+50
20…1.00k
–18…+18
300…10.00k
0.5…10.0
–18…+18
500…20.00k
0.5…10.0
–18…+18
0…50
Off, On
Dry, 1 : 99…
99 : 1, Wet
Off…Tempo
–100…+100
Sets the range of Wah
p.263
Selects the modulation source that controls the Wah
p.263
Switches between overdrive and hi-gain distortion
Sets the degree of distortion
p.263
Sets the low range cut amount of the distortion input
p.263
Sets the output level
p.263
Selects the modulation source for the output level
Sets the modulation amount of the output level
Sets the center frequency for
Low EQ (shelving type)
Sets the gain of Low EQ
Sets the center frequency for
Mid/High EQ 1 (peaking type)
Sets the band width of Mid/High
EQ 1
p.255
Sets the gain of Mid/High EQ 1
Sets the center frequency for
Mid/High EQ 2 (peaking type)
Sets the band width of Mid/High
EQ 2
p.255
Sets the gain of Mid/High EQ 2
Sets the amount of the dry sound mixed to the distortion
Switches the speaker simulation on/off
Sets the balance between the effect and the dry input
Selects a modulation source for
Wet/Dry
Sets the modulation amount for
Wet/Dry
a: Wah
The Wah parameter switches the wah effect on/off.
a: Sw
This parameter sets how the wah effect is switched on and off via the modulation source.
When
Sw
= Moment, the wah effect is usually turned off. It is turned on only when you press the pedal or operate the joystick.
When a value for the modulation source is less than 64,
“off” speed is selected, and when the value is 64 or higher, “on” is selected.
When
Sw
= Toggle, the wah effect is switched between on and off each time you press the pedal or operate the joystick.
The switch will be turned on/off each time the value of the modulation source exceeds 64.
b: Wah Sweep Range b: Wah Sweep Src
This parameter sets the sweep range of the wah center frequency. A negative value will reverse the direction of sweep. The wah center frequency can be controlled by the modulation source specified in the
Wah Sweep Src
parameter.
d: Pre Low-cut
Cutting the signal in the low range before it is input to the
Distortion will create a sharp distortion.
d: Drive e: Output Level (Level)
The degree of distortion is determined by the level of input signal and the setting of
Drive
. Raising the
Drive
setting will cause the entire volume level to increase. Use the
Output Level
parameter to adjust the volume level. The
Output Level
parameter uses the signal level input to the 3 ‐
Band EQ. If clipping occurs at the 3 ‐ Band EQ, adjust the
Output Level
parameter.
263
264
021: St. Guitar Cabinet (Stereo
Guitar Cabinet)
This simulates the acoustical character of a guitar amp’s speaker cabinet.
Stereo In — Stereo Out
Left
Wet / Dry
a b
Right
Trim
Type c Air
Wet/Dry d Src
Amt
Cabinet Simulator
Trim
Trim
Cabinet Simulator
0…100
TWEED —
1×12
TWEED —
4×10
BLACK — 2×10
BLACK — 2×12
Sets the input level
Selects the type of the cabinet
Open-back cabinet with one 12″ speaker, typically used for blues
Open-back cabinet with four 10″ speakers
Open-back cabinet with two 10″ speakers
American open-back cabinet with two12″ speakers
VOX AC15 —
1×12
VOX AC30 —
2×12
Vox AC15 open-back cabinet with one 12″ “Blue” speaker
Vox AC30 open-back cabinet with two 12″ “Blue” speakers
VOX AD412 —
4×12
VOX AD412 closed-back cabinet with four 12″ speakers
UK H30 —
4×12
UK T75 — 4×12
Closed-back classic cabinet with four 30W 12″ speakers
Closed-back cabinet with four
75W 12″ speakers
US V30 — 4×12
Closed-back cabinet with four
30W 12″ speakers
0…100
Dry, 1 : 99…
99 : 1, Wet
Off…Tempo
–100…+100
Sets the mic position
Sets the balance between the effect and the dry input
Selects a modulation source for
Wet/Dry
Sets the modulation amount for
Wet/Dry
Wet / Dry
022: St. Bass Cabinet (Stereo
Bass Cabinet)
This simulates the acoustical character of a bass amp’s speaker cabinet.
Stereo In — Stereo Out
Left
Wet / Dry
Cabinet Simulator
Trim
Trim
Cabinet Simulator
Right
a c
Trim b Cabinet Type
Wet/Dry
Src
Amt
0…100
LA — 4×10
MODERN —
4×10
METAL — 4×10
CLASSIC —
8×10
UK — 4×12
STUDIO —
1×15
JAZZ — 1×15
VOX AC100 —
2×15
US — 2×15
UK — 4×15
Sets the input level
Selects the cabinet type
Four 10″ speakers / LA sound cabinet
Four 10″ aluminum-cone speakers / modern cabinet
Four 10″ aluminum-cone speakers / modern cabinet
Eight 10″ speakers / classic cabinet
Four 12″ speakers / UK-manufactured cabinet
One 15″ speaker / studio combo cabinet
One 15″ speaker / jazz combo cabinet
Two 15″ speakers / cabinet for
Vox AC100
Two 15″ speakers / US-manufactured cabinet
Four 15″ speakers / UK-manufactured cabinet
LA — 1×18
COMBI — 1×12
& 1×18
Dry, 1 : 99…
99 : 1, Wet
One 18″ speaker /
LA sound cabinet
One 12″ and one 18″ speaker combination cabinet
Off…Tempo
–100…+100
Sets the balance between the effect and the dry input
Selects a modulation source for
Wet/Dry
Sets the modulation amount for
Wet/Dry
Wet / Dry
Overdrive, Amp models, and Mic models (OD Amp Mic) 023: Bass Amp Model
023: Bass Amp Model
This simulates a bass amp.
Wet: Mono In — Mono Out / Dry: Stereo In — Stereo Out
Left
+
Bass Amp Model
Volume
Wet / Dry
Right
D -mod
a
Amplifier
Type
Volume b
Src
Amt c Bass
Middle d
Mid Range e Treble f Presence
Wet/Dry g Src
Amt
LA STUDIO
JAZZ COMBO
GOLD PANEL
SCOOPED
VALVE2
VALVE
CLASSIC
0…100
Off…Tempo
–100…+100
0…100
0…100
0…4
0…100
0…100
Dry, 1 : 99…
99 : 1, Wet
Off…Tempo
–100…+100
Selects the amplifier type
An amp that is typical of the LA sound.
A combo amp favored by jazz bassists.
An amp distinctive for its eyecatching gold panel and clean sound.
An amp typical of 80’s sounds.
A tube amp suitable for rock.
A tube amp with the ULTRA LO switch turned ON.
A tube amp whose basic character changes according to the setting of the value dial.
Sets the output level
Selects the modulation source for the output level
Sets the modulation amount of the output level
Sets the bass (low range) level
Sets the middle (mid range) level
Sets the mid-frequency range
Sets the treble (high range) level
Sets the presence (highfrequency tone)
Sets the balance between the effect and the dry input
Selects a modulation source for
Wet/Dry
Sets the modulation amount for
Wet/Dry
Wet / Dry
024: Bass Amp+Cabinet (Bass
Amp Model+Cabinet)
This simulates a bass amp and speaker cabinet.
Wet: Mono In — Mono Out / Dry: Stereo In — Stereo Out
Left
Wet / Dry
+
Bass Amp Model1
Volume
Cabinet Simulator
Right
D -mod
Wet / Dry
a b
Amplifier
Type
Volume
Src
Amt c Bass
Middle d e f g i
Mid Range
Treble
Presence
Cabinet
Simulater h Cabinet Type
Wet/Dry
Src
Amt
LA STUDIO,
JAZZ
COMBO,
GOLD PANEL,
SCOOPED,
VALVE2,
VALVE,
CLASSIC
0…100
Selects the type of the amplifier
p.265
Off…Tempo
–100…+100
Sets the output level
Selects the modulation source for the output level
Sets the modulation amount of the output level
Sets the bass (low range) level
Sets the middle (mid range) level
0…100
0…100
0…4
0…100
0…100
Off, On
Sets the mid-frequency range
Sets the treble (high range) level
Sets the presence (highfrequency tone)
Switches the cabinet simulator on/off
LA — 4×10,
MODERN —
4×10,
METAL — 4×10,
CLASSIC —
8×10,
UK — 4×12,
STUDIO —
1×15,
JAZZ — 1×15,
VOX AC100 —
2×15,
US — 2×15,
UK — 4×15,
LA — 1×18,
COMBI — 1×12
& 1×18
Dry, 1 : 99…
99 : 1, Wet
Selects the cabinet type
p.264
Sets the balance between the effect and the dry input
Off…Tempo
–100…+100
Selects a modulation source for
Wet/Dry
Sets the modulation amount for
Wet/Dry
a: Amplifier Type h: Cabinet Type
Recommended Combinations of Bass Amp Models and
Cabinets:
Amplifier Type
LA STUDIO
JAZZ COMBO
GOLD PANEL
SCOOPED
VALVE2
VALVE
CLASSIC
Cabinet Type
LA ‐ 4×10, LA ‐ 1×18
JAZZ ‐ 1×15
MODERN ‐ 4×10
METAL ‐ 4×10
CLASSIC ‐ 8×10
CLASSIC ‐ 8×10
COMBI ‐ 1×12 & 1×18
Note:
It is convenient to use the Effect Preset function to
preset your favorite pairings of amp model and cabinet. (see p.60)
265
266
025: TrebleBST (Treble
Booster)
This effect models a famous boost/overdrive effect that was developed in order to produce a “guitar orchestra” effect, and designed for use with the VOX AC30. You can use this to add clear boost to the signal, or apply it to an organ sound to add an overdrive that generates rich overtones. Three controls allow a broad range of settings, letting you create a wide variety of overdrive sounds.
Wet: Mono In — Mono Out / Dry: Stereo In — Stereo Out
Left
Wet / Dry
+
Treble Booster
Right
Wet / Dry
a Drive b Level c Tone
Wet/Dry b Src
Amt
1…100
0…100
1…100
Dry, 1:99 …
99:1, Wet
Off…Tempo
–100…+100
Sets the gain for overdrive p.263
Sets the output level
p.263
Sets the tone for overdrive
Sets the balance between the effect and the dry input
Selects a modulation source for
Wet/Dry
Sets the modulation amount for
Wet/Dry g Tube2 Bias h
0…100
Tube2
Output Level
[dB]
–48.0…+0.0
Wet/Dry
Dry, 1 : 99…
99 : 1, Wet i Src Off…Tempo
Amt –100…+100
Sets the bias voltage for stage 2
p.266
Sets the output level
Sets the balance between the effect and the dry input
Selects a modulation source for
Wet/Dry
Sets the modulation amount for
Wet/Dry
b, f: Saturation [%]
With higher settings of this value, the waveform will change at high gain levels, tending to cause distortion. Lower settings of this value will produce linear response.
Mic/Pre Amp — Saturation
Out
Saturation = 0
Saturation = 50
Saturation = 100
In
Bias = 0
c: Tube1 Bias
This expresses the effect that changes in vacuum tube bias have on the distortion of the waveform. Higher settings of this value will produce distortion even at low gain levels.
Since this will also change the overtone structure, you can use it to control the tonal character.
Mic/Pre Amp — Bias
Out
Bias = 100
Bias = 50
Bias = 0
In
026: Tube PreAmp Model
(Tube PreAmp Modeling)
This effect simulates a two ‐ stage vacuum tube preamp. You can make individual settings for two vacuum tubes connected in series. This lets you create the warm sound typical of vacuum tubes.
Wet: Mono In — Mono Out / Dry: Stereo In — Stereo Out
Left
Wet / Dry
+
Tube Pre Amp1
Invert
+
–
Tube Pre Amp2
Output Level
Right
Wet / Dry
a b c d e
Tube1 Low
Cut [Hz]
High Cut [Hz]
Thru,
21…8.00k
53…20.00k,
Thru
Tube1 Gain
[dB]
Saturation
[%]
–24.0…+24.0
0…100
Sets the cutoff frequency for the low cut filter of stage 1
Sets the cutoff frequency for the high cut filter of stage 1
Sets the input gain for stage 1
Tube1 Bias
Tube1 Phase
Tube2 Low
Cut [Hz]
High Cut [Hz]
0…100
Normal,
Wet Invert
Thru,
21…8.00k
53…20.00k,
Thru
Sets the input/output response for stage 1
p.266
Sets the bias voltage for stage 1
p.266
Turns phase reversal on/off
p.266
Sets the cutoff frequency for the low cut filter of stage 2
Sets the cutoff frequency for the high cut filter of stage 2 f
Tube2 Gain
[dB]
Saturation
[%]
–24.0…+24.0
0…100
Sets the input gain for stage 2
Sets the input/output response for stage 2
p.266
Satulation = 50
d: Tube1 Phase
With the Wet Invert setting, the phase of the signal will be inverted between stage 1 and stage 2. Since “Bias” is applied to the inverted signal in stage 2, this will change the tonal character.
027: St. Tube PreAmp (Stereo
Tube PreAmp Modeling)
This is a stereo vacuum tube preamp simulator (See “026:
Tube PreAmp Model (Tube PreAmp Modeling)” on page 266.).
Stereo In — Stereo Out
Tube Pre Amp1
Tube Pre Amp1
+
–
+
–
Invert
Tube Pre Amp2
Output Level
Tube Pre Amp2
Overdrive, Amp models, and Mic models (OD Amp Mic) 028: Mic Model+PreAmp (Mic Modeling + PreAmp)
028: Mic Model+PreAmp (Mic
Modeling + PreAmp)
This effect simulates a mic and vacuum tube preamp. You can choose from various types of mic and positions to create differing sonic characters.
Wet: Mono In — Mono Out / Dry: Stereo In — Stereo Out
Left
Wet / Dry
+
Mic Simulation Tube Pre Amp
Output Level
Right
Wet / Dry
a b c
Mic Type
Mic Position
Tube Low Cut
[Hz]
High Cut [Hz]
Vintage
Dynamic,
Multi
Condenser,
Percussion
Condenser,
Drums Dynamic,
Vocal Dynamic,
Multi Dynamic,
Vocal
Condenser,
Vocal Tube,
Kick Dynamic
Thru,
21…8.00k
53…20.00k,
Thru
Selects the type of mic
Close, On, Off,
Far
Sets the mic placement distance
p.267
Sets the frequency of the low cut filter
Sets the frequency of the high cut filter d
Tube Gain
[dB]
Saturation
[%]
–24.0…+24.0
0…100
e f g
Tube Bias
Tube Output
Level [dB]
Wet/Dry
Src
Amt
0…100
–48.0…+0.0
Dry, 1 : 99…
99 : 1, Wet
Off…Tempo
–100…+100
Sets the input gain to the vacuum tube preamp
Sets the input/output response of the preamp
p.266
Sets the bias level of the preamp
p.266
Sets the output level of the preamp
Sets the balance between the effect and the dry input
Selects a modulation source for
Wet/Dry
Sets the modulation amount for
Wet/Dry
b: Mic Position
This expresses the effect that the mic position has on the sound. The Close setting is the closest mic position, and the
Far setting is the farthest.
267
268
Chorus, Flanger, and Phaser (Cho/Fln Phaser)
029: Stereo Chorus
This effect adds thickness and warmth to the sound by modulating the delay time of the input signal. You can add spread to the sound by offsetting the phase of the left and right LFOs from each other.
Stereo In — Stereo Out
Left
Wet / Dry
LEQ HEQ
Chorus
EQ Trim
LEQ HEQ
Chorus
EQ Trim
Right
Wet / Dry
LFO Phase
LFO: Tri / Sine
LFO
Waveform
Triangle, Sine Selects the LFO Waveform a
LFO Phase
[degree]
–180…+180
Sets the LFO phase difference between the left and right
p.259
LFO
Frequency
[Hz]
0.02…20.00
Sets the speed of the LFO p.259
b c d f e
Src
Amt
MIDI Sync
BPM
Base Note
Times
LFO Type
Common
LFO Offset
[deg]
L Pre Delay
[msec]
R Pre Delay
[msec]
Depth
Src
Off…Tempo
–20.00…
+20.00
Off, On
MIDI,
40.00…
300.00
…
x1…x32
Individual,
Common1,
Common2
–180…+180
0.0…50.0
0.0…50.0
0…100
Off…Tempo
Selects a modulation source for
LFO speed
Sets the modulation amount of
LFO speed
When this is on, the LFO speed is set by BPM, Base Note, and
Times, instead of Frequency
p.257
MIDI syncs to the system tempo;
40–300 sets the tempo manually for this individual effect
p.257
Selects the type of notes that specify the LFO speed
p.257
Sets the number of notes that specify the LFO speed
p.257
Selects either (individual) LFO,
Common FX LFO1, or Common
LFO2
p.257
Sets the phase offset when Type
= Common 1 or Common 2
p.257
Sets the delay time for the left channel
p.268
Sets the delay time for the right channel
p.268
Sets the depth of LFO modulation
Selects the modulation source for the LFO modulation depth g h j i
Amt
EQ Trim
Pre LEQ Fc
Pre HEQ Fc
–100…+100
0…100
Low,
Mid-Low
High,
Mid-High
Sets the modulation amount of the LFO modulation depth
Sets the EQ input level
Selects the cutoff frequency (low or mid-low) of the low-range equalizer
Selects the cutoff frequency
(high or mid-high) of the highrange equalizer
Pre LEQ Gain
[dB]
Pre HEQ Gain
[dB]
–15.0…+15.0
Sets the gain of the Low EQ
–15.0…+15.0
Sets the gain of the High EQ
Wet/Dry
Src
Amt
–Wet…
–1 : 99, Dry,
1 : 99…Wet
Off…Tempo
–100…+100
Sets the balance between the effect and the dry input
p.259
Selects a modulation source for
Wet/Dry
Sets the modulation amount for
Wet/Dry
e: L Pre Delay [msec] e: R Pre Delay [msec]
Setting the left and right delay time individually allows you to control the stereo image.
030: Vintage Chorus
This models a famous chorus unit that was built into a guitar amp. Although it does not provide a chorus and vibrato select switch, you can use the
Wet/Dry
setting to produce their effect. The
Speed
,
Depth
, and
Manual
parameters allow an even wider range of sounds than the original unit.
Wet: Mono In — Stereo Out / Dry: Stereo In — Stereo Out
Left
Wet / Dry
Stereo
(L-D&R-W)
Mono
Output Mode
+
Chorus
Right
Wet / Dry
LFO
a
Speed [Hz]
Src
Amt
0.10…10.0
Off…Tempo
–100…+100
Sets the speed of LFO
Selects a modulation source for
Speed [Hz]
Sets the modulation amount for
Speed [Hz] b
Depth
Src
0…100
Off…Tempo
Sets the modulation depth
Selects a modulation source for
Depth
Amt –100…+100 c Manual 1…100
Sets the sweep frequency d Output Mode
0: Mono,
1: ST (L-D&R-W)
Sets the outpu mode e
Wet/Dry
Src
Dry, 1:99 …
99:1, Wet
Off…Tempo
Sets the modulation amount for
Depth
Sets the balance between the effect and the dry input
Selects a modulation source for
Wet/Dry
Amt –100 … +100
Sets the modulation amount for
Wet/Dry
e: Wet/Dry d: Output Mode
For the master effects,
Wet/Dry
adjusts the output level of the effect sound.
When
Output Mode
is Mono, L and R will output the same vibrato effect. Normally, you’ll use the
Wet/Dry
setting to mix the direct sound and processed sound so that a chorus effect is produced. If you set this to Wet so that none of the direct sound is included, you’ll obtain a vibrato effect.
If
Output Mode
is ST (L ‐ D&R ‐ W), the direct sound will be panned to L, and the effect sound will be panned to R for output. Normally, you’ll use the
Wet/Dry
setting to mix the direct sound and processed sound, producing a chorus effect on only the R ‐ channel, and creating a spacious stereo effect that extends to the left and right. If you set this to Wet, and pan the direct and processed sounds to left and right, and then output them to stereo speakers, the direct sound and processed sound will be mixed in the air, producing a chorus effect with spacious clarity.
Chorus, Flanger, and Phaser (Cho/Fln Phaser) 031: Black Chorus
031: Black Chorus
This models a Danish ‐ made stereo chorus + pitch modulator
& flanger. Although this effect was originally intended for guitar, it was also used by numerous keyboard players.
Used with electric piano, it produces a distinctive tone.
Wet: Mono In — Stereo Out / Dry: Stereo In — Stereo Out
Left
Mode & Intensity
+
Input Gain
Chorus
+
—
+
+
Right
LFO
Wet / Dry
Mono
Output Mode
Stereo
Wet / Dry
a b c d e f g
Speed [Hz]
Src
Amt
Intensity
Mode
Width
Input Gain
Src
0.10…10.0
Off…Tempo
–100…+100
1…100
0, 1, 2
0…100
1…100
Output Mode 0, 1
Wet/Dry
Amt
Dry, 1:99 …
99:1, Wet
Off…Tempo
–100 … +100
Sets the LFO speed
Selects a modulation source for
Speed [Hz]
Sets the modulation amount for
Speed [Hz]
Sets the intensity of LFO modulation
Select a mode
0: Chorus
1: Pitch Modulation
2: Flanger
Sets the LFO modulation depth
Sets the input gain
Select a output mode
0: Mono
1: Stereo
Sets the balance between the effect and the dry input
Selects a modulation source for
Wet/Dry
Sets the modulation amount for
Wet/Dry
c: Mode b: Intensity
Increasing the
Intensity
value will strengthen the modulation effect. This controls the effect, direct, and feedback values. The values that are controlled will depend on the
Mode
setting.
032: EP Chorus
This is inspired by a rare chorus built into an early version of a famous modified tine piano.
a
Speed [Hz]
Src
Amt
Depth b Src
Amt c
Wet/Dry
Src
Amt
0.10…10.0
Off…Tempo
–100…+100
0…100
Off…Tempo
–100…+100
Sets the LFO speed
p.259
Selects a modulation source for
Speed [Hz]
Sets the modulation amount for
Speed [Hz]
Sets the depth of LFO modulation
Selects the modulation source of the LFO modulation depth
Sets the modulation amount of the LFO modulation depth
Dry,
1:99…99:1,
Wet
Off…Tempo
–100…+100
Sets the balance between the effect and the dry input
Selects a modulation source for
Wet/Dry
Sets the modulation amount for
Wet/Dry
033: St.HarmonicChorus
(Stereo Harmonic Chorus)
This effect applies chorus only to higher frequencies. This can be used to apply a chorus effect to a bass sound without making the sound thinner. You can also use this chorus block with feedback as a flanger.
Stereo In — Stereo Out
Left
Low Level
High/Low Split Point
Chorus/Flanger
Chorus/Flanger
High Damp
Feedback
High Damp
Low Level
High Level
High Level
Right
Wet / Dry
Wet / Dry
LFO Phase
LFO: Tri / Sine
j a
LFO
Waveform
LFO Phase
[degree]
LFO
Frequency
[Hz] b
Src c d e f g
Amt
MIDI Sync
BPM
Base Note
Times
LFO Type
Common
LFO Offset
[deg]
Pre Delay
[msec]
Depth
Src
Amt
High/Low
Split Point
Feedback h
High Damp
[%]
Low Level i
High Level
Wet/Dry
Src
Amt
Triangle, Sine Selects the LFO Waveform
–180…+180
0.02…20.00
Off…Tempo
–20.00…
+20.00
Off, On
MIDI,
40.00…
300.00
…
x1…x32
Individual,
Common1,
Common2
–180…+180
0.0…50.0
0…100
Off…Tempo
–100…+100
1…100
–100…+100
0…100
0…100
0…100
Dry, 1 : 99…
99 : 1, Wet
Off…Tempo
–100…+100
Sets the LFO phase difference between the left and right
p.259
Sets the speed of the LFO p.259
Selects a modulation source for
LFO speed
Sets the modulation amount of
LFO speed
When this is on, the LFO speed is set by BPM, Base Note, and
Times, instead of Frequency
p.257
MIDI syncs to the system tempo;
40–300 sets the tempo manually for this individual effect
p.257
Selects the type of notes that specify the LFO speed
p.257
Sets the number of notes that specify the LFO speed
p.257
Selects either (individual) LFO,
Common FX LFO1, or Common
LFO2
p.257
Sets the phase offset when Type
= Common 1 or Common 2
p.257
Sets the delay time from the original sound
Sets the depth of LFO modulation
Selects the modulation source of the LFO modulation depth
Sets the modulation amount of the LFO modulation depth
Sets the frequency split point between the low and high range
p.269
Sets the feed back amount of the chorus block
p.270
Sets the high range damping amount of the chorus block
Sets the low range output level
Sets the high range (chorus) output level
Sets the balance between the effect and the dry input
Selects a modulation source for
Wet/Dry
Sets the modulation amount for
Wet/Dry
g: High/Low Split Point
This parameter sets the frequency that splits the high and low range. Only the high range will be sent to the chorus block.
269
270 h: Feedback
Sets the feedback amount of the chorus block. Increasing the feedback will allow you to use the effect as a flanger.
034: St. Biphase Mod. (Stereo
Biphase Modulation)
This stereo chorus effect adds two different LFOs together.
You can set the Frequency and Depth parameters for each
LFO individually. Depending on the setting of these LFOs, very complex waveforms will create an analog ‐ type, unstable modulated sound.
Stereo In — Stereo Out
Left
Wet / Dry
Chorus/Flanger
Feedback
High Damp
High Damp
Chorus/Flanger
Right
LFO1: Tri / Sine
LFO2: Tri / Sine
180 [degree]
Wet / Dry
a
LFO1
Waveform
LFO2
Waveform
Phase Sw
LFO1
Frequency
[Hz] b
Src d f c
LFO1 Amt
LFO2
Frequency
[Hz]
Amt e
LFO1 Type
Common
LFO Offset
[deg]
LFO2 Type
Common
LFO Offset
[deg]
Depth1
Src
Amt
Depth2 g h
Amt
L Pre Delay
[msec]
R Pre Delay
[msec] i
Feedback
High Damp
[%]
Triangle, Sine Selects LFO1 waveform
Triangle, Sine Selects LFO2 waveform
0 deg,
180 deg
0.02…30.00
Off…Tempo
–30.00…
+30.00
0.02…30.00
–30.00…
+30.00
Individual,
Common1,
Common2
–180…+180
Individual,
Common1,
Common2
–180…+180
0…100
Off…Tempo
–100…+100
0…100
–100…+100
0.0…50.0
0.0…50.0
–100…+100
0…100
Switches the LFO phase difference between left and right
Sets the LFO1 speed
Selects the modulation source of
LFO1&2 speed
Sets the modulation amount of
LFO1 speed
Sets the LFO2 speed
Sets the modulation amount of
LFO2 speed
Selects either (individual) LFO,
Common FX LFO1, or Common
LFO2
p.257
Sets the phase offset when LFO1
Type = Common 1 or Common 2
p.257
Selects either (individual) LFO,
Common FX LFO1, or Common
LFO2
p.257
Sets the phase offset when LFO2
Type = Common 1 or Common 2
p.257
Sets the depth of LFO1 modulation
Selects the modulation source of
LFO1&2 modulation depth
Sets the modulation amount of
LFO1 modulation depth
Sets the depth of LFO2 modulation
Sets the modulation amount of
LFO2 modulation depth
Sets the delay time for the left channel
p.268
Sets the delay time for the right channel
p.268
Sets the feedback amount
p.270
Sets the damping amount in the high range
Wet/Dry j
Src
Amt
–Wet…
–1 : 99, Dry,
1 : 99…Wet
Off…Tempo
–100…+100
Sets the balance between the effect and the dry input
p.259
Selects a modulation source for
Wet/Dry
Sets the modulation amount for
Wet/Dry
Bi-Phase Modulation LFO
LFO1
LFO2
Depth1
Depth2
+
035: Multitap Cho/Delay
(Multitap Chorus/Delay)
This effect has four chorus blocks with a different LFO phase. You can create a complex stereo image by setting each block’s delay time, depth, output level, and pan individually. You can also fix some of the chorus blocks to combine the chorus and delay effects.
Wet: Mono In — Stereo Out / Dry: Stereo In Stereo Out
Left
Feedback
Tap1 Delay
+
Tap2 Delay
Tap3 Delay
Tap4 Delay
Right
0 [degree]
180 [degree]
90 [degree]
270 [degree]
LFO: Triangle
Level
Level
Level
Level
Pan
Pan
Pan
Pan
Wet / Dry
Wet / Dry
a
LFO
Frequency
[Hz]
LFO Type b c
Common
LFO Offset
[deg]
Tap1 (000)
[msec]
Depth
Level
Pan d
Tap2 (180)
[msec]
Depth
Level e
Pan
Tap3 (090)
[msec]
Depth
Level
Pan f
Tap4 (270)
[msec]
Depth
Level
Pan
0.02…13.00
Sets the speed of the LFO
0…1000
0…30
0…30
L6…L1, C,
R1…R6
0…1000
0…30
0…30
L6…L1, C,
R1…R6
0…1000
0…30
0…30
L6…L1, C,
R1…R6
0…1000
0…30
0…30
L6…L1, C,
R1…R6
Individual,
Common1,
Common2
–180…+180
Selects either (individual) LFO,
Common FX LFO1, or Common
LFO2
p.257
Sets the phase offset when Type
= Common 1 or Common 2
p.257
Sets the Tap1 (LFO phase=0 degrees) delay time
Sets the Tap1 chorus depth
Sets the Tap1 output level
Sets the Tap1 stereo image
Sets the Tap2 (LFO phase=180 degrees) delay time
Sets the Tap2 chorus depth
Sets the Tap2 output level
Sets the Tap2 stereo image
Sets the Tap3 (LFO phase=90 degrees) delay time
Sets the Tap3 chorus depth
Sets the Tap3 output level
Sets the Tap3 stereo image
Sets the Tap4 (LFO phase=270 degrees) delay time
Sets the Tap4 chorus depth
Sets the Tap4 output level
Sets the Tap4 stereo image
Chorus, Flanger, and Phaser (Cho/Fln Phaser) 036: Ensemble
Tap1
Feedback g Src
Amt
Wet/Dry j Src
Amt
–100…+100 Sets the Tap1 feedback amount
Off…Tempo
–100…+100
Dry, 1 : 99…
99 : 1, Wet
Off…Tempo
–100…+100
Selects the modulation source of
Tap1 feedback amount and effect balance
Sets the Tap1 feedback amount and modulation amount
Sets the balance between the effect and the dry input
Selects a modulation source for
Wet/Dry
Sets the modulation amount for
Wet/Dry
036: Ensemble
This Ensemble effect has three chorus blocks that use LFO to create subtle shimmering, and gives three dimensional depth and spread to the sound, because the signal is output from the left, right, and center.
Wet: Mono In — Stereo Out / Dry: Stereo In — Stereo Out
Left
Wet / Dry
+
Ensemble
Right
Shimmer
LFO
Wet / Dry
a
Speed
Src
Amt
Depth b Src
Amt c Shimmer
Wet/Dry d
Src
Amt
1…100
Off…Tempo
–100…+100
0…100
Off…Tempo
–100…+100
0…100
Dry, 1 : 99…
99 : 1, Wet
Off…Tempo
–100…+100
Sets the speed of the LFO
Selects a modulation source for
LFO speed
Sets the modulation amount of
LFO speed
Sets the depth of LFO modulation
Selects the modulation source of the LFO modulation depth
Sets the modulation amount of the LFO modulation depth
Sets the amount of shimmering of the LFO waveform
p.271
Sets the balance between the effect and the dry input
Selects a modulation source for
Wet/Dry
Sets the modulation amount for
Wet/Dry
c: Shimmer
This parameter sets the amount of shimmering of the LFO waveform. Increasing this value adds more shimmering, making the chorus effect more complex and richer.
Ensemble LFO
Level
Shimmer
Time
037: Polysix Ensemble
This models the ensemble effect built into the classic Korg
PolySix programmable polyphonic synthesizer.
Wet: Mono In — Mono Out / Dry: Stereo In — Stereo Out
Left
Wet / Dry
+
Polysi x
Ensemble
Right
Depth a
Src
Amt
Wet/Dry b Src
Amt
0…100
Off…Tempo
–100…+100
Dry, 1 : 99…
99 : 1, Wet
Off…Tempo
–100…+100
Sets the depth of the effect
Selects the modulation source that will control the effect depth
Sets the amount by which the effect depth will be modulated
Sets the balance between the effect and the dry input
Selects a modulation source for
Wet/Dry
Sets the modulation amount for
Wet/Dry
Wet / Dry
038: Stereo Flanger
This effect gives a significant swell and movement of pitch to the sound. It is more effective when applied to a sound with a lot of harmonics. This is a stereo flanger. You can add spread to the sound by offsetting the phase of the left and right LFOs from each other.
Stereo In — Stereo Out
Left
Wet / Dry
Flanger
Feedback
Flanger
High Damp
Right
Wet / Dry
LFO Phase
LFO: Tri / Sine LFO Shape
a b
Delay Time
[msec]
LFO
Waveform
LFO Shape c
LFO Phase
[degree]
LFO
Frequency
[Hz] d
Src
0.0…50.0
Sets the delay time from the original sound
Triangle, Sine Selects the LFO Waveform
–100…+100
–180…+180
Changes the curvature of the
LFO Waveform
p.258
Sets the LFO phase difference between the left and right
p.259
0.02…20.00
Sets the speed of the LFO p.259
e
Amt
MIDI Sync
BPM
Base Note
Times
Off…Tempo
–20.00…
+20.00
Off, On
MIDI,
40.00…
300.00
…
x1…x32
Selects a modulation source for
LFO speed
Sets the modulation amount of
LFO speed
When this is on, the LFO speed is set by BPM, Base Note, and
Times, instead of Frequency
p.257
MIDI syncs to the system tempo;
40–300 sets the tempo manually for this individual effect
p.257
Selects the type of notes that specify the LFO speed
p.257
Sets the number of notes that specify the LFO speed
p.257
271
272
f
LFO Type
Common
LFO Offset
[deg] g Depth
Individual,
Common1,
Common2
Feedback h
High Damp
[%]
–100…+100
0…100
i
Wet/Dry
Src
–Wet…
–1 : 99, Dry,
1 : 99…Wet
Off…Tempo
Amt
–180…+180
0…100
–100…+100
Selects either (individual) LFO,
Common FX LFO1, or Common
LFO2
p.257
Sets the phase offset when Type
= Common 1 or Common 2
p.257
Sets the depth of LFO modulation
Sets the feedback amount
p.272
Sets the feedback damping amount in the high range
p.272
Sets the balance between the effect and the dry input
p.259, p.272
Selects a modulation source for
Wet/Dry
Sets the modulation amount for
Wet/Dry
h: Feedback i: Wet/Dry
The peak shape of the positive and negative
Feedback
value is different. The harmonics will be emphasized when the effect sound is mixed with the dry sound if you set a positive value for both
Feedback
and
Wet/Dry
, and if you set a negative value for both
Feedback
and
Wet/Dry
.
h: High Damp [%]
This parameter sets the amount of damping of the feedback in the high range. Increasing the value will cut high ‐ range harmonics.
039: Vintage Flanger
This models a classic analog flanger. It is highly effective for chording on clavi ‐ type keyboards or electric piano.
Wet: Mono In — Mono Out / Dry: Stereo In — Stereo Out
Left
Feedback
+
Flanger
Wet / Dry
Right
Reset Offset
Wet / Dry
LFO Sync
LFO
a b
Speed [Hz]
Src
Amt
Depth
Src
0.10…10.0
Off…Tempo
–100…+100
0…100
Off…Tempo
Sets the speed of LFO
Selects a modulation source for
Speed [Hz]
Sets the modulation amount for
Speed [Hz]
Sets the depth of LFO modulation
Selects a modulation source for
Depth
Amt –100…+100
Sets the modulation amount for
Depth c
Resonance d Manual e
LFO Reset
Source f Reset Offset 0…100
Wet/Dry
–Wet…
–1 : 99, Dry,
1 : 99…Wet
g
Src Off…Tempo
Amt
0…100
1…100
–100…+100
Sets the resonance amount
Sets the sweep frequency
Off…Tempo
Selects a modulation source for
LFO reset
Sets the offset
Sets the balance between the effect and the dry input
Selects a modulation source for
Wet/Dry
Sets the modulation amount for
Wet/Dry
040: St. Random Flanger
(Stereo Random Flanger)
The stereo effect uses a step ‐ shape waveform and random
LFO for modulation, creating a unique flanging effect.
Stereo In — Stereo Out
Left
Wet / Dry
Flanger
Feedback
Flanger
High Damp
Right
Wet / Dry
LFO Phase
LFO: Step-Tri/Random
a
Delay Time
[msec]
LFO
Waveform b
LFO Phase
[degree]
LFO
Frequency
[Hz] c
Src
0.0…50.0
Step-Tri,
Random
–180…+180
0.02…20.00
Sets the delay time from the original sound
Selects the LFO Waveform p.259
Sets the LFO phase difference between the left and right
p.259
Sets the speed of the LFO p.259
d
LFO Step
Frequency
[Hz] e f g h
Amt
Step Amt
MIDI Sync
BPM
Base Note
Times
Step Base
Note
Times
LFO Type
(Step)
Common
LFO Offset
[deg]
Depth
–20.00…
+20.00
–50.00…
+50.00
MIDI,
40.00…
300.00
…
Individual,
Common1,
Common2 j
Feedback i
High Damp
[%]
–100…+100
0…100
Wet/Dry
Src
–Wet…
–1 : 99, Dry,
1 : 99…Wet
Off…Tempo
Amt
Off…Tempo
0.05…50.00
Off, On x1…x32
…
x1…x32
–180…+180
0…100
–100…+100
Selects the modulation source used for both LFO speed and step speed
Sets the modulation amount of
LFO speed
Sets the LFO step speed (speed that changes in steps)
Sets the modulation amount of
LFO step speed
When this is on, the LFO speed is set by BPM, Base Note, and
Times, instead of Frequency
p.257
MIDI syncs to the system tempo;
40–300 sets the tempo manually for this individual effect
p.257
Selects the type of notes that specify the LFO speed
p.257
Sets the number of notes that specify the LFO speed
p.257
Selects the type of notes to specify the LFO step speed
p.259
Sets the number of notes to specify the LFO step speed
p.259
Selects either (individual) LFO,
Common FX LFO1, or Common
LFO2
p.257
Sets the phase offset when Type
= Common 1 or Common 2
p.257
Sets the depth of LFO modulation
Sets the feedback amount
p.272
Sets the feedback damping amount in the high range
p.272
Sets the balance between the effect and the dry input
p.259, p.272
Selects a modulation source for
Wet/Dry
Sets the modulation amount for
Wet/Dry
Chorus, Flanger, and Phaser (Cho/Fln Phaser) 041: St. Env. Flanger (Stereo Envelope Flanger)
041: St. Env. Flanger (Stereo
Envelope Flanger)
This Flanger uses an envelope generator for modulation. You will obtain the same pattern of flanging each time you play. You can also control the Flanger directly using the modulation source.
Stereo In — Stereo Out
Left
Wet / Dry
Flanger
Feedback
Flanger
High Damp
Right
D -mod
EG Attack/Decay
D-mod
EG
Sweep Mode
Wet / Dry
a b c d e f g
L Delay
Bottom
[msec]
L Delay Top
[msec]
R Delay
Bottom
[msec]
R Delay Top
[msec]
0.0…50.0
0.0…50.0
0.0…50.0
0.0…50.0
Sweep Mode EG, D-mod
Src
EG Attack
EG Decay
Feedback
High Damp
[%]
Wet/Dry
Src
Amt
Off…Tempo
1…100
1…100
–100…+100
0…100
–Wet…
–1 : 99, Dry,
1 : 99…Wet
Off…Tempo
–100…+100
Sets the lower limit of the leftchannel delay time
Sets the upper limit of the leftchannel delay time
Sets the lower limit of the rightchannel delay time
Sets the upper limit of the rightchannel delay time
Determines whether the flanger is controlled by the envelope generator or by the modulation source
p.273
Selects the modulation source that triggers the EG (when
Sweep Mode = EG), or the modulation source that causes the flanger to sweep (when
Sweep Mode = D-mod)
p.273
Sets the EG attack speed
p.273
Sets the EG decay speed
p.273
Sets the feedback amount
p.272
Sets the feedback damping amount in the high range
p.272
Sets the balance between the effect and the dry input
p.259, p.272
Selects a modulation source for
Wet/Dry
Sets the modulation amount for
Wet/Dry
c: Sweep Mode c: Src
This parameter switches the flanger control mode. With
Sweep
Mode
= EG, the flanger will sweep using the envelope generator. This envelope generator is included in the envelope flanger, and not related to the Pitch EG, Filter EG, or Amp EG.
The
Src
parameter selects the source that starts the envelope generator. If you select, for example, Gate, the envelope generator will start when the note ‐ on message is received.
When
Sweep Mode
= D ‐ mod, the modulation source can control the flanger directly. Select the modulation source using the
Src
parameter.
The effect is off when a value for the modulation source specified for the
Src
parameter is smaller than 64, and the effect is on when the value is 64 or higher. The
Envelope Generator is triggered when the value changes from 63 or smaller to 64 or higher.
d: EG Attack d: EG Decay
Attack and Decay speed are the only adjustable parameters on this EG.
042: Stereo Phaser
This effect creates a swell by shifting the phase. It is very effective on electric piano sounds. You can add spread to the sound by offsetting the phase of the left and right LFOs from each other.
Stereo In — Stereo Out
Left
Wet / Dry
Phaser
Phaser
Resonance
High Damp
Right
Wet / Dry
LFO Phase
LFO: Tri / Sine LFO Shape
d j a e f
LFO
Waveform
LFO Shape b
LFO Phase
[degree]
LFO
Frequency
[Hz] c
Src
Amt
MIDI Sync
BPM
Base Note
Times
LFO Type
Common
LFO Offset
[deg]
Manual
Src
Amt
Depth
Src
Amt
Resonance h
High Damp
[%]
–100…+100
0…100
i
Wet/Dry
Src
–Wet…
–1 : 99, Dry,
1 : 99…Wet
Off…Tempo
Amt
Triangle, Sine Selects the LFO Waveform
–100…+100
–180…+180
0.02…20.00
Off…Tempo
–20.00…
+20.00
Off, On
MIDI,
40.00…
300.00
…
x1…x32
Individual,
Common1,
Common2
–180…+180
0…100
Off…Tempo
–100…+100
0…100
Off…Tempo
–100…+100
–100…+100
Changes the curvature of the
LFO Waveform
p.258
Sets the LFO phase difference between the left and right
p.259
Sets the speed of the LFO p.257
Selects a modulation source for
LFO speed
Sets the modulation amount of
LFO speed
When this is on, the LFO speed is set by BPM, Base Note, and
Times, instead of Frequency
p.257
MIDI syncs to the system tempo;
40–300 sets the tempo manually for this individual effect
p.257
Selects the type of notes that specify the LFO speed
p.257
Sets the number of notes that specify the LFO speed
p.257
Selects either (individual) LFO,
Common FX LFO1, or Common
LFO2
p.257
Sets the phase offset when Type
= Common 1 or Common 2
p.257
Sets the frequency to which the effect is applied
Selects the modulation source for the LFO modulation
Sets the modulation amount of the LFO modulation
Sets the depth of LFO modulation
Selects the modulation source for the LFO modulation depth
Sets the modulation amount of the LFO modulation depth
Sets the resonance amount
p.273
Sets the resonance damping amount in the high range
p.274
Sets the balance between the effect and the dry input
p.259, p.273
Selects a modulation source for
Wet/Dry
Sets the modulation amount for
Wet/Dry
h: Resonance i: Wet/Dry
The peak shape of the positive and negative Feedback value is different. The harmonics will be emphasized when the effect sound is mixed with the dry sound, if you set a
273
274
positive value for both
Resonance
and
Wet/Dry
, and if you set a negative value for both
Resonance
and
Wet/Dry
.
h: High Damp [%]
This parameter sets the amount of damping of the resonance in the high range. Increasing the value will cut high ‐ range harmonics.
043: Small Phaser
This models a classic phaser that was born in New York during the 1970s. With a warm, rich tone, it is also loved by many electric piano players.
Wet: Mono In — Mono Out / Dry: Stereo In — Stereo Out
Left
+
Color
Phaser
Wet / Dry
Right
Wet / Dry
LFO
a
Speed [Hz]
Src
Amt b Color
Wet/Dry c
Src
Amt
0.10…10.0
Off…Tempo
–100…+100
Off, On
–Wet…
–1 : 99, Dry,
1 : 99…Wet
Off…Tempo
–100…+100
Sets the speed of the LFO
Selects a modulation source for
Speed [Hz]
Sets the modulation amount for
Speed [Hz]
Switches the tone of the phaser sound p.274
Sets the balance between the effect and the dry input
p.259, p.273
Selects a modulation source for
Wet/Dry
Sets the modulation amount for
Wet/Dry
b: Color
This lets you choose between two types of phaser sound.
Turning this On produces a deeper phase shift effect with a distinctive modulation.
045: Black Phaser
This models a Danish ‐ made four ‐ stage phaser that featured a wide range.
Wet: Mono In — Mono Out / Dry: Stereo In — Stereo Out
Left
Resonance
+
Phaser
Wet / Dry
Right
Wet / Dry
LFO
a
Speed [Hz]
Src
Amt
Depth b Src
Amt c Resonance d Manual e
Wet/Dry
Src
Amt
0.10…10.0
Off…Tempo
–100…+100
0…100
Off…Tempo
–100…+100
0…100
1…100
–Wet…
–1 : 99, Dry,
1 : 99…Wet
Off…Tempo
–100…+100
Sets the speed of the LFO
Selects a modulation source for
Speed [Hz]
Sets the modulation amount for
Speed [Hz]
Sets the depth of LFO modulation
Selects a modulation source for
Depth
Sets the modulation amount for
Depth
Sets the resonance amount
Sets the frequency where the effect is applied
Sets the balance between the effect and the dry input
Selects a modulation source for
Wet/Dry
Sets the modulation amount for
Wet/Dry
044: Orange Phaser
This models a standard model of analog phaser that achieved great popularity. It gives a sense of movement to electric piano sounds, adding a rich ‐ sounding phase shift effect.
046: U-VIBE
This models a famous chorus/vibrato pedal effect.
Simulating a rotary speaker, this effect produced a fascinatingly lush tone.
Wet: Mono In — Mono Out / Dry: Stereo In — Stereo Out
Left
Wet / Dry
+
U-VIBE
Mix
Right
Wet / Dry
LFO
Speed [Hz] a
Src
Amt
Depth b
Src
Amt
Mix c
Src
Amt
1.00…10.0
Off…Tempo
–100…+100
0…100
Off…Tempo
–100…+100
0…100
Off…Tempo
–100…+100
Sets the speed of the vibration
Selects a modulation source for
Speed [Hz]
Sets the modulation amount for
Speed [Hz]
Sets the depth of vibration
Selects a modulation source for
Depth
Sets the modulation amount for
Depth
Sets the effect mix level
Selects a modulation source for
Mix
Sets the modulation amount for
Mix
Chorus, Flanger, and Phaser (Cho/Fln Phaser) 047: St. Random Phaser (Stereo Random Phaser)
Wet/Dry d
Src
Amt
–Wet…
–1 : 99, Dry,
1 : 99…Wet
Off…Tempo
–100…+100
Sets the balance between the effect and the dry input p.275
Selects a modulation source for
Wet/Dry
Sets the modulation amount for
Wet/Dry
c: Mix d: Wet/Dry
The
Mix
parameter specifies the amount of effect sound relative to the direct sound. A setting of 0 produces the direct sound, a setting of about 50 produces chorus, and a setting of 100 produces a vibrato effect. If you set the
Wet/
Dry
parameter to Wet, the sound will be output with the mix balance specified by
Mix
.
047: St. Random Phaser
(Stereo Random Phaser)
This is a stereo phaser. The effect uses a step ‐ shape waveform and random LFO for modulation, creating a unique phasing effect.
Stereo In — Stereo Out
Left
Wet / Dry
Phaser
Phaser
Resonance
High Damp
Right
Wet / Dry
LFO Phase
LFO: Step-Tri/Random
a
LFO
Waveform
LFO Phase
[degree]
LFO
Frequency
[Hz] b
Src
Amt c
LFO Step
Frequency
[Hz]
Amt d
MIDI Sync
BPM
Base Note
Times e
Step Base
Note
Times f
LFO Type
(Step)
Common
LFO Offset
[deg]
Step-Tri, Step-
Sin, Random
Selects the LFO Waveform p.259
–180…+180
Sets the LFO phase difference between the left and right
p.259
0.02…20.00
Sets the speed of the LFO p.257
Off…Tempo
–20.00…
+20.00
Selects the modulation source commonly used for LFO speed and step speed
Sets the modulation amount of
LFO speed
0.05…50.00
Sets the LFO step speed
p.259
–50.00…
+50.00
Off, On
MIDI,
40.00…
300.00
…
x1…x32
…
x1…x32
Individual,
Common1,
Common2
–180…+180
Sets the modulation amount of
LFO step speed
When this is on, the LFO speed is set by BPM, Base Note, and
Times, instead of Frequency
p.257
MIDI syncs to the system tempo;
40–300 sets the tempo manually for this individual effect
p.257
Selects the type of notes that specify the LFO speed
p.257
Sets the number of notes that specify the LFO speed
p.257
Selects the type of notes to specify the LFO step speed
p.257
Sets the number of notes to specify the LFO step speed
p.257
Selects either (individual) LFO,
Common FX LFO1, or Common
LFO2
p.257
Sets the phase offset when Type
= Common 1 or Common 2
p.257
g h
Manual
Src
Amt
Depth j
Resonance i
High Damp
[%]
–100…+100
0…100
Wet/Dry
Src
–Wet…
–1 : 99, Dry,
1 : 99…Wet
Off…Tempo
Amt
0…100
Off…Tempo
–100…+100
0…100
–100…+100
Sets the frequency to which the effect is applied
Selects the modulation source for the LFO modulation
Sets the modulation amount of the LFO modulation
Sets the depth of LFO modulation
Sets the resonance amount
p.273
Sets the resonance damping amount in the high range
p.274
Sets the balance between the effect and the dry input
p.259, p.273
Selects a modulation source for
Wet/Dry
Sets the modulation amount for
Wet/Dry
275
276
048: St. Env. Phaser (Stereo
Envelope Phaser)
This stereo phaser uses an envelope generator for modulation. You will obtain the same pattern of phasing each time you play. You can also control the Phaser directly using the modulation source.
Stereo In — Stereo Out
Left
Right
D -mod
EG Attack/Decay
D-mod
EG
Sweep Mode
Phaser
Phaser
Resonance
High Damp
Wet / Dry
Wet / Dry
a b c d e
L Manual
Bottom
R Manual
Bottom
EG Attack
EG Decay
0…100
L Manual Top 0…100
0…100
R Manual Top 0…100
Sweep Mode EG, D-mod
Src
Resonance f
High Damp
[%]
0…100
g
Wet/Dry
Src
–Wet…
–1 : 99, Dry,
1 : 99…Wet
Off…Tempo
Amt
Off…Tempo
1…100
1…100
–100…+100
–100…+100
Sets the lower limit of the frequency range for the effect on the left channel
Sets the upper limit of the frequency range for the effect on the left channel
Sets the lower limit of the frequency range for the effect on the right channel
Sets the upper limit of the frequency range for the effect on the right channel
Determines whether the flanger is controlled by the envelope generator or by the modulation source
p.273
Selects the modulation source that triggers the EG (when EG is selected for Sweep Mode), or modulation source that causes the flanger to sweep (when Dmod is selected for Sweep
Mode)
p.273
Sets the EG attack speed
p.273
Sets the EG decay speed
p.273
Sets the resonance amount
p.273
Sets the resonance damping amount in the high range
p.274
Sets the balance between the effect and the dry input
p.259, p.273
Selects a modulation source for
Wet/Dry
Sets the modulation amount for
Wet/Dry
Modulation and Pitch Shift (Mod./P.Shift) 049: Stereo Vibrato
Modulation and Pitch Shift (Mod./P.Shift)
049: Stereo Vibrato
This effect causes the pitch of the input signal to shimmer.
Using the AutoFade allows you to increase or decrease the shimmering speed.
Stereo In — Stereo Out
Left
Wet / Dry
Vibrato
Vibrato
Right
LFO: Tri / Sine
AutoFade
LFO Shape
Fade-In Delay LFO Frequency
Wet / Dry
a b c d e
AUTOFADE
Src
Fade-In Rate
LFO
Waveform
LFO Shape
LFO
Frequency
Mod
LFO
Frequency
[Hz]
Src
Off…Tempo
Fade-In Delay
[msec]
00…2000
1…100
Triangle, Sine Selects the LFO Waveform
–100…+100
D-mod,
AUTOFADE
Changes the curvature of the
LFO Waveform
p.259
Switches between D-mod and
AUTOFADE for the LFO frequency modulation
p.277
0.02…20.00
Off…Tempo
Selects the modulation source that starts AutoFade
p.277
Sets the fade-in delay time
p.277
Sets the rate of fade-in
p.277
Sets the speed of the LFO f g h i
Amt
MIDI Sync
BPM
Base Note
Times
LFO Type
Common
LFO Offset
[deg]
Depth
Src
Amt
Wet/Dry
Src
Amt
–20.00…
+20.00
Off, On
MIDI,
40.00…
300.00
…
x1…x32
Individual,
Common1,
Common2
–180…+180
0…100
Off…Tempo
–100…+100
Dry, 1 : 99…
99 : 1, Wet
Off…Tempo
–100…+100
Selects a modulation source for
LFO speed
Sets the modulation amount of
LFO speed
When this is on, the LFO speed is set by BPM, Base Note, and
Times, instead of Frequency
p.257
MIDI syncs to the system tempo;
40–300 sets the tempo manually for this individual effect
p.257
Selects the type of notes that specify the LFO speed
p.257
Sets the number of notes that specify the LFO speed
p.257
Selects either (individual) LFO,
Common FX LFO1, or Common
LFO2
p.257
Sets the phase offset when Type
= Common 1 or Common 2
p.257
Sets the depth of LFO modulation
Selects the modulation source of the LFO modulation depth
Sets the modulation amount of the LFO modulation depth
Sets the balance between the effect and the dry input
Selects a modulation source for
Wet/Dry
Sets the modulation amount for
Wet/Dry
a: AUTOFADE Src b: Fade-In Delay [msec] b: Fade-In Rate d: LFO Frequency Mod
When
LFO Frequency Mod
is set to AUTOFADE, you can use the modulation source selected in
AUTOFADE Src
as a trigger to automatically fade in the modulation amount.
When
MIDI Sync
is set to On, you cannot use this.
The
Fade-In Rate
parameter specifies the rate of fade ‐ in. The
Fade-In Delay
parameter determines the time from
AutoFade modulation source On until the fade ‐ in starts.
The following is an example of fade-in where the LFO speed is increased from “1.0Hz” to “4.0Hz” when a note-on message is received.
AUTOFADE Src=Gate1, LFO Frequency Mod=AUTOFADE,
LFO Frequency [Hz]=1.0, Amt=3.0
The effect is off when a value for the dynamic modulation source specified for the
AUTOFADE Src
parameter is smaller than 64, and the effect is on when the value is 64 or higher. The AutoFade function is triggered when the value changes from 63 or smaller to
64 or higher.
Gate1 Signal
AUTOFADE
Note On
Fade-In Rate
Fade-In Dealy
AUTOFADE
AutoFade
Source=Gate1
LFO Freq. Mod=AUTOFADE
LFO Frequency[Hz]=1.0
Amount=+3.0
All Note Off
LFO Frequency
=1.0+3.0=4.0Hz
LFO Frequency
=1.0Hz
050: St. Auto Fade Mod. (Stereo
Auto Fade Modulation)
This stereo chorus/flanger effect enables you to control the
LFO speed and effect balance using auto fade, and you can spread the sound by offsetting the phase of the left and right
LFOs from each other.
Stereo In — Stereo Out
Left
Delay
Delay
Feedback
High Damp
Right
LFO: Tri / Sine
AutoFade
LFO Shape
LFO Phase
LFO Frequency
Wet / Dry
Wet / Dry
Wet / Dry
a b c
AUTOFADE
Src
Fade-In Delay
[msec]
Rate
LFO
Frequency
Mod
Wet/Dry Mod
LFO
Waveform
LFO Shape
Off…Tempo
00…2000
1…100
D-mod,
AUTOFADE
D-mod,
AUTOFADE
Selects the modulation source that starts AutoFade
p.277
Sets the fade-in delay time
p.277
Sets the rate of fade-in
p.277
Switches between D-mod and
AUTOFADE for the LFO frequency modulation
p.277
Switches between D-mod and
AUTOFADE for the effect balance modulation
p.277
Triangle, Sine Selects the LFO Waveform
–100…+100
Changes the curvature of the
LFO Waveform
p.258
277
278
d
LFO Phase
[degree]
–180…+180
LFO
Frequency
[Hz] e
Src
0.02…20.00
f g
Off…Tempo
Amt
LFO Type
–20.00…
+20.00
Individual,
Common1,
Common2
Common
LFO Offset
[deg]
L Delay Time
[msec]
R Delay Time
[msec]
–180…+180
0.0…500.0
0.0…500.0
h Depth 0…200
j i
Feedback
High Damp
[%]
Wet/Dry
Src
Amt
Sets the LFO phase difference between the left and right
Sets the speed of the LFO
p.259
Selects a modulation source for
LFO speed
Sets the modulation amount of
LFO speed
Selects either (individual) LFO,
Common FX LFO1, or Common
LFO2
p.257
Sets the phase offset when Type
= Common 1 or Common 2
p.257
Sets the left channel delay time
–100…+100
0…100
–Wet…
–1 : 99, Dry,
1 : 99…Wet
Off…Tempo
–100…+100
Sets the right channel delay time
Sets the depth of LFO modulation
Sets the feedback amount
p.272
Sets the feedback damping amount in the high range
p.272
Sets the balance between the effect and the dry input
p.259, p.272
Selects a modulation source for
Wet/Dry
Sets the modulation amount for
Wet/Dry
051: 2Voice Resonator
This effect resonates the input signal at a specified pitch.
You can set the pitch, output level, and pan settings for two resonators individually. You can control the resonance intensity via an LFO.
Wet: Mono In — Stereo Out / Dry: Stereo In — Stereo Out
Left
High Damp
Resonator
Trim
+
Resonance
Resonator
Trim
High Damp
Right
Invert: On/Off
D -mod
LFO
Manual
Control Mode
Pitch, Fine [cents]
Level
Pan
Level Pan
Wet / Dry
Wet / Dry
a
Control
Mode
LFO/D-mod
Invert b
LFO
Frequency
[Hz]
D-mod Src
Manual, LFO,
D-mod
Off, On
0.02…20.00
Off…Tempo
Switches the controls of resonance intensity
p.278
Reverses the Voice 1 and 2 control when LFO/D-mod is selected
p.278
Sets the speed of the LFO c
MIDI Sync
BPM
Base Note
Times
Off, On
MIDI,
40.00…
300.00
…
x1…x32
Selects the modulation source that controls resonance intensity
When this is on, the LFO speed is set by BPM, Base Note, and
Times, instead of Frequency
p.257
MIDI syncs to the system tempo;
40–300 sets the tempo manually for this individual effect
p.257
Selects the type of notes that specify the LFO speed
p.257
Sets the number of notes that specify the LFO speed
p.257
d e j i f g h
LFO Type
Common
LFO Offset
[deg]
Mod. Depth
Trim
Voice1: Pitch
Fine [cent]
Level
Voice1:
Resonance
High Damp
[%]
Individual,
Common1,
Common2
–180…+180
–100…+100
0…100
C0…B8
–50…+50
0…100
–100…+100
0…100
Selects either (individual) LFO,
Common FX LFO1, or Common
LFO2
p.257
Sets the phase offset when Type
= Common 1 or Common 2
p.257
Sets the amount of resonance intensity control via LFO/D-mod
Sets the input level at the resonator
Sets the voice1 Pitch for resonance
p.278
Fine-adjusts the voice 1 pitch for resonance
p.278
Sets the Voice1 output level
Sets the intensity of resonance when Control Mode = Manual
p.278
Sets the damping amount of resonant sound in the high range
p.279
Pan
L6…L1, C,
R1…R6
Sets the Voice1 stereo image
Voice2: Pitch
Fine [cent]
Level
Voice2:
Resonance
High Damp
[%]
Pan
Wet/Dry
Src
Amt
C0…B8
–50…+50
0…100
–100…+100
0…100
Sets the voice 2 Pitch for resonance
p.278
Fine-adjusts the voice 2 pitch for resonance
p.278
Sets the Voice2 output level
Sets the intensity of resonance when Control Mode = Manual
p.278
Sets the damping amount of resonant sound in the high range
p.279
L6…L1, C,
R1…R6
Dry, 1 :99… 99
: 1, Wet
Off…Tempo
Sets the Voice2 stereo image
Sets the balance between the effect and the dry input
Selects a modulation source for
Wet/Dry
–100…+100
Sets the modulation amount for
Wet/Dry
a: Control Mode g: Voice 1: Resonance i: Voice 2: Resonance
This parameter determines the resonance intensity.
When
Control Mode
= Manual, the
Resonance
parameter sets the intensity of resonance. If the
Resonance
parameter has a negative value, harmonics will be changed, and resonance will occur at a pitch one octave lower.
When
Control Mode
= LFO, the intensity of resonance varies according to the LFO. The LFO sways between positive and negative values, causing resonance to occur between specified pitches an octave apart in turn.
When
Control Mode
= D ‐ mod, the resonance is controlled by the dynamic modulation source. If JS X is assigned as the modulation source, the pitch an octave higher and lower can be controlled, similar to when LFO is selected for Control
Mode.
a: LFO/D-mod Invert
When
Control Mode
= LFO or D ‐ mod, the controlled phase of either Voice 1 or 2 will be reversed. When the resonance pitch is set for Voice 1 (Resonance has a positive value),
Voice 2 will resonate at a pitch an octave below (Resonance has a negative value).
f: Voice 1: Pitch f: Fine [cent] h: Voice 2: Pitch h: Fine [cent]
The Pitch parameter specifies the pitch of resonance by note name. The
Fine
parameter allows for fine adjustment in steps of cents.
Modulation and Pitch Shift (Mod./P.Shift) 052: Doppler g: High Damp [%] i: High Damp [%]
This sets the amount of damping amount for the high frequencies of the resonant sound. Lower values create a metallic sound with a higher range of harmonics.
052: Doppler
This effect simulates the “Doppler effect” of a moving sound with a changing pitch, similar to the siren of an passing ambulance. Mixing the effect sound with the dry sound will create a unique chorus effect.
Wet: Mono In — Stereo Out / Dry: Stereo In — Stereo Out
Left
Wet / Dry
+
Doppler
Pan Depth
Right
D -mod
Trigger
LFO
LFO Mode = 1-Shot
Wet / Dry
a b
LFO Mode
Src
LFO Sync
Loop, 1-Shot
Off…Tempo
Off, On
Switches LFO operation mode
p.279
Selects the modulation source of
LFO reset
p.279
Switches between LFO reset on and off when LFO Mode is set to
Loop
p.279
LFO
Frequency
[Hz] c
Src
0.02…20.00
Sets the speed of the LFO p.259
d e f g h
Amt
MIDI Sync
BPM
Base Note
Times
LFO Type
Common
LFO Offset
[deg]
Src
Amt
Pan Depth
Src
Amt
Wet/Dry
Src
Amt
Off…Tempo
–20.00…
+20.00
Off, On
MIDI,
40.00…
300.00
…
x1…x32
Individual,
Common1,
Common2
–180…+180
Pitch Depth 0…100
Off…Tempo
–100…+100
–100…+100
Off…Tempo
Selects a modulation source for
LFO speed
Sets the modulation amount of
LFO speed
When this is on, the LFO speed is set by BPM, Base Note, and
Times, instead of Frequency
p.257
MIDI syncs to the system tempo;
40–300 sets the tempo manually for this individual effect
p.257
Selects the type of notes that specify the LFO speed
p.257
Sets the number of notes that specify the LFO speed
p.257
Selects either (individual) LFO,
Common FX LFO1, or Common
LFO2
p.257
Sets the phase offset when Type
= Common 1 or Common 2
p.257
Sets the pitch variation of the moving sound
p.279
Selects the modulation source of pitch variation
Sets the modulation amount of pitch variation
Sets the panning of the moving sound
p.279
Selects the modulation source of panning
Sets the modulation amount of panning
–100…+100
Dry,
1 : 99…99 : 1,
Wet
Off…Tempo
–100…+100
Sets the balance between the effect and the dry input
Selects a modulation source for
Wet/Dry
Sets the modulation amount for
Wet/Dry
a: LFO Mode a: Src b: LFO Sync
The
LFO Mode
parameter switches LFO operation mode.
When Loop is selected, the Doppler effect will be created repeatedly. If
LFO Sync
is set to On, the LFO will be reset when the modulation source specified with the
Src
parameter is turned on.
When
LFO Mode
is set to 1 ‐ Shot, the Doppler effect is created only once when the modulation source specified in the
Src
field is turned on. At this time if you do not set the
Src
parameter, the Doppler effect will not be created, and no effect sound will be output.
The effect is off when a value for the modulation source specified for the
Src
parameter is smaller than 64, and the effect is on when the value is 64 or higher. The
Doppler effect is triggered when the value changes from 63 or smaller to 64 or higher.
f: Pitch Depth
With the Doppler effect, the pitch is raised when the sound approaches, and the pitch is lowered when the sound goes away. This parameter sets this pitch variation.
g: Pan Depth
This parameter sets the width of the stereo image of the effect sound. With larger values, the sound seems to come and go from much further away. With positive values, the sound moves from left to right; with negative values, the sound moves from right to left.
Doppler — Pitch / Pan Depth
Pitch
Pan Depth
= (+) value
Pan Depth
= (–) value
Original Pitch Pitch Depth
Left
Center
Pan Depth
< < < < < <<<<<< >>>>>> > > > > >
Louder Volume Louder
Right
053: Scratch
This effect is applied by recording the input signal and moving the modulation source. It simulates the sound of scratches you can make using a turntable.
Wet: Mono In — Mono Out / Dry: Stereo In — Stereo Out
Left
Wet / Dry
+
Scratch
Rec Control
Scratch
Direct
Mix
Right
Wet / Dry
D -mod
Input
D-mod
Envelope Control
Envelope Select
D -mod
a
Scratch
Source b Response c
Envelope
Select
Src
Off…Tempo
0…100
D-mod, Input
Off…Tempo
Selects the modulation source for simulation control
p.280
Sets the speed of the response to the Scratch Src
p.280
Selects whether the start and end of recording is controlled via the modulation source or the input signal level
p.280
Selects the modulation source that controls recording when
Envelope Select is set to D-mod
p.280
279
280
d Threshold e Response f Direct Mix
Wet/Dry g Src
Amt
0…100
0…100
Always On,
Always Off,
Cross Fade
Dry, 1 : 99…
99 : 1, Wet
Off…Tempo
–100…+100
Sets the recording start level when Envelope Select is set to
Input
p.280
Sets the speed of the response to the end of recording
p.280
Selects how a dry sound is mixed
p.280
Sets the balance between the effect and the dry input
Selects a modulation source for
Wet/Dry
Sets the modulation amount for
Wet/Dry
a: Scratch Source b: Response
The Scratch Source parameter enables you to select the modulation source that controls simulation. The value of the modulation source corresponds to the playback position.
The Response parameter enables you to set the speed of the response to the modulation source.
Scratch Source
Start Playback Position End
Recorded Sound
Scratch Source
D -mod
JS X
JS+Y
JS–Y etc…
– Max
Zero
Scratch!
Zero
+ Max
+ Max
c: Envelope Select c: Src d: Threshold
When
Envelope Select
is set to D ‐ mod, the input signal will be recorded only when the modulation source value is 64 or higher.
When
Envelope Select
is set to Input, the input signal will be recorded only when its level is over the Threshold value.
The maximum recording time is 2,730msec. If this is exceeded, the recorded data will start being erased from the top.
e: Response
This parameter enables you to set the speed of the response to the end of recording. Set a smaller value when you are recording a phrase or rhythm pattern, and set a higher value if you are recording only one note.
f: Direct Mix
With Always On, a dry sound is usually output. With
Always Off, dry sounds are not output. With Cross Fade, a dry sound is usually output, and it is muted only when scratching.
Set Wet/Dry to Wet to use this parameter effectively.
054: Grain Shifter
This effect cuts extremely short samples (“grains”) from the input signal waveform and plays them repeatedly, giving a mechanical character to the sound.
Wet: Mono In — Mono Out / Dry: Stereo In — Stereo Out
Left
Wet / Dry
+
Grain Shifter
Sample Cycle
Right
Wet / Dry
LFO
D -mod
Trigger
a b c d e f
Duration
Src
Amt
LFO Sync Src
LFO Sample
Cycle [Hz]
Src
Amt
MIDI Sync
BPM
Base Note
Times
LFO Type
Common
LFO Offset
[deg]
Wet/Dry
Src
Amt
0…100
Off…Tempo
–100…+100
Off…Tempo
0.02…20.00
Off…Tempo
–20.00…
+20.00
Off, On
MIDI,
40.00…
300.00
…
x1…x32
Sets the duration of the grain
p.280
Selects the source that will modulate the duration of the grain
Sets the amount by which the grain duration will be modulated
Selects the modulation source that will reset the LFO
Sets the frequency at which the grain will be switched
p.280
Selects a modulation source for
LFO speed
Sets the modulation amount of
LFO speed
When this is on, the LFO speed is set by BPM, Base Note, and
Times, instead of Frequency
p.257
MIDI syncs to the system tempo;
40–300 sets the tempo manually for this individual effect
p.257
Selects the type of notes that specify the LFO speed
p.257
Sets the number of notes that specify the LFO speed
p.257
Individual,
Common1,
Common2
–180…+180
Selects either (individual) LFO,
Common FX LFO1, or Common
LFO2
p.257
Sets the phase offset when Type
= Common 1 or Common 2
p.257
Dry, 1: 99… 99
: 1, Wet
Sets the balance between the effect and the dry input
Off…Tempo
–100…+100
Selects a modulation source for
Wet/Dry
Sets the modulation amount for
Wet/Dry
a: Duration c: LFO Sample Cycle [Hz]
Duration
sets the length of the sampled grain, and the
LFO
Sample Cycle
controls how often a new grain is sampled. In between Sample Cycles, the current grain is repeated continuously.
Sample Cycle / Duration
Sample Cycle
Duration
In
Out
Modulation and Pitch Shift (Mod./P.Shift) 055: Stereo Tremolo
055: Stereo Tremolo
This effect modulates the volume level of the input signal.
The effect is stereo, and offsetting the LFO of the left and right phases from each other produces a tremolo effect between left and right.
Stereo In — Stereo Out
Left
Tremolo
Wet / Dry
Tremolo
Right
LFO: Tri/Sin/Vintage/Up/Down LFO Shape
LFO Phase
Wet / Dry
d
BPM
Base Note
Times
LFO Type e
Common
LFO Offset
[deg]
Depth f Src
Amt
Wet/Dry g Src
Amt a
LFO
Waveform
LFO Shape b
LFO Phase
[degree]
LFO
Frequency
[Hz] c
Src
Amt
MIDI Sync
Triangle, Sine,
Vintage, Up,
Down
Selects the LFO Waveform
p.281
–100…+100
–180…+180
Changes the curvature of the
LFO Waveform
p.258
Sets the LFO phase difference between the left and right
p.281
0.02…20.00
Sets the speed of the LFO p.259
Off…Tempo
–20.00…
+20.00
Off, On
MIDI,
40.00…
300.00
…
x1…x32
Individual,
Common1,
Common2
–180…+180
0…100
Off…Tempo
–100…+100
Dry, 1 : 99…
99 : 1, Wet
Off…Tempo
–100…+100
Selects a modulation source for
LFO speed
Sets the modulation amount of
LFO speed
When this is on, the LFO speed is set by BPM, Base Note, and
Times, instead of Frequency
p.257
MIDI syncs to the system tempo;
40–300 sets the tempo manually for this individual effect
p.257
Selects the type of notes that specify the LFO speed
p.257
Sets the number of notes that specify the LFO speed
p.257
Selects either (individual) LFO,
Common FX LFO1, or Common
LFO2
p.257
Sets the phase offset when Type
= Common 1 or Common 2
p.257
Sets the depth of LFO modulation
Selects the modulation source of the depth of modulation
Sets the modulation amount of the depth of modulation
Sets the balance between the effect and the dry input
Selects a modulation source for
Wet/Dry
Sets the modulation amount for
Wet/Dry
a: LFO Waveform
This parameter sets the basic shape of the LFO. The
Vintage
waveform models classic guitar ‐ amp tremolo.
Tremolo — LFO Waveform
Triangle Sine Vintage Up Down
b: LFO Phase [degree]
This parameter determines the difference between the left and right LFO phases. A higher value will simulate the auto ‐ pan effect in which the sound is panned between left and right.
056: TEX Treml (TEX Tremolo)
This models the highly ‐ acclaimed tremolo circuit that was built into a US ‐ made combo amp. The Spread setting lets you create a pan effect that wavers between left and right.
Stereo In — Stereo Out
Left
Wet / Dry
Tremolo
Right
LFO
Tremolo
Spread
a b
Speed [Hz]
Src
Amt
Depth
Src
Amt
0.10…10.0
Off…Tempo
–100…+100
0…100
Off…Tempo
c Spread 0…100
d Level Adjust 1…100
Wet/Dry
–Wet…
–1 : 99, Dry,
1 : 99…Wet
e
Src Off…Tempo
Amt
–100…+100
–100…+100
Sets the tremolo speed
Selects a modulation source for
Speed [Hz]
Sets the modulation amount for
Speed [Hz]
Select the tremolo depth
Selects a modulation source for
Depth
Sets the modulation amount for
Depth
Sets the width of the stereo image of the effect sound
Sets the output level
Sets the balance between the effect and the dry input
Selects a modulation source for
Wet/Dry
Sets the modulation amount for
Wet/Dry
Wet / Dry
057: St. Env. Tremolo (Stereo
Envelope Tremolo)
This effect uses the input signal level to modulate a stereo tremolo (LFO volume modulation). For instance, you can create a tremolo effect that becomes deeper and faster as the input gets more quiet.
Stereo In — Stereo Out
Left
Wet / Dry
Tremolo
Tremolo
Right
LFO Phase
LFO: Tri/Sin/Vintage LFO Shape
+
Envelope Envelope Shape
Envelope Sens
a b
Envelope
Sens
Envelope
Shape
LFO
Waveform
LFO Shape
0…100
Sets the envelope’s sensitivity to the input signal
–100…+100 Sets the envelope’s curvature
Triangle, Sine,
Vintage
Selects the LFO Waveform
–100…+100
Changes the curvature of the
LFO Waveform
p.258
Wet / Dry
281
282
c
LFO Phase
[degree]
LFO
Frequency
[Hz] d f e
Envelope
Amount [Hz]
–20.00…
+20.00
Depth
Envelope
Amount
Wet/Dry
Src
Amt
–180…+180
0.02…20.00
0…100
–100…+100
Dry, 1 : 99…
99 : 1, Wet
Off…Tempo
–100…+100
Sets the LFO phase difference between the left and right
p.281
Sets the speed of the LFO
p.282
Sets the amount added to or subtracted from the Frequency when the envelope is at maximum
p.282
Sets the initial amount of tremolo
p.282
Sets the amount added to or subtracted from the Depth when the envelope is at maximum
p.282
Sets the balance between the effect and the dry input
Selects a modulation source for
Wet/Dry
Sets the modulation amount for
Wet/Dry
d: LFO Frequency [Hz] d: Envelope Amount [Hz] e: Depth e: Envelope Amount
The graphic below shows an example of tremolo modulation with negative modulation of both
Depth
and
Frequency
. At the start of the note, the input is at maximum volume. This slows down the LFO
Frequency
to
1.0Hz
, but also modulates the
Depth
to
0
–so the tremolo doesn’t have any effect.
As the input volume dies down, the
Frequency
speeds up; the
Depth
also increases, making the tremolo effect increasingly audible. When the input volume approaches silence, the
Depth
is at its maximum (
100
) and
Frequency
is at
8Hz
.
Level Dry Envelope
Shimmer
LFO Frequency[Hz]=8.0
Envelope Amount[Hz]= –7.0Hz
Depth=100
Envelope Amount= –100
Time
058: Stereo Auto Pan
This is a stereo ‐ in, stereo ‐ out auto ‐ panner. The Phase and
Shape parameters lets you create various panning effects, such as making the left and right inputs seem to chase each other around the stereo field.
Stereo In — Stereo Out
Left
Right
LFO: Tri / Sin LFO Shape
Pan
Pan
LFO Phase
Depth
a
LFO
Waveform
LFO Shape b
LFO Phase
[degree]
Triangle, Sine Selects the LFO Waveform
–100…+100
–180…+180
Changes the curvature of the
LFO Waveform
p.282
Sets the LFO phase difference between the left and right
p.282
Wet / Dry
Wet / Dry
LFO
Frequency
[Hz] c
Src
Amt
MIDI Sync d
BPM
Base Note
Times
LFO Type e
Common
LFO Offset
[deg]
Depth f Src
Amt
Wet/Dry g Src
Amt
0.02…20.00
Sets the speed of the LFO p.259
Off…Tempo
–20.00…
+20.00
Off, On
MIDI,
40.00…
300.00
…
x1…x32
Individual,
Common1,
Common2
–180…+180
0…100
Off…Tempo
–100…+100
Dry, 1 : 99…
99 : 1, Wet
Off…Tempo
–100…+100
Selects a modulation source for
LFO speed
Sets the modulation amount of
LFO speed
When this is on, the LFO speed is set by BPM, Base Note, and
Times, instead of Frequency
p.257
MIDI syncs to the system tempo;
40–300 sets the tempo manually for this individual effect
p.257
Selects the type of notes that specify the LFO speed
p.257
Sets the number of notes that specify the LFO speed
p.257
Selects either (individual) LFO,
Common FX LFO1, or Common
LFO2
p.257
Sets the phase offset when Type
= Common 1 or Common 2
p.257
Sets the depth of LFO modulation
Selects the modulation source of the depth of modulation
Sets the modulation amount of the depth of modulation
Sets the balance between the effect and the dry input
Selects a modulation source for
Wet/Dry
Sets the modulation amount for
Wet/Dry
a: LFO Shape
You can change the panning curve by modifying the LFO’s
Shape
.
b: LFO Phase [degree]
This determines the phase difference between the left and right LFOs. When you gradually change the value away from 0, the sounds from the left and right channels will seem to chase each other around. If you set the parameter to +180 or –180, the sounds from each channel will cross over each other.
You’ll only hear the effect of this parameter if the input is true stereo, with different signals in the left and right channels.
LFO Phase = 0 degrees
L-In
R-In
L-In
R-In
L-In
R-In
L-In
R-In
L-In
R-In
Left
Center
Output Stereo Image
Right
L-In
R-In
LFO Phase = 90 degrees
R-In
L-In
R-In
L-In
R-In
L-In
R-In
L-In
Stereo Auto Pan — LFO Phase
L-In
LFO Phase = 180 degrees
R-In
L-In
R-In
L-In
R-In
L-In
R-In
L-In
R-In
059: St. Phaser + Trml (Stereo
Phaser + Tremolo)
This effect combines a stereo phaser and tremolo, with linked LFOs. Swelling phaser modulation and tremolo effects synchronize with each other, creating a soothing modulation effect particularly suitable for electric piano.
Stereo In — Stereo Out
Left
Wet / Dry
Phaser
Phaser Wet / Dry
Phaser
Resonance
Phaser Wet / Dry
Tremolo
Tremolo
Right
LFO Type
LFO
Wet / Dry
LFO Shape
LFO Phase
a
Type
Phaser —
Tremolo,
…
Phaser LR —
Tremolo LR
Amt g
Phaser Wet/
Dry h
Tremolo
Shape
Tremolo
Depth
–100…+100
–Wet, –2 :
98…Dry… 2 :
98, Wet
–100…+100
0…100
i Src
Selects the type of the tremolo and phaser LFOs
p.283
Phaser — Tremolo,
Phaser — Tremolo Spin,
Phaser — Tremolo LR,
Phaser LR — Tremolo,
Phaser LR — Tremolo Spin, Phaser
LR — Tremolo LR
Sets the phase difference between the tremolo and phaser
LFOs
p.283
LFO Phase
[degree]
LFO
Frequency
[Hz] b
Src d
Common
LFO Offset
[deg]
Phaser
Manual e f c
Amt
MIDI Sync
BPM
Base Note
Times
LFO Type
Resonance
Off, On x1…x32
Individual,
Common1,
Common2
–180…+180
0…100
–100…+100
Phaser Depth 0…100
Src
Amt
–180…+180
0.02…20.00
Off…Tempo
–20.00…
+20.00
MIDI,
40.00…
300.00
…
Off…Tempo
Off…Tempo
–100…+100
Sets the speed of the LFO p.259
Selects a modulation source for
LFO speed
Sets the LFO speed modulation amount
When this is on, the LFO speed is set by BPM, Base Note, and
Times, instead of Frequency
p.257
MIDI syncs to the system tempo;
40–300 sets the tempo manually for this individual effect
p.257
Selects the type of notes that specify the LFO speed
p.257
Sets the number of notes that specify the LFO speed
p.257
Selects either (individual) LFO,
Common FX LFO1, or Common
LFO2
p.257
Sets the phase offset when Type
= Common 1 or Common 2
p.257
Sets the phaser frequency range
Sets the phaser resonance amount
Sets the phaser modulation depth
Selects the modulation source for the phaser modulation depth
Sets the modulation amount for the phaser modulation depth
Sets the balance between the phaser effect and dry sounds
p.283
Sets the degree of the tremolo
LFO shaping
Sets the tremolo modulation depth
Selects the modulation source for the tremolo modulation depth
Sets the modulation amount of the tremolo modulation depth
Modulation and Pitch Shift (Mod./P.Shift) 059: St. Phaser + Trml (Stereo Phaser + Tremolo)
Wet/Dry j
Src
Amt
Dry, 1 : 99…
99 : 1, Wet
Off…Tempo
–100…+100
Sets the balance between the effect and the dry input
p.283
Selects a modulation source for
Wet/Dry
Sets the modulation amount for
Wet/Dry
a: Type a: LFO Phase [degree]
Select the type of phaser LFO and tremolo LFO for the
Type
parameter. How the effect sound moves or rotates depends on the type of LFO. Selecting
LFO Phase
enables you to offset the timing of the phaser peak and control a subtle movement and rotation of the sound.
g: Phaser Wet/Dry j: Wet/Dry
PHASER Wet/Dry
sets the balance between the phaser output and the dry sound.
OUTPUT Wet/Dry
sets the balance between the final phaser and tremolo output level and the dry sound.
060: St. Ring Modulator
(Stereo Ring Modulator)
This effect creates a metallic sound by applying the oscillators to the input signal. Use the LFO or Dynamic
Modulation to modulate the oscillator to create a radical modulation. Matching the oscillator frequency with a note number will produce a ring modulation effect in specific key ranges.
Stereo In — Stereo Out
Left
Pre LPF
Ring Modulator
Pre LPF
Direct Mix
Ring Modulator
Right
Fixed Frequency
Note No.
Note Offset, Fine
Fixed
Sine Oscillator
OSC Mode
Pitch
Note (Key Follow)
LFO
Wet / Dry
Wet / Dry
a b c d
OSC Mode
Pre LPF
Fixed
Frequency
[Hz]
Src
Amt
Note Offset
Note Fine
Direct Mix
Fixed, Note
(Key Follow)
0…100
0…12.00k
Off…Tempo
–12.00k…
+12.00k
–48…+48
–100…+100
0…100
Switching between specifying the oscillator frequency and using a note number
p.284
Sets the damping amount of the high range input to the ring modulator
p.284
Sets the oscillator frequency when OSC Mode is set to Fixed
p.284
Selects the modulation source for the oscillator frequency when
OSC Mode is set to Fixed
Sets the modulation amount of the oscillator frequency when
OSC Mode is set to Fixed
Sets the pitch difference from the original note when OSC Mode is set to Note (Key Follow)
p.284
Fine-adjusts the oscillator frequency
p.284
Direct signal (after passing through the pre-low-pass filter) mixed into the ring modulation output
283
284
LFO
Frequency
[Hz] d
Src
Amt
MIDI Sync e
BPM
Base Note
Times
LFO Type f
Common
LFO Offset
[deg]
LFO Depth g
Src
Amt
Wet/Dry h
Src
Amt
0.02…20.00
Sets the speed of the LFO p.259
Off…Tempo
–20.00…
+20.00
Off, On
MIDI,
40.00…
300.00
…
x1…x32
Individual,
Common1,
Common2
–180…+180
0…100
Off…Tempo
–100…+100
Off…Tempo
–100…+100
Selects a modulation source for
LFO speed
Sets the modulation amount of
LFO speed
When this is on, the LFO speed is set by BPM, Base Note, and
Times, instead of Frequency
p.257
MIDI syncs to the system tempo;
40–300 sets the tempo manually for this individual effect
p.257
Selects the type of notes that specify the LFO speed
p.257
Sets the number of notes that specify the LFO speed
p.257
Selects either (individual) LFO,
Common FX LFO1, or Common
LFO2
p.257
Sets the phase offset when Type
= Common 1 or Common 2
p.257
Sets the depth of LFO modulation for the oscillator frequency
Selects the modulation source of the depth of modulation
Sets the modulation amount of the depth of modulation
Dry,
1 : 99…99 : 1,
Wet
Sets the balance between the effect and the dry input
Selects a modulation source for
Wet/Dry
Sets the modulation amount for
Wet/Dry
a: OSC Mode
This parameter determines whether or not the oscillator frequency follows the note number.
a: Pre LPF
This parameter enables you to set the damping amount of the high range sound input to the ring modulator. If the input sound contains lots of harmonics, the effect may sound dirty. In this case, cut a certain amount of high range.
b: Fixed Frequency [Hz]
This parameter sets the oscillator frequency when
OSC
Mode
is set to Fixed.
c: Note Offset c: Note Fine
These parameters for the oscillator are used when
OSC
Mode
is set to Note (Key Follow). The
Note Offset
sets the pitch difference from the original note in semitone steps.
The
Note Fine
parameter fine ‐ adjusts the pitch in cent steps.
Matching the oscillator frequency with the note number produces a ring modulation effect in the correct key.
061: Detune
Using this effect, you can obtain a detune effect that offsets the pitch of the effect sound slightly from the pitch of the input signal. Compared to the chorus effect, a more natural sound thickness will be created.
Wet: Mono In — Mono Out / Dry: Stereo In — Stereo Out
Left
+
Input Level
Input Level
Detune
Right
Delay
High Damp
Feedback
Wet / Dry
Wet / Dry
a
Pitch Shift
[cent]
Src
Amt b c d
Delay Time
[msec]
Feedback
High Damp
[%]
Input Level
D-mod [%]
Src e
Wet/Dry
Src
Amt
–100…+100
Off…Tempo
–100…+100
Sets the pitch difference from the input signal
Selects a modulation source for pitch shift
Sets the modulation amount for pitch shift
0…1000
Sets the delay time
–100…+100 Sets the feedback amount
0…100
Sets the damping amount in the high range
–100…+100
Off…Tempo
Sets the modulation amount of the input level
p.284
Selects the modulation source for the input level
p.284
Dry, 1 : 99…
99 : 1, Wet
Off…Tempo
–100…+100
Sets the balance between the effect and the dry input
Selects a modulation source for
Wet/Dry
Sets the modulation amount for
Wet/Dry
d: Input Level D-mod [%] d: Src
This parameter sets the dynamic modulation of the input level.
Input Level Dmod
Input Level x1.0
Input Level x1.0
Input Level Dmod= –50
Input Level Dmod= –100 x0.5
Input Level Dmod= +50
Input Level Dmod= +100 x0.5
Zero
Higher
Max
D -mod
Zero
Higher
Max
D -mod
Modulation and Pitch Shift (Mod./P.Shift) 062: Pitch Shifter
062: Pitch Shifter
This effect changes the pitch of the input signal. You can select from three types: Fast (quick response), Medium, and
Slow (preserves tonal quality). You can also create an effect in which the pitch is gradually raised (or dropped) using the delay with feedback.
Wet: Mono In — Mono Out / Dry: Stereo In — Stereo Out
Left
Input Level
+
Input Level
Pitch Shifter
Post
Delay
Pre
Feedback Position
High Damp
Feedback
Right
Wet / Dry
Wet / Dry
a
Mode
Slow,
Medium, Fast
Pitch Shift [1/
2tone]
–24…+24 b c
Src
Amt
Fine [cent]
Amt
Off…Tempo
–24…+24
–100…+100
–100…+100
Switches Pitch Shifter mode
p.285
Sets the pitch shift amount by steps of a semitone
p.285
Selects the modulation source of pitch shift amount
p.285
Sets the modulation amount of pitch shift amount
p.285
Sets the pitch shift amount by steps of a cent
p.285
Sets the modulation amount of pitch shift amount
p.285
d e
Delay Time
[msec]
Feedback
Position
0…2000
Pre, Post
Sets the delay time f g h
Feedback
High Damp
[%]
Input Level
D-mod [%]
Src
Wet/Dry
Src
Amt
–100…+100
0…100
–100…+100
Off…Tempo
Dry, 1 : 99…
99 : 1, Wet
Off…Tempo
–100…+100
Switches the feedback connection
p.285
Sets the feedback amount
p.285
Sets the damping amount in the high range
Sets the modulation amount of the input level
p.284
Selects the modulation source for the input level
p.284
Sets the balance between the effect and the dry input
Selects a modulation source for
Wet/Dry
Sets the modulation amount for
Wet/Dry
a: Mode
This parameter switches the pitch shifter operating mode.
With Slow, tonal quality will not be changed too much. With
Fast, the effect becomes a Pitch Shifter that has a quick response, but may change the tone. Medium is in ‐ between these two. If you do not need to set too much pitch shift amount, set this parameter to Slow. If you wish to change the pitch significantly, use Fast.
b: Pitch Shift [1/2tone] b: Src b: Amt c: Fine [cent] c: Amt
The amount of pitch shift will use the value of the
Pitch
Shift
plus the
Fine
value. The amount of modulation will use the b: Amt value plus the c: Amt.
The same Modulation Source is used for both
Pitch Shift
and
Fine
.
e: Feedback Position f: Feedback
When
Feedback Position
is set to
Pre
, the pitch shifter output is again input to the pitch shifter. Therefore, if you specify a higher value for the Feedback parameter, the pitch will be raised (or lowered) more and more each time feedback is repeated.
If
Feedback Position
is set to
Post
, the feedback signal will not pass through the pitch shifter again. Even if you specify a higher value for the
Feedback
parameter, the pitch ‐ shifted sound will be repeated at the same pitch.
063: Pitch Shifter BPM
This pitch shifter enables you to set the delay time to match the song tempo.
Wet: Mono In — Mono Out / Dry: Stereo In — Stereo Out
Left
Input Level
+
Input Level
Pitch Shifter
Post
Delay
Pre
Feedback Position
High Damp
Feedback
Right
Tempo
BPM
BPM
Base Note x Times
Wet / Dry
Wet / Dry
a Mode
Slow,
Medium, Fast
Pitch Shift [1/
2tone]
–24…+24 b c d e f g h i
Src
Amt
Fine [cent]
Amt
BPM
Time Over?
Delay Base
Note
Times
Feedback
Position
Feedback
High Damp
[%]
Input Level
D-mod [%]
Src
Wet/Dry
Src
Amt
Off…Tempo
–24…+24
–100…+100
–100…+100
MIDI,
40.00…
300.00
—, OVER!
…
x1…x32
Pre, Post
–100…+100
0…100
–100…+100
Off…Tempo
Dry, 1 : 99…
99 : 1, Wet
Off…Tempo
–100…+100
Switches Pitch Shifter mode
p.285
Sets the pitch shift amount in steps of a semitone
p.285
Selects the modulation source of pitch shift amount
p.285
Sets the modulation amount of pitch shift amount
p.285
Sets the pitch shift amount in steps of one cent
p.285
Sets the modulation amount of pitch shift amount
p.285
MIDI syncs to the system tempo;
40–300 sets the tempo manually for this individual effect
p.285
Displays an error message when the delay time exceeds the upper limit
p.285
Selects the type of notes to specify the delay time
p.285
Sets the number of notes to specify the delay time
p.285
Switches the feedback connection
p.285
Sets the feedback amount
p.285
Sets the damping amount in the high range
Sets the modulation amount of the input level
p.284
Selects the modulation source for the input level
p.284
Sets the balance between the effect and the dry input
Selects a modulation source for
Wet/Dry
Sets the modulation amount for
Wet/Dry
d: BPM e: Delay Base Note e: Times
The delay time is the duration of
Times
number of
Delay
Base Note
note values at the
BPM
tempo (or if
BPM
is set to
MIDI, the tempo determined by MIDI Clock).
d: Time Over?
You can set the delay time up to 5,290msec. If the delay time exceeds this limit, the error message “OVER!” appears on the display. Set the delay time parameters so that this message will not appear.
Time Over?
is only a display parameter.
285
286
064: Pitch Shift Mod. (Pitch
Shift Modulation)
This effect modulates the detuned pitch shift amount using an LFO, adding a clear spread and width to the sound by panning the effect sound and dry sound to the left and right.
This is especially effective when the effect sound and dry sound output from stereo speakers are mixed.
Wet: Mono In — Stereo Out / Dry: Stereo In — Stereo Out
Left
Wet / Dry
+
Pitch Shifter
Pan
Right
LFO: Tri / Sqr
Wet / Dry
a b
Pitch Shift
[cent]
LFO
Waveform
LFO
Frequency
[Hz] c
Src
Amt d f e g h
MIDI Sync
BPM
Base Note
Times
LFO Type
Common
LFO Offset
[deg]
Depth
Src
Amt
Pan
Wet/Dry
Src
Amt
–100…+100
Triangle,
Square
0.02…20.00
Sets the pitch difference from the input signal
p.286
Selects the LFO Waveform
Sets the speed of the LFO p.259
Off…Tempo
–20.00…
+20.00
Off, On
MIDI,
40.00…
300.00
…
x1…x32
Individual,
Common1,
Common2
–180…+180
–100…+100
Off…Tempo
–100…+100
L, 1 : 99…99 :
1, R
Dry, 1 : 99…
99 : 1, Wet
Off…Tempo
–100…+100
Selects a modulation source for
LFO speed
Sets the modulation amount of
LFO speed
When this is on, the LFO speed is set by BPM, Base Note, and
Times, instead of Frequency
p.257
MIDI syncs to the system tempo;
40–300 sets the tempo manually for this individual effect
p.257
Selects the type of notes that specify the LFO speed
p.257
Sets the number of notes that specify the LFO speed
p.257
Selects either (individual) LFO,
Common FX LFO1, or Common
LFO2
p.257
Sets the phase offset when Type
= Common 1 or Common 2
p.257
Sets the LFO modulation depth for pitch shift amount
p.286
Selects the modulation source of the depth of modulation
Sets the modulation amount of the depth of modulation
Sets the panning effect sound and dry sound separately
p.286
Sets the balance between the effect and the dry input
p.286
Selects a modulation source for
Wet/Dry
Sets the modulation amount for
Wet/Dry
a: Pitch Shift [cent] f: Depth
These parameters set the amount of pitch shift and amount of modulation by means of the LFO.
Pitch Shift Mod — Pitch Shift / Depth
Pitch
LFO Waveform=Triangle
Depth (+value)
Original Pitch
Pitch Shift (+ value)
LFO Waveform=Square
Depth (–value)
g: Pan h: Wet/Dry
The Pan parameter pans the effect sound and dry sound to the left and right. With L, the effect sound is panned left, and the dry sound is panned right. With a Wet/Dry = Wet setting, the effect and dry sound will be output in a proportion of
1:1.
065: Organ Vib/Chorus (Organ
Vibrato/Chorus)
This effect simulates the chorus and vibrato circuitry of a vintage organ. The modulation speed and depth can be customized.
Wet: Mono In — Mono Out / Dry: Stereo In — Stereo Out
Left
Wet / Dry
+
Preset Setting
Custom Parameters Mode
Vibrato/Chorus
Right
Wet / Dry
a b c d e f g
Input Trim
Control
Mode
Preset Type
Src
Amt
Custom Mix
Src
Amt
Custom
Depth
Src
Amt
Custom
Speed [Hz]
Src
Amt
Wet/Dry
Src
Amt
0…100
Preset,
Custom
V1, C1, V2, C2,
V3, C3
Off…Tempo
Sets the input level
Selects either preset or custom settings
p.286
Selects the effect type when
Mode=Preset
V1/V2/V3 are variations of vibrato, and C1/C2/C3 are variations of chorus
p.286
Selects the modulation source that will change the effect type
–5…+5
Vibrato,
1:99…99:1,
Chorus
Off…Tempo
–100…+100
Sets the modulation amount for changing the effect type
p.287
Sets the mix level of the direct sound when Mode=Preset
p.286
Selects the modulation source that will control the mix level of the direct sound
Sets the modulation amount for controlling the mix level of the direct sound
0…100
Off…Tempo
–100…+100
0.02…20.00
Sets the vibrato depth
p.286
Selects the modulation source that will control vibrato depth
Sets the modulation amount for controlling the vibrato depth
Sets the vibrato speed
p.286
Off…Tempo
–20.00…
+20.00
Dry, 1 : 99…
99 : 1, Wet
Off…Tempo
–100…+100
Selects the modulation source for controlling the vibrato speed
Sets the modulation amount for controlling the vibrato speed
Sets the balance between the effect and the dry input
Selects a modulation source for
Wet/Dry
Sets the modulation amount for
Wet/Dry
b: Control Mode c: Preset Type d: Custom Mix e: Custom Depth f: Custom Speed [Hz]
If Control Mode=Preset, you can use c: Preset Type to select the effect. In this case, the Custom Mix/Depth/Speed settings are ignored. If Control Mode=Custom, the Custom Mix/
Modulation and Pitch Shift (Mod./P.Shift) 066: Rotary Speaker
Depth/Speed settings are valid, and the c: Preset Type setting is ignored.
c: Amt
If Preset Type=V1 and Src=JS+Y, you can set this to +5 and move JS +Y to control the effect in the order of
V1
C1
V2
C2
V3
C3.
066: Rotary Speaker
This effect simulates a rotary speaker, and obtains a more realistic sound by simulating the rotor in the low range and the horn in the high range separately. The effect also simulates the stereo microphone settings.
Wet: Mono In — Stereo Out / Dry: Stereo In — Stereo Out
Left
Horn
Right
D -mod
D -mod
D -mod
+
Rotary Speaker
Rotor
Horn/Rotor
Balance
Mic Distance
Mic Spread
Speaker Simulation
Mode Switch: Rotate/Stop
Speed Switch: Slow/Fast
Manual Speed Control
Wet / Dry
Wet / Dry
a b c d e f g
Mode Switch Rotate, Stop
Src
Sw
Src
Sw
Manual
Speed Ctrl
Horn
Acceleration
Horn Ratio
Rotor
Acceleration
Rotor Ratio
Horn/Rotor
Balance
Mic Distance
0…100
0…100
0…100
Mic Spread 0…100
Wet/Dry
Dry, 1 : 99…
99 : 1, Wet h
Src Off…Tempo
Amt
Off…Tempo
Toggle,
Moment
Speed Switch Slow, Fast
Off…Tempo
Toggle,
Moment
Off…Tempo
Stop,
0.50…2.00
Stop,
0.50…2.00
Rotor, 1…99,
Horn
–100…+100
Switches between speaker rotation and stop
Selects a modulation source for
Rotate/Stop
Sets the switch mode for Rotate/
Stop modulation
p.287
Switches the speaker rotation speed between slow and fast
p.287
Selects a modulation source for
Slow/Fast
Sets the switch mode for Slow/
Fast modulation
p.287
Sets a modulation source for direct control of rotation speed
p.287
How quickly the horn rotation speed in the high range is switched
p.287
Adjusts the (high-range side) horn rotation speed. Standard value is 1.00. Selecting “Stop” will stop the rotation
Determines how quickly the rotor rotation speed in the low range is switched
p.287
Adjusts the (low-frequency) rotor speed. Standard value is 1.00.
Selecting “Stop” will stop the rotation
Sets the level balance between the high-frequency horn and low-frequency rotor
Sets the distance between the microphone and rotary speaker
p.287
Sets the angle of left and right microphones
p.287
Sets the balance between the effect and the dry input
Selects a modulation source for
Wet/Dry
Sets the modulation amount for
Wet/Dry
a: Sw
This parameter sets how the modulation source switches between rotation and stop.
When
Sw
=
Toggle
, the speaker rotates or stops alternately each time you press the pedal or move the joystick. Via
MIDI, rotation will switch between start and stop each time the modulation amount exceeds 64.
When
Sw
=
Moment
, the speaker rotates by default, and stops only when you press the pedal or move the joystick.
Via MIDI, modulation values above 64 make the speaker rotate, and values below 64 make it stop.
b: Speed Switch
This parameter controls how the rotation speed (slow and fast) is switched via the modulation source.
When
Sw
=
Toggle
, the speed will switch between slow and fast each time you press the pedal or move the joystick. Via
MIDI, the speed will switch each time the modulation amount exceeds 64.
When
Sw
=
Moment
, the speed is usually slow. It becomes fast only when you press the pedal or move the joystick. Via
MIDI, modulation values above 64 set the speed to
Fast
, and values below 64 set it to
Slow
.
c: Manual Speed Ctrl
If you wish to control the rotation speed manually, instead of switching between Slow and Fast, select a modulation source in the
Manual Speed Ctrl
parameter. If you don’t want to use manual control, set this to
Off
.
d: Horn Acceleration e: Rotor Acceleration
On a real rotary speaker, the rotation speed accelerates or decelerates gradually after you switch the speed. The
Horn
and
Rotor Acceleration
parameters set the transition times between fast and slow speeds.
g: Mic Distance g: Mic Spread
This is a simulation of stereo microphone settings.
Microphone
Rotary Speaker — Mic Placement
Mic Spread
Microphone
Mic Distance Mic Distance
Rotary Speaker (Top View)
287
288
067: St.EP Tone+Trml (Stereo
EP Tone+Tremolo)
This faithfully simulates the preamp section and vibrato
(tremolo) effect from a famous model of tine ‐ type electric piano.
a b c d e
Volume
Treble
Bass
Src
Sw
Vibrato
Intensity
Src
Amt
0…100
–10.0…+10.0
–10.0…+10.0
Vibrato Switch On, Off
Off…Tempo
Toggle,
Moment
1…100
Off…Tempo
–100…+100
Sets the volume level of the preamp
Sets the high-frequency boost or cut.
This controls the low-frequency boost or cut.
Switches Vibrato on/off
Selects a modulation source for
Vibrate on/off
Selects the switching mode for the modulation source that switches the Vibrate on and off
p.288
Sets the intensity of LFO modulation
Selects a modulation source for
Intensity
Sets the modulation amount for
Intensity
Vibrato
Speed
00.0…100 Sets the LFO speed f g
Src
Amt
Wet/Dry
Src
Amt
Off…Tempo
–100…+100
Dry, 1 : 99…
99 : 1, Wet
Off…Tempo
–100…+100
Selects a modulation source for
Speed
Sets the modulation amount for
Speed
Sets the balance between the effect and the dry input
Selects a modulation source for
Wet/Dry
Sets the modulation amount for
Wet/Dry
d: Sw
When this is set to
Toggle
, the
Vibrato Switch
will alternate between on and off. For instance, if vibrato is off, and
Src
is assigned to a footswitch, the first press will turn on the
Vibrato, and the next press will turn it off again.
Momentary means that the change happens only while the controller is enabled. Continuing the example from above, when the footswitch is pressed down, the Vibrato will turn on; when the footswitch is released, the Vibrato will turn off again.
Src
lets you switch to the opposite of the programmed setting. For instance, if vibrato is on, and the
Sw
is set to
Moment, then pressing down on the footswitch would turn off the Vibrato.
If you set modulation source to use a continuous controller, such as the Joystick, values of 0 ‐ 63 are as if the switch was off, and values of 64–127 are as if the switch was on.
Finally ‐ note that the assignable switches, SW1 and SW2, can themselves be set to either moment or toggle modes, and these settings are reflected by the switch LEDs.
Individual parameter settings, such as the vibrato on/off and
Sw
, do not affect the LEDs.
So, if you’re using SW1 or SW2 as the modulation source, it’s best to set the
Sw
to Moment, and then just let the switch itself determine the momentary/toggle behavior.
Delay 068: L/C/R Delay
Delay
068: L/C/R Delay
This multitap delay outputs three Tap signals to the left, right, and center respectively. You can also adjust the left and right spread of the delay sound.
Wet: Mono In — Stereo Out / Dry: Stereo In — Stereo Out
Left
Input Level D-mod
L Delay
+
High Damp Low Damp
Input Level D-mod
Level
C Delay
Level
Feedback
R Delay
Level
Right
Spread
Wet / Dry
Wet / Dry
a b c
L Delay Time
[msec]
Level
C Delay Time
[msec]
Level
R Delay Time
[msec]
Level
Feedback
(C Delay)
0…2730
0…50
0…2730
0…50
0…2730
0…50
–100…+100 d Src Off…Tempo
e f
Amt
High Damp
[%]
Low Damp
[%]
Input Level
D-mod [%]
Src
–100…+100
0…100
0…100
–100…+100
Off…Tempo
g h
Spread
Wet/Dry
Src
Amt
0…50
Dry, 1 : 99…
99 : 1, Wet
Off…Tempo
–100…+100
Sets the delay time of TapL
Sets the output level of TapL
Sets the delay time of TapC
Sets the output level of TapC
Sets the delay time of TapR
Sets the output level of TapR
Sets the feedback amount of
TapC
Selects the modulation source of the TapC feedback amount
Sets the modulation amount of the TapC feedback amount
Sets the damping amount in the high range
p.289
Sets the damping amount in the low range
p.289
Sets the modulation amount of the input level
p.284
Selects the modulation source for the input level
p.284
Sets the width of the stereo image of the effect sound
p.289
Sets the balance between the effect and the dry input
Selects a modulation source for
Wet/Dry
Sets the modulation amount for
Wet/Dry
e: High Damp [%] e: Low Damp [%]
These parameters set the damping amount of high range and low range. The tone of the delayed sound becomes darker and lighter as it feeds back.
g: Spread
This parameter sets the pan width of the effect sound. The stereo image is widest with a value of 50, and the effect sound of both channels is output from the center with a value of 0.
069: Stereo/CrossDelay
This is a stereo delay, and can by used as a cross ‐ feedback delay effect in which the delay sounds cross over between the left and right by changing the feedback routing.
Stereo In — Stereo Out
Left
Input Level D-mod
Stereo/Cross
Input Level D-mod
Right
High Damp Low Damp
Delay
Delay
Feedback
High Damp Low Damp
Spread
Stereo/Cross
Wet / Dry
Wet / Dry
a Stereo/Cross Stereo, Cross b c d j e f g h i
L Delay Time
[msec]
R Delay Time
[msec]
0.0…1360.0
0.0…1360.0
L Feedback
Src
Amt L
R Feedback
Amt R
High Damp
[%]
Low Damp
[%]
Input Level
D-mod [%]
Src
Spread
Wet/Dry
Src
Amt
–100…+100
Off…Tempo
–100…+100
–100…+100
–100…+100
0…100
0…100
–100…+100
Off…Tempo
–50…+50
Dry, 1 : 99…
99 : 1, Wet
Off…Tempo
–100…+100
Switches between stereo delay and cross-feedback delay
Sets the delay time for the left channel
Sets the delay time for the right channel
Sets the feedback amount for the left channel
Selects the modulation source of feedback amount
Sets the modulation amount of the left channel feedback
Sets the feedback amount for the right channel
Sets the modulation amount of the right channel feedback
Sets the damping amount in the high range
p.289
Sets the damping amount in the low range
p.289
Sets the modulation amount of the input level
p.284
Selects the modulation source for the input level
p.284
Sets the width of the stereo image of the effect sound
p.289
Sets the balance between the effect and the dry input
Selects a modulation source for
Wet/Dry
Sets the modulation amount for
Wet/Dry
289
290
070: St. Multitap Delay (Stereo
Multitap Delay)
The left and right Multitap Delays have two taps respectively. Changing the routing of feedback and tap output allows you to create various patterns of complex effect sounds.
Stereo In — Stereo Out
Left
Input Level D-mod
Input Level D-mod
Feedback
Delay
High Damp Low Damp
Mode
(1)
Tap1 Level
High Damp Low Damp (1)
Delay
Feedback
Right
(2)
Mode
(2)
Spread
Wet / Dry
Tap1=(1)
Tap2=(2)
Wet / Dry
a Mode i Src
Normal, Cross
Feedback,
Cross Pan1,
Cross Pan2
Switches the left and right delay routing
p.290
0.0…1360.0
Sets the Tap1 delay time b c e
Tap1 Time
[msec]
Tap2 Time
[msec] d Tap1 Level
Feedback
(Tap2)
Src f g h
Amt
High Damp
[%]
Low Damp
[%]
Input Level
D-mod [%]
Src j
Spread
Amt
Wet/Dry
Src
Amt
0.0…1360.0
0…100
Sets the Tap2 delay time
Sets the Tap1 output level
p.290
–100…+100 Sets the Tap2 feedback amount
Off…Tempo
–100…+100
0…100
0…100
–100…+100
Off…Tempo
–100…+100
Off…Tempo
–100…+100
Dry, 1 : 99…
99 : 1, Wet
Off…Tempo
–100…+100
Selects the modulation source of the Tap2 feedback amount
Sets the modulation amount of the Tap2 feedback amount
Sets the damping amount in the high range
p.289
Sets the damping amount in the low range
p.289
Sets the modulation amount of the input level
p.284
Selects the modulation source for the input level
p.284
Sets the width of the stereo image of the effect sound
p.289
Selects the modulation source of the effect sound’s stereo image width
Sets the modulation amount of the effect sound’s stereo image width
Sets the balance between the effect and the dry input
Selects a modulation source for
Wet/Dry
Sets the modulation amount for
Wet/Dry
Mode: Normal Mode: Cross Feedback Mode: Cross Pan1 Mode: Cross Pan2
a: Mode
You can change how the left and right delay signals are panned by modifying the routing of the left and right delay as shown in the figure above. You need to input different sounds to each channel in order for this parameter to be effective.
d: Tap1 Level
This parameter sets the output level of Tap1. Setting a different level from Tap2 will add a unique touch to a monotonous delay and feedback.
071: St. Mod Delay (Stereo
Modulation Delay)
This stereo delay uses an LFO to sweep the delay time. The pitch also varies, creating a delay sound which swells and shimmers. You can also control the delay time using a modulation source.
Stereo In — Stereo Out
Left
Delay
Feedback
Delay
Right
D -mod
LFO Sync
Response
LFO: Tri / Sine LFO Shape
L/R: +/+ +/–
D-mod
LFO
LFO Phase Modulation Mode
Wet / Dry
Wet / Dry
a
Modulation
Mode
D-mod
Modulation b Src c d
Response
LFO
Waveform
LFO Shape
LFO D-mod
Sync
Src e
LFO
Frequency
[Hz]
LFO, D-mod
L/R:+/+,
L/R:+/–
Off…Tempo
0…30
Switches between LFO modulation control and modulation source control
Reversed L/R control by modulation source
p.291
Selects the modulation source that controls delay time
Sets the rate of response to the modulation source
Triangle, Sine Selects the LFO Waveform
–100…+100
Off, On
Off…Tempo
Changes the curvature of the
LFO Waveform
p.258
Switches LFO reset off/on
p.291
Selects the modulation source that resets the LFO
0.02…20.00
Sets the speed of the LFO p.259
f
MIDI Sync
BPM
Base Note
Times
Off, On
MIDI,
40.00…
300.00
…
x1…x32
LFO Type g h
Common
LFO Offset
[deg]
L LFO Phase
[deg]
L Depth
Individual,
Common1,
Common2
–180…+180
–180…+180
0…200
j i
R LFO Phase
[deg]
R Depth
–180…+180
0…200
L Delay Time
[msec]
0.0…1000.0
L Feedback –100…+100 k
R Delay Time
[msec]
0.0…1000.0
R Feedback –100…+100
When this is on, the LFO speed is set by BPM, Base Note, and
Times, instead of Frequency
p.257
MIDI syncs to the system tempo;
40–300 sets the tempo manually for this individual effect
p.257
Selects the type of notes that specify the LFO speed
p.257
Sets the number of notes that specify the LFO speed
p.257
Selects either (individual) LFO,
Common FX LFO1, or Common
LFO2
p.257
Sets the phase offset when Type
= Common 1 or Common 2
p.257
Sets the phase obtained when the left LFO is reset
p.291
Sets the depth of the left LFO modulation
Sets the phase obtained when the right LFO is reset
p.291
Sets the depth of the right LFO modulation
Sets the delay time for the left channel
Sets the feedback amount of left delay
Sets the delay time for the right channel
Sets the feedback amount of right delay
Delay 072: St. Dynamic Delay (Stereo Dynamic Delay)
Wet/Dry l
Src
Amt
–Wet…
–1 : 99, Dry,
1 : 99…Wet
Off…Tempo
–100…+100
Sets the balance between the effect and the dry input
p.259
Selects a modulation source for
Wet/Dry
Sets the modulation amount for
Wet/Dry
b: D-mod Modulation
When the modulation source is used for control, this parameter reverses the left and right modulation direction.
d: LFO D-mod Sync d: Src h: L LFO Phase [deg] i: R LFO Phase [deg]
If
LFO D-mod Sync
is On, the LFO will be reset by the modulation source that is received.
The
Src
parameter sets the modulation source that resets the
LFO. For example, you can assign Gate as a modulation source so that the sweep always starts from the specified point.
L LFO Phase
and
R LFO Phase
set the phase obtained when the left and right LFOs are reset. In this way, you can create changes in pitch sweep for the left and right channels individually.
The effect is off when a value of the modulation source specified in the
Src
parameter is 63 or smaller, and the effect is on when the value is 64 or higher. The LFO is triggered and reset to the
L LFO Phase
and
R LFO
Phase
settings when the value changes from 63 or smaller to 64 or higher.
072: St. Dynamic Delay (Stereo
Dynamic Delay)
This stereo delay controls the level of delay according to the input signal level. You can use this as a ducking delay that applies delay to the sound only when you play keys at a high velocity or only when the volume level is low.
Stereo In — Stereo Out
Left
Wet / Dry
High Damp Low Damp
Delay
Delay
Feedback
High Damp Low Damp
Spread
Right
+
FB
Envelope
Threshold
Attack, Release
Out
Control Target
Wet / Dry
d j a b c
Control
Target
Polarity e f
L Delay Time
[msec]
R Delay Time
[msec] g Feedback
High Damp
[%] h
Low Damp
[%] i
Threshold
Offset
Attack
Release
Spread
Wet/Dry
Src
Amt
None, Out, FB
+, –
0…100
0…100
Selects from no control, output, and feedback
p.291
Reverses level control
p.291
Sets the level to which the effect is applied
p.291
Sets the offset of level control
p.291
1…100
1…100
Off…Tempo
–100…+100
Sets the attack time of level control
p.291
Sets the release time of level control
p.291
0.0…1360.0
0.0…1360.0
0…100
–100…+100
Sets the delay time for the left channel
Sets the delay time for the right channel
–100…+100 Sets the feedback amount
0…100
Sets the damping amount in the high range
p.289
Sets the damping amount in the low range
p.289
Sets the width of the stereo image of the effect sound
p.289
Dry,
1 : 99…99 : 1,
Wet
Sets the balance between the effect and the dry input
Selects a modulation source for
Wet/Dry
Sets the modulation amount for
Wet/Dry
a: Control Target
This parameter selects no level control, delay output control
(effect balance), or feedback amount control.
a: Polarity b: Threshold b: Offset c: Attack d: Release
The
Offset
parameter specifies the value for the
Control
Target
parameter (that is set to None), expressed as the ratio relative to the parameter value (the
Wet/Dry
value with
Control Target
= Output Level, or the
Feedback
value with
Control Target
= Feedback).
When
Polarity
is positive, the
Control Target
value is obtained by multiplying the parameter value by the
Offset
value (if the input level is below the threshold), or equals the parameter value if the input level exceeds the threshold.
When
Polarity
is negative, Control Target value equals the parameter value if the input level is below the threshold, or is obtained by multiplying the parameter value by the
Offset
value if the level exceeds the threshold.
291
292
The
Attack
and
Release
parameters specify attack time and release time of delay level control.
Dynamic Delay
Level
Dry
Envelope
Threshold
Release
Attack
Wet
Target=Output Level
Polarity= (–)
Wet
Target=Output Level
Polarity= (+)
(Ducking Delay)
Delay Time
Time
073: St. AutoPanningDly
(Stereo Auto Panning Delay)
This stereo delay effect pans the delay sound left and right using the LFO.
Stereo In — Stereo Out
Left
Delay
High Damp Low Damp
Feedback
Delay
High Damp Low Damp
Right
Pan
Pan
Depth
Wet / Dry
Wet / Dry
LFO Phase
LFO: Tri / Sin LFO Shape
a
L Delay Time
[msec]
L Feedback
0.0…1360.0
–100…+100 b
R Delay Time
[msec]
0.0…1360.0
R Feedback –100…+100 c d
High Damp
[%]
Low Damp
[%]
LFO
Waveform
LFO Shape e
Phase
[degree]
0…100
0…100
–100…+100
–180…+180
Sets the delay time for the left channel
Sets the feedback amount for the left channel
Sets the delay time for the right channel
Sets the feedback amount for the right channel
Sets the damping amount in the high range
Triangle, Sine Selects the LFO Waveform
p.289
Sets the damping amount in the low range
p.289
Changes the curvature of the
LFO Waveform
p.258
Sets the LFO phase difference between the left and right
p.282
f
Panning
Frequency
[Hz]
0.02…20.00
Sets the panning speed g h i
MIDI Sync
BPM
Base Note
Times
LFO Type
Common
LFO Offset
[deg]
Panning
Depth
Src
Off, On
MIDI,
40.00…
300.00
…
x1…x32
Individual,
Common1,
Common2
–180…+180
0…100
Off…Tempo
Switches between using the frequency of the panning speed and using the tempo and notes
p.257
MIDI syncs to the system tempo;
40–300 sets the tempo manually for this individual effect
p.257
Selects the type of notes to specify the delay time for the panning speed
p.257
Sets the number of notes to specify the delay time for the panning speed
p.257
Selects either (individual) LFO,
Common FX LFO1, or Common
LFO2
p.257
Sets the phase offset when Type
= Common 1 or Common 2
p.257
j
Amt
Wet/Dry
Src
Amt
–100…+100
Dry, 1 : 99…
99 : 1, Wet
Off…Tempo
–100…+100
Sets the panning width
Selects the modulation source for the panning width
Set the modulation amount of the panning width
Sets the balance between the effect and the dry input
Selects a modulation source for
Wet/Dry
Sets the modulation amount for
Wet/Dry
Delay 074: Echo Plus
074: Echo Plus
This models a famous analog tape echo unit. On the original device, “echo” was created by a playback head, and the
“delay time” was specified by adjusting the speed of the motor. The warmth and subtlety of the echoes it generated made this “lo ‐ fi” unit a favorite with many pro musicians.
Wet: Mono In — Mono Out / Dry: Stereo In — Stereo Out
Left
+
Input Level
D-mod
Tone
Delay
Feedback
Right
Low Damp
Wet / Dry
Wet / Dry
a f
Time [ms]
Src
0…2700
Off…Tempo
b
Amt –100…+100 Sets the amount for Time [ms]
Feedback 0…100
Src Off…Tempo
Selects the modulation source of
Feedback
Amt c Tone d
Low Damp
[%]
–100…+100 Sets the amount of Feedback
1…100
Sets the tone of the delay sound
0…100
e
Input Level
D-mod [%]
Input Level
Mod Src
–100…+100
Off…Tempo
Sets the damping amount in the low range
p.289
Sets the modulation amount of the input level
p.284
Selects the modulation source for the input level
p.284
Wet/Dry
Src
Amt
Dry, 1 : 99…
99 : 1, Wet
Off…Tempo
–100…+100
Sets the delay time
Selects the modulation source of
Time [ms]
Sets the balance between the effect and the dry input
Selects a modulation source for
Wet/Dry
Sets the modulation amount for
Wet/Dry e
Tap2 Level
Pan
Feedback
Amt
0…100
L, 1…99, R
Sets the Tap2 output level
Sets the stereo image of tap2
Sets the Tap2 feedback amount
p.293
f g
Tap3 Level
Pan
Feedback
Amt
Feedback 0…100
Src h
Amt
High Damp
[%]
Low Damp
[%] j i Saturation
Input Trim
Pre Tone k
Wow Flutter
[Hz]
Wow Flutter depth
0…100
L, 1…99, R
–100…+100
0…100
0…100
0…100
0…100
0…100
0.02…1.00
0…100
Sets the Tap3 output level
Sets the stereo image of tap3
Sets the Tap3 feedback amount
p.293
Sets the amount of feedback for
Taps 1, 2, and 3
p.293
Off…Tempo
Selects the modulation source of feedback amount
–100…+100 Sets the feedback amount
Sets the damping amount in the high range
Sets the damping amount in the low range
Sets the distortion amount
Sets the input gain
Sets the tone of the input
Sets the frequency at which pitch variation will occur
Sets the depth of pitch variation
Wet/Dry
–100…+100
Dry,
1 : 99…99 : 1,
Wet
Sets the balance between the effect and the dry input l
Src
Amt
Off…Tempo
–100…+100
Selects a modulation source for
Wet/Dry
Sets the modulation amount for
Wet/Dry
a: Delay (Tap1) [msec] a: Src a: Amt b: Tap2 Position [%] b: Tap3 Position [%]
The delay time for Tap 2 and 3 is specified as a proportion
(%) relative to
Delay (Tap1)
. Even if you use dynamic modulation to control
Delay (Tap1)
, Tap 2 and 3 will change at the same proportion.
d: Feedback Amt e: Feedback Amt f: Feedback Amt g: Feedback
The feedback output from Tap 1, 2, and 3 is mixed according to the
Feedback Amt
, and then the final amount of feedback is specified by
Feedback
.
075: Tape Echo
This effect simulates a tape echo unit with three playback heads. The distortion and tonal change typical of magnetic tape are also reproduced.
Wet: Mono In — Stereo Out / Dry: Stereo In — Stereo Out
Left
Right
+
Trim
D -mod
Feedback
Pre Tone
Feedback Amt
Tape
Saturation
High / Low Damp
Wah Flatter
Delay Time
(3)
(2)
(1)
Delay
Level Pan
Tap2/3
Position
Wet / Dry
Wet / Dry
b c d
Delay (Tap1)
[msec]
0…2700
a Src
Amt
Tap2 Position
[%]
Tap3 Position
[%]
Tap1 Level
Pan
Feedback
Amt
Off…Tempo
–2700…
+2700
0…100
0…100
0…100
L, 1…99, R
–100…+100
Sets the delay time (tap1)
p.293
Selects the modulation source of the delay time
p.293
Sets the modulation amount of delay time
p.293
Sets the position of Tap 2 relative to the Tap 1 delay time the depth of pitch variation
p.293
Sets the position of Tap 3 relative to the Tap 1 delay time the depth of pitch variation
p.293
Sets the Tap1 output level
Sets the stereo image of tap1
Sets the Tap1 feedback amount
p.293
076: Auto Reverse
This effect records the input signal and automatically plays it in reverse (the effect is similar to a tape reverse sound).
Wet: Mono In — Mono Out / Dry: Stereo In — Stereo Out
Left
Wet / Dry
+
Auto Reverse
Rec/Reverse Play
Control
Direct
Mix
Right
Wet / Dry
D -mod
D-mod
Input
Envelope Select
Envelope Control
a Rec Mode b
Single, Multi
Reverse Time
[msec]
20…2640
Sets the recording mode
p.294
Sets the maximum duration of the reverse playback
p.294
293
294
c
Envelope
Select
Src d Threshold e Response f
Direct Mix
Wet/Dry g
Src
Amt
D-mod, Input
Selects whether the start and end of recording is controlled via the modulation source or the input signal level
p.294
Off…Tempo
0…100
0…100
Selects the modulation source that controls recording when
Envelope Select is set to D-mod
p.294
Sets the recording start level when Envelope Select is set to
Input
p.294
Sets the speed of the response to the end of recording
p.280
Always On,
Always Off,
Cross Fade
Dry, 1 : 99…
99 : 1, Wet
Selects how a dry sound is mixed
p.280
Off…Tempo
–100…+100
Sets the balance between the effect and the dry input
Selects a modulation source for
Wet/Dry
Sets the modulation amount for
Wet/Dry
a: Rec Mode b: Reverse Time [msec]
When
Rec Mode
is set to Single, you can set up to 2,640msec for
Reverse Time
. If recording starts during the reverse playback, the playback will be interrupted.
When
Rec Mode
is set to Multi, you can make another recording during the reverse playback. However, the maximum Reverse Time is limited to 1,320msec.
If you wish to record a phrase or rhythm pattern, set
Rec
Mode
to Single. If you record only one note, set
Rec Mode
to
Multi.
The
Reverse Time
parameter specifies the maximum duration of the reverse playback. The part in excess of this limit will not be played in reverse. If you wish to add short pieces of the reverse playback of single notes, make the
Reverse Time
shorter.
Rec Reverse Rec
Mode/Reverse Time
Reverse
Envelope Select = Input
Input
Time
Mode = Single
Mode = Multi
Reverse Time Reverse Time
c: Envelope Select c: Src d: Threshold
These parameters select the source to control the start and end of recording.
When
Envelope Select
is set to D ‐ mod, the input signal will be recorded only when the value of the modulation source selected by the Src parameter is 64 or higher.
When
Envelope Select
is set to Input, the input signal will be recorded only when its level exceeds the Threshold level.
When recording is completed, reverse playback starts immediately.
077: Sequence BPM Dly
(Sequence BPM Delay)
This four ‐ tap delay enables you to select a tempo and rhythm pattern to set up each tap.
Wet: Mono In — Stereo Out / Dry: Stereo In — Stereo Out
Left
Wet / Dry
Pan
Right
Input Level D-mod
+
High Damp Low Damp
Input Level D-mod
Tempo
BPM
Rythm Pattern
BPM
Delay
Feedback
Wet / Dry
a b c
Rhythm
Pattern
Tap1 Pan
Tap2 Pan
Tap3 Pan
Tap4 Pan
Feedback d Src e f
Amt
High Damp
[%]
Low Damp
[%]
Input Level
D-mod [%]
Src g
BPM
Wet/Dry
Src
Amt
MIDI,
40.00…
300.00
…
3
MIDI syncs to the system tempo;
40–300 sets the tempo manually for this individual effect
p.294
Selects a rhythm pattern
p.294
L, 1…99, R
L, 1…99, R
L, 1…99, R
Sets the panning of Tap1
Sets the panning of Tap2
Sets the panning of Tap3
L, 1…99, R Sets the panning of Tap4
–100…+100 Sets the feedback amount
Off…Tempo
Selects the modulation source of feedback amount
–100…+100 Sets the feedback amount
0…100
Sets the damping amount in the high range
p.289
0…100
–100…+100
Off…Tempo
Sets the damping amount in the low range
p.289
Sets the modulation amount of the input level
p.284
Selects the modulation source for the input level
p.284
Dry, 1 : 99…
99 : 1, Wet
Off…Tempo
–100…+100
Sets the balance between the effect and the dry input
Selects a modulation source for
Wet/Dry
Sets the modulation amount for
Wet/Dry
a: BPM b: Rhythm Pattern
With the tempo specified by the
BPM
parameter (or the
MIDI Clock tempo if
BPM
is set to MIDI), the length of one beat equals the feedback delay time, and the interval between taps becomes equal. Selecting a rhythm pattern will automatically turn the tap outputs on and off. When
BPM
is set to MIDI, the lower limit of the
BPM
is 44.
Delay 078: L/C/R BPM Delay
078: L/C/R BPM Delay
The L/C/R delay enables you to match the delay time with the song tempo. You can also synchronize the delay time with the arpeggiator or sequencer. If you program the tempo before performance, you can achieve a delay effect that synchronizes with the song in real ‐ time. Delay time is set by notes.
Wet: Mono In — Stereo Out / Dry: Stereo In — Stereo Out
Left
Input Level D-mod
+
High Damp Low Damp
Input Level D-mod
L Delay
Level
C Delay
Feedback
R Delay
Level
Level
Right
Tempo
BPM
BPM
Base Note x Times
Base Note x Times
Base Note x Times
Spread
Wet / Dry
Wet / Dry
a
BPM
MIDI,
40.00…
300.00
Time Over?
—, OVER!
L Delay Base
Note b
Times d
Level
Feedback
(C Delay) e Src
0…50
–100…+100
Off…Tempo
Amt f g
High Damp
[%]
Low Damp
[%]
Input Level
D-mod [%]
Src
–100…+100
0…100
0…100
–100…+100
Off…Tempo
h i c
Level
C Delay Base
Note
Times
Level
R Delay Base
Note
Times
Spread
Wet/Dry
Src
Amt
…
x1…x32
0…50
…
x1…x32
0…50
…
x1…x32
0…50
Dry, 1 : 99…
99 : 1, Wet
Off…Tempo
–100…+100
MIDI syncs to the system tempo;
40–300 sets the tempo manually for this individual effect
p.285
Displays an error message when the delay time exceeds the upper limit
p.295
Selects the type of notes to specify the delay time for TapL
p.285
Sets the number of notes to specify the delay time for TapL
p.285
Sets the output level of TapL
Selects the type of notes to specify the delay time for TapC
p.285
Sets the number of notes to specify the delay time for TapC
p.285
Sets the output level of TapC
Selects the type of notes to specify the delay time for TapR
p.285
Sets the number of notes to specify the delay time for TapR
p.285
Sets the output level of TapR
Sets the feedback amount of
TapC
Selects the modulation source for the TapC feedback
Sets the modulation amount of the TapC feedback
Sets the damping amount in the high range
p.289
Sets the damping amount in the low range
p.289
Sets the modulation amount of the input level
p.284
Selects the modulation source for the input level
p.284
Sets the width of the stereo image of the effect sound
p.289
Sets the balance between the effect and the dry input
Selects a modulation source for
Wet/Dry
Sets the modulation amount for
Wet/Dry
a: Time Over?
You can set the delay time up to 5,460msec. If the delay time exceeds this limit, the error message “OVER!” appears in the display. Set the delay time parameters so that this message will not appear.
Time Over?
is only a display parameter.
079: Stereo BPM Delay
This stereo delay enables you to set the delay time to match the song tempo.
Stereo In — Stereo Out
Left
Wet / Dry
High Damp Low Damp
Delay
Input Level D-mod
Feedback
High Damp Low Damp Input Level D-mod
Delay
Right
Tempo
BPM
BPM
Base Note x Times
Base Note x Times
Adjust [%]
Adjust [%]
Wet / Dry
a b c d i
BPM
MIDI,
40.00…
300.00
Time Over? L —, OVER!
R
L Delay Base
Note
Times
Adjust [%]
R Delay Base
Note
Times
Adjust [%]
L Feedback
Src
Amt L
—, OVER!
…
x1…x32
–2.50…+2.50
…
x1…x32
–2.50…+2.50
–100…+100
Off…Tempo
–100…+100
R Feedback –100…+100 e
Amt R f g h
High Damp
[%]
Low Damp
[%]
Input Level
D-mod [%]
Src
Wet/Dry
Src
Amt
–100…+100
0…100
0…100
–100…+100
Off…Tempo
Dry, 1 : 99…
99 : 1, Wet
Off…Tempo
–100…+100
MIDI syncs to the system tempo;
40–300 sets the tempo manually for this individual effect
p.285
Display the error message if the left channel delay time exceeds the upper limit
p.295
Display the error message if the right channel delay time exceeds the upper limit
p.295
Selects the type of notes to specify the left channel delay time
p.285
Sets the number of notes to specify the left channel delay time
p.285
Fine-adjust the left channel delay time
Selects the type of notes to specify the right channel delay time
p.285
Sets the number of notes to specify the right channel delay time
p.285
Fine-adjust the right channel delay time
Sets the feedback amount for the left channel
Selects the modulation source of feedback amount
Sets the modulation amount of the left channel feedback
Sets the feedback amount for the right channel
Sets the modulation amount of the right channel feedback
Sets the damping amount in the high range
p.289
Sets the damping amount in the low range
p.289
Sets the modulation amount of the input level
p.284
Selects the modulation source for the input level
p.284
Sets the balance between the effect and the dry input
Selects a modulation source for
Wet/Dry
Sets the modulation amount for
Wet/Dry
a: Time Over? L, R
You can set the delay time up to 2,730msec. If the delay time exceeds this limit, the error message “OVER!” appears in the display. Set the delay time parameters so that this message will not appear.
Time Over?
is only a display parameter.
295
296
080: St.BPM Mtap Delay (Stereo
BPM Multitap Delay)
This is a stereo multi ‐ tapped delay that lets you set the delay time to match the tempo of the song.
Stereo In — Stereo Out
Left
Right
Tempo
BPM
Input Level D-mod
Input Level D-mod
Feedback
High Damp Low Damp
Mode
(1)
Tap1 Level
High Damp Low Damp (1)
Delay
Delay
Feedback
(2)
Mode
(2)
Spread
BPM
Base Note x Times
Base Note x Times
a b c d e
Mode
BPM
Tap 1 Base
Note
Tap 2 Base
Note
Normal, Cross
Feedback,
Cross Pan1,
Cross Pan2
Switches the left and right delay routing
p.290
MIDI,
40.00…
300.00
MIDI syncs to the system tempo;
40–300 sets the tempo manually for this individual effect
p.285
Time Over? 1 —, OVER!
2
Times
Times
Tap1 Level
—, OVER!
…
x1…x32
…
x1…x32
0…100
Displays an error message when the delay time for Tap1 exceeds the upper limit
p.295
Displays an error message when the delay time for Tap2 exceeds the upper limit
p.295
Selects the type of notes to specify the delay time for Tap1
p.285
Sets the number of notes to specify the delay time for Tap1
p.285
Selects the type of notes to specify the delay time for Tap2
p.285
Sets the number of notes to specify the delay time for Tap2
p.285
Sets the Tap1 output level
p.290
Feedback
(Tap2)
–100…+100 Sets the Tap2 feedback amount f g h j i
Src
Amt
High Damp
[%]
Low Damp
[%]
Input Level
D-mod [%]
Src
Spread
Src
Amt
Wet/Dry
Src
Amt
Off…Tempo
–100…+100
0…100
0…100
–100…+100
Off…Tempo
–100…+100
Off…Tempo
–100…+100
Dry, 1 : 99…
99 : 1, Wet
Off…Tempo
–100…+100
Selects the modulation source of the Tap2 feedback amount
Sets the modulation amount of the Tap2 feedback amount
Sets the damping amount in the high range
p.289
Sets the damping amount in the low range
p.289
Sets the modulation amount of the input level
p.284
Selects the modulation source for the input level
p.284
Sets the width of the stereo image of the effect sound
p.289
Selects the modulation source of the effect sound’s stereo image width
Sets the modulation amount of the effect sound’s stereo image width
Sets the balance between the effect and the dry input
Selects a modulation source for
Wet/Dry
Sets the modulation amount for
Wet/Dry
Wet / Dry
Tap1=(1)
Tap2=(2)
Wet / Dry
081: St.BPM Mod. Delay (Stereo
BPM Modulation Delay)
This is a stereo modulation delay that lets you synchronize the delay time to the tempo of the song.
Stereo In — Stereo Out
Left
Delay
Feedback
Delay
Right
Tempo
BPM
D -mod
LFO Sync
BPM
Base Note x Times
Base Note x Times
Response
LFO: Tri / Sine
D-mod
LFO Shape
L/R: +/+ +/–
LFO
LFO Phase Modulation Mode
Wet / Dry
Wet / Dry
a
Modulation
Mode
D-mod
Modulation b Src
Response c
LFO
Waveform
LFO Shape d
LFO D-mod
Sync
Src e
LFO
Frequency
[Hz]
LFO, D-mod
L/R:+/+,
L/R:+/–
Off…Tempo
0…30
Switches between LFO modulation control and modulation source control
Reversed L/R control by modulation source
p.291
Selects the modulation source that controls delay time
Sets the rate of response to the modulation source
Triangle, Sine Selects the LFO Waveform
–100…+100
Off, On
Off…Tempo
Changes the curvature of the
LFO Waveform
p.258
Switches LFO reset off/on
p.291
Selects the modulation source that resets the LFO
0.02…20.00
Sets the speed of the LFO p.259
f
MIDI Sync
BPM
Base Note
MIDI,
40.00…
300.00
…
Times
LFO Type g h
Common
LFO Offset
[deg]
L LFO Phase
[deg]
Depth x1…x32
Individual,
Common1,
Common2
–180…+180
–180…+180
0…200
i j
R LFO Phase
[deg]
Depth
–180…+180
0…200
BPM(Delay)
MIDI,
40.00…
300.00
Time Over? L —, OVER!
R
Off, On
—, OVER!
When this is on, the LFO speed is set by BPM, Base Note, and
Times, instead of Frequency
p.257
MIDI syncs to the system tempo;
40–300 sets the tempo manually for this individual effect
p.257
Selects the type of notes that specify the LFO speed
p.257
Sets the number of notes that specify the LFO speed
p.257
Selects either (individual) LFO,
Common FX LFO1, or Common
LFO2
p.257
Sets the phase offset when Type
= Common 1 or Common 2
p.257
Sets the phase obtained when the left LFO is reset
p.291
Sets the depth of the left LFO modulation
Sets the phase obtained when the right LFO is reset
p.291
Sets the depth of the right LFO modulation
MIDI syncs to the system tempo;
40–300 sets the tempo manually for this individual effect
p.285
Display the error message if the left channel delay time exceeds the upper limit
p.297
Display the error message if the right channel delay time exceeds the upper limit
p.297
Delay 082: St.BPMAutoPanDly (Stereo BPM Auto Panning Delay)
k l m
L Delay Base
Note
Times
Feedback
R Delay Base
Note
Times
Feedback
Wet/Dry
Src
Amt
…
x1…x32
–100…+100
…
x1…x32
–100…+100
–Wet…
–1 : 99, Dry,
1 : 99…Wet
Off…Tempo
–100…+100
Selects the type of notes to specify the left channel delay time
p.285
Sets the number of notes to specify the left channel delay time
p.285
Sets the feedback amount of left delay
Selects the type of notes to specify the right channel delay time
p.285
Sets the number of notes to specify the right channel delay time
p.285
Sets the feedback amount of right delay
Sets the balance between the effect and the dry input
p.259
Selects a modulation source for
Wet/Dry
Sets the modulation amount for
Wet/Dry
j: Time Over? L, R
You can set the delay time up to 2,550msec. If the delay time exceeds this limit, the error message “OVER!” appears in the display. Set the delay time parameters so that this message will not appear.
Time Over?
is only a display parameter.
082: St.BPMAutoPanDly (Stereo
BPM Auto Panning Delay)
This stereo auto panning delay enables you to set the delay time to match the song tempo.
Stereo In — Stereo Out
Left
High Damp Low Damp
Delay
Feedback
Delay
High Damp Low Damp
Right
Tempo
BPM
BPM
Base Note x Times
Base Note x Times
LFO: Tri / Sin LFO Shape
Pan
Pan
LFO Phase
Depth
Wet / Dry
Wet / Dry
a b c d
BPM
Time Over? L
R
L Delay Base
Note
Times
Feedback
R Delay Base
Note
Times
Feedback
High Damp
[%]
Low Damp
[%]
MIDI,
40.00…
300.00
—, OVER!
—, OVER!
…
x1…x32
–100…+100
…
x1…x32
–100…+100
0…100
0…100
MIDI syncs to the system tempo;
40–300 sets the tempo manually for this individual effect
p.285
Display the error message if the left channel delay time exceeds the upper limit
p.295
Display the error message if the right channel delay time exceeds the upper limit
p.295
Selects the type of notes to specify the left channel delay time
p.285
Sets the number of notes to specify the left channel delay time
p.285
Sets the feedback amount for the left channel
Selects the type of notes to specify the right channel delay time
p.285
Sets the number of notes to specify the right channel delay time
p.285
Sets the feedback amount for the right channel
Sets the damping amount in the high range
p.289
Sets the damping amount in the low range
p.289
j e f
LFO
Waveform
Shape
LFO Phase
Triangle, Sine Selects the LFO Waveform
–100…+100
–180…+180
Changes the curvature of the
LFO Waveform
p.258
Sets the LFO phase difference between the left and right
p.281
Panning
Frequencyuency [Hz]
0.02…20.00
Sets the panning speed
p.257
g h
MIDI Sync
BPM
Base Note
Times
LFO Type
Common
LFO Offset
[deg]
Panning
Depth
Off, On
MIDI,
40.00…
300.00
…
x1…x32
Individual,
Common1,
Common2
–180…+180
0…100
When this is on, the pan LFO speed is set by BPM, Base Note, and Times, instead of Frequency
p.257
MIDI syncs to the system tempo;
40–300 sets the tempo manually for this individual effect
p.257
Selects the type of notes to specify the delay time for the panning speed
p.257
Sets the number of notes to specify the delay time for the panning speed
p.257
Selects either (individual) LFO,
Common FX LFO1, or Common
LFO2
p.257
Sets the phase offset when Type
= Common 1 or Common 2
p.257
Sets the panning width i Src
Amt
Wet/Dry
Src
Amt
Off…Tempo
–100…+100
Dry, 1 : 99…
99 : 1, Wet
Off…Tempo
–100…+100
Selects the modulation source for the panning width
Set the modulation amount of the panning width
Sets the balance between the effect and the dry input
Selects a modulation source for
Wet/Dry
Sets the modulation amount for
Wet/Dry
083: Tape Echo BPM
This is a tape echo that lets you synchronize the delay time to the tempo of the song.
Wet: Mono In — Stereo Out / Dry: Stereo In — Stereo Out
Left
Wet / Dry
Feedback
Right
+
Trim Pre Tone
Feedback Amt
Tape
Saturation
High / Low Damp
Wah Flatter
Base Note x Times Delay Time
Tempo
BPM
BPM
D -mod
(3)
(2)
(1)
Delay
Level Pan
Tap2/3 Position
Wet / Dry
a
BPM (Delay)
Tap1 Dmod
Src
Tap1 Delay
Note
MIDI,
40.00…
300.00
Off…Tempo
…
b c
Times
Time Over?
Tap1 Dmod
Note
Times x1…x32
—, OVER!
…
x1…x32
MIDI syncs to the system tempo;
40–300 sets the tempo manually for this individual effect
p.285
Selects the modulation source of the delay time
p.298
Selects the type of notes to specify the delay time (tap1)
p.285, p.298
Sets the number of notes to specify the delay time (tap1)
p.285, p.298
Displays an error message when the delay time exceeds the upper limit
p.298
Selects the note value used to specify the delay time when the modulation is at maximum
p.298
Specifies the number of notes used to specify the delay time when the modulation is at maximum
p.298
297
298
d f e g h i
Tap2 Position
[%]
Tap3 Position
[%]
Tap1 Level
Pan
Feedback
Amt
Tap2 Level
Pan
Feedback
Amt
Tap3 Level
Pan
Feedback
Amt
0…100
0…100
Feedback 0…100
Src
Amt j
High Damp
[%]
Low Damp
[%] k Saturation
Input Trim l
Pre Tone m n
Wow Flutter
[Hz]
Wow Flutter depth
Wet/Dry
Src
Amt
0…100
L, 1…99, R
–100…+100
0…100
L, 1…99, R
–100…+100
0…100
L, 1…99, R
–100…+100
Off…Tempo
–100…+100
0…100
0…100
0…100
0…100
0…100
0.02…1.00
0…100
Dry, 1 : 99…
99 : 1, Wet
Off…Tempo
–100…+100
Sets the position of Tap 2 relative to the Tap 1 delay time the depth of pitch variation
p.293
Sets the position of Tap 3 relative to the Tap 1 delay time the depth of pitch variation
p.293
Sets the Tap1 output level
Sets the stereo image of tap1
Sets the Tap1 feedback amount
p.293
Sets the Tap2 output level
Sets the stereo image of tap2
Sets the Tap2 feedback amount
p.293
Sets the Tap3 output level
Sets the stereo image of tap3
Sets the Tap3 feedback amount
p.293
Sets the amount of feedback for
Taps 1, 2, and 3
p.293
Selects the modulation source of feedback amount
Sets the depth by which feedback amount will be modulated
Sets the damping amount in the high range
Sets the damping amount in the low range
Sets the distortion amount
Sets the input gain
Sets the tone of the input
Sets the frequency at which pitch variation will occur
Sets the depth of pitch variation
Sets the balance between the effect and the dry input
Selects a modulation source for
Wet/Dry
Sets the modulation amount for
Wet/Dry
a: Tap1 Dmod Src b: Tap1 Delay Note b: Times c: Tap1 Dmod Note c: Times
If
Tap1 Dmod Src
is Off or the selected modulation is at 0, the delay time will be the length specified by
Tap1 Delay
Note
and
Times
.
If
Tap1 Dmod Src
is other than Off, the delay time will change so that it will be as specified by
Tap1 Dmod Note
and
Times
when the maximum modulation is reached.
b: Time Over?
You can set the delay time up to 5,400msec. If the delay time exceeds this limit, the error message “OVER!” appears in the display. Set the delay time parameters so that this message will not appear.
Time Over?
is only a display parameter.
Reverb and Early Reflections (Reverb ER) 084: Reverb Hall
Reverb and Early Reflections (Reverb ER)
084: Reverb Hall
This hall ‐ type reverb simulates the reverberation of mid ‐ size concert halls or ensemble halls.
085: Reverb SmoothHall
This hall ‐ type reverb simulates the reverberation of larger halls and stadiums, and creates a smooth release.
Reverb — Hall / Plate Type
Level
Dry
Reverb
Pre Delay Thru
Pre Delay Reverb Time
Time
086: Reverb Wet Plate
This plate reverb simulates warm (dense) reverberation.
088: Reverb Room
This room ‐ type reverb emphasizes the early reflections that make the sound tighter. Changing the balance between the early reflections and reverb sound allows you to simulate nuances, such as the type of walls of a room.
087: Reverb Dry Plate
This plate reverb simulates dry (light) reverberation.
Wet: Mono In — Stereo Out / Dry: Stereo In — Stereo Out
Left
Pre Delay Thru
+
EQ Trim
LEQ HEQ
Pre Delay
Reverb
EQ Trim
Right
Wet / Dry
Wet / Dry
a b d e f
Reverb Time
[sec]
High Damp
[%]
Pre Delay
[msec]
Pre Delay
Thru [%] c
EQ Trim
Pre LEQ Fc
Pre HEQ Fc
0.1…10.0
0…100
0…200
0…100
0…100
Low,
Mid-Low
High,
Mid-High
Sets the reverberation time
Sets the damping amount in the high range
Sets the delay time from the dry sound
p.299
Sets the mix ratio of non-delay sound
p.299
Sets the EQ input level
Selects the cutoff frequency (low or mid-low) of the low-range equalizer
Selects the cutoff frequency
(high or mid-high) of the highrange equalizer
Pre LEQ Gain
[dB]
Wet/Dry
–15.0…+15.0
Sets the gain of Low EQ
Pre HEQ Gain
[dB]
–15.0…+15.0
Sets the gain of High EQ
Dry, 1 : 99…
99 : 1, Wet
Src
Amt
Off…Tempo
–100…+100
Sets the balance between the effect and the dry input
Selects a modulation source for
Wet/Dry
Sets the modulation amount for
Wet/Dry
b: Pre Delay [msec] b: Pre Delay Thru [%]
The
Pre Delay
sets the delay time to the reverb input, allowing you to control spaciousness.
Using the
Pre Delay Thru
parameter, you can mix the dry sound without delay, emphasizing the attack of the sound.
089: Reverb BrightRoom
This room ‐ type reverb emphasizes the early reflections that make the sound brighter.
Wet: Mono In — Stereo Out / Dry: Stereo In — Stereo Out
Left
+
EQ Trim
LEQ HEQ
Pre Delay
ERs
Pre Delay Thru
Reverb
ERs
EQ Trim
Right
ER Level
Wet / Dry
Reverb Level
ER Level
Wet / Dry
a b c d e f g h
Reverb Time
[sec]
High Damp
[%]
Pre Delay
[msec]
Pre Delay
Thru [%]
ER Level
Reverb Level
EQ Trim
Pre LEQ Fc
Pre HEQ Fc
0.1…3.0
0…100
0…200
0…100
0…100
0…100
0…100
Low,
Mid-Low
High,
Mid-High
Sets the reverberation time
Sets the damping amount in the high range
Sets the delay time from the dry sound
p.299
Sets the mix ratio of non-delay sound
p.299
Sets the level of early reflections
p.299
Sets the reverberation level
p.299
Sets the EQ input level
Selects the cutoff frequency (low or mid-low) of the low-range equalizer
Selects the cutoff frequency
(high or mid-high) of the highrange equalizer
Pre LEQ Gain
[dB]
Wet/Dry
–15.0…+15.0
Sets the gain of Low EQ
Pre HEQ Gain
[dB]
–15.0…+15.0
Sets the gain of High EQ
Dry, 1 : 99…
99 : 1, Wet
Src
Amt
Off…Tempo
–100…+100
Sets the balance between the effect and the dry input
Selects a modulation source for
Wet/Dry
Sets the modulation amount for
Wet/Dry
c: ER Level d: Reverb Level
These parameters set the early reflection level and reverb level.
299
300
Changing these parameter values allows you to simulate the type of walls in the room. That is, a larger
ER Level
simulates a hard wall, and a larger
Reverb Level
simulates a soft wall.
Reverb — Room Type
Level
Dry ER
(Early Reflections)
Reverb
Time
Pre Delay Thru
Pre Delay Reverb Time
090: Reverb2 Spring
The Reverb2 ‐ type reverbs Reverb2 Spring–Reverb2 Room have a different sonic character than Rev.Hall–Rev.Room2.
They model the spring reverb systems that are built into some amps.
091: Reverb2 Hall
This models the reverberation of a concert hall that includes numerous echo components.
092: Reverb2 Plate
This models a type of reverb unit that vibrates a metal plate rather than springs. The reverb time is relatively short.
Because the reverberation has a fast attack, it is suitable for percussive playing.
Time
In these reverbs,
Time
is not expressed in seconds, but instead is a value from 1 to 100. A value of 1 produces the shortest reverb, and 100 provides the longest reverb.
094: Early Reflections
This effect is only the early reflection part of a reverberation sound, and adds presence to the sound. You can select one of the four decay curves.
Wet: Mono In — Stereo Out / Dry: Stereo In — Stereo Out
Left
+
EQ Trim
LEQ HEQ
Pre Delay Early Reflections
EQ Trim
Right
Wet / Dry
Wet / Dry
a Type
Sharp, Loose,
Modulated,
Reverse
Selects the decay curve for the early reflection
p.300
b c d e f g
ER Time
[msec]
Pre Delay
[msec]
EQ Trim
Pre LEQ Fc
10…800
0…200
0…100
Low,
Mid-Low
Sets the time length of early reflection
Sets the time taken from the original sound to the first early reflection
Sets the input level of EQ applied to the effect sound
Selects the cutoff frequency (low or mid-low) of the low-range equalizer
Pre HEQ Fc
High,
Mid-High
Selects the cutoff frequency
(high or mid-high) of the highrange equalizer
Pre LEQ Gain
[dB]
Pre HEQ Gain
[dB]
–15.0…+15.0
Sets the gain of the Low EQ
–15.0…+15.0
Sets the gain of the High EQ
Wet/Dry
Dry, 1 : 99…
99 : 1, Wet
Sets the balance between the effect and the dry input
Src
Amt
Off…Tempo
–100…+100
Selects a modulation source for
Wet/Dry
Sets the modulation amount for
Wet/Dry
a: Type
This parameter selects the decay curve for the early reflection.
Early Reflections — Type
093: Reverb2 Room
This models the reverberation of a typical room that includes numerous early reflections.
Wet: Mono In — Stereo Out / Dry: Stereo In — Stereo Out
Left
Wet / Dry
+
Pre Delay
Reverb
Right
Wet / Dry
a
Time [sec] b
High Damp
[%] c d
Low Damp
[%]
Pre Delay
[msec]
Wet/Dry e Src
Amt
0…100
0…100
0…100
0…70
Dry, 1 : 99…
99 : 1, Wet
Off…Tempo
–100…+100
Sets the reverberation time p.300
Sets the damping amount in the high range
Sets the damping amount in the low range
Sets the delay time from the dry sound
p.299
Sets the balance between the effect and the dry input
Selects a modulation source for
Wet/Dry
Sets the modulation amount for
Wet/Dry
Sharp
Loose
Modulated
Reverse
Dry
Pre Delay ER Time
Mono-Mono Serial (Mono-Mono) 095: P4EQ — Exciter (Parametric 4-Band EQ — Exciter)
Mono-Mono Serial (Mono-Mono)
095: P4EQ — Exciter (Parametric 4-
Band EQ — Exciter)
This effect combines a mono four ‐ band parametric equalizer and an exciter.
Wet: Mono In — Mono Out / Dry: Stereo In — Stereo Out
Left
Parametric 4Band EQ
+
Trim
Exciter
Exciter
Wet / Dry
Right
P4EQ a b c d e
[E]Trim
[E]B1 Cutoff
[Hz]
Q
Gain [dB]
[E]B2 Cutoff
[Hz]
Q
Gain [dB]
[E]B3 Cutoff
[Hz]
Q
Gain [dB]
[E]B4 Cutoff
[Hz]
Q h Src
0…100
20…1.00k
0.5…10.0
–18…+18
50…5.00k
0.5…10.0
–18…+18
300…10.00k
0.5…10.0
–18…+18
500…20.00k
0.5…10.0
–18…+18
Sets the parametric EQ input level
Sets the center frequency of
Band 1
Sets the bandwidth of Band 1
p.255
Sets the gain of Band 1
Sets the center frequency of
Band 2
Sets the bandwidth of Band 2
p.255
Sets the gain of Band 2
Sets the center frequency of
Band 3
Sets the bandwidth of Band 3
p.255
Sets the gain of Band 3
Sets the center frequency of
Band 4
Sets the bandwidth of Band 4
p.255
Sets the gain of Band 4 Gain [dB]
EXCITER f g
[X]Exciter
Blend
[X]Emphasis
Frequency
Wet/Dry
Amt
–100…+100
0…70
–100…+100
Sets the intensity (depth) of the
Exciter effect
p.256
Sets the frequency range to be emphasized
p.256
Dry,1 : 99… 99
: 1, Wet
Off…Tempo
Sets the balance between the effect and the dry input
Selects a modulation source for
Wet/Dry
Sets the modulation amount for
Wet/Dry
Wet / Dry
096: P4EQ — Wah (Parametric 4-
Band EQ — Wah/Auto Wah)
This effect combines a mono four ‐ band parametric equalizer and a wah. You can change the order of the connection.
Wet: Mono In — Mono Out / Dry: Stereo In — Stereo Out
Left
Parametric 4Band EQ
Routing
Wah/Auto Wah
+
Wah
Trim
Wet / Dry
Right
D -mod
Sweep Mode
Envelope
Auto
D-mod
LFO
LFO
P4EQ a b c d e
[E]Trim
Routing
[E]B1 Cutoff
[Hz]
Q
Gain [dB]
[E]B2 Cutoff
[Hz]
Q
Gain [dB]
[E]B3 Cutoff
[Hz]
Q
Gain [dB]
[E]B4 Cutoff
[Hz]
Q
0…100
P4EQ
Wah,
Wah
P4EQ
20…1.00k
0.5…10.0
–18…+18
50…5.00k
0.5…10.0
–18…+18
300…10.00k
0.5…10.0
–18…+18
500…20.00k
0.5…10.0
Sets the parametric EQ input level
Changes the order of the parametric equalizer and wah connection
Sets the center frequency of
Band 1
Sets the bandwidth of Band 1
p.255
Sets the gain of Band 1
Sets the center frequency of
Band 2
Sets the bandwidth of Band 2
p.255
Sets the gain of Band 2
Sets the center frequency of
Band 3
Sets the bandwidth of Band 3
p.255
Sets the gain of Band 3
Sets the center frequency of
Band 4
Sets the bandwidth of Band 4
p.255
Sets the gain of Band 4
WAH
Gain [dB] f
[W]Frequenc y Bottom
Frequency
Top
–18…+18
0…100
0…100
Auto,
D-mod,
LFO g
[W]Sweep
Mode
Src Off…Tempo
Sets the lower limit of the wah center frequency
Sets the upper limit of the wah center frequency
p.257
Selects the control from autowah, modulation source, and
LFO
p.257
Selects the modulation source for the wah when Sweep
Mode=D-mod
p.257
h
[W]LFO
Frequency
[Hz]
Resonance
0.02…20.00
Sets the speed of the LFO j i
LPF
[W]Wet/Dry
Src
Amt
Wet/Dry
Src
Amt
0…100
Off, On
Sets the resonance amount
Switches the wah low pass filter on and off
Dry,1 : 99… 99
: 1, Wet
Sets the wah effect balance
Off…Tempo
–100…+100
Selects the Wet/Dry modulation source for the wah
Sets the Wet/Dry modulation amount for the wah
Dry,1 : 99… 99
: 1, Wet
Sets the balance between the effect and the dry input
Off…Tempo
–100…+100
Selects a modulation source for
Wet/Dry
Sets the modulation amount for
Wet/Dry
Wet / Dry
301
097: P4EQ — Cho/Flng
(Parametric 4-Band EQ —
Chorus/Flanger)
This effect combines a mono four ‐ band parametric equalizer and a chorus/flanger.
Wet: Mono In — Stereo Out / Dry: Stereo In — Stereo Out
Left
Parametric 4Band EQ Chorus/Flanger
+
Trim
Right
Wet / Dry
Chorus/Flanger
Feedback
+
Normal
Output Mode
–
Wet Invert
Cho/Flng Wet / Dry
Wet / Dry
LFO: Tri / Sine
P4EQ a [E]Trim
[E]B1 Cutoff
[Hz]
0…100
20…1.00k
Sets the parametric EQ input level
Sets the center frequency of
Band 1 b
Q
Gain [dB]
[E]B2 Cutoff
[Hz]
0.5…10.0
–18…+18
50…5.00k
Sets the bandwidth of Band 1
p.255
Sets the gain of Band 1
Sets the center frequency of
Band 2 c
Q 0.5…10.0
Sets the bandwidth of Band 2
p.255
Sets the gain of Band 2 Gain [dB]
[E]B3 Cutoff
[Hz]
–18…+18
300…10.00k
Sets the center frequency of
Band 3 d
Q 0.5…10.0
Sets the bandwidth of Band 3
p.255
Sets the gain of Band 3 e
Gain [dB]
[E]B4 Cutoff
[Hz]
Q
–18…+18
500…20.00k
0.5…10.0
Sets the center frequency of
Band 4
Sets the bandwidth of Band 4
p.255
Sets the gain of Band 4 Gain [dB]
CHORUS/FLANGER f
[F]LFO
Frequency
[Hz]
LFO
Waveform
–18…+18
0.02…20.00
Sets the speed of the LFO
Triangle, Sine Selects the LFO Waveform
[F]Delay Time
[msec]
0.0…1350.0
Sets the delay time g h j i
Depth
Feedback
[F]Cho/Flng
Wet/Dry
Src
Amt
[F]Output
Mode
Wet/Dry
Src
Amt
0…100
–100…+100
–Wet…
–1 : 99, Dry,
1 : 99…Wet
Off…Tempo
–100…+100
Normal,
Wet Invert
Dry, 1 : 99…
99 : 1, Wet
Off…Tempo
–100…+100
Sets the depth of LFO modulation
Sets the feedback amount
p.272
Sets the effect balance of the chorus/flanger
p.259, p.272
Selects the Wet/Dry modulation source for the chorus/flanger
Sets the Wet/Dry modulation amount for the chorus/flanger
Selects the output mode for the chorus/flanger
p.302
Sets the balance between the effect and the dry input
Selects a modulation source for
Wet/Dry
Sets the modulation amount for
Wet/Dry
302 i: [F]Output Mode
When Wet Invert is selected, the right channel phase of the chorus/flanger effect sound is inverted. This creates pseudo ‐ stereo effects and adds spread.
However, if a mono ‐ input type effect is connected after this effect, the left and right sounds may cancel each other, eliminating the chorus/flanger effects.
098: P4EQ — Phaser (Parametric 4-
Band EQ — Phaser)
This effect combines a mono four ‐ band parametric equalizer and a phaser.
Wet: Mono In — Stereo Out / Dry: Stereo In — Stereo Out
Left
Parametric 4Band EQ
+
Trim
Right
Phaser
Wet / Dry
Phaser
Resonance
Normal
+
–
Wet Invert
Output Mode
Phaser Wet / Dry
Wet / Dry
LFO: Tri / Sine
P4EQ a [E]Trim
[E]B1 Cutoff
[Hz] b
Q
Gain [dB]
[E]B2 Cutoff
[Hz] c
Q
Gain [dB]
[E]B3 Cutoff
[Hz] d
Q
Gain [dB]
[E]B4 Cutoff
[Hz] e
Q
Gain [dB]
PHASER f
[P]LFO
Frequency
[Hz]
LFO
Waveform
[P]Manual g h i j
Depth
Resonance
[P]Phaser
Wet/Dry
Src
Amt
[P]Output
Mode
Wet/Dry
Src
Amt
0…100
20…1.00k
0.5…10.0
–18…+18
50…5.00k
0.5…10.0
–18…+18
300…10.00k
0.5…10.0
–18…+18
500…20.00k
0.5…10.0
–18…+18
0.02…20.00
Sets the parametric EQ input level
Sets the center frequency of
Band 1
Sets the bandwidth of Band 1
Sets the gain of Band 1
Band 2
Sets the gain of Band 2
Sets the speed of the LFO
p.255
Sets the center frequency of
Sets the bandwidth of Band 2
p.255
Sets the center frequency of
Band 3
Sets the bandwidth of Band 3
Sets the gain of Band 3
Sets the gain of Band 4
p.255
Sets the center frequency of
Band 4
Sets the bandwidth of Band 4
p.255
Triangle, Sine Selects the LFO Waveform
0…100
0…100
–100…+100
–Wet…
–1 : 99, Dry,
1 : 99…Wet
Off…Tempo
Sets the frequency to which the effect is applied
Sets the depth of LFO modulation
Sets the resonance amount
p.273
Sets the phaser effect balance
p.259, p.273
–100…+100
Normal,
Wet Invert
Dry, 1 : 99…
99 : 1, Wet
Off…Tempo
–100…+100
Selects the Wet/Dry modulation source for the phaser
Sets the Wet/Dry modulation amount for the phaser
Selects the phaser output mode
p.305
Sets the balance between the effect and the dry input
Selects a modulation source for
Wet/Dry
Sets the modulation amount for
Wet/Dry
Mono-Mono Serial (Mono-Mono) 099: P4EQ — Mt. Delay (Parametric 4-Band EQ — Multitap Delay)
099: P4EQ — Mt. Delay
(Parametric 4-Band EQ —
Multitap Delay)
This effect combines a mono four ‐ band parametric equalizer and a multitap delay.
Wet: Mono In — Mono Out / Dry: Stereo In — Stereo Out
Left
Parametric 4Band EQ
+
Trim
Multitap Delay
High Damp
Feedback
Delay
(2)
(1)
Mt.Dly Wet / Dry
Wet / Dry
Right
Wet / Dry
P4EQ a b c d e
[E]Trim
[E]B1 Cutoff
[Hz]
Q
Gain [dB]
[E]B2 Cutoff
[Hz]
Q
Gain [dB]
[E]B3 Cutoff
[Hz]
Q
Gain [dB]
[E]B4 Cutoff
[Hz]
Q
0…100
20…1.00k
0.5…10.0
–18…+18
50…5.00k
0.5…10.0
–18…+18
300…10.00k
0.5…10.0
–18…+18
500…20.00k
0.5…10.0
Sets the parametric EQ input level
Sets the center frequency of
Band 1
Sets the bandwidth of Band 1
p.255
Sets the gain of Band 1
Sets the center frequency of
Band 2
Sets the bandwidth of Band 2
p.255
Sets the gain of Band 2
Sets the center frequency of
Band 3
Sets the bandwidth of Band 3
p.255
Sets the gain of Band 3
Sets the center frequency of
Band 4
Sets the bandwidth of Band 4
p.255
Sets the gain of Band 4 Gain [dB]
MULTITAP DELAY
[D]Tap1 Time
[msec] f
Tap1 Level
–18…+18
0.0…1360.0
0…100
g h j i
Sets the Tap1 delay time
Sets the Tap1 output level
p.290
[D]Tap2 Time
[msec]
Feedback
(Tap2)
[D]High
Damp [%]
[D]Mt.Delay
Wet/Dry
Src
Amt
Wet/Dry
Src
Amt
0.0…1360.0
0…100
Dry, 1 : 99…
99 : 1, Wet
Off…Tempo
–100…+100
Dry, 1 : 99…
99 : 1, Wet
Off…Tempo
–100…+100
Sets the Tap2 delay time
–100…+100 Sets the Tap2 feedback amount
Sets the damping amount in the high range
Sets the multitap delay effect balance
Selects the Wet/Dry modulation source for the multitap delay
Sets the Wet/Dry modulation amount for the multitap delay
Sets the balance between the effect and the dry input
Selects a modulation source for
Wet/Dry
Sets the modulation amount for
Wet/Dry
100: Comp — Wah (Compressor —
Wah/Auto Wah)
This effect combines a mono compressor and a wah. You can change the order of the connection.
Wet: Mono In — Mono Out / Dry: Stereo In — Stereo Out
Left
Compressor
Routing
Wah/Auto Wah
+
EQ Trim LEQ HEQ
Comp
Output Level
Wah
Wet / Dry
Wet / Dry
Right
Envelope — Control
Sweep Mode
D
Envelope
-mod
Auto
D-mod
LFO
LFO
COMPRESSOR a
[C]
Sensitivity
[C]Attack b
1…100
1…100
Output Level 0…100
c [C]EQ Trim
[C]Pre LEQ
Gain [dB] d
Pre HEQ Gain
[dB]
0…100
–15…+15
–15…+15
WAH
[W]Frequenc y Bottom e
Frequency
Top
0…100
0…100
f
[w]Sweep
Mode
Src
Auto,
D-mod,
LFO
Off…Tempo
Sets the sensitivity
Sets the attack level
p.251
p.251
Sets the compressor output level
p.251
Sets the EQ input level
Sets the gain of Low EQ
Sets the gain of High EQ
Sets the lower limit of the wah center frequency
p.257
Sets the upper limit of the wah center frequency
p.257
Selects the control from autowah, modulation source, and
LFO
Selects the modulation source for the wah when Sweep
Mode=D-mod j g
[W]LFO
Frequency
[Hz]
Resonance h i
LPF
[W]Wet/Dry
Src
Amt
Routing
Wet/Dry
Src
Amt
0.02…20.00
Sets the speed of the LFO
0…100
Off, On
Sets the resonance amount
Switches the wah low pass filter on and off
Dry,
1 : 99…99 : 1,
Wet
Off…Tempo
–100…+100
Sets the wah effect balance
Off…Tempo
Selects the Wet/Dry modulation source for the wah
–100…+100
Sets the Wet/Dry modulation amount for the wah
Comp
Wah,
Wah
Comp
Switches the order of the compressor and wah
Dry, 1 : 99…
99 : 1, Wet
Sets the balance between the effect and the dry input
Selects a modulation source for
Wet/Dry
Sets the modulation amount for
Wet/Dry
Wet / Dry
303
304
101: Comp — Amp Sim
(Compressor — Amp Simulation)
This effect combines a mono compressor and an amp simulation. You can change the order of the effects.
Wet: Mono In — Mono Out / Dry: Stereo In — Stereo Out
Left
Compressor
Routing
Amp Simulation
+
EQ Trim LEQ HEQ
Comp
Output Level
Amp Simulation Filter
Wet / Dry
Right
Wet / Dry
Envelope — Control
COMPRESSOR a
[C]
Sensitivity
[C]Attack b
1…100
1…100
Output Level 0…100
Sets the sensitivity
p.251
Sets the attack level
p.251
Sets the compressor output level
p.251
Sets the EQ input level c
[C]EQ Trim
[C]Pre LEQ
Gain [dB] d
Pre HEQ Gain
[dB]
0…100
–15…+15
–15…+15
AMP SIM e
[A]Amplifier
Type f g
Routing
Wet/Dry
Src
Amt
Sets the gain of Low EQ
Sets the gain of High EQ
SS, EL84, 6L6
Selects the type of guitar amplifier
Comp
Amp,
Amp
Comp
Switches the order of the compressor and amp simulation
Dry, 1 : 99…
99 : 1, Wet
Off…Tempo
–100…+100
Sets the balance between the effect and the dry input
Selects a modulation source for
Wet/Dry
Sets the modulation amount for
Wet/Dry
102: Comp — OD/HiGain
(Compressor — Overdrive/Hi.Gain)
This effect combines a mono compressor and an overdrive/ high ‐ gain distortion. You can change the order of the effects.
Wet: Mono In — Mono Out / Dry: Stereo In — Stereo Out
Left
Compressor
Routing
Overdrive / Hi-Gain
+
Comp
Output Level
3 Band PEQ
Driver
Output Level
Wet / Dry
Mode: Overdrive / Hi-Gain
Drive
Right
Envelope — Control
Wet / Dry
Wet / Dry
COMPRESSOR a
[C]
Sensitivity
[C]Attack b
1…100
1…100
Output Level 0…100
OD/HI-GAIN
[O]
Drive Mode c
Drive
[O]Output
Level d Src e f g h j i
Amt
[O]Low
Cutoff [Hz]
Gain [dB]
[O]Mid1
Cutoff [Hz]
Q
Gain [dB]
[O]Mid2
Cutoff [Hz]
Q
Gain [dB]
[O]Wet/Dry
Src
Amt
Routing
Wet/Dry
Src
Amt
Sets the sensitivity
Sets the attack level
p.251
p.251
Sets the compressor output level
p.251
Overdrive, Hi-
Gain
1…100
0…50
Off…Tempo
–50…+50
20…1.00k
–18…+18
300…10.00k
0.5…10.0
–18…+18
500…20.00k
0.5…10.0
Switches between overdrive and high-gain distortion
Sets the degree of distortion
p.263
Sets the overdrive output level
p.263
Selects the modulation source for the overdrive output level
Sets the modulation amount of the overdrive output level
Sets the center frequency for
Low EQ (shelving type)
Sets the gain of Low EQ
Sets the center frequency for
Mid/High EQ 1 (peaking type)
Sets the band width of Mid/High
EQ 1
p.255
Sets the gain of Mid/High EQ 1
Sets the center frequency for
Mid/High EQ 2 (peaking type)
Sets the band width of Mid/High
EQ 2
p.255
Sets the gain of Mid/High EQ 2 –18…+18
Dry,
1 : 99…99 : 1,
Wet
Sets the overdrive effect balance
Off…Tempo
–100…+100
Selects the Wet/Dry modulation source for the overdrive
Sets the Wet/Dry modulation amount for the overdrive
Comp
OD/
HG,
OD/HG
Comp
Dry, 1 : 99…
99 : 1, Wet
Switches the order of the compressor and overdrive
Off…Tempo
–100…+100
Sets the balance between the effect and the dry input
Selects a modulation source for
Wet/Dry
Sets the modulation amount for
Wet/Dry
Mono-Mono Serial (Mono-Mono) 103: Comp — P4EQ (Compressor — Parametric 4-Band EQ)
103: Comp — P4EQ (Compressor —
Parametric 4-Band EQ)
This effect combines a mono compressor and a four ‐ band parametric equalizer. You can change the order of the effects.
Wet: Mono In — Mono Out / Dry: Stereo In — Stereo Out
Left
Compressor
Routing
Parametric 4Band EQ
+
Comp
Output Level
Trim
Right
Envelope — Control
Wet / Dry
Wet / Dry
COMPRESSOR a
[C]
Sensitivity
[C]Attack b
1…100
1…100
Output Level 0…100
P4EQ i c e f g h
[E]Trim
[E]B1 Cutoff
[Hz] d
Q
Gain [dB]
[E]B2 Cutoff
[Hz]
Q
Gain [dB]
[E]B3 Cutoff
[Hz]
Q
Gain [dB]
[E]B4 Cutoff
[Hz]
Q
Gain [dB]
Routing
Wet/Dry
Src
Amt
Sets the sensitivity
Sets the attack level
p.251
Sets the compressor output level
p.251
p.251
0…100
20…1.00k
0.5…10.0
–18…+18
Sets the parametric EQ input level
Sets the center frequency of
Band 1
Sets the bandwidth of Band 1
p.255
Sets the gain of Band 1
50…5.00k
0.5…10.0
–18…+18
300…10.00k
0.5…10.0
Sets the center frequency of
Band 2
Sets the bandwidth of Band 2
p.255
Sets the gain of Band 2
Sets the center frequency of
Band 3
Sets the bandwidth of Band 3
p.255
Sets the gain of Band 3 –18…+18
500…20.00k
0.5…10.0
Sets the center frequency of
Band 4
Sets the bandwidth of Band 4
p.255
–18…+18
Comp
P4EQ,
P4EQ
Comp
Sets the gain of Band 4
Switches the order of the compressor and parametric EQ
Dry, 1 : 99…
99 : 1, Wet
Sets the balance between the effect and the dry input
Off…Tempo
–100…+100
Selects a modulation source for
Wet/Dry
Sets the modulation amount for
Wet/Dry
104: Comp — Cho/Flng
(Compressor — Chorus/Flanger)
This effect combines a mono compressor and a chorus/ flanger. You can change the order of the effects.
Wet: Mono In — Stereo Out / Dry: Stereo In — Stereo Out
Left
Compressor
Routing
Chorus/Flanger
Wet / Dry
Right
+
EQ Trim
LEQ HEQ
Comp
Output Level
Chorus/Flanger
Feedback
Normal
+
–
Wet Invert
Output Mode
Cho/Flng Wet / Dry
Wet / Dry
Envelope — Control LFO: Tri / Sine
COMPRESSOR a
[C]
Sensitivity
[C]Attack b
1…100
1…100
Output Level 0…100
Sets the sensitivity
p.251
Sets the attack level
p.251
Sets the compressor output level
p.251
Sets the EQ input level c
[C]EQ Trim
[C]Pre LEQ
Gain [dB] d
Pre HEQ Gain
[dB]
0…100
–15…+15
–15…+15
Sets the gain of Low EQ
Sets the gain of High EQ
CHORUS/FLANGER e
[F]LFO
Frequency
[Hz]
LFO
Waveform
0.02…20.00
[F]Delay Time
[msec]
0.0…1350.0
Sets the speed of the LFO
Triangle, Sine Selects the LFO Waveform
Sets the delay time f g h
Depth
Feedback
[F]Cho/Flng
Wet/Dry
Src
Amt
[F]Output
Mode
0…100
–100…+100
–Wet…
–1 : 99, Dry,
1 : 99…Wet
Off…Tempo
–100…+100
Sets the depth of LFO modulation
Sets the feedback amount
p.272
Sets the effect balance of the chorus/flanger
p.259, p.272
Selects the Wet/Dry modulation source for the chorus/flanger
Sets the Wet/Dry modulation amount for the chorus/flanger
Selects the output mode for the chorus/flanger
p.305
i
Routing
Wet/Dry
Normal,
Wet Invert
Comp
Flanger,
Flanger
Comp
Dry, 1 : 99…
99 : 1, Wet
Switches the order of the compressor and chorus/flanger
p.305
j Src
Amt
Off…Tempo
–100…+100
Sets the balance between the effect and the dry input
Selects a modulation source for
Wet/Dry
Sets the modulation amount for
Wet/Dry
h: [F]Output Mode i: Routing
When Wet Invert is selected, the right channel phase of the chorus/flanger effect sound is inverted. This creates pseudo ‐ stereo effects and adds spread.
However, if a mono ‐ input type effect is connected after this effect, the left and right sounds may cancel each other, eliminating the chorus/flanger effects.
When
Routing
is set to Flanger
→
Comp,
[F]Output Mode
will be set to Normal.
305
306
105: Comp — Phaser
(Compressor — Phaser)
This effect combines a mono compressor and a phaser. You can change the order of the effects.
Wet: Mono In — Stereo Out / Dry: Stereo In — Stereo Out
Left
Routing
Compressor
Phaser
Right
Wet / Dry
+
EQ Trim LEQ HEQ
Comp
Output Level
Phaser
Resonance
+
–
Normal
Wet Invert
Phaser Wet / Dry
Output Mode
Wet / Dry
Envelope — Control
LFO: Tri / Sine
COMPRESSOR a
[C]
Sensitivity
[C]Attack b
1…100
1…100
Output Level 0…100
Sets the sensitivity
p.251
Sets the attack level
p.251
Sets the compressor output level
p.251
Sets the EQ input level c
[C]EQ Trim
[C]Pre LEQ
Gain [dB] d
Pre HEQ Gain
[dB]
0…100
–15…+15
–15…+15
PHASER e
[P]LFO
Frequency
[Hz]
LFO
Waveform
0.02…20.00
Sets the gain of Low EQ
Sets the gain of High EQ
Sets the speed of the LFO
Triangle, Sine Selects the LFO Waveform f
[P]Manual
Depth
Resonance
0…100
0…100
–100…+100
Sets the frequency to which the effect is applied
Sets the depth of LFO modulation
Sets the resonance amount
p.273
[P]Phaser
Wet/Dry
–Wet…
–1 : 99, Dry,
1 : 99…Wet
Sets the phaser effect balance
p.259, p.273
g h
Src
Amt
[F]Output
Mode
Off…Tempo
–100…+100
Selects the Wet/Dry modulation source for the phaser
Sets the Wet/Dry modulation amount for the phaser
Selects the phaser output mode
p.302
i
Routing
Wet/Dry
Normal,
Wet Invert
Comp
Phaser,
Phaser
Comp
Dry, 1 : 99…
99 : 1, Wet
Switches the order of the compressor and phaser
p.305
j Src
Amt
Off…Tempo
–100…+100
Sets the balance between the effect and the dry input
Selects a modulation source for
Wet/Dry
Sets the modulation amount for
Wet/Dry
106: Comp — Mt. Delay
(Compressor — Multitap Delay)
This effect combines a mono compressor and a multitap delay. You can change the order of the effects.
Wet: Mono In — Mono Out / Dry: Stereo In — Stereo Out
Left
Compressor
Routing
Multitap Delay
+
EQ Trim LEQ HEQ
Comp
Output Level
High Damp
Feedback
Delay
(2)
(1)
Mt.Dly Wet / Dry
Wet / Dry
Right
Wet / Dry
Envelope — Control
COMPRESSOR a
[C]
Sensitivity
[C]Attack b
1…100
1…100
Output Level 0…100
Sets the sensitivity
p.251
Sets the attack level
p.251
Sets the compressor output level
p.251
Sets the EQ input level c
[C]EQ Trim
[C]Pre LEQ
Gain [dB] d
Pre HEQ Gain
[dB]
0…100
–15…+15
–15…+15
MULTITAP DELAY
[D]Tap1 Time
[msec] e
Tap1 Level
0.0…1360.0
0…100
f g
Sets the gain of Low EQ
Sets the gain of High EQ
Sets the Tap1 delay time
Sets the Tap1 output level
p.290
[D]Tap2 Time
[msec]
Feedback
(Tap2)
[D]High
Damp [%]
0.0…1360.0
0…100
Sets the Tap2 delay time
–100…+100 Sets the Tap2 feedback amount
Sets the damping amount in the high range
p.289
[D]Mt.Delay
Wet/Dry
Dry,
1 : 99…99 : 1,
Wet
Sets the multitap delay effect balance h
Src
Amt
Off…Tempo
–100…+100
Selects the Wet/Dry modulation source for the multitap delay
Sets the Wet/Dry modulation amount for the multitap delay i Routing
Wet/Dry
Comp
Mt.Delay,
Mt.Delay
Comp
Dry, 1 : 99…
99 : 1, Wet
Switches the order of the compressor and multitap delay j Src
Amt
Off…Tempo
–100…+100
Sets the balance between the effect and the dry input
Selects a modulation source for
Wet/Dry
Sets the modulation amount for
Wet/Dry
Mono-Mono Serial (Mono-Mono) 107: Limiter — P4EQ (Limiter — Parametric 4-Band EQ)
107: Limiter — P4EQ (Limiter —
Parametric 4-Band EQ)
This effect combines a mono limiter and a four ‐ band parametric equalizer. You can change the order of the effects.
Wet: Mono In — Mono Out / Dry: Stereo In — Stereo Out
Left
Limiter
Routing
Parametric 4Band EQ
+
Limiter
Gain Adjust
Trim
Right
Envelope — Control
Wet / Dry
Wet / Dry
LIMITER
[L]Ratio a
Threshold
[dB] b
[L]Attack
Release c
P4EQ
[L]Gain
Adjust [dB] d [E]Trim
[E]B1 Cutoff
[Hz] e
Q f
Gain [dB]
[E]B2 Cutoff
[Hz]
Q
Gain [dB]
[E]B3 Cutoff
[Hz] g
Q
Gain [dB]
[E]B4 Cutoff
[Hz] h
Q
Gain [dB] i Routing j
Wet/Dry
Src
Amt
1.0 : 1…
50.0 : 1, Inf : 1
–40…0
1…100
1…100
–Inf,
–38…+24
Sets the signal compression ratio
p.307
Sets the level above which the compressor is applied
p.307
Sets the attack time
Sets the release time
Sets the limiter output gain
p.307
0…100
20…1.00k
0.5…10.0
–18…+18
50…5.00k
0.5…10.0
Sets the parametric EQ input level
Sets the center frequency of
Band 1
Sets the bandwidth of Band 1
p.255
Sets the gain of Band 1
Sets the center frequency of
Band 2
Sets the bandwidth of Band 2
p.255
–18…+18
300…10.00k
0.5…10.0
–18…+18
Sets the gain of Band 2
Sets the center frequency of
Band 3
Sets the bandwidth of Band 3
p.255
Sets the gain of Band 3
500…20.00k
0.5…10.0
–100…+100
Sets the center frequency of
Band 4
Sets the bandwidth of Band 4
p.255
–18…+18
Limiter
P4EQ,
P4EQ
Limiter
Sets the gain of Band 4
Switches the order of the limiter and parametric EQ
Dry, 1 : 99…
99 : 1, Wet
Off…Tempo
Sets the balance between the effect and the dry input
Selects a modulation source for
Wet/Dry
Sets the modulation amount for
Wet/Dry
a: [L]Ratio a: Threshold [dB] c: [L]Gain Adjust [dB]
This parameter sets the signal compression
[L]Ratio
.
Compression is applied only when the signal level exceeds the
Threshold
value.
Adjust the output level using the
Gain Adjust
parameter, since compression causes the entire level to be reduced.
Output Level
Threshold
Limiter — Threshold / Ratio
Ratio=1.0 : 1
Ratio=2.0 : 1
Ratio=4.0 : 1
Ration=Inf : 1
Level
Dry
Louder
Ratio=1.0 : 1
Ratio=2.0 : 1
Ratio=4.0 : 1
Input Level
Threshold
Ratio=Inf : 1
Time
108: Limiter — Cho/Flng
(Limiter — Chorus/Flanger)
This effect combines a mono limiter and a chorus/flanger.
You can change the order of the effects.
Wet: Mono In — Stereo Out / Dry: Stereo In — Stereo Out
Left
Routing
Limiter Chorus/Flanger
+
Right
Wet / Dry
Limiter
EQ Trim
Gain Adjust
LEQ HEQ
Chorus/Flanger
Feedback
Normal
+
–
Wet Invert
Cho/Flng Wet / Dry
Output Mode
Wet / Dry
Envelope — Control LFO: Tri / Sine
LIMITER
[L]Ratio
1.0 : 1…
50.0 : 1, Inf : 1 a b
Threshold
[dB]
[L]Attack
Release
–40…0
1…100
1…100
c
[L]Gain
Adjust [dB]
CHORUS/FLANGER
–Inf,
–38…+24 d e
Sets the signal compression ratio
p.307
Sets the level above which the compressor is applied
Sets the attack time
Sets the release time
Sets the limiter output gain
[F]LFO
Frequency
[Hz]
LFO
Waveform
0.02…20.00
[F]Delay Time
[msec]
0.0…1350.0
Sets the speed of the LFO
Triangle, Sine Selects the LFO Waveform
Sets the delay time
Depth
Feedback
0…100
–100…+100
Sets the depth of LFO modulation
Sets the feedback amount
p.307
p.307
p.272
f [F]EQ Trim
[F]Pre LEQ
Gain [dB] g
Pre HEQ Gain
[dB]
0…100
–15…+15
–15…+15
[F]Cho/Flng
Wet/Dry
–Wet…
–1 : 99, Dry,
1 : 99…Wet
h
Src Off…Tempo
Amt –100…+100
Sets the EQ input level
Sets the gain of Low EQ
Sets the gain of High EQ
Sets the effect balance of the chorus/flanger
p.259, p.272
Selects the Wet/Dry modulation source for the chorus/flanger
Sets the Wet/Dry modulation amount for the chorus/flanger
307
308
j
[F]Output
Mode i
Routing
Wet/Dry
Src
Amt
Normal,
Wet Invert
Limiter
Flanger,
Flanger
Limiter
Dry, 1 : 99…
99 : 1, Wet
Off…Tempo
–100…+100
Selects the output mode for the chorus/flanger
p.305
Switches the order of the limiter and chorus/flanger
Sets the balance between the effect and the dry input
Selects a modulation source for
Wet/Dry
Sets the modulation amount for
Wet/Dry
109: Limiter — Phaser
This effect combines a mono limiter and a phaser. You can change the order of the effects.
Wet: Mono In — Stereo Out / Dry: Stereo In — Stereo Out
Left
Routing
Limiter Phaser
Wet / Dry
Right
+
Envelope — Control
Limiter
Gain Adjust
Phaser
Resonance
Normal
+
–
Wet Invert
Output Mode
Phaser Wet / Dry
Wet / Dry
LFO: Tri / Sine
LIMITER
[L]Ratio a b c
Threshold
[dB]
[L]Attack
Release
[L]Gain
Adjust [dB]
PHASER d
[P]LFO
Frequency
[Hz]
LFO
Waveform f e g h i
[P]Manual
Depth
Amt
1.0 : 1…
50.0 : 1, Inf : 1
–40…0
1…100
1…100
–Inf,
–38…+24
0.02…20.00
–100…+100
Sets the signal compression ratio
p.307
Sets the level above which the compressor is applied
p.307
Sets the attack time
Sets the release time
Sets the limiter output gain
p.307
Sets the speed of the LFO
Triangle, Sine Selects the LFO Waveform
0…100
0…100
Sets the frequency to which the effect is applied
Sets the depth of LFO modulation
Sets the resonance amount
p.273
Resonance –100…+100
[P]Phaser
Wet/Dry
Src
–Wet…
–1 : 99, Dry,
1 : 99…Wet
Off…Tempo
Amt
[P]Output
Mode
Routing
Wet/Dry
Src
–100…+100
Normal,
Wet Invert
Limiter
Phaser,
Phaser
Limiter
Dry, 1 : 99…
99 : 1, Wet
Off…Tempo
Sets the phaser effect balance and phaser
p.259, p.273
Selects the phaser’s Wet/Dry modulation source
Sets the phaser’s Wet/Dry modulation amount
Selects the phaser output mode
p.302
Switches the order of the limiter
p.305
Sets the balance between the effect and the dry input
Selects a modulation source for
Wet/Dry
Sets the modulation amount for
Wet/Dry
110: Limiter — Mt.Delay
(Limiter — Multitap Delay)
This effect combines a mono limiter and a multitap delay.
You can change the order of the effects.
Wet: Mono In — Mono Out / Dry: Stereo In — Stereo Out
Left
Limiter
Routing
Multitap Delay
+
Limiter
Gain Adjust High Damp
Feedback
Delay
(2)
(1)
Mt.Dly Wet / Dry
Wet / Dry
Right
Wet / Dry
Envelope — Control
LIMITER
[L]Ratio a b e f
Threshold
[dB]
[L]Attack
Release c
[L]Gain
Adjust [dB]
MULTITAP DELAY d
[D]Tap1 Time
[msec]
Tap1 Level
[D]Tap2 Time
[msec]
Feedback
[D]High
Damp [%]
[D]Mt.Delay
Wet/Dry g h i
Src
Amt
Routing
Wet/Dry
Src
Amt
1.0 : 1…
50.0 : 1, Inf : 1
–40…0
1…100
1…100
–Inf,
–38…+24
0.0…1360.0
0…100
0.0…1360.0
Sets the signal compression ratio
p.307
Sets the level above which the compressor is applied
Sets the attack time
Sets the release time
Sets the limiter output gain
Sets the Tap1 delay time
p.307
p.307
Sets the Tap1 output level p.290
Sets the Tap2 delay time
–100…+100 Sets the Tap2 feedback amount
0…100
Sets the damping amount in the high range
p.289
Dry, 1 : 99…
99 : 1, Wet
Off…Tempo
–100…+100
Sets the multitap delay effect balance
Selects the multitap delay’s Wet/
Dry modulation source
Sets the multitap delay’s Wet/Dry modulation amount
Limiter
Mt.Delay,
Mt.Delay
Limiter
Dry, 1 : 99…
99 : 1, Wet
Off…Tempo
Switches the order of the limiter and multitap delay
Sets the balance between the effect and the dry input
Selects a modulation source for
Wet/Dry
–100…+100
Sets the modulation amount for
Wet/Dry
Mono-Mono Serial (Mono-Mono) 111: Exciter — Comp (Exciter — Compressor)
111: Exciter — Comp (Exciter —
Compressor)
This effect combines a mono exciter and a compressor. You can change the order of the effects.
Wet: Mono In — Mono Out / Dry: Stereo In — Stereo Out
Left
Exciter
Routing
Compressor
+
EQ Trim LEQ HEQ
Exciter Comp
Output Level
Wet / Dry
Right
Envelope — Control
EXCITER a
[X]Exciter
Blend
–100…+100 b
[X]Emphasis
Frequency c [X]EQ Trim
[X]Pre LEQ
Gain [dB] d
Pre HEQ Gain
[dB]
COMPRESSOR
0…70
0…100
–15…+15
–15…+15 e
[C]
Sensitivity
[C]Attack
1…100
1…100
f
Output Level 0…100
g Routing
Wet/Dry
Exciter
Comp,
Comp
Exciter
Dry, 1 : 99…
99 : 1, Wet h Src Off…Tempo
Amt –100…+100
Sets the intensity (depth) of the
Exciter effect
p.256
Sets the frequency range to be emphasized
p.256
Sets the EQ input level
Sets the gain of Low EQ
Sets the gain of High EQ
Sets the sensitivity
p.251
Sets the attack level
p.251
Sets the compressor output level
p.251
Switches the order of the exciter and compressor
Sets the balance between the effect and the dry input
Selects a modulation source for
Wet/Dry
Sets the modulation amount for
Wet/Dry
Wet / Dry
112: Exciter — Limiter
This effect combines a mono exciter and a limiter. You can change the order of the effects.
Wet: Mono In — Mono Out / Dry: Stereo In — Stereo Out
Left
Routing
Exciter
+
EQ Trim LEQ HEQ
Exciter
Limiter
Limiter
Gain Adjust
Right
Envelope — Control
Wet / Dry
Wet / Dry
EXCITER a b
[X]Exciter
Blend
[X]Emphasis
Frequency e [L]Ratio
–100…+100
0…70
c [X]Trim
[X]Pre LEQ
Gain [dB] d
Pre HEQ Gain
[dB]
LIMITER
0…100
–15…+15
–15…+15
1.0 : 1…
50.0 : 1, Inf : 1 f
[L]Threshold
[dB] g
[L]Attack h
Release
[L]Gain
Adjust [dB] i
Routing
Wet/Dry
–40…0
1…100
1…100
–Inf,
–38…+24
Exciter
Limiter,
Limiter
Exciter
Dry, 1 : 99…
99 : 1, Wet j Src
Amt
Off…Tempo
–100…+100
Sets the intensity (depth) of the
Exciter effect
p.256
Sets the frequency range to be emphasized
p.256
Sets the EQ input level
Sets the gain of Low EQ
Sets the gain of High EQ
Sets the signal compression ratio
p.307
Sets the level above which the compressor is applied
p.307
Sets the attack time
Sets the release time
Sets the limiter output gain
p.307
Switches the order of the exciter and limiter
Sets the balance between the effect and the dry input
Selects a modulation source for
Wet/Dry
Sets the modulation amount for
Wet/Dry
309
310
113: Exciter — Cho/Flng (Exciter —
Chorus/Flanger)
This effect combines a mono limiter and a chorus/flanger.
Wet: Mono In — Stereo Out / Dry: Stereo In — Stereo Out
Left
Exciter
+
EQ Trim LEQ HEQ
Exciter
Right
Chorus/Flanger
Wet / Dry
Chorus/Flanger
Feedback
Normal
+
–
Wet Invert
Output Mode
Cho/Flng Wet / Dry
Wet / Dry
LFO: Tri / Sine
EXCITER a
[X]Exciter
Blend
–100…+100 b
[X]Emphasis
Frequency c [X]Trim
[X]Pre LEQ
Gain [dB] d
Pre HEQ Gain
[dB]
0…70
0…100
–15…+15
–15…+15
Sets the intensity (depth) of the
Exciter effect
Sets the frequency range to be emphasized
p.256
Sets the EQ input level
Sets the gain of Low EQ
Sets the gain of High EQ
p.256
CHORUS/FLANGER e
[F]LFO
Frequency
[Hz]
0.02…20.00
Sets the speed of the LFO
LFO
Waveform
[F]Delay Time
[msec]
Triangle, Sine Selects the LFO Waveform
0.0…1350.0
Sets the delay time f g
Depth
Feedback
[F]Cho/Flng
Wet/Dry
Src
0…100
–100…+100
–Wet…
–1 : 99, Dry,
1 : 99…Wet
Off…Tempo
Sets the depth of LFO modulation
Sets the feedback amount
p.272
Sets the effect balance of the chorus/flanger
p.259, p.272
Selects the Wet/Dry modulation source for the chorus/flanger h i
Amt
[F]Output
Mode
Wet/Dry
Src
Amt
–100…+100
Normal,
Wet Invert
Dry, 1 : 99…
99 : 1, Wet
Off…Tempo
–100…+100
Sets the Wet/Dry modulation amount for the chorus/flanger
Selects the output mode for the chorus/flanger
p.302
Sets the balance between the effect and the dry input
Selects a modulation source for
Wet/Dry
Sets the modulation amount for
Wet/Dry
114: Exciter — Phaser
This effect combines a mono limiter and a phaser.
Wet: Mono In — Stereo Out / Dry: Stereo In — Stereo Out
Left
Exciter
+
EQ Trim LEQ HEQ
Right
Phaser
Wet / Dry
Exciter Phaser
Resonance
Normal
+
–
Wet Invert
Output Mode
Phaser Wet / Dry
Wet / Dry
LFO: Tri / Sine
EXCITER a b
[X]Exciter
Blend
[X]Emphasis
Frequency e
[P]LFO
Frequency
[Hz]
LFO
Waveform
–100…+100
0…70
c [X]Trim
[X]Pre LEQ
Gain [dB] d
Pre HEQ Gain
[dB]
PHASER
0…100
–15…+15
–15…+15
0.02…20.00
Sets the intensity (depth) of the
Exciter effect
p.256
Sets the frequency range to be emphasized
p.256
Sets the EQ input level
Sets the gain of Low EQ
Sets the gain of High EQ
Sets the speed of the LFO
Triangle, Sine Selects the LFO Waveform f
[P]Manual
Depth
Resonance
0…100
0…100
–100…+100
Sets the frequency to which the effect is applied
Sets the depth of LFO modulation
Sets the resonance amount
p.273
[P]Phaser
Wet/Dry
–Wet…
–1 : 99, Dry,
1 : 99…Wet
Sets the phaser effect balance
p.259, p.273
g h i
Src
Amt
[P]Output
Mode
Wet/Dry
Src
Amt
Off…Tempo
–100…+100
Normal,
Wet Invert
Dry, 1 : 99…
99 : 1, Wet
Off…Tempo
–100…+100
Selects the Wet/Dry modulation source for the phaser
Sets the Wet/Dry modulation amount for the phaser
Selects the phaser output mode
p.302
Sets the balance between the effect and the dry input
Selects a modulation source for
Wet/Dry
Sets the modulation amount for
Wet/Dry
Mono-Mono Serial (Mono-Mono) 115: Exciter — Mt.Delay (Exciter — Multitap Delay)
115: Exciter — Mt.Delay (Exciter
— Multitap Delay)
This effect combines a mono exciter and a multitap delay.
Wet: Mono In — Mono Out / Dry: Stereo In — Stereo Out
Left
Exciter
+
EQ Trim LEQ HEQ
Exciter
Multitap Delay
High Damp
Feedback
Delay
(1)
(2)
Mt.Dly Wet / Dry
Wet / Dry
Right
Wet / Dry
EXCITER a
[X]Exciter
Blend b
[X]Emphasis
Frequency c [X]Trim
[X]Pre LEQ
Gain [dB] d
Pre HEQ Gain
[dB]
0…70
0…100
–15…+15
–15…+15
MULTITAP DELAY
[D]Tap1 Time
[msec] e
Tap1 Level
–100…+100
0.0…1360.0
0…100
g h i f
Sets the intensity (depth) of the
Exciter effect
Sets the frequency range to be emphasized
p.256
Sets the EQ input level
Sets the gain of Low EQ
Sets the gain of High EQ
Sets the Tap1 delay time
p.256
Sets the Tap1 output level
p.290
[D]Tap2 Time
[msec]
Feedback
(Tap2)
[D]High
Damp [%]
[D]Mt.Delay
Wet/Dry
Src
Amt
Wet/Dry
Src
Amt
0.0…1360.0
0…100
Dry, 1 : 99…
99 : 1, Wet
Off…Tempo
–100…+100
Dry, 1 : 99…
99 : 1, Wet
Off…Tempo
–100…+100
Sets the Tap2 delay time
–100…+100 Sets the Tap2 feedback amount
Sets the damping amount in the high range
p.289
Sets the multitap delay effect balance
Selects the Wet/Dry modulation source for the multitap delay
Sets the Wet/Dry modulation amount for the multitap delay
Sets the balance between the effect and the dry input
Selects a modulation source for
Wet/Dry
Sets the modulation amount for
Wet/Dry
116: OD/HG — Amp Sim
(Overdrive/Hi.Gain — Amp
Simulation)
This effect combines a mono overdrive/high ‐ gain distortion and an amp simulation. You can change the order of the effects.
Wet: Mono In — Mono Out / Dry: Stereo In — Stereo Out
Left
Overdrive / Hi-Gain
Routing
Amp Simulation
+
3 Band PEQ
Driver
Output Level
Mode: Overdrive / Hi-Gain
Drive
Amp Simulation Filter
Right
Wet / Dry
Wet / Dry
OD/HI-GAIN
[O]Drive
Mode a b
Drive
[O]Output
Level
Src e
[O]Low
Cutoff [Hz]
Gain [dB]
[O]Mid1
Cutoff [Hz] f
Q
Gain [dB]
[O]Mid2
Cutoff [Hz] g
Q
Gain [dB]
AMP SIM h
[A]Amplifier
Type j i
Amt
Routing
Wet/Dry
Src
Amt
Overdrive, Hi-
Gain
1…100
0…50
Off…Tempo
–50…+50
20…1.00k
–18…+18
300…10.00k
0.5…10.0
–18…+18
500…20.00k
0.5…10.0
–18…+18
Switches between overdrive and high-gain distortion
Sets the degree of distortion
p.263
Sets the overdrive output level
p.263
Selects the modulation source for the overdrive output level
Sets the modulation amount of the overdrive output level
Sets the center frequency for
Low EQ (shelving type)
Sets the gain of Low EQ
Sets the center frequency for
Mid/High EQ 1 (peaking type)
Sets the band width of Mid/High
EQ 1
p.255
Sets the gain of Mid/High EQ 1
Sets the center frequency for
Mid/High EQ 2 (peaking type)
Sets the band width of Mid/High
EQ 2
p.255
Sets the gain of Mid/High EQ 2
SS, EL84, 6L6
OD/HG
Amp,
Amp
OD/HG
Dry, 1 : 99…
99 : 1, Wet
Off…Tempo
–100…+100
Selects the type of guitar amplifie
Switches the order of the overdrive and amp
Sets the balance between the effect and the dry input
Selects a modulation source for
Wet/Dry
Sets the modulation amount for
Wet/Dry
311
312
117: OD/HG — Cho/Flng
(Overdrive/Hi.Gain — Chorus/
Flanger)
This effect combines a mono overdrive/high ‐ gain distortion and a chorus/flanger. You can change the order of the effects.
Wet: Mono In — Stereo Out / Dry: Stereo In — Stereo Out
Left
Overdrive / Hi-Gain
Routing
Chorus/Flanger
+
3 Band PEQ
Driver
Output Level
Mode: Overdrive / Hi-Gain
Drive
Chorus/Flanger
Feedback
Wet / Dry
Normal
+
–
Wet Invert
Cho/Flng Wet / Dry
Output Mode
Right
Wet / Dry
LFO: Tri / Sine
OD/HI-GAIN a
[O]Drive
Mode
Drive b
[O]Output
Level
Src
Amt
0…50
Off…Tempo
–50…+50
Sets the overdrive output level
p.263
Selects the modulation source for the overdrive output level
Sets the modulation amount of the overdrive output level
Sets the center frequency for
Low EQ (shelving type) f e
[O]Low
Cutoff [Hz]
Gain [dB]
[O]Mid1
Cutoff [Hz]
Q
Gain [dB]
[O]Mid2
Cutoff [Hz]
20…1.00k
–18…+18
300…10.00k
0.5…10.0
–18…+18
500…20.00k
Sets the gain of Low EQ
Sets the center frequency for
Mid/High EQ 1 (peaking type)
Sets the band width of Mid/High
EQ 1
p.255
Sets the gain of Mid/High EQ 1
Sets the center frequency for
Mid/High EQ 2 (peaking type) g
Q 0.5…10.0
Sets the band width of Mid/High
EQ 2
p.255
Sets the gain of Mid/High EQ 2 Gain [dB]
CHORUS/FLANGER h
[F]LFO
Frequency
[Hz]
–18…+18
0.02…20.00
Sets the speed of the LFO
LFO
Waveform
[F]Delay Time
[msec]
Triangle, Sine Selects the LFO Waveform
0.0…1350.0
Sets the delay time j i Depth
Feedback
[F]Cho/Flng
Wet/Dry
Src
Amt
[F]Output
Mode
Overdrive, Hi-
Gain
1…100
Switches between overdrive and high-gain distortion
Sets the degree of distortion
p.263
0…100
–100…+100
–Wet…
–1 : 99, Dry,
1 : 99…Wet
Off…Tempo
–100…+100
Sets the depth of LFO modulation
Sets the feedback amount
p.272
Sets the effect balance of the chorus/flanger
p.259, p.272
Selects the Wet/Dry modulation source for the chorus/flanger
Sets the Wet/Dry modulation amount for the chorus/flanger
Selects the output mode for the chorus/flanger
p.305
k
Routing
Wet/Dry
Normal, Wet
Invert
OD/HG
Flanger,
Flanger
OD/HG
Dry, 1 : 99…
99 : 1, Wet
Switches the order of the overdrive and chorus / flanger l Src
Amt
Off…Tempo
–100…+100
Sets the balance between the effect and the dry input
Selects a modulation source for
Wet/Dry
Sets the modulation amount for
Wet/Dry
118: OD/HG — Phaser
(Overdrive/Hi.Gain — Phaser)
This effect combines a mono overdrive/high ‐ gain distortion and a phaser. You can change the order of the effects.
Wet: Mono In — Stereo Out / Dry: Stereo In — Stereo Out
Left
Routing
Overdrive / Hi-Gain
Phaser
Right
+
Wet / Dry
3 Band PEQ
Driver
Output Level
Mode: Overdrive / Hi-Gain
Drive
Phaser
Resonance
+
–
Normal
Output Mode
Wet Invert
Phaser Wet / Dry
Wet / Dry
LFO: Tri / Sine
OD/HI-GAIN
[O]Drive
Mode a
Drive
[O]Output
Level b Src e f
Amt
[O]Low
Cutoff [Hz]
Gain [dB]
[O]Mid1
Cutoff [Hz]
Q
Gain [dB]
[O]Mid2
Cutoff [Hz] g
Q
Gain [dB]
PHASER h
[P]LFO
Frequency
[Hz]
LFO
Waveform
[P]Manual i
Depth
Resonance
[P]Phaser
Wet/Dry j
Src
Amt
[P]Output
Mode k
Routing l
Wet/Dry
Src
Amt
Overdrive, Hi-
Gain
1…100
0…50
Off…Tempo
–50…+50
20…1.00k
–18…+18
300…10.00k
0.5…10.0
–18…+18
500…20.00k
0.5…10.0
–18…+18
Switches between overdrive and high-gain distortion
Sets the degree of distortion
p.263
Sets the overdrive output level
p.263
Selects the modulation source for the overdrive output level
Sets the modulation amount of the overdrive output level
Sets the center frequency for
Low EQ (shelving type)
Sets the gain of Low EQ
Sets the center frequency for
Mid/High EQ 1 (peaking type)
Sets the band width of Mid/High
EQ 1
p.255
Sets the gain of Mid/High EQ 1
Sets the center frequency for
Mid/High EQ 2 (peaking type)
Sets the band width of Mid/High
EQ 2
p.255
Sets the gain of Mid/High EQ 2
0.02…20.00
Sets the speed of the LFO
Triangle, Sine Selects the LFO Waveform
0…100
0…100
–100…+100
Sets the frequency to which the effect is applied
Sets the depth of LFO modulation
Sets the resonance amount
p.273
–Wet…
–1 : 99, Dry,
1 : 99…Wet
Sets the phaser effect balance
p.259, p.273
Off…Tempo
–100…+100
Selects the Wet/Dry modulation source for the phaser
Sets the Wet/Dry modulation amount for the phaser
Selects the phaser output mode
p.305
Normal,
Wet Invert
OD/HG
Phaser,
Phaser
OD/
HG
Dry, 1 : 99…
99 : 1, Wet
Off…Tempo
Switches the order of the overdrive and phaser
p.305
Sets the balance between the effect and the dry input
Selects a modulation source for
Wet/Dry
–100…+100
Sets the modulation amount for
Wet/Dry
Mono-Mono Serial (Mono-Mono) 119: OD/HG — Mt.Delay (Overdrive/Hi.Gain — Multitap Delay)
119: OD/HG — Mt.Delay
(Overdrive/Hi.Gain — Multitap Delay)
This effect combines a mono overdrive/high ‐ gain distortion and a multitap delay.
Wet: Mono In — Mono Out / Dry: Stereo In — Stereo Out
Left
Overdrive / Hi-Gain
+
3 Band PEQ
Driver
Output Level
Mode: Overdrive / Hi-Gain
Drive
Multitap Delay
High Damp
Feedback
Delay
(2)
(1)
Mt.Dly Wet / Dry
Right
Wet / Dry
Wet / Dry
OD/HI-GAIN a b e f g
[O]Drive
Mode
Drive
[O]Output
Level
Src
Amt
[O]Low
Cutoff [Hz]
Gain [dB]
[O]Mid1
Cutoff [Hz]
Q
Gain [dB]
[O]Mid2
Cutoff [Hz]
Q
Overdrive, Hi-
Gain
1…100
0…50
Off…Tempo
–50…+50
20…1.00k
–18…+18
300…10.00k
0.5…10.0
–18…+18
500…20.00k
0.5…10.0
Switches between overdrive and high-gain distortion
Sets the degree of distortion
p.263
Sets the overdrive output level
p.263
Selects the modulation source for the overdrive output level
Sets the modulation amount of the overdrive output level
Sets the center frequency for
Low EQ (shelving type)
Sets the gain of Low EQ
Sets the center frequency for
Mid/High EQ 1 (peaking type)
Sets the band width of Mid/High
EQ 1
p.255
Sets the gain of Mid/High EQ 1
Sets the center frequency for
Mid/High EQ 2 (peaking type)
Sets the band width of Mid/High
EQ 2
p.255
Sets the gain of Mid/High EQ 2 Gain [dB]
MULTITAP DELAY
[D]Tap1 Time
[msec] h
Tap1 Level
–18…+18
0.0…1360.0
0…100
l j i k
Sets the Tap1 delay time
Sets the Tap1 output level
p.290
[D]Tap2 Time
[msec]
Feedback
[D]High
Damp [%]
[D]Mt.Delay
Wet/Dry
Src
Amt
Wet/Dry
Src
Amt
0.0…1360.0
–100…+100
0…100
Dry, 1 : 99…
99 : 1, Wet
Off…Tempo
–100…+100
Dry, 1 : 99…
99 : 1, Wet
Off…Tempo
–100…+100
Sets the Tap2 delay time
Sets the Tap2 feedback amount
Sets the damping amount in the high range
p.289
Sets the multitap delay effect balance
Selects the Wet/Dry modulation source for the multitap delay
Sets the Wet/Dry modulation amount for the multitap delay
Sets the balance between the effect and the dry input
Selects a modulation source for
Wet/Dry
Sets the modulation amount for
Wet/Dry
120: Wah — Amp Sim (Wah —
Amp Simulation)
This effect combines a mono wah and an amp simulation.
You can change the order of the effects.
Wet: Mono In — Mono Out / Dry: Stereo In — Stereo Out
Left
Wah/Auto Wah
Routing
Amp Simulation
+
Wah
Wet / Dry
Amp Simulation Filter
Wet / Dry
Right
Sweep Mode
Envelope
D -mod
Auto
D-mod
LFO
LFO
WAH a
[W]
Frequency
Bottom
Frequency
Top b
[W]Sweep
Mode
Src
0…100
0…100
Auto,
D-mod,
LFO
Off…Tempo
Sets the lower limit of the wah center frequency
p.257
Sets the upper limit of the wah center frequency
p.257
Selects the control from autowah, modulation source, and
LFO
p.257
Selects the modulation source for the wah when Sweep
Mode=D-mod c d
[W]LFO
Frequency
[Hz]
Resonance
LPF
[W]Wet/Dry
Src
0.02…20.00
0…100
Off, On
Dry, 1 : 99…
99 : 1, Wet
Off…Tempo
Sets the speed of the LFO
Sets the resonance amount
Switches the wah low pass filter on and off
Sets the wah effect balance
Selects the Wet/Dry modulation source for the wah
Sets the Wet/Dry modulation amount for the wah
AMP SIM e
[A]Amplifier
Type f Routing g
Amt
Wet/Dry
Src
Amt
–100…+100
SS, EL84, 6L6
Wah
Amp,
Amp
Wah
Dry, 1 : 99…
99 : 1, Wet
Off…Tempo
–100…+100
Selects the type of guitar amplifier
Switches the order of the wah and amp simulation
Sets the balance between the effect and the dry input
Selects a modulation source for
Wet/Dry
Sets the modulation amount for
Wet/Dry
Wet / Dry
313
121: Decimator — Amp
(Decimator — Amp Simulation)
This effect combines a mono decimator and an amp simulation. You can change the order of the effects.
Wet: Mono In — Mono Out / Dry: Stereo In — Stereo Out
Left
Decimator
Routing
Amp Simulation
+
Resolution
Pre LPF
Output Level
Decimator
High Damp
Amp Simulation Filter
Wet / Dry
Right
DECIMATOR
[D]Pre LPF a b
High Damp
[%]
[D]Sampling
Frequency
[Hz]
Resolution c
[D]Output
Level
AMP SIM d
[A]Amplifier
Type
Off, On
0…100
Turn the harmonic noise caused by lowered sampling on and off
p.262
Sets the ratio of high-range damping
1.00k…48.00k
Sets the sampling frequency
4…24
0…100
Sets the data bit length
p.262
Sets the decimator output level
p.262
f e Routing
Wet/Dry
Src
Amt
SS, EL84, 6L6
Decimator
Amp,
Amp
Decimator
Dry, 1 : 99…
99 : 1, Wet
Selects the type of guitar amplifier
Switches the order of the decimator and amp simulation
Off…Tempo
–100…+100
Sets the balance between the effect and the dry input
Selects a modulation source for
Wet/Dry
Sets the modulation amount for
Wet/Dry
Wet / Dry
122: Decimator — Comp
(Decimator — Compressor)
This effect combines a mono decimator and a compressor.
You can change the order of the effects.
Wet: Mono In — Mono Out / Dry: Stereo In — Stereo Out
Left
Decimator
Routing
Compressor
+
Resolution
Decimator
Pre LPF
Output Level
High Damp
Comp
Output Level
Wet / Dry
Right
Wet / Dry
Envelope — Control
314
DECIMATOR
[D]Pre LPF a b
High Damp
[%]
[D]Sampling
Frequency
[Hz] c
Resolution
[D]Output
Level
COMPRESSOR d
[C]
Sensitivity
Off, On
0…100
Turn the harmonic noise caused by lowered sampling on and off
p.262
Sets the ratio of high-range damping
1.00k…48.00k
Sets the sampling frequency
4…24
0…100
1…100
Sets the data bit length
Sets the sensitivity
p.262
Sets the decimator output level
p.262
p.251
e f g
[C]Attack
Routing
Wet/Dry
Src
Amt
1…100
Output Level 0…100
Sets the attack level
p.251
Sets the compressor output level
p.251
Decimator
Comp,
Comp
Decimator
Dry, 1 : 99…
99 : 1, Wet
Switches the order of the decimator and compressor
Off…Tempo
–100…+100
Sets the balance between the effect and the dry input
Selects a modulation source for
Wet/Dry
Sets the modulation amount for
Wet/Dry
123: AmpSim — Tremolo (Amp
Simulation- Tremolo)
This effect combines a mono amp simulation and a tremolo.
Wet: Mono In — Mono Out / Dry: Stereo In — Stereo Out
Left
Amp Simulation
+
Amp Simulation Filter
Tremolo
Tremolo
Wet / Dry
Right
LFO: Tri/Sin/Vintage/Up/Down
LFO Shape
AMP SIM a
[A]Amplifier
Type
TREMOLO
SS, EL84, 6L6
Selects the type of guitar amplifier b
[T]LFO
Waveform
LFO Shape c
[T]LFO
Frequency
[Hz] d [T]Depth
Triangle, Sine,
Vintage, Up,
Down
Selects the LFO Waveform p.281
–100…+100
Changes the curvature of the
LFO Waveform
p.258
0.02…20.00
Sets the speed of the LFO e
Wet/Dry
Src
Amt
0…100
Dry, 1 : 99…
99 : 1, Wet
Off…Tempo
–100…+100
Sets the depth of LFO modulation
Sets the balance between the effect and the dry input
Selects a modulation source for
Wet/Dry
Sets the modulation amount for
Wet/Dry
Wet / Dry
Mono-Mono Serial (Mono-Mono) 124: Cho/Flng — Mt.Dly (Chorus/Flanger — Multitap Delay)
124: Cho/Flng — Mt.Dly (Chorus/
Flanger — Multitap Delay)
This effect combines a mono chorus/flanger and a multitap delay.
Wet: Mono In — Mono Out / Dry: Stereo In — Stereo Out
Left
Chorus/Flanger Multitap Delay
+
EQ
Trim
LEQ HEQ
Chorus/Flanger
Feedback
Cho/Flng
Wet / Dry
Feedback
Delay
(1)
High Damp
(2)
Mt.Dly
Wet / Dry
Right
Wet / Dry
Wet / Dry
LFO: Tri / Sine
CHORUS/FLANGER a
[F]LFO
Frequency
[Hz]
0.02…20.00
Sets the speed of the LFO
LFO
Waveform
[F]Delay Time
[msec]
Triangle, Sine Selects the LFO Waveform
0.0…1350.0
Sets the delay time b Depth
Feedback
0…100
–100…+100
Sets the depth of LFO modulation
Sets the feedback amount
p.272
c [F]EQ Trim
[F]PreLEQ
Gain [dB] d
PreHEQ Gain
[dB]
0…100
–15…+15
–15…+15
Sets the EQ input level
Sets the gain of Low EQ
Sets the gain of High EQ e d e
[F]Cho/Flng
Wet/Dry
Src
Amt
Wet/Dry
Src
Amt
–Wet…–1 : 99,
Dry,
1 : 99…Wet
Sets the effect balance of the chorus/flanger
p.259, p.272
MULTITAP DELAY
[D]Tap1 Time
[msec] a
Tap1 Level b c
0.0…1360.0
Sets the Tap1 delay time
0…100
Sets the Tap1 output level
p.290
[D]Tap2 Time
[msec]
Feedback
0.0…1360.0
Sets the Tap2 delay time
[D]High
Damp [%]
[D]Mt.DelayW
et/Dry
–100…+100 Sets the Tap2 feedback amount
0…100
Dry, 1 : 99…
99 : 1, Wet
Sets the damping amount in the high range
p.289
Sets the multitap delay effect balance
Off…Tempo
–100…+100
Dry, 1 : 99…
99 : 1, Wet
Off…Tempo
–100…+100
Selects the Wet/Dry modulation source for the multitap delay
Sets the Wet/Dry modulation amount for the multitap delay
Sets the balance between the effect and the dry input
Selects a modulation source for
Wet/Dry
Sets the modulation amount for
Wet/Dry
125: Phaser — Cho/Flng (Phaser
— Chorus/Flanger)
This effect combines a mono phaser and a chorus/flanger.
Wet: Mono In — Stereo Out / Dry: Stereo In — Stereo Out
Left
Phaser Chorus/Flanger
Wet / Dry
Right
+
Phaser
Resonance
Chorus/Flanger
EQ
Trim
Phaser
Wet / Dry
LEQ HEQ
Feedback
Normal
+
–
Wet Invert
Cho/Flng
Wet / Dry
Output Mode
Wet / Dry
LFO: Tri / Sine
LFO: Tri / Sine
PHASER a
[P]LFO
Frequency
[Hz]
LFO
Waveform
0.02…20.00
Sets the speed of the LFO
Triangle, Sine Selects the LFO Waveform b
[P]Manual
Depth
Resonance
[F]Cho/Flng
Wet/Dry
0…100
0…100
–100…+100 c e
[P]Phaser
Wet/Dry
Depth
Feedback
–Wet…
–1 : 99, Dry,
1 : 99…Wet
0…100
–100…+100
Sets the phaser effect balance
p.259, p.273
CHORUS/FLANGER d
[F]LFO
Frequency
[Hz]
0.02…20.00
Sets the speed of the LFO
LFO
Waveform
[F]Delay Time
[msec]
Triangle, Sine Selects the LFO Waveform
0.0…1350.0
Sets the delay time
Sets the depth of LFO modulation
Sets the feedback amount
p.272
f [F]EQ Trim
[F]PreLEQ
Gain [dB] g
PreHEQ Gain
[dB]
0…100
–15…+15
–15…+15
Sets the EQ input level
Sets the gain of Low EQ
Sets the gain of High EQ
–Wet…
–1 : 99, Dry,
1 : 99…Wet
Sets the frequency to which the effect is applied
Sets the depth of LFO modulation
Sets the resonance amount
p.273
j h i
Src
Amt
[F]Output
Mode
Wet/Dry
Src
Amt
Off…Tempo
–100…+100
Normal,
Wet Invert
Dry, 1 : 99…
99 : 1, Wet
Off…Tempo
–100…+100
Sets the effect balance of the chorus/flanger
p.259, p.272
Selects the Wet/Dry modulation source for the chorus/flanger
Sets the Wet/Dry modulation amount for the chorus/flanger
Selects the output mode for the chorus/flanger
p.302
Sets the balance between the effect and the dry input
Selects a modulation source for
Wet/Dry
Sets the modulation amount for
Wet/Dry
315
316
126: Reverb — Gate
This effect combines a mono reverb and a gate.
Wet: Mono In — Mono Out / Dry: Stereo In — Stereo Out
Left
Reverb
+
Pre Delay
EQ Trim
LEQ HEQ
Reverb
Right
Gate+Dmpr
Input Reverb Mix
Input
D-mod
Envelope — Control
Envelope Select
Gate
Reverb
Balance
Gate
Wet / Dry
Wet / Dry
REVERB a
[R]Reverb
Time [sec]
High Damp
[%] b c
[R]Pre Delay
[msec]
[R]EQ Trim
Reverb
Balance
0.1…10.0
0…100
0…200
0…100
Dry, 1 : 99…
99 : 1, Wet
Sets the reverberation time
Sets the damping amount in the high range
Sets the delay time of the reverb sound and gate control signal
Sets the EQ input level
Sets the reverb effect balance d f
[R]PreLEQ Fc
Pre HEQ Fc
[G]Envelope
Select
Src
Low,
Mid-Low
High,
Mid-High
Selects the cutoff frequency (low or mid-low) of the low-range equalizer
Selects the cutoff frequency
(high or mid-high) of the highrange equalizer
[R]PreLEQ
Gain [dB] e
GATE
Pre HEQ Gain
[dB]
–15.0…+15.0
Sets the gain of Low EQ
–15.0…+15.0
Sets the gain of High EQ
D-mod, Input
Off…Tempo
Switches between modulation source control and input signal control
p.316
Selects the modulation source that controls the gate when
Envelope Select is set to D-mod
p.316
g h j i
[G]Input
Reverb Mix
Threshold
[G]Polarity
[G]Attack
Release
Wet/Dry
Src
Amt
Dry, 1 : 99…
99 : 1, Wet
0…100
+, –
1…100
1…100
Dry, 1 : 99…
99 : 1, Wet
Off…Tempo
–100…+100
Sets the balance between the dry and reverb sounds of the gate control signal
p.316
Sets the gate threshold level
p.316
Switches between non-invert and invert of the gate on/off state
p.254
Sets the attack time
Sets the release time
p.254
p.254
Sets the balance between the effect and the dry input
Selects a modulation source for
Wet/Dry
Sets the modulation amount for
Wet/Dry
f: [G]Envelope Select f: Src g: [G]Input Reverb Mix g: Threshold
The
[G]Envelope Select
parameter enables you to select whether turning the gate on and off is triggered by the input signal level or controlled directly by the modulation source.
You can select from Off to Gate2+Dmpr for the Src parameter to specify the modulation source.
When
[G]Envelope Select
is set to Input, the gate is controlled by the level of signals that are the combination of the dry sound and the reverb sound. When the signal level exceeds the threshold, the gate opens and the reverb sound is output.
Normally, set
[G]Input Reverb Mix
to Dry (the gate is controlled only by the dry sound). If you wish to extend the gate time, set the
[G]Input Reverb Mix
value higher and adjust the
Threshold
value.
Mono/Mono Parallel (Mono//Mono) 126: Reverb — Gate
Mono/Mono Parallel (Mono//Mono)
127: P4EQ // P4EQ (Parametric 4 ‐ Band EQ // Parametric 4 ‐
Band EQ) through 171: BPM Dl // BPM Dl (Multitap BPM
Delay // Multitap BPM Delay) are parallel effects.
The pan and effect balance of each effect can be set independently.
In the screen, the L ‐ side is shown as [1], and the R ‐ side as
[2].
These provide various combinations of 4 ‐ band EQ,
Compressor, Limiter, Exciter, Overdrive, Wah, Chorus/
Flanger, Phaser, and Multitap Delay, as described below.
P4EQ (4-band EQ)
P4EQ a b
Trim
Q
Gain [dB]
0…100
B1 Cutoff [Hz] 20…1.00k
Sets the input level
Sets the center frequency of
Band 1
0.5…10.0
Sets the bandwidth of Band 1
p.255
–18.0…+18.0
Sets the gain of Band 1 c
B2 Cutoff [Hz] 50…5.00k
Q 0.5…10.0
Sets the center frequency of
Band 2
Sets the bandwidth of Band 2
p.255
Gain [dB] –18.0…+18.0
Sets the gain of Band 2
B3 Cutoff [Hz] 300…10.00k
Sets the center frequency of
Band 3 d e f g
Q 0.5…10.0
Sets the bandwidth of Band3
p.255
Gain [dB] –18.0…+18.0
Sets the gain of Band 3
B4 Cutoff [Hz] 500…20.00k
Sets the center frequency of
Band 4
Q
Gain [dB]
L Wet/Dry
(R Wet/Dry)
Src
Amt
L Pan (R Pan)
0.5…10.0
Sets the bandwidth of Band 4
p.255
–18.0…+18.0
Sets the gain of Band 4
Dry, 1 : 99…
99 : 1, Wet
Off…Tempo
–100…+100
Sets the balance between the effect and the dry input
Selects a modulation source for
Wet/Dry
Sets the modulation amount for
Wet/Dry
L000…C064…R
127
Sets the stereo image
Comp (Compressor)
COMPRESSOR a Sensitivity b Attack
1…100
1…100
c Output Level 0…100
d EQ Trim 0…100
Pre LEQ Gain
[dB] e
–15…+15
Pre HEQ Gain
[dB]
–15…+15
L Wet/Dry
(R Wet/Dry)
Dry,1 : 99… 99
: 1, Wet
Sets the sensitivity
Sets the attack level
Sets the output level
Sets the EQ input level
Sets the gain of Low EQ
Sets the gain of High EQ
p.251
p.251
Sets the balance between the effect and the dry input f g
Src
Amt
L Pan (R Pan)
Off…Tempo
–100…+100
Selects a modulation source for
Wet/Dry
Sets the modulation amount for
Wet/Dry
L000…C064…R
127
Sets the stereo image
Limiter
LIMITER a f
Ratio b e
Threshold
[dB] c
Attack d
Release
Gain Adjust
[dB]
L Wet/Dry
(R Wet/Dry)
Src
Amt g L Pan (R Pan)
1.0 : 1…
50.0 : 1, Inf : 1
–40…0
1…100
1…100
–Inf,
–38…+24
Dry, 1 : 99…
99 : 1, Wet
Sets the signal compression ratio
p.307
Sets the level above which the compressor is applied
p.307
Sets the attack time
Sets the release time
Sets the output gain
p.307
Off…Tempo
–100…+100
Sets the balance between the effect and the dry input
Selects a modulation source for
Wet/Dry
Sets the modulation amount for
Wet/Dry
L000…
C064…R127
Sets the stereo image
Exciter
EXCITER a Exciter Blend –100…+100 b
Emphasis
Frequency c Trim d
Pre LEQ Gain
[dB] e
0…70
0…100
–15…+15
Pre HEQ Gain
[dB]
L Wet/Dry
(R Wet/Dry)
–15…+15
Dry, 1 : 99…
99 : 1, Wet f g
Src
Amt
L Pan (R Pan)
Sets the intensity (depth) of the
Exciter effect
p.256
Sets the frequency range to be emphasized
Sets the EQ input level
Sets the gain of Low EQ
Sets the gain of High EQ
p.256
Off…Tempo
Sets the balance between the effect and the dry input
Selects a modulation source for
Wet/Dry
–100…+100
Sets the modulation amount for
Wet/Dry
L000…C064…R
127
Sets the stereo image
0D/HG (Overdrive)
OD/HI GAIN a b c d e f g
Drive Mode
Drive
Low Cutoff
[Hz]
Gain [dB]
Mid1 Cutoff
[Hz]
Gain [dB]
Mid2 Cutoff
[Hz]
Gain [dB]
L Wet/Dry
(R Wet/Dry)
Overdrive, Hi-
Gain
Output Level 0…50
Src
Amt
Q
Q
Src
Amt
L Pan (R Pan)
1…100
Off…Tempo
–50…+50
20…1.00k
–18…+18
300…10.00k
0.5…10.0
Switches between overdrive and high-gain distortion
Sets the degree of distortion
p.263
Sets the output level
p.263
Selects the modulation source for the output level
Sets the modulation amount of the output level
Sets the center frequency for
Low EQ (shelving type)
Sets the gain of Low EQ
Sets the center frequency for
Mid/High EQ 1 (peaking type)
Sets the band width of Mid/High
EQ 1
p.255
–18…+18
500…20.00k
0.5…10.0
–18…+18
Dry, 1 : 99…
99 : 1, Wet
Off…Tempo
–100…+100
Sets the gain of Mid/High EQ 1
Sets the center frequency for
Mid/High EQ 2 (peaking type)
Sets the band width of Mid/High
EQ 2
p.255
Sets the gain of Mid/High EQ 2
Sets the balance between the effect and the dry input
Selects a modulation source for
Wet/Dry
Sets the modulation amount for
Wet/Dry
L000…C064…R
127
Sets the stereo image
317
318
Wah
WAH a
Frequency
Bottom
Frequency
Top b
Src
0…100
0…100
Sweep Mode
Auto,
D-mod,
LFO
Off…Tempo
Sets the lower limit of the wah center frequency
p.257
Sets the upper limit of the wah center frequency
p.257
Selects the control from autowah, modulation source, and
LFO
p.257
Selects the modulation source for the wah when Sweep
Mode=D-mod c
LFO
Frequency
[Hz] d Resonance f e
Low Pass
Filter
L Wet/Dry
(R Wet/Dry)
Src
Amt g
L Pan (R Pan)
0.02…20.00
Sets the speed of the LFO
0…100
Off, On
Dry, 1 : 99…
99 : 1, Wet
Sets the resonance amount
Switches the wah low pass filter on and off
Sets the balance between the effect and the dry input
Off…Tempo
–100…+100
Selects a modulation source for
Wet/Dry
Sets the modulation amount for
Wet/Dry
L000…C064…R
127
Sets the stereo image
Cho/Flng (Chorus / Flanger)
CHORUS/FLANGER
LFO
Frequency
[Hz]
0.02…20.00
Sets the speed of the LFO a
LFO
Waveform
Triangle, Sine Selects the LFO Waveform b
Delay [msec] 0.0…1350.0
Sets the delay time
Sets the depth of LFO modulation c
Depth 0…100
Feedback –100…+100
Sets the feedback amount
p.272
Sets the EQ input level d EQ Trim
Pre LEQ Gain
[dB] e
Pre HEQ Gain
[dB]
0…100
–15…+15
–15…+15
L Wet/Dry
(R Wet/Dry)
–Wet…
–1 : 99, Dry,
1 : 99…Wet
Sets the gain of Low EQ
Sets the gain of High EQ
Sets the balance between the effect and the dry input f g
Src
Amt
L Pan (R Pan)
Off…Tempo
–100…+100
Selects a modulation source for
Wet/Dry
Sets the modulation amount for
Wet/Dry
L000…C064…R
127
Sets the stereo image
Phaser
PHASER a
LFO
Frequency
[Hz] b
LFO
Waveform
0.02…20.00
Sets the speed of the LFO
Triangle, Sine Selects the LFO Waveform d f c e g
Manual
Depth
Resonance
L Wet/Dry
(R Wet/Dry)
Src
Amt
L Pan (R Pan)
0…100
0…100
–100…+100
Sets the frequency to which the effect is applied
Sets the depth of LFO modulation
Sets the resonance amount
p.273
–Wet…
–1 : 99, Dry,
1 : 99…Wet
Sets the balance between the effect and the dry input
Off…Tempo
–100…+100
Selects a modulation source for
Wet/Dry
Sets the modulation amount for
Wet/Dry
L000…C064…R
127
Sets the stereo image
BPM Dly (Multi-tap BPM Delay)
MULTITAP BPM DELAY a b c d e f g
BPM
Time Over? L —, OVER!
Time Over? R —, OVER!
Tap1 Base
Note
Times
Tap2 Base
Note
Times
Tap1 Level
Feedback
(Tap2)
High
Damp[%]
L Wet/Dry
(R Wet/Dry)
Src
Amt
L Pan (R Pan)
MIDI,
40.00…
300.00
…
x1…x32
…
x1…x32
0…100
–100…+100 Sets the Tap2 feedback amount
0…100
Dry, 1 : 99…
99 : 1, Wet
Off…Tempo
–100…+100
MIDI syncs to the system tempo;
40–300 sets the tempo manually for this individual effect
p.285
Displays an error message when the delay time exceeds the upper limit
p.295
Displays an error message when the delay time exceeds the upper limit
p.295
Selects the type of notes to specify the delay time for the
Tap1
p.285
Sets the number of notes to specify the delay time for the
Tap1
p.285
Selects the type of notes to specify the delay time for the
Tap2
p.285
Sets the number of notes to specify the delay time for the
Tap2
p.285
Sets the Tap1 output level
Sets the damping amount in the high range
p.289
Sets the balance between the effect and the dry input
Selects a modulation source for
Wet/Dry
Sets the modulation amount for
Wet/Dry
L000…C064…R
127
Sets the stereo image
Mono/Mono Parallel (Mono//Mono) 127: P4EQ // P4EQ (Parametric 4-Band EQ // Parametric 4-Band EQ)
127: P4EQ // P4EQ (Parametric
4-Band EQ // Parametric 4-
Band EQ)
This effect connects two four ‐
band EQ (p.317) units in
parallel.
Stereo In — Stereo Out
Left
Trim
Parametric 4Band EQ
Parametric 4Band EQ
Wet / Dry Pan
130: P4EQ // Exciter (Parametric
4-Band EQ // Exciter)
This effect connects a four ‐
band EQ (p.317) and an exciter
(p.317) in parallel.
Stereo In — Stereo Out
Left
Trim
Parametric 4Band EQ
Parametric 4Band EQ
Wet / Dry Pan
Trim
Wet / Dry Pan
Right
Trim LEQ HEQ
Exciter
Exciter
Wet / Dry Pan
Right
Parametric 4Band EQ
Parametric 4Band EQ
128: P4EQ // Comp (Parametric
4-Band EQ // Compressor)
This effect connects a four ‐
band EQ (p.317) and a compressor (p.317) in parallel.
Stereo In — Stereo Out
Left
Trim
Parametric 4Band EQ
Parametric 4Band EQ
Wet / Dry Pan
Right
Trim LEQ HEQ
Compressor
Envelope — Control
Compressor
Output Level
Wet / Dry Pan
131: P4EQ // OD/HG
(Parametric 4-Band EQ //
Overdrive/Hi.Gain)
This effect connects a four ‐
band EQ (p.317) and an overdrive
(p.317) in parallel.
Stereo In — Stereo Out
Left
Trim
Parametric 4Band EQ
Parametric 4Band EQ
Wet / Dry Pan
Right
Driver
Overdrive / Hi-Gain
Output Level 3 Band PEQ
Overdrive / Hi-Gain
Wet / Dry Pan
129: P4EQ // Limiter (Parametric
4-Band EQ // Limiter)
This effect connects a four ‐
band EQ (p.317) and a limiter
(p.317) in parallel.
Stereo In — Stereo Out
Left
Trim
Parametric 4Band EQ
Parametric 4Band EQ
Wet / Dry Pan
Right
Envelope — Control
Limiter
Limiter
Gain Adjust
Wet / Dry Pan
132: P4EQ // Wah (Parametric
4-Band EQ // Wah)
This effect connects a four ‐
band EQ (p.317) and a wah
(p.318) in parallel.
Stereo In — Stereo Out
Left
Trim
Parametric 4Band EQ
Parametric 4Band EQ
Wet / Dry Pan
Right
D -mod
Envelope
LFO
Wah
Sweep Mode
Wah / Auto Wah
Wet / Dry Pan
319
320
133: P4EQ // Cho/Flng
(Parametric 4-Band EQ //
Chorus/Flanger)
This effect connects a four ‐
band EQ (p.317) and a chorus /
flanger (p.318) in parallel.
Stereo In — Stereo Out
Left
Trim
Parametric 4Band EQ
Parametric 4Band EQ
Wet / Dry Pan
Right
Trim LEQ HEQ
LFO: Tri / Sine
Feedback
Chorus/Flanger
Chorus / Flanger
Wet / Dry Pan
134: P4EQ // Phaser (Parametric
4-Band EQ // Phaser)
This effect connects a four ‐
band EQ (p.317) and a phaser
(p.318) in parallel.
Stereo In — Stereo Out
Left
Trim
Parametric 4Band EQ
Parametric 4Band EQ
Wet / Dry Pan
Right
LFO: Tri / Sine
Resonance
Phaser
Phaser
Wet / Dry Pan
135: P4EQ // BPM Dly
(Parametric 4-Band EQ //
Multitap BPM Delay)
This effect connects a four ‐
band EQ (p.317) and a multitap
BPM delay (p.318) in parallel.
Stereo In — Stereo Out
Left
Trim
Right
Tempo
BPM
Parametric 4Band EQ
Parametric 4Band EQ
Feedback
High Damp
Delay
(1)
(2)
Base Note x Times
Base Note x Times
Multitap BPM Delay
Wet / Dry Pan
Wet / Dry Pan
136: Comp // Comp
(Compressor // Compressor)
This effect connects two compressor (p.317) units in parallel.
Stereo In — Stereo Out
Left
Trim LEQ HEQ
Right
Trim LEQ HEQ
Compressor
Envelope — Control
Compressor
Wet / Dry Pan
Output Level
Output Level
Compressor
Envelope — Control
Compressor
Wet / Dry Pan
137: Comp // Limiter
(Compressor // Limiter)
This effect connects a compressor (p.317) and a limiter
(p.317) in parallel.
Stereo In — Stereo Out
Left
Trim LEQ HEQ
Right
Compressor
Envelope — Control
Compressor
Wet / Dry Pan
Envelope — Control
Limiter
Limiter
Output Level
Gain Adjust
Wet / Dry Pan
138: Comp // Exciter
(Compressor // Exciter)
This effect connects a compressor (p.317) and an exciter
(p.317) in parallel.
Stereo In — Stereo Out
Left
Trim LEQ HEQ
Compressor
Envelope — Control
Compressor
Wet / Dry Pan
Output Level
Exciter
Trim LEQ HEQ
Right
Wet / Dry Pan
Exciter
Mono/Mono Parallel (Mono//Mono) 139: Comp // OD/HG (Compressor // Overdrive Hi.Gain)
139: Comp // OD/HG
(Compressor // Overdrive
Hi.Gain)
This effect connects a compressor (p.317) and an overdrive
(p.317) in parallel.
Stereo In — Stereo Out
Left
Compressor
Wet / Dry Pan
Trim LEQ HEQ
Envelope — Control
Compressor
Output Level
Output Level
3 Band PEQ
Driver
Overdrive / Hi-Gain
Right
Wet / Dry Pan
Overdrive / Hi-Gain
142: Comp // Phaser
(Compressor // Phaser)
This effect connects a compressor (p.317) and a phaser
(p.318) in parallel.
Stereo In — Stereo Out
Left
Trim LEQ HEQ
LFO: Tri / Sine
Compressor
Envelope — Control
Compressor
Resonance
Phaser
Right
Phaser
Wet / Dry Pan
Output Level
Wet / Dry Pan
140: Comp // Wah (Compressor
// Wah)
This effect connects a compressor (p.317) and a wah (p.318)
in parallel.
Stereo In — Stereo Out
Left
Trim LEQ HEQ
Right
D -mod
Envelope
LFO
Compressor
Envelope — Control
Compressor
Wet / Dry Pan
Output Level
Wah
Sweep Mode
Wet / Dry Pan
Wah / Auto Wah
143: Comp // BPM Dly
(Compressor // Multitap BPM
Delay)
This effect connects a compressor (p.317) and a multitap
BPM delay (p.318) in parallel.
Stereo In — Stereo Out
Left
Trim LEQ HEQ
Compressor
Envelope — Control
Compressor
Feedback
High Damp
Delay
(1)
(2)
Right
Tempo
BPM
Base Note x Times
Base Note x Times
Multitap BPM Delay
Wet / Dry Pan
Output Level
Wet / Dry Pan
141: Comp // Cho/Flng
(Compressor // Chorus/Flanger)
This effect connects a compressor (p.317) and a chorus /
flanger (p.318) in parallel.
Stereo In — Stereo Out
Left
Right
Compressor
Wet / Dry Pan
Trim LEQ HEQ
Envelope — Control
Compressor
Trim LEQ HEQ
LFO: Tri / Sine
Feedback
Chorus/Flanger
Output Level
Wet / Dry Pan
Chorus / Flanger
144: Limiter // Limiter
This effect connects two limiter (p.317) units in parallel.
Stereo In — Stereo Out
Left
Right
Limiter
Envelope — Control
Limiter
Wet / Dry Pan
Gain Adjust
Gain Adjust
Envelope — Control
Limiter
Wet / Dry Pan
Limiter
321
322
145: Limiter // Exciter
This effect connects a limiter (p.317) and an exciter (p.317) in
parallel.
Stereo In — Stereo Out
Left
Limiter
Wet / Dry Pan
Envelope — Control
Limiter
Gain Adjust
Exciter
Trim LEQ HEQ
Right
Wet / Dry Pan
Exciter
148: Limiter // Cho/Fl (Limiter /
/ Chorus/Flanger)
This effect connects a limiter (p.317) and a chorus / flanger
(p.318) in parallel.
Stereo In — Stereo Out
Left
Right
Limiter
Wet / Dry Pan
Envelope — Control
Limiter
Trim LEQ HEQ
LFO: Tri / Sine
Feedback
Chorus/Flanger
Gain Adjust
Wet / Dry Pan
Chorus / Flanger
146: Limiter // OD/HG (Limiter /
/ Overdrive/Hi.Gain)
This effect connects a limiter (p.317) and an overdrive
(p.317) in parallel.
Stereo In — Stereo Out
Left
Right
Limiter
Wet / Dry Pan
Envelope — Control
Limiter
Output Level
Gain Adjust
3 Band PEQ
Driver
Overdrive / Hi-Gain
Wet / Dry Pan
Overdrive / Hi-Gain
149: Limiter // Phaser
This effect connects a limiter (p.317) and a phaser (p.318) in
parallel.
Stereo In — Stereo Out
Left
Right
LFO: Tri / Sine
Limiter
Envelope — Control
Limiter
Resonance
Wet / Dry Pan
Gain Adjust
Phaser
Wet / Dry Pan
Phaser
147: Limiter // Wah
This effect connects a limiter (p.317) and a wah (p.318) in
parallel.
Stereo In — Stereo Out
Left
Right
D -mod
Envelope
LFO
Limiter
Wet / Dry Pan
Envelope — Control
Limiter
Gain Adjust
Wah
Sweep Mode
Wet / Dry Pan
Wah / Auto Wah
150: Limiter // BPM Dl (Limiter
// Multitap BPM Delay)
This effect connects a limiter (p.317) and a multitap BPM
delay (p.318) in parallel.
Stereo In — Stereo Out
Left
Right
Tempo
BPM
Limiter
Wet / Dry Pan
Envelope — Control
Limiter
Gain Adjust
Feedback
High Damp
Delay
(1)
(2)
Wet / Dry Pan
Base Note x Times
Base Note x Times
Multitap BPM Delay
Mono/Mono Parallel (Mono//Mono) 151: Exciter // Exciter
151: Exciter // Exciter
This effect connects two exciter (p.317) units in parallel.
Stereo In — Stereo Out
Left
Trim LEQ HEQ
Exciter
Wet / Dry Pan
Exciter
Exciter
Trim LEQ HEQ
Right
Exciter
Wet / Dry Pan
154: Exciter // Cho/Fl (Exciter //
Chorus/Flanger)
This effect connects an exciter (p.317) and a chorus / flanger
(p.318) in parallel.
Stereo In — Stereo Out
Left
Trim LEQ HEQ
Right
Exciter
Exciter
Trim LEQ HEQ
LFO: Tri / Sine
Feedback
Chorus/Flanger
Chorus / Flanger
Wet / Dry Pan
Wet / Dry Pan
152: Exciter // OD/HG (Exciter //
Overdrive/Hi.Gain)
This effect connects an exciter (p.317) and an overdrive
(p.317) in parallel.
Stereo In — Stereo Out
Left
Exciter
Trim LEQ HEQ
Exciter
Driver
Overdrive / Hi-Gain
Output Level
3 Band PEQ
Right
Overdrive / Hi-Gain
Wet / Dry Pan
Wet / Dry Pan
155: Exciter // Phaser
This effect connects an exciter (p.317) and a phaser (p.318) in
parallel.
Stereo In — Stereo Out
Left
Trim LEQ HEQ
Exciter
Wet / Dry Pan
Exciter
Resonance
Phaser
LFO: Tri / Sine
Right
Wet / Dry Pan
Phaser
153: Exciter // Wah
This effect connects an exciter (p.317) and a wah (p.318) in
parallel.
Stereo In — Stereo Out
Left
Trim LEQ HEQ
Exciter
Wet / Dry Pan
Exciter
Right
D -mod
Envelope
LFO
Wah
Sweep Mode
Wah / Auto Wah
Wet / Dry Pan
156: Exciter // BPM Dl (Exciter /
/ Multitap BPM Delay)
This effect connects an exciter (p.317) and a multitap BPM
delay (p.318) in parallel.
Stereo In — Stereo Out
Left
Trim LEQ HEQ
Exciter
Exciter
Feedback
High Damp
Delay
(1)
(2)
Right
Tempo
BPM
Base Note x Times
Base Note x Times
Multitap BPM Delay
Wet / Dry Pan
Wet / Dry Pan
323
324
157: OD/HG // OD/HG
(Overdrive/Hi.Gain //
Overdrive/Hi.Gain)
This effect connects two overdrive (p.317) units in parallel.
Stereo In — Stereo Out
Left
Right
Overdrive / Hi-Gain
Wet / Dry Pan
Overdrive / Hi-Gain
Driver
Driver
Overdrive / Hi-Gain
Output Level
Output Level
3 Band PEQ
3 Band PEQ
Overdrive / Hi-Gain
Wet / Dry Pan
160: OD/HG // Phaser
(Overdrive/Hi.Gain // Phaser)
This effect connects an overdrive (p.317) and a phaser
(p.318) in parallel.
Stereo In — Stereo Out
Left
Right
Overdrive / Hi-Gain
Wet / Dry Pan
Overdrive / Hi-Gain
Driver
Output Level
Resonance
3 Band PEQ
Phaser
LFO: Tri / Sine
Phaser
Wet / Dry Pan
158: OD/HG // Wah (Overdrive/
Hi.Gain // Wah)
This effect connects an overdrive (p.317) and a wah (p.318)
in parallel.
Stereo In — Stereo Out
Left
Right
D -mod
Overdrive / Hi-Gain
Wet / Dry Pan
Overdrive / Hi-Gain
Driver
Output Level
3 Band PEQ
Envelope
LFO
Wah
Sweep Mode
Wet / Dry Pan
Wah / Auto Wah
161: OD/HG // BPMDly
(Overdrive/Hi.Gain // Multitap
BPM Delay)
This effect connects an overdrive (p.317) and a multitap
BPM delay (p.318) in parallel.
Stereo In — Stereo Out
Left
Right
Tempo
BPM
Overdrive / Hi-Gain
Wet / Dry Pan
Overdrive / Hi-Gain
Driver
Output Level
3 Band PEQ
Feedback
High Damp
Delay
(1)
(2)
Base Note x Times
Base Note x Times
Multitap BPM Delay
Wet / Dry Pan
159: OD/HG // Cho/Fln
(Overdrive/Hi.Gain // Chorus/
Flanger)
This effect connects an overdrive (p.317) and a chorus /
flanger (p.318) in parallel.
Stereo In — Stereo Out
Left
Right
Overdrive / Hi-Gain
Wet / Dry Pan
Overdrive / Hi-Gain
Driver
Output Level
Feedback
3 Band PEQ
Trim LEQ HEQ
Chorus/Flanger
LFO: Tri / Sine
Chorus / Flanger
Wet / Dry Pan
162: Wah // Wah
This effect connects two wah (p.318) units in parallel.
Stereo In — Stereo Out
D -mod
Left
Wah / Auto Wah
Wet / Dry Pan
Right
D -mod
LFO
Envelope
Sweep Mode
Wah
Envelope
LFO
Wah
Sweep Mode
Wah / Auto Wah
Wet / Dry Pan
Mono/Mono Parallel (Mono//Mono) 163: Wah // Cho/Flng (Wah // Chorus/Flanger)
163: Wah // Cho/Flng (Wah //
Chorus/Flanger)
This effect connects a wah (p.318) and a chorus / flanger
(p.318) in parallel.
Stereo In — Stereo Out
D -mod
Left
Right
Wah / Auto Wah
LFO
Envelope
Sweep Mode
Wah
Trim LEQ HEQ
LFO: Tri / Sine
Feedback
Chorus/Flanger
Chorus / Flanger
Wet / Dry Pan
Wet / Dry Pan
166: Cho/Fl // Cho/Fl (Chorus/
Flanger // Chorus/Flanger)
This effect connects two chorus / flanger (p.318) units in
parallel.
Stereo In — Stereo Out
Left
Right
Chorus / Flanger
Trim LEQ HEQ
LFO: Tri / Sine
Chorus/Flanger
Feedback
Feedback
Trim LEQ HEQ
Chorus/Flanger
LFO: Tri / Sine
Chorus / Flanger
Wet / Dry Pan
Wet / Dry Pan
164: Wah // Phaser
This effect connects a wah (p.318) and a phaser (p.318) in
parallel.
Stereo In — Stereo Out
D -mod
Left
Wah / Auto Wah
Wet / Dry Pan
LFO
Envelope
Sweep Mode
Wah
Resonance
Phaser
LFO: Tri / Sine
Right
Phaser
Wet / Dry Pan
167: Cho/Fl // Phaser (Chorus/
Flanger // Phaser)
This effect connects a chorus / flanger (p.318) and phaser
(p.318) in parallel.
Stereo In — Stereo Out
Left
Right
Chorus / Flanger
Trim LEQ HEQ
LFO: Tri / Sine
Chorus/Flanger
Feedback
Resonance
Phaser
LFO: Tri / Sine
Phaser
Wet / Dry Pan
Wet / Dry Pan
165: Wah // BPM Dly (Wah //
Multitap BPM Delay)
This effect connects a wah (p.318) and a multitap BPM delay
(p.318) in parallel.
Stereo In — Stereo Out
D -mod
Left
Wah / Auto Wah
Wet / Dry Pan
Right
Tempo
BPM
LFO
Envelope
Sweep Mode
Wah
Feedback
High Damp
Delay
(1)
(2)
Base Note x Times
Base Note x Times
Multitap BPM Delay
Wet / Dry Pan
168: Cho/Fl // BPMDly (Chorus/
Flanger // Multitap BPM Delay)
This effect connects a chorus / flanger (p.318) and a multitap
BPM delay (p.318) in parallel.
Stereo In — Stereo Out
Left
Chorus / Flanger
Trim LEQ HEQ
LFO: Tri / Sine
Chorus/Flanger
Feedback
Feedback
High Damp
Delay
(1)
(2)
Right
Tempo
BPM
Base Note x Times
Base Note x Times
Multitap BPM Delay
Wet / Dry Pan
Wet / Dry Pan
325
326
169: Phaser // Phaser
This effect connects two phaser (p.318) units in parallel.
Stereo In — Stereo Out
Left
Phaser
Wet / Dry Pan
LFO: Tri / Sine
Resonance
Resonance
Phaser
Phaser
LFO: Tri / Sine
Right
Wet / Dry Pan
Phaser
170: Phaser // BPMDly (Phaser //
Multitap BPM Delay)
This effect connects a phaser (p.318) and a multitap BPM delay (p.318) in parallel.
Stereo In — Stereo Out
Left
Wet / Dry Pan
Right
Tempo
BPM
Phaser
LFO: Tri / Sine
Phaser
Resonance
Feedback
High Damp
Delay
(1)
(2)
Base Note x Times
Base Note x Times
Multitap BPM Delay
Wet / Dry Pan
171: BPM Dl // BPM Dl
(Multitap BPM Delay //
Multitap BPM Delay)
This effect connects two multitap BPM delay (p.318) units in
parallel.
Stereo In — Stereo Out
BPM
Tempo
Left
Wet / Dry Pan
Right
Tempo
BPM
Multitap BPM Delay
Base Note x Times
Base Note x Times
High Damp
Delay
(1)
(2)
Feedback
Feedback
High Damp
Delay
(1)
(2)
Base Note x Times
Base Note x Times
Multitap BPM Delay
Wet / Dry Pan
Double Size 172: St. Mltband Limiter (Stereo Multiband Limiter)
Double Size
Double ‐ size effects can be used only with insert effects IFX1,
2, 3, 4 and master effect MFX1.
172: St. Mltband Limiter
(Stereo Multiband Limiter)
This is a stereo multiband limiter.
Stereo In — Stereo Out
Left
Band-Pass Filters
Low
Right
Envelope — Control
Mid
Envelope — Control
High
Envelope — Control
Envelope — Control
Low
Envelope — Control
Mid
High
Offset
Envelope — Control
Limiter
Limiter
Limiter
Limiter
Limiter
Limiter
Wet / Dry
Gain Adjust
Gain Adjust
Wet / Dry
a
Ratio b
Threshold
[dB] c Attack d Release e
Low Offset
[dB] f g
Mid Offset
[dB]
High Offset
[dB]
Gain Adjust
[dB] h Src i
Amt
Wet/Dry
Src
Amt
1.0 : 1…
50.0 : 1, Inf : 1
–40…0
1…100
1…100
–40…0
–40…0
–40…0
Sets the signal compression ratio
p.307
Sets the level above which the compressor is applied
p.307
Sets the attack time
Sets the release time
Sets the low range gain of trigger signal
p.253
Sets the mid range gain of trigger signal
p.253
Sets the high range gain of trigger signal
p.253
–Inf,
–38…+24
Sets the output gain
p.307
Off…Tempo
–63…+63
Dry, 1 : 99…
99 : 1, Wet
Off…Tempo
–100…+100
Selects the modulation source for the output gain
Sets the modulation amount of the output gain
Sets the balance between the effect and the dry input
Selects a modulation source for
Wet/Dry
Sets the modulation amount for
Wet/Dry
173: PianoBody/Damper
(PianoBody/Damper Simulation)
This effect simulates the resonance of the piano sound board caused by the string vibration, and also simulates the resonance of other strings that are not being played when you press the damper pedal. It will create a very realistic sound when applied to acoustic piano sounds.
Wet: Mono In — Stereo Out / Dry: Stereo In — Stereo Out
Left
Wet / Dry
+
Piano
Body/Damper
Simulation
Right
D -mod
Damper
Wet / Dry
a c d e f
Sound Board
Depth
0…100
b
Damper
Depth
Src
Tone
Mid Shape
Tune
Wet/Dry
Src
Amt
0…100
Off…Tempo
1…100
0…36
–50…+50
Dry, 1 : 99…
99 : 1, Wet
Off…Tempo
–100…+100
Sets the intensity of resonance of the sound board
p.327
Sets the intensity of the string resonance created when the damper pedal is pressed
p.327
Selects the modulation source of damper effect
p.327
Sets tonal quality of effect sound
p.327
Sets the mid range of tonal quality
p.327
Fine tuning
p.327
Sets the balance between the effect and the dry input
Selects a modulation source for
Wet/Dry
Sets the modulation amount for
Wet/Dry
a: Sound Board Depth
This parameter sets the intensity of resonance of the piano sound board.
b: Damper Depth b: Src
This parameter sets the resonance intensity of the other strings created when the damper pedal is pressed. The
Src
parameter selects the modulation source from which the damper effect is applied. Usually, select Damper #64 Pdl
(Damper pedal).
The effect is off when a value for the modulation source specified for the
Src
parameter is 63 or smaller, and the effect is on when the value is 64 or higher.
c: Tone d: Mid Shape
These parameters control the tonal quality of the effect sound.
e: Tune
Since this effect simulates the resonance of the strings, the sound varies depending on the pitch. If you have changed tuning using the
Master Tune
(Global P0), adjust this parameter value.
327
328
174: Vocoder
This effect applies the timbral character of a one signal (the modulator) to a second signal (the carrier).
On the KROME, an external source such as a mic cannot be used as the modulator source, but you can create unique effects by using an internal sound source as the modulator.
Try selecting voice ‐ type sounds, rhythms, or sound effects as the modulator. The most suitable choices for the carrier are sounds that contain a large number of overtones, such as strings or distorted guitar. For details on how to make
settings, refer to “Example: Vocoder (Combination)” on page 238.
Wet: Stereo In — Mono Out / Dry: Stereo In — Stereo Out
Left
Carrier Trim
+
Modulator Trim
Envelope
Band Pass Filter
Modulator Select
Modulator Source
Right
FX Control BUS 1
FX Control BUS 2
Noise Level
Noise
Generator
+
Modulator High Mix
Wet / Dry
Wet / Dry
a Carrier Trim 0…100
b
Modulator
Trim
0…100
c d
Modulator
Source
Modulater
Select
Input,
FX Control 1,
FX Control 2
L/R Mix,
L Only,
R Only
Sets the Carrier input level
Sets the Modulator input level
Selects the modulator input f e g h j i
Formant Shift –2…+2
Response
Noise Level
Src
Amt
Modulator
High Mix
High Gain
[dB]
Wet/Dry
Src
Amt
0…100
0…100
Off…Tempo
–100…+100
0…100
Low Gain [dB] –12…+12
–12…+12
Dry, 1 : 99…
99 : 1, Wet
Off…Tempo
–100…+100
Selects whether to use the left/ right mix, only left, or only right of the modulator input
Sets the height of the frequency for the vocoder effect
p.328
Sets the speed of the response to the modulator input
Sets the noise mix level to the
Carrier
p.328
Selects the modulation source for the noise mix level
Sets the modulation amount for the noise mix level
Sets the high-range output level of the modulator
p.328
Sets the low-range output level of the vocoder
Sets the high-range output level of the vocoder
Sets the balance between the effect and the dry input
Selects a modulation source for
Wet/Dry
Sets the modulation amount for
Wet/Dry
e: Formant Shift
By offsetting the Carrier filter, you can adjust the height of the frequency range to which the vocoder effect is applied.
The tonal quality will change significantly.
g: Noise Level
This parameter enables you to mix white noise with the
Carrier.
h: Modulator High Mix
This parameter sets the high ‐ range output level of the modulator sound. If the modulator is a human voice, it will make the words more clear.
175: OD/HyperGain Wah
(Overdrive/Hyper Gain Wah)
This distortion effect has two modes: overdrive and hyper ‐ gain that produces a strong distortion. A higher high ‐ gain setting is required for this effect relative to a normal ‐ size effect.
Wet: Mono In — Mono Out / Dry: Stereo In — Stereo Out
Left
+
Pre Low-cut
Wah
Mode: Overdrive / Hyper-Gain
Drive
3 Band EQ
Driver Amp Simulation
Output Level
Direct Mix
Right
D -mod
Wet / Dry
Wet / Dry
a
Wah
Src
Sw
Amt
Off, On
Off…Tempo
Wah Sweep
Range b
Wah Sweep
Src
–10…+10
Off…Tempo
c Drive Mode
Drive
Overdrive,
Hyper-Gain
1…120
d
Pre Low-cut 0…10
Output Level 0…50
Off…Tempo
e
Src
Amt –50…+50 f
Low Cutoff
[Hz]
Gain [dB]
Mid1 Cutoff
[Hz] g
Q
Gain [dB]
Mid2 Cutoff
[Hz] h
Q
20…1.00k
–18…+18
300…10.00k
0.5…10.0
–18…+18
500…20.00k
j i
Gain [dB]
Direct Mix
Speaker
Simulation
Wet/Dry
Src
0.5…10.0
–18…+18
0…50
Off, On
Dry, 1 : 99…
99 : 1, Wet
Off…Tempo
Toggle,
Moment
–100…+100
Switches Wah on/off
p.263
Selects the modulation source that switches the Wah on and off
p.263
Selects the switching mode for the modulation source that switches the Wah on and off
p.263
Sets the range of Wah
p.263
Selects the modulation source that controls the Wah
p.263
Switches between overdrive and hi-gain distortion
Sets the degree of distortion
p.263
Sets the low range cut amount of the distortion input
p.263
Sets the output level
p.263
Selects the modulation source for the output level
Sets the modulation amount of the output level
Sets the center frequency for
Low EQ (shelving type)
Sets the gain of Low EQ
Sets the center frequency for
Mid/High EQ 1 (peaking type)
Sets the band width of Mid/High
EQ 1
p.255
Sets the gain of Mid/High EQ 1
Sets the center frequency for
Mid/High EQ 2 (peaking type)
Sets the band width of Mid/High
EQ 2
p.255
Sets the gain of Mid/High EQ 2
Sets the amount of the dry sound mixed to the distortion
Switches the speaker simulation on/off
Sets the balance between the effect and the dry input
Selects a modulation source for
Wet/Dry
Sets the modulation amount for
Wet/Dry
Double Size 176: GuitarAmp + P4EQ (Guitar Amp Model + Parametric 4-Band EQ)
176: GuitarAmp + P4EQ
(Guitar Amp Model +
Parametric 4-Band EQ)
This combines a guitar amp simulation (which even faithfully replicates the distortion and tone control circuitry) with a four ‐ band equalizer.
By using this in conjunction with “021: St. Guitar Cabinet
(Stereo Guitar Cabinet)” on p.264, you can obtain an even
more realistic guitar sound that simulates a guitar amp + speaker cabinet.
Wet: Mono In — Mono Out / Dry: Stereo In — Stereo Out
Left
Wet / Dry
+
Guitar Amp Model
Volume
Parametric 4Band EQ
Right
D -mod
Wet / Dry
a b f j i c d e g h
Amplifier
Type
Drive Gain
Volume
Src
Amt
Bass
Middle
Treble
Presence
Post P4EQ
Band1 Cutoff
[Hz]
Q
Gain [dB]
Band2 Cutoff
[Hz]
Q
Gain [dB]
Band3 Cutoff
[Hz]
Q
Gain [dB]
Band4 Cutoff
[Hz]
Q
Gain [dB]
Wet/Dry
Src
Amt
VOX AC15,
VOX AC15TB,
VOX AC30,
VOX AC30TB,
UK BLUES, UK
70’S,
UK 80’S,
UK 90’S,
UK MODERN,
US MODERN,
US HIGAIN,
BOUTIQUE
OD,
BOUTIQUE
CL,
BLACK 2×12,
TWEED —
1×12,
TWEED —
4×10
Selects the type of the amplifier
p.329
0…100
0…100
Off…Tempo
–100…+100
Sets the input gain
Sets the output level
Selects the modulation source for the output level
Sets the modulation amount of the output level
0…100
0…100
0…100
0…100
Thru, On
Sets the bass (low range) level
Sets the middle (mid range) level
Sets the treble (high range) level
Sets the presence (highfrequency tone)
p.329
Selects through or on for the equalizer
p.329
20…1.00k
0.5…10.0
–18…+18
50…5.00k
0.5…10.0
–18…+18
300…10.00k
0.5…10.0
–18…+18
500…20.00k
0.5…10.0
–18…+18
Dry, 1 : 99…
99 : 1, Wet
Off…Tempo
–100…+100
Sets the center frequency of
Band 1
Sets Band 1’s bandwidth
Sets the gain of Band 1
Sets the center frequency of
Band 2
Sets Band 2’s bandwidth
Sets the gain of Band 2
Sets the center frequency of
Band 3
Sets Band 3’s bandwidth
Sets the gain of Band 3
Sets the center frequency of
Band 4
Sets Band 4’s bandwidth
Sets the gain of Band 4
Sets the balance between the effect and the dry input
Selects a modulation source for
Wet/Dry
Sets the modulation amount for
Wet/Dry
a: Amplifier Type d: Presence
If the Amplifier Type is VOX AC15…VOX AC30TB, this sets the attenuation of the high ‐ frequency range. For other types, this sets the boost of the high ‐ frequency range.
This corresponds to the Cut knob control of amps made by the VOX Corporation.
e: Post P4EQ
By chaining this with 19: St.Guitar Cabinet you can simulate the combination of a guitar amp and speaker cabinet. In this case, we recommend that you set
Post P4EQ
to “Thru,” but if necessary you can turn it “On” and adjust the tone.
Recommended Combinations of Guitar Amp Models and Cabinet Simulators:
Amplifier Type
VOX AC15
VOX AC15TB
VOX AC30
VOX AC30TB
UK BLUES
UK 70’S
UK 80’S
UK 90’S
UK MODERN
US MODERN
US HIGAIN
BOUTIQUE OD
BOUTIQUE CL
BLACK 2×12
TWEED ‐ 1×12
TWEED ‐ 4×10
Cabinet Type
VOX AC15 ‐ 1×12
VOX AC15 ‐ 1×12
VOX AC30 ‐ 2×12
VOX AC30 ‐ 2×12
UK H30 ‐ 4×12
UK H30 ‐ 4×12
UK T75 ‐ 4×12
UK T75 ‐ 4×12
UK T75 ‐ 4×12, US V30 ‐ 4×12
US V30 ‐ 4×12
US V30 ‐ 4×12, UK T75 ‐ 4×12
UK H30 ‐ 4×12
UK H30 ‐ 4×12
BLACK ‐ 2×12
TWEED ‐ 1×12
TWEED ‐ 4×10
Note:
It is convenient to use the Effect Preset function to
preset your favorite pairings of amp model and cabinet. (see p.60)
177: G.Amp Clean Combo
This models the clean channel of a amp that went on sale in
1975 and contained two 12″ speakers. As the name suggests, it produces a clean tone with a tight sounding character, and a deep and compact low ‐ end.
178: G.Amp California
This American combo amp with four 10″ speakers was produced during the years 1963–1968, and was known for its big, clean sound and its warm and husky sound when driven heavily.
179: G.Amp Tweed
This American ‐ made tweed ‐ covered 1957 model combo amp with two 12″ speakers is known for its rich, clean tone that is ideal for classic rock, blues, and country. By raising the volume you can also produce a powerful and punchy overdrive sound.
329
330
180: G.Amp Modded OD
This models a 100W boutique amp head produced in North
Hollywood. An overdrive tone with a rich harmonic structure is combined with a relaxed sustain, making for an enjoyable playing experience.
Wet: Mono In — Mono Out / Dry: Stereo In — Stereo Out
Left
Wet / Dry
+
Guitar Amp Model
Volume
Right
Wet / Dry
a Gain
Volume b
Source
Amount c Bass d Middle e Treble f Presence
Wet/Dry g
Source
Amount
0…100
0…100
Off…Tempo
–100…+100
0…100
0…100
0…100
0…100
Sets the input gain
Sets the output level
Selects a modulation source for
Volume
Sets the modulation amount for
Volume
Sets the bass (low range) level
Sets the middle (mid range) level
Sets the treble (high range) level
Sets the presence (highfrequency tone)
Dry,
1 : 99…99 : 1,
Wet
Sets the balance between the effect and the dry input
Off…Tempo
–100…+100
Selects a modulation source for
Wet/Dry
Sets the modulation amount for
Wet/Dry
Examples of amp and cabinet combinations
We recommend that you use these amp model effects in a chain with the cabinet model effect (S21: St.Gt Cab). You are free to use any combination to create a variety of sounds, so try out various combinations and listen to the result. Here are some typical combinations.
177: G,Amp Clean Combo
178: G.Amp California
179: G.Amp Tweed
180: G.Amp Modded OD
1×12 TWEED
2×10 BLACK
2×12 BLACK
4×12 UK H30
1×12 TWEED
4×10 TWEED
2×12 BLACK
4×12 UK H30
1×12 TWEED
2×10 BLACK
2×12 BLACK
4×12 UK T75
4×12 US V30
181: BassTubeAmp+Cab. (Bass
Tube Amp Model + Cabinet)
This simulates a bass amp (with gain and drive) and speaker cabinet.
Wet: Mono In — Mono Out / Dry: Stereo In — Stereo Out
Left
Wet / Dry
Right
D -mod
+
Bass Amp Model2
Volume
Drive
Cabinet Simulator
Wet / Dry
a b c d e f g h j
Amplifier
Type
Drive Gain
Volume
Src
Amt
Bass
Middle
Treble
Presence
Cabinet
Simulator i Cabinet Type
Wet/Dry
Src
Amt
STUDIO
COMBO
VOX AC100
UK MAJOR
0…100
0…100
Off…Tempo
–100…+100
0…100
0…100
0…100
0…100
Off, On
Selects the type of the amplifier
p.329
A tube combo ideal for the
Motown sound
A 100W tube amp AC100 made by Vox
A 200W tube amp made in the
UK
Sets the input gain
Sets the output level
Selects the modulation source for the output level
Sets the modulation amount of the output level
Sets the bass (low range) level
Sets the middle (mid range) level
Sets the treble (high range) level
Sets the presence (highfrequency tone)
Switches the cabinet simulator on/off
LA — 4×10,
MODERN —
4×10,
METAL — 4×10,
CLASSIC -8×10,
UK — 4×12,
STUDIO — 1×15,
JAZZ — 1×15,
VOX AC100 —
2×15,
US — 2×15,
UK — 4×15,
LA — 1×18,
COMBI — 1×12
& 1×18
Dry,
1 : 99…99 : 1,
Wet
Selects the cabinet type
Sets the balance between the effect and the dry input
Off…Tempo
–100…+100
Selects a modulation source for
Wet/Dry
Sets the modulation amount for
Wet/Dry
a: Amplifier Type i: Cabinet Type
Recommended Combinations of Bass Amp Models and
Cabinets:
Amplifier Type
STUDIO COMBO
AC100
UK MAJOR
Cabinet Type
STUDIO ‐ 1×15
VOX AC100 ‐ 2×15
UK ‐ 4×15, UK ‐ 4×12
Note:
It is convenient to use the Effect Preset function to
preset your favorite pairings of amp model and cabinet. (see p.60)
Double Size 182: EP Cabinet/Drive
182: EP Cabinet/Drive
This faithfully simulates the characteristics of the power amp and speaker cabinet of a famous model of tine ‐ type electric piano. It produces a tone with a distinctive sense of drive and warmth.
a Cabinet Type
Tine EP I,
Tine EP II,
Reed EP
Drive Switch Off, On b c d
Src
Sw
Drive
Src
Amt
Wet/Dry
Src
Amt
Off…Tempo
Toggle,
Moment
00.0…100
Off…Tempo
Select the power amp and speaker cabinet.
Switches drive on/off
Selects a modulation source to switch drive on/off
Sets the switch mode for drive on/off modulation
Sets the amount of overdrive and distortion in the amp
Selects a modulation source for
Drive
Sets the modulation amount for
Drive
–100…+100
Dry,
1 : 99…99 : 1,
Wet
Off…Tempo
–100…+100
Sets the balance between the effect and the dry input
Selects a modulation source for
Wet/Dry
Sets the modulation amount for
Wet/Dry
c: Drive
At lower settings, the amp is very clean; as you increase the
Drive
, it gets dirtier and more distorted. The output level is compensated, so increasing
Drive
causes only a moderate increase in perceived volume.
183: St. Mic + PreAmp (Stereo
Mic Modeling + PreAmp)
This is a stereo mic and preamp simulator (See “028: Mic
Model+PreAmp (Mic Modeling + PreAmp)” on page 267.).
For example you might use this to simulate micing of a stereo source such as a rotary speaker.
Stereo In — Stereo Out
Left
Wet / Dry
Mic Simulation Tube Pre Amp
Output Level
Mic Simulation Tube Pre Amp
Right
Wet / Dry
184: Multitap Cho/Delay
(Multitap Chorus/Delay)
This effect has six chorus blocks with different LFO phases.
You can produce a complex stereo image by setting a different delay time and depth for each block. You can control the delay output level via a modulation source.
Wet: Mono In — Stereo Out / Dry: Stereo In — Stereo Out
Left
Feedback
Tap1 Delay
Tap2 Delay
+
Tap3 Delay
Tap4 Delay
Tap5 Delay
Tap6 Delay
Right
0 [degree]
180 [degree]
60 [degree]
240 [degree]
120 [degree]
300 [degree]
LFO: Triangle
D -mod
On/Off Control
Panning Preset
Wet / Dry
Wet / Dry
a
LFO
Frequency
[Hz]
Tap1 (000)
[msec]
Depth b
Status c d e f g
Tap2 (180)
[msec]
Depth
Status
Tap3 (060)
[msec]
Depth
Status
Tap4 (240)
[msec]
Depth
Status
Tap5 (120)
[msec]
Depth
Status
Tap6 (300)
[msec]
Depth
Status
0.02…13.00
Sets the speed of the LFO
0…2000
0…30
Always On,
Always Off,
On
Off
(Dm),
Off
On
(Dm)
Sets the Tap1 (LFO phase=0 degrees) delay time
Sets the Tap1 chorus depth 0…30
Always On,
Always Off,
On
Off
(Dm),
Off
On
(Dm)
Selects on, off, or modulation source for the control of Tap1 output
p.332
0…2000
0…30
Always On,
Always Off,
On
Off (Dm),
Off
On (Dm)
0…2000
Sets the Tap2 (LFO phase=180 degrees) delay time
Sets the Tap2 chorus depth
Selects on, off, or modulation source for the control of Tap2 output
p.332
Sets the Tap3 (LFO phase=60 degrees) delay time
Sets the Tap3 chorus depth 0…30
Always On,
Always Off,
On
Off
(Dm),
Off
On
(Dm)
Selects on, off, or modulation source for the control of Tap3 output
p.332
0…2000
Sets the Tap4 (LFO phase=240 degrees) delay time
Sets the Tap4 chorus depth
Selects on, off, or modulation source for the control of Tap4 output
p.332
0…2000
Sets the Tap5 (LFO phase=120 degrees) delay time
Sets the Tap5 chorus depth 0…30
Always On,
Always Off,
On
Off
(Dm),
Off
On
(Dm)
Selects on, off, or modulation source for the control of Tap5 output
p.332
0…2000
Sets the Tap1 (LFO phase=300 degrees) delay time
Sets the Tap6 chorus depth 0…30
Always On,
Always Off,
On
Off
(Dm),
Off
On
(Dm)
Selects on, off, or modulation source for the control of Tap6 output
p.332
331
332
h
Panning
Preset
Tap1
Feedback i Src
Amt
Wet/Dry j Src
Amt
1 : L 1 2 3 4 5
6 R,
2 : L 135 246 R,
3 : L 1 3 5 2 4
6 R,
4 : L 1 4 5 6 3
2 R
Selects the stereo panning pattern for each tap
p.332
–100…+100 Sets the Tap1 feedback amount
Off…Tempo
–100…+100
Dry, 1 : 99…
99 : 1, Wet
Off…Tempo
–100…+100
Selects the modulation source for the Tap output level, feedback amount, and effect balance
Sets the modulation amount of
Tap1 feedback amount
Sets the balance between the effect and the dry input
Selects a modulation source for
Wet/Dry
Sets the modulation amount for
Wet/Dry
b, c, d, e, f, g: Status
These parameters set the output status of each Tap.
Always On
: Output is always on. (No modulation)
Always Off
: Output is always off. (No modulation)
On
→
Off (dm)
: Output level is switched from on to off depending on the modulation source.
Off
→
On (dm)
: Output level is switched from off to on depending on the modulation source.
Combining these parameters, you can change from 4 ‐ phase chorus to two ‐ tap delay by crossfading them gradually via the modulation source during a performance.
h: Panning Preset
This parameter selects combinations of stereo images of the tap outputs.
184: St. Pitch Shifter (Stereo
Pitch Shifter)
This is a stereo pitch shifter. The pitch shift amount for the left and right channels can be reversed from each other.
Stereo In — Stereo Out
Left
Input Level
Input Level
Pitch Shifter
Post
Delay
Pre
Feedback Position
Pre
Post
Pitch Shifter
High Damp
Feedback
Delay
High Damp
Spread
Right
Wet / Dry
Wet / Dry
a b c d e i f g h
Mode
L/R Pitch
Pitch Shift [1/
2tone]
Src
Amt
Fine [cent]
Amt
L Delay
[msec]
R Delay
[msec]
Feedback
High Damp
[%]
Feedback
Position
Spread
Input Level
D-mod [%]
Src
Wet/Dry
Src
Amt
Slow,
Medium, Fast
Normal,
Up/Down
–24…+24
Off…Tempo
–24…+24
–100…+100
–100…+100
0…2000
0…2000
–100…+100
0…100
Pre, Post
–100…+100
–100…+100
Off…Tempo
Dry, 1 : 99…
99 : 1, Wet
Off…Tempo
–100…+100
Switches Pitch Shifter mode
p.287
Determines whether or not the
L/R pitch shift amount is inverted
p.332
Sets the pitch shift amount in steps of a semitone
p.285
Selects the modulation source of pitch shift amount
p.285
Sets the modulation amount of pitch shift amount
p.285
Sets the pitch shift amount in steps of one cent
p.285
Sets the modulation amount of pitch shift amount
p.285
Sets the delay time for the left channel
Sets the delay time for the right channel
Sets the feedback amount
p.285
Sets the damping amount in the high range
Switches the feedback connection
p.285
Sets the width of the stereo image of the effect sound
p.289
Sets the modulation amount of the input level
p.284
Selects the modulation source for the input level
p.284
Sets the balance between the effect and the dry input
Selects a modulation source for
Wet/Dry
Sets the modulation amount for
Wet/Dry
a: L/R Pitch
When you select Up/Down for this parameter, the pitch shift amount for the right channel will be reversed. If the pitch shift amount is positive, the pitch of the left channel is raised, and the pitch of the right channel is lowered.
Double Size 185: St. PitchShift BPM (Stereo Pitch Shifter BPM)
185: St. PitchShift BPM (Stereo
Pitch Shifter BPM)
This stereo pitch shifter enables you to set the delay time to match the song tempo.
Stereo In — Stereo Out
Left
Input Level
Input Level
Pitch Shifter
Post
Delay
Pre
Feedback Position
Pre
Post
Pitch Shifter Delay
High Damp
Feedback
High Damp
Spread
Right
Tempo
BPM
BPM
Base Note x Times
Base Note x Times
a b j i f c d e g h
Mode
L/R Pitch
Pitch Shift [1/
2tone]
Src
Amt
Fine [cent]
Amt
BPM
Time Over? L
R
L Delay Base
Note
Times
R Delay Base
Note
Times
Feedback
Position
Spread
Feedback
High Damp
[%]
Input Level
D-mod [%]
Src
Wet/Dry
Src
Amt
Slow,
Medium, Fast
Normal,
Up/Down
–24…+24
Off…Tempo
–24…+24
–100…+100
–100…+100
MIDI,
40.00…
300.00
—, OVER!
—, OVER!
…
x1…x32
…
x1…x32
Pre, Post
–100…+100
–100…+100
0…100
–100…+100
Off…Tempo
Dry, 1 : 99…
99 : 1, Wet
Off…Tempo
–100…+100
Switches Pitch Shifter mode
p.285
Determines whether or not the
L/R pitch shift amount is inverted
p.332
Sets the pitch shift amount in steps of a semitone
p.285
Selects the modulation source of pitch shift amount
p.285
Sets the modulation amount of pitch shift amount
p.285
Sets the pitch shift amount in steps of one cent
p.285
Sets the modulation amount of pitch shift amount Sets the modulation amount of pitch shift amount
p.285
MIDI syncs to the system tempo;
40–300 sets the tempo manually for this individual effect
p.285
Display the error message if the left channel delay time exceeds the upper limit
p.285
Display the error message if the right channel delay time exceeds the upper limit
p.285
Selects the type of notes to specify the left channel delay time
p.285
Sets the number of notes to specify the left channel delay time
p.285
Selects the type of notes to specify the right channel delay time
p.285
Sets the number of notes to specify the right channel delay time
p.285
Switches the feedback connection
Sets the width of the stereo image of the effect sound
p.285
Sets the feedback amount
p.285
Sets the damping amount in the high range
Sets the modulation amount of the input level
p.284
Selects the modulation source for the input level
p.284
Sets the balance between the effect and the dry input
Selects a modulation source for
Wet/Dry
Sets the modulation amount for
Wet/Dry
Wet / Dry
Wet / Dry
186: Rotary SpeakerOD
(Rotary Speaker Overdrive)
This is a stereo rotary speaker effect. It has an internal speaker simulator that simulates overdrive (recreating the amp distortion) and characteristics of the rotary speaker, producing a very realistic rotary speaker sound.
Wet: Mono In — Stereo Out / Dry: Stereo In — Stereo Out
Left
Horn
Right
D -mod
D -mod
D -mod
D -mod
+
Overdrive
Rotary Speaker Horn/Rotor
Balance
Rotor
Speaker Simulation
Mic Distance
Mic Spread
On/Off
Mode Switch: Rotate/Stop
Speed Switch: Slow/Fast
Manual Speed Control
Wet / Dry
Wet / Dry
a
Overdrive
Src i
Sw
Src
Sw
Horn/Rotor
Balance
Manual
SpeedCtrl
Horn
Acceleration
Horn Ratio
Mic Distance 0…100
j
Mic Spread 0…100
Wet/Dry
Src
Dry, 1 : 99…
99 : 1, Wet
Off…Tempo
Amt
Off, On
Off…Tempo
Toggle,
Moment b
C
Overdrive
Gain
Overdrive
Level
Overdrive
Tone
Speaker
Simulator
0…100
0…100
0…15
Off, On
Mode Switch Rotate, Stop d e f g h
Src
Sw
Off…Tempo
Toggle,
Moment
Speed Switch Slow, Fast
Off…Tempo
Toggle,
Moment
Rotor, 1…99,
Horn
Off…Tempo
0…100
Stop,
0.50…2.00
Rotor
Acceleration
0…100
Rotor Ratio
Stop,
0.50…2.00
–100…+100
Switches overdrive on/off
Selects a modulation source to switch overdrive on/off
Sets the switch mode for overdrive on/off modulation
p.334
Determines the degree of distortion
Sets the overdrive output level
Sets the tonal quality of the overdrive
Switches the speaker simulation on/off
Switches between speaker rotation and stop
Selects a modulation source for
Rotate/Stop
Sets the switch mode for Rotate/
Stop modulation
p.287
Switches the speaker rotation speed between slow and fast
Selects a modulation source for
Slow/Fast
Sets the switch mode for Slow/
Fast modulation
p.287
Sets the volume balance between the high-range horn and low-range rotor
Sets a modulation source for direct control of rotation speed
p.287
Sets how quickly the horn rotation speed changes
p.287
Adjusts the (high-frequency) horn rotation speed. Standard value is 1.00. “Stop” stops the rotation
Sets how quickly the rotor speed changes
p.287
Adjusts the (low-frequency) rotor rotation speed. Standard value is
1.0. “Stop” stops the rotation
Distance between the microphone and rotary speaker
p.287
Angle of left and right microphones
p.287
Sets the balance between the effect and the dry input
Selects a modulation source for
Wet/Dry
Sets the modulation amount for
Wet/Dry
333
334 a: Sw
This parameter determines how to switch on/off the overdrive via a modulation source.
When
Sw
= Toggle, overdrive is turned on/off each time the pedal or joystick is operated.
Overdrive will be switched on/off each time the value of the modulation source exceeds 64.
When
Sw
= Moment, overdrive is applied only when you press the pedal or operate the joystick.
Only when the value for the modulation source is 64 or higher, the overdrive effect is applied.
188: L/C/R Long Delay
This multitap delay outputs three Tap signals to left, right and center respectively. You can set a maximum of
5,460msec for the delay time.
Wet: Mono In — Stereo Out / Dry: Stereo In — Stereo Out
Left
Input Level D-mod
L Delay
+
High Damp Low Damp
Input Level D-mod
Level
C Delay
Feedback
Level
R Delay
Level
Right
Spread
Wet / Dry
Wet / Dry
a b c d
L Delay Time
[msec]
Level
C Delay Time
[msec]
Level
R Delay Time
[msec]
Level
Feedback
(C Delay)
0…5460
0…50
0…5460
0…50
0…5460
0…50
–100…+100
Src Off…Tempo
f e g h
Amt
High Damp
[%]
Low Damp
[%]
Input Level
D-mod [%]
Src
Spread
Wet/Dry
Src
Amt
–100…+100
0…100
0…100
–100…+100
Off…Tempo
0…50
Dry, 1 : 99…
99 : 1, Wet
Off…Tempo
–100…+100
Sets the delay time of TapL
Sets the output level of TapL
Sets the delay time of TapC
Sets the output level of TapC
Sets the delay time of TapR
Sets the output level of TapR
Sets the feedback amount of
TapC
Selects the modulation source for the TapC feedback
Sets the modulation amount of the TapC feedback
Sets the damping amount in the high range
p.289
Sets the damping amount in the low range
p.289
Sets the modulation amount of the input level
p.284
Selects the modulation source for the input level
p.284
Sets the width of the stereo image of the effect sound
p.289
Sets the balance between the effect and the dry input
Selects a modulation source for
Wet/Dry
Sets the modulation amount for
Wet/Dry
189: St/Cross Long Delay
(Stereo/Cross Long Delay)
This is a stereo delay, and can by used as a cross ‐ feedback delay effect in which the delay sounds cross over between left and right by changing the feedback routing. You can set a maximum of 2,730msec for the delay time.
Stereo In — Stereo Out
Left
Input Level D-mod
Stereo/Cross
Input Level D-mod
Delay
Feedback
Delay
Right
High Damp Low Damp
Stereo/Cross
High Damp Low Damp
Spread
Wet / Dry
Wet / Dry
a Stereo/Cross Stereo, Cross b c
L Delay Time
[msec]
R Delay Time
[msec]
0.0…2730.0
0.0…2730.0
d e j i
L Feedback –100…+100
Src
Amt
R Feedback
Amt f g h
High Damp
[%]
Low Damp
[%]
Input Level
D-mod [%]
Src
Spread
Wet/Dry
Src
Amt
Off…Tempo
–100…+100
–100…+100
–100…+100
0…100
0…100
–100…+100
Off…Tempo
–50…+50
Dry, 1 : 99…
99 : 1, Wet
Off…Tempo
–100…+100
Switches between stereo delay and cross-feedback delay
Sets the delay time for the left channel
Sets the delay time for the right channel
Sets the feedback amount for the left channel
Selects the modulation source of feedback amount
Sets the modulation amount of the left channel feedback
Sets the feedback amount for the right channel
Sets the modulation amount of the right channel feedback
Sets the damping amount in the high range
p.289
Sets the damping amount in the low range
p.289
Sets the modulation amount of the input level
p.284
Selects the modulation source for the input level
p.284
Sets the width of the stereo image of the effect sound
p.289
Sets the balance between the effect and the dry input
Selects a modulation source for
Wet/Dry
Sets the modulation amount for
Wet/Dry
Double Size 190: Hold Delay
190: Hold Delay
This effect records the input signal and plays it back repeatedly. You can control the start of recording and reset via a modulation source. Easy to use for real ‐ time performances.
Wet: Mono In — Stereo Out / Dry: Stereo In — Stereo Out
Left
Wet / Dry
+
Delay
Pan
Loop Time: Auto/ …5400ms
Right
D -mod
D -mod
REC Control
RST Control
Tempo
BPM
BPM
Base Note x Times
Wet / Dry
a b j c
Loop Time
[msec]
Loop BPM
Sync
BPM
Time Over?
Amt
Wet/Dry
Src
Amt
Auto,
1…10800
Off, On
MIDI,
40.00…
300.00
—, OVER!
d
Loop Base
Note
Times e f g h
REC Control
Src
RST Control
Src
Manual REC
Control
Manual RST
Control
Pan i Src
…
x1…x32
Off…Tempo
Off…Tempo
REC Off,
REC On
Off, RESET
L100…L1, C,
R1…R100
Off…Tempo
–100…+100
Dry, 1 : 99…
99 : 1, Wet
Off…Tempo
–100…+100
Sets Automatic loop time setup mode or specifies loop time
p.335
Specifies whether delay time is set in milliseconds, or as a note value relative to tempo
p.335
MIDI syncs to the system tempo;
40–300 sets the tempo manually for this individual effect
p.335
An error indication that appears if delay time exceeds the upper limit when MIDI/Tempo
Sync=On
Selects the type of notes to specify the delay time
p.335
Sets the number of notes to specify the delay time
p.335
Selects control source for recording
p.335
Selects control source for reset
p.335
Sets the recording switch
p.335
Sets the reset switch
p.335
Sets the stereo image of the effect
Selects the modulation source of stereo image of the effect
Sets the modulation amount of stereo image of the effect
Sets the balance between the effect and the dry input
Selects a modulation source for
Wet/Dry
Sets the modulation amount for
Wet/Dry
a: Loop Time [msec]
With Auto, the loop time is automatically set. Otherwise, you can specify the loop time.
When Auto is selected, the Loop Time is automatically set to the time it takes for a performance recorded while the
Modulation Source or
Manual REC Control
is on. However, if the time length exceeds 10,800msec, the loop time will be automatically set to 10,800msec.
c: Time Over?
You can set the delay time up to 10,800msec. If the delay time exceeds this limit, the error message “OVER!” appears in the display. Set the delay time parameters so that this message will not appear.
Time Over?
is only a display parameter.
b: Loop BPM Sync c: BPM d: Loop Base Note d: Times
If
Loop BPM Sync
is on, the
Times
setting is ignored; the loop time is determined by
BPM
,
Loop Base Note
, and
Times
. Even in this case, the delay time cannot exceed
10,800 msec.
“Hold” procedure (when Loop Time = Auto)
1. “Rec Src” JS +Y: #01
“Reset Src” JS –Y: #02
“Manual REC Control” REC Off
“Manual RST Control” RESET
“Loop Time [msec]” Auto
“MIDI/Tempo Sync” Off
It should be noted that all recordings will be deleted while Reset is On.
2. “Manual RST Control” Off
Reset is cancelled and the unit enters Rec ready mode.
3. Push the joystick in the +Y direction (forward) and play a phrase you wish to hold. When you pull the joystick to its original position, the recording will be finished and the phrase you just played will be held.
Loop Time is automatically set only for the first record ‐ ing after resetting. If the time length exceeds 10,800msec,
Loop Time will be automatically set to 10,800msec. (If you have set
Times
to 1–10,800msec, the specified loop time will be used regardless of the time taken from push ‐ ing the joystick forward until it is pulled back. However, the recording method remains the same. The phrase being played while the joystick is pushed forward will be held.)
4. If you made a mistake during recording, pull the joystick in the –Y direction (back) to reset. In this way, the recording will be erased. Repeat step 3. again.
5. The recorded phrase will be repeated again and again.
You can use this to create an accompaniment.
6. By pushing the joystick in the +Y direction (forward), you can also overdub performances over the phrase that is being held.
e: REC Control Src g: Manual REC Control
REC Control Src
selects the modulation source that controls recording.
If this modulation is on, or if
Manual REC Control
is set to
On, you can record the input signal. If a recording has already been carried out, additional signals will be overdubbed.
The effect is off when a value for the modulation source specified for the
REC Control Src
parameter is 63 or smaller, and the effect is on when the value is 64 or higher.
f: RST Control Src h: Manual RST Control
The
RST Control Src
parameter specifies the modulation source that controls the reset operation.
When you set this modulation source to On, or
Manual RST
Control
to RESET, you can erase what you recorded. If the
Loop Time parameter has been set to Auto, the loop time is also reset.
The effect is off when a value for the modulation source specified for the
RST Control Src
parameter is 63 or smaller, and the effect is on when the value is 64 or higher.
335
336
191: LCR BPM Long Dly (L/C/R
BPM Long Delay)
The L/C/R delay enables you to match the delay time with the song tempo.
Wet: Mono In — Stereo Out / Dry: Stereo In — Stereo Out
Left
+
Input Level D-mod
High Damp Low Damp
Input Level D-mod
L Delay
Level
C Delay
Feedback
Level
R Delay
Level
Right
Tempo
BPM
BPM
Base Note x Times
Base Note x Times
Base Note x Times
Spread
Wet / Dry
Wet / Dry
b
Times
C Delay Base
Note c
Times d f a e g h i
BPM
Time Over?
L Delay Base
Note
Level
Level
R Delay Base
Note
Times
Level
Feedback
(C Delay)
Src
Amt
High Damp
[%]
Low Damp
[%]
Input Level
D-mod [%]
Src
Spread
Wet/Dry
Src
Amt
MIDI,
40.00…
300.00
—, OVER!
…
x1…x32
0…50
…
x1…x32
0…50
…
x1…x32
0…50
–100…+100
Off…Tempo
–100…+100
0…100
0…100
–100…+100
Off…Tempo
0…50
Dry, 1 : 99…
99 : 1, Wet
Off…Tempo
–100…+100
MIDI syncs to the system tempo;
40–300 sets the tempo manually for this individual effect
p.285
Displays an error message when the delay time exceeds the upper limit
p.336
Selects the type of notes to specify the delay time for TapL
p.285
Sets the number of notes to specify the delay time for TapL
p.285
Sets the output level of TapL elects the type of notes to specify the delay time for TapC
p.285
Sets the number of notes to specify the delay time for TapC
p.285
Sets the output level of TapC
Selects the type of notes to specify the delay time for TapR
p.285
Sets the number of notes to specify the delay time for TapR
p.285
Sets the output level of TapR
Sets the feedback amount of
TapC
Selects the modulation source for the TapC feedback
Sets the modulation amount of the TapC feedback
Sets the damping amount in the high range
p.289
Sets the damping amount in the low range
p.289
Sets the modulation amount of the input level
p.284
Selects the modulation source for the input level
p.284
Sets the width of the stereo image of the effect sound
p.289
Sets the balance between the effect and the dry input
Selects a modulation source for
Wet/Dry
Sets the modulation amount for
Wet/Dry
a: Time Over?
You can set the delay time up to 10,920msec. If the delay time exceeds this limit, the error message “OVER!” appears in the display. Set the delay time parameters so that this message will not appear.
Time Over?
is only a display parameter.
192: St. BPM Long Dly (Stereo
BPM Long Delay)
The stereo delay enables you to match the delay time with the song tempo.
Stereo In — Stereo Out
Left
Wet / Dry
Input Level D-mod
Input Level D-mod
Delay
High Damp Low Damp
Delay
Feedback
High Damp Low Damp
Right
Tempo
BPM
BPM
Base Note x Times
Base Note x Times
Adjust [%]
Adjust [%]
Wet / Dry
a b c d i
BPM
Time Over? L
R
L Delay Base
Note
Times
Adjust [%]
R Delay Base
Note
Times
Adjust [%]
L Feedback
Src
L Amt
MIDI,
40.00…
300.00
—, OVER!
—, OVER!
…
x1…x32
–2.50…+2.50
…
x1…x32
–2.50…+2.50
–100…+100
Off…Tempo
–100…+100
R Feedback –100…+100 e
R Amt f g h
High Damp
[%]
Low Damp
[%]
Input Level
D-mod [%]
Src
Wet/Dry
Src
Amt
–100…+100
0…100
0…100
–100…+100
Off…Tempo
Dry, 1 : 99…
99 : 1, Wet
Off…Tempo
–100…+100
MIDI syncs to the system tempo;
40–300 sets the tempo manually for this individual effect
p.285
Display the error message if the left channel delay time exceeds the upper limit
p.336
Display the error message if the right channel delay time exceeds the upper limit
p.336
Selects the type of notes to specify the left channel delay time
p.285
Sets the number of notes to specify the left channel delay time
p.285
Fine-adjust the left channel delay time
Selects the type of notes to specify the right channel delay time
p.285
Sets the number of notes to specify the right channel delay time
p.285
Fine-adjust the right channel delay time
Sets the feedback amount for the left channel
Selects the modulation source of feedback amount
Sets the modulation amount of the left channel feedback
Sets the feedback amount for the right channel
Sets the modulation amount of the right channel feedback
Sets the damping amount in the high range
p.289
Sets the damping amount in the low range
p.289
Sets the modulation amount of the input level
p.284
Selects the modulation source for the input level
p.284
Sets the balance between the effect and the dry input
Selects a modulation source for
Wet/Dry
Sets the modulation amount for
Wet/Dry
a: Time Over? L, R
You can set the delay time up to 5,460msec. If the delay time exceeds this limit, the error message “OVER!” appears in the display. Set the delay time parameters so that this message will not appear.
Time Over?
is only a display parameter.
193: Early Reflections
This early reflection effect has more precise early reflections with twice the maximum length of a normal ‐
size effect (See
“094: Early Reflections” on page 300.). You can create a very
smooth and dense sound.
Wet: Mono In — Stereo Out / Dry: Stereo In — Stereo Out
Left
+
EQ Trim
LEQ HEQ
Pre Delay
Early Reflections
EQ Trim
Right
Wet / Dry
Wet / Dry
a
Type
Sharp, Loose,
Modulated,
Reverse
Selects the decay curve for the early reflection
p.300
b c d e f g
ER Time
[msec]
Pre Delay
[msec]
EQ Trim
Amt
10…1600
0…200
0…100
–100…+100
Sets the time length of early reflection
Sets the time taken from the original sound to the first early reflection
Sets the input level of EQ applied to the effect sound
Pre LEQ Fc
Pre HEQ Fc
Low,
Mid-Low
High,
Mid-High
Selects the cutoff frequency (low or mid-low) of the low-range equalizer
Selects the cutoff frequency
(high or mid-high) of the highrange equalizer
Pre LEQ Gain
[dB]
–15.0…+15.0
Pre HEQ Gain
[dB]
–15.0…+15.0
Sets the gain of High EQ
Wet/Dry
Src
Dry, 1 : 99…
99 : 1, Wet
Off…Tempo
Sets the gain of Low EQ
Sets the balance between the effect and the dry input
Selects a modulation source for
Wet/Dry
Sets the modulation amount for
Wet/Dry
Double Size 193: Early Reflections
337
338
Appendices
Alternate Modulation Sources (AMS)
Alternate Modulation
Overview
Alternate Modulation lets you use controllers, envelopes,
LFOs, etc. to modulate Program parameters. You can use one controller to modulate multiple parameters simultaneously. You can also create complex modulation setups in which (for example) an envelope modulates the frequency of an LFO, and that LFO is then used to modulate a filter.
Programs provide 48 types (88 destinations) for alternate modulation.
Alternate Modulation Sources
You can use the sources listed on the following page to control Alternate Modulation. If you select two or more
Alternate Modulation destinations for control by the same
AMS, a single source will apply modulation to each of the specified destinations.
Frequently used assignments such as using Joystick X to control pitch are provided as special parameters, so it is not necessary to use Alternate Modulation to accomplish this.
AMS Mixers
The AMS Mixers combine two AMS sources into one, or process an AMS source to make it into something new.
For instance, they can add two AMS sources together, or use one AMS source to scale the amount of another. You can also use them to change the shapes of LFOs and EGs in various ways, modify the response of realtime controllers, and more.
The AMS Mixer outputs appear in the list of AMS sources, just like the LFOs and EGs.
The original, unmodified inputs to the AMS Mixers are still available as well. For instance, if you use LFO 1 as an input to a AMS Mixer, you can use the processed version of the
LFO to control one AMS destination, and the original version to control another.
Finally, you can cascade two AMS Mixers together, by using one as the input of another.
For more information, please see “6–1: OSC1 AMS Mix1” on page 46.
Alternate Modulation
Intensity Mod
Frequency Mod 1
Frequency Mod 2
LFO1
Shape
Intensity Mod
Frequency Mod 1
Frequency Mod 2
LFO2
Shape
Intensity Mod
Frequency Mod
Common LFO
Shape
Reset
Intensity Mod
Intensity Mod
Pitch Mod
Intensity Mod
OSC1
Pitch EG
Intensity Mod to A
Intensity Mod to A
Intensity Mod to A
Filter1 A
Cutoff Mod 1
Cutoff Mod 2
Resonance Mod
Output Level Mod
Intensity Mod to A
Filter1 EG
Intensity Mod to B
Intensity Mod to B
Intensity Mod to B
Filter1 B
Cutoff Mod 1
Cutoff Mod 2
Resonance Mod
Output Level Mod
Intensity Mod to B
Driver
Drive
Low Boost
Amp 1
Amp1 EG
Level Mod
Time Mod 1
Time Mod 2
Time Mod 3
Reset
Level Mod
Time Mod 1
Time Mod 2
Time Mod 3
Reset
Intensity Mod
Intensity Mod
Amp Mod
Pan Mod
OSC 1
OSC 2
Level Mod 1
Level Mod 2
Time Mod
Reset
339
Appendices
AMS (Alternate Modulation
Source) List
340
Physical and MIDI controllers
Off
This means that no modulation source is selected.
Note Number
This is the note’s MIDI note number, from 0 (C ‐ 2) to 127
(G9).
Velocity
This is the note’s MIDI note ‐ on velocity.
Exp. Velocity (Exponential Velocity)
This is MIDI note ‐ on velocity through an exponential curve.
The curve means that low velocities won’t have very much effect, and the difference between two lower velocity values won’t be very noticeable.
On the other hand, high velocities produce increasingly greater effects, and the difference between any two higher velocity values will be more pronounced.
Poly After
Polyphonic aftertouch allows a different aftertouch value for each note. This can be received from external MIDI devices or generated by the internal sequencer. The KROME keyboard itself does not generate poly aftertouch, however.
After Touch
The effect will be applied by channel aftertouch messages from the KROME’s sequence data or received from MIDI IN.
JS X
This is the horizontal movement of the main joystick. It also receives MIDI Pitchbend.
JS+Y: CC#01
This is the vertical movement of the main joystick, upwards from the center. It also receives MIDI CC#01 (mod wheel).
JS–Y: CC#02
This is the vertical movement of the main joystick, downwards from the center. It also receives MIDI CC#02
(breath controller).
JS +Y & AT/2 (Joy Stick +Y & After Touch/2)
The effect will be controlled by the joystick +Y (Vertical upward) and by aftertouch. In this case, the effect of aftertouch will be only half of the specified intensity.
JS –Y & AT/2 (Joy Stick –Y & After Touch/2)
The effect will be controlled by the joystick –Y (Vertical downward) and by aftertouch. In this case, the effect of aftertouch will be only half of the specified intensity.
Pedal: CC#04 (Foot Pedal: CC#04)
This AMS source receives MIDI CC#04. It can also be generated by a foot pedal connected to the rear ‐ panel
ASSIGNABLE PEDAL input, if the Global
Foot Pedal
Assign
parameter is set to Foot Pedal (CC#04). For more information, please see “Foot Pedal Assignments” on page 350.
KnobMod1: #17 (Realtime Knob Modulation1: CC#17)
This AMS source always responds to MIDI CC#17. A MIDI value of 0 causes the maximum negative modulation; 64
(center) means no modulation; and 127 causes the maximum positive modulation. (You can invert this response, if desired, by using a negative AMS intensity.)
It also usually corresponds to Realtime Controls USER knob
1 on the Controllers Setup page; but this will depend on the
R ealtime Controls knob Assign settings of each individual
Program, Combination, and Song.
Basically, there are two separate factors: a physical knob named USER knob 1, and an AMS source named “Knob
Mod.1: #17.” This provides a great deal of flexibility–but’s it’s also easy to link the two together. To do so:
1. Go to the current mode’s Controllers page.
2. Set knob USER 1’s Realtime Controls Knob Assign to
Knob Mod.1: #17.
For more information, please see “1–3: Controllers Setup”
on page 16, and “Realtime Controls Knobs 1–4
Assignments” on page 348.
KnobMod2: #19 (Realtime Knob Modulation2: CC#19)
This AMS source always responds to MIDI CC#19, and will usually also correspond to Realtime Controls USER knob 2.
For more information, please see “KnobMod1: #17 (Realtime
Knob Modulation1: CC#17)” on page 340.
KnobMod3: #20 (Realtime Knob Modulation3: CC#20)
This AMS source always responds to MIDI CC#20, and will usually also correspond to Realtime Controls USER knob 3.
For more information, please see “KnobMod1: #17 (Realtime
Knob Modulation1: CC#17)” on page 340.
KnobMod4: #21 (Realtime Knob Modulation4: CC#21)
This AMS source always responds to MIDI CC#21, and will usually also correspond to Realtime Controls USER knob 4.
For more information, please see “KnobMod1: #17 (Realtime
Knob Modulation1: CC#17)” on page 340.
KnobMod1[+] (Realtime Knob Modulation1[+])
KnobMod2[+] (Realtime Knob Modulation2[+])
KnobMod3[+] (Realtime Knob Modulation3[+])
KnobMod4[+] (Realtime Knob Modulation4[+])
With these AMS sources, the knob position and the direction of the resulting change are different than KnobMod1: #17–
KnobMod4: #21. If AMS intensity is set to a positive (+) value, rotating the knob to the far left will produce an AMS effect of 0. Rotating the knob toward the right will apply change only in the positive direction. (If the intensity is set to a negative value, the result will be the opposite.)
Damper: #64
This is the Damper pedal, also sometimes called the sustain pedal. It corresponds to MIDI CC#64.
When using Korg’s optional half ‐ damper pedal, the DS ‐ 1H, this AMS source is continuous–not just on/off.
Porta.SW: #65
This is the MIDI portamento switch (CC#65), which also enables and disables portamento.
Sostenuto: #66
This is the MIDI sostenuto pedal (CC#66).
Soft: CC#67
This is the MIDI oft pedal (CC#67).
SW 1: CC#80 (SW 1 Modulation: CC#80)
This is CC#80, which is the default for assignable front ‐ panel switch 1 (SW1). To use SW1 and SW2 as AMS sources:
1. Go to the Controllers Setup page.
2. Under Panel Switch Assign, assign SW1 to SW1 Mod.
(CC#80) and SW2 to SW2 Mod. (CC#81).
These assignments are stored separately for each Program,
Combination, and Song.
For more information, please see “SW1/2 Assignments” on page 348.
SW 2: CC#81 (SW 2 Modulation: CC#81)
This is CC#81, which is the default for assignable front ‐ panel switch 2 (SW2). For more information, please see “SW 1:
CC#80 (SW 1 Modulation: CC#80)” above.
Foot SW: #82 (Foot SW: CC#82)
This AMS source receives MIDI CC#82. It can also be generated by a foot switch connected to the rear ‐ panel
ASSIGNABLE SWITCH input, if the Global
Foot Pedal
Assign
parameter is set to Foot SW (CC#82). For more information, please see “Foot Switch Assignments” on page 349.
MIDI: CC#83
MIDI control change (CC#83)
Tempo
This lets you use the system tempo as a modulation source.
120 is the center, for a value of 0; 60BPM is –99, and 240BPM is +99.
Note that this is different from actually syncing to tempo; for that purpose, use the dedicated synchronization functions for the LFOs, effects, etc.
Gate1
Gate1+Damper
Gate 1 is triggered by a new note after all notes have been released, such as at the beginning of a phrase. Gate
1+Damper is similar, except that it is triggered by a new note ‐ on after all notes and the damper are released.
You can use this to reset the Common LFO. For instance, to create an effect similar to the per ‐ voice LFO and Step
Sequencer’s
Key Sync Off
setting, use
Gate 1 + Damper
as the reset source.
Gate2
Gate2+Damper
Gate 2 is similar to Gate 1, but it triggers with every new note ‐ on, even in the middle of a legato phrase.
Gate2+Damper includes the damper pedal in the equation, as shown in the diagram below.
Note:
When used as a reset controller for Common LFO,
Gate2 and Gate2+Damper will have the same effect.
Note
Damper Pedal
1 2 1 2 3 3
Gate1,Gate1+Damper,
Gate2,Gate2+Damper
Dmpr
Gate1
Gate1+Dmpr
Gate2
Gate2+Dmpr
On
Off
Reset
Controller
Time
Alternate Modulation Sources (AMS)
341
Appendices
342
Alternate Modulation settings
When you operate an AMS (Alternate Modulation Source), the modulation destination will be affected as shown in the table below.
By using alternate modulation, you can create complex systems of modulation in which EG, LFO, keyboard tracks, and controllers work together.
• You can apply complex change to an LFO or EG, for example by using the pitch/filter/amp EG to control the frequency or intensity of an LFO that modulates the pitch/ filter/amp, or by using LFO2 to control the frequency of
LFO1.
• The tone, EG, and LFO etc. can be controlled not only by key velocity or the joystick, but also from a button, knob, or pedal etc.
• Panning can be controlled in realtime from a controller,
EG, or LFO etc.
• You can use the filter EG to control pitch or volume at the same time that it controls the filter.
• Controllers etc. can be used to control EG levels or times.
This lets you shape the EG in realtime.
• Filter/amp keyboard tracking or note number can be used to control the EG or LFO according to the keyboard pitch that is played.
• Pitch, tone, EG or LFO can be controlled by the tempo of the arpeggiator and/or sequencer.
AMS operations and their result
AMS source
& value range
Parameter AMS
Intensity
Pitch *4 (+12.00)
Amp EG
0…+99
0…+1
Octave
Pitch & Filter
EGs
–99…0…+99
Pitch EG
Int.
(+12.00)
Pitch
LFO1/2 Int.
Filter
Frequency
(+12.00)
(+99)
–
0…+1
Octave
0…+10
Octaves
–1…0…+1
Octaves
(Filter EG as
AMS; dedicated parameter for Pitch EG)
Dedicated parameter for Pitch EG
–1…0…+1
Octaves
–10…0…+10
Octaves
(Pitch EG as
AMS; dedicated parameter for Filter EG)
Filter
Resonance
Filter EG
Int.
(+99)
(+99)
0…+99
–
0…+99
Dedicated parameter for Filter EG
–99…0…+99 Filter LFO1/
2 Int.
(+99)
Filter
Output
Level A/B
Drive
(+99)
(+99)
Low Boost (+99)
Amp (+99)
0…+99
0…+99
0…+99
Dedicated parameter
0…1x…8x
LFO1 & 2
–99…0…+99
Dedicated parameter
–
–
Common LFO
–99…0…+99
Filter & Amp
Key Track
–99…0…+99
–1…0…+1
Octaves
Dedicated parameter
–
–
Dedicated parameter
–99…0…+99
–1…0…+1
Octaves
Dedicated parameter for Filter
KTrk
–1…0…+1
Octaves
–10…0…+10
Octaves
–99…0…+99
–
–
–99…0…+99
–99…0…+99
–99…0…+99
–99…0…+99
0…1x…8x
Dedicated parameter for Amp
KTrk
Common
Key Track
1 & 2
–99…0…+99
Note Number
C–1…C4…C9
–99…0…+99
–
Dedicated parameter
–
–
–
EXT(+/–) *1
–Max…0…+Max
EXT (Tempo) *2
=…60.00…120.00…240.00…
–1…0…+1
Octaves
–1…0…+1
Octaves
–10…0…+10
Octaves
–99…0…+99
0…1x…8x
Amp
LFO1/2 Int.
Pan
EG Level
EG Time
LFO 1
Frequency *4
(+99)
(+50)
(+66)
(+49)
(+99)
0…+99
0…+63
–99…0…+99
1x…64x
1x…64x
–
–
–
1/64x…
1x…64x
(LFO2 only)
–
–99…0…+99
–63…0…+63
–99…0…+99
1/64x…1x…64x
1/64x…1x…64x
1/64x…1x…64x
LFO 2
Frequency *4
Common
LFO
Frequency *4
LFO 1
Shape
(+99)
(+99)
(+99)
(+99)
0…+99
0…+99
–
–99…0…+99
(LFO2 only)
–
–99…0…+99
–99…0…+99
1/64x…1x…64x
LFO 2
Shape
Common
LFO
Shape
(+99) – –99…0…+99
EXT(+) *3
0…127
0…+1
Octave
0…+1
Octave
0…+1
Octave
0…+10
Octaves
0…+99
0…+99
0…+99
0…+99
0…+99
0…+99
1x…8x
0…+99
0…+63
0…+99
1x…64x
1x…64x
1x…64x
1x…64x
0…+99
0…+99
0…+99
Alternate Modulation Sources (AMS)
Notes for the table
*1
EXT(+–): JS X, Ribbon:CC#16, Knob Mod1 (CC#17), Knob
Mod2 (CC#19), Knob Mod3 (CC#20), Knob Mod4
(CC#21)
*2
When Tempo is selected as an AMS source, the base value is =120.00.
For example if the Pitch AMS is set to Tempo, and
Intensity is set to 12.00, doubling the tempo value (
=120.00
→
240.00) will raise the pitch one octave, and halving the tempo ( =120.00
→
60.00) will lower the pitch one octave. The stated modulation results are for tempo values between 60bpm and 240bpm. As the tempo decreases from 60 to 0bpm, AMS modulation will have increasingly negative effects; as it increases from 240 to
250bpm, modulation will have increasingly positive effects.
*3
EXT(+): Velocity, Exp. Velocity, Poly After, After Touch,
JS+Y:CC#01, JS–Y:CC#02, JS+Y & AT/2, JS–Y & AT/2,
Pedal:CC#04, ValueSldr:#18, Knob Mod1[+], Knob Mod2
[+], Knob Mod3[+], Knob Mod4[+], Damper:CC#64,
Porta.SW:CC#65, Sostenuto:CC#66, Soft:CC#67,
SW1:CC#80, SW2:CC#81, MIDI:CC#83, MIDI:CC#85,
MIDI:CC#86, MIDI:CC#87, MIDI:CC#88.
*4
It is possible to control LFO
Frequency
by using Tempo
AMS
and
Intensity
. However if you use the Frequency
MIDI/Tempo Sync function (Prog 5–1c), the LFO frequency can be synchronized to the tempo and note value.
The effects of AMS on various parameters, and example applications
We’ll describe some examples of using alternate modulation.
Pitch (Prog 2–2a)
Pitch can be controlled by the Common LFO, filter/amp EG, controllers, or tempo etc.
• If you select Filter EG or Amp EG as the
AMS
and set
Intensity
to +12.00, the pitch will change up to ±1 octave in synchronization with the EG.
• If you select Tempo as the
AMS
and set
Intensity
to
+12.00, doubling the tempo (based on =120.00) will raise the pitch one octave, and halving the tempo will lower the pitch one octave.
Pitch EG (Prog 2–2b)
Pitch EG intensity can be controlled by the Common LFO, keyboard tracking, controllers, or tempo.
• If you select JS +Y:CC#01 as the
AMS
and set
Intensity
to
+12.00, moving the joystick in the +Y direction will gradually increase the effect of the Pitch EG to a maximum of ±1 octave. If
Intensity
has a negative value, the effect of the Pitch EG will be inverted.
LFO 1/2 (Prog 2–2d)
Pitch modulation intensity of the LFO1/2 can be controlled by the Common LFO, an EG, keyboard tracking, controllers, or tempo etc.
• If you select EG as the
AMS
, the pitch change width of
LFO modulation etc. can be controlled in synchronization with the level changes of the EG. With positive (+) settings of
Intensity
, the vibrato effect will gradually deepen as the EG level rises, or gradually lessen as the EG level decreases. With negative (–) settings of
Intensity
, the
LFO phase will be inverted.
• If you select a controller such as SW1 or 2 as the
AMS
, you can press the SW1 or SW2 switch when desired to turn on the vibrato effect.
Filter (Cutoff) Frequency (Prog 3–1b(c))
The cutoff frequency of filter A/B can be controlled by the pitch/amp EG, Common keyboard tracking, controllers, or tempo. Use the 3–3: Filter1 Modulation page Filter A/B
Modulation (Prog 3–3b) to set AMS and Intensity for Filter
A or B.
• If you select JS X as the AMS1 or AMS2 and set
Intensity
to a positive (+) value, moving the joystick toward the right will raise the cutoff frequency, and moving it toward the left will lower the cutoff frequency. Negative
(–) settings will have the opposite effect.
• If you select the same controller as an AMS1 or AMS2 and set separate intensities for Filter A (Low Pass Filter)
Intensity
and Filter B (High Pass Filter)
Intensity
, you can operate a single controller to simultaneously control the cutoff frequencies of both filters.
Resonance (Prog 3–1b)
You can use the EG, LFO, keyboard tracking, controllers, or tempo etc. to control the resonance level.
• If you select Filter KTrk or Amp KTrk as the
AMS
, you can use the filter or amp keyboard tracking settings to control the resonance level. For example if the amp keyboard tracking parameters
Ramp BtmLo
and
Ramp
HiTop
are set to positive (+) values, Amp KTrk is selected as the
AMS
, and
Intensity
it set to a positive (+) value, playing toward either end of the keyboard will cause amp keyboard tracking to increase the volume, and
AMS
to raise the resonance level.
• You can select a controller as the
AMS
, and apply resonance when desired by operating the controller.
• You can select Common LFO, LFO1 or 2 as the
AMS
, and use the LFO to control the resonance level.
Output (Prog 3–1b)
You can use the EG, LFO, keyboard tracking, controllers, or tempo etc. to control the output level of Filter A/B.
• Set the Filter Routing to Parallel, and specify the desired
Type and other settings for Filter A and Filter B. Set the
AMS
to LFO for Filter A and Filter B, and set the LFO to
+99 and –99 respectively. The output of Filter A and Filter
B will be cyclically faded ‐ in/out by the LFO.
Filter EG Intensity (Prog 3–3a)
Filter EG intensity can be controlled by the Common LFO,
Common keyboard tracking, a controller or tempo etc. You can use
Intensity to A
and
Intensity to B
to independently specify the intensity for Filter A and B.
• If you select JS –Y (CC#02) as the
AMS
and set
Intensity to A
and
Intensity to B
to a positive (+) value, moving the joystick in the –Y direction will gradually increase the effect of the Filter EG. If you set
Intensity to A
and
Intensity to B
to a negative (–) value, the effect of the
Filter EG will be inverted.
• If you select JS X as the
AMS
and set
Intensity to A
and
Intensity to B
to a positive (+) value, operating the joystick toward the right will gradually increase the effect of the Filter EG. Operating the joystick toward the left will gradually increase the effect of the Filter EG with an inverted phase.
Filter LFO1/2 Intensity (Prog 3–4a)
The LFO 1/2 filter modulation intensity can be controlled by the EG, Common LFO, keyboard tracking, controller, or tempo etc. You can use
Intensity to A
and
Intensity to B
to independently specify the intensity for Filter A and B.
• If you select EG as the
AMS
, the auto ‐ wah effect produced by LFO modulation will be controlled by the changes in EG level. If you set
Intensity to A
and
Intensity to B
to a positive (+) value, the wah effect will deepen as the EG level rises, and will lessen as the EG
343
Appendices
344
level falls. With negative (–) values of
Intensity to A
and
Intensity to B
, the phase of the LFO will be inverted.
• If you use a controller such as SW1 or 2 as the
AMS
, you can apply the auto ‐ wah effect when desired by pressing the SW1 or SW2 switch.
Filter Common LFO (Prog 3–4b)
You can use the EG, LFO, keyboard tracking, controllers, or tempo etc. to control the Common LFO filter modulation intensity. You can use
Intensity to A
and
Intensity to B
to specify the intensity separately for Filter A and B.
• You can set
AMS
to a controller, and operate the controller only when desired to control the depth of the filter sweep produced by the Common LFO.
Driver Drive (Prog 4–1a)
Driver Low Boost (Prog 4–1a)
You can use the EG, LFO, keyboard tracking, controllers, and tempo etc. to control the driver’s boost and low boost.
Although you can use separate AMS to control these two parameters, it is also effective to control them simultaneously by using controllers such as the knobs etc. (It is particularly effective to control the filter resonance at the same time. This is also nice for synth bass sounds.)
• If you choose Knob Mod.1 (CC#17) as the
AMS
, set
Intensity
to a positive (+) value, and set Realtime Controls to USER, turning knob 1 toward the right of center will raise the drive or low boost level, while turning the knob toward the left of center will lower the drive or low boost level. If
Intensity
is set to a negative (–) value, the opposite will occur.
• If you set
AMS
to Common LFO, LFO 1, or 2, the drive amount will be controlled cyclically by the LFO.
Amp (Prog 4–2b)
The volume can be controlled by the pitch/filter EG,
Common LFO, controllers, or tempo etc.
• If an EG or controller that changes with a positive (+) value (EXT(+)) is selected as the
AMS
, setting the
Intensity
to +99 will allow you to increase the volume to a maximum of eight times that of the current volume.
• If an EG, LFO, or controller that changes with a ± value
(Pitch EG, Filter EG, LFO, KT, EXT(+–) is selected as the
AMS
, setting the
Intensity
to +99 will allow you to increase the volume to a maximum of eight times that of the current volume (for positive (+) changes of the
AMS
), or to decrease the volume to zero (for negative (–) changes of the
AMS
).
• In addition to the time ‐ variant changes in volume produced by the amp EG, you can also make the volume change in synchronization with the pitch/filter EG. Select
Pitch EG or Filter EG as the
AMS
, and adjust
Intensity
. If you wish to cancel the effect of the Amp EG and use the pitch/filter EG to control the volume, set all levels of the
Amp EG to +99.
Amp LFO1/2 Intensity (Prog 4–2b)
The amp modulation intensity of LFO 1/2 can be controlled by the EG, Common LFO, keyboard tracking, controllers, or tempo etc.
• If you select EG as the
AMS
, the depth of the tremolo effect produced by LFO modulation will change in synchronization with the changes in EG level. If you set
Intensity
to a positive (+) value, the tremolo effect will deepen as the EG level rises, and lessen as the EG level falls. If
Intensity
is set to a negative (–) value, the phase of the LFO will be inverted.
• If select a controller such as SW1 or 2 as the
AMS
, you can apply the tremolo effect by pressing the SW1 or SW2 switch when desired.
Pan (Prog 4–1c)
The oscillator pan can be controlled by the EG, LFO, keyboard tracking, controllers, or tempo etc.
• If you select Note Number as the
AMS
and set
Intensity
to +50, panning will be controlled by the keyboard position: center at the C4 note, far right at C9 or above, and far left at C–1 or below.
• If EG is selected as the
AMS
, the oscillator pan will be controlled in synchronization with the changes in EG level. If
Intensity
is set to a positive (+) value, the pan will move toward the right as the EG level increases, and toward the left as the EG level decreases. If
Intensity
is set to a negative (–) value, the opposite effect will occur.
EG Reset —
Pitch EG (Prog 2–8a)
Filter EG (Prog 3–5a)
Amp EG (Prog 4–3a)
You can use the EG, LFO, keyboard tracking, controllers, or tempo etc. to control EG Reset. Use the Threshold setting to specify the AMS value at which result will occur.
• By setting
AMS
to Common LFO, you can reset the envelope cyclically at the interval of the Common LFO.
The result is just as if the shape specified by the envelope were being used as a special LFO.
• You can reset the envelope by setting
AMS
to a controller such as JS+Y, and operating the controller when desired, producing a one ‐ shot filter envelope sweep.
EG Level —
Pitch EG (Prog 2–8c)
Filter EG (Prog 3–5c)
Amp EG (Prog 4–3c)
EG levels can be controlled by the Common LFO, keyboard tracking, controllers, or tempo etc.
You can specify an
Intensity
value for each EG segment
(
Start
,
Attack
,
Break
). If you set the
Intensity
value to +66, you will be able to control the respective level over a maximum range of ±99.
• Set
AMS
to Velocity for Amp EG Level Modulation,
Intensity
Start
to +00,
Attack
to +66, and
Break
to –66.
Set all Amp EG levels to +00. As you play with increasing velocity, the EG levels will change more greatly. At the maximum velocity, the Start Level will stay at +00, but the
Attack Level will change to +99 and the Break Level will change to –99.
EG Time —
Pitch EG (Prog 2–8c)
Filter EG (Prog 3–5c)
Amp EG (Prog 4–3d)
EG times can be controlled by the Common LFO, keyboard tracking, controllers, or tempo etc.
You can specify an
Intensity
value for each EG segment
(
Attack
,
Decay
,
Slope
,
Release
). EG times are determined by the Alternate Modulation value when the preceding point is reached. For example, the Alternate Modulation value at the moment the envelope reaches the attack level will determine the decay time.
If
Intensity
is set to a value of 8, 17, 25, 33, 41, or 49, the corresponding time can be multiplied by a maximum of 2, 4,
8, 16, 32, or 64 times (or divided by 1/2, 1/4, 1/8, 1/16, 1/32, 1/
64).
• Select JS +Y:CC#01 for
AMS
, and set
AMS Intensity
to +8,
At
to +,
Dc
to –, and
Sl
and
Rl
to 0. When you move the joystick in the +Y direction, the Attack Time will be lengthened by a maximum of 2 times. The Decay Time will be shortened by a maximum of 1/2. The Slope and
Release times will not change.
LFO Frequency (Prog 5–1a)
The frequency of LFO 1, 2 or Common LFO can be controlled by the EG, keyboard tracking, controllers, or tempo etc.
You can also use the LFO2 frequency to modulate LFO1, or use the Common LFO frequency to modulate LFO 1/2.
If
Intensity
is set to a value of 16, 33, 49, 66, 82, or 99, the corresponding frequency can be multiplied by a maximum of 2, 4, 8, 16, 32, or 64 times (or divided by 1/2, 1/4, 1/8, 1/16,
1/32, 1/64).
• Select JS +Y:CC#01 for
AMS
, and set
Intensity
to +16.
When you move the joystick in the +Y direction, the LFO frequency will be increased by a maximum of 2 times. If you set
Intensity
to –16 and move the joystick in the +Y direction, the LFO frequency will be decreased by up to 1/
2.
LFO Frequency AMS Intensity (Prog 5–1b)
You can use the EG, keyboard tracking, controllers, or tempo etc. to control the intensity of the AMS that controls the frequency of the LFO 1, 2, or Common LFO.
For example if you’re using the pitch EG to modulate the
LFO frequency, you could use a separate AMS to control the depth of this effect.
• Set
AMS
to a controller such as SW 1 or 2, so that the pitch EG will lightly control the LFO frequency when the switch is off, and more deeply when the switch is on.
LFO Shape (Prog 5–1a)
You can use a EG, keyboard tracking, controllers, or tempo etc. to control the shape of the LFO 1, 2, or Common LFO waveform. You can also use the LFO2 frequency to modulate LFO1, or use the Common LFO frequency to modulate LFO 1/2.
• You can control the LFO waveform by setting
AMS
to a controller such as JS+Y, and operating the controller when desired.
Common LFO Reset (Prog 5–10a)
You can use a controller or tempo etc. to reset the Common
LFO.
• By setting
AMS
to Gate 1, you can make the Common
LFO reset when a note is played from a state in which all notes are off. For example, this will ensure that a filter sweep always starts from the same place.
• You can set
AMS
to a controller such as JS+Y: CC#01, and operate the controller when you want to reset the LFO.
Alternate Modulation Sources (AMS)
345
346
Appendices
Dynamic Modulation Sources (Dmod)
You can control certain effect parameters using the joystick,
Realtime Controls knobs, SW1/SW2, etc. “on the fly.”
These parameters can also be controlled by the sequencer.
Controlling effects in this way is referred to as Dynamic
Modulation. For example, you can use After Touch to speed up the LFO of the chorus and flanger, or you can use the joystick to sweep a wah effect. This lets you take full advantage of the effects as part of the expressive potential of your instrument.
Most of the parameters for dynamic modulation consist of parameter values for
Source
and
Amount
. The
Source
field selects the modulation source, and
Amount
sets the modulation intensity. When the
Source
is at its maximum value (for instance, when JS+Y is moved all the way up), the actual degree of the effect will be the parameter value plus the
Amount
.
Example: Wet/Dry 10:90, Source JS+Y:#01, Amount +50
In this case, the effect balance will normally be 10:90, and moving the joystick in the +Y direction will gradually increase the proportion of the effect sound. When the joystick is moved all the way in the +Y direction, the effect balance will be 60:40.
Wet / Dry
Wet
Dynamic Modulation (Example)
Wet / Dry=10:90
Amt= +50
Wet / Dry=60:40
Amt= –50
60:40
10:90
Dry
Zero Higher Max
D -mod
See the individual effects descriptions for explanations of other dynamic modulation parameters. Parameters which can be controlled through dynamic modulation are marked by the symbol.
Dmod and MIDI
In Program mode, dynamic modulation is always controlled via the global MIDI Channel.
In Combination and Sequencer modes, dynamic modulation is controlled via the MIDI channel independently specified by the
Ch
for IFX1–5, MFX1, 2, and TFX.
KnobM3: #20
KnobM4: #21
KnobM1 [+]
KnobM2 [+]
KnobM3 [+]
KnobM4 [+]
Damper: #64
PrtaSW: #65
Sostenu: #66
Soft: #67
SW 1: #80
SW 2: #81
FootSW: #82
MIDI: CC#83
MIDI: CC#85
MIDI: CC#86
MIDI: CC#87
MIDI: CC#88
Tempo
Off
Gate1
Gate1+Dmpr
Gate2
Gate2+Dmpr
Note Numbr
Velocity
Exp Velocity
After Touch
JS X
JS+Y: #01
JS–Y: #02
Pedal: #04
FXCtrl1: #12
FXCtrl2: #13
Ribbon: #16
ValSldr: #18
KnobM1: #17
KnobM2: #19
Dynamic Modulation Source
List
dynamic modulation is not used
note on/off (p.347) note on + damper on/off (p.347)
note on/off (retrigger) (p.347) note on + damper on/off (retrigger) (p.347) note number velocity exponential velocity (p.347) aftertouch (Channel After Touch) reception joystick X (horizontal) direction joystick +Y (Vertical upward) direction (CC#01) joystick –Y (Vertical downward) direction
(CC#02) assignable foot pedal (CC#04) (p.347)
MIDI effect control 1 (CC#12)
MIDI effect control 2 (CC#13)
MIDI Control Change (CC#16)
MIDI Control Change (CC#18) (p.347)
Realtime Controls USER knob (knob modulation 1 CC#17) (p.347)
Realtime Controls USER knob (knob
modulation 2 CC#19) (p.347)
Realtime Controls USER knob (knob
modulation 3 CC#20) (p.347)
Realtime Controls USER knob (knob modulation 4 CC#21) (p.347)
Realtime Controls USER knob 1 [+] (p.347)
Realtime Controls USER knob 2 [+] (p.347)
Realtime Controls USER knob 3 [+] (p.347)
Realtime Controls USER knob 4 [+] (p.347) damper pedal (CC#64) portamento switch (CC#65) sostenuto pedal (CC#66) soft pedal (CC#67) assignable panel switch 1 (SW1 modulation
CC#80) (p.348) assignable panel switch 2 (SW2 modulation
CC#81) (p.348) assignable foot switch (CC#82) (p.349)
MIDI Control Change (CC#83)
MIDI Control Change (CC#85)
MIDI Control Change (CC#86)
MIDI Control Change (CC#87)
MIDI Control Change (CC#88) tempo (internal clock or external MIDI clock tempo data) (p.347)
Dynamic Modulation Sources (Dmod)
Gate1, Gate1+Dmpr (Gate1, Gate1+Damper)
The effect is at maximum during note ‐ on, and will stop when all keys are released. With Gate1 + Damper, the effect will remain at maximum even after the keys are released, as long as the damper (sustain) pedal is pressed.
3
Gate1,Gate1+Dmpr
Dmpr
2 3
Note
Damper Pedal
1 2 1
Gate1
On
Off
Gate1+Dmpr
Time
Gate2, Gate2+Dmpr (Gate2, Gate2+Damper)
This is essentially the same as for Gate 1 or Gate 1 + Dmpr.
However when Gate 2 or Gate 2 + Damper are used as a dynamic modulation source for the EG of 041: St. Env.
Flanger etc. or the AUTOFADE of 049: Stereo Vibrato, a trigger will occur at each note ‐ on. (In the case of Gate 1 and
Gate 1 + Dmpr, the trigger occurs only for the first note ‐ on.)
3
Gate2,Gate2+Dmpr
Dmpr
2 3
Note
Damper Pedal
1 2 1
Gate2
On
Off
Gate2+Dmpr
Time
Exp Velocity (Exponential Velocity)
Modulation will be applied exponentially according to the velocity value. Weak velocity values will produce little effect, but the effect will increase rapidly as the velocity values rise.
Pedal: #04 (Foot Pedal: CC#04)
If you wish to use the assignable foot pedal as a dynamic modulation source, set
Foot Pedal Assign
(Global P2:
Controller 2–1a) to Foot Pedal (CC#04). ( See “Foot Pedal
Assignments” on page 350.)
A foot controller etc. connected to the ASSIGNABLE PEDAL jack can be used to control an effect.
KnobM1:#17 (Knob Modulation1: CC#17)
KnobM2:#19 (Knob Modulation2: CC#19)
KnobM3:#20 (Knob Modulation3: CC#20)
KnobM4:#21 (Knob Modulation4: CC#21)
If you want to use knobs 1–4 as a dynamic modulation source when the
Realtime Controls
is USER, use the
Controllers Setup page
Realtime Controls Knob Assign
parameter to assign
Knob USER 1
to Knob Mod.1 (CC#17),
Knob USER 2
to Knob Mod.2 (CC#19),
Knob USER 3
to
Knob Mod.3 (CC#20), and
Knob USER 4
to Knob Mod.4
(CC#21) for each program, combination, or song. (See
“Realtime Controls Knobs 1–4 Assignments” on page 348.)
Then put the
Realtime Controls
in USER, and you can use knobs 1–4 to control the effects.
If the knob is set to the 12 o’clock position, the resulting effect as a dynamic modulation source will be zero. If the
Amount
is a positive (+) value, rotating the knob toward the right will apply positive change, and rotating it toward the left it will produce negative change. (With negative values, the result will be the opposite.)
KnobM1 [+] (Knob Modulation1 [+])
KnobM2 [+] (Knob Modulation2 [+])
KnobM3 [+] (Knob Modulation3 [+])
KnobM4 [+] (Knob Modulation4 [+])
The knob position and the direction of the resulting change are different than Knob Mod.1 (CC#17)–Knob Mod.4
(CC#21). If
Amount
is set to a positive (+) value, rotating the knob to the far left all the way wil produce an effect of 0 as the dynamic modulation source all the way will apply change only in the positive direction. (If the
Amount
is set to a negative value, the result will be the opposite.)
SW 1: #80 (Switch Modulation 1: CC#80)
SW 2: #81 (Switch Modulation 2: CC#81)
If you wish to use the SW1 or SW2 switch as a dynamic modulation source, make settings in Program, or Song to set the Controllers Setup page parameter
Panel Switch Assign
to the following values respectively:
SW1
to SW1 Mod.
(CC#80), or
SW2
to SW2 Mod. (CC#81) ( See “SW1/2
Assignments” on page 348.).
The effect will be controlled when you operate the SW1 or
SW2 switch.
FootSW: #82 (Foot Switch: CC#82)
If you wish to use an assignable foot switch as a dynamic modulation source, set
Foot Switch Assign
(Global 2–1a) to
Foot Switch (CC#82) ( See “Foot Switch Assignments” on page 349.).
The effect will be controlled when you operate a foot switch etc. connected to the ASSIGNABLE SWITCH jack.
Tempo
The resulting modulation will be zero at 120 BPM, the maximum positive value at 240 BPM, and the maximum negative value at 60 BPM.
347
Appendices
Controller Assignments
348
SW1/2 Assignments
Switch assignments are saved separately with each
Program, Combination, and Song.
For more information, see:
• Programs: “1–3: Controllers Setup” on page 16
• Combinations: “1–1: Controllers Setup” on page 78
• Sequencer mode: “1–1: Setup” on page 122
List of SW 1/2 assignments
The following functions can be assigned to SW1 and SW2.
Off
This setting disables the switch.
SW1 Mod. (CC#80) (SW1 Modulation: CC#80)
SW2 Mod. (CC#81) (SW2 Modulation: CC#81)
This lets you use the switch as an AMS or Dmod source.
Note that you’ll also need to assign SW1 Mod or SW2 Mod to control the desired parameter within the Program or
Effect.
Each time the switch is turned on or off, it transmits the corresponding MIDI CC (80 or 81); Off is 0, and On is 127.
Porta.SW (CC#65) (Portamento SW: CC#65)
This turns Portamento on and off. When the LED is lit,
Portamento is on.
Each time the switch is turned on or off, it transmits MIDI
CC#65; Off is 0, and On is 127.
With single Programs, this simply enables and disables
Portamento, regardless of the of the Program’s stored
Portamento Enable
setting.
With double Programs, it’s slightly more complex. If
Portamento is either enabled for both OSC 1 and 2, or off for both, then the Portamento Switch controls both OSC.
If Portamento is enabled for only one of the two, only that element will be affected by the switch; for the other element,
Portamento will always be off.
Octave Down
When the switch is on (LED lit), the pitch will be transposed down by one octave.
Octave Up
When the switch is on (LED lit), the pitch will be transposed up by one octave.
Lock functions
The Lock functions let you use SW1 or SW2 to “lock” the current position of the joystick. This leaves your hands free to play on the keyboard, or to use other controllers.
For instance, let’s say that JS+Y is assigned to create a filter sweep, and that SW2 is assigned to JS+Y Lock. You can then:
1. Move the joystick to open up the filter.
2. Press SW2 to turn on JS+Y Lock.
3. Release the joystick.
Since SW2 is locking JS+Y, the filter remains open, even though the joystick has physically snapped back to its center position.
Note that Lock affects only the physical controls. Even if
Lock is On, incoming MIDI messages can still change the joystick.
For more information, please see “Locking the Joystick” on page 25 of the Operation guide.
JS X Lock
Locks the effect of the joystick X axis.
JS Y Lock
Locks the effect of the joystick Y axis (both + and – directions).
JS+Y Lock
Locks the effect of the joystick +Y direction.
JS–Y Lock
Locks the effect of the joystick –Y direction.
Realtime Controls Knobs 1–4
Assignments
The following functions can be assigned as the function of knobs 1–4 when the Realtime Control s
is assigned to USER.
Knob assignments are saved separately with each Program,
Combination, and Song.
For more information, see:
• Programs: “1–3: Controllers Setup” on page 16
• Combinations: “1–1: Controllers Setup” on page 78
• Sequencer mode: “1–1: Setup” on page 122
List of Knobs 1–4 assignments
The following functions can be assigned to Realtime
Controls knobs 1–4.
Off
This setting disables the knob.
Knob Mod. 1–4 (CC#s17, 19, 20, 21)
These settings let you use the knob as an AMS or Dmod source. Note that you’ll also need to assign the knob to control the desired parameter within the Program or Effect.
Master Volume
This controls the overall volume, and transmits the
Universal System Exclusive Master Volume message [F0H,
7FH, nn, 04, 01, vv, mm, F7H]. You can use this to adjust the volumes of all Tracks or Timbres at the same time, while preserving their relative balance.
Portamento Time (CC#05)
This controls the portamento time. Note that a different controller, CC#65, turns Portamento on and off; see
“Porta.SW (CC#65) (Portamento SW: CC#65)” on page 348.
Volume (CC#07)
Controls the volume, and transmits CC#7.
Post IFX Pan (CC#08)
Controls the panning after the last Insert Effect in the chain, and transmits CC#8.
Pan (CC#10)
Controls stereo pan, and transmits CC#10.
Expression (CC#11)
Expression is a secondary volume control, which you can use to scale level without affecting the main volume settings or CC#7 values.
When used one at a time, MIDI Volume and Expression affect level in exactly the same way: a MIDI value of 127 is equal to Program’s main Level setting, and lower values
Controller Assignments
reduce the volume.
If both CC#7 and CC#11 are used simultaneously, the one with the lower value determines the maximum volume, and the one with the higher value scales down from that maximum.
FX Control 1 & 2 (CC#s12 & 13)
These assignments are intended for Effect Dynamic
Modulation (Dmod). Note that you’ll also need to assign
FX
Control 1
or
2
to control the desired parameter within the
Effect.
Cutoff (CC#74)
This scales the cutoff frequency of all of the filters at once.
For instance, it affects both Filters A and B.
Resonance (CC#71)
This scales the resonance of all of the filters at once. For instance, it affects both Filters A and B.
Filter EG Int. (CC#79)
This scales the effect of the Filter EG on the cutoff frequency.
It affects all of the filters at once; for instance, it affects both
Filters A and B.
F/A Attack (CC#73)
This scales the attack times of the Filter and Amp EGs, along with other related parameters.
When the CC value is above 64, this also affects the Amp
EG’s Start and Attack Levels, Start Level AMS, and Attack
Time AMS, as described below:
Between values of 65 and 80, the Start Level, Start Level
AMS, and Attack Time AMS will change from their programmed values to 0. Over the same range, the Attack
Level will change from its programmed value to 99.
F/A Decay (CC#75)
This scales the decay and slope times of the Filter and Amp
EGs.
F/A Sustain (CC#70)
This scales the sustain levels of the Filter and Amp EGs.
F/A Release (CC#72)
This scales the release times of the Filter and Amp EGs.
Pitch LFO1 Spd (CC#76)
This scales LFO1’s frequency.
Pitch LFO1 Dep (CC#77)
This scales the effect of LFO1 on the Pitch.
Pitch LFO1 Dly (CC#78)
This scales LFO1’s fade ‐ in time.
SW 1 Mod. & SW 2 Mod (CC#s 80 & 81)
Normally, these are used for the two assignable switches ‐ but you can assign them to the knobs instead, if you like.
Foot Switch (CC#82)
You can use this general ‐ purpose controller as an AMS or
Dmod source. Note that you’ll also need to assign
FootSW
(CC#82)
to control the desired parameter within the
Program or Effect.
MIDI CC#83 (CC#83)
You can use this general ‐ purpose controller as an AMS or
Dmod source. Note that you’ll also need to assign
MIDI
CC#83
to control the desired parameter within the Program or Effect.
MFX Send 1 & 2 (CC#s 93 & 91)
These control the send levels to Master Effects 1 and 2, respectively.
CC#s 93 and 91 actually control send levels in two different places: the sends directly from the Program OSC and the send levels of the last Insert Effect in the chain which matches the CC’s MIDI channel.
MIDI CC#00–95 and 102–119
These settings let you transmit any MIDI CC, except for registered and non ‐ registered parameters (CCs 96–101). If you choose a CC which is used by AMS, Dmod, or the standard CC routings, then it will affect the corresponding
KROME parameters.
When the Realtime Controls in TONE , the function of knobs 1–4 is fixed.
Knobs 1–4
Realtime Controls knob 1–4 have preset assignments, as below:
TONE [1]: CUTOFF (Filter Cutoff: CC#74)
This scales the cutoff frequency of all of the filters at once.
TONE [2]: RESONANCE (Filter Resonance: CC#71)
This scales the resonance of all of the filters at once.
TONE [3]: EG INTENSITY (Filter EG Intensity: CC#79)
This scales the effect of the Filter EG on the cutoff frequency.
TONE [4]: EG RELEASE (Filter, Amplifier EG Release: CC#72)
This scales the release times of the Filter and Amp EGs.
Foot Switch Assignments
You can connect a footswitch (such as the optional Korg PS ‐ 1 or PS ‐ 3) to the rear ‐ panel ASSIGNABLE SWITCH input, and then use it to control a wide variety of functions, as described below.
This setting is made globally, on the Global P2: Controllers–
Foot Controllers page.
Foot Switch and MIDI CCs
Some of the assignments include MIDI CCs, which are transmitted each time the switch is turned on or off (Off = 0, and On = 127). Note that the MIDI CCs can still be received even if they are not assigned to a physical controller.
USER [1] – [4] and SW1/2 are special cases, since these can themselves be assigned to different MIDI CCs. If the footswitch is assigned to duplicate these controls, it will also use their CC assignments.
List of Foot Switch assignments
Off
This setting disables the switch.
Foot Switch (CC#82)
This lets you use the switch as an AMS or Dmod source.
Note that you’ll also need to assign Foot SW (CC#82) to control the desired parameter within the Program or Effect.
Portamento SW (CC#65)
This controls portamento on/off. For more information, please see “Porta.SW (CC#65) (Portamento SW: CC#65)” on page 348.
Sostenuto (CC#66)
This controls the sostenuto effect, which holds only the notes being played at the moment that the footswitch is turned on.
Soft (CC#67)
Turns the soft pedal effect on and off.
Damper (CC#64)
Turns the damper pedal effect on and off.
349
350
Appendices
Program Up
This lets you use the switch to increment the current
Program or Combination number, for hands ‐ free patch changes. Note that this is only active while on the Prog P0:
Play or Combi P0: Play pages, respectively.
When you use this control, the KROME will also transmit the corresponding MIDI Program Change and Bank Select messages.
Program Down
This decrements the current Program or Combination number, for hands ‐ free patch changes. For more information, please see “Program Up” above.
Value Inc
Operating the foot switch will produce the same operation as pressing the INC button. For more information, please see
“2–1: Menu Command” on page 202.
Value Dec
Operating the foot switch will produce the same operation as pressing the DEC button.
Song Start/Stop
The foot switch will control sequencer start/stop.
Simultaneously, a MIDI Start or Stop message will be transmitted.
Song Punch In/Out
If Seq P0: Preference “Recording Setup” (0–8b) is set to
Manual Punch In, the switch can be used to punch ‐ in and punch ‐ out when recording on the sequencer.
Cue Repeat Control
This is valid if the
Repeat
setting for each step in Seq P11:
Cue List is set to FS (11–1b). If you press the pedal switch while a step is repeating, this will be the trigger to proceed to the next step.
Tap Tempo
This duplicates the function of the front ‐ panel TAP button, for setting the system tempo in real ‐ time.
ARP ON/OFF
The foot switch will turn the arpeggiator on/off.
DRUM TRACK ON/OFF
The foot switch will turn the Drum Track on/off.
JS+Y (CC#01)
The switch will control the effect produced by joystick movement in the +Y direction (Vertical upward).
JS–Y (CC#02)
The switch will control the effect produced by joystick movement in the –Y direction (Vertical downward).
Value Slider (CC#18)
You can use this general ‐ purpose controller as an AMS or
Dmod source. Note that you’ll also need to assign
ValueSlider (CC#18) to control the desired parameter within the Program or Effect.
TONE [1]…TONE [4]
USER [1]…USER [4]
Use the switch to control the effect of knobs 1–4 when the
Realtime Controls is in USER/TONE.
(Foot switch “on” is equivalent to turning the knob to the far right; foot switch “off” is equivalent to turning the knob to the far left.)
SW1, 2
The footswitch duplicates the function of the selected front ‐ panel switch.
ARP GATE
Use the switch to control the arpeggiator’s
Gate
.
(Foot switch “on” is equivalent to turning the knob to the far right; foot switch “off” is equivalent to turning the knob to the far left.)
ARP VELOCITY
Use the switch to control the arpeggiator’s
Velocity
.
(Foot switch “on” is equivalent to turning the knob to the far right; foot switch “off” is equivalent to turning the knob to the far left.)
ARP LENGTH
Use the switch to control the arpeggiator’s
Length
.
(Foot switch “on” is equivalent to turning the knob to the far right; foot switch “off” is equivalent to turning the knob to the far left.)
ARP STEP
Use the switch to control the arpeggiator’s
Step
.
(Foot switch “on” is equivalent to turning the knob to the far right; foot switch “off” is equivalent to turning the knob to the far left.)
Foot Pedal Assignments
You can connect a pedal (such as the optional Korg XVP ‐ 10 or EXP ‐ 2) to the rear ‐ panel ASSIGNABLE PEDAL input, and then use it to control a wide variety of functions, as described below.
This setting is made for the entire KROME, on the Global P2:
Controllers– Foot Controllers page.
A note on MIDI CCs
Some of the assignments include MIDI CCs, which are transmitted whenever the knob is moved. Note that the
MIDI CCs can still be received even if they are not assigned to a physical controller.
If you select USER [1] –USER [4], the MIDI control change message specified by the Realtime Controls Knob Assign settings in each mode will be transmitted.
List of Foot Pedal assignments
Off
This setting disables the pedal.
Master Volume
This controls the overall volume, and transmits the
Universal System Exclusive Master Volume message [F0H,
7FH, nn, 04, 01, vv, mm, F7H]. You can use this to adjust the volumes of all Tracks or Timbres at the same time, while preserving their relative balance.
Foot Pedal (CC#04)
You can use this general ‐ purpose controller as an AMS or
Dmod source. Note that you’ll also need to assign
Foot
Pedal (CC#04)
to control the desired parameter within the
Program or Effect.
Portamento Time (CC#05)
Controls the speed at which portamento will change the pitch.
Volume (CC#07)
Control the volume of a Program, Combination, or of a
MIDI track in Sequencer modes.
Post IFX Pan (CC#08)
Control the pan after passing through the Insert Effect.
Pan (CC#10)
Control the pan of a Program, of a timbre in a Combination, or of a MIDI track in Sequencer modes.
Expression (CC#11)
Expression is a secondary volume control, which you can use to scale level without affecting the main volume settings or CC#7 values. For more information, please see
“Expression (CC#11)” on page 348.
FX Control 1 & 2 (CC#s12 & 13)
These assignments are intended for Effect Dynamic
Modulation (Dmod). Note that you’ll also need to assign
FX
Ctrl1
or
2
to control the desired parameter within the Effect.
MFX Send 1 & 2 (CC#s 93 & 91)
These control the send levels to Master Effects 1 and 2, respectively.
CC#s 93 and 91 actually control send levels in two different places: the sends directly from the Program OSC and the send levels of the last Insert Effect in the chain which matches the CC’s MIDI channel.
JS+Y (CC#01)
This duplicates the function of JS+Y. Whatever JS+Y is assigned to control, the pedal will control as well.
JS–Y (CC#02)
This duplicates the function of JS–Y. Whatever JS–Y is assigned to control, the pedal will control as well.
Ribbon (CC#16)
You can use this general ‐ purpose controller as an AMS or
Dmod source. Note that you’ll also need to assign
Ribbon
(CC#16)
to control the desired parameter within the
Program or Effect.
Value Slider (CC#18)
You can use this general ‐ purpose controller as an AMS or
Dmod source. Note that you’ll also need to assign
ValueSlider (CC#18) to control the desired parameter within the Program or Effect.
TONE [1]…TONE [4]
USER [1]…USER [4]
Use the pedal to control the effect of knobs 1–4 when the
Realtime Controls is in USER/TONE.
ARP GATE
Use the pedal to control the arpeggiator’s
Gate
.
ARP VELOCITY
Use the pedal to control the arpeggiator’s
Velocity
.
ARP SWING
Use the pedal to control the arpeggiator’s
Swing
.
ARP STEP
Use the pedal to control the arpeggiator’s
Step
.
Controller Assignments
351
Appendices
System exclusive messages affected by Create Excl Data,
Erase Excl Data, and Event Edit
Create/Erase
352
Create/Erase
Univ: Mater Volume
Univ: Master Balance
Univ: Master Fine Tune
Univ: Master Coarse Tune
Song Setup
Track 01
Song Common
Drum Track
Play/Mute/Solo
Parameter
Controls [SELECT]
Tone Adjust Track
Tone Adjust Auto
Load
Scale Type
Scale Key
Scale Random
[SW1]
SW1:Assign
SW1:Mode
[SW2]
SW2:Assign
SW2:Mode
USER CONTROL1:
Assign
USER CONTROL2:
Assign
USER CONTROL3:
Assign
USER CONTROL4:
Assign
Event Edit
*Dump/Ext*
*Unavailable*
MaterVolume
MasterBalance
MasterFineTune
MasterCoarseTune
Controls [SELECT]
Tone Adjust Track
TA AutoLoad
Scale Type
Scale Key
Scale Random
[SW1]
SW1:Assign
SW1:Mode
[SW2]
SW2:Assign
SW2:Mode
USER1:Assign
USER2:Assign
USER3:Assign
USER4:Assign
[ON/OFF]
Pattern Bank
Pattern Number
Shift
DT:[ON/OFF]
DT:Pattern Bank
DT:PatternNumber
DT:Shift
Input MIDI Channel DT:In MIDI Ch
Output MIDI Channel DT:Out MIDI Ch
Trigger Mode
Trigger Sync
DT:Trigger Mode
DT:Trigger Sync
DT:Trigger Latch Trigger Latch
Keyboard Zone
Bottom
Keyboard Zone Top
Velocity Zone
Bottom
DT:KeyZone Btm
DT:KeyZone Top
DT:VelZone Btm
Velocity Zone Top
Play/Mute
Solo
Program
Pan
Volume
EX2 Bank
Select(MSB)
DT:VelZone Top
T01:Play/Mute
T01:Solo
T01:Program
T01:Pan
T01:Volume
T01:EX2Bank MSB
EX2 Bank Select(LSB) T01:EX2Bank LSB
Force OSC Mode T01:OSC Mode
OSC Select
Arpeggiator Assign
T01:OSC Select
T01:Portamento
Portamento
Transpose
Detune
Bend Range
T01:Portamento
T01:Transpose
T01:Detune
T01:Bend Range
Use Program’s Scale T01:Prog’s Scale
Delay Time [ms] T01:DelayTime:ms
Delay MIDI/Tempo
Sync
T01:DelayMIDISync
Delay Sync Base Note T01:Delay Base
Delay Sync Times T01:Delay Times
Auto Load Program
EQ
T01:Auto Prog EQ
EQ Bypass
EQ Input Trim
EQ High Gain
EQ Mid Freq
EQ Mid Gain
T01:EQ Bypass
T01:EQ Input Trim
T01:EQ High Gain
T01:EQ Mid Freq
T01:EQ Mid Gain
Track 02…16
Arpeggiator
Tone Adjust
:
Play/Mute/Solo
Tone Adjust
Arpeggio
Arpeggior-A, B
T01TA:SL2:Assign
T01TA:SL3:Assign
T01TA:SL4:Assign
T01TA:SL5:Assign
T01TA:SL6:Assign
T01TA:SL7:Assign
T01TA:SL8:Assign
T01TA:SL1:Value
T01TA:SL2:Value
T01TA:SL3:Value
T01TA:SL4:Value
T01TA:SL5:Value
T01TA:SL6:Value
T01TA:SL7:Value
T01TA:SL8:Value
T02:Play/Mute
:
T16TA:SL8:Value
KAR:[ON/OFF]
KAR:[LATCH]
KAR:[MOD.CTRL]
KAR:[M] SCENE
KAR:SceneQuantze
KAR:LinkStartSeed
KAR:Load GE Opt
KAR:UseRTCModel
KAR:Reset Scenes
KAR:DT Run 1
KAR:DT Run 2
KAR:DT Run 3
KAR:DT Run 4
KAR:DT Run 1
KAR:DT Run 2
KAR:DT Run 3
Event Edit
T01:EQ Low Gain
T01:Bus Select
T01:Send1(MFX1)
T01:Send2(MFX2)
T01:FX Ctrl Bus
T01TA:SW1:Assign
T01TA:SW2:Assign
T01TA:SW3:Assign
T01TA:SW4:Assign
T01TA:SW5:Assign
T01TA:SW6:Assign
T01TA:SW7:Assign
T01TA:SW8:Assign
T01TA:SW1:on/off
T01TA:SW2:on/off
T01TA:SW3:on/off
T01TA:SW4:on/off
T01TA:SW5:on/off
T01TA:SW6:on/off
T01TA:SW7:on/off
T01TA:SW8:on/off
T01TA:SW1:Value
T01TA:SW2:Value
T01TA:SW3:Value
T01TA:SW4:Value
T01TA:SW5:Value
T01TA:SW6:Value
T01TA:SW7:Value
T01TA:SW8:Value
T01TA:SL1:Assign
KAR:DT Run 4
KAR:DT Run 1
Slider4:Assign
Slider5:Assign
Slider6:Assign
Slider7:Assign
Slider8:Assign
Slider1:Value
Slider2:Value
Slider3:Value
Slider4:Value
Slider5:Value
Slider6:Value
Slider7:Value
Slider8:Value
Play/Mute
:
Slider8:Value
[ON/OFF]
Run A
Run B
[GATE]
[VELOCITY]
[SWING]
[STEP]
Pattern
Resolution
Octave
Gate
Velocity
Sort
Latch
Key Sync.
Keyboard
Keyboard Zone
Bottom
Keyboard Zone Top
SW4:On/Off
SW5:On/Off
SW6:On/Off
SW7:On/Off
SW8:On/Off
SW1:(On)Value
SW2:(On)Value
SW3:(On)Value
SW4:(On)Value
SW5:(On)Value
SW6:(On)Value
SW7:(On)Value
SW8:(On)Value
Slider1:Assign
Slider2:Assign
Slider3:Assign
EQ Low Gain
Bus Select
Send1(MFX1)
Send2(MFX2)
FX Control Bus
SW1:Assign
SW2:Assign
SW3:Assign
SW4:Assign
SW5:Assign
SW6:Assign
SW7:Assign
SW8:Assign
SW1:On/Off
SW2:On/Off
SW3:On/Off
System exclusive messages affected by Create Excl Data, Erase Excl Data, and Event Edit
Create/Erase
Insert Effect
Master Effect
Total Effect
Setup
IFX1:No Effect
Event Edit
Velocity Zone
Bottom
Velocity Zone Top
IFX1 SW
KAR:DT Run 2
KAR:DT Run 3
IFX1:SW
IFX1 IFX1
IFX1 Control Channel IFX1:Control Ch.
IFX1 Chain To
IFX1 Chain
IFX1 Pan
IFX1 Bus Select
IFX1 Control Bus
IFX1 Send1
IFX1 Send2
IFX2 SW
:
IFX5
:
Parameter0
Parameter71
:
:
IFX1:Chain To
IFX1:Chain
IFX1:Pan
IFX1:Bus Select
IFX1:Control Bus
IFX1:Send1
IFX1:Send2
IFX2:SW
IFX5:Send2
IFX1:Parameter0
IFX1:Parameter71
IFX2:No Effect…
IFX5:No Effect
Common FX LFO1
:
Parameter0
Parameter71
Frequency[Hz]
Sync(Reset)
IFX2:Parameter0
:
IFX5:Parameter71
FX LFO1:Freq[Hz]
FX LFO1:Sync
Sync Source FX LFO1:Sync Src
Sync Control Channel FX LFO1:Sync Ctrl
MIDI/Tempo Sync
MIDI Sync BPM
FX LFO1:MIDI Sync
FX LFO1:BPM
MIDI Sync BaseNote FX LFO1:Base Note
MIDI Sync Times FX LFO1:Times
Common FX LFO2 Frequency[Hz]
: :
FX LFO1:Freq[Hz]
Setup
MIDI Sync Times
MFX1 SW
MFX1
MFX1 Control
Channel
FX LFO2:Times
MFX1:SW
MFX1
MFX1:Control Ch.
MFX1 Return
MFX2 SW
MFX2
MFX2 Control
Channel
MFX1:Return
MFX2:SW
MFX2
MFX2:Control Ch.
MFX1:No Effect
MFX2:No Effect
Setup
TFX:No Effect
MFX2 Return
MFX Chain
Chain Direction
Chain Level
:
Parameter0
Parameter71
Parameter0
MFX2:Return
MFX Chain
MFX Chain Direct.
MFX Chain Level
:
MFX1:Parameter0
MFX1:Parameter71
MFX2:Parameter0
:
Parameter71
TFX SW
TFX
:
MFX2:Parameter71
TFX SW
TFX
TFX Control Channel TFX:Control Ch.
Master Volume TFX Master Vol.
:
Parameter0
Parameter71
:
TFX:Parameter0
TFX:Parameter71
353
Appendices
MIDI transmission when the KROME’s controllers are operated
354
The following tables show the relation between the MIDI messages that are transmitted when the KROME’s controllers are operated, and the AMS (alternate modulation source) or DMS (dynamic modulation source) that
MIDI Messages and physical controllers
Joystick
Realtime
Knob
TONE1…4
Realtime
Knob
USER1…4
SW1, 2 On/Off correspond to each MIDI message.
# indicates a fixed function, and * indicates an assignable function.
Knob1
(GATE)
ARP
Knob2
(VELOCITY)
Knob3
(SWING)
Knob4
(STEP)
Damper
Foot
Switch
Foot
Pedal
Available for AMS
Available for Dmod MIDI messages
CC#
10
11
12
8
9
6
7
3
4
5
0
1
2
Note ‐ off
Note ‐ on (note number)
Note ‐ on (velocity)
Poly aftertouch
Bank select (MSB)
Modulation 1
Modulation 2
–
Foot controller
Portamento time
23
24
25
26
20
21
22
16
17
18
19
13
14
15
Data entry (MSB)
Volume
Post Insert Effect panpot
–
Panpot
Expression
Effect control 1
Effect control 2
ARP On/Off control
–
Controller (CC#16)
Knob modulation 5
Controller (CC#18)
Knob modulation 6
30
31
32
27
28
29
–
–
–
–
–
Knob modulation 7
Knob modulation 8
ARP–GATE control
ARP–VELOCITY control
ARP–SWING control
ARP–STEP control
–
Bank select (LSB)
33…37
–
38 Data entry (LSB)
39…63
–
64
65
66
67
Damper
Portamento On/Off
Sostenuto
Soft pedal
79
80
81
75
76
77
78
68…69
–
70 Sustain level
71 Filter resonance level
72
73
74
Release time
Attack time
Filter cutoff frequency
Decay time
LFO1 speed
LFO1 depth (pitch)
LFO1 delay
Filter EG intensity
SW1 modulation On/Off
SW2 modulation On/Off
86
87
88
82
83
84
85
Foot switch On/Off
Controller (CC#83)
–
Controller (CC#85)
Controller (CC#86)
Controller (CC#87)
Controller (CC#88)
89…90
–
91 Effect depth 1 (send 2 level)
92 Effect depth 2 (IFX 1–5 On/Off)
93
94
95
Effect depth 3 (send 1 level)
Effect depth 4 (MFX 1, 2 On/Off)
Effect depth 5 (TFX 1, 2 On/Off)
96
97
98
99
Data increment
Data decrement
NRPN(LSB)
NRPN(MSB)
100 RPN(LSB)
0: Bend range
1: Fine tune
2: Coarse tune
101 RPN(MSB) 0
102 –
103 –
104 –
105 –
106 –
107 –
108 –
109 –
114 –
115 –
116 –
117 –
118 –
119 –
Program change
Channel aftertouch
Pitch Bend
Universal exclusive
Master volume
Master balance
Master fine tune
Master coarse tune
#(+Y)
#(–Y)
+X, ‐ X
# (Knob2)
# (Knob4)
# (Knob1)
# (Knob3)
*
*
*
*
*
*
*
*
*
*
*
*
*
*
*
*
*
*
*
*
*
*
*
*
*
*
*
*
*
*
*
*
*
*
*
*
*
*
*
*
*
*
*
*
*
*
*
*
*
*
*
*
*
*
*
*
*
*
*
*
*
*
*
*
*
*
*
*
*
*
*
*
*
*
*
*
*
*
*
*
*
*
*
*
*
*
*
*
*
*
*
* (SW1)
* (SW2)
*
*
*
*
*
*
*
*
*
*
*
*
*
*
*
*
*
*
*
*
*
*
*
*
*
*
*
*
*
*
*
*
*
*
*
*
*
*
*
*
*
*
*
*
*
*
*
*
*
*
*
*
*
*
*
*
*
*
*
*
*
*
[*]
*
*
*
*
*
*
*
*
*
*
*
*
*
*
*
*
*
*
*
*
*
*
*
*
*
*
*
*
*
*
*
*
*
*
*
*
*
*
*
*
*
*
*
*
*
*
*
*
*
*
*
*
*
*
*
*
*
*
*
*
*
*
*
*
*
*
*
*
*
*
*
*
*
*
*
*
*
*
*
*
*
*
*
*
*
*
*
*
*
*
*
[*]
*
*
*
*
*
*
*
*
*
*
*
*
*
*
*
*
*
*
*
*
*
*
*
*
*
*
*
*
*
*
*
*
*
*
*
*
*
*
*
*
*
*
*
*
*
*
*
*
*
*
*
*
*
*
*
*
*
*
*
*
*
*
*
*
*
*
*
*
*
*
*
*
*
*
*
*
*
*
*
*
*
*
*
*
*
*
*
[*]
*
*
*
*
*
*
*
*
*
*
*
*
*
*
*
*
*
*
*
*
*
*
*
*
*
*
*
*
*
*
*
*
*
*
*
*
*
*
*
*
*
*
*
*
*
*
*
*
*
*
*
*
*
*
*
*
*
*
*
*
*
*
*
*
*
*
*
*
*
*
*
*
*
*
*
*
*
*
*
*
*
*
*
*
*
*
*
*
*
*
*
*
[*]
*
*
*
*
*
*
*
*
*
*
*
*
*
*
*
*
*
*
*
*
*
*
*
*
*
*
*
*
*
*
*
*
*
*
*
*
*
*
*
*
*
*
*
*
*
*
*
*
*
*
*
*
*
*
*
*
*
*
*
*
*
*
*
*
*
*
*
*
*
*
*
*
*
*
*
*
*
*
*
*
*
*
*
*
*
*
*
*
*
*
*
*
*
*
[*]
*
*
*
*
*
*
*
*
*
*
*
*
*
*
#
*
*
*(1)
*
*
*
*
*
*(1)
*(1)
*(1)
*(1)
*
*
*
*
*
*
*
*
*
*
*
*
*
*
*
*
*
*(1)
*(1)
*(1)
*(1)
*
*
*
*
*
*
*
*
*
*
*
*
*
*
*
*
*
*
*
*
*
*
*
*
*
*
*
*
*
*
*
*
*
*
*
*
*
*
*
*
*
*
*
*
*
*
*
*
*
*
*
*
*
*
*
*
*
*
*
*
*
MIDI transmission when the KROME’s controllers are operated
(1):When a arpeggiator controller is assigned to a CC# indicated by [*] (Global P2: Controllers– MIDI CC#
Assign)
*: Assignable
[*]:The ARP Controllers can be assigned to CC#00–119.
CC#s indicated by [*] will be assigned automatically when you execute the Global P2– MIDI CC# Assign menu command
Reset Controller MIDI Assign
with the
CC Default setting.
The CC Default settings are the CC#s recommended as the CC# for each of these controllers. Normally you should use these settings when assigning CC#s.
When one of the KROME’s controllers is operated, the corresponding or the assigned control change will be transmitted.
If you choose USER [1] –USER [4], or SW1/2, its MIDI control change message will be transmitted according to the settings in Realtime Controls Knob Assign, SW1/2 Assign.
If you’ve selected ARP ON/OFF, ARP GATE, ARP
VELOCITY, ARP SWING, ARP STEP, those MIDI control change messages will be transmitted according to the Global
P2 ‐ MIDI CC# Assign settings.
The following sections describes operation in each mode.
Program mode
When one of the KROME’s controllers is operated, a control change message will be transmitted on the global MIDI channel (
MIDI Channel
Global 1–1a).
If the Realtime Controls is set to USER, and knobs 1–4 or the assignable pedal are assigned to Master Volume, the universal exclusive message Master Volume will be transmitted.
Combination mode
When one of the KROME’s controllers is operated, a control change message will be transmitted on the global MIDI channel (
MIDI Channel
Global 1–1a).
Simultaneously, the message will also be transmitted on the
MIDI channel (
MIDI Channel
Combi 3–1(2)c) of any timbre whose
Status
(Combi 3–1(2)c) is EXT or EX2.
When one of the KROME’s controllers is operated, its effect will apply to any timbre whose
Status
is INT and whose
MIDI Channel
setting is either Gch or the same as the global MIDI channel.
In the case of Master Volume, the universal exclusive message Master Volume will be transmitted only on the global MIDI channel.
You can make settings for MIDI Filter (Combi P5) to enable or disable control changes and controllers for each timbre. When checked, the above operations will be enabled.
Effect dynamic modulation can be controlled when the
Ch
(Combi 8–4a, 9–2a) setting for IFX1–5, MFX1, 2, or TFX is either set to Gch or to the same channel as the global MIDI channel. (In the case of All Routed, control is possible on the
MIDI channel of any routed timbre.)
Sequencer mode
When one of the KROME’s controllers is operated, its effect will apply to the MIDI track 1–16 that is currently selected by
Track Select
(Seq 0–1(2)a).
If the
Status
(Seq 3–1(2)c) of the track selected by
Track
Select
is EXT, EX2, or BTH, a control change message will be transmitted on the MIDI channel specified by
MIDI
Channel
(Seq 3–1(2)c).
If the
Status
is INT or BTH, operating one of the KROME’s controllers will affect only that MIDI track. Simultaneously, the same effect will also apply to any MIDI track with the same
MIDI Channel
setting.
In the case of Master Volume, the universal exclusive message Master Volume will be transmitted.
You can make settings for MIDI Filter (Seq P3) to enable or disable control changes and controllers for each track. When checked, the operations effective for a
Status
of INT or BTH will be enabled. Tracks whose
Status
is EXT, EX2, or BTH will transmit control changes regardless of this setting.
Effect dynamic modulation can be controlled when the
Ch
(Seq 8–4a, 9–2a) setting for IFX1–5, MFX1, 2, or TFX matches the MIDI channel of the track selected by
Track Select
. (In the case of All Routed, control is possible on the MIDI channel of all routed tracks.)
If one of the KROME’s controllers is operated during realtime recording, the corresponding or assigned control change will be recorded.
355
Appendices
KROME and MIDI CCs
356
Responses to standard MIDI controllers
The following table shows how the KROME responds to
MIDI control change messages, and the relation between settings and controller movements on the KROME.
CC# Control
0 Bank select (MSB)
1 Modulation 1
2 Modulation 2
3 –
4 Foot controller
5 Portamento time
6 Data entry (MSB)
7 Volume
8 Post Insert Effect panpot
9 –
10 Panpot
11 Expression
12 Effect control 1
13 Effect control 2
14 ARP ON/OFF control
15 –
16 Controller (CC#16)
17 Knob modulation 1
18 Controller (CC#18)
19 Knob modulation 2
Value
0…127
0…127
0…127
–
0…127
0…127
0…127
0…127
0…127
–
0…127
0…127
0…127
0…127
0…63(Off),
64…127(On)
–
0…127
0…127
0…127
0…127
20 Knob modulation 3
21 Knob modulation 4
22 ARP–GATE control
23 ARP–VELOCITY control
24 ARP–SWING control
25 ARP–STEP control
26…31 –
32 Bank select (LSB)
33…37 –
38 Data entry (LSB)
39…63 –
64 Damper
65 Portamento On/Off
66 Sostenuto On/Off
67 Soft
68…69 –
70 Sustain level
71 Filter resonance level
72 Release time
73 Attack time
74 Filter cutoff frequency
75 Decay time
76 LFO1 speed
0…127
0…127
0…127
0…127
0…127
0…127
0…127
0…127
0…127
0…127
0…127
0…127
0…127
–
0…127
–
0…127
–
0…127
0…63(Off),
64…127(On)
0…63(Off),
64…127(On)
0…127
–
Function
bank select message MSB *1 corresponds to joystick movement in the +Y direction (Vertical upward) corresponds to joystick movement in the –Y direction (Vertical downward)
– corresponds to when the assignable pedal function is set to Foot
Pedal portamento time
MSB of RPN and NRPN data volume pan after the Insert Effect
*2
*3
– pan volume
corresponds to effect dynamic control source FX Control1 (p.363) corresponds to effect dynamic control source FX Control2 (p.363)
*3 equivalent to on/off when CC#14 is assigned to the
ARP
buttons *7
– for controlling AMS or Dmod corresponds to when the Realtime Controls knob function is set to Knob
Mod.1
for controlling AMS or Dmod *8 corresponds to when the Realtime Controls knob function is set to Knob
Mod.2
corresponds to when the Realtime Controls knob function is set to Knob
Mod.3
corresponds to when the Realtime Controls knob function is set to Knob
Mod.4
equivalent to when CC#22 is assigned to arpeggio control knob 1
(GATE) equivalent to when CC#23 is assigned to arpeggio control knob 2
(VELOCITY)
*7
*7 equivalent to when CC#24 is assigned to arpeggio control knob 3
(SWING) equivalent to when CC#25 is assigned to arpeggio control knob 4
(STEP)
–
LSB of bank select message
–
LSB of RPN or NRPN data
– damper effect
*7
*7
*1
*2 turn the portamento effect on/off turn the sostenuto effect on/off soft pedal effect
– sustain levels of the filter EG and amp EG resonance level of the filter cutoff frequency of the high pass filter release times of the filter EG and amp EG cutoff frequency of the low pass filter decay times/slope times of the filter EG and amp EG
LFO1 speed
*4
*4
*4
*4
*4
*4
*4
KROME and MIDI CCs
CC# Control
77 LFO1 depth
78 LFO1 delay
79 Filter EG intensity
80 SW1 modulation On/Off
81 SW2 modulation On/Off
82 Foot switch On/Off
83 Controller (CC#83)
84 –
85…88 Controller (CC#85…88)
89, 90 –
91 Effect depth 1 (send 2 level)
92
Effect depth 2 (Insert Effect 1–5 On/
Off)
93 Effect depth 3 (send 1 level)
94
Effect depth 4 (master effect 1, 2
On/Off)
95 Effect depth 5 (total effect On/Off)
96 Data increment
97 Data decrement
98 NRPN(LSB)
99 NRPN(MSB)
100 RPN(LSB)
101 RPN(MSB)
102…119 –
Value
2
0
0
1
–
–
–
0
0
0…127
0…127
0…127
0…63(Off),
64…127(On)
0…63(Off),
64…127(On)
0…63(Off),
64…127(On)
0…127
–
0…127
–
0…127
0…63(Off),
64…127(On)
0…127
0…63(Off),
64…127(On)
0…63(Off),
64…127(On)
You can assign any control change number (CC#00–119) to the Realtime Controls Knobs USER 1–4. In this case, the transmitted values will all be 0…127.
You can assign any control change number (CC#00–119) to the ARP button, arpeggio control knobs 1–4. In this case,
ARP buttons will transmit values of 0 (Off) or 127 (On), knobs 1–4 will transmit values of 0…127.
*1 In the KROME sequencer, bank select messages are normally specified as program change events (“MIDI
Event Edit” Sequencer P6). However in some cases this will be insufficient when you wish to change banks on an external device. In such cases, you can use CC#00 and
CC#32 to specify the banks.
For information on the relation between bank select numbers and the banks of your external device, refer to the owner’s manual for your external device.
*2 Unlike conventional control changes, pitch bend range, fine tune, and coarse tune settings are made using RPC
(Registered Parameter Control) messages. In Program,
Combination, and Sequencer modes, you can use RPC messages to control the bend range and tuning for each program, Timbre (Combination), or Track (Sequencer).
The procedure is to use an RPN (Registered Parameter
Number) message to select the parameter that you wish to edit, and then use Data Entry to input a value for that parameter. To select the parameter, use CC#100 (with a value of 00…02) and CC#101 (with a value of 00). use
CC#06 and CC#38 to enter the data.
The data entry values for each parameter and the corre ‐ sponding settings are as follows.
Function
pitch LFO1 intensity
LFO1 delay filter EG intensity corresponds to on/off when the SW1 function is set to SW1 Mod.
*4
*4
*4 corresponds to on/off when the SW2 function is set to SW2 Mod.
corresponds to on/off when the function of the assignable foot switch is set to Foot SW for controlling AMS or Dmod
– for controlling AMS or Dmod
– send 2 level turn Insert effect 1…5 on/off send 1 level
*5 master effect 1, 2 on/off *5 total effect on/off *5
LSB of NRPN
MSB of NRPN selects the pitch bend range controls Fine Tune controls Coarse Tune
MSB of RPN
–
RPN=0 (Pitch bend range)
CC#06 CC#38 Parameter value (Semitone steps)
0 00
0
12 00
+12
24
127
00
00
RPN=1 (Fine tune)
CC#06 CC#38
0 00
64
127
127
00
00
127
+24
+24
Parameter value (1 cent steps)
-100
0
+98
+99
RPN=2 (Coarse tune)
CC#06 CC#38 Parameter value (Semitone steps)
0
00
-24
40
00
-24
64
88
127
00
00
00
0
+24
+24
*2
*2
*2
For example, if in Sequencer mode you wish to set a
MIDI track that is receiving channel 1 to a transpose
(coarse tuning) value of –12, you would first transmit [B0,
64, 02] (64H=CC#100) and [B0, 65, 00] (65H=CC#101) to the KROME to select the RPN coarse tune. Then you
357
358
Appendices
would set this to –12 by transmitting [B0, 06, 34]
(06H=CC#6), 34H=52 (corresponds to –12), and [B0, 26,
00] (26H=CC#38, 00H=0).
*3 The volume of the KROME is determined by multiplying the Volume (CC#07) with the Expression (CC#11). In
Sequencer mode when you stop the song playback and return the location to the beginning of the track, the
Volume will be set to the starting value, and the
Expression will be set to the maximum value (127).
*4 A value of 64 will correspond to the value specified by the program parameter. 0 is the minimum, and 127 is the maximum. Changing from 63–1 or from 65–126 will adjust the effect from the program parameter setting toward the minimum value or maximum value.
• For details about the specific parameters controlled by
these CCs, please see “Parameters controlled by MIDI
CCs #70 ‐ 79” on page 358.
*5 Controlled on the global MIDI channel.
*6 If you assign a CC# to the ARP button or arpeggio control knobs 1–4 and perform these operations on the KROME, the assigned CC# will be transmitted, and the KROME itself will also be controlled at the same time. If this message is received, the result will be the same as if the
KROME itself had been operated.
The CC# settings for each knob and button are made in the Global P2– MIDI CC# Assign page. Use these settings if you need to assign control change messages, for exam ‐ ple when you want to record button operations on the internal sequencer or an external MIDI sequencer, or to control the arpeggiator from an external MIDI device.
CC#
70 (Sustain level)
71 (Filter resonance)
72 (Release time)
73 (Attack time)
74 (Filter cutoff frequency)
75 (Decay time)
76 (LFO1 speed)
77 (LFO1 Pitch intensity)
78 (LFO1 delay)
79 (Filter EG intensity)
Each knob and button can be assigned to any desired
MIDI control change message CC#00–119, but normally you will choose the Global P2– MIDI CC# Assign menu command
Reset Controller MIDI Assign
Default settings.
will assign these CC#s.
and use the CC
This table shows the operations for the CC Default set ‐ tings. The CC Default settings are the CC#s recom ‐ mended for use with these controllers. Normally, you
Parameters controlled by MIDI
CCs #70-79
CC#70–79 correspond to the KROME’s program parameters listed below.
In Program mode, the corresponding program parameters will be temporarily edited when CC#70–79 messages are received on the global MIDI channel (
MIDI Channel
Global
1–1a), when knobs 1–4 are operated when the Realtime
Controls is in TONE, or when knobs 1–4 are operated when assigned to CC#70–79 with the Realtime Controls in USER.
In most cases, you can use the
Write Program
menu command to save the edited values, over ‐ writing the previous Program settings.
In Combination and Sequencer modes, you can use these CCs to temporarily edit the parameters for all
Timbres or Tracks on a given MIDI channel. However,
Internal parameters controlled by the CC
Filter EG 1/2 Sustain (see page 32)
Amp EG 1/2 Sustain (see page 39)
Filter A/B, 1/2 Resonance (see page 27)
Filter EG 1/2 Release (see page 32)
Amp EG 1/2 Release (see page 39)
EG Times:
Filter EG 1/2 Attack (see page 32)
Amp EG 1/2 Attack (see page 39)
Amp EG 1/2 Time Modulation: Attack (see page 39)
EG Levels:
Amp EG 1/2 Level Start (see page 38)
Amp EG 1/2 Level Attack (see page 38)
Amp EG 1/2 Level Modulation: Start (see page 40)
Filter A/B, 1/2 Frequency (see page 27)
Filter EG 1/2 Decay (see page 32)
Filter EG 1/2 Slope (see page 32)
Amp EG 1/2 Decay (see page 39)
Amp EG 1/2 Slope (see page 39)
LFO 1 Frequency (see page 42)
Pitch LFO1 Intensity (see page 22)
LFO 1 Delay (see page 43)
Filter EG 1/2 Intensity to A (see page 30)
Filter EG 1/2 Intensity to B (see page 30)
MIDI applications
MIDI applications
About MIDI
MIDI stands for Musical Instrument Digital Interface, and is a world ‐ wide standard for exchanging various types of musical data between electronic musical instruments and computers. When MIDI cables are used to connect two or more MIDI devices, performance data can be exchanged between the devices, even if they were made by different manufacturers.
Settings when connected to a
MIDI device or computer
Here we will explain the settings you’ll make on the
KROME when connecting it to another device.
The “Convert Position” setting
The KROME’s settings
Key Transpose
,
Velocity Curve
, and
After Touch Curve (MIDI IN)
(Global 0–1a) respectively allow you to adjust the transposition, velocity sensitivity, and aftertouch (received only from the internal sequencer or from MIDI IN) sensitivity.
The aftertouch curve is applied only to data received from the internal sequencer or from MIDI IN. The
After
Touch Curve (MIDI IN)
setting does nothing if
Convert Position
(Global 1–1a) is Pre ‐ MIDI.
The effect that these settings will have on the internal sequencer and on the MIDI data that is transmitted and received will depend on
Convert Position
(Global 1–1a) setting.
• If you want to control an external MIDI tone generator from the KROME, set
Convert Position
to PreMIDI. The various settings listed above will be reflected in the MIDI data that is transmitted. These settings will also be reflected in the data that is recorded on the internal sequencer.
Incoming MIDI data will be handled with settings equiv ‐ alent to
Key Transpose
0,
Velocity Curve
4, and
After
Touch Curve
3.
• When controlling the KROME’s tone generator from an external MIDI device, select PostMIDI. The above ‐ listed settings will affect the MIDI data that is received. These settings will also affect the data that is played back from the internal sequencer.
Outgoing MIDI data will be handled with settings equiv ‐ alent to
Key Transpose
0, and
Velocity Curve
4.
Local Control On settings
If you’ve connected the KROME to a computer or external
MIDI sequencer and want to use the “echo ‐ back” from that device to play the KROME, turn echo ‐ back on for your external MIDI sequencer or computer (so that the data it receives at MIDI IN will be retransmitted from MIDI OUT), and turn off the KROME’s local control setting (so that the
KROME’s keyboard section and sound generator will be internally disconnected).
When you play the keyboard of the KROME, the musical data will be transmitted to the external MIDI sequencer or computer, and then echoed back to play the KROME’s tone generator. In other words, by turning Local Control OFF, you can prevent notes from being sounded in duplicate, as would otherwise occur if a note were sounded by the
KROME’s own keyboard and again by the data that was echoed ‐ back.
If the arpeggiator function is on, playing the KROME’s keyboard will not cause the arpeggiator to operate, and only the musical data produced by playing the keyboard will be transmitted. The arpeggiator will operate only in response to the notes that are echoed ‐ back and received at MIDI IN.
In this way, turning off Local Control prevents the arpeggiator from operating in duplicate.
Use this setting when you wish to record on the external
MIDI sequencer or computer only the notes that trigger the arpeggiator, and to use the echoed ‐ back notes to operate the arpeggiator while monitoring your recording or during playback.
Note:
If you want the note data produced by the arpeggiator to be recorded on the external sequencer/computer, set Local
Control on, and turn off the Echo Back setting of the external sequencer/computer.
To turn off Local Control, press the
Local Control On
(Global 1–1a) check box to uncheck it.
When using the KROME by itself, leave Local Control turned on. (If this is off when the KROME is used by itself, playing the keyboard will not produce sound.)
359
Appendices
Messages transmitted and received by the KROME
In the text below, […] indicates hexadecimal notation.
360
MIDI channels
MIDI messages can be exchanged when the transmitting and receiving devices are set to the same MIDI channel.
MIDI uses sixteen channels, numbered 1–16. The way in which channels are handled will differ depending on the mode.
Program mode
• Other than transmission for the Drum Track function, all data is transmitted and received on the global MIDI channel.
The global MIDI channel is the basic channel that the
KROME uses for MIDI transmission/reception, and is set by
MIDI Channel
(Global 1–1a).
• The Drum Track function in Program mode will transmit and receive on the following MIDI channels.
Receive:
Global MIDI channel.
Transmit:
The MIDI channel specified by the Drum Track
Prog MIDI Out
(Global 1–1a) setting (default: channel
10).
Note:
Transmission is enabled if Drum Track
Prog MIDI
Out
(Global 1–1a) is checked. By default, this is off
(unchecked).
Combination mode
• The global MIDI channel is used to transmit/ receive messages for selecting a combination and turning effects on/off, and to transmit/receive exclusive data.
• Each timbre will transmit/receive MIDI data on the
MIDI
Channel
(Combi 3–1(2)c) that is specified for that timbre.
• The Drum Track function will transmit and receive on the following MIDI channels.
Receive:
Global MIDI channel. The KROME’s keyboard will control triggering.
Transmit:
The MIDI channel specified by the Drum Pat ‐ tern
Output
(Combi 7–6a) setting of each combination.
Set this to match the MIDI channel of a timbre to which a drum program is assigned.
• The
Ch
MIDI channel specified for each effect (Combi 8–
4a, 9–2a) is used to control dynamic modulation of the insert/master/total effect, the pan following the insert effect, and send 1 and 2.
• When you operate the keyboard or controllers of the
KROME, messages will be transmitted on the global MIDI channel, and will also be transmitted on the MIDI channel of any timbre whose
Status
(Combi 2–1a) is set to EXT or
EX2.
• Channel messages will be received if they match the MIDI channel of a timbre whose
Status
is set to INT (Combi 3–
1(2)c).
Sequencer mode
• The global MIDI channel is used to transmit/ receive exclusive data and for messages that switch effects on/off.
• MIDI data transmission/reception for each MIDI track will occur on the MIDI channel specified for each MIDI track by
MIDI Channel
(Seq 3–1(2)c).
• The Drum Track function will transmit and receive on the following MIDI channels.
Receive:
The MIDI channel specified by the Drum Pat ‐ tern
Input
(Seq 1–1a) setting of each song. You will nor ‐ mally set this to Tch and use the KROME’s keyboard to control triggering.
Transmit:
The MIDI channel specified by the Drum Pat ‐ tern
Output
(Seq 1–1a) setting of each song. Set this to match the MIDI channel of the MIDI track to which a drum pattern is assigned.
• The MIDI channel specified for each effect by the
Ch
parameter (Seq 8–4a, 9–2a) is used to control dynamic modulation of the insert/master/total effect, the pan following the insert effect, and send 1 and 2.
• When you operate the keyboard or controllers of the
KROME, messages will be transmitted on the MIDI channel selected by
Track Select
(Seq 0–1(2)a). However, messages will be transmitted only if the selected MIDI track has a
Status
of BTH, EXT, or EX2. For more information, please see “Track Select” on page 110.
• When the sequencer is played back, musical data of MIDI tracks whose
Status
is BTH, EXT, or EX2 will be transmitted on the specified MIDI channels.
• MIDI tracks whose
Status
is INT or BTH will receive channel messages of the matching MIDI channel. For
more information, please see “Status” on page 125, and
“MIDI Channel” on page 125.
Note on/off
Note-on [9n, kk, vv]
Note-off [8n, kk, vv]
(n: channel, kk: note number, vv: velocity)
When you play a note on the KROME’s keyboard, it will transmit note ‐ on/off messages.
When the arpeggiator is running, note ‐ on/off messages generated by the arpeggiator are transmitted. If Local is Off, note ‐ on/off messages generated by the arpeggiator will not be transmitted. (See “Local Control On settings” on page 359)
If the Drum Track
Prog MIDI Out
setting (Global 1–1a) is checked, the drum track pattern will transmit note ‐ on/off messages while the drum track function is operating.
However, most instruments do not receive or transmit note ‐ off velocity, and neither does the KROME.
Program Change/Bank Select
Changing the program/bank
Program change [Cn, pp]
(n: channel, pp: program number that allows 128 sounds to be selected)
• Programs 000–127 in banks A–E correspond to program changes [Cn, 00]–[Cn, 7F].
• Programs 001–128 in banks GM, g(1), g(2), g(3), g(4), g(5), g(6), g(7), g(8), g(9), and g(d) correspond to program changes [Cn, 00]–[Cn, 7F].
Bank select MSB (CC#0) [Bn, 00, mm]
Bank select LSB (CC#32) [Bn, 20, bb]
(n: channel, mm: bank number upper byte, bb: bank number lower byte)
• The internal banks that correspond to each bank select number will depend on the
Bank Map
setting (Global 0–
2a). KORG is the default setting. For more information, please see “Bank Map” on page 196.
Simply receiving a Bank Select message will not cause the program or bank to change. The program or bank will
MIDI applications
actually change when a Program Change message is received.
Program mode
• In Prog P0: Play, these messages will transmit and receive program change and bank select operations. They will not be received in P1–P9.
Note:
Drum track programs do not support transmission or reception of program change or bank select messages.
Combination, Sequencer modes
• Program change and bank select messages can be received on the MIDI channel specified for each timbre/
MIDI track to select programs on that timbre/track.
• When you select a combination, program change and bank select messages will be transmitted by timbres whose
Status
is EXT or EX2.
In Sequencer mode, program change or bank select mes ‐ sages will be transmitted by tracks whose
Status
is BTH,
EXT, or EX2 when you select the
Program Select
parame ‐ ter (0–1(2)b), when you select a song, or when you return
to the beginning of a measure. For more information, please see “Program Select” on page 112.
• In Combination and Sequencer modes, transmission/ reception can be switched on/off for each timbre/track.
See “Enable Program Change” on page 87, and Global P1:
MIDI “Track MIDI Out” on page 200.
Selecting combinations
You can use program change and bank select messages to select combinations in the same way that you select programs.
• Combinations 000–127 in banks A–D correspond to program changes [Cn, 00]–[Cn, 7F].
• Similarly as for program banks, the internal banks that correspond to each bank select number will depend on the
Bank Map
setting (Global 0–2a). For more information, please see “Bank Map” on page 196.
• In Combi P0: Play, program change and bank select messages are transmitted/received on the global MIDI channel. They are not received in P1– P9.
Note:
All program changes can be turned off in
MIDI Filter
(Global 1–2b)
As needed, you can independently turn all program changes on/off, specify whether or not incoming messages will be able to change combinations, and turn reception/ transmission of bank select messages on/off.
• If
Combination Change
(Global 1–2b) is unchecked, the combination will not change even if a program change on the global MIDI channel is received in Combi P0: Play. In this case, the program of the timbre that matches the
MIDI channel of the received message will change.
• If
Bank Change
(Global 1–2b) is unchecked, bank select messages will not be transmitted or received.
Aftertouch
Channel aftertouch [Dn, vv]
(n: channel, vv: value)
When this message is received, the aftertouch effect will be applied. The assigned alternate modulation or dynamic modulation effect will also be applied.
The keyboard of the KROME itself cannot transmit aftertouch. Aftertouch can be received only from the internal sequencer or from MIDI IN.
• Aftertouch reception for the entire instrument can be turned on/off in
Enable After Touch
(Global 1–2b).
• In Combination and Sequencer modes, aftertouch can be turned on/off independently for each timbre/track
(
Enable After Touch
Combi/Seq 5–1(2)c).
Polyphonic aftertouch [An, kk, vv]
(n: channel, kk: note number, vv: value)
There is another type of aftertouch called Polyphonic Key
Pressure, which allows aftertouch to be applied independently for individual keys. This message can be used as an alternate modulation source, but cannot be transmitted by the KROME’s keyboard. In order to use this message, it will have to be received from an external device, or recorded on your sequencer.
The aftertouch mentioned in this manual refers to Channel
After Touch.
Pitch bend
Pitch bend change [En, bb, mm]
(n: channel, bb: lower byte of the value, mm: upper byte of the value, together expressing a value of 16,384 steps where
8,192 [bb, mm = 00H, 40H] is the center value)
When the KROME’s joystick is moved in the X axis (left/ right), a pitch bend effect will be applied, and pitch bender messages will also be transmitted. When these messages are received, a pitch bend effect will be applied.
The range of pitch change that is produced by pitch bend messages can also be adjusted via MIDI. (See “Changing the pitch bend range” on page 365)
Control change
[Bn, cc, vv]
Transmitted and received as (n: channel, cc: control change no., vv: value)
For more information, please see “MIDI transmission when the KROME’s controllers are operated” on page 354, and
“KROME and MIDI CCs” on page 356.
• Control changes can be turned on/off as a whole in
Enable Control Change
(Global 1–2b).
• In Combination and Sequencer modes, the P3: MIDI
Filter1 settings allow transmission/reception of control changes to be individually turned on/off for each timbre/ track. For the assignable controllers (SW1, SW2, Realtime
Controls Knob USER1 – USER4, and Foot Pedal/Switch),
MIDI filter settings will apply to the control change number to which each controller is assigned.
Other
Control Change
applies to control changes that are not covered by the items of the other check boxes.
Note:
You can select MIDI CC#00–CC#119 for knobs 1–4 when the Realtime Controls USER is selected.
Although you can select MIDI CC#00–CC#119 for the ARP
Controllers, you will normally use the default settings that are assigned when you execute the menu command
Reset
Controller MIDI Assign
with Default Setting, ARP
Controllers
SW – ARP ON/OFF
at CC#014,
KNOB1 – ARP
GATE
at CC#022,
KNOB2 – ARP VELOCITY
at CC#023,
KNOB3 – ARP SWING
at CC#024,
KNOB4 – ARP STEP
at
CC#025.
Selecting program/combination banks
Bank select (CC#00, CC#32)
Technically, Bank Select is a controller. In practice, however, it is a component of Program Change. For more information, please see “Program Change/Bank Select” on page 360)
361
Appendices
Using the joystick to apply modulation
Modulation 1 depth (CC#01) [Bn, 01, vv]
When you move the KROME’s joystick in the +Y direction
(Vertical upward), Modulation 1 Depth messages will be transmitted. When these messages are received, the same effect will be applied as when the KROME’s joystick is operated. Normally this will apply a vibrato effect (pitch
LFO).
• In Combination and Sequencer modes, transmission/ reception can be turned on/off for each timbre/track
(
Enable JS+Y
Combi/Seq 5–3(4)c).
Modulation 2 depth (CC#02) [Bn, 02, vv]
When you move the KROME’s joystick in the –Y direction
(Vertical downward), Modulation 2 Depth messages will be transmitted. When these messages are received, the same effect will be applied as when the KROME’s joystick is operated. Normally this will apply a wah effect (filter LFO).
• In Combination and Sequencer modes, transmission/ reception can be turned on/off for each timbre/track
(
Enable JS–Y
Combi/Seq 5–3(4)c).
Other manufacturers use this message for other purposes
(e.g., breath controller, etc.)
Controlling portamento
Portamento time (CC#05) [Bn, 05, vv]
If you assign the above CC# to an Assignable Pedal or knobs
1–4 when the Realtime Controls USER is selected, rotating that knob will transmit Portamento Time messages, and will modify the speed at which the portamento pitch changes.
When this message is received, the result will be the same as when the controller is operated.
Portamento switch (CC#65) [Bn, 41, vv]
When the above CC# is assigned to SW1, SW2 or the
Assignable Switch, operating that switch will transmit vv=127 [7F] for ON or vv=0 [00] for OFF, and the portamento effect will be switched on/off. When this message is received, the result will be the same as when the controller is operated. (vv of 63 [3F] or less will be OFF, and 64 [40] or
greater will be ON.) (See “SW1/2 Assignments” on page 348)
• In Combination and Sequencer modes, transmission/ reception of this message can be turned on/off independently for each timbre/track (
Enable Portamento
SW
Combi 5–1(2)c/Seq 3–1a).
• In Sequencer mode, portamento time/switch messages will be transmitted by each track whose
Status
is BTH,
EXT, or EX2 when you set
Portamento
(Seq 3–3(4)c), re ‐ select a song or SMF, or return to the beginning of a
measure. For more information, please see “Portamento” on page 126.
362
Controlling volume
Volume (CC#07) [Bn, 07, vv]
When the above CC# is assigned to the Assignable Pedal or knobs 1–4 when the Realtime Controls USER is selected, operating that controller will transmit Volume messages, and the volume will change. When this message is received, the result will be the same as when the controller is operated.
Expression (CC#11) [Bn, 0B, vv]
When the above CC# is assigned to the Assignable Pedal or knobs 1–4 when the Realtime Controls USER is selected, operating that controller will transmit Expression messages, and the volume will change. When this message is received, the result will be the same as when the controller is operated.
The volume of the KROME is determined by multiplying the value of the Volume message with the value of the
Expression message.
If adjusting the Volume message does not increase the volume as you expect, or if there is no sound, transmit MIDI messages from an external device to reset the value of the
Expression message (set vv to 127).
Note:
In Sequencer mode, this will be reset when the
Location
of the song is moved to 001:01.000.
• In Combination mode, Volume messages will be transmitted by each timbre whose
Status
is EXT or EX2 when you re ‐ select the combination.
• When you change the
Volume
setting (Seq 0–3(4)b) in
Sequencer mode, or when you re ‐ select the song or return to the beginning of the song in Sequencer mode, volume messages will be transmitted by each track whose
Status
is BTH, EXT, or EX2. See Global P1: MIDI “Track MIDI
Out” on page 200.
Note:
Regardless of the
Status
settings, re ‐ selecting a song, or returning to the beginning will reset the internal Volume value to the value specified by each track (the starting settings), and will reset the Expression value to the maximum.
Note:
This message can be used to control the volume of each MIDI track. Normally, you will include a Volume message in the MIDI track setting data (the settings at the beginning of the track) to set the initial volume, and use
Expression to create changes in dynamics as the song progresses.
By using the universal exclusive Master Volume message, you can adjust the overall volume without changing the
volume balance between timbres or tracks. (“About system exclusive messages” on page 365)
Controlling pan (stereo position)
Pan (CC#10) [Bn, 0A, vv]
(vv: value, where 00 is far left, 64 is center, and 127 is far right)
When the above CC# is assigned to the Assignable Pedal or knobs 1–4 when the Realtime Controls USER is selected, operating that controller will transmit Pan messages, and the panning will change. When this message is received, the result will be the same as when the controller is operated.
• When you set the
Pan
(Seq 0–3(4)b) in Sequencer mode, or when you re ‐ select the song or return to the beginning of the measure in Sequencer mode, Panpot messages (except for RND) will be transmitted by each track whose
Status
is BTH, EXT, or EX2. See “Pan” on page 113, Global P1:
MIDI “Track MIDI Out” on page 200.
Post insert effect pan (CC#08) [Bn, 08, vv]
(vv: value, where 00 is far left, 64 is center, and 127 is far right)
When the above CC# is assigned to the Assignable Pedal or knobs 1–4 when the Realtime Controls USER is selected, operating that controller will transmit Post Insert Effect
Panpot messages, and the panning of the sound following the insert effect will change. When this message is received, the result will be the same as when the controller is operated.
• In Program mode, this message is transmitted/received on the global MIDI channel. In Combination, and Sequencer modes, this message is transmitted/received on the MIDI channel specified for each insert effect.
• When you set
Pan: #8
(Seq 8–3b) in Sequencer mode, or when you re ‐ select the song or return to the beginning of the measure in Sequencer mode, Post Insert Effect Panpot
MIDI applications
messages will be transmitted by each track whose
Status
is BTH, EXT, or EX2. For more information, please see “8–
3b: Insert Effect” on page 149.
Controlling effects
Effect control 1 (CC#12) [Bn, 0C, vv]
Effect control 2 (CC#13) [Bn, 0D, vv]
When the above CC# is assigned to the Assignable Pedal or knobs 1–4 when the Realtime Controls USER is selected, operating that controller will transmit Effect Control 1/2 messages, and the specified dynamic modulation will be controlled. When this message is received, the result will be the same as when the controller is operated.
Although various types of control change can be selected as dynamic modulation sources, Effect Control 1 (CC#12) and 2
(CC#13) are dedicated for dynamic modulation.
Effect 1 depth (Send 2) (CC#91) [Bn, 5B, vv]
Effect 3 depth (Send 1) (CC#93) [Bn, 5D, vv]
When the above CC# is assigned to the Assignable Pedal or
Realtime Controls knobs 1–4, operating that controller will transmit Effect 1 Depth (Send 2) or Effect 3 Depth (Send 1) messages, and the send level 1 or 2 to the master effects
MFX1 or MFX2 will be controlled respectively. When this message is received, the result will be the same as when the controller is operated.
On the corresponding MIDI channels, this will simultaneously control the timbre/track setting as well as the setting following the Insert Effect.
• In Combination, and Sequencer modes, the actual send level of the timbre/track is determined by multiplying this value with the send 1/2 settings for each oscillator (Prog
8–1d). (See “Send 1 (MFX1),” “Send 2 (MFX2)” on
page 96, Global P1: MIDI “Track MIDI Out” on page 200)
• When you adjust
Send 1 (MFX1)
or
Send 2 (MFX2)
(Sequencer 8–1b) in Sequencer mode, or when you re ‐ select a song or return to the beginning of the measure in
Sequencer mode, Send 1/2 will be transmitted by each track whose
Status
is BTH, EXT, or EX2. (See “Send1
(MFX1)” on page 148).
Effect 2 depth (IFX1–5 on/off) (CC#92) [Bn, 5C, vv]
Effect 4 depth (MFX1, 2 on/off) (CC#94) [Bn, 5E, vv]
Effect 5 depth (TFX on/off) (CC#95) [Bn, 5F, vv]
Separately from the effect on/off settings in each mode,
Effect Global SW
(Global 0–1b) allows you to turn off insert effects IFX1–5 and master effects MFX1, 2 and total effect
TFX. Master effects MFX1/2 and the total effect TFX can also be turned off using the front panel MASTER FX button and
TOTAL FX button.
If you uncheck
Enable IFX1–5
,
Enable MFX1&2
or
Enable
TFX
, the corresponding message will be transmitted with vv=0 [00]. If you check these settings, the corresponding message will be transmitted with vv=127 [7F]. If you uncheck these settings, the corresponding effect(s) will be turned off as a group. If you check these settings, the on/off settings of each mode will be used. The same applies to reception. (vv of 00 is off, and 01 or greater is the original setting.) These messages are transmitted/received on the global MIDI channel. (“IFX 1–5 on/off” ‐ “MFX 1, 2 on/off” ‐
“TFX on/off” on page 59, page 61)
Note:
These messages are defined simply for use in adjusting the effect levels, and may not have the same function on another instrument connected to the KROME.
Using various controllers
Here we will explain typical ways to use the various controllers. You can choose from MIDI CC#00–CC#119 for knobs 1–4 when the Realtime Controls USER is selected.
Foot controller (CC#04) [Bn, 04, vv]
If the above CC# is assigned as the Assignable Pedal function, this message will be transmitted when the controller is operated.
• In Combination and Sequencer modes, transmission/ reception of this message can be turned on/off independently for each timbre/track (
Enable Foot Pedal/
Switch
Combi/Seq 5–1(2)c).
Controller (CC#18) [Bn, 12, vv]
This message will be transmitted when the KROME’s
VALUE dial is operated.
This is valid in
Program Select
(Prog 0–1a) and
Combination Select
(Combi 0–1(2)a) when the program or combination number/name is selected (highlighted).
Knob modulation USER [1], USER [2], USER [3], USER [4]
(CC#17, 19, 20, 21)
[Bn, 11, vv], [Bn, 13, vv], [Bn, 14, vv], [Bn, 15, vv]
If the above CC# are assigned to the knobs 1–4 when the
Realtime Controls USER mode is selected, these messages will be transmitted when the knobs are operated.
• In Combination and Sequencer modes, transmission/ reception of this message can be turned on/off independently for each timbre/track (
Enable Realtime
Controls Knob UER [1], USER [2], USER [3], USER [4]
Combi 5–7(8)c/Seq 5–7(8)c).
Controller (CC#83) [Bn, 53, vv]
If you assign the above CC# to a knobs 1–4 when the
Realtime Controls USER mode is selected, this message will be transmitted when you operate the corresponding controller of the KROME.
Damper pedal (CC#64) [Bn, 40, vv]
This message is transmitted when you operate a damper pedal (optional DS ‐ 1H) connected to the DAMPER jack, and the damper effect will be turned on/off. If the DS ‐ 1H is used, a half ‐ damper effect can be applied.
• In Combination and Sequencer modes, transmission/ reception of this message can be turned on/off independently for each timbre/track (
Enable Damper
Combi/Seq 5–1(2)c).
SW1 modulation (CC#80) [Bn, 50, vv]
SW2 modulation (CC#81) [Bn, 51, vv]
If the above CC# are assigned as the function of SW1 or
SW2, operating the switch will transmit this message with vv=127 [7F] for ON, and vv=00 [00] for OFF.
• In Combination and Sequencer modes, transmission/ reception of these messages can be turned on/off independently for each timbre/track (
Enable SW1
,
Enable
SW2
Combi/Seq 5–9(10)c)
Foot switch (CC#82) [Bn, 52, vv]
If the above CC# is assigned as the function of the
ASSIGNABLE SWITCH, operating the switch will transmit this message with vv=127 [7F] for ON, and vv=00 [00] for
OFF.
• In Combination and Sequencer modes, transmission/ reception of this message can be turned on/off independently for each timbre/track (“Enable Foot
Switch” Combi/Seq 5–9(10)c).
Sostenuto (CC#66) [Bn, 42, vv]
If the above CC# is assigned as the function of the
ASSIGNABLE SWITCH, operating the switch will transmit this message with vv=127 [7F] for ON, and vv=00 [00] for
363
Appendices
OFF, and the sostenuto effect will be turned on/off. When this message is received, the result will be the same as when the controller is operated (OFF for vv=63 [3F] or below, and
ON for vv=64 [40] or above).
Soft pedal (CC#67) [Bn, 43, vv]
If the above CC# is assigned as the function of the
ASSIGNABLE SWITCH, operating the switch will transmit, and the soft pedal effect will be turned on. When this message is received, the result will be the same as when the controller is operated.
When “Foot controller (CC#04)”–“Soft pedal (CC#67)” are operated on the KROME, the specified alternate modulation or dynamic modulation etc. will be controlled. When these messages are received, the result will be the same as if the controller had been operated. For “SW1 modulation
(CC#80)”–“Soft pedal (CC#67),” vv of 63 [3F] or less will be
OFF, and 64 [3F] or greater will be ON.
Controlling via the controllers of a connected
MIDI instrument such as the KRONOS
Ribbon Controller (CC#16) [Bn, 10, vv]
When a control change is received from the ribbon controller or other assigned controller of a MIDI instrument
(such as the KRONOS), the specified effect (e.g., alternate modulation or dynamic modulation) will be applied.
• In Combination or Sequencer modes, transmission and reception can be turned on/off for each timbre/track.
(“Enable Ribbon CC#16” on page 88, page 134)
Controller (CC#85, CC#86, CC#87, CC#88)
[Bn, 12, vv], [Bn, 13, vv], [Bn, 14, vv], [Bn, 15, vv]
When the VALUE dial of MIDI instruments such as the
KRONOS, or a control change assigned to a controller is received, the specified alternate modulation or dynamic modulation effect will be applied.
364
Controlling Program tone & envelope shapes
CC#70–79 control specific parameters of a program.
For details on the program parameters that correspond to each control change, and how the KROME will respond in
each mode when these are received, refer to “KROME and
MIDI CCs” on page 356.
Filter cutoff (CC#74) [Bn, 4A, vv]
Resonance level (CC#71) [Bn, 47, vv]
Filter EG intensity (CC#79) [Bn, 4F, vv]
Release time (CC#72) [Bn, 48, vv]
These messages are transmitted when you operate the
Realtime Controls TONE [1] – [4] knobs. (They can also be set as Realtime Controls USER [1] – [4] knobs functions.)
Sustain level (CC#70) [Bn, 46, vv]
Attack time (CC#73) [Bn, 49, vv]
Decay time (CC#75) [Bn, 4B, vv]
LFO 1 speed (CC#76) [Bn, 4C, vv]
LFO 1 depth (pitch) (CC#77) [Bn, 4D, vv]
LFO 1 delay (CC#78) [Bn, 4E, vv]
These messages are transmitted when assign the above CC# to the Realtime Controls USER [1] – [4] knobs function.
When you operate these, the corresponding program parameters will be controlled, and the sound and envelope will change. When these messages are received, the result will be the same as when the controller is operated. (When the message has a value vv=64 [40], the setting will have the value that was set by the program parameter.)
• In Combination and Sequencer modes, transmission/ reception can be turned on/off independently for each timbre/track (
Enable Realtime Controls–
CUTOFF…RELEASE, USER [1]…USER [4]
Combi/Seq 5–
5 (6/7/8)).
Note:
In Program mode, the corresponding program parameters will be temporarily edited by these messages.
You can Write the program to save the modified state
(except for certain parameters). The Write operation can also be performed by a MIDI System Exclusive Program Write
Request message, in addition to the usual method of using the KROME’s buttons. When you write the data, the values of the corresponding program parameters will be rewritten.
Note:
The results of receiving these messages will depend on the instrument. The operation may be different when a device other than the KROME is connected.
Control the arpeggiator
If you assign the following CC#s to knob and switch of arpeggiator, the specified CC# will be transmitted when you operate the KROME, and the KROME itself will be controlled simultaneously. When these messages are received, the result will be the same as if you operated the
KROME itself.
The CC# settings for the knobs and buttons are made in the
Global P2– MIDI CC# Assign page. However, you can edit these settings if you need to assign MIDI control change messages to the controllers, such as when you want to record the Realtime Controls ARP knob, ARP button operations on the internal sequencer or an external MIDI sequencer, or to control the arpeggiator from an external
MIDI device. If Global P1: MIDI
ARP Controllers MIDI Out
is set to Control Change, MIDI control change messages will
be transmitted. (See “ARP Controllers MIDI Out” on page 200)
Each knob and button can be assigned any MIDI control change CC#00–CC#119, or a desired MIDI note number.
However, you will normally use the default settings that are assigned when you execute the menu command
Reset
Controller MIDI Assign
with CC Default. For more
information, please see “Reset Controller MIDI Assign” on page 220.
The operations described below are for these CC Default settings. Transmitted when the corresponding KROME controller is transmitted. When this is received, the same effect will apply as when the KROME’s controller is operated.
ARP ON/OFF (CC#14) [Bn, 0E, vv]
Corresponds to the ARP button. It will transmit vv=127[7F] when On, and vv=000[7F] when Off.
KNOB1 – ARP GATE (CC#22) [Bn, 16, vv]
KNOB2 – ARP VELOCITY (CC#23) [Bn, 17, vv]
KNOB3 – ARP LENGTH (CC#24) [Bn, 18, vv]
KNOB4 – ARP STEP (CC#25) [Bn, 19, vv]
Corresponds to knobs 1–4 when the Realtime Controls is set to ARP.
Silencing all notes on a specific channel
All note off (CC#123) [Bn, 7B, 00] (value 00)
When this is received, all currently ‐ sounding notes on that channel will be turned off (as though the keys had been released). However, the release portion of the notes will remain.
All sound off (CC#120) [Bn, 78, 00] (value 00)
When this is received, all currently ‐ sounding notes on that channel will be silenced. While the All Note Off message allows the release portion of the notes to remain, the All
Sound Off message will silence the notes immediately.
However, these messages are provided for emergency use, and are not something that you will use while performing.
MIDI applications
Resetting all controllers on a specific channel
Reset all controllers (CC#121) [Bn, 79, 00] (value 00)
When this is received, the value of all controllers on that channel will be reset.
Using RPN (Registered Parameter
Numbers)
RPN (Registered Parameter Numbers) are a type of message that allow settings to be made in a way that is common between instrument manufacturers. (NRPN (Non ‐ registered
Parameter Numbers) and exclusive messages can be freely used in non ‐ compatible ways by different manufacturers and models of instrument.)
RPN messages can be used for editing with the following procedure.
1. Use RPN MSB (CC#101) [Bn, 65, mm] and RPN LSB
(CC#100) [Bn, 64, rr] (n: channel, mm, rr: upper and lower bytes of the parameter number) messages to select the parameter.
2. Use data entry MSB (CC#6) [Bn, 06, mm] and data entry
LSB (CC#38) [Bn, 26, vv] (n: channel, mm, vv: upper and lower bytes of the value, together expressing 16,384 levels) to specify the value.
3. You can use data increment (CC#96) [Bn, 60, 00] or data decrement (CC#97) [Bn, 61, 00] (n: channel, value is fixed at 00) to change the value in steps of one.
The KROME can receive the following three RPN messages
(tuning, transpose, and pitch bend range).
Tuning
RPN fine tune [Bn, 65, 00, 64, 01]
This RPN message can be used to adjust the detuning for a program or timbre (in Combination mode), or for a track (in
Sequencer mode).
The procedure is as follows.
1. [Bn, 65, 00, 64, 01]: Select RPN parameter 01.
2. [Bn, 06, mm, 26, vv]: Use data entry to set the value. A value of 8192 [mm, vv=40, 00] is center, 0 [mm, vv=00,
00] is –100 cents, and 16383 [mm, vv=7F, 7F] is +99 cents.
Note:
You can use the universal exclusive Fine Tune message to adjust the overall tuning that corresponds to the
Master Tune
(Global P0: 0–1a) parameter. (See “About system exclusive messages” on page 365)
Transposing
RPN coarse tune [Bn, 65, 00, 64, 02]
This RPN message can be used to adjust the transposition for a program or timbre (in Combination mode), or for a track (in Sequencer mode).
The procedure is as follows.
1. [Bn, 65, 00, 64, 02]: Select RPN parameter 02.
2. [Bn, 06, mm, 26, vv]: Use data entry to set the value.
Normally only the upper byte is used.
A value of 8192 [mm, vv=40, 00] is center, 6656 [mm, vv=34,
00] is –12 semitones, and 9728 [mm, vv=4C, 00] is +12 semitones.
Note:
You can use the universal exclusive Coarse Tune message to adjust the overall tuning that corresponds to the
Key Transpose
(Global P0: 0–1a) parameter. (See “About system exclusive messages” on page 365)
Changing the pitch bend range
RPN pitch bend range [Bn, 64, 00, 65, 00]
This RPN message can be used to adjust the pitch bend range for a program or timbre (in Combination mode) or for a track (in Sequencer mode).
The procedure is as follows.
1. [Bn, 65, 00, 64, 00]: Select RPN parameter 00.
2. [Bn, 06, mm, 26, vv]: Use data entry to set the value.
Normally only the upper byte is used.
A value of 0 [mm, vv=00, 00] is +00, and a value of 1536 [mm, vv=0C, 00] is +12 (one octave). Although it is possible to set a negative value for a timbre/track, only positive values can be set using RPN messages.
About system exclusive messages
Since the way in which these messages are used is left up to each manufacturer, they are mainly used to transmit and receive sound data and editing data for parameters that are unique to a particular instrument. The KROME’s system exclusive message format is [F0, 42, 3n, 00, 01, 15, ff, …. F7]
F0:
exclusive status
42:
Korg ID
3n:
[n=0–F] global MIDI channel 1–16
mm:
Model ID byte 1 (00)
mm:
Model ID bytes 2 (01)
mm:
Model ID bytes 3 (15)
ff:
function ID (type of message)
:
:
F7:
end of exclusive
Note:
To obtain a copy of the “MIDI Implementation” which includes MIDI System Exclusive format information, please contact your Korg distributor.
Universal system exclusive
Certain of the system exclusive messages are publicly defined for a specific use, and these are called universal system exclusive messages.
The KROME uses the following six universal system exclusive messages.
Inquiry message request [F0, 7E, nn, 06, 01, F7]
Inquiry message [F0, 7E, nn, 06, 02, (nine bytes), F7]
When an inquiry message request is received, the KROME will respond by transmitting an inquiry message that means
“I am a Korg KROME, with system version …”
GM system on [F0, 7E, nn, 09, 01, F7]
When this message is received in Sequencer mode, the
KROME will be initialized for GM playback.
Master volume [F0, 7F, nn, 04, 01, vv, mm, F7]
(vv: lower byte of the value, mm: upper byte of the value, together indicating 16384 steps)
This message is transmitted if you assign Master Volume as the function of the Assignable Pedal or as a Realtime
Controls USER 1 – 4 knobs. This will adjust the overall volume balance without changing the relative volume balance between timbres/tracks. When this message is received, the result will be the same as when the controller is operated.
Master balance [F0, 7F, nn, 04, 02, vv, mm, F7]
(vv: lower byte of the value, mm: upper byte of the value, together indicating 16384 steps, where 8192 is the default
365
Appendices
366
position, and lower values will move the sound toward the left)
When this is received, the overall panning will be adjusted without changing the relative panning between timbres/ tracks.
Master fine tuning [F0, 7F, nn, 04, 03, vv, mm, F7]
(A value of 8192 [mm, vv=40, 00] is center, 4096 [mm, vv=20,
00] is –50 cents, and 12288 [mm, vv=60, 00] is +50 cents.)
When this is received, the
Master Tune
(Global P0: 0–1a) parameter will be set.
Master coarse tuning [F0, 7F, nn, 04, 04, vv, mm, F7]
(Normally only the upper byte mm is used. A value of 8192
[mm, vv=40, 00] is center, 6656 [mm, vv=34, 00] is –12 semitones, and 9728 [mm, vv=4C, 00] is +12 semitones.)
When this is received, the
Key Transpose
(Global 0–1a) parameter will be set.
Transmitting sound settings data (Data
Dump)
Data for programs, combinations, drum kits, user arpeggio pattern, global settings, and sequencer data can be transmitted as MIDI System Exclusive messages. The operation of sending this system exclusive data to an external device is called a “data dump.”
By performing a data dump, you can store the KROME’s sounds and settings on an external device, or rewrite the sounds and settings of another KROME.
There are the following two types of data dump.
• When you use the
Dump
(Global P1) menu command to dump data, various types of internal memory data will be transmitted. If this data is received by the KROME, the data will be written directly into internal memory, and it will not be necessary to perform the Write operation. (See
“Sending SysEx data dumps” on “Receiving SysEx data dumps” on page 219)
• If the
Enable Exclusive
(Global 1–2b) setting is checked, data will also be dumped in response to a Dump Request message. This data is transmitted and received on the global MIDI channel.
When the KROME receives this data, the data will be written into the edit buffer. If you want to save the data into internal memory, you’ll have to execute the Write operation. This can be done either by executing the Write operation (See “Writing to internal memory” on page 115 of the Operation guide) on the KROME itself, or by a
MIDI System Exclusive program write request, combina ‐ tion write request, drum kit write request, user arpeggio pattern write request or global setting write request.
Editing sounds via SysEx
By using various MIDI System Exclusive data dumps, you can rewrite all programs or an individual program. By using parameter change messages, you can edit individual parameters as follows.
Parameter changes
• In Program mode, all parameters other than the program name can be edited.
• In Combination mode, parameters other than the combination name can be edited.
• In Sequencer mode, you can edit the track parameters in
P0, 1, 2, 3, 4, and 5, and the P7: Arpeggiator/Drum Track,
P8: Insert Effect, and P9: Master/Total Effect parameters.
(See “System Exclusive events supported in Sequencer mode” on page 191)
Drum kit parameter change and user arpeggio pattern parameter change
In Global mode, you can edit drum kit and user arpeggio pattern.
Since the other global parameters or Sequencer mode musical data cannot be edited, you will use data dumps to transfer this data.
The global MIDI channel is used to transmit and receive this data.
First check the
Enable Exclusive
(Global 1–2b) setting to enable transmission and reception of exclusive data. When you switch modes on the KROME, a mode change will be transmitted. When you edit individual parameters, parameter change messages will be transmitted.
When these messages are received, the same editing operation will be performed as on the transmitted device.
Cautions regarding data dumps and sound editing
• After MIDI System Exclusive data has been received and processed, a Data Load Completed message will be transmitted. The control master device must not transmit the next message until this message is received (or until a sufficient interval of time has elapsed).
• When you change use parameter changes to edit, the changes will affect the data in the edit buffer and will not be stored in internal memory unless you Write, so that the changes will be lost if you re ‐ select the program or combination. The Write operation can be performed by a
MIDI System Exclusive Program Write Request or
Combination Write Request message, in addition to the usual method of using the KROME’s buttons. For more information, please see “Writing to internal memory” on page 113 of the Operation guide.
• There is no need to write a song, but it will not be backed ‐ up when you turn off the power. Important data that you want to keep must be saved to an SD card before you turn off the power. For more information, please see “Saving to SD card” on page 113 of the Operation guide.
If notes are “stuck”
If some problem causes “stuck” notes that continue sounding even though you are no longer playing on the keyboard or via MIDI, you can stop the sound by switching the KROME’s mode.
Playing the KROME multi-timbrally from an external device
The KROME can be connected to an external device and played multi ‐ timbrally in the following ways.
• MIDI messages from the external device can play a combination (16 ‐ part multi ‐ timbral performance). You can change the overall settings (programs, levels, and effects) by using program change messages to switch combinations.
• MIDI messages from the external device can be used to play a song (16 ‐ part multi ‐ timbral performance). Overall settings (programs, levels, effects etc.) can be changed by using a Song Select message to switch songs.
• MIDI Clock messages from the external device can be used to make the KROME playback a song (set
MIDI
Clock
to External MIDI, and run the KROME’s sequencer). (“Synchronizing the playback of the
Arpeggiator, Drum Track function or sequencer”) You can change the overall settings (programs, levels, effects) by using song select messages to switch songs.
MIDI applications
Note:
MIDI Clock
External USB will operate in the same way as External MIDI. With the Auto setting, an external
MIDI clock received at the MIDI IN connector or the USB B connector will automatically cause the KROME to switch to the same method of operation as External MIDI or External
USB.
Synchronizing the playback of the
Arpeggiator, Drum Track function or sequencer
The choice of whether the KROME will be the master (the controlling device) or the slave (the controlled device) is made by
MIDI Clock
(Global 1–1a).
Note:
When MIDI Clock is set to Auto, the KROME will normally operate in the same way as for the Internal setting.
When an external MIDI clock is received from the MIDI IN or USB connector, the KROME will automatically operate as for the External MIDI setting.
Using the KROME as master and the external MIDI device as slave
Connect the KROME’s MIDI OUT connector to the MIDI IN connector of the external MIDI device. Connect the
KROME’s USB B connector to your computer’s USB port.
• When you set
MIDI Clock
to Internal, the KROME will be the master device, and will transmit MIDI timing clock messages.
Arpeggiator and Drum Track function:
The tempo can be controlled from the KROME.
Performance data will be transmitted via MIDI. (Perfor ‐ mance data from the drum track will be transmitted in
Program mode if the Drum Track
Prog MIDI Ch
setting
(Global 1–1a) is checked. Performance data from the
Arpeggiator and the Drum Track function in Combina ‐ tion or Sequencer mode will be transmitted from timbres or MIDI tracks whose
Status
is BTH, EXT, or EX2.) An external tone generator connected to MIDI OUT or USB will sound, and the tempo of an external sequencer can be controlled.
Sequencer:
The musical data can be played back and controlled on the KROME.
Simultaneously, the sequencer playback will be transmit ‐ ted via MIDI from MIDI tracks whose
Status
is BTH,
EXT, or EX2. An external tone generator connected to
MIDI OUT or USB will sound, and the tempo of an exter ‐ nal sequencer can be controlled.
Using the external MIDI device as master and the
KROME as slave
Connect the KROME’s MIDI IN connector to the MIDI OUT connector of the external MIDI device. Connect the
KROME’s USB connector to your computer’s USB port.
• If you use the MIDI connectors to make connections, set
MIDI Clock
to External MIDI. If you use the USB connector to make connections, set it to External USB. The
KROME will be the slave.
Arpeggiator and Drum Track function:
The tempo will follow the MIDI timing clock. If you playback the exter ‐ nal sequencer, the KROME’s Arpeggiator or Drum Track function will synchronize to the external timing clock.
Even if
MIDI Clock
is External MIDI or External USB and the KROME is being controlled from the external device, the performance of the Arpeggiator or Drum
Track function will still be transmitted via MIDI. (Perfor ‐ mance data from the Drum Track will be transmitted in
Program mode if the Drum Track
Prog MIDI Out
setting
(Global 1–1a) is checked. Performance data from the arpeggiator and the drum track function in Combination or Sequencer mode will be transmitted from timbres or
MIDI tracks whose
Status
is BTH, EXT, or EX2.)
Sequencer:
The KROME will not be able to control the performance data; it will be controlled by the external
MIDI device connected to MIDI IN or the computer con ‐ nected to USB. If you wish to playback the external sequencer to make the KROME’s sequencer playback in synchronization to the external timing clock, you must first set the same time signature and starting measure locations on both devices.
Even if
MIDI Clock
is set to External MIDI or External
USB and the KROME is being controlled from an external device, musical data will be transmitted by tracks whose
Status
is BTH, EXT, or EX2.
Recording musical data from an external device
There are two ways in which you can play back an external sequencer and record its playback on the KROME.
• Set
MIDI Clock
(Global 1–1a) to Internal, begin recording, and then start the external sequencer. With this method, the MIDI messages will be recorded without the two devices being synchronized. Since the incoming musical data will simply be recorded, this method allows the performance to be reproduced faithfully, but since measure divisions etc. will not be kept track of, this method is not suitable if you intend to edit the data later.
• If you set
MIDI Clock
to External MIDI or External USB, the start of recording and the tempo etc. will all be under the control of the external sequencer.
Since the two devices will be synchronized during the recording process, measure divisions etc. will be accurately preserved. (You will need to set the time signature before recording.) For more information, please
see “Multi REC” on page 118.
Recording the MIDI output of the
KROME’s controllers, Arpeggiator, Drum
Track function and internal sequencer to an external sequencer/computer
If you wish to record the MIDI output of the KROME’s controllers, Arpeggiator, Drum Track function, and internal sequencer on an external sequencer or computer and use the
KROME as the monitoring and playback tone generator while you record, you must turn off the KROME’s Local
Control setting (
Local Control On
Global 1–1a), and set your external sequencer/computer for echo ‐ back (a function by which the data received at MIDI IN is retransmitted without change from MIDI OUT) so that the data from the
KROME’s controllers, Arpeggiator, Drum Track function and internal sequencer will not be applied in duplicate to the tone generator.
Using an external MIDI sequencer/computer to record performance data from the Drum Track function
Turn off the KROME’s local control setting. In Program mode, the Drum Track function will transmit performance data if the Drum Track
Prog MIDI Out
setting (Global 1–1a) is on (checked). By default, this is off (unchecked), so you’ll need to turn it on.
In your external sequencer/computer, turn the echo ‐ back setting on. With these settings, the sound generator won’t produce duplicate notes, and recording and playback will occur correctly.
367
368
Appendices
Using the Realtime Controls Knob 1–4 to record
MIDI control changes on an external MIDI sequencer/computer
Set the KROME to Local Control Off. Set the external MIDI sequencer/computer to Echo Back On. With these settings, recording and playback will occur correctly, and the control changes will not be applied to the tone generator in duplicate.
Recording the Arpeggiator or RPPR function on an external MIDI sequencer/computer
When the arpeggiator is on, playing the keyboard or operating the controllers of the KROME will operate and control the arpeggiator.
In the same way, the arpeggiator will be controlled by MIDI messages received from MIDI IN.
Notes transmitted from MIDI OUT (USB) by the arpeggiator are controlled as follows, according to the local control setting (
Local Control On
Global 1–1a).
In Sequencer mode, when the RPPR function is on, playing the keyboard will cause RPPR to operate. Similarly, the
RPPR function will also operate in response to notes received on the MIDI channel of the track selected by
Track
Select
(Seq 0–1(2)a). Notes will be transmitted by RPPR from MIDI OUT according to the local control setting (
Local
Control On
) as described below.
Local Control On
: Notes from the arpeggiator or RPPR will be transmitted from MIDI OUT (USB).
Local Control Off
: Notes from the arpeggiator or RPPR will not be transmitted from MIDI OUT (USB). The KROME will sound only in response to MIDI messages received at MIDI
IN, or generated by the arpeggiator or RPPR.
Setting example 1
Record the note messages generated by the arpeggiator or
RPPR function on the external MIDI sequencer/computer.
1. Turn on this instrument’s arpeggiator or RPPR function. Set this instrument to Local Control On.
2. Turn Local Control On for this instrument.
3. Turn Echo Back Off on your external sequencer/computer.
By turning echo back off, you will prevent the arpeggiator or
RPPR function from performing duplicate processing on the monitored notes during recording.
4. During playback, turn off the arpeggiator and RPPR functions of this instrument.
Setting example 2
Use the external MIDI sequencer/computer to record only the notes that trigger the arpeggiator or RPPR function, and operate this instrument’s arpeggiator or RPPR function for monitoring while recording, and during playback.
1. Turn on the KROME’s arpeggiator or RPPR function.
2. Set the KROME to Local Control Off.
The note messages generated by the arpeggiator or RPPR function will not be output.
3. On your external MIDI sequencer/computer, turn echo back on.
With these settings, the data will be recorded and played correctly, and the arpeggiator or RPPR function will not be applied in duplicate.
About GM (General MIDI)
The KROME supports the GM standard. It also supports the
GM2 sound map (including bank select) with 256 programs and 9 drum programs provided in ROM banks GM, g(1)– g(9), and g(d). (Banks g(1)–g(9) are GM2 variation programs, and g(d) contains drum programs.)
GM is a standard that ensures basic compatibility of sounds and controllers between GM ‐ compatible instruments made by different manufacturers. When using GM with KROME, be aware of the following.
• GM System On is supported in Sequencer mode. For more information, please see “GM Initialize” on page 165.
• When you wish to play a GM sequence, or load GM data into a song, set
Bank Map
(Global 0–2a) to GM(2).
About standard MIDI files
Standard MIDI files (SMF) make it possible for different computer programs or musical instruments made by different manufacturers to exchange time ‐ based MIDI data.
Each standard MIDI file contains one song. The KROME supports format 0 (type 0) in which all of the MIDI data is combined into one track, and format 1 (type 1) in which the data is separated by track.
When a SMF is loaded into a song in Media mode, the program bank that is selected will differ depending on the
Bank Map
(Global 0–2a) setting. When playing/loading
SMF data that conforms to the GM specifications, set
Bank
Map
to GM(2).
Sequencer mode
In Media mode when you convert a song into a Standard
MIDI File and save it, you can choose either format 0 or format 1.
• If KROME song data that was saved as a format 1 SMF file is loaded into another device, the track configuration may be different than it was before being saved. This is because MIDI tracks that contain no musical data are omitted, and the remaining tracks are moved into the unused tracks. This will not affect the playback itself.
• If song data that was saved by another device as a format
1 SMF file is loaded into the KROME, the track configuration may be different than it was before being saved. This is because tracks that contain no musical data are omitted, and the remaining tracks are moved into the unused tracks. This will not affect the playback itself.
When exchanging sequence data between two KROME, we recommend that you save the sequence data in the
KROME’s native format (
Save SEQ
).
When sequence data is saved in the KROME’s native format, all of the settings and patterns unique to the KROME will be saved, which will ensure a higher level of reproducibility than when the data is saved as a Standard MIDI File (
Save to Std MIDI File
).
Parameter changes and other recorded data is included in the song data as System Exclusive events, so it can be saved to or loaded from media as usual. Exclusive messages can also be loaded or saved as SMF (Standard MIDI File) data
(
Load Standard MIDI File
,
Save Song as Standard MIDI
File
). This allows recorded System Exclusive events to be saved as SMF data, or exclusive messages included in SMF data to be converted into song data.
During playback, this data can be transmitted to an external
MIDI device, or used to control track parameters or effect parameters of the song.
Compatibility with the M50
Compatibility with the M50
The KROME can load M50 format .PCG and .SNG files while converting them. Data compatibility is supported for loading and saving each type of data via media.
KROME format .PCG and .SNG files cannot be loaded by the M50. Song data (.SNG) can be loaded into the M50 if you
first save it as Standard MIDI File (SMF format) data (see p.232).
When loading M50 format .PCG or .SNG files into the
KROME, please be aware that the following limitations will apply.
Pad parameters
(Program, Combination, Song)
Since the KROME does not have these functions, the corresponding parameters will not be loaded.
External Setup parameters (Global)
Since the KROME does not have these functions, the corresponding parameters will not be loaded.
Global Mode “Foot Switch Assign” parameters
Settings related to other functions will be loaded in the following ways.
M50
RT Knob 1–A…4–B
ARP GATE, VELOCITY,
LENGTH, OCTAVE
KROME
TONE [1] – [4] , USER [1] – [4] knobs
ARP GATE, VELOCITY, SWING, STEP
Global Mode “Foot Pedal Assign” parameter
Settings related to other functions will be loaded in the following ways.
M50
RT Knob 1–A…4–B
ARP GATE, VELOCITY,
LENGTH, OCTAVE
KROME
TONE [1] – [4] , USER [1] – [4] knobs
ARP GATE, VELOCITY, SWING, STEP
Bank/number configurations on the KROME and
M50
The following table shows the configuration of the
Combination, Program, Drum Kit, Drum Pattern,
Multisample, and Drumsample banks and numbers for the
KROME and the M50. The table at the right shows what will happen when an M50 format file is loaded into the KROME.
If the data being loaded contains a bank or number that doesn’t exist on the KROME, its settings will be modified if there is no corresponding bank. This means that the data may not sound correctly. Please use caution when loading files between the KROME and the M50.
Bank configurations on the M50
Bank configurations on the
KROME
Combination
C
D
A
B
A
B
C
D
Program
A
B
C
D
E
A
B
C
D
E
F
GM, g(1)… g(9), g(d) G (GM), g(1)… g(9), g(d)
Drum Kit
00…31(INT)
32…47(USER)
00…31(INT)
32…47(USER)
48…56(GM) 48…56(GM)
User Drum Track Pattern
U000…U999
User Arpeggio Pattern
U000…U999
U000…U999 U000…U1027
Multisample
Mono
Stereo
‐
‐
Mono
Stereo
XL Mono
XL Stereo
Drumsample
Mono
Stereo
‐
‐
Mono
Stereo
XL Mono
XL Stereo
369
370
Appendices
MIDI Implementation
MIDI Implementation
371
372
Appendices
Korg Krome EX: List of Available Documents
Note for Owners:
Guidesimo.com webproject is not a service center of Korg trademark and does not carries out works for diagnosis and repair of faulty Korg Krome EX equipment. For quality services, please contact an official service center of Korg company. On our website you can read and download documentation for your Korg Krome EX device for free and familiarize yourself with the technical specifications of device.
More Musical Instrument Devices:
-
Yamaha YDP-S31
DIC F672YDP-S31Para información sobre el montaje del soporte del teclado, consulte las instrucciones al final de este manual.Owner’s ManualРуководство пользователяMode d’emploiManual de instrucciones Pour obtenir des informations sur l’assemblage du support du clavier, reportez-vous aux instructions à la fin de ce manuel.Информацию о сборке п� …
YDP-S31 Musical Instrument, 44
-
Korg TRITON
Installation Manual Internal Hard Disk KORG TRITON Contents: 1. General 2. Open the KORG Triton Keyboard 3. Installation of the Hard Disk Board 4. First test and formatting the Hard Disk 5. New installation of the KORG SCSI Board 6. SCSI-ID change 7. Assemble the KORG Triton Keyboard © 2000 musitronics GmbH , Version 8.4.2009 ATTENTION A qualified service …
TRITON Keyboard, 4
-
Panasonic KX-TVM50
KX-TVM50 Model KX-TVM200Thank you for purchasing a Panasonic Voice Processing System.Please read this manual carefully before using this product and save this manual for future use.KX-TVM50/KX-TVM200: Version 1.0Voice Processing SystemFeature Manual …
KX-TVM50 Telephone Accessories, 120
-
Roland FR-8X
page | 1 ROLAND FR-8x How to use Expansion Sound FR-8x Getting Ready to Load Expansion Sounds 1. Unzip the file you downloaded. 2. Copy the files with the extension «.bin», «.UPB» and «.ST8» under FR-8x folder into the root directory of the USB memory (sold separately). ※ Depending on the title of Expansion Sound, the type of the included file is different …
FR-8X Musical Instrument, 2
-
Xotic Guitars ProVintage Series
++MINMAXBRIDGENECKCUTMINMA XMINMA XMINMA X13546+++++++++2++++++ ++ +78Please contact us prior to returning the unit to us for repair at [email protected]: To obtain warranty service, it is imperative that you provide a copy of the original receipt. If you do not provide a receipt, you are responsible for all repair and shipping charges. e warranty does not cover shipping costs.CONTROLS …
ProVintage Series Musical Instrument, 2
Recommended Documentation:
KORG Music Workstation Semi Weighted Keyboard Руководство пользователя

Благодарим вас за покупку музыкальной рабочей станции Korg KROME EX. Внимательно прочтите это руководство, чтобы помочь вам максимально использовать возможности вашего нового инструмента.
Меры предосторожности
Местоположение
Использование устройства в следующих местах может привести к неисправности.
- Под прямыми солнечными лучами
- В местах с экстремальной температурой или влажностью
- Сильно пыльные или грязные места
- Места чрезмерной вибрации
- Близко к магнитным полям
Источник питания
Подключите предназначенный для этого адаптер переменного тока к розетке переменного тока нужной мощности.tagе. Не подключайте его к розетке переменного тока с напряжениемtage кроме той, для которой предназначена ваша установка.
Помехи другим электрическим устройствам
Расположенные поблизости радиоприемники и телевизоры могут испытывать помехи при приеме. Используйте данное устройство на подходящем расстоянии от радио и телевизоров.
Управляемость
Во избежание поломки не прилагайте чрезмерных усилий к переключателям или элементам управления.
Уход
Если внешняя поверхность загрязнилась, протрите ее чистой сухой тканью. Не используйте жидкие чистящие средства, такие как бензин или разбавитель, а также чистящие составы или легковоспламеняющиеся полироли.
Сохраните это руководство
После прочтения этого руководства сохраните его для дальнейшего использования.
Не допускайте попадания посторонних предметов в ваше оборудование
Никогда не ставьте емкости с жидкостью рядом с оборудованием. Попадание жидкости в оборудование может привести к поломке, возгоранию или поражению электрическим током.
Будьте осторожны, не допускайте попадания металлических предметов внутрь оборудования. Если что-то попало внутрь оборудования, отключите адаптер переменного тока от розетки. Затем обратитесь к ближайшему дилеру Korg или в магазин, где было приобретено оборудование.
ПРЕДУПРЕЖДЕНИЕ О РЕГУЛИРОВАНИИ FCC (для США)
ПРИМЕЧАНИЕ. Это оборудование было протестировано и признано соответствующим ограничениям для цифровых устройств класса B в соответствии с частью 15 правил FCC. Эти ограничения разработаны для обеспечения разумной защиты от вредных помех при установке в жилых помещениях. Это оборудование генерирует, использует и может излучать радиочастотную энергию и, если оно установлено и используется не в соответствии с инструкциями, может создавать вредные помехи для радиосвязи. Однако нет гарантии, что помехи не возникнут при конкретной установке. Если это оборудование действительно создает недопустимые помехи для приема радио или телевидения, что можно определить путем включения и выключения оборудования, пользователю рекомендуется попытаться устранить помехи одним или несколькими из следующих способов:
- Изменить ориентацию или местоположение приемной антенны.
- Увеличьте расстояние между оборудованием и приемником.
- Подключить оборудование к розетке в цепи, отличной от той, к которой подключен приемник.
- Обратитесь за помощью к дилеру или опытному радио / телевизионному технику.
Если в комплект данного оборудования входят такие элементы, как кабели, вы должны использовать эти элементы.
Несанкционированные изменения или модификации этой системы могут лишить пользователя права на эксплуатацию этого оборудования.
ЗАЯВЛЕНИЕ О СООТВЕТСТВИИ ПОСТАВЩИКА (для США)
Ответственная сторона: KORG USA INC.
Адрес: ЮЖНАЯ СЕРВИСНАЯ ДОРОГА, 316, MELVILLE, NY
Телефон: 1-631-390-6500
Тип оборудования: МУЗЫКАЛЬНАЯ РАБОЧАЯ СТАНЦИЯ
Модель: KROME EX-61 / KROME EX-73 / KROME EX-88
Это устройство соответствует требованиям части 15 правил FCC. Эксплуатация возможна при соблюдении следующих двух условий:
(1) Это устройство не должно создавать вредных помех, и (2) это устройство должно принимать любые принимаемые помехи, включая помехи, которые могут вызвать сбои в работе.
Уведомление об утилизации (только для ЕС)![]() Когда этот символ «перечеркнутый мусорный бак на колесах» отображается на продукте, руководстве пользователя, аккумуляторе или упаковке аккумулятора, это означает, что, когда вы хотите утилизировать этот продукт, руководство, упаковку или аккумулятор, вы должны сделать это одобренным способом. . Не выбрасывайте этот продукт, руководство, упаковку или батарею вместе с обычными бытовыми отходами. Правильная утилизация предотвратит нанесение вреда здоровью человека и потенциальный ущерб окружающей среде. Поскольку правильный метод утилизации будет зависеть от применимых законов и постановлений в вашем районе, пожалуйста, свяжитесь с вашим местным административным органом для получения подробной информации. Если аккумулятор содержит тяжелые металлы в количестве, превышающем установленное, под символом «перечеркнутый мусорный бак на колесах» на аккумуляторе или упаковке аккумулятора отображается химический символ.
Когда этот символ «перечеркнутый мусорный бак на колесах» отображается на продукте, руководстве пользователя, аккумуляторе или упаковке аккумулятора, это означает, что, когда вы хотите утилизировать этот продукт, руководство, упаковку или аккумулятор, вы должны сделать это одобренным способом. . Не выбрасывайте этот продукт, руководство, упаковку или батарею вместе с обычными бытовыми отходами. Правильная утилизация предотвратит нанесение вреда здоровью человека и потенциальный ущерб окружающей среде. Поскольку правильный метод утилизации будет зависеть от применимых законов и постановлений в вашем районе, пожалуйста, свяжитесь с вашим местным административным органом для получения подробной информации. Если аккумулятор содержит тяжелые металлы в количестве, превышающем установленное, под символом «перечеркнутый мусорный бак на колесах» на аккумуляторе или упаковке аккумулятора отображается химический символ.
Что касается ЖК-экрана
ЖК-экран KROME является высокоточным устройством, и качеству его продукции уделяется особое внимание. Хотя вы можете заметить некоторые из проблем, перечисленных ниже, имейте в виду, что они связаны с характеристиками ЖК-экранов и не являются неисправностями.
- На экране могут быть пиксели, которые всегда темные (не светятся) или всегда яркие (светятся).
- В зависимости от отображаемого содержимого яркость экрана может быть неравномерной.
- В зависимости от отображаемого содержимого могут быть видны горизонтальные полосы затенения.
- В зависимости от отображаемого контента могут быть видны мерцание или муар.
Обработка данных
Неправильная работа или неисправность могут привести к потере содержимого памяти, поэтому мы рекомендуем сохранять важные данные на USB-накопителях или других носителях. Имейте в виду, что Korg не несет ответственности за любой ущерб, который может возникнуть в результате потери данных.
ПРЕДУПРЕЖДЕНИЕ ОБ АВТОРСКИХ ПРАВАХ
- Это профессиональное устройство предназначено только для использования с произведениями, авторскими правами на которые вы владеете, и на которые вы получили разрешение от правообладателя публично исполнять, записывать, транслировать, продавать и копировать, или в связи с деятельностью, которая является «честной» использование »в соответствии с законом об авторском праве. Если вы не являетесь владельцем авторских прав, не получили разрешения от правообладателя или не участвовали в добросовестном использовании произведений, вы можете нарушить закон об авторском праве и понесете ответственность за ущерб и штрафы. KORG НЕ НЕСЕТ ОТВЕТСТВЕННОСТИ ЗА ЛЮБЫЕ НАРУШЕНИЯ, СОВЕРШЕННЫЕ ПРИ ИСПОЛЬЗОВАНИИ ПРОДУКТОВ KORG.
- Содержимое, встроенное в этот продукт или включенное в него, не может быть извлечено, записано или сохранено в форме, аналогичной его первоначальному состоянию, а также распространено или сделано общедоступным в Интернете. Содержимое этого продукта (например, звуковые программы, данные стиля, образцы аккомпанемента, данные MIDI, PCM-файлы).ampфайловые данные, аудиоданные, операционная система и т. д.) является собственностью KORG Inc., защищенной авторским правом, или является защищенным авторским правом материалом, используемым KORG Inc. по лицензии третьей стороны. Вам не требуется разрешение от KORG Inc. для использования вышеуказанного контента для создания или исполнения музыкальных произведений, а также для записи и распространения таких произведений.
Об этом руководстве
Руководства и способы их использования
KROME EX поставляется со следующими руководствами.
- Краткое руководство (в печатном виде и в формате PDF) (этот документ)
- Дополнительное руководство (PDF)
- KROME Руководство по эксплуатации (PDF)
- Руководство по параметрам KROME (PDF)
- Список голосовых имен (PDF)
Печатная копия прилагается только к Краткому руководству.
Руководство по быстрому старту
Это дает простое объяснение функций KROME EX. Сначала прочтите это руководство.
Дополнительное руководство
Это объясняет расширенные функции и другие особенности KROME EX, касающиеся программ, комбинаций и так далее. Пожалуйста, прочтите это как дополнение к Руководству по эксплуатации KROME и Руководству по параметрам KROME.
KROME Руководство по эксплуатации
Проще говоря, Руководство по эксплуатации разработано, чтобы ответить на вопрос: «Как мне это сделать?»
В нем объясняются названия и функции каждой части KROME, основные операции, болееview каждого режима, как редактировать звуки, как записывать на секвенсор и какampле В этом руководстве также объясняются основы арпеджиатора, эффектов, наборов ударных и трека ударных.
Наконец, он также содержит руководство по устранению неполадок и дополнительную информацию, например технические характеристики.
Руководство по параметрам KROME
Руководство по параметрам разработано, чтобы ответить на вопрос: «Что это делает?»
Руководство по параметрам, организованное по режимам и страницам, включает информацию по каждому параметру KROME.
Список голосовых имен
В списке названий тембров перечислены все звуки и настройки, которые есть в KROME EX, когда он поставляется с завода, включая программы, комбинации, мультисигналы.amples, барабаныampфайлы, наборы ударных, паттерны арпеджио, паттерны треков ударных, шаблоны песен и пресеты эффектов.
PDF версии
Руководства KROME EX в формате PDF предназначены для удобной навигации и поиска. Они включают обширную информацию о содержимом PDF-файла, которая обычно отображается сбоку окна программы для чтения PDF-файлов и позволяет быстро перейти к определенному разделу. Все перекрестные ссылки являются гиперссылками, поэтому нажатие на них автоматически приведет вас к источнику ссылки.
Условные обозначения в этом руководстве
Ссылки на KROME EX
KROME EX доступен в моделях с 88, 73 и 61 клавишами. В руководствах все модели без исключения именуются «KROME». На иллюстрациях передней и задней панелей в руководстве показана 61-клавишная модель, но они аналогичны другим моделям.
Example экран отображает
Значения параметров, показанные в прим.ampЭти экраны в данном руководстве предназначены только для пояснительных целей и могут не совпадать со значениями, отображаемыми на ЖК-экране вашего прибора.
Сокращения для руководств: QS, OG, PG, VNL.
В документации ссылки на руководства сокращены следующим образом.
КС: Руководство по быстрому старту
ОГ: KROME Руководство по эксплуатации
PG: Руководство по параметрам KROME
ВНЛ: Список названий голосов
Символы ![]() Примечание, советы
Примечание, советы
Эти символы соответственно обозначают предостережение, объяснение, связанное с MID I, дополнительное примечание или совет.
Пояснения, связанные с MIDI
CC # — это сокращение от Control Change Number. В пояснениях к сообщениям MIDI цифры в квадратных скобках [] обозначают шестнадцатеричные числа.
* Все названия продуктов и компаний являются товарными знаками или зарегистрированными товарными знаками соответствующих владельцев.
Основные особенности
Новые области звука для клавишника и создателя музыки
- EDS-X (Enhanced Definition Synthesis-eXpanded) KROME — это новый звуковой движок, который обеспечивает синтез, модуляцию, функциональность эффектов и качество звукового движка EDS, признанного профессионалами, а также позволяет более чем в десять раз больше звуковых данных PCM быть под контролем.
- Технология озвучивания, разработанная для KRONOS, широко применяется, давая вам в общей сложности 4 ГБ высококачественных данных PCM, включая длинные стерео.ampфайлы, захваченные для каждого ключа. Каждая деталь, от атаки до затухания, была тщательно разработана для обеспечения тонкой и динамичной выразительной силы. Эмоции в кончиках ваших пальцев будут точно передаваться вашим слушателям с помощью этого широкого набора звуков: акустических пианино, электрических пианино, органов, духовых инструментов, синтезаторов и ударных.
Эффекты
- KROME содержит 193 различных типа эффектов, начиная от хоруса, задержки, реверберации, овердрайва и имитации вин.tagе эффекты и amps, каждая из которых отличается качеством и гибкостью профессионального уровня. Пресеты эффектов позволяют легко сохранять и вызывать все настройки для отдельного эффекта.
- Вы можете использовать до 8 из этих эффектов одновременно, с 5 эффектами разрыва, 2 мастер-эффектами (например, для посылов реверберации) и 1 общим эффектом (для обработки стереофонической шины). Каждая программа имеет трехполосный эквалайзер, что позволяет использовать до шестнадцати таких эквалайзеров в каждой комбинации или песне. Эти настройки могут быть выполнены индивидуально для каждой программы, комбинации и песни.
- Мастер-эффекты и общий эффект можно включить / выключить с передней панели.
Двойные полифонические арпеджиаторы
В дополнение к традиционным паттернам арпеджио прошлого, эти арпеджиаторы могут генерировать гитарные или басовые риффы, а также паттерны ударных. Их также можно использовать как часть процесса проектирования звука для создания пэдов, синтезаторных звуков и звуковых эффектов, которые включают в себя тонкое ощущение движения. В комбинированном режиме и режиме секвенсора вы можете использовать два арпеджиатора одновременно.
Имеется 960 пользовательских паттернов арпеджио, дающих вам потрясающий потенциал для мощного исполнения. Оригинальные паттерны можно создавать быстро и легко, редактируя паттерны на экране пианино.
Паттерны барабанной дорожки
Драм-трек — это встроенная функция драм-машины, которая использует высококачественные барабанные звуки KROME. Всего 710 паттернов.
Клавиатура и контроллеры для выразительного исполнения
- KROME EX 61 и 73 оснащены полувзвешенной клавиатурой, которая позволяет с легкостью играть все, от звуков фортепиано до звуков синтезатора. KROME EX 88 оснащен клавиатурой NH (Natural Weighted Hammer Action), которая особенно удобна.tagЭто особенно важно, когда вы играете звуки, позволяющие выразить тонкие нюансы, например, фортепиано или электрическое пианино.
- В дополнение к джойстику, тональные изменения можно контролировать с помощью кнопок (SW1, 2), где вы можете назначать такие функции, как сдвиг октавы или блокировку джойстика, и контроллеры в реальном времени, которые вы можете использовать для настройки среза, резонанса или эффектов во время игры, делая ваши выступления еще более выразительными.
- Три гнезда, куда можно подключить рекламуampИмеются педаль, ножной переключатель и ножная педаль. Они позволяют регулировать громкость, управлять эффектами или переключать звуки ногой.
Секвенсор для создания музыки или выступления
Внутренний секвенсор обеспечивает 16 MIDI-треков и один мастер-трек. Существует полный набор функций для создания и исполнения музыки, включая автоматическую настройку песни, которая позволяет вам начать создание песни в момент, когда приходит вдохновение, шаблоны песен, RPPR и списки подсказок. Вы можете редактировать треки и паттерны на треке view или на экране пианино. Данные SMF также можно импортировать или экспортировать, что обеспечивает плавную интеграцию с другой платформой, например с вашим компьютером.
Подключение к компьютеру через USB-слот для SD-карты
Вы можете подключить KROME к компьютеру через USB для простой передачи MIDI-данных. Вы также можете использовать SD-карту (имеется в продаже), чтобы легко управлять KROME. file поле.
Передняя панель

Громкости
1. Ручка VOLUME
Этот регулятор регулирует громкость выходов AUDIO OUTPUT L / MONO, R, а также громкость разъема для наушников.
SW1, 2 и джойстик
2. Кнопки SW1, SW2
Вы можете назначить этим кнопкам желаемую функцию, например, изменение октавы клавиатуры, включение / выключение портаменто или блокировку джойстика. Вы также можете использовать их для управления звуком или эффектами сложными способами, назначив их параметру AMS звукового генератора или параметру Dmod эффекта.
3. Джойстик
Вы можете управлять параметрами синтеза или параметрами эффекта, перемещая джойстик вверх / вниз / влево / вправо.
КОНТРОЛЬ В РЕАЛЬНОМ ВРЕМЕНИ
Эти контроллеры реального времени состоят из четырех регуляторов и одной кнопки. Вы можете использовать их для следующих целей.
4. Кнопка ВЫБОР
5. Ручки 1
Используйте кнопку SELECT для выбора функций, которыми вы хотите управлять с помощью регуляторов 1. С помощью регуляторов 4 вы можете управлять звуком, эффектами и арпеджиатором. (См. «Элементы управления в реальном времени» на странице 1.)
Арпеджиатор
6. Кнопка ARP.
Эта кнопка включает / выключает арпеджиатор. Кнопка будет гореть, если арпеджиатор включен. (См. Страницу 14)
БАРАБАННАЯ ДОРОЖКА
7. Кнопка DRUM TRACK
Эта кнопка включает или выключает функцию Drum Track. Эта кнопка также указывает рабочее состояние драм-трека. (Не горит: не горит, мигает: ожидает срабатывания триггера, горит: горит. См. Стр. 14.)
Кнопки эффектов
8. Кнопка MASTER FX, кнопка TOTAL FX.
Эти кнопки включают / выключают мастер-эффект и общий эффект. Когда кнопка горит (светодиод горит), активируются настройки эффектов программы, комбинации или песни. Когда кнопка выключена (светодиод не горит), соответствующий эффект будет выключен. Состояние включения / выключения этих кнопок запоминается даже при переключении программ, комбинаций или песен.
Монитор
9. дисплей
сенсорныйView Дисплей имеет простое сенсорное управление и выбор множества функций и параметров. (См. Страницу 10)
режим
10. Кнопки COMBI, PROG, SEQ.
11. Кнопки GLOBAL, MEDIA.
KROME имеет пять различных режимов работы, каждый из которых оптимизирован для определенного набора функций. Нажмите одну из этих кнопок, чтобы войти в соответствующий режим.
Подробнее см. «Выбор режимов» на стр. 11.
ПРОГ / КОМБИ-БАНК
12. Кнопки A, B, C, D, E, F
Эти кнопки выбирают банки программ AF, UAUF и комбинированные банки AF (см. Стр. 12). Банк программ будет переключаться с AF на UAUF и обратно при каждом последовательном нажатии кнопки BANK. Вы также можете использовать эти кнопки для выбора банка тембровых программ в комбинации или банка программ треков в песне. Если вы хотите выбрать банк GM, используйте цифровые клавиши (см. «15» ниже, стр. 12) или меню выбора банка / программы (см. Стр. 13).
VALUE контроллеры
Используйте эти контроллеры для редактирования параметра, выбранного на дисплее.
13. Кнопки INC и DEC.
14. Диск VALUE.
15. 0, и. кнопки
16. Кнопка ENTER.
Используйте их, чтобы указать значение выбранного параметра.
17. Кнопка СРАВНИТЬ
Сравнивает ваши текущие правки звука со звуком до того, как он был отредактирован.
ВЫБОР СТРАНИЦЫ, ВЫХОД
18. Кнопка PAGE
Когда вы нажимаете эту кнопку, на дисплее появляется список страниц в выбранном режиме. Нажмите кнопку нужной страницы. (См. Стр. 9 Руководства по эксплуатации)
19. Кнопка EXIT.
Нажмите эту кнопку, чтобы вернуться на главную страницу текущего режима.
20. Кнопка WRITE
Используйте эту кнопку для сохранения программ, комбинаций, глобальных настроек, наборов ударных или паттернов арпеджио во внутренней памяти (см. Стр. 20). Вы также будете использовать эту кнопку для сохранения песен на носитель (см. Стр. 21).
Sequencer
Кнопки в этом разделе используются для операций в режиме секвенсора, таких как запись и воспроизведение (см. Стр. 54 Руководства по эксплуатации). Помимо использования во время записи, кнопка REC также используется для сохранения программы или комбинации или при использовании функции автоматической настройки композиции (см. Стр. 16).
21. PAUSE ![]() кнопка, НАЗАД
кнопка, НАЗАД ![]() кнопка, FF
кнопка, FF ![]() кнопка, LOCATE
кнопка, LOCATE ![]() кнопка, REC
кнопка, REC ![]() кнопка, СТАРТ / СТОП
кнопка, СТАРТ / СТОП ![]() кнопка
кнопка
TEMPO контроль
22. Регулятор TEMPO, светодиод TEMPO
Эта ручка регулирует темп арпеджиатора, трека ударных или внутреннего секвенсора. Этот светодиод будет мигать с интервалами в четверть текущего темпа.
23. Кнопка TAP
Нажав (или нажав) эту кнопку на доле, вы можете ввести темп, используемый арпеджиатором, треком ударных или внутренним секвенсором.
Наушники
24. Разъем для наушников.
Подключите сюда свои наушники. Это гнездо будет выводить тот же сигнал, что и гнезда AUDIO OUTPUT L / MONO и R. Громкость наушников регулируется ручкой VOLUME.
Задняя панель

Источник питания
Обязательно ознакомьтесь с разделом «Подключение клавиатуры и включение питания» на стр. 8 и следуйте правильной процедуре, описанной там. Примечание: KROME имеет функцию автоматического отключения питания, которая автоматически отключает питание, если клавиатура или кнопки передней панели не используются в течение определенного времени. При заводских настройках это значение составляет 4 часа (см. «Функция автоматического отключения питания» на стр. 9).
- Выключатель
Этот переключатель включает / выключает питание. - разъем адаптера переменного тока
Сюда подключается прилагаемый адаптер переменного тока. Подключения должны производиться при выключенном питании. Имейте в виду, что неаккуратное обращение может повредить вашу акустическую систему или вызвать сбои в работе.
 - Кабельный крючок
Используйте это, чтобы закрепить кабель прилагаемого адаптера переменного тока.
АУДИОВЫХОДЫ - AUDIO OUTPUT L / MONO, разъем R
Это основные стереофонические аудиовыходы. Регулятором VOLUME отрегулируйте громкость.
Педали - Разъем ASSIGNABLE PEDAL, разъем ASSIGNABLE SWITCH, DAMPРазъем ER
Вы можете подключить рекламуampе педаль, ножной переключатель и ножную педаль к этим гнездам. Это дает вам более широкий спектр функций и эффектов для управления.
MIDI - Разъем MIDI IN, разъем MIDI OUT
MIDI позволяет подключать KROME к компьютеру или другим MIDI-устройствам для отправки и получения нот, жестов контроллера, настроек звука и т. Д.
SD - слот для карт памяти SD
Вы можете вставить сюда SD-карту и использовать ее для сохранения / загрузки программ, комбинаций или данных песен KROME. (См. Страницу 20)
USB - Разъем USB (для подключения к компьютеру)
К этому разъему можно подключить свой компьютер. Используя один USB-кабель, ваш KROME может отправлять и получать MIDI-информацию непосредственно на компьютер и с него, без необходимости использования MIDI-интерфейса. Примечание: USB-разъем KROME может только передавать и принимать MIDI-данные.
Подключение клавиатуры и включение питания
Включение питания
Примечание. Перед включением питания проверьте следующее.
- Убедитесь, что вы используете розетку переменного тока с правильнымtage для вашего устройства.
- Используйте только прилагаемый адаптер переменного тока.
- Поверните ручку VOLUME на передней панели KROME до упора влево, чтобы уменьшить громкость.
- Убедитесь, что питание KROME выключено.
- Если вы подключаетесь к внешнему устройству вывода, например микшеру или активному монитору, уменьшите его громкость и выключите питание.
Вот как подключить питание.
1. Подключите штекер постоянного тока прилагаемого адаптера переменного тока к разъему адаптера переменного тока, расположенному на задней панели KROME.
Подключите шнур питания к розетке переменного тока. Подключите шнур питания к адаптеру переменного тока. Чтобы предотвратить случайное отключение вилки постоянного тока, закрепите кабель вокруг кабельного крючка KROME.
Подключение адаптера переменного тока

2. Подключите разъемы AUDIO OUTPUT L / MONO и R KROME к микшеру или активным мониторным динамикам.
• Если вы осуществляете мониторинг через наушники, подключите их к разъему для наушников, расположенному на левой стороне передней панели KROME. Через этот разъем для наушников будет выводиться тот же сигнал, что и на стереовыход (AUDIO OUTPUT L / MONO и R).
3. Включите питание, нажав выключатель питания, расположенный на задней панели KROME.![]() Если функция автоматического отключения питания включена, при запуске появится сообщение, информирующее вас о времени до автоматического отключения питания. Если это диалоговое окно не появляется, автоматическое отключение питания не включено; питание не отключится автоматически. (См. «Функция автоматического отключения питания» на странице 9.)
Если функция автоматического отключения питания включена, при запуске появится сообщение, информирующее вас о времени до автоматического отключения питания. Если это диалоговое окно не появляется, автоматическое отключение питания не включено; питание не отключится автоматически. (См. «Функция автоматического отключения питания» на странице 9.)
4. Включите внешние устройства вывода и соответствующим образом отрегулируйте их громкость.
5. Играя на клавиатуре, постепенно поворачивайте ручку VOLUME вправо, чтобы отрегулировать громкость.
Выключение питания
![]() Когда вы закончите использовать KROME, выключите питание, нажав выключатель питания, расположенный на задней панели KROME.
Когда вы закончите использовать KROME, выключите питание, нажав выключатель питания, расположенный на задней панели KROME.
При выключении питания любая программа, комбинация или глобальные настройки, которые вы, возможно, редактировали, вернутся в исходное состояние. Если вы хотите сохранить результаты вашего редактирования, вы должны сохранить (записать) отредактированные настройки. Таким же образом данные песни будут потеряны при выключении питания. Если вы хотите снова использовать данные песни позже, вы должны сохранить их перед выключением питания, а затем загрузить их снова при желании. (См. «Сохранение ваших правок» на странице 20.)![]() Если функция автоматического отключения питания KROME включена, питание автоматически отключится по прошествии определенного времени без какого-либо вмешательства пользователя. Это автоматическое отключение питания также приведет к потере всех несохраненных данных.
Если функция автоматического отключения питания KROME включена, питание автоматически отключится по прошествии определенного времени без какого-либо вмешательства пользователя. Это автоматическое отключение питания также приведет к потере всех несохраненных данных.![]() Если выключить питание во время записи данных во внутреннюю память, данные во внутренней памяти могут быть повреждены. Никогда не выключайте питание во время выполнения какого-либо процесса. Во время обработки появится следующее сообщение: «Сейчас идет запись во внутреннюю память».
Если выключить питание во время записи данных во внутреннюю память, данные во внутренней памяти могут быть повреждены. Никогда не выключайте питание во время выполнения какого-либо процесса. Во время обработки появится следующее сообщение: «Сейчас идет запись во внутреннюю память».
Функция автоматического отключения питания
KROME имеет функцию автоматического отключения питания, которая автоматически отключает питание, если клавиатура или кнопки передней панели не используются (*) в течение определенного времени.
* Ручка VOLUME в комплект не входит.
Примечание. При заводских настройках питание отключится, если пользователь не будет вводить данные в течение примерно четырех часов.![]() Когда питание отключится, все настройки, которые вы редактировали, будут потеряны. Если вы хотите сохранить отредактированные настройки, вы должны сохранить их до отключения питания.
Когда питание отключится, все настройки, которые вы редактировали, будут потеряны. Если вы хотите сохранить отредактированные настройки, вы должны сохранить их до отключения питания.
Изменение настройки автоматического отключения питания
Изменение настроек в диалоговом окне запуска
Если функция автоматического отключения питания включена, чтобы питание отключалось автоматически, текущее указанное время автоматического отключения отображается сразу после запуска системы.

1. Пока отображается это сообщение, нажмите кнопку «Изменить настройку» в диалоговом окне.
Появится следующее диалоговое окно.

2. Нажмите всплывающую кнопку и выберите желаемое время для автоматического отключения питания. Если вы не хотите, чтобы питание отключалось автоматически, выберите «Отключено».
Примечание. Если это диалоговое окно не появляется сразу после запуска, функция автоматического отключения питания отключена; питание не отключится автоматически. Примечание. Вы также можете изменить настройку автоматического отключения питания во время работы (см. Стр. 16 Руководства по эксплуатации).
Предупреждающее сообщение об автоматическом отключении питания
По истечении указанного времени появится сообщение с предупреждением о том, что функция автоматического отключения питания собирается выключить питание.

Если вы хотите продолжить использование KROME, нажмите клавиатуру, кнопку или дисплей. Автоматическое отключение питания будет сброшено, и такое же сообщение появится, когда указанное время снова истечет без какого-либо вмешательства пользователя.
О дисплее и режимах
Монитор
KROME использует Korg’s TouchView графический пользовательский интерфейс.
Нажимая или перетаскивая объекты, отображаемые на дисплее, вы можете выбирать программы или комбинации или редактировать значения параметров. Здесь мы объясним имена и функции этих объектов.

a: кнопка режима
Это указывает на текущий выбранный режим.
Когда вы нажимаете эту кнопку, появляется меню Mode. В меню режима нажмите название режима, который вы хотите переместить. Если вы выберете текущий выбранный режим, появится меню выбора страницы для этого режима. Даже в другом режиме нажатие правой части имени отобразит меню выбора страницы для каждого режима.
Чтобы закрыть меню, нажмите кнопку «Закрыть» или кнопку «ВЫХОД».
Вы также можете выбирать режимы и страницы, нажимая кнопки на передней панели. Нажмите кнопку выбора режима, чтобы выбрать режим, а затем нажмите кнопку PAGE, чтобы перейти к экрану выбора страницы.
b: Текущая страница
Это указывает на текущую страницу в выбранном режиме.
Начиная с левого края, в этой области отображается номер страницы: имя и имя вкладки.

c: вкладка
Большинство страниц разделено на две или более вкладок.
d: Параметры
Параметры для различных настроек отображаются на дисплее. Выберите параметр на дисплее и отредактируйте его значение. Вы можете использовать диск VALUE и другие контроллеры значений (см. Стр. 7), чтобы редактировать значение, перемещая палец по дисплею, или включать / выключать настройку, нажимая его на дисплее.

Для некоторых параметров вы можете нажать на параметр дважды или долго, а затем отпустить, чтобы получить доступ к экранной панели редактирования, где вы можете редактировать значение. см. «Панель редактирования» на стр. 6 Руководства по эксплуатации.
e: Всплывающие кнопки
Когда вы нажимаете всплывающую кнопку, доступные значения параметров отображаются в виде всплывающего меню или меню с вкладками.
f: кнопка управления меню
* Меню
При нажатии этой кнопки появляется список команд меню. Отображаемые команды меню будут отличаться в зависимости от выбранной в данный момент страницы. Меню закроется при нажатии на дисплей в другом месте, кроме меню, или при нажатии кнопки EXIT.

* Диалоговое окно
Когда вы выбираете команду меню, вы увидите экран, содержащий настройки, необходимые для выполнения команды. Это называется диалоговым окном. Появившееся диалоговое окно будет зависеть от выбранной вами команды меню. Некоторые команды, такие как Exclusive Solo, не отображают диалоговое окно.

* Кнопка редактирования текста
Когда вы нажимаете эту кнопку, появляется диалоговое окно редактирования текста для изменения названий программ, комбинаций, песен и т. Д.
* Кнопки ОК и Отмена
После выполнения других операций в диалоговом окне вы можете выполнить команду, нажав кнопку ОК. Для отмены без выполнения нажмите кнопку Отмена. Диалоговое окно закроется.
Кнопка EXIT соответствует кнопке «Отмена» и кнопке «Готово».
Выбор режимов
KROME предоставляет большое количество функций, таких как воспроизведение или редактирование программ и комбинаций, запись и воспроизведение песен, а также управление медиа. Эти функции сгруппированы в «режимы». KROME имеет пять режимов. Чтобы получить доступ к режиму, нажмите кнопку соответствующего режима (см. Стр. 6).
Режим программы
Программы — это основные звуки KROME.
В программном режиме вы можете:
- Выберите и запустите программы.
- Используйте в своем исполнении один арпеджиатор.
- Воспроизведение паттернов трека ударных во время исполнения с использованием программы.
- Редактировать программы
Вы можете использовать элементы управления в реальном времени и функцию настройки тона, чтобы легко редактировать программу. Вы можете настроить параметры и настройки осцилляторов, фильтров, amps, EG, LFO, эффекты, арпеджиатор, трек ударных и т. д. Вы можете использовать до пяти встроенных эффектов, двух мастер-эффектов и одного общего эффекта. Кроме того, вы можете создавать программы ударных, используя наборы ударных (созданные в режиме Global).
Комбинированный режим
Комбинации — это наборы до 16 программ, которые можно воспроизводить одновременно, что позволяет создавать звуки, более сложные, чем одна программа. В комбинированном режиме вы можете:
- Выберите и воспроизведите Комбинации.
- Используйте несколько тембров для воспроизведения паттернов арпеджио, созданных двумя арпеджиаторами.
- Используйте один или несколько тембров для воспроизведения паттернов в треке ударных.
- Используйте KROME в качестве мультитембрального тон-генератора из 16 частей.
- Редактировать комбинации
Вы можете использовать функцию регулировки тембра, чтобы легко редактировать программу каждого тембра. Вы можете назначить программы на каждый из 16 тембров, каждый с отдельной громкостью, панорамой, эквалайзером, а также зонами клавиатуры и скорости нажатия; отрегулируйте настройки эффектов, арпеджиатора и барабанной дорожки. Кроме того, вы можете использовать до пяти встроенных эффектов, два мастер-эффекта и один общий эффект.
Режим секвенсора
Режим секвенсора позволяет записывать, воспроизводить и редактировать MIDI-треки. Ты можешь:
- Используйте шестнадцатитрековый MIDI-секвенсор для записи и воспроизведения песен. Записывайте по одному MIDI-треку за раз или записывайте до всех шестнадцати треков одновременно. Вы также можете записывать эксклюзивные сообщения.
- Используйте несколько дорожек для записи и воспроизведения исполнения, созданного двумя арпеджиаторами.
- Используйте один или несколько треков для воспроизведения паттернов в треке ударных.
- Редактировать песни.
- Используйте KROME как 16-трековый мультитембральный звуковой модуль.
- Также поддерживается воспроизведение GM / GM2.
- Используйте функцию настройки тона, чтобы легко редактировать программу каждого трека.
- Используйте до пяти встроенных эффектов, двух мастер-эффектов и одного общего эффекта.
- Запишите паттерны и назначьте их отдельным клавишам, используя RPPR (воспроизведение / запись паттернов в реальном времени).
- Создайте Cue List, который будет воспроизводить несколько песен в указанном вами порядке. Вы также можете объединить эти песни в одну песню.
- Создание пользовательских паттернов трека ударных.
Глобальный режим
Глобальный режим позволяет настраивать общие параметры для всего KROME, а также редактировать наборы ударных и паттерны арпеджио. В глобальном режиме вы можете:
- Отрегулируйте настройки, влияющие на весь KROME, такие как основная мелодия и глобальный MIDI-канал.
- Создавайте пользовательские весы.
- Создавайте наборы ударных, используя барабаныampим.
- Создание пользовательских паттернов арпеджио.
- Переименуйте программы и комбинации категорий.
- Установите функцию назначаемых педалей и назначаемых переключателей.
- Передача эксклюзивных дампов данных системы MIDI.
Медиа режим
Вы можете сохранять или загружать данные с помощью SD-карты. В режиме мультимедиа вы можете:
- Сохраните и загрузите программы, комбинации, песни и данные общих настроек.
- Отформатируйте SD-карту, скопируйте и переименуйте fileс, и т.д.
- Выполнять file такие операции, как копирование данных на носитель или с него.
- Экспорт и импорт секвенций в и из SMF (Standard MIDI Fileс).
- Использовать данные FileФункция r для сохранения или загрузки эксклюзивных данных системы MIDI.
Воспроизведение звуков
Игровые программы и комбинации
Выбор программ по банку и номеру (A)
Вот как выбрать программу. Для получения дополнительной информации о характеристиках и функциях программного режима см. «Программный режим» на стр. 11.
1. Нажмите кнопку PROG на передней панели (загорится светодиод), чтобы войти в режим программирования.
В верхнем левом углу ЖК-экрана отображается название текущей страницы PROG P0: Play. Это хорошая база для игры в Программы. Обратите внимание на большие выделенные символы в верхней части ЖК-дисплея. Это название и номер текущей Программы. Когда они выделены, вы можете нажимать кнопки INC / DEC для выбора следующей или ранее пронумерованной программы. Вы также можете повернуть диск VALUE для перемещения по программам более крупным шагом или ввести номера программ непосредственно с цифровой клавиатуры.
2. С помощью кнопок BANK A… F выберите Программы из других банков.
Нажмите подсвеченную кнопку, чтобы выбрать банки UAUF (кнопка будет мигать).
Нажмите мигающую или не светящуюся кнопку, чтобы выбрать банки AF (кнопка загорится).
Вы также можете использовать кнопки банка в верхнем левом углу дисплея, чтобы переключиться на банк U.
Чтобы выбрать банк GM, удерживайте нажатой цифровую клавишу 0 и нажмите одну из кнопок -, 1 или (.). Банк GM, варианты GM g (9) g (1) или программы ударных GM g (d) будут выбраны соответственно.
Выбор программ по категории (B)
Есть и другие способы выбора программ, но здесь мы объясним, как выбирать программы по их категории, например звуки клавиатуры, органа, баса или ударных.
- На ЖК-экране нажмите всплывающую кнопку выбора категории / программы.
Появится всплывающее меню выбора категории / программы.
На рисунке выбрана категория «Клавиатура». В меню отображается программа из этой категории. - Если вы хотите выбрать другую категорию, нажмите вкладки слева и справа от экрана.
- Чтобы выбрать программу, нажмите ее название в меню.

Выбор программ по категории

Выбранная программа будет выделена, и программа изменится. Вы также можете использовать кнопки INC / DEC или колесо VALUE для переключения программ.
В меню отображается сразу шестнадцать программ. Для просмотра других программ используйте полосу прокрутки для прокрутки списка. Играйте на клавиатуре, чтобы услышать звук выбранной программы.
4. Если вы хотите выбрать программы по подкатегориям, нажмите кнопку «Перейти к подпрограмме», чтобы получить доступ к меню выбора подкатегории / программы.
Нажмите вкладку слева, чтобы выбрать подкатегорию.
Выберите программу, как описано в шаге 3.
Чтобы подтвердить свой выбор, нажмите кнопку ОК. Если вы хотите отменить, нажмите кнопку «Отмена». Вы вернетесь в основную категорию.
5. Если вас устраивает выбранная программа, нажмите кнопку OK, чтобы закрыть меню.
Если вы нажмете кнопку «Отмена», ваш выбор здесь будет отменен, и вы вернетесь к программе, которая была выбрана непосредственно перед открытием меню.
Примечание: если вы нажмете всплывающую кнопку слева от «Program Select», появится меню выбора банка / программы, организованное по банкам. Процедура аналогична описанной в разделе «Выбор программ по категории (B)».
О других способах выбора программ см. «Выбор программ» на стр. 21 Руководства по эксплуатации.
Содержимое банка программ
KROME имеет в общей сложности 1,801 программу. Когда устройство поставляется с завода, внутренняя память содержит 896 программ предварительной загрузки и 265 программ GM для немедленного использования. Остальные 640 программ — это инициализированные программы, предназначенные для сохранения ваших собственных исходных программ. Вы также можете редактировать и перезаписывать любую из программ в банках AF и UA UF, но не в программах банков GM-g (d).
Содержимое банка программ

Выбор комбинаций
Вот как выбрать комбинацию.
Для получения дополнительной информации о комбинациях см. «Комбинированный режим» на странице 11.
1. Нажмите кнопку COMBI, чтобы войти в комбинированный режим.
Загорится светодиод COMBI. Находясь в режиме Combo, вы можете выбирать и воспроизводить комбинации по банку / номеру или категории точно так же, как вы делали программы.
Содержимое комбинированного банка

Использование контроллеров для изменения звука
Джойстик, SW1 и SW2
Джойстик (см. Стр. 6) и SW1 / SW2 (см. Стр. 6), расположенные с левой стороны передней панели KROME, представляют собой контроллеры, которые вы можете использовать во время выступления. Вы можете использовать эти контроллеры для изменения звука.
Эффект, производимый каждым контроллером, будет отличаться для каждой программы или комбинации. В дополнение к типичным функциям контроллеры в некоторых случаях могут иметь эффект выделения отдельных звуков или могут применять комбинацию нескольких эффектов. Так что попробуйте их все, чтобы увидеть, что каждый контроллер делает для выбранного звука.
Стандартные функции джойстика

Контроль в реальном времени
Контроллеры реального времени (см. Стр. 6), расположенные на левой стороне передней панели, используются для управления звуком при воспроизведении программы или комбинации или для простого редактирования звука. Они также используются для управления арпеджиатором.
- Нажмите кнопку SELECT, чтобы выбрать функции, которыми будут управлять ручки 1 (загорится соответствующий светодиод).
Ручки будут управлять звуком, если выбран TONE или USER, или арпеджиатором, если выбран ARP. - Поверните регуляторы 1 и обратите внимание на изменение звука, эффектов или паттерна арпеджио.
Когда вы поворачиваете ручку, на дисплее появляется всплывающее окно с названием контроллера и его значением.
- Если выбран SELECT TONE, регуляторы будут управлять отсечкой фильтра, резонансом фильтра, интенсивностью EG фильтра и временем затухания EG фильтра соответственно.
- Если выбран ВЫБОР ПОЛЬЗОВАТЕЛЯ, регуляторы 1 будут управлять широким спектром параметров, индивидуально назначаемых каждой программой или комбинацией. Во многих (но не во всех) случаях ручки 4 и 1 будут управлять параметрами синтезатора, ручка 2 будет управлять глубиной эффекта модуляции, такого как хорус, а ручка 3 будет управлять глубиной реверберации.
- Подробнее о SELECT ARP см. В следующем разделе.
Исполнение с арпеджиатором
Программа позволяет использовать один полифонический арпеджиатор. При воспроизведении комбинации или использовании секвенсора вы сможете использовать два полифонических арпеджиатора.
Включение / выключение арпеджиатора
- Выберите программу или комбинацию, которую хотите воспроизвести.
- Нажмите кнопку ARP, чтобы загорелся светодиод.. Включится арпеджиатор.
- Играйте на клавиатуре.
Начнется воспроизведение арпеджио. (Обратите внимание, что для некоторых звуков арпеджиатор настроен так, чтобы реагировать только на определенный диапазон нот на клавиатуре.)
Управление паттерном арпеджио
- Нажмите кнопку SELECT, чтобы загорелся светодиодный индикатор ARP.
- Поверните ручки 1 (GATE, VELOCITY, SWING, STEP), чтобы изменить шаблон.
Также эффективно установить регуляторы реального времени на TONE или USER и использовать их для изменения звука во время игры арпеджиатора. Паттерны арпеджио, соответствующие каждому звуку, назначаются каждой из установленных на заводе программ и комбинаций. Попробуйте выбрать программы и комбинации из множества категорий и воспроизвести их с включенным арпеджиатором. - Используйте ручку TEMPO или кнопку TAP для настройки темпа (см. Стр. 7).
Режим программы
Паттерн арпеджио программы можно переключать с помощью параметра «Pattern» страницы P0: Play Arpeggiator.
- Нажмите кнопку PROG, а затем вкладку ARP.
- Нажмите всплывающую кнопку «Шаблон» и выберите шаблон.
Если на этой странице выбрана настройка «Защелка», арпеджио продолжит играть даже после того, как вы уберете руку с клавиатуры. Если этот параметр не выбран, воспроизведение арпеджио прекращается, когда вы убираете руку с клавиатуры.

Комбинированный режим и режим секвенсора
В режимах Combination и Sequencer настройки арпеджиатора регулируются на страницах P0 Arpeggiator A и B.
Использование барабанной дорожки
Включение и выключение трека ударных
- Нажмите кнопку DRUM TRACK. В зависимости от различных настроек, трек ударных может начать играть сразу или может ждать, пока вы не начнете играть на клавиатуре. Если светодиод на кнопке мигает и гаснет, значит, он ждет, когда вы начнете играть.
- Используйте ручку TEMPO или кнопку TAP для настройки темпа (см. Стр. 7).
Выбор паттерна и звука трека ударных
Режим программы
В режиме программы трек ударных имеет специальный зарезервированный слот микшера и специальный параметр выбора программы. Чтобы настроить трек ударных в режиме программирования:
- Нажмите кнопку PROG, а затем вкладку Mixer & Drum.
Появится страница Mixer & Drum TRACK.
- В правой части дисплея используйте два банка паттернов / номер. всплывающие кнопки для выбора паттерна трека ударных.
Примечание. Обратите внимание, что кнопка DRUM TRACK не включается для паттерна, который не содержит данных, например, пользовательского банка InitDrumPattern или для паттерна пресетного банка P000: Off. - В правой части экрана используйте всплывающую кнопку «Программа» программы трека ударных, чтобы выбрать программу, которая будет озвучивать паттерн.
- Используйте кнопки слева для управления настройками отключения звука и соло, а также используйте ползунок для регулировки громкости. Вы можете использовать эквалайзер трека ударных для настройки эквалайзера программы трека ударных.

Комбинированный режим, режим секвенсора
В комбинациях (и песнях) трек ударных просто отправляет MIDI для воспроизведения одного или нескольких из 16 тембров / треков. Для получения дополнительной информации см. «Настройки функции Drum Track в режиме комбинации» на стр. 101 Руководства по эксплуатации.
Простое программное и комбинированное редактирование
Регулировка эквалайзера и баланса громкости
Для программы значение возврата эквалайзера и мастер-эффекта можно настроить на главной странице P0: Play.
На странице P0: Play Mixer & Drum Track вы можете настроить баланс громкости осцилляторов 1 и 2 и трека ударных. Здесь вы также можете настроить эквалайзер программы драм-трека.
Использование настройки тона
Функция настройки тона KROME назначает параметры программы, которые полезны для редактирования с помощью кнопок и ползунков на дисплее. Вы можете использовать их для эффективного редактирования звука.
- Войдите в режим программирования P0: Play Tone Adjust. Нажмите кнопку PROG, а затем вкладку Tone Adjust.
- Для регулировки используйте ползунки и кнопки на дисплее. Вы также можете использовать контроллеры VALUE для корректировки.
Параметры, назначенные ползункам и ручкам, будут отличаться в зависимости от программы или комбинации. (Для некоторых звуков результат может быть трудно заметить.)
Для бывшихample, «Pitch Stre.» ползунок обеспечивает богатые тональные изменения и вариации без ухудшения характера исходного звука. «1: F lfo IA» управляет эффектом вау, «1: lfo IA» контролирует вибрато, а «1: Drive» может слегка утолщать звук или применять сильные искажения.
«F / A EG A», «F / A EG D», «F / A EG S» и «F / A EG R» соответственно управляют временем атаки, временем затухания, уровнем сустейна и временем восстановления фильтра. а также amp ЭГ.
Если вы включите кнопку 1: Trsp, транспозиция генератора 1 будет изменена на значение, показанное под кнопкой, повышая или понижая высоту тона.
Изменение программы или баланса громкости тембров
Комбинации можно назначить до шестнадцати программ, что позволяет создавать плотные и богатые текстуры.
- В комбинированном режиме нажмите всплывающую кнопку выбора категории; затем на вкладке 12 «Bass Splits» выберите C059: Bass & Piano. Категория Bass Splits содержит комбинации разделенного типа, в которых нижний диапазон клавиатуры воспроизводит басовый звук, а верхний диапазон — другой звук.
Bass & Piano назначает акустическое фортепиано на тембр 1, а акустический бас — на тембры 2 и 3.  Попробуем изменить назначение программы так, чтобы вместо фортепиано играл орган.
Нажмите всплывающую кнопку «Категория тембра 1 / Программа тембров» для доступа к списку. В левой части списка нажмите вкладку 01 Орган, а затем выберите программу из списка. Нажмите кнопку ОК, чтобы подтвердить свой выбор.- Играйте на клавиатуре. Ноты C4 и выше будут воспроизводить звук органа, а нижние ноты будут воспроизводить звук баса.
- Теперь давайте настроим панораму (стереопозицию) и громкость звука органа и баса.
В нижней части дисплея нажмите вкладку Mixer 1. Отрегулируйте ручку панорамирования и ползунок громкости для каждого тембра. - Попробуем изменить точку разделения, разделяющую звуки органа и баса.
Нажмите кнопку PAGE; затем в разделе «Выбор страницы» нажмите P4 Zone / Delay. Нажмите вкладку Key Z 1 для доступа к странице P8: Zone / Delay Key Zone T4T01. Удерживая нажатой «нижнюю клавишу» тембра 08, сыграйте ноту на клавиатуре. Это определит самую низкую клавишу, которая воспроизводит звук органа. Удерживая нажатой «верхнюю клавишу» тембра, который воспроизводит басовый звук, нажмите ноту, которая на полтона ниже самой нижней ноты диапазона органа, указанного на предыдущем шаге. Это определит самую верхнюю клавишу, воспроизводящую басовый звук.
 Попробуем изменить назначение программы так, чтобы вместо фортепиано играл орган.
Использование секвенсора
Запись вашего выступления
Автоматическая настройка песни
Функция автоматической настройки композиции копирует текущую программу или комбинацию в композицию, а затем переводит систему в режим готовности к записи. Когда приходит вдохновение, вы можете использовать эту функцию, чтобы немедленно начать запись. Для этого в программном режиме:
Выберите программу, которую хотите использовать для записи. При желании вы можете включить кнопки ARP или DRUM TRACK, чтобы добавить арпеджиатор или ударную установку.
производительность.
- Удерживая нажатой кнопку ENTER, нажмите кнопку SEQUENCER REC.
 кнопку.
Сообщение «Продолжить?» появится в диалоговом окне «Настройка записи» на дисплее. - Нажмите кнопку REC кнопку еще раз. (В качестве альтернативы вы можете использовать кнопку OK или кнопку ENTER.)
KROME автоматически переключится в режим секвенсора и войдет в состояние ожидания записи, и щелчок начнет звучать в такт темпу (). Отрегулируйте темп () по желанию (см. «Регуляторы TEMPO» на стр. 7.). - Нажмите кнопку START / STOP.
 кнопку, чтобы запустить секвенсор и начать запись.
При настройках по умолчанию перед началом записи будет отсчет двух тактов. - Включите то, что хотите записать, а затем нажмите кнопку START / STOP. кнопка, чтобы остановить запись.
Секвенсор автоматически вернется к началу композиции. - Нажмите кнопку START / STOP. кнопка, чтобы услышать то, что вы записали
Поскольку вы начали в режиме программы, ваша игра будет записана на дорожку 1. Если вы использовали дорожку ударных, она будет записана на дорожку 10. Для комбинаций по мере необходимости используются другие дорожки.
Добавление еще одной дорожки
Давайте добавим еще один трек к исполнению, которое вы записали с помощью Auto Song Setup.
- Нажмите вкладку Preference, чтобы перейти на страницу P0: Play / REC Preference. Справа снимите флажок «Multi REC».
Примечание. Автоматическая настройка композиции включает эту функцию для записи трека ударных программы или нескольких каналов в комбинации.
- Нажмите вкладку Prog 1, чтобы перейти на страницу P8: Play / REC Program T0.
- Под названием песни откройте всплывающее окно выбора трека и выберите MIDI-трек 02.
Это управляет как дорожкой, которую вы играете с клавиатуры, так и (при выключенной функции Multi REC) записываемой дорожкой.  спойте во всплывающих меню «Категория» или «Выбор банка / программы», выберите программу для дорожки 02.
- Если вы включили кнопки ARP и DRUM TRACK, выключите их.
- Нажмите LOCATE
 , чтобы вернуться к началу композиции.
 - Нажмите кнопку REC кнопку, чтобы включить запись, а затем нажмите кнопку START / STOP. для запуска.
- Включите то, что хотите записать, а затем нажмите кнопку START / STOP. Кнопка, когда вы закончите.

 спойте во всплывающих меню «Категория» или «Выбор банка / программы», выберите программу для дорожки 02.
Редактирование MIDI
При желании вы можете изменить свое исполнение после записи. Например, вы можете стереть неправильно сыгранные ноты или скорректировать их высоту и синхронизацию.
Корректировка времени
Временная коррекция выполняется посредством квантования. Он берет проигранные вами ноты и выстраивает их до ближайшей доли или доли доли в зависимости от выбранного вами разрешения. Его также можно использовать для придания ощущения «свинга». Давайте попробуем квантовать только что записанный MIDI-трек.
- Нажмите кнопку PAGE; затем в «Выбор страницы» нажмите P6 Track Edit. Затем нажмите вкладку Track Edit, чтобы перейти на страницу P6: Track Edit Track Edit.
Эта страница включает график, показывающий каждую дорожку в последовательности. Маленькие прямоугольники представляют собой меры, которые содержат данные о производительности.
- Выберите MIDI Track 01 из всплывающего окна над графиком.
- Используя параметры «От измерения» и «До конца измерения» в нижней части дисплея, установите диапазон измерений, который вы хотите изменить. На данный момент установите «От» на 001 и «До конца» на 064.
- Нажмите кнопку меню и выберите «Квантовать».
Появится диалоговое окно Quantize.
- Установите разрешение на желаемое ритмическое значение.
Как правило, выбирайте самую короткую ноту, используемую в записанном исполнении. - Нажмите кнопку OK, чтобы квантовать выбранные данные.
Если результат отличался от ожидаемого, нажмите кнопку «СРАВНИТЬ», чтобы восстановить песню в исходное состояние до применения квантования. Поэкспериментируйте с различными разрешениями, установите для параметра Intensity значение менее 100%, чтобы сохранить некоторую естественность, или увеличьте значение Swing, чтобы создать ощущение перетасовки или свинга. Вы также можете применить квантование во время записи, используя параметр REC Resolution в верхней части страницы P0. Выберите желаемое разрешение, и во время записи будет применяться квантование.

Исправление или добавление заметок
Вы можете редактировать данные исполнения, перемещая или стирая ноты, изменяя продолжительность или силу ноты или добавляя ноты.
Трек использовать удобно View редактирование, когда вы хотите стереть, переместить или скопировать данные в единицах целых дорожек или тактов.
- (Нажмите кнопку PAGE; затем в режиме выбора страницы нажмите P6: Track Edit.) Затем нажмите кнопку Track View Вкладка для доступа к P6: Track Edit Track View стр.
- Используя инструменты, укажите начальную и конечную такты для выбора области редактирования.
- Используйте инструменты для перемещения, копирования или стирания данных.
Подробнее см. Стр. 68 Руководства по эксплуатации.

Редактирование фортепианной музыки удобно использовать, если вы хотите детально редактировать отдельные ноты.
- Используя инструменты, укажите начальную и конечную такты для выбора области редактирования.
- Нажмите кнопку меню и выберите «Piano Roll».
Или нажмите нижнюю панель инструментов в P6: Track Edit Track View стр.
Появится диалоговое окно Piano Roll.
- Используйте кнопки масштабирования, чтобы выбрать удобный коэффициент масштабирования.
- Используйте инструменты для редактирования заметок.

Подробнее см. Стр. 70 Руководства по эксплуатации.
Шаблоны песен
Шаблоны песен содержат звуки и эффекты, подходящие для определенного музыкального стиля, поэтому вы можете сразу приступить к созданию песни, просто выбрав соответствующий шаблон. В дополнение к предустановленным шаблонам вы можете создавать свои собственные оригинальные песни-шаблоны, содержащие ваши часто используемые звуки.
Шестнадцать предустановленных композиций-шаблонов (P00P15) содержат настройки параметров трека, такие как программа, громкость и панорама, а также эффекты, арпеджиатор, параметры трека и настройки темпа.
Обратите внимание, что песни-шаблоны не включают MIDI-данные для треков, паттернов и т. Д.
- На странице Sequencer P0: Play / REC нажмите кнопку меню и выберите команду «Загрузить шаблон песни».
Появится диалоговое окно.
- В поле «От» выберите шаблонную композицию, которую хотите загрузить.
- Отметьте «Копировать паттерн в трек тоже?» флажок.
Если этот флажок установлен, диалоговое окно для копирования паттерна появится автоматически после завершения загрузки шаблона песни.
Если этот флажок не установлен, будет загружена только выбранная композиция-шаблон. - Нажмите кнопку OK, чтобы загрузить шаблон песни, или нажмите кнопку Отмена, чтобы выйти без внесения изменений.
Когда вы нажмете OK, настройки шаблона песни будут скопированы в текущую песню.
Если копировать паттерн в трек? был отмечен на шаге 3, откроется диалоговое окно «Копировать паттерн в трек». - Используйте всплывающие окна Bank (User или Preset) и Pattern, чтобы выбрать паттерн для копирования..

- В поле To Track выберите трек, который будет использоваться для паттерна.
Примечание. В каждой из шестнадцати предустановленных шаблонных композиций дорожка 1 всегда назначается программе ударных. (В некоторых случаях другие дорожки также могут содержать программы ударных.) - В поле «Мера» установите меру, с которой вы хотите, чтобы паттерн начинался.
После названий каждого из 710 предустановленных паттернов частично отображаются музыкальный стиль и названия наиболее подходящих программ ударных.
Загрузив программу ударных и соответствующий предустановленный паттерн, вы можете мгновенно настроить трек ударных в соответствии с шаблоном композиции. - Чтобы загрузить рисунок, нажмите кнопку ОК.
После загрузки паттерна отсчет такта начнется автоматически. Затем вы можете скопировать другой рисунок, если хотите. Например, вы можете использовать разные паттерны один за другим, чтобы создать песню, с разными паттернами для куплета, припева и бриджа. После того, как вы закончили добавлять шаблоны, нажмите кнопку Exit, и все готово! Подробнее о записи см. В разделе «Добавление еще одной дорожки» на стр. 16.


Использование эффектов
У вас есть выбор из 193 различных цифровых эффектов. Секция эффектов KROME состоит из пяти встроенных эффектов, двух мастер-эффектов, одного общего эффекта и микшера, который управляет маршрутизацией между этими процессорами эффектов. Каждый из них обеспечивает стерео вход и выход. Вы можете свободно управлять эффектами с помощью динамической модуляции (Dmod), что позволяет вам использовать контроллеры KROME для управления эффектами в реальном времени во время исполнения, а также синхронизировать различные типы эффектов модуляции через общий LFO или использовать MIDI / Tempo Sync. для создания эффектов, синхронизированных с темпом.
Настройки маршрутизации и эффектов
Вы будете использовать маршрутизацию, чтобы указать эффекты, на которые будет отправляться звук. Вот бывшийample этих настроек для песни.
- Выберите эффекты вставки, которые вы хотите использовать. Отрегулируйте эти настройки на странице Seq P8: Routing / IFX Insert FX Setup.

- Укажите эффект, на который будет отправлен вывод каждого трека. На странице Seq P8: Routing / IFX Routing T01 используйте «Выбор шины (IFX / Выход)» для настройки этих параметров. Для бывшегоampЕсли вы хотите, чтобы выход дорожки 2 был входом для вставки эффекта 3, назначьте дорожку 2 «Выбор шины (IFX / Output)» для IFX3.
В верхней части экрана отображается состояние маршрутизации, встроенных эффектов и настроек цепочки. В этом бывшемample, T01 (дорожка 1) назначен DKit и использует IFX1 и 2. Здесь используются настройки набора ударных. T02 подключен к IFX3, а T04 связан цепью с IFX4 и IFX5.
- «Send1» и «Send2» определяют уровни отправки на мастер-эффект для каждой дорожки. «Send1» соответствует MFX1, а «Send2» соответствует MFX2.
На этой странице «Send1» и «Send2» могут быть выбраны только в том случае, если для «Bus (IFX / Output) Select» установлено значение L / R или Off. Если «Выбор шины (IFX / Выход)» установлен на IFX1, уровни передачи задаются «Send5» и «Send1» после того, как сигнал прошел через вставные эффекты (P2: страница Routing / IFX Insert FX Setup). - Seq P9: страница маршрутизации MFX / TFX / LFO. Здесь вы можете выбрать мастер-эффекты и общий эффект, который будет использоваться. На этой странице также показан поток сигналов.


Сохранение и загрузка данных
Сохранение ваших правок
Понимание записи и сохранения
Есть два способа сохранить вашу работу в KROME: записать и сохранить. Примечание. Если вы выключите питание перед записью или сохранением, данные, которые вы изменили, будут потеряны. Обязательно сохраняйте важные данные во внутренней памяти или на SD-карте. «Запись» означает сохранение данных во внутренней памяти самого KROME. Вы можете использовать операцию записи для программ, комбинаций, паттернов арпеджио, наборов ударных и глобальных настроек. Примечание. Данные композиции нельзя записать во внутреннюю память (см. «Сохранение данных на KROME» на стр. 113 Руководства по эксплуатации). «Сохранение» означает сохранение данных на SD-карте. Вы можете использовать операцию сохранения для сохранения данных песни, которые нельзя записать во внутреннюю память, а также данных, которые могут быть записаны во внутреннюю память. Примечание. Операция «Сохранить» позволяет сохранять отдельные элементы данных, а также все данные KROME вместе. Сохраняя весь набор звуковых данных (т.е. программ и комбинаций), глобальных настроек и данных песни секвенсора, вы можете управлять всем текущим состоянием KROME как единым набором данных. Это полезный способ управлять настройками для отдельных проектов или живых выступлений.
Writing
Написание программ
Вот как записать отредактированную Программу во внутреннюю память.
1. Нажмите кнопку WRITE.
Появится диалоговое окно. Здесь у вас есть возможность сохранить данные под другим номером или изменить название или категорию программы. Если вы хотите просто перезаписать существующие данные без внесения каких-либо из этих изменений, перейдите к шагу 2.
- Изменение названия программы:
Нажмите кнопку «T», чтобы открыть диалоговое окно редактирования текста. Используйте экранную клавиатуру, чтобы ввести имя, а затем нажмите кнопку OK, чтобы вернуться в предыдущее диалоговое окно. - Изменение категории и подкатегории: нажмите всплывающую кнопку «Категория» или «Подкатегория» и выберите нужную категорию из списка. Вы вернетесь в предыдущее диалоговое окно.
- Указание банка и номера назначения записи: нажмите всплывающую кнопку «Программа», используйте вкладки для выбора банка и выберите номер из списка. Нажмите кнопку ОК, чтобы вернуться в предыдущее диалоговое окно.
2. Еще раз нажмите кнопку WRITE, чтобы выполнить операцию записи. (Вы также можете выполнить, нажав кнопку OK или кнопку ENTER.)
Запись других данных
Чтобы написать комбинацию, выберите комбинацию, которую вы хотите написать, и напишите ее так же, как вы это делали для программы. Другие данные, такие как паттерны арпеджио, записываются на соответствующей странице. Подробнее см. Стр. 113 Руководства по эксплуатации.
Примечание. В качестве альтернативы использованию кнопки WRITE вы также можете использовать команду «Write» в меню. Пресеты эффектов можно записать только с помощью команды «Запись».
Сохранение и загрузка
Сохранение данных на SD-карту
Данные, которые вы создали или отредактировали на KROME, можно сохранить на SD-карту. KROME может обрабатывать несколько типов files и данные, но здесь мы объясним два общих типа file: .ПКГ files и .SNG files.
PCG означает «Программа, комбинация и глобальность». Эти files может также включать пользовательские паттерны арпеджио, наборы ударных и пользовательскую дорожку ударных.
SNG означает «Песня». Эти files сохранить все композиции из режима секвенсора.
Сохранение программ и песен вместе
При сохранении песни, созданной с использованием отредактированных программ или измененных программ, вы можете сохранить данные программы вместе с данными песни.
- Вставьте SD-карту в слот для SD-карты.
Повернув носитель этикеткой вверх, вставьте конец карты с разъемом в слот для SD-карты и нажмите на нее до щелчка. - Нажмите кнопку MEDIA, чтобы войти в режим Media (загорится светодиод).
- Нажмите вкладку «Сохранить», чтобы перейти на страницу «Сохранение мультимедиа».
- Выберите каталог, в котором вы хотите сохранить данные.
Нажмите кнопку «Открыть», чтобы перейти на более низкий уровень, или нажмите кнопку «Вверх», чтобы перейти на более высокий уровень. Чтобы создать новый каталог, перейдите на уровень, на котором вы хотите создать каталог, и используйте команду меню «Создать каталог» на странице MediaUtility. - На странице MediaSave нажмите кнопку меню, чтобы открыть меню, и выберите команду «Сохранить все».
Эта команда сохранит набор файлов .PCG и .SNG. fileвсе сразу.
Появится диалоговое окно.

6. Нажмите кнопку редактирования текста («T») и введите имя для files.
Все files будет иметь одно и то же имя с разными суффиксами для отображения типа данных (.PCG, .SNG).
7. Нажмите кнопку ОК, чтобы сохранить данные на SD. карте!
Когда сохранение будет завершено, система вернется на страницу сохранения, и на дисплее отобразится результат. file(s). Требуемое количество времени будет зависеть от количества сохраняемых данных. Примечание. Вы можете использовать различные кнопки «Выбор» в диалоговом окне, чтобы указать банк, используемый для сохранения; однако при сохранении песни вы также должны сохранить вместе с ней программы и наборы ударных, используемые в песне. Точно так же при сохранении комбинации вы должны сохранить вместе с ней программы и наборы ударных, используемые в этой комбинации.
Сохранение песни
В режиме секвенсора вы можете нажать кнопку WRITE, чтобы сохранить .SNG file на вашу SD-карту. Когда появится диалоговое окно, нажмите кнопку WRITE еще раз, чтобы выполнить операцию сохранения.
Загрузка данных
Вы можете загрузить все содержимое памяти сразу, включая звуковые данные (программы, комбинации и т. Д.) И данные песен. Для этого:
- Вставьте SD-карту, содержащую file вы хотите загрузить в слот для SD-карты.
Повернув носитель этикеткой вверх, вставьте конец карты с разъемом в слот для SD-карты и нажмите на нее до щелчка. - Нажмите кнопку MEDIA, чтобы войти в режим Media (загорится светодиод).
- Нажмите вкладку «Загрузка», чтобы перейти на страницу «Загрузка носителя».
- Перейдите в каталог, содержащий file являетесь
хотите загрузить и выберите .SNG file. Выберите каталог (отображается в виде значка папки) и нажмите кнопку «Открыть», чтобы перейти на более низкий уровень, или нажмите кнопку «Вверх», чтобы перейти на более высокий уровень. Выбранный .SNG file будут выделены. - Нажмите красную кнопку Загрузить внизу страницы.
(Вы также можете использовать команду меню «Загрузить выбранное».) Появится диалоговое окно, содержащее ряд параметров. - Выберите «Загрузить [fileимя] .PCG тоже ».
Когда эти флажки отмечены, система ищет .PCG file с тем же именем, что и основной .SNG file. - Используйте «Select .SNG Allocation», чтобы указать, как будут загружаться композиции и будут ли удалены существующие композиции.
присоединять загружает песни в первые свободные номера песен, следующие за песнями, которые уже находятся в памяти.
Очистить сотрет все песни из внутренней памяти и загрузит песни с точными номерами, с которых они были сохранены. - Нажмите кнопку ОК, чтобы загрузить данные.
![]() Никогда не выключайте питание и не извлекайте SD-карту во время загрузки или сохранения данных.
Никогда не выключайте питание и не извлекайте SD-карту во время загрузки или сохранения данных.![]() При загрузке программ, комбинаций, песен, наборов ударных или пользовательских паттернов арпеджио убедитесь, что настройки защиты памяти на странице Global Basic Setup отключены (не отмечены флажком). Если они включены, вы не сможете загрузить данные.
При загрузке программ, комбинаций, песен, наборов ударных или пользовательских паттернов арпеджио убедитесь, что настройки защиты памяти на странице Global Basic Setup отключены (не отмечены флажком). Если они включены, вы не сможете загрузить данные.
Прослушивание демо-песен
Загрузка данных демонстрационной песни
![]() Когда вы выполняете следующую операцию, данные, хранящиеся в KROME, будут сброшены и перезаписаны предустановленной программой, комбинированными данными и данными демонстрационной песни. Если вы не хотите потерять данные, которые вы отредактировали или создали, вам следует сохранить их на SD-карту (имеется в продаже), прежде чем продолжить.
Когда вы выполняете следующую операцию, данные, хранящиеся в KROME, будут сброшены и перезаписаны предустановленной программой, комбинированными данными и данными демонстрационной песни. Если вы не хотите потерять данные, которые вы отредактировали или создали, вам следует сохранить их на SD-карту (имеется в продаже), прежде чем продолжить.
- Нажмите кнопку GLOBAL (светодиод загорится), чтобы войти в глобальный режим.
- Откройте страницу P0: Play / REC Program T01.
Если эта страница не отображается, вам нужно несколько раз нажать кнопку EXIT. - Нажмите кнопку меню в верхнем правом углу дисплея и выберите «Загрузить предварительные / демонстрационные данные».

- В поле «Kind» выберите «All (Preload PCG and Demo Songs)».
Когда вы выполняете загрузку, будут загружены предварительно загруженные данные и данные демонстрационной песни. - Нажмите кнопку OK или кнопку ENTER.
В диалоговом окне вас попросят подтвердить. Еще раз нажмите кнопку OK или ENTER, чтобы загрузить данные.Никогда не выключайте питание во время загрузки данных. Если появится диалоговое окно «Память защищена», нажмите Системную настройку. вкладка и снимите флажок с параметра Memory Protect Song. Затем снова загрузите данные.

Прослушивание демо-песен
Вот как слушать демонстрационные песни в режиме секвенсора.
- Нажмите кнопку SEQ (светодиод загорится), чтобы войти в режим секвенсора.
- Откройте страницу P0: Play / REC– Program T01–08.
Если эта страница не отображается, вам нужно нажать кнопку
Кнопку EXIT несколько раз.
- Начнем с прослушивания песни S000.
Убедитесь, что выбрана песня S000. Если выбрана другая песня, нажмите область отображения названия песни (Выбор песни), чтобы выделить ее. Затем нажмите цифровую клавишу 0, а затем кнопку ENTER. - Нажмите кнопку SEQUENCER START / STOP. кнопку.
Светодиод будет мигать, и песня начнет воспроизведение. - Если вы хотите остановить воспроизведение в середине песни, нажмите кнопку START / STOP. кнопку еще раз.
- Послушаем следующую песню.
Нажмите на область отображения названия песни (Выбор песни). Нажмите цифровую клавишу 1, а затем нажмите кнопку ENTER. (Будет выбрана композиция «S001».)
Кроме того, вы можете нажать круглую кнопку (всплывающее окно «Выбор песни»), расположенную слева от названия песни, и появится список названий песен. Нажмите одно из названий песни, чтобы выбрать песню. - Нажмите кнопку START / STOP. кнопку, чтобы начать воспроизведение. Чтобы остановить воспроизведение, нажмите кнопку START / STOP. кнопку еще раз.Демонстрационная песня не будет сохранена при выключении питания, но вы можете загрузить ее снова в любое время.

Последовательное воспроизведение нескольких песен
Песни можно назначить в список сигналов, и они будут воспроизводиться в указанном порядке. Вы также можете указать, сколько раз будет повторяться каждая песня. Вот как воспроизвести демонстрационные песни, назначенные списку сигналов.
- Перейдите на страницу P11: Cue List.
Нажмите кнопку PAGE, чтобы перейти к странице выбора последовательной страницы. Нажмите на дисплее «P11 Cue List».
- Нажмите кнопку SEQUENCER START / STOP. кнопку.
Вы услышите песни в списке в заданном порядке. Если вы хотите остановить воспроизведение до того, как дойдете до конца списка, нажмите кнопку START / STOP. кнопку еще раз.

Выступление с RPPR
В режиме секвенсора функция RPPR (воспроизведение / запись паттернов в реальном времени) позволяет вам назначать предустановленный паттерн или пользовательский паттерн (и трек для его воспроизведения) каждой клавише.
Таким образом, вы можете воспроизвести паттерн, просто нажав клавишу, которой он назначен. Вы также можете записать полученное воспроизведение.
Загруженные вами демонстрационные песни содержат данные, в которых используется функция RPPR. Вот как это можно использовать.
- Откройте страницу P0: Play / REC Program T01 и выберите S08.
Подробнее см. Шаги 6 и 7 на предыдущей странице.
- Убедитесь, что установлен флажок «RPPR».
Если этот флажок установлен, RPPR будет включен.
Если этот флажок не установлен, RPPR будет отключен. - Нажмите C # 2 или более высокую клавишу.

Начнется воспроизведение паттерна, назначенного этой клавише. Паттерн, такой как паттерн ударных или басовая фраза и т. Д., Может быть назначен каждой из семидесяти двух клавиш C # 2C8 (обозначенных на иллюстрации как Pattern Assignable). Клавиши, которые не назначены, будут воспроизводиться нормально.
В некоторых случаях паттерн будет продолжать играть даже после того, как вы отпустите клавишу. В этом случае вы можете остановить воспроизведение, нажав любую клавишу C2 или ниже (клавиши выключения) дважды в быстрой последовательности (обозначенные на рисунке как клавиши выключения).

На этом наш быстрый старт завершен. Из широкого набора функций KROME в этом руководстве по эксплуатации объясняется, как использовать некоторые из наиболее типичных операций. Мы настоятельно рекомендуем вам найти время, чтобы прочитать его полностью.
Основные технические характеристики
Клавиатура:
61-клавишная или 73-клавишная полувзвешенная клавиатура (чувствительна к скорости нажатия, послекасание не поддерживается) 88-клавишная клавиатура NH (с естественным взвешенным молоточковым действием) (чувствительна к скорости нажатия, послекасание не поддерживается)
Источник питания:
Разъем адаптера переменного тока (12 В постоянного тока), выключатель питания
Габаритные размеры (ширина × глубина × высота):
61 банкнота 1,027 × 313 × 93 мм / 40.43 ″ × 12.32 ″ × 3.66 ″
73 банкнота 1,191 × 313 × 93 мм / 46.89 ″ × 12.32 ″ × 3.66 ″
88 банкнота 1,448 × 383 × 131 мм / 57.01 ″ × 15.08 ″ × 15.16 ″
Вес:
61-нотная 7.2 кг / 15.87 фунта
73-нотная 8.2 кг / 18.08 фунта
88-нотная 14.7 кг / 32.41 фунта
Потребляемая мощность:
13 W
Включенные предметы:
Адаптер переменного тока, шнур питания
Краткое руководство (этот документ)
Аксессуары (продаются отдельно):
XVP-20, XVP-10: педаль экспрессии / громкости
EXP-2: ножной контроллер
ДС-1Н: Дampэр педаль
PS-1, PS-3: Педальный переключатель
* Технические характеристики и внешний вид могут быть изменены без предварительного уведомления.
ВАЖНОЕ УВЕДОМЛЕНИЕ ДЛЯ ПОТРЕБИТЕЛЕЙ
Этот продукт был изготовлен в соответствии со строгими спецификациями и объемомtagтребования, действующие в стране, в которой предполагается использовать этот продукт. Если вы приобрели этот продукт через Интернет, по почте и / или по телефону, вы должны убедиться, что этот продукт предназначен для использования в стране, в которой вы проживаете.
ПРЕДУПРЕЖДЕНИЕ: Использование этого продукта в любой стране, кроме той, для которой он предназначен, может быть опасным и может привести к аннулированию гарантии производителя или дистрибьютора. Также сохраните квитанцию в качестве доказательства покупки, в противном случае ваш продукт может быть лишен гарантии производителя или дистрибьютора.
![]()
www.korg.com
Опубликовано 12/2018 Отпечатано в Китае
Документы / Ресурсы
View a manual of the Korg Krome EX below. All manuals on ManualsCat.com can be viewed completely free of charge. By using the ‘Select a language’ button, you can choose the language of the manual you want to view.
Page: 1
ENGLISH
Contents
Precautions . . . . . . . . . . . . . . . . . . . . . . . . . . . . . . .2
Regarding the LCD screen . . . . . . . . . . . . . . . . .2
Data handling . . . . . . . . . . . . . . . . . . . . . . . . . . . . .3
COPYRIGHT WARNING . . . . . . . . . . . . . . . . . . . . .3
About this manual. . . . . . . . . . . . . . . . . . . . . . . . .4
Main Features. . . . . . . . . . . . . . . . . . . . . . . . 5
Front Panel . . . . . . . . . . . . . . . . . . . . . . . . . . 6
Rear Panel. . . . . . . . . . . . . . . . . . . . . . . . . . . . . . . . .7
Connecting the keyboard and turning
the power on. . . . . . . . . . . . . . . . . . . . . . . . . 8
Turning the power on . . . . . . . . . . . . . . . . . . . . .8
Turning the power off . . . . . . . . . . . . . . . . . . . . .9
About the display and the modes . . . . 10
Display. . . . . . . . . . . . . . . . . . . . . . . . . . . . . . . . . . 10
Selecting modes. . . . . . . . . . . . . . . . . . . . . . . . . 11
Playing sounds. . . . . . . . . . . . . . . . . . . . . . 12
Playing Programs and Combinations . . . . . 12
Using controllers to modify the sound. . . . 13
Performing with the arpeggiator . . . . . . . . . 14
Using the Drum Track. . . . . . . . . . . . . . . . . . . . 14
Simple program and combination
editing . . . . . . . . . . . . . . . . . . . . . . . . . . . . . . . . . . 15
Using the sequencer . . . . . . . . . . . . . . . . . 16
Recording your performance. . . . . . . . . . . . . 16
Editing MIDI . . . . . . . . . . . . . . . . . . . . . . . . . . . . . 17
Template songs . . . . . . . . . . . . . . . . . . . . . . . . . 18
Using effects . . . . . . . . . . . . . . . . . . . . . . . . 19
Routing and effect settings . . . . . . . . . . . . . . 19
Saving and loading data . . . . . . . . . . . . . 20
Saving your edits . . . . . . . . . . . . . . . . . . . . . . . . 20
Writing . . . . . . . . . . . . . . . . . . . . . . . . . . . . . . . . . . 20
Saving and loading . . . . . . . . . . . . . . . . . . . . . . 20
Listening to the demo songs . . . . . . . . . 22
Loading the demo song data. . . . . . . . . . . . . 22
Listening to the demo songs . . . . . . . . . . . . . 22
Playing multiple songs in succession . . . . . 23
Performing with RPPR . . . . . . . . . . . . . . . . . . . 23
Main Specifications. . . . . . . . . . . . . . . . . . 24
Page: 2
En-2
Precautions
Location
Using the unit in the following locations can result in a mal-
function.
• In direct sunlight
• Locations of extreme temperature or humidity
• Excessively dusty or dirty locations
• Locations of excessive vibration
• Close to magnetic fields
Power supply
Please connect the designated AC adapter to an AC outlet of
the correct voltage. Do not connect it to an AC outlet of volt-
age other than that for which your unit is intended.
Interference with other electrical devices
Radios and televisions placed nearby may experience recep-
tion interference. Operate this unit at a suitable distance from
radios and televisions.
Handling
To avoid breakage, do not apply excessive force to the
switches or controls.
Care
If the exterior becomes dirty, wipe it with a clean, dry cloth.
Do not use liquid cleaners such as benzene or thinner, or
cleaning compounds or flammable polishes.
Keep this manual
After reading this manual, please keep it for later reference.
Keeping foreign matter out of your equipment
Never set any container with liquid in it near this equipment.
If liquid gets into the equipment, it could cause a breakdown,
fire, or electrical shock.
Be careful not to let metal objects get into the equipment. If
something does slip into the equipment, unplug the AC
adapter from the wall outlet. Then contact your nearest Korg
dealer or the store where the equipment was purchased.
Regarding the LCD screen
The KROME LCD screen is a precision device, and careful
attention has been paid to its product quality. Although you
may notice some of the issues listed below, please be aware
that these are due to the characteristics of LCD screens, and
are not malfunctions.
• There may be pixels in the screen that are always dark
(unlit) or always bright (lit).
• Depending on the displayed content, the brightness of the
screen may appear uneven.
• Depending on the displayed content, horizontal stripes of
shading may be visible.
• Depending on the displayed content, flickering or moire
patterns may be visible.
Thank you for purchasing the Korg KROME EX Music
Workstation. To help you get the most out of your new
instrument, please read this manual carefully.
THE FCC REGULATION WARNING (for USA)
NOTE: This equipment has been tested and found to comply with
the limits for a Class B digital device, pursuant to Part 15 of the
FCC Rules. These limits are designed to provide reasonable
protection against harmful interference in a residential installation.
This equipment generates, uses, and can radiate radio frequency
energy and, if not installed and used in accordance with the
instructions, may cause harmful interference to radio
communications. However, there is no guarantee that interference
will not occur in a particular installation. If this equipment does
cause harmful interference to radio or television reception, which
can be determined by turning the equipment off and on, the user is
encouraged to try to correct the interference by one or more of the
following measures:
• Reorient or relocate the receiving antenna.
• Increase the separation between the equipment and receiver.
• Connect the equipment into an outlet on a circuit different from
that to which the receiver is connected.
• Consult the dealer or an experienced radio/TV technician for
help.
If items such as cables are included with this equipment, you must
use those included items.
Unauthorized changes or modification to this system can void the
user’s authority to operate this equipment.
SUPPLIER’S DECLARATION OF CONFORMITY (for USA)
Responsible Party: KORG USA INC.
Address: 316 SOUTH SERVICE ROAD, MELVILLE, NY
Telephone: 1-631-390-6500
Equipment Type: MUSIC WORKSTATION
Model: KROME EX-61/KROME EX-73/KROME EX-88
This device complies with Part 15 of FCC Rules. Operation is
subject to the following two conditions:
(1) This device may not cause harmful interference, and (2) this
device must accept any interference received, including
interference that may cause undesired operation.
Notice regarding disposal (EU only)
When this “crossed-out wheeled bin” symbol is displayed
on the product, owner’s manual, battery, or battery
package, it signifies that when you wish to dispose of this
product, manual, package or battery you must do so in an
approved manner. Do not discard this product, manual,
package or battery along with ordinary household waste.
Disposing in the correct manner will prevent harm to
human health and potential damage to the environment. Since the
correct method of disposal will depend on the applicable laws and
regulations in your locality, please contact your local administrative
body for details. If the battery contains heavy metals in excess of
the regulated amount, a chemical symbol is displayed below the
“crossed-out wheeled bin” symbol on the battery or battery
package.
Page: 3
En-3
English
Français
Deutsch
Español
中文
Data handling
Incorrect operation or malfunction may cause the contents of
memory to be lost, so we recommend that you save important
data on USB storage devices or other media. Please be aware
that Korg will accept no responsibility for any damages which
may result from loss of data.
COPYRIGHT WARNING
• This professional device is intended only for use with
works for which you yourself own the copyright, for which
you have received permission from the copyright holder to
publicly perform, record, broadcast, sell, and duplicate, or
in connection with activities which constitute “fair use”
under copyright law.
If you are not the copyright holder, have not received
permission from the copyright holder, or have not engaged
in fair use of the works, you may be violating copyright
law, and may be liable for damages and penalties.
KORG TAKES NO RESPONSIBILITY FOR ANY
INFRINGEMENT COMMITTED THROUGH USE OF
KORG PRODUCTS.
• The content that is built into this product or included with
it may not be extracted, recorded, or stored in a form
similar to its original state, and distributed or made
publicly available on the internet.
The content of this product (such as sound programs, style
data, accompaniment patterns, MIDI data, PCM sample
data, audio data, operating system etc.) is the copyrighted
property of KORG Inc. or is copyrighted material used by
KORG Inc. under license from a third party.
You do not need permission from KORG Inc. to use the
above content to produce or perform musical works, or to
record and distribute such works.
Page: 4
En-4
About this manual
The manuals and how to use them
The KROME EX comes with the following manuals.
• Quick Start Guide (printed and PDF)
(this document)
• Supplementary Manual (PDF)
• KROME Operation Guide (PDF)
• KROME Parameter Guide (PDF)
• Voice Name List (PDF)
A printed copy is included only for the Quick Start
Guide.
Quick Start Guide
This provides a simple explanation of the KROME EX’s
functions. Read this manual first.
Supplementary Manual
This explains the expanded functions and other
features of the KROME EX, regarding the programs,
combinations and so on. Please read this as a
supplement to be used with the KROME Operation
Guide and the KROME Parameter Guide.
KROME Operation Guide
Put simply, the Operation Guide is designed to answer
the question, “How do I do this?”
It explains the names and functions of each part of the
KROME, basic operation, an overview of each mode,
how to edit sounds, how to record on the sequencer,
and how to sample. This guide also explains the basics
of the Arpeggiator, effects, Drum Kits, and the Drum
Track.
Finally, it also contains a troubleshooting guide and
supplemental information such as specifications.
KROME Parameter Guide
The Parameter Guide is designed to answer the
question, “What does this do?”
Organized by mode and page, the Parameter Guide
includes information on each and every parameter in
the KROME.
Voice Name List
The Voice Name List lists all of the sounds and setups
that are in the KROME EX when it is shipped from the
factory, including Programs, Combinations,
Multisamples, Drumsamples, Drum Kits, Arpeggio
Patterns, Drum Track Patterns, Template Songs, and
Effect Presets.
PDF versions
The KROME EX PDF manuals are designed for easy
navigation and searching. They include extensive PDF
contents information, which generally appears on the
side of the window in your PDF reader and lets you
jump quickly to a specific section. All cross-references
are hyper-links, so that clicking on them automatically
takes you to the source of the reference.
Conventions in this manual
References to the KROME EX
The KROME EX is available in 88-key, 73-key, and 61-
key models. The manuals refer to all models without
distinction as “the KROME.” The front panel and rear
panel illustrations in the manual show the 61-key
model, but they apply identically to the other models.
Example screen displays
The parameter values shown in the example screens of
this manual are only for explanatory purposes, and
may not necessary match the values that appear on the
LCD screen of your instrument.
Abbreviations for the manuals: QS, OG, PG,
VNL
In the documentation, references to the manuals are
abbreviated as follows.
QS: Quick Start Guide
OG: KROME Operation Guide
PG: KROME Parameter Guide
VNL: The Voice Name List
Symbols , , Note, Tips
These symbols respectively indicate a caution, a MIDI-
related explanation, a supplementary note, or a tip.
MIDI-related explanations
CC# is an abbreviation for Control Change Number.
In explanations of MIDI messages, numbers in square
brackets [ ] indicate hexadecimal numbers.
* All product names and company names are the
trademarks or registered trademarks of their respective
owners.
Page: 5
English
Français
Deutsch
Español
中文
Main Features
En-5
Main Features
New realms of sound for the keyboard
player and the musical creator
• The KROME’s EDS-X (Enhanced Definition
Synthesis-eXpanded) is a newly designed sound
engine that delivers the synthesis, modulation,
effect functionality and quality of the EDS sound
engine acclaimed by professionals, while
additionally allowing more than ten times as much
PCM sound data to be controlled.
• Voicing technology developed for the KRONOS has
been lavishly applied, giving you a total of 4GB of
high-quality PCM data that includes long stereo
samples captured for each key. From the sound’s
attack to its decay, every detail has been carefully
designed for subtle and dynamic expressive power.
The emotion in your fingertips will be faithfully
transmitted to your listeners via this wide array of
sounds: acoustic pianos, electric pianos, organs,
wind instruments, synths, and drums.
Effects
• The KROME contains 193 different types of effects,
ranging from chorus, delay, reverb, overdrive, and
simulations of vintage effects and amps, each
boasting professional-level quality and flexibility.
Effect Presets let you easily store and recall all of
the settings for an individual effect.
• You can use up to 8 of these effects simultaneously,
with 5 Insert Effects, 2 Master Effects (for reverb
sends, for instance), and 1 Total Effects (for stereo
bus processing). Each program provides a three-
band EQ, letting you use up to sixteen such EQs in
each combination or song. These settings can be
made individually for each program, combination,
and song.
• The master effects and total effect can be turned
on/off from the front panel.
Dual polyphonic arpeggiators
In addition to the traditional arpeggio patterns of the
past, these arpeggiators can generate guitar or bass
riffs as well as drum patterns. They can also be used as
part of the sound designing process to create pads,
synth sounds, and sound effects that include a subtle
sense of movement. In Combination mode and
Sequencer mode, you can use two arpeggiators
simultaneously.
There are 960 user arpeggio patterns, giving you
amazing potential for powerful performances.
Original patterns can be created quickly and easily by
editing patterns in the piano roll screen.
Drum track patterns
The drum track is a built-in drum machine function
that uses the KROME’s high-quality drum sounds.
There are 710 patterns.
Keyboard and controllers for richly
expressive performances
• The KROME EX 61 and 73 feature a Semi-Weighted
Keyboard that provides a great-feeling way to play
everything from piano sounds to synthesizer
sounds.
The KROME EX 88 features a NH (Natural
Weighted Hammer Action) keyboard that is
especially advantageous when you’re playing
sounds that allow subtle nuances of expression
such as piano and electric piano.
• In addition to the joystick, tonal changes can be
controlled by buttons (SW1, 2) where you can
assign functions such as octave shift or joystick
lock, and realtime controllers that you can use to
adjust cutoff, resonance, or effects while you play,
making your performances even more expressive.
• Three jacks where you can connect a damper pedal,
foot switch, and foot pedal are provided. These
allow you to use your foot to adjust the volume,
control the effects, or switch sounds.
Sequencer for music production or
performance
The internal sequencer provides 16 MIDI tracks and
one master track. There’s a full complement of
functionality for music production and performance,
including Auto Song Setup that lets you start
producing a song the moment inspiration strikes,
template songs, RPPR, and cue lists.
You can edit tracks and patterns in the track view or in
a piano roll screen.
SMF data can also be imported or exported, allowing
smooth integration with another platform such as your
computer.
Computer connection via USB
SD card slot
You can connect the KROME to your computer via
USB for easy transfer of MIDI data. You can also use an
SD card (commercially available) to easily manage the
KROME’s file data.
Page: 6
Front Panel
En-6
Front Panel
Volume
1. VOLUME knob
This knob adjusts the volume of the AUDIO OUTPUT
L/MONO, R outputs, as well as the volume of the
headphone jack.
SW1, 2 and Joystick
2. SW1, SW2 buttons
You can assign these buttons to a desired function such
as changing the octave of the keyboard, turning
portamento on/off, or locking the joystick. You can also
use these to control the sound or effects in
sophisticated ways by assigning them to an AMS
parameter of the sound generator or a Dmod
parameter of an effect.
3. Joystick
You can control synthesis parameters or effect
parameters by moving the joystick up/down/left/right.
REALTIME CONTROLS
These realtime controllers consist of four knobs and
one button. You can use them to do the following
things.
4. SELECT button
5. Knobs 1–4
Use the SELECT button to select the functions that you
want to be controlled by knobs 1–4. By using knobs 1–4
you can control the sound, effects, and the arpeggiator.
(See “Realtime controls” on page 13.)
Arpeggiator
6. ARP button
This button turns the arpeggiator on/off. The button
will be lit up if the arpeggiator is on. (See page 14)
DRUM TRACK
7. DRUM TRACK button
This button turns the Drum Track function on or off.
This button also indicates the operating state of the
drum track. (Unlit: off, Blinking: waiting for trigger,
Lit: on. See page 14.)
Effect buttons
8. MASTER FX button, TOTAL FX button
These buttons turn the master effect and total effect
on/off. When the button is on (LED lit), the effect
settings of the program, combination, or song will be
enabled. When the button is off (LED unlit), the
corresponding effect will be off.
The on/off status of these buttons is remembered even
when you switch programs, combinations, or songs.
Display
9. Display
The TouchView display features simple touch control
and selection of numerous features and parameters.
(See page 10)
Mode
10. COMBI, PROG, SEQ buttons
11. GLOBAL, MEDIA buttons
The KROME has five different operational modes, each
one optimized for a specific set of functions.
Press one of these buttons to enter the corresponding
mode.
For details, please see “Selecting modes” on page 11.
3
2
5 11 9 13 15 20 10 12 22
6
24 7 18
19 16 21 23
8 14
1
4
17
* The diagram shown is for KROME EX-61
Page: 7
English
Français
Deutsch
Español
中文
Rear Panel
En-7
PROG/COMBI BANK
12. A, B, C, D, E, F buttons
These buttons select program banks A–F, U-A–U-F and
combination banks A–F (see page 12). The program
bank will switch from A–F to U-A–U-F and back, with
each consecutive press of a BANK button.
You can also use these buttons to select the bank of
timbre programs in a combination, or the bank of track
programs in a song.
If you want to select a GM bank, use the numeric keys
(see “15”, below, page 12) or the Bank/Program Select
menu (see page 13).
VALUE controllers
Use these controllers to edit the parameter that’s
selected in the display.
13. INC and DEC buttons
14. VALUE dial
15. 0–9, – and . buttons
16. ENTER button
Use these to specify the value of the selected
parameter.
17. COMPARE button
Compares your current sound edits to the sound
before it was edited.
PAGE SELECT, EXIT
18. PAGE button
When you press this button, a list of the pages within
the selected mode will appear in the display. Press the
button of the desired page. (See page 9 of the
Operation Guide)
19. EXIT button
Press this button to return to the main page of the
current mode.
Save (Write)
20. WRITE button
Use this button to save programs, combinations, global
settings, drum kits, or arpeggio patterns to the internal
memory (see page 20).
You’ll also use this button to save songs to media (see
page 21).
Sequencer
The buttons in this section are used for operations in
Sequencer mode, such as recording and playback (see
page 54 of the Operation Guide). In addition to its use
during recording, the REC button is also used to save a
program or combination, or when using the Auto Song
Setup function (see page 16).
21. PAUSE ( ) button, REW ( ) button,
FF ( ) button, LOCATE ( ) button,
REC ( ) button, START/STOP ( ) button
TEMPO controls
22. TEMPO knob, TEMPO LED
This knob adjusts the tempo of the arpeggiator, drum
track, or internal sequencer.
This LED will blink at quarter-note intervals of the
current tempo.
23. TAP button
By pressing (or tapping) this button on the beat, you
can enter the tempo used by the arpeggiator, drum
track, or internal sequencer.
Headphone
24. Headphone jack
Connect your headphones here.
This jack will output the same signal as the AUDIO
OUTPUT L/MONO and R jacks.
The headphone volume is controlled by the VOLUME
knob.
Rear Panel
Power supply
Be sure to see the “Connecting the keyboard and
turning the power on” section on page 8 and follow the
correct procedure described there.
Note: The KROME has an auto power-off function that
automatically turns off the power when the keyboard
or front panel buttons have not been used for a certain
length of time. With the factory settings, this is set to 4
hours (see “The auto power-off function” on page 9).
1. Power switch
This switch turns the power on/off.
2. AC adapter connector
The included AC adapter is connected here.
Connections must be made with the power turned
off. Please be aware that careless operation may
damage your speaker system or cause
malfunctions.
3. Cable hook
Use this to secure the cable of the included AC adapter.
1 2 3
4
6
7
8 5
Page: 8
Connecting the keyboard and turning the power on
En-8
AUDIO OUTPUTS
4. AUDIO OUTPUT L/MONO, R jack
These are the main stereo audio outputs. Use the
VOLUME knob to adjust the volume.
PEDALS
5. ASSIGNABLE PEDAL jack, ASSIGNABLE
SWITCH jack, DAMPER jack
You can connect a damper pedal, foot switch, and foot
pedal to these jacks. This gives you a broader range of
functions and effects to control.
MIDI
6. MIDI IN connector, MIDI OUT connector
MIDI lets you connect the KROME to a computer or
other MIDI devices, for sending and receiving notes,
controller gestures, sound settings, and so on.
SD
7. SD card slot
You can insert an SD card here, and use it to save/load
KROME programs, combinations, or song data. (See
page 20)
USB
8. USB connector (for connecting to
computer)
You can connect your computer to this connector.
Using a single USB cable, your KROME can send and
receive MIDI information directly to and from a
computer, without requiring a MIDI interface.
Note: The USB connector of the KROME is only able to
transmit and receive MIDI data.
Connecting the keyboard and turning the power on
Turning the power on
Note: Check the following before you turn the power
on.
• Make sure that you’re using an AC outlet that
supplies the correct voltage for your unit.
• Use only the included AC adapter.
• Turn the KROME’s front panel VOLUME knob all
the way to the left to minimize the volume.
• Make sure that the KROME’s power is off.
• If you’re connecting to an external output device
such as a mixer or a powered monitor speaker,
minimize its volume and turn off its power.
Here’s how to connect the power.
1. Connect the included AC adapter’s DC plug to the
AC adapter connector located on the KROME’s
rear panel.
Plug the power cord into an AC outlet.
Connect the power cord to the AC adapter.
To prevent the DC plug from being disconnected
accidentally, fasten the cable around the KROME’s
cable hook.
AC adapter connections
2. Connect the KROME’s AUDIO OUTPUT
L/MONO and R jacks to your mixer or powered
monitor speakers.
• If you’re monitoring through headphones, connect
them to the headphone jack that’s located on the
left side of the front of the KROME. This
headphone jack will output the same signal as the
stereo output (AUDIO OUTPUT L/MONO and R).
3. Turn on the power by pressing the power switch
located on the rear panel of the KROME.
If the auto power-off function is enabled, a
message will appear at start-up, informing you of
the time until the power will turn off
automatically. If this dialog box does not appear,
auto power-off is not enabled; the power will not
turn off automatically. (See “The auto power-off
function” on page 9.)
4. Power-on your external output devices, and adjust
their volume appropriately.
5. While playing the keyboard, gradually turn the
VOLUME knob toward the right to adjust the
volume.
Power switch
d: Cable hook
AC adapter
When fastening the
cable to the cable
hook, take care not
to bend this portion
any more than
necessary.
c: Plug into AC outlet.
a: AC adapter
connector
b: Power cord for AC
adapter
Page: 9
English
Français
Deutsch
Español
中文
Turning the power off
En-9
Turning the power off
When you’ve finished using the KROME, turn off the
power by pressing the power switch that’s located on
the rear panel of the KROME.
When you turn off the power, any program,
combination, or global settings you may have
edited will return to its original state. If you want
to keep the results of your editing, you must save
(write) the edited settings.
In the same way, the song data will also be lost
when you turn off the power. If you want to use
the song data again later, you must save it before
you turn off the power, and then load it again
when desired. (See “Saving your edits” on
page 20.)
If the KROME’s auto power-off function is
enabled, the power will automatically turn off
after a certain length of time has elapsed without
any user input. This automatic power-off will also
cause all unsaved data to be lost.
If the power is turned off while data is being
written to the internal memory, the data in the
internal memory may be damaged. Never turn off
the power while any process is being executed.
While processing is occurring, the following
message will appear:
“Now writing into internal memory”
The auto power-off function
The KROME has an auto power-off function that
automatically turns off the power when the keyboard
or front panel buttons have not been used (*) for a
certain length of time.
* The VOLUME knob is not included.
Note: With the factory settings, the power will turn off
when there has been no user input for approximately
four hours.
When the power turns off, any settings you had
been editing will be lost. If you want to keep your
edited settings, you must save them before the
power turns off.
Changing the auto power-off setting
Changing the settings in the start-up dialog box
If the auto power-off function is enabled so that the
power will turn off automatically, the currently
specified auto power-off time is displayed immediately
after the system starts up.
1. While this message is shown, press the Change
Setting button in the dialog box.
The following dialog box will appear.
2. Press the popup button and select the desired time
for auto power-off to occur. If you don’t want the
power to turn off automatically, choose Disabled.
Note: If this dialog box does not appear immediately
after start-up, the auto power-off function is set to
Disabled; the power will not turn off automatically.
Note: You can also change the auto power-off setting
during operation (see page 16 of the Operation Guide).
Auto power-off warning message
When the specified time has elapsed, a message will
warn you that the auto power-off function is about to
turn off the power.
If you want to continue using the KROME, press the
keyboard, a button, or the display. Auto power-off will
be reset, and the same message will appear when the
specified time has again elapsed without any user
input.
Page: 10
About the display and the modes
En-10
About the display and the modes
Display
The KROME uses Korg’s TouchView graphical user
interface.
By pressing or dragging objects shown in the display,
you can select programs or combinations, or edit
parameter values. Here we’ll explain the names and
functions of these objects.
a: Mode button
This indicates the currently selected mode.
When you press this button, the Mode menu will
appear. In the mode menu, press the name of the mode
that you want to move. If you select the currently
selected mode, the Page Select menu for that mode will
appear. Even in another mode, pressing the right side
of the name will display the Page Select menu for each
mode.
To close the menu, press the Close button or the EXIT
button.
You can also choose modes and pages by pressing the
front panel buttons. Press a mode select button to
select a mode, and then press the PAGE button to
access the page select screen.
b: Current page
This indicates the current page within the selected
mode.
Beginning at the left, this area shows the page number:
name, and tab name.
c: Tab
Most pages are divided into two or more tabs.
d: Parameters
The parameters for various settings are shown in the
display. Select a parameter in the display, and edit its
value.
You can use the VALUE dial and other value
controllers (see page 7) to edit a value by dragging
your finger in the display, or turn a setting on/off by
pressing it in the display.
For some parameters, you can press the parameter
twice in succession or long-press and then release it to
access an on-screen edit pad where you can edit the
value. see “Edit pad” on page 6 of the Operation
Guide.
e: Popup buttons
When you press a popup button, the available
parameter values will appear as a popup menu or a
tabbed menu.
f: Menu command button
* Menu
When this button is pressed, a list of menu commands
will appear.
The menu commands that appear will differ
depending on the page that’s currently selected.
The menu will close when you press the display
somewhere other than the menu, or when you press
the EXIT button.
* Dialog box
When you select a menu command, you’ll see a screen
containing the settings needed to execute the
command. This is called a dialog box. The dialog box
that appears will depend on the menu command that
you select. Some commands, such as Exclusive Solo,
do not display a dialog box.
* Text edit button
When you press this button, the text edit dialog box
appears for changing the names of Programs,
Combinations, Songs, etc.
a: Mode button
b: Current page
c: Tab
d: Parameters
e:
Popup
buttons
f: Menu command button
Mode button Page number: name
Tab name
Menu command button
Menu
Text edit button
Cancel button OK button
Page: 11
English
Français
Deutsch
Español
中文
Selecting modes
En-11
* OK and Cancel buttons
After performing the other operations in the dialog
box, you can execute the command by pressing the OK
button. To cancel without executing, press the Cancel
button. The dialog box will close.
The EXIT button corresponds to the Cancel button and
Done button.
Selecting modes
The KROME provides a large number of functions,
such as playing or editing programs and combinations,
recording and playing back songs, and managing
media. These functions are grouped into “modes.” The
KROME has five modes. To access a mode, press the
corresponding mode button (See page 6).
Program mode
Programs are the basic sounds of the KROME.
In Program mode, you can:
• Select and play Programs.
• Use one arpeggiator in your performance.
• Play back Drum Track patterns while you perform
using a Program.
• Edit Programs
You can use the realtime controls and the Tone
Adjust function to easily edit the program.
You can adjust the parameters and settings of the
oscillators, filters, amps, EGs, LFOs, effects,
arpeggiator, drum track, etc.
You can use up to five insert effects, two master
effects, and one total effect.
Plus, you can create drum programs using drum
kits (as created in Global mode).
Combination mode
Combinations are sets of up to 16 programs that can be
played simultaneously, letting you create sounds that
are more complex than a single Program. In
Combination mode, you can:
• Select and play Combinations.
• Use multiple timbres to play arpeggio patterns
generated by two arpeggiators.
• Use one or more timbres to play back the patterns
in the drum track.
• Use the KROME as a 16-part multitimbral tone
generator.
• Edit Combinations
You can use the tone adjust function to easily edit
the program of each timbre.
You can assign Programs to each of the 16 Timbres,
each with separate volume, pan, EQ, and keyboard
and velocity zones; adjust settings for effects,
arpeggiator and the drum track.
Plus, you can use up to five insert effects, two
master effects, and one total effect.
Sequencer mode
Sequencer mode lets you record, playback, and edit
MIDI tracks. You can:
• Use the sixteen-track MIDI sequencer to record and
play back songs.
Record a single MIDI track at a time, or record as
many as all sixteen tracks simultaneously. You can
also record exclusive messages.
• Use multiple tracks to record and play back
performances generated by two arpeggiators.
• Use one or more tracks to play back the patterns in
the drum track.
• Edit songs.
• Use the KROME as a 16-track multi-timbral sound
module.
• GM/GM2 playback is also supported.
• Use the Tone Adjust function to easily edit the
program of each track.
• Use up to five insert effects, two master effects, and
one total effect.
• Record patterns and assign them to individual
keys, using RPPR (Realtime Pattern
Play/Recording).
• Create a Cue List that will play back multiple songs
in the order that you specify. You can also combine
these songs into a single song.
• Create user Drum Track patterns.
Global mode
Global mode lets you adjust overall settings for the
entire KROME, and edit drum kits and arpeggio
patterns. In Global mode, you can:
• Adjust settings that affect the entire KROME, such
as master tune and the global MIDI channel.
• Create user scales.
• Create drum kits using drumsamples.
• Create user arpeggio patterns.
• Rename program and combination categories.
• Set the function of the assignable pedals and
assignable switches.
• Transmit MIDI System Exclusive data dumps.
Media mode
You can save or load data using an SD card. In Media
mode, you can:
• Save and load Programs, Combinations, Songs, and
Global setup data.
• Format an SD card, copy and rename files, etc.
• Perform file operations such as copying data to or
from media.
• Export and import sequences to and from SMF
(Standard MIDI Files).
• Use the Data Filer function to save or load MIDI
System Exclusive data.
Page: 12
Playing sounds
En-12
Playing sounds
Playing Programs and
Combinations
Selecting Programs by bank and
number (A)
Here’s how to select a program.
For more about the features and functions of Program
mode, see “Program mode” on page 11.
1. Press the front-panel PROG button (the LED will
light up) to enter Program mode.
The upper left side of the LCD screen shows the name
of the current page, PROG P0: Play. This is a good
home base for playing Programs.
Notice the large, highlighted characters in the upper
part of the LCD display. These are the name and
number of the current Program. When these are
highlighted, you can press the INC/DEC buttons to
select the next or previously numbered Program.
You can also turn the VALUE dial to move through the
Programs in larger steps, or enter Program numbers
directly from the numeric keypad.
2. Use the BANK A…F buttons to select Programs
from other banks.
Press the lit button to select banks U-A–U-F (the button
will blink).
Press a blinking or unlit button to select banks A–F (the
button will light).
You can also use the bank buttons at the top left corner
of the display to switch to bank U.
To select a GM bank, hold down numeric key 0 and
press one of the -, 1–9, or (.) buttons. The GM bank, GM
variations g(1)–g(9), or GM drum programs g(d) will
be selected respectively.
Selecting Programs by Category (B)
There are other ways to select Programs, but here we’ll
explain how to select programs by their category, such
as keyboard, organ, bass, or drum sounds.
1. In the LCD screen, press the Category/Program
Select popup button.
The Category/Program Select popup menu will
appear.
In the illustration, the Keyboard category is selected.
The menu shows the program in that category.
2. If you want to select a different category, press the
tabs at the left and right side of the display.
3. To select a program, press its program name in the
menu.
A1-4 INC/DEC buttons
A1-3 Program Select
A1-5 VALUE dial A2-2 BANK GM
Numeric keys 0 + (–), 1–9, (.)
A1-6 Numeric keys
and ENTER button
A1-2 PROG P0: Play
Selecting programs by bank and number
A2-1BANK A–F (Lit)
BANK U-A–U-F (Blinking)
A–F buttons
COMBI button
A1-1 PROG button
Bank/Program Select popup button
Bank button
B1-1
(Selecting a program by bank)
Category/Program Select menu
Bank/Program Select menu B2-1 Tabs
B4-1 to sub-categories
B3-2
Scroll bar
B5-1 OK button to confirm
B3-1 Program names
Category/Program Select
popup button
Selecting programs by category
Page: 13
English
Français
Deutsch
Español
中文
Using controllers to modify the sound
En-13
The selected program will be highlighted, and the
program will change. You can also use the INC/DEC
buttons or the VALUE dial to switch programs.
The menu shows sixteen programs at once. To see
other programs, use the scroll bar to scroll the list.
Play the keyboard to hear the sound of the program
that you’ve selected.
4. If you want to choose programs by sub-category,
press the “Jump to Sub” button to access the Sub
Category/Prog Select menu.
Press a tab on the left to select a sub category.
Select a program as described in step 3.
To confirm your choice, press the OK button. If you
want to cancel, press the Cancel button. You will return
to the main category.
5. If you’re happy with the selected program, press
the OK button to close the menu.
If you press the Cancel button, your selection here will
be discarded, and you will return to the program that
had been selected immediately before you opened the
menu.
Note: If you press the popup button to the left of
“Program Select,” the Bank/Program Select menu
organized into banks will appear. The procedure is the
same as described in “Selecting Programs by Category
(B)”.
For other ways to select Programs, see “Selecting
Programs” on page 21 of the Operation Guide.
Program Bank Contents
The KROME has a total of 1,801 programs. When the
unit is shipped from the factory, the internal memory
contains 896 preload programs and 265 GM programs
for immediate use. The remaining 640 programs are
initialized programs, provided for you to save your
own original programs. You are also free to edit and
overwrite any of the programs in banks A–F and U-A–
U-F, but not the programs of banks GM–g(d).
Program bank contents
Selecting Combinations
Here’s how to select a combination.
For more about combinations, see “Combination
mode” on page 11.
1. Press the COMBI button to enter Combination
mode.
The COMBI LED will light up.
Once you’re in Combi mode, you can select and play
Combinations by either bank/number or category, in
the same way as you did Programs.
Combination bank contents
Using controllers to modify
the sound
Joystick, SW1 and SW2
The joystick (see page 6) and SW1/SW2 (see page 6)
located on the left side of the KROME’s front panel are
controllers for you to use while performing. You can
use these controllers to modify the sound.
The effect produced by each controller will differ for
each Program or Combination. In addition to the
typical functions, the controllers in some cases might
have the effect of emphasizing individual sounds, or
might apply a combination of several effects. So try
them all out to see what each controller does for the
selected sound.
Standard Joystick functions
Realtime controls
The realtime controllers (see page 6) located on the left
side of the front panel are used to control the sound
while playing a program or combination, or for simple
sound editing. They are also used to control the
arpeggiator.
1. Press the SELECT button to choose the functions
that knobs 1–4 will control (the corresponding
LED will light up).
The knobs will control the sound if TONE or USER are
selected, or the arpeggiator if ARP is selected.
2. Turn knobs 1–4, and notice how the sound, effects,
or arpeggio pattern changes.
When you turn a knob, a popup will appear on the display,
indicating the name of the controller and its value.
• If SELECT TONE is selected, the knobs will control
the filter cutoff, filter resonance, filter EG intensity,
and filter EG release time respectively.
• If SELECT USER is selected, knobs 1–4 will control
a wide variety of parameters individually assigned
by each program or combination. In many (but not
all) cases, knobs 1 and 2 will control synth
parameters, knob 3 will control the depth of a
modulation effect such as chorus, and knob 4 will
control reverb depth.
• For details on SELECT ARP, refer to the next
section.
Bank No. Contents
A…F, U-A 000…127 Preload programs
U-B…U-F 000…127 Initialized programs
GM
001…128
GM2 capital programs
g(1)…g(9) GM2 variation programs
g(d) GM2 drum programs
Bank No. Contents
A…D 000…127 Preload combinations
E, F 000…127 Initialized combinations
Move the joystick… Normally controls…
Left Pitch bend down
Right Pitch bend up
Forwards (away from yourself) Vibrato
Backwards (towards yourself) Filter LFO (wah)
Page: 14
Playing sounds
En-14
Performing with the
arpeggiator
A program allows you to use a single polyphonic
arpeggiator. When playing a combination or using the
sequencer, you’ll be able to use two polyphonic
arpeggiators.
Turning the arpeggiator on/off
1. Select the program or combination that you want
to play.
2. Press the ARP button to make the LED light up.
The arpeggiator will turn on.
3. Play the keyboard.
The arpeggio will start playing. (Please note that for
some sounds, the arpeggiator is set to respond only to
a specific range of notes on the keyboard.)
Controlling the arpeggio pattern
1. Press the SELECT button to make the ARP LED
light up.
2. Turn knobs 1–4 (GATE, VELOCITY, SWING,
STEP) to modify the pattern.
It is also effective to set the realtime controls to TONE
or USER and use them to modify the sound while the
arpeggiator is playing.
Arpeggio patterns appropriate for each sound are
assigned to each of the factory-set programs and
combinations. Try selecting programs and
combinations from a variety of categories, and play
them with the arpeggiator turned on.
3. Use the TEMPO knob or the TAP button to adjust
the tempo (see page 7).
Program mode
The arpeggio pattern of a program can be switched by
the P0: Play– Arpeggiator page “Pattern” parameter.
1. Press the PROG button, and then the ARP tab.
2. Press the “Pattern” popup button, and select a
pattern.
If the Latch setting on this page is selected, the
arpeggio will continue playing even after you take
your hand off the keyboard. If this setting is not
selected, the arpeggio will stop playing when you take
your hand off the keyboard.
Combination mode and Sequencer mode
In Combination and Sequencer modes, arpeggiator
settings are adjusted in the P0 Arpeggiator A and B pages.
Using the Drum Track
Turning the Drum Track on and off
1. Press the DRUM TRACK button.
Depending on various settings, the Drum Track may
begin to play immediately, or may wait until you start
to play on the keyboard. If the button’s LED is blinking
on and off, it’s waiting for you to play.
2. Use the TEMPO knob or the TAP button to adjust
the tempo (see page 7).
Selecting the Drum Track pattern &
sound
Program mode
In Program mode, the Drum Track has a special
reserved mixer slot and a dedicated Program select
parameter. To set up the Drum Track in Program
mode:
1. Press the PROG button, and then the Mixer &
Drum tab.
The Mixer & Drum TRACK page will appear.
2. On the right side of the display, use the two
Pattern Bank/No. popup buttons to select a Drum
Track pattern.
Note: Please note that the DRUM TRACK button will
not turn on for a pattern that contains no data such as
the User bank InitDrumPattern, or for the Preset bank
P000: Off pattern.
3. On the right side of the display, use the Drum
Track Program “Program” popup button to select
the program that will sound the pattern.
4. Use the buttons on the left to control the mute and
solo settings, and use the slider to adjust the
volume. You can use the Drum Track EQ to adjust
the EQ of the drum track program.
Combination mode, Sequencer mode
In Combinations (and Songs), the Drum Track simply
sends MIDI to play one or more of the 16
Timbres/Tracks.
For more information, see “Drum Track function
settings in Combination mode” on page 101 of the
Operation Guide.
Latch
Arpeggio Pattern
Arpeggio
Pattern
Preview
Pattern
Bank/No.
Drum Track
Program
Drum Track Play/Mute, Solo On/Off, Volume
Drum Track
EQ
Page: 15
English
Français
Deutsch
Español
中文
Simple program and combination editing
En-15
Simple program and
combination editing
Adjusting the EQ and volume balance
For a program, the program’s EQ and master effect
return amount can be adjusted in the P0: Play– Main
page.
In the P0: Play– Mixer & Drum Track page you can
adjust the volume balance of oscillators 1 and 2, and
the drum track. Here you can also adjust the EQ of the
drum track program.
Using Tone Adjust
The KROME’s Tone Adjust function assigns program
parameters that are useful for editing with buttons and
sliders in the display. You can use these to edit the
sound efficiently.
1. Access the Program mode P0: Play– Tone Adjust
page. Press the PROG button, and then the Tone
Adjust tab.
2. Use the sliders and buttons in the display to make
adjustments. You can also use the VALUE
controllers to make adjustments.
The parameters assigned to the sliders and knobs will
differ depending on the program or combination. (For
some sounds, the result may be difficult to notice.)
For example, the “Pitch Stre.” slider produces rich
tonal changes and variations without impairing the
character of the original sound. “1: F lfo IA” controls
wah, “1: lfo IA” controls vibrato, and “1: Drive” can
subtly fatten the sound or apply extreme distortion.
“F/A EG A,” “F/A EG D,” “F/A EG S,” and “F/A EG R”
respectively control the attack time, decay time, sustain
level, and release time of the filter and amp EGs.
If you turn the 1: Trsp button on, the oscillator 1
transposition will be modified by the value shown
below the button, raising or lowering the pitch.
Changing the program or volume
balance of the timbres
Up to sixteen programs can be assigned to a
combination, allowing you to produce dense and rich
textures.
1. In Combination mode, press the Category Select
popup button; then from tab 12 “Bass Splits,”
choose C059: Bass & Piano. The category Bass
Splits contains split-type combinations where the
lower range of the keyboard plays a bass sound
and the upper range plays a different sound.
Bass & Piano assigns an acoustic piano to timbre 1 and
an acoustic bass to timbres 2 and 3.
2. Let’s try changing the program assignment so that
an organ is played instead of the piano.
Press the timbre 1 Category/Timbre Program popup
button to access the list.
At the left side of the list, press the 01 Organ tab, and
then select a program from the list. Press the OK
button to confirm your choice.
3. Play the keyboard. Notes C4 and above will play
an organ sound, and lower notes will play a bass
sound.
4. Now let’s adjust the pan (stereo position) and
volume of the organ and bass sounds.
In the lower part of the display, press the Mixer 1–8 tab.
Adjust the Pan knob and Volume slider of each timbre.
5. Let’s try changing the split point that divides the
organ and bass sounds.
Press the PAGE button; then in Page Select, press P4
Zone/Delay. Press the Key Z 1–8 tab to access the P4:
Zone/Delay– Key Zone T01–T08 page.
While pressing the timbre 1 “Bottom Key,” play a note
on the keyboard. This will specify the lowest key that
plays the organ sound.
While pressing the “Top Key” of the timbre that plays
the bass sound, press the note that’s a semitone below
the lowest note of the organ range you specified in the
previous step. This will specify the highest key that
plays the bass sound.
Category/Combination Select popup button
Category/Timbre Program popup button
A.Piano A.Bass
Bottom
Key
Top
Key
Page: 16
Using the sequencer
En-16
Using the sequencer
Recording your performance
Auto Song Setup
The Auto Song Setup feature copies the current
Program or Combination into a Song, and then puts
the system in record-ready mode. When inspiration
strikes, you can use this function to start recording
immediately. To do so from Program mode:
Select the program that you want to use for recording.
If desired, you can turn on the ARP or DRUM TRACK
buttons to add an arpeggiator or drum kit
performance.
1. While holding down the ENTER button, press the
SEQUENCER REC ( ) button.
The message “Do you continue?” will appear in the
Setup to Record dialog box in the display.
2. Press the REC ( ) button once again.
(Alternatively, you can use the OK button or the
ENTER button.)
The KROME will automatically switch to Sequencer
mode and enter the record-standby state, and the click
will begin sounding in time with the tempo (). Adjust
the tempo () as desired (see “TEMPO controls” on
page 7.).
3. Press the START/STOP ( ) button to start the
sequencer and begin recording.
With the default settings, there will be a two measure
count-down before recording starts.
4. Play what you’d like to record, and then press the
START/STOP ( ) button to stop recording.
The sequencer will automatically return to the
beginning of the Song.
5. Press the START/STOP ( ) button to hear
what you recorded.
Since you started in Program mode, your playing will
have been recorded on Track 1. If you used the Drum
Track, it will have been recorded on Track 10. For
Combinations, more tracks are used as needed.
Adding another track
Let’s add another track to the performance that you
recorded using Auto Song Setup.
1. Press the Preference tab to access the P0:
Play/REC– Preference page. At the right, clear the
“Multi REC” check box.
Note: Auto Song Setup turns this on to record the
Program’s Drum Track, or multiple channels in a
Combination.
2. Press the Prog 1–8 tab to access the P0: Play/REC–
Program T01–08 page.
3. Below the Song name, open the Track Select
popup and select MIDI Track 02.
This controls both the track that you play from the
keyboard, and (with Multi REC turned off) the track
that’s recorded.
4. Using the Category or Bank/Program Select popup
menus, select a Program for Track 02.
5. If you had turned on the ARP and DRUM TRACK
buttons, turn them off.
6. Press the LOCATE ( ) button to go back to the
start of the Song.
7. Press the REC ( ) button to enable recording, and
then press the START/STOP ( ) button to
start.
8. Play what you’d like to record, and then press the
START/STOP ( ) button when you’re done.
Multi REC
Track
Select
Track 2
Program
Page: 17
English
Français
Deutsch
Español
中文
Editing MIDI
En-17
Editing MIDI
You can modify your performance after recording, if
you wish. For instance, you can erase misplayed notes,
or correct their pitch and timing.
Correcting the timing
Timing correction is done through Quantization. This
takes the notes you played and lines them up to the
nearest beat or fraction of a beat, based on the
resolution you select. It can also be used to add a
“swing” feel. Let’s try quantizing the MIDI track we
just recorded.
1. Press the PAGE button; then in Page Select, press
P6 Track Edit. Then press the Track Edit tab to
access the P6: Track Edit– Track Edit page.
This page includes a graphic which shows each track
in the sequence. The small rectangles represent
measures which contain performance data.
2. Select MIDI Track 01 from the popup above the
graphic.
3. Using the “From Measure” and “To End of
Measure” parameters at the bottom of the display,
set the range of measures that you wish to modify.
For now, set “From” to 001, and “To End” to 064.
4. Press the menu command button, and choose
“Quantize.”
The Quantize dialog appears.
5. Set the Resolution to the desired rhythmic value.
As a general rule, choose the shortest note-value used
in the recorded performance.
6. Press the OK button to quantize the selected data.
If the result was different from what you had expected,
press the COMPARE button to restore the song to the
original state before the quantization was applied.
Experiment with different Resolutions, set the
Intensity to less than 100% in order to preserve some
of the natural feel, or raise the Swing value to create a
shuffle or swing feel.
You can also apply quantization during recording,
using the REC Resolution parameter at the top of the
P0 page. Choose the desired resolution, and
quantization will be applied as you record.
Correcting or adding notes
You can edit your performance data by moving or
erasing notes, modifying a note’s duration or strength,
or adding notes.
It’s convenient to use Track View editing when you
want to erase, move, or copy data in units of entire
tracks or measures.
1. (Press the PAGE button; then in Page Select, press
P6: Track Edit.) Then press the Track View tab to
access the P6: Track Edit– Track View page.
2. Using the tools, specify the start and end measures
to select the edit region.
3. Use the tools to move, copy, or erase data.
For details, see page 68 of the Operation Guide.
It’s convenient to use piano roll editing when you want
to edit individual notes in detail.
1. Using the tools, specify the start and end measures
to select the edit region.
2. Press the menu command button, and choose
“Piano Roll.”
Alternatively, press the bottom tool box in the P6: Track
Edit– Track View page.
The piano roll dialog box will appear.
3. Use the zoom buttons to select a convenient zoom
ratio.
4. Use the tools to edit the notes.
For details, see page 70 of the Operation Guide.
Starting measure Ending measure
Toolbox:
Move the events of the
selected measures
Copy the events of the
selected measures
Erase the events of the
selected measures
Specify the starting measure
Specify the ending measure
Jump to the piano roll
Zoom
Scroll (view control)
Note event
Playback
Switch the note event
display
Exit
Toolbox:
Select or move a note
Change a note’s duration
Enter notes
Erase notes
Move the displayed note
view area
Page: 18
Using the sequencer
En-18
Template songs
Template songs contain sounds and effects that are
suitable for a specific musical style, so you can
immediately get started creating a song simply by
selecting an appropriate template. In addition to the
preset templates, you can create your own original
template songs containing your frequently-used
sounds.
The sixteen preset template songs (P00–P15) contain
track parameter settings such as program, volume, and
pan, as well as effect, arpeggiator, track parameter, and
tempo settings.
Note that Template Songs do not include MIDI data for
song tracks and patterns, and so on.
1. In the Sequencer P0: Play/REC page, press the
menu command button and select the Load
Template Song command.
A dialog box will appear.
2. In the From field, choose the Template Song that
you want to load.
3. Check the “Copy Pattern to Track too?” check-box.
When this box is checked, a dialog box for copying a
pattern will automatically appear after Load Template
Song is complete.
If this is not checked, only the selected Template Song
will be loaded.
4. Press the OK button to load the template song, or
press the Cancel button to exit without making
changes.
When you press OK, the Template Song’s settings will
be copied into the current Song.
If Copy Pattern to Track too? was checked in step 3,
the Copy Pattern to Track dialog box will appear.
5. Use the Bank (User or Preset) and Pattern popups
to select a pattern to copy.
6. In the To Track field, select the track to use for the
pattern.
Note: In each of the sixteen preset Template Songs,
track 1 is always assigned to a Drum Program. (In
some cases, other tracks may also have Drum
Programs.)
7. In the Measure field, set the measure where you’d
like the pattern to start.
Following the names for each of the 710 preset
patterns, the musical style and the name of the most
suitable Drum Programs are partially displayed.
By loading a Drum Program and the corresponding
preset pattern, you can instantly set up a drum track to
match the Template Song.
8. To load the pattern, press the OK button.
After the pattern is loaded, the Measure will count up
automatically. You can then copy another pattern if
desired. For instance, you can use different patterns
one after the other to build up a song, with different
patterns for verse, chorus, and bridge.
After you’ve finished adding patterns, press the Exit
button, and you’re done!
For details on how to record, see “Adding another
track” on page 16.
Page: 19
English
Français
Deutsch
Español
中文
Using effects
En-19
Using effects
You have a choice of 193 different digital effects.
The KROME’s effect section consists of five insert
effects, two master effects, one total effect, and a mixer
that controls the routing between these effect
processors. Each of these provides stereo input and
output.
You can freely control the effects via dynamic
modulation (Dmod), which lets you use the KROME’s
controllers to control the effects in realtime while you
perform, as well as synchronize different types of
modulation effects via the common LFO, or use
MIDI/Tempo Sync to produce tempo-synchronized
effects.
Routing and effect settings
You’ll use routing to specify the effects to which the
sound will be sent.
Here’s an example of these settings for a song.
1. Select the insert effects that you want to use.
Adjust these settings in the Seq P8: Routing/IFX–
Insert FX Setup page.
2. Specify the effect where the output of each track
will be sent. In the Seq P8: Routing/IFX– Routing
T01–08 page, use “Bus (IFX/Output) Select” to
adjust these settings. For example if you want the
output of track 2 to be the input to insert effect 3,
assign the track 2 “Bus (IFX/Output) Select” to
IFX3.
The upper part of the screen shows the status of the
routing, insert effects, and chain settings. In this
example, T01 (track 1) is assigned to DKit, and uses
IFX1 and 2. This uses the settings of the drum kit. T02
is connected to IFX3, and T04 is chain-connected to
IFX4 and IFX5.
3. “Send1” and “Send2” specify the send levels to
the master effect for each track. “Send1”
corresponds to MFX1, and “Send2” corresponds to
MFX2.
In this page, “Send1” and “Send2” can be selected only
if “Bus (IFX/Output) Select” is set to L/R or Off.
If “Bus (IFX/Output) Select” is set to IFX1–5, the send
levels are specified by “Send1” and “Send2” after the
signal has passed through the insert effects (P8:
Routing/IFX– Insert FX Setup page).
4. Seq P9: MFX/TFX/LFO– Routing page. Here you
can select the master effects and the total effect
that will be used. This page also shows the signal
flow.
Page: 20
Saving and loading data
En-20
Saving and loading data
Saving your edits
Understanding Write and Save
There are two ways to store your work on the KROME:
Write and Save.
Note: If you turn off the power before you Write or
Save, the data you modified will be lost. Be sure to save
important data to internal memory or an SD card.
“Writing” refers to saving data to the internal memory
of the KROME itself. You can use the Write operation
for programs, combinations, arpeggio patterns, drum
kits, and global settings.
Note: Song data cannot be written to internal memory
(see “Saving data on the KROME” on page 113 of the
Operation Guide).
“Saving” refers to saving data on an SD card. You can
use the Save operation to save the song data that
cannot be written to internal memory as well as the
data that can be written to internal memory.
Note: The Save operation allows you to save individual
items of data as well as all of the KROME’s data
together. By saving the entire set of sound data (i.e.,
programs and combinations), global settings, and
sequencer song data, you can manage the entire
current state of the KROME as a single set of data. This
is a useful way to manage your settings for separate
projects or live performances.
Writing
Writing Programs
Here’s how to write an edited Program to internal
memory.
1. Press the WRITE button.
A dialog box will appear. Here you have the option of
saving the data to a different number, or of changing
the program name or category. If you want to simply
overwrite the existing data without making any of
these changes, proceed to step 2.
• Changing the program name:
Press the “T” button to access the text edit dialog
box.
Use the on-screen keyboard to enter a name, and
then press the OK button to return to the previous
dialog box.
• Changing the category and sub-category:
Press the Category or Sub Category popup button,
and choose the desired category from the list. You
will return to the previous dialog box.
• Specifying the writing-destination bank and
number:
Press the Program popup button, use the tabs to
select a bank, and select a number from the list.
Press the OK button to return to the previous dialog
box.
2. Once again press the WRITE button to perform the
Write operation. (You can also execute by pressing
the OK button or the ENTER button.)
Writing other data
To write a combination, select the combination that
you want to write, and write it just as you did for a
program. Other data such as arpeggio patterns are
written in the corresponding page. For details, see
page 113 of the Operation Guide.
Note: As an alternative to using the WRITE button, you
can also use the Write command in the menu. Effect
presets can only be written by using the Write
command.
Saving and loading
Saving data to an SD card
Data you’ve created or edited on the KROME can be
saved to an SD card. The KROME can handle several
types of files and data, but here we’ll explain two
common types of file: .PCG files and .SNG files.
PCG stands for “Program, Combination, and Global.”
These files can also include user Arpeggio patterns,
Drum Kits, and user Drum Track.
SNG stands for “Song.” These files store all of the
Songs from Sequencer mode.
Saving programs and songs together
When saving a song that you created using edited
programs or rearranged programs, you can save the
program data along with the song data.
1. Insert your SD card into the SD card slot.
With the label of the media facing upward, insert the
connector end of the card into the SD card slot, and
press it in until it clicks into place.
2. Press the MEDIA button to enter Media mode (the
LED will light up).
3. Press the Save tab to access the Media- Save page.
4. Select the directory where you want to save the
data.
Press the Open button to move to a lower level, or
press the Up button to move to an upper level.
To create a new directory, move to the level where you
want to create the directory, and use the Create
Directory menu command on the Media–Utility page.
5. On the Media–Save page, press the menu
command button to open the menu, and select the
Save All command.
This command will save a set of .PCG and .SNG files
all at once.
Page: 21
English
Français
Deutsch
Español
中文
Saving and loading
En-21
A dialog box will appear.
6. Press the text edit button (“T”) and enter a name
for the files.
All of the files will share the same name, with different
suffixes to show the data type (.PCG, .SNG).
7. Press the OK button to Save the data to the SD
card.
When the save is complete, the system returns to the
Save page, and the display will show the resulting
file(s). The amount of time required will depend on the
amount of data being saved.
Note: You can use the various “Selection” buttons in the
dialog box to specify the bank used for saving;
however when saving a song, you should also save the
programs and drum kits used by the song together
with it.
Similarly when saving a combination, you should save
the programs and drum kits used by the combination
together with it.
Saving a song
In Sequencer mode, you can press the WRITE button to
save the .SNG file to your SD card.
When the dialog box appears, press the WRITE button
once again to execute the Save operation.
Loading data
You can load the entire contents of the memory at once,
including sound data (Programs, Combinations, etc.),
and Songs data. To do so:
1. Insert the SD card containing the file you want to
load into the SD card slot.
With the label of the media facing upward, insert the
connector end of the card into the SD card slot, and
press it in until it clicks into place.
2. Press the MEDIA button to enter Media mode (the
LED will light up).
3. Press the Load tab to access the Media- Load page.
4. Navigate to the directory that contains the file you
want to load, and select the .SNG file.
Select a directory (shown as a folder icon) and press
the Open button to move to a lower level, or press the
Up button to move to a higher level.
The selected .SNG file will be highlighted.
5. Press the red Load button at the bottom of the
page.
(You can also use the Load Selected menu command.)
A dialog box will appear, containing a number of
options.
6. Select the “Load [filename].PCG too” check box.
When these boxes are checked, the system looks for
.PCG file with the same name as the main .SNG file.
7. Use “Select .SNG Allocation” to specify how the
Songs will be loaded, and whether or not existing
Songs will be erased.
Append loads the Songs into the first free Song
numbers following the song(s) which are already in
memory.
Clear will erase all songs from internal memory, and
load the Songs into the exact numbers from which they
were saved.
8. Press the OK button to load the data.
Never turn off the power or remove the SD card
while data is being loaded or saved.
When loading Programs, Combinations, Songs,
Drum Kits, or user Arpeggio patterns, make sure
that the Global Basic Setup page’s Memory Protect
settings are turned off (unchecked). If they are on,
you won’t be able to load the data.
Page: 22
Listening to the demo songs
En-22
Listening to the demo songs
Loading the demo song data
When you perform the following operation, the
data stored within the KROME will be discarded
and overwritten by the preset program and
combination data and the demo song data. If you
don’t want to lose the data that you edited or
created, you should save it to an SD card
(commercially available) before you proceed.
1. Press the GLOBAL button (the LED will light up)
to enter Global mode.
2. Access the Global P0: Basic Setup page.
If another page is displayed, press the EXIT button.
3. Press the menu button on the upper right side of
the display, and choose “Load Preload/Demo
Data.”
4. In the “Kind” field, choose “All (Preload PCG and
Demo Songs).”
When you execute loading, the preloaded data and the
demo song data will be loaded.
5. Press the OK button or ENTER button.
A dialog box will ask you for confirmation.
Press the OK button or ENTER button once again to
load the data.
Never turn off the power while data is being
loaded.
If the Memory Protected dialog appears, press the
System Pref. tab and clear the check mark from the
Memory Protect Song setting. Then load the data
again.
Listening to the demo songs
Here’s how to listen to the demo songs in Sequencer
mode.
1. Press the SEQ button (the LED will light up) to
enter Sequencer mode.
2. Access the P0: Play/REC– Program T01–08 page.
If this page is not displayed, you’ll need to press the
EXIT button a few times.
3. Let’s start by listening to song S000.
Verify that song S000 is selected. If another song is
selected, press the song name display area (Song
Select) to highlight it. Then press the numeric key 0,
and then the ENTER button.
4. Press the SEQUENCER START/STOP ( )
button.
The LED will blink, and the song will begin playing
back.
5. If you want to stop playback mid-way through the
song, press the START/STOP ( ) button once
again.
6. Let’s listen to the next song.
Press the song name display area (Song Select). Press
the numeric key 1, and then press the ENTER button.
(Song “S001” will be selected.)
Alternatively, you can press the round button (Song
Select popup) located to the left of the song name, and
a list of song names will appear. Press one of the song
names to select a song.
7. Press the START/STOP ( ) button to begin
playback. To stop playback, press the
START/STOP ( ) button once again.
The demo song will not be retained when the
power is turned off, but you can load it again at
any time.
Popup
Track Select
Song Select
Meter Tempo
Program
Select,
& Popup
Category
Track 2
Solo
Play/Mute/Rec
Track 1
Page: 23
English
Français
Deutsch
Español
中文
Playing multiple songs in succession
En-23
Playing multiple songs in
succession
Songs can be assigned to a cue list, and will playback
in the specified order. You can also specify the number
of times that each song will be repeated. Here’s how to
play back the demo songs that are assigned to a cue
list.
1. Access the P11: Cue List page.
Press the PAGE button to access the Seq Page Select
page. Press “P11 Cue List” in the display.
2. Press the SEQUENCER START/STOP ( )
button.
You will hear the songs in the list in the assigned order.
If you want to stop playback before you reach the end
of the list, press the START/STOP ( ) button once
again.
Performing with RPPR
In Sequencer mode, the RPPR (Realtime Pattern
Play/Recording) function allows you to assign a preset
pattern or user pattern (and a track to play it) to each
key.
This way, you can play a pattern simply by pressing
the key where it is assigned. You can also record the
resulting playback.
The demo songs you loaded contain data that uses the
RPPR function. Here’s how you can use it.
1. Access the P0: Play/REC– Program T01–08 page,
and select S002.
For details, refer to steps 6 and 7 on the preceding
page.
2. Make sure that the “RPPR” check box is checked.
If this is checked, RPPR will be on.
If this is unchecked, RPPR will be off.
3. Press C#2 or a higher key.
The pattern that’s assigned to that key will begin
playing. A pattern such as a drum pattern or bass
phrase etc. can be assigned to each of the seventy-two
keys C#2–C8 (indicated in the illustration as Pattern
Assignable). Keys that are not assigned will play
normally.
In some cases, the pattern will continue playing even
after you release the key. If so, you can stop playback
by playing any key C2 or lower (the Shutdown Keys)
twice in rapid succession (indicated in the illustration
as Shutdown Keys).
This completes our quick start.
Of the KROME’s wide range of functionality, this
operation guide explains how to use some of the most
typical operations. We highly recommend that you
take the time to read it completely.
RPPR
88 Keys
61 Keys
73 Keys
Shutdown Keys
C-1 … C2
RPPR key mapping
Pattern Assignable
C#2 … C 8
C-1 G9
Pattern
Pattern
Pattern
Pattern
Pattern
Pattern
Pattern
Page: 24
Main Specifications
En-24
Main Specifications
Keyboard:
61-note or 73-note Semi-Weighted Keyboard
(velocity sensitive, aftertouch not supported)
88-note NH (Natural Weighted Hammer Action)
keyboard (velocity sensitive, aftertouch not supported)
Power supply:
AC adapter connector (DC 12V, ), power switch
Dimensions (width × depth × height):
61-note 1,027 × 313 × 93 mm / 40.43″ × 12.32″ × 3.66″
73-note 1,191 × 313 × 93 mm / 46.89″ × 12.32″ × 3.66″
88-note 1,448 × 383 × 131 mm / 57.01″ × 15.08″ × 15.16″
Weight:
61-note 7.2 kg/15.87 lbs
73-note 8.2 kg/18.08 lbs
88-note 14.7 kg/32.41 lbs
Power consumption:
13 W
Included items:
AC adapter, power cord
Quick Start Guide (this document)
Accessories (sold separately):
XVP-20, XVP-10: Expression/volume pedal
EXP-2: Foot controller
DS-1H: Damper pedal
PS-1, PS-3: Pedal switch
* Specifications and appearance are subject to change
without notice for improvement.