owner’s Manuals
PowerWear & PowerParts Manuals
Here is your personal document
If you prefer a printed document to thumb through, or you would like to search for an older document, these are available in the Print on Demand portal.
In the portal, you can find owner’s and repair manuals for a wide variety of models.
You can choose between PDF downloads and printed copies.
To the Print on Demand portal

Сборник руководств (92 штуки) на английском языке по эксплуатации и техническому обслуживанию мотоциклов KTM 2000-2014 годов выпуска.
- Издательство: KTM-Sportmotocycle AG
- Год издания: 1999-2013
- Страниц: —
- Формат: PDF
- Размер: 341,5 Mb

Руководство на английском языке по эксплуатации и техническому обслуживанию квадроциклов KTM 450 XC/525 XC 2008 года выпуска.
- Издательство: KTM-Sportmotocycle AG
- Год издания: 2007
- Страниц: 103
- Формат: PDF
- Размер: 6,6 Mb

Руководство на английском языке по эксплуатации и техническому обслуживанию квадроциклов KTM 525 XC 2012 года выпуска.
- Издательство: KTM-Sportmotocycle AG
- Год издания: 2011
- Страниц: 207
- Формат: PDF
- Размер: 3,9 Mb

Руководство на английском и немецком языках по техническому обслуживанию и ремонту мотоциклов KTM 250 GS/250 MX/250 MXC.
- Издательство: KTM-Motor-Fahrzeugbau KG
- Год издания: 1983
- Страниц: 63
- Формат: PDF
- Размер: 178,0 Mb

Руководство на английском языке по ремонту двигателей мотоциклов KTM 60 SX/65 SX.
- Издательство: KTM Sportmotocycle AG
- Год издания: —
- Страниц: 92
- Формат: PDF
- Размер: 3,2 Mb

Руководство на английском языке по ремонту двигателя мотоциклов KTM 85 SX.
- Издательство: KTM Sportmotocycle AG
- Год издания: —
- Страниц: 89
- Формат: PDF
- Размер: 3,1 Mb

Руководство на английском языке по ремонту двигателей KTM 125/200.
- Издательство: KTM Sportmotocycle AG
- Год издания: —
- Страниц: 92
- Формат: PDF
- Размер: 158,0 Mb

Руководство на английском языке по ремонту двигателя мотоциклов KTM 250 SX.
- Издательство: KTM Sportmotocycle AG
- Год издания: —
- Страниц: 80
- Формат: PDF
- Размер: 2,7 Mb

Руководство на английском языке по ремонту двигателя мотоциклов KTM 250 SX-F 2005-2006 годов выпуска.
- Издательство: KTM Sportmotocycle AG
- Год издания: —
- Страниц: 125
- Формат: PDF
- Размер: 7,3 Mb

Руководство на английском языке по ремонту двигателей мотоциклов KTM 250/300 SX/SXS/MXC/EXC/EXC Six Days/XC/XC-W 2004-2006 годов выпуска.
- Издательство: KTM Sportmotocycle AG
- Год издания: —
- Страниц: 159
- Формат: PDF
- Размер: 11,3 Mb

Руководство на английском языке по ремонту двигателей мотоциклов KTM 250/300/380 EXC, MXC, SX.
- Издательство: KTM Sportmotocycle AG
- Год издания: —
- Страниц: 153
- Формат: PDF
- Размер: 5,3 Mb

Руководство на английском языке по ремонту двигателей мотоциклов KTM 250-525 SX, MXC, EXC Racing.
- Издательство: KTM Sportmotocycle AG
- Год издания: —
- Страниц: 167
- Формат: PDF
- Размер: 26,3 Mb

Руководство на английском языке по ремонту двигателей мотоциклов KTM 250 EXC Racing, 400/450 SX, MXC, XC, EXC, SMR, SXS Racing, 520/525 SX, MXC, XC, EXC, SMR Racing, 540 SXS, 560 SMR, 640 Crate 2000-2006 годов выпуска.
- Издательство: KTM Sportmotocycle AG
- Год издания: —
- Страниц: 125
- Формат: PDF
- Размер: 12,2 Mb

Руководство на немецком языке по ремонту двигателей KTM 400/620 LC4/LC4e 1997 года выпуска.
- Издательство: KTM Sportmotocycle AG
- Год издания: —
- Страниц: 76
- Формат: PDF
- Размер: 10,2 Mb

Руководство на английском языке по ремонту двигателей KTM 400-660 LC4 2003 года выпуска.
- Издательство: KTM Sportmotocycle AG
- Год издания: —
- Страниц: 387
- Формат: PDF
- Размер: 18,4 Mb

Руководство на английском языке по ремонту двигателей мотоциклов KTM 950 Adventure 2003 года выпуска.
- Издательство: KTM Sportmotocycle AG
- Год издания: —
- Страниц: 185
- Формат: PDF
- Размер: 9,1 Mb

Руководство на английском языке по ремонту двигателей мотоциклов KTM 950 Adventure и 990 Super Duke 2003-2005 годов выпуска.
- Издательство: KTM Sportmotocycle AG
- Год издания: —
- Страниц: 273
- Формат: PDF
- Размер: 18,0 Mb

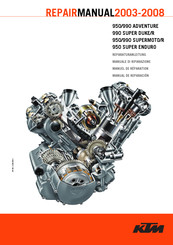
Руководство на английском языке по ремонту двигателей мотоциклов KTM 950/990 Adventure, 950 Super Enduro, 950 Supermoto, 990 Super Duke 2003-2006 годов выпуска.
- Издательство: KTM Sportmotocycle AG
- Год издания: —
- Страниц: 394
- Формат: PDF
- Размер: 24,4 Mb

Руководство на английском языке по ремонту двигателей мотоциклов KTM 950/990 Adventure, 950 Super Enduro, 950 Supermoto, 990 Super Duke 2003-2007 годов выпуска.
- Издательство: KTM Sportmotocycle AG
- Год издания: —
- Страниц: 394
- Формат: PDF
- Размер: 25,8 Mb

Руководство на английском языке по ремонту амортизаторов WP Suspension моделей 5018 DCC/5018 SXS/5018 SMR 2005-2006 годов выпуска.
- Издательство: KTM Sportmotocycle AG
- Год издания: —
- Страниц: 103
- Формат: PDF
- Размер: 5,1 Mb

Руководство на английском языке по ремонту амортизаторов WP Suspension Fork SXS/SMR 4860 MXMA 2005-2006 годов выпуска.
- Издательство: KTM Sportmotocycle AG
- Год издания: —
- Страниц: 123
- Формат: PDF
- Размер: 6,8 Mb

Руководство на английском языке по ремонту амортизаторов WP Suspension модели 4860 MXMA.
- Издательство: —
- Год издания: —
- Страниц: 51
- Формат: PDF
- Размер: 1,5 Mb

Руководство на английском языке по ремонту амортизаторов WP Suspension модели 5018 PDS 2003 года выпуска.
- Издательство: —
- Год издания: —
- Страниц: 99
- Формат: PDF
- Размер: 4,9 Mb
В руководстве представлена информация об устройстве и работе всех узлов и агрегатов мотоцикла.
- Издательство: Алфамер
- Год издания: —
- Страниц: 220
- Формат: —
- Размер: —

Информация, представленная на Сайте, носит информационный характер и ни при каких условиях не является публичной
офертой, определяемой положениями статьи 437 Гражданского кодекса Российской Федерации. Все содержащиеся на
Сайте сведения носят исключительно информационный характер и не являются исчерпывающими. Все условия
приобретения мототехники, цены, спецпредложения и комлектации мототехники указаны с целью ознакомления.
Комплектации и цены действительны на момент публикации и могут быть изменены без предварительного оповещения.
Представленная на Сайте мототехника может быть укомплектована дополнительным оборудованием, не входящим в
стандартную версию, но доступным за дополнительную плату. Сведения о продукции, касающиеся объёмов поставки,
внешнего вида, характеристик, габаритов и веса, эксплуатационных затрат и т.д. не являются обязательными,
рассматриваются как приблизительные и указаны с условием того, что могут возникнуть ошибки при печати, настройке
и/или наборе текста. Такая информация может быть изменена без предварительного уведомления. Чтобы получить
полную информацию о продукции, услугах, дополнительном оборудовании и спецпредложениях, интересных для Вас,
обращайтесь к менеджерам Дилерского центра
- Manuals
- Brands
- KTM Manuals
- Engine
- 450 SX-F
- Repair manual
-
Contents
-
Table of Contents
-
Bookmarks
Related Manuals for KTM 450 SX-F
Summary of Contents for KTM 450 SX-F
-
Page 1
REPAIRMANUAL2007 450 / 505 SX-F 450 SXS-F REPARATURANLEITUNG MANUALE DI RIPARAZIONE MANUEL DE RÉPARATION MANUAL DE REPARACIÓN… -
Page 3
KTM Group Partner… -
Page 5: General Information
1 SERVICE-INFORMATIONS 2 GENERAL INFORMATION 3 DISMOUNTING AND MOUNTING THE ENGINE 4 DISASSEMBLING THE ENGINE 5 SERVICING INDIVIDUAL COMPONENTS 6 ASSEMBLING THE ENGINE 7 ELECTRICAL 8 FUEL SYSTEM 9 TROUBLE SHOOTING 10 TECHNICAL SPECIFICATIONS 11 PERIODIC MAINTENANCE SCHEDULE 12 WIRING DIAGRAMS…
-
Page 7
X P L A N A T I O N P D A T I N G 3.206.029-E Repair Manual 450/505 SX-F 10/2006 Basic version Model year 2007 Edition: 10/2006… -
Page 9
“NOTE” POINTS OUT USEFUL TIPS. Use only ORIGINAL KTM SPARE PARTS. The KTM high performance engine is only able to meet user expectations if the maintenance work is performed regularly and professionally. In accordance with the international quality management ISO 9001 standard, KTM uses quality assurance processes that lead to the highest possible product quality. -
Page 11
REPLY FAX FOR REPAIR MANUALS We have made every effort to make our repair manuals as accurate as possible but it is always possible for a mistake or two to creep in. To keep improving the quality of our repair manuals, we request mechanics and shop foremen to assist us as follows: If you find any errors or inaccuracies in one of our repair manuals –… -
Page 13: Table Of Contents
GENERAL INFORMATION INDEX CHANGING THE COOLING LIQUID ……..2-2 CHECKING THE COOLING LIQUID LEVEL .
-
Page 15: Changing The Cooling Liquid
Only use fully synthetic engine oils that meet the JASO MA quality requirements (see information on the can). 5W/40 10W/50 KTM recommends Motorex Power Synt 4T in the 10W/50 viscosity (for temperatures over 5°C, 41°F) or 5W/40 (for temperatures under 5°C, 41°F). Changing the engine oil CAUTION N ENGINE AT OPERATING TEMPERATURE AND THE ENGINE OIL IT CONTAINS ARE –…
-
Page 16: Changing The Oil Filter
Changing the oil filter – Place a pan under the engine to drain the oil. Remove the 2 screws and take off the oil filter cover and O-ring. – Pull the oil filter insert out of the housing with circlip pliers 510.12.011.000.
-
Page 17: Engine Oil Circuit
Engine oil circuit Engine oil circuit oil screen Pressure oil pump Bypass valve Oil filter insert Throttle to meter the oil for the timing chain tensioner Oil spraying nozzle for piston Jet to meter the oil to the lower conrod bearing Throttle to meter the oil to the clutch pushrod Oil duct for the cam lever support Oil spraying nozzle for the camshaft…
-
Page 18: Checking The Oil Level Of The Hydraulic Clutch
Checking the oil level of the hydraulic clutch CAUTION SAE 10 NLY FILL BIODEGRADABLE HYDRAULIC OIL OTOREX YDRAULIC LUID INTO THE MASTER CYLINDER O NOT ADD BRAKE FLUID NOTE: remove the cover to check the oil level in the master cylinder of the clutch.
-
Page 19: Changing The Front Brake Fluid
Changing the front brake fluid – Move the hand brake cylinder into a horizontal position. – Remove the screws and the cover together with the rubber boot – Use a syringe to extract the used brake fluid and add fresh DOT 5.1 brake fluid (Motorex Brake Fluid DOT 5.1).
-
Page 20: Changing The Rear Brake Fluid
Changing the rear brake fluid – Move the vehicle into a vertical position. – Disassemble the screw cap together with the rubber boot from the brake fluid reservoir. – Use a syringe to extract the used brake fluid and fill with fresh DOT 5.1 brake fluid (Motorex Brake Fluid DOT 5.1).
-
Page 21: Special Tools — Engine
SPECIAL TOOLS — ENGINE 36 36…
-
Page 22
SPECIAL TOOLS — ENGINE ITEM PART NO. DESCRIPTION 560.12.001.000 Universal engine work stand 773.29.002.000 Retaining arm, complete 600.29.012.000 Plastigauge measuring strips 510.12.011.000 Circlip pliers, inverted 590.29.033.000 Double jaw puller 600.29.015.000 Piston ring compressor 6899785 Loctite 243 blue 151.12.017.000 Bearing puller 151.12.018.000 Insert 12-16mm 151.12.018.100… -
Page 23
DISMOUNTING AND MOUNTING THE ENGINE INDEX DISMOUNTING THE ENGINE ……..3-2 MOUNTING THE ENGINE . -
Page 25: Dismounting The Engine
Dismounting the engine – Thoroughly clean the motorcycle and jack it up on a suitable assembly stand. Make sure it cannot tip over. – Remove the seat and tank with the spoiler. – Disconnect the battery. – Open the chain and remove. –…
-
Page 26
– Loosen the hose clamp and remove the coolant hose – Disconnect the spark plug connector – Remove the vent hose – Unscrew the chain guard from the clutch slave cylinder and from the frame and remove. – Cut off the cable tie, unscrew the clutch slave cylinder and tilt aside. -
Page 27
– Push the carburetor back and remove the rubber sleeve from the cylinder head. – Dismount the carburetor towards the right and let it hang down. CAUTION O NOT PLACE THE CARBURETOR IN THE AIR FILTER BOX SINCE THE AIR FILTER WILL ABSORB ANY LEAKING FUEL –… -
Page 28: Mounting The Engine
Mounting the engine – Lift the engine into the frame from the left, position and screw in the lower and the front engine fixing screws (M10x123) but do not tighten them yet. – Mount the upper engine brace (all screws are M8x42), do not tighten yet.
-
Page 29
– Screw the hot start actuator in the carburetor. – Connect the socket connectors on the throttle position sensor pulse generator and generator. Fasten the wiring harnesses with cable ties. – Mount the clutch slave cylinder , screw in both of the front screws (M6x25) and tighten to 10 Nm. -
Page 30
– Position the header pipe from the front of the motorcycle. – Attach the exhaust springs to the cylinder head with a suitable tool. – Mount the fixing screw (M6x25) for the header pipe with a washer and rubber sleeve and tighten to 10 Nm. –… -
Page 31
DISASSEMBLING THE ENGINE INDEX PREPARATION ……….4-2 DRAINING THE ENGINE OIL . -
Page 33: Preparation
Preparation – Thoroughly clean the outside of the engine and clamp in the universal work stand 560.12.001.000 with the engine holders 773.29.002.000. – Remove the shift lever. Draining the engine oil – Remove the oil drain plug together with the seal ring. –…
-
Page 34: Removing The Sprocket
Removing the sprocket – Use holding wrench 510.12.012.000 to hold the sprocket while you remove the screw with the spring washer. – Remove the sprocket, distance bushing and O-ring. Removing the ignition cover – Remove the 7 screws on the ignition cover and take off the ignition cover –…
-
Page 35: Moving The Engine To Ignition Tdc
Moving the engine to ignition TDC – Remove the 3 screws on the valve covers together with the rubber seal. – Remove the valve cover together with both gaskets. – Remove the spark plug. – Move the crankshaft to ignition TDC. Both cams point towards the outside in this position.
-
Page 36: Removing The Clutch Cover
Removing the clutch cover – Remove the plug including the O-ring. – Insert the mounting pin 773.29.012.100. NOTE: you do not need to remove the water pump cover to remove the clutch cover. – Remove the screws and completely take off the clutch cover. –…
-
Page 37: Removing The Timing Chain Tensioner
– Bend up the lock washer on the drive nut. – Hold the driver with the clutch holder 773.29.003.000 while you remove the drive nut together with the lock washer. – Remove the driver together with the stop disk mounted underneath. NOTE: the stop disk usually sticks to the driver.
-
Page 38: Removing The Cylinder Head
Removing the cylinder head – Remove the screws and take off the retaining bracket. – Grasp the double gear and use a screw to pull the axle for the double gear out of the cylinder head. – Remove the timing chain from the double gear. –…
-
Page 39: Removing The Cylinder / Piston
Removing the cylinder / piston – Remove the cylinder. – Remove the axles including the O-ring. – Take out the tensioning rail and guide rail. – Remove the lock ring – Gently push the piston bolt out of the piston and remove the piston. –…
-
Page 40: Removing The Timing Chain
Removing the timing chain – Remove the screws and take off the retaining bracket. – Grasp the timing chain while you pull the axle for the balancer gear out of the engine case with a screw. – Simultaneously remove the timing chain, balancer gear, stop disk and both needle bearings.
-
Page 41: Removing The Primary Gear
4-10 Removing the primary gear – Remove the nut with special socket wrench 773.29.021.000. – Remove the primary gear. – Remove the engine locking screw 773.29.010.000. Removing the oil pumps – Remove the screws – Remove the oil pump cover together with the gasket and oil pressure pump.
-
Page 42: Removing The Shift Mechanism
4-11 – Remove the needle roller – Remove the screws on the oil pump cover and take off the oil pump cover. – Remove the suction oil pump together with the oil pump shaft and needle roller. Removing the shift mechanism –…
-
Page 43: Separating The Engine Case Halves
4-12 Separating the engine case halves – Remove all screws from the housing. – Remove both nuts on the engine holder in the universal engine work stand. CAUTION O NOT PRY THE CASE HALVES APART WITH A SCREWDRIVER OR SIMILAR TOOL SINCE THIS WILL DAMAGE THE SEALING AREAS –…
-
Page 45
SERVICING INDIVIDUAL COMPONENTS INDEX LEFT ENGINE CASE HALF ………5-2 RIGHT ENGINE CASE HALF . -
Page 47: Left Engine Case Half
Left engine case half – Pry out the shaft seal ring on the crankshaft , the shift shaft and the countershaft without damaging the case. – Remove the bearing bolt – Remove the throttle in the oil duct. – Remove the oil jet –…
-
Page 48: Right Engine Case Half
Right engine case half – Pry out the shaft seal ring on the crankshaft without damaging the case. – Remove the screws from the bearing bolt and take off the bearing bolt together with the lock washer. – Remove the screw and washer from the locking lever and take off the locking lever together with the sleeve and locking lever spring.
-
Page 49: Water Pump
Water pump – Remove the screws – Remove the water pump cover and the seal ring. – Remove the cap nut and take off the water pump wheel. Assemble in the reverse order, paying attention to the following items: – Inspect the parts for damage or wear. –…
-
Page 50: Clutch Cover
– Degrease the thread on the screws for the retaining bracket, apply Loctite 243 and tighten to 6 Nm. – Align the mark on the balancer gear with the mounting pin Clutch cover – Remove the screws on the bearing retainer and the retaining bracket –…
-
Page 51: Lubrication System
Lubrication system – Check the O-rings and gaskets for damage and replace if necessary. – Replace the oil filter every time you change the engine oil. – Clean the oil screen and replace if damaged. – Check the inner and outer rotor on the oil pump for damage and deposits.
-
Page 52: Crankshaft
Crankshaft CAUTION EVER CLAMP THE CRANKSHAFT IN A VISE TOGETHER WITH THE CRANKPIN TO TRY TO EXTRACT THE INNER BEARING RING HIS WILL ONLY COMPRESS THE CRANKSHAFT WEBS AND MAKE THE CRANKSHAFT UNUSABLE – Clamp the crankshaft in a vise using protective jaws. –…
-
Page 53: Axial Clearance Of The Crankshaft
– If you will continue to use the crankshaft, check the crankshaft journal for runout. Place the crankshaft on a roller stand or similar stand and measure the crankshaft journal runout with a gauge. Crankshaft journal runout: max. 0.15 mm –…
-
Page 54: Piston / Cylinder
– Measure the diameter of the cylinder in the X and the Y-axis to detect any ovality. Cylinder diameter 450 SX-F / 450 SXS-F 505 SX-F size I: 97.000 — 97.012 mm size I: 100.000 — 100.012 mm size II: 97.012 — 97.025 mm…
-
Page 55
5-10 – Insert the piston ring in the cylinder and align with the piston (approx. 10 mm under the upper edge of the cylinder). – Measure the end gap with a feeler gauge. Compression ring: max. 0.80 mm Oil scraper ring: max. 1.00 mm If the end gap is larger than indicated above, check the cylinder for wear. -
Page 56: Camshafts
5-11 Camshafts – Wrap some masking tape around the outer cam on the camshaft to protect it from being damaged in the vise. – Clamp the camshaft in a vise with aluminum protective jaws. Position the outer cam so that the camshaft will not rotate. –…
-
Page 57: Radial Clearance Of The Camshaft Bearings
5-12 Radial clearance of the camshaft bearings – Insert the camshafts in the cylinder head without actuating the valves. – Position the plastigauge measuring strip 600.29.012.000 on the camshaft at the bearing positions Note: follow the instructions provided by the plastigauge measuring strip manufacturer.
-
Page 58: Cylinder Head
5-13 Cylinder head – Fold up the cam lever. – Remove the shims (valve adjustment shims) from the spring retainer and mark the installed position. Note: if you mark the installed position you will only need to check the valve clearance when they are remounted. –…
-
Page 59
5-14 – Pretension the valve springs and remove both valve keys – Remove the valve spring retainer and valve springs – Remove the valve. – Remove the valve stem gasket and spring washer Note: proceed in the same way for the remaining valves. Check: –… -
Page 60
5-15 Assemble in the reverse order, paying attention to the following items: – Replace any damaged or worn parts. – If the valves were removed, replace the valve stem gaskets. These must be oiled before they are mounted. – Oil the valve stems and insert the valves in the guides as marked when they were removed. -
Page 61: Timing Chain Tensioner
5-16 Timing chain tensioner CAUTION F YOU DO NOT FOLLOW THESE INSTRUCTIONS THE TIMING CHAIN WILL NOT BE TENSIONED CORRECTLY AND WILL SKIP RESULTING IN ENGINE DAMAGE NOTE: – The timing chain tensioner operates with spring force and with oil pressure.
-
Page 62: Timing Train
5-17 Timing train – Check O-rings for damage and replace if necessary. – Inspect the parts for damage or wear. – Replace any damaged or worn parts. – Also check the timing chain for smooth operation of the chain links. NOTE: The smooth operation of the chain links can easily be checked by simply letting the timing chain hang down — the chain links should align in a row.
-
Page 63: Clutch
5-18 LOCTITE 243 Clutch – Check the pressure piece for damage and smooth operation. – Check the axial bearing for damage and wear. – Lay the pushrod on a level surface and check for runout. – Check the length of the clutch springs .
-
Page 64: Shift Mechanism
5-19 LOCTITE 243 LOCTITE 243 LOCTITE 243 Shift mechanism – Check the shift forks at the blade for damage and wear. New shift forks are 3.90 to 3.95 mm thick; the wear limit is 3.70 mm. – Check the shift grooves in the shift drum for damage and wear.
-
Page 65
5-20 – Clamp the short end of the shift shaft in a vise (use protective jaws). – Mount the shift rail with guide bolt facing down and attach the guide bolt to the shift quadrant. – Mount the pressure spring –… -
Page 66: General Information On Servicing The Transmission
5-21 General information on servicing the transmission Clamp the main shaft or countershaft in the vise (use protective jaws). If continuing to use the shift ring and fixed gears, mark the installed position. Remove the gears and check the following parts for damage and wear: –…
-
Page 67: Countershaft
5-22 Countershaft – Clamp the countershaft in a vise with the toothed end facing down (use protective jaws). – Carefully oil all parts before mounting. – Mount the split needle bearing – Mount the 2 gear idler gear with the shift dogs facing up. –…
-
Page 68: Starter Drive
5-23 Starter drive Freewheel hub Take the freewheel out of the freewheel hub. Check the freewheel hub for damage and wear. Check the contact area pressure marks. Thoroughly clean the freewheel hub. Freewheel Thoroughly clean the freewheel. Check the freewheel segments for damage and wear. Oil the freewheel. Starter gear Check the starter gear for damage and wear.
-
Page 69: Freewheel Hub
5-24 Freewheel hub – Lightly compress the spreader ring with circlip pliers and remove together with the freewheel Assemble in the reverse order, paying attention to the following items: – Inspect the parts for damage or wear. – Replace any damaged or worn parts. –…
-
Page 71
ASSEMBLING THE ENGINE INDEX ASSEMBLING THE ENGINE CASE HALVES ……6-2 MOUNTING THE SHIFT MECHANISM ……. . .6-3 MOUNTING THE OIL PUMP . -
Page 73
Assembling the engine case halves – Fasten the right engine case half to the universal engine work stand. – Oil all bearing positions. – Mount the crankshaft. NOTE: the cone for the rotor must point towards the left engine case half. -
Page 74
– Mount the left engine case half, tapping lightly with a plastic hammer if necessary. – Fasten the engine to the universal engine work stand. – Insert the oiled case screws and tighten. M7x70 Tightening torques M6: 10Nm M7: 14Nm M6x70 –… -
Page 75
Mounting the oil pump – Mount the suction oil pump with the oil pump shaft and oiled needle roller. NOTE: – The rounded side of the suction oil pump should face the engine case. – The groove in the oil pump shaft should face the right side of the engine. -
Page 76
– Mount the oiled oil pressure pump. NOTE: the rounded side of the oil pressure pump should face the oil pump cover. – Degrease the thread on the screws and apply Loctite 243. Screw on the oil pump cover including the gasket and tighten to 10 Nm. Mounting the primary gear –… -
Page 77
Mounting the timing chain – Place the timing chain on the balancer gear. – Insert both oiled needle bearings in the balancer gear and mount the stop disk with the collar facing the balancer gear. – Simultaneously insert all parts in the timing chain compartment. –… -
Page 78: Mounting The Cylinder Head
– Lightly grease the outside surface of the cylinder. – Attach a cable tie to the timing chain and pull it through the timing chain compartment. – Mount the pre-assembled cylinder/piston unit and align the conrod with the piston. – Gently slide in the oiled piston bolt. –…
-
Page 79: Mounting The Timing Chain Tensioner
– Insert both oiled needle bearings in the double gear. – Remove the cable tie and place the timing chain on the double gear. – Align the mark on the double gear with the mark on the cylinder head. Mount the axle double gear with the O-ring.
-
Page 80
Mounting the camshafts NOTE: see Chapter 5 for camshaft reassembly / radial clearance of the camshaft bearing. – Place the pre-assembled camshafts in the oiled bearing positions and align with the flat sides facing up. NOTE: if the camshaft gears were not pressed off the camshafts, check the adjusting bearing bridge 773.29.050.000. -
Page 81
6-10 Checking the valve clearance – Remove the engine locking screw. – Switch on the engine several times. – Move the engine to the ignition TDC position (see Chapter 4) and insert the engine locking screw. – Check the valve clearance with feeler gauge 590.29.041.000: Intake valves: 0.10 — 0.15 mm Exhaust valves: 0.15 — 0.20 mm –… -
Page 82
6-11 Mounting the clutch – Mount the collar sleeve , oiled needle bearing and outer clutch NOTE: make sure the toothing engages in the oil pump idler gear. – Mount the stop disk and driver – Degrease the thread on the main shaft and apply Loctite 243. –… -
Page 83
6-12 Mounting the clutch cover – Insert the O-ring and the quad ring – Insert the rollers – Oil all bearing positions. – Pour approx. 30 ml of engine oil into the oil duct to the conrod bearing. – Degrease the sealing area and apply a thin coat of Three-Bond silicone sealant. -
Page 84
6-13 – Remove the engine locking screw – Insert the screw with the copper washer and tighten to 20 Nm. Mounting the pulse generator – Degrease the thread on the screws and apply Loctite 243. – Screw on the pre-assembled pulse generator and holder by hand. Do not tighten the screws yet. -
Page 85
6-14 Mounting the sprocket – Mount the O-ring, oiled distance bushing with the recess for the O- ring on the inside. – Mount the sprocket with the collar on the inside. – Degrease the thread on the screw , apply Loctite 243 and mount the spring washer. -
Page 86
6-15 Filling the engine with engine oil – Insert the oiled plug together with the oil screen and tighten to 30 Nm. – Insert the oil drain plug together with a new seal ring and tighten to 20 Nm. – Pour engine oil into the oil filter housing (approx. 1/3 full) and into the oil filter insert. -
Page 87
ELECTRICAL INDEX IGNITION SYSTEM TROUBLESHOOTING ……7-2 CDI UNIT ……….. .7-2 CHECKING THE IGNITION COIL . -
Page 89
Ignition system troubleshooting Before beginning the testing procedures on the ignition system, make sure: – the short circuit button is not actuated – the battery is fully charged – the main fuse is working Check whether there is an ignition spark upon starting, proceeding as follows: –… -
Page 90
Checking the pickup and stator Use an ohmmeter to take the following measurements (plug connectors disconnected): Pickup coil red — green setpoint value: 100 Ω ± 20 Ω Pickup coil red — ground setpoint value: ∞ Ω Stator coil yellow — yellow setpoint value: 1.8 Ω ± 0.3 Ω Stator coil yellow — ground setpoint value: ∞… -
Page 91
UICK CHARGES WITH HIGH VOLTAGE WILL IMPAIR THE SERVICE LIFE OF YOUR BATTERY – Connect KTM battery charger no. 584.29.074.000. The battery charger can also be used to test the offload voltage, the battery’s startability and the generator capacity. This battery charger cannot be overcharged. -
Page 92
Checking the charging voltage NOTE: : the following figures only apply to fully charged batteries (charging condition at least 90 %). – Connect a voltmeter to both battery terminals. – Start the engine. – Rev the engine up to 5000 rpm and read the voltage. Setpoint value: 14.0 –… -
Page 93
yellow-black blue-white brown yellow-black green blue blue yellow yellow black black red-white red-white white black-white black-white grey brown black yellow black yellow red-white red-white black-white… -
Page 94
Static ignition values Measuring conditions: – Cold engine – Seat and tank removed – All plugs and the ground connections are in a non-corroding condition, plugs tightly connected – Battery fully charged – Gap between the rotor and the pickup: 0.7 mm –… -
Page 95
Static generator values Measuring conditions: – Cold engine – Seat and tank removed – All plugs and the ground connections are in a non-corroding condition, plugs tightly connected – Battery fully charged – Actuate the starter at least 5 seconds for each measurement –… -
Page 97
FUEL SYSTEM INDEX DISMOUNTING AND MOUNTING THE CARBURETOR ….. .8-3 DISASSEMBLING THE CARBURETOR ……. . .8-5 CHECKING THE CHOKE SLIDE . -
Page 99
CARBURETOR — KEIHIN FCR-MX 4125 G… -
Page 100
Dismounting and mounting the carburetor NOTE: clean motorcycle thoroughly. – Remove the seat and tank with spoilers. – Take off the filter box cover and completely remove the air filter. – Loosen the carburetor clamp and remove the carburetor connection boot –… -
Page 101
– Pull the carburetor out of the rubber sleeve. – Unscrew the hot start actuator from the carburetor. – Remove the carburetor. Remount the carburetor in the reverse order, paying attention to the following points: – Check all parts for damage and wear. –… -
Page 102
Disassembling the carburetor NOTE: Before you start to disassemble the carburetor, make sure your workplace is clean and offers enough room to spread out the individual carburetor parts. – Dismount the carburetor and remove any coarse dirt. – Remove the 2 screws and disconnect all vent hoses from the carburetor. -
Page 103
– Remove the 3 screws from the accelerator pump cover and remove the accelerator pump cover. – Take the 2 seal rings , spring and diaphragm out of the accelerator pump housing. – Remove the remaining screws on the float chamber and take off the float chamber housing –… -
Page 104
– Remove the screw and pull the hose connection out of the carburetor. NOTE: only remove the throttle sensor if it is defective. If you loosen the screw , you will need to readjust the throttle sensor. – Remove the screw and take off the throttle sensor –… -
Page 105
Checking the choke slide The choke slide should operate smoothly. The choke slide piston should not have any deep score marks or deposits. Check the condition of the rubber boot and the choke lock. Checking the accelerator pump Check the membrane for cracks or brittleness. Check the gaskets for damage. -
Page 106
Checking the float needle valve Check the needle valve at the sealing area for indentations. Make sure no dirt has accumulated between the valve seat and float needle. Checking the throttle slide The rollers on the throttle slide must turn easily and should not have any flat areas. -
Page 107
8-10 Assembling the carburetor Assemble the carburetor in the reverse order, paying attention to the following points: – Lock the screw on the throttle sensor with Loctite 243 but do not tighten yet. – Lock the screws for the hose connection and the attachment of the throttle slide arm with Loctite 243. -
Page 108
8-11 Checking/adjusting the float height – Tilt the carburetor until the float rests against the float needle valve without compressing it. – The edge of the float should be parallel to the sealing area of the float chamber in this position (see photo). –… -
Page 109
8-12 Adjusting the position of the throttle sensor example NOTE: the following measurement must be made at a component temperature of approx. 20°C. The carburetor must be dismounted to take this measurement. The throttle slide must be in the starting position (1mm open). -
Page 110
8-13 Checking the throttle sensor NOTE: the following measurement must be made at a component temperature of approx. 20°C. The carburetor must be dismounted to take this measurement. The throttle slide must be in the starting position (1mm open). – Connect a multimeter (measuring range kΩ) to the blue (+) and black (-) cables on the throttle sensor and measure the total resistance of the throttle sensor (R ges ). -
Page 111
8-14 Adjusting the idle speed The carburetor idle speed strongly influences the starting performance, a stable idle and engine responsiveness when accelerating. An engine with a correct idle speed will be easier to start than one with an incorrect idle adjustment. The idle speed is adjusted with the adjusting screw and the idle mixture with the mixture control screw… -
Page 113
TROUBLE SHOOTING INDEX TROUBLE SHOOTING ……….9-2… -
Page 115
TROUBLE CAUSE REMEDY Engine doesn’t crank (E-starter). Blown fuse Dismount the filter box cover and replace the fuse in the starter relay. Discharged battery Recharge the battery and investigate the causes for discharging. Low outside temperature Use the 12 V / 4 Ah battery included in the scope of supply. -
Page 116
TROUBLE CAUSE REMEDY Engine does not rev up Carburetor fuel level too high because Dismount carburetor and check if worn out float needle valve is dirty or worn out Loose carburetor jets Tighten jets Electronic ignition timing faulty Check ignition system Engine will not reach full power Fuel supply partially interrupted or Clean and check fuel system as well as carburetor carburetor dirty… -
Page 117
10-1 TECHNICAL SPECIFICATIONS INDEX ENGINE ……….. . 10-2 CHASSIS . -
Page 119
10-2 TECHNICAL SPECIFICATIONS — ENGINE 2007 450 SX-F / 450 SXS-F 505 SX-F Design Liquid-cooled, 1-cylinder, 4-stroke Otto engine Displacement 449.3 ccm 477.5 ccm Bore / Stroke 97 / 60.8 mm 100 / 60.8 mm Compression ratio 12.5 : 1… -
Page 120
10-3 TECHNICAL SPECIFICATIONS – CHASSIS 2007 450 / 505 SX-F 450 SXS-F Frame Central tube chrome-molybdenum-steel frame Fork 4860 MXMA CC Fork offset (caster) adjustable 18mm/20mm adjustable 17.5mm/20.5mm Front/rear suspension travel 300/335 mm Rear suspension WP Progressive Damping System shock absorber, aluminum swing arm Front brake Disk brake with perforated Ø… -
Page 121
Conrod bearings Radial clearance max. 0.03 mm Axial clearance max. 0.80 mm Cylinder 450 SX-F / 450 SXS-F Bore diameter, size I 97.000 — 97.012 mm Bore diameter, size II 97.012 — 97.025 mm 505 SX-F Bore diameter, size I 100.000 — 100.012 mm… -
Page 122
10-5 TIGHTENING TORQUES — ENGINE Oil jet for piston Loctite 243 + 4 Nm Oil restrictor jet for crankshaft Loctite 243 Crankcase air jet Loctite 243 Oil jet for cam lever / camshaft Loctite 243 + 6 Nm Throttle oil supply clutch Loctite 243 + 6 Nm Screw on locking lever Loctite 243 + 6 Nm… -
Page 123
10-6 TIGHTENING TORQUES — CHASSIS Spoke nipple M4.5 / M5 5 Nm Screw on brake disk Loctite 243 + 14 Nm Screw on push rod ball joint 10 Nm Screw on brake caliper, front Loctite 243 + 25 Nm Screw on upper triple clamp 17 Nm Screw on lower triple clamp 12 Nm… -
Page 125
11-1 PERIODIC MAINTENANCE SCHEDULE INDEX 450/505 SX-F / 450 SXS-F ……..11-2… -
Page 127
IF MOTORCYCLE IS USED FOR COMPETITION 10 HOURS SERVICE SHOULD BE CARRIED OUT AFTER EVERY RACE. Service intervalls should never be exceeded by more than 2 hours or 15 liters of fuel. Maintenance work done by KTM authorised workshops is not a substitute for care and checks done by the rider. -
Page 128
Treat blank metal parts (with the exception of brake and exhaust system) with wax-based anti corrosion agent Check tightness of screws, nuts and hose clamps regularly IMPORTANT INSPECTIONS OR MAINTENANCE WORK THAT MUST BE PERFORMED BY THE SPECIALIZED KTM WORKSHOP (SEPARATE ORDER FOR SPECIALIZED KTM WORKSHOP) every… -
Page 129
12-1 WIRING DIAGRAMS INDEX WIRING DIAGRAM ……….12-2 TERMS/TRANSLATIONS, CABLE COLORS . -
Page 131
12-2 yellow-black blue-white brown yellow-black green blue blue yellow yellow black black red-white red-white white black-white black-white grey brown black yellow black yellow red-white red-white black-white… -
Page 132
12-3…
This manual is also suitable for:
505 sx-f
- Manuals
- Brands
- KTM Manuals
- Motorcycle
ManualsLib has more than 1885 KTM Motorcycle manuals
Click on an alphabet below to see the full list of models starting with that letter:
1
2
3
4
5
6
7
8
9
A
C
D
E
F
L
M
R
S
X
Popular manuals

362 pages
350 EXC-F EU Repair Manual

307 pages
250 sxf 2016 Repair Manual

91 pages
65 SX Owner’s Manual

154 pages
300 EXC Owner’s Manual

106 pages
250 SX-F EU Owner’s Manual

96 pages
85 SX 19/16 Owner’s Manual
448 pages
990 Adventure Repair Manual

91 pages
50 SX Owner’s Manual

191 pages
450 EXC-R EU Repair Manual

267 pages
125 DUKE EU Repair Manual

102 pages
350 SX-F Owner’s Manual

159 pages
50 SX Repair Manual

127 pages
150 SX Owner’s Manual

289 pages
250 EXC EU Repair Manual

91 pages
65 SX Owner’s Manual

90 pages
450 SX-F Owner’s Manual

213 pages
1290 SUPERDUKE R Owner’s Manual

387 pages
250 EXC TPI 2019 Repair Manual

411 pages
890 Adventure R US 2021 Owner’s Manual

102 pages
990 ADVENTURE Owner’s Manual
Models
Document Type
1
105 SX 2007

Owner’s Manual
105 SX 2008
Owner’s Manual
105 SX 2010
Owner’s Manual • Spare Parts Manual
105 XC 2008
Owner’s Manual
1050 Adventure
Owner’s Manual • Setup Instructions
1090 ADVENTURE 2017
Owner’s Manual
1090 Adventure R
Owner’s Manual
1090 Adventure R 2018
Setup Instructions
1190 Adventure 2016
Owner’s Manual
1190 Adventure AU 2016
Owner’s Manual
1190 Adventure AUS 2013
Setup Instructions
1190 Adventure AUS 2014
Owner’s Manual
1190 Adventure CN 2016
Owner’s Manual
1190 Adventure EU 2013
Setup Instructions
1190 Adventure EU 2014
Owner’s Manual
1190 Adventure EU 2016
Owner’s Manual
1190 Adventure FR 2013
Setup Instructions
1190 Adventure FR 2014
Owner’s Manual
1190 Adventure FR 2016
Owner’s Manual
1190 Adventure JP 2013
Setup Instructions
1190 Adventure JP 2014
Owner’s Manual
1190 Adventure JP 2016
Owner’s Manual
1190 ADVENTURE R
Owner’s Manual • Owner’s Manual
1190 Adventure R AU
Owner’s Manual
1190 Adventure R AUS
Owner’s Manual
1190 Adventure R CN
Owner’s Manual
1190 Adventure R EU
Owner’s Manual • Owner’s Manual • Owner’s Manual • Owner’s Manual • Owner’s Manual • Owner’s Manual
1190 Adventure R FR
Owner’s Manual • Owner’s Manual
1190 Adventure R JP
Owner’s Manual • Owner’s Manual
1190 Adventure R US
Owner’s Manual
1190 RC8
Owner’s Manual
1190 RC8 AUS
Owner’s Manual
1190 RC8 AUS 2008
Setup Instructions
1190 RC8 AUS/UK 2008
Repair Manual
1190 RC8 EU
Owner’s Manual
1190 RC8 EU 2008
Setup Instructions • Repair Manual
1190 RC8 FR
Owner’s Manual
1190 RC8 FR 2008
Setup Instructions • Repair Manual
1190 RC8 JP
Owner’s Manual
1190 RC8 JP 2008
Setup Instructions • Repair Manual
1190 rc8 r eu/db
Owner’s Manual
1190 RC8 R EU/UK 2009
Owner’s Manual • Owner’s Manual • Owner’s Manual • Owner’s Manual • Owner’s Manual • Repair Manual
1190 rc8 r fr
Owner’s Manual
1190 RC8 R FR 2013
Setup Instructions
1190 rc8 r jp
Owner’s Manual
1190 RC8 R Track
Owner’s Manual
1190 RC8 R USA
Owner’s Manual • Owner’s Manual
1190 RC8 R USA 2013
Setup Instructions
1190 RC8 UK
Owner’s Manual
1190 RC8 UK 2008
Setup Instructions
1190 RC8-R
Owner’s Manual
125
Owner’s Handbook Manual • Repair Manual
125 D-XC
Manual
125 Duke 2016
Setup Instructions
125 Duke 2017
Owner’s Manual
125 Duke DE
Owner’s Manual • Repair Manual
125 Duke DE 2012
Setup Instructions
125 DUKE EU
Owner’s Manual • Owner’s Manual • Owner’s Manual • Installation Instructions Manual • Owner’s Manual • Owner’s Manual • Owner’s Manual • Repair Manual • Setup Instructions • Setup Instructions
125 Duke EU 2012
Setup Instructions
125 Duke EU 2015
Owner’s Manual • Setup Instructions
125 ECX EU
Owner’s Manual
125 EXC
Owner’s Manual • Owner’s Manual • Owner’s Handbook Manual • Owner’s Manual • Owner’s Manual • Owner’s Handbook Manual • Owner’s Manual • Owner’s Manual • Manual • Owner’s Manual • Owner’s Manual
125 EXC 2001
Owner’s Handbook Manual
125 EXC 2004
Owner’s Manual
125 EXC 2006
Owner’s Manual
125 EXC 2008
Owner’s Manual
125 EXC 2015
Setup Instructions
125 EXC EU 2010
Owner’s Manual
125 EXC EU 2012
Setup Instructions
125 EXC EU 2013
Setup Instructions
125 EXC EU 2014
Setup Instructions
125 EXC EU 2016
Owner’s Manual
125 EXC Factory Edition
Owner’s Manual
125 EXC SIX DAYS
Owner’s Manual • Owner’s Manual
125 EXC SIX DAYS 2008
Owner’s Manual
125 EXC Six Days 2015
Setup Instructions
125 EXC Six days EU
Owner’s Manual • Owner’s Manual • Owner’s Manual
125 EXC SIX DAYS EU 2010
Owner’s Manual
125 EXC SIX DAYS EU 2012
Setup Instructions
125 EXC SIX DAYS EU 2013
Setup Instructions
125 EXC SIX DAYS EU 2014
Setup Instructions
125 EXC Six Days EU 2016
Owner’s Manual
125 EXE 2001
Owner’s Handbook Manual
125 LC2 1998
Owner’s Handbook Manual
125 MX
Manual
125 MXC 2001
Owner’s Handbook Manual
125 SUPERMOTO 2001
Owner’s Handbook Manual
125 SX
Owner’s Manual • Owner’s Manual • Owner’s Manual • Owner’s Manual • Owner’s Manual • Owner’s Handbook Manual • Owner’s Manual • Owner’s Handbook Manual • Owner’s Manual • Owner’s Manual • Owner’s Manual
125 SX 2001
Owner’s Handbook Manual
125 SX 2004
Owner’s Manual
125 SX 2006
Owner’s Manual
125 SX 2007
Owner’s Manual
125 SX 2008
Owner’s Manual • Spare Parts Manual
125 SX 2010
Owner’s Manual • Owner’s Manual
125 SX 2011
Setup Instructions
125 SX 2016
Setup Instructions
125 SX 2017
Setup Instructions
125 SX 2018
Owner’s Manual • Setup Instructions
125 SX EU 2013
Setup Instructions
125 SX EU 2015
Owner’s Manual
125 SX EU 2017
Setup Instructions
125 SX US 2015
Owner’s Manual
125 SX US 2017
Setup Instructions
125 SX USA
Owner’s Manual
125 SX USA 2013
Setup Instructions
125 XC-W 2018
Setup Instructions
125 XC-W EU 2017
Setup Instructions
125egs
Owner’s Manual • Owner’s Handbook Manual • Manual
125EXC 2004
Owner’s Manual
125MXC
Owner’s Handbook Manual • Owner’s Manual
1290 Super Adventure
Owner’s Manual • Owner’s Manual • Owner’s Manual • Owner’s Manual • Manual • Owner’s Manual
1290 SUPER ADVENTURE R 2017
Owner’s Manual • Setup Instructions
1290 SUPER ADVENTURE R 2018
Owner’s Manual
1290 Super Adventure R EU 2017
Setup Instructions
1290 Super Adventure R EU 2018
Setup Instructions
1290 Super Adventure R EU 2019
Setup Instructions
1290 Super Adventure R JP 2018
Setup Instructions
1290 Super Adventure R TKC AU 2017
Setup Instructions
1290 Super Adventure R TKC CN 2019
Setup Instructions
1290 Super Adventure R TKC EU 2017
Setup Instructions
1290 Super Adventure R TKC EU 2019
Setup Instructions
1290 Super Adventure R TKC JP 2017
Setup Instructions
1290 Super Adventure R TKC JP 2019
Setup Instructions
1290 Super Adventure R TKC US 2017
Setup Instructions
1290 Super Adventure R TKC US 2019
Setup Instructions
1290 Super Adventure S 2017
Setup Instructions • Owner’s Manual
1290 Super Adventure S 2018
Setup Instructions • Owner’s Manual
1290 SUPER ADVENTURE S 2021
Setup Instructions
1290 Super Adventure S AU 2017
Setup Instructions
1290 Super Adventure S CN 2017
Setup Instructions
1290 Super Adventure S CN F9903T4
Owner’s Manual
1290 Super Adventure S EU 2017
Setup Instructions
1290 Super Adventure S JP 2017
Setup Instructions
1290 Super Adventure T 2017
Setup Instructions
1290 Super Duke GT
Owner’s Manual • Owner’s Manual
1290 Super Duke GT 2018
Owner’s Manual • Setup Instructions
1290 Super Duke GT 2019
Setup Instructions
1290 Super Duke GT AU
Setup Instructions
1290 Super Duke GT CN 2017
Setup Instructions
1290 Super Duke GT CN 2018
Setup Instructions
1290 Super Duke GT CN 2019
Setup Instructions
1290 Super Duke GT EU
Setup Instructions
1290 Super Duke GT EU 2017
Setup Instructions
1290 Super Duke GT EU 2018
Setup Instructions
1290 Super Duke GT EU 2019
Setup Instructions
1290 Super Duke GT JP
Setup Instructions
1290 Super Duke GT JP 2017
Setup Instructions
1290 Super Duke GT JP 2018
Setup Instructions
1290 Super Duke GT JP 2019
Setup Instructions
1290 Super Duke GT Series
Setup Instructions
1290 Super Duke GT US
Setup Instructions
1290 Super Duke GT US 2017
Setup Instructions
1290 Super Duke GT US 2018
Setup Instructions
1290 Super Duke GT US 2019
Setup Instructions
1290 Super Duke R
Owner’s Manual • Setup Instructions
1290 Super Duke R 2016
Setup Instructions
1290 Super Duke R 2017
Owner’s Manual • Setup Instructions
1290 Super Duke R 2018
Owner’s Manual • Setup Instructions
1290 Super Duke R 2019
Setup Instructions
1290 SUPER DUKE R 2021
Owner’s Manual
1290 Super Duke R AU 2017
Owner’s Manual • Setup Instructions
1290 Super Duke R AUS 2014
Repair Manual
1290 Super Duke R EU 2014
Repair Manual
1290 Super Duke R EU 2017
Owner’s Manual • Setup Instructions
1290 Super Duke R FR 2014
Repair Manual
1290 Super Duke R JP 2017
Owner’s Manual • Setup Instructions
1290 Super Duke R US 2017
Setup Instructions
1290 Super Duke R US 2020
Owner’s Manual
1290 Super Duke R USA 2014
Repair Manual
1290 SUPER DUKE RR 2021
Owner’s Manual
1290 SUPERDUKE R
Owner’s Manual
144 SX
Owner’s Manual
144 SX 2008
Owner’s Manual
150 EXC TPI 2021
Setup Instructions
150 SX
Owner’s Manual • Owner’s Manual • Owner’s Manual • Owner’s Manual • Owner’s Manual • Owner’s Manual
150 SX 2010
Owner’s Manual • Owner’s Manual
150 SX 2011
Setup Instructions
150 SX 2016
Setup Instructions
150 SX 2017
Setup Instructions
150 SX 2018
Owner’s Manual • Setup Instructions
150 SX EU 2013
Setup Instructions
150 SX EU 2015
Owner’s Manual
150 SX EU 2017
Setup Instructions
150 SX US 2015
Owner’s Manual
150 SX US 2017
Setup Instructions
150 SX USA
Owner’s Manual • Owner’s Manual
150 SX USA 2013
Setup Instructions
150 XC USA
Owner’s Manual • Owner’s Manual • Owner’s Manual • Owner’s Manual
150 XC USA 2010
Owner’s Manual
150 XC USA 2011
Setup Instructions
150 XC USA 2013
Setup Instructions
150 XC-W 2018
Setup Instructions
150 XC-W US 2017
Setup Instructions
1998 125 EGS
Owner’s Manual
1998 125 EXC
Owner’s Manual
1998 125 MXC
Owner’s Manual
1998 125 SX
Owner’s Manual
1998 125sx
Owner’s Manual
1998 200 EGS
Owner’s Manual
1998 200 EXC
Owner’s Manual
1998 200 MXC
Owner’s Manual
1998 200 SX
Owner’s Manual
1998 250 EGS
Owner’s Manual
1998 250 EXC
Owner’s Manual
1998 250 MXC
Owner’s Manual
1998 250 SX
Owner’s Manual
1998 300 EGS
Owner’s Manual
1998 300 EXC
Owner’s Manual
1998 300 MXC
Owner’s Manual
1998 300 SX
Owner’s Manual
1998 380 EGS
Owner’s Manual
1998 380 EXC
Owner’s Manual
1998 380 MXC
Owner’s Manual
1998 380 SX
Owner’s Manual
1998 400 R
Owner’s Handbook Manual
1998 400 RXCe
Owner’s Handbook Manual
1998 50 SXR Adventure
Owner’s Handbook Manual
1998 620 R
Owner’s Handbook Manual
1998 620 RXCe
Owner’s Handbook Manual
1998 SXC 400
Spare Parts Manual
1998 SXC 540
Spare Parts Manual
2
200
Owner’s Handbook Manual • Repair Manual
200 DUKE 2013 COL
Repair Manual
200 Duke 2014 COL
Setup Instructions
200 Duke 2016
Setup Instructions
200 Duke 2016 CO 2015
Setup Instructions
200 Duke 2017
Owner’s Manual
200 DUKE 2021
Owner’s Manual
200 Duke AR 2015
Owner’s Manual • Setup Instructions
200 Duke ASIA 2015
Owner’s Manual • Setup Instructions
200 Duke BR 2015
Owner’s Manual • Setup Instructions
200 Duke CN 2015
Owner’s Manual • Setup Instructions
200 DUKE EU
Owner’s Manual • Owner’s Manual • Installation Instructions Manual • Owner’s Manual • Owner’s Manual • Repair Manual • Setup Instructions
200 Duke EU 2012
Setup Instructions
200 Duke EU 2015
Owner’s Manual • Setup Instructions
200 DUKE MAL
Owner’s Manual • Setup Instructions
200 Duke MY 2015
Owner’s Manual • Setup Instructions
200 Duke US 2020
Owner’s Manual
200 EXC
Owner’s Manual • Owner’s Manual • Owner’s Handbook Manual • Owner’s Manual • Owner’s Manual • Owner’s Manual • Owner’s Handbook Manual • Owner’s Manual • Owner’s Manual • Owner’s Manual • Owner’s Manual
200 EXC 2001
Owner’s Handbook Manual
200 EXC 2004
Owner’s Manual
200 EXC 2006
Owner’s Manual
200 EXC 2008
Owner’s Manual
200 EXC 2015
Setup Instructions
200 EXC 2016
Setup Instructions
200 EXC AU 2016
Owner’s Manual
200 EXC AUS
Owner’s Manual • Owner’s Manual • Owner’s Manual
200 EXC AUS 2010
Owner’s Manual
200 EXC AUS 2012
Setup Instructions
200 EXC AUS 2013
Setup Instructions
200 EXC AUS 2014
Setup Instructions
200 EXC EU 2010
Owner’s Manual
200 EXC EU 2012
Setup Instructions
200 EXC EU 2013
Setup Instructions
200 EXC EU 2014
Setup Instructions
200 EXC EU 2016
Owner’s Manual
200 EXC2004
Owner’s Manual
200 MXC 2001
Owner’s Handbook Manual
200 SX
Owner’s Manual • Owner’s Handbook Manual • Owner’s Manual
200 SX 2001
Owner’s Handbook Manual
200 SX 2004
Owner’s Manual
200 XC
Owner’s Manual • Owner’s Manual
200 XC 2006
Owner’s Manual
200 XC 2008
Owner’s Manual
200 XC-W
Owner’s Manual • Owner’s Manual • Owner’s Manual • Owner’s Manual • Owner’s Manual • Owner’s Manual • Owner’s Manual
200 XC-W 2006
Owner’s Manual
200 XC-W 2008
Owner’s Manual
200 XC-W 2015
Setup Instructions
200 XC-W 2016
Setup Instructions
200 XC-W US 2016
Owner’s Manual
200 XC-W USA 2012
Setup Instructions
200 XC-W USA 2013
Setup Instructions
200 XC-W USA 2014
Setup Instructions
200 XC?W USA 2010
Owner’s Manual
2000 400 EXC RACING
Owner’s Handbook Manual
2000 400 SX RACING
Owner’s Handbook Manual
2000 520 EXC RACING
Owner’s Handbook Manual
2000 520 SX RACING
Owner’s Handbook Manual
2000 60 SX
Owner’s Manual
2000 640 Duke
Spare Parts Manual
2000 65 SX
Owner’s Manual
2000 LC4 ADVENTURE R 640
Owner’s Handbook Manual
2001 50 JR ADVENTURE
Owner’s Handbook Manual
2001 50 SX Pro Senior LC
Owner’s Handbook Manual
2002 200 EXC AUS
Owner’s Manual
2002 200 EXC EU
Owner’s Manual
2002 200 XC-W USA
Owner’s Manual
2002 250 EXC AUS
Owner’s Manual
2002 250 EXC EU
Owner’s Manual
2002 250 XC-W USA
Owner’s Manual
2002 300 EXC Aus
Owner’s Manual
2002 300 EXC EU
Owner’s Manual
2002 300 XC-W usa
Owner’s Manual
2002 400 EXC Racing
Owner’s Handbook Manual
2002 400 MXC
Owner’s Handbook Manual
2002 400 SX
Owner’s Handbook Manual
2002 50 SX PRO SENIOR LC
Owner’s Handbook Manual
2002 520 EXC Racing
Owner’s Handbook Manual
2002 520 MXC
Owner’s Handbook Manual
2002 520 SX
Owner’s Handbook Manual
2003 125 EXC
Owner’s Handbook Manual • Owner’s Handbook Manual
2003 125 MXC
Owner’s Handbook Manual • Owner’s Handbook Manual
2003 125 SX
Owner’s Handbook Manual • Owner’s Handbook Manual
2003 200 EXC
Owner’s Handbook Manual • Owner’s Handbook Manual
2003 200 MXC
Owner’s Handbook Manual • Owner’s Handbook Manual
2003 200 SX
Owner’s Handbook Manual • Owner’s Handbook Manual
2003 250 EXC
Owner’s Handbook Manual • Owner’s Handbook Manual
2003 250 MXC
Owner’s Handbook Manual • Owner’s Handbook Manual
2003 250 SX
Owner’s Handbook Manual • Owner’s Handbook Manual
2003 300 EXC
Owner’s Handbook Manual • Owner’s Handbook Manual
2003 300 MXC
Owner’s Handbook Manual • Owner’s Handbook Manual
2003 300 SX
Owner’s Handbook Manual • Owner’s Handbook Manual
2003 640 DUKE II
Owner’s Manual
2003 950 Super Enduro
Repair Manual
2003 950 SuperMoto
Repair Manual
2003 990 Adventure
Repair Manual
2003 990 Super Duke
Repair Manual
2004 105 SX
Spare Parts Manual
2004 250 EXC RACING
Owner’s Manual • Owner’s Manual
2004 450 EXC RACING
Owner’s Manual
2004 450 MXC
Owner’s Manual
2004 525 EXC RACING
Owner’s Manual
2004 525 MXC
Owner’s Manual
2004 640 DUKE II
Spare Parts Manual
2004 660 SMC
Spare Parts Manual
2004 950 Super Enduro
Repair Manual
2004 950 SuperMoto
Repair Manual
2004 990 Adventure
Repair Manual
2004 990 Super Duke
Repair Manual
2005 85 SX
Owner’s Manual
2005 950 Adventure
Owner’s Manual • Repair Manual
2005 950 Super Enduro
Repair Manual
2005 950 SuperMoto
Repair Manual
2005 990 Adventure
Repair Manual
2005 990 Super Duke
Repair Manual
2006 660 SMC
Owner’s Manual
2006 950 Super Enduro
Repair Manual
2006 950 SuperMoto
Repair Manual
2006 990 Adventure
Repair Manual
2006 990 Super Duke
Repair Manual
2007 250 EXC-F SIX DAYS
Owner’s Manual • Repair Manual
2007 505 SX-F
Repair Manual
2007 950 Super Enduro R
Owner’s Manual
2007 950 SUPERMOTO
Owner’s Manual
2007 990 ADVENTURE
Owner’s Manual
2007 990 Super Duke
Owner’s Manual
2007 SMR 450
Owner’s Manual
2007 SMR 560
Owner’s Manual
2008 1190 RC8 USA
Owner’s Manual
2008 690 Enduro
Repair Manual
2008 990 SUPER DUKE
Owner’s Manual
2008 990 SUPERMOTO
Owner’s Manual
2009 250 EXC-F SIX DAYS
Owenrs Manual
2009 250 SX-F
Owenrs Manual
2009 250 XC-F
Owenrs Manual
2009 250 XCF-W
Owenrs Manual
2009 400 EXC
Owner’s Manual
2009 400 XC-W
Owner’s Manual
2009 450 EXC SIX DAYS
Owner’s Manual
2009 450 SC-F USA
Owner’s Manual
2009 450 SX-F EU
Owner’s Manual
2009 450 SX-F USA
Owner’s Manual
2009 450 XC-W
Owner’s Manual
2009 530 EXC SIX DAYS
Owner’s Manual
2009 530 XC-W
Owner’s Manual
2009 550 SC-F USA
Owner’s Manual
2009 65 XC
Owner’s Manual
2009 690 DUKE EU
Owner’s Manual
2009 690 ENDURO EU
Owner’s Manual • Repair Manual
2009 690 Rally Factory Replica
Owner’s Manual
200egs
Owner’s Manual • Owner’s Handbook Manual
200MXC
Owner’s Handbook Manual • Owner’s Manual • Owner’s Handbook Manual
2010 1190 RC8
Owner’s Manual
2010 1190 RC8 R AUS
Owner’s Manual
2010 1190 RC8 R FR
Owner’s Manual
2010 1190 RC8 R JP
Owner’s Manual
2010 125 EXC EU
Owner’s Manual
2010 150 XC USA
Owner’s Manual
2010 200 EXC EU
Owner’s Manual
2010 200 XC-W USA
Owner’s Manual
2010 250 EXC EU
Owner’s Manual • Owner’s Manual
2010 250 EXC SixDays
Owner’s Manual
2010 250 EXC-F AUS
Owner’s Manual
2010 250 EXC-F EU
Owner’s Manual
2010 250 SX-F EU
Owner’s Manual
2010 250 XC-W USA
Owner’s Manual • Owner’s Manual
2010 250 XCF-W ZA
Owner’s Manual
2010 300 EXC EU
Owner’s Manual • Owner’s Manual
2010 300 EXC SixDays
Owner’s Manual
2010 300 SX
Owner’s Manual
2010 300 XC EU/USA
Owner’s Manual • Owner’s Manual
2010 300 XC-W USA
Owner’s Manual • Owner’s Manual
2010 400 EXC EU
Owner’s Manual
2010 400 XC-W USA
Owner’s Manual
2010 450 EXC EU
Owner’s Manual
2010 450 SX-F EU
Owner’s Manual
2010 450 SX-F USA
Owner’s Manual
2010 450 XC-W SIX DAYS USA
Owner’s Manual
2010 50 SX MINI
Owner’s Manual
2010 530 EXC EU
Owner’s Manual
2010 530 XC-W SIX DAYS USA
Owner’s Manual
2010 690 SMC AUS
Repair Manual
2010 690 SMC EU
Repair Manual • Setup Instructions
2010 690 SMC UK
Repair Manual
2010 990 Super Duke R
Owner’s Manual
2011 400 EXC Factory Edition
Owner’s Manual
2011 450 EXC Factory Edition
Owner’s Manual
2011 450 EXC SIX DAYS
Owner’s Manual
2011 450 XC-W SIX DAYS
Owner’s Manual
2011 530 EXC Factory Edition
Owner’s Manual
2011 530 EXC SIX DAYS
Owner’s Manual
2011 530 XC-W SIX DAYS
Owner’s Manual
2011 690 Duke R
Owner’s Manual
2011 690 SMC AUS
Repair Manual • Owner’s Manual
2011 690 SMC EU
Repair Manual • Owner’s Manual
2011 690 SMC UK
Repair Manual • Owner’s Manual
2011 990 Adventure
Owner’s Manual
2011 990 Supermoto T USA
Owner’s Manual • Owner’s Manual • Owner’s Manual
2012 125 DUKE
Owner’s Manual
2012 125 ECX EU
Owner’s Manual
2012 125 EXC Six days EU
Owner’s Manual
2012 125 SX
Owner’s Manual
2012 150 SX
Owner’s Manual
2012 150 XC
Owner’s Manual
2012 200 DUKE
Owner’s Manual
2012 250 EXC-F SIX DAYS
Owner’s Manual
2012 250 SX
Owner’s Manual
2012 250 SX-F
System Maintenance And Repair Manual
2012 250 XC
Owner’s Manual
2012 250 XCF-W
Owner’s Manual
2012 300 XC
Owner’s Manual
2012 350 EXC-F SIX DAYS
Owner’s Manual
2012 350 XCF-W
Owner’s Manual
2012 450 EXC SIX DAYS
Owner’s Manual
2012 450 SX-F EU
Owner’s Manual
2012 450 SX-F USA
Owner’s Manual
2012 450 XC-W
Owner’s Manual
2012 500 EXC SIX DAYS
Owner’s Manual
2012 500 XC-W
Owner’s Manual
2012 990 Adventure
Owner’s Manual
2013 1190 Adventure R
Owner’s Manual
2013 1190 RC8 R JP
Owner’s Manual • Setup Instructions
2013 125 DUKE
Owner’s Manual
2013 125 EXC SIX DAYS
Owner’s Manual
2013 125 SX
Owner’s Manual
2013 150 SX
Owner’s Manual
2013 150 XC
Owner’s Manual
2013 200 DUKE
Owner’s Manual
2013 200 EXC
Owner’s Manual
2013 200 XC-W
Owner’s Manual
2013 250 EXC SIX DAYS
Owner’s Manual
2013 250 SX
Owner’s Manual
2013 250 XC
Owner’s Manual
2013 250 XC-W
Owner’s Manual
2013 300 EXC SIX DAYS
Owner’s Manual
2013 300 XC
Owner’s Manual
2013 300 XC-W
Owner’s Manual
2013 450 EXC EU
Owner’s Manual
2013 450 Rally Factory Replica
Owner’s Manual
2013 450 SX-F EU
Owner’s Manual
2013 450 SX-F USA
Owner’s Manual
2013 450 SX-F USA Factory edition
Owner’s Manual
2013 450 XC-F USA
Owner’s Manual
2013 450 XC-W USA
Owner’s Manual
2013 500 EXC AUS
Owner’s Manual • Repair Manual • Setup Instructions
2013 500 EXC EU
Owner’s Manual
2013 500 XC-W USA
Owner’s Manual
2013 690 Duke R
Owner’s Manual
2013 690 SMC R EU
Owner’s Manual • Repair Manual
2013 990 SUPER DUKE R
Owner’s Manual
2013 990 SUPERMOTO T
Owner’s Manual
2014 1190 Adventure
Owner’s Manual
2014 125 EXC SIX DAYS
Owner’s Manual
2014 125 SX
Owner’s Manual
2014 1290 Super Duke R FR
Owner’s Manual
2014 150 SX
Owner’s Manual
2014 150 XC
Owner’s Manual
2014 200 EXC
Owner’s Manual
2014 200 XC-W
Owner’s Manual
2014 250 EXC SIX DAYS
Owner’s Manual
2014 250 SX
Owner’s Manual
2014 250 XC
Owner’s Manual
2014 250 XC-W
Owner’s Manual
2014 300 EXC SIX DAYS
Owner’s Manual
2014 300 XC
Owner’s Manual
2014 300 XC-W SIX DAYS
Owner’s Manual
2014 350 EXC-F SIX DAYS
Owner’s Manual
2014 350 XCF-W SIX DAYS
Owner’s Manual
2014 450 EXC SIX DAYS
Owner’s Manual
2014 450 XC-W
Owner’s Manual
2014 500 EXC SIX DAYS
Owner’s Manual
2014 500 XC-W
Owner’s Manual
2014 65 SX
Owner’s Manual • Setup Instructions
2014 690 Enduro R EU
Owner’s Manual
2014 690 SMC R EU
Owner’s Manual • Repair Manual
2014 Freeride 350
Owner’s Manual
2015 125 SX EU
Owner’s Manual • Setup Instructions
2015 150 SX EU
Owner’s Manual • Setup Instructions
2015 200 Duke
Owner’s Manual
2015 250 SX EU
Owner’s Manual • Setup Instructions
2015 250 XC EU/US
Owner’s Manual • Setup Instructions
2015 300 XC EU/US
Owner’s Manual • Setup Instructions
2015 450 Rally Factory Replica
Owner’s Manual
2015 450 SC-F USA
Owner’s Manual
2015 450 SX-F EU
Owner’s Manual
2015 450 SX-F USA
Owner’s Manual
2015 RC 390 ASIA
Owner’s Manual
2015 RC 390 AU
Owner’s Manual
2015 RC 390 BR
Owner’s Manual
2015 RC 390 CN
Owner’s Manual
2015 RC 390 EU
Owner’s Manual
2015 RC 390 JP
Owner’s Manual
2015 RC 390 MY
Owner’s Manual
2016 690 DUKE R
Owner’s Manual • Owner’s Manual
2016 RC 250
Owner’s Manual
2016 RC 390
Owner’s Manual
2018 50 SX
Owner’s Manual
25 EXC 2016
Setup Instructions
25 EXC Six Days
Owner’s Manual
250 AUS
Owner’s Manual
250 DUKE
Owner’s Manual
250 EXC
Repair Manual • Owner’s Manual • Owner’s Manual • Owner’s Manual • Owner’s Handbook Manual • Owner’s Manual • Owner’s Manual • Manual • Owner’s Handbook Manual • Owner’s Manual • Owner’s Manual • Owner’s Manual • Owner’s Manual
250 EXC 2001
Owner’s Handbook Manual
250 EXC 2006
Owner’s Manual
250 EXC 2008
Owner’s Manual
250 EXC 2015
Setup Instructions
250 EXC 2016
Setup Instructions
250 EXC 2018
Owner’s Manual
250 EXC AU 2016
Owner’s Manual
250 EXC AU 2017
Setup Instructions
250 EXC AUS
Owner’s Manual • Owner’s Manual • Repair Manual
250 EXC AUS 2010
Owner’s Manual
250 EXC AUS 2012
Setup Instructions
250 EXC AUS 2013
Setup Instructions
250 EXC AUS 2014
Setup Instructions
250 EXC EU
Owner’s Manual • Owner’s Manual • Owner’s Manual • Repair Manual
250 EXC EU 2010
Owner’s Manual
250 EXC EU 2012
Setup Instructions
250 EXC EU 2013
Setup Instructions
250 EXC EU 2014
Setup Instructions
250 EXC EU 2016
Owner’s Manual
250 EXC EU 2017
Setup Instructions
250 EXC Factory Edition
Owner’s Manual
250 EXC RACING 2003
Owner’s Manual
250 EXC RACING 2004
Owner’s Manual
250 EXC RACING 2005
Owner’s Manual • Owner’s Manual
250 EXC RACING 2006
Owner’s Manual
250 EXC Six Day TPI 2019
Setup Instructions
250 EXC SIX DAYS
Owner’s Manual • Owner’s Manual • Owner’s Manual
250 EXC SIX DAYS 2008
Owner’s Manual
250 EXC Six Days 2015
Setup Instructions
250 EXC Six days EU
Owner’s Manual • Owner’s Manual • Owner’s Manual • Repair Manual
250 EXC SIX DAYS EU 2010
Owner’s Manual
250 EXC SIX DAYS EU 2012
Setup Instructions
250 EXC SIX DAYS EU 2013
Setup Instructions
250 EXC SIX DAYS EU 2014
Setup Instructions
250 EXC Six Days EU 2016
Owner’s Manual
250 EXC Six Days EU 2017
Setup Instructions
250 EXC Six Days TPI
Owner’s Manual
250 EXC Six Days TPI 2019
Repair Manual
250 EXC Six Days TPI 2020
Owner’s Manual
250 EXC Six Days TPI EU 2018
Setup Instructions
250 EXC SIX DAYS TPI EU 2021
Setup Instructions
250 EXC TPI
Owner’s Manual
250 EXC TPI 2019
Repair Manual • Setup Instructions
250 EXC TPI 2020
Owner’s Manual
250 EXC TPI EU 2018
Setup Instructions
250 EXC TPI EU 2021
Setup Instructions
250 EXC-F 2017
Owner’s Manual
250 EXC-F 2018
Setup Instructions
250 EXC-F 2019
Setup Instructions
250 EXC-F AR 2019
Setup Instructions
250 EXC-F AU 2017
Owner’s Manual
250 EXC-F AU 2018
Owner’s Manual • Setup Instructions
250 EXC-F AU 2019
Setup Instructions
250 EXC-F AUS
Owenrs Manual • Owner’s Manual • Owner’s Manual
250 EXC-F AUS 2012
Setup Instructions
250 EXC-F BR 2017
Owner’s Manual
250 EXC-F BR 2018
Owner’s Manual • Setup Instructions
250 EXC-F BR 2019
Setup Instructions
250 EXC-F EU
Owenrs Manual • Owner’s Manual • Owner’s Manual • Setup Instructions
250 EXC-F EU 2010
Owner’s Manual • Owner’s Manual • Owner’s Manual • Owner’s Manual
250 EXC-F EU 2012
Setup Instructions
250 EXC-F EU 2015
Setup Instructions
250 EXC-F EU 2017
Owner’s Manual
250 EXC-F EU 2018
Owner’s Manual • Setup Instructions
250 EXC-F EU 2019
Setup Instructions
250 EXC-F Factory Edition
Owner’s Manual
250 EXC-F Factory Edition EU
Owner’s Manual
250 EXC-F Six Days
Owner’s Manual • Owner’s Manual
250 EXC-F Six Days 2018
Setup Instructions
250 EXC-F Six Days 2019
Setup Instructions
250 EXC-F Six Days EU
Owenrs Manual • Owner’s Manual • Setup Instructions
250 EXC-F SIX DAYS EU 2012
Setup Instructions
250 EXC-F SIX DAYS EU 2015
Setup Instructions
250 EXC-F Six Days EU 2017
Owner’s Manual
250 EXC-F Six Days EU 2018
Owner’s Manual • Setup Instructions
250 EXC-F Six Days EU 2019
Setup Instructions
250 EXC-F SIX DAYS EY
Owner’s Manual
250 EXC-F US 2018
Setup Instructions
250 EXC-F US 2019
Setup Instructions
250 EXC-W USA
Owner’s Manual • Owner’s Manual
250 MXC
Repair Manual • Owner’s Handbook Manual • Owner’s Manual • Owner’s Handbook Manual
250 MXC 2001
Owner’s Handbook Manual
250 SC
Owner’s Manual
250 SC-F USA
Owner’s Manual
250 sc-f usa 2014
Owner’s Manual
250 scf 2016
Repair Manual
250 SX
Repair Manual • Owner’s Manual • Owner’s Manual • Owner’s Manual • Owner’s Manual • Owner’s Handbook Manual • Owner’s Manual • Owner’s Manual • Owner’s Handbook Manual • Owner’s Manual • Owner’s Manual • Setup Instructions • Owner’s Manual
250 SX 2019
Owner’s Manual
250 SX 2001
Owner’s Handbook Manual
250 SX 2004
Owner’s Manual
250 SX 2006
Owner’s Manual
250 SX 2007
Owner’s Manual
250 SX 2008
Owner’s Manual
250 SX 2010
Owner’s Manual • Owner’s Manual
250 SX 2011
Setup Instructions
250 SX 2016
Setup Instructions
250 SX 2017
Setup Instructions
250 SX EU
Owner’s Manual • Owner’s Manual • Setup Instructions
250 SX EU 2013
Setup Instructions
250 SX EU 2015
Owner’s Manual
250 SX EU 2017
Setup Instructions
250 SX Series
Setup Instructions
250 SX US
Setup Instructions
250 SX US 2015
Owner’s Manual
250 SX US 2017
Setup Instructions
250 SX USA 2013
Setup Instructions
250 SX-F
Owner’s Manual • Owner’s Manual • Setup Instructions
250 SX-F 2006
Owner’s Manual • Repair Manual • Repair Manual
250 SX-F 2007
Owner’s Manual • Repair Manual
250 sx-f 2011
Repair Manual
250 SX-F 2016
Owner’s Manual
250 SX-F EU
Owenrs Manual • Owner’s Manual • Owner’s Manual • Setup Instructions
250 SX-F EU 2010
Owner’s Manual
250 SX-F EU 2012
Owner’s Manual • Owner’s Manual
250 sx-f eu 2014
Owner’s Manual
250 sx-f Musquin replica 2011
Repair Manual
250 SX-F ROCKZEN REPLICA EU 2012
Owner’s Manual
250 SX-F Roczen Replica EU
Owner’s Manual
250 SX-F ROCZEN REPLICA EU 2012
Owner’s Manual
250 SX-F US
Owner’s Manual
250 SX-F USA
Owenrs Manual • Owner’s Manual • Owner’s Manual
250 SX-F USA 2010
Owner’s Manual
250 SX-F USA 2012
Owner’s Manual • Owner’s Manual
250 sx-f usa 2014
Owner’s Manual
250 SX-FUSA
Owner’s Handbook Manual • Setup Instructions • Setup Instructions
250 sxf 2016
Repair Manual
250 SXF2012
Owner’s Manual
250 XC
Owner’s Manual • Owner’s Manual • Owner’s Manual • Owner’s Manual • Owner’s Manual
250 XC 2006
Owner’s Manual
250 XC 2008
Owner’s Manual
250 XC 2016
Setup Instructions
250 XC 2017
Setup Instructions
250 XC 2019
Owner’s Manual
250 XC EU
Owner’s Manual
250 XC EU 2011
Setup Instructions
250 XC EU 2015
Owner’s Manual
250 XC EU/USA 2010
Owner’s Manual • Owner’s Manual
250 XC Series
Setup Instructions
250 XC TPI
Owner’s Manual
250 XC US
Setup Instructions
250 XC US 2015
Owner’s Manual
250 XC US 2017
Setup Instructions
250 XC USA
Owner’s Manual
250 XC USA 2011
Setup Instructions
250 XC-F 2007
Owner’s Manual • Repair Manual
250 xc-f 2011
Repair Manual
250 XC-F 2016
Owner’s Manual
250 XC-F AU 2015
Setup Instructions
250 XC-F EU
Owner’s Manual
250 XC-F EU 2012
Owner’s Manual
250 XC-F USA
Owenrs Manual • Owner’s Manual
250 XC-F USA 2012
Owner’s Manual
250 XC-F, XCF-W, EXC-F, 400 XC-W, EXC RACING, 450 XC, XC-W, EXC RACING, 525 XC, XC-W, EXC RACING, 525 XC DESERT RACING
Owner’s Manual
250 XC-W
Owner’s Manual • Owner’s Manual • Owner’s Manual • Owner’s Manual • Owner’s Manual • Owner’s Manual • Owner’s Manual • Repair Manual
250 XC-W 2006
Owner’s Manual
250 XC-W 2008
Owner’s Manual
250 XC-W 2015
Setup Instructions
250 XC-W 2016
Setup Instructions
250 XC-W 2018
Owner’s Manual
250 XC-W TPI
Owner’s Manual
250 XC-W TPI 2019
Repair Manual • Setup Instructions
250 XC-W TPI 2020
Owner’s Manual
250 XC-W TPI US 2018
Setup Instructions
250 XC-W TPI US 2021
Setup Instructions
250 XC-W US 2016
Owner’s Manual
250 XC-W US 2017
Setup Instructions
250 XC-W USA 2012
Setup Instructions
250 XC-W USA 2013
Setup Instructions
250 XC-W USA 2014
Setup Instructions
250 XC?W USA 2010
Owner’s Manual
250 XCF-W 2007
Owner’s Manual • Repair Manual
250 XCF-W Six Days USA
Owner’s Manual
250 XCF-W US 2015
Setup Instructions
250 XCF-W USA
Owenrs Manual
250 XCF-W USA 2012
Setup Instructions
250 XCF-W ZA
Owenrs Manual
250 XCF-W ZA 2010
Owner’s Manual • Owner’s Manual • Owner’s Manual
250egs
Owner’s Manual • Manual • Owner’s Handbook Manual
250EXC 2004
Owner’s Manual
25370313211
Owner’s Manual
3
300
Owner’s Handbook Manual
300 ECX BR 2015
Setup Instructions
300 EXC
Repair Manual • Owner’s Manual • Owner’s Manual • Owner’s Handbook Manual • Owner’s Manual • Owner’s Manual • Owner’s Manual • Manual • Owner’s Handbook Manual • Owner’s Manual • Owner’s Manual • Owner’s Manual • Repair Manual • Owner’s Manual • Owner’s Manual
300 EXC 2001
Owner’s Handbook Manual
300 EXC 2004
Owner’s Manual
300 EXC 2006
Owner’s Manual
300 EXC 2015
Setup Instructions
300 EXC 2016
Setup Instructions
300 EXC 2018
Owner’s Manual
300 EXC AU 2016
Owner’s Manual
300 EXC AU 2017
Setup Instructions
300 EXC AUS
Owner’s Manual • Owner’s Manual • Repair Manual
300 EXC AUS 2010
Owner’s Manual
300 EXC AUS 2012
Setup Instructions
300 EXC AUS 2013
Setup Instructions
300 EXC AUS 2014
Setup Instructions
300 EXC BR 2016
Owner’s Manual
300 EXC BR 2017
Setup Instructions
300 EXC Erzberg Edition TPI
Owner’s Manual
300 EXC EU 2010
Owner’s Manual
300 EXC EU 2012
Setup Instructions
300 EXC EU 2013
Setup Instructions
300 EXC EU 2014
Setup Instructions
300 EXC EU 2016
Owner’s Manual
300 EXC EU 2017
Setup Instructions
300 EXC Factory Edition
Owner’s Manual
300 EXC Six Day TPI 2019
Setup Instructions
300 EXC SIX DAYS
Owner’s Manual • Owner’s Manual • Owner’s Manual
300 EXC Six Days 2015
Setup Instructions
300 EXC Six days eu
Owner’s Manual • Owner’s Manual • Repair Manual
300 EXC SIX DAYS EU 2010
Owner’s Manual
300 EXC SIX DAYS EU 2013
Setup Instructions
300 EXC SIX DAYS EU 2014
Setup Instructions
300 EXC Six Days EU 2016
Owner’s Manual
300 EXC Six Days EU 2017
Setup Instructions
300 EXC Six Days TPI
Owner’s Manual
300 EXC Six Days TPI 2019
Repair Manual
300 EXC Six Days TPI 2020
Owner’s Manual
300 EXC SIX DAYS TPI CN
Setup Instructions
300 EXC Six Days TPI EU 2018
Setup Instructions
300 EXC SIX DAYS TPI EU 2021
Setup Instructions
300 EXC TPI
Owner’s Manual
300 EXC TPI 2019
Repair Manual • Setup Instructions
300 EXC TPI 2020
Owner’s Manual
300 EXC TPI ERZBERGRODED EU 2021
Setup Instructions
300 EXC TPI ERZBERGRODEO 2020
Owner’s Manual
300 EXC TPI EU 2018
Setup Instructions
300 EXC TPI EU 2021
Setup Instructions
300 EXC-E SIX DAYS 2008
Owner’s Manual
300 EXS SIX DAYS EU 2012
Setup Instructions
300 MXC
Repair Manual • Owner’s Manual • Spare Parts Manual • Owner’s Handbook Manual • Owner’s Manual • Owner’s Handbook Manual • Owner’s Manual
300 MXC 2001
Owner’s Handbook Manual
300 MXC 2004
Owner’s Manual
300 SC
Owner’s Manual
300 SX
Repair Manual • Owner’s Handbook Manual • Owner’s Handbook Manual • Owner’s Manual
300 SX 2001
Owner’s Handbook Manual
300 XC 2006
Owner’s Manual
300 XC 2008
Owner’s Manual
300 XC 2016
Setup Instructions
300 XC 2017
Setup Instructions
300 XC 2019
Owner’s Manual
300 XC EU
Owner’s Manual
300 XC EU 2011
Setup Instructions
300 XC EU 2013
Setup Instructions
300 XC EU 2015
Owner’s Manual
300 XC EU/USA
Owner’s Manual • Owner’s Manual • Owner’s Manual • Owner’s Manual • Owner’s Manual
300 XC Series
Setup Instructions
300 XC TPI
Owner’s Manual
300 XC US
Setup Instructions
300 XC US 2015
Owner’s Manual
300 XC US 2017
Setup Instructions
300 XC USA
Owner’s Manual
300 XC USA 2011
Setup Instructions
300 XC USA 2013
Setup Instructions
300 XC-W
Owner’s Manual • Owner’s Manual • Owner’s Manual • Owner’s Manual • Owner’s Manual • Owner’s Manual • Owner’s Manual • Repair Manual
300 XC-W 2006
Owner’s Manual
300 XC-W 2008
Owner’s Manual
300 XC-W 2015
Setup Instructions
300 XC-W 2016
Setup Instructions
300 XC-W 2018
Owner’s Manual
300 XC-W Six Day 2018
Owner’s Manual
300 XC-W Six Day TPI 2019
Setup Instructions
300 XC-W Six Days
Owner’s Manual • Owner’s Manual
300 XC-W Six Days 2015
Setup Instructions
300 XC-W Six Days TPI
Owner’s Manual
300 XC-W Six Days TPI 2019
Repair Manual
300 XC-W Six Days TPI 2020
Owner’s Manual
300 XC-W Six Days US 2016
Owner’s Manual
300 XC-W Six Days US 2017
Setup Instructions
300 XC-W SIX DAYS USA
Owner’s Manual • Repair Manual
300 XC-W SIX DAYS USA 2014
Setup Instructions
300 XC-W TPI
Owner’s Manual
300 XC-W TPI 2019
Repair Manual • Setup Instructions
300 XC-W TPI 2020
Owner’s Manual
300 XC-W TPI ERZBERGRODEO 2020
Owner’s Manual
300 XC-W TPI ERZBERGRODEO US 2021
Setup Instructions
300 XC-W TPI US 2021
Setup Instructions
300 XC-W US 2016
Owner’s Manual
300 XC-W US 2017
Setup Instructions
300 XC-W USA 2012
Setup Instructions
300 XC-W USA 2013
Setup Instructions
300 XC-W USA 2014
Setup Instructions
300 XC?W USA 2010
Owner’s Manual
300egs
Owner’s Manual • Manual • Owner’s Handbook Manual
3200 XC
Owner’s Manual
3213432
Setup Instructions
3213887en
Instruction Manual
3214221en
Owner’s Manual
3214300
Owner’s Manual
3214400en
Setup Instructions
3214445
Setup Instructions
3214648EN
Owner’s Manual
350 EFC-F AUS
Owner’s Manual
350 EXC-F 2015
Owner’s Manual
350 EXC-F 2017
Owner’s Manual • Setup Instructions
350 EXC-F 2018
Owner’s Manual
350 EXC-F 2022
Owner’s Manual
350 EXC-F 2023
Owner’s Manual
350 EXC-F AU 2015
Setup Instructions
350 EXC-F AU 2018
Owner’s Manual
350 EXC-F AU 2019
Setup Instructions
350 EXC-F AUS
Owner’s Manual
350 EXC-F AUS 2012
Repair Manual
350 EXC-F AUS 2014
Setup Instructions
350 EXC-F BR 2018
Owner’s Manual
350 EXC-F BR 2019
Setup Instructions
350 EXC-F EU 2012
Repair Manual
350 EXC-F EU 2014
Setup Instructions
350 EXC-F EU 2015
Setup Instructions
350 EXC-F EU 2018
Owner’s Manual
350 EXC-F EU 2019
Setup Instructions
350 EXC-F Six Days 2017
Setup Instructions
350 EXC-F Six Days 2018
Owner’s Manual
350 EXC-F Six Days BR 2018
Owner’s Manual
350 EXC-F Six Days BR 2019
Setup Instructions
350 EXC-F SIX DAYS EU
Owner’s Manual • Owner’s Manual • Repair Manual • Owner’s Manual • Owner’s Manual • Setup Instructions
350 EXC-F SIX DAYS EU 2012
Repair Manual
350 EXC-F SIX DAYS EU 2014
Setup Instructions
350 EXC-F SIX DAYS EU 2015
Setup Instructions
350 EXC-F Six Days EU 2018
Owner’s Manual
350 EXC-F Six Days EU 2019
Setup Instructions
350 EXC-F US 2015
Setup Instructions
350 EXC-F US 2019
Setup Instructions
350 EXC-F US 2022
Owner’s Manual
350 EXC-F USA 2012
Repair Manual
350 EXC-F USA 2014
Setup Instructions
350 EXC-F WESS
Setup Instructions
350 EXC-Factory Edition
Owner’s Manual
350 SC-F
Owner’s Manual
350 SX-F 2011
Owner’s Manual
350 SX-F 2012
Owner’s Manual
350 SX-F 2013
Owner’s Manual
350 SX-F 2016
Setup Instructions
350 SX-F 2017
Setup Instructions
350 SX-F Cairoli replica
Owner’s Manual • Owner’s Manual • Owner’s Manual • Owner’s Manual • Setup Instructions
350 SX-F Cairoli Replica 2011
Owner’s Manual
350 SX-F EU 2011
Setup Instructions
350 SX-F EU 2017
Setup Instructions
350 SX-F US 2017
Setup Instructions
350 SX-F USA 2011
Setup Instructions
350 XC-F
Owner’s Manual • Owner’s Manual • Setup Instructions
350 XC-F 2012
Owner’s Manual
350 XC-F 2013
Owner’s Manual
350 XC-F 2016
Setup Instructions
350 XC-F 2017
Setup Instructions
350 XC-F US 2017
Setup Instructions
350 XC-F USA 2011
Setup Instructions
350 XCF-W SIX DAYS US 2015
Setup Instructions
350 XCF-W SIX DAYS USA 2014
Setup Instructions
350 XCF-W US 2015
Setup Instructions
350 XCF-W USA
Owner’s Manual • Owner’s Manual • Repair Manual • Owner’s Manual • Owner’s Manual • Setup Instructions
350 XCF-W USA 2012
Repair Manual
350 XCF-W USA 2014
Setup Instructions
380 EXC
Repair Manual • Owner’s Handbook Manual • Owner’s Manual • Owner’s Handbook Manual
380 EXC 2001
Owner’s Handbook Manual
380 MXC
Repair Manual • Owner’s Handbook Manual • Owner’s Manual • Owner’s Handbook Manual
380 MXC 2001
Owner’s Handbook Manual
380 SX
Repair Manual • Owner’s Handbook Manual • Owner’s Manual • Owner’s Handbook Manual
380 SX 2001
Owner’s Handbook Manual
380EGS
Owner’s Manual • Owner’s Handbook Manual
390 Adventure 2020
Owner’s Manual
390 ADVENTURE 2022
Setup Instructions
390 ADVENTURE AR 2022
Setup Instructions
390 ADVENTURE ASEAN 2022
Setup Instructions
390 ADVENTURE B.D. 2 EU 2022
Setup Instructions
390 ADVENTURE B.D. EU 2022
Setup Instructions
390 ADVENTURE CN 2022
Setup Instructions
390 ADVENTURE CO 2022
Setup Instructions
390 ADVENTURE EU 2022
Setup Instructions
390 ADVENTURE JP 2022
Setup Instructions
390 ADVENTURE PH 2022
Setup Instructions
390 ADVENTURE UK 2022
Setup Instructions
390 ADVENTURE US 2022
Setup Instructions
390 Duke 2014 COL 2013
Repair Manual
390 Duke 2015 COL
Owner’s Manual • Installation Instructions Manual • Owner’s Manual • Setup Instructions • Setup Instructions
390 DUKE 2017
Owner’s Manual
390 Duke AR
Owner’s Manual • Setup Instructions
390 Duke AR 2018
Setup Instructions
390 Duke AR 2019
Owner’s Manual
390 Duke ASIA
Setup Instructions
390 Duke AU
Owner’s Manual • Setup Instructions
390 Duke AU 2018
Setup Instructions
390 Duke AU 2019
Owner’s Manual
390 Duke AUS 2013
Repair Manual
390 DUKE B.D. 2 EU
Owner’s Manual
390 DUKE B.D. 3 EU
Owner’s Manual
390 DUKE B.D. EU
Owner’s Manual
390 Duke B.D. EU 2019
Owner’s Manual
390 DUKE BR
Owner’s Manual
390 Duke BR 2018
Setup Instructions
390 Duke BR 2019
Owner’s Manual
390 Duke CN
Owner’s Manual • Setup Instructions
390 Duke CN 2018
Setup Instructions
390 Duke CN 2019
Owner’s Manual
390 DUKE CO
Owner’s Manual
390 Duke CO 2018
Setup Instructions
390 Duke CO 2019
Owner’s Manual
390 Duke EU
Owner’s Manual • Setup Instructions
390 Duke EU 2013
Repair Manual
390 Duke EU 2018
Setup Instructions
390 Duke EU 2019
Owner’s Manual
390 Duke JP
Owner’s Manual • Setup Instructions
390 Duke JP 2018
Setup Instructions
390 Duke JP 2019
Owner’s Manual
390 Duke MAL 2013
Repair Manual
390 Duke MY
Owner’s Manual • Setup Instructions
390 Duke MY 2018
Setup Instructions
390 Duke MY 2019
Owner’s Manual
390 DUKE PH
Owner’s Manual
390 Duke PH 2018
Setup Instructions
390 Duke PH 2019
Owner’s Manual
390 Duke Series 2018
Setup Instructions
390 Duke Series 2019
Owner’s Manual
390 DUKE TH
Owner’s Manual
390 Duke TH 2018
Setup Instructions
390 Duke TH 2019
Owner’s Manual
390 Duke US
Setup Instructions
390 Duke US 2018
Setup Instructions
3CF6001G4EN
Manual
4
400 EGS
Owner’s Handbook Manual
400 EXC AUS
Owner’s Manual • Owner’s Manual • Repair Manual • Setup Instructions
400 EXC AUS 2009
Setup Instructions
400 EXC AUS 2010
Owner’s Manual
400 EXC AUS 2011
Repair Manual • Setup Instructions
400 EXC EU 2009
Repair Manual • Setup Instructions
400 EXC EU 2010
Owner’s Manual
400 EXC EU 2011
Repair Manual • Setup Instructions
400 EXC FACTORY EDITION EU
Owner’s Manual • Owner’s Manual • Repair Manual • Setup Instructions
400 EXC RACING
Owner’s Manual • Owner’s Manual • Owner’s Manual • Owner’s Manual • Owner’s Manual
400 EXC RACING 2000
Owner’s Handbook Manual
400 EXC RACING 2005
Owner’s Manual • Owner’s Manual
400 EXC RACING 2006
Owner’s Manual
400 EXC RACING 2007
Owner’s Manual
400 LC4-E
Owner’s Handbook Manual
400 LC4-E 2001
Owner’s Handbook Manual
400 LC4R
Owner’s Handbook Manual
400 LS-E/MIL
Owner’s Handbook Manual • Owner’s Handbook Manual • Owner’s Handbook Manual • Owner’s Manual
400 SC
Owner’s Handbook Manual
400 SX RACING 2000
Owner’s Handbook Manual • Owner’s Handbook Manual
400 SXC 1999
Owner’s Handbook Manual
400 XC-W 2007
Owner’s Manual
400 XC-W USA
Repair Manual • Setup Instructions
400 XC-W USA 2009
Repair Manual • Setup Instructions
400 XC-W USA 2010
Owner’s Manual • Owner’s Manual
400LC4
Owner’s Handbook Manual
450 ECX
Owner’s Manual
450 ESC USA 2011
Setup Instructions
450 EX-W AUS
Owner’s Manual
450 EX-W EU
Owner’s Manual
450 EXC 2003
Owner’s Manual
450 EXC AUS
Owner’s Manual • Owner’s Manual • Owner’s Manual • Repair Manual • Setup Instructions
450 EXC AUS 2009
Repair Manual • Setup Instructions
450 EXC AUS 2010
Owner’s Manual
450 EXC AUS 2011
Repair Manual • Setup Instructions
450 EXC AUS 2013
Repair Manual • Setup Instructions
450 EXC Champions EU
Setup Instructions
450 EXC Champions USA
Setup Instructions
450 EXC DAYS EU 2011
Setup Instructions
450 EXC EU
Owner’s Manual • Owner’s Manual • Owner’s Manual • Repair Manual • Setup Instructions
450 EXC EU 2009
Repair Manual • Setup Instructions
450 EXC EU 2010
Owner’s Manual
450 EXC EU 2011
Repair Manual • Setup Instructions
450 EXC EU 2013
Repair Manual • Setup Instructions
450 EXC RACING
Owner’s Manual
450 EXC RACING 2005
Owner’s Manual • Owner’s Manual
450 EXC RACING 2006
Owner’s Manual • Owner’s Manual • Owner’s Manual • Owner’s Manual • Owner’s Manual • Owner’s Manual • Owner’s Manual • Setup Instructions
450 EXC RACING 2007
Owner’s Manual
450 EXC SIX DAYS
Owner’s Manual • Setup Instructions
450 EXC SIX DAYS 2013
Owner’s Manual
450 EXC SIX DAYS EU
Owner’s Manual • Owner’s Manual • Owner’s Manual • Owner’s Manual • Repair Manual • Setup Instructions
450 EXC SIX DAYS EU 2009
Repair Manual • Setup Instructions
450 EXC SIX DAYS EU 2010
Owner’s Manual
450 EXC SIX DAYS EU 2011
Repair Manual
450 EXC SIX DAYS EU 2013
Repair Manual • Setup Instructions
450 EXC USA
Repair Manual • Setup Instructions
450 EXC USA 2009
Repair Manual • Setup Instructions
450 EXC USA 2011
Repair Manual
450 EXC-F 2020
Owner’s Manual • Setup Instructions
Pages:
- 0-999
-
1000-1999