- Manuals
- Brands
- LG Manuals
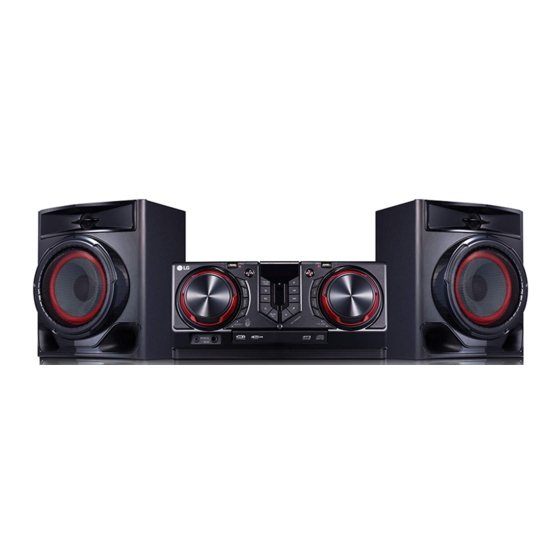
- Stereo System
- CJ44
- Service manual
-
Contents
-
Table of Contents
-
Troubleshooting
-
Bookmarks
Quick Links
Internal Use Only
Mini Hi-Fi System
SERVICE MANUAL
MODEL: CJ44
(CJ44, CJS45F)
CAUTION
BEFORE SERVICING THE UNIT, READ THE «SAFETY PRECAUTIONS»
IN THIS MANUAL.
P/NO : AFN77612119
JANUARY, 2017
Related Manuals for LG CJ44
Summary of Contents for LG CJ44
-
Page 1
Internal Use Only Mini Hi-Fi System SERVICE MANUAL MODEL: CJ44 (CJ44, CJS45F) CAUTION BEFORE SERVICING THE UNIT, READ THE “SAFETY PRECAUTIONS” IN THIS MANUAL. P/NO : AFN77612119 JANUARY, 2017… -
Page 2
CONTENTS SECTION 1 ..GENERAL SECTION 2 ..CABINET & MAIN CHASSIS SECTION 3 ..ELECTRICAL SECTION 4 ..REPLACEMENT PARTS LIST… -
Page 3: Table Of Contents
SECTION 1 SUMMARY CONTENTS SERVICING PRECAUTIONS ……………………..1-3 ESD PRECAUTIONS ……………………….1-5 HIDDEN KEY MODE ……………………….1-6 1. HIDDEN KEY MODE TABLE ……………………1-6 2. HIDDEN KEY MODE DESCRIPTION ………………….. 1-7 SERVICE INFORMATION FOR EEPROM ………………….1-9 PROGRAM DOWNLOAD GUIDE ……………………1-10 FOTA UPDATE STEP USING BT APP ………………….
-
Page 4: Servicing Precautions
SERVICING PRECAUTIONS NOTES REGARDING HANDLING OF THE PICK-UP 1. Notes for transport and storage 1) The pick-up should always be left in its conductive bag until immediately prior to use. 2) The pick-up should never be subjected to external pressure or impact. Storage in conductive bag Drop impact 2.
-
Page 5
NOTES REGARDING COMPACT DISC PLAYER REPAIRS 1. Preparations 1) Compact disc players incorporate a great many ICs as well as the pick-up (laser diode). These components are sensitive to, and easily affected by, static electricity. If such static electricity is high voltage, components can be damaged, and for that reason components should be handled with care. -
Page 6: Esd Precautions
ESD PRECAUTIONS Electrostatically Sensitive Devices (ESD) Some semiconductor (solid state) devices can be damaged easily by static electricity. Such components commonly are called Electrostatically Sensitive Devices (ESD). Examples of typical ESD devices are integrated circuits and some field-effect transistors and semiconductor chip components. The following techniques should be used to help reduce the incidence of component damage caused by static electricity.
-
Page 7: Hidden Key Mode
HIDDEN KEY MODE 1. HIDDEN KEY MODE TABLE HIDDEN MODE ENTRANCE KEY(Audio) EXIT KEY Front ‘Stop’ Version Check Remote Control Key ‘Play’ for 1.5s + Remote Control Key ‘Play’ for 5s Front ‘Stop’ EEPROM INITIAL Auto exit + Remote Control Key ‘ ‘…
-
Page 8: Hidden Key Mode Description
2. HIDDEN KEY MODE DESCRIPTION 2-1. Version Check — Function : Version Check. — Entrance Key : Front ‘Stop’ + Remote Control Key ‘Play’ for 5s. — Exit Key : Remote Control Key ‘Play’ for 1.5s. — Operation explanation : Remote Control Key VFD Display (Example) Result MCS Version…
-
Page 9
2-5. Disc Lock On/Off — Function : Lock Open Key. — Entrance Key : Front ‘Stop’ + Remote Control Key ‘Stop’ for 5s. — Exit Key : Front ‘Stop’ + Remote Control Key ‘Stop’ for 5s. — Operation Explain : Open Key Block ‘LOCKED’. 2-6. -
Page 10: Service Information For Eeprom
SERVICE INFORMATION FOR EEPROM POWER ON It is possible at any function. (ex. It is possible at VFD “NO USB” status, too.) VFD “NO DISC” status This is an example. Front ‘Stop’ + Remote control ‘ ’ DETECT NEW EEPROM push same timing during 5 s (OPTION EDIT SCREEN) NAME…
-
Page 11: Program Download Guide
PROGRAM DOWNLOAD GUIDE 1. CD PROGRAM Download program file name must be HG740_CJ44_YYMMDDX.bin If security program(Water Wall) is activated on PC, you must save the file to the USB storage device and disable the security software, then download the file to your set. Downloading file proceeds in the same way at USB1 function and USB2 function.
-
Page 12
2. EQ & DEMO PROGRAM Download program file name must be EQ_PRG.BIN If security program(Water Wall) is activated on PC, you must save the file to the USB storage device and disable the security software, then download the file to your set. Downloading file proceeds in the same way at USB1 function and USB2 function. -
Page 13: Fota Update Step Using Bt App
FOTA UPDATE STEP USING BT APP Step1 : App connecting Step2 : Device version info (Check FW version) After connecting the BT App with SET, When touch the “Device Version info” button, the user could fi nd the “Device Version info” on user could fi…
-
Page 14
Step5 : Download from CDN server Step6 : Transfer FW 1st step is download from CDN server to After completed the download from server, smart phone. The progress bar is displayed smart phone start to transfer the fi rmware to the on BT App. -
Page 15: Specifications
SPECIFICATIONS • GENERAL Power requirements Refer to the main label on the unit. Power consumption Refer to the main label on the unit. Networked standby : 0.5 W (If all network ports are activated.) Dimensions (W x H x D) Approx.
-
Page 16
SECTION 2 CABINET & MAIN CHASSIS CONTENTS EXPLODED VIEWS ……………………….2-3 1. CABINET AND MAIN FRAME SECTION ………………..2-3 2. PACKING ACCESSORY SECTION ………………….2-7 3. SPEAKER SECTION ……………………..2-8 DISASSEMBLY INSTRUCTIONS ……………………2-9 1. Case Top …………………………2-9 2. Bracket …………………………2-9 3. -
Page 18: Exploded Views
EXPLODED VIEWS 1. CABINET AND MAIN FRAME SECTION NOTES) THE EXCLAMATION POINT WITHIN AN EQUILATERAL TRIANGLE IS INTENDED TO ALERT THE SERVICE PERSONNEL TO THE PRESENCE OF IMPORTANT SAFETY INFORMATION IN SERVICE LITERATURE. MAIN SMPS CABLE1 CABLE2 FRONT…
-
Page 20: Packing Accessory Section
2. PACKING ACCESSORY SECTION Battries 801 Owner’s manual 900 Remote control FM antenna Packing 804 Bag 802 Box…
-
Page 21: Speaker Section
3. SPEAKER SECTION • FRONT SPEAKER…
-
Page 22: Disassembly Instructions
DISASSEMBLY INSTRUCTIONS 1. Case Top 1-1) Remove the 5 Screws. 1-2) Remove the Case Top. Figure 1 2. Bracket 2-1) Remove the two Brackets between Front & Back Panel. You can easily remove the Bracket after the hook detach from Front Panel. Figure 2…
-
Page 23: Panel Rear
3. Panel Rear 3-1) Remove the 4 Screws from the Panel Rear. 3-2) Remove the Power Cord & FAN Cable from the SMPS Board. 3-3) Remove the Panel Rear. Figure 3 2-10…
-
Page 24: Main Board & Smps Board
4. MAIN Board & SMPS Board 4-1) Remove the 9 Screws from the MAIN Board & SMPS Board. 4-2) Remove the 6 Cables from the MAIN Board. 4-3) Remove the Power Cord from the SMPS Board. 4-4) Remove the MAIN Board & SMPS Board. Figure 4 2-11…
-
Page 25: Main Pcb & Smps Pcb
5. Main PCB & SMPS PCB 5-1) Remove the 2 Screws. 5-2) Unhook the 5 Locking Tabs by using Flat-head screwdriver. 5-3) Remove the Panel Front Assembly. Figure 5 2-12…
-
Page 26: Panel Pcb & Multi Knob
6. Panel PCB & Multi Knob 6-1) Multi Knob 6-1-1) Insert a Flat-head screwdriver in the hole (H1). 6-1-2) Remove the Multi Knob. 6-2) Jack PCB 6-2-1) Remove the 2 Screws. 6-2-2) Remove the Jack PCB. 6-3) BT Module 6-3-1) Unhook the Locking tab (L1). 6-3-2) Remove the BT Module.
-
Page 27: Bracket Smps
7. Bracket SMPS 7-1) Remove the Bracket SMPS. Figure 7 8. MD 8-1) Remove the 2 Screws from the MD. 8-2) Remove the MD. Figure 8 2-14…
-
Page 28
SECTION 3 ELECTRICAL CONTENTS ONE POINT REPAIR GUIDE ……………………..3-2 1. NO POWER ……………………….3-2 2. NO BOOTING WHEN POWER ON THE SET………………3-4 3. VFD IS NOT DISPLAYED WHEN POWER ON THE SET …………..3-5 4. NO OPERATION OF MD ……………………3-6 5. NO SOUND ……………………….3-11 ELECTRICAL TROUBLESHOOTING GUIDE ………………..3-17 1. -
Page 29: One Point Repair Guide
ONE POINT REPAIR GUIDE 1. NO POWER If the unit doesn’t work by no power problem, repair the set according to the following guide. 1-1. FUSE & BRIDGE DIODE 1-1-1. Solution Please check and replace F901, BD901, TH901 or TH903 on SMPS board. 1-1-2.
-
Page 30
ONE POINT REPAIR GUIDE NO POWER If the unit doesn’t work by no power problem, repair the set according to the following guide. 1-2. D951 1-2-1. Solution Please check and replace D951 on SMPS board. 1-2-2. How to troubleshoot (Countermeasure) 1) Check the anode-cathod voltage of D951 with a digital multi-meter, it is normally 0.2 ~ 0.3 V. -
Page 31: Booting When Power On The Set
ONE POINT REPAIR GUIDE 2. NO BOOTING WHEN POWER ON THE SET The set doesn’t work when press the power button on the front board or the remote control. 2-1. FLASH MEMORY 2-1-1. Solution Please check and replace IC501 on MAIN board. 2-1-2.
-
Page 32: Vfd Is Not Displayed When Power On The Set
ONE POINT REPAIR GUIDE 3. VFD IS NOT DISPLAYED WHEN POWER ON THE SET When power on the set, any icons or characters on VFD are not displayed. 3-1. VFD 3-1-1. Solution Please check and replace VFD300 on FRONT board. 3-1-2.
-
Page 33
ONE POINT REPAIR GUIDE 4. NO OPERATION OF MD When no sound output in the CD function, you can not listen to music reading data from a CD disc if the servo motors in MD don’t work. This step is for checking the SPINDLE MOTOR among them. 4-1. -
Page 34: Operation Of Md
ONE POINT REPAIR GUIDE NO OPERATION OF MD When no sound output in the CD function, you can not listen to music reading data from a CD disc if the servo motors in MD don’t work. This step is for checking the SLED MOTOR among them. 4-2.
-
Page 35
ONE POINT REPAIR GUIDE NO OPERATION OF MD When no sound output in the CD function, you can not listen to music reading data from a CD disc if the servo motors in MD don’t work. This step is for checking the TRAY OPEN / CLOSE MOTOR among them. -
Page 36
ONE POINT REPAIR GUIDE NO OPERATION OF MD When no sound output in the CD function, you can not listen to music reading data from a CD disc if the pickup module in MD doesn’t work. This step is for checking the LASER TRACKING ACTUATOR. 4-4. -
Page 37
ONE POINT REPAIR GUIDE NO OPERATION OF MD When no sound output in the CD function, you can not listen to music reading data from a CD disc if the pickup module in MD doesn’t work. This step is for checking the LASER FOCUSING ACTUATOR. 4-5. -
Page 38
ONE POINT REPAIR GUIDE 5. NO SOUND There is no sound output in the CD FUNCTION, repair the set according to the following guide. 5-1. IN THE CD FUNCTION 5-1-1. Solution Please check and replace IC501, IC601 on MAIN board. 5-1-2. -
Page 39: Sound
ONE POINT REPAIR GUIDE NO SOUND There is no sound output by DIGITAL AUDIO AMP DAMAGE, repair the set according to the following guide. 5-2. BY DIGITAL AUDIO AMP DAMAGE (IN ALL FUNCTIONS) 5-2-1. Solution Please check and replace IC701, IC702 on MAIN board. 5-2-2.
-
Page 40
ONE POINT REPAIR GUIDE NO SOUND There is no sound output in the USB FUNCTION, repair the set according to the following guide. 5-3. IN THE USB FUNCTION 5-3-1. Solution Please check and replace IC500 on MAIN board & IC104 on USB board. 5-3-2. -
Page 41
ONE POINT REPAIR GUIDE NO SOUND There is no sound output in the AUX FUNCTION, repair the set according to the following guide. 5-4. IN THE AUX FUNCTION 5-4-1. Solution Please check and replace IC202 on MAIN board. 5-4-2. How to troubleshoot (Countermeasure) 1) Check AUX_L/R signals to IC202 (Pin29, 30). -
Page 42
ONE POINT REPAIR GUIDE NO SOUND There is no sound output in the TUNER FUNCTION, repair the set according to the following guide. 5-5. IN THE TUNER FUNCTION 5-5-1. Solution Please check and replace IC202, TU200 on MAIN board. 5-5-2. How to troubleshoot (Countermeasure) 1) Check if TUNER_LR is entered from Pin1, 3 of TU200 to IC202(Pin27, 28). -
Page 43
ONE POINT REPAIR GUIDE NO SOUND There is no sound output in the PORTABLE FUNCTION, repair the set according to the following guide. 5-6. IN THE PORTABLE FUNCTION 5-6-1. Solution Please check and replace IC202 on MAIN board. 5-6-2. How to troubleshoot (Countermeasure) 1) Check PT_L/R signals to IC202 (Pin1, 2). -
Page 44: Electrical Troubleshooting Guide
ELECTRICAL TROUBLESHOOTING GUIDE 1. POWER (SMPS) No 5.6 VA F901 normal? Replace F901 (Use the same fuse). BD901 normal? Replace BD901. TH901(TH903) normal? Replace TH901. Is Vcc (10 V ~ 18 V) supplied to D902 normal? IC901 pin7? Check or replace D902. D933 normal? Replace D933.
-
Page 45
ELECTRICAL TROUBLESHOOTING GUIDE No PVDD F901 normal? Replace F901 (Use the same fuse). BD901 normal? Replace BD901. TH901(TH903) normal? Replace TH901. Is Vcc (10 V ~ 18 V) supplied to D903 normal? IC911 pin4? Check or replace D903. Q901 base “H”? •… -
Page 46
ELECTRICAL TROUBLESHOOTING GUIDE No 12 V Is Vcc (15 V) Check or replace D935. supplied to IC931? IC931 pin4 “H”? Check P-CTRL “H” signal from MCU. Check or replace IC931. No VFD Check or replace D931. D931 normal? ZD931 normal? Check or replace ZD931. -
Page 47: Mcs Part Check
ELECTRICAL TROUBLESHOOTING GUIDE 2. MCS PART CHECK MCS PART CHECK Check if voltage of CN102 Refer to SMPS troubleshooting. Pin13, 14 is 12 VA. Check if IC100 Check and change IC100. have 3.3 VA output. Check if IC101 Check and change IC101. have 1.2 VA output.
-
Page 48: Fld Display Check
ELECTRICAL TROUBLESHOOTING GUIDE 4. FLD DISPLAY CHECK FLD DISPLAY CHECK Check CN102 Pin13,14 input Refer to SMPS troubleshooting. voltage. Check if both end voltage of F+, F- are over 1.85 V VH : over 27 V. Check CN300 connection and Check CN300 connection.
-
Page 49: Pwm Modulation Check
ELECTRICAL TROUBLESHOOTING GUIDE 5. PWM MODULATION CHECK PWM MODULATION PART CHECK Check Refer to CN102 Pin13, 14 SMPS troubleshooting. (12 VA) • Check IC700(TAS5548) VDD 3.3 V — Pin9,14.35,50. • Check X700 (12.288 MHz). Check Check X700 Replace X700(12.288 MHz). X700(12.288 MHz) (12.288 MHz).
-
Page 50: Power Amp Part Check
ELECTRICAL TROUBLESHOOTING GUIDE 6. POWER AMP PART CHECK POWER AMP PART CHECK Check Refer to SMPS troubleshooting. CN102 Pin13, 14: +12 VA Pin5, 6, 7 : 36 V. Check IC701, IC702 Pin29, 30, 31, 36, 37, 38 input voltage. Check IC701, IC702 Check each line resistor output voltage.
-
Page 51: Tuner / Aux Function Check
ELECTRICAL TROUBLESHOOTING GUIDE 7. TUNER / AUX FUNCTION CHECK FUNCTION CHECK Check IC202 Check JK200,TU200. (PCM1865) Pin27, 28, 29, 30 input. Check Check IC202 IC202 Pin8: ADC +3.3 V Check CN102 Pin13,14: 12 VA. (PCM1865) Pin18, 19 Pin13,14,25: DVCC output data. +3.3 V.
-
Page 52: Cd Function
ELECTRICAL TROUBLESHOOTING GUIDE 9. CD FUNCTION CD FUNCTION Is Motor_open/close OK? Can the Is load +,- ok? (IC400 Pin9,10) disc insert? Check IC400. Is Motor ok? (about 12 Ω) Check loading motor. Check IC400 (Motor drive IC). Focus, IM driving Disc reading tracking, sled signal (Focus and tracking) is ok?
-
Page 53: Double Usb Function
ELECTRICAL TROUBLESHOOTING GUIDE 10. DOUBLE USB FUNCTION USB FUNCTION Plug-in USB device. Check CON301. Display “NO USB”. Check USB_5 V. Check USB jack Check USB_D-/D+ Display “READ”. (JK301/ JK302). (R383, 384). Check IC500 Display “NO FILE”. Replace IC500. (Pin U7, U8/ A7, A8). Check USB audio file in USB device (MP3, WMA file is playable) 3-26…
-
Page 54: Waveforms Of Major Check Point
WAVEFORMS OF MAJOR CHECK POINT CD-16 M DATA ADDRESS Fig 1. SDRAM Fig 2. SERVO ① ② IC504 pin38, IC504 pin53 ⑤ IC500 pin M1 ③ ④ IC504 pin35, IC504 pin19 MCS_MCLK CD_BCK MCS_BCK CD_LRCK MCS_LRCK CD_DATA ADC_DATA Fig 3-1. AUDIO PATH Fig 3-2.
-
Page 55
3-28… -
Page 56: Wiring Diagram
WIRING DIAGRAM C J65 : 80 X 80 C J45 : 60 X 60 C C J65 O pt i on AUX In Tuner C J44 : N ot appl y IC204 LED Driver IC202 IC401 IC500 RF IC SMPS IC504 IC400 SDRAM…
-
Page 57: Block Diagrams
BLOCK DIAGRAMS 1. SYSTEM BLOCK DIAGRAM ANALOG INPUT Block Block PWM + AMP Block [CJ65 : Total 2hch 900W] [[CJ45: Total 2.1ch 720W 240+240+240] [CJ44 : Total 2ch 460W] FRONT Block 3-31 3-32…
-
Page 58: Smps Block Diagram
2. SMPS BLOCK DIAGRAM 3-33 3-34…
-
Page 59: Power Block Diagram
3. POWER BLOCK DIAGRAM SMPS 3-35 3-36…
-
Page 60: Circuit Voltage Chart
CIRCUIT VOLTAGE CHART 1. INPUT VOLTAGE OF ICs 2. INPUT VOLTAGE OF CONNECTORS 3. VOLTAGE OF CAPACITORS Location No. Pin No. SPEC [V] Test [V] Pin Name Spec. Range [%] Test Block Location No. Spec. Test IC100 Pin No MAIN(CN902) <-> SMPS (CN102) C121 220 uF / 10 V 3.06…
-
Page 61: Printed Circuit Board Diagrams
PRINTED CIRCUIT BOARD DIAGRAMS 1. SMPS P.C.BOARD DIAGRAM (TOP VIEW) (BOTTOM VIEW) NOTE) Warning Parts that are critical with respect to risk of fire or electrical shock. 3-39 3-40…
-
Page 62: Main P.c.board
2. MAIN P.C.BOARD DIAGRAM (TOP VIEW) (BOTTOM VIEW) 3-41 3-42…
-
Page 63: Front P.c.board
3. FRONT P.C.BOARD DIAGRAM (TOP VIEW) (BOTTOM VIEW) 3-43 3-44…
-
Page 64: Mic P.c.board Diagram
4. MIC P.C.BOARD DIAGRAM (TOP VIEW) (BOTTOM VIEW) 3-45 3-46…
-
Page 65
3-47 3-48…
This manual is also suitable for:
Cjs45f
Краткое описание гарантии производителя
Срок покрытия
- Работа : 12 месяцев since 01/10/2007
- Запчасти : 12 месяцев since 01/10/2007
Точные условия гарантии доступны в гарантийном талоне, входящем в обязательный пакет документов, прилагаемых при покупке техники.
Если вам необходим ремонт, воспользуйтесь онлайн свяжитесь с нами.Пожалуйста, заранее подготовьте серийный номер вашего изделия и документы, подтверждающие покупку (чек). В негарантийных случаях может взиматься плата за диагностику, ремонтные работы и запчасти.
Download Service manual of LG CJ44 Stereo System for Free or View it Online on All-Guides.com. This version of LG CJ44 Manual compatible with such list of devices, as: CJ44, CJ65, CJS45F, CJS65F

1

2

3

4

5

6

7

8

9

10

11

12

13

14

15

16

17

18

19

20

21

22

23

24

25

26

27

28

29

30

31

32

33

34

35

36

37

38

39

40

41

42

43

44

45

46

47

48

49

50

51

52

53

54

55

56

57

58

59

60

61

62

63

64

65

SERVICE MANUAL
SERVICE MANUAL
CAUTION
BEFORE SERVICING THE UNIT, READ THE “SAFETY PRECAUTIONS”
IN THIS MANUAL.
Internal Use Only
MODEL: CJ65 (CJ65, CJS65F)
MODEL: CJ65
(CJ65, CJS65F)
Mini Hi-Fi System
Table of Contents for LG CJ44:
-
2. EQ & DEMO PROGRAM Download program file name must be EQ_PRG.BIN If security program(Water Wall) is activated on PC, you must save the file to the USB storage device and disable the security software, then download the file to your set. Downloading file proceeds in the same way at USB1 function and USB2 function. Caution: When downloading the file, you should neither unplug the USB device, change to the other function, nor power off the device. USB device must be unplugged
-
3-16 ONE POINT REPAIR GUIDE NO SOUND There is no sound output in the PORTABLE FUNCTION, repair the set according to the following guide. 5-6. IN THE PORTABLE FUNCTION 5-6-1. Solution Please check and replace IC202 on MAIN board. 5-6-2. How to troubleshoot (Countermeasure) 1) Check PT_L/R signals to IC202 (Pin1, 2). 2) Check if MCS_BCK, MCS_LRCK, & MCS_MCLK are entered from IC500 to IC202. 3) Check if ADC_DATA is entered from IC202 to IC500. If no signal, check +5 V & +3.3 V(ADC) for IC202. If NG, replace it a new one. 4) Check the following I2S signal
-
3-31 3-32 BLOCK DIAGRAMS 1. SYSTEM BLOCK DIAGRAM ڤڤڞڐڋڌٻ ڨڼۄۉٻڟڮګٻ ٻ ٻٻ ڃچڎډڎڱںڞڟڇٻڱڞڞڌډڍڄٻ ڟڠڞڦٻٻٻ ڨڠڞڣڜکڤڮڨٻ ڨٻ ګڊڰګٻ ڃڱڞڞڐڋڄٻ ٻ ٻ گڪګٻ ڝڧڪڞڦٻ ڱۊۇېۈۀڊٻ ڦۀ۔ٻ ڃچڎډڎڱڜڇڐڱڄٻ ڤڞڐڋڏٻ ڌڑڨڝٻڮڟڭڜڨٻٻ ڤڞڐڋڌٻ ڏڨڝٻڡۇڼێۃٻ ڤڞڏڋڋٻ ڨۊۏۊۍٻڟۍۄۑۀۍٻ ڰڮڝڌٻ ڰڮڝڍٻ ڤڞڏڋڌٻ ڭڡٻڤڞٻ ڤڞڍڋڌٻ ڜڟڞٻ ڟڭڨںڲڠکڊڞڜڮڊٻ ڭڜڮڊڮڠڧڊڞڧڦڊڞڦڠٻ ٻڮۋۀڼۆۀۍٻ ڧۄۂۃۏۄۉۂٻ
-
3-5 ONE POINT REPAIR GUIDE 3. VFD IS NOT DISPLAYED WHEN POWER ON THE SET When power on the set, any icons or characters on VFD are not displayed. 3-1. VFD 3-1-1. Solution Please check and replace VFD300 on FRONT board. 3-1-2. How to troubleshoot (Countermeasure) 1) Check if 12 VA is output from SMPS to VFD via the MAIN board. 2) Check if Check if LED_5 V, DVCC_3 V output from the MAI
-
3-43 3-44 3. FRONT P.C.BOARD DIAGRAM (TOP VIEW) (BOTTOM VIEW)
-
1. CD PROGRAM Download program file name must be HG740_CJ44_YYMMDDX.bin If security program(Water Wall) is activated on PC, you must save the file to the USB storage device and disable the security software, then download the file to your set. Downloading file proceeds in the same way at USB1 function and USB2 function. Caution: When downloading the file, you should neither unplug the USB device, change to the other function, nor power
-
2-62-5
-
3-9 ONE POINT REPAIR GUIDE NO OPERATION OF MD When no sound output in the CD function, you can not listen to music reading data from a CD disc if the pickup module in MD doesn’t work. This step is for checking the LASER TRACKING ACTUATOR. 4-4. LASER TRACKING ACTUATOR 4-4-1. Solution Please check and replace IC400, IC401 on MAIN board. 4-4-2. How to troubleshoot (Countermeasure) The tracking actuator makes the laser beam be positioned in the center of a track on CD disc. 1) Check the TRD signal from Pin22 of IC400.
-
3-14 ONE POINT REPAIR GUIDE NO SOUND There is no sound output in the AUX FUNCTION, repair the set according to the following guide. 5-4. IN THE AUX FUNCTION 5-4-1. Solution Please check and replace IC202 on MAIN board. 5-4-2. How to troubleshoot (Countermeasure) 1) Check AUX_L/R signals to IC202 (Pin29, 30). 2) Check if MCS_BCK, MCS_LRCK & MCS_MCLK are entered from IC500 to IC202. 3) Check if ADC_DATA is entered from IC202 to IC500. If no signal, check +5 V & +3.3 V(ADC) for IC201. If is NG, replace it a new one. 4) Check the following I
-
1-6 HIDDEN MODE ENTRANCE KEY(Audio) EXIT KEY Version Check Front ‘Stop’ + Remote Control Key ‘Play’ for 5s Remote Control Key ‘Play’ for 1.5s EEPROM INITIAL Front ‘Stop’ + Remote Control Key ‘ ‘ for 5s Auto exit Option EDIT Front ‘Stop’ + Remote Control Key ‘ ‘ for 5s Front ‘Stop’ + Remote Control Key ‘ ‘ APD Test Display Front ‘Stop’ + Remote Control Key ‘3’ for 5s Auto exit Disc Lock On/Off Front ‘Stop’ + Remote Control Key ‘Stop�
-
3-20 3. IC503(GD25Q80) CHECK CHECK IC500 PIN. OKOK Refer to MCS troubleshooting. Replace MCS. OKOK Check pinA12, pinB12 SF_SCK : SF_MISO Check MCS voltage 3.3 VA. Check MCS. NO NO NO YES YES YES YES ELECTRICAL TROUBLESHOOTING GUIDE 2. MCS PART CHECK YES YES YES YES YES MCS PART CHECK OK Refer to SMPS troubleshooting. Check and change IC101. X500: 24 MHz, X500: 32.768 kHz Check the operation. Check and change IC100. NO NO NO Check if voltage of CN102 Pin13, 14 is
-
1-7 2. HIDDEN KEY MODE DESCRIPTION 2-1. Version Check — Function : Version Check. — Entrance Key : Front ‘Stop’ + Remote Control Key ‘Play’ for 5s. — Exit Key : Remote Control Key ‘Play’ for 1.5s. — Operation explanation : Remote Control Key OR . VFD Display (Example) Result MCS Version MICOM Version OPTION Version DEMO Version DJ PRO Version EQ Version EQ Check sum Version 2-2. EEPROM Initial — Function : Initialize data st
Questions, Opinions and Exploitation Impressions:
You can ask a question, express your opinion or share our experience of LG CJ44 device using right now.
|
Detail Specifications: 2157/2157878-cj44.pdf file (31 Dec 2022) |
Accompanying Data:
LG CJ44 Stereo System PDF Service Manual (Updated: Saturday 31st of December 2022 10:46:33 PM)
Rating: 4.3 (rated by 54 users)
Compatible devices: CM2460, MCD503 Series, LX-M230A, OL100, CM2760, MUSIC flow R1, MDD105, CM2531.
Recommended Documentation:
Text Version of Service Manual
(Ocr-Read Summary of Contents, UPD: 31 December 2022)
-
46, No 12 V Is Vcc (15 V) supplied to IC931? Check or replace D935. YES YES NO IC931 pin4 “H”? Check P-CTRL “H” signal from MCU. YES NO Check or replace IC931. No VFD YES D931 normal? ZD931 normal? Q300 / Q301 normal? Check or replace D931. Check or replace ZD931. Check or replace Q300 / Q301. YES YES YES NO NO NO Check or replace VFD. 3-19 ELECTRICAL T…
-
43, 3-16 ONE POINT REPAIR GUIDE NO SOUND There is no sound output in the PORTABLE FUNCTION, repair the set according to the following guide. 5-6. IN THE PORTABLE FUNCTION 5-6-1. Solution Please check and replace IC202 on MAIN board. 5-6-2. How to troubleshoot (Countermeasure) 1) Check PT_L/R signals to IC202 (Pin1, 2). 2) Check if MCS_BCK, MCS_LRCK, & MCS_MCL…
-
52, 3-25 ELECTRICAL TROUBLESHOOTING GUIDE 9. CD FUNCTION CD FUNCTION Is Motor_open/close OK? (IC400 Pin9,10) Replace Cristal (X400). Check loading motor. Check IC400. Check IC400 (Motor drive IC). Is the MD(CN400 Pin7) about 190 mV? Check IM (pick-up). IM driving (Focus and tracking) is ok? Check Vcc of IC401. Replace IC500. Check Cristal (X400). Is Motor ok? (about 12 Ω)…
-
44, 1. POWER (SMPS) No 5.6 VA YES F901 normal? Replace F901 (Use the same fuse). YES NO BD901 normal? Replace BD901. YES NO TH901(TH903) normal? Replace TH901. YES NO Is Vcc (10 V ~ 18 V) supplied to IC901 pin7? Is there about 2.5 V at IC951 pin1? D902 normal? Replace D951. YES NO NO Check or replace D902. Is there about 2.5 V at IC941 Pin1? Replace IC941. YES NO D951 normal? Replace D951. Y…
-
34, LG CJ44 3-7 ONE POINT REPAIR GUIDE < Signal check point > NO OPERATION OF MD When no sound output in the CD function, you can not listen to music reading data from a CD disc if the servo motors in MD don’t work. This step is for checking the SLED MOTOR among them. 4-2. SLED MOTOR 4-2-1. Solution Please check and replace IC400, IC401 on MAIN board. 4-2-2. How to …
-
3, LG CJ44 SECTION 1 SUMMARY CONTENTS SERVICING PRECAUTIONS ……………………………………………………………………………………………………………. 1-3 ESD PRECAUTIONS ……………………………………………………………………………………………………………………….. 1-5 HIDDEN KEY MODE ……………
-
50, LG CJ44 3-23 ELECTRICAL TROUBLESHOOTING GUIDE 6. POWER AMP PART CHECK YES YES YES YES YES YES YES POWER AMP PART CHECK OK Refer to SMPS troubleshooting. Check each line resistor output voltage. Replace the coil. Check IC701, IC702 Pin29, 30, 31, 36, 37, 38 input voltage. Check PWM Modulator input IC701 Pin14, 15 / IC702 Pin5, 6. 14, 15. Check IC701, IC702 Pin27, 28, 32, 35, 39, 40. NO NO NO Check …
-
54, LG CJ44 3-27 WAVEFORMS OF MAJOR CHECK POINT CLK DATA ADDRESS CS CD-16 M Fig 1. SDRAM ①IC504 pin38, ②IC504 pin53 ③IC504 pin35, ④IC504 pin19 Fig 2. SERVO ⑤IC500 pin M1 1 2 3 4 CD_BCK CD_LRCK CD_DATA MCS_MCLK MCS_BCK MCS_LRCK ADC_DATA Fig 3-1. AUDIO PATH ⑥IC500 pin N4, ⑦ICIC500 pin N1 ⑧ICIC500 pin N2 Fig 3-2. AUDIO PATH ⑨IC500 pin D2, ⑩IC500 pin E1 ⑪IC500 pin…
-
11, 1. CD PROGRAM Download program file name must be HG740_CJ44_YYMMDDX.bin If security program(Water Wall) is activated on PC, you must save the file to the USB storage device and disable the security software, then download the file to your set. Downloading file proceeds in the same way at USB1 function and USB2 function. Caution: When downloading the file, you sho…
Recommended Instructions:
MW9339SB, NX-089B-RR, BRAVIA KDL-55EX500, 30551


-
Black plate (1,1)Cadillac Escalade/Escalade ESV Owner Manual — 2013 — CRC 2nd Edition — 10/9/122013 Cadillac Escalade/Escalade ESVOwner Manual MIn Brief . . . . . . . . . . . . . . . . . . . . . . . . 1-1Instrument Panel . . . . . . . . . . . . . . 1-2Initial Drive Information . . . . . . . . 1-4Vehicle Features . . . . . . . . . . . . . 1-16Performance andMaintenance . . . . . . …
Escalade 532
-
Manuel de l’utilisateurRTD3131Il est important de lire ce manuel d’instructions avant d’utiliser votre nouveau produit pour la première fois.- 1 — 4 — 8 — — 9 — — 10 — — 11 — 5 — — 6 — — 7 — 2 — — 3 -Cet appareil est conforme à la partie 15 du règlement de la FCC. L’opération est soumise aux deux conditions suivantes: (1) Cet appareil ne peut pas provoquer d’ …
RTD3131 2
-
4—-ifr/Electron ic Com ponentssD-s2300sD-s3300Operating lnstructions’tiIIThe photographs show sl/stem SD-S3300)aL,tBefore connecting, operating or adjusling these components,please read.these instructions completelyRQT1 474-P’ HO192c2032/.F.,P ,,,rted in Japan …
SD-s2300 84
-
Seats and Restraint Systems……………………… 1-1Front Seats……………………………………….. 1-3Rear Seats……………………………………….. 1-9Safety Belts……………………………………… 1-11Child Restraints………………………………… 1-31Air Bag Systems……………………………….. 1-60Restraint System Check …
2004 Canyon 420