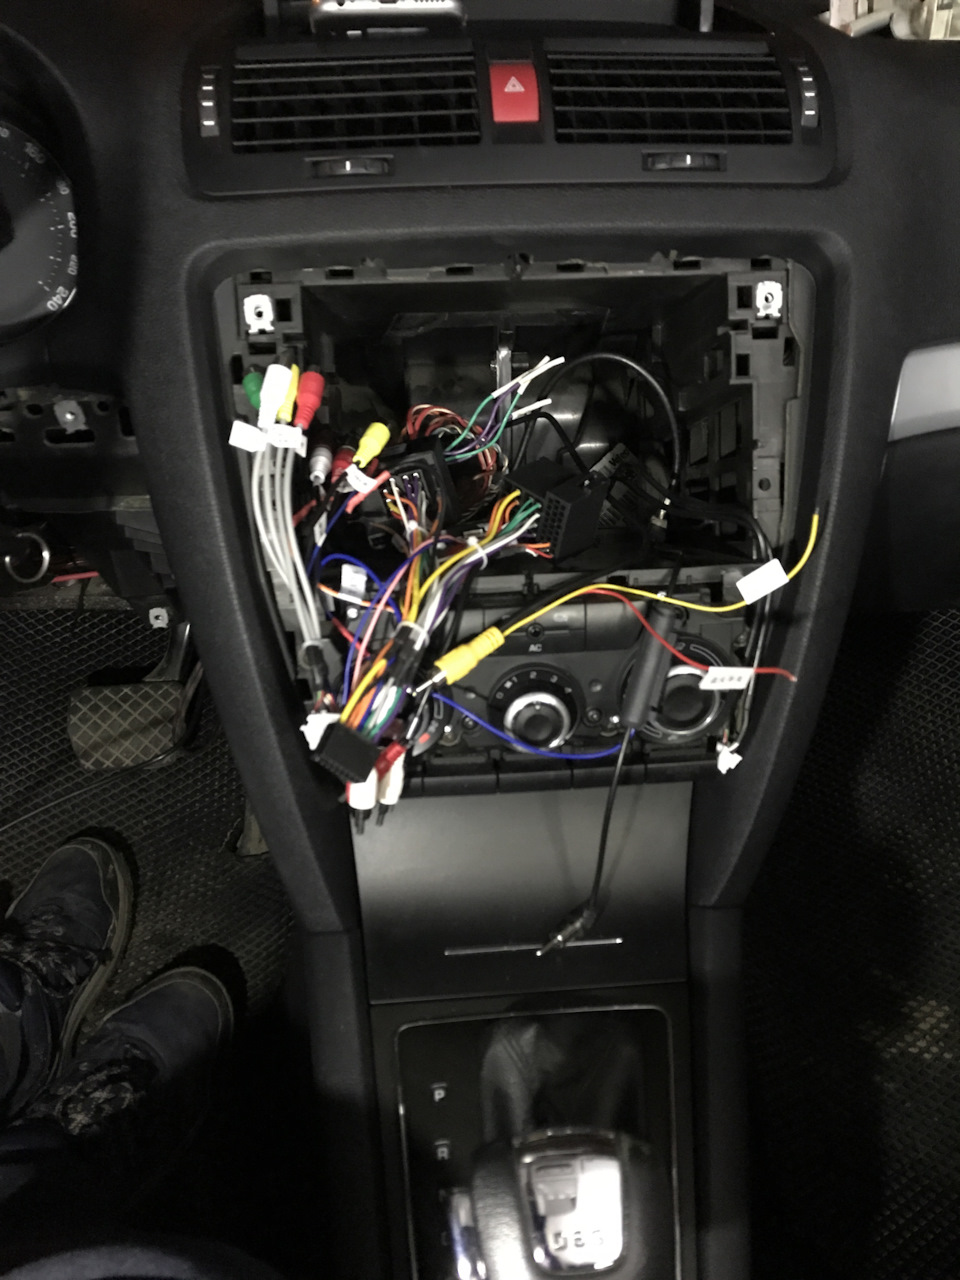
Господа Шкодоводы, нужна помощь. Купил вот такую магнитолу.

Ts7 premium
Все подключал по инструкции (хотя какая нафиг инструкция, разъём в разъём, перепутать физически не возможно).
Полный размер
Змеиная свадьба
В комплекте есть can-bus адаптер. Вроде HiWorld ( если память меня не подводит).
Теперь к сути вопроса. Эта сука не выключается. Я привык, ключ вынул — мафон выключился. Эта продолжает петь.
Насколько я понял честного ACC не в штатном квадлоке. То есть команда на ВЫКЛ идёт по кан шине. Мафон вроде кан шину видит, но как то странно. Открытие дверей показывает, включение габаритов тоже, при включении задней, включает камеру.
Но не видит ручник, забортную температуру, и видимо положения ключа зажигания.
Через штатный софт настраивал кан бас адаптер . Шкоды там нет. Естьт VW=> pq.
За два дня она выжрала акум. Так дела не делаются.
Пачка вопросов
1. Можно ли как то привести к мафону честный АСС?
2. Надо ли как то прописывать в машине новый мафон?
3. Правильно я понимаю, что корень зла в кан шине?
UPD. В меню что на фото ниже у меня нет информации.
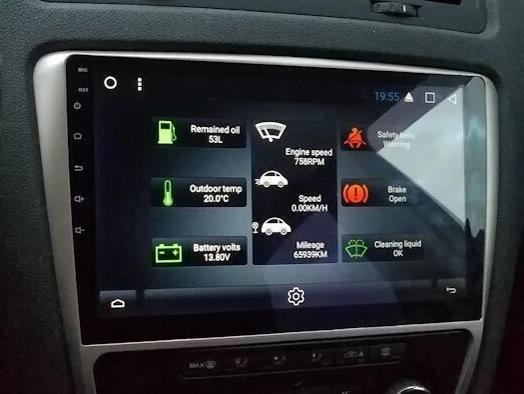
А у меня тут все по нулям.
Upd2 поменял в настройках can bus модуль сменил на raise. Появилась информация о машине ( пробег, вольтаж и пр).
После вынимания ключа магнитола продолжает работать как ни в чем не бывало.
Жгут проверил рассоединялки нет.
Цена вопроса: 15 000 ₽
Пробег: 240 000 км
Описание TS7 2/32GB 9 дюйомв
- ОC Android 10
- Процессор 4 ядра ARMv7 Processor rev 5 (v71)
- Внутренняя память 32Gb
- Оперативная память 2Gb
- Диагональ дисплея 9″
- Разрешение экрана 1024×600
- Тип матрицы экрана IPS (антибликовый)
- Тип стекла экрана 2.5D
- Звуковой процессор: PT2313
- Наличие Wi-Fi — Да
- Разделение экрана — Да
- Выбор цвета кнопок — Да
- Язык меню — Русский язык
- Встроенная навигация — есть
- Наличие GPS приемника — Да
- Наличие USB портов — USB 2.0
- Поддерживаемые носители- USB Flash / HDD / MicroSD
- Эквалайзер — 15 полос
- Bluetooth — встроенный модуль (синхронизация телефонной книги, воспроизведение музыки). USB — 2 выхода USB 2.0
- Функция разделения экрана
- Подключение камеры заднего вида (для парковки)
- Возможность подключения мультируля
- Возможность подключения дополнительных мониторов, внешнего источника A/V сигнала.
- Возможность подключения видеорегистратора.
-
Contents
-
Table of Contents
-
Bookmarks
Quick Links
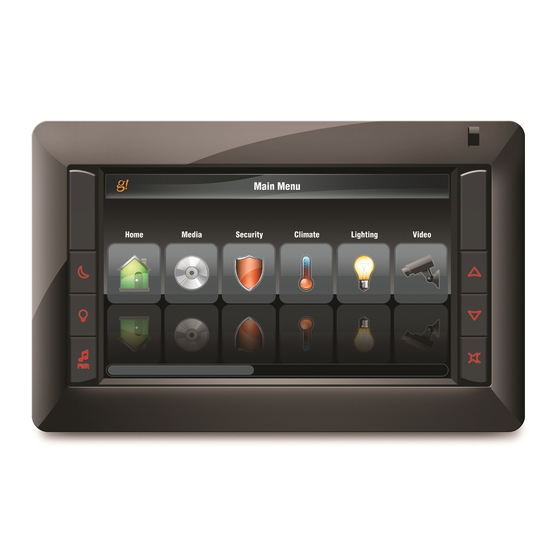
TS7
Touch Screen
User’s Guide
Related Manuals for Elan TS7

Summary of Contents for Elan TS7
-
Page 1
Touch Screen User’s Guide… -
Page 2: Table Of Contents
E L A N H O M E S Y S T E M S Table of Contents Chapter 1: Introduction …………3 The ELAN Story ………………3 Chapter 2: TS7 Controls and Display ……….4 Chapter 3: Display Screens …………6 Home Page ………………. 6 Main Menu ………………. 8 Security ………………..
-
Page 3
DVR Playback ………………….67 Pool Control ………………69 Main Page ……………………69 Features Tab ………………….. 70 Lights Tab ……………………70 System Status ………………….71 Settings Page ………………….72 History Page ………………….. 74 © ELAN Home Systems 2010 | All rights reserved. Page 2… -
Page 4: Chapter 1: Introduction
The ELAN Story Located in Lexington, KY, USA, ELAN Home Systems has designed innovative multi-room audio/video systems since 1989. ELAN systems were the first to integrate music, intercom and TV distribution features that used the homeowner’s stereos, televisions and telephones to create the whole-house entertainment experience.
-
Page 5: Chapter 2: Ts7 Controls And Display
Volume Up Sleep Mode Press to increase the volume in the zone. Press to put the TS7 into Sleep Mode, press and hold to power the TS7 off. Volume Down When the TS7 is off, pressing will turn the panel Press to decrease the volume in the zone.
-
Page 6
TS7 User’s Guide E L A N H O M E S Y S T E M S The TS7 controls and/or provides feedback for the following: Time & Weather Security Systems Climate Systems Lighting Systems Media Messaging Irrigation Systems… -
Page 7: Chapter 3: Display Screens
Your Apps may be in a different order than what is presented in this manual. Home Page When the TS7 is first powered up it will display the Home Page. Your dealer can customize your Home Page if desired. Figure 3-1:…
-
Page 8
You can erase the note at any time by selecting the date and pressing the CLEAR button. Figure 3-3: Notes Dates that have messages are highlighted with a box outline as shown in Figure 3-1 and 3-2 of this manual. © ELAN Home Systems 2010 | All rights reserved. Page 7… -
Page 9: Main Menu
Home icon returns you to the Home page. Scroll through all icons by pressing the scroll bar at the bottom of the display and sliding it to the right or left. Figure 3-5: Main Menu Page Two © ELAN Home Systems 2010 | All rights reserved. Page 8…
-
Page 10: Security
MAIN HOUSE partition and that the backup battery charge is low. Figure 3-7: Partition Status Selecting the icon returns you to the Main Menu, selecting the Security icon returns you to the partition selection page. © ELAN Home Systems 2010 | All rights reserved. Page 9…
-
Page 11: Zone Status
The overall alarm status history and the history for each zone are displayed. Use the scroll bar to display additional zones. Use the arrow buttons to navigate through the history timeline. Figure 3-9: Security History © ELAN Home Systems 2010 | All rights reserved. Page 10…
-
Page 12
Figure 3-10: Security History Zoom In – Zoom out for the “big picture” by using the button at the bottom of the page. Figure 3-11: Security History Zoom Out © ELAN Home Systems 2010 | All rights reserved. Page 11… -
Page 13: Security Arming / Disarming
CANCEL to halt the process. Figure 3-12: Security Arm/Disarm The display will change back to the status screen and display the current alarm mode for the selected partition. Figure 3-13: Security Alarm Mode © ELAN Home Systems 2010 | All rights reserved. Page 12…
-
Page 14: Zone Bypass
The status page will now show that the alarm has been armed and that the zones have been bypassed. Figure 3-15: Outside Keypad Talk to your dealer for additional information regarding your Security system. © ELAN Home Systems 2010 | All rights reserved. Page 13…
-
Page 15: Climate
Group display at the bottom of the screen. To adjust a specific thermostat, select the group it is in and then select the thermostat. Figure 3-17: Group Mode © ELAN Home Systems 2010 | All rights reserved. Page 14…
-
Page 16: Climate Zone Status
Use the UP and DOWN arrows next to each set point to adjust them. Use the LEFT and RIGHT arrows at the top of the screen to flip through the thermostats. Figure 3-19: Climate Zone Controls © ELAN Home Systems 2010 | All rights reserved. Page 15…
-
Page 17: Scheduling
The UP and DOWN arrows next to each setting are used to adjust time, cooling set point, heating set point and fan mode for each period. Figure 3-20: Climate Page Schedule © ELAN Home Systems 2010 | All rights reserved. Page 16…
-
Page 18: Hold Commands
The TIMED HOLD function can be adjusted from eight hours maximum down to just a few seconds using the UP and DOWN arrows on the START button. Figure 3-21: Climate Page Timed Hold © ELAN Home Systems 2010 | All rights reserved. Page 17…
-
Page 19: History
The zoom in and zoom out features function the same way as the Security history view described on pages 10 and 11 of this manual. Figure 3-22: Climate Page Timed Hold Talk to your dealer for additional information regarding your Climate system. © ELAN Home Systems 2010 | All rights reserved. Page 18…
-
Page 20: Lighting
System Modes and Lighting periods are set up by your dealer. Actual scheduling functions are handled through the Schedule page. Figure 3-24: Lighting Page Schedule © ELAN Home Systems 2010 | All rights reserved. Page 19…
-
Page 21: Schedule Programming
Lighting Page Time Type Commands are added to the schedule by selecting the time period being programmed and pressing the + COMMAND button. Figure 3-26: Lighting Page Adding Commands © ELAN Home Systems 2010 | All rights reserved. Page 20…
-
Page 22
You may also add commands for individual switches. Multiple commands can be added to any given period. When you are finished adding commands press the DONE button in the upper left corner of the display. Figure 3-28: Lighting Page Switch Commands © ELAN Home Systems 2010 | All rights reserved. Page 21… -
Page 23
After adding commands to the schedule you can test them by pressing the TEST button. Figure 3-29: Lighting Page Testing Commands Talk to your dealer for additional information regarding your Lighting system. © ELAN Home Systems 2010 | All rights reserved. Page 22… -
Page 24: Media
Media Due to the wide variety of sources and A/V controllers available today it will not be possible to show them all in this manual. This manual will focus on ELAN A/V Controllers and sources. Your actual displays and controls may vary from what is presented here.
-
Page 25: Source Select Screen
The currently selected source name is displayed in the upper right corner. Figure 3-32: Media Page Source Controls © ELAN Home Systems 2010 | All rights reserved. Page 24…
-
Page 26: Settings Tab
If available for your system, a settings tab will allow BASS and TREBLE, to be adjusted. The ELAN A/V Controller settings for Whole House Music (WHM) off and on, Do Not Disturb (DND) and Loudness EQ can also be displayed.
-
Page 27: Elan Via!Dj Ii
E L A N H O M E S Y S T E M S Media (Continued) Source Examples The following pages will discuss ELAN sources using their pre-made templates. Talk to your dealer for additional information regarding your Media system. ELAN VIA!dj II…
-
Page 28
The PLAY button will start playback of all tracks (in alphabetical order) by that artist. button is discussed in Adding Music to a Playlist on page 32. © ELAN Home Systems 2010 | All rights reserved. Page 27… -
Page 29
Press the PLAY button to play the entire album from the beginning. button is discussed in Adding Music to a Playlist on page 32. Figure 3-38: Media Page ELANVIA!dj II Play Album © ELAN Home Systems 2010 | All rights reserved. Page 28… -
Page 30
You may also press on the letter on the right side to jump to the track name. Pressing and holding on a track name will allow you to drag the selections up and down in the display. Figure 3-40: Media Page ELANVIA!dj II Tracks Tab © ELAN Home Systems 2010 | All rights reserved. Page 29… -
Page 31
The track order in the Playlist can be re-arranged and tracks that have been added can be deleted in the PLAYLIST TAB. The following pages will cover each of these functions in detail. © ELAN Home Systems 2010 | All rights reserved. Page 30… -
Page 32: Creating Playlists
Playlist and press OK when you are finished. Use the LEFT ARROW to backspace if needed. Figure 3-43: Media Page ELANVIA!dj II Renaming Playlist © ELAN Home Systems 2010 | All rights reserved. Page 31…
-
Page 33
Selecting an individual track on an album and pressing the next to the track’s name will add only that track to the Playlist. Figure 3-44: Media Page ELANVIA!dj II Adding Music © ELAN Home Systems 2010 | All rights reserved. Page 32… -
Page 34: Editing Playlists
Use the UP and DOWN arrows to move the selection forward or backward in the list. Use the DELETE (X) button to delete the selection from the Playlist. You can completely delete a Playlist by selecting the Playlist and pressing the DELETE PLAYLIST button. © ELAN Home Systems 2010 | All rights reserved. Page 33…
-
Page 35
To add music to the Jukebox, select the Artist, Album or Track you want to add and press button next to the selection. Figure 3-46: Media Page ELANVIA!dj II Adding Album to Jukebox Figure 3-47: Media Page ELANVIA!dj II Adding Track from Album to Jukebox © ELAN Home Systems 2010 | All rights reserved. Page 34… -
Page 36
Media Page ELANVIA!dj II Deleting Track from Jukebox This only deletes tracks from the Jukebox, it will not delete music from the VIA!dj II or from the standard Playlists. © ELAN Home Systems 2010 | All rights reserved. Page 35… -
Page 37: Elan Dt22 / Dt11
If the currently selected station is one of the presets the preset button will also be highlighted. Use the BAND button at the upper right to switch between AM and FM tuning. © ELAN Home Systems 2010 | All rights reserved. Page 36…
-
Page 38
To add a station to the FAVORITES tab, tune in the station and press the ADD STATION button at the top of the screen. FAVORITES are displayed in the order they were added. Figure 3-52: Media Page DT22 AM/FM Adding Favorites © ELAN Home Systems 2010 | All rights reserved. Page 37… -
Page 39
Use the keyboard to edit the name. Once you have renamed the station press the SAVE button to keep your changes. Press the DELETE PRESET button to remove the station from the FAVORITES list. Figure 3-54: Media Page DT22 AM/FM Deleting Favorites © ELAN Home Systems 2010 | All rights reserved. Page 38… -
Page 40
This information includes the channel number, channel name, currently playing artist and current track title. If the currently selected station is one of the presets the preset button will also be highlighted. Figure 3-55: Media Page Sirius Tuner Favorites Tab © ELAN Home Systems 2010 | All rights reserved. Page 39… -
Page 41
Genres are listed on the left of the display and stations grouped in the selected genre are shown on the right. Use the scroll bars to access additional genres and stations. Figure 3-57: Media Page Sirius Tuner Genre Selection © ELAN Home Systems 2010 | All rights reserved. Page 40… -
Page 42
Sirius Tuner Adding Favorites If you tune in a station and the ADD STATION button does not highlight it means that station has already been added to the FAVORITES tab. © ELAN Home Systems 2010 | All rights reserved. Page 41… -
Page 43
Delete Favorite To DELETE a favorite from the Sirius tuner PRESS the station’s select button and HOLD until the station is deleted. Figure 3-60: Media Page Sirius Tuner Deleting Favorites © ELAN Home Systems 2010 | All rights reserved. Page 42… -
Page 44: Elan Via!Migo
Media Page ELAN VIA!migo Main Menu Use the UP and DOWN arrows on the left to switch between MAIN MENU pages. Figure 3-62: Media Page ELAN VIA!migo Main Menu More © ELAN Home Systems 2010 | All rights reserved. Page 43…
-
Page 45
ELAN VIA!migo Settings Menu More Use the BACK button to go back one “level” in the menu and the HOME button to go back to the MAIN MENU screen. © ELAN Home Systems 2010 | All rights reserved. Page 44… -
Page 46
ELAN VIA!migo Music Menu More Use the BACK button to go back one “level” in the menu and the HOME button to go back to the MAIN MENU screen. © ELAN Home Systems 2010 | All rights reserved. Page 45… -
Page 47
The image below shows an episode of the TV show “Highlander” has been selected. Information about the episode is displayed in the lower right corner. Figure 3-68: Media Page ELAN VIA!migo TV Show Selected © ELAN Home Systems 2010 | All rights reserved. Page 46… -
Page 48: Internal Player
The Internal Player allows music to be played from the hard-drive of the Home Controller or from a network attached external hard-drive. The Internal Player control and operation is virtually identical to the ELAN VIA!dj II as described in this manual starting on page 26.
-
Page 49: Source Samples
This example is a cable box with DVR capabilities. Note the “MAIN” and “DVR” tabs, indicating two pages of controls for the source. Figure 3-70: Media Page Example: Cable Box Main Page Figure 3-71: Media Page Example: Cable Box DVR Page © ELAN Home Systems 2010 | All rights reserved. Page 48…
-
Page 50
This example is of a DVD player with the basic controls that would be found on the remote. Figure 3-72: Media Page Example: DVD Talk to your dealer for additional information regarding your Media system. © ELAN Home Systems 2010 | All rights reserved. Page 49… -
Page 51: Messages
If you have more than six Mail Boxes a scroll bar shows at the bottom of the display to allow access to them. Your dealer can enable the TS7 to display the Settings tab and the Call Log tab as well. Figure 3-73:…
-
Page 52
If there are additional Mail Boxes the DEFAULT greeting will include them as well. Each Voice Mail Box can have a CUSTOM GREETING instead of the DEFAULT greeting Figure 3-76: Messaging Page Greetings © ELAN Home Systems 2010 | All rights reserved. Page 51… -
Page 53: Custom Greetings
Settings (Continued) Custom Greetings To create a CUSTOM GREETING select the Voice Mail Box that will have the greeting. Press the RECORD NEW button to start recording the greeting. Speak directly into the TS7 to record the message. Figure 3-77:…
-
Page 54: Call Log
To revert back to the DEFAULT greeting press USE DEFAULT. This will delete the CUSTOM GREETING. Call Log The CALL LOG lists all incoming calls by CALLER NAME, PHONE NUMBER, CALL DATE and TIME OF CALL. Figure 3-80: Messaging Page Call Log © ELAN Home Systems 2010 | All rights reserved. Page 53…
-
Page 55: Voice Mail
You can PLAY an individual message or PLAY ALL messages starting with the oldest first. Use the UP and DOWN arrows to adjust playback volume. Figure 3-82: Messaging Page Voice Mail Playback © ELAN Home Systems 2010 | All rights reserved. Page 54…
-
Page 56
Figure 3-83: Messaging Page Voice Mail Rewind Once a message has been played, to reset its status to NEW press the MARK button. Figure 3-84: Messaging Page Voice Mail Status © ELAN Home Systems 2010 | All rights reserved. Page 55… -
Page 57: Internal Voice Mail
Voice Mail (Continued) Internal Voice Mail Messages may be recorded directly into a Mail Box using the TS7. To directly record a message, select the Mail Box you wish to record the message for and press the RECORD button. Speak directly into the TS7 to record the message.
-
Page 58: Irrigation
RUN PROGRAM — When the RUN PROGRAM mode is selected the irrigation zones are automatically activated based on the programming in the schedule. The irrigation system will activate irrigation zones, one at a time, in order, until the schedule is complete. © ELAN Home Systems 2010 | All rights reserved. Page 57…
-
Page 59: Manual
Press the RUN PROGRAM button to have the SCHEDULE take over irrigation zone operation. The active zone feedback will be displayed at the upper left of the display. Figure 3-89: Irrigation Page Run Program © ELAN Home Systems 2010 | All rights reserved. Page 58…
-
Page 60: Schedule Tab
TIMES can be based on SUNRISE or SUNSET or can be set to a specific time. START TIMES can be adjusted in 10 minute increments using the UP and DOWN arrows. The same START TIMES apply to all IRRIGATION ZONES. © ELAN Home Systems 2010 | All rights reserved. Page 59…
-
Page 61: Programming
(shown above,) ODD DAYS of the month, specific DAYS OF THE WEEK (shown below,) EVERY DAY, or SKIP certain DAYS. Figure 3-92: Irrigation Page Programming Days of the Week © ELAN Home Systems 2010 | All rights reserved. Page 60…
-
Page 62: Seasonal Map
Use the UP and DOWN arrows for each month to set the percentage of base time that the system should water for each month. This percentage is used to calculate the APPLICATION TIME shown in the figures on page 60. Figure 3-93: Irrigation Page Seasonal Map © ELAN Home Systems 2010 | All rights reserved. Page 61…
-
Page 63: History Tab
The zoom in and zoom out features function the same way as the Security history view described on pages 10 and 11 of this manual. Figure 3-94: Irrigation Page History Figure 3-95: Irrigation Page History Zoom © ELAN Home Systems 2010 | All rights reserved. Page 62…
-
Page 64: Video
To look at an individual camera, touch the image for that camera. The display will switch to a larger view of that camera alone. Use the ARROWS at the top of the screen to flip between cameras. Figure 3-97: Video Page Single Camera Selected © ELAN Home Systems 2010 | All rights reserved. Page 63…
-
Page 65: Individual Camera View
Camera Resolution The FULL SCREEN button enlarges the image and removes the controls. Touch anywhere on the screen to return to the previous view,. Figure 3-99: Video Page Full Screen © ELAN Home Systems 2010 | All rights reserved. Page 64…
-
Page 66: Pan/Tilt/Zoom Cameras
For cameras that allow Presets, a series of numbered Preset buttons are displayed. To program a new preset, move the camera to the desired location then press and hold the preset # to save the setting. © ELAN Home Systems 2010 | All rights reserved. Page 65…
-
Page 67: Dvr Tab
Figure 3-101: Video Page LIVE / DVR Selection To access the DVR controls press the DVR button at the top of the screen. Figure 3-102: Video Page DVR Selected View © ELAN Home Systems 2010 | All rights reserved. Page 66…
-
Page 68: Dvr Playback
Use the scroll button to select the recording to be viewed. Use the slider button to quickly scan through the recording. Use the SKIP buttons (top left controls) to quickly “jump” from recording to recording. Figure 3-104: Video Page DVR View Recordings © ELAN Home Systems 2010 | All rights reserved. Page 67…
-
Page 69
Press the LIVE button to return to a “real time” camera view. Figure 3-105: Video Page Return to Live View Talk to your dealer for additional information regarding your Camera system. © ELAN Home Systems 2010 | All rights reserved. Page 68… -
Page 70: Pool Control
Talk to your dealer for additional information regarding your Pool controller. Not all options shown in this manual will apply to all controllers. They are shown here for reference only. © ELAN Home Systems 2010 | All rights reserved. Page 69…
-
Page 71: Features Tab
The LIGHTS TAB provides basic on/off and level control (if applicable) of lights controlled by the Pool Controller. Use the Lights tab to configure colored lights on compatible pool systems. Figure 3-108: Pool Page Lights Tab © ELAN Home Systems 2010 | All rights reserved. Page 70…
-
Page 72: System Status
The SYSTEM STATUS TAB provides information on the overall function of the controller and allows cancelling of any delays that may have been set. Figure 3-109: Pool Page System Status Tab © ELAN Home Systems 2010 | All rights reserved. Page 71…
-
Page 73: Settings Page
Use the LIGHT COLORS TAB to adjust the lighting colors on pool systems that have this feature. Figure 3-110: Pool Page Light Colors Tab SWIM COLOR The SWIM COLOR TAB provides additional lighting effect controls. Figure 3-111: Pool Page Swim Colors Tab © ELAN Home Systems 2010 | All rights reserved. Page 72…
-
Page 74
The RUN-ONCE TAB is similar to the SCHEDULE TAB, but items set on this page will only run once, rather than repeat the cycle every week. Figure 3-113: Pool Page Run-Once Tab © ELAN Home Systems 2010 | All rights reserved. Page 73… -
Page 75: History Page
The zoom in and zoom out features function the same way as the Security history view described on pages 11 and 12 of this manual. Figure 3-115: Pool Page History Tab © ELAN Home Systems 2010 | All rights reserved. Page 74…
-
Page 76
WE HOPE YOU ENJOY your new touchscreen and g! system for years to come. It’s a whole new way of living. And g! grows with you. As your lifestyle changes, you can easily add on other features. And ELAN has other fine products you may be interested in. -
Page 77: Limited Warranty
Except as may be expressly provided and authorized in writing by ELAN, ELAN shall not be subject to any other obligations or liabilities whatsoever with respect to equipment manufactured by ELAN or services rendered by ELAN.