| Публикации | Статистика | Дата и Автор | |
|---|---|---|---|
 |
|
1 Коментов 1 013 Просмотров |
Дата: 21 мар 2018, 20:01 Автор: Rikugun Chusa |
![[AAR] Delivery - Broomel - Засада (Combat Mission)](https://imtw.ru/uploads/imperiall/av-132023.jpg) |
|
0 Коментов 1 194 Просмотров |
Дата: 03 мар 2017, 10:18 Автор: Delivery |
 |
|
0 Коментов 1 751 Просмотров |
Дата: 17 ноя 2016, 21:45 Автор: KAST |
|
|
0 Коментов 1 604 Просмотров |
Дата: 08 мая 2016, 09:23 Автор: KAST |
![[ГАЙД] Настройки Quick Battle](https://imtw.ru/uploads/imperiall/av-91647.jpg) |
|
0 Коментов 1 377 Просмотров |
Дата: 04 апр 2016, 12:03 Автор: xog1224 |
|
|
0 Коментов 1 966 Просмотров |
Дата: 15 мар 2016, 18:20 Автор: KAST |
|
|
0 Коментов 2 122 Просмотров |
Дата: 05 мар 2016, 13:28 Автор: KAST |
|
|
0 Коментов 1 104 Просмотров |
Дата: 02 мар 2016, 10:54 Автор: KAST |
|
|
0 Коментов 1 345 Просмотров |
Дата: 29 фев 2016, 10:31 Автор: KAST |
|
|
0 Коментов 1 386 Просмотров |
Дата: 21 фев 2016, 14:50 Автор: KAST |
|
|
0 Коментов 1 540 Просмотров |
Дата: 19 фев 2016, 12:32 Автор: KAST |
|
|
0 Коментов 993 Просмотров |
Дата: 13 фев 2016, 03:40 Автор: KAST |
|
|
0 Коментов 1 103 Просмотров |
Дата: 03 фев 2016, 14:22 Автор: KAST |
|
|
0 Коментов 1 350 Просмотров |
Дата: 02 фев 2016, 13:59 Автор: KAST |
|
|
0 Коментов 1 200 Просмотров |
Дата: 01 фев 2016, 15:34 Автор: KAST |
|
|
0 Коментов 1 346 Просмотров |
Дата: 30 янв 2016, 07:20 Автор: KAST |
|
|
0 Коментов 1 458 Просмотров |
Дата: 29 янв 2016, 13:50 Автор: KAST |
|
|
1 Коментов 1 168 Просмотров |
Дата: 16 мар 2015, 03:37 Автор: KAST |
|
|
0 Коментов 4 422 Просмотров |
Дата: 18 фев 2015, 09:21 Автор: KAST |
|
|
0 Коментов 1 600 Просмотров |
Дата: 12 авг 2014, 21:30 Автор: KAST |
![]()
COMBAT MISSION II
Game User Manual
PDF Addendum
|
Combat Mission: Barbarossa to Berlin |
1 |

Safety Information
A very small percentage of people may experience a seizure when exposed to certain visual images, including flashing lights or patterns that may appear in video games. Even people who have no history of seizures or epilepsy may have an undiagnosed condition that can cause these
.photosensitive epileptic seizures. while watching video games.
These seizures may have a variety of symptoms including: lightheadedness, altered vision, eye or face twitching, jerking or shaking of arms or legs, disorientation, confusion, or momentary loss of awareness. Seizures may also cause loss of consciousness or convulsions that can lead to injury from falling down or striking nearby objects.
Immediately stop playing and consult a doctor if you experience any of these symptoms. Parents should watch for or ask their children about the above symptoms.children and teenagers are more likely than adults to experience these seizures.
The risk of photosensitive epileptic seizures may be reduced by sitting farther from the television screen, using a smaller television screen, playing in a well-lit room, and not playing when you are drowsy or fatigued.
If you or any of your relatives have a history of seizures or epilepsy, consult a doctor before playing.
|
2 |
Combat Mission: Barbarossa to Berlin |

Table of Content
Please note that parts of this manual are contained on the CD in PDF format.
|
THE BASICS |
3 |
|
THE INTERFACE |
11 |
|
THE MISSION |
26 |
|
THE ENVIRONMENT |
PDF 4 |
|
THE COMBAT |
41 |
|
THE MEN AND MACHINES |
PDF 24 |
|
THE COMMAND |
64 |
|
THE EDITOR |
PDF 63 |
|
THE CHALLENGE |
PDF 89 |
|
THE BEGINNER’S TUTORIAL |
PDF 108 |
|
THE ADVANCED TUTORIAL |
PDF 123 |
|
THE OSTFRONT |
PDF 128 |
|
APPENDIX A – HOTKEYS |
73 |
|
APPENDIX B — ORDERS |
76 |
|
APPENDIX C — TROUBLESHOOTING |
PDF 142 |
|
APPENDIX D — INDEX |
PDF 152 |
|
CREDITS |
83 |
|
SUPPORT |
86 |
|
Combat Mission: Barbarossa to Berlin |
3 |

The Environment
“The effect of climate in Russia is to make things impassable in the mud of spring and autumn, unbearable in the heat of summer and impossible in the depths of winter. Climate in Russia is a series of natural disasters.” — General von Greiffenburg, Chief of Staff 12th Army
(War on the Eastern Front, the German Soldier in Russia 19411945, James Lucas, pg 78)
The Environment
Many things can influence the outcome of wars, but among these the environment where a battle takes place – be it the weather, the lay of the land, the ground conditions and even the time of day – is generally regarded as the most influential in a military sense. The beginning of the mud season, the near standstill of combat in the winter, the unreliability of equipment in the hot summer months in the steppe – were all deciding factors in the outcome of the struggle on the Eastern Front, at both the strategic and tactical levels.
Combat Mission: Barbarossa to Berlin simulates many different environmental conditions, from the seasons to the time of day, to the weather, temperature and ground conditions. Each mix can be a unique challenge. From fighting in a foggy night in deep snow, to struggling through deep mud on a rainy day in spring, to sweating in extreme heat on the steppe – the possibility for scenario designers and armchair generals are manifold. The
|
4 |
Combat Mission: Barbarossa to Berlin |

The Environment
following chapter explains the various settings and their effect on gameplay.
Terrain
There are many different terrain types in the game. Each one has an impact on lines of sight, cover, concealment, and movement. What you need to understand to play the game is that what you see in the game is merely a visual representation of the underlying mathematical 3D battlefield and some abstractions are necessary to keep the game (dis)playable.
Trees are one such abstraction. Although you see individual trees on the map, their actual placement plays no role for the game as such, as can be seen by the fact that tree density can be toggled by the user to fit hardware performance ability. What counts is the “woods” terrain “tile”, as seen by the different kind of ground beneath and around trees. Same applies to – for example — brush terrain, and “graveyards”.
“Open ground”, although seemingly “empty”, is not. Bushes, small dips, high grass and other random features are all taken into account, and so the LOS cannot be traced endlessly even across open ground. More importantly, weapons accuracy decreases dynamically with range, not only because it is harder to hit something farther away, but also because it is harder to see the target at all.
The LOS tool is a very useful aid to understand the terrain on the map better, as it shows what kind of terrain is used for the in-game calculations. You can pinpoint the exact end of woods, the exact corner of a building, the exact point where a wall or hedge starts, etc. Most of the time such things are clear from looking at the map (and your judgement will become better with playing experience), but when in doubt, the LOS tool provides the answer.
Terrain also changes with the different seasons. For example, depending on the scenario’s time and date trees can be dense and thick (summer) or leafless (winter). Grain fields also change dramatically with the seasons and
|
Combat Mission: Barbarossa to Berlin |
5 |
The Environment
weather. This has a direct impact on the concealment and cover provided by such terrain.
Buildings
There are various types of buildings in the game: wooden shacks
(considered extremely light buildings), small farm houses (light and heavy), a tall light building (2 levels), a big blockhouse (2 levels, heavy), a church (basically a special type of the big blockhouse, i.e. 2-level heavy building), and large factory complexes (considered 2-level heavy buildings). Buildings have an impact on concealment and cover, with heavy buildings being more protective than light ones. Light buildings also tend to be reduced to rubble much more quickly than heavy buildings, with a few highexplosive rounds of 75mm caliber or higher being enough to achieve this (one such round is often enough to destroy a wooden shack). Any unit inside a 2-level building which collapses will usually suffer serious casualties.
Lines of sight can be a bit tricky around buildings at first, but most answers are easy when you think about it. In order to be able to look outside of a building without restrictions, a unit needs to be within a few meters of the outside wall (i.e. to peer through windows or other openings). If it is further away than about 5 meters, it can still “see” a few meters into or out of the house, but not far beyond that.
When a building or a unit in a building is fired at, regardless if it is direct fire or indirect fire (from mortars for example), most of the fire hits the outer walls of the building. Units hiding within can still be hurt by the blast from flying stones, glass, shrapnel or even just the blast. However, some rounds can also make it into the building and explode within, e.g. through holes in the outer walls or roof, blasted doors or windows. Such shots can cause severe damage. There is even a very small chance that a round can make it into and THROUGH a building, exploding on the other side!
The interiors of buildings are abstracted and included into combat resolution calculations. Although you can trace an LOS within a building without restrictions (though with
|
6 |
Combat Mission: Barbarossa to Berlin |
The Environment
limited range) the chance of enemy units hiding within the same building and remaining unspotted is relatively high (imagine them hiding in another room), but drops dramatically the more time your units spend inside.
There are also two different height levels for buildings. Level one, the ground level, simulates houses that are one to two stories high. Level two simulates houses three to four stories high. These are the only available levels for Combat Mission: Barbarossa to Berlin. You cannot place units in church towers.
One thing to keep in mind with buildings is that they are a confined space and can contain only so many soldiers at a time. The general rule of thumb is one squad per corner of a building. But if you try to put a whole platoon into a small farmhouse, don’t be surprised to find that one squad has to leave and wait outside.
Watch out when you want to fire weapons with backblast (like bazookas and Panzerfausts) within buildings — this often suppresses the firing unit and there is a good risk that the building will catch fire from the backblast. Vehicles and guns are not allowed to enter buildings. Mortars can enter a building, but cannot fire from it.
Building Damage
Buildings and bridges display “damaged” or “heavily damaged” labels according to how much damage they have received, and the “Warning Labels” option is on. Additionally, they’re listed with a ‘*’ attached, like “light building*”, or a ‘**’ for heavy damage. The building will begin to show damage visually after 40% of the structure is damaged.
Rubble
These are the leftovers after a building has collapsed. Vehicles may not
enter rubble. It provides excellent cover and concealment for infantry. LOS is heavily restricted across rubble, but only to a certain height (which is naturally much lower than the building previously was). There are two forms of rubble in the game – rubble as it originates from a
|
Combat Mission: Barbarossa to Berlin |
7 |
The Environment
collapsed building, with parts of exterior walls still standing, and “flat” rubble, which can simulate debris piled up on roads for example. The difference is visual only, as both types of rubble behave the same and cannot be, for example, entered or crossed by vehicles.
Scattered Trees
These are single trees with little or no brush, standing in loose groups together or along a road. Orchards fall
into this terrain type as well. They provide only light cover and concealment, but are certainly better than open ground. Do not expect miracles, especially in winter when even a single squad has trouble hiding in scattered trees.
Note: Scattered trees can also be used to simulate narrow paths in forests, allowing tanks and other vehicles to pass at a slow rate and considerable risk of bogging down.
Woods
This is the “usual” woods terrain, which includes mixed types of trees, and fairly thick underbrush and bushes.
Woods provide good cover and concealment. No vehicles are allowed to enter woods in Combat Mission: Barbarossa to Berlin.
Tall Pines
“Tall pines” represents dense woods terrain, but with only little underbrush
and bushes, and provide cover and concealment similar to “Woods”, except that the pines are taller and so are more likely to block elevated lines of sight from tall buildings or hilltops. Movement through tall pines is faster than through woods, and LOS can be traced further due to less underbrush.
Hedges
This is the common type of hedge and is about one meter high, planted or
naturally grown, and is passable for tracked vehicles and
|
8 |
Combat Mission: Barbarossa to Berlin |
The Environment
infantry (with some impact on speed, however). It provides decent concealment for prone units, but little cover.
Stone Wall
A man-made stone wall, about 1 meter high, and thick enough to block even a direct hit from a tank main round. Walls are passable for tracked vehicles and infantry, albeit at a lower speed. Vehicles behind stone walls can achieve hull-down status, unless the enemy is on a higher elevation. Stone walls provide good cover and concealment, especially for prone units
behind it, but not when the attacker is at a higher elevation or attacking from the sides or rear.
Wooden fence
A man-made fence, usually to separate fields, but also very often found in Russian villages around each house. This is only a small obstacle to vehicles and infantry, and can be crossed by all unit types with a small delay. It provides nearly no cover and very little concealment.
Brush
Brush can be used to simulate several things types of terrain such as
bushes, wild fields or low trees. It provides good concealment and restricts LOS, but offers little cover. It tends to catch and spread fire quickly.
Grain Fields
Grain fields are just that. The concealment and cover they provide vary with the seasons. Basically
considered open ground in winter with not much to hide behind, they can provide decent concealment in summer and less so in fall or spring. Cover, however, is almost nonexistent. Grain fields also increase the chance of vehicles bogging down in them, even with otherwise dry ground conditions. This type of terrain tends to catch and spread fire quickly.
|
Combat Mission: Barbarossa to Berlin |
9 |

The Environment
Marsh
Marsh is swampy open ground, providing little more cover than some bushes and grass. It is difficult to walk
on even for infantry, and cannot be entered or crossed by vehicles or heavy support weapons of any type.
Soft ground
This can be a muddy field, a shallow marsh or a small stream, and although passable to all units, dramatically increases the danger of vehicles bogging down as well as slows down all movement. It provides no extra cover or concealment.
Rough
Rough represents heavily broken or rocky terrain, impossible for vehicles to cross and
accessible only by infantry. It provides good cover and concealment.
Rocky
Similar to “rough” terrain but more easily passable — with usually a number of large rocks or debris to provide decent cover and concealment, but also enough open space for vehicles to pass through.
Roads
Roads come as two types: dirt and paved. Dirt roads are the main type of
road encountered in Eastern Europe outside of the big cities. There is no cover or concealment on a road, but movement is fast.
Paved roads have gravel or hard concrete surfaces and are relatively easy to drive on even during muddy ground conditions or snow. However, besides some few main highways and city streets, paved roads are not encountered very often on the Eastern Front.
|
10 |
Combat Mission: Barbarossa to Berlin |

The Environment
Bridges
There are three types of bridges — wooden bridges, often encountered across small streams or creeks and two
elevations high; stone bridges, spanning small rivers at two elevations high; and tall stone bridges, across major rivers or valleys, four elevation levels in height which allow vehicles and troops to pass under them.
Railroad Tracks
These offer little concealment and almost no cover, and troops do not gain
much speed advantage on them (in fact, wheeled vehicles are slowed down, and chances of bogging increase due to the rough surface).
Water
Water tiles are used to simulate rivers or lakes, and cannot be entered by any units except infantry embarked in assault boats. Regardless if there is
snow on the ground or not, when temperature is set to freezing and below, water becomes frozen — vehicles and guns are not allowed to enter, but infantry is able to cross ice.
Fords
CMBB features two types of fords, which allow crossing rivers on foot or with vehicles. Shallow fords can be crossed (slowly) by all units, although the chances for bogging down are high – especially for non-tracked vehicles. Deep fords can only be used by infantry units.
Slopes
These are inclines steep enough to prohibit vehicular travel. Infantry can still climb them, albeit slowly.
Cliffs
No unit is allowed to traverse a cliff.
|
Combat Mission: Barbarossa to Berlin |
11 |

The Environment
Steppe
This is a special type of terrain, found mainly in Southern Russia. It consists of waist-high grass which provides excellent concealment for hiding infantry, but very little cover. The random map generator in Quick Battles and the editor will use “Steppe” as the default terrain type for all southern maps with “rural” and “flat” or “gentle slopes” settings (see Editor). Of course “Steppe” terrain can also be used to simulate “high grass” on any map.
Fortifications
Fortifications (bunkers, pillboxes, wire, and mines) are available only for the defender, and never in meeting engagement scenarios. They are granted to a side by the scenario designer or can (and in the case of Assault type battles MUST) be bought for Quick Battles. During the Setup Phase of a battle, you are free to move and place them within the constraints of the setup zones, but they cannot be moved during the battle itself.
All forms of fortifications (including mines) may be placed only within a valid setup zone. A minefield is 20m x 20m in size (except for daisy-chain mines, which represent hasty laid mines not dug into the earth, and which are slightly smaller than 20m in diameter), with the mine marker placed in its center. The defender can place minefields next to each other, thereby creating larger minefields, but for game purposes CM treats these as separate 20m x 20m elements. Once a minefield has been spotted, the TacAI will try to move units around it during the Action Phase, or simply refuse to enter minefields and stop a distance away from them. You can not force units to enter minefields, as the movement line will turn red trying to do so, until these have been cleared by engineers using demo charges.
Fortified Firing Positions
Bunkers and pillboxes have a firing arc inside which they can engage targets through a frontal firing slit. Outside of this arc, they are basically impotent. The rear of a bunker or pillbox is its weak point — since this is where the exit doors are located — and can be penetrated even by light ordnance. From close range, however, a bunker/
|
12 |
Combat Mission: Barbarossa to Berlin |
The Environment
pillbox is always vulnerable to infantry, which can throw grenades through firing ports. Flamethrowers are especially useful for knocking out bunkers/pillboxes, as well as grenade bundles, demo charges and molotov cocktails. Additionally, ordnance can occasionally score a lucky hit to a pillbox’s frontal firing slit, possibly knocking out the pillbox in the process. But this is generally only possible at close range (within a few hundred meters).
Note: AT gun Pillboxes receive an accuracy bonus, vs. a normal AT gun, because such fortifications have already “ranged in” the area within their firing arc. Range determination is one of the greatest contributors to aiming accuracy, so predetermined and reliable range information greatly increases accuracy (all else being equal).
Barbed Wire & Roadblocks
Wire can be crossed by infantry or fully-tracked vehicles, but only at a much slower pace. Roadblocks can be
crossed by infantry (at a slower pace) but are impassable to vehicles. Roadblocks and wire cannot be placed on water and marsh terrain, as well as not inside buildings. There must be sufficient space to place wire and roadblocks, so when two houses are too close together it might be not possible to do so (or you will have to rotate the wire or roadblock marker to fit in between).
Trenches and foxholes
Each defending infantry unit in an eligible location (i.e. not on paved surfaces, in marsh or water or other
unsuitable terrain) can dig in at the beginning of a battle, creating a foxhole underneath. The foxhole remains on the map for the duration of the battle (or operation), and can be used by other units (including the enemy) to gain its defensive benefits (mainly cover). Digging in occurs automatically but the player can toggle it on or off with the “Dig In” command.
Also, depending on the parameters of a battle or operation, the defending player can create additional fallback positions using the ALT-F hotkeys during the setup phase of a battle. These additional foxholes can be created
|
Combat Mission: Barbarossa to Berlin |
13 |

The Environment
anywhere within a valid setup zone on the map by leftclicking on the map while in ALT-F mode, and the number of available foxholes is equal to the number of non-heavy infantry units on the map. Left-clicking on an already existing foxhole makes it disappear and return to the “foxhole pool”. Hitting ALT-F again exits the foxhole placement mode.
Note that in Quick Battles which are Meeting Engagements or Probes, neither side is allowed to dig foxholes. And Assaults are the only Quick Battles in which the defender may dig fallback foxholes.
In regular scenarios, neither side may dig in during Meeting Engagements. Otherwise, the ability of the defender to dig in is determined by the scenario author.
Trenches are similar to foxholes except they are much larger and provide considerably more cover and concealment for their occupants. Further, they may be placed and rotated during the setup phase like any other unit. In addition, they can be used by infantry to move from one location to another while staying inside the trench, thereby benefiting from its defensive bonus on the way. In fact, it is possible to place a whole trench system on the map by simply linking trenches together (placing them adjacent to one another). Trenches can be rotated like any other unit in any direction desired. Trenches cannot be placed on unsuitable terrain (marsh, water, fords and in buildings), and remain on the map for the duration of the battle (or operation).
Only fully-tracked vehicles are allowed to enter or cross trenches, but do so very slowly and at great risk of bogging.
Mines
There are three types of mines in the game.
Antipersonnel Mines
Lethal to infantry and can cause several casualties within seconds when stumbled upon. Casualties are higher
|
14 |
Combat Mission: Barbarossa to Berlin |

The Environment
for infantry units moving quickly through a mined area than when crawling or moving slowly. Once spotted, a mine marker appears in the area. Infantry will refuse to enter such a minefield even when ordered to. They may, however, enter it when in panic or rout. Since mines are dug into the earth, they cannot be placed on paved surfaces or in buildings, in water or marsh or rough terrain.
Sneak (crawl) is always less likely to set off a mine.
Mines are also much less likely to go off if they’re *known* (i.e. one already went off, and your men are now assumed to be paying more attention and doing things like moving in a single line (or a couple of lines) to minimize further explosions).
So the least mine explosions happen in a known minefield to crawling units.
Note: Dug in mines are never spotted unless one actually explodes!
Antitank Mines
Dangerous to tanks and all vehicles, and although not always lethal, can at least immobilize them. Antitank mines are harmless to infantry because infantry is not heavy enough to detonate them. Since mines are dug into the earth, they cannot be placed on paved surfaces or in buildings, in water or marsh or rough terrain.
Daisy-Chain Mines
Hastily-placed anti-vehicle mines that are easily spotted by the enemy because they are above ground. They do not generally cause direct harm, but rather deny the enemy certain approaches, generally across road surfaces. Their real life advantage is that they can be placed MUCH faster than normal minefields and hence were used often in hasty retreats. Daisy-Chain Mines cannot be placed on water or marsh, and not in buildings.
Clearing Mines
Engineers and Pioneers with demolition charges are able to clear gaps through minefields. Simply move them within 25 meters of the minefield and wait. It takes a few
|
Combat Mission: Barbarossa to Berlin |
15 |

The Environment
minutes (turns) to clear a gap through the mines. You can of course also target the minefield marker manually.
Additionally, engineers can clear Daisy-chain mines without the use of demolition charges. The number of engineers and their experience affect their speed in clearing mines. Generally a near full squad is needed to accomplish clearing a particular mined area.
Minefields can be reduced or eliminated by shellfire (though this will not be explicitly shown — you just have to judge roughly by how many craters you see, and hope).
Weather
It is common military knowledge that weather can in fact dictate the outcome of wars. The German progress (or lack of it in the winter) during Operation Barbarossa — their assault against Russia — is a good example. The Russian ability to bring their air superiority to bear (with decisive results) during periods of clear weather later in the war is another. At the tactical level, bad weather means troops tire more quickly and vehicles get stuck more easily. Movement is generally slower during periods of rain or snow, and visibility can be seriously impaired as well. Simply changing a battle’s weather settings can fundamentally alter the way the battle plays out.
Time of Day
There are four daylight conditions simulated in CM: dawn, mid-day, dusk, and night. Visibility is reduced during dawn and dusk and heavily restricted during night. Nighttime fighting also creates a risk of misidentifying one’s own troops as enemy and friendly fire can result. Keep this in mind when separating your forces and/or moving close to enemy positions, and occasionally check your unit’s target orders to make sure they have not by mistake decided to fire on their own troops.
Atmospheric Weather
Clear — a nice sunny day with few or no clouds, offering good visibility across long distances. This is the only weather type that allows airplanes to operate in the game.
Overcast — the sky is full with dark, low hanging clouds. Visibility is somewhat reduced.
|
16 |
Combat Mission: Barbarossa to Berlin |

The Environment
Rain — Visibility is reduced substantially. Noises are muffled and sound contacts are considerably more difficult to obtain.
Fog — a light mist covers the battlefield and visibility as well as noise are reduced.
Fog and Rain — a mix (or more like an addition) of the two above. Visibility and noise are heavily reduced.
Thick Fog — you almost can’t see your own hand if you stretch it out in front of your face. Visibility is reduced to a mere few meters and the fog reduces the chance for sound contacts.
Snow — reduces visibility and has a slightly lesser impact on sound contacts than rain.
Blizzard — very heavy snowfall reduces visibility and noise substantially.
Ground Conditions
Very Dry — very dry ground conditions increase the chance of fires substantially.
Dry — dry ground.
Damp — early in the morning or after several days of overcast weather or fog, ground conditions are often damp. This raises the chance for vehicles bogging down when off dirt or paved roads.
Wet — after rain showers you tend to have wet ground. The chance of bogging down when off roads is substantially increased, and even the dirt roads pose some danger of bogging.
Mud — when it has been raining for a few days, wet ground will turn into mud. Vehicles tend to get stuck in muddy ground (even on dirt roads) quickly and mud also greatly reduces the speed of vehicles and infantry.
|
Combat Mission: Barbarossa to Berlin |
17 |

The Environment
Deep Mud — after long periods of rain or melting snow, the ground can become a quagmire, what the Russians call “Rasputitsa”. Vehicles should stick to roads (paved if possible) and even infantry will find the going slow and tiring through such ground conditions.
Light Snow — a few inches of snow. The chance for bogging is increased slightly and the snow affects movement speed a bit, but most vehicles can handle it well. Soft ground remains uncovered by snow during this condition.
Snow — roughly 8 inches of snow. Wheeled vehicles will get stuck frequently and even tracked vehicles will find the going tougher. Infantry moves more slowly.
Deep Snow — 12 inches or more. Most vehicles will get bogged eventually and infantry movement is slowed down substantially.
Fire & Smoke
If there is anything to be found on a WWII battlefield more often than casualties, it is smoke and fire, from burning terrain or vehicles, or from smoke rounds used to cover the attacker’s approaches or defender’s line of retreat.
Smoke
Smoke in varying sizes comes from burning buildings, fields, woods, vehicles, and smoke rounds from tanks, guns, or artillery. Small smoke shells or small burning vehicles (e.g. Kübelwagen) degrade, but do not always block, LOS through them.
Designer’s Note: Infantry smoke grenades, a source of smoke commonly found in other WWII games is not available in CMBB. Our research shows little credible evidence that this type of smoke was used regularly at the squad level in WWII for tactical purposes. Instead, it appears to have been used for signalling mostly, and we have therefore decided to exclude it from CMBB to prevent its potential unrealistic overuse.
|
18 |
Combat Mission: Barbarossa to Berlin |

The Environment
Fire
The chance of a piece of terrain catching fire depends largely on ground conditions and weather. You will see fewer terrain fires during rain or with wet or snowy ground. On the other hand, very dry ground increases the chances for fires, and sometimes even tracer ammunition from an MG can be enough to spark a blaze.
Terrain fires often start off “small”, and at this stage have no effect on the game except for some smoke. But small fires have the chance to grow and spread depending on overall conditions. If a fire becomes “big” (the whole terrain “tile” (20m by 20m) is burning) units located in that tile are forced to exit the area immediately. If for some reason a unit cannot do this (say it is immobilized), the unit will be destroyed by the fire and any remaining crew will abandon the vehicle/gun immediately and run to safety. Units will also refuse to enter terrain burning with a “large” fire.
Burning terrain and vehicles remain burning for the duration of a battle (and can, in fact, cause adjacent terrain to catch fire eventually). Fires and smoke will cease, and burned buildings will collapse to rubble between the battles of an operation.
Fog of War
Unless you choose to play with “Fog of War: none” (in the Options menu at scenario startup), only friendly forces will be visible on the map initially. Enemies must be spotted by one of your units before they appear on the map. Combat Mission: Barbarossa to Berlin uses a complex spotting model to simulate the limited knowledge of a battlefield commander and what is generally known as Fog of War.
Enemy units can be displayed on the map according to five “spotting levels”:
No Contact — Level 0
No enemy unit is displayed. It’s still out there, but you can’t see it, because none of your units are able to see or hear it. Keep in mind, though, that the enemy might see
|
Combat Mission: Barbarossa to Berlin |
19 |

The Environment
you! If you’re walking down a quiet road and the enemy is hiding behind some hedges, he might have identified all your units before you even catch a glimpse of him. In fact, your units might be dead before they see where the fire is coming from in such a situation.
Sound Contact — Level 1
Most wargames allow spotting only when a line of sight exists between the spotter and the target. In Combat Mission: Barbarossa to Berlin, sound also plays an important role. If you are close enough, or if the target is loud enough (e.g. a tank racing down a road at full speed or an infantry squad firing its weapons), you can “spot” a unit even when no line of sight exists. Such units are displayed as generic gray icons, and clicking on them reveals SOUND CONTACT in the unit info window. The general type of the unit is displayed as well, e.g. infantry? or tank?, but do not rely too much on this. Additionally, the enemy unit is shown at a location which may be somewhat incorrect (your soldiers are making their best guess by listening), so don’t be surprised if the enemy unit seems to move through impassable terrain (or even off-map), and then suddenly “moves” into line of sight in a different (but nearby) location.
First Contact — Level 2
The enemy unit has moved into line of sight and one of your friendly units has caught a glimpse of it or the enemy has opened fire at you and you see the muzzle flashes. At this point only sketchy details are available. When you click on such a unit, a general unit type is given (Infantry? or Tank?), but not much more than that. Enemy infantry units are always displayed using one soldier figure, regardless of the actual type. Enemy vehicles and guns are always displayed with a generic grey model.
Contact — Level 3
If the enemy is close enough, is exposed, or has been firing at you for a while, more information becomes available. Enemy infantry units now are classified as squads or teams (e.g. mortar teams, anti-tank teams) and weapons can be spotted, too. Vehicle types — tanks or tank
|
20 |
Combat Mission: Barbarossa to Berlin |
![]()
The Environment
destroyers or assault-guns — are usually identifiable at this stage.
Infantry is displayed with the corresponding number of figures based on unit strength and vehicles are displayed as a common model of vehicle for the identified vehicle type and the given month and year.
Take careful note of the fact that sometimes your troops — especially the inexperienced ones — can incorrectly identify enemy vehicles, usually as something bigger and scarier than they really are. However, once the spotting reaches level 4 (see below) any “mistakes” are corrected and the true identity of the vehicle is displayed.
IdentifiedLevel 4
If the unit is sufficiently close or exposed, one of your units will identify it fully. This means that the number of soldiers in a squad or team are displayed in the unit window, as well as the correct model of vehicle, experience of the unit, and more. This is as much information as you will ever get about the enemy.
Lost Contact — Generic Unit Marker
After a unit has been spotted, it is possible to lose contact with it. The “lost” unit will be graphically replaced by a generic unit marker (each nationality has its own unique marker typestars for Russians, crosses for Germans, etc.), showing the last known position of the enemy unit. Clicking on such a marker will display the last available information about the unit.
These markers stay on the map until the same unit has been spotted again (even if in a completely different location) or if you approach near enough to the marker to verify that the previously spotted unit is no longer there. In such a case the marker disappears, regardless of whether the enemy has been spotted elsewhere.
Option — Extreme Fog of War
With the option set to “Fog of War: extreme” it will take a lot longer before your units are able to fully identify enemy units, i.e. reach spotting level 4. Enemy units must
|
Combat Mission: Barbarossa to Berlin |
21 |

The Environment
come into very close contact with your troops before headcount, experience and armament become “visible” to you, and many units in cover or far away will never be fully identified for the duration of a battle. In fact, reaching identification level 4 and even 3 will be a rare occurrence in most situations. While more realistic, this option requires more attention from the player, and is therefore not set as default. Otherwise, this option works the same as “Full Fog of War”, which is the default setting explained above.
Option — Partial Fog of War
With the options set to “Fog of War: partial”, enemy units must still be spotted, but every spotted enemy is automatically fully identified from this point on. This is a good way for less-experienced players to get used to the game system.
Option — No Fog of War
With the setting “Fog of War: none”, all enemy units on the map will be shown and fully identified, regardless if they are spotted or not. This is a great way for beginners to get a feel for the game, but also for scenario designers who wish to test a battle they made. Mind you though, this works both ways, your opponent is able to see all of your units also when this setting is in effect, even the computer player!
SPOTTING
Units spot best when stationary. Movement, especially running, means that a unit’s field of vision is generally restricted to the direction in which the unit is moving. The same is true for vehicles, as the driver and tank commander are (at least partly) focused on getting to their objective without colliding with obstacles or bogging down. Hiding units also spot worse, as their main task is to keep their heads down, not watch for the enemy.
Spotting is always worst to the rear of a unit, and panicked or broken units relay almost no useful spotting information to the player.
Vehicles are generally much poorer spotters than infantry, especially when buttoned up. In fact, most tanks
|
22 |
Combat Mission: Barbarossa to Berlin |

The Environment
have large blind spots within a certain distance around the tank when buttoned up due to the heavily restricted field of view. In CMBB, this has been abstracted into a general rule: Buttoned vehicles have a blind spot for infantry (which is NOT currently targeting the vehicle) within 15m provided the infantry is not in the front 60-degree arc centered on the turret facing.
So don’t be surprised when one of your tanks with closed hatches suddenly runs into an anti-tank team hiding just a few meters away from it. Also don’t be surprised when YOU (as the player hovering above the battlefield) can see a target that your tank simply will not engage. What you can see is not necessarily what the tank can see!
It’s often tactically wise to keep some units stationary on overwatch duty while others advance. Unfortunately, one cannot always afford the luxury of being cautious.
Designer’s Note: In order to prevent the abuse of bailed out crews as disposable scouts, we drastically reduced their ability to spot enemy units. Be warned that if you go moving your crews off into enemy territory the first unit they spot might be their last!
|
Combat Mission: Barbarossa to Berlin |
23 |
The Men and Machines
“In addition, a fire fight with Josef Stalin tanks should not be undertaken at less than platoon strength; employment of individual Tigers means their loss.” From Septemer 1944 issue of the Nachrichtenblatt der
Panzertruppen, report of a Tiger unit which had met the IS-II Stalin tank in combat (found in: Soviet Armor Tactics in World War II, Charles C. Sharp)
The Men and Machines
Units in Combat Mission: Barbarossa to Berlin represent squads and teams of soldiers as well as individual vehicles and guns with crew. These are (with a few exceptions) the smallest tactical elements that can receive orders – in other words, in Combat Mission you are not telling every individual soldier what to do, but issue orders from the position of a squad or team leader to the whole group.
This is obvious from looking at your units – although you will see individual figures standing on the map, these do not represent single men, but rather a group. In the case of squads, usually three figures (two if you use the “reduced figures” option) represent anywhere from 7-14 men. Teams (including HQs and gun crews) are usually shown as one figure regardless of the actual team size – a design decision to keep squads and teams easily recognizable.
|
24 |
Combat Mission: Barbarossa to Berlin |

The Men and Machines
Designer’s note: We would have loved to show every single man on the battlefield, but have decided not to because of restrictions of current computer hardware to display and animate thousands of soldiers on the map, and in order to keep the interface from getting clogged. Individual soldiers and their positions on the battlefield ARE tracked with regard to casualties, however, albeit somewhat abstractly.
Combat Mission: Barbarossa to Berlin features a tremendous number of units for each of the six nations, including infantry formations, guns and vehicles and other heavy weapons. Listing them all even with a brief overview would be totally beyond the scope of this manual. However, each unit’s detailed information can be accessed from within the game and in the editor, by clicking on a unit and hitting the ENTER key. This opens the Detailed Unit Information window in the upper left corner. Detailed stats for each unit, its weapons, and capabilities are displayed here. On the following pages you will find a short explanation of what is shown and tracked by CMBB.
|
Combat Mission: Barbarossa to Berlin |
25 |
The Men and Machines
Men
Nationality, Division and Type of Unit
This shows the nationality of the unit, its parent division type, and the unit type, similar to what is shown in the unit information panel described earlier.
Speed Class
The speed class determines the speed at which the infantry unit is able to move. The speed class a unit belongs to depends essentially on how much heavy equipment it is carrying. There are three speed classes for infantry units (there are some more for other units, explained later in this chapter):
Slow — most heavy equipment (e.g. the MG42 heavy machinegun) but also units carrying a lot of extra equipment like artillery spotting teams without radio sets
Medium — light machineguns, light mortars (e.g. the 60mm mortar), and spotters with radios
Fast — squads, sharpshooters, and other small and mobile infantry teams
Slow and medium speed units CAN use RUN movement orders, but will tire a lot faster than FAST units; if you do not want to exhaust your troops too quickly, RUN orders
|
26 |
Combat Mission: Barbarossa to Berlin |

The Men and Machines
should be given to slow and medium units to cover short stretches in emergencies only.
Transport Class
Ranges from 1 to 9, with 9 representing the largest heavy equipment in the game. Units can only mount vehicles which offer at least the same or higher transport class.
Leadership Abilities
If the selected unit is an HQ unit, its leadership abilities (if any) are displayed as, for example, “Morale +1” or “Command +2”.
Special Equipment
If a unit is carrying special equipment (e.g. Panzerfaust, rifle grenades, demolition charges, Molotov cocktails, magnetic mines etc.), the type and quantity is mentioned here. Hand grenades are NOT mentioned here seperately. Also, if the unit has binoculars (greatly enhancing its long range spotting and identifying abilities), this will be noted here as — you guessed it — “has binoculars”.
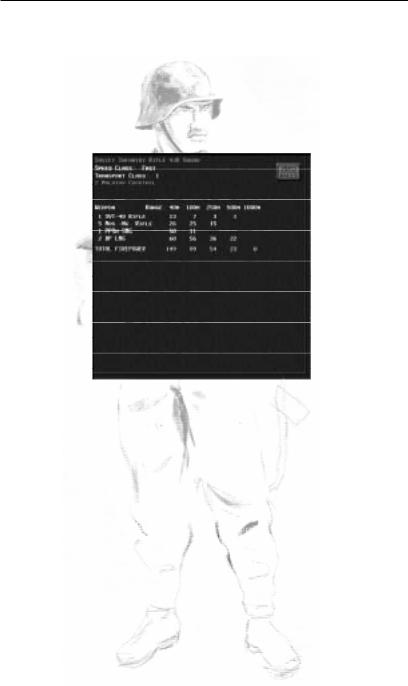
Weapons & Firepower
A list of available small arms for the selected unit is displayed. Which weapons are available depends on the nationality and type of the unit. Note that some captured weapons can be assigned to units from game start, depending on their documented historical use (the Germans reportedly loved the Russian PPSh submachinegun for example, and you will often find a number of these assigned to German squads and HQ units)
As the unit takes casualties, individual weapons disappear from the list, showing that the soldier carrying that particular weapon has been put out of action. Sometimes, however, soldiers can exchange weapons. For example, if the soldier carrying a squad’s machinegun is hit, another soldier of that squad might drop his own weapon and pick it up.
|
Combat Mission: Barbarossa to Berlin |
27 |

The Men and Machines
Beside the weapons listing, a firepower table shows the firepower of each weapon according to the range to a target. The firepower (FP) is shown for all weapons of the same type, e.g. a German Rilfe 44 squad has 6 K98 rifles. That means 6 x fp 3 at 250m = 18 fp. However, the firepower as shown in increments of 40m, 100m, 250m, 500m, and 1000m is a reference for the player only — the game engine uses a more precise system measuring down to the meter.
Eligible for exit
If a unit is eligible for map exit (as part of a scenario’s victory objectives), this will be noted in the right upper corner of the detailed unit info screen.
Info/Kills
By clicking on the white Info/Kills box in the upper right corner of the info screen, you can toggle the display between unit stats and a summary of how the unit fared in the particular battle so far. To preserve the “fog of war”, only verified kills are shown — so if your mortar team takes out a squad hiding in woods and nobody sees it, the “kill” will not be shown here until the battle is completely over.
|
28 |
Combat Mission: Barbarossa to Berlin |
The Men and Machines
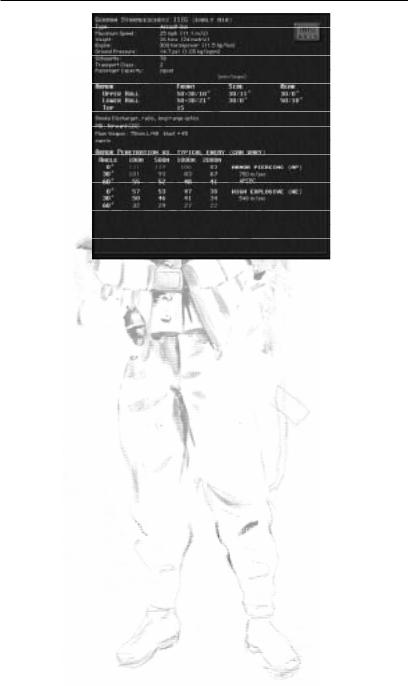
Machines
Nationality, Division and Type of Unit
This shows the nationality of the unit, its parent division type, and the unit type, similar to what is shown in the unit information panel described earlier.
Maximum Speed
This states (in miles per hour and meters per second) the maximum speed the vehicle can go on a paved road. Cross-country movement is generally much slower.
Weight
Measured in tons (U.S. and metric).
Engine
The horsepower is used for speed and acceleration calculations. Diesel-powered engines are slightly less likely to catch fire when hit.
Ground Pressure
Measurement of the vehicle weight and the surfacecontact area of its tracks. Higher ground pressure increases the chance of bogging down.
Silhouette
A numerical value representing the size of the vehicle, modified especially by its height, that affects gunnery accuracy and spotting against it. A value of 100 is “medium size”.
Transport Class
A vehicle can only transport (tow) other units with the same or lower transport class.
Passenger Capacity
Can be squad, team or none. Units may ride on the deck of a tank for example, or within a passenger compartment on transport vehicles like some halftracks and trucks.
|
Combat Mission: Barbarossa to Berlin |
29 |
The Men and Machines
Armor
The armor table gives the thickness and slope of armor for various tank parts (usually turret, upper hull, lower hull, and top) for the front, sides and rear. Other information may include armor quality (values lower than 100% represent manufacturing and metallurgical flaws, common in early Allied vehicles and some late-war German vehicles). Special features like armor skirts (Schürzen) or partly-open vehicles (open top and/or sides) are also noted here, along with “curved” mantlets such as the famous “Saukopfblende” of the German StuGIII, which can provide an effective armor protection substantially higher than the base thickness and slope indicate (depending on which part of the curved armor is hit, thickness and slope can vary to a large degree within a fairly small hit area). When you see a value like “50+20”, then the 50 represents the tank’s base armor, and the 20 additional bolted-on armor, either as field modification or done by the factory. This increases armor protection somewhat, but bolted-on armor is usually a somewhat less effective than the armor of the same thickness made from a single piece of metal.
Special Equipment
Smoke Dischargers — small chemical packets mounted on the outside of a tank that can create a smoke cloud.
|
30 |
Combat Mission: Barbarossa to Berlin |
![]()
The Men and Machines
Nahverteidigungswaffe — close defense weapon — hurls an HE or smoke grenade from the inside of the tank against any enemy infantry approaching the tank.
Alternate Rear-facing Driver — some German armored cars were equipped with a second driver seat in the rear of the vehicle, allowing them to reverse quickly out of enemy view.
Cupola — some tanks feature a tank commander’s hatch with cupola allowing the tank commander a 360° view around the tank even with the hatch closed. It enhances a tank’s close range observation against infantry assaults, even from from the rear.
1 man turret — some early war tank models with a crew of 2 have only one man in the turret — meaning that the tank commander is usually also the gunner and loader, and therefore cannot remain unbuttoned and fire the tank’s main armament at the same time. This greatly diminishes a tank’s spotting abilities while firing and affects rate of fire and accuracy also, as the tank commander has to reload by himself and therefore is forced to take his eye off the sight for each shot.
2 man turret — many earlier T-34 models have only two men in the turret — usually a loader and the tank commander/gunner. This greatly diminishes a tank’s spotting abilities while firing, rate of fire and accuracy — albeit not as much as a 1 man turret layout. The tank must button up to fire its main armament.
Radio — many early war Soviet tanks were not equipped with radios, making inter-platoon communication for armored formations very difficult, having to use hand signs, flares and even whistles to communicate. Tanks without radio have to stay a lot closer to the formation’s parent HQ to remain in command, and also lose any command bonus when either the HQ or subordinate unit (or both) are buttoned up.
Optics
All vehicles in game are rated for their optics (described in more detail later in this chapter). When a vehicle or tank has optics better than STANDARD, this is listed here.
|
Combat Mission: Barbarossa to Berlin |
31 |

The Men and Machines
Special Features
Burns Easily — some vehicles stow ammunition and/or fuel in such a way that internal damage regularly causes the entire vehicle to catch fire.
Shot Trap — certain vehicles (like the early Panther model A) have a design flaw in their external shape, which creates a “shot trap” — a curved surface on the underside of the turret front which deflects incoming projectiles downward into the turret ring, or the weakly-armored hull top, where it often penetrates easily.
Slow ROF — certain vehicles are known for their slow “rate of fire”, i.e. long reloading times for their main gun. This can be due to design flaws (e.g. a cramped crew compartment) or especially bulky ammunition or cumbersome loading mechanisms.
Turret Speed
Turreted vehicles (mostly tanks but also some armored cars) are rated for their ability to rotate the turret. Five different speeds are possible: Very fast turret, fast turret, medium turret, slow turret, very slow turret.
Machine Gun
Most vehicles have one or more machineguns mounted in various places. Most common are bow and co-axial MGs, with the first able to fire only within the vehicle hull’s front arc, while the latter can be directed wherever the main gun can point. “Flexible” machineguns, usually top-mounted and meant for antiaircraft purposes, have a full 360º traverse but can normally only be operated when the vehicle is unbuttoned, though some German vehicles have remote-control capability for these weapons (which, if applicable, is also listed here). Some Russian tanks feature an MG mounted on the rear of the turret, but this usually cannot be fired at the same time as the main gun, as there is no extra crew to man this MG at all times. Machinegun ammo is listed in brackets.
Flame
Vehicles equipped with a flamethrower have this entry, together with the available “ammo”, i.e. flamebursts. Note
|
32 |
Combat Mission: Barbarossa to Berlin |

The Men and Machines
that flames fired at longer ranges can use more than one “ammo point” per shot.
Main Weapon
Gives the caliber, muzzle velocity and blast strength of the main gun, as well as any other special info, e.g. “rearfacing” for vehicles with guns (or mortars) only capable of firing towards the rear of the vehicle. The blast strength is a rough measure that represents, in a single number, the values tracked by the game engine, which are the explosive power and the shrapnel generation of the gun’s shells.
Armor Penetration
The penetration table states how many millimeters of armor the shell can penetrate at four ranges (100m, 500m, 1000m, and 2000m), for three different armor slopes (0°, 30° and 60°) and the various anti-armor ammunition types that the gun can fire. These values, however, can vary a lot in the heat of battle, and are supposed to give a rough idea only. Also, although only four ranges are shown, the game engine uses much more precise algorithms (down to a fraction of a meter). The table is color coded to correspond to the colors shown for the various armor parts in the unit interface. For each ammo type, also additional information is listed, like the muzzle velocity and type of ammo (explained later in this chapter).
|
Combat Mission: Barbarossa to Berlin |
33 |

The Men and Machines
Guns
The details screen for guns is a mix of the entries available for infantry units and tanks. Most entries are the same as for infantry units. Additional to that, the MAIN WEAPON is shown, including caliber (e.g. 57mm), muzzle velocity (e.g. 823 m/sec) and a blast value. The latter indicates roughly how lethal the weapon is within a certain range from the impact point.
For guns, the optics (explained in detail further below) are listed here as well, if they are classified as better than STANDARD.
Below that is an armor penetration table, which is intended to give a rough idea of the potential of the gun. It’s a rough idea only because a lot of factors influence the actual chance of armor penetration in the heat of battle.
The penetration table states how many millimeters of armor the shell can penetrate at four ranges (100m, 500m, 1000m, and 2000m), for three different armor slopes and the best anti-armor ammunition types that the gun can fire.
Two additional speed levels are available for guns:
Immobile — the unit cannot move on its own and has to be towed (usually only heavy guns, e.g. the 88mm
|
34 |
Combat Mission: Barbarossa to Berlin |

The Men and Machines
Flak). Additionally, guns which took an exceptionally long time to be prepared for towing after having been setup for firing, will be noted as “cannot embark during battle”. Such units can enter the game map towed and move into position, but cannot embark once they disembark. Keep in mind that vehicles can only tow guns with the same or a lower transport class.
Very Slow — usually used for heavier guns which can be pushed by their crews, albeit slowly (e.g. the 75mm AT Gun)
|
Combat Mission: Barbarossa to Berlin |
35 |

The Men and Machines
Weapons
Small arms
“Small arms” is a military term describing rifles, pistols, machineguns, and other small-caliber bullet-firing weapons wielded by the individual soldier. Although Combat Mission: Barbarossa to Berlin simulates squads and teams rather than individual soldiers, it does treat all weapons of an infantry unit individually.
Small arms and MGs use abstracted “ammo points”. When a squad or team fires it expends one ammo point. Infantry units never run completely out of ammunition to simulate the scrounging of ammo found on the battlefield or taken from fallen comrades. Instead, when the last ammo point has been used, ammo is considered to be “low” and the unit tries to conserve its last ammo. Such units fire their weapons rarely and even then primarily in self-defense.
Machineguns on vehicles are treated like other Small Arms. Unlike these, however, ammo counts for MGs are displayed in the unit’s Detailed Unit Information window, and the vehicle MGs CAN run out of ammo. Vehiclemounted flamethrowers sometimes consume even more than one “ammo point” per shot when the target is near the maximum flamethrower range.
Long Distance Targeting
In the case of infantry squads, all weapons of a squad which are effective at the particular range to the target are fired automatically. This means that usually past 400 meters, only the squad’s light automatic weapon will fire. As the target comes closer first rifles, and then submachineguns, join in.
Ammo Loss Due to Casualties
Ammo points are reduced whenever a moving teamserved weapon (not squad!) suffers casualties. This simulates the “lost” ammo carried by the nowincapacitated men. Take a bazooka team for example. It consists of two men; a gunner and an ammo bearer. If one
|
36 |
Combat Mission: Barbarossa to Berlin |

The Men and Machines
of them is hit, expect to see the ammo available for the unit cut significantly. The same is true for machinegun teams, although these usually have more than one ammo bearer which means the ammo loss is not as dramatic.
Extra and Reduced Ammo Levels
During prepared defense situations, units often are awarded (by the scenario designer) extra ammo to “stockpile” within their fortified positions. Even if a unit suffers no casualties, the extra ammo is lost once the team decides to leave its defensive position, because there’s no one to carry it!
Units can also start out with less ammo than they normally can carry. This would be done to simulate units that are under-supplied or have recently had intense combat and have not yet had the chance to acquire replacement ammo fully.
Effects of Small-arms Fire
When a unit fires, the firepower rating is used to determine the chance of causing damage. Many factors are used in the calculations, like exposure of the enemy unit, the terrain it is in, the activity and suppression of both firer and target (running, crawling, hiding), the marksmanship (experience) of the firing unit — just to name a few.
Generally, the higher the outgoing firepower and the higher the exposure of the target, the more casualties can be expected with each “shot”. A random factor is built in, however, as “lady luck” always takes part in any combat situation.
Suppression
Even when no casualties are caused, incoming fire always has a chance to suppress the target and other units nearby. The higher the effective firepower, the higher the chance of suppressing the enemy.
But suppression does not always mean that the enemy goes prone or runs away. Sometimes incoming fire will “only” change the enemy unit’s status from OK to Alerted
|
Combat Mission: Barbarossa to Berlin |
37 |

The Men and Machines
or Cautious, which might be enough to cause it to reevaluate its orders or return fire less effectively.
Small arms fire from a unit (simulating sometimes the firing of a dozen rifles and machineguns at a time) is NOT directed at one pinpoint area only. Instead, each “shot” affects an area around the target unit or zone, in which it can cause casualties or suppression. This area is bigger for the “area fire” command.
Infantry Casualties
Casualties for infantry squads and teams are tracked on a man-by-man basis instead of an arbitrary “unit strength” rating. When a squad is fired at, the game determines how many and which of its members are hit. When a man (or men) of your unit has been hit, you can see this immediately in the detailed info window, because the weapon carried by that particular soldier is removed from the list, and the firepower ratings adjusted accordingly.
Example: a German Rifle 1944 squad consists of 6 soldiers armed with the K98 bolt action rifle, two MP40 submachineguns and one MG42 light machinegun. If the squad is hit and suffers one casualty, one of these weapons (and the soldier carrying it) is removed. You might lose a rifle, the submachinegun or — if you’re unlucky — the MG42 gunner.
However, important squad weapons — like machineguns (e.g. MG42s) as well as light anti-tank weapons — might be picked up by another squad member even if the man initially carrying the weapon is hit. In such a case, one of the squad members drops his own weapon and acquires the more important one.
Casualties do not necessarily represent dead soldiers. In fact, most of the soldiers regarded as casualties are not dead, just (more or less) seriously wounded. But the end result is the same since the soldier is not capable of fighting any more and is removed from the squad as a casualty. Only at the end of the battle is the actual distribution of wounded vs. killed determined (randomly). A portion of the casualties sustained might be wounded just lightly and return for subsequent battles (during operations).
|
38 |
Combat Mission: Barbarossa to Berlin |

The Men and Machines
Casualties for infantry units have several effects during the course of a game. Besides an adverse effect on a unit’s morale, there is a loss of firepower as individual weapons are removed. Additionally, if a heavy infantry weapon (e.g. most mortars and heavy machineguns) loses most of its crew, not only is ammunition lost if the unit attempts to move, but when only one man remains the weapon becomes entirely immobilized because a single man simply cannot effectively carry the weapon, ammo, and personal equipment by himself.
Hand-To-Hand Combat
Up close and personal, this kind of combat usually does not last very long, as one or the other side (and often both) are decimated quickly and either surrender or are completely annihilated. Close combat starts when two infantry units are within approximately 20 meters or so from each other. You can recognize hand-to-hand combat by the sounds of shouts and rifle butts knocking on helmets, as well as liberal use of grenades by both sides. The victor usually is the one that had some combination of superior numbers, close-range firepower (e.g. SMGs), better experience, and suppressing fire from other friendly units.
Normally, small arms like rifles and machineguns are too weak to cause serious damage to armored vehicles. The exception is lightly-armored vehicles like halftracks and armored cars, or “soft” vehicles without any armor (e.g. jeeps, trucks, and assault boats). These can indeed be penetrated and even destroyed by small arms fire. The penetration chances decrease with distance, but the HMG42 can destroy lightly armored halftracks or armored cars out to as much as 200 or 300 meters depending on angle.
But even if no penetration is achieved, small arms fire can still be effective against armored targets. It can cause crew casualties if the target vehicle is “unbuttoned”, or force it to button up. Open top vehicles, like the SU-76M tank destroyer or the Hummel assault howitzer, are also vulnerable to small arms fire. Firing rifles from a higher elevation right into the top of such a vehicle usually
|
Combat Mission: Barbarossa to Berlin |
39 |

The Men and Machines
achieves good results in Combat Mission: Barbarossa to Berlin, as it would in real life.
The closer the armored target, the more options are available to destroy it. Many units have specialized antitank weapons available later in the war (see SPECIAL EQUIPMENT section), but all infantry squads and HQs have hand grenades, which can be used for a close assault against a tank. Hand grenades work best against open-top vehicles, but can also be used — albeit less effectively — against buttoned up tanks. This simulates the occasional hero climbing on, or right up to, an enemy tank and placing the grenade in a vulnerable spot. Demolition charges and grenade bundles are very useful anti-tank weapons at very close ranges by providing extra “punch”, as are rifle grenades (used by the Germans), which can take out light armored vehicles at medium distances. By the far the best close distance anti-armor weapon are magnetic mines, which are placed or sometimes thrown on enemy tanks and stick to the metallic surface of its armor; Molotov cocktails can also be used effectively against opentop vehicles and — to a limited degree — against armored targets.
The main problem with using these weapons is that the infantry unit often needs to get within throwing distance to an enemy tank, and often expose itself to the tank or — much worse — other enemy units covering the tank. There is a good reason why most nations awarded medals for individuals close-assaulting enemy armor, and why a good number of those individuals didn’t survive the war…
Special Equipment
Panzerfausts, demolition charges, rifle grenades and other special infantry squad weapons are handled automatically by the TacAI. The player does not give direct orders for the use of these weapons; their actual use is determined instead by the TacAI, but by manually targeting a close-by enemy tank, the TacAI is “encouraged” to use special equipment against that target – if in range.
|
40 |
Combat Mission: Barbarossa to Berlin |
![]()
The Men and Machines
Panzerfaust
A short-range, one-shot antitank rocket launcher commonly used by late-war German infantry squads. They come in four different types and three ranges (two types are 30m, one each is 60m and 100m) depending on the scenario date.
If an enemy armored vehicle comes within range, your squad tries to fire its Panzerfaust. However, suppression can reduce the likelihood of this significantly, and additionally your troops will be reluctant to fire at distances close to the weapon’s maximum effective range as the chance for a miss is high. Sometimes your troops might even fire a Panzerfausts at enemy infantry if the enemy is heavily dug in and/or your unit is carrying several Panzerfausts and feels it can spare one for antipersonnel use.
Demolition Charges
Usually carried only by engineers, these bags of explosives are automatically used to clear minefields, destroy enemy units in close combat, or knock out fixed fortifications. This weapon packs a lot of punch and will usually be enough to at least immobilize a tank!
Rifle Grenades
German squads might be armed with special grenades which can be fired using a modified rifle. They provide a light anti-tank capability at greater ranges than hand grenades or demolition charges.
Grenade bundles
A bundle of six or more grenades to provide extra “punch” — used often against lightly armored targets, which would normally withstand the impact of one hand grenade alone. An improvised anti-tank weapon. It can take out a tank or most often at least immobilize it, but don’t count on it.
Magnetic mines
Anti-tank charges designed to stick to the metal surface of tank and vehicle armor. Usually placed on a vulnerable
|
Combat Mission: Barbarossa to Berlin |
41 |

The Men and Machines
spot on a tank, like top armor, engine compartment cover, the tracks or hatches to maximize damage. During the war, Germany developed a special anti-magnetic paste called “Zimmerit” to prevent magnetic mines from sticking to the tanks. Ironically, Germany’s opponents never used magnetic mines.
Panzerwurfmine
These are hand-held shaped-charge grenades with fabric “wings” or a directional strip that help the charge arrive “head on” when contacting armor after being thrown through the air. The Russian “RPG-43” (not to be confused with the modern Russian RPG) is a similar weapon.
Molotov cocktails
Essentially, a bottle filled with a flammable liquid, designed to burst into a ball of flame upon impact. There are various designs of Molotov cocktails, ranging from rude (a bottle of gasoline with a piece of cloth, which is ignited before throwing) to sophisticated (specially manufactured glass containers with a mix of gasoline and other chemicals and a more effective ignition mechanism). The end result is usually the same — the target is engulfed in a ball of flame which continues to burn for some time. It’s meant for use against armor, though its effects are limited, unless a critical hit against the engine compartment can be achieved, or the armored vehicle is open topped or unbuttoned. The Russians also developed a special launching mechanism for Molotov-like projectiles, called Ampuloment, which was able to hurl a Molotov across bigger distances, and even though widely used, this mechanism never proved to be very effective.
|
42 |
Combat Mission: Barbarossa to Berlin |

The Men and Machines
Anti-tank
Ammo Types for Guns/Mortars
Ammunition is tracked individually for heavy guns (tanks, ordnance, infantry anti-tank weapons, and mortars). The five types of ammo are:
“he” — High Explosive (HE)
Rounds of this type carry a significant explosive charge and are intended to generate on impact as many shell fragments (shrapnel) as possible, thereby increasing the lethal radius against soft targets (infantry, lightly armored or open-top vehicles) but sacrificing penetrating power against more heavily-armored targets.
“ap” — Armor Piercing (AP)
This type of shell (or shot) uses kinetic energy to punch through armor plate and has little or no explosive charge. This makes it ideal for use against armored vehicles but generally ineffective against soft targets.
“hc” — Hollow Charge
Also referred to as HEAT ammunition, this projectile uses a “hollow” (or “shaped”) explosive to focus a thin jet of hot gas against armor plate, literally melting a hole through it instead of smashing through with brute force (like AP ammunition does). Because it does not rely on kinetic energy, a HEAT round’s penetrative capability does not decrease over long range.
“c” — Canister
Canister ammunition is not unlike a shotgun cartridge — a lightweight shell breaks apart (intentionally) and releases several hundred steel balls that spread out laterally. It’s deadly against soft targets at short range (within about 200m) but ineffective against hard targets or at long range.
Russians use it in 57mm and 76mm tank guns. Germans use it in their 75mm “short” gun, like on the early StuG III.
|
Combat Mission: Barbarossa to Berlin |
43 |

The Men and Machines
“t” — Tungsten Core
Known by the Germans as PzGr40 (Panzergranate 40). This type of projectile is lighter than a standard AP round and can be fired at a higher muzzle velocity. It has a highdensity shatter-resistant metal core (usually made of tungsten) with greatly improved penetrative power against armor. The drawback to tungsten ammo is that its smaller (core) caliber and lighter shell mass mean that kinetic energy is lost more rapidly over long distances, and the shell has a tendency to ricochet off steeply sloped armor. But the increase in velocity and shell strength almost always make up for these drawbacks. Tungsten is a relatively expensive material meaning these shells are generally rare. By 1944 Germany suffered from a severe shortage of tungsten and other metals, and so had virtually no PzGr40 available.
“s” — Smoke
These projectiles are designed to generate a thick smoke screen as cover for other friendly forces. Smoke ammo causes no damage if fired against enemy infantry or armor, but generally blocks LOS through it for a short time.
Designer’s Note: understand the above five ammo types as basic categories, used to describe the countless types and models of projectiles used during the war. Internally, Combat Mission: Barbarossa to Berlin tracks the weight, muzzle velocity, ballistic coefficient and size of explosive charge of all the different shell types from all the different guns in the game individually. The AP ammo generally used by the Soviets until April 1944 (uncapped AP) is NOT the same that they use thereafter (ballistic-capped APBC — exceptions: 122mm switches over in August and 100mm never switches to APBC). The APBC is generally more powerful partly because AP ammo was poorly manufactured, especially in 1941, and also because Russian APBC has a blunt nose shape which ‘grips’ on contact and does reasonably well against highly-sloped armor. NOTE: Russian 45mm AP ammo in 1941 is especially poorly made.
Selecting Ammo Type
Your units decide, based on your orders and the type of target they are about to fire at, which ammo type to use.
|
44 |
Combat Mission: Barbarossa to Berlin |

The Men and Machines
You cannot order a tank specifically to fire tungsten ammo, for example. The tank commander (read: TacAI) is responsible for the choice of ammo and usually tries to first fire some regular rounds to “bracket” the target. The tank commander uses special ammo once a hit is likely to be achieved, but only when the standard type proves ineffective.
Anti-tank gunnery
The phenomenon of armor penetration by projectiles is a complex matter. Unlike many other wargames, Combat Mission: Barbarossa to Berlin simulates the process by modeling real-world physics instead of abstract CRTs (Combat Resolution Tables).
Hit Chance
First of all, an anti-tank round — regardless if fired from an anti-tank gun, a light infantry anti-tank weapon like a panzerschreck or another tank — has to hit its target. As a guideline, a Hit Chance is shown whenever you order a unit to fire at an enemy armored vehicle. The hit chance is calculated based on many different dynamic factors, which also change constantly during the course of an Action Phase — but it does give the player a rough idea about the capabilities of the firing weapon.
Some factors taken into account when calculating hit chances are
•size of the target (the silhouette rating)
•facing of the target (vehicle sides are usually bigger — longer — than the front)
•distance between firing unit and target
•exposure of the target (it’s much more difficult to hit something which is obstructed from view by trees, a stone wall, a house or a slope — see HULL DOWN)
•the accuracy of the firing weapon, which is often directly proportional to its muzzle velocity, i.e. a faster shot means a flatter trajectory and easier aiming
•the experience rating of the firing crew
•number of previous rounds already fired at this target, which allow the gunner to “bracket”
|
Combat Mission: Barbarossa to Berlin |
45 |

The Men and Machines
•ammunition type, caliber, and weight
•the optics of the firing unit
•if the firing unit and/or target are moving. The hit chance is dramatically reduced when the firing unit is on the move.
Hull Down
One of the best tactics to enhance the survivability of your armor is to occupy hull down positions. “Hull down” means that only the turret or superstructure is visible to (and hittable by) the enemy, thereby minimizing the target area tremendously (the silhouette of a vehicle is reduced) without sacrificing one’s own ability to fire. Hull-down vehicles are also harder to spot in the first place.
Hull-down positions are not as easy to find as one might think, though. What makes it so difficult is that a hull-down position is always relative between the firing unit and the target. It is entirely possible to be hull-down against one tank, while being in full view of another one. Only rarely will you find a natural dip in the terrain large enough to fit a tank which also provides hull-down status in multiple directions. (Note: in some scenarios you might be allowed to dig in your tanks, however, which achieves exactly this result).
Experience is what it takes to spot good hull-down positions. Hull-down positions can be found anywhere, all the time, and not only in “holes” but even on top of a hill. If your tank is far enough off the ridge, only its turret/ superstructure will be visible to targets on the opposite side.
The “seek hull down” order in Combat Mission: Barbarossa to Berlin is intended to make finding hull-down spots relative to ONE specific spot on the map easier for the average player, but it is a command best used while out of contact with the enemy and represents the ability of pretty much any tank crew to find a hull-down spot given enough time and preparation. For getting hull-down during the heat of combat, you might be better off scout the map yourself and use your best judgement. Here, the LOS or TARGET tool will aid you, as the words “hull down” will
|
46 |
Combat Mission: Barbarossa to Berlin |

The Men and Machines
appear over the targetted area or unit as soon as your unit has reach a hull-down position.
Misses
If a shot misses, it does not magically disappear. Instead, the round is tracked to its impact point. Since the trajectory of gun rounds is modelled realistically (i.e. rounds drop by gravity as they travel), this might mean that a missed projectile ends up somewhere behind the missed target in the ground or, if fired too short, in front of it. But elevations can change this dramatically, and when a target on a hill is missed, the round can easily travel hundreds or thousands of meters further.
Wherever the impact point lies, damage is caused. If a round which missed the intended target sails further and lands near another unit, damage is assessed just as if the unlucky target was the intended one. It won’t happen often, but it can.
Armor Penetrations
When a gun round hits an armored target, it does not mean an automatic kill. Far from it — both Axis and Allies had tanks in service which could shrug off direct hits, especially if the shell came from long range and at an oblique angle.
Some factors taken into account when determining whether a round penetrates armor are:
•armor thickness for front/side/rear as well as top/ turret/upper hull/lower hull
•armor slope for all of the above
•Side angle (i.e. obliquity)
•Striking velocity (reduced by air resistance as the shell travels)
•Armor quality (i.e. metallurgical flaws)
•Face hardened or homogeneous armor plate
•Brinnell Hardness Number (BHN)
•Shot-to-plate diameter ratio
•Shell “cap” type and strength
•Special ammo (like tungsten rounds)
•Shot shatter
|
Combat Mission: Barbarossa to Berlin |
47 |

The Men and Machines
•Shot traps (a design flaw in the vehicle shape which tends to “catch” shells rather than let them ricochet away)
•Armor skirts (“Schürzen”)
Note: Combat Mission: Barbarossa to Berlin does not use a generic armor “strength”, but real-life values taken directly from historical sources: armor thicknesses in millimeters and slopes measured in degrees.
A successful anti-armor round penetrates the armor, sending molten metal fragments and spray into the crew compartment, and — if the shell also contains an explosive charge — exploding inside the vehicle. In many (but not all) cases this means that the penetrated vehicle is either physically damaged in some fundamental way, members of the crew are incapacitated or panicked, or both. A vehicle so damaged is called “knocked out”, and surviving crew members hastily “bail out” of their wrecked vehicle before the next shell arrives. Sometimes the results are even more horrific. If the penetration contacts live ammunition inside the vehicle, or a tank of gasoline, the whole vehicle can burst into flames, otherwise known as a “brew up”. Sometimes no one escapes these deadly infernos.
The lethality of a penetration takes into account the mass of armor sent into the interior, the likelihood of the armor to fragment, and the size of the bursting charge of AP ammo, if any (and the chance it might not function properly on penetrations which don’t make it cleanly through). You’ll find that AP “shot” (which has no explosive capacity) tends to to a better job penetrating armor, but less damage once inside compared to AP “shells” which have an explosive charge. With small guns — especially antitank rifles — it often takes multiple hits to knock out tanks, and often this will be from injuring or killing the crew rather than significant physical damage to the tank itself.
Armor penetrations that penetrate less than 15% “beyond” the armor resistance will be displayed as “partial penetration” and often are less dangerous to the crew of the tank which was hit. (Note: the reduced lethality is not a hard cutoff at 15%, that’s just the cutoff to show the ‘partial’ message).
|
48 |
Combat Mission: Barbarossa to Berlin |
 Loading…
Combat Mission is one of the more challenging simulation wargame series out there and the most recent Cold War installment, Combat Mission: Cold War, continues that trend. New players not familiar with the series or other strategy games of a similar nature may find themselves overwhelmed by the game’s complexity, tactical intricacies, and engine eccentricities. We put together a list of pointers and tips to ease players into Combat Mission: Cold War.
Learn Hotkeys
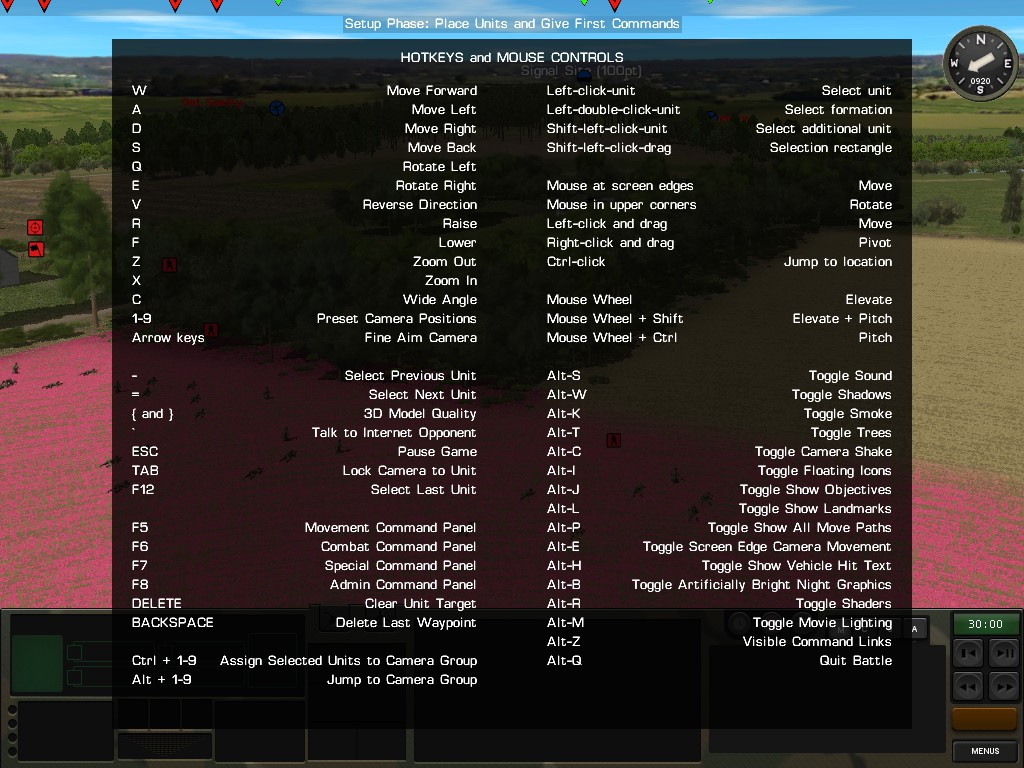
Commanders will spend most of their time ordering troops to complete various objectives, such as taking vital ground or eliminating specific opposing units. Every action or behavior has to be manually programmed for every single unit, if the player wants them to act.
Players have the option of selecting a unit and then pressing the desired command in the command window, which can take up a lot of time and take attention away from the meatier tactical decision-making.
Prospective military leaders: take the extra time and spend additional energy to learn the command hotkeys for ease of troop control.
Press Space For Command Quick Access
A great entry point for learning hotkeys is to utilize the unit order quick access menu by pressing the spacebar. With a unit selected, pressing the spacebar will bring up a separate orders menu on the cursor. This can be a useful alternative to hotkeys, especially if playing in real time as it allows for relatively quick response.
Activate Unit Movement Path UI
One of the central concepts of Combat Mission’s battle system is fighting with incomplete information. Every way the player can get information on their own and enemy troops helps in lifting the veil over the battlefield’s unknowns. Pressing Alt+P will reveal all currently active unit orders and moves and is a far more efficient way of tracking unit behavior than manually selecting each unit in sequence.
Hold Shift For Movement Waypoints
While the Combat Mission series may have a more complicated command system than other strategy games, the classic waypoint creation system makes a welcome home in the game’s order system. Holding shift while setting and programming multiple orders in sequence allows for granular control, as well as letting a unit perform different actions without needing constant watch from the player, giving more time for the player to observe other areas of the battlefield.
Make Shorter Orders
Speaking of granularity, Combat Mission’s combat system benefits from finesse and careful precision when utilizing units, as weapons are deadly and can make quick work of their targets. Short orders give the necessary flexibility and accurate control to maximize unit performance and terrain benefits when moving, attacking, or performing complex maneuvers.
Stick to Cover
The best defence in Combat Mission is simply to not be seen by the enemy. As such, when moving around the map, preparing an attack, or establishing a defensive line, any kind of concealing or covering terrain that blocks enemy line of sight will help friendly troops stay alive. Terrain can range from thick woods, buildings of varying size, or even the smallest hill or embankment.
Utilize Fire Arcs
Most firefights and engagements usually start as ambushes when troops stumble into the range of a hidden tank or weapon system. It’s also important not to let troops give away their position prematurely by firing weapons from beyond their effective range.
All units with a weapon can set firing arcs or overwatch areas, which indicates at what range and at which location the unit in question will begin firing at. This order is the best way to set up ambushes and coordinate multiple units to fire on approaching targets.
Split Infantry Into Teams
Infantry will be the most common unit type on the field and most combat-oriented infantry formations will come in squads of up to ten men. All squads can be split further down into teams.
Splitting infantry into teams can be a valuable tactic when you’re getting close to expected enemy positions to give extra precision and granularity of control over the infantry and their weapons. In addition, by splitting up infantry into teams you can cover more ground and effectively distract enemy fire.
Utilize Forward Observers
Information and knowledge is power in Combat Mission and being able to spot the enemy before they get a sense of your own positions can give you a massive tactical advantage. Aside from dedicated observer units, any unit can act as an observer with infantry being especially useful to sneak forward and act as a screen in front of tanks or other armored vehicles.
Some vehicles with specialized equipment, like infrared sights, can also act as useful intelligence gathering units. In essence, when defending, attacking or just generally moving in the opponent’s expected direction, deploying small and sneaky units that can stay ahead and discover enemy positions will help develop a more complete picture of the tactical landscape.
Hopscotch Movement When Attacking
An attack against prepared enemy positions shouldn’t always rely on the often costly frontal attack where all troops simultaneously stand up and go. Instead a nuanced approach is more useful, especially when weapons are exceedingly deadly on the Cold War battlefield.
Some units need to be committed to providing a base of fire and suppressing enemy positions to minimize enemy retaliation. Once a friendly group of troops moves a small distance forward, then another bounds forward as well. This staggered approach means there’s always some unit keeping eyes on the enemy and covering troops that may be exposing themselves while moving.
Combat Mission: Cold War is available on PC.
READ NEXT: 15 Best Strategy Games For Beginners
Some of the coverage you find on Cultured Vultures contains affiliate links, which provide us with small commissions based on purchases made from visiting our site. We cover gaming news, movie reviews, wrestling and much more.
Как обещал, пишу пост про основы механики Combat mission. Останавливаться на интерфейсе не буду, есть в мануале и в целом все очевидно, в крайнеми случае можно потыкать кнопки и посмотреть, что будет. В целом, отдача приказов юнитам не намного сложнее чем в РТС. А вот с геймплеем все несколько сложнее. И интереснее, кстати. Для начала рассмотрим, чем СМ отличается от других игр.
Сейчас реалистичной ДМ в компьютерных играх никого не удивить, столкновение снаряда с броней под определенным углом на определенном растоянии просчитаь не сложно, точность стрельбы, скорости движения танков и т.п. так же легко расчитывается. Но вот с обнаружением и моделированием скорости открытия огня все сложнее, тут парой формул не обойтись. А ведь это — ключевой фактор при моделировании боя. В современной войне — вообще основной, при мощности современного вооружения важнее кто первый выстрелит, «Брэдли» массово выпиливали Т-62 из инвиза несмотря на то, что у Т-62 пушка больше и броня толще.
И в СМ этот момент отображается наиболее подробно.
Используются элементы нечеткой логики, юнит может знать о вражеском юните:
-самую общую информацию, «вон там 10 минут назад видели танк» — знак вопроса, чем более устаревшая информация — тем бледнее значок.
-может видеть, что там есть враг, но не наблюдать напрямую. «В кустах есть пехота, видно движение, но прицелится нельзя». Знак вопроса, могут постреливать туда наугад, особенно если враг пропал в ходе перестрелки.
-враг наблюдается, тут все понятно.
И если у юнита есть информация о враге — он смотрит в то место более внимательно и обнаруживает цель быстрее, если она там стоит до сих пор. Как следствие — если выехать на танке в одно месте и закатиться обратно, то второй раз в этом же месте лучше не вызжать, заметят быстрее.
И, самое интересное — информацией можно делится! Информация о противнике передается по командной цепи, если есть связь. (связь, кстати, бывает визуальная, голосовая, через планшеты и бортовые компьютеры) Передача информации занимает время. Если цель обнаружило отделение, то пока инфа дойдет до командира роты и до отделения из соседнего взвода — пройдет куча времени. А если допустим расположить эти отделения в радиусе голосовой связи — гораздо быстрее.
И тут можно применять различные хитрости. Допустим, есть мотострелковая рота и танковый взвод, не объединенные в одно подразделение. Они не будут передавать инфу по радио друг другу. Но если отослать от ком. роты заместителя поближе к командиру танкового взвода и приказать последнему открыть люки и высунутсья — то они будут омбениваться инфой и передавать своим юнитам по командной цепочке.
Это все мелочи, и можно играть и без этого. Но эти мелочи могут решить. И тут, кстати говоря, ярко показывается преимущества советских танковых бригад с ротой танкодесантников. Автоматчики спрыгивают с танков, заглядывают за препятсвия, засекают цели, передают данные танкистам. Играли с diekroten встречный танковый бой, возможно именно это и решило исход боя. Эх, жаль скрины потер.
Так, кажется я перескочил вперед… В следующем посте рассмотрим более базовые вещи, как перемещать юниты, как атаковать.
Overview
Combat Mission comes with a tutorial campaign. This guide is meant to go along with that campaign to teach you the basics of the game.This guide is available in the manual on page 15 if you would prefer to use that. I felt that having it within Steam would allow easier access as you can now easily see it from inside the game by opening the Steam Overlay.
Getting Started
How to Begin
When you are ready to begin this tutorial, select “Campaign” from the main menu and then select “Training Campaign”. Select “Fight!” to start the campaign. You will be asked to select a play mode and skill level. Combat Mission: Shock Force 2 has two different play modes available for campaigns: turn-based and real time.
For this training campaign it is recommended that you choose Veteran difficulty and We-Go.
Campaign Briefing

You will now be given the campaign briefing. This briefing will inform you of the entire
campaign’s scope and details, accompanied by an assortment of maps. Left-click “OK” to
move to the first scenario of the campaign. After the loading screen, you will again find
yourself at a briefing screen, this time for the first mission. You should read briefings carefully for vital information to your mission, but with a glance at your maps you can glean the basic facts.
When you are done reading the briefing, press “OK” to enter the mission. If you wish to revisit
the briefing, you can always find it by left-clicking on “Menus” in the lower right-hand corner
and then “Briefing”.

What is a Campaign?
In Combat Mission, a Campaign is a series of missions that are linked together, usually with an accompanying story arc. Missions are single battles, and winning or losing them may change the course of the Campaign. At the end of the Campaign, all mission results are tallied up and the Campaign results are determined. You can typically lose some missions and still win a Campaign, or vice versa.
The Training Campaign is designed to let you practice with a variety of units and equipment while teaching you some basic tactics for success in Combat Mission. The campaign is four missions long. Here’s a peek at what the missions offer:
Mission 1: “Basic Gunnery Range”. Learn basic movement and combat commands on a practice patrol and firing range.
Mission 2: “Advanced Gunnery Range”. Learn more advanced infantry and vehicle topics. Mission 3: “Fire Support Training”. Learn the ins and outs of directing fire support missions from mortars, artillery, and air support. The basics of night vision, spotting, and information sharing are also covered.
Mission 4: “Practical Exercise”. Use basic tactical skills to defeat an opponent who shoots back.
Mission 1: Basic Gunnery Range — Camera and UI
The User Interface
Upon entering the mission you will be greeted with a view of your troops on a road leading up
to the training range. Before you begin to give them commands, take a moment to become
accustomed to the interface. Most of the screen is occupied by the view of the
battlefield, with the user interface located along the bottom of the screen. Select
one of your squads by left-clicking on the round blue icon that floats above them.
The squad icon will look like a soldier. The interface below will then be populated
with information on that unit, as seen in the image below

On the far left is the Unit Info Panel (1), where you will find basic information about the selected unit, including what type of unit it is, its name, experience, ammunition levels, and so on. The next box to the right (2) shows what special equipment the unit is carrying, such as binoculars, night vision equipment, and rocket launchers
The center panel, called the Team Info Panel (3), gives detailed information about each soldier in the squad, such as what weapon they are carrying, whether they possess a specialty skill, and whether they are wounded. Each column represents a different team within the squad.
The panel furthest to the right (4) is the Command Panel. Here you can select Commands to give to the selected unit. The Commands are separated into four tabs by function: Movement, Combat, Special, and Admin. Move between tabs by either using the hotkeys F5-F8 or by pressing the buttons above the panel: M for Movement, C for Combat, S for Special, and A for Admin. You can also bring up a pop-up list of Commands by pressing the Spacebar. In this mission we will only be concerned with the Movement and Combat tabs. Don’t worry about what all the Commands mean just yet; we will get to them later.
At the bottom-right of the interface (5), you will find the Menus button. Left-clicking this button will bring up various game menus, such as the mission briefing, a list of hotkeys, a save game function, or an option to exit the mission. The big red button will start the turn, while the buttons above that (6) will advance the turn, pause the game, and control the replay feature in WEGO play mode. The white numbers tell you how much time remains before the mission ends
Take some time to explore the interface. You should also take a look at the Hotkeys window within the menu options (5), where you can find some commonly used keyboard shortcuts. If you ever want to know more about the equipment displayed in the User Interface, such as rifles and tank models, you can consult the Encyclopedia chapter of this manual
Using the Camera
Combat Mission features a precision camera for viewing the detailed 3-D battlefield from any angle or position. Because this camera is much more flexible that those found in most games, it may take some practice for you to smoothly move around.
**Panning the Camera (Moves camera across the battlefield)
Mouse: Press and hold the left mouse button and drag the mouse. The camera will pan and follow your motion. The further you drag the mouse, the faster the camera will move.
Keyboard: Use the W, A, S, and D keys to pan the camera. Press and release to make small incremental adjustments, and hold the keys down to pan the camera quickly
**Swiveling the Camera (Changes camera facing)
Mouse: Press and hold the right mouse button and drag the mouse in any direction. The
camera facing will follow the motion of the mouse. Once again, the further you drag the mouse, the faster the camera will turn
Keyboard: Use keys Q and E to rotate the camera to the left and right.
**Altitude of the Camera (How close camera is to the ground)
Mouse: Scroll up or down with the mouse wheel to raise and lower the camera.
Keyboard: Use key R to raise the camera and key F to lower the camera.
**Other Useful Camera Controls
- You can jump to preset altitudes by pressing keys 1-9, with 2-4 being the most useful
- CTRL-left clicking on the ground will instantly jump the camera to that point. This is
useful on large maps where you can avoid panning for long distances. - Pressing V will flip the camera view around 180 degrees.
- The camera can be zoomed up to 20x. Press X to zoom in, and Z to zoom out
**Camera Tips
It is best to make slow dragging motions with your mouse when moving the camera
You can also move the camera by touching the edge of the screen with the cursor. The camera will quickly pan in that direction. This behavior can be disabled if desired.
Mission 1: Basic Gunnery Range — Basic Movement
Selecting Units
A unit in Combat Mission is a vehicle or a group of soldiers that receives commands and act together as a group. Soldier units are typically either teams of 2-7 men or
squads of 2-3 teams. When you give a command to a squad unit or team unit, all of the soldiers in that unit will carry out the command. Each vehicle is always a single unit. Each unit is marked with a floating icon that floats above it on the battlefield.
To select a unit, left-click on the floating icon or on any of the soldiers in the unit. The floating icon will blink and pulsing green circles will appear underneath the soldiers. To select a group of units, press and hold the Shift key, then, while holding down the left mouse button, drag a box around the units you wish to select. In this manner, you can give multiple units the same movement or targeting command. You can also select all of the units within a small formation, such as a platoon, by double-clicking on the floating icon of any of the units in the platoon. This will automatically select all of the units belonging to the platoon. You can also select multiple units by holding the Shift key while you left-click on units.
**Move Out!
Your first objective is to move your platoon to the objective labeled “(1) Range Control”. The objective is signified by white text floating above tinted ground. To fulfill this objective you must move a unit onto it. You can toggle the display of objectives by pressing ALT-J.

- Select your platoon headquarters (HQ) by leftclicking on the flag-shaped floating icon.
- Ensure that the Movement panel is open by pressing the F5 key.
- Left-click on the Move command button and then left-click on the tinted ground inside the
objective. A white ball will appear at this point with a colored line connecting the HQ unit to the
point. This white ball at the destination is known as a Waypoint, and when the action starts the soldiers will move themselves to this point. - Right-click anywhere to end the order.
IMPORTANT: If you mess up an order and want to re-do it, press the Backspace key to delete the last waypoint.
Repeat this process for your three rifle squads following the HQ. Assign them Move commands to anywhere in the objective area. You can move troops into buildings by simply left-clicking on the building. If the building is more than one floor tall, a prompt will pop up asking you to choose which floor you want to move the unit to. Try moving one of your rifle squads into a building; you will know
that you have successfully set a waypoint in the building if a waypoint appears inside the building.
Note: Use the hotkey Alt-P to activate Show All Move Paths: this will allow you to see other units’ movement orders when you have a unit selected.
Your orders for this turn are complete! When you are ready to watch the
action, left-click the red button in the lower right-hand corner of the
screen.
You will now watch for sixty seconds as the game plays. Remember,
you will not be able to modify or give any new orders until sixty
seconds have elapsed. The Move command orders soldiers to walk
at a relaxed pace, without undue regard for potential enemy activity.
This command is useful for moving units long distances without tiring
them out. Some units are that tired, burdened with an excessive load
of ammunition, or carrying very heavy equipment may also be
restricted to Move and will not be able to move any faster.
You will notice that, as the first soldiers move over the objective space,
the tinted coloration disappears and a message informs you that
your unit has reached the objective. This is a “Touch” objective, and
entering it once will award you victory points; you will not have to
occupy it for the entire battle. All of the objectives in this mission are
Touch objectives. In contrast, “Occupy” objectives require you to
keep troops inside the objective zone to earn victory points. If enemy troops are also in an
Occupy objective, then the objective is contested and neither side will be awarded points.
You can either watch your troops move for the full sixty seconds, or you can left-click the red
button to end the replay phase immediately and skip to the next turn. If you watch the full
sixty seconds, you will see a “DONE” text pop up, at which point you should left-click the red
button to enter the next turn. You will then be back in Command Phase and can give your
units fresh commands, or modify pre-existing ones that have not been completed yet.
**Quick Move Command
Your training is behind schedule! Issue your platoon a Quick movement command to the objective “(2) Trees”. Remember to right-click to end the order after you’ve set down the Quick command. Your men will now run at a slow jog, much faster than the previous Move command. The extra speed will come at a cost, however. The faster your men move, the less aware they are of their surroundings, and the more likely the enemy is to spot them. Quick tends to be the most commonly used movement speed for troops in combat, since it offers a balance of speed, awareness, and physical exertion
Reminder: If you mess up an order and want to re-do it, press the Backspace key to delete the last waypoint.
After issuing your orders and beginning the action, you will notice that your troops automatically move around obstacles in their path, such as the tall walls around the compound. Units usually do not follow your commands precisely, and will alter their path as needed to avoid obstacles and take advantage of terrain. Depending on where you where place the Quick commands, it may take one or two turns for your troops to reach the objective.
**Fast Move Command and Fatigue
It’s time to sprint! Issue the platoon a Fast movement command to the “(3) Field” objective and start the action. The soldiers will now move in a fast run, covering a lot more ground in one turn. Fast is useful if you need to get somewhere very quickly without stopping for any reason. Running across
streets that may be covered by enemy fire is a good situation to use a Fast Command. However, this speed comes at a cost: fatigue.
After the turn has ended and you have entered the next Command Phase, you will notice that your squads display “Tiring” or “Tired” in the left-hand Unit Info panel of the interface. They have become fatigued from running and may have to rest before they can use the Fast command again. As long as they do not move too quickly, the unit fatigue level will improve over a number of turns as the soldiers catch their breath. Be careful to not run your troops too hard before they enter into combat with the enemy, or they may wind up being too tired to fight or move effectively!
Fatigue is affected by numerous factors, such as soldier fitness, ambient temperature, and how
much weight the soldier is carrying. Soldiers carrying heavy loads or in hot temperatures
will tire more quickly. If burdened enough, soldiers may not even have the Fast or Quick commands available to them.
Mission 1: Basic Gunnery Range — Multiple Waypoint Commands
Multiple Waypoint Commands
To conclude the patrol, you will move your platoon to the objective “(4) Small Arms Range” for some target practice. However, this time we will give them multi-waypoint orders. Select one of your units and give it a Move command somewhere halfway between the unit and the objective. However, instead of right-clicking to end the order, left-click a bit further ahead,onto the road. A second line and waypoint will appear. Right-click to stop giving Move commands. Now select the Quick command, and left-click on the “(4) Small Arms Range”objective, just next to the short wall running along the objective. Right-click again to stop giving commands.
Reminder: If you mess up an order and want to re-do it, press the Backspace key to delete the last waypoint.
Advance the turn. Your units will move to each of the waypoints in the order they were laid down. At each waypoint (the white pyramid-shaped joints connecting the colored lines), they will change movement speeds as commanded, so you will see your troops change from a walk to a jog as they arrive at the waypoint that separates the Move and Quick commands.You’ll also notice that waypoints are color-coded to the type of command they use: blue for Move, yellow for Quick, orange for Fast,and so on.
During the command phase, you can edit the movement command used by an already
existing waypoint by left-clicking on the colored line and selecting a new movement
command. The color of the line will change to match the new command. Left-click
anywhere on the map to stop editing the waypoint.
You can combine waypoints and movement commands in as many combinations as you desire. Adding extra waypoints is especially useful when following terrain features such as curved roads. You can adjust the location of waypoints after you place them by left clicking the waypoint and then ragging it across the map.
Mission 1: Basic Gunnery Range — Target Practice
It will probably take a couple of turns for your troops to reach the smalls arms range, depending on how fast you move them. When they reach it, they will automatically align themselves along the wall, spot targets, and begin shooting.
Combat Commands
For the most part, your troops will intelligently select their own targets without any need for commands from you. However, sometimes you will want to specify a target for your units. Select one of your units and open the Combat command panel (hotkey F6). Left-click on Target, then move the cursor onto the map. A line will be drawn between your unit and the cursor’s location. This line indicates your line of fire (LOF) and the distance to the target in meters. If the line is light blue, you have a clear LOF and can fire at the target. If the line is dark blue and pink, then the line of fire is blocked somewhere along the way and you cannot fire at the target. A grey line means that you can issue a fire order, but not all of the soldiers in the unit can see the target and fire at it.
Select the Target command and left-click on one of the walls, or buildings to designate it as a target, then advance the turn. Your unit will shoot at it until you order it to stop by using the Clear Target order in the Combat command panel.
You can also order a unit to fire at a specific enemy unit by left-clicking the Target command and then left clicking on either the enemy unit itself or the floating icon above it. Your unit will then attack it until it is destroyed, out of sight or range, or your unit is no longer capable of firing.
Issuing a Target order against the ground or a building will order the unit to perform what is known as Area Fire. The unit will fire at the terrain without knowing whether it is hitting any enemy units or not. Area Firing units will spread their shots around to cover the nearby terrain, and will automatically switch to target enemy units if they appear in the nearby area.

Note: The Clear Target command does not tell a unit to stop firing altogether, it just tells the unit that they are no longer required to fire at the target previously specified. If Clear Target is used, the unit will return to firing at will on its own targets.
**More Toys!
fter five minutes have elapsed (this should happen while your men are using the small arms range), reinforcements will arrive on the east end of the map. Two M1A2 Abrams main battle tanks and two M2A3 Bradley infantry fighting vehicles have arrived on the road. With these armored beasts, you have some real firepower! Move the tanks up to the objective “(5) Gunnery Range”. They will automatically spot and begin firing at enemy target tanks, changing targets as each is destroyed. Don’t worry, these enemy tanks are just targets; they will not shoot back.
**Target Light
Tanks and other armored fighting vehicles are usually equipped with not only a main gun, but also secondary weapons such as machine guns. Although vehicle units will usually choose the most appropriate weapon to engage a target with, you may want to save main gun ammunition by not wasting it on low-threat infantry targets. Giving vehicle units a Target Light command from the Combat command panel tells them to engage a target with secondary weapons only, such as machine guns.
Try giving one of your Abrams a Target Light command aimed at a building on the gunnery range. Since vehicles tend to carry a lot of spare machine gun rounds, this is a useful way to keep enemy infantry pinned down for a length of time. Don’t worry: if your tank spots another, more threatening target, it will engage that target instead to defend itself.
**Target Arc Command
Sometimes you will want your units to focus their fire in a specific area. The Target Arc command was made for this purpose. A unit with a Target Arc command will usually attack only enemy units that are located in the designated area, unless it feels immediately threatened by an enemy outside its arc.
Select an Abrams, then open the Combat command panel, and then left-click the Target Arc command. By left-clicking on the map twice, make a small highlighted arc in front of the tank.

You can use the Clear Target command to erase the Target Arc command. The tank will then continue to fire at targets, but it will no longer be constrained by the Target Arc command.
An alternative to Target Arc is Target Armor Arc. It functions the same as Target Arc, except that a unit with this command will only engage enemy armored vehicles within its arc, and will leave soft targets like infantry alone. This is useful if you do not want your anti-tank weapons to reveal themselves too soon against enemy scouts.
Anti-Tank Guided Missiles
Like many infantry fighting vehicles, your Bradleys are equipped with Anti-Tank Guided Missiles, or ATGMs for short. ATGMs are powerful weapons that can destroy main battle tanks (and any other target) at very long distances, often far exceeding that of tank cannons. ATGMs have enabled even light vehicles and dismounted infantry to be a severe threat to heavy vehicles such as tanks.
However, ATGMs have a number of drawbacks:
- ATGMs travel much more slower than cannon shells or bullets. A target in the crosshairs can potentially dodge the missile by moving behind cover or deploying a smoke screen.
- Most ATGMs must be actively guided by the operator all the way to the target in order to achieve a hit. This means that if the operator is spotted and killed or forced to take cover before the missile arrives, it will most likely veer off and miss.
- ATGMs cannot be used at extremely close ranges, because they require a certain amount of distance in order to stabilize in flight and acquire the target. The minimum required range will differ depending on the exact model of ATGM, but is typicallysomewhere from 75 to 300 meters.
**End
You have now completed all objectives for the mission. When you are ready to move on to the next battle, select “Cease Fire” from the Menus panel. This will end the scenario. Press “OK” to move past the After Action Report (AAR) screen to the next scenario (we will address the AAR screen in Mission 3).
At this point, you will be prompted to save your campaign progress. You should always make a unique save file at the beginning of every mission in a campaign; you might want to backtrack or replay a mission.
Note: Combat Mission DOES NOT MAKE AUTOSAVES. Always save between missions or before exiting a mission in progress!
Mission 2: Advanced Gunnery Range — setup phase, transporting troops
During your second day at the gunnery range you will learn more advanced commands with some new forces. You have some infantry mounted in M1126 Strykers and a platoon of mechanized infantry mounted in M2A3 Bradleys. We will use these troops to demonstrate a number of special commands and pieces of equipment. Notice that this time your troops begin the mission sitting on blue-tinged ground.
Setup Phase
Setup Phase is a special phase that occurs at the beginning of every scenario. During this time the battle is paused and you may arrange your forces around the setup zone instantly by using movement commands. The blue-tinged ground underneath your soldiers is called a Setup Zone, and is a special zone that exists only during the Setup Phase. There can be up to three different Setup Zones present per side.
A unit placed within a Setup Zone must start the battle somewhere within that same Setup Zone. A unit that is not in any Setup Zone is locked in place until the battle begins. During Setup Phase, you can give all units starting orders for the first turn, which they will immediately begin to execute when the battle begins. For this mission you don’t need to move your units in the Setup Zone, but you can rearrange them if you wish. In future missions, how you arrange your forces within the Setup Zone can be vitally important, especially if you are defending.
Transporting Troops in Vehicles
At the beginning, almost all of your infantry are riding in vehicles, which is a very common way to move your troops in Shock Force. Any vehicle that can carry passengers will have grey dots in its info panel. Each grey dot represents an empty passenger seat, while a green dot is a seat occupied by a passenger. You can order troops into a vehicle by simply selecting any movement command and clicking on either the vehicle or its floating icon as the movement destination. The troops will then move to the vehicle and mount it.
Dismounting is just as easy: select the passenger unit and give it a movement order anywhere. Once the vehicle has finished its own movement commands, if any, the passengers will dismount. You can also use the Dismount command in the Special command panel (F7). If the passenger unit is also the driver of the vehicle, as sometimes happens with light trucks such as Humvees, you’ll have to use the Dismount command, found in the Special command panel (hotkey F7).

Spend the first couple turns of the mission driving the Bradleys to the “Dismount” objective, and then have their passengers dismount there. Remember, you can either use the Dismount command, or simply give the passengers any movement command which will cause them to automatically dismount while they carry out their orders.
You should be careful about driving a vehicle laden with passengers in view of the enemy: one lucky shot from an ATGM or tank could destroy a whole rifle squad along with the vehicle! While armored personnel carriers and infantry fighting vehicles provide some degree of protection from small arms and shell splinters, any hits from bigger guns are likely to cause catastrophic damage to the passengers.
Mission 2: Advanced Gunnery Range — stacking commands
Stacking Commands
Let’s get your mech infantry to the small arms firing range. We’ll use this movement as a chance to show how stack multiple commands on a single waypoint.
Select one of the rifle squads that have just dismounted from their Bradley. Open the Movement command panel (hotkey F5), select Quick, and place a waypoint just shy of the Small Arms Range, on the dirt road that runs adjacent to it. Use the picture below as a guide.
Select the Quick movement waypoint by left-clicking on the colored line. The line will highlight, indicating that any orders you give will edit the waypoint. Open the Special commands panel (hotkey F7), and select Pause. A five second counter will appear above the waypoint. Once the unit reaches the waypoint, it will wait five seconds before moving on to the next waypoint. Left-clicking the Pause order repeatedly will increase the length of the pause and eventually remove it. Set Pause to 5 seconds (00:05) and left click anywhere on the screen to deselect the waypoint.
[link]
What you have just done is stack commands. A waypoint can contain one command each from the Movement, Combat, and Special command tabs. Stacking commands allows you to dictate very sophisticated orders to your units. The next waypoint you plot will contain a Movement and Combat order stacked on it. Refer to the picture as a guide.
Ensure that your infantry squad is still selected and that the first waypoint is not highlighted. Open the Movement command panel and select Slow. Slow orders your units to crawl on the ground. This movement command is very slow and tiring, but allows for maximum protection and concealment. Left-click inside the “Small Arms Range” objective to order them to crawl to it. Next, select the Slow waypoint by left-clicking on its line, open the Combat command panel (F6), and give the unit a Target Arc that covers a portion of the firing range. Notice that the orange arc comes out of the waypoint, and not the current position of the unit. The unit will adopt this covered arc as soon as it reaches the waypoint.
To summarize your units orders, they will Quick move up to the range, pause for five seconds, Slow move (crawl) to the “Small Arms Range” objective, then adopt a Covered Arc covering the range.
Repeat these instructions or mix it up with your own commands for the rest of the mech rifle platoon.
Mission 2: Advanced Gunnery Range — Vehicle interface, splitting squads, engineers
Vehicle Interface
Select one of the Strykers. Make sure you select the vehicle itself, and not a passenger unit.
You will notice that the Team Info Panel in the center of the UI strip has been replaced with
a new panel that provides detailed information on the selected vehicle.

From left to right:
- Shows the status of the vehicle crew.
- Describes the vehicle type and main weapon, as well as passenger capacity. Blue dots are crew members, and grey dots are open passenger “seats”. Green dots are passengers.
- Provides some basic comparisons on vehicle mobility
- This section has three sub-tabs. The first sub-tab with the bullets icon shows how much ammunition the vehicle carries, and what type. White text is ammunition carried for the vehicle’s own weapon systems, such as tank shells or bullets for the coaxial machine gun. Green-colored ammo can be Acquired by infantry and passengers.
The middle sub-tab with the wrench icons shows the status of vehicle subsystems. Individual vehicle subsystems, such as the gun, tracks, engine, radio, etc can be damaged or destroyed individually. A green square means that the subsystem is in optimal condition, a yellow or orange circle means that the subsystem is damaged, and a red “X” means that the subsystem has been destroyed. Destroyed or damaged subsystems will be at the top.
The last sub-tab with the shield icon lists general protection levels against various projectiles. From top to bottom the threats are: HEAT projectiles (ATGMs, rockets), large shells (tank gun), medium shells (30 mm autocannon), and small arms (machine gun or rifle). From left to right the icons represent protection against those threats from the front, left and right sides, and rear. The white-blue icons below list which types of special protective systems the vehicle is equipped with. You can look up their meaning in the Icons and Reference chapter.
Squad Splitting Commands
Squads can be split into their component teams using the Split commands in the Admin commands panel (F8). Select a squad, go to the Admin orders panel, and select the Split Teams command. Your squad will split into distinct team units, each with their own floating icon and ability to be given commands separately. There are a variety of other Split Team commands which can be very useful in the right situations. The Antitank Team option, for example, will split off one soldier carrying the squad’s antitank weapon, such as a Javelin or RPG-7, and an assistant to help him. To merge a squad that has been split, move the teams to the same spot and let them stay there for a moment. They will automatically merge into a whole squad. Only teams originally from the same squad can merge.
Engineers and Blasting
Next to the “MOUT Range” objective you have a Breach team (their floating icon looks like a shovel). This unit is an example of an Engineer unit, also called Sappers or Pioneers. Engineers are specialized combat units that are equipped with demo charges. Demo charges can be used to open holes in walls and buildings, allowing you to make new and unexpected entry points. This is an extremely useful tool in urban combat, where the enemy is usually covering the streets with fields of fire.
Blast
Units possessing demo charges or breach kits have access to a special movement command called Blast. Blast allows a unit to expend a demo charge or breach kit to blow through a tall wall or the side of a building. Additionally, enemy units on the other side will be heavily suppressed.

To give a Blast command, position a unit carrying demo charges or breach kits next to a wall or
building. Open the Movement command panel (F6) and select the Blast command. Place the
destination on the other side of the wall, or inside the building. The unit will go prone for a period of
time as it prepares (up to 10-30 seconds) before blasting its way through the wall. Use your breach
team to practice the Blast command throughout the MOUT training complex.
Mission 2: Advanced Gunnery Range — special equipment
Special Equipment
**The Javelin
The Javelin is a powerful ATGM that can kill any vehicle on the battlefield. Most American rifle squads have a Javelin stowed in their transport vehicle. Javelins are a vital battlefield asset: if you are the American player, you should guard them carefully while making full use of them; if you are
the Syrian player, you need to eliminate Javelin teams as fast as you can find them.
Select one of the rifle squads near the objective “OP 1”. The squad should still be mounted in the Stryker. If it is not, order it back into the Stryker with any movement command. Open the Special commands panel (F7), and left-click on the Acquire command. A list of ammunition will pop up. This is ammunition carried in the vehicle that passengers can grab and carry with them. As such, vehicle ammo stocks are an excellent way for your infantry to restock when their ammunition runs low during a battle. Most heavy weapons will also tend to have extra ammo for their weapon stocked in the transport vehicle.
Acquire the Javelin ATGM Launcher (which comes pre-equipped with a missile) and the extra missiles for it. Next, order the Javelin-equipped squad to climb to the roof of the “OP 1” tower. Once there, they will automatically spot and attack enemy vehicles with the Javelin. The Javelin has a special plunging attack profile that allows it to attack vehicles where they are weakest at the top armor. The descent is also steep enough that active protection systems cannot stop the Javelin missile.
**Explosive Reactive Armor
To counter the threat of ATGMs and weapons such as the RPG that use HEAT warheads, many modern armored vehicles are equipped with Explosive Reactive Armor (ERA). ERA consists of a high explosive material sandwiched between two metal plates, placed on top of the vehicles normal armor. When penetrated by a weapon, the explosive detonates, blowing the metal plates away. Against the jet penetrator formed by a shaped charge High ExplosiveAnti-Tank (HEAT) warhead, these moving plates impede their function by effectively lengthening the length of material that the jet must penetrate, as well as breaking up the jet before it can enter the interior of the vehicle. Against a long rod penetrator such as from a tank’s SABOT round, some advanced ERA can deflect or damage the rod.
The mechanism of most ERA can be defeated by a tandem-charge HEAT warhead, used by some modern anti-tank weapons (including the Javelin). The tandem-charge warhead uses two shaped charges, with the first being a precursor warhead that punches a channel through the ERA or detonates it prematurely, before the larger primary warhead strikes the regular armor underneath.
**Remote Weapon Stations
Some vehicles, such as your Strykers, are equipped with Remote Weapons Stations (RWS). RWS allow the vehicle gunner or commander to observe through, aim, and fire the weapon from the interior of the vehicle. This is a major advantage if the vehicle finds itself engaging enemy infantry within small arms range, since the operator will not have to expose themselves to use the weapon. However, with many RWS the operator must unbutton to reload the weapon. RWS typically also feature powerful thermal and daylight camera optics for observation.
**Abrams Tanks
After a few minutes, you will receive reinforcements. A platoon of four Abrams main battle tanks have arrived on the east edge of the map. You can use these tanks to mop up any targets left on the range, or you can simply move on by using the Cease Fire button found in the interface menu (remember, lower right corner).
Reminder: Save your campaign progress!
Mission 3: Fire Support Training — Spotting and Contacts
You should have noticed that right at the start of the scenario some enemy icons are visible: this is known as pre-battle intelligence and tells you the location of some enemy units at the beginning of the scenario. You or your opponent may receive this bonus. Whether a side receives pre-battle intelligence and how much will vary based on the scenario.
Spotting is a rather complicated affair in Combat Mission, but basically consists of your units detecting confirmed enemy units, which are signified by a floating icon that can be selected by left-clicking on it, and contacts, which appear as floating icons with question marks. A confirmed enemy unit is straightforward: at least one of your units can see it, and confirm its basic type, such as a soldier, an anti-tank gun, or a vehicle. Your units will automatically fire
upon these units as they see fit.

Contacts, on the other hand, are merely possible enemy units: your units think there might be something there, or know that something is there but cannot identify the type or exact position. Your units will not automatically fire at contacts. The opacity of a contact will tell you how confident your troops are that something is there: a very translucent contact is less certain than one that is fully opaque. Contacts can be upgraded to confirmed units over time, by moving closer to the contact, if the enemy units moves or shoots, or through C3 information sharing (more on
this soon). Units that move or fire are much easier to spot. Contacts can also be the last known location of confirmed units.
Unlike the “Borg” spotting seen in most games, where once spotted a unit is automatically seen by every enemy, units do not automatically share their spotting with all friendly units. This system is known as Relative Spotting. For example, under the Relative Spotting system, if one of your units spots an enemy tank, a nearby unit might not see the same tank at all! The unit will have to spot the tank on its own, or have the information passed to it through the C3 network.
You can tell which of your units can spot an enemy unit by clicking on the enemy unit icon. All of your units that have currently spotted and confirmed it will have highlighted icons. If you select a friendly unit under your control, the display of enemy units on the map will change to show only what units and contacts that particular unit can see. If you do not have any friendly units selected, then you see the totality of what your entire force sees.
As you will soon see, the subject of spotting is a complex one whose mechanics are purposely somewhat mysterious to the player. The best way to take advantage of the spotting system is to act like you would in real life, by occupying excellent observation points, being careful in dense areas like woods, and keeping all of your units in contact with their headquarters so that they can share information.
Night Vision Systems
You have probably figured out by now that this scenario takes place at night, and that just as in real life, darkness impedes your ability to see things. Modern militaries seek to negate this limitation by equipping their troops and vehicles with night vision technology, typically through image intensification, active illumination, and thermal vision..
In Shock Force 2, American (and most Western) troops will automatically equip night vision equipment when it is dark. Zoom in on some of your troops to see for yourself. Syrian infantry typically have no night vision at all, except for some specialized teams and elite forces. You can tell whether your troops are equipped with night vision by checking the special equipment panel and looking for the night vision icon.

Almost all armored combat vehicles such as APCs, IFVs, and tanks are equipped with either night vision or thermal vision. Because the imaging units on these vehicles are much larger, they have a higher resolution and zoom, and thus can typically spot better and further than man-portable systems. You can tell whether a vehicle has night vision systems by opening the subsystem tab in the vehicle info panel (it is the middle tab). “IR Optics” will be listed here if the vehicle possesses such technology.
Now we will do some practical exercises to demonstrate the spotting system and the advantages of night vision
Spotting and Information Sharing
Let’s start by going back to the small arms range. You have some Syrian soldiers already present at the range. If you haven’t already let the first turn pass, go ahead and do it now. If you are playing in WEGO mode as recommended, you can fast forward through the turn. During the turn it is very unlikely that your Syrian troops will spot any enemy units on the small arms range, although there might be a contact or two from the pre-battle intel. These Syrian troops are not equipped with any night vision systems, so the darkness has severely impacted their spotting.
After the turn is over, find the American rifle squad located just behind the small arms range. Like all American troops, they are equipped with night vision goggles. Move the squad next to your Syrian troops on the small arms range. Once the American squad arrives, they will immediately begin to spot enemy units and contacts on the small arms range. Night vision makes a big difference!
Now comes the fun part. During the next turn, select the Syrian units on the range again. You will see that they now have spotted some contacts! The American troops have verbally shared their spotting information with the nearby Syrian troops, consequently boosting their ability to see the enemy units.
Let’s try another example. Go to OP 1, and select the HQ team nearby. Move the team up to the roof of OP 1 (this may take several turns). After they reach the roof, let one turn pass. When the sniper team arrives, they will begin spotting Syrian tanks on the gunnery range. After a few turns have passed, click on the US rifle squad at the small arms range. Notice that they too have contact icons for the tanks! The HQ team shared information on what it had spotted through the C3 network, through both radios and satellite-linked PDAs. Every unit connected to the HQ team through some form of communication, whether verbal, hand signals, radio, or satellite, will get information on the battlefield passed to it. Ultimately this makes it easier for other units to spot and attack enemy units that have already been spotted by another friendly unit with a C3 link.
As a last example of the C3 information sharing system in action, select your Syrian squad on the small arms range. You should see that they also have contacts for the tanks on the gunnery range, as the information was verbally passed 2nd-hand from the American rifle squad next to them.

Remember that in order to share information between each other, two units must have some sort of
communications link. In Shock Force 2 this is most commonly via radio, but other types include visual (close distance), visual (long distance), verbal, satellite (vehicle station), and satellite (PDA). The more ways in which two units are linked, the stronger the connection. The unit info panel displays connections to its higher HQ.
Note: You can toggle the display of “command lines” to show whether your HQs and their subordinates have a C3 connection by pressing Alt-Z. The brighter the line, the stronger the link. A black line means that there is no C3 link, and thus no information can be shared.
With the lessons on C3 links out of the way, it’s time to start using some big guns!
Mission 3: Fire Support Training — Support Missions
As mentioned before, fire support comes in three forms: artillery, air support, and UAVs. Artillery support can be either off-map, or be on-map mortars. Air support and UAVs are always considered off-map. This means that they are not a visible unit that you can control and move around, but are instead interacted with through the support panel. To start, we are going to use some on-map mortars.
Deploy Weapon
Before your mortars can be fired, they must be set up. Many crew-served weapons such as mortars, some tripod-mounted ATGMs, and heavy machine guns must be Deployed before they can be fired. Find and select one of your mortar teams by the Range Control buildings (their floating icons looks like a mortar). Open the Special commands panel (hotkey F7). Click Deploy Weapon to order them to deploy their mortar. Repeat this for the other mortar team.

Advance the turn. The mortar teams will be busy deploying the weapon for a period of time, in this case about a minute and a half. The duration varies depending on the specific weapon. While the mortars are setting up, select all of the JTAC and forward observer teams (their floating icons resemble binoculars) and move them to the roofs of the OP towers they are next to. The two towers are OP 1 and OP 2. When the mortar teams have finished setting up, the white “Not Deployed” text will disappear from the weapon info panel.
Note: We could have left the mortars inside their Stryker mortar vehicles, from which they can fire their main 120 mm mortars. Typically, this is what you will want to do. However, we started the mortars dismounted in order to demonstrate the Deploy command.
Call for Fire
Now that your mortars are deployed, it’s time to blow things up! To fire indirectly onto a target, your mortars will need a spotter. HQ teams and Forward Observers (FOs) make the best spotters, although other units can usually serve in a pinch. The mortar team must also be able to communicate with the spotter. Communication occurs in one of two ways; either the mortar team is close enough to be within visual or shouting distance of the spotter (about 50 meters), or the mortar team has radio or satellite data contact with the spotter.

In this case the mortars are already in contact with the fire support teams on OP 1 and OP 2: the FO is linked to the mortars by the communications equipment that the fire support and mortar HQ possess, allowing the HQ to pass on the fire support teams commands to the mortars.
Select the fire support team. Remember that their icon looks like a pair of binoculars.
These teams are extremely valuable assets that are specialized at calling in support
missions more quickly than HQ teams. Depending on their nationality, they may
also have access to more powerful artillery that HQ teams cannot contact. Guard them
carefully! It is usually prudent to give them a short Target Arc Command, so that they will
not fire at enemy soldiers and attract attention to themselves.

Follow these steps to call the support mission:
- Click on the artillery icon (located just above the special equipment panel). The support mission interface will now appear. Select one of the M252 81mm mortar boxes from the panel that pops up. If you failed to correctly Deploy the mortars, their boxes will be unselectable and they will display “Not Positioned”. Deploy them and this will go away. The support mission has parameters to define that will determine the characteristics of the support mission.

- For Target Type, select Point Target. The cursor will turn orange and you will now pick the target. Left-click on one of the buildings within the “Artillery Range” area. You will also notice that a lowing green line connects both the spotter and the mortar team to the target.
- For Mission, select Medium. This defines how intensively the mortar will fire. A Heavy mission
will cause the mortar to fire as fast as possible, while a Harass mission will order it to fire rounds only occasionally, conserving ammunition. Emergency missions shorten the length of the call for fire at the risk of greater inaccuracy; only use these missions in true emergencies! - For Duration, select Medium. This tells the mortar how long to fire. Quick fire missions last a very short time, while Maximum fire missions last until all ammunition has been expended.
- For Effect, choose General. General missions will cause the shell to explode upon contacting an obstacle. These missions are best when you are attacking a building, fortification, or vehicle. The Personnel setting causes the shells to airburst above the target, which is most effective against enemy infantry in the open or in woods.
- Confirm the fire mission. If you mess anything up or change your mind, you can cancel here and restart the call for fire without penalty.

If you open the Support panel again with the FO selected, you’ll notice that the other assets have a “Spotter Busy” text over them. A spotter team can only direct one support mission at a time. Once the current mission has been cancelled or entered “fire for effect”, they can create a new support mission.

You can assign multiple support assets to a single support mission by shift-left-clicking on multiple assets.
With the other mortar, you can attack another target of your choosing. Choose the Personnel effect to see airburst rounds in action. Remember that you will need to select another team to act as the spotter, since a team can only spot for one mission at a time.
Within a turn or two, the support mission should begin. After receiving the fire mission and preparing, the spotter and support asset will enter “spotting” phase. During this time, a single round will be shot every now and then. It may be very inaccurate, but the spotter will adjust the shots until the target area is hit. Once the spotting rounds hit the target area, the asset will “fire for effect” and begin firing full-speed on the target.
Note: On-map mortars can also fire directly on battlefield targets without using a spotter if they can see the target from their position. Although this means that they can bring rounds on target much faster, it also makes them vulnerable to enemy counterfire. The enemy will usually make spotted mortar teams a priority target!
Mission 3: Fire Support Training — Support Missions Continued
Target Reference Points
Along with your mortars, you also have a battery of M109 Paladins for artillery support. These are more powerful support assets than your mortars. Artillery is a higher-level asset than mortars, which means that it takes longer for the fire-for-effect to arrive.
Fortunately, you have a special fortification “unit” called a Target Reference Point (TRP). You can
find it by looking for an orange symbol on the ground in the vicinity of the “TRP” landmark.
TRPs are sites where your artillery has “dialed in” and crunched the math necessary to fire on the site quickly and accurately, without the need for spotting adjustments. Ordering a mission near these points results in a shorter delay until delivery, greater accuracy, and zero warning to your opponent that a barrage is incoming. Furthermore, your spotter does not need to have a visual LOS on the TRP to order the fire mission. Needless to say, this is a huge advantage, especially if you possess heavy artillery.
Unlike all other units, TRPs are not restricted to set up zones and may be placed anywhere on the map during the Setup Phase. However, once the game has begun, TRPs can never be moved. TRPs are also secret: your opponent will not know where they are, although they will probably find out the hard way!
This time, the TRP has already been placed for you. In future scenarios, you should place TRPs on objectives that are likely to be heavily defended, obvious enemy routes of advance, and in “dead space” that your units cannot see but you suspect that the enemy will try to move through.
Pre-Planned Bombardments
Support missions made during Setup Phase arrive instantly beginning with the first turn, without the need for preparation or spotting. You can even set a delay so that the mission arrives 5, 10, or 15 minutes after the mission has begun. Also, each spotter team can manage an unlimited number of Support Requests as long as they are made during Setup Phase. This represents pre-planned support strikes that do not need active involvement from the spotter team.
Smoke Support Missions
Support assets that have smoke ammunition can perform Smoke missions instead of firing high explosive rounds. When making a Support Request, specify Smoke in the Mission parameter.
With Smoke missions, you can lay down smoke screens that will conceal your troops moving across open ground. Troublesome enemy positions can also have smoke put in front of them to blind them. When laying down smoke, always check what direction the wind is blowing! How far the smoke spreads, and long how long it lasts, is influenced by the direction and strength of the wind. You can check the wind by going into the menu and selecting “Conditions”. Note: Thick smoke from artillery missions will not block spotting with thermal sights. Smoke from many vehicle-deployed smoke grenades, however, will block thermal sights.
Precision Support Missions
Some fire support assets in Shock Force 2 have access to precision artillery shells. These special support missions fire only one artillery shell per gun, but they are guided shells with much higher accuracy and precision. Select either of your fire support teams and choose an enemy tank as a Point target. Under Mission, select Precision. Precision missions do not have a spotting phase; the shells arrive (hopefully) on target with no warning. Precision missions are very useful for attacking enemy armored vehicles and bunkers that typically need a direct or near-direct hit to knock them out of the fight, or for targeting a specific building or location while trying to avoid collateral damage.
Note: Precision missions must use a Point target.
Air Support Missions
Select the JTAC team in OP 1. Their floating icon, like the fire support team, looks like a pair of binoculars. JTAC teams are an example of a special unit called Air Controllers. Air controllers are personnel specially trained for directing air strikes. Air controller units (typically referred to as JTAC or TACP teams in American service) get a significant bonus to delivery time and accuracy when ordering an air strike.
Note: Syrian air support MUST be ordered by an air controller team; ordinary units do not have access to their air support.
With the JTAC team selected, open up the Air Support Panel by clicking on the middle button of the support panel. The procedure and rules for ordering air support missions are almost identical to ordering artillery support missions, with some exceptions:
- If given a Point target, the aircraft will attempt to destroy that specific target. Once the target is destroyed, the air asset will end the mission.
- If given an Area target, the aircraft will hunt the specified area for targets to attack.
- Aircraft carry a variety of loadouts, ranging from cannons to bombs to guided missiles. Heavy missions will instruct the aircraft to prioritize the use of its most powerful weaponry such as large bombs and Hellfire missiles. Light missions will prioritize cannons (if available). However, the aircraft will ultimately decided for itself what weapons to use
- Spotters for Helicopter strike missions do not require LOS to the target.
- Aircraft can engage in “friendly fire” if friendly units are too close to the target. Be careful!
Go ahead and order some strike missions around the map with your helicopters and airplanes.
Unmanned Aerial Vehicles
Unmanned Aerial Vehicles (UAVs) are a new type of support asset for the Shock Force battlefield. UAVs are controlled very similarly to air support assets, but have some major differences, chief among them being the ability to perform an Observe mission.
Unlike air support assets, most UAVs are not armed. Instead, UAVs perform Observe missions. These special missions are ordered just like a normal support mission, but instead of attacking targets, the UAV performs surveillance of the ordered area. UAVs performing an Observe mission will spot enemy units and contacts just like a ground unit would, and will transmit that information through the communications network, giving friendly units with a C3 link enhanced spotting abilities on the target area. UAVs are equipped with high resolution cameras and thermal imagers, allowing them to be used night or day.
In addition, artillery and air support strikes can be ordered on an area that a UAV is Observing, even if the spotter ordering the mission does not have LOS to the area. In this case, the UAV essentially acts as the spotter’s eyes.
Let’s give this special feature a try. Select one of your fire support teams and open the UAV Support Panel (the button on the right). Select the RQ-7B Shadow asset and then select an
Area target. Place the circle around the “UAV Target” landmark located on the map. Select
Observe mission, Immediate, and Confirm. After some length of time (it is variable, so it may
take a few minutes), the UAV will begin to spot some vehicles in the area.
Once some vehicles have been spotted, you can call in artillery strikes on them. Select the same
fire support team and order artillery strikes on the spotted vehicles. Without the UAV Observing the area, it would have been impossible for your fire support team to call in an artillery barrage here. Another special feature of UAVs is that a spotter directing a UAV Observer mission can break the rule of only one support mission per spotter; spotters directing a UAV Observe mission can direct one extra support mission in addition to the UAV, allowing them to call in a UAV and direct a fire support mission at the same time.
End
This concludes the tutorial for this mission. You can continue to use fire support against the remaining targets on the battlefield, or you can move on by using the Cease Fire function.
Reminder: Save your campaign progress!
Mission 4: Practical Exercise — Assess the Situation and Reconnaissance
This is the final mission of the training campaign. In this mission you will conduct an attack on an enemy that shoots back, and in the process learn some basic tactics. You can think of this mission as a graduation exercise
Assess the Situation
Before moving your troops, be sure to thoroughly read the briefing. Briefings will give you valuable information that will help you complete your mission, such as information on what reinforcements may be arriving, disposition of enemy forces, and what your objectives are.
During the Setup Phase of each mission you should thoroughly take stock of the forces you have available, as well as check the briefing for whether reinforcements will arrive. What tactical options you have available will depend in part on the forces available to you. In this case, your force is comprised of a Stryker infantry platoon, with the addition of a Humvee carrying a forward observer and sniper team. For support you have an RQ-11B Raven UAV and a section of off-map 120mm mortars.
After determining what forces you have, the next task is to take a close look at the terrain. The terrain that you must move and fight over will determine your tactics as much as the composition of your force. This map consists of patches of woods separated by open ground, with the exception of the objective area which is an urban combat training course. This means that most the combat in this mission will likely take place from the edge of the forests and the urban area, while the open ground should be avoided when possible by infantry units.
Your setup zone is connected to a sunken road that runs along the north edge of the map, and curves around the northeast corner to lead south, fairly close to the objective area. The low elevation of this road will mask the movement of units travelling along to get as close to the objective as possible. It is recommended that when evaluating the terrain, you bring the camera close to the ground so that you can more easily see the contours of the terrain. Even a couple of meters in elevation difference can make a major difference in your maneuvers.

The objective area is composed of densely packed buildings. This indicates that the final assault is going to be urban combat, and that typically indicates close range combat against enemy infantry. The large patch of woods between your setup zone and the objective area has decent cover and a clear line of sight over open ground. This makes it an ideal location for some of your units (such as the Strykers and machine guns) to set up a base of fire to attack the objective area from afar.
Reconnaissance
Although it is certain that the primary enemy defenses are around the objectives, it is likely that some defenses or outposts are established elsewhere on the map. You will have to find out where the enemy is, or you may get ambushed! Even if there are not any enemy ambushes waiting for you, moving carefully and making maximum use of cover and concealment may allow you to see them before they see you. The first step is to send some rifle teams forward to conduct reconnaissance and get an idea of where the enemy is. In case your rifle teams stumble upon the enemy and get in trouble, having their Strykers overlooking their advance from a distance can be helpful.
Take a rifle squad and split it using the Split Teams command in the Admin command panel (F8). Split into two, your rifle team will be able to cover more ground and if they get ambushed by the enemy, they won’t take as many casualties. Send the rifle team forward through the areas that your attack will advance through soon, while their Stryker looks over them from a distance. The Hunt movement Command will tell them to advance at a cautious pace, with weapons at the ready. If any enemy is spotted or they are fired upon, the units will stop moving immediately and await further orders. Hunt also maximizes spotting at a cost to speed and fatigue. Hunt is a useful command when you want a unit to probe for enemy units, without risking overextending itself and running into trouble.

Note: the woods here can be dense, making it hard to see the ground. You can temporarily toggle off the appearance of foliage by pressing Alt-T.
As part of your reconnaissance, you also need to occupy observation points that your HQs and fire support teams can use to survey the battlefield for potential fire support targets. The ideal observation post is an elevated position that offers concealment and cover, such as a building or a wooded hill. Send your fire support team to the “Observation Post” (OP) objective. However, make sure that they trail behind the scouting rifle teams; you really don’t want these valuable units to get ambushed!
Be sure to give the teams occupying the OP a Target Arc command so that they do not fire on distant enemy troops and give their positions away. Holding the Shift key while placing the arc will allow you to place a full circle Target Arc. Set the circle at about 50 meters or so, so that your men will defend themselves against nearby enemies that would have spotted them anyways, but won’t start shooting at distant targets.
Whenever possible, you should strive to never give away the position of high level HQs, fire support teams, or air controllers, because they are extremely valuable. You should also not co-locate any unit that will be shooting at the enemy with these valuable teams.
Once your scout teams arrive at their objective, leave them in place for at least a couple of turns to let them take a look around. the longer they stay in place, the better their spotting will be. Depending on where exactly you send them, they may get shot at. If this happens, they will stop moving and go to ground if they are using the Hunt command. Keep the rest of your force near the starting area for now; the job of your scouts is find out where the enemy is (and isn’t!) so that you will have a better idea of where to send the rest of your forces.
Once your HQ and fire support team have occupied the Observation Point, it is time to conduct some aerial reconnaissance. Select the fire support team and open the UAV support panel. Select the RQ-11B Raven and have it conduct an Observe mission over the objectives OBJ1, OBJ 2, and/or OBJ 3 and the surrounding area. With any luck, the UAV will over the course of the battle gather intel for your forces. If any enemy vehicles or infantry are spotted by the UAV, remember that your fire support team can order some fire missions on them with the 120 mm mortar section. This is an ideal way to destroy enemy units, since they can be destroyed before they have a chance to deal any damage.
Mission 4: Practical Exercise — Fire and Maneuver, Assault, Suppression and Morale
Fire and Maneuver – Base of Fire
The opposing force occupies a dominating position within the group of buildings, protected by excellent cover and with clear ground all around them. In order for your rifle platoon to most effectively assault their objectives, you will need to suppress and destroy the defenders as much as possible before your infantry try to attack the position. To do this you will split your forces into two groups: a base of fire group and an assault group.
The base of fire group usually consists of high firepower units such as armored vehicles (your Strykers), ATGMs, and machine guns. Snipers and automatic grenade launchers are also well suited to the role. The base of fire’s job is to fire constantly on the enemy positions and keep them ducking. Once the enemy is suppressed by your base of fire, the assault group, which typically consists of the rifle squads, headquarters units, and often some of the vehicles, moves in and attacks at close range. You will use this basic tactic or some variation of it in almost every Combat Mission battle.
Get the base of fire in position by moving a rifle squad, the machine gun teams, and the sniper team, along with several Strykers, to the “Base of Fire” objective. Remember that the machine gun teams will need to Deploy before they can fire at full effectiveness

Fire and Maneuver – Assault
While your base of fire is setting up, start moving your assault force into position. They will have the unenviable task of assaulting the objectives. The wooded area around “Assault Route 1-2” should give your soldiers the cover and concealment they need to get as close as possible to the objectives without incurring devastating enemy fire.
Move your assault force to the “Assault Route 1” objective by following the sunken road running along the northeast corner of the map. Avoid exposing them to observation/attack from the objective area. Once you reach the wood line and dismount your rifle squads, give them Assault movement commands to travel to the “Assault Route” objectives. When using the Assault command, squads will move alternately in small groups of men and engage the enemy on the move, making this order time consuming but very useful when closing with the enemy to destroy them. Remember, if you have trouble seeing around the trees in this area, you can temporarily toggle them off visually by pressing Alt-T.
Continue to send your dismounted infantry assault towards the “Assault Route 2” objective. You can either send their Strykers along with them in the woods, or have the Strykers move alongside the woods in the open ground. Sending vehicles directly into wooded terrain is a risky proposition for several reasons. First, enemy infantry will have a better chance of attacking the vehicle at close range with anti-tank weapons. Second, the chance of vehicles temporarily bogging or becoming completely immobilized is much higher in wooded terrain.
Note: The Assault movement command is only available to squads which have multiple teams.
Suppression and Morale
As the troops exchange fire, you will notice that some of them will curl into a fetal position and not do much of anything that is useful other than trying to survive. You are witnessing the effects of suppression. People quite reasonably do not like being shot at or blown up and, if pushed hard enough, will begin to value conserving their lives over following orders.

Each unit’s morale status can be seen in the Unit Info Panel. A colored indicator (the colored fan) tells you how suppressed the unit is. The more intense or accurate the enemy fire, the higher the level of suppression will be, and the more likely the unit will sustain unfavorable penalties. Taking casualties will cause even higher amounts of suppression. While the unit is not under fire, the suppression will begin wear off and the morale state will eventually improve.
Always monitor your troops’ suppression levels throughout the battle and try not to push them too hard. If a unit receives a large amount of accurate enemy fire, it may become “Pinned”, which will cause it to ignore your movement commands. If the unit’s morale state is enclosed by a red box then the unit is so demoralized that it will not respond to your commands at all. The unit may even run away or surrender to the enemy! If a unit’s morale becomes seriously degraded, it becomes “brittle”, incurring a significant morale penalty for the rest of the battle.
How much suppression a soldier or vehicle can take depends on its Motivation. A unit with high Motivation will be able to receive more enemy fire before becoming suppressed than a unit with poor Motivation. A unit with high Motivation will also rally faster after being suppressed
Mission 4: Practical Exercise – Headquarters and Leadership, Close With and Destroy, Victory
Headquarters and Leadership

By now you have probably begun to wonder just what the HQ units with flag icons are good for. These units contain your leaders. Every section, platoon, company, and battalion possesses an HQ unit. The leaders in HQs fulfill two very important functions: they exert a leadership modifier on their subordinate units, and link units to the Command and Control (C3) network.

If you select your platoon leader, you will notice a “+1” next to their name in the unit information panel (1). This means that they exert a positive leadership bonus on all units under his command. The details of what this bonus entails are intentionally murky, but the gist is that units under their command will perform their jobs better than units under the command of a leader without a bonus. Leaders may have a -2, -1, 0, +1, or +2 leadership bonus; yes, that means that you can even get bad leaders! But that doesn’t mean you should hide your less than stellar leaders in a corner somewhere, because HQs are always vital in C3 links.
In the lower left corner (2) of the Unit Info Panel you will see what organizational C3 levels the unit is linked to, and whether they are currently connected to them. A green dot means that they are connected, and a red X means that they are not. If they are connected, then information and leadership bonuses can be shared. How efficiently this sharing happens depends on the type of C3 established (3), as discussed previously in the last mission. The most effective leadership is always through the close verbal C3 link (face to face).
What does this mean for you in the current scenario? Keep your HQ unit near your assault force. The leader will confer his leadership bonus to them, and they will most likely need it.
Close With and Destroy
Before your assault forces leaves the “Assault Route” objectives and begin their final attack, you should make sure that your Strykers are in a position where they can provide fire support, but don’t let them get too close (within about 250 meters) or Syrian RPG-7s may score a hit. Even if enemy units are not currently spotted, you can keep the suppressing fire up from the Base of Fire by using generous amounts of Area Target commands on the buildings around the objective areas.
To maximize the suppression from their weapons as your rifle squads assaults, try waiting until the last moment before lifting their fire as the rifle squads approach. To do so, select a Stryker, open the Combat command panel (F6), and then give them a Target Briefly command. Set any of the buildings as a target. A “00:15” text will pop up. Target Briefly tells the unit to stop firing after the indicated time has elapsed. You can add extra 15-second increments to the order by giving the Target Briefly command repeatedly. However, for this situation, keep this command at 30 seconds: we don’t want to blow up our own troops!
When you are ready and the enemy is no longer shooting back, order your rifle squads at the “Assault Route 2” objective to enter the town. Move to secure all three OBJ objectives. If you encounter a particularly troublesome patch of enemy resistance, don’t solve it by throwing more soldiers at the meat grinder. Instead, back off and call for fire support to destroy the position, or carefully move a Stryker up to attack the position directly. You will take casualties, because urban combat is messy, but you should press on.
Victory and After Action Report Screen
At some time during the final fight, the Syrians will surrender, and you will be shown the results of the battle. Once the enemy has surrendered, the After Action Report (AAR) screen will appear. This screen lists a summary of the scenario results and outcomes. Most importantly it will tell you who won the battle! The AAR screen shows the Victory Points (VP) breakdown in detail, organized by objective types.
There are three objective types in Combat Mission: Ground, Targets and Parameters. Ground objectives are the Touch objectives you have seen before and the OBJ 1, OBJ 2, and OBJ 3 Occupy objectives. The church is a Preserve objective, which awards you points for not causing structural damage to the building within the objective. Target objectives are units themselves. Depending on the scenario, a side can get points for destroying enemy units or even just spotting them. Parameter objectives deal with simple percentage-based statistics, such as being awarded 200 points for sustaining less than 25 percent casualties.
CAMPAIGN END
Although the tutorial is over, the learning will never end, as there are a near-endless number of tactical situations to experience. With a game as richly detailed and complex as Combat Mission, you will never stop learning and becoming a better tactical commander. With three more campaigns, dozens of scenarios, an endless Quick Battle system, online opponents, and a thriving internet community creating new campaigns and scenarios, you have years of combat ahead of you.
Recommended Posts
")
HotShotBenjamin
Posted July 31, 2021
-
- Share
Posted July 31, 2021
Does anyone know if a manual exists for CMA and if I would be able to get my hands on a copy of it? I am just purchasing the game and unfortunately it doesn’t look like one is available in the store. Please let me know if you have any suggestions or information! Thank you!
0
- Quote
Link to comment
Share on other sites
")
Erwin
Posted July 31, 2021
-
- Share
Posted July 31, 2021
I tend to always buy the CD version rather than d/l and I see no printed manual. There will be a digital manual included with the game. It’s about 3.13 MB.
Make sure you also get the updates to v1.03.
0
- Quote
Link to comment
Share on other sites
HotShotBenjamin
Posted August 1, 2021
- Author
-
- Share
Posted August 1, 2021
Great, thank you for your reply and information!
0
- Quote
Link to comment
Share on other sites
Join the conversation
You can post now and register later.
If you have an account, sign in now to post with your account.

Unfortunately, your content contains terms that we do not allow. Please edit your content to remove the highlighted words below.
Reply to this topic…
×
Pasted as rich text. Paste as plain text instead
Only 75 emoji are allowed.
×
Your link has been automatically embedded. Display as a link instead
×
Your previous content has been restored. Clear editor
×
You cannot paste images directly. Upload or insert images from URL.
- Insert image from URL
×
- Desktop
- Tablet
- Phone
Share
Followers
0
История серии Combat Mission (CM) насчитывает около двадцати лет. Глубокий тактический симулятор поля боя со средней, по нынешним меркам графикой, внушительной ценой, запутанной системой патчей и доступностью через один единственный нишевый магазин Battlefront (до недавнего времени).
И все же, как и во всех хороших играх, в ней есть свой уникальный, игровой процесс. Несмотря на все его недостатки, а они есть, это все еще один из самых серьезных доступных тактических симуляторов поля боя. На счету Combat Mission одиннадцать отдельных релизов и несколько расширений. И в течение примерно двух десятилетий серия заставляет своих поклонников возвращаться на поле битвы. Когда Slitherine / Matrix объявили о выпуске Combat Mission: Shock Force 2 (CMSF2) в Steam, это кажется идеальным моментом, чтобы вернуться и взглянуть по новой на эту давнюю серию.
В конце концов, обязательно появятся новые игроки, впервые открывающих для себя CM. Если вы сомневаетесь в том, стоит ли попробовать игру, надеюсь, эта статья поможет вам.
Всего в серии CM одиннадцать игр, многие из которых имеют дополнительные DLC:
- Combat Mission: Beyond Overlord (CMBO)
- Combat Mission II: Barbarossa to Berlin (CMBB)
- Combat Mission III: Afrika Korps (CMAK)
- Combat Mission: Shock Force (CMSF)
- Combat Mission: Afghanistan (CMA)
- Combat Mission: Battle for Normandy (CMBFN)
- Combat Mission: Fortress Italy (CMFI)
- Combat Mission: Red Thunder (CMRT)
- Combat Mission: Black Sea (CMBS)
- Combat Mission: Final Blitzkrieg (CMFB)
- Combat Mission: Shock Force 2 (CMSF2)
Также важно отметить, что есть два проприетарных движка, на которых построены игры CM (CMx1 и CMx2). CMSF и все последующие игры используют CMx2. Это важно, потому что игры, построенные на движке CMx2, по сути являются одной и той же игрой, действие которой происходит в разные эпохи или на разных театрах военных действий. По мере выпуска новых игр и добавления новых функций в движок CMx2 Battlefront решила задним числом обновить старые игры CM (приведя их в соответствие с последними стандартами движка) с помощью платных обновлений. Вследствие этого…
Патчи бесплатны, но обновление движка стоит денег
Как и большинство разработчиков, Battlefront выпускает патчи с корректировкой баланса и исправлениями ошибок — их вроде как, можно скачать бесплатно. В отличие от большинства разработчиков, Battlefront обновляет и старые игры серии CM. Вместо того, чтобы отказываться от поддержки старых игр, Battlefront предлагает платные обновления, которые объединяют старые игры с последними улучшениями движка. На момент написания последним обновлением является движок 4.0. Стоимость обновления зависит от версии ядра, с которой вы обновляетесь (CMBFN и CMFI требуют обновления до версии 3.0, а затем 4.0). Как правило, обновления стоят от 10 до 15 долларов. Также есть возможность приобрести обновление для всех пяти игр (в виде пакета за 25 долларов США). Это сбивает с толку.
Взятые вместе, патчи и обновления движка стирают грань между бесплатными и платными обновлениями. Battlefront предлагает бесплатные исправления ошибок и изменения баланса, но после обновления движка поддержка старой версии прекращается. Если у вас есть движок 3.0 для CMBN и вы хотите установить последний патч для игры (4.03), вам сначала нужно приобрести обновление движка 4.0, а затем загрузить бесплатный патч 4.03. Следовательно, если ошибка исправлена в патче, относящемся к новому движку, вам, по сути, придется заплатить за исправление ошибки.
Чтобы сделать ситуацию еще более запутанной, почти все модули DLC / расширения имеют разные предварительные требования (все они перечислены ниже). Некоторые DLC требуют, чтобы вы также приобрели обновления движка, чтобы функционировать. Другие требуют, чтобы у вас были другие модули DLC. Следовательно, все это не только сбивают с толку, но и стоит еще дороже, чем вы могли подумать.
Теоретически, заплатить за существенное обновление движка вместо того, чтобы повторно выпускать старую игру — неплохая идея. Однако, например, примечания к патчу для обновления 4.0 выглядят странно. Честно говоря, «под капотом» может быть много изменений, но они не перечислены в примечаниях к патчу. В любом случае, политика внесения исправлений в Battlefront вызывает беспокойство у многих и об этом следует помнить при покупке серии.
Впрочем, на момент написания вся эта политика не является проблемой для новых игроков. Если вы купите любую игру CM сейчас, вы получите последнюю версию и, следовательно, не обязаны платить за предыдущие обновления движка. Однако в случае дальнейшего развития игрового движка CMx2 пользователи почти наверняка будут обязаны платить — это отдельная покупка для каждой из ваших игр.
Combat Mission — главное геймплей, а не внешний вид
Графика в Combat Mission никогда не была топовой. Она в лучшем случае адекватна и оригинальные три игры кажутся по графике довольно устаревшими. При этом, модели выглядят достаточно детализированными, особенно боевой техники. Однако анимация юнитов неуклюжа. Но когда игровой процесс затягивает, графика отходит на второй план. Тактические сражения настолько интенсивны, что даже примитивная анимация солдат не может нарушить погружение в игру.
То, на что нацелена игра, она делает очень хорошо.
Прежде чем включить опцию реального времени, попробуйте механику WEGO
В оригинальной трилогии игр CM использовалась пошаговая гибридная система, получившая название «WEGO». Каждый ход оба игрока отдавали приказы юнитам. Затем эти приказы исполнялись одновременно в течение минуты реального времени в конце каждого хода. С выпуском CMSF и обновленного движка CMx2 в Battlefront добавлена возможность воспроизведения CM в режиме реального времени с возможностью приостановки.
Однако эта игра была разработана для использования в системе WEGO. Это потому, что WEGO частично имитирует задачи управления и контроля, с которыми сталкиваются командиры. В системе WEGO вы вынуждены передать контроль над своими подразделениями виртуальным командирам (так называемым TacAI), поскольку они пытаются выполнять ваши приказы. Но вы не можете моментально реагировать на поле боя в этом режиме.
Это заставляет игрока принимать решения на основе неполной информации, поскольку вы не можете мгновенно реагировать на движения противника. Таким образом, WEGO объединяет тактическую глубину и планирование пошагового игрового процесса с интенсивностью систем реального времени. Хотя такой вариант может быть и не для всех, он добавляет дополнительный уровень реализма к общему опыту, и его определенно стоит попробовать.
Не бойтесь неудач на раннем этапе и сложной кривой обучения
Combat Mission — сложна для освоения, и вы будете терпеть неудачу много раз. То, что работает в других играх, здесь вряд ли сработает. Это потому, что CM позиционирует себя как тактический симулятор поля боя. Особое внимание уделяется использованию основных военных принципов, таких как ведение подавляющего огня при атаке позиций. Еще одна проблема, которую необходимо решить — это понимание механики и нюансов игры. Например, есть несколько типов команд движения, которые могут быть даны юнитам: движение, быстрое, медленное, охота, нападение и обратный ход. Каждый из них делает что-то свое. Отдаленно, можно сравнить с играми Close Combat. Хороший способ начать — сначала посмотреть приемы и прохождения на YouTube.
Моды для Combat Mission
В Battlefront всегда было очень активное сообщество разработчиков модов. И хотя, вы не найдете новых театров военных действий, но вы найдете новые звуковые эффекты, сценарии и кампании, расширяющие игровой процесс. Что касается графики, вы найдете обновленную пехоту, транспорт, танки, окружение и деревья. Шейдерами также можно управлять для повышения графической части игры. Посетите YouTuber SmartWargames, чтобы увидеть, насколько серьезными могут быть изменения, а также инструкции по настройкам шейдеров, которые он использует. Вот вам один из сайтов с такими модами.
С какой игрой из серии Combat Mission стоит начать знакомство?
Как уже упоминалось выше, игры на движке CMx2 практически идентичны по функциям. Расхождения в игровом процессе сводятся к различию юнитов, местности и оружия. В конечном счете, при выборе игры следует руководствоваться периодом и театром, который вас больше всего интересует.
Combat Mission: Beyond Overlord
Игра, положившая начало серии, CMBO была выпущена в 2000 году. В ней воссозданы сражения по всей северо-западной Европе — от вторжения в «день Д» и до конца войны. Важно отметить, что игра была хорошо принята и сломала стереотип предшествовавших ей пошаговых гексагональных варгеймов. Фигурные или миниатюрные изображения на сетке полей сражений, которые доминировали в жанре, были заменены трехмерной графикой и гибридной системой пошагового / реального времени (WEGO). Графически эта игра порядком устарела, но если вы действительно попробовать, у GOG есть цифровая версия.
Combat Mission II: Barbarossa to Berlin
Вторая часть серии CM. Barbarossa to Berlin была выпущена в 2002 году, опять же с положительными отзывами. Действие было перенесено на Восточный фронт и охватывало театр военных действий 1941-1945 годов. Второстепенные нации были также представлены итальянскими, венгерскими, румынскими и финскими войсками.
Графически игра получила изрядное обновление, звук был улучшен, а также добавлено множество новых функций. Учитывая театр военных действий, бронетехника также, была улучшена. Игроки могли добавлять свои моды и сценарии и сама игра предлагала огромное количество геймплея. Все это выглядело очень неплохо для своего времени. Также можно купить в GOG.

Combat Mission III: Afrika Korps
Последняя игра, разработанная на движке CMx1. CMAK была выпущена в 2004 году и переносит действие на Средиземноморье. Сражения на Крите, в Италии и в Северной Африке с 1940 по 1945 годы. По сути, это та же игра, что и CMBB. Критики были немного разочарованы тем, что слабые стороны предыдущей игры не получили внимания. Это станет обычной проблемой для игроков всей серии CM.
Afrika Korps — хороший способ испытать игровой процесс сериала. При цене 450р, покупка CMBB или CMAK самый дешевый способ узнать, нравится ли вам стиль игры, предлагаемый серией. Более поздние игры добавляют больше возможностей, улучшают графику, но игровой процесс остается прежним. По сути, если вам не нравятся эти игры, движок CMx2 не изменит ваше мнение. Как упоминалось выше, игровой движок CMx2 представляет собой скорее эволюцию игрового процесса, чем революцию. Доступно в GOG.
Combat Mission: Shock Force
CMSF изменил ситуацию, когда был выпущен в 2007 году. Он использовал новый игровой движок (CMx2) и перенес сражения из Второй мировой в современную эпоху. Он также моделировал пехоту в масштабе 1: 1, тогда как игры на основе CMx1 моделировали пехоту в масштабе 1: 3. Основываясь на гипотетическом вторжении США в Сирию, CMSF в целом хвалили за его новую атмосферу.
Однако, на этом похвалы заканчивались. ИИ был слабым, проблемы с поиском путей, проблемы с балансом и ошибки, что привело к множеству исправлений. Были выпущены еще три «модуля» (версия DLC для Battlefront), в которые добавлены силы Великобритании, НАТО и Морской пехоты США. Прямое продолжение было выпущено в 2018 году со значительными улучшениями. Следовательно, оригинал в настоящее время недоступен для покупки.
Combat Mission: Afghanistan
Был разработан по лицензии российским разработчиком Snowball. Он охватывает советско-афганскую войну с акцентом на два различных периода: 1980–1982 и 1985–1987 годы. Есть две кампании и пятнадцать сценариев. За исключением уникальной эпохи и обстановки не много новых возможностей. В то время как Battlefront продолжала обновлять игры на основе CMx2 на протяжении многих лет, вся активная разработка CMA прекратилась — доступных обновлений движка нет. Доступно только на сайте Battlefront.
Combat Mission: Battle for Normandy
CMBFN возвращается к корням сериала. Выпущенный в 2011 году, он возвращает игроков в бокажи на северо-западе Франции. От высадки союзников в «день Д» в июне до операции «Кобра» в августе. Это обычный набор сценариев и кампаний. Доступно в Battlefront и включает следующие дополнения:
DLC Commonwealth Forces добавляет британские, канадские и польские войска для союзников. Новые силы требуют новой тактики и стилей игры, подчеркивающих одну из сильных сторон движка CMx2 и всей серии в целом. Завершают пакет две новые кампании и около двадцати сценариев.
DLC Market Garden не требует пояснений. Две кампании, четырнадцать сценариев и огромное количество новых юнитов. Для работы Market Garden требуется игровой движок 2.0 или выше.
DLC для транспортных средств — это небольшой модуль, привносящий в игру некоторые странные конфигурации транспортных средств. Для полной функциональности этого пакета необходимы DLC Commonwealth Forces и Market Garden. Для работы также требуется игровой движок 3.0 или выше.
Наконец, Battle Pack 1 охватывает битвы между кампанией в Нормандии и операцией Market Garden. Для полной функциональности Battle Pack 1 требуется DLC Commonwealth Forces, Market Garden и Vehicle Pack. Для работы также требуется игровой движок 3.0 или выше.
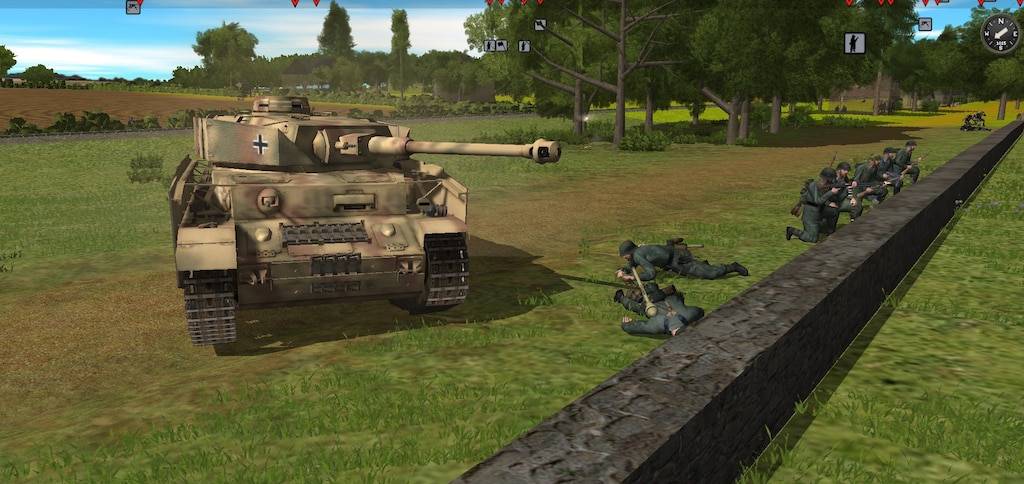
Combat Mission: Fortress Italy
CMFI был выпущен в 2012 году. На основе движка CMx2 он получил дальнейшее развитие в том, что станет первым из платных обновлений движка — под названием 2.0. Обновленный движок добавил отображение рельефа, новые шейдеры, улучшенную частоту кадров и временный режим TCP / IP с возможностью приостановки — наряду с другими небольшими обновлениями.
Все эти функции могут быть добавлены в CMBFN за символическую плату. Что касается CMFI, в базовой игре была операция «Хаски», охватывающая четыре кампании и семнадцать сценариев. Силы ограничивались американскими, немецкими и итальянскими войсками. Аддоны продолжат итальянские кампании вплоть до самой Италии. Доступно в Battlefront со следующими дополнениями:
В DLC Gustav Line добавлены силы Содружества (Соединенное Королевство, Канада, Польша и Новая Зеландия) в кампанию на Сицилии. Также были добавлены юниты для всех фракций, чтобы освещать такие сражения, как Салерно, Анцио и Монте-Кассино, закончившиеся захватом Рима в июне 1944 года. Еще четыре кампании, восемнадцать сценариев и различные дополнительные карты для использования в режиме быстрой битвы, раунд из аддона. Примечание. Для работы Gustav Line требуется игровой движок 3.0 или выше.
Rome to Victory продолжил поход из Рима в Альпы. Были добавлены еще две кампании и восемь сценариев, а также силы Индии, Бразилии, Южной Африки и Свободной Франции, чтобы ослабить OOB союзников. Силы оси получили несколько соединений Ваффен СС и Люфтваффе. Примечание. Для работы Rome to Victory требуется игровой движок 4.0 и патч v2.10. Модуль Gustav Line также рекомендуется для полной функциональности.
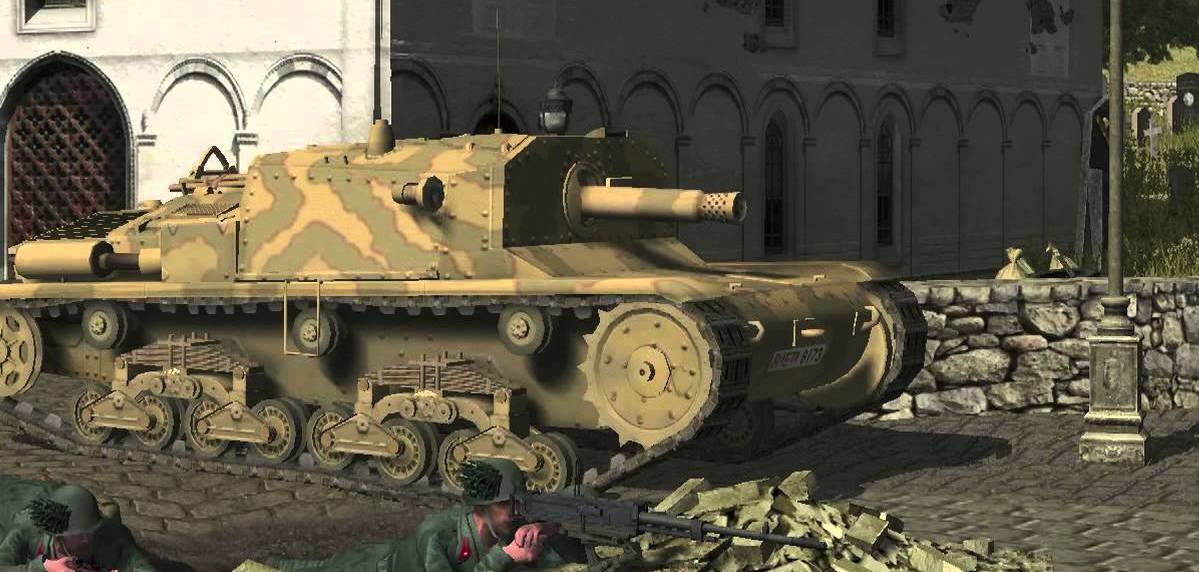
Combat Mission: Red Thunder
CMRT был выпущен в 2014 году. Движок игры получил платное обновление до версии 3.0. Соединения TCP / IP теперь могут разыгрывать сражения с использованием системы WEGO. На технику были добавлены декали попаданий, добавлены наземные и воздушные бои, улучшено время загрузки, а также графические улучшения в виде новых шейдеров.
Сама игра представляет собой сражение на Восточном фронте с начала операции «Багратион» в июне 44 года до падения Берлина в 1945 году. Изначально казалось маловероятным (на данном этапе жизненного цикла игры), что она получит расширение . Однако, есть еще Fire and Rubble, которая все еще разрабатывается и на момент написания не была установлена дата выпуска. Здесь вы можете следить за развитием расширения.
Обзор игры
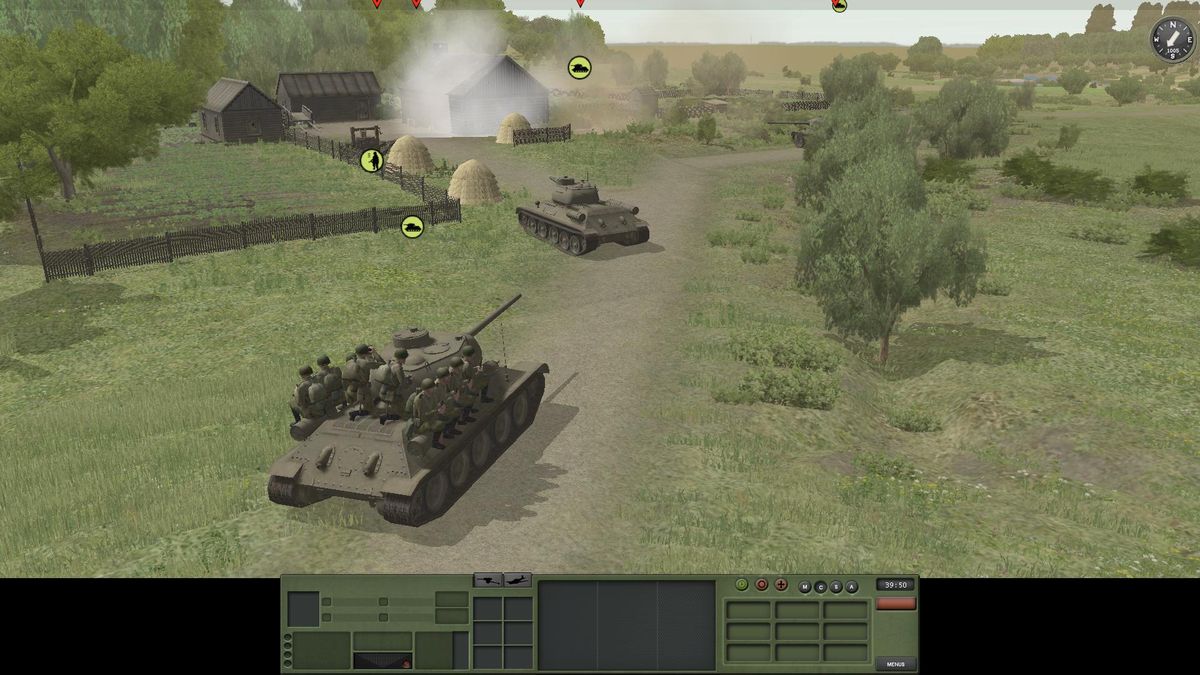
Combat Mission: Black Sea
Еще одна игра 2014 года. CMBS вернулся в наши дни с вымышленным конфликтом в 2017 году. В некоторой степени как пророчество, игра изображает конфликт между силами НАТО и Российской Федерации из-за Украины (история для CMBS была разработана в 2009 году, еще до вполне реального конфликта в 2014 г.). Были добавлены новые функции, такие как радиоэлектронная борьба, БПЛА и ночное видение, чтобы лучше представить современную войну.
Доступно в Battlefront и Steam.
Обзор игры
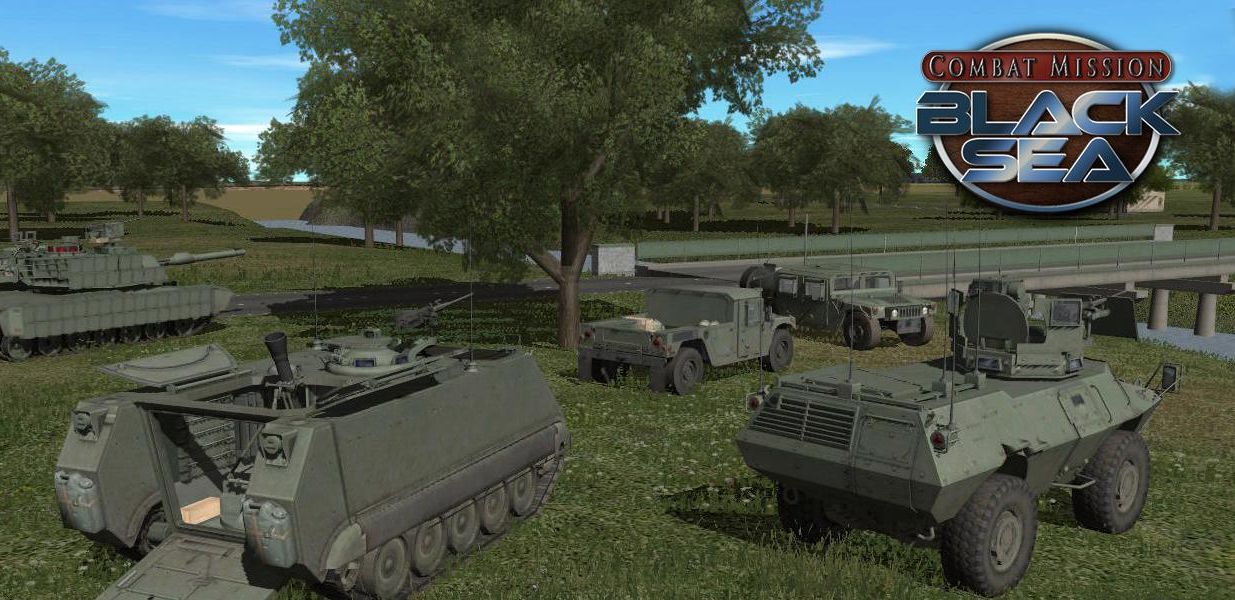
Battle Pack 1 для CMBS добавляет две новые кампании, шесть сценариев и несколько новых карт, которые можно использовать в игровом режиме Quick Battle. Примечание. Для работы Battle Pack 1 требуется игровой движок 4.0.
Combat Mission: Final Blitzkrieg
CMFB была последней игрой, в которой использовалась версия 3.0 движка CMx2. Он фокусируется на американском секторе Battle of the Bulge с октября 44-го по январь 1945 года. Как и CMRT, Battlefront предполагал, что будут некоторые расширения, но этого не произошло. Доступно в Battlefront.
Combat Mission: Shock Force 2
Последняя игра серии CM, Shock Force 2, была выпущена в декабре 2019 года. В очередной раз серия вернулась к современной войне, моделируя гипотетическую войну между западной коалицией и сирийскими силами. CMSF2 служит обновлением исходной CMSF, привнося исходное название в игровой движок 4.0. Также были переделаны три исходных расширения.
Морские пехотинцы добавляют подразделения морской пехоты США вместе с сирийскими воздушно-десантными силами, которые вооружены российской техникой. Добавлена новая гипотетическая кампания — вторжение морской пехоты из Средиземного моря во внутренние районы Сирии. Шестнадцать сценариев завершают предложение. Британские силы включают в себя ряд тяжелых и легких соединений.
Добавлены в игру войска Германии, Канады и Нидерландов. Каждый из участников использует различную тактику в соответствии со значительно различающимся оружием и снаряжением, доступным силам каждой страны.
Доступно в Battlefront и Steam.
При написании статьи использованы материалы с сайтов Wargamer и Real and simulated Wars