Материал из BikesWiki — энциклопедия японских мотоциклов
Перейти к: навигация, поиск

Kawasaki ZX-9R
Ниже представлены прямые ссылки на скачку сервисной документации.
Для Kawasaki ZX-9R
- Сервисный мануал (Service Manual) на Kawasaki ZX-9R (1994-1997)
- Сервисный мануал (Service Manual) на Kawasaki ZX-9R (1998-1999)
- Сервисный мануал (Service Manual) на Kawasaki ZX-9R (1998-1999), на русском
- Сервисный мануал (Service Manual) на Kawasaki ZX-9R (2002-2003)
Обзор модели
- Kawasaki ZX-9R
Источник — «https://bikeswiki.ru/index.php?title=Kawasaki_ZX-9R:_мануалы&oldid=9749»
Категория:
- Сервисная документация
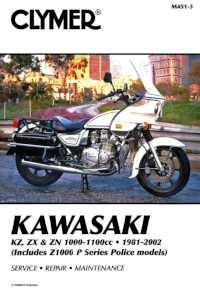
Руководство на английском языке по техническому обслуживанию и ремонту мотоциклов Kawasaki серий KZ, ZX и ZN 1981-2002 годов выпуска с двигателями объемом 1000-1100 cc.
- Издательство: Clymer
- Год издания: 2003
- Страниц: 378
- Формат: PDF
- Размер: 43,5 Mb
Руководство на английском языке по техническому обслуживанию и ремонту мотоциклов Kawasaki Ninja ZX-6R.
- Издательство: Kawasaki Heavy Industries, Ltd.
- Год издания: 1997
- Страниц: 370
- Формат: PDF
- Размер: 64,3 Mb
Руководство на английском языке по техническому обслуживанию и ремонту мотоциклов Kawasaki Ninja ZX-6R 2000-2002 годов выпуска.
- Издательство: Kawasaki Heavy Industries, Ltd.
- Год издания: —
- Страниц: 332
- Формат: PDF
- Размер: 19,1 Mb
Руководство на английском языке по техническому обслуживанию и ремонту мотоциклов Kawasaki Ninja ZX-6R.
- Издательство: Kawasaki Heavy Industries, Ltd.
- Год издания: 2007
- Страниц: 663
- Формат: PDF
- Размер: 12,0 Mb
Руководство на английском языке по техническому обслуживанию и ремонту мотоциклов Kawasaki Ninja ZX-6R и ZX-6RR 2003-2004 годов выпуска.
- Издательство: Kawasaki Heavy Industries, Ltd.
- Год издания: —
- Страниц: 514
- Формат: PDF
- Размер: 42,5 Mb

Руководство на английском языке по техническому обслуживанию и ремонту мотоциклов Kawasaki Ninja ZX-6RR.
- Издательство: Kawasaki Heavy Industries, Ltd.
- Год издания: 2004
- Страниц: 519
- Формат: PDF
- Размер: 10,1 Mb
Руководство на английском языке по подготовке к гонкам мотоциклов Kawasaki ZX-6RR.
- Издательство: Kawasaki Heavy Industries, Ltd.
- Год издания: 2005
- Страниц: 63
- Формат: PDF
- Размер: 7,5 Mb

Руководство на английском языке по техническому обслуживанию и ремонту мотоциклов Kawasaki Ninja ZX-7R и ZX-7RR.
- Издательство: Kawasaki Heavy Industries, Ltd.
- Год издания: —
- Страниц: 364
- Формат: PDF
- Размер: 38,7 Mb
Руководство на английском языке по подготовке к гонкам мотоциклов Kawasaki ZX-7R м ZXR750R 1992 года выпуска.
- Издательство: Kawasaki Heavy Industries, Ltd.
- Год издания: 1991
- Страниц: 69
- Формат: PDF
- Размер: 148,4 Mb
Руководство на английском языке по подготовке к гонкам мотоциклов Kawasaki ZX-7RR 1998 года выпуска.
- Издательство: Kawasaki Heavy Industries, Ltd.
- Год издания: 1997
- Страниц: 107
- Формат: PDF
- Размер: 138,0 Mb
Руководство на испанском языке по эксплуатации и техническому обслуживанию мотоциклов Kawasaki Ninja ZX-9R.
- Издательство: —
- Год издания: —
- Страниц: 174
- Формат: PDF
- Размер: 3,3 Mb
Сборник руководств на английском языке по техническому обслуживанию и ремонту мотоциклов Kawasaki Ninja ZX-9R.
- Издательство: Kawasaki Heavy Industries, Ltd.
- Год издания: —
- Страниц: 307/322
- Формат: PDF
- Размер: 161,3 Mb
Руководство на английском языке по техническому обслуживанию и ремонту мотоциклов Kawasaki ZX-10 и Ninja ZX-10.
- Издательство: Kawasaki Heavy Industries, Ltd.
- Год издания: 1989
- Страниц: 231
- Формат: PDF
- Размер: 162,0 Mb
Руководство на английском языке по техническому обслуживанию и ремонту мотоциклов Kawasaki Ninja ZX-10R.
- Издательство: Kawasaki Heavy Industries, Ltd.
- Год издания: 2008
- Страниц: 694
- Формат: PDF
- Размер: 14,7 Mb
Руководство на английском языке по подготовке к гонкам мотоциклов Kawasaki ZX-10R 2006 года выпуска.
- Издательство: Kawasaki Heavy Industries, Ltd.
- Год издания: 2006
- Страниц: 82
- Формат: PDF
- Размер: 2,5 Mb

Руководство по эксплуатации и техническому обслуживанию мотоциклов Kawasaki Ninja ZX-10R.
- Издательство: Kawasaki Heavy Industries, Ltd.
- Год издания: 2011
- Страниц: 207
- Формат: PDF
- Размер: 6,4 Mb
Руководство на английском языке по техническому обслуживанию и ремонту мотоциклов Kawasaki Ninja ZX-11 и ZZ-R1100 1993-2001 годов выпуска.
- Издательство: Kawasaki Heavy Industries, Ltd.
- Год издания: —
- Страниц: —
- Формат: JPG
- Размер: 62,4 Mb
Руководство на английском языке по техническому обслуживанию и ремонту мотоциклов Kawasaki Ninja ZX-12R.
- Издательство: Kawasaki Heavy Industries, Ltd.
- Год издания: 2004
- Страниц: 613
- Формат: PDF
- Размер: 11,3 Mb
Руководство на немецком языке по техническому обслуживанию и ремонту мотоциклов Kawasaki Ninja ZX-12R (ZX1200-A).
- Издательство: Kawasaki Motoren GmbH
- Год издания: 2000
- Страниц: 431
- Формат: PDF
- Размер: 149,8 Mb
Руководство на немецком языке по техническому обслуживанию и ремонту мотоциклов Kawasaki ZX-12R (ZX1200B).
- Издательство: Kawasaki Motors Europe
- Год издания: 2002
- Страниц: 451
- Формат: PDF
- Размер: 38,7 Mb

Руководство на английском языке по техническому обслуживанию и ремонту мотоциклов Kawasaki Ninja ZX-14 и ZZR1400.
- Издательство: Kawasaki Heavy Industries, Ltd.
- Год издания: 2006
- Страниц: 703
- Формат: PDF
- Размер: 13,6 Mb
Руководство на английском языке по техническому обслуживанию и ремонту мотоциклов Kawasaki ZX400-H2
- Издательство: Kawasaki Heavy Industries, Ltd.
- Год издания: —
- Страниц: —
- Формат: PDF
- Размер: 46,6 Mb
Руководство на немецком языке по техническому обслуживанию и ремонту мотоциклов Kawasaki ZX500-A1 и ZX600-A1.
- Издательство: —
- Год издания: —
- Страниц: 234
- Формат: PDF
- Размер: 19,9 Mb

Руководство на английском языке по техническому обслуживанию и ремонту мотоциклов Kawasaki KZ500/KZ550/ZX550 1979-1985 годов выпуска.
- Издательство: Clymer
- Год издания: —
- Страниц: 341
- Формат: PDF
- Размер: 12,0 Mb
Руководство на английском языке по техническому обслуживанию и ремонту мотоциклов Kawasaki ZX600/ZZR600/Ninja ZX-6 1990-2000 годов выпуска.
- Издательство: Haynes Publishing
- Год издания: 2001
- Страниц: —
- Формат: JPG
- Размер: 57,7 Mb
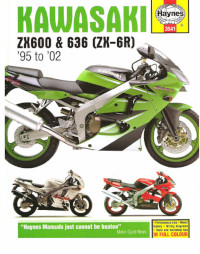
Руководство на английском языке по техническому обслуживанию и ремонту мотоциклов Kawasaki ZX600/ZX636 (ZX-6R) 1995-2002 годов выпуска.
- Издательство: Haynes Publishing
- Год издания: 2003
- Страниц: 272
- Формат: PDF
- Размер: 171,0 Mb
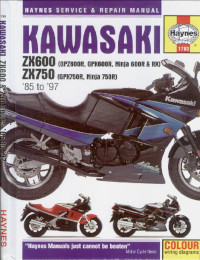
Руководство на английском языке по техническому обслуживанию и ремонту мотоциклов Kawasaki GPX600R/GPX750R/GPZ600R/Ninja 600R/Ninja 600RX/Ninja 750R/ZX600/ZX750 1985-1987 годов выпуска.
- Издательство: Haynes Publishing
- Год издания: 1999
- Страниц: 265
- Формат: PDF
- Размер: 77,0 Mb
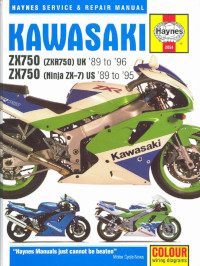
Руководство на английском языке по техническому обслуживанию и ремонту мотоциклов Kawasaki ZX750 (ZXR750) 1989-1996 и ZX750 (Ninja ZX-7) 1989-1995 годов выпуска.
- Издательство: Haynes Publishing
- Год издания: 1998
- Страниц: 341
- Формат: PDF
- Размер: 36,7 Mb
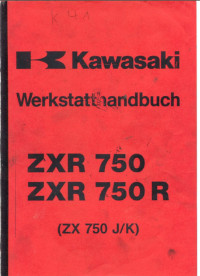
Руководство на немецком языке по техническому обслуживанию и ремонту мотоциклов Kawasaki ZX750J/ZX750K/ZXR750/ZXR750R.
- Издательство: —
- Год издания: —
- Страниц: 282
- Формат: PDF
- Размер: 23,4 Mb
Руководство на немецком языке по техническому обслуживанию и ремонту мотоциклов Kawasaki GPX750R/ZX750F.
- Издательство: Kawasaki Heavy Industries, Ltd.
- Год издания: —
- Страниц: 192
- Формат: PDF
- Размер: 11,4 Mb
Руководство на английском языке по техническому обслуживанию и ремонту мотоциклов Kawasaki ZX900-A1.
- Издательство: Kawasaki Heavy Industries, Ltd.
- Год издания: —
- Страниц: 293
- Формат: PDF
- Размер: 22,9 Mb
Руководство на английском языке по техническому обслуживанию и ремонту мотоциклов Kawasaki ZX900-C1 и ZX900-D1.
- Издательство: Kawasaki Heavy Industries, Ltd.
- Год издания: —
- Страниц: 307
- Формат: PDF
- Размер: 27,9 Mb

Руководство на немецком языке по техническому обслуживанию и ремонту мотоциклов Kawasaki GPZ1000RX (ZX1000-A1).
- Издательство: Kawasaki Heavy Industries, Ltd.
- Год издания: —
- Страниц: 130
- Формат: PDF
- Размер: 20,8 Mb
Руководство на немецком языке по техническому обслуживанию и ремонту мотоциклов Kawasaki GPZ1100 (ZX1100E).
- Издательство: Kawasaki Heavy Industries, Ltd.
- Год издания: —
- Страниц: 327
- Формат: PDF
- Размер: 10,9 Mb

#1
![]()
max232
- Пол:Мужчина
- Страна:Россия
- Город:Елец, Липецкая область
- Мото:zx-10r `08
Отправлено 16 Август 2013 — 19:04
- Наверх
#2
![]()
viskant
viskant
-

- Members
-
- 40 сообщений
Прохожий


- Пол:Мужчина
- Страна:Россия
- Город:Казань
- Мото:Kawasaki zx9r 2000г
Отправлено 15 Январь 2016 — 10:28
А есть мануал на русском?
- Наверх
#3
![]()
goksa
goksa
- Пол:Мужчина
- Страна:Россия
- Город:Санкт-Петербург
- Мото:Kawasaki Ninja ZX-7R, 1996 (P1)
Отправлено 15 Январь 2016 — 13:05
А есть мануал на русском?
если мануалы и есть, то все они опубликованы в мануалах.
подозреваю, что на русском языке нужного тебе мануала не будет.
по ситуации можешь проявить инициативу и взяться за перевод.
- Наверх
#4
![]()
Garik
Garik
-
- Читатели
- 3 сообщений

- Пол:Мужчина
- Страна:Россия
- Город:Зерноград
- Мото:kawasaki zx9r
Отправлено 01 Март 2016 — 23:42
ABBYY FineReader вот прога поможет с переводом, просто распознает текст с картинки, там чуток подрозобраться с ней и можно любой мануал переводить)
- Наверх
#5
![]()
Smart
Smart
- Пол:Мужчина
- Страна:Россия
- Город:Митино
- Мото:9-ka 1999г—>9-ka 2001г
Отправлено 05 Март 2016 — 08:25
есть у меня такая прога. Пользуюсь ей.
Она немного коряво работает. Но приловчится можно.
Корявость в том что она в авто режиме не всегда может отделить фото от текста.
Приходится в ручном режиме.
И еще в ней нет возможности перевести только определенные страницы.
Только весь документ целиком.
Либо приходится мучится с PDF сохранять тто что тебе нужно в отдельный документ а потом переводить.
- Наверх
#6
![]()
int474
int474
-
- Читатели
- 8 сообщений

- Пол:Мужчина
- Страна:Россия
- Город:Москва
- Мото:Kawasaki zx9r
Отправлено 15 Апрель 2016 — 23:22
Перевел на русский, если есть не точности извиняйте : > линк < 
- goksa это нравится
- Наверх
#7
![]()
Smart
Smart
- Пол:Мужчина
- Страна:Россия
- Город:Митино
- Мото:9-ka 1999г—>9-ka 2001г
Отправлено 16 Апрель 2016 — 10:03
Перевел на русский, если есть не точности извиняйте : > линк <
спасибо добавил в список
- Наверх
#8
![]()
ant1840
ant1840
-
- Members
-
- 48 сообщений
Прохожий

- Пол:Мужчина
- Страна:РФ
- Город:Москва
- Мото:kawasaki zx9r 97 года
Отправлено 20 Апрель 2016 — 16:38
Перевел на русский, если есть не точности извиняйте : > линк <
спасибо большое, а случаем на 97 год нет на русском?
- Наверх
#9
![]()
kawasaki zx
kawasaki zx
-
- Members
-
- 20 сообщений
Прохожий

- Пол:Мужчина
- Страна:Россия
- Город:Белоярский
- Мото:kawasaki zx-9r
Отправлено 01 Май 2016 — 07:21
Перевел на русский, если есть не точности извиняйте : > линк <
Пожскажи пожалуйста, как ты переводил?
- Наверх
#10
![]()
Яким
Яким
-
- Members
-
- 28 сообщений
Прохожий

-
Вконтакте:
- Пол:Мужчина
- Страна:Украина-
- Город:Черкассы
- Мото:Кавасаки ZX9R
Отправлено 01 Февраль 2018 — 21:22
Перевел на русский, если есть не точности извиняйте : > линк <
привед.пишет что не удается получить доступ к сайту…мож как нить в другом месте покажеш?буду благодарен..
- Наверх
#11
![]()
denis353
denis353
- Пол:Мужчина
- Страна:Россия
- Город:Волгоградская обл.
- Мото:ZX-9R Ninja (ZX900-F1)
Отправлено 02 Февраль 2018 — 21:38
привед.пишет что не удается получить доступ к сайту…мож как нить в другом месте покажеш?буду благодарен..
отсюда скачай:
https://yadi.sk/i/NFRhyQE_r3UiN
- goksa и maksim 1980 это нравится
- Наверх
Welcome to ManualMachine
You have been successfully registered
We have sent a verification link to to complete your registration.
If you can’t find the email, check your Junk/Spam folder.


- Buy Points
- How it Works
- FAQ
- Contact Us
- Questions and Suggestions
- Users
…
Kawasaki Service Manual
 Loading…
You can only view or download manuals with
Sign Up and get 5 for free
Upload your files to the site. You get 1 for each file you add
Get 1 for every time someone downloads your manual
Buy as many as you need
View and download manuals available only for
Register and get 5 for free
Upload manuals that we do not have and get 1 for each file
Get 1 for every download of your manual
Buy as much as you need
Чтобы скачать инструкцию введите решение кода с картинки и нажмите скачать. Сколько будет:
(скачивание инструкции бесплатно)
Формат файла: PDF
Доступность: Бесплатно как и все руководства на сайте. Без регистрации и SMS.
Дополнительно: Чтение инструкции онлайн

 ZX- on
Motorcycle Owner's Manual
Whenever you see the symbols NOTE
shown below, heed their instructions! Las
Always follow safe operating and main- OThis note symbol indicates points of
tenance practices. particular interest for more efficient
and convenient operation.
This warning symbol identifies special NOTICE
instructions or procedures which, if
not correctly followed, could result in FACTURES EGR e у, BERET
personal injury, or loss of life. ABLE AND PRUDENT MANNER BY A
QUALIFIED OPERATOR AND AS A
VEHICLE ONLY.
CAUTION
This caution symbol identifies special
instructions or procedures which, if
not strictly observed, could result in
damage to or destruction of equip-
ment.
LL II DN ER
(Australian model only)
TAMPERING WITH NOISE CONTROL SYSTEM
Owners are warned that the law may prohibit:
(a) The removal or rendering inoperative by any person other than for pur-
poses of maintenance, repair or replacement, of any device or element of
design incorporated into any new vehicle for the purpose of noise control
prior to its sale or delivery to the ultimate purchaser or while it is in use;
and |
(b) the use of the vehicle after such device or element of design has been re-
moved or rendered inoperative by any person.
FOREWORD
We wish to thank you for choosing this fine Kawasaki Motorcycle. Your new mo-
torcycle is the product of Kawasaki's advanced engineering, exhaustive testing, and
continuous striving for superior reliability, safety, and performance. |
Read this Owner's Manual before riding so you will be thoroughly familiar with the
proper operation of your motorcycle's controls, its features, capabilities and limita-
tions. This manual offers many safe riding tips, but its purpose is not to provide in-
struction in all the techniques and skills required to ride a motorcycle safely.
Kawasaki strongly recommends that all operators of this vehicle enroll in a motorcycle
rider training program to attain awareness of the mental and physical requirements
necessary for safe motorcycle operation.
To ensure a long, trouble-free life for your motorcycle, give it the proper care and
maintenance described in this manual. For those who would like more detailed infor-
mation on their Kawasaki Motorcycle, a Service Manual is available for purchase from
any Kawasaki dealer. The Service Manual contains detailed disassembly and mainte-
nance information.
Due to improvements in design and performance during production, in some cases there may
be minor discrepancies between the actual vehicle and the illustrations and text in this manual.
KAWASAKI HEAVY INDUSTRIES, LTD.
CONSUMER PRODUCTS GROUP
© Kawasaki Heavy Industries, Ltd., 1993 Oct. 1993. (1). (M)
»›»»»»»»»»»»»»»»»»»» ТАВ!Е ОР СОМТЕМТ$О «««««««««««««««««««
Specifications... 6
Location of Parts... 9
General Information ……….………………… 12
Meter Instruments... 12
Speedometer and Tachometer....... 13
OD ©. cv 584 ost vivsinsasesinsasiosios 13
Coolant Temperature Gauge.......... 13
Indicator Lights 14
M ius acond sra ate 14
Ignition Switch/Steering Lock ........... 15
Right Handlebar Switches .................. 16
Engine Stop Switch ..................... 16
Stato DON ze BEN EEE 17
Headlight Switch............................ 17
Left Handlebar Switches..................... 18
Dimmer Switch ............-...——<-—.w.ww. 18
Turn Signal Switch 18
HOI Bu RE 18
Passing BUTHON ara e rer 18
Brake/Clutch Lever Adjusters............. 19
Fuel Tank CAD….00risorenseneuemeenmennsennss 19
Pol NN hci A ida ssn gos 20
Fuel Tafi-...—Za=::=00== 000 mc ió 22
BAT dates 24
Soat Lask :- dias DA ааа 25
Tving Hook... arias cone 26
Helmet Huoks --::::.:-..... 22020. erbeaneóa 26
Tool Kit Document/Compartments ....27
Air Cleaner Intakes 27
Broak-10:..:.:::.-0=n nal ma phran ra ds taase 28
How to Ride the Motorcycle............ 29
Starting the Engine.............................. 29
Jump Starting === ana iés nina 31
Moving Off ...:m00c0r ere 33
Ehilting Gear <= -0e ció 34
BrakinO ea ren 35
Stopping the Engine........................... 37
Stopping the Motorcycle
in an Emergency... 37
PRR isa a cio o O
Safe Operation ...................................... 40 Rear Shock Absorber........................... 84
Daily Safety Checks............................. 40 УФ a riesisucimaticae reasons dame sobs idea 86
Additional Considerations for ODE 50m 59 55 26 Bus sma nas sama fami sadip dha 90
High Speed Operation ................... 42 Headlight Beam ...................................92
Maintenance and Adjustment........... 43 EUROS ns mai mia 94
Periodic Maintenance Chart ............... 44 CUB ЗУБОВ И ... == 0hancihsirccanóiceoo cinco 95
Engine era e acocion ma ani 47 CIOANIDO :<00.0 aio ai shears 95
Cooling System... 50 Storage ...........................e.ere_receeerecereecee.. 98
Pare PUDE Ae 55 Wiring Diagram ............ Inside back cover
Valve Clearance 56
Kawasaki Clean Air System 56
ME Cleaner =:....2. 20 ein Seth nins 57
SOPOIES QU Di ccapiencaisaissutaririanperanmnia saute у 63
NONE OVO oo ic sion a seit int 65
4%," Cite] CT 66
ОИСИ noir sarao raros daa 68
ООВ СЫНА rare cia ne 69
Drakes......................_eeseiccor ccoo pecacnenene. 75
Brake Light Switches .......................... 79
Font POr m1 ina Asian 80
»»»»»»›»»»»»»»»»»»»»»»» бРЕС|Н!САТЮМ№5 «««««««««««««««««««««
PERFORMANCE
Maximum Horse Power
Maximum Torque
(U)
(S)
(U)
(S)
Minimum Turning Radius
DIMENSIONS
Overall Length
Overall Width
Overall Height
Wheelbase
Road Clearance
Dry Weight
ENGINE
Type
Displacement
Bore x Stroke
Compression Ratio
Starting System
(D)(N)(S)
(1)
102 kW (139 PS) @10,500 r/min (rpm)
92 kW (125 PS) @10,500 r/min (rpm) (ISO)
63 kW (86 PS) @10,000 r/min (rpm)
96 N-m (9.8 kg-m, 70.9 ft-lb) @9,000 r/min (rpm)
N/A
74 N-m (7.6 kg-m, 55.0 ft-1b) (247,000 r/min (rpm)
3.5 m (138 in.)
2,085 mm (82.09 in.)
2,195 mm (86.42 in.)
2,105 mm (82.87 in.)
725 mm (28.5 in.)
1,165 mm (45.87 in.)
1,440 mm (56.69 in.)
125 mm (4.92 in.)
215 kg (474 Ib)
DOHC, 16-valve, 4-cylinder, 4-stroke, liquid-cooled
899 mL (54.9 cu in.)
73.0 x 53.7 mm (2.87 x 2.11 in.)
1145-21
Electric starter
Cylinder Numbering Method
Firing Order
Carburetors
Ignition System
Ignition Timing
(Electronically advanced)
Spark Plugs
Lubrication System
Engine Oil
Engine Oil Capacity
Coolant Capacity
TRANSMISSION
Transmission Type
Clutch Type
Driving System
Primary Reduction Ratio
Final Reduction Ratio
Overall Drive Ratio
Gear Ratio: 1st
2nd
3rd
4th
5th
6th
Left to right, 1-2-3-4
1-2-4-3
Keihin CVKD40 x 4
Battery and coil (transistorized ignition)
10° BTDC @1,100 r/min (rpm) ~
45° BTDC @5,800 r/min (rpm)
NGK CR9EK or ND U27ETR
Forced Lubrication (wet sump)
SE, SF or SG class SAE 10W40, 10W50, 20W40, or 20W50
4.0 L (4.2 US qt)
2.4 L (2.5 US qt)
6-speed, constant mesh, return shift
Wet, multi disc
Chain drive
1.534 (89/58)
2.750 (44/16)
4.656 (Top gear)
2.857 (40/14)
2.055 (37/18)
1.650 (33/20)
1.391 (32/23)
1.222 (33/27)
1.103 (32/29)
FRAME
Castor
Trail
Tire Size: Front
Rear
Fuel Tank Capacity
ELECTRICAL EQUIPMENT
Battery
Headlight
Tail/Brake Light
(D): Danish model
(1) : Italian model
(N): Norwegian model
(S): Swedish model
(U): UK model
24°
93 mm (3.66 in.)
120/70ZR17 Tubeless
180/55ZR17 Tubeless
20 L (5.3 US gal)
12V 10 Ah
12 V 55/55 W (U) 12 V 60/55 W
12V 5/21 Wx 2
Specifications subject to change without notice, and may not apply to every country.
E
2» »»9»»»»»»»»»»»»»»»» LOCATION OF PARTS «««««««««««««««««««
. Clutch Lever
. Clutch Fluid Reservoir
. Meter Instruments
. Brake Fluid Reservoir
(Front)
. Front Brake Lever
. Left Handlebar Switches
. Spring Preload Adjuster
. Rebound Damping Force
Adjuster
. Ignition Switch/Steering
Lock
. Right Handlebar Switches
. Throttle Grip
ad = o 00 Y oa BP 0 N=
——
, Air Cleaner Intake
. Headlight
. Turn Signal Light
. Spark Plugs
. Air Cleaner
. Fuel Tap
. Battery
. Junction Box (Fuses)
. Tool Kit/Document
. Helmet Hooks
. Seat Lock
. Tying Hooks k = ||.
ae Di aca
. Front Fork
. Brake Caliper
. Shift Pedal
. Side Stand
. Drive Chain
17 Tu 14
AB 7 -
Compartments
И
De) 20 5) 62) 68) 69) @0) @1
—
30.
31.
32.
33.
34.
35.
36.
37.
38.
39.
40.
41.
Tail/Brake Light
Brake Fluid Reservoir
(Rear)
Fuel Tank
Fuel Tank Cap
Carburetors
Muffler
Rear Brake Light Switch
Rear Shock Absorber
Rear Brake Pedal
Idle Adjusting Screw
Coolant Reserve Tank
Oil Level Gauge
11
»›»»»»»»»»»»»»»»»» GENERAL INFORMATION «ae «aaa
Meter Instruments
Im п MDOWP
—
r= ox
. Speedometer
. Tachometer
. Red Zone
. Fuel Gauge
‚ Coolant Temperature
Gauge
. High Baam Indicator
Light
. Neutral Indicator Light
. Turn Signal Indicator
Light
. Oil Pressure Warning
Light
. Trip Meter
. Trip Reset Knob
. Odometer
12
Speedometer and Tachometer
The speedometer shows the speed of
the vehicle. In the speedometer face are
the odometer and trip meter. The odom-
eter shows the total distance that the
vehicle has been ridden. The trip meter
Re the distance traveled since it was
ast reset to zero. The trip meter can be
reset to zero by turning the reset knob
counterclockwise.
The tachometer shows the engine
speed in the revolutions per minute
(r/min, rpm). On the right side of the
tachometer face is a portion called the
“red zone.” Engine r/min (rpm) in the
red zone is above maximum recom-
mended engine speed and is also above
the range for good performance.
CAUTION
Engine r/min (rpm) should not be al-
lowed to enter the red zone; operation
In the red zone will overstress the en-
ine and may cause serious engine
pet
damage.
Fuel Gauge
The fuel gauge shows the amount of
fuel in the fuel tank. When the needle
comes near the E (empty) position, re-
fuel at the earliest opportunity.
Coolant Temperature Gauge
This gauge shows the temperature of
coolant. Ordinarily, the needle should
stay within the white zone. If the nee-
dle reaches the "H" position, stop the
engine and check the coolant level in
the reserve tank after the engine cools
down.
CAUTION
Do not let the engine continue running
when the gauge needle reaches the
"H" position. Prolonged engine opera-
tion will result in severe damage from
overheating.
ч 13
Indicator Lights
HIGH BEAM: When the headlight is on
high beam, the high beam indicator light
is lit.
NEUTRAL: When the transmission is in
neutral, the neutral indicator light is lit.
TURN: When the turn signal switch is
turned to left or right, the turn signal in-
dicator light flashes on and off.
OIL: The oil pressure warning light goes
on whenever the oil pressure is danger-
ously low or the ignition switch is in the
ON position with the engine not run-
ning, and goes off when the engine oil
pressure is high enough. Refer to the
Maintenance and Adjustment chapter
for more detailed engine oil information.
14 Ps
Key
This motorcycle has a combination
key, which is used for the ignition
switch/steering lock, seat lock, and fuel
tank cap.
Blank keys are available at your Ka-
wasaki dealers. Ask your dealer to make
any additional spare keys you may need,
using your original key as a master.
Ignition Switch/Steering Lock OFF Engine off. All electrical
This is a four-position, key-operated re
switch. The key can be removed from = 5
the switch when it is in the OFF, LOCK, ON Engine on. All electrical
or P(PARK) position. equipment can be used.
LOCK Steering locked. Engine
off. All electrical circuits
off.
P (Park) | Steering locked. Engine
off. Tail, city (except Aus-
tralian model), and license
plate lights on. All other
electrical circuits cut off.
NOTE
O Australian model only:The tail and
license plate lights are on whenever
A, Ignition Switch/Steering Lock
DB. ON position
, OFF position the ignition switch is in the ON posi-
‚ LOCK position tion. The headlight goes on when the
‚ P (Park) position starter button is released after starting
the enigne. To avoid battery dis-
charge, always start the engine imme-
diately after turning the ignition
switch to ON.
15
OI/f you leave the PARK position on for
a long time (one hour), the battery
may become totally discharged.
To lock the steering:
1. Turn the handlebar fully to the left.
2. With the ignition switch key in the
OFF position, push down and re-
lease the key.
3. Turn the key to LOCK or P (Park)
position.
4. Pull the key out.
Right Handlebar Switches
Engine Stop Switch
In addition to the ignition switch, the
engine stop switch must be in the RUN
position for the motorcycle to operate.
The engine stop switch is for emer-
gency use. If some emergency requires
stopping the engine, move the engine
stop switch to the OFF position.
NOTE
OAlthough the engine stop switch
stops the engine, it does not turn off
all the electrical circuits. Ordinarily,
the ignition switch should be used to
stop the engine.
16 o
` тор Switch
, Engin
Starter Button
Headlight Switch
Starter Button
The starter button operates the elec-
trie starter when pushed with the clutch
lover pulled in or the transmission in
tral.
Refer to the Starting the Engine sec-
of the "How to Ride the Motorcy-
* chapter for starting instructions.
Headlight Switch
(except Australian model)
O
The headlight is off with the
switch in the O position.
Р
The city, tail, license plate,
and meter lights come on if
the switch is pushed to the P
position with the ignition
switch in the ON position.
The head, city, tail, license
plate, and meter lights come
on if the switch is pushed
forward to the H position
with the ignition switch in
the ON position.
17
|
Left Handlebar Switches
Dimmer Switch
High or low beam can be selected
with the dimmer switch. When the
headlight is on high beam (HI), the
high beam indicator light is lit.
B. Turn Signal Switch
C. Horn Button
D. Passing Button
Turn Signal Switch
When the turn signal switch is
turned to L (left) or R (right), the cor-
responding turn signals flash on and
off.
To stop flashing, push the switch in.
Horn Button
When the horn button is pushed,
the horn sounds.
Passing Button
When the passing button is pushea,
the headlight high beam (passing
beam) comes on to signal the driver of
the vehicle ahead that you are about to
pass him. The passing light shuts off
as soon as the switch is released.
WE 3232320209090 090 RRR.
Brake/Clutch Lever Adjusters
There is an adjuster on both the
brake and clutch levers. Each adjuster
has 4 positions so that the released le-
ver position can be adjusted to suit the
operators hands. Push the lever for-
ward and turn the adjuster to align the
number with the triangular mark on the
lever holder. The distance from the
fip to the released lever is minimum at
Number 4 and maximum at Number 1.
B. Mark
Fuel Tank Cap
To open the fuel tank cap, pull up
the key hole cover. Insert the ignition
switch key into the lock and turn the
key to the right.
To close the cap, push it down into
place with the key inserted. The key
can be removed by turning it counter-
clockwise to the original position.
NOTE
O The tank cap cannot be closed with-
out the key inserted, and the key
cannot be removed unless the cap is
locked properly.
ODo not push the cap down with the
key, or the cap cannot be locked.
—
A. Key Hole Cover
B. Ignition Switch Key
C. Fuel Tank Cap
Fuel Tank
Avoid filling the tank in the rain or
where heavy dust is blowing so that
the fuel does not get contaminated.
@ Q (2)
077
1. Tank Cap
2. Fuel Tank
3. Top Level
4, Filler Neck
E NN A iii
AA WARNING
| Gasoline is extremely flammable and
can be explosive under certain condi-
tions. Turn the ignition switch OFF.
“Do not smoke. Make sure the area is
| well ventilated and free from any
| source of flame or sparks: this in-
cludes any appliance with a pilot light.
“Never fill the tank so the fuel level
Fises into the filler neck. If the tank is
overfilled, heat may cause the fuel to
expand and overflow through the
nts in the tank cap.
After refueling, make sure the tank
cap is closed securely.
gasoline is spilled on the fuel tank,
pe it off immediately.
Fuel Requirement:
Your Kawasaki engine is designed to
use unleaded gasoline. However, ex-
cept for Australian models, if suitable
gasoline is not available then PRE-
MIUM, SUPER, or FOUR-STAR gaso-
lines may be used.
CAUTION
Use of leaded gasoline is Illegal In
some countries, states or lerritories.
Check local regulations before using
leaded gasoline.
Octane Rating
The octane rating of a gasoline is a
measure of its resistance to detonation
or “knocking.” The term commonly
used to describe a gasoline's octane rat-
ing is the Research Octane Number
(RON). Always use a gasoline with an
octane rating equal to, or higher than,
Research Octane Number (RON) 91.
21
NOTE Fuel Tap
The fuel tap has three positions: ON,
o if "knocking" or "pinging" METIA, OFF, and RES (reserve). For normal
Aaa different brand of gasoline or operation turn the tap to the ON posi-
igher octane raling. tion. If the fuel runs out with the tap in
the ON position, the last 4.0 L (1.1 US
gal) of fuel can be used by turning the
fuel tap to the RES position.
SR
A. Fuel Tap С. ОЕЕ position
B. RES position D. ON position
Om)
RRR EEE EEE
With the fuel tap in the ON or RES
Josition fuel flows to carburetors only
When the engine is started or is running,
and fuel supply is shut off when the en-
ine is stopped.
* Turn the fuel tap to the OFF position
When the fuel tank is removed for main-
nance and adjustments or the motor-
ycle is stored for a long time.
NOTE
ince riding distance is limited when
In RES, refuel at the earliest opportu-
Make certain that the fuel tap is
Wrned to ON (Not RES) after filling
Ip the fuel tank.
When the carburetor js completely
pty. it takes about 30 seconds for
engine to start.
CAUTION
Do not operate the starter contin-
uously for more than 5 seconds or the
starter will overheat and the battery
power will drop temporarily. Wait 15
seconds between each operation of
the starter to let it cool and the battery
power recover.
Practice operating the fuel tap with the
motorcycle stopped. To prevent an
accident you should be able to operate
the fuel tap while riding without taking
your eyes off the road.
23
Stand NOTE
The motorcycle is equipped with a OThe motorcycle is equipped with a
side stand. side stand switch. This switch is de- |
na
signed so that the engine stops if the
clutch is engaged with the trans-
mission in gear when the side stand
has been left down.
A. Side Stand
NOTE
O When using the side stand, turn the
handlebar to the left.
Whenever the side stand is used,
make it a practice to kick the stand fully
up before sitting on the motorcycle.
24
WE 0000000 0 0 AAA ROOMS
В Lock
To remove the seat, first remove the
enger's seat by inserting the ignition
witch key into the seat lock, turning the
f to the left, pulling up on the rear of
e seat, and pulling the seat forward.
A. Hook Bracket C. Rider's Seat
B. Bolts
e Remove the rider's seat by pulling
up on the rear and to the rear.
anger’s Seat
at Lock
ition Switch Key
ke off the bolts and remove the
bk bracket.
25
|
Detail Specifications: 492/492241-ninja_zx9r.pdf file (21 Dec 2022) |
Accompanying Data:
Kawasaki Ninja ZX-9R Motorcycle PDF Service Manual (Updated: Wednesday 21st of December 2022 03:41:12 AM)
Rating: 4.9 (rated by 6 users)
Compatible devices: NINJA 6502014, Ninja 250R 2008, VULCAN 1600 CLASSIC — SERVICE, VULCAN S ABS, 500 H1-E, ninja 250sl, Vulcan 1700 Voyager ABS, ZZ-R250.
Recommended Documentation:
Text Version of Service Manual
(Ocr-Read Summary of Contents, UPD: 21 December 2022)
Recommended Instructions:
HAR-511, V995, 93579, Contour Monster Beam 760


-
No part of this publication may be reproduced without written permission.This publication includes the latest production information available beforeprinting. Honda Motor Co., Ltd. reserves the right to make changes at any timewithout notice and without incurring any obligation.This manual should be considered a permanent part of the motorcycle andshould remain with the m …
GL1800A 251
-
ASSEMLBY INSTRUCTIONS CAUTION NEVER ATTEMPT TO START THIS MINI BIKE WITHOUT READING AND UNDERSTANDING THE OWNER’S MANUAL. THE OWNER’S MANUAL PROVIDES INFORMATION ON SAFETY, PARTS, FUNCTIONS, PRE-RIDE INSPECTION, STARTING AND MAINTENANCE. …
Drift hero 16
-
OWNER’S MANUAL 2010400 EXC EU400 EXC AUS400 XC-W USA450 EXC EU450 EXC AUS450 EXC SIX DAYS EU450 XC-W SIX DAYS USA450 XC-W ZA530 EXC EU530 EXC AUS530 EXC SIX DAYS EU530 XC-W SIX DAYS USA530 XC-W ZAArt. no. 3211467en …
400 EXC EU 2010 118
-
~ ‘[[email protected]@@ ~ ‘[[email protected]@@ If, c~ ~ ‘[[email protected]@ If, MANUALE 01 OFFICINA WORKSHOP MANUAL COD, 30 92 01 60 Varianti al Malluale per modeHi Vl000 G5 e 1000 SP — Cod. 17920160 Additions 10 the Workshop manual lor the models VtOOO G5 and 1000 Sp· Cod. 179201 61 …
CALIFOANIA 1000 50