
LOCKON_FC2_Flight_Manual_RU
Дата — 10.11.2012 08:47:29
- Лицензия: Свободная — Бесплатная версия, Неограниченное распр.
- Язык: Русский
- Размер файла: 20.19 Мб
- Скачано: 3041
- Комментариев: 4
|
|||||||||||||||||
|
Корзина
|
|||||||||||||||||

|
Документация
Карта TC-1

«DCS: Чёрная Акула» и «LockOn: Горячие скалы 2»: карта театра военных действий, масштаб 1:500 000.
Кампания Су-27 «Весенний шторм»

Кампания Су-27 «Весенний шторм» для «LockOn: Горячие скалы 2» от EvilBivol-1
Руководство пользователя LOMAC 1.1

Руководство пилота для версии «LockOn: Modern Air Combat».
![]()
Lock On:TMModern Air Combat
Lock On:TM Air Combat Simulation
Enhanced Manual
Reference Manual
Training Guide
Recognition Guide
Digital Aspirin Ltd & Ubisoft
2003
Copy Number
All content, (including in-game graphics), except where otherwise noted are copyright by Ubisoft and Digital Aspirin Ltd and cannot be reproduced without expressed written consent. All screenshot images, except where otherwise noted, are copyright Digital Aspirin and are used under license. Certain images are Public Domain, such as the aircraft recognition section. Please email info@lomac-manual.com if you believe the manual contains copyrighted material and we will remove and/or label the images accordingly.

Index
|
Introduction by Carl C. Norman |
i |
|
Reference Manual |
1 |
|
Training Guide |
134 |
|
Recognition Guide |
209 |
|
Key Reference |
269 |
|
Acronyms |
276 |
|
Brevity Code |
278 |
|
SAM/AAA Reference Sheets |
282 |
|
Mission Planning Sheets |
284 |
Introduction i
Introduction
It is indeed a pleasure to have been asked to write this introduction for what will hopefully become a trend for flight simulation games.
Our Unique Hobby
Combat Flight Simulation games for have been in existence since the first personal computers. At one time flight sims were one of the primary entertainment applications for the personal computer. Those of us that enjoy these products share a love of several genres, be it the military, flying, speed, or the fine details and procedure of aviation brought to our screens. Whatever the reason, we all share a common interest in something that requires patience and skill as well as an understanding of the principals of flight and aerial combat. We are a unique group of enthusiasts. Instead of wanting a game that is easy to figure out and simple to operate, we demand and marvel at the complexity and fidelity of air combat. We are the “Armchair Fighter Pilots” who want to sample a bit of the thrill of strapping ourselves to a jet that is going to go into harm’s way.
Our Hobby Abandoned
Being unique has a real disadvantage. We are a niche market in an overall population that craves instant gratification and reward. Alas, our niche community has been abandoned by the traditional market for video games. The big money can now be found in first-person shoot ‘em ups, “Pop Culture” licensed titles, and “simulations” that model our interpersonal relationships. The video game industry has “gone Hollywood” and there is little room in this financial juggernaut for the detail and high-fidelity that we desire. Video games are now played on your television with a console box that is easy to use and simple to configure. While I have nothing against the world of console video games, their popularity has pushed our hobby off the shelves. Combat fight simulations are not dead, but they are no longer a genre that is supported by the software industry. Fortunately publishers like Ubi Soft have supported products like IL-2 Sturmovik (an excellent WWII flight simulation developed by our friends at 1C: Maddox Games who are also located in Moscow) and, of course, Lock On
The Community
The combat flight simulation community is a strange bunch. Some of the most loyal and dedicated users of any product can be found in our midst. Many of these people participate online in the various community forums and product websites. It is an international crowd with users from all over the globe sharing their passion and experiences. The majority of these people are friendly and will go out of their way to help out a fellow flight sim enthusiast. I’m pleased to have made friends all over the world through my participation online in the flight simulation community.
Unfortunately, we have our dark side as well. While the majority of users are helpful and willing to assist anyone showing an interest in our hobby, there are also those that show incredible amounts of intolerance and snobbery. These types are easy to spot in the online community. Like most human endeavours, there are always a few bad apples. They are to be avoided if possible. You’ll recognize them immediately should you encounter them online.
Introduction ii
But fear not brave user! The community remains active and vibrant. You can always count on the majority of online users to give you the answers to your questions and provide you with the latest information about our hobby. There is also an enormous amount of creativity online in the form of humor, third-party enhancements, and new missions. It is well worth your time to spend some time online with this bunch. A good place to start is the General Forum at www.lo-mac.com.
History of Lock On
Back in 1994 an entertainment software company called Strategic Simulations, Inc. (SSI), well known for its line of wargames and fantasy role-playing games, was purchased by Mindscape, Inc. A gentleman named Jim Mackonochie, who was a Vice President for Mindscape, was able to enter into an agreement with a gentleman named Nick Grey. Nick is one of the managing directors of The Fighter Collection (TFC), which operates with a software development studio named Eagle Dynamics. Eagle is based in Moscow and at the time had a prototype simulation depicting the Su-27 Flanker jet fighter. This product became Su-27 Flanker and was published in 1995.
Lock On is the third product in a generation of combat flight simulations that started with Su-27 Flanker and was followed by Flanker 2.0. The Flanker series of products introduced the flight sim community to combat aircraft flown by Russia. The staff at Eagle Dynamics is a very talented and dedicated group of professionals.
I was fortunate enough to have been a newly hired Producer at SSI when the Su-27 Flanker product was started. The opportunity to work on this project was something I jumped on immediately. I was working with the fine folks at Eagle Dynamics and my counter-parts at the Mindscape UK office. Following the release of this first Flanker product we soon created an add on product for Su-27 Flanker which included new missions and a major product upgrade to Version 1.5.
The sequel Flanker 2.0 was released in 1999 by SSI. As with the original Su-27 Flanker product, we went on to create a major upgrade to Flanker 2.0 that we called Flanker 2.5. This upgrade would be sold online and would add the MiG-29 as a user flyable aircraft. We also upgraded and enhanced the overall simulation by fixing some problems and adding new features.
Lock On began as a proposed add on product to Flanker 2.0 that would feature the Russian Su-25 Frogfoot attack jet. Our original plan was to dovetail the development effort for the Flanker 2.5 upgrade into the process to create the Su-25 Frogfoot product. During the early planning for this next Flanker product Mindscape and SSI went through a corporate acquisition by The Learning Company. This was to be the first of several additional corporate buyouts and mergers. At the time I was an Executive Producer with SSI in charge of Combat Simulations.
We saw an opportunity to expand our original plans for a new Flanker product by adding a Western attack jet, the A-10 Thunderbolt II affectionately known as the “Warthog”. At the time another large publisher of combat flight simulations had cancelled their plans to feature the Warthog in a product. I must admit at this point that my personal interest in the Warthog was a major factor in my going the distance to get this aircraft included in the product. I have always had an interest for the A-10 and wanted it in our simulation very much. We obtained approval to proceed with including this unique and very popular combat aircraft into our plans.
Introduction iii
The decision was made to create a sequel product instead of a mere add on. This new product would feature the Frogfoot and Warthog and would be called Flanker: Attack. Of course there would be a few more corporate adventures and The Learning Company was soon purchased by Mattel and we became a new publishing and development organization known as Mattel Interactive. The scope of the product increased at this time by the inclusion of a Western counter-part to the Su-27. Thus, the F-15C Eagle joined the ranks as another flyable aircraft in the product.
At the very end of our development efforts on the Flanker 2.5 upgrade the future of our group was again questionable as Mattel was selling off the assets of Mattel Interactive. We were up for sale with no idea what would happen to our future products. This state of being would become a familiar one as we were soon sold to a holding company which helped maintain our existence but had plans to parcel off the assets of the former Mattel Interactive/Learning Company.
Once Flanker 2.5 was finished we were still in a state of limbo. We came to decision to release the 2.5 upgrade for free over the Internet to ensure that the upgrade reached the users who had purchased Flanker 2.0 in case we were forced to shut down. Several weeks following the release of the Flanker 2.5 upgrade the entertainment product group of the former Mattel Interactive/Learning Company was sold to Ubi Soft Entertainment.
Each one of these corporate acquisitions and changes in ownership resulted in a process of evaluation to determine which products would continue and which ones would be cancelled. This resulted in major delays to the products we were working on at the time to include all the combat simulations. Some products were cancelled; others were cancelled and then resurrected. Fortunately, Flanker: Attack survived but it now had a new name – Lock On. We added some new features to include the ability to scale the product to make it more accessible to new users without taking away the more realistic aspects that veteran users desired. Of course all of this only resulted in further delays.
In late 2002 I left Ubi Soft and began working directly with The Fighter Collection and Eagle Dynamics. I was pleased to be able to concentrate my efforts on the genre and product line that I loved. Our product had suffered many delays and yet all of knew that it had great potential. We also knew that there was little competition for this type of product as modern air combat simulations were not being supported by the industry. We believed then and we still believe now that we have a product that would be popular.
This Manual
My association with Mr. Nic Cole began in the late Summer of 2003 when he inquired on the official Lock On forums about the possibility of producing a hard copy manual for Lock On. I contacted him and lent my support for such an effort. I had been suggesting that a hard copy manual for Lock On be made available for separate purchase by the publisher so I was very pleased to see an effort from the community take form.
The trend in the entertainment software industry has been to eliminate hard copy manuals and move to smaller standard packaging for software products. The documentation for most products being sold now consists of a small “get started” pamphlet and a more extensive manual in “electronic format” on the game disk. This arrangement works fairly well for 99% of the games being published. It does not work well for a detailed and complex product like a combat flight simulation. I have always been an advocate of rich and detailed documentation for the products I’ve worked on, but the costs and resources for this type of manual were no longer something that the publishing arm was interested in devoting to a niche line of products.

Introduction iv
Through his persistence and some backing by a few of us that really believed in the concept of a third-party manual effort, Nic Cole was able to convince Ubi Soft that this manual was a viable option. An agreement was soon reached. Nic began to gather content and enlist the help of several of us in the Lock On community to assist him in getting the manual together. We at Eagle Dynamics were delighted at the prospect of a more detailed hard copy manual. That you are now reading this is proof that a grass roots effort by dedicated and talented members of the flight sim community can achieve great things.
The Future
As I write this introduction we are in the final days of development for Lock On. We are testing a Release Candidate as I type. It’s been a long process to get it finished and we are very proud of our work. What about the future?
We see great potential for follow on products in the form of new aircraft to fly and new missions. We have several proposals for such products and we hope that they are forthcoming. There are also new combat simulation products on our drawing board that we hope to bring to you in the future. The future of all these products depends on the success of Lock On. The potential for these types of third-party produced manuals depends on you, the members of community. Please help promote this manual to your peers. Let them know about it and urge them to support Nic and his efforts. This will ensure that we have this type of documentation for future products.
Much Appreciation
Those of us at TFC/Eagle Dynamics would like to thank several people who really made a difference. Mark “Shepski” Shepheard and Andrew “Swing Kid” Pavacic were instrumental in their assistance. We owe our dedicated external Beta Testing crew our thanks for the many hours of dedicated support. They and many others too numerous to mention here are listed in the credits and several of them have been with us since our first product. “Gentleman Jim” Mackonochie continues to be an invaluable ally and friend and we are grateful for his constant support.
T
hanks also to our friend and colleague Matt Wagner at Ubi Soft for his hard work and dedicated efforts. Special thanks to Nic Cole for making this manual possible. We wish him much success in this venture and hope that it is the start of something that continues for our community and his success.
I would also like to express my deep personal appreciation for my associates Igor Tishin, Jim Mackonochie, and Nick Grey. I have always been blessed to have been working with people whom I can call friend. I am also proud to have worked with the talented staff of Eagle Dynamics. Their hard work and skill is appreciated by all of us.
Kind Regards,
Carl C. Norman
Executive Producer
The Fighter Collection / Eagle Dynamics

Introduction v
Manual Credits
Nic Cole – Editor
Mark Shepheard – Training Section Editor
Lynn Gosley – Binder Design and Build Consultant
Quality Assurance & Clearance
Matt Wagner – Ubisoft
Charlie Barrett – Ubisoft
Carl Norman – Eagle Dynamics / The Fighter Collection
Special Thanks Go To:
The entire www.lo-mac.com forum moderators and members for their welcome input and encouragement.
Chris Bergeron
Christopher Halpin
Terry Reinhart at Virtual Flight Productions
Carl Norman (again)
For their proof reading skills and mastery of the English language
Sarah Berridge at Ubisoft for putting up with our requests for graphics and text at such short notice.
Nic Cole
Digital Aspirin
Sheffield
November 2003
Introduction vi
Lock On Credits
Eagle Dynamics
M A N A G E M E N T
Nick Grey
Project Director,
Director of The Fighter Collection
Igor Tishin
Project Development Manager,
Director of Eagle Dynamics, Russia
Andrey Chizh
Assistant Development & QA Manager
Carl Norman
Executive Producer & Consultant
D E S I G N E R S
Vladimir Trifonov
Terrain
Vladimir Titov
Terrain
Marina Kurdjukova
Terrain
Vladislav Kuprin
Cockpits, GUI
Alexander Drannikov
Planes
Timur Cygankov Ships, ground vehicles
Introduction vii
|
Yury Shubin |
Evgeny Dovgopoly |
|
Planes |
Mission Editor |
|
Alexander Porozov |
Igor Loginov |
|
Planes |
GUI, Mission Editor |
|
Vyacheslav Bogdanov |
Alexey Kravetsky |
|
Graphics effects |
GUI, Mission Editor |
|
Denis Poznyakov |
Alexey Vakhov |
|
Graphics effects |
Mission Editor |
|
Alexander Alexeev |
|
|
P R O G R A M M E R S |
GUI |
|
Valery Blazhnov |
Anton Trutce |
|
Lead Programmer |
Avionics, weapon systems |
|
Vyacheslav Patutinsky |
Vladimir Feofanov |
|
AI Planes |
Flight dynamics |
|
Igor Krylov |
Maxim Zelensky |
|
SAMs, Ships, Ground Vehicles |
AI Planes, Flight Dynamics |
|
Alexander Matveev |
Dmitry Baikov |
|
Input, Sound |
Internet game, Installer, GUI |
|
Sergey Chistov |
Sergey Gurchev |
|
Track IR, Sound |
LAN game, Track Recording |
|
Grigory Yakushev |
Dmitry Illarionov |
|
Graphics |
MAP |
|
Timur Ivanov |
T E C H N I C A L S U P P O R T |
|
Graphics |
German Lutchak |
|
Yury Uralsky |
Internet & Network maintenance |
|
Graphics |
|
|
Andrey Solomykin |
|
|
Dmitry Sultanov |
Flight dynamics research |
|
Graphics |
Dmitry Moskalenko |
|
Dmitry Zhukov |
Aerodynamics calculations |
|
Graphics |
|
|
Denis Panchuk |
|
|
Maxim Porshnev |
Aerodynamics calculations |
|
Objects Animation |
Alexander Komarov |
|
Dmitry Robustov |
Lead Tester |
|
Terrain |
|
|
Vitaly Nikityanin |
|
|
Optimisation |
Introduction viii
U B I S O F T
CEO:
Yves Guillemot
International Production Director:
Christine Burgess-Quemard
International Content Director:
Serge Hascoet
L O C A L I Z A T I O N
Worldwide Localization Manager:
Coralie Martin
Localization Project Manager:
Loic Jacolin
P R O D U C T I O N
VP of product development:
Bret Berry
Executive Producer:
Tony Van
Producer:
Matt Wagner
Associate Producer:
Marc Fish
Data Management International Service:
Guenaele Mendroux
David Picco
Benoit Maury-Bouet
M A R K E T I N G
US Marketing Director:
Tony Kee
US Group Manager:
Karen Conroe
US Brand Managers:
Tena Lawry
Sarah Berridge
EMEA Marketing Director:
Florence Alibert
EMEA Group Manager:
Gabrielle Zagoury
EMEA Brand Manager:
Yannick Spagna
International Marketing Team:
Sylvaine Gomez
Andreas Balfanz
Doug Mc Conckey
Christian Born
Javier Montoro
Pim Hofmeester
Nick Wong
Soren Lass
Yannick Theler
Bertrand Chaverot
Vanessa Leclercq
Zhou Hui Bo
P U B L I C R E L A T I O N S
US PR Manager:
Clint Hayashi
T E S T
QA Manager:
Eric Tremblay
Assistant Manager:
Eric Audette
Lead Tester:
Emmanuel-Yvan Ofoe
Testers:
Alain Chenier
Allen Tremblay
Antoine Drouin
Antoine Thisdale
Eric St-Jean
Frederic Laporte
Louis-Phillipe Brissette
Marc Brouillette
Marc-Andre Proulx
Martin Shank
Martin Tavernier
Mathieu Larin
Mathieu Laurin
Introduction ix
|
Pascal Gauthier |
Alexey Larin |
|
Patrice Cote |
Vagan Grigoryan |
|
Pierre Boyer |
Sergey Vertelev |
|
Alexey Prokopchuk |
|
|
Compatibility Test: |
Igor Anisimov |
|
David Levesque |
Andrey Serov |
|
Jason Alleyne |
Mikhail Sapronov |
|
Alexander Gorbachenko |
|
|
External Beta Testers: |
Ruslan Ilyin |
|
Oscar Garcia Minguillan |
|
|
Jose Benito |
G A M E M A N U A L |
|
Francisco de Ascanio |
|
|
Carlos Garcia Pineiro |
Reference Manual: |
|
Jim Campisi |
|
|
Jeff Streeter |
Tom Basham |
|
Gene Buckle |
|
|
Leonardo Rogic |
S O U N D |
|
Goran Ivaz |
|
|
Robert Borjesson |
Music: |
|
Juan Andres Hermoso Franco |
Marshall Crutcher — Perfect Score |
|
Guillaume Leleve |
Voice recordings: |
|
Manuel Silveira |
|
|
Dan Crenshaw |
Charles DeVries Multimedia |
|
James Rhodes |
|
|
Moodie Coretti |
S P E C I A L T H A N K S |
|
Chad Matthew Griffin |
|
|
Michael Scampini |
Thomas Desaveines |
|
Lou Mayers |
for aircraft textures |
|
Pascual Malonda |
David Moratilla |
|
Ivan San Primitivo |
|
|
Alejandro Lorenzo Gallego |
for aircraft textures |
|
Francesc Basullas |
|
|
Domingo Silanes |
Eric Johnson |
|
Jose Luis Barrero |
for aircraft textures |
|
Jose Ma Catena |
Frederic Bourges |
|
Santiago Cerezo |
|
|
Fernando Fernandez de Benito |
for aircraft textures |
|
Luis Rivas |
|
|
Roberto Seoane |
Troy A. Fortmann |
|
Ian Boys |
for F-15C consultation |
|
Andrew Peter Pavacic |
Steve Davies |
|
James Hallows |
|
|
Chris Picco |
for F-15C consultation |
|
Aaron Watson |
|
|
Igor Harlukov |
Edward Burke |
|
Anton Stepanov |
for A-10A consultation |
|
Arkady Lalayants |
Christopher Andreychik |
|
Denis Chumachenko |
|
|
Alexander Saigushkin |
for A-10A consultation |
|
Alexey Egorov |
|
|
Danila Pyatkin |
Andy Bush |
|
Kirill Dzyuba |
for A-10A consultation |
|
Vladimir Vorobiev |
Joe Hodges |
|
Alexander Tulin |
Introduction x
|
for A-10A consultation |
Francisco de Ascanio de la Vega |
|
Glenn Davis |
for Pilot Log Book consultation |
|
for military aircraft consultaion |
|
|
Ertugrul Ozmen |
|
|
Sergey Trukhan |
for Pilot Log Book consultation |
|
for Su-25 and Su-27 consultation |
Dominik Merk |
|
Alexander Degtyaryov |
for Pilot Log Book consultation |
|
for MiG-29 and Su-27 consultation |
|
|
Chris Janssens |
|
|
Daniil Tuseev |
for Pilot Log Book consultation |
|
for MiG-29 and Su-27 consultation |
Yuri Yashnev |
|
Nikolay Isaev |
for Pilot Log Book consultation |
|
for military consultation |
|
|
Mark Shepheard |
|
|
Andrew Peter Pavacic |
for training and single missions |
|
for single missions |
Jean-Francis Tetreault, Martin Asnong |
|
and Pilot Log Book consultation |
|
|
for CD protection |
|
|
Jan Slegers |
|
|
for Pilot Log Book consultation |
Halstead York — NaturalPoint |
|
for TrackIR support |
|
|
Michael Larsen |
Justin Cooney — ATI |
|
for Pilot Log Book consultation |
|
|
for Development Support |
|
|
Manuel Fossa |
|
|
for Pilot Log Book consultation |
The Forum Moderators and Community |
|
Members at the Official Lock On Forums |
|
|
George Gachaleishvili |
Jim Mackonochie |
|
for Pilot Log Book consultation |
|
|
for constant support and Business |
|
|
Roy van Versendaal |
Development |
|
for Pilot Log Book consultation |
Introduction xi
Printed Manual Errata
Page 5. Starting the game. A “Show Replay” (SHOW)” button has been added to the Navigation Bar on the Main Menu. Once selected, you can use the browser menu to select Track Files. Once selected, press the Start button to begin playing the Demo track.
Page 5. Starting the game. A “Network Play (NTW)” button has been added to the Navigation Bar on the Main Menu. This allows you to directly access the Network play menus from the Main Menu.
Page 6. Starting the game. The Back/Fwd Button has been removed from the Main Menu.
Page 9. Graphics. We suggest setting VISIB RNG and SCENES to High and WATER to Very High if you have top-end computer.
Page 9. Graphics. An option to toggle civilian road and rail traffic on and off had been added to the Graphics settings. From the CIV TRAFF button, you can select Yes or No.
Page 9. Graphics. An option to toggle the advanced haze effect as been added to the Graphics settings. From the HAZE button, you can choose Basic or Advanced.
Page 9. Graphics. As option to choose water detail level has been added to the Graphics settings. From the WATER button, you can choose Low, Medium, High, or Very High.
Page 9. Graphics. An option to disable engine heat blur has been added to the Graphics settings. From the HEAT BLR button, you can select On or Off. Note that game smoothness can at times be negatively impacted if Heat Blur and FSAA are used simultaneously.
Page 9. Graphics. The FREQ selection has been removed.
Page 10. Audio. If you feel the engine and other cockpit sounds are too quiet, you can use the COCKPIT slider to increase the volume. You can also increase the ENGINES level to make the engine sound louder in the cockpit.
Page 10. Audio. “Betty in Russian” has been changed to “Russian Voices.” This is because you can now hear all radio communications in Russian when flying a Russian aircraft. If you select the German MiG-29A, the Betty voice will be in German.
Page 11 and 45. Difficulty. Two additional buttons have been added to the My Plane box. The G-EFFECTS button allows you to disable black-outs and red-outs when under extreme G. The PADLOCK button allows you to enable or disable the use of the padlock option.
Page 11 and 46. Difficulty. The AWACS view has been renamed the MAP view.
Page 11. Difficulty. Within the Simplification box is a button entitled SET GLOBAL. When this button is ON, the player’s difficulty settings and the Scene setting for Graphics will be used for all missions. If however the button is not on, the difficulty and scene settings will be used when the mission was created.
Page 11. Difficulty. When simplification is changed between imperial and metric, this only applies to measurements used in the Mission Editor. It does not apply to the flight portion of the game.
Introduction xii
Page 12. Cockpit. The G-Effects setting has been moved to the Difficulty page.
Page 18. Multiplayer. After pressing the NTW button, a window that allows you choose either a LAN or Internet game will be displayed now. You must make this decision before preceded to Host or Join a multiplayer game.
Page 19. Multiplayer. Protocol section has been removed from LAN network connection options.
Page 19. Multiplayer. The Ubi.com button only applies to an Internet game. This button has been removed from the LAN screen.
Page 18. Multiplayer. The multiplayer description in only accurate for when LAN play is selected. Internet play uses an entirely new system of connection. When you enter an Internet game, there will be a two-position dial near the top of the screen. One setting is labeled Player and the other Connect.
When set to Player, you can enter your name in the NAME field. Press the enter key once you have typed in your name.
When set to Connect, you can enter your Host or Client connection properties. If Network Settings button is set to SERVER, then you are acting as the Host and you can determine PORT number, connection speed, and password. You can also set global setting such as session title, maximum number of players, and game mode in the Game Settings screen. If set to Client, you can enter the SERVER IP number and the required password if needed.
Once the SERVER and CLIENTS have entered the required data, they can press the START key to proceed.
After the SERVER presses the START key, they will be brought to the OPEN mission screen. After selecting the desired mission, press the MAP key to return to the Internet interface.
Once all players have reached the Join Game screen, they can select their coalition. If no planes are available in a coalition, the JOIN box will be greyed out. Upon selecting a valid coalition, press the SELECT button in the top / left portion of the screen to select an aircraft. Simply click on the aircraft you wish in the Select Plane list. If you wish to change coalitions, you can click the Coalitions button on the top menu bar.
Once players have selected their aircraft, the FLY button can be pressed to start the mission. Note that each player must press the FLY button in order to enter the mission.
Page 22. Multiplayer. It is not possible for clients to in-flight refuel during multiplayer games.
Page 22. Multiplayer. Only a single player can be assigned to take off from the Kuznetsov aircraft carrier. Adding more than one aircraft will cause over-lapping.
Page 22. Multiplayer. When flying an Internet game, each player must be assigned an individual Group when creating the mission. You cannot assigned players to separate Flights within a Group.
Page 22. Training. Advanced Training has been renamed Top Gun.
Introduction xiii
Page 22. Training. Select the EXIT button in the lower / left portion of the screen to exit the Training screen.
Page 22. Training. In order to avoid problems with the training missions, please mind the following:
— Resolution to 1024×768
-Cockpit view angle set to 60(default) -Mouseview off
-Mirrors off
-Russian HUD setting
-Do not press any key but «S» to pause and un-pause while viewing
Page 25. Log Book. The pull down menu to view general statistics has been removed.
Page 26. Log Book. To exit the Log Book, press the Exit button in the lower / left portion of the screen.
Page 29. Easy Radar. When setting the display mode to ALL, all ground, surface, and naval units will be displayed on the screen.
Page 30. Mission Editor. From the File selection on the Menu Bar, Merge is also available. This allows two separate missions to be combined into a single mission.
Page 30. Mission Editor. From the View selection on the Menu Bar, Crimean View has been changed to Actual Size view. Additionally, Object View and Region View have been removed.
Page 30. Mission Editor. From the File selection on the Menu Bar, Record AVI has been added. After selecting a track file, this option can be enabled and allow the player to convert a track file into an AVI video. To create an AVI file, please follow these steps:
1- From the Mission Editor, select the desired Track file you wish to convert to an AVI file.
2- Once selected, select RECORD AVI from the File pull down.
3- A new dialog screen will be presented in which you can select Start and End time of recording, the compression Codec and quality level, the name you wish to save the AVI as, and the frame rate you wish the AVI to play back as.
Once you have made your selections, press the Start button. Lock On will then replay the Track file frame by frame until completion. Note that this can be a long process of the recording length or frame rates have been set high.
After the video had been recorded, the sound pass will automatically be recorded. This will play back in real time, but you will only hear the mission being played out. For proper AVI sound recording, ensure you have WAV as your Windows sound recording device.
Page 30. Mission Editor. From the File selection on the Menu Bar, Loop track can be selected to continually loop the selected track file.
Page 44. Mission Editor. Regarding cloud cover, when the Density is set to 5 or higher, the precipitation drop down becomes active. Selections include None, Rain, and Thunderstorm. If however the Season is set to Winter, the precipitation options will be None, Snow, and Snow-storm
.
Introduction xiv
Page 45. Mission Editor. Creating a Campaign. Creating a user-created campaign is a simple process that uses the fundamentals of creating a single mission within the Mission Editor. To get started, enter the Mission Editor and press the CAMP button on the left portion of the screen.
You will now be presented with the Campaign creator / editor. To create a new campaign, follow these steps:
1- Select the countries that will take part in the two coalitions. From the Coalitions button at the top of the screen, place at least one country in the Red and Blue coalitions. Press OK when complete.
2- In the top Title box, enter the title of the campaign you are about to create.
3- Each mission is composed of a generated stage that you create. In the Stage box, enter the name of the first stage in the Title box. In the Description box, enter the text briefing that the player will read.
4- Create the stage as you would a normal single mission. However, all the static objects you place in the first stage will automatically be carried over to later missions.
5- When you are ready to create the next stage in the campaign, forward the stage number to 2 and create you next mission. You can keep adding stages this way until you have all the stages you wish in the mission.
6- To enter the text that the player will read when he or she has finished the campaign; select the Results button and enter the campaign debriefing text.
TROUBLESHOOTING & TIPS
Increasing frame rate and performance
It’s always a good idea to defragment your drive for better performance. Use the Windows Disk Defragmenter in Accessories/System Tools to defragment your drive.
Ensure that you have the very latest drivers for you video card. You can usually obtain updated drivers on the support website of your card’s manufacturer. The manufactures of the more popular video cards often update their drive sets.
Ensure that you have DirectX 8.1 or higher installed on your system. DirectX 9 is included as part of the Lock On installation routine. The setup for DirectX 9 is located on the Lock On CD. Many of the “MX” type of cards are older video chips that are use more memory and are then marketed as newer cards, but many of them do not support 8.1 or higher. Older video cards MAY run Lock On but without all the effects and the performance will be questionable. Your video card MUST support DirectX 8.1 or higher. NOTE: Having the correct version of DirectX installed on your system alone is NOT the answer. Your card MUST also be compliant with 8.1 or higher. Older cards will most likely NOT meet this requirement.
Shut down programs running in the background (Virus Scanners, Firewalls, etc.) Zone Alarm is known to cause problems when trying to use the Options menu as reported by several Lock On Demo users. If you choose to run other applications in the background you WILL have a lower performance with Lock On. There are several utility programs such as Enditall and others you can obtain on the Internet that can assist you in shutting down other applications.
Introduction xv
Lock On will run slower if you have all the graphics and effects settings on their highest settings. This is particularly noticeable with minimum spec computers and hardware. Your “mileage” may vary, but to get all the effects and have good performance you will need top of the line equipment. Lock On can be run at lower settings and still be a very enjoyable simulation experience, but the high end and the future of hardware were primary considerations when we designed this product and its graphics effects.
Performance will also be affected by the size and content of missions. Large missions with many vehicles, missiles, aircraft, and radars will have a noticeable affect on performance and frame rates. Try adjusting the settings in the Options – Graphics screen to optimize for your best performance for your hardware.
There are quite a few different options for graphics and cockpit settings in Lock On the more of them you use and the higher the quality you select then the lower your performance will be when running the program. While we would like to provide you with an optimum settings profile, it is impossible to give a profile that will be optimum for all the many different hardware configurations that users possess. You are going to have to experiment with your individual settings to see what works best for you and what options you feel are worth the hit in performance. As each of us have our own personal preferences for graphics and effects, these aspects only add to the difficulty in our providing a standard profile. Again, your preferences and personal tastes will have to be factored into how you set up the features in Lock On.
The settings for WATER, VISABLE RANGE, and COLOR have a big impact on frame rate.
The WATER effects are a big frame killer even if you are not flying over water and have the setting on high, your performance will be lower. Set WATER to Low if you do not have a high performance system and/or video card.
VISABLE RANGE will also take a lot of your system’s performance. Unless you are using a high resolution, there really is no big difference between the Medium and High settings for this option. Medium appears to be optimum. Your results may differ depending upon your hardware.
The HEAT BLUR effect is NOT compatible with your video card anti-aliasing features turned on and will create a conflict that will greatly affect performance and frame rate. If you want HEAT BLUR effects you need to turn off your anti-aliasing settings. Note: The HEAT BLUR effects do not appear for all aircraft (A-10 for example) and will not appear for aircraft if they are travelling at high speeds.
The COLOR setting should really be set to 16 bit as the advantages of 32 bit are only for the very top end video cards. The advantage of 32 bit will most likely be noticeable with video cards that will be hitting the market in the near future. For now it is recommended that you stick with 16 bit. If you do use 32 bit, ensure that your Windows Desktop is also set for 32 bit.
Cockpit Mirrors are nice to have, but they can rob you of performance. They are not essential, particularly for air-to-ground. Turn them off unless you really feel that you need them. You can also lower their resolution to save on performance.
Introduction xvi
Joysticks, Throttles, Rudders, and other devices
You may need to manually adjust your joystick, throttle, and rudders using the Options – Input menu.
The default settings for Lock On may not match your particular input devices. Go to the Options section and set the select knob to INPUT in the upper right hand corner of the Options screen.
In the upper left hand corner there is a toggle switch showing BUTTONS or AXIS, click on this so that AXIS is selected and then select the pull-down box window so that your particular joystick is selected instead of KEYBOARD or MOUSE.
In the BUTTONS MAP text box below on the left will be a list of input areas and their corresponding inputs (PITCH, ROLL, RUDDER, THRUST, etc.) and their respective axis or rotator. To ensure your equipment is configured properly select each one and then hit the CHANGE button to upper right. A CAUTION dialog box will appear with a blank entry for an Axis input. When this box appears move the appropriate device you want to set. The proper axis or rotator will appear in the text box. Hit OK and you have set the device properly in Lock On.
NOTE: This section also provides you the ability to configure dual or split throttles to control two-engine aircraft if you have such an input device.
In the RESPONSES section of the INPUT screen there is a graph showing the response profile for each device. It is recommended that you select your RUDDER in BUTTONS MAP and then flip the switch in RESPONSES from SLIDER to AXIS. This will display the response curve for your RUDDER.
Often the rudder input devices continue to “pull” to one side. This will cause your aircraft to roll or yaw to one side. Configuring your rudders with a bit of a “dead space” will prevent your aircraft from rolling or pulling to one side. Do this by selecting the RUDDER in the BUTTONS MAP area and then moving the D-ZONE slider a small amount to the left. You will notice a flat line appear in the middle of the response curve. This will create a dead space at the centre of your rudder that will prevent rudder inputs while your rudder is in the center position.
It is also recommended that you increase the curve by placing the SHIFT slider in the middle position of the slider giving the rudders a smooth response curve on both sides.
There is also a selection on this screen that will allow you reverse (invert) the directions of your input devices.
Trim and Control
Several of the aircraft, the MiG-29 in particular MUST be constantly trimmed or your control inputs will not be as effective. Read the section on trim and consult the appropriate Tutorial Mission to learn how to trim the aircraft. ALT-T will neutralize your trim settings. NOTE: Airspeed changes also affect trim settings. Be sure to adjust trim after coming out of Autopilot.
Introduction xvii
Audio Adjustments
If you are having choppy or distorted sound, turn Hardware Acceleration OFF in your DirectX Sound Settings. To do this, run the DirectX Diagnostics Tool (C:WINDOWSsystem32dxdiag.exe), select the SOUND tab, and turn off Hardware Acceleration with the slider. Even if you do not have distorted sounds, many users of the Demo have reported better performance with Hardware Acceleration turned off.
If you want more ambient sounds in the cockpit you will need to adjust your audio volume settings in the Options – Sound screen. Adjust the sliders for the various sound effects to the levels you prefer. If you like to hear the engines and gun fire from the cockpit then you should increase the ENGINES and COCKPIT sliders to higher. 100% for COCKPIT will give you both engines and gun sounds.
As with the graphics settings, the volume of the various sounds in Lock On is an individual taste. You need to experiment with the settings to obtain the sound levels you desire.
Engaging Targets with Weapons
Familiarize yourself with the proper way to configure your aircraft for combat modes. The weapons will not fire unless you configure your aircraft to the proper combat mode. The default mode is Navigation when you first start a mission. The weapons will not fire in Nav mode.
Taking Screenshots and Recording Videos
Screenshots can be made by hitting the PrtScn (Print Screen) button. Each time you hit this button a screenshot will be created and saved to the Lock On Screenshots subdirectory with a sequential naming convention. If you wish to remove the information bar for exterior views hit the “Y” key twice to turn off the bar. Hitting “Y” again will toggle the bar back on.
Key Input Changes
1-Cockpit camera discrete steps have been implemented with Ctrl — Keypad 1-9 or Ctrl — Joystick hat. Alt-Z toggles between snap modes (to return or not to return camera tacitly). The discrete steps are configurable in the Config/View/View.cfg file.
2- Ctrl-Keypad 5 action has been changed to Alt-Keypad 5 for F11 view.
3- Shift-F11 trains/cars toggle has been added for Ctrl-F12 view.
Introduction xviii
This page has been left intentionally blank
INSTRUCTION MANUAL
CONTENTS
Aircraft Introduction . . . . . . . . . . . . . . . . . . . . . . . . . . . 2
Aircraft Cockpits . . . . . . . . . . . . . . . . . . . . . . . . . . . . . . 6
Heads-Up Display Modes . . . . . . . . . . . . . . . . . . . . . 30
Sensors . . . . . . . . . . . . . . . . . . . . . . . . . . . . . . . . . . . .68
Radar Warning Receivers . . . . . . . . . . . . . . . . . . . . . . 76
Air-to-Air Missiles . . . . . . . . . . . . . . . . . . . . . . . . . . . . 82
Air-to-Ground Weapons . . . . . . . . . . . . . . . . . . . . . . . 97
Ground School . . . . . . . . . . . . . . . . . . . . . . . . . . . . . 108
Primary Flight School . . . . . . . . . . . . . . . . . . . . . . . . 112
Air Combat Basics . . . . . . . . . . . . . . . . . . . . . . . . . . . 115
Weapon Usage . . . . . . . . . . . . . . . . . . . . . . . . . . . . . 129
2 Aircraft Introduction
AIRCRAFT INTRODUCTION
The old adage, “Use the right tool for the job,” applies to air combat as much as carpentry. Aircraft missions, such as air superiority, close air support, deep strike, etc., generally have conflicting requirements. Heavy armor that protects a pilot while engaging an enemy AAA site is a serious disadvantage in a dogfight. Success in the air requires a thorough understanding of each aircraft’s strengths and weaknesses. The following section identifies each aircraft flyable by the player and summarizes its combat role.
1.1 F-15C “Eagle”
The F-15C “Eagle” has often been labeled the greatest fighter aircraft in the world. Designed to counter the exaggerated capabilities of the Soviet MiG-25 “Foxbat,” the F-15 has been the backbone of U.S. air defense for three decades. The F-15C, equipped with improved avionics and weapons over the original F-15A, has scored over 100 air-to-air victories in the service of Israel, Saudi Arabia, and the U.S. without suffering any losses.
The F-15C rules the Beyond Visual Range arena (BVR). No slouch in a dogfight, the F-15C excels at finding targets, positively identifying them as hostile, and engaging them with AIM-120 AMRAAM and AIM-7M missiles before the enemy can respond.
The Eagle is somewhat restricted in the close-in dogfight. The AIM-9 Sidewinder, a reliable weapon that has soldiered on since the 1960’s, does not have the high offboresight capability of recent Russian heat-seeking missiles. Eagle drivers should generally favor the higher-speed “energy fight” in favor of the low-speed turning duel, especially against nimble adversaries.
Length: 63’ 9”
Height: 18’ 8”
Wingspan: 42’ 10”
Speed: Mach 2.5+ at sea level
Ceiling: 65,000’
Max. Takeoff Weight: 68,000 lbs
1.2 A-10A “Thunderbolt II”
Very few address this aircraft by its given name of “Thunderbolt II.” Instead, its unusual appearance earned it the moniker “Warthog,” and often simply “the Hog.” Designed as a Close Air Support (CAS) platform to counter the massive quantities of Soviet armor during the Cold War, the Hog is heavily armored and carries an impressive weapon load, including a deadly 30mm anti-armor cannon. Efforts to retire the A-10 from active duty began gaining momentum, but fell by the wayside after the aircraft’s stellar performance during the 1991 Gulf War and the 2003 Operation Iraqi Freedom.
The A-10 was intended to fly low, using the terrain to mask its presence from enemy Surface-to-Air Missiles (SAMs). Low flying, however, places the aircraft in the heart of the Anti-Aircraft Artillery (AAA) engagement zone. Therefore, the aircraft is heavily armored, including a “titanium bathtub” which surrounds the pilot. When the threat of SAMs has been reduced, the A-10 generally flies
Aircraft Introduction 3
missions at medium altitudes, placing it safely out of the reach of AAA guns.
The sub-sonic A-10 can carry AIM-9 Sidewinders for self-defense, but should avoid dogfighting. It carries an impressive air-to-ground weapon load, but lacks the power for a sustained fight against a dedicated air-to-air platform. When confronted by an enemy fighter, the Hog pilot should use the A-10’s impressive turn rate capability to point the nose (and the dreaded 30mm cannon) at the attacker. When the attacker overshoots, unload and extend until the attacker makes another pass, and then use another maximum-rate turn to point the nose back at the adversary.
Length: 53’ 4”
Height: 14’ 8”
Wingspan: 57’ 6”
Speed: Mach 0.56
Ceiling: 45,000’
Max. Takeoff Weight: 51,000 lbs
1.3 Su-25 “Frogfoot”
The Su-25 Frogfoot bears little resemblance to the U.S. A-10, but was designed for a very similar Close Air Support (CAS) ground-attack mission. The Su-25 was built to operate near the battlefront from rough, “unimproved” airstrips, and can carry a kit with tools, spare parts, auxiliary power supply, a pump for manual refueling, and other “self-deployment” supplies. It carries a wide variety of weapons for missions, including anti-radar, runway denial, and tank killing.
The fortified cockpit and armored canopy helps protect the pilot from AAA and small-arms fire while engaging targets at low altitude. Flying low, the Su-25 hunts down mobile targets, pops up, delivers its weapons, and dives back behind the terrain. The Frogfoot may arguably be the most powerful ground-attack aircraft in Eastern inventories.
The Su-25 is not intended for dogfighting, though. Its primary defense against patrolling flights is simple avoidance. When engaged, the Su-25 should operate at extremely low altitude, which hampers enemy fighters’ ability to dive toward it. Using available terrain, the pilot should turn to face oncoming threats.
Length: 50’ 11”
Height: 15’ 9”
Wingspan: 47’ 11”
Speed: Mach 0.8 at sea level
Ceiling: 22,965’
Max. Takeoff Weight: 38,800 lbs
1.4 Su-27 “Flanker B”
The Su-27 Flanker and its descendants are some of the most impressive and capable fighter aircraft in the world, designed to beat the vaunted F-15. Born in the waning years of the Cold War, the Flanker did not have an easy life. The initial design suffered serious problems. Then, the breakup of the Soviet Union hindered its deployment, denying it the opportunity to prove itself as the world’s greatest aircraft.
4 Aircraft Introduction
The Su-27 is tailored for air-to-air combat, not air-to-ground. Armed with the R-27 (AA-10) Alamo missiles, the Flanker has an impressive BVR capability. Meanwhile, the helmet-mounted sight and the high off-boresight R-73 (AA-11) Archer heatseeking missile, coupled with the Su-27’s high thrust and sustained turn capability give the aircraft a powerful edge in a knife fight. High-AOA maneuvering helps the pilot point his weapons at the enemy. Finally, its large fuel capacity keeps it in the fight well after most Western aircraft are running on fumes. It carries as many as ten air-to-air missiles, giving it an impressive “punch.”
Detractors criticize the Su-27’s avionics and cockpit layout, citing limited ability to track/engage multiple targets, high reliance on GCI control, and high pilot workload, but its passive Electro-Optical System (EOS) lets it find and engage targets without any radar signals (which can warn the target). Debate continues on whether high-AOA maneuvers (such as tail slides and the famed “Cobra”) are useful combat tactics or merely impressive air-show routines.
Length: 71’ 11”
Height: 19’ 5”
Wingspan: 48’ 2”
Speed: Mach 2.35 at sea level
Ceiling: 59,055’
Max. Takeoff Weight: 72,750 lbs
1.5 Su-33 “Flanker D”
Originally named the Su-27K, this descendant of the Su-27 was specifically designed to operate from Soviet versions of super aircraft carriers. Equipped with canards for improved takeoff and landing performance, the first Su-27K made its maiden flight in 1985. The tail cone was shortened to reduce the risk of tail strike during high-AOA carrier landings, but also reduced the space available for defensive countermeasures (including chaff and flare dispensers). Whereas the Su-27 was tailored as an air-to-air interceptor, the Su-33 is a multi-role aircraft (a necessity of carrier-based aviation operating far from home bases). The Su-33 retains, to a large extent, the avionics and cockpit of the basic Su-27.
Length: 69’ 6”
Height: 19’ 4”
Wingspan: 48’ 2”
Speed: Mach 1.14+ at sea level
Ceiling: 55,250’
Max. Takeoff Weight: 66,000 lbs
1.6 MiG-29A “Fulcrum A” and MiG-29S “Fulcrum C”
Western observers often conclude, inaccurately, that the Su-27 and MiG-29 were born of a single design program, which copied the U.S. Navy’s F/A-18, no less. Indeed, the Su-27 and MiG-29 look quite similar, and some observers cannot readily tell the two aircraft apart, despite the MiG-29 being substantially shorter than the Su-27. Both the Su-27 and MiG-29 design teams reportedly worked with common research data and drew common design conclusions. The MiG-29 was much more widely exported than the Su-27, serving in many Warsaw Pact air
Aircraft Introduction 5
forces, several of which have since joined NATO (bringing their Soviet-made MiG29s with them).
The MiG-29 originally shared most of its avionics suite with the Su-27 (including the radar, the Electro-Optical System (EOS), and the helmet-mounted sight), but was designed as a short-range fighter, not an interceptor. The EOS lets the Fulcrum search for, track, and engage targets without emitting tell-tale radar signals. Being smaller, it doesn’t carry as many missiles as the Su-27, but its highAOA maneuverability, coupled with the R-73 (AA-11) Archer high off-boresight, heat-seeking missile, and helmet-mounted sight makes the MiG-29 a deadly dogfighter. The slow-speed turning fight is the MiG-29’s preferred arena where it can use its high-AOA capability to point its weapons at a floundering target. The newer MiG-29C includes the medium-range R-77 (AA-12) Adder missile and an internal radar jamming system.
As with the Su-27, critics cited weak avionics and poor cockpit design as weaknesses of the MiG-29A. The later MiG-29S (Fulcrum C), though, incorporated numerous improvements, including better defensive countermeasures and increased fuel capacity. The MiG-29 reportedly requires a significant amount of maintenance, especially the engines. German MiG-29As (inherited from the East when Germany was re-unified) have had their engine performance “tuned down” somewhat to preserve engine lifespan. Obtaining spare parts continues to be a concern for former Warsaw Pact nations.
Russian forces in LOMAC employ the MiG-29A and MiG-29S, while German forces in NATO operate only the MiG-29A.
Length: 56’ 10”
Height: 15’ 6”
Wingspan: 37’ 3”
Speed: Mach 2.3 at sea level
Ceiling: 55,775’
Max. Takeoff Weight: 40,785 lbs
6 Aircraft Cockpits
AIRCRAFT COCKPITS
Each aircraft’s cockpit is tailored for the role it performs. Although all cockpits share certain instruments, such as an airspeed indicator, an attitude indicator, engine indicators, etc., cockpit design philosophies have changed dramatically over the years. Furthermore, Eastern and Western aircraft designers often take different approaches to solving common problems. As a result, cockpit layout varies greatly from aircraft to aircraft.
In this chapter, we’ll examine each aircraft’s cockpit and instrumentation. You’ll need to familiarize yourself with the cockpit layout for each aircraft type you intend to fly.
2.1. F-15C Eagle Cockpit
Although the F-15C Eagle retains a nominal air-to-ground capability, it is strictly an air-to-air superiority fighter today. Consequently, its cockpit is tailored around the radar display and threat warning display, which are situated just below the HUD. The lower section of the instrument panel focuses on aircraft attitude, engines, and storage management.
The F-15C Cockpit
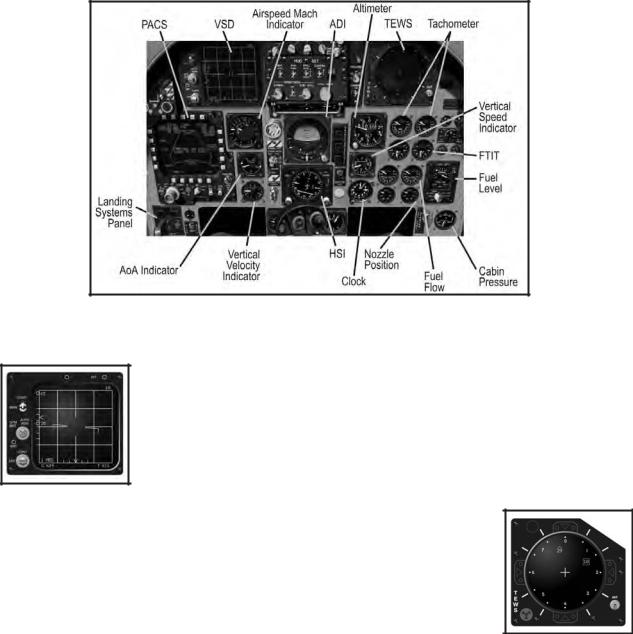
2.101 Vertical Situation Display (VSD)
The Vertical Situation Display (VSD), otherwise known as the “radar display,” dominates the instrument panel’s upper-left corner. The VSD shows a top-down view of the airspace ahead of the aircraft, highlighting target aircraft detected by the radar. Full details of radar operation and VSD symbology appear in the “Sensors” chapter.
The VSD
2.102 Tactical Electronic Warfare System (TEWS)
The Tactical Electronic Warfare System (TEWS), located in the upper right of the instrument panel, detects radar emissions (from other aircraft, surface-to-air missile launchers, etc.). It
The TEWS
Aircraft Cockpits 7
categorizes the information it detects and displays clues about the direction and type of emitter. Full usage and symbology details appear in the “Radar Warning Receivers” chapter.
2.103 Programmable Armament Control System (PACS)
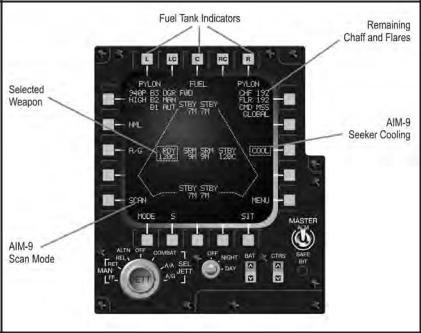
The Programmable Armament Control System (PACS), located in the lower left of the instrument panel, is a multipurpose display that provides storage (fuel, weapons, chaff, and flares) management.
The top edge of the PACS display shows the number of loaded external fuel tanks. The positions L, C, and R indicate the status of the left, center, and right pylons, respectively. When a fuel tank is loaded, the word “FUEL” appears beneath the pylon indicator. When a tank is not loaded, the word “PYLON” appears.
Fuel Tank Indicators
The left side of the PACS display shows two indicators. The uppermost button shows the current firing rate of the 20 mm cannon. HIGH indicates 6,000 rounds per minute; LOW indicates 4,000 rounds per minute. The number directly below the rate of fire indicates the quantity of 20 mm rounds remaining. When fired, the counter decrements in units of 10.
The SCAN indicator in the bottom-left corner will be highlighted with a box when an AIM-9 missile is selected and operating in SCAN mode. See the “Weapon Usage” chapter for full details on using SCAN mode.
The right side of the PACS display indicates the defensive stores (chaff and flares) remaining, along with weapons status. The CHF and FLR displays in the upper right indicate the number of chaff and flares, respectively. The F-15C can carry up to 120 chaff rounds and up to 60 flares.
The COOL indicator along the right edge of the PACS display indicates the overall weapons status. With the Master Arm switch in the ARM position, a box appears around the word “COOL,” indicating weapons are ready. The box disappears when the Master Arm switch is in the SAFE position.
The center of the PACS display shows the loaded weapons and their status. There are eight weapon stations, four on the fuselage and two on each wing. Air-to-air
8 Aircraft Cockpits
missiles appear in two categories: AIM-9 variants are classified as “Short-Range Missiles” (SRM), while AIM-7 and AIM-120 variants are classified as “MediumRange Missiles” (MRM). The status for each station shows two lines based on the selected weapon type:
•When an MRM is selected: RDY appears above the selected weapon. STBY appears above all other medium-range missiles. SRM appears above all shortrange missiles.
•When an SRM is selected: RDY appears above the selected weapon. STBY appears above all medium-range missiles. SRM appears above all other shortrange missiles.
The following table illustrates the abbreviations used for each missile type:
|
Abbreviation |
Missile |
Range |
|
7M |
AIM-7M |
MRM |
|
120C |
AIM-120 |
MRM |
|
9M |
AIM-9M |
SRM |
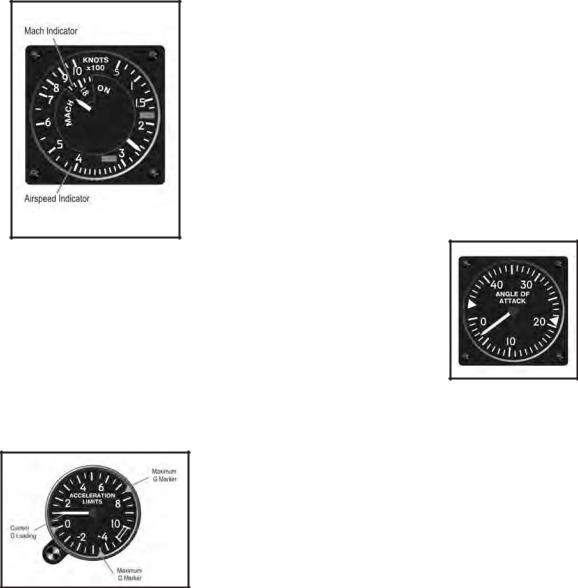
2.104 Airspeed/Mach Indicator
Located next to the PACS, the airspeed/Mach indicator shows the Calibrated Airspeed (CAS) and Mach number. The fixed airspeed scale, graduated from 50 to 1000 knots, and a rotating Mach number scale (synchronized so their correct relationship is shown at all altitudes) allow a single pointer to indicate both readings. The Mach number shows above 200 knots.
Airspeed / Mach Indicator
2.105 AOA Indicator
Located below the airspeed/Mach indicator, the AOA indicator displays the current Angle Of Attack in units from 0 to 45. The units are calibrated against the F-15C’s normal flight envelope – a single unit does not equate to a single degree of pitch. An index mark is set at the approximate optimum landing approach AOA (20 to 22 units).
AOA Indicator
2.106 Accelerometer
The accelerometer displays instantaneous positive and negative acceleration G-loads. Markers highlight the maximum positive and negative G-loads achieved. The instrument is independent of, and less accurate than, the G-load displayed on the HUD.
Accelerometer
![]()
The HSI
Aircraft Cockpits 9
2.107 Attitude Director Indicator (ADI)
The Attitude Director Indicator (ADI) dominates the center of the instrument panel. The rolling attitude sphere displays the aircraft’s pitch and bank angles. Pitch markings are graduated in 5-degree increments. The bank markings are graduated in 10-degree increments. During Instrument Landing System (ILS) approaches, the ILS bank steering (localizer) and glideslope bars appear in front of the attitude sphere. During ILS
landings, fly toward the ILS needles.
Longitudinal Aiming Mode Symbology
The turn-and-slip indicator resides at the bottom of the instrument. When not centered, apply rudder toward the needle to center the indicator.
2.108 Horizontal Situation Indicator (HSI)
The Horizontal Situation Indicator (HSI) shows a horizontal, top-down view of the aircraft superimposed on a compass. The compass rotates so that the aircraft heading always appears at the top of the display. The outer edge of the compass ring shows the course arrow, indicating the direction of the next navigation point.
The course deviation indicator in the center of the compass illustrates the intended course relative to the aircraft in the center of the instrument. During an ILS landing, the bar corresponds with the bank steering bar, showing
deviation from the localizer beam. Please note, however, that the course deviation indicator moves the opposite direction of the ILS bank steering bar.
The desired heading is also displayed numerically on the right side of the instrument. The distance to the destination, in nautical miles, is shown on the left side of the instrument.
The Altimeter
2.109 Altimeter
The altimeter displays altitude above sea level (MSL) in 20-foot increments. It consists of a numeric readout in the center with a clock-like display along the outside edge, which graphically displays the “hundreds” of feet. In the example shown, the numeric readout shows an altitude of 29,093 feet. The needle, therefore, points to 93.

10 Aircraft Cockpits
FTIT Indicators
2.110 Vertical Velocity Indicator (VVI)
The Vertical Velocity Indicator (VVI) indicates the aircraft’s rate of climb (or descent) in thousands of feet per minute. The needle counts clockwise from zero as the aircraft climbs, and counts counter-clockwise as the aircraft descends.
The Vertical Velocity Indicator
2.111 Engine Tachometer
This pair of instruments indicates the engine speed as a percentage of maximum RPM for both the left and right engines. The red band indicates afterburner.
Engine Tachometers
2.112 Fan Turbine Inlet Temperature (FTIT)
Indicators
Located below the tachometers, this pair of instruments combines an analog pointer and digital readout. The temperature is shown in increments of 10 degrees centigrade. The red band indicates excessive temperature.
2.113 Fuel Flow Indicators
This pair of instruments shows the fuel flow, including afterburner, for each engine. Flow is measured in pounds per hour.
Fuel Flow Indicators
2.114 Exhaust Nozzle Position Indicators
Located in the lower right of the instrument panel, this pair of instruments shows the exhaust nozzle position for each engine. The display shows the position as a percentage of being completely open.
Exhaust Nozzle Position Indicators
2.115 Fuel Quantity Indicator
The fuel quantity indicator shows the remaining fuel in the internal and external tanks. The needle in the center of the display shows the internal fuel, measured in thousands of pounds. Three numeric indicators show the total fuel remaining (internal and external), the fuel remaining in the left wing tank, and the fuel remaining in the right wing tank. All three displays measure the remaining fuel in pounds.
Fuel Quantity Indicator

Aircraft Cockpits 11
2.116 Cabin Pressure Indicator
The cabin pressure indicator shows the current “altitude” inside the cockpit based on the air pressure in the cabin. In the event of structural damage, the cabin may lose air pressure, causing the cabin altitude to increase. If the cabin pressure altitude climbs above 10,000 feet, descend immediately!
Cabin Pressure Indicator
2.2. A-10A Cockpit
Designed specifically for Close Air Support (CAS) ground attacks, the A-10A doesn’t carry radar or many of the advanced electronic systems found in other fighters. It has a much simpler cockpit dominated by navigational and engine instruments. The sole TV screen shows only images from AGM-65 Maverick seekers.
The A-10A Cockpit
2.201 TV Monitor
The TV Monitor (TVM) displays the view from the AGM-65 Maverick missile-seeker head. A description of AGM-65 displays and the targeting process is included in the «Sensors» chapter.
The TV Monitor
2.202 Radar Warning Receiver (RWR)
The A-10’s radar warning system consists of two instruments. The Radar Warning Receiver (RWR), located in the right side of the instrument panel, listens for radar emissions (from other aircraft, surface-to-air missile launchers, etc.). It categorizes the information it “hears,” displaying clues about the direction and
The RWR source of the emitter. The RWR control indicator, located just below the HUD, provides additional details about the sources of radar emissions. Full usage and symbology details appear in the RWR chapter.

The ADI
Airspeed / Mach Indicator
AOA Indicator
AOA Indexer
12 Aircraft Cockpits
2.203 Airspeed Indicator
Located just below the RWR scope, the airspeed indicator shows Calibrated Airspeed (CAS) from 50 to 500 knots, and reads within 4 knots of the airspeed displayed on the HUD. The striped needle moves to show the limiting structural airspeed.
2.204 AOA Indicator
Located to the left of the Airspeed Indicator, the AOA indicator displays the current Angle Of Attack in units from zero to 30. The units are calibrated against the A-10A’s normal flight envelope – a single unit does not equate to a single degree of pitch. An index mark is set at the approximate optimum landing approach AOA (20 units).
2.205 AOA Indexer
The AOA indexer sits on the canopy railing just left of the HUD. It displays three indicators comparing the current AOA with the proper landing approach AOA. When the top light illuminates, the AOA is either too high or the airspeed is too slow. When the bottom light illuminates, the AOA is
either too low or the airspeed is too high. When the center light illuminates, the aircraft is maintaining the correct landing AOA. Slight errors are indicated when the center light illuminates in conjunction with one other light.
2.206 Attitude Director Indicator (ADI)
The Attitude Director Indicator (ADI) dominates the center of the instrument panel. The rolling attitude sphere displays the aircraft’s pitch and bank angles. Pitch markings are graduated in 5- degree increments. The bank markings are graduated in 10-degree increments. During Instrument Landing System (ILS) approaches, the ILS bank steering (localizer) and glideslope bars
appear in front of the attitude sphere. During ILS landings, fly toward the ILS needles.
The turn-and-slip indicator resides at the bottom of the instrument. When not centered, apply rudder toward the needle to center the indicator.

Aircraft Cockpits 13
2.207 Horizontal Situation Indicator (HSI)
The Horizontal Situation Indicator (HSI) shows a horizontal, top-down view of the aircraft superimposed on a compass. The compass rotates so that the aircraft heading always appears at the top of the display. The outer edge of the compass ring shows the course arrow, indicating the direction of the next navigation point.
The course deviation indicator in the center of the compass illustrates the intended course relative to the aircraft in the center of the instrument. During an ILS landing,
HSI the bar corresponds with the bank steering bar, showing deviation from the localizer beam. Please note, however, that the course deviation indicator moves the opposite direction of the ILS bank steering bar.
The desired heading is also displayed numerically on the right side of the instrument. The distance to the destination, in nautical miles, is shown on the left side of the instrument.
2.208 Altimeter
The altimeter displays altitude above sea level (MSL) in 20-foot increments. It consists of a numeric readout in the center with a clock-like display along the outside edge, which graphically displays the “hundreds” of feet.
The Altimeter
2.209 Vertical Velocity Indicator (VVI)
The Vertical Velocity Indicator (VVI) indicates the aircraft’s rate of climb (or descent) in thousands of feet per minute. The needle counts clockwise from zero as the aircraft climbs, and counts counter-clockwise as the aircraft descends.
The Vertical Velocity Indicator
2.210 Accelerometer
The accelerometer displays instantaneous positive and negative acceleration G-loads. Markers highlight the maximum positive and negative G-loads achieved.
Accelerometer
2.211 Interstage Turbine Temperature (ITT)
Indicators
This pair of instruments displays the temperature between the high and low-pressure turbine sections in degrees C.
Interstage Turbine Temperature Indicators

14 Aircraft Cockpits
2.212 Engine Core Speed Indicator
This pair of instruments indicates the compressor core speed as a percentage of maximum RPM for both the left and right engines.
Engine Core Speed Indicator
2.213 Engine Oil Pressure Indicator
This pair of instruments indicates the engine oil pressure reading in psi. If pressure drops below 27.5 psi, the engine oil pressure caution light illuminates.
Engine Oil Pressure
2.214 Fan Speed Indicator
This pair of instruments indicates the engine speed as a percentage of maximum RPM for both the left and right engines. Engine fan speed is the primary indicator of thrust being generated by the A-10A’s TF-34 engines.
Fan Speed Indicator
hEngine fan speed provides the best indication of thrust being generated in the A-10A.
2.215 Fuel Flow Indicators
This pair of instruments shows the fuel flow for each engine.
Flow is measured in pounds per hour.
Fuel Flow Indicators
2.216 Flaps Indicator
The flaps indicator shows the position of the flaps.
Flaps Indicator
2.217 Brake Indicator
The brake indicator shows the position of the speed brake.
Brake Indicator
2.218 Fuel Quantity Indicator
The fuel quantity indicator shows the remaining fuel in the internal and external tanks. The digital readout shows internal fuel remaining. The left and right pointers indicate fuel remaining in the left and right tanks, respectively.
Fuel quantity indicator

Aircraft Cockpits 15
Armament Control Panel
2.219 Armament Control Panel
The armament control panel dominates the lower left side of the instrument panel, showing the quantity and status of each of the A-10A’s eleven hardpoints. Each hardpoint is represented by a square of four lights.
The two upper lights in each square represent the quantity of weapons (or jamming pods) on that hardpoint. If both upper green lights are lit, there are two or more weapons on that hardpoint. If only one
upper green light is lit, there is only one weapon on that hardpoint. When all weapons on the hardpoint are exhausted, the upper lights turn off and the red light on the bottom row illuminates.
The green light in the lower row indicates the “active” or selected hardpoint. Cycling through available weapons causes the green light in the lower row to move from hardpoint to hardpoint.
2.220 Ripple Quantity Indicator
hAutomatically releasing multiple bombs with a single press of the release button is called “rippling.”
The Ripple Quantity indicator shows the number of bombs that will be released per drop.
2.221 Ripple Interval
The Ripple Interval indicator indicates the spacing in milliseconds times ten between each bomb release. For example, “50” would equate to 500 milliseconds, or 0.5 seconds.
2.222 Cannon Rate Switch
The Cannon Rate switch selects between the high (60 rounds per second) and low (30 rounds per second) rates of fire for the 30mm cannon.
2.223 Master Arm Switch
The Master Arm switch enables ARM and disables SAFE in the weapons system. The switch should be in the SAFE position during takeoff, landing, and flying over friendly territory. Switch to ARM to enable the weapons when entering hostile airspace.

16 Aircraft Cockpits
2.3. Su-25 Frogfoot Cockpit
The Su-25 cockpit is relatively simple, dominated by a series of analog gauges. In addition, most instruments are the same as (or very similar to) Su-27 and MiG-29 cockpits.
The Su-25 Cockpit
2.301 Indicated Airspeed ( IAS) Indicator
The IAS indicator shows the aircraft’s indicated airspeed (IAS). The scale ranges from 0 to 800 km/h.
IAS Indicator
2.302 Landing System Signal Panel
The landing system signal panel shows the deployment status of the landing gear, flaps, Leading Edge Flaps (LEF), and speed brakes. The red light in the center illuminates when any of the landing gear is not locked in the position of the landing gear handle (up or down). The light flashes if one or more landing gear is locked up but the handle is down, or
Landing System Signal Panel if the LEF are down but the handle is up.
2.303 Combined AOA/G-Meter
The combined AOA/G-meter simultaneously displays the aircraft’s angle of attack and current g-load. The pointer on the left shows the current AOA in degrees. The long needle on the right side of the instrument shows the current g-load.
Combined AOA/G-Meter
2.304 Attitude Director Indicator (ADI)
The ADI simultaneously shows current flight attitude and course guidance information. The numeric tape in the center shows the aircraft’s current pitch and bank angle. The horizontal lines remain parallel with the horizon at all times. The

Aircraft Cockpits 17
turn-and-slip indicator at the bottom indicates the current sideslip. As always, apply rudder toward the sliding ball (also called “stepping on the ball”) to center it.
h“Step on the ball” in the turn-and-slip indicator (apply rudder toward it) to center it and correct sideslip.
The horizontal Pitch Steering Bar in the center of the instrument indicates the correct pitch angle to reach the next waypoint. Likewise, the Course Steering Bar leans left or right, indicating the correct course to the next waypoint. When both bars are centered, the aircraft is on course.
During landings, the W-shaped glideslope deviation indicator and course deviation indicator provide Instrument Landing System (ILS) direction. If either channel of the ILS system has failed, the appropriate OFF light illuminates. During automatic landing approaches, the appearance of either light indicates an automatic level-off by the flight control system.
ADI
2.305 Horizontal Situation
Indicator (HSI)
The Horizontal Situation Indicator (HSI) provides a horizontal view of the aircraft with respect to the navigation course. The compass card rotates such that the correct heading is always displayed at the very top. The course pointer shows the desired heading, while the bearing pointer points
HSI directly toward the next waypoint. The range counter indicates the distance in
kilometers to the next steer point while the bearing counter provides a numeric readout of the desired heading. ILS localizer and glideslope bars are located within the center of the compass.
2.306 Vertical Velocity
Indicator (VVI)
The needle moves along the left edge of the Vertical Velocity Indicator (VVI), indicating the aircraft’s current rate of climb or descent. A turn-and-slip indicator in the center provides backup should the ADI malfunction. The turn needle in the center leans toward the direction of the turn, but does not provide accurate rate-of-turn information.
VVI

18 Aircraft Cockpits
2.307 Radar Altimeter
The radar altimeter shows the aircraft’s current Altitude above Ground Level (AGL), from 0 to 1,000 meters. It does not indicate altitude when above 1,000 meters.
Radar Altimeter
2.308 Engine RPM Indicator
The engine RPM indicator shows the current speed of both engines as a percentage of maximum RPM.
Engine RPM Indicator
2.309 Fuel Quantity Indicator
The fuel quantity indicator shows the amount of fuel remaining onboard, from 0 to 10 tons. The white tape shows the total fuel quantity.
Fuel Quantity Indicator
2.310 EGT Indicators
The Exhaust Gas Temperature (EGT) indicators show the exhaust temperature from 200 degrees C to 1,000 degrees C.
EGT
2.311 Radar Homing And Warning
(RHAW) Display Panel
The Radar Homing And Warning (RHAW) panel indicates the direction and source of detected radar emitters. The Aircraft symbol represents your position; the lights around it indicate the bearing to the emitter. The six lights along the bottom indicate the radar type. See the «Radar Warning Receivers» chapter for additional details.
RHAW Display Panel
![]()
Aircraft Cockpits 19
Weapons Display 2.312
In the rightmost side of the weapons console, there are two small windows displaying cyrillic letters. These letters identify the type of weapons available in the currently selected pylons:
•HPC: Rockets
•YP: Missiles (either AG or AA)
•B: Bombs
•BPY: Cannon
•Black and white stripes: no cannon rounds left
Pylons #2 & #9 selected and ready (green lights). Weapon of choice: rockets (HPC). Below «HPC» it reads «BPY» meaning the cannon is operational.
Pylons #5 and #6 selected. #6 is not green because it is carrying a fuel tank. 5 carries a bomb (b).
Pylons #3 & #8 selected. #3 is not green because it is carrying an ECM pod, not a weapon. Pylon 8 carries a missile (YP).
Selecting the cannon as the active weapon is indicated by the label (BPY). In the bottom window there is a «K» meaning we have between 1/2 and a full load of ammo rounds.
Pylons #4 & #7 selected. Weapon of choice: missiles (YP). As you can see, we are moving inwards through the pylons.
As we fire the cannon, available rounds will eventually get below 1/2. This is shown by the label «1/2». If we keep firing, the next label will be «1/4». When no more rounds are left there will appear a black and white striped label.

20 Aircraft Cockpits
2.313 ECM Light
Before engaging hostile forces it is a good idea to switch on our ECM pod. A green light will appear on the right console to inform us that we are emitting jamming noise.
2.314 Heads-Up Display (HUD)
On the base of the HUD, colored lights indicate sensor and weapon status.
2.315 Weapons Panel
The weapons panel provides indications to inform the pilot of weapon status and type selected.

Aircraft Cockpits 21
2.316 Warning Panel
This series of lights indicates aircraft damage and system indicators.
2.4. Su-27 and Su-33 Flanker Cockpit
The Su-27 and Su-33 cockpits are extremely similar. Although some control panels differ, the instrumentation is identical between the two aircraft. Furthermore, most instruments are identical (or very similar) to the MiG-29 and Su-25 cockpits.
The Su-27cockpit
2.401 Indicated Airspeed (IAS) Indicator
The IAS indicator shows the aircraft’s Indicated Airspeed (IAS). The scale ranges from 0 to 1,600 km/h.
IAS Indicator

22 Aircraft Cockpits
2.402 Altimeter
The altimeter shows the aircraft’s altitude above sea level (MSL), from 0 to 25,000 meters. The inner ring and short needle show the altitude in thousands of meters. The outer ring and long needle show it in hundreds of feet. Add the two readings to obtain the exact altitude.
Altimeter
2.403 Landing System Signal Panel
The landing system signal panel shows the deployment status of the landing gear, flaps, Leading Edge Flaps (LEF), and speed brakes. The red light in the center illuminates when any of the landing gear is not locked in the position of the landing gear handle (up or down). The light flashes if one or more landing gear is locked up but the handle is down, or if the LEF are down but the handle is up.
Landing System Signal Panel
2.404 Combined AOA/G-Meter
The combined AOA/G-meter simultaneously displays the aircraft’s angle of attack and current G-load. The pointer on the left shows the current AOA in degrees. The long needle on the right side of the instrument shows the current G-load. The small needle indicates the maximum G-load encountered during the flight.
Combined AOA/G-Meter
2.405 Attitude Director Indicator (ADI)
The ADI simultaneously shows current flight attitude and course guidance information. The numeric tape in the center shows the aircraft’s current pitch and bank angle. The horizontal lines remain parallel with the horizon at all times. The turn-and-slip indicator at the bottom indicates the current sideslip. As always, apply rudder toward the sliding ball (also called “stepping on the ball”) to center it.
h“Step on the ball” in the turn-and-slip indicator (apply rudder toward it) to center it and correct sideslip.
The horizontal Pitch Steering Bar in the center of the instrument indicates the correct pitch angle to reach the next waypoint. Likewise, the Course Steering Bar leans left or right, indicating the correct course to the next waypoint. When both bars are centered, the aircraft is on course.

Aircraft Cockpits 23
During landings, the W-shaped glideslope deviation indicator and course deviation indicator provide Instrument Landing System (ILS) direction. If either channel of the ILS system has failed, the appropriate OFF light illuminates. During automatic landing approaches, the appearance of either light indicates an automatic level-off by the flight control system.
ADI
2.406 Horizontal Situation Indicator (HSI)
The Horizontal Situation Indicator (HSI) provides a horizontal view of the aircraft with respect to the navigation course. The compass card rotates such that the
correct heading is always displayed at the very top. The course pointer shows the desired heading, while the bearing pointer points directly toward the next waypoint. The range counter indicates the distance in kilometers to the next steer point, while the bearing counter provides a numeric readout of the desired heading. ILS localizer and glideslope bars are located within the center of the compass.
HSI
2.407 Vertical Velocity Indicator (VVI)
The needle moves along the left edge of the Vertical Velocity Indicator (VVI), indicating the aircraft’s current rate of climb or descent. A turn- and-slip indicator in the center provides backup should the ADI malfunction. The turn needle in the center leans toward the direction of the turn, but does not provide accurate rate-of-turn information.
VVI
2.408 Clock
The clock shows the current time of day.
Clock

24 Aircraft Cockpits
2.409 Engine RPM Indicator
The engine RPM indicator shows the current speed of both engines as a percentage of maximum RPM. The green lights under the indicator illuminate when the afterburner engages.
Engine RPM Indicator
2.410 Fuel Quantity Indicator
The fuel quantity indicator shows the amount of fuel remaining onboard, from 0 to 9 tons. The tape in the middle shows the total fuel quantity.
Fuel Quantity Indicator
2.411 EGT Indicators
The Exhaust Gas Temperature (EGT) indicators show the exhaust temperature from 200° C to 1,000° C.
EGT
2.412 HDD
The Heads-Down Display (HDD) TV monitor fills the upper right corner of the instrument panel. The HDD displays the programmed flight path and steer points, the location of runways, and the location of targets detected by the radar. See the “Sensors” chapter for details on HDD usage.
HDD
2.413 Radar Homing And Warning
(RHAW) Display Panel
The Radar Homing And Warning (RHAW) panel indicates the direction and source of detected radar emitters. The Aircraft symbol represents your position; the lights around it indicate the bearing to the emitter. The six lights along the bottom indicate the radar type. See the «Radar Warning Receivers» Chapter for additional details.
RHAW Display Panel

Aircraft Cockpits 25
2.414 Warning Panel
This series of lights indicates aircraft damage and system indicators.
2.5. MiG-29 Fulcrum Cockpit
The MiG-29 cockpit is relatively simple, dominated by a series of analog gauges. The MiG-29A Fulcrum (used by NATO) and MiG-29S Fulcrum C cockpits are identical. In addition, most instruments are the same as (or very similar to) to Su27 and Su-25 cockpits.
The MiG-29A and MiG-29S Cockpit

26 Aircraft Cockpits
2.501 Indicated Airspeed ( IAS) Indicator
Altimeter
The IAS indicator shows the aircraft’s Indicated Airspeed (IAS). The scale ranges from 0 to 800 kts.
IAS Indicator
2.502 Altimeter
The altimeter shows the aircraft’s altitude above sea level (MSL), from 0 to 25,000 meters. The inner ring and short needle show the altitude in thousands of meters. The outer ring and long needle show it in hundreds of feet. Add the two readings to obtain the exact altitude.
2.503 Landing System Signal Panel
The landing system signal panel shows the deployment status of the landing gear, flaps, Leading Edge Flaps (LEF), and speed brakes. The red light in the center illuminates when any of the landing gear is not locked in the position of the landing gear handle (up or down). The light flashes if one or more landing gear is locked up but the handle is down, or if the LEF are down but the handle is up.
Landing System Signal Panel
2.504 Combined AOA/G-Meter
The combined AOA/G-meter simultaneously displays the aircraft’s angle of attack and current g-load. The pointer on the left shows the current AOA in degrees. The long needle on the right side of the instrument shows the current g-load. The small needle indicates the maximum g-load encountered during the flight.
Combined AOA/G-Meter
2.505 Attitude Director Indicator (ADI)
The ADI simultaneously shows current flight attitude and course guidance information. The numeric tape in the center shows the aircraft’s current pitch and bank angle. The horizontal lines remain parallel with the horizon at all times. The turn-and-slip indicator at the bottom indicates the current sideslip. As always, apply rudder toward the sliding ball (also called “stepping on the ball”) to center it.
h“Step on the ball” in the turn-and-slip indicator (apply rudder toward it) to center it and correct sideslip.
The horizontal Pitch Steering Bar in the center of the instrument indicates the correct pitch angle to reach the next waypoint. Likewise, the Course Steering Bar leans left or right, indicating the correct course to the next waypoint. When both bars are centered, the aircraft is on course.

Aircraft Cockpits 27
During landings, the W-shaped glideslope deviation indicator and course deviation indicator provide Instrument Landing System (ILS) direction. If either channel of the ILS system has failed, the appropriate OFF light illuminates. During automatic landing approaches, the appearance of either light indicates an automatic level-off by the flight control system.
ADI
2.506 Horizontal Situation Indicator (HSI)
The Horizontal Situation Indicator (HSI) provides a horizontal view of the aircraft with respect to the navigation course. The compass card rotates such that the correct heading is always displayed at the very top. The course pointer shows the
desired heading while the bearing pointer points directly toward the next waypoint. The range counter indicates the distance in kilometers to the next steer point, while the bearing counter provides a numeric readout of the desired heading. ILS localizer and glideslope bars are located within the center of the compass.
HSI
2.507 Vertical Velocity Indicator (VVI)
The needle moves along the left edge of the Vertical Velocity Indicator (VVI), indicating the aircraft’s current rate of climb or descent. A turn- and-slip indicator in the center provides backup should the ADI malfunction. The turn needle in the center leans toward the direction of the turn, but does not provide accurate rate-of-turn information.
VVI
2.508 Mach Indicator
The Mach indicator shows the aircraft’s current Mach number.
Mach Indicator

28 Aircraft Cockpits
2.509 Clock
The clock shows the current time of day.
Clock
2.510 Radar Altimeter
The radar altimeter shows the aircraft’s current Altitude above Ground Level (AGL), from 0 to 1,000 meters. It does not indicate altitude when above 1,000 meters.
Radar Altimeter
2.511 Engine RPM Indicator
The engine RPM indicator shows the current speed of both engines as a percentage of maximum RPM. Green afterburner indicators at the far right of the instrument panel indicate when afterburners are engaged.
Engine RPM Indicator
EGT
2.512 Fuel Quantity Indicator
The fuel quantity indicator shows the amount of fuel remaining on board, from 0 to 5.5 tons. The tape in the middle shows the total fuel quantity. The four triangular indicators show the amount of fuel in the centerline (CL), wing (WING), tank 1, and tank 3. The four lights illuminate as the respective tanks are emptied.
Fuel Quantity Indicator
2.513 EGT Indicators
The Exhaust Gas Temperature (EGT) indicators show the exhaust temperature from 200° C to 1,000° C.
2.514 HDD
The Heads-Down Display (HDD) TV monitor fills the upper right corner of the instrument panel. The HDD displays the programmed flight path and steer points, the location of runways, and the location of targets detected by the radar. See the “Sensors” chapter for details on HDD usage.
HDD
 Loading…
![]()
- Prev
- 1
- 2
- 3
- Next
- Page 1 of 3
Recommended Posts
![]()
-
- Share
Вот собственно. В Формате Word 2000 с гиперссылками и добавленной подглавой «Режимы работы прицела АСП-17».
Гиперссылки — выделенный текст (у меня синего цвета и подчеркнутый), например AIM120 — наводим мышку, щелкаем и сразу перемещаемся в раздел описания американской ракеты «воздух-воздух» средней дальности AIM-120. Так же соответственно и все остальные .
Если будет глючить (аварийное закрытие программы) — отключите проверку грамматики и орфографии в верхней менюшке Сервис-Параметры-Правописание-убрать все галочки с Грамматики и Орфографии. Общий размер RAR — 4,3 Мб.
Руководство пилота.part1.rar
Руководство пилота.part2.rar
Руководство пилота.part3.rar
Руководство пилота.part4.rar
Руководство пилота.part5.rar
-

2

Link to comment
Share on other sites
![]()
-
- Share
Т.е. это стандартный мануал к ГС, но в формате .doc?
Или что-то новенькое (может переведённый Шоу, а?… (мечтательно закатывает глаза))?
With my Art I’m the fist
In the face of god
Link to comment
Share on other sites
![]()
- Author
-
- Share
Верно, стандартный мануал в формате .doc  Для начала неплохо бы его изучить, а уж после другое (Шоу — это который Бернард ?
  )
)
Link to comment
Share on other sites
![]()
-
- Share
Шоу — это который Роберт Ли. Сейчас на сайтах вирпильных сообществ столько информации, адаптированной к симуляторам, что переводить эту книгу просто не имеет особого смысла. Говорю это потому, что переводил её и публиковал на сухом.ру четыре года назад. Недавно пересмотрел черновики, те что не выкладывал, сравнил с тем. что уже курсирует в сообществе и не стал возвращаться к этой работе. Так, что дорогой Emperor, нет необходимости мечтательно закатывать глаза — необходимой информации пруд пруди.
Link to comment
Share on other sites
- 3 months later…
![]()
-
- Share
Предложу и свой труд, кому интересно:
Руководство по боевому применению МиГ-29 в формате doc.
http://www.megaupload.com/?d=YN222ZOZ
Для удобства и при наличии свободного места рекомендуется после скачивания перегнать файл в формат rtf — это ускорит работу (все картинки будут уже загружены, но файл будет весить 147Mb).
-
4
Link to comment
Share on other sites
![]()
-
- Share
вот за такой труд — большое персональное спасибо!
сам распознавал?
«There are five dangerous faults which may affect a general: recklessness, which leads to destruction; cowardice, which leads to capture; a hasty temper, which can be provoked by insults; a delicacy of honor which is sensitive to shame; over-solicitude for his men, which exposes him to worry and trouble.» Sun Tzu
[sigpic]http://forums.eagle.ru/signaturepics/sigpic2354_5.gif[/sigpic]
Link to comment
Share on other sites
![]()
-
- Share
А что за картинки? Оновлённые?
Link to comment
Share on other sites
![]()
-
- Share
Тяну. Хоть я их и наизусть знаю, но таки бу зубрить заново!
Всех убью, один останусь!
Link to comment
Share on other sites
![]()
-
- Share
olmiz выложил аккуратно оформленое известное РЛЕ по 9-12, с распознаным текстом, подписаными картинками и красиво оформлеными таблицами. в общем лучший варинт обработки РЛЕ, который мне попадался на глаза.
«There are five dangerous faults which may affect a general: recklessness, which leads to destruction; cowardice, which leads to capture; a hasty temper, which can be provoked by insults; a delicacy of honor which is sensitive to shame; over-solicitude for his men, which exposes him to worry and trouble.» Sun Tzu
[sigpic]http://forums.eagle.ru/signaturepics/sigpic2354_5.gif[/sigpic]
Link to comment
Share on other sites
- ED Team
![]()
- ED Team
-
- Share
Качнул…
При всем уважении, плоховато. 
Не хватило времени наверное.
Best Regards, Dmitry.
«Чтобы дойти до цели, надо прежде всего идти.» © О. Бальзак
Link to comment
Share on other sites
![]()
-
- Share
вот за такой труд — большое персональное спасибо!
сам распознавал?
К сожалению, распознаваться текст наотрез отказался, так что набирал вручную в течение последних трех месяцев на работе в свободное время.
А что за картинки? Оновлённые?
Нет, те, что были, вставлял.
Качнул…
При всем уважении, плоховато.
Не хватило времени наверное.
А что именно не понравилось?
Link to comment
Share on other sites
- ED Team
![]()
- ED Team
-
- Share
А что именно не понравилось?
К сожалению общий стиль оформления и особенно картинки (только что вырезаны и все ) не порадовали. Уж извини.
Я в курсе, что работы по переводу из сканов в ПДФ или Ворд выше крыши, но если делать, то качественно. Потому больше одной книги пока не осилил.
Best Regards, Dmitry.
«Чтобы дойти до цели, надо прежде всего идти.» © О. Бальзак
Link to comment
Share on other sites
![]()
-
- Share
К сожалению общий стиль оформления и особенно картинки (только что вырезаны и все
Я в курсе, что работы по переводу из сканов в ПДФ или Ворд выше крыши, но если делать, то качественно. Потому больше одной книги пока не осилил.
Признаюсь, с картинками работать не умею. Вообще: ни сам рисовать, ни фотошопить, ни еще что-то делать, кроме как вырезать, вставлять и менять размер в paint’е.
Link to comment
Share on other sites
- ED Team
![]()
- ED Team
-
- Share
К сожалению общий стиль оформления и особенно картинки (только что вырезаны и все
Я в курсе, что работы по переводу из сканов в ПДФ или Ворд выше крыши, но если делать, то качественно. Потому больше одной книги пока не осилил.
А я считаю ОЧЕНЬ СЕРЬЕЗНУЮ работу человек сделал. Может быть картинки и «не современны», но ясны и понятны. Пока что ни разу в жизни для профессиональных военных инструкции экипажу (ИЭ) или РЛЭ цветной и с фотками не видел. Сделано как все наши военные инструкции экипажу: ч-б рисунки-схемы-графики. ПОверьте, подавляющее большинство наших выдающихся пилотов именно по таким инструкциям ими, этими мастерами своего дела, и стали.
Интересно, а амеры неуж-то по рекламным цветным буклетам учатся? Кто знает?
Link to comment
Share on other sites
- ED Team
![]()
- ED Team
-
- Share
А я считаю ОЧЕНЬ СЕРЬЕЗНУЮ работу человек сделал. Может быть картинки и «не современны», но ясны и понятны. Пока что ни разу в жизни для профессиональных военных инструкции экипажу (ИЭ) или РЛЭ цветной и с фотками не видел. …
Серьезности проделанной работы ни в коей мере не отрицаю. Но не считаю, что она окончена.
Нет, картинки такие в оригинале и есть, только окультурить бы их не помешало.
ПС. С автором все уже обсуждено в личном порядке.
Надеюсь у нас с ним не осталось взаимных претензий.
Best Regards, Dmitry.
«Чтобы дойти до цели, надо прежде всего идти.» © О. Бальзак
Link to comment
Share on other sites
![]()
-
- Share
Серьезности проделанной работы ни в коей мере не отрицаю. Но не считаю, что она окончена.
Нет, картинки такие в оригинале и есть, только окультурить бы их не помешало.
ПС. С автором все уже обсуждено в личном порядке.
Надеюсь у нас с ним не осталось взаимных претензий.
Да нет, камрады, я не в обиде, более того, насчет картинок я согласен с Laivynas. Когда я приступал к работе, я думал над этим вопросом; лучше всего было бы нарисовать их в том же Word’е, и выглядело бы все красивее, и файл бы весил в 10 раз меньше. Но просто я не могу сделать это — рисовать, даже не очень, казалось бы, сложные вещи у меня совершенно не получается.
И спасибо за слова поддержки. :p
ЗЫ. Никаких.
Link to comment
Share on other sites
- ED Team
![]()
- ED Team
-
- Share
… лучше всего было бы нарисовать их в том же Word’е …
О рисовании в Ворде даже не думай! Ни не надо таких мук и ужаса.
Гляну твой файл и свои исходники, может чего накидаю.
В векторах, но не в Ворде.
Best Regards, Dmitry.
«Чтобы дойти до цели, надо прежде всего идти.» © О. Бальзак
Link to comment
Share on other sites
- ED Team
![]()
- ED Team
-
- Share
Не, нормально вполне (я проглядел по диагонали). Фон на рисунках легко убирается прямо в Ворде — два щелчка «контрастностью» вверх — и его почти нет. Таймс (по-моему) только вот не лучший шрифт, я всегда предпочитаю Arial — но это дело вкуса.
Ну ты и пахал.. вручную все это набивать — дело тяжелое. Теперь из самого главного — кто что заметит в плане опечаток и неточностей (nobody’s perfect) надо бы в эту ветку положить.
Спасибо. Пригодится.
Men may keep a sort of level of good, but no man has ever been able to keep on one level of evil. That road goes down and down.
Можно держаться на одном уровне добра, но никому и никогда не удавалось удержаться на одном уровне зла. Эта дорога ведёт вниз и вниз.
G.K. Chesterton
DCS World 2.5: Часто задаваемые вопросы
Link to comment
Share on other sites
- ED Team
![]()
- ED Team
-
- Share
Как такая «реинкарнация»?
Рис. 1
Рис. 2
Рис. 17
PS. Все картинки имеют векторные версии-исходники…
Best Regards, Dmitry.
«Чтобы дойти до цели, надо прежде всего идти.» © О. Бальзак
Link to comment
Share on other sites
![]()
-
- Share
Предложу и свой труд, кому интересно:
Руководство по боевому применению МиГ-29 в формате doc.
А я не понял, почему только по МиГ-29? А где по Су-27!?!?! 
НЕТ ФAШИЗМУ и НЕОНAЦИЗМУ! / NO TO FASCISM and NEO-NAZISM!
Link to comment
Share on other sites
![]()
-
- Share
Laivynas, а теперь таким макаром — все остальные рисунки, и оцифрацию РЛЭ можно будет считать полностью законченной. Там, правда, дальше картинки посложнее будут…
With my Art I’m the fist
In the face of god
Link to comment
Share on other sites
- ED Team
![]()
- ED Team
-
- Share
Laivynas, а теперь таким макаром — все остальные рисунки, и оцифрацию РЛЭ можно будет считать полностью законченной. Там, правда, дальше картинки посложнее будут…
Ты знаешь, я даже в курсе.
Но попробовать можно. Тем более, что РЛЭ в другом виде уже давно на руках у многих и данный вариант совсем не горит.
Best Regards, Dmitry.
«Чтобы дойти до цели, надо прежде всего идти.» © О. Бальзак
Link to comment
Share on other sites
![]()
-
- Share
А я не понял, почему только по МиГ-29? А где по Су-27!?!?!
У меня нет руководства по Су-27. Только по Миг-29.
В общем, как в анекдоте — «елок нет, остались одни березы!»
Link to comment
Share on other sites
![]()
-
- Share
Автору респект за проделанную работу!!!:D
Link to comment
Share on other sites
![]()
-
- Share
У меня нет руководства по Су-27. Только по Миг-29.
В общем, как в анекдоте — «елок нет, остались одни березы!»
А тебя обрадует то, что оно у меня есть? Правда так же в jpg-ском формате и весит всё 52 метра.
НЕТ ФAШИЗМУ и НЕОНAЦИЗМУ! / NO TO FASCISM and NEO-NAZISM!
Link to comment
Share on other sites
- Prev
- 1
- 2
- 3
- Next
- Page 1 of 3
-
Recently Browsing
0 members
- No registered users viewing this page.
Содержание:
- 1 1. Введение: как управлять самолётом
- 2 2. Руление и взлёт
- 3 3. Выполнение «бочки»
- 4 4. Переворот и иммельман
- 5 5. Визуальная посадка
- 6 Технологии
- 7 Системные требования
- 8 Тестовая система
- 8.1 Перелет к современности
- 8.2 Реальность рулит!
- 8.3 Читать – не перечитать
- 8.4 Править небом
- 8.5 Горячее железо
- 8.6 Полезные ссылки:
- 8.7 Плюсы:
- 8.8 Минусы:
- 9 Обязательно обновите драйвера видеокарты и другое ПО
- 10 Lock On: Горячие скалы 2 не запускается
- 11 Lock On: Горячие скалы 2 тормозит. Низкий FPS. Лаги. Фризы. Зависает
- 12 Lock On: Горячие скалы 2 вылетает на рабочий стол
- 13 Черный экран в Lock On: Горячие скалы 2
- 14 Lock On: Горячие скалы 2 не устанавливается. Зависла установка
- 15 В Lock On: Горячие скалы 2 не работают сохранения
- 16 В Lock On: Горячие скалы 2 не работает управление
- 17 Не работает звук в Lock On: Горячие скалы 2
1. Введение: как управлять самолётом
1. Добро пожаловать в LockOn на курс учебной лётной подготовки на самолёте A-10 «Thunderbolt II», который любовно называют ещё и «Warthog — Бородавочник»! ВНИМАНИЕ: не пользуйтесь изменением видов и масштаба изображения во время проигрывания трека.
2. А-10 — это надежный, прочный и лёгкий в управлении штурмовик с двумя турбовентиляторными двигателями, разработанный и построенный в США.
3. Это вводное занятие, на котором будет рассказано, какая информация выводится на индикатор на лобовом стекле (ИЛС) и как управлять самолётом по тангажу, крену и рысканию.
4. Чтобы в любое время взять на себя управление самолётом или выйти из миссии, необходимо нажать клавишу «Esc». Для временной остановки, например, чтобы прочитать текст, нажмите клавишу «Pause».
5. В верхней части ИЛС находятся указатель вектора скорости (УВС) и шкала тангажа. УВС всегда показывает текущее направление траектории самолёта. Если при приближении к холму поместить УВС над его гребнем, самолёт пройдёт над холмом.
6. Шкала тангажа, идентичная авиагоризонту на панели приборов, показывает положение продольной оси самолёта относительно горизонта.
7. Шкала тангажа проградуирована через 5°. На ней меткой 0 отмечена сплошная линия, соответствующая горизонту. Снизу и сверху от неё расположены соответственно пунктирные линии для отрицательных углов тангажа и сплошные — для положительных.
8. При вращении самолёта вокруг продольной оси, шкала тангажа остаётся стабилизированной по горизонту и показывает положение самолёта по крену, даже если естественный горизонт не виден.
9. В левой части ИЛС находится цифровой индикатор приборной скорости в узлах (морских милях в час).
10. В правой части ИЛС находится указатель барометрической высоты или высоты относительно уровня моря.
11. Под указателем барометрической высоты находится цифровой индикатор угла тангажа. Отрицательные значения угла соответствуют опущенному носу самолёта, положительные — поднятому.
12. Под шкалой радиовысотомера находится цифровой указатель радиовысоты, помеченный буквой «R». Он не будет выводиться на ИЛС, если высота будет более 5000 футов или при крене более 45°, так как при этом высотомер перестает принимать отражённый от поверхности радиосигнал.
13. Под шкалой тангажа находится вращающаяся шкала курса, на которой расположенный ниже неё треугольник указывает магнитный курс самолёта.
14. Используя только ИЛС, можно управлять самолётом при полном отсутствии видимости. Это все, что необходимо знать об ИЛС для выполнения вводного задания.
15. Чтобы изменить угол тангажа самолёта, то есть поднять или опустить нос, необходимо отклонить руль высоты (РВ), двигая ручку управления самолётом (РУС) соответственно на себя или от себя.
16. Для вращения самолёта вокруг продольной оси необходимо отклонить элероны движением РУС вправо или влево.
17. Можно также изменить направление продольной оси самолёта, используя педали руля направления (РН). Левая педаль или клавиша «Z» отклоняют нос самолёта влево, правая или клавиша «X» — вправо.
18. Так как самолёт оснащён демпфером рысканья, использование педалей обычно необязательно в полёте, кроме случаев полёта с одним неработающим двигателем или вывода из штопора.
19. Слева ниже виден Сухумский аэропорт, а впереди — величественные Кавказские горы.
20. Мы начинаем на высоте 5000 футов, разгоняясь до 300 узлов курсом 360. Набирая высоту и снижаясь, следим за шкалой тангажа вместе с указателем высоты на правой стороне ИЛС и приборной скоростью — на левой.
21. Это набор высоты. Обратите внимание на положительные значения на шкале тангажа, увеличение высоты и падение скорости.
22. Это снижение. Обратите внимание на отрицательные значения на шкале тангажа, уменьшение высоты и увеличение скорости.
23. Изменение направления полёта креном требует небольших движений РУС. Создаём крен примерно в 30°, и по шкале курса будет видно, как самолёт медленно повернёт.
24. Увеличиваем крен до 60°. Вместе с увеличением угловой скорости разворота нос самолёта стремится опуститься из-за уменьшения подъёмной силы, так что приходится немного подтягивать РУС на себя и добавлять оборотов двигателям, чтобы сохранить высоту и скорость.
25. Как только курс сменится на обратный, то есть станет равным 180°, я переложу самолёт в противоположный вираж с креном 60°, отклонив РУС влево, и буду находиться в нём, пока курс снова не станет равным 360°.
26. Если вы сможете выполнять такой крутой вираж с отклонением по высоте не более 200 футов, а по скорости — не более 20 узлов, то вы всё делаете правильно и летаете, как профессионал.
27. Сейчас вам пришла пора попробовать самому. Нажмите клавишу «Esc», чтобы взять управление на себя или выйти из миссии.
1. Добро пожаловать на тренировочное задание по теме «Руление и взлёт» на самолёте МиГ-29А. Этот истребитель оснащён двумя турбореактивными двигателями и имеет все необходимые приборы и системы, позволяющие успешно решать боевые задачи в любое время суток при любой погоде.
2. Выполняя это тренировочное задание, вы узнаете о некоторых приборах, научитесь запускать двигатели, освоите руление и взлёт. Чтобы в любое время взять на себя управление самолётом или выйти из миссии, нажмите клавишу «Esc». Для временной остановки, например, чтобы прочитать текст, нажмите клавишу «Pause».
3. Для запуска двигателей сначала необходимо поставить рычаг управления двигателем (РУД) в положение «малый газ». Включаем навигационные огни нажатием клавиш «RCtrl + L». Чтобы запустить левый двигатель, нажимаем клавиши «RAlt + Home» для начала процедуры автоматического запуска, контролируя его по загоранию соответствующей лампы на табло светосигнализатора.
4. Здесь видно, как гаснет лампа и продолжает раскручиваться левый двигатель. Чтобы прекратить запуск и остановить двигатель, нажмите клавиши «RAlt + End» для левого двигателя № 1 и «RCtrl + End» для правого двигателя № 2.
5. Мы контролируем запуск, глядя на указатель оборотов левого двигателя и контролируя по прибору и на слух увеличение его оборотов, одновременно следим за температурой газов за турбиной, чтобы быть уверенными, что не происходит зависания оборотов.
6. Теперь левый двигатель работает на режиме «малый газ» на 65% оборотов с нормальной температурой газов за турбиной, то есть запуск прошёл нормально. Теперь запускаем правый двигатель нажатием клавиши «RCtrl + Home», наблюдая за оборотами и температурой.
7. Пока продолжается запуск второго двигателя ознакомимся с приборами на приборной доске.
8. Это указатель приборной скорости, он показывает её в пределах от 0 до 1000 км/ч.
9. Это барометрический высотомер, показывающий высоту в метрах над уровнем моря.
10. Это вариометр, показывающий вертикальную скорость самолёта и угловую скорость разворота. Шкала вариометра проградуирована как для набора высоты, так и для снижения до 200 м/с. Шкала указателя поворота — до 3°/с вправо и влево.
11. Это пилотажно-посадочный индикатор (ППИ), на котором отображается состояние шасси, закрылков, тормозных щитков и тормозного парашюта. Теперь вы знаете о панели приборов всё, что нужно для выполнения этого тренировочного задания.
12. Выпускаем закрылки во взлётное положение, нажав клавишу «F» и контролируя их выпуск по ППИ.
13. Тягой двигателей можно управлять, используя РУД на джойстике или клавишами «+» и «-» на дополнительной клавиатуре.
14. Запрашиваем выруливание на ВПП, используя последовательно клавиши «/», «F6» и «F2».
15. Включаем рулёжные фары, нажав клавиши «RAlt + L». Чтобы преодолеть инерцию и стронуть самолёт с места, приходится добавить оборотов. Закрываем фонарь, нажав клавиши «LCtrl + C».
16. Как только самолёт тронется, проверим тормоза колёс, кратковременно нажав клавишу «W».
17. Для руления используйте педали или клавиши «Z» и «X». Обычно при рулении старайтесь держать белую линию разметки по оси самолёта. Пользуйтесь РУД и тормозами колёс, чтобы сохранять скорость в пределах 20 — 30 км/ч.
18. Торец полосы у нас справа, продолжаем движение. Убираем газ и притормаживаем, чтобы остановиться недалеко от полосы 22 и визуально контролировать воздушное движение.
19. А это пилотажная группа наших знаменитых «Стрижей» на самолётах МиГ-29, выполняющих разворот над полосой на высокой скорости.
20. Теперь всё свободно, можно выруливать в торец полосы и остановиться в ожидании разрешения на взлёт.
21. Запрашиваем разрешение на взлёт, последовательно нажимая клавиши «/», «F6» и «F4».
22. Перед началом разбега сначала нажимаем тормоза колёс, выводим обороты на 90% и выжидаем около 3 секунд, чтобы убедиться в нормальной работе двигателей. Затем отпускаем тормоза и увеличиваем обороты до 100%, удерживая самолёт по центру полосы при помощи педалей.
23. Когда скорость достигает 250 км/ч, плавным движением отклоняем РУС на себя, пока нос самолёта не поднимется примерно на 10°, и удерживаем этот угол. Когда вариометр начинает показывать набор высоты, убираем шасси нажатием клавиши «G», контролируя уборку по ППИ.
24. После достижения высоты 100 м убираем закрылки, нажимая клавишу «F», и увеличиваем угол тангажа до 20°. Самолёт может несколько «провалиться» во время уборки закрылков, так что вы должны быть к этому готовы.
25. Сейчас наш самолёт в полётной конфигурации с убранными шасси и закрылками. Мы будем продолжать набирать скорость, заданную высоту и ложиться на заданный курс.
26. Для более полной информации о приборах в кабине МиГ-29 и их работе необходимо ознакомиться с руководством пилота.
27. На этом тренировочное задание «Руление и взлёт» закончено. Нажмите клавишу «Esc», чтобы взять управление на себя или выйти из миссии.
3. Выполнение «бочки»
1. Добро пожаловать на занятие по теме «бочка» на самолёте МиГ-29. Чтобы в любое время взять управление самолётом на себя или выйти из миссии, нажмите клавишу «Esc». Для временной остановки, например, чтобы прочитать текст, нажмите клавишу «Pause».
2. «Бочка» — это одна из основных фигур пилотажа, когда самолёт поворачивается на 360° вокруг продольной оси.
3. Вот так выглядит «бочка».
4. «Бочка» — это основа для выполнения более сложных фигур, таких как переворот или иммельман, которые мы рассмотрим позже.
5. Начинаем с горизонтального полёта на высоте 1000 м со скоростью 700 км/ч, курсом 270.
6. Чтобы выполнить «бочку», немного берём РУС на себя, чтобы поднять нос самолёта градусов на 8°, затем ставим её в нейтральное положение и плавно отклоняем её до конца влево. Когда самолёт перевернется вверх ногами, нос опустится на уровень горизонта. Затем останавливаем вращение самолёта, отклонив РУС вправо, и выравниваем самолёт в исходное положение.
7. Если «бочка» выполнена правильно, самолёт не должен значительно отклониться от исходных высоты и направления полёта.
8. Пора и вам попробовать сделать «бочку».
4. Переворот и иммельман
1. Доброе утро. Мы в кабине А-10A «Thunderbolt II» и проходим юго-западную границу полигона Ткварчели, где будем отрабатывать переворот и иммельман. Эти освящённые временем фигуры пилотажа, придуманные ещё в Первую мировую войну, применяются и сейчас.
2. Чтобы в любое время взять на себя управление самолётом или выйти из миссии, нажмите «Esc». Для временной остановки, например, чтобы прочитать текст, нажмите «Pause».
3. Иммельман и переворот — это простые, но эффективные фигуры пилотажа, позволяющие изменить направление полёта на 180°.
4. Переворот, разменивающий высоту на скорость — это эффективное средство для выхода из боя.
5. Иммельман разменивает скорость на высоту и удобен для тактики «ударил и беги».
6. Чтобы выполнить переворот, сначала нужно сделать «полубочку», а затем, отклонив РУС на себя и убрав газ, чтобы избежать чрезмерного разгона, начать пикирование.
7. В пикировании продолжаем тянуть РУС на себя, пока самолёт не выровняется, затем ставим его в нейтральное положение, чтобы продолжить горизонтальный полёт.
8. Чтобы выполнить иммельман, даём полный газ.
9. Из горизонтального полёта со скоростью не менее 330 км/ч, потянув РУС на себя, переходим в набор высоты.
10. Продолжаем подтягивать РУС на себя и, когда самолёт, пройдя вертикаль, окажется на спине, а на указателе тангажа будет +10°, выполняем «полубочку» и переходим в горизонтальный полёт.
11. Пора и вам потренироваться в выполнении переворота и иммельмана.
5. Визуальная посадка
1. Приветствую вас на тренировочном полёте на самолёте Су-25, на котором мы будем отрабатывать визуальную посадку.
2. Чтобы в любое время взять на себя управление самолётом или выйти из миссии, нажмите клавишу «Esc». Для временной остановки, например, чтобы прочитать текст, нажмите клавишу «Pause».
3. Наш самолёт сейчас без внешних подкрыльевых подвесок, с остатком топлива 50% во внутренних баках, масса самолёта — 11 тонн. Исходный режим полёта — это горизонтальный полёт на высоте 600м со скоростью 500 км/ч, перпендикулярно посадочному курсу, при заходе на посадку с прямой, на полосу 04 в Крымске.
4. Визуальный заход на посадку возможен в условиях хорошей видимости и отсутствия облачности или тумана в районе аэродрома.
5. Очень важно постоянно наблюдать за окружающим воздушным пространством. Пилотировать самолёт необходимо, в основном, визуально — по проекции линии горизонта на видимые части фонаря кабины, контролируя при этом режим полёта по указателю скорости, высотомеру и вариометру на приборной доске.
6. Сначала уберём обороты до «малого газа».
7. Когда скорость упадет до 370 км/ч, выпускаем шасси клавишей «G». В подтверждение их выпуска и постановки на замки на пилотажно-посадочном индикаторе загорятся 3 зелёных световых сигнализатора.
8. Медленно снижаем скорость примерно до 350 км/ч и выпускаем закрылки в маневренное положение нажатием клавиши «F». При выпуске закрылков самолёт стремится немного поднять нос, поэтому координированным движением ручки от себя парируем эту тенденцию, в то время, пока самолёт продолжает терять скорость.
9. Как только скорость снизится до 320 км/ч выпускаем закрылки во взлётно-посадочное положение клавишей «Shift + F» и добавляем двигателям оборотов до 70%.
10. Перед выполнением разворота на посадочный курс необходимо снова осмотреть воздушное пространство. Разворот начинается тогда, когда угол визирования на полосу достигнет заданного.
11. Для выдерживания заданной глиссады снижения необходимо установить режим работы двигателя примерно 50 — 60%. Это обеспечит нам скорость снижения 3 — 4 м/с при путевой скорости 260 — 280 км/ч.
12. После того, как мы перевели самолёт в посадочную конфигурацию и установили заданный режим снижения, необходимо сттриммировать самолёт.
13. Самый простой способ выдерживать заданную глиссаду снижения — это держать точку начала выравнивания, находящуюся примерно в 100 м от торца полосы, в одном и том же месте относительно отражателя прицела или ИЛС. Это обеспечит нам точный расчёт на посадку и снижение в заданную точку начала выравнивания.
14. Если точка начинает сдвигаться вниз относительно отражателя, это означает, что мы уходим выше глиссады и должны увеличить скорость снижения, уменьшив обороты или тангаж. Если точка уходит выше — мы должны увеличить обороты или тангаж.
15. Приближаясь к полосе, мы должны снизить скорость до 260 км/ч при проходе торца и затем плавно перевести РУД на «малый газ». Затем по мере падения скорости плавно увеличить тангаж до посадочного угла, пока колёса основных стоек шасси не коснутся полосы.
16. Основные колёса коснулись полосы. После опускания носового колеса выпускаем тормозной парашют клавишей «P» и применяем тормоза основных колес.
17. Теперь снижаем скорость до скорости руления.
18. Важная вещь, которую стоит всегда помнить, — при увеличении веса самолёта скорость на глиссаде и посадочная скорость должны быть больше, при уменьшении — меньше.
19. Теперь мы должны срулить с рабочей ВПП. Переключаем посадочные фары на рулёжный режим нажатием «Alt + L».
20. Во избежание опрокидывания и повреждения законцовок крыльев, повороты на Су-25 рекомендуется производить на скорости не более 5 — 10 км/ч.
21. Убираем закрылки, останавливаем двигатели клавишами «RAlt + End» и «RCtrl + End», и выключаем навигационные огни клавишами «RCtrl + L».
22. Ну, что? Приятно откинуться в кресле и почувствовать свежий ветерок после первой посадки? 😉
23. На этом наш полёт закончен.
Разработчик
Eagle Dynamics
Издатель
1C
Официальный сайт
www.lockon.ru
Дата выхода
02.03.2005
Издатель в России
1C
Российское название
LockOn: Горячие Скалы
Дата выхода в России
02.03.2005
Другие платформы
—
Технологии
| API | DirectX 8.1 |
| Engine | Собственный |
| Пиксельные шейдеры | Да |
| Вершинные шейдеры | Да |
| Управление трилинейной фильтрацией | Да |
| Управление анизотропной фильтрацией | Да |
| Управление антиалиасингом | Да |
| Последняя доступная версия | 1.11 |
| Для рецензии использовалась версия | 1.11 |
Системные требования
| Процессор | Минимальный: Pentium 4 1,5 ГГц или Athlon XP 1500+ Рекомендуемый: Intel Pentium 4 3 ГГц или AMD Athlon XP 3000+ |
| Память | Минимальный объем: 512 МБ Рекомендуемый объем: 1024 МБ |
| Видеокарта | Минимально: поддежка шейдеров DX8.1 и 64 МБ памяти Рекомендуется: поддержка шейдеров DX9.0 и 256 Мб памяти |
| CD/DVD | Минимально: 8x CD-ROM Рекомендуется: 40x CD/DVD-ROM |
| HDD | Для установки игры: 2 ГБ Для работы игры: 500 МБ |
| ОС | Windows 98, ME, 2000 или XP и DirectX 9.0 |
Тестовая система
| Процессор | Intel Pentium 4 3.2 ГГц |
| Память | 1024 МБ DDR PC3200 |
| Видеокарта | nVIDIA GeForce 6600 GT |
| CD/DVD | NEC DVD-RW ND3540 |
| HDD | Seagate Barracuda 7200.8 Serial ATA 120 ГБ |
| ОС | Windows XP SP2 + DirectX 9.0c |
Авиасимуляторы – жанр элитарный. Если автогонки и шутеры нравятся практически всем, то сесть за штурвал самолета, пусть и виртуального, сможет не каждый. Один конструктор, принимавший участие в создании МИГ и СУ, сказал: это игры для летчиков и авиационных специалистов. Наскоком освоить даже начальную ступень не выйдет. Нетерпеливый казуал уйдет со словами вроде «а, ничего интересного, то ли дело игра N» (опустим, чтобы никого не обижать) и с тщательно скрываемой досадой. Лишь рожденный настоящим авиафанатом, сев в кабину СУ-25Т, СУ-27 или МИГ-29, уже никогда не выйдет оттуда. К неудовольствию родных и близких. Зато у него появится немало новых друзей, с которыми он будет обсуждать разницу в принципах работы телевизионных ГСН ракеты Х-29Т и авиабомбы КАБ-500КР, или то, что видит летчик на прицеле нашлемной системы целеуказания, или особенности триммирования на сверхзвуке, и подобные, не каждому понятные, вещи. Ненужные никому, кроме небольшой, но стойкой когорты навсегда ушибленных небом.
Российские авиасимуляторы последних лет («ИЛ-2 Штурмовик» и «Забытые сражения», «Перл-Харбор», «LockOn — Современная боевая авиация» и «LockOn: Горячие скалы») заставили авторов статьи вспомнить старый-старый советский фильм, где иноземный супостат по некоему поводу говорил: «Эти русские несносны! Вчера они последние, сегодня вторые, а завтра. » Да, далеко не всегда все так солнечно в нашей стране, но вот по части авиасимуляторов – извините -подвиньтесь. Здесь «завтра» уже наступило, и лучше наших никого нет и, пока что, не предвидится.
В далеком 1995-м Eagle Dynamics выпустила самый первый «Flanker», диск с которым вирпилы трепетно берегут до наших дней. В 1999-м пришел «Flanker 2». Тогда мы впервые увидели в отечественном авиасимуляторе настолько близкую к реальной кабину современных российских истребителей СУ-27 и палубного СУ-33 и получили возможность столь детально управлять полетными и боевыми режимами. Шутка ли – около 20 только основных навигационных и боевых режимов, более 150 команд управления самолетом, оружием и видами!
Спустя 6 лет Eagle Dynamics серьезно обновила игру — появился «Flanker 2.5». Возникла возможность, поработав с редактором миссий, полетать на МИГ-29К (правда, таких «К» было выпущено всего-то две опытные машины — борта 311 и 312, но это тема для другой статьи и в другом издании:). Игра серьезно усложнилась и поумнела.
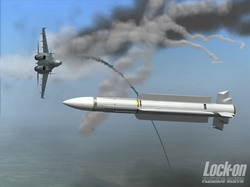
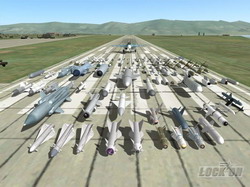
Перелет к современности
Выход в 2003-м продолжения «Flanker», по сути, совершенно новой игры – «LockOn – Современная боевая авиация» — стал просто праздником для фанатов авиасимуляторов. Геймеру стало дозволено летать на штурмовиках СУ-25 и (американском) А-10, на истребителях СУ-27, СУ-33 (палубном), МИГ-29 – «9.12А» (ошибочно называемом как МИГ-29А, очевидно, исходя из НАТОвского обозначения 29-го — «Falcrum A»). Всего было 46 самолетов и 14 вертолетов – «нелетабов» (управляемых искусственным интеллектом, но недоступных для полетов игрока 3D-моделей), 90 (!) типов объектов «наземки» и кораблей, 12 бортовых комплексов обнаружения и сопровождения наземных целей и РЭП, более 100 (. ) типов управляемого и неуправляемого оружия, включая ракеты «корабль-корабль». Одним словом – целый бастион смерти! Переработать (именно творчески, а не только технически переработать) такой объем информации под силу только настоящим специалистам и фанатам своего дела. Заодно это команда Eagle Dynamics достойна, что называется, поклона до земли.
Год 2005-ый подарил нам «LockOn: Горячие скалы», к обзору которого мы и приступаем. Это комплект из двух CD, включающий в себя все, что входит в первый «LockOn». Игра устанавливается автономно от предшественника, поэтому ставить первую часть имеет смысл только для того, чтобы сравнить возросшее качество.
Самолеты, на которых может летать игрок, пополнились СУ-25Т – модернизированным штурмовиком СУ-25, к которому добавили, в частности, ракеты с лазерным и телевизионным наведением. Основным бортовым средством обнаружения и сопровождения целей на СУ-25Т является комплекс «Шквал», логика работы с которым вполне добротно реализована в игре, вплоть до учета реально существующего ограничения времени непрерывной работы лазера-подсветчика цели! Отметим, правда, что управляемая «Шквалом» ракета «Вихрь» в реальной жизни не делает таких «кадушек», как показано в игре. При нормальном наведении «Вихрь» летит как бы в «трубке» максимум двухметрового диаметра. Иначе бы он никогда не попадал в цель с отклонением от точки прицеливания, не превышающим метр – полтора. Но это так – наши придирки, которые, надеемся, будут учтены разработчиками.
В новом адд-оне появились три новые кампании: «Горячие скалы» для Су-25Т (20 миссий), «Операция «Суховей» для Су-27 (27 миссий) и «Последний рубеж» для МиГ-29С (29 миссий). Что можно о них сказать? Да практически любую кампанию «LockOn» и «ИЛ-2 Штурмовик» очень точно описать изречением великого русского литературоведа и философа Михаила Бахтина: «Каждое слово текста выводит за его пределы. Всякое понимание есть соотнесение данного текста с другими текстами». Сложно? А проще так – чем больше вы узнаете о предмете, тем больше вы как бы заново открываете его для себя, и тем больше кайф — кайф открытия нового. Что-то вроде этого чувствует и вирпил, когда открывает вместе с разработчиками их творение — придуманный, и в тоже время так похожий на настоящий, эпизод реальной войны.
Тех, кому довелось бывать в Гудауте (Абхазия), не оставит равнодушным видеоролик к «титульной» кампании. При виде НАТОвской техники на гудаутском аэродроме, еще помнящем свои, родные ПВОшные СУ-15, а после сменившие их СУ-27, адреналин резко прибавляется, возникают мысли, как бы туда наведаться. С полной загрузкой.
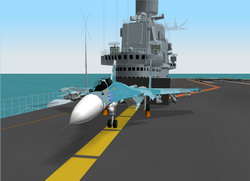
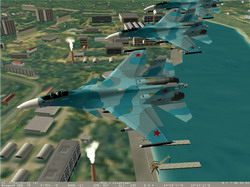
Реальность рулит!
В «Горячих скалах» для одного только для СУ-25Т реализована детальная 3D модель и усовершенствованная раскраска, «тянущая» по данным разработчиков на 26 Мб. Кажется, никто еще не выходил на такой уровень в авиа 3D-моделях. Графика преобразилась: усовершенствованы текстуры ландшафта, разработаны дополнительные текстуры для весны, осени, зимы. Но, самое главное в дополнении это то, что коренным образом переработана физическая модель, получившая название AFM (Advanced Flight Model – Улучшенная Летная Модель). Штурмовик уже не «сидит в воздухе» так плотно, как СУ-25 в первом «LockOn». Полетав на нем, начинаешь понимать, почему квалификация «летчик-снайпер» столь высоко почитается в ВВС. Попробуйте-ка расстрелять из пушки БМП или грузовик. Самолет «гуляет» в воздухе, мешая прицелиться, а стоит хоть чуточку запоздать с началом вывода машины из пикирования, особенно если на подвесках что-то серьезное, вроде «пятисоток», и «полон рот земли», как говорят летчики в таком случае, гарантирован.
Усовершенствованы летные модели и других самолетов. Так, коснувшись воды соплами двигателей на СУ-33 (но именно коснувшись!), мы получили возможность оценить ощущения летчиков-испытателей Аверьянова и Шендрика – когда они в 1999-м на авиашоу в Ле-Бурже точно так же коснулись земли на СУ-30МК. В игре происходит то же, что было в реальной жизни – пожар обоих двигателей, но гибнущий самолет дает пилоту несколько секунд, чтобы катапультироваться. В первом «LockOn» пилота в этом случае ждал бы мгновенный «бульк». Однако, увидев в одном из полетов на высотомере МИГ-29 высоту 30000 метров, мы поняли, что разработчикам еще есть над чем работать в части достоверности летных моделей. Тем не менее, отметим, что СУ-25 и СУ-25Т, как им и положено, честно доползают до 11000.
Отметим добротный звук. Когда слушаешь начальный ролик, то просто морозом продирает по коже от удовольствия, будто оказываешься на полигоне. Из эфира доносится: «Я 32-й, цель наблюдаю, разрешите работать»… «Я 32-й, работу закончил»…«32-й, что там у вас, почему молчите. »… «Да нормально все. Прямое. ». И шуточный комментарий сидящего рядом ведущего по самолету – «Ну, все, посодют Виктора Васильича за нарушение режима секретности переговоров…». Что касается боевых машин, то хотелось бы иметь более выразительный, акцентированный звук. Хотя в то же время понимаешь, что летчик, сидя в гермокабине современного истребителя, вряд ли детально слышит двигатели, шипение стартующих с АПУ (пусковых балок) ракет или грохот пушки. И еще один недостаток, связанный именно со звуком, позволим себе отметить. В игре предусмотрены добротно сделанные обучающие треки. Но почему-то часть из них только с текстовым «мануалом», трек для СУ-25Т – с текстом и с голосом, то же для А-10, но уже с голосовым сопровождением на английском языке. Естественно, должна была бы быть единая система, и текст и голос, при этом диктору незачем читать весь текст. Достаточны было бы озвучить лишь наиболее существенные моменты.
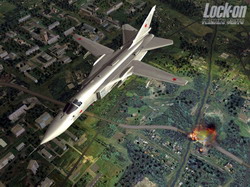
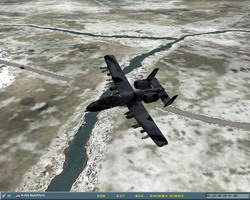
Читать – не перечитать
По сравнению с первым «LockOn», серьезнейшим образом переработано и дополнено «Руководство пилота». Теперь это 280 страниц с подробнейшим описанием кабин перечисленных самолетов, обзорно-прицельных систем и комплексов обороны. Здесь же в достаточном объеме изложены самые необходимые основы полета и сведения по боевому применению, в том числе по тактике воздушного боя. Очень жаль, что летное пособие не выпущено как книга. Настоящие вирпилы не упустили бы случай поставить его на свою книжную полку рядом с прекрасно изданными руководствами пользователя и «Наставлением по боевым действиям штурмовой авиации» из «коробок» «ИЛ-2 Штурмовик» и «ИЛ-2 Штурмовик — Забытые сражения». В «Руководстве» есть, конечно, мелкие, в основном не очень существенные ляпсусы – но их и не могло не быть, все-таки не профессионалы – разработчики и эксплуатационщики его написали. В описании СУ-27 и МИГ-29 есть и сугубо «политичные» проколы, возникшие по причинам, известным только тем, кто разрабатывал и испытывал эти машины. Микояновец со стажем только иронически усмехнется, прочитав, что СУ-27 и МИГ-29 «внешне выглядят очень похожими друг на друга». Это СУ похож на МИГ-29, и не иначе. Потому что когда «суховцам» пришлось поставить крест на первой модификации СУ, летающем «уродце» Т-10, МИГ-29 в том самом виде, который мы все знаем, уже налетал сотни часов, а в ЦАГИ имелись подробнейшие материалы по его продувкам. Было с чего делать настоящий, сегодняшний СУ-27. Взлетевший почти на 4 года позже МИГа.
Править небом
Говоря об авиасимуляторах вообще, нельзя не сказать об устройствах управления. Лучшей системой управления для «LockOn» была бы подключенная к компьютеру кабина реального, скажем, СУ-27 или МИГ-29, с настоящими РУС и РУД, с педалями и пультами. Но поскольку это из области фантастики (по крайней мере, пока. А там – кто знает?…), придется подумать о чем-то попроще. Можно, конечно, обойтись каким-нибудь недорогим джойстиком, но получить с ним реальное ощущение полета и боя очень трудно. Если уж играть всерьез, то в «LockOn» пилот должен управлять своим самолетом с помощью системы HOTAS (Hands On Throttle And Stick — «Руки только на РУС и РУД»), состоящей из джойстика — ручки управления самолетом и РУД-а — ручки управления тягой двигателя. Неплохо бы добавить и педали, отвечающие за положение руля направления, в крайнем случае, в виде соответствующей оси джойстика или так называемой «качалки». Тогда основное управление самолетом, бортовым комплексом и вооружением окажется сосредоточенным на джойстике, РУДе и педалях. Даже и в этом случае вряд ли удастся обойтись без клавиатуры, но, формируя свою систему управления, нужно постараться свести обращение к ней к минимуму. Многие виртуальные пилоты используют и дополнительные устройства для управления обзором поворотом головы. Да, это роскошь, но крайне полезная роскошь. Так что покупка TrackIr или подобного устройства у настоящего вирпила должна быть запланирована на самое ближайшее будущее.
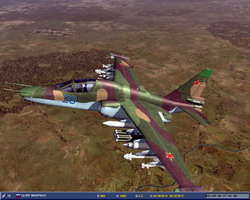
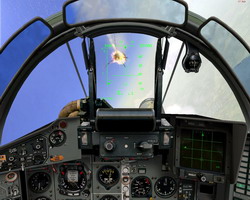
Так что же выбрать? Если уже готовый комплект, то это Thrustmaster HOTAS Cougar (стоит порядка $350), или недорогой Thrustmaster Top Gun Afterburner II (есть вариант AB Force Feedback, но его мы не посоветуем). Или же Saitek X45 или Saitek X52. У Х52 есть определенные проблемы с управлением по крену и тангажу, но с точки зрения достаточности для «LockOn» числа кнопок и переключателей — оба они вполне достойны внимания. И тем, кто сможет достать автономный РУД фирмы CH Products – CH Pro Throttle USB, можно посоветовать в дополнение к нему джойстик Saitek Cyborg 3D Force Stick, с оптическими датчиками, а, значит, очень надежный. Комплект CH Pro Throttle — Cyborg 3D Force Stick лишь немногим уступит «фирменным» HOTAS-комплектам. Мы недаром столько места уделили устройствам управления. Повторим, что без хорошего комплекта в «LockOn» играть и нелегко, и не очень интересно.
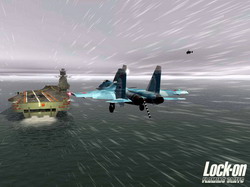

Горячее железо
Что касается системных требований, то тут все просто. Чем больше гигагерц имеет процессор в вашем ПК, и чем мощнее видеокарта – тем лучше. Рекомендованную конфигурацию (она приведена в начале статьи) лучше всего считать за начальный уровень, а о «минимальной» лучше забыть. Впрочем, судя по имеющимся отзывам, вполне можно играть на машинах на базе Athlon 1700, 512 МВ памяти и GeForce TI4200, но тогда придется ограничиться минимальными настройками и разрешением экрана 800×600 пикселей. Тем не менее, в той или иной степени пожертвовав качеством графики, даже на сравнительно слабых компьютерах можно получить главное, что есть в «LockOn» – никем пока не достигнутую в авиасимуляторах достоверность полета и боя на современных боевых машинах.
На сайте Eagle Dynamics не так давно появилось скромное объявление: Игра «Lock-On: Черная Акула» продолжает серию авиационных симуляторов, разработанных на основе «Lock-On: Современная боевая авиация». В отличие от предшественников, в новой игре предлагается управлять не только самолетами, но и боевым новейшим отечественным вертолетом КА-50. Игра «LockOn: Черная Акула», работает самостоятельно, включает в себя возможности игры «LockOn: Горячие Скалы» и является ее дальнейшим развитием».
Вирпилы уже сейчас с нетерпением ждут марта следующего года – выход «Акулы» намечен именно на этот срок. Очень надеемся, что задержек не будет. В отличие от широко известных и выпущенных сотнями МИГ и СУ, КА-50 издано всего-то два десятка. Тем дороже сердцу появление этой машины в лучшем современном авиасимуляторе. Уровень, достигнутый в «Горячих скалах», подсказывает, что в «Акуле» будет что-то запредельное. То, что представлено в анонсах на сайте Eagle Dynamics, весьма обоснованно это подтверждает.
Памятуя о просто-таки неимоверном объеме работы, необходимом для выпуска «Акулы», придется возразить уважаемому автору одной из рецензий на «Горячие скалы», заметившему, что «выставлять на прилавки коробку с одним новым самолетом внутри — не очень красиво». Не надо забывать, что не так уж много поклонников у авиасимуляторов такого уровня сложности. Не стоит забывать и о том, что команда Eagle Dynamics – живые люди, которым надо приносить домой мало-мальски достойную зарплату. И что берется она не из воздуха, а в основном от проданных копий. А при той цене, что мы здесь, в России, платим за «коробку», вмещающую столько труда, упрекать их в меркантильности и в неуважении к вирпильскому сообществу просто язык не поворачивается.
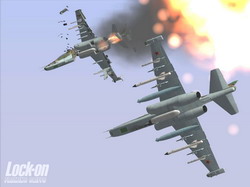
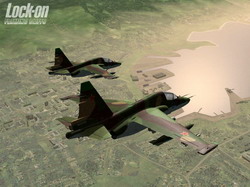
В завершении несколько серьезных слов. Прочитавшие статью – поклонитесь, хотя бы мысленно, тем советским авиастроителям, кто создал эти великие МИГи и СУ, и летчикам-испытателям, поставившим эти машины на крыло. И будем надеяться, что следующее поколение теперь уже российских инженеров и конструкторов сохранит энергию того небывалого подъема 70-х — 80-х, когда были заложены основы нынешней российской авиации.
Возможно, никто не сказал о самолете лучше, чем Леонид Степанович Попов, штурман-испытатель фирмы «МИГ», — «Я летаю на нем с 1976 года, и еще хочется. Если верно, что самолеты несут на себе отпечаток людей, живших с ними одной жизнью, то хотелось бы и обратного – иметь и хранить в себе отблеск этого чуда». Сказано о МИГ-31, но разве не то же самое могли бы сказать летчики о МИГ-29, о СУ-27? «LockOn» требует от вирпила немалого труда, но в награду за это дарит этот отблеск. И гложет мысль, что, сложись жизнь нашей страны немного иначе, мы в следующем «LockOn» вполне могли бы ждать «летабельный», как говорят вирпилы, истребитель пятого поколения, какой-нибудь СУ-57 или МИГ-49. Но это уже совсем другая история.
Словом, выставляя суммарную оценку «Горячим скалам» мы ставим команде Eagle Dynamics «пятерку» по пятибалльной системе. Но все же с жирным минусом. Чтобы не зазнавались, не почивали на лаврах и не забывали исправлять ошибки.
Полезные ссылки:
Плюсы:
- Высочайшая степень реализма
- Отличная графика
- Достоверная реализация современной авиатехники и вооружения
- Подробнейшая инструкция
Минусы:
- Высокие системные требования
Если вы столкнулись с тем, что Lock On: Горячие скалы 2 тормозит, вылетает, Lock On: Горячие скалы 2 не запускается, Lock On: Горячие скалы 2 не устанавливается, в Lock On: Горячие скалы 2 не работает управление, нет звука, выскакивают ошибки, в Lock On: Горячие скалы 2 не работают сохранения – предлагаем вам самые распространенные способы решения данных проблем.
Первое – проверьте, соответствуют ли характеристики вашего ПК минимальным системным требованиям:
- ОС: Windows XP/Vista/7
- Процессор: Pentium IV 2 ГГц
- Память: 2 Гб
- Видео: 256 Мб
- HDD: 6 Гб
- DirectX 9
Обязательно обновите драйвера видеокарты и другое ПО
Перед тем, как вспоминать самые нехорошие слова и высказывать их в сторону разработчиков, не забудьте отправиться на официальный сайт производителя своей видеокарты и скачать самые свежие драйвера. Зачастую, к релизу игр готовятся специально оптимизированные для них драйвера. Также можно попробовать установить более позднюю версию драйверов, если проблема не решается установкой текущей версии.
Важно помнить, что следует загружать только окончательные версии видеокарт – старайтесь не использовать бета-версии, так как в них может быть большое количество не найденных и не исправленных ошибок.
Не забывайте, что для стабильной работы игр часто требуется установка последней версии DirectX, которую всегда можно скачать с официального сайта Microsoft.
Lock On: Горячие скалы 2 не запускается
Многие проблемы с запуском игр случаются по причине некорректной установки. Проверьте, не было ли ошибок во время установки, попробуйте удалить игру и запустить установщик снова, предварительно отключив антивирус – часто нужные для работы игры файлы по ошибке удаляются. Также важно помнить, что в пути до папки с установленной игрой не должно быть знаков кириллицы – используйте для названий каталогов только буквы латиницы и цифры.
Еще не помешает проверить, хватает ли места на HDD для установки. Можно попытаться запустить игру от имени Администратора в режиме совместимости с разными версиями Windows.
Lock On: Горячие скалы 2 тормозит. Низкий FPS. Лаги. Фризы. Зависает
Первое – установите свежие драйвера на видеокарту, от этого FPS в игре может значительно подняться. Также проверьте загруженность компьютера в диспетчере задач (открывается нажатием CTRL+SHIFT+ESCAPE). Если перед запуском игры вы видите, что какой-то процесс потребляет слишком много ресурсов – выключите его программу или просто завершите этот процесс из диспетчера задач.
Далее переходите к настройкам графики в игре. Первым делом отключите сглаживание и попробуйте понизить настройки, отвечающие за пост-обработку. Многие из них потребляют много ресурсов и их отключение значительно повысит производительность, не сильно повлияв на качество картинки.
Lock On: Горячие скалы 2 вылетает на рабочий стол
Если Lock On: Горячие скалы 2 у вас часто вылетает на рабочий слот, попробуйте начать решение проблемы со снижения качества графики. Вполне возможно, что вашему компьютеру просто не хватает производительности и игра не может работать корректно. Также стоит проверить обновления – большинство современных игр имеют систему автоматической установки новых патчей. Проверьте, не отключена ли эта опция в настройках.
Черный экран в Lock On: Горячие скалы 2
Чаще всего проблема с черным экраном заключается в проблеме с графическим процессором. Проверьте, удовлетворяет ли ваша видеокарта минимальным требованиям и поставьте свежую версию драйверов. Иногда черный экран является следствием недостаточной производительности CPU.
Если с железом все нормально, и оно удовлетворяет минимальным требованиям – попробуйте переключиться на другое окно (ALT+TAB), а потом вернуться к окну игры.
Lock On: Горячие скалы 2 не устанавливается. Зависла установка
Прежде всего проверьте, хватает ли у вас места на HDD для установки. Помните, что для корректной работы программы установки требуется заявленный объем места, плюс 1-2 гигабайта свободного пространства на системном диске. Вообще, запомните правило – на системном диске всегда должно быть хотя бы 2 гигабайта свободного места для временных файлов. Иначе как игры, так и программы, могут работать не корректно или вообще откажутся запуститься.
Проблемы с установкой также могут произойти из-за отсутствия подключения к интернету или его нестабильной работы. Также не забудьте приостановить работу антивируса на время установки игры – иногда он мешает корректному копированию файлов или удаляет их по ошибке, считая вирусами.
В Lock On: Горячие скалы 2 не работают сохранения
По аналогии с прошлым решением проверьте наличие свободного места на HDD – как на том, где установлена игра, так и на системном диске. Часто файлы сохранений хранятся в папке документов, которая расположена отдельно от самой игры.
В Lock On: Горячие скалы 2 не работает управление
Иногда управление в игре не работает из-за одновременного подключения нескольких устройств ввода. Попробуйте отключить геймпад или, если по какой-то причине у вас подключено две клавиатуры или мыши, оставьте только одну пару устройств. Если у вас не работает геймпад, то помните – официально игры поддерживают только контроллеры, определяющиеся как джойстики Xbox. Если ваш контроллер определяется иначе – попробуйте воспользоваться программами, эмулирующими джойстики Xbox (например, x360ce).
Не работает звук в Lock On: Горячие скалы 2
Проверьте, работает ли звук в других программах. После этого проверьте, не отключен ли звук в настройках самой игры и выбрано ли там устройство воспроизведения звука, к которому подключены ваши колонки или гарнитура. Далее следует во время работы игры открыть микшер и проверить, не отключен ли звук там.
Если используете внешнюю звуковую карту – проверьте наличие новых драйверов на сайте производителя.