Канальная линейка (Channel Strip).
Для начала давайте рассмотрим каким образом протекает сигнал по канальной линейке.
На вход канальной линейки подается аудио сигнал либо сигнал из программного инструмента, затем сигнал подвергается обработке, например, эквалайзером и далее уже обработанный сигнал идет на выход и вы слышите конечный результат.
С помощью кнопки посыла Send можно направить часть сигнала с канальной линейки через виртуальную шину Bus на вспомогательную линейку Aux для обработки сигнала процессорами эффектов. Например, ревербератором. При посыле сигнала на Aux можно регулировать уровень обработанного сигнала и подмешивать его к необработанному. При этом обработанный сигнал и необработанный на выходе суммируются, это влияет на общий уровень сигнала.
Подробнее…
Logic Pro X Микшер
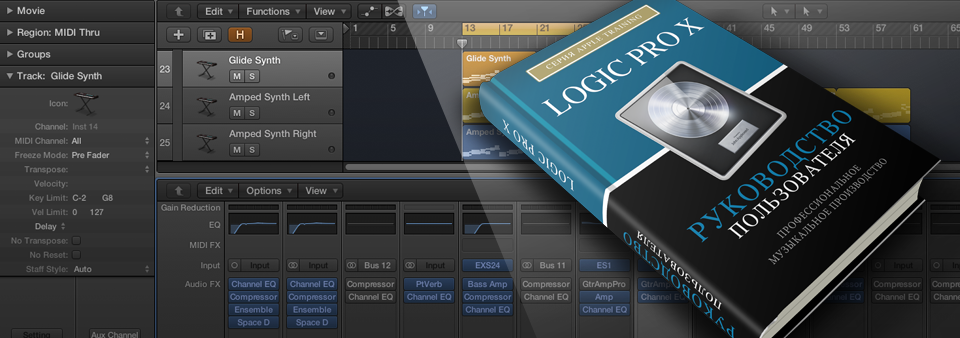
Микшер (Mixer).
Микшер показывает все канальные линейки, которые используются в вашем проекте, включая канальные линейки треков, вспомогательные и выходные каналы, а также мастер канал. Открывается микшер по умолчанию с помощью горячей клавиши [X] либо с помощью кнопки Mixer на панели инструментов, а также в главном меню View > Show/Hide Mixer:

Окно микшера может отображаться двумя способами. Как часть главного окна в нижней части области треков, либо как отдельное окно. Это очень удобно, когда необходимо создать собственный скринсет, который будет состоять, например, только из микшера. Чтобы открыть микшер в отдельном окне нужно зайти в главное меню Window >Open Mixer либо воспользоваться горячими клавишами [Command] + [2].
Подробнее…
Logic Pro X обеспечивает несколько способов получения ответов на вопросы как для знакомства с элементами управления и функциями во время вашей работы в приложении, так и для просмотра подробной информации обо всех аспектах работы приложения. Вы также можете просматривать информацию непосредственно в самом приложении, используя функцию «скорой помощи» — Quick Help. В дополнение к той информации, которую вы можете получить из меню Help приложения Logic Pro, полный набор справочной документации доступен онлайн как в формате HTML, так и в формате PDF.
Quick Help | Скорая помощь
Вы можете просматривать краткие описания окон, элементов управления и других элементов интерфейса приложения Logic Pro, не выходя из приложения и не прерывая своего рабочего процесса. Вы можете включить просмотр Quick Help либо в области Inspector, либо в подвижном плавающем окне.
- Для просмотра Quick Help в Inspector, откройте Inspector, затем выберите Help > Quick Help.
- Для просмотра Quick Help в плавающем окне, закройте inspector, затем выберите Help > Quick Help.
Подробная информация о работе с приложением Logic Pro X
В качестве полной справочной информации компания Apple предоставляет четыре Руководства пользователя, касающиеся различных аспектов работы с приложением Logic Pro X:
- Logic Pro X User Guide | Руководство пользователя приложением Logic Pro X
- Logic Pro X Instruments | Инструменты приложения Logic Pro X
- Logic Pro X Effects | Эффекты приложения Logic Pro X
- Logic Pro X Control Surfaces Support | Поддержка управляющих консолей в приложении Logic Pro X
Logic Remote | Удаленное управление приложением Logic
Для пользователей IPad доступно отдельное приложение, которое позволяет просматривать подробную справочную информацию на вашем IPad во время работы в приложении Logic Pro. Приложение Logic Remote доступно в магазине App Store.
- Для получения Справки Logic Remote для iPhone на русском языке перейдите по адресу
http://help.apple.com/logicremote/iphone/1.4/logicpro/?lang=ru - Для получения Справки Logic Remote для iPad на русском языке перейдите по адресу
http://help.apple.com/logicremote/ipad/1.4/logicpro/?lang=ru
Copyright © 2019 Apple Inc. All rights reserved.
Copyright © 2019 Алексей Алимкин (перевод).
![]()
Download Article
![]()
Download Article
Logic Pro X is a software programs created by Apple for the purpose of producing music. These instructions are designed for those individuals who have a background in music production and/or are well versed in music theory. The following steps explain the basics on how to set up and create a song in Logic Pro X.
-

1
Set up your workstation. Before beginning work on Logic Pro X, make sure all of your equipment (MIDI keyboard, Mixer, Mic, Monitors, etc.) are all properly connected.
-
2
Open up Logic Pro X. Ensure your Mac has sufficient battery, and open up the software. Close other programs for optimal performance.
Advertisement
-
3
Set up your project. Before beginning work on any project, you must set the Tempo, Key, and Time Signature. This can be set up at the bar at the top that shows your project info.
- You can always change the tempo of your project later. However, you cannot change the tempo with any tracked out instruments or vocals, as those are tracked out according to the tempo that was present when they were recorded. If you do need to change the tempo in such a scenario, you must re-record those particular components.
- It is also recommended that you change your «Count In» settings before you record so you have a comfortable amount of room before your actual recording begins. You can do so by going into the «Record» option at the top of the bar, scrolling down to «Count in» and selecting what you are comfortable with.
-
4
Create a new track. To create a new track, navigate your mouse to the «Track» option in the top bar and select «New Track». Select the first track you want to add in the arrange window.
-
5
Record software instruments. With your MIDI keyboard/synthesizer, you can emulate hundreds of different instruments through Logic’s library.
- From the new track window, click «Software Instrument». Select your instrument and make sure your MIDI workstation is connected and ready. Press «R» your keyboard to record.
-
6
Use Quantization. To correct any discrepancies in timing when recording software instruments, you can quantize that track to a certain time signature, based on its frequency in the recording.
- To do so, first go into the inspector by clicking «View» at the top bar, and then «Show Inspector».
- Select your track, then navigate to the «Quantize» option and select your particular timing. Those notes will automatically align themselves according to the timing you select.
-
7
Record real instruments. To record any real instrument you can either connect to the mixer or use a mic.
- Make sure your instrument/mic is connected to the mixer, and is turned on.
- Go to the «New Track» window, and select «Audio» as the option.
- Specify your input device as the the mixer you are using, and the output device as your headphones. Press «R» on your keyboard to record.
-
8
Record vocal tracks. To record vocals must use a mic that is connected to the mixer.
- Make sure your mic is connected to the mixer and turned on.
- Go to the «New Track» window, and select «Audio» as the option.
- Specify your input device as the mixer you are using, and output as the headphones. Press «R» to record
-
9
Use Apple loops. Logic Pro X provides a large amount of pre-created audio loops for those who want to use them in their project.
- Navigate to the «View» window and select «Show Apple Loops».
- Select the loop you want to use based on the categories that are shown. Clicking on multiple categories narrows down your options.
- Drag the loop and drop it into the area labeled «Drag Apple Loops Here».
-
10
Save your project. Periodically as you are working on your project, you must continue to save so you do not lose any of your work.
- Navigate to the «File» option at the top bar and select «Save As» or «Save», and give your project a name.
-
11
Bounce your project. Whether you are finished with a draft, or the final, Logic Pro X allows you to bounce this project as a variety of different formats based on your needs. («Bouncing» refers to creating one individual track that is made up of a number of tracks that you select.)
- You can track out your project as a different audio tracks for mixing using another software, such as Pro Tools. Navigate to the «File» option in the top bar, and select «Export» and then click on «All Tracks As Audio Files». Select the format of the files, and click «Bounce».
- You can bounce the entire project, or a selected few tracks, to listen to it as if they were a finished song (at that point.). Select the particular tracks that you want to hear in the bounce. Navigate to the «File» option in the top bar, and select «Bounce», and then click «Project or Section». Specify your formatting options and select «Bounce».


Advertisement
Add New Question
-
Question
Can I do this without the equipment?

Yes. You can use only software instruments and input notes with the «musical typing» option. You can also use your internal Mac microphone for real instruments, but it will be very low quality.
-
Question
How can I send the song to YouTube with a picture playing behind it?
Jelke de Jong
Community Answer
If you have Final Cut or iMovie installed on your Mac, you can use the Bounce function in Logic (make sure you deselect any track before you do this, or else it will only export that specific track) to export your song to an mp3, which you can open in Final Cut or iMovie and insert a picture.
Ask a Question
200 characters left
Include your email address to get a message when this question is answered.
Submit
Advertisement
-
You can loop a section of your track to make it easier when producing. Do so by selecting turning the loop option on, and selecting the region you want to loop. The loop button lies directly to the right of the project info bar.
-
If your mic is not picking up sound:
- Ensure that all wire connections are made and phantom power is turned on. Afterwards, try creating a new audio track using this mic
- If this is still not working, create a new audio track using the computer’s own «Built-in-Output». This will allow you to see if it is an issue with the hardware (mixer/mic) or software. If the built in mic picks up sound, then most likely it is a problem with the hardware, for which you should contact the manufacturer.
-
If Logic Pro X keeps crashing:
- Check to see if you have the latest version of Logic Pro X. Usually if there is a bug causing the software to crash then Apple will put out a stable release in short time.
- Close other apps/programs that you have running (such as Safari, iMessage, etc.) that you do not need running at the time.
Thanks for submitting a tip for review!
Advertisement
-
When use a mic with Phantom Power, make sure you switch the Phantom power on only after you have connected to the mixer.
-
Never set your individual audio track levels above 0db to make sure there is no clipping. This can lower the quality of the sound farther into the process. You can adjust the levels through the mixer (press X on your keyboard).
-
Make sure you periodically save your work!
Advertisement
Things You’ll Need
- Logic Pro X software
- Any type of Mac computer (Macbook, iMac, Mac Pro, etc.)
- Mixer
- Recording Mic
- MIDI workstation
- Studio Monitor speakers
- Headphones
About This Article
Thanks to all authors for creating a page that has been read 34,374 times.
Did this article help you?
From support and training to tutorials and an online community of knowledgeable music pros, take your experience with Logic Pro to a new level.
Support and Learning
Support
Logic Remote
Wirelessly extend the creative power of Logic Pro using your iPad or iPhone. Logic Remote takes full advantage of Multi-Touch on iOS and iPadOS devices and offers incredible ways to record, mix, and even perform on instruments in Logic Pro from anywhere in the room.
Learn more about logic remote
AppleCare Support
AppleCare Professional Audio Support can help you keep your project running smoothly whether you’re setting up a new installation or troubleshooting an existing setup.
Learn more about AppleCare support
Training Videos and Tutorials
Whether you’re new to Logic Pro and MainStage or just looking to pick up some tips, you can get up to speed quickly with free online tutorials or fee-based training provided by today’s leading music creation software trainers.
ADSR
Specializing in both beat-making content and electronic music creation videos, ADSR’s production experts deliver free training on YouTube. Additionally, ADSRsounds.com subscribers gain full access to in-depth courses on all aspects of music production and music creation techniques.
Ask.Audio
A daily resource covering the latest news, reviews, tutorials, and interviews relating to Logic Pro.
Groove3
Presenting full coverage and in-depth Logic Pro video tutorials from industry experts, Groove3 has a diverse catalog of lessons that cover all aspects of production with Logic Pro for every type of user — from beginner to advanced.
Im A Music Mogul
Learn the secrets of beat-making with Logic Pro, uniquely taught through the lens of popular music and presented in hundreds of entertaining and informative YouTube videos.
macProVideo
An extensive collection of online courses for Logic Pro and MainStage. Training staff include Grammy- and Emmy Award–winning producers and professional audio engineers.
MusicTechHelpGuy
Engaging and fun music production lessons delivered by expert Logic Pro instructor Josh Carney — an experienced recording engineer, musician, composer, producer, educator, and YouTuber with over 14 years of experience in the field.
Why Logic Pro Rules
Audio engineer, producer, and expert Logic Pro educator Chris Vandeviver delivers entertaining and informative video training on all things Logic Pro — presented on his popular YouTube channel and website.
Books
Documentation
Online Communities
As the world of Logic Pro professionals continues to expand, the body of collective knowledge grows with it. Tap into a rich source of information and collegial support by joining a user group, participating in a web forum, or browsing a Logic Pro blog.
Web Forums
Logic User Group
Share insights and information with the worldwide community of Logic Pro users.
Logic Pro Help
Learn more about Logic Pro from one of the most active and supportive web communities focused on Logic Pro, MainStage, and GarageBand.
Logic Subreddits
The most popular subs for Reddit users who want to learn more about Logic Pro.
LogicPro
Logic_Studio
White Papers
Elemental Morphing in Alchemy
Learn how to morph between and combine elements of different sounds in exciting ways. Examples demonstrate the behavior and effect of each Morph Element control to illustrate some of the creative potential of the morphing and resynthesis tools in Alchemy.
Elemental Morphing in Alchemy (PDF)
Alchemy for Creative Loop Manipulation
Read a workflow-driven examination of tools and techniques in Alchemy you can use to creatively alter loop playback. Explore examples demonstrating how to make loops play at project tempo and transpose in real time. Additional demos take it a step further, showing how to transform loops with modulation and other effects.
Alchemy for Creative Loop Manipulation (PDF)
Plug-ins and Content
Audio Units Plug-ins
macOS provides a robust plug-in architecture called Audio Units, which gives you access to thousands of instruments and sound-processing tools made by today’s leading developers.
Logic Pro Sampler Libraries
Loop Libraries
Hardware
Controller Keyboards
USB keyboard controllers designed to take full advantage of the core technologies provided by macOS and Logic Pro.
Control Surfaces
Audio Interfaces
Third-party hardware manufacturers specializing in studio-quality audio recording hardware compatible with macOS and Logic Pro.
MIDI Interfaces
Connect legacy MIDI hardware to your Mac and Logic Pro.
Logic pro x user guide
Table of contents
Document Outline
- Logic Pro X User Guide
- Contents
- Chapter 1: What’s new in Logic Pro X
- What’s new in Logic Pro X
- Chapter 2: Get started with Logic Pro X
- Get started overview
- Get started with the Logic Pro main window
- Get started with projects
- Get started with playback and navigation
- Get started with the project tempo, key, and time signature
- Get started with tracks
- Get started with audio tracks
- Get started with software instrument tracks
- Get started with track header controls
- Get started arranging regions in the Tracks area
- Get started editing regions
- Get started with the Piano Roll Editor
- Get started with the Audio Track Editor
- Get started with Smart Controls
- Get started with mixing
- Get started with Apple Loops
- Get started with Drummer
- Get started with Track Stacks
- Get started with sharing
- Chapter 3: If you are upgrading
- Overview
- Work with advanced tools and additional options
- New concepts in Logic Pro X
- New and changed terms in Logic Pro X
- Chapter 4: Logic Pro basics
- What is Logic Pro?
- Logic Pro workflow overview
- Logic Pro interface overview
- Logic Pro main window
- Tracks area
- Library
- Inspector
- Mixer
- Smart Controls
- Editors
- Note Pads
- List Editors
- Loop Browser
- Browsers
- Logic Pro project basics
- Advanced tools and additional options
- Work with Logic Pro windows
- Open and close windows
- Move and resize windows
- Zoom windows
- Scale plug-in windows
- Move through display levels
- Control how windows change as the playhead moves
- Control window relationships using Link mode
- Control windows using screensets
- Work with tools in Logic Pro
- Tools overview
- Assign tools
- Common tools
- Undo and redo edits in Logic Pro
- Download additional content
- How to get help
- Chapter 5: Connect external devices
- Connecting overview
- Connect audio devices
- Audio devices overview
- Connect a microphone
- Connect an electric instrument
- Connect an audio interface
- Connect speakers and other audio devices
- Configure a connected audio device
- Configure Apogee and Euphonix audio devices
- Connect MIDI devices
- MIDI devices overview
- Connect a USB music keyboard
- Connect MIDI keyboards and modules
- About multichannel MIDI devices
- Separate a MIDI keyboard from its sound generator
- Chapter 6: Work with projects
- Projects overview
- Create projects
- Open projects
- Save projects
- Delete projects
- Play and navigate projects
- Play a project
- Set the playhead position
- Control playback with the transport buttons
- Use transport shortcut menus
- Use transport key commands
- Customize the control bar
- Use the cycle area
- Use the Chase Events function
- Control Logic Pro using Apple Remote
- Set project properties
- Project properties overview
- Set the project tempo
- Set the project key and scale
- Set the project time signature
- Set the project sample rate
- Set the project start and end points
- Set the project playback volume
- Manage projects
- Project management overview
- Use project alternatives and backups
- Clean up projects
- Manage project assets
- Consolidate assets in a project
- Rename projects
- Copy and move projects
- Import data and settings from other projects
- Preview projects in the Finder
- Close projects
- View project information and reorganize memory
- Chapter 7: Work with tracks
- Tracks overview
- Track basics
- Create tracks
- Create tracks that use existing channel strips
- Reassign tracks to different channel strips
- Select tracks
- Duplicate tracks
- Rename tracks
- Change track icons
- Change track colors
- Reorder tracks in the Tracks area
- Zoom tracks
- Replace or double drum sounds in the Tracks area
- Use the track header controls
- Track header overview
- Mute tracks
- Solo tracks
- Set track volume levels
- Set track pan positions
- Enable tracks for recording
- Turn on input monitoring for audio tracks
- Turning off tracks
- Protect tracks
- Freeze tracks
- Hide tracks
- Delete tracks
- Edit multiple tracks using slide activation
- Work with patches in the Library
- Patches overview
- Choose a patch
- Choose presets and other file types in the Library
- Search for patches by name
- Merge patch settings with the current patch
- Reset patches to their original settings
- Save custom patches
- Work with Track Stacks
- Track Stacks overview
- Create and edit Track Stacks
- Track Stacks and the Library
- Work with the master track
- Control timing with the groove track
- Bounce tracks and regions in place
- Bounce in place overview
- Bounce a track in place
- Bounce all tracks in place
- Bounce a region in place
- Export tracks and regions
- Export tracks as audio files
- Export regions as audio files
- Move audio files used for audio regions
- Export MIDI regions as standard MIDI files
- Edit track parameters
- Chapter 8: Record your voice or a musical instrument
- Recording overview
- Record audio
- Before recording audio
- Record sound from a microphone or an electric instrument
- Record multiple audio takes
- Record to multiple audio tracks
- Punch in and out of audio recordings
- Replace audio recordings
- Delete audio recordings
- Record software instruments
- Before recording software instruments
- Play software instruments
- Record software instruments
- Record additional software instrument takes
- Overdub software instrument recordings
- Record to multiple software instrument tracks
- Replace software instrument recordings
- Use step input recording techniques
- Advanced recording techniques
- Advanced recording commands
- Color takes while recording
- Mark takes while recording
- Capture your most recent performance
- Comp your audio recordings
- Comping overview
- Preview take recordings
- Create, save, edit, and rename comps
- Edit take regions
- Manage take folder contents
- Chapter 9: Use prerecorded media
- Prerecorded media overview
- Import and search for media files
- Import media files
- Search for media files
- Media file search conditions
- Use Apple Loops in your projects
- What are Apple Loops?
- Search for Apple Loops
- Play Apple Loops
- Access your favorite Apple Loops
- Add Apple Loops to your projects
- Create your own Apple Loops
- Customize the Loop Browser
- Use the Project Audio Browser
- Project Audio Browser overview
- Add and delete audio files
- Play audio files
- Sort, group, and rename audio files
- Move, copy, and convert audio files
- Export and import audio region information
- Import compressed audio files
- Add ReCycle files to your project
- Supported media and file formats
- Media and file formats overview
- GarageBand projects
- Final Cut Pro XML files
- Standard MIDI files
- AAF files
- Chapter 10: Create a song arrangement
- Arranging overview
- Work in the Tracks area
- Tracks area overview
- Position items using the ruler
- Snap items to the grid
- Quantize regions
- Control positioning with drag modes
- Scrub the project
- Scroll and zoom in the Tracks area
- Customize the toolbar
- Arrange regions in the Tracks area
- Regions overview
- Select regions in the Tracks area
- Select parts of regions in the Tracks area
- Cut, copy, and paste regions in the Tracks area
- Move regions in the Tracks area
- Add or remove gaps in an arrangement
- Shift the playback position of regions in the Tracks area
- Loop regions in the Tracks area
- Resize regions in the Tracks area
- Mute and solo regions in the Tracks area
- Time stretch regions in the Tracks area
- Split regions in the Tracks area
- Demix MIDI regions in the Tracks area
- Join regions in the Tracks area
- Create aliases of MIDI regions in the Tracks area
- Clone audio regions in the Tracks area
- Change the color of regions in the Tracks area
- Convert audio regions to EXS sample zones
- Delete regions in the Tracks area
- Create fades and crossfades on audio regions
- Create fades
- Edit fades
- Create automatic crossfades
- Delete fades
- Remove silent passages from audio files
- Remove silent passages in the Strip Silence Window
- Uses for Strip Silence
- Work with folders
- Folders overview
- Pack and unpack folders
- Open and close folders
- Add and remove regions from folders
- Create alias folders
- Work with groove templates
- Create groove templates
- Import groove templates
- Edit region parameters
- Region inspector
- Shared region parameters
- Quantize parameter values
- Advanced quantization parameters
- Audio region parameters
- MIDI region parameters
- Chapter 11: Edit audio regions in the Audio Track Editor
- Audio Track Editor overview
- Select audio regions in the Audio Track Editor
- Cut, copy, and paste audio regions in the Audio Track Editor
- Move audio regions in the Audio Track Editor
- Trim audio regions in the Audio Track Editor
- Split and join audio regions in the Audio Track Editor
- Snap edits to zero crossings in the Audio Track Editor
- Delete audio regions in the Audio Track Editor
- Chapter 12: Edit MIDI regions in the Piano Roll Editor
- Piano Roll Editor overview
- Add and edit notes in the Piano Roll Editor
- Add notes in the Piano Roll Editor
- Select notes in the Piano Roll Editor
- Snap items to the Piano Roll Editor grid
- Move notes in the Piano Roll Editor
- Copy notes in the Piano Roll Editor
- Change the pitch of notes in the Piano Roll Editor
- Resize notes in the Piano Roll Editor
- Edit note velocity in the Piano Roll Editor
- Quantize the timing of notes in the Piano Roll Editor
- Quantize the pitch of notes in the Piano Roll Editor
- Lock the position of events in the Piano Roll Editor
- Mute notes in the Piano Roll Editor
- Change the color of notes in the Piano Roll Editor
- Delete notes in the Piano Roll Editor
- View multiple MIDI regions in the Piano Roll Editor
- Split chords in the Piano Roll Editor
- Use MIDI Draw in the Piano Roll Editor
- Open the Event List or Score Editor from the Piano Roll Editor
- Chapter 13: Add a drummer to your project
- Drummer overview
- Work in the Drummer Editor
- Drummer Editor overview
- Choose genres and drummers
- Choose drummer presets
- Edit the drummer’s performance
- Follow the rhythm of another track
- Work with Producer Kits
- Use Drum Kit Designer
- Drum Kit Designer overview
- Play drums and adjust kit piece settings
- Exchange drums
- Map Drum Kit Designer to external hardware controllers
- Convert Drummer regions to MIDI regions
- Chapter 14: Edit the timing and pitch of audio
- Flex Time and Pitch overview
- Edit the timing of audio
- Flex Time algorithms and parameters
- Time stretch using flex markers
- Time stretch using marquee selections
- Time stretch using the Flex tool
- Delete, reset, and move flex markers
- Edit the pitch of audio
- Flex Pitch algorithm and parameters
- Edit the pitch of audio in the Audio Track Editor
- Edit the pitch of audio in the Tracks area
- Quantize the timing of audio regions in the Audio Track Editor
- Quantize the pitch of notes in the Audio Track Editor
- Change the gain of audio regions in the Audio Track Editor
- Use Varispeed to alter the speed and pitch of audio
- Chapter 15: Advanced edit features
- Advanced Logic Pro editors
- Event List
- Event List overview
- Event List display options
- Select and create events in the Event List
- Edit events in the Event List
- Event Types
- Event Float window
- Step Editor
- Step Editor overview
- Create and edit steps in the Step Editor
- Lane parameters
- Use Lane Sets
- Audio File Editor
- Audio File Editor overview
- Audio File Editor interface
- Play audio files in the Audio File Editor
- Navigate audio files in the Audio File Editor
- Make selections in the Audio File Editor
- Edit and process audio in the Audio File Editor
- Use an external sample editor
- MIDI Transform window
- MIDI Transform window overview
- Use transform sets
- MIDI Transform window presets
- MIDI Transform window parameters
- MIDI Transform window examples
- Chapter 16: Mix a project
- Mixing overview
- Mixer channel strips
- Channel strip types
- Channel strip controls
- Set channel strip volume and check levels
- Peak level display and signal clipping
- Set channel strip volume levels
- Check channel strip levels
- Set channel strip input formats
- Set channel strip pan or balance positions
- Mute and solo channel strips
- Work with plug-ins
- Plug-ins overview
- Add, remove, move, and copy plug-ins
- Use the Channel EQ
- Work in the plug-in window
- Work with plug-in settings
- Work with plug-in latencies
- Use the Audio Units Manager
- Work with channel strip settings
- Control channel strip signal flow in the Mixer
- Route audio via insert effects
- Route audio via send effects
- Use aux channel strips
- Use multi-output instruments
- Use output channel strips
- Define a channel strip’s stereo output
- Define a channel strip’s mono output
- Work with channel strip groups in the Mixer
- Grouping overview
- Group inspector
- Edit channel strip group membership
- Automate groups
- Surround panning in the Mixer
- Binaural panning in the Mixer
- Binaural panning overview
- Use the Binaural Panner
- Use the Binaural Post-Processing plug-in
- Work with MIDI channel strips in the Mixer
- MIDI channel strips overview
- Adjust elements of MIDI channel strips
- Save and restore MIDI channel strip settings
- Customize the Mixer
- Change the Mixer view
- Navigate within the Mixer
- View channel strips linked to folder tracks
- Add track notes
- View control surface bars
- Link control surfaces to the Mixer
- Use the I/O Labels window
- Adjust channel strips when recording or playing
- Work with ReWire applications
- Chapter 17: Automate mix and effects settings
- Automation overview
- Show track automation curves
- Choose automation modes
- Add automation to tracks
- Add and adjust control points
- Adjust a range of control points
- Record live automation
- Select, copy, move, and delete automation
- Select, copy, and move automation
- Delete automation
- Snap automation to grid positions
- Edit automation in the Automation Event List
- Write track automation with external controllers
- Use MIDI Draw
- Chapter 18: Use Smart Controls
- Smart Controls overview
- Choose a Smart Control layout
- Map screen controls automatically
- Map screen controls to channel strip and plug-in parameters
- Edit mapping parameters
- Scale values using parameter mapping graphs
- Open the plug-in window for a screen control
- Rename a screen control
- Assign hardware controls to screen controls
- Compare an edited Smart Control with its saved settings
- Use the Arpeggiator with a Smart Control
- Automate screen control movements
- Chapter 19: Make global changes to a project
- Global changes overview
- Use the global tracks
- Global tracks overview
- Show and hide global tracks
- Resize and reorder global tracks
- Work with markers
- Markers overview
- Create markers
- Edit markers
- Rename markers
- Navigate using markers
- Use marker sets
- Customize how markers appear in the Marker List
- Use marker information from imported audio files
- Delete markers
- Build a project with arrangement markers
- Add arrangement markers
- Edit arrangement markers
- Work with time and key signatures
- Time and key signatures overview
- Create time signature changes
- Create key signature changes
- Edit time and key signatures
- Delete signatures
- Use signature sets
- Work with tempo
- Tempo overview
- Create tempo changes with the Tempo track
- Use the Tempo List
- Create tempo changes using Beat Detection
- Match audio recordings to the project tempo
- Match the tempo to an audio region
- Use tempo information from audio files
- Record tempo changes in Logic Pro
- Use Tempo Operations
- Use the Tempo Interpreter
- Control tempo changes with the tempo fader
- Work with transposition
- Transposition overview
- Add and edit transposition control points
- Work with beat mapping
- Beat mapping overview
- Use beat mapping on MIDI regions
- Use beat mapping on audio regions
- Automatically beat map regions
- Control the overall project volume
- Chapter 20: View and edit music notation
- Notation overview
- Work in the Score Editor
- Score Editor overview
- View tracks as music notation in the Score Editor
- Position items graphically in the Score Editor
- Move and copy items in the Score Editor
- Resize notes and symbols in the Score Editor
- Adjust the vertical headroom of the score display
- Repeat events in the Score Editor
- Insert items in multiple regions
- Edit multiple items in the Score Editor
- Select multiple regions in the Score Editor
- Display and edit aliases in the Score Editor
- Add notes to the score
- Add notes and symbols from the Part box
- Part box overview
- View score symbols in the Part box
- Select score symbols in the Part box
- Add notes and rests from the Part box
- Add key and time signature changes
- Change the clef sign
- Add dynamic marks, slurs, and crescendi
- Change the appearance of note heads
- Add accents and other symbols to notes
- Add trills, ornaments, and tremolo symbols
- Add sustain pedal markings
- Add chord symbols
- Add chord grids and tablature symbols
- Add bar lines, repeat signs, and coda signs
- Add page and line break symbols
- Edit notes in the Score Editor
- Select notes in the Score Editor
- Move and copy notes in the Score Editor
- Change a note’s pitch, duration, and velocity
- Quantize the timing of notes in the Score Editor
- Edit attributes of individual notes
- Restrict note input to a diatonic key
- Control the appearance of tied notes
- Create and edit tuplets
- Use tuplets to override display quantization
- Add grace notes and independent notes
- Delete notes in the Score Editor
- Add lyrics and text
- Lyrics and text overview
- Add lyrics
- Add and edit text
- Add automatic text
- Add global text
- Work with chord grids
- Chord grids overview
- Instrument Editor
- Chord Grid Selector
- Chord Grid Editor
- Insert and edit chord grids in the Score Editor
- Create custom chord grids in the Chord Grid Editor
- Create, rename, and delete chord grid libraries
- Import and export chord grid libraries
- Edit score region parameters
- Score region parameters overview
- Style
- Quantize
- Interpretation
- Syncopation
- No Overlap
- Max Dots
- Score
- Edit default parameters for new regions
- Work with staff styles
- Staff styles overview
- Assign staff styles to tracks
- Staff Style window
- Create and duplicate staff styles
- Edit staff styles
- Edit staff, voice, and assign parameters for a staff style
- Add and delete staffs or voices
- Copy and paste staffs or voices
- Copy staff styles between projects
- Delete staff styles
- Assign notes to voices and staffs
- Add notes to a polyphonic staff style
- Change the staff assignment of score symbols
- Beam notes across staffs
- Use drum notation with mapped staff styles
- Predefined staff styles
- Create scores and parts using score sets
- Score sets overview
- Choose score sets
- Create and delete score sets
- Edit score set parameters
- Change the instruments in a score set
- Resize score sets
- Create separate layouts for a full score and parts
- Extract parts from the score
- Import score sets from other projects
- Edit the score layout
- Score layout overview
- Edit line breaks
- Line and page breaks
- Edit local margins
- Change the margin and header values
- Use external symbol fonts
- Share the completed score
- Customize the Score Editor
- Choose a color mode
- Show or hide folder contents
- Display global tracks
- Display instrument names
- Display duration bars
- Change the length of duration bars
- Display guide lines
- Chapter 21: Share projects
- Sharing overview
- Bounce a project
- Bounce a project to an audio file
- Burn a project to a CD or DVD
- Set the bounce range
- Set bounce options
- About dithering algorithms
- Share projects to iTunes
- Share projects to the Media Browser
- Share projects to SoundCloud
- Export projects
- Export a project as an AAF file
- Export a project as a Final Cut Pro XML file
- Export a project as MusicXML
- Chapter 22: Surround in Logic Pro X
- Logic Pro X surround overview
- Set up Logic Pro X for surround
- Set surround preferences
- Set the project surround format
- Set the channel strip input format
- Set the channel strip output format
- Change the order of surround level meters
- Logic Pro X surround features
- Surround Panner
- Surround effects
- Multichannel effects
- Surround master channel strip
- Down Mixer plug-in
- Bounce surround audio files
- Additional surround information
- Surround formats overview
- Surround format channel distribution
- Surround bounce file encoders
- Speaker placement, timing, and levels
- Chapter 23: Work in the Environment
- Environment overview
- Common object parameters
- Work with Environment layers
- Environment layers overview
- Create, name, delete, and switch layers
- Work with Environment objects
- Tools in the Environment
- Add and delete objects
- Move and copy objects
- Adjust the position and size of objects
- Use advanced selection commands
- Create your MIDI signal path
- MIDI signal path overview
- Assign direct output connections
- Cable Environment objects
- Make multiple cable connections
- Cable objects in series and in parallel
- Exchange Environments
- Exchanging Environments overview
- Import Environments
- Update and swap Environments
- Replace Environments
- Customize the Environment
- Environment objects reference
- Standard instrument objects
- Multi-instrument objects
- Mapped instrument objects
- Touch track objects
- Fader objects
- Alias objects
- Ornament objects
- GM mixer objects
- MMC record buttons objects
- Keyboard objects
- Monitor objects
- Macro objects
- Arpeggiator objects
- Transformer objects
- Delay line objects
- Voice limiter objects
- Channel splitter objects
- Chord memorizer objects
- Physical input objects
- Sequencer input objects
- MIDI click objects
- ReWire objects
- Channel strip objects
- Chapter 24: Video and synchronization
- Video and synchronization overview
- Use movies in Logic Pro X
- Add a movie to your project
- Use the Movie window
- About the Movie track
- Use movie scene markers
- Use movie audio tracks
- Create and edit soundtracks
- Logic Pro X synchronization
- Synchronization overview
- External synchronization
- MTC interpretation
- MIDI Machine Control
- Synchronization problems and solutions
- Chapter 25: Preferences, project settings, and key commands
- Logic Pro preferences
- Logic Pro preferences overview
- General preferences
- Audio preferences
- MIDI preferences
- Display preferences
- Score preferences
- Movie preferences
- Automation preferences
- Control Surfaces preferences
- Advanced preferences
- Project settings
- Project settings overview
- General settings
- Synchronization settings
- Metronome settings
- Recording settings
- Tuning settings
- Audio settings
- MIDI settings
- Score settings
- Movie settings
- Assets settings
- Key commands
- Key commands overview
- Browse, import, and save key commands
- Assign key commands
- Print key commands
- Logic Pro preferences