Требуется руководство для вашей Peugeot 4007 (2011)? Ниже вы можете просмотреть и загрузить бесплатно руководство в формате PDF. Кроме того, приведены часто задаваемые вопросы, рейтинг изделия и отзывы пользователей, что позволит оптимально использовать ваше изделие. Если это не то руководство, которое вы искали, – свяжитесь с нами.
Ваше устройство неисправно, и в руководстве отсутствует решение? Перейдите в Repair Café для получения бесплатных ремонтных услуг.
Руководство

Рейтинг
Сообщите нам, что вы думаете о Peugeot 4007 (2011), оставив оценку продукта. Хотите поделиться вашими впечатлениями от данного изделия или задать вопрос? Вы можете оставить комментарий в нижней части страницы.
Довольны ли вы данным изделием Peugeot?
Да Нет
3 голоса
Часто задаваемые вопросы
Наша служба поддержки выполняет поиск полезной информации по изделиям и отвечает на часто задаваемые вопросы. Если вы заметили неточность в наших часто задаваемых вопросах, сообщите нам об этом с помощью нашей контактной формы.
В моей машине есть цепь ГРМ. С каким интервалом ее нужно менять? Проверенный
При нормальной эксплуатации цепь ГРМ должна прослужить весь срок службы автомобиля и не нуждается в замене.
Это было полезно (2246)
Почему я не могу открыть одну или несколько дверей изнутри? Проверенный
Вероятно, в машине активирован детский замок. Обычно его можно разблокировать с помощью механизма в двери.
Это было полезно (689)
Как часто следует менять масло? Проверенный
Практически для каждого автомобиля есть свои точные рекомендации, однако в целом масло разумно менять каждые 10 000–15 000 км пробега или один раз в год. Загрязненное масло может со временем серьезно повредить двигатель.
Это было полезно (588)
Когда следует отключать подушку безопасности сбоку от пассажирского сиденья? Проверенный
При движении с ребенком в автокресле на пассажирском сиденье необходимо выключить подушку безопасности с этой стороны. Это также рекомендуется для детей до 12 лет, которые размещаются на пассажирском сиденье. Это необходимо для предотвращения травм в случае аварии.
Это было полезно (540)
Ключи от машины больше не будут открывать машину на расстоянии, почему? Проверенный
Автомобильные ключи, которые можно разблокировать на расстоянии, обычно работают от аккумулятора. Когда он закончится, ключ перестанет работать. Замените аккумулятор и попробуйте еще раз.
Это было полезно (506)
Приведет ли более низкое давление в шинах к большему сцеплению с дорожным покрытием при езде по снегу? Проверенный
Нет, несмотря на то что при снижении давления пятно контакта шин с дорогой увеличивается, автомобиль становится менее устойчивым. Садитесь за руль, только если в шинах правильное давление!
Это было полезно (303)
Я залил в машину не то топливо, что мне делать? Проверенный
Не садитесь за руль! Неважно, заливаете ли вы дизельное топливо в автомобиль с бензиновым двигателем или бензин в автомобиль с дизельным двигателем. В обоих случаях это может привести к повреждению машины и / или других частей автомобиля. Обратитесь в службу технической поддержки на дорогах.
Это было полезно (198)
Где я могу найти VIN-номер моей машины? Проверенный
Это может варьироваться в зависимости от марки и модели, но на многих автомобилях номер VIN можно найти на дверном косяке, под капотом или на металлическом полу переднего сиденья.
Это было полезно (163)
Как часто нужно менять щетки дворников? Проверенный
Желательно заменять щетки стеклоочистителя не реже одного раза в год. Признаками необходимости замены лезвий являются полосы, дымка, шум или отслоение резины.
Это было полезно (148)
Какой номер VIN? Проверенный
VIN означает идентификационный номер автомобиля и является уникальным номером, который есть у каждого автомобиля. Это делает автомобиль не идентифицируемым, например, после аварии или в случае отзыва. Это также позволяет идентифицировать автомобиль в случае отсутствия номерных знаков.
Это было полезно (121)
Сколько миль в одном километре? Проверенный
1 километр равен 0,621 мили. 10 километров равны 6,21 мили. 1 миля равна 1,609 километра. 10 миль равны 16,09 километра.
Это было полезно (119)
Могу ли я использовать дворники, когда на лобовом стекле обледенел? Проверенный
Нет, это не рекомендуется. Лед острый и может повредить резину на щетках стеклоочистителя.
Это было полезно (117)
Какие модели Peugeot подходят для езды на E10? Проверенный
Peugeot заявляет, что все модели с бензиновым двигателем, построенным в 2000 году или позже, могут ездить на E10.
Это было полезно (27)
- Manuals
- Brands
- PEUGEOT Manuals
- Automobile
- 4007
- Handbook
-
Contents
-
Table of Contents
-
Bookmarks
Quick Links
Related Manuals for PEUGEOT 4007
Summary of Contents for PEUGEOT 4007
-
Page 2
Please note the following point: The fi tting of electrical equipment or accessories which are not recommended by PEUGEOT may result in a failure of your vehicle’s electronic system. Please note this specifi c warning. It is advisable to contact a PEUGEOT dealer to be… -
Page 3
This handbook has been designed to en- own safety, for the safety of others able you to make the most of your 4007. or to avoid any risk of damaging On the fi rst few pages, you will fi nd a your vehicle. -
Page 4: Table Of Contents
CONTENTS CHILD FAMILIARISATION ACCESS SAFETY Remote control key Child seats INSTRUMENTS Electric windows ISOFIX mountings and CONTROLS Doors Child lock Instrument panel Tailgate Warning lamps Lower tailgate Instrument panel displays Sunroof Information in the instrument Fuel tank panel screen Distance recorders Service indicator Trip computer Setting menu…
-
Page 5: Table Of Contents
CONTENTS PRACTICAL AUDIO EQUIPMENT and DRIVING INFORMATION TELEMATICS Parking brake Changing a wheel Audio CD system Manual gearbox Changing a bulb CD changer CVT gearbox Changing a fuse Error messages DCS gearbox Battery Audio-Telematic System Four wheel drive system Changing a wiper blade Navigation Cruise control Towing…
-
Page 6
FAMILIARISATION Reversing camera This system is activated automati- Sunroof cally when reverse gear is engaged providing a visual image on the colour This roof improves the ventilation and screen. light in the passenger compartment. Audible rear parking sensors Lower tailgate This system warns you if an obstacle This lower tailgate provides remarkable is detected behind the vehicle when… -
Page 7
FAMILIARISATION OPENING Remote control key Manual central locking Fuel tank 1. Locking the vehicle. A. Opening the fuel fi ller fl ap. A. Unfolding/folding the key. B. Unlocking the vehicle. 2. Unlocking the vehicle. B. Removing the fuel fi ller cap. C. -
Page 8
FAMILIARISATION OPENING Tailgate Lower tailgate Spare wheel and tools Opening Opening Access to the spare wheel After unlocking the vehicle using the Push the handle C to the right and Remove the plastic cover E to gain remote control or the key, press the tilt the tailgate D gently. -
Page 9
FAMILIARISATION CONFIGURING SEATS Rear seats (row 2) Rear bench seat (row 3) Forwards-backwards adjustment Head restraint height adjustment The rear bench seat can be folded. It is stowed in a location in the fl oor of the vehicle. Seat back angle adjustment Access to the third row (7-seat version) -
Page 10
FAMILIARISATION INTERIOR Digital air conditioning Audio and communication systems This automatic air conditioning system maintains the desired level of com- These systems benefi t from the latest fort and adequate air circulation in the technology: MP3 compatible audio sys- passenger compartment. tem, Bluetooth hands-free telephone, colour screen… -
Page 11
FAMILIARISATION INSTRUMENTS AND CONTROLS 1. Audio system controls. 2. Telephone controls. 3. Steering wheel adjustment control. 4. Front and rear wipers/screenwash control stalk. 5. Instrument panel. 6. Driver’s airbag. Horn. 7. Cruise control switches. 8. Gear lever. 9. Parking brake. 10. -
Page 12
FAMILIARISATION INSTRUMENTS AND CONTROLS 1. Steering lock and ignition. 2. Door mirror controls. Electric window and rear electric window deactivation controls. 3. Lighting and direction indicator control stalk. Headlamp wash control. 4. Central adjustable air vents. 5. Sunshine sensor. 6. Cooled upper glove box. 7. -
Page 13
FAMILIARISATION SITTING COMFORTABLY Front seats Manual adjustments Forwards-backwards Driver’s seat cushion height and angle Seat back angle Electric adjustments (driver’s seat only) Forwards-backwards Seat cushion height and angle Seat back angle… -
Page 14
FAMILIARISATION SITTING COMFORTABLY Manual steering wheel height Door mirror adjustment Front seat belt adjustment A. Selection of the mirror B. Adjustment of the position of the mirror. 1. Releasing the adjustment mechanism. C. Folding/Unfolding. 2. Locking the adjustment mechanism. 3. Adjustment of the height of the steering wheel. -
Page 15
FAMILIARISATION SITTING COMFORTABLY Ignition switch Electric window controls Sunroof controls 1. LOCK position. 1. Driver’s electric window control. 1. Opening control. 2. ACC position. 2. Passenger’s electric window control. 2. Closing control. 3. ON position. 3. Rear right electric window control. 3. -
Page 16
FAMILIARISATION SEEING CLEARLY Lighting Wipers Ring A Windscreen wipers Rear wiper Park. Lighting off. Single wipe. Automatic illumination of head- Park. lamps. Intermittent wipe. Intermittent (speed adjustable Sidelamps. manually). Wiping with screen wash. Dipped or main beam head- lamps. Automatic rain sensitive (speed adjustable manually). -
Page 17
FAMILIARISATION VENTILATION Digital air conditioning Automatic programme (comfort). Deactivation of the air conditioning. Temperature adjustment. Air distribution adjustment. Exterior air intake. Front visibility setting. Interior air recirculation. Air fl ow adjustment. Rear screen demisting/defrosting. -
Page 18
FAMILIARISATION MONITORING Instrument panel Warning lamps Switch panel A. Speedometer. B. Instrument panel screen. When the ignition is on, the orange and A. Passenger’s airbag deactivated C. Rev counter. red warning lamps come on. warning lamp. D. Dashboard lighting dimmer. When the engine is running, these warning lamps should go off. -
Page 19
FAMILIARISATION PASSENGER SAFETY Front passenger’s airbag Child lock ISOFIX mountings 1. Insert the key. This prevents opening of the door Two rings A , located between the seat back and seat cushion of the vehicle’s seat concerned from the inside. 2. -
Page 20
FAMILIARISATION DRIVING SAFELY Four wheel drive system Cruise control Audible rear parking sensors Three transmission modes are avail- This maintains a constant vehicle speed This detects obstacles (person, vehicle, able and can be selected manually by programmed by the driver. tree, gate, …) located behind the vehicle. -
Page 21
ECO-DRIVING Eco-driving is a range of everyday practices that allow the motorist to optimise their fuel consumption and CO emis- sions. Optimise the use of your Control the use of your gearbox electrical equipment With a manual gearbox, move off gently, Before moving off, if the passenger Avoid running the engine before moving change up without waiting and drive by… -
Page 22
Observe the recommendations Limit the causes of excess consumption on maintenance When refuelling, do not continue after Spread loads throughout the vehicle; Check the tyre pressures regularly, place the heaviest items in the bottom when cold, referring to the label in the the 3 rd cut-off of the nozzle to avoid of the boot, as close as possible to the door aperture, driver’s side. -
Page 23: Instrument Panel
INSTRUMENTS and CONTROLS INSTRUMENT PANE INSTRUMENT PANEL Screen type 1 Panel grouping together the dials and 3. Instrument panel screen: warning/indicator lamps. These inform — Warning and status displays. the driver of the activation/deactivation — Total and trip distance recorders. of a system or of the occurrence of a fault.
-
Page 24: Warning Lamps
Change the bulb audible indicator down. or contact a PEUGEOT dealer or a qualifi ed warning workshop. If this indicator lamp fl ashes abnormally quickly, Flashing Right-hand this could indicate that the bulb of one of the with This fl…
-
Page 25
It is accompanied by a message on the The brake fl uid level is instrument panel screen. Top up with brake fl uid too low. and contact a PEUGEOT dealer or a qualifi ed workshop. Contact a PEUGEOT dealer or a qualifi ed This comes on or workshop. -
Page 26
This comes on for a It should go off when the engine is started. If it few seconds when the does not go off, contact a PEUGEOT dealer or a ignition is turned to «ON» qualifi ed workshop. then goes off. -
Page 27: Instrument Panel Displays
INSTRUMENTS and CONTROLS INSTRUMENT PANE INSTRUMENT PANEL DISPLAYS Each time the engine is started: a series of warning lamps and/or messages come on, applying a checking self test. They go off after a few seconds. Engine running: the warning lamp or the message becomes a warning if it remains on continuously or fl…
-
Page 28
If the message remains on Associated warning lamp. contact a PEUGEOT after topping up, contact The level of brake fl uid in dealer or a qualifi ed a PEUGEOT dealer or a the reservoir is too low. workshop. qualifi ed workshop. Braking Fixed… -
Page 29
INSTRUMENTS and CONTROLS Message is on Cause Solution — action Observations Contact a PEUGEOT Fault in the airbags or Airbags Fixed dealer or a qualifi ed pretensioners. workshop. Problem in one of the Stop the vehicle and To identify the problem,… -
Page 30
INSTRUMENTS and CONTROLS Message is on Cause Solution — action Observations Dynamic Contact a PEUGEOT stability Dynamic stability control Fixed dealer or a qualifi ed control system system (ASC) fault. workshop. (ASC) Four wheel drive Contact a PEUGEOT Four wheel… -
Page 31
Start of saturation of the displayed, contact a the particle Fixed driving at a speed of at particle emission fi lter. PEUGEOT dealer or a emission fi lter least 35 mph (60 km/h) qualifi ed workshop. until the message is cleared. -
Page 32
Solution — action Observations Informs the driver of Contact a This is displayed for a few Service the time remaining PEUGEOT dealer Fixed seconds when the ignition is indicator before the vehicle’s or a qualifi ed switched on. scheduled service. -
Page 33: Information In The Instrument Panel Screen
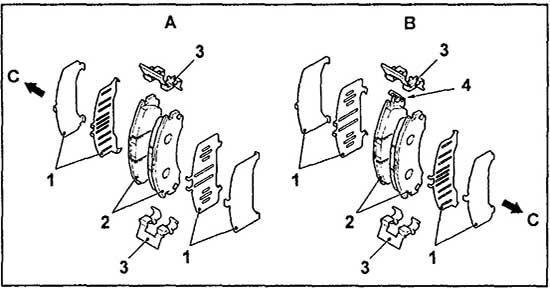
INSTRUMENTS and CONTROLS INFORMATION IN TH INFORMATION IN THE Distance recorder (A and B) Range INSTRUMENT PANEL SCREEN total distance When engine displayed zone running, this indicates Information display of the screen and the number miles trip distance in zone 2 (kilometres) which can (refer to the «Distance still be travelled with the…
-
Page 34: Distance Recorders
Contact a PEUGEOT dealer or was disconnected. The distance a qualifi ed workshop. displayed must be considered an approximate indication.
-
Page 35: Service Indicator
7300 miles (kilometres) remain before to zero the next service is due. System which informs the driver when Your PEUGEOT dealer or a qualifi ed the next service is due in accordance workshop carries out this operation after with manufacturer’s servicing each service.
-
Page 36: Trip Computer
OFF position for more than 4 hours, for long periods in place of the mpg) information reset zero digits while driving, contact a automatically. PEUGEOT dealer or a qualifi ed This is the average fuel workshop. consumption during the last few seconds of driving.
-
Page 37: Setting Menu
INSTRUMENTS and CONTROLS SETTING MENU SETTING MENU MENU 2/3: When the vehicle is moving , a/b (option of displaying a different the setting menu screen is not System which provides access to the language in the instrument panel displayed when you press the settings of certain functions.
-
Page 38
INSTRUMENTS and CONTROLS Options for resetting average In this case, the distance, speed and quantity of fuel units will also be changed fuel consumption and average If the battery is disconnected, in accordance with your choice of fuel the settings memory is cleared speed consumption unit. -
Page 39
INSTRUMENTS and CONTROLS Choice of display language Changing the display interval If the battery is disconnected, the (LANGUAGE) of the «BREAK REMINDER» settings memory is cleared and message You can choose between different the default language (ENGLISH) You can change the display interval of languages for the screen. -
Page 40
INSTRUMENTS and CONTROLS Choice of the direction The factory settings are: press the INFO button for a few seconds to alternate between the indicators sound choices (ON, OFF). You can choose the sound of the direction indicators, on the type 2 Functions Factory setting instrument panel only. -
Page 41
INSTRUMENTS and CONTROLS MONOCHROME SCR CHROME SCREEN Setting the time Selecting the Setting Select the automatic mode or the manual mode as follows: The digital clock can be set in automatic This provides the following information: mode or in manual mode . the time, audio system information (refer to Press button A «PWR»… -
Page 42
INSTRUMENTS and CONTROLS Manual mode The digital clock does not display seconds. When the «minutes» display is set or reset to zero, the clock starts at the zero second of the minute selected. The time setting is lost if the battery is disconnected. -
Page 43: Colour Screen
INSTRUMENTS and CONTROLS COLOUR SCREEN COLOUR SCREEN «Settings» menu «Navigation-guidance» menu This permits display of the following On the control panel, press button C On the control panel, press button B main menus: (SET) to access the «Settings» screen (MENU) to access the «Menu» screen and select: and select: «Audio-video»…
-
Page 44
INSTRUMENTS and CONTROLS «Info» menu «Route» menu Setting the time On the control panel, press button D On the control panel, press button E (NAVI) to access the «Route Menu» (INFO) to access the «Info» screen and The digital clock is set automatically . consult: screen and select: This mode enables the system to set… -
Page 45: Lighting Rheostat
INSTRUMENTS and CONTROLS Once this menu has been selected, you LIGHTING RHEOSTAT can access the following functions: System for manual adjustment of the brightness instruments controls in relation to the exterior brightness. Press button C to access the «Time» 1. RDS Auto Correct: menu .
-
Page 46: Ventilation
fl ow, do not use it and have it checked by a passenger compartment temperature PEUGEOT dealer or a qualifi ed workshop. and air distribution, by means of various In certain cases of particularly arduous…
-
Page 47
COMFORT… -
Page 48: Automatic Air Conditioning
COMFORT AUTOMATIC AIR CONDITIONING 1. Air distribution adjustment 2. Air fl ow adjustment 3. Temperature adjustment 4. Rear screen demisting/defrosting 5. Air conditioning On/Off 6. Intake of exterior air/Recirculation of interior air Automatic operation In automatic mode: when the temperature is set to max- When the engine is cold, to avoid imum (Rapid heating), the intake of Set the temperature control dial 3 to…
-
Page 49
COMFORT Manual operation Air distribution adjustment (1) Air fl ow adjustment (2) It is possible to set one or more func- tions manually while leaving the other Place the dial in the Turn the dial to the functions in automatic mode. right to increase the position required to di- rect the air towards:… -
Page 50
COMFORT Rear screen demisting/ Air conditioning On/Off (5) Intake of exterior air/ defrosting (4) Recirculation of interior air (6) With the engine running, press button 4 This function insulates the passenger Press button 5 to activate the air to activate the demisting/defrosting of conditioning. -
Page 51
COMFORT Personalisation of the Exterior Windows and windscreen demisting/defrosting air intake/Interior air recirculation function This function is controlled automati- cally. However, you can deactivate its automatic control if you wish to change the air intake mode at any time. Changing the status Press the Air intake/Interior air recircu- lation button for at least 10 seconds. -
Page 52: Front Seats
COMFORT FRONT SEATS Manual mode Forwards-backwards adjustment Driver’s seat cushion height and Seat back angle adjustment angle adjustment Raise the control bar and slide the seat Pull the control upwards to adjust the forwards or backwards. Pull and/or push the control several seat back.
-
Page 53
COMFORT FRONT SEATS ONT SEATS Electric mode (driver’s seat only) Forwards-backwards adjustment Driver’s seat cushion height and Seat back angle adjustment angle adjustment Push the control forwards or rearwards to Tilt the control forwards or rearwards to move the seat to the position required. Pull or push the front of the control to raise straighten or tilt the seat back. -
Page 54
COMFORT Heated seats adjustment Head restraint height adjustment Never drive with the removed head restraints in the vehicle as they could be thrown around the vehicle on sharp braking. They must always be in place and ad- justed correctly. After installing the head restraint, check that the height adjustment button has engaged correctly. -
Page 55: Rear Seats
COMFORT REAR SEATS (ROW 2) AR SEATS (ROW 2) The rear seats can be folded in two parts (1/3 — 2/3). When operating the seats, en- sure that no person or object is in the vicinity of the moving parts to avoid any risk of injury or damage.
-
Page 56
COMFORT Rear armrest Access to the third row Lower the armrest to use it. The passenger gains access to the third row of seats by tilting a second row seat. To return to the initial confi guration, push the armrest until it locks in its vertical po- To put this seat back in place, refer to sition. -
Page 57
COMFORT Folding the second row * Before folding the seats, lower the head restraints fully. Before folding the seat backs forwards, insert the seat belt buckles in the slots provided for this purpose in the rear seat cushion. 1. Raise the rear seat lever A , or Pull the button in the boot B for at least one second, or Pull the rear seat releasing strap C towards you. -
Page 58
COMFORT Returning the second row to the normal position 1. Lower the seat pulling simultane- 2. Press on the cushion to put it in 3. Pull the seat back upright pulling si- ously on the releasing strap A lo- place until it engages. multaneously on the releasing strap cated at the rear of the cushion and located at the rear of the seat back. -
Page 59
COMFORT «Lowered seats» configuration 1. Remove the head restraints from the front seats. 2. Raise the rear armrest and remove the load space cover. 3. Move the rear seats as far back as possible. 4. Move the front seats as far forward as possible and tilt their seat backs fully. 5. -
Page 60: Rear Bench Seat
COMFORT REAR BENCH SEAT (ROW 3) ROW 3) Unfolding the bench seat The rear bench seat can be folded. It is 1. Open the tailgate and the lower tail- stowed in a location in the fl oor of the gate (refer to the «Access» section). vehicle.
-
Page 61
COMFORT 3. Pull the black strap C located at the 4. Pull the black strap D to release the 5. Tilt the bench seat rearwards. centre of the seat back to raise the bench seat cushion. seat back. 6. Raise the head restraints. 7. -
Page 62
COMFORT Folding the bench seat 1. Open the tailgate and the lower tail- 3. Unlock the head restraints by slid- 4. Pull the grey strap D and bring the gate (refer to the «Access» section). ing the controls C and fold them bench seat towards you. -
Page 63: Mirrors
3 times to unfold them. The folding and unfolding of the door mirrors can be confi gured via the colour screen «Equipment» menu or deactivated by a PEUGEOT dealer or a qualifi ed workshop. The mirrors can also be folded manually.
-
Page 64
COMFORT REAR VIEW MIRROR AUTOMATIC REAR VIEW AUTOMATIC REAR VIEW AUTOMATIC REAR VIEW AUTOMATIC REAR VIEW MIRROR * MIRROR WITH R TH REVERSING CAMERA CAMERA* Adjust the mirror by moving it up or This automatically and gradually changes Combined with a camera fi tted at the down and/or to the left or right. -
Page 65: Steering Wheel Adjustment
COMFORT STEERING WHEEL MANUA EERING WHEEL MANUAL HEIGHT ADJUSTMENT EIGHT ADJUSTMENT The sun visors fold forwards, and to the side when they are unhooked. They are fi tted with a courtesy mirror Pull the locking lever downwards When removing the mat on the driver’s and a ticket holder.
-
Page 66
COMFORT FRONT INTERIOR FITTINGS FRONT INTERIOR FITTINGS 1. Spectacles storage. 2. Cooled upper glove box. 3. Lockable lower glove box. 4. 12 V socket (120 W max). 5. Armrest with storage compartments 12 V socket (120 W max). 6. Cup holder. 7. -
Page 67
COMFORT Spectacles storage Cooled upper glove box Lower glove box Press the cover to open it. Press button A on the lid to open it. This is fi tted with a lock. To close it, push the cover until it locks. To close it, push the lid up. -
Page 68
COMFORT 12 V socket (120 W max) Armrest with storage compartments Lower storage compartment 12 V socket (120 W max) This is operational when the ignition Upper storage compartment Pull the left-hand lever to open the lid. switch is in the «LOCK», «ON» or «ACC» To close, fold down the lid until it locks. -
Page 69
COMFORT 12 V socket (120 W max) Removable ashtray Check that the electrical equip- ment operates on 12 V and that its maximum electrical power is 120 W. When you use the two sockets at the same time, ensure that the two items of equipment to- gether operate on 12 V and that their combined electrical power… -
Page 70
COMFORT Enclosed storage compartment Cup holder Pull the storage compartment lid to There is a cup holder fi tted in the dash- Two further cup holders are available in open it. board on the driver’s side. front of the front armrest. Press on the centre of the cover to ex- tract the plate. -
Page 71
COMFORT REAR INTERIOR FITTINGS AR INTERIOR FITTINGS Rear armrest Bottle holder Coat hook Pull the armrest forwards to lower it. There is a bottle holder in each rear door. The rear left grab handle is fi tted with a coat hook. Cup holder Grab handle Open the cover A located at the end of the… -
Page 72
COMFORT BOOT BOOT FITTINGS 1. 12 V socket (120 W max). 2. Open storage compartment. 3. Right-hand side enclosed storage compartment. 4. Storage compartment in the fl oor * . 5. Stowing rings. 6. Left-hand side storage compartment or audio equipment. 7. -
Page 73
COMFORT 12 V socket (120 W max) Stowing rings Storage compartment in the fl oor * This operates when the ignition switch There are four stowing rings in the boot Raise the boot fl oor to gain access to is in the «ON» or «ACC» position. for securing luggage: this compartment. -
Page 74
COMFORT Load space cover Unroll the load space cover and install it Second installation position. Removing the load space cover. in the housing A . The load space cover can be secured 1. Reel in the load space cover. To store the load space cover, release it in two different positions B , so that the 2. -
Page 75
ACCESS REMOTE CO O NTROL KEY Unlocking the vehicle Locking the vehicle Unfolding the key System which permits central unlock- Normal locking using the remote ing or locking of the vehicle using the control First press button A to unfold the key. lock or from a distance. -
Page 76
Folding the key your vehicle does not start, contact a First press button A to fold the key. PEUGEOT dealer as soon as possible. The vehicle will relock automati- cally after thirty seconds unless a door or the tailgate is opened. -
Page 77
ACCESS Starting the vehicle Switching the vehicle off Changing the battery Park the vehicle. While pressing the key, turn it to- wards you to position 1 (LOCK) . Remove the key from the ignition switch. Key in ignition A buzzer sounds on opening the driver’s door, if the key has been left in the ignition. -
Page 78
Do not make any modifi cations to the electronic engine immobiliser system, this could cause malfunctions. When purchasing a second-hand vehicle Have the key codes memorised by a PEUGEOT dealer, to ensure that the keys in your possession are the only ones which can start the vehicle. -
Page 79: Electric Windows
ACCESS ELECTRIC W W INDOWS Operation Safety anti-pinch In automatic mode, when the window With the ignition on, you have two op- rises and meets an obstacle, it stops System which opens or closes a window tions: and lowers again. manually or automatically.
-
Page 80
ACCESS Deactivating the passenger and rear Reinitialising the electric windows electric window switches Following reconnection of the battery or Always remove the key from the after the safety anti-pinch has been trig- ignition when leaving the vehicle, gered three times in succession, you even for a short time. -
Page 81: Doors
ACCESS DOORS Manual centralised control System which provides full manual Opening From inside locking or unlocking of the doors and tailgate from the inside. From outside Pull the front or rear door control to open the door. After unlocking the vehicle using the The front passenger door or the rear remote control or the key, pull the Locking…
-
Page 82: Tailgate
ACCESS Emergency control TAILGATE System which locks or unlocks mechani- Locking the front passenger door and the rear doors (from inside) cally the driver’s door only in the event of a malfunction of the central locking. Tilt the interior control B forwards. Using the key Opening After unlocking the vehicle using the…
-
Page 83: Lower Tailgate
ACCESS LOWER TAIL L GATE «Tailgate open» warning Tailgate release This warning lamp comes on This enables the tailgate to be unlocked on the instrument panel screen in the event of a central locking fault. when the tailgate is not closed correctly.
-
Page 84: Sunroof
ACCESS SUNROOF Complete closing Safety anti-pinch and reinitialisation With the ignition on, push the con- If the roof meets an obstacle while it is trol forwards (in the direction 2 ). closing, it stops and opens again. Operation The defl ector folds down gradually on closing.
-
Page 85
ACCESS BLIND Always remove the key from the ignition when leaving the vehi- cle, even for a short time. If the roof meets an obstacle during operation, you must reverse the movement of the roof. To do this, press the control concerned. When the driver operates the roof control, they must ensure that no one is preventing the… -
Page 86: Fuel Tank
ACCESS FUEL TANK Opening the cap may cause an inrush of air. This vacuum, which is completely Capacity of the tank: approximately normal, is caused by the sealing of the fuel system. 60 litres. To fi ll the tank safely: Low fuel level the engine must be switched off, When the low fuel level is…
-
Page 87
European standard EN 15293. is subject to strict application of the special servicing conditions. Contact a For Brazil only, special vehicles are PEUGEOT dealer or a qualifi ed work- marketed to run on fuels containing up shop. to 100 % ethanol (E100 type). -
Page 88: Lighting Stalk
VISIBILITY LIGHTING STALK NG STALK A. Main lighting mode selection ring: Certain functions of the lighting turn it to position the symbol re- stalk (automatic illumination of quired facing the mark. Main lighting headlamps, sensitivity) can be confi gured via the colour screen The various front and rear lamps of the «Equipment»…
-
Page 89
VISIBILITY Front and rear foglamps front and rear foglamps In good or rainy weather, both day and night, the front foglamps and the rear foglamps are pro- To switch on the front foglamps, turn hibited. In these situations, the the ring C forwards once. power of their beams may dazzle To switch on the rear foglamps, turn other drivers. -
Page 90: Daytime Running Lamps
The sensor is located at the base of the The instruments and controls (instrument windscreen. panel, multifunction screen, air condition- Contact a PEUGEOT dealer or a quali- ing control panel, …) are illuminated. fi ed workshop to adjust the sensitivity of the sensor.
-
Page 91: Headlamp Adjustment
In cases of malfunction , 3. 5 occupants (including the driver) this message appears in + maximum authorised load. the multifunction screen. 4. Driver + maximum authorised load. Do not touch the xenon bulbs. Contact a PEUGEOT dealer or a qualifi ed work- shop.
-
Page 92: Wiper Controls
VISIBILITY Manual controls WIPER CONTROL CONTROLS Certain windscreen wiper func- The wiper commands are issued directly tions (intermittent operation, …) Programming by the driver by means of the stalk A and can be confi gured via the colour An automatic control mode is also avail- the ring B .
-
Page 93: Automatic Rain Sensitive Wipers
VISIBILITY Automatic rain sensitive wipers Operating fault Rear wiper Do not cover the rain sensor, linked The windscreen wipers operate automat- with the sunshine sensor and located in ically, without any action on the part of the centre of the windscreen behind the the driver, if rain is detected (sensor be- rear view mirror.
-
Page 94: Courtesy Lamps
VISIBILITY COURTESY LAMP TESY LAMPS Front courtesy lamp Position 1 The courtesy lamp comes on when a door or the tailgate is opened. When the door or the tailgate is closed again, the lighting gradually dims for a few seconds before switching off. However, the courtesy lamp is switched off automatically in the following cases: When the doors and the tailgate…
-
Page 95
VISIBILITY Rear courtesy lamp When the doors and the tailgate are Courtesy lamps automatic closed and you lock the vehicle from switch off inside or using the remote control. To prevent discharging of the battery, the courtesy lamps, map reading lamps and boot lamp switch off automatically Position 3 «OFF»… -
Page 96: Child Seats
CHILD SAFETY GENERAL POINTS RELATING CHILD SEAT IN THE F E FRONT TO CHILD SEATS Although one of PEUGEOT’s main cri- «Rearwards-facing» «Forwards-facing» teria when designing your vehicle, the safety of your children also depends on you. For maximum safety, please observe…
-
Page 97
CHILD SAFETY CHILD SEATS RECOMMENDED BY PEUGEOT CHILD SEATS RECOMMENDED B PEUGEOT offers a complete range of recommended child seats which are secured using a three point seat belt : Group 0+: from birth to 13 kg «RÖMER Baby-Safe Plus»… -
Page 98
CHILD SAFETY Refer to the advice given on the label present on both sides of the passenger’s sun visor. Passenger airbag OFF To assure the safety of your child, you must deactivate the passenger’s front airbag when you install a child seat in the rearwards facing posi- tion on the front passenger’s seat. -
Page 99
CHILD SAFETY LOCATIONS FOR CHILD SEATS SECURED USING THE SEAT BELT LOCATIONS FOR CHILD SEATS S In accordance with European regulations, this table indicates the options for installing child seats secured using a seat belt and universally approved (a) in relation to the weight of the child and the seat in the vehicle. Weight of the child and indicative age Less than 13 kg From 9 to 18 kg… -
Page 100: Isofix Mountings
CHILD SAFETY «ISOFIX» mountings These are three rings for each seat: This ISOFIX mounting system provides fast, reliable and safe fi tting of the child seat in your vehicle. Your vehicle has been approved in The ISOFIX child seats are fi tted with accordance with the new ISOFIX regu- two latches which are secured easily on lation .
-
Page 101
CHILD SAFETY ISOFIX CHILD SEAT RECOMMENDED BY PEUGEOT AND APPROVED FOR YOUR VEHICLE ISOFIX CHILD SEAT RECOMMEN ISOFIX RÖMER Duo Plus (size category B1 ) Group 1: from 9 to 18 kg Installed in the forward facing position. Fitted with an upper strap to be secured on the ISOFIX upper ring, referred to as the TOP TETHER. -
Page 102
CHILD SAFETY LOCATIONS FOR ISOFIX CHILD SEATS In accordance with European Regulations (ECE 16), this table indicates the options for installing ISOFIX child seats on seats in the vehicle fi tted with ISOFIX mountings. In the case of universal and semi-universal ISOFIX child seats, the ISOFIX size category, determined by a letter from A to G , is indicated on the child seat next to the ISOFIX logo. -
Page 103: Child Lock
Child lock on belts or the child seat harnesses thighs. keeping the slack in relation to PEUGEOT recommends the use of a the child’s body to a minimum , booster seat which has a back, fi tted even for short journeys.
-
Page 104: Direction Indicators
SAFETY DIRECTION INDICATORS «Motorway» function Automatic operation of hazard warning lamps Press briefl y upwards or down- wards, without going beyond the When braking in an emergency, de- point of resistance; the direction pending on the deceleration, the hazard indicators will fl ash 3 times. warning lamps come on automatically.
-
Page 105: Braking Assistance Systems
Anti-lock braking system Contact a PEUGEOT dealer or a qualifi ed when braking. and electronic brake force workshop. Contact a PEUGEOT dealer or a qualifi ed distribution workshop.
-
Page 106
This is indicated by fl ashing After an impact, have these sys- of this symbol on the instrument panel The display of this symbol in the top tems checked by a PEUGEOT screen. right corner of the instrument panel dealer or a qualifi ed workshop. -
Page 107: Front Seat Belts
SAFETY Fastening SEAT BELTS Height adjustment Front seat belts The front seat belts are fi tted with a pre- tensioning and force limiting system. This system improves safety in the front seats in the event of a front or side im- pact.
-
Page 108
SAFETY Front seat belt not fastened/ Front passenger’s seat belt Storing after use unfastened warning lamp Outer rear seat belts Driver’s seat belt When the ignition is switched on, this warning lamp comes on accompanied by an audi- ble signal for a few seconds if the driver has not fastened their seat belt. -
Page 109
PEUGEOT dealer is able to pyrotechnic cartridge incorporated in provide. The upper part must be positioned the system. -
Page 110: Airbags
SAFETY AIRBAGS Impact detection zones Front airbags System which protects the head and System designed to maximise the safety chest of the driver and front passenger of the occupants (with the exception of in the event of a front impact. the rear centre passenger) in the event The driver’s airbag is fi…
-
Page 111
A to the «ON» position to reacti- on the instrument panel screen, contact vate the airbag and so ensure the safety a PEUGEOT dealer or a qualifi ed work- of your front passenger in the event of an shop to have the system checked. The impact. -
Page 112
If this warning lamp comes on in the instru- ment panel and this display appears in the in- strument panel screen, contact a PEUGEOT dealer or a qualifi ed workshop to have the system checked. The airbags may no longer… -
Page 113
Use only approved covers on the seats, compatible with the deployment the lateral airbags. For information on the range of seat covers suitable for your vehicle, you can contact a PEUGEOT dealer (see «Practical information — § Accessories»). Do not fi x or attach anything to the seat backs (clothing…). This could cause After an accident or if the vehicle has injury to the chest or arms if the lateral airbag is deployed. -
Page 114: Parking Brake
DRIVING PARKING BRAKE 5-SPEED MANUAL GEARBOX NUAL GEARBOX 6-SPEED MANUAL GEARBOX 6-SPEED MANUA Applying Engaging 5 th or 6 th gear Engaging reverse Pull the parking brake lever up to Move the gear level fully to the right Lift the sleeve below the gear knob immobilise your vehicle.
-
Page 115: Cvt Gearbox
DRIVING CVT GEARBOX CVT GEA Move the lever backwards, then to the left to select this mode, then: The six-speed automatic gearbox of- push forward to change up, fers a choice between the comfort of push backward to change down. automatic regulation or the pleasure of manual gear changing.
-
Page 116
If the message remains displayed or ap- roundabout, exit from a car park with a Take your foot off the accelerator pedal pears frequently, contact a PEUGEOT steep gradient, overtaking…). gently to engage the gear. dealer or a qualifi ed workshop without… -
Page 117: Dcs Gearbox
DRIVING DCS GEARBOX DCS GEA Displays in the instrument Gear lever positions panel The six-speed electronically controlled gearbox offers a choice between the comfort of automatic regulation or the pleasure of manual gear changing. This gearbox has three driving modes: a manual mode for changing of the gears by the driver using the steering mounted controls or the gear lever,…
-
Page 118
DRIVING Moving off Manual mode Using the gear lever Using the steering mounted controls Select position P or N . Press the brake pedal fi rmly Move the gear lever backwards, then to Press behind the «+» steering mounted while starting the engine. the left to select position +/- . -
Page 119
DRIVING «Normal» automatic mode «Sport» automatic mode Stopping the vehicle Select position D . From automatic mode, you can engage Before switching off the engine, you «Sport» mode. must engage position P or N to place «D» appears in the instrument panel the gearbox in neutral. -
Page 120
If the message disappears for a long period, you can set off again. If the message remains displayed or ap- pears frequently, contact a PEUGEOT dealer or a qualifi ed workshop without delay. Overheating of the engine may re- sult in unwanted declutching of the gearbox. -
Page 121: Four Wheel Drive System
DRIVING FOUR WHEEL DRIVE SYSTEM FOUR WH Selecting the transmission mode WITH ELECTRONIC CONTROL WITH E 4WD AUTO (position 1) 2WD (position 3) System which permits the selection of The vehicle operates with four wheel The vehicle operates with front two a transmission mode in relation to the drive and provides optimum traction re- wheel drive.
-
Page 122
If «4WD» and «LOCK» are displayed alternately «MAINTENANCE REQUIRED» is displayed in the instru- ment panel, the system has failed and the safety system has been activated. Contact a PEUGEOT dealer or a quali- fi ed workshop without delay. -
Page 123: Cruise Control
DRIVING CRUISE CONTROL CRUISE C Steering mounted controls Display on the instrument panel System which automatically maintains the vehicle speed at the value programmed by the driver, without any action on the accelerator pedal. The cruise control is switched on manually: the vehicle speed must be 25 mph (40 km/h) minimum and sec- ond gear must be engaged in the case…
-
Page 124
DRIVING Increasing the programmed Temporary acceleration/ Reactivating the function speed deceleration When the cruise control has been de- Temporary acceleration activated, you can return to the stored Using button 3 «ACC RES» : speed by pressing button 3 «ACC RES» Press the accelerator pedal as normal. -
Page 125
DRIVING AUDIBLE REAR PARKING AUDIBLE Detection zones Activation SENSORS The detection zones differ depending The parking sensors are activated by on whether the vehicle is fi tted with a engaging reverse gear. System consisting of proximity sensors towbar. The proximity information is indicated by installed in the rear bumper. -
Page 126: Reversing Camera
A fl ashes when reverse Linked with the navigation option, a re- gear is engaged. versing camera is activated automatically Contact a PEUGEOT dealer or a quali- when reverse gear is engaged. fi ed workshop. The colour image is provided on the navi-…
-
Page 127
AND PROTECTION OF THE ENVIRONMENT Innovation at the service of performance The TOTAL Research and Development teams develop lubricants for PEUGEOT which satisfy the requirements of the latest technical innovations incorporated in PEUGEOT vehicles. This ensures that you obtain the best performance and the maximum engine life. -
Page 128: Bonnet
CHECKS OPENING T ENING THE BONNET RUNNING Bonnet stay If you run out of fuel, fi ll the tank and op- erate the starter until the engine starts. Several attempts may be needed be- fore the engine re-starts. From inside: pull the release lever A , Secure the stay in its housing to hold on the right-hand side below the door, the bonnet open.
-
Page 129: Petrol Engine
CHECKS PETROL ENGINE Access for checking the levels of the various fl uids and the replacement of certain components. 1. Screenwash and headlamp wash reservoir. 2. Coolant reservoir. 3. Power steering fl uid reservoir. 4. Brake fl uid reservoir. 5. Fusebox. 6.
-
Page 130
CHECKS DIESEL EN SEL ENGINE Access for checking the levels of the various fl uids and the replacement of certain components. 1. Coolant reservoir. 2. Power steering fl uid reservoir. 3. Screenwash and headlamp wash reservoir. 4. Brake fl uid reservoir. 5. -
Page 131: Checking Levels
If it is not, check the brake pad Changing the coolant fl uid corresponding system checked by a wear. PEUGEOT dealer or a qualifi ed work- Refer to the servicing booklet for details shop. of the interval for this operation.
-
Page 132: Checks
The minimum level of this additive is indicat- ter must be carried out by a PEUGEOT these components in accordance with ed by lighting of the service warning lamp, the servicing booklet and in relation to dealer or a qualifi ed workshop.
-
Page 133
This system must be checked by a PEUGEOT dealer or a qualifi ed work- shop. Brake pads Only use products recommended by PEUGEOT or products of equivalent quality and specifi… -
Page 134: Changing A Wheel
PRACTICAL INFORMATION CHAN ANGING A WHEEL List of tools Other accessories Access to the tools 4. Removable towing eye. Refer to the «Towing» paragraph. Wheel with trim The tools are stored in the storage com- partment in the boot right-hand trim. 1.
-
Page 135
PRACTICAL INFORMATION Access to the spare wheel in the 7 seat configuration Putting the wheel back in place Remove the plastic cover A using Put the wheel back in place in its the handle 3 . carrier. Lift the carrier C and reposition the hook D . -
Page 136
PRACTICAL INFORMATION Access to the spare wheel in the 5 seat configuration Putting the wheel back in place Remove the plastic cover A using the handle 3 . Put the wheel back in place in its carrier. Pass the hook C into the chain. The pressed steel spare wheel is installed Open the lower tailgate (refer to the on the outside, under the boot, supported… -
Page 137
PRACTICAL INFORMATION Removing a wheel List of operations If your vehicle is equipped with secu- rity wheel bolts (equipment available as an accessory) fi t the security sock- et 5 on the wheelbrace 1 to slacken the security bolt. Slacken the other bolts using the wheelbrace 1 only. -
Page 138
50 mph (80 km/h). Have the tightening of the bolts Fitting snow tyres and the pressure of the spare wheel checked by a PEUGEOT If you equip your vehicle with dealer or a qualifi ed workshop snow tyres fi tted on steel wheel without delay. -
Page 139: Changing A Bulb
CHANG Front lamps WARNING: RISK OF ELECTROCUTION Xenon bulbs must be replaced by a PEUGEOT dealer or a qualifi ed work- shop. In some weather conditions (e.g. low temperature or humidity), the presence of misting on the internal surface of the glass of the head- lamps and rear lamps is normal;…
-
Page 140
PRACTICAL INFORMATION Direction indicators (1) Access to the bulbs on the left-hand Access to the bulbs on the right- side hand side When you change a bulb on the left- When you change a bulb on the right- Turn the bulb holder A to the left and remove it. -
Page 141
PRACTICAL INFORMATION Changing dipped beam headlamp Changing sidelamp bulbs (3) Changing main beam headlamp bulbs (2) bulbs (4) Unscrew the cover F . Unscrew the cover H . Unscrew the cover J . Disconnect the connector. Disconnect the connector. Disconnect the connector. Turn the bulb G to the left and re- Turn the bulb holder I a quarter of a Move aside the spring K to release… -
Page 142
To refi t, carry out these operations in reverse order. To obtain repeaters, contact a PEUGEOT dealer or qualifi ed workshop. Remove the three screws C then Turn the bulb E to the left and re- pull the lamp holder towards you. -
Page 143
Changing the third brake lamp (LEDs) Turn the pin B to the left and remove it. All work on the LED lamps must be Pull the bulb out and change it. carried out by a PEUGEOT dealer or a qualifi ed workshop. -
Page 144
PRACTICAL INFORMATION Changing reversing lamp bulbs Open the tailgate (refer to the «Access» Pull the bulb C out and change it. Insert a thin screwdriver in the open- section), ing on the lens to press the tab E . To refi t, carry out these operations in From the inside of the tailgate, in- reverse order. -
Page 145
PRACTICAL INFORMATION Changing foglamp bulbs Open the tailgate and the lower tail- Turn the pin and bulb assembly D to gate (refer to the «Access» section) the left. and fold down the cover A . Remove the bulb. Remove the 4 clips B using a screw- To refi… -
Page 146: Changing A Fuse
Identify the failed fuse by checking vehicle, contact a PEUGEOT the condition of its fi lament. dealer or a qualifi ed workshop. PEUGEOT will not accept re- sponsibility for the cost incurred in repairing your vehicle or for rec- tifying the malfunctions resulting…
-
Page 147
PRACTICAL INFORMATION Dashboard fuses Fuse N° Rating Functions The fuseboxes are placed in the lower 30 A Heating. dashboard behind the glove box. Brake lamps, third brake lamp, built-in systems 15 A interface. 10 A Rear foglamps. 30 A Windscreen wipers and screenwash. 10 A Diagnostic socket. -
Page 148
Driver’s electric seat, footwell lighting, rear bench 25 A seat release. 30 A Heated seats. * The maxi-fuses provide additional protection for the electrical systems. All work on the maxi-fuses must be carried out by a PEUGEOT dealer or a qualifi ed workshop. -
Page 149
PRACTICAL INFORMATION Engine compartment fuses Fuse N° Rating Functions The fuse box is placed in the engine compartment near the battery (left-hand side). 15 A Front foglamps. 2.4 litre 16V engine control unit. CVT automatic gearbox control unit, 20 A CVT automatic gearbox control relay. -
Page 150
Diesel engine control unit. * The maxi-fuses provide additional protection for the electrical systems. All work on the maxi-fuses must be carried out by a PEUGEOT dealer or a qualifi ed workshop. Spare fuses The spare fuses are located under the engine compartment fuse box cover. -
Page 151: Battery
PRACTICAL INFORMATION BATTERY BATTE Starting using another battery Access to the battery Looking for an earth point at the right-hand engine mounting Raise the front of the cover 1 to re- lease the three clips 2 . Connect one end of the green or black The battery A is located under the bon- Then pull the cover 1 towards you cable to the negative terminal (-) of the…
-
Page 152
It is advisable to disconnect the diffi culties are encountered following this fully. battery if the vehicle is to be left un- operation, contact a PEUGEOT dealer or used for more than one month. Put the top-up caps back in place. a qualifi ed workshop. -
Page 153: Changing A Wiper Blade
PRACTICAL INFORMATION CHANGING A WIPER BLADE CHANG Removing a front or rear wiper blade Raise the corresponding wiper arm. Remove the wiper blade, sliding it towards the outside. Fitting a front or rear wiper blade At the front, check the size of the wiper blade as the shorter blade is fi…
-
Page 154: Towing
PRACTICAL INFORMATION TOWIN WING Access to the tools Having your vehicle towed on a flatbed Place the gear lever in neutral. Always have the vehicle towed on a fl atbed. Never have the vehicle towed with the four wheels on the ground, this could damage the transmission.
-
Page 155
PRACTICAL INFORMATION Towing another vehicle General recommendations Observe the legislation in force in your country. Ensure that the weight of the towing vehicle is higher than that of the towed vehicle. The driver must stay at the wheel of the towed vehicle. Driving on motorways and fast roads is prohibited when towing. -
Page 156: Towing A Trailer
Refer to the «Technical Data» section for If the message fl ashes rapidly, contact details of the weights and towing loads a PEUGEOT dealer or a qualifi ed work- which apply to your vehicle. shop without delay. Side wind…
-
Page 157: Fitting Roof Bars
PRACTICAL INFORMATION FITTING ROOF BARS Consult a PEUGEOT dealer or a quali- accessories recommended fi ed workshop for the installation of PEUGEOT and follow the accessory longitudinal roof bars. manufacturer’s fi tting instructions. Maximum authorised weight on the roof bars, for a loading When fi…
-
Page 158: Accessories
Depending on the legislation in ine parts is available from the PEUGEOT wheel security bolts, fi rst aid kit, warn- force in the country, it may be dealer network. ing triangle, high visibility vest, stolen compulsory to have a high vis-…
-
Page 159: Engines
TECHNICAL DATA ENGINES AND GEARBOXES VU4HK8 VU4HK8/1P VUSFY0 — VUSFY9 — V U4HK8 — Model codes VVSFY0 VVSFY9 VV4HK8 VV4HK8 VV4HK8/1P Engine 2.4 litre 2.2 litre HDi PEF Cubic capacity (cc) 2 360 2 179 Bore x stroke (mm) 88 x 97 85 x 96 EU standard maximum power (kW) Max power engine speed (rpm)
-
Page 160: Weights
TECHNICAL DATA WEIGHTS AND TOWED LOADS (IN KG) ADS (IN KG) Engines 2.4 litre 2.2 litre HDi PEF Manual Manual Gearbox (5-speed) (6-speed) (6-speed) (6-speed) VU4HK8 VV4HK8 Model codes VUSFY0 VVSFY0 VUSFY9 VVSFY9 VU4HK8 VV4HK8 VU4HK8/ VV4HK8/ Version 5 seats 7 seats 5 seats 7 seats…
-
Page 161: Dimensions
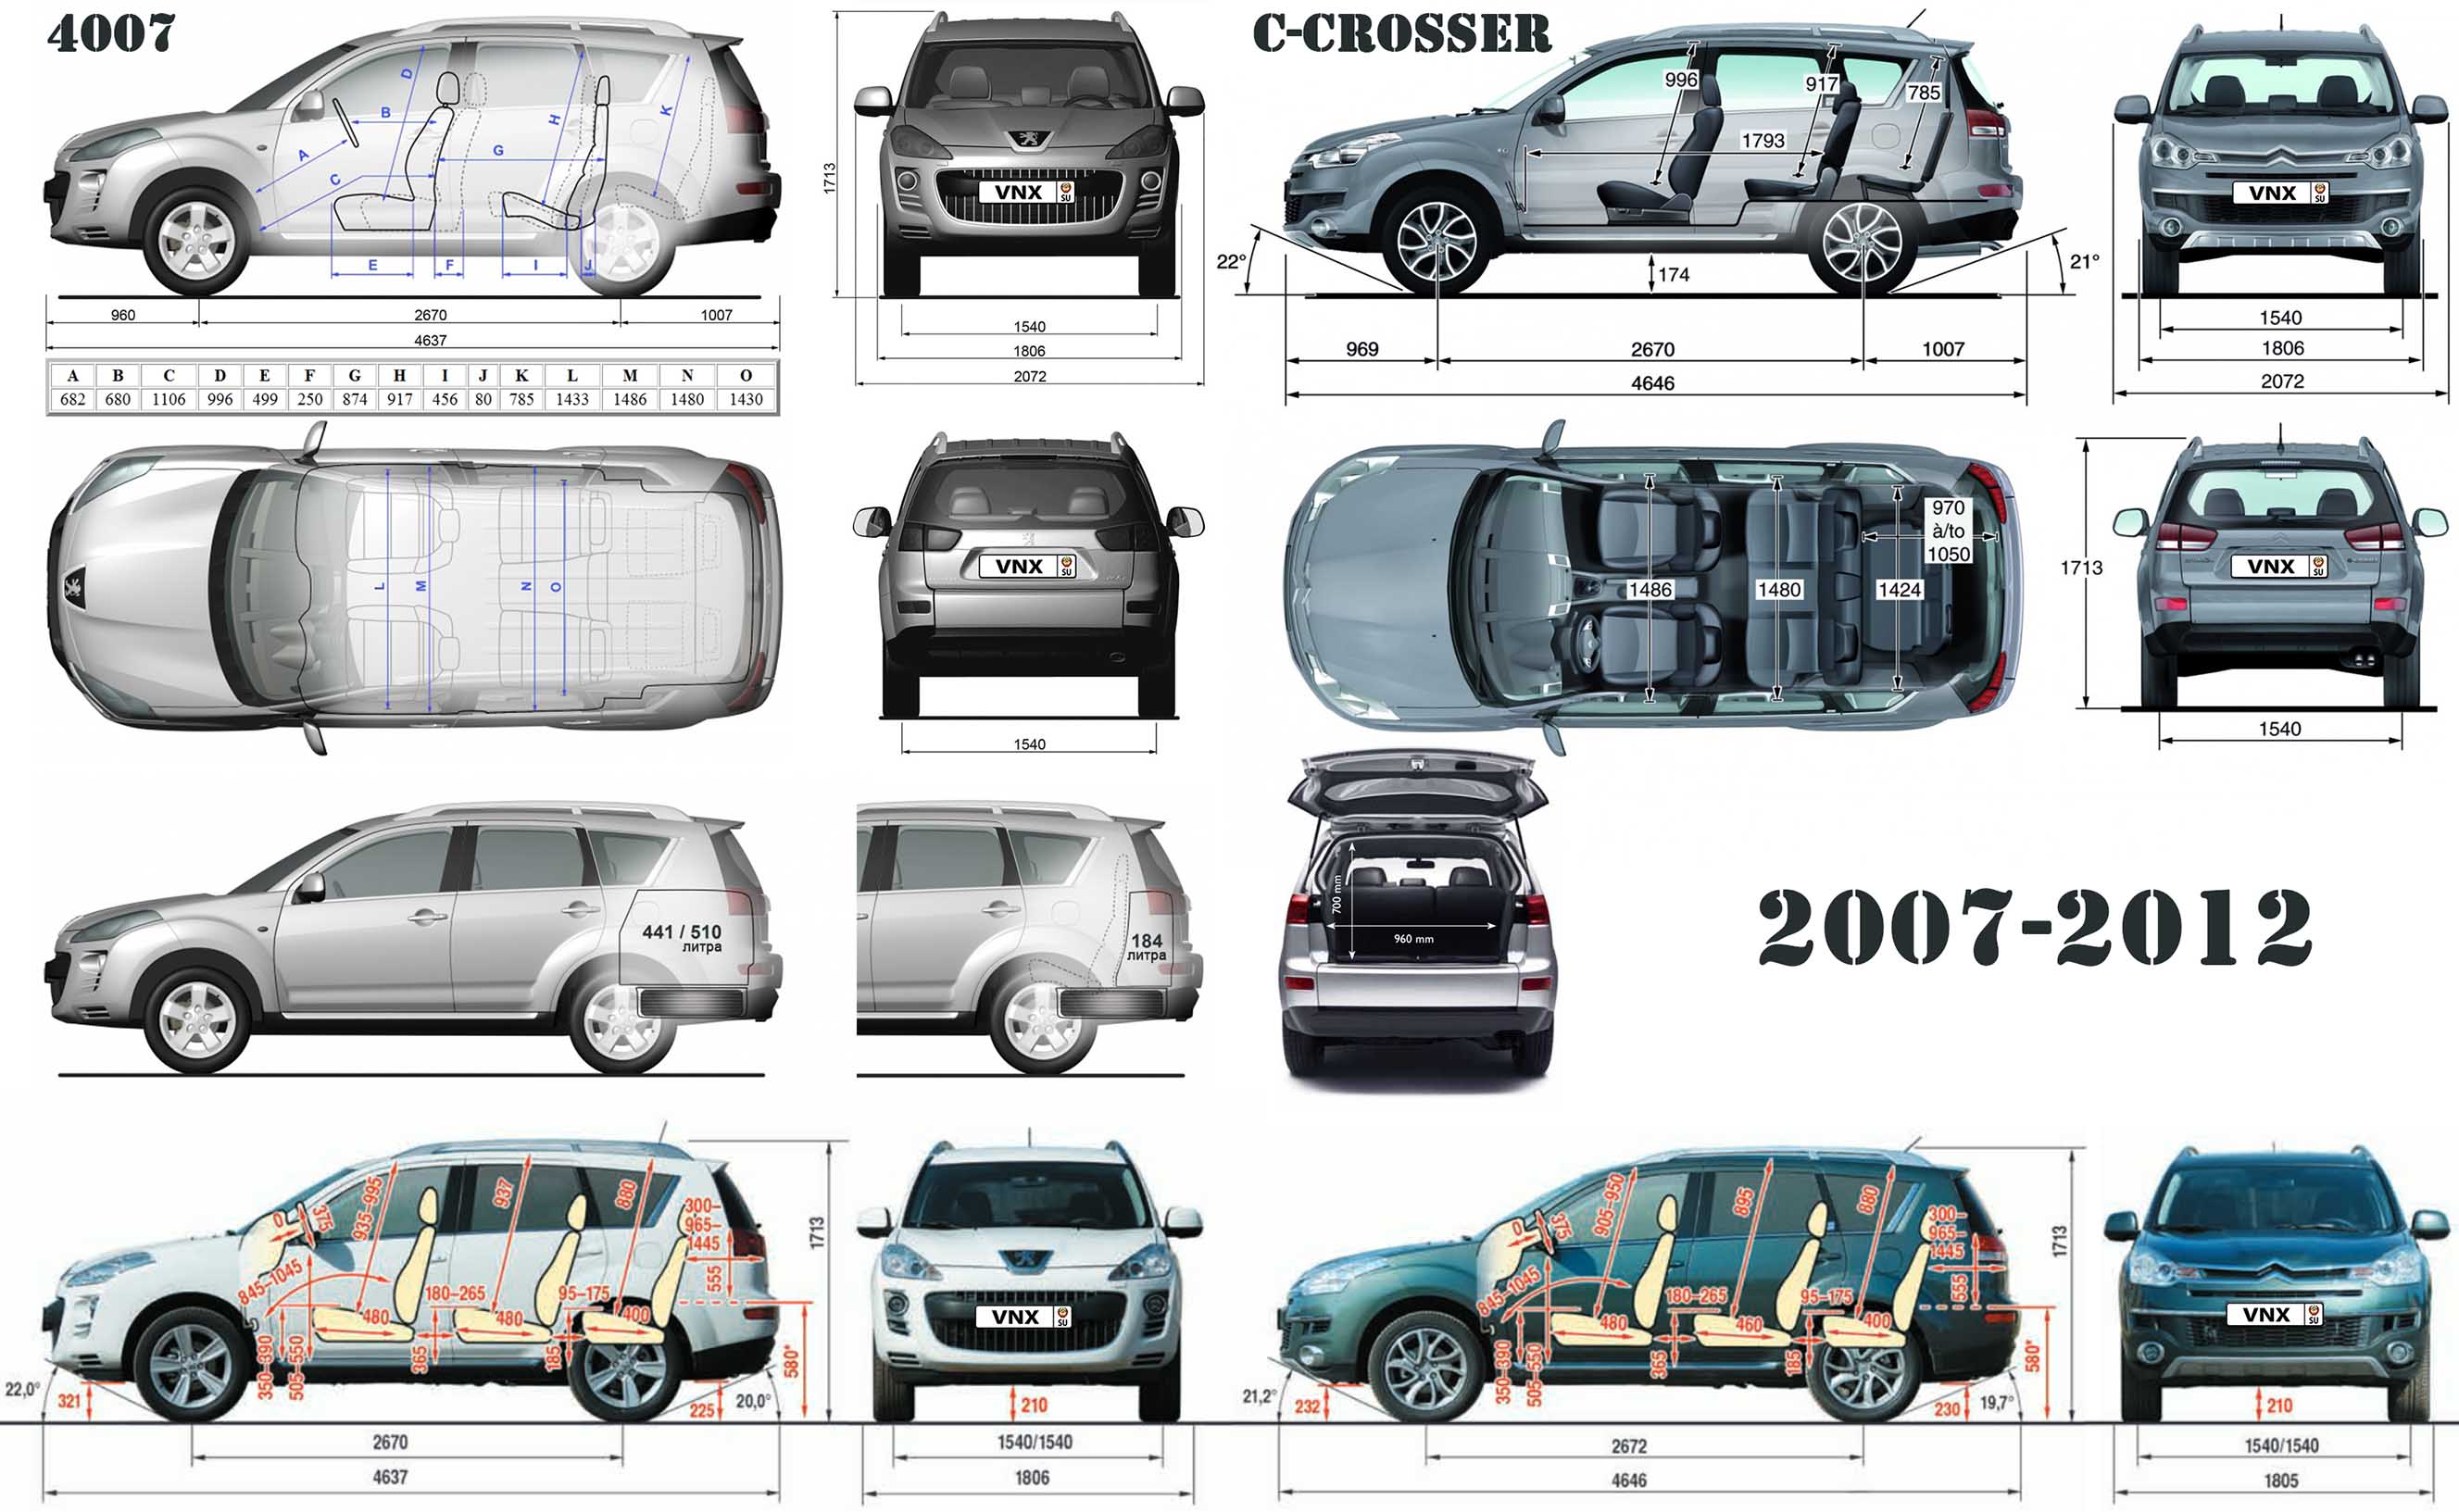
TECHNICAL DATA DIMENSIONS (IN MM)
-
Page 162: Technical Data
TECHNICAL DATA IDENTIFICATION MARKINGS A. Manufacturer’s plate. It indicates the following information: The tyre pressures must be The Vehicle Identifi cation Number — tyres pressures, laden and unladen, checked when cold at least once (VIN) is indicated on a plate on the — wheel rim and tyre sizes, a month.
-
Page 163
TECHNICAL DATA… -
Page 164: Audio Cd System
AUDIO EQUIPMENT and TELEMATICS AUDIO CD SYSTEM AUDIO CD SYSTEM Eject one or more CD slot. CDs. Load one or more discs. Selection and adjustment of audio settings (BASS, TREBLE, …). Manual search for a lower Audio system On/Off. or higher radio frequency/ Decrease/Increase volume.
-
Page 165
AUDIO EQUIPMENT and TELEMATICS Fast backwards play. Display CD-Text/MP3/Tag ID3 Multifunction screen. information. Search for TP traffi c information. Scroll information by page. Activation/ Deactivation of PTY. Play the beginning of each Repeat (track/ track (MP3 folder/disc). MP3 folder/disc). Manual storing and recall of radio stations/ PTY (12 to 17). -
Page 166
AUDIO EQUIPMENT and TELEMATICS STEERING MOUNTED CONTROLS STEERING MOUNTED CONTRO Switching on Searching in radio mode Press button 1 for more than two seconds. Press button 4 or 5 to search for a higher or lower radio frequency respectively. The last source selected before switching off comes back into operation. -
Page 167
AUDIO EQUIPMENT and TELEMATICS GENERAL FUNCTIONS Switching on Setting the audio modes Selecting the musical ambience «TYPE» Press the «PWR» button. Press «SOUND» but- Turn the «SOUND» dial; the ton several times; the audio musical ambiences change The last source selected be- modes change in the following in the following order: fore switching off resumes… -
Page 168
AUDIO EQUIPMENT and TELEMATICS Selecting the surround effect Setting the bass «BASS» Setting the volume of the bass «FIELD» unit «SUB PUNCH» Turn the «SOUND» dial; the Turn the «SOUND» dial to Turn the «SOUND» dial to set the volume surround effects change in set the required bass value. -
Page 169
AUDIO EQUIPMENT and TELEMATICS RADIO Selecting radio mode Manual station search Automatic station storing Press the «PWR» button Turn the «TUNE» dial re- Stations can only be stored automati- or the «AM/FM» button to spectively left cally on wavebands FM3, MW and LW. switch on the radio. -
Page 170
AUDIO EQUIPMENT and TELEMATICS «RDS» «RDS» The «Radio Data System» (RDS) func- Alternative frequencies «AF» Traffic information «TP» tion on the FM waveband permits: Your radio automatically checks and The «Traffi c Program» (TP) function per- selects the best frequency for the radio access to the display of information, mits automatic and temporary switc-hing station to which it is tuned (if the station… -
Page 171
AUDIO EQUIPMENT and TELEMATICS Emergency broadcasts Search for a «PTY» broadcast «ALERT» Press the «PTY» button. An emergency broadcast automatically Turn the «TUNE» dial to se- and temporarily interrupts the FM station The sound cuts out then becomes au- lect the type of programme or the source that you are listening to. -
Page 172
AUDIO EQUIPMENT and TELEMATICS Functions setting mode CD PLA PLAYER This can play audio CDs (CD-DA, CD- Audio CDs This permits activation or deactivation Text, CD-R/RW) or MP3 CDs. of the functions below. Fast search Press the «TUNE» button for Selecting CD mode Press and hold button «… -
Page 173
AUDIO EQUIPMENT and TELEMATICS CD-TEXT DISPLAY XT DISPLAY MP3/TAG ID3 CD Playing the beginning of each track The CD player and the CD changer are The CD player and the CD changer compatible with the display of CD-Text are compatible with the playing of MP3 Press the «SCAN»… -
Page 174
AUDIO EQUIPMENT and TELEMATICS Repeating the tracks in a folder Playing the beginning of each track To deactivate this information, press the «DISP» button again for more than Press the «SCAN» button two seconds. Press the «RPT» button for to start playing the fi rst ten more than two seconds to re- seconds of each track in peat the playing of the tracks… -
Page 175: Cd Changer
AUDIO EQUIPMENT and TELEMATICS CD CHANGER See also «CD-Text display» and «MP3/ Loading all of the discs Ejecting all of the discs Tag ID3 CD». Selecting changer mode Press the «LOAD» button for Press this button for more than more than two seconds. two seconds.
-
Page 176
AUDIO EQUIPMENT and TELEMATICS Audio CD Repeating a disc Playing of the beginning of each track Fast search Press the «RPT» button for Press the «SCAN» button more than two seconds to to start play of the fi rst ten Press and hold button «… -
Page 177: Error Messages
Triggering of the internal protection against high Wait approximately 30 minutes to allow the audio ERROR HOT temperatures. system to cool. Communication error between the audio system and the external system. ERROR Consult a PEUGEOT dealer. External system supply error.
-
Page 178: Audio-Telematic System
AUDIO EQUIPMENT and TELEMATICS AUDIO-TELEMATIC SYSTEM AUDIO-TELEMATIC SYSTEM AUDIO: selection of Audio-video SCALE: changing the scale of the (FM, CD, music server, …) or map. Navigation (map) display. ENT: confi rms the choice of the item selected on the screen. VOL: adjustment of audio-video volume.
-
Page 179
AUDIO EQUIPMENT and TELEMATICS DESCRIPTION OF THE CONTROLS — MENUS MODE: Audio-video menu for: INFO: Information menu for the consultation or adjustment of certain radio, settings for your vehicle. audio, MP3 or WMA CD, music server, DVD. SET: Settings menu for: NAVI: display of the current location on the map . -
Page 180: Navigation
AUDIO EQUIPMENT and TELEMATICS NAVIGATION — GUIDANCE NAVIGATION — GUIDANCE What is the navigation system and What precautions should be What is a point of interest (POI)? the GPS? observed in order to make best use A point of interest (POI) is of the system? The satellite navigation system guides represented by an icon on…
-
Page 181
AUDIO EQUIPMENT and TELEMATICS Information displayed on J. Destination/intermediate destination A. Manoeuvre icon: indicates whether the map during navigation the driver should turn left or right at information: indicates the distance and the time remaining until the des- the next junction indicated by the tination or intermediate destination is guidance and the distance to this reached. -
Page 182
AUDIO EQUIPMENT and TELEMATICS Searching for a destination — Select a location using the address or using an address or points of street name of the destination. Select: interest (POI) A1 — the country, A2 — the city, A3 — the street, A4 — the house number, A5 — the name of a junction, A6 — to select the search using either a number… -
Page 183
AUDIO EQUIPMENT and TELEMATICS Searching using previous destinations, a stored address or a return home — Select a location using one of the 20 previous destinations. — Select a location using an address stored in the address book. Sort E1 — con, E2 — Name, E3 — Date. -
Page 184
AUDIO EQUIPMENT and TELEMATICS Navigation settings and — Select the settings of functions linked with the navigation to: information (1/2) G1 — set the screen display parameters such as: — display 1 or 2 maps, — display or do not display the POIs on the map, display selected icons, — change the colours of the map,… -
Page 185
AUDIO EQUIPMENT and TELEMATICS Navigation settings and — Select basic information relating to the navigation as well as a pre- information (2/2) set route demonstration to: H1 — choose to divert your route to avoid certain areas, H2 — select a location using an ad- vanced search based on a POI along a motorway or in the vicinity of the motorway exit,… -
Page 186
University/college Vehicles and travel of interest icon which are displayed on (Dark blue) your map screen. Entertainment and attractions Press the MENU button then [Navigation/ (Blue) PEUGEOT Settings]. Airport Theme park Bus stop Bowling alley Vehicle hire Casino Suburban station/station… -
Page 187
AUDIO EQUIPMENT and TELEMATICS Entering an address and starting guidance (1/2) Press Explanations Result Press the MENU button. Press [Address/Junction]. Press [Country] and enter the name of the country using the touch keypad. When a character of the name of the country is entered, if 5 countries or fewer are recognised, you can select a country from a list which is dis- played or press [List]. -
Page 188
AUDIO EQUIPMENT and TELEMATICS Entering an address and starting guidance (2/2) Press Explanations Result Press [Street] and enter the name of a street using the touch keypad. When a character of the name of the street is entered, if 5 streets or fewer are recognised, you can select a street from a list which is displayed or press [List]. -
Page 189
AUDIO EQUIPMENT and TELEMATICS Traffic information During navigation, the system gives you traffi c information received in real time. The system can then suggest a detour route, if dynamic guidance has been activated by pressing MENU, [Naviga- tion settings] then [TMC]. Press Explanations Result… -
Page 190
AUDIO EQUIPMENT and TELEMATICS AUDIO-VIDEO AUDIO-VIDEO Radio, RDS, AF, REG, TP, PTY What is RDS? RDS station following Traffi c information function Radio Data System (RDS) function Your radio automatically checks The Traffic Program (TP) func- on the FM waveband permits: and selects the best frequency tion permits automatic and tem- for the radio station to which it is… -
Page 191
AUDIO EQUIPMENT and TELEMATICS Information displayed in Radio mode G. To receive the stored station. Press and hold to store a station. H. To change the frequency step by step. Press and hold for scrolling of the frequency. To search for currently broadcast- ing stations which can be received in the current location, until a station is found. -
Page 192
AUDIO EQUIPMENT and TELEMATICS Radio, selecting an FM station and storing Press Explanations Result Press the MODE button. Press FM. By default the screen shows the FM1 stations. Press [ Tune] to decrease the frequency or [Tune ] to increase the frequency. -
Page 193
AUDIO EQUIPMENT and TELEMATICS Radio, RDS settings Press Explanations Result Press the MODE button. Press FM. By default the screen shows the stations on FM1. Press [^]. Press [RDS Settings]. Press [On] or [Off] to activate or deactivate the functions: AF: automatic search for the best frequency, REG: switch to the regional frequencies, TP: automatic selection of stations broadcasting traffi… -
Page 194
AUDIO EQUIPMENT and TELEMATICS CD player Your Audio-Telematic system allows you Switching off the engine or removing What is the Gracenote CDDB? to listen to audio CDs (CDDA, CD-Text, the CD during recording will result in The title information for the CD-R/RW) or MP3 and WMA CDs. -
Page 195
AUDIO EQUIPMENT and TELEMATICS Information displayed in CD mode and recording a CD H. Displays the number and the name of the track. While driving, they are not available and cannot be selected. To display the secondary menu. J. Move the cursor onto the track cur- rently being played. -
Page 196
AUDIO EQUIPMENT and TELEMATICS Playing a CD Press Explanations Result Press the MODE button then CD, if the player already contains a CD. Otherwise, insert a CD in the player, play begins automatically. Selecting a track Press [ Track] to select the previous track or return to the beginning of the track currently being played. -
Page 197
AUDIO EQUIPMENT and TELEMATICS Recording a CD onto the music server (1/3) Press Explanations Result Automatic recording of all of the tracks All of the tracks are recorded automatically when a CD is inserted. This automatic recording is programmed by default on leaving the factory. If you have changed the recording mode (manual or fi… -
Page 198
AUDIO EQUIPMENT and TELEMATICS Recording a CD onto the music server (2/3) Press Explanations Result Manual recording of individual tracks You can record the tracks manually, one by one. After inserting a CD and while it is being played, press [^] to access the secondary menu. -
Page 199
AUDIO EQUIPMENT and TELEMATICS Recording a CD onto the music server (3/3) Press Explanations Result Automatic recording of the fi rst track You can programme the automatic recording of the fi rst track when a CD is inserted. After inserting a CD and while it is being played, press [^] to access the secondary menu. -
Page 200
AUDIO EQUIPMENT and TELEMATICS General notes on the Music Server «Original» group, number 01: «Original Playlist» lists: What is the music server? This is the location of These are original play- the original playlist cre- lists created automati- Your Audio-Telematic system allows ated automatically (not manual) when a cally (not manual) when you to copy audio CDs onto a music… -
Page 201
AUDIO EQUIPMENT and TELEMATICS Information displayed in Music Server mode G. To display the list of groups, the playlist and the list of tracks. H. To scroll up or down through the tracks. Press and hold for fast backwards or forwards playing of a track. To scroll up or down through the playlists. -
Page 202
AUDIO EQUIPMENT and TELEMATICS Playing a track or a playlist on the Music Server Press Explanations Result Press the MODE button then Music Server. The playlists are played in a loop. The server can play a track while recording another track from a CD. You must wait until recording is complete before playing the recorded track. -
Page 203
AUDIO EQUIPMENT and TELEMATICS Creating a group and a playlist on the Music Server Press Explanations Result Creating a group Press [^] to access the secondary menu. Press [New Group], enter the name of the group and confi rm by pressing [SET]. The group is stored on the server. -
Page 204
AUDIO EQUIPMENT and TELEMATICS General notes on MP3/WMA CDs Playing an MP3/WMA CD What is the MP3/WMA fi le format? Acceptance of the fi les When the MP3/WMA CD MP3 is the abbreviation of MPEG-1 Audio Some blank CDs may not be played is inserted in the player, Layer 3 and MPG is the abbreviation of by your equipment (quality, recording… -
Page 205
AUDIO EQUIPMENT and TELEMATICS Information displayed in MP3/WMA CD mode To scroll up or down through the tracks. Press and hold for fast backwards or forwards playing of a track. J. To scroll up or down through the folders. K. Displays the folder number and the folder name. -
Page 206
AUDIO EQUIPMENT and TELEMATICS Playing an MP3/WMA CD (1/2) Press Explanations Result Press the MODE button then CD, if the player already contains a CD. Otherwise, insert a CD in the player, play begins automatically. Moving around the folders You can move by one level at a time. Press on the name of a folder and at each press the list of folders of the level below is displayed. -
Page 207
AUDIO EQUIPMENT and TELEMATICS Playing an MP3/WMA CD (2/2) Press Explanations Result Selecting a track Press [ Track] to select the previous track or return to the beginning of the track currently being played. Press and hold for fast backwards play. Press [Track ] to select the next track. -
Page 208: Dvd Mode
AUDIO EQUIPMENT and TELEMATICS DVD MO DVD MODE Information displayed in DVD K. To display the DVD title menu. mode L. To scroll up or down through the chapters. Press and hold for fast backwards or forwards play. M. To scroll up or down through the titles.
-
Page 209
AUDIO EQUIPMENT and TELEMATICS Playing a DVD Press Explanations Result Press the MODE button then DVD, if the player already contains a DVD. Otherwise, insert a DVD in the player, the picture is displayed automatically. Press the screen to access the menus. While driving, only the soundtrack is played and no picture is displayed. -
Page 210
AUDIO EQUIPMENT and TELEMATICS SETTING SETTINGS Display, sound, picture — Choose to switch off the display. To switch it back on, touch the screen or press any button. — Choose the settings of the sound in the vehicle, if an audio source is selected (FM, CD, …), for: B1 — the sound distribution or the vol- ume such as the front-rear bal-… -
Page 211
AUDIO EQUIPMENT and TELEMATICS Time and date, language, unit, — Choose the base settings of the picture size system for: D1 — setting of the time by the RDS signal, time zone, summer time, D2 — the language (English, Français, Deutsch, Nederlands, Portuguese, Español, Svenska, Italiano, Dansk), D3 — the units for calculation of the dis-… -
Page 212
AUDIO EQUIPMENT and TELEMATICS Equipment, contrast, traffic information (TP) — Choose to adjust or set the param- eters of certain equipment offered in your vehicle (e.g.: unfolding/folding of the mirrors, closing the windows on locking, timing and sensitivity of the automatic lighting, direction indi- cators motorway function, …): F1 — to scroll up the list, F2 — to scroll down the list,… -
Page 213
AUDIO EQUIPMENT and TELEMATICS INFORMATION System version, satellite — Consult the system information: A1 — the software version, A2 — the map data version, A3 — the system information database version. To update the versions, insert the DVD containing the new data and follow the instructions on the screen. -
Page 214
AUDIO EQUIPMENT and TELEMATICS Calendar, trip — Make a note on the calendar of special days, birthdays, … Use the arrows to fi nd a date and press directly on the day re- quired to enter the event. — Consult the driving information: D1 — the average speed, D2 — the average fuel consumption, D3 — the current fuel consumption,… -
Page 215
AUDIO EQUIPMENT and TELEMATICS Environment, air conditioning, — Consult the environment informa- telephone tion: E1 — the altitude, E2 — the atmospheric pressure, E3 — the ambient temperature. The ice symbol fl ashes if there is a risk of ice. — Consult the air conditioning con- ditions: F1 — the fan speed indicator,… -
Page 216: Hands-Free Telephone
AUDIO EQUIPMENT and TELEMATICS HANDS-FREE TELEPHONE HANDS-FREE TELEPHONE General notes What is the Bluetooth ® hands-free telephone with voice recognition? The system uses wireless communication technology referred to as You can make telephone calls using Bluetooth ® which allows you to make hands-free telephone calls in a microphone, located in the cour- your vehicle via your Bluetooth compatible mobile telephone.
-
Page 217
AUDIO EQUIPMENT and TELEMATICS Changing the language, programming the voice Changing the language of the voice Programming the user’s voice 5 — The system says the fi rst of 45 typical commands phrases. You can use the user’s voice program- By default, the recognition system is in ming function to create a voice model English. -
Page 218
AUDIO EQUIPMENT and TELEMATICS Training voice commands # 790 (for # = «Hash») 55 66 77 88 99 Home, Work, Mobile, Pager * 671 (for * = «Star») 44 33 22 11 00 List of names 212 — 4 903 Call 293 — 5804 235 — 3 494 Call * 350… -
Page 219
AUDIO EQUIPMENT and TELEMATICS Matching your Bluetooth ® 8 — The system confi rms the validity of 12 — After the audible signal, allo- the number spoken, answer «Yes». cate a name to the telephone telephone by saying the name of your Say «No»… -
Page 220
AUDIO EQUIPMENT and TELEMATICS Making a telephone call using a number, phone book A Bluetooth ® compatible mobile telephone Recording a name in the system’s 7 — The system says «HOME, WORK, must be matched with the system. phone book MOBILE OR PAGER». -
Page 221
AUDIO EQUIPMENT and TELEMATICS Making a telephone call using a name in the phone book, receiving a call Using a name in the system’s phone 8 — Answer «Yes» or say «No» to Receiving a call book return to step 4. The telephone ring is transmitted on the The name must be recorded in the sys- speaker by the front passenger’s seat. -
Page 222
AUDIO EQUIPMENT and TELEMATICS Voice commands (1/2) Press this button to start the voice recognition. Confi gure Divert the call Home, at home Phone book Add a location Work, at work Dial Confi gure the confi rmation requests Mobile, on mobile Call Language Pager, on pager… -
Page 223
AUDIO EQUIPMENT and TELEMATICS Voice commands (2/2) Press this button to start the voice recognition. Zero English Word training Phone book New entry Phone book Change Repeat training Phone book Delete Activate Three Four Phone book Clear All Deactivate Five Phone book List of names Incorporate the call Confi… -
Page 224
VISUAL SEARCH EXTERIOR FRONT Remote control key, starting, battery……..73-76 Central locking ……..79 Sunroof ……..82-83 Door mirrors ……..61 Windscreen wipers …… 90-91 Rain sensor ……..90 Opening/closing the doors … 79-80 Opening the bonnet ……126 Filler cap, fi lling the fuel tank …..84 Engine …….. -
Page 225
VISUAL SEARCH EXTERIOR REAR Accessories ……..156 Roof bars ………155 3rd brake lamp ……..141 Door mirror ……..61 Tailgate ……..80-81 Rear wiper ………91 Side repeaters ………140 Spare wheel, jack, changing, fi tting ……..132-136 Opening/closing the doors … 79-80 Lower tailgate ……..81 Towbar ……….154 Brakes …….. -
Page 226
VISUAL SEARCH INSTRUMENTS AND CONTROLS Toll card window ……..63 Instrument panels, dials, speedometer …21 Trip computer ……..34 Courtesy lamps ……92-93 Warning lamps, messages ..22-30 Screens ……..39-43 Rear view mirror ……..62 Indicators, screens …… 31-38 Changing the time ……. 39-43 Dashboard lighting dimmer ….43 Audio equipment ….. -
Page 227
VISUAL SEARCH STEERING MOUNTED CONTROLS Lighting ……..86-88 Wipers ……… 90-91 dipped beam headlamps, main beam headlamps, Screenwash ……… 90-91 foglamps. Automatic illumination of headlamps …88 Headlamp wash ………90 Cruise control ……121-122 Audio system controls …..162, 176 Headlamp adjustment …….89 Parking sensors ……. -
Page 228: Visual Search
VISUAL SEARCH INTERIOR Seats ……….. 50-52 head restraint, heated seat controls. Rear seats ……..53-57 Rear fi ttings ……… 69-72 Courtesy lamp, interior lighting ..92-93 stowing rings, storage tray, load space cover. Rear bench seat (7-seat version)……58-60 Child seats ……… 94-101 Airbags ……..
-
Page 229
VISUAL SEARCH TECHNICAL DATA — MAINTENANCE Engine technical data ……157 Weights, loads ………158 Dimensions ……..159 Checking the levels ….129-131 Air/oil fi lters, checks ….129-131 fuel supply, Identifi cation markings …..160 engine oil dipstick, power steering fl uid, brake fl uid, coolant. -
Page 231: Alphabetical Index
ALPHABETICAL INDEX Automatic illumination Check, passenger of headlamps ……86, 88 compartment filter ……130 ABS ……….103 Automatic operation Checking the air filter ….130 ABS and EBFD systems….103 of hazard warning lamps …102 Checking the oil filter ….130 Accessories ……..156 Automatic rain sensitive Checks……….130 Accessory socket, windscreen wipers …….91…
-
Page 232
ALPHABETICAL INDEX Inflating tyres ……..19 Fuel filler cap ……..84 Instrument panel ……21 Fuel filler flap ……..84 EBFD ……….103 Instrument panel screen ….31 Fuel gauge……..84 Eco-driving ……..19 Interior fittings ……64, 69 Fuel tank ………84 Economical driving ……19 ISOFIX child seats ….98-100 Electronic brake force distribution ISOFIX mountings ….98-100 (EBFD) ……..103… -
Page 233
ALPHABETICAL INDEX Screenwash fluid level ….129 Lighting on reminder …….87 Seat, rear bench ……58 Loading ………..19 Parking brake ……. 112, 130 Load space cover …..70, 72 Seat adjustment….50, 51, 53 Parking sensors, rear ….123 Seat belts……106, 107 Player, CD MP3 ….164, 170, 175 Seat belts warning lamp ….105 Protecting children …..94, 97-101 Seat configurations ……57… -
Page 234
ALPHABETICAL INDEX Temperature, coolant ……32 Temperature adjustment ….46 Third brake lamp……141 Tools ……….132 Total distance recorder …..31, 32 Towbar ……….154 Towed loads……..157 Towing another vehicle ….152 TP (Traffic information) ..168, 208 Traction control (TCL) ….104 Trajectory control systems ….104 Transfer box and rear differential ….130 Trip computer ……31, 34 Tyre pressures ……160… -
Page 235
The descriptions and illustrations are given without any obligation. Automo- biles PEUGEOT reserves the right to modify the technical specifi cations, equipment and accessories without having to update the current hand- book. -
Page 236
Anglais AN. 11487.0030 www.peugeot.com…
Руководство по эксплуатации, техническому обслуживанию и ремонту автомобилей Citroen C-Crosser и Peugeot 4007 с 2007 года выпуска с бензиновыми двигателями объемом 2,0/2,4 л.
- Автор: —
- Издательство: Легион-Автодата
- Год издания: —
- Страниц: 616
- Формат: —
- Размер: —
Руководство по ремонту и эксплуатации автомобилей Citroen C-Crosser и Peugeot 4007 с 2007 года выпуска с бензиновыми и дизельными двигателями.
- Автор: —
- Издательство: Монолит
- Год издания: —
- Страниц: 410
- Формат: —
- Размер: —

Инструкция по эксплуатации автомобиля Peugeot 4007.
- Автор: —
- Издательство: Peugeot
- Год издания: 2011
- Страниц: 236
- Формат: PDF
- Размер: 18,9 Mb
Посмотреть инструкция для Peugeot 4007 (2012) бесплатно. Руководство относится к категории автомобили, 6 человек(а) дали ему среднюю оценку 8.9. Руководство доступно на следующих языках: русский. У вас есть вопрос о Peugeot 4007 (2012) или вам нужна помощь? Задайте свой вопрос здесь
Не можете найти ответ на свой вопрос в руководстве? Вы можете найти ответ на свой вопрос ниже, в разделе часто задаваемых вопросов о Peugeot 4007 (2012).
Как перевести мили в километры?
Где я могу узнать идентификационный номер транспортного средства Peugeot?
Что такое идентификационный номер транспортного средства (VIN)?
Когда транспортному средству Peugeot требуется техническое обслуживание?
Когда следует заменять тормозную жидкость на Peugeot?
В чем разница между топливом E10 и E5?
Одна или несколько дверей не открываются изнутри. Что мне делать?
Автомобильный радиоприемник не включается, что делать?
Инструкция Peugeot 4007 (2012) доступно в русский?
Не нашли свой вопрос? Задайте свой вопрос здесь
SUV Peugeot 4007 / Citroën C-Crosser (Mitsubishi GS Platform) профессиональное руководство по эксплуатации, техническому обслуживанию и ремонту с бензиновыми двигателями: SFA 4B11 2.0 л (1998 см³) 147 л.с./108 кВт и SFZ 4B12 2.4 л (2360 см³) 170 л.с./125 кВт; Инструкция по эксплуатации, каталог расходных запчастей, технические характеристики, электросхемы, характерные неисправности, проверка и замена, моменты затяжки, техобслуживание, периодичность, объемы и жидкости, диагностика — 670 кодов DTC/25 систем, устройство, особенности конструкции, контрольные размеры кузова. Производственно-практическое издание компактные кроссоверы Пежо 4007 и Ситроен С-Кроссер с цельнометаллическими несущими кузовами пятидверный универсал повышенной вместимости передне- и полноприводные модели первого поколения (включая рестайлинг 2009) выпуска с 2007 по 2012 год
ЕСЛИ ВЫ ВИДИТЕ ОШИБКУ 406 Not Acceptable и не видите документ, то скорей всего у Вас IP РФ и его надо сменить, на любой другой страны, с помощью VPN ( Scribd и SlideShare блокируют посетителей с Российским IP).
Видео Peugeot 4007 замена передних тормозных колодок и переднего бампера (Пежо 4007 07-12)
Peugeot 4007 общая информация (Пежо 4007 2007-2012)
Проверка и замена тормозных колодок передних тормозов
Внимание: при необходимости замены тормозной колодки замените тормозные колодки комплектом, кроме того, одновременно замените тормозные колодки на противоположном колесе данной оси.
1. Через специальное сервисное отверстие в тормозном суппорте измерьте толщину накладки тормозной колодки.
Номинальное значение………………..10 мм
Предельно допустимое значение…………2 мм
2. Выверните нижний направляющий палец. Поднимите суппорт в сборе и подвесьте его на проволоке.
3. Снимите следующие детали со скобы суппорта:
— прокладки,
— тормозные колодки,
— фиксаторы колодок.
Примечание: индикатор износа установлен только на внутренней колодке для левого колеса.
4. Очистите поршень и установите его в цилиндр, используя струбцину. Примечание: не допускайте попадания смазки и грязи на рабочие поверхности тормозного диска и колодок.
5. Установите прокладки, тормозные колодки и фиксаторы в суппорт и затяните направляющий болт.
Момент затяжки………….. 74 ±10 Нм
Примечание: нанесите смазку на детали.
Смазка для направляющего пальца……… смазка из ремкомплекта, Niglube RM или аналогичная.
Комплекты тормозных колодок передних колёс.
А — правая сторона, В — левая сторона, С — внешняя сторона, 1 — прокладки, 2 — тормозные колодки, 3 — фиксатор, 4 — индикатор износа.
Передний бампер (Peugeot 4007).
1 — усилитель переднего бампера, 2 — боковой кронштейн переднего бампера, 3 — стойка, 4 — панель вентиляционной решетки, 5 — передний бампер, 6 — вентиляционная решетка, 7 — энергопоглощающая вставка, 8 — накладка переднего бампера, 9 — боковой молдинг переднего бампера, 10 — дефлектор, 11 — элемент жесткости, 12 — заглушка (модели без противотуманных фар), 13 — элемент жесткости, 14 — отделка противотуманной фары.
Снятие и установка переднего бампера
1. Отсоедините провод от отрицательной
клеммы аккумуляторной батареи.
2. Снимите передние подкрылки.
а) Снимите переднее колесо.
б) Используя съемник фиксаторов, отсоедините фиксаторы «1». Отверните болт «2».
в) Используя съемник фиксаторов, отсоедините фиксаторы «4» и снимите подкрылок «3».
г) Аналогичным способом снимите подкрылок с другой стороны автомобиля.
3. Снимите передний бампер в сборе,
а) Используя съемник, отсоедините фиксаторы «1» и снимите крышки «2» болтов крепления переднего бампера.
б) Отверните болты крепления переднего бампера «3».
в) Используя плоскую отвертку, обмотанную защитной лентой, освободите защелки «а» и снимите крышку «4».
г) Отсоедините разъем «b».
д) (Модификации) Отсоедините шланг омывателя фар «с».
е) Отсоедините фиксаторы «d».
ж) Снимите нижний защитный кожух моторного отсека «2» (см. выше).
з) Освободите защелки переднего бампера, потянув края бампера сначала в направлении стрелки «е», а затем — в направлении стрелки «f», после чего снимите бампер «5».
4. Установка производится в порядке, обратном снятию. Примечание: после завершения установки деталей подсоедините провод к отрицательной клемме аккумуляторной батареи.
| № | Спецификация / Specs | Данные |
| Габариты (мм/mm) и масса (кг/kg) / Dimensions and Weight | ||
| 1 | Длина / Length | 4637 |
| 2 | Ширина (без/с зеркалами) / Width | 1805-1806/2072 |
| 3 | Высота (загружен/пустой) / Height | 1713 |
| 4 | Колёсная база / Wheelbase | 2670 |
| 5 | Дорожный просвет (клиренс) / Ground clearance | 210⇒174 |
| 6 | Снаряжённая масса / Total (curb) weight | 1680 |
| Полная масса / Gross (max.) weight | 2290 | |
|
Двигатель / Engine |
||
| 7 | Тип / Engine Type, Code | Бензиновый, жидкостного охлаждения, четырехтактный, SFZ 4B12-MMC |
| 8 | Количество цилиндров / Cylinder arrangement: Total number of cylinders, of valves | 4-цилиндровый, рядный, 16V, DOHC с верхним расположением двух распределительных валов MIVEC |
| 9 | Диаметр цилиндра / Bore | 88.0 мм |
| 10 | Ход поршня / Stroke | 97.0 мм |
| 11 | Объём / Engine displacement | 2360 см³ |
| 12 | Система питания / Fuel supply, Aspiration | Распределенный впрыск топлива MPI (ECI-MULTI) |
| Атмосферный | ||
| 13 | Степень сжатия / Compression ratio | 10.5:1 |
| 14 | Максимальная мощность / Max. output power kW (HP) at rpm | 170 кВт (125 л.с.) при 6000 (5750) об/мин |
| 15 | Максимальный крутящий момент / Max. torque N·m at rpm | 232 Нм при 4100 об/мин |
|
Трансмиссия / Transmission |
||
| 16 | Сцепление / Clutch type | Torque Converter / Гидротрансформатор с блокировкой |
| 17 | КПП / Transmission type | W1CJA Continuously Variable Transmission CVT — Бесступенчатый Вариатор с возможностью выбора шести псевдо передач |
О Книге
- Название: Руководство по ремонту и техническому обслуживанию автомобилей Peugeot 4007 / Citroen С-Сrosser
- Бензиновые двигатели: SFA 4B11 2.0 л (1998 см³) 147 л.с./108 кВт и SFZ 4B12 2.4 л (2360 см³) 170 л.с./125 кВт
- Выпуск с 2007 года
- Серия: «Профессионал»
- Год издания: 2013
- Автор: Коллектив авторов
- Издательство: «Ассоциация независимых издателей»
- Формат: PDF
- Страниц в книге: 613
- Размер: 243.52 МБ
- Язык: Русский
- Количество электросхем: 234


