Перейти к контенту
Вы можете скачать руководство по эксплуатации и техническому обслуживанию, устройству скутеров китайского, корейского и тайваньского изготовления класса 125 см3 и 150 см3.
- Формат: PDF
- Количество страниц: 121
- Качество: Отсканированные страницы
- Язык книги: Русский
- Размер: 11,6 МБ
В данном пособии рассматриваются вопросы по техническому обслуживанию, устройству, эксплуатации скутеров от 125 до 150 см3. Статьи сопровождаются фотографиями и цветными схемами.

Осмотрены конструкции скутеров последующих моделей:
- ABM — Sprinter 150, Vulcan 150
- Alfamoto — Bison 150, Fighter 150, Saigak 150
- Baotian — BT151 T-2, BT125Т-2/17
- ВМ Балтмоторс — Galaxy 125, Maxxy 125, Biwis125, Action 6
- CPI — Oliver Sport 125, Oliver City 125
- Corsa — Fratello 150
- Defiant — Lamberti DT125T, Velon DT125QTB, Maxo 150, Spike 150, Booster 150, Reflex 150, Reaper 150, Wudo 150
- Daelim — Trans 125, Delfino 125, S1 125, SL 125 History
- E-Moto
- Forsage — FT-150T-6, FT-150T-6C, Saturn 150, Neo 150, Ufo 150
- Fada — FD150QT-15
- Honling — Boomerang 125, Joker 125
- Hyosung — MC 150
- Irbis — Centrino 125, SLX 125, ZR 125, Nirvana 150
- Jialing — JL125T, JL150T-6, JL150T-7
- Кeeway — Аrn 150, Focus 150
- Kinlon Rus — JL125T-C, JL125T-E, JL125T-10, JL125T-10E
- Kinroad — XT125T-8, XT150T-8 Wind Hunter
- Kymco — Grand Dink 125, Grand Dink 150, Agility 125
- Lifan / ЗиД-Lifan — LF 125T, LF150QT-8, LF150QT-15
- Patron Rus — Leo 125, Major 150
- Qingqi — QM125T-R
- Reggy — Fantom RG125S1250-1251
- RM Rus Русская механика — Brilus 125-12E, RM-X125-12С
- Skymoto — Bravo 150, Rio 150, Asia 150
- SYM — VS-150, RS-125, RS-150
- Vento — Phantom GT5, Hantera GT5, Triton R4
- Viper — Legend 125, Cruiser 150, Storm 150, Fabius 150, Volcano 150, Matrix 150, F1-150, Mega 150, Nova 150, Victory 150
- Xinling — TXM125-E, TXM125 Winq
- Yinxiang — YX150
Книжка адресуется всем обладателям и юзерам представленных марок скутеров.
СОДЕРЖАНИЕ
- Введение — 3
- Технические характеристики — 7
- Эксплуатация скутера — 17
- Органы управления — 17
- Контрольные приборы — 18
- Замок зажигания — 21
- Подготовка к выезду после длительной стоянки — 21
- Заправка скутера топливом — 22
- Запуск двигателя — 23
- Подготовка к запуску двигателя — 23
- Запуск холодного двигателя — 23
- Запуск холодного двигателя электрическим стартером — 23
- Запуск теплого двигателя — 24
- Запуск двигателя в случае «перелива» — 24
- Правила вождения скутера — 24
- Обкатка скутера — 25
- Техническое обслуживание — 26
- Замена топливного фильтра — 30
- Обслуживание воздушного фильтра — 30
- Проверка уровня моторного масла — 35
- Замена моторного масла — 36
- Проверка уровня трансмиссионного масла — 42
- Замена трансмиссионного масла — 42
- Проверка и регулировка зазоров клапанов — 45
- Проверка состояния и замена свечи зажигания — 48
- Топливный кран — 54
- Регулировка карбюратора — 54
- Воздушная заслонка — 56
- Регулировка оборотов холостого хода — 56
- Проверка и регулировка натяжения троса акселератора (свободного хода ручки «газа») — 59
- Система очистки картерных газов — 60
- Проверка и замена ремня вариатора — 62
- Разборка вариатора. Проверка и замена роликов вариатора — 70
- Снятие центробежного сцепления. Проверка и замена колодок центробежного сцепления — 80
- Специнструмент для замены ремня и разборки вариатора — 83
- Регулировка заднего тормоза (для моделей с задними барабанными тормозами) — 86
- Замена задних тормозных колодок (для моделей с задними барабанными тормозами) — 88
- Типы тормозных механизмов переднего тормоза — 89
- Замена передних тормозных колодок — 90
- Контроль уровня тормозной жидкости — 94
- Замена тормозной жидкости и прокачка тормозов — 95
- Замена тормозной жидкости — 96
- Замена тормозного диска переднего колеса — 100
- Аккумулятор — 102
- Замена предохранителя — 104
- Замена ламп освещения и сигнализации скутера — 105
- Замена лампы головного света — 105
- Замена лампы переднего габаритного света и ламп указателей поворотов — 107
- Замена ламп заднего фонаря — 108
- Колеса и шины — 110
- Инструкция по эксплуатации сигнализации скутеров Viper и Reggy (RG125S1250-1251) — 110
- Управление сигнализацией — 110
- Приложения — 113
- Моменты затяжки стандартных крепежных винтов — 113
- Моменты затяжки для деталей двигателя — 113
- Блок-схемы поиска и устранения неисправностей — 114

Автомеханик с опытом более 20 лет в ремонте и обслуживании автомобильной и мотоциклетной техники. Пишу статьи и отвечаю на вопросы посетителей сайта skuterov.ru

- Manuals
- Brands
- Honda Manuals
- Scooter
- Click 125i 2017
- Owner’s manual
-
Contents
-
Table of Contents
-
Troubleshooting
-
Bookmarks
Quick Links
Related Manuals for Honda Click 125i 2017
Summary of Contents for Honda Click 125i 2017
-
Page 2
This publication includes the latest production information available before printing. Honda Motor Co., Ltd. reserves the right to make changes at any time without notice and without incurring any obligation. No part of this publication may be reproduced without written permission. -
Page 3
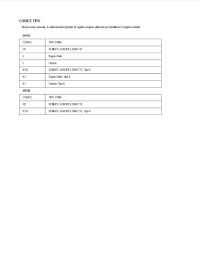
Welcome Congratulations on your purchase of a new The following code in this manual indicates ● Honda scooter. Your selection of a Honda the country. makes you part of a worldwide family of satisfied customers who appreciate Honda’s Country Codes… -
Page 4
A Few Words About Safety Your safety, and the safety of others, is very DANGER important. Operating this scooter safely is an You WILL be KILLED or SERIOUSLY HURT important responsibility. if you don’t follow instructions. To help you make informed decisions about safety, we have provided operating WARNING procedures and other information on safety… -
Page 5: Table Of Contents
Contents Scooter Safety P. 2 Operation Guide P. 12 Maintenance P. 36 Troubleshooting P. 72 Information P. 86 Specifications P. 97 Index P. 100…
-
Page 6: Scooter Safety
Scooter Safety This section contains important information for safe riding of your scooter. Please read this section carefully. Safety Guidelines ………. P. 3 Safety Precautions ……..P. 6 Riding Precautions……..P. 7 Accessories & Modifications…… P. 10 Loading …………P. 11…
-
Page 7: Safety Guidelines
Safety Guidelines Safety Guidelines that you and your passenger are both wearing an approved motorcycle helmet and protective Follow these guidelines to enhance your safety: apparel. Instruct your passenger on holding onto Perform all routine and regular inspections the grab rail or your waist, leaning with you in ●…
-
Page 8
Safety Guidelines Make Yourself Easy to See Keep Your Honda in Safe Condition Make yourself more visible, especially at night, by It’s important to keep your scooter properly wearing bright reflective clothing, positioning maintained and in safe riding condition. yourself so other drivers can see you, signaling… -
Page 9
Safety Guidelines leaks, check the tightness of critical nuts and WARNING bolts, and check the handlebar, control levers, brakes, and wheels. Ride slowly and cautiously. Running the engine of your scooter Your scooter may have suffered damage that is while in an enclosed or even partially not immediately apparent. -
Page 10: Safety Precautions
Safety Precautions Safety Precautions Face shield with unobstructed field of vision or ● other approved eye protection Ride cautiously and keep your hands on the WARNING ● handlebar and feet on the floor. Keep passenger’s hands onto the grab rail or ●…
-
Page 11: Riding Precautions
Riding Precautions Riding Precautions Avoid continuous braking. ● Repeated braking, such as when descending long, steep slopes can seriously Running-in Period overheat the brakes, reducing their During the first 500 km (300 miles) of running, effectiveness. follow these guidelines to ensure your scooter’s For full brake effectiveness, operate both the ●…
-
Page 12
Riding Precautions Wet or Rainy Conditions To reduce the likelihood of theft, always lock ● Road surfaces are slippery when wet, and wet the handlebar, remove the key and close the brakes further reduce braking efficiency. shutter when leaving the scooter unattended. Exercise extra caution when braking in wet Use of an anti-theft device is also recommended. -
Page 13
Riding Precautions Refuelling and Fuel Guidelines Left handle grip Follow these guidelines to protect the engine, fuel system and catalytic converter: Use only unleaded petrol. ● Use recommended octane number. Using ● lower octane petrol will result in decreased engine performance. Do not use fuels containing a high ●… -
Page 14: Accessories & Modifications
Honda or make modifications to your scooter from its original Follow all instructions in this owner’s design. Doing so can make it unsafe.
-
Page 15: Loading
Loading Loading WARNING Carrying extra weight affects your scooter’s ● Overloading or improper loading can handling, braking and stability. Always ride at a cause a crash and you can be seriously safe speed for the load you are carrying. hurt or killed. Avoid carrying an excessive load and keep ●…
-
Page 16: Operation Guide
Basic Operation Flow Pre-ride Inspection (P41) Acceleration (P28) Carefully inspect your scooter to make sure that it is safe to ride. Apply throttle gradually. Obey the speed limit. Starting the Engine (P24) Start and warm the engine. How to use basic features. Starting the Avoid revving the engine.
-
Page 17
Parking Braking (P8) (P29) Close the throttle and apply the Close the throttle and apply the front and rear brakes together. front and rear brakes together. Park on a firm level surface. Use The brakelight will indicate that The brakelight will indicate that the stand, lock the steering, and you have applied the brakes. -
Page 18
Parts Location Document bag (P34) Tool (P34) Luggage box (P34) Throttle grip (P69) Front brake fluid reservoir (P63) Front brake lever Glove box (P35) Hook (P35) Helmet holder (P33) Coolant reserve tank (P61) Battery (P52) Main Fuse (P84) Engine oil fill cap/dipstick (P57) -
Page 19
Brake lock lever (P23) Rear brake lever (P64) Helmet holder (P33) Seat (P32) Fuel fill cap (P30) Glove box (P35) Spark plug (P55) Crankcase breather (P70) Engine oil drain bolt (P58) Centre stand (P8) Side stand (P68) -
Page 20
Instruments Speedometer Display Check When the ignition switch is turned to ON position, the speedometer needle swings to the maximum scale on the dial once, all the mode and digital segments will temporarily show. If any part of these displays does not come on when it should, have your dealer check for problems. -
Page 21
Fuel gauge Remaining fuel when only 1st (E) segment left: approximately 1.5 litres (0.40 US gal, 0.33 lmp gal). This segment flashes when the fuel decreases further. If the fuel gauge indicator flashes in a repeat pattern or turns off: (P76) Odometer (If the mileage is over 200,000 km) -
Page 22
Indicators If one of these indicators does not come on when it should, have your dealer check for problems. High beam indicator High coolant temperature indicator If it comes on while riding: (P74) PGM-FI (Programmed Fuel Injection) malfunction indicator lamp (MIL) Comes on briefly when the ignition switch is turned on. -
Page 23
Right turn signal indicator Left turn signal indicator… -
Page 24
Switches Start button Turn signal switch Pressing the switch turns the turn signal off. Horn button Headlight dimmer switch • : High beam • : Low beam… -
Page 25
Ignition Switch Turns electrical system on for starting/riding. Switches the electrical system on/off, SEAT locks the steering, and operates the Operates the seat opener switch. seat opener switch. Key can be removed when in the OFF Turns engine off. (LOCK) position. (LOCK) Steering Lock Locking… -
Page 26
Switches (Continued) Shutter The shutter will automatically close when you The ignition switch for this scooter is remove the ignition key at the (LOCK) equipped with an automatic shutter. After position. parking the scooter, close the shutter for Also you can close the shutter manually. theft prevention. -
Page 27
Rear Brake Lock Be sure the rear brake lock is applied while Unlocking starting and warming up the engine. Squeeze the rear brake lever. Before riding, make sure that the rear brake Locking lock is fully released so there is no drag on the rear wheel. -
Page 28
Starting the Engine Start your engine using the following Consult your dealer for advice if you plan to procedure, regardless of whether the engine ride your scooter at an altitude above 2,500 m is cold or warm. (8,000 feet). NOTICE This scooter is equipped with a side stand If the scooter is transported to a place 2,000 m (6,500 feet) ignition cut-off system. -
Page 29
Place the scooter on its centre stand. Lock the rear wheel by squeezing the rear brake lever and setting the brake lock lever. Turn the ignition switch to the ON position. The starter motor will only work when the Confirm the following: brake lever is squeezed and the side stand •… -
Page 30
Starting the Engine (Continued) Starting the Engine with the Electric Starting the Engine without the Electric Starter Starter With the throttle closed, press the start Lightly depress the kickstarter until resistance button. is felt. Then let the kickstarter return to the Release the start button as soon as the top of its stroke. -
Page 31
If you cannot restart a warm engine: Using the kickstarter Rotate the throttle 1/8 — 1/4 turn while starting Turn the ignition switch to the OFF position. the engine. Open the throttle fully and crank the engine several times with the kickstarter. Turn the ignition switch to the ON position. -
Page 32
Riding Starting the Scooter Acceleration and deceleration Push the scooter forward off the centre To accelerate: Open the throttle slowly. stand. To decelerate: Close the throttle. Lock the rear brake lock. Keep throttle closed. Close (Decelerate) Make sure the side stand and centre stand Open (Accelerate) are up. -
Page 33
Braking Close the throttle and apply the front and rear brake levers together. Do not apply the brake lock while riding. It may cause the wheel to lock, reducing control of the scooter. Rear brake lever Front brake lever… -
Page 34
Refuelling Fuel type: Unleaded petrol only Arrow marks Fuel octane number: Your scooter is Lower edge designed to use Research Octane Number of filler neck (RON) 88 or higher. Tank capacity: 5.5 litres (1.45 US gal, 1.21 Imp gal) Refuelling and Fuel Guidelines (P9) Opening the Fuel Fill Cap Open the seat. -
Page 35
Closing the Fuel Fill Cap Install and tighten the fuel fill cap firmly by turning it clockwise. Make sure that the arrow marks on the cap and fuel tank are aligned. Close the seat. WARNING Petrol is highly flammable and explosive. You can be burned or seriously injured when handling fuel. -
Page 36
Storage Equipment Seat Open Turn the handlebar pointed straight ahead. Seat Insert the ignition key and turn it to the position of SEAT. Push the SEAT side of the seat opener switch. Open the seat. SEAT Seat Close Close and push down on the rear of the seat until locks. -
Page 37
Helmet Holder WARNING The helmet holders are located under the seat. Riding with a helmet attached to the holder can interfere with your ability to Use the helmet holders only when parked. safely operate the scooter and could lead to a crash in which you can be Helmet seriously hurt or killed. -
Page 38
Storage Equipment (Continued) Luggage Box Tool Never exceed the maximum weight limit. The tools are on the reverse side of the seat. Maximum Weight: 10 kg (22 lb) Document Bag Do not store any items that are flammable or susceptible to heat damage. The document bag is in the document Do not store valuables or fragile articles. -
Page 39
Hook Glove box The hook is provided below the handlebar. The glove boxes are provided below the handlebar. Do not attach large luggage to the hook that would hang out from the scooter and/or interfere with the movement of your feet. Glove boxes The maximum allowable load on the hook and Hook… -
Page 40: Maintenance
Maintenance Please read “Importance of Maintenance” and “Maintenance Fundamentals” carefully before attempting any maintenance. Refer to “Specifications” for service data. Importance of Maintenance …… P. 37 Coolant …………P. 61 Maintenance Schedule ……. P. 38 Brakes …………P. 63 Maintenance Fundamentals……. P. 41 Side Stand …………P.
-
Page 41: Importance Of Maintenance
Importance of Maintenance Importance of Maintenance Maintenance Safety Keeping your scooter well-maintained is Always read the maintenance instructions before absolutely essential to your safety and to protect you begin each task, and make sure that you your investment, obtain maximum performance, have the tools, parts, and skills required.
-
Page 42: Maintenance Schedule
Maintenance work should be performed in new owner. accordance with Honda’s standards and specifications by properly trained and Honda recommends that your dealer should equipped technicians. Your dealer meets all of road test your scooter after each periodic these requirements. Keep an accurate record maintenance is carried out.
-
Page 43
: Inspect (clean, adjust, lubricate, or replace, if necessary) Procedures are provided in an official Honda Shop Manual. : Replace : Technical. In the interest of safety, have your scooter serviced : Clean by your dealer. -
Page 44
Maintenance Schedule Frequency Pre-ride Annual Regular Refer to Items Check × 1,000 km Check Replace page P. 41 × 1,000 mi Final Drive oil 2 Years – Brake Fluid 2 Years Brake Shoes/Pads Wear 64, 67 Brake System Brake Lock Operation –… -
Page 45: Maintenance Fundamentals
Maintenance Fundamentals Brakes-Check operation; Pre-ride Inspection ● Front: check brake fluid level and To ensure safety, it is your responsibility to pads wear. P. 63, 64 perform a pre-ride inspection and make sure Rear: check shoes wear and that any problem you find is corrected. A pre- freeplay, adjust if necessary.
-
Page 46
Maintenance Fundamentals WARNING Replacing Parts Always use Honda Genuine Parts or their Installing non-Honda parts may make equivalents to ensure reliability and safety. your scooter unsafe and cause a crash in which you can be seriously hurt or killed. Always use Honda Genuine Parts or equivalents that have been designed and approved for your scooter. -
Page 47
Maintenance Fundamentals WARNING Battery Your scooter has a maintenance-free type The battery gives off explosive hydrogen battery. You do not have to check the battery gas during normal operation. electrolyte level or add distilled water. Clean the battery terminals if they become dirty or A spark or flame can cause the battery to corroded. -
Page 48
Always replace the battery with another maintenance-free battery of the same type. NOTICE Installing non-Honda electrical accessories can overload NOTICE the electrical system, discharging the battery and possibly Replacing a fuse with one that has a higher rating greatly damaging the system. -
Page 49
Conserving” or “Resource Conserving” on the For recommended engine oil, see circular API service symbol. “Specifications.” P. 98 If you use non-Honda engine oil, check the label to make sure that the oil satisfies all of the following standards: JASO T 903 standard : MB ●… -
Page 50
Using coolant not specified for aluminium engines, or Recommended brake fluid: ordinary tap water or mineral water can cause corrosion. Honda DOT 3 or DOT 4 Brake Fluid or equivalent Crankcase Breather Service more frequently when riding in rain, at full throttle, or after the scooter is washed or overturned. -
Page 51
Maintenance Fundamentals Inspecting for Abnormal Wear Tyres (Inspecting/Replacing) Inspect the tyres for Checking the Air Pressure signs of abnormal Visually inspect your tyres and use an air wear on the contact pressure gauge to measure the air pressure at surface. least once a month or any time you think the tyres look low. -
Page 52
Maintenance Fundamentals Inspecting Tread Depth WARNING Inspect the tread wear indicators. If they become visible, replace the tyres immediately. Riding on tyres that are excessively worn or improperly inflated can cause a crash in which you can be seriously hurt or killed. -
Page 53
Maintenance Fundamentals Have your tyres replaced by your dealer. WARNING For recommended tyres and pressure, see “Specifications.” P. 98 Installing improper tyres on your scooter Follow these guidelines whenever you replace can adversely affect handling and tyres. stability, and can cause a crash in which Use the recommended tyres or equivalents of ●… -
Page 54
Maintenance Fundamentals Air Cleaner This scooter is equipped with a viscous type air cleaner element. Air blow cleaning or any other cleaning can degrade the viscous element performance and cause the intake of dust. Do not perform the maintenance. Should be serviced by your dealer. -
Page 55: Tool
Tool The tools are in reverse side of the seat. P. 34 You can perform some roadside repairs, minor adjustments and parts replacement with the tools contained in the kit. Spark plug wrench ● Standard/Phillips screwdriver ● Screwdriver handle ●…
-
Page 56: Removing & Installing Body Components
Removing & Installing Body Components Battery Positive terminal Negative terminal Screw Battery lid Battery Service Battery coupler cover guide Battery Battery box cover Removal Make sure the ignition switch is in the OFF position. 1. Remove the battery lid from step floor by removing the screw.
-
Page 57
Removing & Installing Body Components Battery Installation 3. Remove the battery cover from step floor. 4. Disconnect the negative terminal from Install the parts in the reverse order of the battery. removal. Always connect the positive 5. Disconnect the positive terminal from terminal first. -
Page 58: Front Top Cover
Removing & Installing Body Components Front Top Cover Front Top Cover Removal 1. Remove the screws. 2. Release the tabs from the slots. Screws 3. Remove the front top cover. Front top cover Installation Install the parts in the reverse order of removal.
-
Page 59: Spark Plug
Spark Plug Checking the Spark Plug Spark plug wrench For the recommended spark plug, see “Specifications.” P. 98 Use only the recommended type of spark plug in the recommended heat range. NOTICE Using a spark plug with an improper heat range can cause Spark plug cap engine damage.
-
Page 60
Spark Plug Checking the Spark Plug 5. Check the spark plug gap using a wire- 8. Tighten the spark plug: type feeler gauge. If the old plug is good: 1/8 turn after it ● If adjustment is necessary, bend the seats. -
Page 61: Engine Oil
Engine Oil Checking the Engine Oil Oil fill cap/dipstick 1. If the engine is cold, idle the engine for 3 to 5 minutes. Upper level 2. Turn the ignition switch to the OFF position and wait 2 to 3 minutes. Lower 3.
-
Page 62
Engine Oil Adding Engine Oil Adding Engine Oil For the recommended oil and oil selection guidelines, see “Maintenance Fundamentals.” If the engine oil is below or near the lower P. 41 level mark, add the recommended engine oil. P. 98 Changing Engine Oil, Cleaning 1. -
Page 63
Engine Oil Changing Engine Oil, Cleaning Strainer Screen 5. Remove the oil fill cap/dipstick, drain bolt Sealing washer and sealing washer to drain the oil. 6. Remove the oil plug, O-ring, spring and oil strainer screen and let the remaining oil drain out. -
Page 64
Engine Oil Changing Engine Oil, Cleaning Strainer Screen 12. Fill the crankcase with the recommended oil ( P. 45) and install the oil fill cap/ dipstick. Required oil When changing oil & cleaning the strainer screen: 0.9 litres (1.0 US qt, 0.8 Imp qt) When changing oil: 0.8 litres (0.8 US qt, 0.7 Imp qt) 13. -
Page 65: Coolant
Coolant Checking the Coolant If the coolant level is dropping noticeably or the reserve tank is empty, you likely have a Check the coolant level in the reserve tank serious leak. Have your scooter inspected by while the engine is cold. your dealer.
-
Page 66
Coolant Changing Coolant 3. Securely reinstall the reserve tank cap. Reserve tank 4. Install the removed parts in the reverse cover order of removal. WARNING Removing the radiator cap while the engine is hot can cause the coolant to spray out, potentially scalding you. Screw Reserve tank cap Always let the engine and radiator cool… -
Page 67: Brakes
Brakes Checking the Front Brake Fluid Front brake fluid reservoir 1. Place your scooter in an upright position on a firm, level surface. 2. Check that the brake fluid reservoir is horizontal and that the fluid level is above the LOWER level mark. If the brake fluid level in the reservoir is below the LOWER level mark or the brake lever freeplay becomes excessive, inspect the brake…
-
Page 68
Brakes Inspecting the Front Brake Pads Inspecting the Front Brake Pads Always replace both left and right brake pads at the same time. Check the condition of the brake pad wear indicators. Inspecting the Rear Brake Lever The pads need to be replaced if a brake pad is Freeplay worn to the indicator. -
Page 69
Brakes Adjusting the Rear Brake Lever Freeplay Adjusting the Rear Brake Lever Check the brake cable for kinks or signs of wear. If necessary have it replaced by your Freeplay dealer. Lubricate the brake cable with a commercially Adjust the freeplay of the brake lever with the available cable lubricant to prevent premature front wheel pointed straight ahead. -
Page 70
Brakes Adjusting the Rear Brake Lever Freeplay 1. Adjust by turning the rear brake adjusting 3. Push the brake arm to confirm that there is nut a half-turn at a time. a gap between the rear brake adjusting nut and brake arm pin. Brake arm pin Brake arm Push… -
Page 71
The rear brake is equipped with a brake wear the brake, the brake shoes must be replaced. indicator. See your dealer for this service. Arrow When the brake service is necessary, see your dealer. Use only Honda Genuine Parts or its equivalent. Reference Brake arm mark Brake panel… -
Page 72: Side Stand
Side Stand Checking the Side Stand 4. Sit on the scooter and raise the side stand. 5. Start the engine. 6. Lower the side stand all the way. The engine should stop as you lower the side stand. If the engine doesn’t stop, have your scooter inspected by your dealer.
-
Page 73: Throttle
Throttle Checking the Throttle With the engine off, check that the throttle rotates smoothly from fully closed to fully open in all steering positions and throttle freeplay is correct. If the throttle does not move smoothly, close automatically, or if the cable is damaged, have the scooter inspected by your dealer.
-
Page 74: Crankcase Breather
Crankcase Breather Cleaning the Crankcase Breather 1. Place a suitable container under the crankcase breather tube. 2. Remove the crankcase breather tube and drain deposits. Crankcase 3. Reinstall the crankcase breather tube. breather tube…
-
Page 75: Other Adjustments
Other Adjustments Adjusting the Headlight Aim The right and left headlight aim can be adjusted in the same way. You can adjust vertical aim of the headlights for proper alignment. Turn the pinion in or out as necessary using provided Phillips screwdriver ( P.
-
Page 76: Troubleshooting
Troubleshooting Engine Will Not Start……..P. 73 Blown Fuse …………P. 84 Overheating (High coolant temperature Unstable Engine Operation Occurs indicator is on) ………. P. 74 Intermittently……….P. 85 Warning Indicators On or Flashing … P. 75 PGMI-FI (Programmed Fuel Injection) Malfunction Indicator Lamp (MIL)….P.
-
Page 77: Engine Will Not Start
Engine Will Not Start Starter Motor Operates But Starter Motor Does Not Engine Does Not Start Operate Check the following items: Check the following items: Check the correct engine starting sequence. Check the correct engine starting sequence. ● ● P. 24 P.
-
Page 78: Overheating (High Coolant Temperature Indicator Is On)
Overheating (High coolant temperature indicator is on) The engine is overheating when the following 1. Stop the engine using the ignition switch. occurs: 2. Allow the engine to cool with the ignition High coolant temperature indicator comes switch in the OFF position. ●…
-
Page 79: Warning Indicators On Or Flashing
Warning Indicators On or Flashing PGM-FI (Programmed Fuel Injection) Malfunction Indicator Lamp (MIL) If the indicator comes on while riding, you may have a serious problem with the PGM-FI system. Reduce speed and have your scooter inspected by your dealer as soon as possible.
-
Page 80: Other Warning Indications
Other Warning Indications Fuel Gauge Failure Indication If the fuel system has an error, all segments will blink or go off as shown in the illustration. If these occur, see your dealer as soon as possible.
-
Page 81: Tyre Puncture
Tyre Puncture Repairing a puncture or removing a wheel WARNING requires special tools and technical expertise. We recommend you have this type of service Riding your scooter with a temporary performed by your dealer. tyre repair can be risky. If the temporary After an emergency repair, always have the repair fails, you can crash and be tyre inspected/replaced by your dealer.
-
Page 82: Electrical Trouble
Electrical Trouble Battery Goes Dead Burned-out Light Bulb Charge the battery using a motorcycle battery Follow the procedure below to replace a charger. burned-out light bulb. Remove the battery from the scooter before Turn the ignition switch to the OFF or charging.
-
Page 83
Electrical Trouble Burned-out Light Bulb Headlight Position Light Position light Headlight The headlight uses several LEDs. The position light uses several LEDs. If there is a LED which is not turned on, see If there is a LED which is not turned on, see your dealer for this servicing. -
Page 84
Electrical Trouble Burned-out Light Bulb Brakelight Bulb Bulb License light base Connector cover Socket Screws 3. Turn the sockets counterclockwise, then pull them out. 1. Remove the license light base cover by 4. Pull out the bulbs without turning. removing the screws. 5. -
Page 85
Electrical Trouble Burned-out Light Bulb Taillight Bulb Rear Turn Signal Bulb Bulb Socket Socket Bulb 1. Remove the license light base cover. 1. Remove the license light base cover. P. 80 P. 80 2. Turn the socket counterclockwise, then pull 2. -
Page 86
Electrical Trouble Burned-out Light Bulb 4. Install a new bulb in the reverse order of 2. Turn the socket counterclockwise, then pull removal. it out. Use only the amber bulb. 3. Pull out the bulb out without turning. 5. Install the removed parts in the reverse 4. -
Page 87
Electrical Trouble Burned-out Light Bulb License Plate Light Bulb Bulb Socket 1. Remove the license light base cover. P. 80 2. Pull out the socket without turning. 3. Pull out the bulb without turning. 4. Install a new bulb in the reverse order of removal. -
Page 88: Blown Fuse
Electrical Trouble Blown Fuse Blown Fuse 1. Remove the battery lid and the battery cover from the step floor. P. 52 Before handling fuses, see “Inspecting and 2. Pull out the fuses one by one to check for a Replacing Fuses.” P.
-
Page 89: Unstable Engine Operation Occurs Intermittently
Unstable Engine Operation Occurs Intermittently If the fuel pump filter is clogged, unstable engine operation will occur intermittently while riding. Even if this symptom occurs, you can continue to ride your scooter. If unstable engine operation occurs even if sufficient fuel is available, have your scooter inspected by your dealer as soon as possible.
-
Page 90: Information
Information Keys ………….. P. 87 Instruments, Controls, & Other Features..P. 87 Caring for Your Scooter ……P. 88 Storing Your Scooter ……..P. 91 Transporting Your Scooter ……P. 92 You & the Environment……P. 93 Serial Numbers ……….P. 94 Fuels Containing Alcohol ……
-
Page 91: Keys
Keys Keys Instruments, Controls, & Other Features Ignition Key Ignition Switch Be sure to record the key number provided with the original keys and record it in this manual. Leaving the ignition switch in the ON position Store the spare key in a safe location. with the engine stopped will drain the battery.
-
Page 92: Caring For Your Scooter
Frequent cleaning and polishing is important to 4. After the scooter dries, lubricate any moving ensure the life of your Honda. A clean scooter parts. makes it easier to spot potential problems.
-
Page 93
Caring for Your Scooter Washing Precautions Do not direct water at the air cleaner: ● Follow these guidelines when washing: Water in the air cleaner can prevent the Do not use high-pressure washers: engine from starting. ● High-pressure water cleaners can damage Do not direct water near the headlight: ●… -
Page 94
Caring for Your Scooter Aluminium Components Exhaust Pipe and Muffler Aluminium will corrode from contact with dirt, When the exhaust pipe and muffler are painted, mud, or road salt. Clean aluminium parts do not use a commercially available abrasive regularly and follow these guidelines to avoid kitchen cleaning compound. -
Page 95: Storing Your Scooter
Storing Your Scooter Storing Your Scooter After removing your scooter from storage, inspect all maintenance items required by the If you store your scooter outdoors, you should Maintenance Schedule. consider using a full-body scooter cover. If you won’t be riding for an extended period, follow these guidelines: Wash your scooter and wax all painted ●…
-
Page 96: Transporting Your Scooter
Transporting Your Scooter Transporting Your Scooter If your scooter needs to be transported, it should be carried on a motorcycle trailer or a flatbed truck or trailer that has a loading ramp or lifting platform, and motorcycle tie-down straps. Never try to tow your scooter with a wheel or wheels on the ground.
-
Page 97: You & The Environment
You & the Environment You & the Environment drain or on the ground. Used oil, petrol, coolant, and cleaning solvents contain poisons that can Owning and riding a scooter can be enjoyable, hurt refuse workers and contaminate drinking but you must do your part to protect the water, lakes, rivers, and oceans.
-
Page 98: Serial Numbers
Serial Numbers Serial Numbers Frame number The frame and engine serial numbers uniquely identify your scooter and are required in order to register your scooter. They may also be required when ordering replacement parts. You should record these numbers and keep them in a safe place.
-
Page 99: Fuels Containing Alcohol
Fuels Containing Alcohol Fuels Containing Alcohol The use of petrol containing more than 10% ethanol may: Some conventional fuels blended with alcohol Damage the painting of the fuel tank. ● are available in some locales to help reduce Damage the rubber tubes of the fuel line. ●…
-
Page 100: Catalytic Converter
(CO), and oxides of nitrogen (NOx) in the running properly, stop riding and turn off the exhaust gasses into safe compounds. engine. A defective catalytic converter contributes to air pollution and can impair your engine’s performance. A replacement unit must be an original Honda part or equivalent.
-
Page 101: Specifications
Specifications Specifications Main Components ■ Displacement 124 cm (7.6 cu-in) Overall length 1,921 mm (75.6 in) Bore × stroke 52.400 × 57.907 mm (2.0630 × 2.2798 in) Overall width 683 mm (26.9 in) Compression ratio 11.0:1 Overall height 1,096 mm (43.1 in) Unleaded petrol Fuel Wheelbase…
-
Page 102
After disassembly 0.12 Imp qt) Tyre type Bias-ply, tubeless Recommended Front SRI FT235 or IRC NF66 Recommended Honda DOT 3 or DOT 4 Brake Fluid brake fluid Tyre Rear SRI FT235 or IRC NR83 Cooling system Front 200 kPa (2.00 kgf/cm… -
Page 103
Specifications Bulbs Torque Specifications ■ ■ Headlight Engine oil drain bolt 24 N·m (2.4 kgf·m, 18 lbf·ft) Brakelight 12 V-10 W × 2 Oil plug 20 N·m (2.0 kgf·m, 15 lbf·ft) Taillight 12 V-5 W Front turn signal light 12 V-10 W × 2 Rear turn signal light 12 V-10 W ×… -
Page 104: Index
Index Index Accessories ………….10 Caring for Your Scooter ……..88 Catalytic Converter ……….96 Compartment Battery …………..43, 52 Document Bag……….34, 87 Brakes Owner’s Manual ……….. 34, 87 Fluid …………..46, 63 Coolant…………… 46, 61 Front Pad Wear…………64 Crankcase Breather ……….70 Rear Brake Lever Freeplay………64 Rear Brake Shoe Wear ……..67 Braking……………..
-
Page 105
Flooded Engine…………27 Ignition Cut-off System Frame Number…………94 Side Stand…………. 68 Fuel Ignition Key …………. 87 Gauge…………..17 Ignition Switch……….21, 87 Recommended………….30 Indicators…………..18 Remaining ………….17 Instruments………….. 16 Tank Capacity …………30 Fuels Containing Alcohol ……..95 Fuses…………..44, 84 Load Limits…………… 11 Loading Guidelines ……….11 Luggage box ………… -
Page 106
Repair Kit …………..77 Odometer …………17, 87 Riding Precautions ……….7 Engine ………….45, 57 Overheating ………….74 Safety Precautions……….. 6 Seat…………….32 Serial Numbers…………94 Shutter…………… 22 Parking…………….. 8 Side Stand …………..68 Parts Location …………14 Petrol………….. 9, 30, 97 Side Stand Ignition Cut-off System..24, 68 PGM-FI (Programmed Fuel Injection) Spark Plug………… -
Page 107
Switches …………..20 Throttle…………..69 Tool…………..34, 51 Transporting Your Scooter ………92 Troubleshooting………….72 Turn Signal Indicators ……….19 Tyres Air Pressure…………47, 98 Puncture …………..77 Replacing…………47, 77 Warning Indicator On………..75 Washing Your Scooter ………88 Weight Limit …………11…
Руководство на английском языке по эксплуатации и техническому обслуживанию скутеров Honda @ 125/125 ES/150/150 ES.
- Издательство: Honda Italia Industriale S.p.A.
- Год издания: 2001
- Страниц: 114
- Формат: PDF
- Размер: 2,2 Mb
Руководство на английском языке по эксплуатации и техническому обслуживанию скутеров Honda CHF50 и CHF50S.
- Издательство: Honda Motor Co., Ltd.
- Год издания: 2007
- Страниц: 226
- Формат: PDF
- Размер: 4,5 Mb

Руководство на английском, испанском и итальянском языках по эксплуатации и техническому обслуживанию скутеров Honda S-Wing FES125/FES125A/FES150/FES150A.
- Издательство: Honda Italia Industriale S.p.A.
- Год издания: 2007
- Страниц: 418
- Формат: PDF
- Размер: 4,9 Mb

Руководство на английском языке по эксплуатации и техническому обслуживанию скутеров Honda FES250.
- Издательство: Honda Motor Co., Ltd.
- Год издания: 1998
- Страниц: 114
- Формат: PDF
- Размер: 2,6 Mb
Сборник руководств на английском языке по эксплуатации и техническому обслуживанию скутеров Honda FJS400A/FJS400D/600A/600D Silver Wing и Honda SW-T400.
- Издательство: Honda Motor Co., Ltd.
- Год издания: 2004/2008
- Страниц: 154/154
- Формат: PDF
- Размер: 4,9 Mb

Сборник руководств на английском языке по эксплуатации и техническому обслуживанию скутеров Honda FSC600/FSC600A/FSC600D Silver Wing.
- Издательство: Honda Motor Co., Ltd.
- Год издания: 2004/2006/2008/2009
- Страниц: 249/249/256/245
- Формат: PDF
- Размер: 9,1 Mb

Сборник руководств на английском языке по эксплуатации и техническому обслуживанию скутеров Honda NSS250A/NSS250EX/NSS250S/NSS250X.
- Издательство: Honda Motor Co., Ltd.
- Год издания: 2005/2008
- Страниц: 188/204
- Формат: PDF
- Размер: 7,2 Mb
Руководство на английском языке по эксплуатации и техническому обслуживанию скутеров Honda SCV100 Lead.
- Издательство: Honda Motor Co., Ltd.
- Год издания: 2003
- Страниц: 114
- Формат: PDF
- Размер: 2,0 Mb

Руководство на английском языке по эксплуатации и техническому обслуживанию скутеров Honda SH125 и SH150CRF.
- Издательство: Honda Motor Co., Ltd.
- Год издания: 2009
- Страниц: 126
- Формат: PDF
- Размер: 3,8 Mb
Руководство на английском языке по эксплуатации и техническому обслуживанию скутеров Honda Spacy-i.
- Издательство: Honda Motor Co., Ltd.
- Год издания: 2013
- Страниц: 100
- Формат: PDF
- Размер: 7,1 Mb

Руководство на английском языке по эксплуатации и техническому обслуживанию электровелосипеда Honda TDR01Z.
- Издательство: —
- Год издания: —
- Страниц: 11
- Формат: PDF
- Размер: 956 Kb
Руководство на английском языке по эксплуатации и техническому обслуживанию скутеров Honda Today.
- Издательство: Honda Motor Co., Ltd.
- Год издания: —
- Страниц: 60
- Формат: PDF
- Размер: 1,3 Mb

Руководство на английском языке по эксплуатации и техническому обслуживанию скутеров Honda SH300/SH300A/SH300AR/SH300R.
- Издательство: Honda Italia Industriale S.p.A.
- Год издания: 2007
- Страниц: 142
- Формат: PDF
- Размер: 1,7 Mb
Руководство на английском языке по обслуживанию и ремонту скутеров Honda CN250.
- Издательство: Honda Motor Co., Ltd.
- Год издания: 1993
- Страниц: 219
- Формат: PDF
- Размер: 24,9 Mb

Руководство на английском языке по обслуживанию и ремонту скутеров Honda NSS250/NSS250A/NSS250AS/NSS250S Reflex 2001-2007 годов выпуска.
- Издательство: Honda Motor Co., Ltd.
- Год издания: 2004
- Страниц: 401
- Формат: PDF
- Размер: 11,0 Mb
Руководство на итальянском языке по техническому обслуживанию и ремонту скутеров Honda SH125 и SH150.
- Издательство: Honda Motor Co., Ltd.
- Год издания: 2005
- Страниц: 371
- Формат: PDF
- Размер: 8,4 Mb

Руководство на немецком языке по техническому обслуживанию и ремонту скутеров Honda FJS600 Silver Wing.
- Издательство: Honda Motor Co., Ltd.
- Год издания: 2001
- Страниц: 439
- Формат: PDF
- Размер: 33,5 Mb

Руководство по эксплуатации и техническому обслуживанию скутеров Honda FJS600A и FJS600D.
- Издательство: Honda Motor Co., Ltd.
- Год издания: —
- Страниц: 146
- Формат: PDF
- Размер: 3,6 Mb

Руководство по техническому обслуживанию и ремонту скутеров Honda Lead.
- Издательство: Легион-Автодата.
- Год издания: —
- Страниц: 128
- Формат: —
- Размер: —

Руководство по техническому обслуживанию и ремонту скутеров Honda Dio и Honda Tact.
- Издательство: Легион-Автодата.
- Год издания: —
- Страниц: 112
- Формат: —
- Размер: —

Руководство по техническому обслуживанию и ремонту скутеров Honda Tact и Honda Dio.
- Издательство: Легион-Автодата.
- Год издания: 2002
- Страниц: 73
- Формат: PDF
- Размер: 16,3 Mb

Руководство по техническому обслуживанию и ремонту скутеров с карбюраторними двигателями объемом 50 до 250 кубических сантиметров. Представлены модели Honda FES 125 Pantheon, FES 250 Foresight, NES 125@125, SCV 100 Lead, SES 125Dylan, SFX 50, SGX 50 Sky, SH 50, SH 125, SZX 50 (X8R-S и X8R-X).
- Издательство: Алфамер
- Год издания: —
- Страниц: 368
- Формат: —
- Размер: —

Инструкции и руководства
На этой странице вы можете скачать инструкции и руководства по ремонту, обслуживанию и эксплуатации мотоциклов, скутеров с объемом двигателя 125 куб. см. Список доступных книг постоянно обновляется. Если вы не нашли нужный мануал для вашей модели мотоцикла, то сообщите нам об этом.
Скачать:
- Руководство по ремонту и обслуживанию Aprilia RS 125 (на английском языке)
- Инструкция по сборке BSE PH10-125
- Руководство по эксплуатации скутера Honda PCX 125/150
- Инструкция по эксплуатации Irbis TTR 125 R
- Руководство по сборке Irbis TTR125R
- Инструкция по эксплуатации, обслуживанию и ремонту Kayo T2 (T150/E250), Kayo T4 (T250R), Kayo T6 (T250RR). Подходит и для Kayo 125.
- Руководство по эксплуатации мотоцикла Patron Aero 125 F
- Руководство по эксплуатации мотоцикла Patron Simpler 125
- Руководство по эксплуатации мотоцикла Stels Trigger 125 EFI
- Руководство по эксплуатации скутеров SYM Jet 4 50/125
- Руководство (техническое обслуживание, эксплуатация) Yamaha YBR 125
- Руководство (техническое обслуживание, эксплуатация) Yamaha YBR 125 Новое!
- Руководство по ремонту Yamaha YBR 125 (полностью на русском языке)
- Руководство по эксплуатации мотоцикла Минск М 125, Минск М 125Х
- Руководство пользователя по эксплуатации мотоцикла Минск С4 125
- Руководство по эксплуатации, обслуживанию и ремонту двигателя (ZSCB125) мотоцикла Minsk C4 125
- Ремонтный мануал на двигатель Минск С4 125 (на английском языке)
Обновлено: 23.09.2016
ОБСЛУЖИВАНИЕ И ЭКСПЛУАТАЦИЯ СКУТЕРОВ, МОТОРОЛЛЕРОВ SKYMOTO QM125T-10D, PATROL II-125 (QM125T-10H), LYNX-125 (QM125T-10E), JOKER-125 (QM125T-10V), DIAMOND-125 (QM125T-G), SKYBIKE VARIANT-125 (QM125T-10R), 125 КУБОВ, 4 ТАКТА

Производитель: JINAN QINGQI MOTORCYCLE CO., LTD
ПРИМЕНИМО В ПОЛНОЙ МЕРЕ К СКУТЕРАМ, МОТОРОЛЛЕРАМ SKYMOTO SKYSTAR 125, MIO-125.
(ПЕРЕВОД РУКОВОДСТВА ПОЛЬЗОВАТЕЛЯ «OWNER”S MANUAL»)
ОБЩИЕ СВЕДЕНИЯ И РЕКОМЕНДАЦИИ.
В скутерах, мотороллерах SKYMOTO QM125T-10D, PATROL II-125, LYNX-125, JOKER-125, DIAMOND-125, SKYSTAR 125, MIO-125, SKYBIKE VARIANT-125, установлен двигатель P152QMI (GY6).
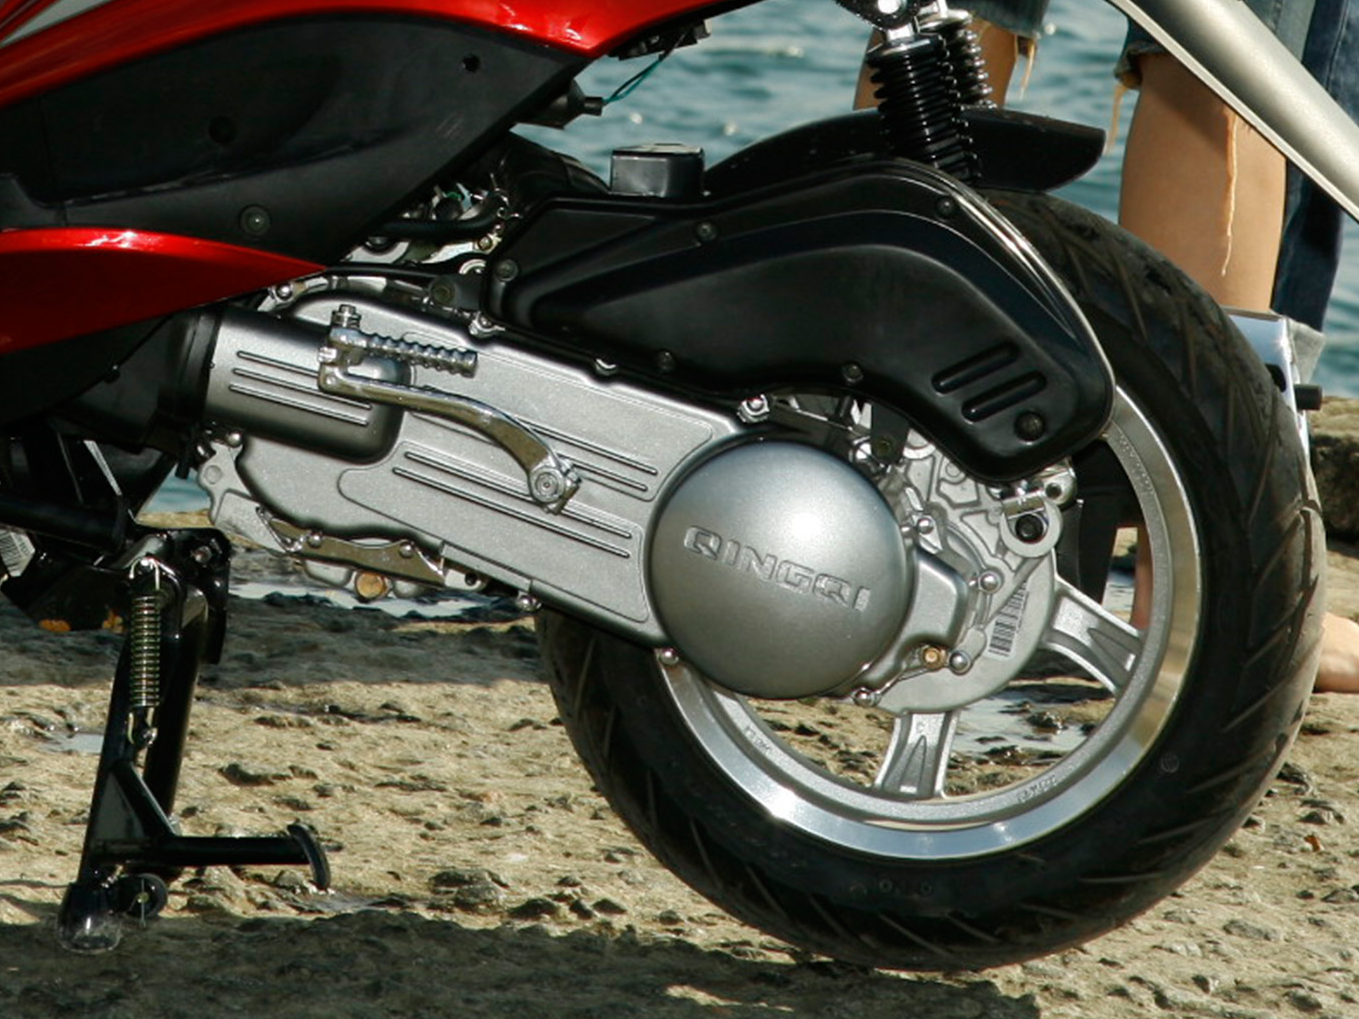
Это одноцилиндровый 4-тактный двигатель воздушного охлаждения типа GY6, диаметр поршня 52,4 мм. Используйте моторное масло для 4-хтактных двигателей SAE15W40 API SF/CD. Подлежит обязательной замене каждые 3000 км.
Если этого масла нет, купите моторное масло аналогичного типа. Спепень вязкости выбираите согласно таблице, которая указана ниже.

Трансмиссионное масло рекомендованное производителем SAE85W-90 GL4/5. Подлежит обязательной замене каждые 6000 км.
Для заправки скутеров SKYMOTO QM125T-10D, PATROL II-125, LYNX-125, JOKER-125, DIAMOND-125, SKYSTAR 125, MIO-125, SKYBIKE VARIANT-125 используйте бензин с октановым числом 95 с малым содержанием свинца, это увеличивает срок службы свечи зажигания, а также срок службы двигателя.
Дополнительный топливный фильтр для тонкой очистки топлива способствует меньшему загрязнению карбюратора, уменьшает вероятность попадания воды и инородных частиц в топливную систему. Не держите ценные, а также хрупкие и чувствительные к высокой температуре предметы в багажнике под сидением.
Давление в холодных шинах 3,5*10 — передняя шина 1,25 кг./см2 , задняя шина 1,75 кг./см2
Давление в холодных шинах 12″ — передняя шина 2,00 кг./см2 , задняя шина 2,25 кг./см2
Давление в холодных шинах 120/90-10″ — передняя шина 2,00 кг./см2 , задняя шина 2,25 кг./см2
Давление в холодных шинах 13″ — передняя шина 2,00 кг./см2 , задняя шина 2,25 кг./см2
Рекомендуется, чтобы шина была заменена, когда глубина протектора шины составляет 1,6мм или меньше.
Ремень вариатора рекомендуется менять каждые 6000 км.
ЭКСПЛУАТАЦИЯ И ОБСЛУЖИВАНИЕ
В таблице технического обслуживания скутеров SKYMOTO QM125T-10D, PATROL II-125, LYNX-125, JOKER-125, DIAMOND-125, SKYSTAR 125, MIO-125, SKYBIKE VARIANT-125 указаны интервалы между обслуживанием в километрах и месяцах. Если ваш скутер, мотороллер используется в тяжелых условиях сильной нагрузки, полного использования ручки газа или используется в пыльной местности, некоторые пункты регламента обслуживания необходимо проводить чаще.
ГРАФИК ТЕКУЩЕГО ОБСЛУЖИВАНИЯ
Аккумуляторная батарея — осмотр каждые 5000 км.
Гайки в крышке цилиндра и глушителе — обтяжка каждые 5000 км.
Головка цилиндра, цилиндр и глушитель — чистка каждые 5000 км.
Карбюратор— осмотр каждые 5000 км.
* Воздушный фильтр — чистка каждые 500 км.
* — Если скутер эксплуатируется в местах с повышенной запыленностью воздуха (на грунтовых дорогах) чистку воздушного фильтра необходимо проводить каждые 200 км.
Свеча зажигания — замена каждые 5000 км.
Зазор клапанов — регулировка каждые 3000 км.
Шланги подачи топлива — осмотр каждые 5000 км., замена каждые 10000 км.
Моторное масло — замена каждые 3000 км.
Насос моторного масла — осмотр и регулировка каждые 5000 км
Тормоза— осмотр и регулировка каждые 5000 км
Передняя вилка — осмотр и регулировка каждые 5000 км
Руль — осмотр и регулировка каждые 5000 км
Задний амортизатор — осмотр и регулировка каждые 5000 км
Покрышки — осмотр каждые 5000 км
Топливный фильтр — замена каждые 5000 км.
Крепежные гайки и болты— осмотр и обтяжка каждые 5000 км
Тросики газа, тормоза — осмотр и смазка каждые 5000 км
АККУМУЛЯТОРНАЯ БАТАРЕЯ
Аккумуляторную батарею скутера , работающую на жидком электролите, необходимо периодически проверять и обслуживать. При проверке, уровень жидкости в аккумуляторе должен сохраниться в середине между верхним и нижним пределом. Если показатели ниже минимального уровня, необходимо добавить дистиллированную воду до максимального уровня.
СВЕЧА ЗАЖИГАНИЯ
На скутеры SKYMOTO QM125T-10D, PATROL II-125, LYNX-125, JOKER-125, DIAMOND-125, SKYSTAR 125, MIO-125, SKYBIKE VARIANT-125 рекомендуется устанавливать свечу зажигания A7RTC. Для чистки свечи используйте металлическую щетку, чтобы удалить нагар каждые 3000 км. Зазор в свече зажигания должен быть 0.6~0.8 мм. Рекомендуется менять свечу зажигания каждые
5 000 км. Если свеча зажигания черная, используется слишком обогащенная рабочая смесь или свеча «холодная». Нормальная свеча зажигания должна быть рыжевато-коричневого цвета. Не зажимайте сильно свечи зажигания, это может повредить головку цилиндра.
РЕГУЛИРОВКА ЗАЗОРОВ КЛАПАНОВ
Клапанный зазор может измениться в период эксплуатации, что приведет к некорректной работе двигателя, а также негативно повлияет на технические характеристики двигателя.. Поэтому, важно регулярно выполнять регулировку зазора клапана в пределах 0,08 — 0,11 мм. Желательно чтобы эту работу выполнял квалифицированный механик или дилер.
ВОЗДУШНЫЙ ФИЛЬТР
Фильтрующий элемент воздушного фильтра на скутерах состоит из пенополиуретана. Если фильтрующий элемент забит пылью, сопротивление впуска увеличится, в результате чего это отразится на мощности и увеличит расход горючего. Проверяйте и чистите фильтрующий элемент воздушного фильтра согласно следующей процедуре:
1) Выкрутить два винта.
2) Переместить два зажима установки.
3) Снять крышку воздушного фильтра.
4) Снять фильтрующий элемент.
МОЙКА ФИЛЬТРУЮЩЕГО ЭЛЕМЕНТА ВОЗДУШНОГО ФИЛЬТРА СКУТЕРА.
1) Наполнить поддон мойки раствором воды и стирального порошка. Погрузить фильтрующий элемент в раствор и вымыть его.
2) Выжать фильтрующий элемент, сжимая его между пальцами обеих рук.
Не крутите, не скручивайте фильтрующий элемент — это образует трещины.
3) Погрузить фильтрующие элементы в раствор моторного масла, потом отжать масло с фильтрующего элемента, чтобы смешать этим немного влагу с маслом.
4) Установить очищенный фильтрующий элемент воздушного фильтра на скутер в обратном порядке. Убедитесь, что фильтрующий элемент расположен плотно и должным образом.
В течение операции по очистке, тщательно исследуйте фильтрующий элемент воздушного фильтра на любые разрывы в материале. Порванный фильтрующий элемент должен быть заменен новым. При использовании мотороллера в пыльных условиях, фильтрующий элемент необходимо чистить чаще. Работа двигателя без фильтрующего элемента увеличит его износ. Всегда проверяйте, чтобы фильтрующий элемент находился в превосходном эксплуатационном состоянии. Срок работы двигателя зависит в значительной степени от этого единственного компонента.
ШЛАНГ ПОДАЧИ ТОПЛИВА
Шланги подачи топлива рекомендуется менять каждые два года, или каждые 10000 км.
КАРБЮРАТОР
Четкая работа карбюратора скутера — одно из основных требований, которое необходимо для вашего двигателя. Есть два способа регулировки работы карбюратора, которые вы можете осторожно применять — обороты холостого хода двигателя и зазор воздушной заслонки. Периодически регулируйте обороты холостого хода двигателя и зазор воздушной заслонки.
РЕГУЛИРОВКА ОБОРОТОВ ХОЛОСТОГО ХОДА ДВИГАТЕЛЯ
1) Запустить двигатель и дать ему нагреться.
2) После того, как двигатель нагреется, провернуть стопорный болт заслонки так, чтобы двигатель мог достигнуть 1400-1600 оборотов в минуту. Обороты холостого хода двигателя должны быть отрегулированы после того, как двигатель нагрелся.
РЕГУЛИРОВКА ТРОСИКА ГАЗА
1) Ослабьте контргайку.
2) Отрегулируйте натяжку троса, вращая регулятор, чтоб получить прогиб
5-10 мм.
3) После наладки провисания, зажмите контргайку.
ПРОВЕРКА И РЕГУЛИРОВКА ТОРМОЗОВ
РЕГУЛИРОВКА ПЕРЕДНЕГО БАБАННОГО ТОРМОЗА
На скутерах установлен передний барабанный тормоз. Зазор между ручкой переднего тормоза и ручкой руля должен быть 10-20мм. Проворачивайте регулировочную гайку переднего тормоза по часовой стрелке или против, до тех пор, пока Вы не достигнете рекомендованного зазора.
ПРОВЕРКА И РЕГУЛИРОВКА ПЕРЕДНЕГО ДИСКОВОГО ТОРМОЗА
Для моделей скутеров, где установлен передний дисковый тормоз.
1. Проверьте, нет ли утечки тормозной жидкости.
Выжмите ручку переднего тормоза и удерживайте ее нажатой в течение минуты. Убедитесь в том, что тормозная жидкость нигде не протекает.
2. Проверка состояния передних тормозных колодок
Выжать тормоз, проверить индикатор износа. Если индикатор почти достиг тормозного диска, поменяйте тормозные колодки переднего дискового тормоза.
3. Проверка уровня тормозной жидкости
В случае нехватки тормозной жидкости, воздух может попасть в тормозную систему, что приведет к неисправности тормозов. Проверьте уровень тормозной жидкости перед управлением и долейте, если это необходимо
1. Чтобы проверить уровень тормозной жидкости, поверните руль, чтобы сделать доступным резервуар тормозной жидкости.
2. Всегда используйте рекомендованную тормозную жидкость. Иначе, резиновые уплотнения будут повреждены, после чего может появиться утечка и неисправность тормоза.
3. Всегда используйте одну и ту же тормозную жидкость. Смесь различных типов тормозной жидкости может произвести к химической реакции и неисправности тормоза!!!
4. Никогда не допускайте попадания тормозной жидкости на тормозной диск.
5. Тормозная жидкость разъедает окрашенные поверхности и пластмассовые детали. Вытрите все чистой тряпкой в случае любого попадания на детали. Рекомендуемый тип тормозной жидкости: DOT 4.
РЕГУЛИРОВКА ЗАДНЕГО ТОРМОЗА
на скутере зазор между ручкой заднего тормоза и ручкой руля должен быть 10-20мм.
Проверка зазора и регулировка:
1) Поворачивайте регулировочную гайку заднего тормоза по- или против часовой стрелки, до тех пор, пока Вы не получите рекомендованный зазор. Поворот регулировочной гайки по часовой стрелке уменьшит зазор.
2) После регулировки зазора, проверьте, нет ли трения при вращении колеса. Проверьте, когда рычаг сильно сжат, что зазор достаточный между захватом тормозной рукоятки.
РЕГУЛИРОВКА ПЛАНКИ УПРАВЛЕНИЯ СЦЕПЛЕНИЯ ПРИВОДА КИК-СТАРТЕР СКУТЕРА.
Если Вы не можете запустить двигатель ножным стартером (рычаг ножного стартера двигается свободно), когда выжата ручка заднего тормоза, значит, пусковой механизм в редукторе не включается. Поверните немного регулировочную гайку тяги сцепления по часовой стрелке. Поворачивайте гайку до тех пор, пока Вы не будете способны запустить мотор ножным стартером с выжатой рукояткой заднего тормоза. Когда ручка заднего тормоза отпущена, рычаг ножного стартера должен двигаться свободно.
Если Вы способны запустить двигатель ножным стартером, когда ручка заднего тормоза отпущена, слегка поверните регулировочную гайку тяги сцепления против часовой стрелки. Поворачивайте гайку, до тех пор, пока Вы больше не будете способны запустить мотор ножным стартером с выпущенной рукояткой заднего тормоза. После регулировки хорошо зажмите две регулировочные гайки тяги сцепления.
ПРОЦЕДУРА ЗАМЕНЫ ТРАНСМИССИОННОГО МАСЛА НА СКУТЕРЕ
Для замены трансмиссионного масла необходимо снять левую крышку картера. Чтобы проверить уровень трансмиссионного масла, нужно выкрутить контрольный винт уровня масла, в это время мотороллер должен стоять на ровной поверхности на центральной подножке. Уровень масла должен быть на уровне с отверстием контрольного винта уровня масла.
Замену масла необходимо проводить при неработающем прогретом двигателе. Выкрутите контрольный винт уровня масла. Подставьте емкость для отработанного масла под сливное отверстие и выкрутите пробку слива масла. Дождитесь, пока все масло вытечет из сливного отверстия. Чтобы полностью слить масло, немного наклоните мотороллер. Закрутите и зажмите пробку сливного отверстия, будьте осторожны, чтобы не повредить уплотнительную шайбу. Наливайте масло в контрольное отверстие до тех пор, пока масло не начнет вытекать. Закрутите контрольный винт и удалите избытки масла из полости вариатора. Установите на место левую крышку картера.
ПРЕДОХРАНИТЕЛЬ
Предохранитель на скутере расположен возле аккумуляторной батареи. Если есть какая-то неисправность в электрической системе, сначала проверьте плавкий предохранитель. В случае, если предохранитель оплавился, замените на новый 15A предохранитель.
ПОДГОТОВКА СКУТЕРОВ, МОТОРОЛЛЕРОВ, МОПЕДОВ К ХРАНЕНИЮ
Если скутер не планируется использовать в течение длительного периода времени (зимнее хранение или по любой другой причине), двигатель нуждается в специальном обслуживании.
1.Поставить мотороллер на его главную опору.
2. Выкрутить свечу, затем с карбюратора снять воздушный фильтр, ручку газа провернуть до остановки, затем нужно одновременно впрыскивать консервант в карбюратор и прокручивать двигатель до появления паров из свечного отверстия. Свечу вкрутить в цилиндр, воздушный фильтр закрепить на карбюратор.
3. Заправить топливный бак доверху топливом, смешанным со стабилизатором горючего. Дренировать карбюратор или завести двигатель на несколько минут, пока стабилизированное горючее не попадет в карбюратор.
4. Снять аккумуляторную батарею с мотороллера, скутера. Очистить внешнюю сторону батареи моющим средством и удалить коррозию от соединений кабеля, проводов и зажимов. Хранить батарею необходимо в комнате с температурой выше нуля. Во время хранения периодически заряжайте батарею (один раз в месяц).
5. Спустить шины до нормального давления.
6. Все пластмассовые и резиновые части рекомендуем покрыть консервирующим средством. Покрыть не окрашенные поверхности жидкостью для профилактики ржавчины. Покрыть окрашенные поверхности автомобильным воском.
ПОРЯДОК РАБОТЫ ПО ПОДГОТОВКЕ СКУТЕРОВ, МОТОРОЛЛЕРОВ К ЭКСПЛУАТАЦИИ
— Вытереть или помыть скутер.
— Выкрутить свечу зажигания, провернуть двигатель несколько раз, нажимая рычаг ножного стартера, и вкрутить свечу зажигания назад.
— Поставить аккумуляторную батарею.
— Подкачать давление в шинах .
— Проверить скутер, мотороллер перед поездкой.

При ремонте скутеров QM125T-10D, PATROL II-125 (QM125T-10H), LYNX-125 (QM125T-10E), JOKER-125 (QM125T-10V), DIAMOND-125 (QM125T-G), SKYBIKE VARIANT-125 (QM125T-10R),, рекомендуем применять только оригинальные запчасти компании JINAN QINGQI MOTORCYCLE CO., LTD. Это поможет продлить срок службы Вашего скутера.