Материал из BikesWiki — энциклопедия японских мотоциклов
Перейти к: навигация, поиск
Honda Shadow 1100 Classic
Ниже представлены прямые ссылки на скачку сервисной документации.
Для Honda Shadow 1100 (VT1100)
- Полный сервисный мануал (Haynes Repair Manual) на Honda Shadow 1100 (1985-1998)
- Сервисный мануал (Service Manual) на Honda Shadow 1100 (1997-2005)
- Руководство пользователя (Owners Manual) на Honda Shadow 1100
Обзор модели
- Honda VT1100 Shadow
Источник — «https://bikeswiki.ru/index.php?title=Honda_Shadow_1100:_мануалы&oldid=9523»
Категория:
- Сервисная документация
- Manuals
- Brands
- Honda Manuals
- Motorcycle
- Shadow VT1100
Manuals and User Guides for Honda Shadow VT1100. We have 1 Honda Shadow VT1100 manual available for free PDF download: Owner’s Manual
Honda Shadow VT1100 Owner’s Manual (225 pages)
Brand: Honda
|
Category: Motorcycle
|
Size: 24.73 MB
Table of Contents
-
Contents
1
-
Honda Shadow VT1100 View
2
-
About this Manual
3
-
Identification Numbers
4
-
Buying Parts
5
-
General Specifications
5
-
Maintenance Techniques, Tools and Working Facilities
7
-
Maintenance and Minor Repair Tool Kit
8
-
Repair and Overhaul Tool Set
11
-
Care and Maintenance of Tools
12
-
Working Facilities
12
-
Safety First
13
-
Motorcycle Chemicals and Lubricants
15
-
Troubleshooting
16
-
Index
25
-
Common Spark Plug Conditions
31
-
Models Covered by this Manual
32
-
Tune-Up and Routine Maintenance
33
-
Honda Shadow Routine Maintenance Intervals
35
-
Introduction to Tune-Up and Routine Maintenance
36
-
Fluid Levels-Check
36
-
Engine Oil
36
-
Brake Fluid
36
-
Clutch Fluid
37
-
Coolant
37
-
Battery Electrolyte Level/Specific Gravity-Check
38
-
Brake Pads and Shoes-Wear Check
38
-
Brake System-General Check
39
-
Brake Pedal Height and Freeplay (Drum Brake Models)-Check and Adjustment
39
-
Tires/Wheels-General Check
39
-
Throttle Cable and Choke Operation-Check and Adjustment
40
-
Clutch-Check and Adjustment
42
-
Final Drive Oil-Check and Change
42
-
Engine Oil/Filter-Change
43
-
Air Filter Element-Servicing
44
-
Cylinder Compression-Check
45
-
Spark Plugs-Replacement
45
-
Lubrication-General
46
-
Idle Speed-Check and Adjustment
47
-
Carburetor Synchronization-Check and Adjustment
47
-
Cooling System-Check
47
-
Cooling System-Draining, Flushing and Refilling
48
-
Evaporative Emission Control System (California Models Only)-Inspection
49
-
Exhaust System-Check
50
-
Steering Head Bearings-Check, Adjustment and Lubrication
50
-
Fasteners-Check
50
-
Fuel System-Check and Filter Replacement
50
-
Suspension-Check
51
-
Suspension Adjustments
51
-
Engine, Clutch and Transmission
53
-
Torque Specifications
59
-
General Information
60
-
Operations Possible with the Engine in the Frame
60
-
Operations Requiring Engine Removal
60
-
Major Engine Repair-General Note
60
-
Engine-Removal and Installation
61
-
Engine Disassembly and Reassembly-General Information
62
-
Cylinder Head Cover and Rocker Arm Assembly-Removal, Inspection and Installation
65
-
Reassembly
68
-
Bleeding the Hydraulic Tappets
68
-
Adjusting the Hydraulic Tappets
68
-
Valve Adjustment Shim Selection Chart
69
-
Camshaft and Sprocket-Removal, Inspection and Installation
70
-
Front Cylinder Camshaft
72
-
Rear Cylinder Camshaft
73
-
Front or Rear Camshaft
73
-
Cam Chain Tensioner-Removal, Inspection and Installation
74
-
Cylinder Head-Removal and Installation
74
-
Valves/Valve Seats/Valve Guides-Servicing
75
-
Cylinder Head and Valves-Disassembly, Inspection and Reassembly
76
-
Cam Chain Guide-Removal, Inspection and Installation
79
-
Cylinder-Removal, Inspection and Installation
79
-
Pistons and Oil Jets-Removal, Inspection and Installation
82
-
Piston Rings-Installation
84
-
Clutch Release System-Bleeding, Removal and Installation
86
-
Hydraulic System (1985 through 1996 VT1100C Models)
86
-
Bleeding the Hydraulic Release System
86
-
Master Cylinder Overhaul
86
-
Clutch Master Cylinder (Hydraulic Clutch Models)-Exploded View
87
-
Master Cylinder Installation
87
-
Stave Cylinder Removal
87
-
Slave Cylinder Overhaul
87
-
Cable System (VT1100C2, VT1100T and 1997-On VT1100C Models
88
-
Slave Cylinder Installation
88
-
Cable Removal and Installation
88
-
Lifter Arm Removal
88
-
Lifter Arm Inspection
89
-
Clutch-Removal, Inspection and Installation
91
-
1985 Through 1996 VT1100C Models
91
-
VT1100C2, VT1100T and 1997-On VT1100C
92
-
Clutch Disc Details
94
-
Oil Pump Drive Chain and Sprockets-Removal, Inspection and Installation
96
-
Primary Drive Gear-Removal, Inspection and Installation
98
-
Cam Chains and Rear Cam Chain Drive Sprocket-Removal, Inspection and Installation
99
-
Gearshift Linkage-Removal, Inspection and Installation
99
-
Externa, Gearshift Linkage (VT1100C Models)
101
-
Internal Gearshift Mechanism
101
-
Oil Pump-Removal, Inspection and Installation
102
-
Oil Pressure Relief Valve Details
103
-
Oil Pump Details
103
-
Crankcase-Disassembly and Reassembly
105
-
Right Crankcase Bolts
105
-
Crankcase Components-Inspection and Servicing
107
-
Main and Connecting Rod Bearings-General Note
107
-
Connecting Rods and Bearings-Removal, Inspection and Installation
107
-
Connecting Rod Bearing Selection Chart
109
-
Connecting Rod Weight Selection
109
-
Connecting Rod Weight Selection Chart
110
-
Crankshaft and Main Bearings-Removal, Inspection and Installation
110
-
Crankcase Bearing Diameter Selection Chart
111
-
Transmission-Removal, Inspection and Installation
112
-
Shift Drum, Shift Forks and Shift Fork Shaft
113
-
Countershaft and Mainshaft
113
-
The Assembled Mainshaft and Countershaft
114
-
Output Gear Assembly-Removal and Installation
115
-
Initial Start-Up after Overhaul
117
-
Recommended Break-In Procedure
117
-
Cooling System
118
-
Radiator Cap-Check
119
-
Radiator-Removal and Installation
119
-
Cooling Fan and Thermostatic Fan Switch-Check and Replacement
120
-
Fan Motor
121
-
Thermostatic Fan Switch
121
-
Coolant Temperature Warning System-Check and Component Replacement
121
-
Coolant Temperature Sensor
122
-
Thermostat-Removal, Check and Installation
122
-
Thermostat Housing-Removal and Installation
123
-
Coolant Reservoir-Removal and Installation
123
-
Water Pump-Check, Removal and Installation
124
-
Removal, Inspection and O-Ring Replacement
124
-
Fuel and Exhaust Systems
128
-
Fuel Tank-Removal and Installation
129
-
Main Fuel Tank
130
-
Auxiliary Fuel Tank
130
-
Fuel Tank-Cleaning and Repair
131
-
Crankcase Emission Control System-Description, Check and Component Replacement
131
-
Crankcase Breather Separator
131
-
Left Crankcase Cover Breather Pipe Adapter O-Ring
131
-
Breather Hoses
132
-
Evaporative Emission Control System (California Models)-Description, Check and Component Replacement
132
-
Purge Control Valve
133
-
Carburetor Air Vent Control Valve (California Models)
133
-
Purge Control Valve (California Models)
134
-
EVAP Canister
134
-
Air Cleaner Housing-Removal and Installation
134
-
Air Intake Ducts-Removal and Installation
135
-
Sub-Air Cleaner-Removal and Installation
135
-
Fuel Pump System-Check and Component Replacement
135
-
Fuel Pump Discharge Volume Check
136
-
Fuel Pump Relay
136
-
Throttle Cables and Grip-Removal, Installation and Adjustment
137
-
Carburetor Overhaul-General Information
137
-
Carburetors-Removal and Installation
138
-
Carburetors-Disassembly, Inspection, Cleaning and Reassembly
140
-
Float Assembly, Jets and Pilot Screw Assembly
143
-
Vacuum Chamber and Air Cut-Off Diaphragm Assemblies
143
-
Idle Fuel/Air Mixture-Adjustment
145
-
Exhaust System-Removal and Installation
145
-
Ignition System
148
-
Ignition System-Check
149
-
Engine will Not Start
149
-
Engine Starts but Misfires
149
-
Ignition Coils-Check and Replacement
150
-
Ignition Coil Test (1985 through 1986 Models)
150
-
Ignition Pulse Generator(S)-Check and Replacement
151
-
Ignition Pulse Generator Details
151
-
Timing Rotor-Removal and Installation
152
-
Ignition Control Module-Check and Replacement
152
-
Ignition Timing-Check
152
-
Steering, Suspension and Final Drive
154
-
Handlebar-Removal and Installation
155
-
Fork Oil Change
156
-
Forks-Removal and Installation
156
-
Forks-Disassembly, Inspection and Reassembly
157
-
Front Fork Details
158
-
Steering Stem and Bearings-Removal, Inspection and Installation
161
-
Steering Stem/Lower Triple Clamp Details
163
-
Rear Shock Absorbers-Removal, Inspection and Installation
164
-
Swingarm-Removal and Installation
165
-
Swingarm Bearings-Replacement
166
-
Brakes, Wheels, Tires and Final Drive
167
-
Brake Pads-Replacement
169
-
Brake Caliper-Removal, Overhaul and Installation
170
-
Front Brake Caliper Assembly
172
-
Brake Disc-Inspection, Removal and Installation
173
-
Brake Master Cylinder-Removal, Overhaul and Installation
174
-
Master Cylinder Details
175
-
Brake Hose-Inspection and Replacement
177
-
Brake System Bleeding
177
-
Drum Brake-Removal, Overhaul and Installation
178
-
Rear Brake Pedal and Linkage-Removal and Installation
180
-
Wheels-Inspection and Repair
182
-
Rear Wheel-Removal and Installation
183
-
Front Wheel-Removal and Installation
184
-
Left Fork Leg Details
184
-
Wheel Bearings-Inspection and Maintenance
185
-
Front Wheel Bearings
185
-
Rear Wheel Bearings
186
-
Tires-General Information
187
-
Frame and Bodywork
189
-
Frame-Inspection and Repair
189
-
Footpegs-Removal and Installation
189
-
Sidestand-Maintenance
190
-
Sidestand-Removal and Installation
190
-
Seat-Removal and Installation
190
-
Steering Head Covers-Removal and Installation
191
-
Side Covers-Removal and Installation
191
-
Saddlebags (VT1100C2 Models)-Removal and Installation
192
-
Rear Fender-Removal and Installation
192
-
Rear Grab Rails and Fender Stays-Removal and Installation
192
-
Windshield (VT1100C2 Models)-Removal and Installation
192
-
Electrical System
193
-
Electrical Troubleshooting
194
-
Battery-Removal, Inspection, Maintenance and Installation
195
-
Battery-Charging
195
-
Conventional Batteries
195
-
Battery Charge-Time Table (Maintenance-Free Batteries)
196
-
Fuses-Check and Replacement
196
-
Lighting System-Check
197
-
Turn Signal Lights/Brake Light/Taillight/License Plate Light
197
-
Instrument and Indicator Lights
197
-
Headlight Bulb-Replacement
197
-
Headlight Aim-Check and Adjustment
198
-
Headlight Assembly-Removal and Installation
198
-
Turn Signal, Tail/Brake Light and License Plate Bulbs-Replacement
198
-
Turn Signal Circuit and Relay-Check
200
-
Brake Light Switches-Check and Replacement
200
-
Turn Signal Assembly-Removal and Installation
201
-
Taillight Assembly-Removal and Installation
202
-
Instruments and Speedometer Cable-Removal and Installation
203
-
Instrument and Indicator Lights-Replacement
203
-
Ignition Main (Key) Switch-Check and Replacement
204
-
Handlebar Switches-Check
205
-
Left Handlebar Switches
205
-
Right Handlebar Switches
206
-
Handlebar Switches-Removal and Installation
206
-
Neutral Switch-Check and Replacement
206
-
Oil Pressure Switch-Check and Replacement
207
-
Sidestand Switch-Check and Replacement
208
-
Clutch Switch-Check and Replacement
208
-
Horn-Check and Replacement
208
-
Starter Relay Switch-Check and Replacement
209
-
Clutch Diode-Check and Replacement
209
-
Starter Motor, Drive Gear and Torque Limiter-Removal and Installation
210
-
Charging System Testing-General Information and Precautions
211
-
Charging System-Check
211
-
Alternator-Check and Replacement
211
-
Flywheel (Rotor)
212
-
Voltage Regulator/Rectifier-Check and Replacement
213
-
Starter Clutch Assembly-Removal, Inspection and Installation
213
-
Wiring Diagrams
215
-
Honda VT1100 Wiring Diagram-1985 and 1986 Models
216
-
Honda VT1100 Wiring Diagram-1985 through 1986 Models
217
-
Honda VT1100 Wiring Diagram-1987 through 1993 Models
218
-
Honda VT1100 Wiring Diagram-1994 and 1995 Models
220
-
Honda VT1100 Wiring Diagram-1996 and Later Models
222
-
Conversion Factors
224
Advertisement
Advertisement
Related Products
-
Honda VT1100C2
-
Honda VT1300CX Fury
-
Honda 1999 Shadow Aero VT1100C3
-
Honda VT1300CXA
-
Honda VT1300CR/CRA
-
Honda VT1300CT/CTA
-
Honda VT750C 2005 Shadow Aero
-
Honda VT600CD Shadow VLX
-
Honda VT750C2B
-
Honda Shadow Aero VT750CS 2018
Honda Categories
Motorcycle
Automobile
Lawn Mower
Offroad Vehicle
Engine
More Honda Manuals
Honda Shadow VT1100: List of Available Documents
Note for Owners:
Guidesimo.com webproject is not a service center of Honda trademark and does not carries out works for diagnosis and repair of faulty Honda Shadow VT1100 equipment. For quality services, please contact an official service center of Honda company. On our website you can read and download documentation for your Honda Shadow VT1100 device for free and familiarize yourself with the technical specifications of device.
More Motorcycle Devices:
-
CSC SG250
SG250 Owner’s and Service Manual www.CSCMotorcycles.com 1 Contents Foreword ……………………………………………………………………………………………………………………………………. 4 Caution and Warning Symbols ………………………………………………………………………………………………………. 4 Section 1: Owner …
SG250 Motorcycle, 111
-
Yingang YG48Q-5A
YG48Q-5AMaintenance ManualForeword 1 Foreword With the ever increasing varieties of motorcycles, new structures and new techniques have increasingly been applied. To help YINGANG TECHNOLOGY Co., Ltd users and maintenance personnel better understand the maintenance, adjustment and repair techniques of YG48Q-5A motorcycle, we prepared this maintenance manual. This manual is expected to facilitate …
YG48Q-5A Motorcycle, 144
-
Beta Rev 4T
betamotor.comOWNER’S MANUALThank you for choosing Betamotor. We hope you enjoy your motorcycle. This booklet provides the information you will needto use and maintain your bike properly.The details and specifications given in this manual do not commit BETAMOTOR S.p.A, who reserve the right to make changes to their models at any time. …
Rev 4T Motorcycle, 36
-
Yamaha 650
1 of 9 YAMAHA 650 BUYER’S GUIDE This guide is intended to aid the purchaser or seller of a Yamaha 650 twin in evaluating the bike and determining the ballpark costs associated with any problems found. This information is only a guideline and cannot protect the buyer from all possible problems. Each buying decision is unique and the buyer must use judgment and consider that the final decisio …
650 Motorcycle, 9
Recommended Documentation:
Сборник руководств на английском языке по эксплуатации и техническому обслуживанию мотоциклов Honda VT750C/VT750C Shadow Aero/VT750C2 Shadow Spirit 750/VT750C2F-9/VT750DC.
- Издательство: Honda Motor Co., Ltd.
- Год издания: 2001-2008
- Страниц: —
- Формат: PDF
- Размер: 13,7 Mb
Руководство на английском языке по эксплуатации и техническому обслуживанию мотоциклов Honda VT1100C2.
- Издательство: Honda Motor Co., Ltd.
- Год издания: 1994
- Страниц: 110
- Формат: PDF
- Размер: 2,6 Mb
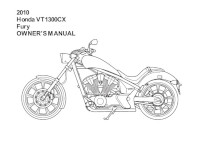
Руководство на английском языке по эксплуатации и техническому обслуживанию мотоциклов Honda VT1300CX Fury 2010 года выпуска.
- Издательство: Honda Motor Co., Ltd.
- Год издания: —
- Страниц: 245
- Формат: PDF
- Размер: 3,2 Mb
Руководство на английском, немецком, французском и испанском языках по техническому обслуживанию и ремонту мотоциклов Honda VT250F и VT250-FII.
- Издательство: Honda Motor Co., Ltd.
- Год издания: —
- Страниц: 326
- Формат: JPG
- Размер: 38,2 Mb

Руководство на английском, немецком и французском языках по техническому обслуживанию и ремонту мотоциклов Honda VT500С.
- Издательство: Honda Motor Co., Ltd.
- Год издания: 1983
- Страниц: 520
- Формат: PDF
- Размер: 112,3 Mb
Руководство на английском, немецком и французском языках по техническому обслуживанию и ремонту мотоциклов Honda VT600С.
- Издательство: Honda Motor Co., Ltd.
- Год издания: 1988
- Страниц: 532
- Формат: PDF
- Размер: 33,0 Mb

Руководство на английском, немецком и французском языках по техническому обслуживанию и ремонту мотоциклов Honda VT600С.
- Издательство: Honda Motor Co., Ltd.
- Год издания: 1993
- Страниц: 46
- Формат: PDF
- Размер: 2,0 Mb
Руководство на английском языке по техническому обслуживанию и ремонту мотоциклов Honda VT600С и VT600CD.
- Издательство: Honda Motor Co., Ltd.
- Год издания: 1998
- Страниц: 447
- Формат: PDF
- Размер: 33,5 Mb
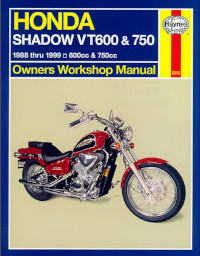
Руководство на английском языке по техническому обслуживанию и ремонту мотоциклов Honda VT600/VT750 Shadow 1988-1999 годов выпуска.
- Издательство: Haynes Publishing
- Год издания: 2003
- Страниц: 225
- Формат: DjVu
- Размер: 71,0 Mb

Руководство на английском языке по техническому обслуживанию и ремонту мотоциклов Honda Shadow VT700С 1983-1985 и VT750C 1983 года выпуска.
- Издательство: Honda Motor Co., Ltd.
- Год издания: 1984
- Страниц: 333
- Формат: PDF
- Размер: 184,8 Mb

Руководство на немецком языке по техническому обслуживанию и ремонту мотоциклов Honda Shadow VT750C и VT750C2v.
- Издательство: Honda Motor Co., Ltd.
- Год издания: 1997
- Страниц: 413
- Формат: PDF
- Размер: 111,5 Mb
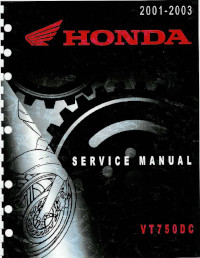
Руководство на английском языке по техническому обслуживанию и ремонту мотоциклов Honda VT750DС 2001-2003 годов выпуска.
- Издательство: Honda Motor Co., Ltd.
- Год издания: 2000
- Страниц: 345
- Формат: PDF
- Размер: 58,9 Mb
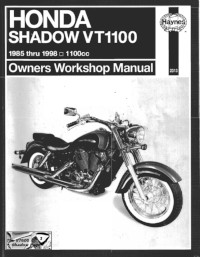
Руководство на английском языке по техническому обслуживанию и ремонту мотоциклов Honda VT1100 Shadow 1985-1998 годов выпуска.
- Издательство: Haynes Publishing
- Год издания: —
- Страниц: 227
- Формат: PDF
- Размер: 23,8 Mb

Руководство по эксплуатации и техническому обслуживанию мотоциклов Honda VT750C.
- Издательство: Honda Motor Co., Ltd.
- Год издания: —
- Страниц: 127
- Формат: PDF
- Размер: 3,7 Mb

Руководство по эксплуатации и техническому обслуживанию мотоциклов Honda VT750C2B и VT750C2S.
- Издательство: Honda Motor Co., Ltd.
- Год издания: —
- Страниц: 163
- Формат: PDF
- Размер: 6,3 Mb

Руководство по эксплуатации и техническому обслуживанию мотоциклов Honda VT1300CXA.
- Издательство: Honda Motor Co., Ltd.
- Год издания: —
- Страниц: 153
- Формат: PDF
- Размер: 17,3 Mb
Table of Contents for Honda Shadow VT1100:
-
Contents Introductory pages About th is manual 0-5 Introduction to the Honda VT11 00 Shadow 0-5 Identification numbers 0-6 Buying parts 0-7 General specifications 0-8 Maintenance techniques, tools and working facilities 0-9 Safety first! 0-15 Motorcycle chemicals and lubricants 0-17 Troubleshooting 0-18 Chapter 1 1 Tune-up and routine maintenance 1-1 Chapter 2 2 Engine, clutch and transmission 2-1 Chapter 3 3 C
-
0-10 Maintenance techniques, tools and working facilities Spark plug gap adjusting tool Control cable pressure luber Tools A selection of good tools is a basic requirement for anyo ne who plans to maintain and repair a motorcycle. For the owner who has few tools, it any, the Initial investment might seem high, but when com- pared to the spiraling costs of routine maintenance and repair, It is a wise one. Ta help the owner decide which tools are needed to perform the tasks detailed in this manual, the following looll
-
0-22 Troubleshooting described in Chapter 3. 4 Faulty radiator cap. Remove the cap and have It pressure checked at a service station. S Coolant passages clogged. Have the entire system dra in ed and flushed, then refill with new coolant. 6 Water pump defective. Remove the pump and check the compo- nents. 7 Clogged radiator fins. Clean them by blowing compressed air through the tins from th
-
Honda VT1100 Shadow V-Twins Owners Workshop Manual by Mike Stubblefield and John H Haynes Member of the Guild of Motoring Writers Models covered: Honda ¥fll00C Shadow. 1099 cc. (1985 through 1990, 1992 through 1996) Honda ¥fll00C2 Shadow American Classic Edition. 1099 cc. (1995 through 1998) Honda ¥fll OOC Shadow Spirit. 1099 cc. (1997 and 1998) Honda ¥fll OOT Shadow 1100 American Classic Edition Tourer. 1099 cc. (1997 and 1998) Haynes Publishing Sparkford Nr
-
0-20 Troubleshooting bustian chamber causes extremely high compression. the head gasket may leak . Retorquing the head is not always sufficient to restore the seal, so gasket replacement is necessary (Chapter 2). 8 Cylinder head warped. This is caused by overheating or improp- erly lightened head boilS. Machine shop resurfacing or head replace- ment is necessary (Chapler 2). 9 Valve spring broken or weak. Caused by component failure or wear; the spring(s) must be replaced (Chapter 2). 10 Valve not seating pr
-
0-14 Maintenance techniques, tools and working facilities duct ion to basic workshop practi ce which will be of interest to a home mechanic working on any type of motorcyc le. Care and maintenance of tools Good tools are expensive. so it makes sense to treat them with respect. Keep them clean and in usable condition and store them properly when not in use . Always wipe off any dirt. grease or metal chip
-
Acknowledgments Our thanks to Honda of Milpitas, Milpitas. CA. for providing the motor- cycles used In these photographs; to Pete Sirelt, service manager. for arranging the facilities and fitting the project Into his shop’s busy schedule; and to Bruce Farley, service technician, for doing the mechanical work and providing vaJuable technical information. Wiring diagrams originated exclusively for Haynes North
-
0-16 Safety first! ids should be done in a well venlllated area. When using cleaning fluids and solvents, read the instructions carefully. Never use materials from unmarked containers — they may give oN poisonous vapors. Never run the engine at a motor vehicle in an enclosed space such as a garage. Exhaust fumes contain carbon monoxide which is extremely POISOnoUS; if you need to run the engine, always do so in the open air or at least have the rear 01 the vehicle outs
-
0-12 Maintenance techniques, tools and working facilities O-to-1 inch micrometer Cylinder surfacing hone Cylinder compression gauge Dial indicator set Multimeter (voIUohm/ammeter) Adjustable spanner
-
0-9 Maintenance techniques, tools and working facilities Basic maintenance techniques There are a number of techniques involved in maintenance and repair that will be referred to throughout this manual. Application of these techniques will enable the amateur mechanic to be more effi- cient, better organized and capable of periorming the various tasks properly, which will ensure that the repair job is thorou
-
Safety first! Professional mechanics are trained In safe working procedures. However enthusiastic you may be about getting on with the job at hand, take the time to enSure that your safety is not put at rIsk. A moment’s lack of attention: can result In an accid;:mt, as can failure to observe simple precautions. There wm always be new ways of having accidents, and the fo!- lowing is not a comprehensive list of ali dangers; it is intended rather to make you aware of ina risks and to encourage a safe a
-
0-24 Troubleshooting Abnormal frame and suspension noise 38 Front end noise Low fluid level or incorrect viscosity oil in forks. This can sound like «spurting» and is usually accompanied by inconsistent fork action (Chapter 6). 2 FOri( spring weak or broken. Makes a clicking or scraping sound. Fork oil, when drained, will have metal particles In it (Chapter 6). 3 Sl.eering head bearings loose or damaged. Cl
-
0-4 Honda Shadow VT11 00
-
Maintenance techniques, tools and working facilities 0-13 Alternator rotor puller open-ended ones, they offer the advantages of both types of wrench. Combination wrench set (6 mm to 22 mm) Adjustable wrench· 8 in Spark plug socket (with rubber insert) Spark plug gap adjusting tool Feeler gauge set Standard screwdriver (5116 in x 6 In) Ph/flips screwdriver (No, 2 x 6 in) Allen (hex) wrench set (4 mm to 12 mm) Combination
-
Troubleshooting 0-21 Poor running or no power at high speed 14 Firing incorrect , Air filter element restricted. Replace filter (Chapter 1). 2 Spark plug fouled , detective or worn out. Clean or replace the spark plugs (Chapter 1) . 3 Spark plug cap or plug wire defective (Chapter 5). 4 SparX plug cap not In good contact (Chapter 5) . 5 Incorrect spark plug. Wrong type, heat range or cap configura- tion. Check and install COrTect plugs listed in Chapter 1. A cold
Questions, Opinions and Exploitation Impressions:
You can ask a question, express your opinion or share our experience of Honda Shadow VT1100 device using right now.

Мотоцикл Honda VT1100 Shadow (1995-2007).
Модель круизера Honda VT1100 Shadow появилась в 1985 году на американском рынке. В те годы модель отличалась высокой мощностью (78 л.с.), двойным дисковым тормозом спереди и гидравлическим сцеплением. Заводское обозначение модели — VT1100C. С 1987 года мотоцикл обновляется внешне и по технической части — увеличивается колесная база, глушители по бокам переносятся на правую сторону, снижается максимальная мощность (до 67 л.с.), значительно снижаются рабочие обороты, что повышает тягу на «низах» и «середине», гидравлическое сцепление уступает место тросиковому. Именно с этой модификации началась популярность модели Honda VT1100 Shadow — версии 1985-1986 годов встречаются довольно редко.
Основные модификации Honda VT1100 Shadow:
➤ Honda VT1100C Shadow (1987-1996) — базовая версия мотоцикла. Отличается литыми колесными дисками, двойным выхлопом справа, топливным баком на 13 литров, 4-ступенчатой КПП и задним барабанным тормозом.
➤ Honda VT1100C Spirit (1997-2007) — преемник прошлой модификации. Визуально очень похож на предшественника. Отличается формой выхлопа, бака и некоторыми визуальными чертами. Из технических отличий следует отметить увеличенный до 15,8 л топливный бак и 5-ступенчатую КПП.
➤ Honda VT1100C2 A.C.E. (1995-1999) — классическая версия мотоцикла. ACE расшифровывает как American Classic Edition. Модель отличается спицованными колесами, удлиненными крыльями, более широкими колесами, задним дисковыми тормозом, коленвалом с одной шатунной рейкой (для усиления вибраций) и мощностью в 53 л.с.
➤ Honda VT1100T A.C.E. Tourer (1998-2001) — туринговая версия прошлой модификации. Отличается наличием пластиковых кофров, ветровым стеклом, литыми колесными дисками, выхлопной системой по бокам и другими колесами.
➤ Honda VT1100C3 Aero (1998-2002) — аналогичная ACE-версии, но с более глубокими крыльями, большой фарой и выхлопом 2-в-1.
➤ Honda VT1100C2 Sabre (2000-2007) — аналогичная ACE-версии, но с двигателем от Spirit и литыми колесными дисками особой формы.
Технические характеристики:
Год выпуска: 1995-2007
Тип двигателя: 2-цилиндровый, V-образный, объем 1099 см³
Охлаждение: жидкостное
ГРМ: Количество клапанов на цилиндр SOHC, 3 клапана на цилиндр (с гидрокомпенсаторами зазоров)
Топливная система: карбюратор, 2x Keihin CV36
Максимальная мощность: 53/67/78 л.с.
Максимальный крутящий момент: 88/91/101 Нм
Сцепление: Многодисковое в масляной ванне
КПП: 5-ступенчатая или 4-ступенчатая для 1987-1996
Тип привода: кардан
Размер передней шины: R18
Размер задней шины: R15
Передние тормоза: 2 диска, 269 мм, 2-поршневые суппорта
Задние тормоза: барабан на VT1100C, 1 диск для VT1100C2/C3/T
Передняя подвеска: 41 мм телескопическая вилка, ход — 150 мм
Задняя подвеска: маятниковая с двумя амортизаторами, ход — 100 мм
Длина мотоцикла: 2325-2485 мм
Ширина мотоцикла: 810-965
Высота по седлу: 660-750 мм
Минимальный дорожный просвет (клиренс): 150 мм
Разгон до 100 км/ч: 6,1 сек
Максимальная скорость: 172 км/ч
Емкость бензобака: 13/15/15.8 л
Масса мотоцикла (сухая): 242-284 кг
Сервисный ремонтный мануал на мотоцикл Honda VT1100 «Shadow», размером 515 стр.
В мануале перечислены все основные параметры мотоцикла, приведены описание процедур регулировки, разборки и сборки всех узлов мотоцикла, а также алгоритм поиска неисправностей и электросхемы.
Также в дополнении к книге есть информационные плакаты А2: ТехноШпаргалка, ЭлектроСхема и Сервисные блокноты.
Download Owners workshop manual of Honda shadow 1100 Motorcycle for Free or View it Online on All-Guides.com.

1

2

3

4

5

6

7

8

9

10

11

12

13

14

15

16

17

18

19

20

21

22

23

24

25

26

27

28

29

30

31

32

33

34

35

36

37

38

39

40

41

42

43

44

45

46

47

48

49

50

51

52

53

54

55

56

57

58

59

60

61

62

63

64

65

66

67

68

69

70

71

72

73

74

75

76

77

78

79

80

81

82

83

84

85

86

87

88

89

90

91

92

93

94

95

96

97

98

99

100

101

102

103

104

105

106

107

108

109

110

111

112

113

114

115

116

117

118

119

120

121

122

123

124

125

126

127

128

129

130

131

132

133

134

135

136

137

138

139

140

141

142

143

144

145

146

147

148

149

150

151

152

153

154

155

156

157

158

159

160

161

162

163

164

165

166

167

168

169

170

171

172

173

174

175

176

177

178

179

180

181

182

183

184

185

186

187

188

189

190

191

192

193

194

195

196

197

198

199

200

201

202

203

204

205

206

207

208

209

210

211

212

213

214

215

216

217

218

219

220

221

222

223

224

225

226

227


You can only view or download manuals with
Sign Up and get 5 for free
Upload your files to the site. You get 1 for each file you add
Get 1 for every time someone downloads your manual
Buy as many as you need


