
Данная инструкция на русском языке предназначена для автомобиля
Kia Picanto SA (2004 — 2010), описывает принцип работы и основные моменты эксплуатации устройства.
Производитель настойчиво рекомендует перед включением автомобиля
внимательно изучить настоящую инструкцию.
Инструкция для автомобиля
представлена в формате PDF. Все современные браузеры уже поддерживают данный формат и сложностей с открытием файла возникнуть не должно.
Но если открыть инструкцию все же не удается, то необходимо установить на компьютер программу для чтения PDF файлов, например, Acrobat Reader. Если у вас возникли сложности с открытием инструкции на смартфоне под управлением Android, нужно установить, например, Adobe Acrobat Reader.
Комментарии (0)
Комментарии про другие Автомобили
Другие Автомобили Kia
Автосервис Москва, Авиамоторная
Автосервис ЮВАО, ВАО — метро Авиамоторная:
Автосервис Серп и Молот | Автосервис Красноказарменная | Автосервис Лефортово
Ближайшие станции метро — Авиамоторная, Площадь Ильича, Шоссе Энтузиастов, Чкаловская, Бауманская, Семеновская. Ближайшие для подъезда улицы — третье транспортное кольцо (ТТК), проезд завода Серп и Молот, Лефортовский вал, Красноказарменная улица.
Автосервис Москва, Октябрьское поле
Автосервис СЗАО, САО — метро Октябрьское поле, станция Зорге МЦК (район Щукино, Хорошёво—Мнёвники)
Ближайшие станции метро — Октябрьское поле, Полежаевская. Станция Московского Центрального Кольца — Зорге. Ближайшие для подъезда улицы — Маршала Бирюзова, Берзарина, Народного ополчения, Зорге, Куусинена, Расплетина.
Автосервис Москва, Измайлово
Автосервис ВАО — метро Соколиная гора (район Измайлово)
Ближайшие станции метро — Соколиная гора, Партизанская, Измайлово, Шоссе Энтузиастов, Черкизовская. Ближайшие для подъезда улицы — Вернисажная, Шоссе Энтузиастов, проспект Будённого, Северо-Восточная хорда, Щербаковская улица, Большая Черкизовская улица.
Автосервис Москва, Щелковская
Автосервис ВАО — метро Щелковская (район Гольяново)
Ближайшие станции метро — Щелковская, Черкизовская, Бульвар Рокоссовского, Первомайская, Партизанская, Измайловская. Ближайшие для подъезда улицы — Щелковское шоссе, Амурская, Сиреневый бульвар, Монтажная улица, Байкальская улица, Открытое шоссе.
AUTO-TEXCENTER.RU
Франшиза автосервиса, Вакансии автосервиса
Ремонт (сервис) корейских автомобилей. Специализированный техцентр (автосервис) в Москве. Copyright © 2000-2023. Все права сохранены. Обращаем Ваше внимание на то, что данный сайт носит исключительно информационный характер и ни при каких условиях не является публичной офертой, определяемой положениями Статьи 437 (2) Гражданского кодекса Российской Федерации.
Компания «АвтоМиг» является НЕОФИЦИАЛЬНЫМ техническим центром по обслуживанию и ремонту автомобилей марок KIA и HYUNDAI. Никакого отношения ни к официальным представителям (дилерам), ни к самим производителям транспортных средств автосервис не имеет! Все упоминания торговых знаков (марок автомобилей) на данном сайте носят исключительно ИДЕНТИФИЦИРУЮЩИЙ характер (используются не в качестве средства индивидуализации), указывают, какие именно автомобили обслуживает техцентр (в соответствии со ст. 1474, 1487 Гражданского Кодекса РФ).
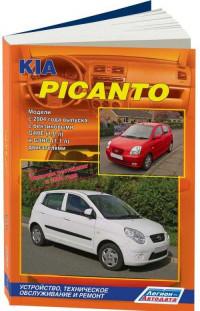
инструкцияKia Picanto (2007)

the
company
Now that you are the owner of a Kia Vehicle, you’ll probably be
asked a lot of questions about your vehicle and the company like
“What is a Kia?,” “Who is Kia?,” “What does ‘Kia’ mean?”
Here are some answers. First, Kia is the oldest car company in
Korea. It’s a company that has thousands of employees focused
on building high-quality vehicles at affordable prices.
The first syllable, Ki, in the word “Kia” means “to arise from to
the world” or “to come up out of to the world.” The second syl-
lable, a, means “Asia.” So, the word Kia, means “to arise from”
or “to come up out of Asia to the world.”
Enjoy your Vehicle!
Посмотреть инструкция для Kia Picanto (2007) бесплатно. Руководство относится к категории автомобили, 6 человек(а) дали ему среднюю оценку 8.5. Руководство доступно на следующих языках: английский. У вас есть вопрос о Kia Picanto (2007) или вам нужна помощь? Задайте свой вопрос здесь
Главная
| Kia | |
| Picanto (2007) | |
| автомобиль | |
| английский | |
| Руководство пользователя (PDF) |
Не можете найти ответ на свой вопрос в руководстве? Вы можете найти ответ на свой вопрос ниже, в разделе часто задаваемых вопросов о Kia Picanto (2007).
Не нашли свой вопрос? Задайте свой вопрос здесь
Всероссийский автомобильный клуб
www.Club-Picanto.ru
2007-2023
Главная страница сайта
Пикантные новости
Статьи клуба
Форум Club-Picanto
Блоги пользователей клуба
Фото альбом Club-Picanto
Видео альбом Club-Picanto
Каталог файлов
Доска Объявлений
Партнеры клуба
Еще
Конкурсы
Гостевая книга
Контакты
RSS
Статистика
Путеводитель по сайту
Справка по сайту
Сейчас в клубе
Онлайн всего: 21
Гостей: 21
Членов клуба: 0
Club-Picanto — Все права защищены ©
Хостинг от uWeb
![]()
KIA, THE COMPANY
Now that you are the owner of a Kia Vehicle, you’ll probably be asked a lot of questions about your vehicle and the company like “What is a Kia?,” “Who is Kia?,” “What does ‘Kia’ mean?”
Here are some answers. First, Kia is the oldest car company in Korea. It’s a company that has thousands of employees focused on building high-quality vehicles at affordable prices.
The first syllable, Ki, in the word “Kia” means “to arise from to the world” or “to come up out of to the world.” The second syllable, a, means “Asia.” So, the word Kia, means “to arise from” or “to come up out of Asia to the world.”
Enjoy your Vehicle! 

FOREWORD
Thank you for choosing a Kia vehicle.
When you require service, remember that your dealer knows your vehicle best. Your dealer has factory-trained technicians, recommended special tools, genuine Kia replacement parts and is dedicated to your complete satisfaction.
Because subsequent owners require this important information as well, this publication should remain with the vehicle if it is sold.
This manual will familiarize you with operational, maintenance and safety information about your new vehicle. It is supplemented by a Warranty and Maintenance book that provides important information on all warranties regarding your vehicle. If your vehicle is equipped with an audio system, you will also have a Kia Integrated Audio System manual explaining its operation. We urge you to read these publications carefully and follow the recommendations to help assure enjoyable and safe operation of your new vehicle.
Kia offers a great variety of options, components and features for its various models.
Therefore, the equipment described in this manual, along with the various illustrations, may not all be applicable to your particular vehicle.
The information and specifications provided in this manual were accurate at the time of printing. Kia reserves the right to discontinue or change specifications or design at any time without notice and without incurring any obligation. If you have questions, always check with your Kia Dealer.
We assure you of our continuing interest in your motoring pleasure and satisfaction in your Kia vehicle.
© 2007 Kia Motors Corp.
All rights reserved. Reproduction by any means, electronic or mechanical, including photocopying, recording, or by any information storage and retrieval system or translation in whole or part is not permitted without written authorization from Kia Motors Corporation.
Printed in Korea
i

|
Introduction |
1 |
|
|
Your vehicle at a glance |
2 |
|
|
Knowing your vehicle |
3 |
|
TABLE OF CONTENTS 
|
Driving your vehicle |
4 |
|
|
Driving tips |
5 |
|
|
In case of an emergency |
6 |
|
|
Maintenance |
7 |
|
|
Specifications |
8 |
|
ii

How to use this manual / 1-2
Vehicle break-in process / 1-3

INTRODUCTION
HOW TO USE THIS MANUAL
We want to help you get the greatest possible driving pleasure from your vehicle. Your Owner’s Manual can
1assist you in many ways. We strongly recommend that you read the entire manual. Especially, in order to
2minimize the chance of death or injury, you must read the WARNING
|
3 |
and CAUTION |
sections |
spread |
|
|
throughout the manual. |
||||
|
Illustrations complement the |
words |
|||
|
4 |
||||
|
in this manual to best explain how to |
||||
|
enjoy your vehicle. By reading your |
||||
|
5 |
manual, you learn about features, |
|||
|
important safety |
information, and |
driving tips under various road condi-
6tions.
7
8
9
The general layout of the manual is provided in the Table of Contents. A good place to start is the index; it has an alphabetical listing of all information in your manual.
Sections: This manual has eight sections plus an index. Each section begins with a brief list of contents so you can tell at a glance if that section has the information you want.
You’ll find various WARNING’s, CAUTION’s, and NOTICE’s in this manual. These were prepared to enhance your personal safety. You should carefully read and follow ALL procedures and recommendations provided in these WARNING’s,
CAUTION’s and NOTICE’s.
 WARNING
A WARNING indicates a situation in which serious bodily injury or death could result if the warning is ignored.
CAUTION
A CAUTION indicates a situation in which personal injury, perhaps severe, could result if the caution is ignored.
NOTICE
A NOTICE indicates a situation in which damage to your vehicle could result if the notice is ignored.
1 2

VEHICLE BREAK-IN PROCESS
No special break-in period is needed. By following a few simple precautions for the first 1,000 km (600 miles) you may add to the performance, economy and life of your vehicle.
•Do not race the engine.
•Do not maintain a single speed for long periods of time, either fast or slow. Varying engine speed is needed to properly break-in the engine.
•Avoid hard stops, except in emergencies, to allow the brakes to seat properly.
•Avoid full-throttle starts.
INTRODUCTION
1
2
3
4
5
6
7
8
9
1 3

Your vehicle at a glance
Interior overview / 2-2
Instrument panel overview / 2-3
Engine compartment / 2-4

Your vehicle at a glance
INTERIOR OVERVIEW
1
2
3
4
5
6
7
8
9
|
1. |
Door lock/unlock lever ………………….. |
3- 9 |
|
2. |
Outside rearview mirror control |
|
|
switch* ……………………………………….. |
3-81 |
|
|
3. Power window switches* ………………. |
3-13 |
|
|
4. |
Master power window control lock*… |
3-14 |
|
5. Vent controls ………………………………. |
4-46 |
|
|
6. |
Instrument cluster ……………………….. |
4-23 |
|
7. |
Steering wheel ……………………………. |
4-20 |
|
8. |
Steering wheel tilt* ………………………. |
4-21 |
|
9. |
Hood release lever ……………………… |
3-75 |
|
10. Fuel filler lid release lever …………… |
3-76 |
* : if equipped
1SAE0004/1SAA0005/1SAA0006
2 2

Your vehicle at a glance
INSTRUMENT PANEL OVERVIEW
|
1. |
Driver’s Air Bag*………………………….. |
3-58 |
|
2. |
Light control / Turn signals ……………. |
4-33 |
|
3. |
Instrument cluster ……………………….. |
4-23 |
|
4. Wiper/Washer……………………………… |
4-38 |
|
|
5. |
Ignition switch……………………………… |
4- 2 |
|
6. Hazard……………………………………….. |
4-42 |
|
|
7. |
Climate control system…………………. |
4-43 |
|
8. |
Shift lever …………………………………… |
4- 6 |
|
9. |
Passenger’s airbag* …………………….. |
3-59 |
|
10. Glove box …………………………………. |
3-84 |
* : if equipped
1SAA0003
2 3

Your vehicle at a glance
ENGINE COMPARTMENT
1
2
3
4
5
6
7
8
9
|
1. |
Power steering fluid reservoir |
………..7-23 |
|
2. |
Engine oil filler cap………………………. |
7-14 |
|
3. |
Brake fluid reservoir …………………….. |
7-20 |
|
4. |
Air cleaner ………………………………….. |
7-31 |
|
5. Fuse box ……………………………………. |
6- 7 |
|
|
6. |
Negative battery terminal ……….. |
6 — 5/7-37 |
|
7. |
Positive battery terminal …………. |
6 — 5/7-37 |
|
8. |
Auto transaxle oil dipstick* ……………. |
7-27 |
|
9. |
Radiator cap……………………………….. |
7-19 |
|
10. Engine oil dipstick ……………………… |
7-14 |
|
|
11. Engine coolant reservoir …………….. |
7-18 |
12. Windshield washer fluid reservoir …7-30
* : if equipped
1SAA0007
2 4
![]()
Keys / 3-2
Remote keyless entry / 3-4
Immobilizer system / 3-7
Door locks / 3-8
Knowing your vehicle
Window / 3-13 Seat / 3-16 Safety belts / 3-32
Airbags-supplemental restraint system / 3-56 Hood / 3-75
Fuel filler lid / 3-76 Mirrors / 3-79 Interior lights / 3-82
Storage compartment / 3-83 Interior features / 3-86 Luggage net / 3-90 Antenna / 3-91

Knowing your vehicle
KEYS
1
2
3
The key code number is stamped on
5the plate attached to the key set. Should you lose your keys, this number will enable an authorized Kia
6Dealer to duplicate the keys easily.
Remove the plate and store it in a safe place. Also, record the code
7number and keep it in a safe and handy place, but not in the vehicle.
8
9

1SAA2001
Key operations
Master key
Used to start the engine, lock and unlock the doors.
Transmitter
Used to lock and unlock the doors (if equipped).
WARNING — Ignition key
Leaving children unattended in a vehicle with the ignition key is dangerous even if the key is not in the ignition. Children copy adults and they could place the key in the ignition. The ignition key would enable children to operate power windows or other controls, or even make the vehicle move, which could result in serious bodily injury or even death. Never leave the keys in your vehicle with unsupervised children.
3 2

CAUTION
Use only Kia original parts for the ignition key in your vehicle. If an aftermarket key is used, the ignition switch may not return to ON after START. If this happens, the starter will continue to operate causing damage to the starter motor and possible fire due to excessive current in the wiring.
Knowing your vehicle
1
2
3
4
5
6
7
8
9
3 3

Knowing your vehicle
REMOTE KEYLESS ENTRY (IF EQUIPPED)
1SAA2002
Lock/unlock button
•Lock
All doors are locked if the lock/unlock button ( ) is pressed.
•Unlock
All doors are unlocked if the lock/unlock button ( ) is pressed again.
After depressing this button, the doors will be locked automatically unless you open them within 30 seconds.
NOTICE
The transmitter will not work if any of following occur:
—The ignition key is in ignition switch.
—You exceed the operating distance limit (5 m).
—The battery in the transmitter is weak.
—Other vehicles or objects may be blocking the signal.
—The weather is extremely cold.
—The transmitter is close to a radio transmitter such as a radio station or an airport which can interfere with normal operation of the transmitter.
When the transmitter does not work correctly, open and close the door with the ignition key. If you have a problem with the transmitter, contact an authorized Kia Dealer.
3 4

NOTICE
Keep the transmitter away from water or any liquid. If the keyless entry system is inoperative due to exposure to water or liquids, it will not be covered by your manufacturer vehicle warranty.
Operational distance may vary depending upon the area the transmitter is used in. For example, if the vehicle is parked near police stations, government and public offices, broadcasting stations, military installations, airports, or transmitting towers, etc.
1SAA2003
Battery replacement
Transmitter uses a 3 volt lithium battery which will normally last for several years. When replacement is necessary, use the following procedure.
Knowing your vehicle
1.Remove the screw ( ) using a cross-tip screwdriver.
2.Insert a slim tool into the slot and gently pry open the transmitter center cover ( ).
3.Remove the battery cover ( ).
4.Replace the battery with new one. When replacing the battery, make sure the battery positive “+” symbol faces up as indicated in the illustration.
5.Install the battery in the reverse order of removal.
3 5

Knowing your vehicle
NOTICE
The keyless entry system transmitter is designed to give you years of
1troublefree use, however it can malfunction if exposed to moisture or
2static electricity. If you are unsure how to use your transmitter or
replace the battery, contact an
3authorized Kia dealer.
For replacement transmitters, see an
4Authorized Kia Dealer for reprogramming.
NOTICE
•Using the wrong battery can cause the transmitter to malfunction. Be sure to use the correct battery.
•To avoid damaging the transmitter, don’t drop it, get it wet, or expose it to heat or sunlight.
3 6

IMMOBILIZER SYSTEM (IF EQUIPPED)
Your vehicle is equipped with an electronic engine immobilizer system to reduce the risk of unauthorized vehicle use.
Your immobilizer system is comprised of a small transponder in the ignition key, and antenna coil in the key cylinder and ICU (Immobilizer Control Unit) in the steering shaft.
With this system, whenever you insert your ignition key into the ignition switch and turn it to ON, the antenna coil in the ignition switch receives a signal from the transponder in the ignition key and then sends the signal to the ECU (Engine Control Unit).
The ECU checks the signal whether the ignition key is valid.
If the key is determined to be valid, the engine will start.
If the key is determined to be invalid, the engine will not start.
To deactivate the immobilizer system:
Insert the ignition key into the key cylinder and turn it to the ON position.
To activate the immobilizer system:
Turn the ignition key to the OFF position. The immobilizer system activates automatically. Without a valid ignition key for your vehicle, the engine will not start.
NOTICE
When starting the engine, do not use the key with other immobilizer keys around.
Otherwise the engine may not start or may stop soon after it starts. Keep each key separately not to have any malfunction after you receive your new vehicle.
Knowing your vehicle
CAUTION
|
The transponder in your ignition |
|||||
|
key is an important part of the |
1 |
||||
|
immobilizer |
system. |
It |
is |
||
|
designed to give years of trou- |
|||||
|
2 |
|||||
|
blefree |
service, however |
you |
|||
|
should avoid exposure to mois- |
|||||
|
ture, static electricity and rough |
3 |
||||
|
handling. Immobilizer |
system |
||||
|
malfunction could occur. |
|||||
|
4 |
|||||
|
CAUTION |
|||||
|
5 |
|||||
|
Do not change, alter or adjust |
|||||
|
the immobilizer system because |
|||||
|
it could cause the immobilizer |
6 |
||||
|
system |
to |
malfunction |
and |
||
|
should only be serviced by an |
|||||
|
7 |
|||||
|
authorized Kia dealer. |
|||||
|
Malfunctions caused by improp- |
|||||
|
er alterations, adjustments or |
8 |
|
|
modifications to the immobilizer |
||
|
system are not covered by your |
||
|
vehicle manufacturer warranty. |
9 |
|
3 7

Knowing your vehicle
DOOR LOCKS
1
|
Unlock |
||||||
|
2 |
Lock |
|||||
|
3 |
||||||
|
4 |
||||||
|
1SAA2004 |
Operating door locks from
5outside the vehicle
|
• Turn the key toward rear of vehicle |
||
|
6 |
to unlock and toward front of vehi- |
|
|
cle to lock. |
||
|
• Doors can also be locked and |
||
|
7 |
||
|
unlocked with the transmitter key. |
||
|
8 |
||
|
9 |
||
•Once the doors are unlocked, it may be opened by pulling the door handle.
•When closing the door, push the door by the hand. Make sure that doors are closed securely.
•Central door locks (if equipped)
If you lock/unlock the front door with a key, all vehicle doors will lock/unlock automatically.
1SA2005
To lock a door without the key, push the inside door lock lever ( ) to the “LOCK” position and close the door ( ).
NOTICE
Always remove the ignition key, engage the parking brake, close all windows and lock all doors when leaving your vehicle unattended.
3 8

NOTICE
If the door is locked/unlocked multiple times in rapid succession with either the vehicle key or door lock lever, the system may stop operating temporarily in order to protect the circuit and prevent damage to system components.
Knowing your vehicle
|
• Central door locks (if equipped) |
|||||||
|
If you lock/unlock the front door |
|||||||
|
with door lock lever, all vehicle |
|||||||
|
1 |
|||||||
|
doors will lock/unlock automatical- |
|||||||
|
ly. |
|||||||
|
Unlock |
|||||||
|
2 |
|||||||
|
Lock |
|||||||
|
3 |
|||||||
|
4 |
|||||||
|
1SAA2006 |
|||||||
|
Operating door locks from |
|||||||
|
inside the vehicle |
5 |
• To unlock a door, pull the door lock
|
lever to the “UNLOCK” position. |
6 |
|
|
• To lock a door, push the door lock |
||
|
lever ( ) to the “LOCK” position. |
||
|
7 |
||
|
• To open a door, pull the door han- |
||
|
dle ( ) outward. |
||
|
8 |
||
|
9 |
||
3 9

Knowing your vehicle
CAUTION
•The doors should always be
1 fully closed and locked while the vehicle is in motion to pre-
vent accidental opening of the
2door. Locked doors will also
discourage potential intruders when the vehicle stops or
3slows.
• Be careful when opening
4doors and watch for vehicles,
motorcycles, bicycles or pedestrians approaching the
5vehicle in the path of the door. Opening a door when some-
6thing is approaching can cause damage or injury.
7
8
9
 WARNING
Leaving your vehicle unlocked can invite theft or possible harm to you or others from someone hiding in your vehicle while you are gone. Always remove the ignition key, engage the parking brake, close all windows and lock all doors when leaving your vehicle unattended.
WARNING — Unattended children
An enclosed vehicle can become extremely hot, causing death or severe injury to unattended children or animals who cannot escape the vehicle. Furthermore, children might operate features of the vehicle that could injure them, or they could encounter other harm, possibly from someone gaining entry to the vehicle. Never leave children or animals unattended in your vehicle.
3 10
![]()
1SAA2008
Rear door child safety lock
The child safety lock is provided to help prevent children from accidentally opening the rear doors from inside the vehicle. The rear door safety locks should be used whenever children are in the vehicle.
1.Open the rear door.
2.Push the child safety lock located on the rear edge of the door to the
“lock” position. When the child safety lock is in the “lock (  )” position, rear door will not open when the inner door handle is pulled inside the vehicle.
3.Close the rear door.
4.To open the rear door, pull the outside door handle.
Even though the doors may be unlocked, the rear door will not open by pulling the inner door handle ( ) until rear door child safety lock is unlocked (  ).
).
Knowing your vehicle
|
WARNING — Rear door |
|||
|
locks |
|||
|
1 |
|||
|
If children accidentally open the |
|||
|
rear doors while the vehicle is in |
|||
|
motion, they could fall out and |
2 |
||
|
be severely injured or killed. To |
|||
|
prevent children from opening |
|||
|
the rear doors from the inside, |
3 |
||
|
the rear door safety locks |
|||
|
should be used whenever chil- |
|||
|
4 |
|||
|
dren are in the vehicle. |
|||
|
5 |
|||
|
6 |
|||
|
7 |
|||
|
8 |
|||
|
9 |
|||
3 11

Knowing your vehicle
|
Unlock |
|||||
|
Lock |
|||||
1SAE2009
Rear hatch
Opening the rear hatch
|
• |
Rear hatch is locked or unlocked |
|
|
6 |
with a key. |
|
|
• |
To open the rear hatch, insert the |
|
key into the lock ( ) and turn it to
7the unlock position ( ), pull up the rear hatch by pressing the handle
8 ( ).
• You can also lock/unlock the latch (but not release it) with the central
9 door lock system (if equipped).
•If unlocked, the rear hatch can be opened by pressing the handle ( ) and pulling the hatch up.
3 12

Knowing your vehicle
Power windows (if equipped)
Driver’s door power window switch
Front passenger’s door power window switch
Rear door (left) power window switch (if equipped)
Rear door (right) power window switch (if equipped)
Window opening and closing
Automatic power window down (Driver’s window, if equipped)
Power window lock switch (if equipped)
•Power window timer (if equipped)
The power windows can be operated for approximately 30 seconds after the ignition key is removed or turned to the ACC or LOCK position. However, if the front doors are opened, the power windows cannot be operated even within the 30 seconds after the ignition key removal.
3 13

|
Knowing your vehicle |
||||
|
Power windows (if equipped) |
||||
|
The ignition switch must be in the ON |
||||
|
position for power windows to oper- |
||||
|
1 |
||||
|
ate. Each door has a power window |
||||
|
switch that controls that door’s win- |
||||
|
2 |
dow. However, the driver has a power |
|||
|
window lock switch which can block |
||||
|
the operation of passenger windows. |
||||
|
3 |
||||
|
If you notice buffeting and pulsation |
||||
|
(wind shock) with either side window |
||||
|
4 |
open, you should open the opposite |
|||
|
window slightly to reduce the condi- |
tion.
5NOTICE
To prevent the power window sys- 6 tem from the possibility of damage, do not open or close two windows at
7the same time. This will also ensure the longevity of the fuse.
8
9
CAUTION
•Make sure heads and hands are safely out of the way before closing a window.
•Do not allow children to play with the power windows. Keep the driver’s door power window lock switch in the LOCK position (depressed). Serious injury can result from unintentional window operation by the child.
•Do not extend face or arms outside through the window opening while driving.
•Always double check to make sure all arms, hands and other obstructions are safely out of the way before closing a window.
1SAA2011
1SAA2012
Window opening and closing
The driver’s door has a master power window switch that controls all the windows in the vehicle. To open or close a window, press down ( ) or pull up ( ) the front portion of the corresponding switch.
3 14

Knowing your vehicle
Automatic power window down (driver’s window, if equipped)
Depressing the power window switch momentarily to the second detent position ( ) completely lowers the driver’s window even when the switch is released. To stop the window at the desired position while the window is in operation, pull up the switch momentarily to the opposite direction of the window movement.
If the battery has been discharged or disconnected, the automatic power window system must be reset as follows:
1.Turn the ignition key to ON position.
2.Close each window and continue pulling up on each power window switch for at least 0.5 second after the window is completely closed.
1SAA2013
Power window lock switch (if equipped)
•The driver can disable the power window switches on a passenger door by depressing the power window lock switch located on the driver’s door to LOCK (pressed).
•When the power window lock switch is ON, the driver’s master control cannot operate the passenger door power windows either.
1SAA2014
Manual windows (if equipped)
Use the window crank to open and close each window.
3 15

Knowing your vehicle
SEAT
1
2
3
4
5
6
7
8
9
1SAE2026
Driver’s seat
Seat adjustment, forward / backward (see page 3- 18)
Seatback recliner (see page 3- 19)
Seat heater switch*(see page 3- 20)
Headrest adjustment
(see page 3- 21)
Front passenger seat
Seat adjustment, forward / backward (see page 3- 22)
Seatback recliner (see page 3- 23)
Seat heater switch*(see page 3- 24)
Headrest adjustment
(see page 3- 25)
Rear seat
Folding the rear seat*
(see page 3- 26)
Headrest adjustment*
(see page 3- 31)
* : if equipped
3 16

 WARNING
•Loose objects in the driver’s foot area could interfere with the operation of the foot pedals, possibly causing an accident. Loose objects might interfere with the seat slide mechanism. Do not place anything under the front seats.
•Children should never be left unattended in the car.
WARNING — Driver’s seat
•Never attempt to adjust seat while the vehicle is moving. This could result in loss of control, and an accident causing death, serious injury, or property damage.
•Do not allow anything to interfere with the normal position of the seatback. Storing items against a seatback or in any other way interfering with proper locking of a seatback could result in serious or fatal injury in a sudden stop or collision.
(Continued)
Knowing your vehicle
(Continued)
• Always drive and ride with
|
your seatback upright and the |
1 |
|
|
lap portion of the safety belt, |
||
|
or lap belt, snug and low |
||
|
2 |
||
|
across the hips. This position |
||
|
puts your safety belts in the |
||
|
best position to protect you in |
||
|
3 |
||
|
case of an accident. |
||
|
• In order to avoid unnecessary |
||
|
airbag injuries including the |
4 |
|
|
possibility of severe injury or |
||
|
death, always sit as far back |
5 |
|
|
as possible from the steering |
|
wheel so that your chest is |
||
|
away at least 250 mm (10 inch- |
6 |
|
|
es) away from the steering |
||
|
wheel. |
||
|
7 |
||
|
8 |
||
|
9 |
||
3 17

|
Knowing your vehicle |
||||||
|
2. Slide the seat to the position you |
||||||
|
desire. |
||||||
|
3. Release the lever and make sure |
||||||
|
1 |
||||||
|
the seat is locked in place. |
||||||
|
2 |
||||||
|
3 |
||||||
|
4 |
||||||
|
1SAA2027 |
||||||
|
Driver’s seat adjustment |
||||||
5Adjusting the seat forward and backward
6To move the seat forward or backward:
1. Pull the seat slide adjustment
7lever under the front edge of the seat cushion up and hold it.
8
9
Adjust the seat before driving, and make sure the seat is locked securely by trying to move forward and backward without using the control knob. If the seat moves, it is not locked properly.
3 18

1SAA2029
Adjusting the driver’s seatback recliner
To recline the seatback:
1.Lean forward slightly and lift up on the seatback recline lever located on the outside of the seat, at the rear.
2.Carefully lean back on the seat and adjust the seatback of the seat to the position you desire.
3.Release the lever and make sure the seatback is locked in place. (The lever MUST return to its original position for the seatback to lock.)
Knowing your vehicle
 WARNING
|
Driving or riding in a vehicle |
||||||
|
1 |
||||||
|
with |
a front |
seatback |
reclined |
|||
|
could lead to serious or fatal |
||||||
|
injury in an accident. If a front |
2 |
|||||
|
seat is reclined during an acci- |
||||||
|
dent, the occupant’s hips may |
||||||
|
slide |
under the |
lap portion of |
3 |
|||
|
the safety belt applying great |
||||||
|
force |
to |
the |
unprotected |
|||
|
4 |
||||||
|
abdomen or |
neck. Serious or |
|||||
|
fatal |
internal injuries could |
|||||
|
result. Keep the seatbacks in a |
5 |
|||||
|
comfortably |
upright |
position |
||||
|
whenever the vehicle is in |
|
|
motion. |
6 |
|
7 |
|
|
8 |
|
|
9 |
|
3 19

Knowing your vehicle
1
2
3
Warming the driver’s seat
5(if equipped)
The front seats can be electrically heated individually when the ignition
6switch is ON. When you depress the seat warmer switch, a thermostat
7regulates seat temperature. To deactivate the heating system, depress the switch once again.
8
9
NOTICE
•The seat warmer will not operate if ambient temperature is above 37±3 °C (98.5±5.5°F).
•If the seat warmer doesn’t work when the ambient temperature is below 28±3 °C (82.5±5.5°F), have the system checked by an authorized dealer.
•When cleaning the seats, do not use an organic solvent such as thinner, benzene, alcohol and gasoline. Doing so may damage the surface of the heater or seats.
•To prevent overheating the seat warmer, do not place blankets, cushions or seat covers on the seats while the seat warmer is in operation.
•Do not place heavy or sharp objects on seats equipped with seat warmers. Damage to the seat warming components could occur.
 WARNING
Passengers should use extreme caution when using seat warmers due to the possibility of excess heating or burns. In particular, the following types of passengers should exercise extreme care:
1.Infants, children, elderly or handicapped persons, or hospital outpatients
2.Persons with sensitive skin or those that burn easily
3.Fatigued individuals
4.Intoxicated individuals
5.Individuals taking medication that can cause drowsiness or sleepiness (sleeping pills, cold tablets, etc.)
3 20
![]()
Knowing your vehicle
1SAA2033
Headrest adjustment
Adjusting the height up and down
The headrest not only provides comfort for the driver and passengers, but also helps to protect the head and neck in the event of a collision.
To raise the headrest, pull it up to the desired position ( ). To lower the headrest, push and hold the release button ( ) on the headrest support and lower the headrest to the desired position ( ). For best protection, adjust the headrest so its center is as high as your ears. Also adjust the headrest so its distance from the head is as wide as your fist.
1SAA2034
Removal
To remove the headrest, raise it as far as it can go then press the release lever ( ) while pulling upward ( ).
 WARNING
|
To reduce the risk of head and |
|||
|
1 |
|||
|
neck injuries, do not drive the |
|||
|
vehicle |
with the headrest |
||
|
removed |
or improperly posi- |
2 |
|
|
tioned. |
|||
|
Do not adjust the driver’s head- |
|||
|
3 |
|||
|
rest while driving. |
|||
|
4 |
|||
|
5 |
|||
|
6 |
|||
|
7 |
|||
|
8 |
|||
|
9 |
|||
3 21

Knowing your vehicle
1
2
3
Adjusting the front passenger
5seat
|
Forward/backward position |
|
|
6 |
adjustment |
|
To move the seat forward or back- |
ward:
71. Pull the seat slide adjustment lever (under the front edge of the
8seat cushion) up and hold it.
2.Slide the seat to the position you desire.
93. Release the lever and make sure the seat is locked in place.
Adjust the seat before driving, and make sure the seat is locked securely by trying to move forward and backward without using the control knob. If the seat moves, it is not locked properly.
 WARNING
In order to avoid unnecessary airbag injuries including the possibility of severe injury or death, always sit as far back as possible by moving the seat far back, while still maintaining good vehicle control. Serious injury or death may be caused due to the deployment of the passenger’s airbag.
3 22

1SAA2036
Adjusting the seatback recliner
To recline the seatback:
1.Lean forward slightly and lift up on the seatback recline lever located on the outside of the seat, toward the rear.
2.Carefully lean back on the seat and adjust the back of the seat to the position you desire.
3.Release the lever and make sure the seatback is locked in place. (The lever MUST return to its original position for the seatback to lock.)
Knowing your vehicle
 WARNING
|
Riding in a vehicle with a front |
|||
|
1 |
|||
|
seatback reclined could lead to |
|||
|
serious or fatal injury in an acci- |
|||
|
dent. If a front seat is reclined, |
2 |
||
|
the occupant’s hips may slide |
|||
|
under the lap portion of the |
|||
|
safety belt applying great force |
3 |
||
|
to the unprotected abdomen or |
|||
|
neck. Serious or fatal internal |
|||
|
4 |
|||
|
injuries could result. Keep the |
|||
|
seatbacks in a |
comfortably |
||
|
upright position |
whenever the |
||
|
5 |
|||
|
vehicle is in motion. |
|||
|
6 |
|||
|
7 |
|||
|
8 |
|||
|
9 |
|||
3 23

Knowing your vehicle
1
2
3
Warming the front passenger
5seats (if equipped)
The front seats can be electrically heated individually when the ignition
6switch is ON.
When you depress the seat warmer
7switch, a thermostat regulates seat temperature. To deactivate the heating system, depress the switch once
8again.
9
NOTICE
•The seat warmer will not operate if ambient temperature is above 37±3 °C (98.5±5.5°F).
•If the seat warmer doesn’t work when the ambient temperature is below 28±3 °C (82.5±5.5°F), have the system checked by an authorized dealer.
•When cleaning the seats, do not use an organic solvent such as thinner, benzene, alcohol and gasoline. Doing so may damage the surface of the heater or seats.
•To prevent overheating the seat warmer, do not place blankets, cushions or seat covers on the seats while the seat warmer is in operation.
•Do not place heavy or sharp objects on seats equipped with seat warmers. Damage to the seat warming components could occur.
 WARNING
Passengers should use extreme caution when using seat warmers due to the possibility of excess heating or burns. In particular, the following types of passengers should exercise extreme care:
1.Infants, children, elderly or handicapped persons, or hospital outpatients
2.Persons with sensitive skin or those that burn easily
3.Fatigued individuals
4.Intoxicated individuals
5.Individuals taking medication that can cause drowsiness or sleepiness (sleeping pills, cold tablets, etc.)
3 24

Knowing your vehicle
1SAA2033
Headrest adjustment
Adjusting the height up and down
The headrest not only provides comfort for the driver and passengers, but also helps to protect the head and neck in the event of a collision.
To raise the headrest, pull it up to the desired position ( ). To lower the headrest, push and hold the release button ( ) on the headrest support and lower the headrest to the desired position ( ). For best protection, adjust the headrest so its center is as high as your ears. Also adjust the headrest so its distance from the head is as wide as your fist.
1SAA2034
Removal
To remove the headrest, raise it as far as it can go then press the release button ( ) while pulling upward ( ).
 WARNING
|
To reduce the risk of head and |
|||
|
1 |
|||
|
neck injuries, do not drive the |
|||
|
vehicle |
with the headrest |
||
|
removed |
or improperly posi- |
2 |
|
|
tioned. |
|||
3
4
5
6
7
8
9
3 25

|
Knowing your vehicle |
|||
|
Rear seat |
|||
|
Folding the rear seat |
|||
|
1 |
(if equipped) |
||
|
The rear seatbacks fold forward to |
provide additional cargo space and
2to provide access to the cargo area.
|
• |
To raise the seatback, lift and push |
||
|
3 |
it firmly until it clicks into place. |
||
|
• |
When you return the seatback to |
||
its upright position, reposition the
4rear safety belts so that they can be used by rear seat passengers.
5
WARNING
6After folding the rear seat, unless the driver’s position is properly
set according to the driver’s
7physical figure otherwise, do not fold the rear seat resulting in increased body injuries in a sud-
8den stop or collision.
9
1SAA2039A
1.Slide the front seat to the forward position and insert the safety belt into the belt holder.
NOTICE
When folding or unfolding the rear seat, make sure to move the front seat fully forward. If there were no space enough to be folded, never force to fold the rear seat causing damage to the headrest or the related parts of the seat.
• Type A
1SAA2039
• Type B
1SAA2039B
2.Lift the front of seat cushion ( ) up.
3 26

Knowing your vehicle
|
• Type A |
• Type A |
• Type A |
||
|
1SAA2040 |
1SAA2040A |
1SAA2038 |
||||||||
|
• Type B |
• Type B |
• Type B |
||||||||
|
1SAA2040B |
1SAA2040C |
1SAA2167 |
|||||
|
3. Lift the rear of seat cushion up |
4 Move the seat cushion firmly until it |
6. Pull the lock release lever ( ). |
|||||
|
( ). |
clicks ( ). |
||||||
|
5. Lower the headrest as low as pos- |
|||||||
|
sible (if equipped). |
3 27

Knowing your vehicle
• Type A
1
2
NOTICE
When you fold the rear seatback or put luggage on the rear seat cushion, insert the buckle in the pocket between the rear seatback and cushion. Doing so can prevent the buckle from being damaged by the rear seatback or luggage.
|
3 |
|||||||||||
|
1SAA2039A |
|||||||||||
|
Lap/shoulder belt type |
|||||||||||
|
1SAA2041 |
|||||||||||
|
• Type A |
• Type B |
||||||||||
|
4 |
• Type B |
||||||||||
|
5 |
|||||||||||
|
6 |
|||||||||||
|
1SAE2046A/1SAE2046B |
|||||||||||
|
7 |
Lap belt type |
||||||||||
1SAA2168
87. Fold the seatback forward and down firmly ( ).
9
1SAA2046
3 28

To unfold the rear seat:
1.Lift and push the seatback backward firmly until it clicks into place.
2.Move and push the seat cushion downward firmly to the proper position.
3.Replace the rear safty belt to the proper position.
CAUTION
•When returning the rear seatbacks to the upright position, remember to return the rear shoulder belts to their proper position.
•Do not remove the floor carpet in your vehicle. Emission control system components cause high exhaust temperatures under the floor.
 WARNING — Cargo
Cargo should always be secured to prevent it from being thrown about the vehicle in a collision and causing injury to the vehicle occupants.
Knowing your vehicle
CAUTION
|
• Make sure the engine is off, |
|||||
|
the transaxle is in P and the |
1 |
||||
|
parking |
brake |
is |
applied |
||
|
whenever loading or unload- |
|||||
|
2 |
|||||
|
ing cargo. Vehicle may move if |
|||||
|
shift |
lever is inadvertently |
||||
|
moved to another position. |
3 |
||||
|
• Be careful when loading cargo |
|||||
|
through |
the rear |
passenger |
|||
|
4 |
|||||
|
seats to |
prevent |
damage to |
|||
|
the vehicle interior. |
|||||
|
• When cargo is loaded through |
5 |
||||
|
the |
rear |
passenger |
seats, |
||
|
ensure the cargo is properly |
|||||
|
secured |
to prevent |
it |
from |
6 |
|
|
moving |
while |
driving. |
|||
|
Unsecured cargo in the pas- |
7 |
||||
|
senger |
compartment |
can |
|
cause damage to the vehicle |
|
|
or injury to it’s occupants. |
8 |
|
9 |
|
3 29

|
Knowing your vehicle |
||||||||
|
3. Make sure the seatback is locked |
||||||||
|
securely by trying to move forward |
||||||||
|
and backward without using the |
||||||||
|
1 |
lock release lever. If the seatback |
|||||||
|
moves, it is not locked properly. |
||||||||
|
2 |
||||||||
|
3 |
||||||||
|
4 |
1SAA2038A |
RSAE2038 |
||||||
|
Adjusting the seatback recliner |
2. Adjust the seatback to the position |
|||||||
|
5 |
(6:4 split seat only) |
you desire from the 3 positions. |
||||||
|
To recline the seatback; |
||||||||
61. Pull the lock release lever.
7
8
9
3 30
![]()
Knowing your vehicle
1SAA2042
Headrest adjustment (if equipped)
Adjusting the height up and down
The headrest not only provides comfort for the driver and passengers, but also helps to protect the head and neck in the event of a collision.
To raise the headrest, pull it up to the desired position ( ). To lower the headrest, push and hold the release button ( ) on the headrest support and lower the headrest to the desired position ( ). For best protection, adjust the headrest so its center is as high as your ears. Also adjust the headrest so its distance from the head is as wide as your fist.
1SAA2043
Removal
To remove the headrest, raise it as far as it can go then press the release lever ( ) while pulling upward ( ).
 WARNING
|
To reduce the risk of head and |
|||
|
1 |
|||
|
neck injuries, do not drive the |
|||
|
vehicle |
with the headrest |
||
|
removed |
or improperly posi- |
2 |
|
|
tioned. |
|||
3
4
5
6
7
8
9
3 31

Knowing your vehicle
SAFETY BELTS
1
2
3
Pre-tensioner seat belt
5(if equipped)
Your vehicle is equipped with driver’s and front passenger’s pre-tensioner 6 seat belts. The purpose of the pretensioner is to make sure that the
7seat belts fit tightly against the occupant’s body in certain frontal collisions. The pre-tensioner seat belts
8can be activated together with the airbags, where the frontal collision is
9severe enough.
CAUTION
Both the driver’s and front passenger’s pre-tensioner seat belts will be activated in certain frontal collisions. The pre-ten- sioner seat belts can be activated, where the frontal collision is severe enough, together with the airbag. The pre-tensioners will be activated under these conditions even if there is no one on the seat at the time of the collision.
1SAE3001
The seat belt pre-tensioner system consists mainly of the following components. Their locations are shown in the illustration.
SRS airbag warning light
Seatbelt pre-tensioner assembly
SRS airbag control module
3 32

 WARNING
To obtain maximum benefit from a pre-tensioner seat belt:
•The seat belt must be worn correctly.
•The seat belt must be adjusted to the correct position.
CAUTION
When the pre-tensioner seat belts are activated, a loud noise may be heard and fine dust, which may appear to be smoke, may be visible in the passenger compartment and are not toxic.
Although, it is harmless, the fine dust may cause skin irritation and should not be breathed for prolonged periods. Wash your hands and face thoroughly after an accident in which the airbags and/or pre-tensioner seat belts were activated.
Knowing your vehicle
CAUTION
|
• Because the sensor that acti- |
||||
|
vates the SRS airbag is con- |
1 |
|||
|
nected with pre-tensioner seat |
||||
|
belt, the SRS airbag warning |
||||
|
2 |
||||
|
light on the instrument panel |
||||
|
will blink or illuminate for |
||||
|
approximately 6 seconds after |
3 |
|||
|
the ignition key has been |
||||
|
turned to the “ON” position, |
||||
|
then the light should go off. |
4 |
|||
|
• If the pre-tensioner seat belt is |
||||
|
not |
working |
properly, this |
5 |
|
|
warning light will illuminate |
||||
|
even if there is no malfunction |
||||
|
of SRS airbag system. If the |
6 |
|||
|
SRS airbag warning light does |
||||
|
not illuminate when the igni- |
||||
|
7 |
||||
|
tion key is turned to “ON” , or |
||||
|
if it remains illuminated after |
||||
|
blinking or |
illuminating for |
|||
|
8 |
||||
|
approximately 6 seconds, or if |
||||
|
it illuminates while the vehicle |
||||
|
is being driven, please have |
9 |
|||
|
an |
authorized Kia dealer |
|||
inspect the pre-tensioner seat belt or SRS airbag system as soon as possible.
3 33

Knowing your vehicle
CAUTION
The pre-tensioner seat belt
1assembly mechanisms become hot during activation. Do not
touch the pre-tensioner seat
2belt assembly for several min-
utes after they have been acti-
3vated.
4
5
6
7
8
9
 WARNING
•Pre-tensioners are designed to operate once. After activation, pre-tensioner seat belts must be replaced. All seat belts, of any type, should always be replaced after they have been worn during a collision.
•Do not attempt to inspect or replace the pre-tensioner seat belts yourself. This must be done by an authorized Kia dealer.
 WARNING
•Do not strike the pre-tensioner seat belt assemblies.
•Do not attempt to service or repair the pre-tensioner seat belt system in any manner.
•Improper handling of the pretensioner seat belt assemblies, and failure to heed the warnings not to strike, modify, inspect, place, service or repair the pre-tensioner seat belt assemblies may lead to improper operation or inadvertent activation causing serious injury.
Always wear the seat belts when driving or riding in a motor vehicle.
3 34

Safety belt restraint system
WARNING — Safety belts
To minimize the risk of serious or fatal injury in an accident, the driver and all passengers should use the appropriate safety restraints for their age and size. The presence of airbags does not change the need to be properly restrained by a safety belt or size-appropri- ate child restraint. In fact, airbags are designed to work the best when passengers are correctly restrained in the vehicle. Be sure you are familiar with the information in this section, including the information on infant and child restraints. Read the safety warnings on the sun visors of your vehicle also.
Knowing your vehicle
We strongly recommend that the driver and all passengers be properly restrained at all times by using the safety belts provided with the vehicle. Proper use of the safety belts decreases the risk of severe injury or death in accidents or sudden stops.
All seats (including or except the center rear seat) have lap/shoulder belts. Inertial locks in the safety belt retractors allow all of the lap/shoulder safety belts to remain unlocked during normal vehicle operation. This allows the occupants some freedom of movement and increased comfort while using the safety belts. If a force is applied to the vehicle, such as a strong stop, a sharp turn, or a collision, the safety belt retractors will automatically lock the safety belts.
Since the inertial locks do not require a collision in order to lock up, you may become aware of the safety belts locking while braking or going around sharp corners.
Always use the rear seat position(s) to install your child restraint(s).
Never install a child restraint system in the front passenger position, as an inflating airbag could cause serious or fatal injury to a child in that position.
3 35

Knowing your vehicle
Safety belts provide the best restraint when:
•The seatback is upright.
1 • The occupant is sitting upright (not slouched).
2• The lap belt is snug across the hips.
• The shoulder belt is snug across
3the chest.
•The knees are straight forward.
To help you remember to fasten your 4 safety belt, a warning light will come on. See Safety Belt Warning Light on
5page 3-38.
|
6 |
WARNING — After a colli- |
|
|
sion |
||
• Lap/shoulder belt assemblies
7may be stretched or damaged when subjected to the stress
8and forces of a collision.
•The entire restraint system
should be inspected following
9any collision. All belts, retractors, anchors and hardware damaged by a collision should be replaced before the vehicle is operated again.
WARNING — Cargo area
Passengers should never be allowed to ride in the cargo area of a vehicle. No safety belts are provided for the cargo area. Persons riding in the vehicle without a fastened safety belt are much more likely to suffer serious bodily injury or death during an accident.
WARNING — Twisted belts
A twisted or jammed safety belt cannot restrain you properly. If you cannot untwist or unjam the safety belt, have an authorized Kia dealer it immediately. Never drive or ride with a twisted or jammed safety belt.
WARNING — Belt use
Safety belts must be used correctly to work properly in an accident. Each seating position in your vehicle has a specific safety belt assembly that includes a buckle and tongue designed to be used together.
For greatest effectiveness, follow these guidelines in using safety belts:
•Use the shoulder portion of the safety belt on the outside shoulder only. Never wear the shoulder portion under the arm.
•Never swing the safety belt around your neck to fit over the inside shoulder.
•Never wear the shoulder portion of the safety belt across the neck or face.
(Continued)
3 36

(Continued)
•Wear the lap portion as low as possible. Be sure that the lap belt fits snugly around the hips. Never wear a lap portion of a lap/shoulder belt over your waist; it should always go over the stronger area of your hips.
•Never use a single safety belt for more than one person.
•The front seatbacks should always remain in a comfortable, upright position when the vehicle is moving.
WARNING — Safety belt care
•A damaged belt may not give you the protection you need in an accident.
•Inspect your safety belts periodically for excessive wear or damage. Pull out each belt fully and look for fraying, cuts, burns or other damage. Pull the safety belt out and let it retract a number of times. Make sure that the lap/shoulder belts return smoothly and easily into the retractor.
•Check the latches to make sure they latch and release without interference or delay.
•Never close the doors on any part of the lap or shoulder belt.
•Any belt not in good condition or in good working order should be promptly replaced.
Knowing your vehicle
CAUTION
|
Never close the doors on any |
|
|
part of the lap or shoulder belt. |
1 |
|
It can damage the safety belt or |
|
|
buckle which could increase the |
2 |
|
risk of injury in case of an acci- |
dent.
3
4
5
6
7
8
9
3 37

Knowing your vehicle
1
2
3
Safety belt warning light and
5chime
Type A
6As a reminder to the driver and passenger, safety belt warning light will
blink for approximately 6 seconds
7each time you turn the ignition switch ON.
8If the driver’s lap/shoulder belt is not fastened when the key is turned ON, the safety belt warning light blinks for
9approximately 6 seconds. (if equipped)
Type B (for Europe only, if equipped)
As a reminder to the driver and passenger, safety belt warning light will blink or illuminate for approximately 6 seconds each time you turn the ignition switch ON.
If the driver’s lap/shoulder belt is not fastened when the key is turned ON or if it is disconnected after the key is turned ON, the safety belt warning light will blink or illuminate until the belt is fastened.
If the driver’s lap/shoulder belt is not fastened when the key is turned ON and you drive over 9km/h, the safety belt warning chime will sound for approximately 100 seconds after the warning light blinks for approximately one minute.
If the driver’s lap/shoulder belt is disconnected after the key is turned ON and you drive over 9km/h, the safety belt warning chime will sound for approximately 100 seconds.
But, if the driver’s lap/shoulder belt is connected and disconnected twice within 9 seconds after the belt is fastened, the safety belt warning light and chime will not operate.
Type C
If the driver’s lap/shoulder belt is not fastened when the key is turned ON or if it is disconnected after the key is turn ON, the safety belt warning light illuminates until the belt is fastened.
3 38

Knowing your vehicle
1GHA2262
Lap/shoulder belt
To fasten the front lap/shoulder belt:
1.Grasp the buckle and tongue plate.
2.Slowly pull the lap/shoulder belt out from the retractor.
1GHA2263
3.Insert the tongue plate ( ) into the open end of the buckle ( ) until an audible “click” is heard, indicating the belt is locked in the buckle.
1GHA2264
4.Position the lap portion ( ) of the belt across your lap as LOW ON THE HIPS as possible to reduce the risk of sliding under it during an accident. Adjust the belt to a SNUG FIT by pulling up on the shoulder portion ( ) of the safety belt. The belt retractor is designed to take up excess webbing automatically and to maintain tension on the belt. For your safety, do not put any excess slack into the safety belt at any location.
3 39

Knowing your vehicle
1
2
3
5. Adjust the shoulder anchor posi-
5tion to your size (if equipped). To raise the anchor position, push the anchor up ( ). To lower the anchor
|
6 |
position, press ( ) the button ( A ) |
|
and slide the anchor down ( ). |
|
7 |
After adjustment, make sure the |
|
|
anchor is locked in position. |
||
|
8 |
||
|
9 |
||
1GHA2263A
To unfasten the front lap/shoulder belt:
Press the release button on the buckle and allow the belt to slowly retract.
 WARNING
•The seatbacks should always remain in a comfortable, upright position while the vehicle is in motion. The safety belt system will provide the most protection with the seatbacks in an upright position.
•Never wear the shoulder portion of the safety belt under the outside arm or behind the back.
•Never wear the shoulder portion of the safety belt across the neck or face.
•Wear the lap portion of the safety belt as low on the hips as possible. Be sure the lap belt fits snugly around the hips. Never wear the lap belt over your waist.
(Continued)
3 40
 Loading…
- Руководства по ремонту — Kia Picanto — Кондиционер и отопитель
- 271 просмотров
- 0
Специальный инструмент и приспособления Наименование приспособления и номер по каталогу Иллюстрация Применение 09977-29000 Съемник для болтов нажимного диска Снятие нажимного диска Возможные неисправности, их причины и способы устранения Неисправность Причина неисправности Проверка Действие при неисправности Воздух в салон подается, но […]
Читать
- Руководства по ремонту — Kia Picanto — Кондиционер и отопитель
- 315 просмотров
- 0
Вентиляция Замена вентиляционного блока 1. Отсоединить отрицательную (-) клемму аккумуляторной батареи. 2. Снять перегородку. 3. Отсоединить разъемы от привода впуска, термистора и мотора вентилятора. 4. Снять поперечину капота в сборе. 5. Выкрутить болт и 3 винта крепления, затем снять вентиляционный […]
Читать
- Руководства по ремонту — Kia Picanto — Кондиционер и отопитель
- 256 просмотров
- 0
Снятие и установка 1. Отсоединить отрицательную (-) клемму аккумуляторной батареи. 2. Разрядить систему кондиционирования. 3. На холодном двигателе слить охлаждающую жидкость из системы. 4. Отвернуть болты (А) и снять расширительный клапан (В) с испарителя. Заткнуть или закрыть магистрали немедленно после […]
Читать
- Руководства по ремонту — Kia Picanto — Кондиционер и отопитель
- 267 просмотров
- 0
Клапан регулировки давления Проверка 1. Измерить давление в трубопроводе высокого давления, измерением напряжения между выходами терминалов №1 и №2. 2. Проверить измеренное напряжение по формуле. Напряжение = 0.00878835 * давление + 0.37081095 [PSIA] 3. Если измеренное напряжение не соответствует спецификации, […]
Читать
- Руководства по ремонту — Kia Picanto — Кондиционер и отопитель
- 303 просмотров
- 0
Система кондиционирования воздуха Наименование Спецификация Компрессор Тип HS-II (с качающейся пластиной) Рабочая жидкость/ количество FD46XG (PAG), 120 ± 10 см3 Тип шкива 4PK-TYPE Производительность 110 см3/оборот Конденсор Теплоотдача 9200 ккал/час Клапан регулировки давления А/С (APT) Метод измерения давления Напряжение = […]
Читать
- Руководства по ремонту — Kia Picanto — Пассивная безопасность
- 228 просмотров
- 0
Спецификация Наименование Величина Специфика ция Подушка безопасности водителя (DAB) Сопротивление, Ω 1.6-6.1 Подушка безопасности переднего пассажира (РАВ) Сопротивление, Ω 1.6-6.1 Боковая подушка безопасности (SAB) Сопротивление, Ω 1.6-6.1 Преднатяжитель ремня безопасности (ВРТ) Сопротивление, Ω 1.6-6.1 Моменты затяжки резьбовых соединений Резьбовое соединение […]
Читать
- Руководства по ремонту — Kia Picanto — Пассивная безопасность
- 529 просмотров
- 0
ВНИМАНИЕ! При обращении со сработавшими подушками безопасности следить за тем, чтобы пыль не попала в глаза, для защиты рук от пыли обязательно надевать перчатки. Перед утилизацией автомобиля, оборудованного подушками безопасности и утилизацией модулей подушек безопасности выполнить указанные ниже процедуры срабатывания […]
Читать
- Руководства по ремонту — Kia Picanto — Пассивная безопасность
- 602 просмотров
- 0
ВНИМАНИЕ! • Не пытаться разобрать или отремонтировать преднатяжитель ремня безопасности (ВРТ). • Не ронять преднатяжитель и не допускать его контакта с водой, смазкой или маслом. Заменить преднатяжитель новым при обнаружении деформации, трещин, вмятин или ржавчины. • Не размещать посторонние предметы […]
Читать
- Руководства по ремонту — Kia Picanto — Пассивная безопасность
- 637 просмотров
- 0
Модуль подушки безопасности переднего пассажира ВНИМАНИЕ! • Не пытаться разобрать или отремонтировать модуль подушки безопасности переднего пассажира (РАВ). • Не ронять модуль и не допускать его контакта с водой, смазкой или маслом. Заменить модуль новым при обнаружении деформации, трещин, вмятин […]
Читать
- Руководства по ремонту — Kia Picanto — Пассивная безопасность
- 421 просмотров
- 0
Снятие и установка ВНИМАНИЕ! • При снятии/установке контактного диска необходимо, чтобы передние колеса автомобиля были установлены в положение, соответствующее прямолинейному движению автомобиля. • Перед тем, как устанавливать контактный диск, убедиться в том, что он находится в центральном положении, после чего […]
Читать

Руководство на немецком языке по техническому обслуживанию и ремонту автомобиля Kia Picanto 2004 года выпуска.
- Автор: —
- Издательство: —
- Год издания: —
- Страниц: —
- Формат: PDF
- Размер: 75,8 Mb

Руководство по эксплуатации и ремонту автомобилей Kia Picanto и Kia Morning с 2003 года выпуска с бензиновыми и дизельными двигателями.
- Автор: —
- Издательство: Монолит
- Год издания: —
- Страниц: 257
- Формат: —
- Размер: —

Руководство по эксплуатации и ремонту автомобиля Kia Picanto с 2011 года выпуска с бензиновыми двигателями объемом 1,0/1,25 л.
- Автор: —
- Издательство: Монолит
- Год издания: —
- Страниц: 404
- Формат: —
- Размер: —
Руководство по эксплуатации и техническому обслуживанию автомобиля Kia Picanto 2006 года выпуска.
- Автор: —
- Издательство: —
- Год издания: 2005
- Страниц: 294
- Формат: PDF
- Размер: 5,6 Mb
Руководство по эксплуатации и техническому обслуживанию автомобиля Kia Picanto 2011 года выпуска.
- Автор: —
- Издательство: —
- Год издания: 2011
- Страниц: 520
- Формат: PDF
- Размер: 9,5 Mb
Руководство по техническому обслуживанию и ремонту автомобиля Kia Picanto с 2004 года выпуска с бензиновыми двигателями объемом 1,0/1,1 л.
- Автор: —
- Издательство: Легион-Автодата
- Год издания: 2011
- Страниц: 423
- Формат: —
- Размер: —
Учебные материалы на английском языке по техническому обслуживанию и ремонту автомобиля Kia Picanto.
- Автор: —
- Издательство: —
- Год издания: —
- Страниц: —
- Формат: ISO
- Размер: 421,8 Mb

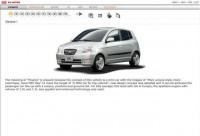
View a manual of the Kia Picanto (2007) below. All manuals on ManualsCat.com can be viewed completely free of charge. By using the ‘Select a language’ button, you can choose the language of the manual you want to view.
Page: 1
kia, the company
Now that you are the owner of a Kia Vehicle, you’ll probably be
asked a lot of questions about your vehicle and the company like
“What is a Kia?,” “Who is Kia?,” “What does ‘Kia’ mean?”
Here are some answers. First, Kia is the oldest car company in
Korea. It’s a company that has thousands of employees focused
on building high-quality vehicles at affordable prices.
The first syllable, Ki, in the word “Kia” means “to arise from to
the world” or “to come up out of to the world.” The second syl-
lable, a, means “Asia.” So, the word Kia, means “to arise from”
or “to come up out of Asia to the world.”
Enjoy your Vehicle!
Page: 2
i
Thank you for choosing a Kia vehicle.
When you require service, remember that your dealer
knows your vehicle best. Your dealer has factory-trained
technicians, recommended special tools, genuine Kia
replacement parts and is dedicated to your complete sat-
isfaction.
Because subsequent owners require this important infor-
mation as well, this publication should remain with the
vehicle if it is sold.
This manual will familiarize you with operational, main-
tenance and safety information about your new vehicle. It
is supplemented by a Warranty and Maintenance book
that provides important information on all warranties
regarding your vehicle. If your vehicle is equipped with
an audio system, you will also have a Kia Integrated
Audio System manual explaining its operation. We urge
you to read these publications carefully and follow the
recommendations to help assure enjoyable and safe oper-
ation of your new vehicle.
Kia offers a great variety of options, components and fea-
tures for its various models.
Therefore, the equipment described in this manual, along
with the various illustrations, may not all be applicable to
your particular vehicle.
The information and specifications provided in this man-
ual were accurate at the time of printing. Kia reserves the
right to discontinue or change specifications or design at
any time without notice and without incurring any obli-
gation. If you have questions, always check with your
Kia Dealer.
We assure you of our continuing interest in your motor-
ing pleasure and satisfaction in your Kia vehicle.
© 2007 Kia Motors Corp.
All rights reserved. Reproduction by any means, elec-
tronic or mechanical, including photocopying, recording,
or by any information storage and retrieval system or
translation in whole or part is not permitted without writ-
ten authorization from Kia Motors Corporation.
Printed in Korea
Foreword
Page: 3
ii
1
2
3
4
5
6
7
8
9
Introduction
Your vehicle at a glance
Knowing your vehicle
Driving your vehicle
Driving tips
In case of an emergency
Maintenance
Specifications
Index
table of contents
Page: 4
1
2
3
4
5
6
7
8
9
How to use this manual / 1-2
Vehicle break-in process / 1-3
Introduction
Page: 5
Introduction
2
1
1
2
3
4
5
6
7
8
9
We want to help you get the greatest
possible driving pleasure from your
vehicle. Your Owner’s Manual can
assist you in many ways. We strong-
ly recommend that you read the
entire manual. Especially, in order to
minimize the chance of death or
injury, you must read the WARNING
and CAUTION sections spread
throughout the manual.
Illustrations complement the words
in this manual to best explain how to
enjoy your vehicle. By reading your
manual, you learn about features,
important safety information, and
driving tips under various road condi-
tions.
The general layout of the manual is
provided in the Table of Contents. A
good place to start is the index; it has
an alphabetical listing of all informa-
tion in your manual.
Sections: This manual has eight sec-
tions plus an index. Each section
begins with a brief list of contents so
you can tell at a glance if that section
has the information you want.
You’ll find various WARNING’s,
CAUTION’s, and NOTICE’s in this
manual. These were prepared to
enhance your personal safety. You
should carefully read and follow ALL
procedures and recommendations
provided in these WARNING’s,
CAUTION’s and NOTICE’s.
✽
✽ NOTICE
A NOTICE indicates a situation in
which damage to your vehicle could
result if the notice is ignored.
HOW TO USE THIS MANUAL
WARNING
A WARNING indicates a situation
in which serious bodily injury or
death could result if the warning
is ignored.
CAUTION
A CAUTION indicates a situation
in which personal injury, perhaps
severe, could result if the caution
is ignored.
Page: 6
1 3
1
2
3
4
5
6
7
8
9
Introduction
VEHICLE BREAK-IN
PROCESS
No special break-in period is need-
ed. By following a few simple precau-
tions for the first 1,000 km (600
miles) you may add to the perform-
ance, economy and life of your vehi-
cle.
• Do not race the engine.
• Do not maintain a single speed for
long periods of time, either fast or
slow. Varying engine speed is
needed to properly break-in the
engine.
• Avoid hard stops, except in emer-
gencies, to allow the brakes to seat
properly.
• Avoid full-throttle starts.
Page: 7
1
2
3
4
5
6
7
8
9
Interior overview / 2-2
Instrument panel overview / 2-3
Engine compartment / 2-4
Your vehicle at a glance
Page: 8
Your vehicle at a glance
2
2
1
2
3
4
5
6
7
8
9
INTERIOR OVERVIEW
1. Door lock/unlock lever…………………..3- 9
2. Outside rearview mirror control
switch*………………………………………..3-81
3. Power window switches*……………….3-13
4. Master power window control lock*…3-14
5. Vent controls ……………………………….4-46
6. Instrument cluster ………………………..4-23
7. Steering wheel …………………………….4-20
8. Steering wheel tilt* ……………………….4-21
9. Hood release lever ………………………3-75
10. Fuel filler lid release lever ……………3-76
* : if equipped
1SAE0004/1SAA0005/1SAA0006
Page: 9
2 3
1
2
3
4
5
6
7
8
9
Your vehicle at a glance
INSTRUMENT PANEL OVERVIEW
1. Driver’s Air Bag*…………………………..3-58
2. Light control / Turn signals…………….4-33
3. Instrument cluster ………………………..4-23
4. Wiper/Washer………………………………4-38
5. Ignition switch………………………………4- 2
6. Hazard………………………………………..4-42
7. Climate control system………………….4-43
8. Shift lever ……………………………………4- 6
9. Passenger’s airbag* ……………………..3-59
10. Glove box ………………………………….3-84
* : if equipped
1SAA0003
Page: 10
Your vehicle at a glance
4
2
1
2
3
4
5
6
7
8
9
ENGINE COMPARTMENT
1SAA0007
1. Power steering fluid reservoir ………..7-23
2. Engine oil filler cap……………………….7-14
3. Brake fluid reservoir……………………..7-20
4. Air cleaner…………………………………..7-31
5. Fuse box …………………………………….6- 7
6. Negative battery terminal ………..6-5/7-37
7. Positive battery terminal ………….6-5/7-37
8. Auto transaxle oil dipstick*…………….7-27
9. Radiator cap………………………………..7-19
10. Engine oil dipstick ………………………7-14
11. Engine coolant reservoir ……………..7-18
12. Windshield washer fluid reservoir …7-30
* : if equipped
Page: 11
1
2
3
4
5
6
7
8
9
Keys / 3-2
Remote keyless entry / 3-4
Immobilizer system / 3-7
Door locks / 3-8
Window / 3-13
Seat / 3-16
Safety belts / 3-32
Airbags-supplemental restraint system / 3-56
Hood / 3-75
Fuel filler lid / 3-76
Mirrors / 3-79
Interior lights / 3-82
Storage compartment / 3-83
Interior features / 3-86
Luggage net / 3-90
Antenna / 3-91
Knowing your vehicle
Page: 12
Knowing your vehicle
2
3
1
2
3
4
5
6
7
8
9
The key code number is stamped on
the plate attached to the key set.
Should you lose your keys, this num-
ber will enable an authorized Kia
Dealer to duplicate the keys easily.
Remove the plate and store it in a
safe place. Also, record the code
number and keep it in a safe and
handy place, but not in the vehicle.
Key operations
➀ Master key
Used to start the engine, lock and
unlock the doors.
➁ Transmitter
Used to lock and unlock the doors
(if equipped).
KEYS
1SAA2001 1SAA2001
WARNING — Ignition key
Leaving children unattended in
a vehicle with the ignition key is
dangerous even if the key is not
in the ignition. Children copy
adults and they could place the
key in the ignition. The ignition
key would enable children to
operate power windows or other
controls, or even make the vehi-
cle move, which could result in
serious bodily injury or even
death. Never leave the keys in
your vehicle with unsupervised
children.
➀
➁
Page: 13
3 3
1
2
3
4
5
6
7
8
9
Knowing your vehicle
CAUTION
Use only Kia original parts for
the ignition key in your vehicle.
If an aftermarket key is used, the
ignition switch may not return
to ON after START. If this hap-
pens, the starter will continue to
operate causing damage to the
starter motor and possible fire
due to excessive current in the
wiring.
Page: 14
Knowing your vehicle
4
3
1
2
3
4
5
6
7
8
9
➀ Lock/unlock button
• Lock
All doors are locked if the
lock/unlock button (➀) is pressed.
• Unlock
All doors are unlocked if the
lock/unlock button (➀) is pressed
again.
After depressing this button, the
doors will be locked automatically
unless you open them within 30
seconds.
✽
✽ NOTICE
The transmitter will not work if any
of following occur:
— The ignition key is in ignition
switch.
— You exceed the operating distance
limit (5 m).
— The battery in the transmitter is
weak.
— Other vehicles or objects may be
blocking the signal.
— The weather is extremely cold.
— The transmitter is close to a radio
transmitter such as a radio station
or an airport which can interfere
with normal operation of the
transmitter.
When the transmitter does not work
correctly, open and close the door
with the ignition key. If you have a
problem with the transmitter, con-
tact an authorized Kia Dealer.
REMOTE KEYLESS ENTRY (IF EQUIPPED)
1SAA2002
➀
Page: 15
3 5
1
2
3
4
5
6
7
8
9
Knowing your vehicle
✽
✽ NOTICE
Keep the transmitter away from
water or any liquid. If the keyless
entry system is inoperative due to
exposure to water or liquids, it will
not be covered by your manufactur-
er vehicle warranty.
Operational distance may vary
depending upon the area the trans-
mitter is used in. For example, if the
vehicle is parked near police sta-
tions, government and public offices,
broadcasting stations, military instal-
lations, airports, or transmitting tow-
ers, etc.
Battery replacement
Transmitter uses a 3 volt lithium bat-
tery which will normally last for sev-
eral years. When replacement is
necessary, use the following proce-
dure.
1. Remove the screw (➀) using a
cross-tip screwdriver.
2. Insert a slim tool into the slot and
gently pry open the transmitter
center cover (➁).
3. Remove the battery cover (➂).
4. Replace the battery with new one.
When replacing the battery, make
sure the battery positive “+” sym-
bol faces up as indicated in the
illustration.
5. Install the battery in the reverse
order of removal.
1SAA2003
➁
➀
➂
Page: 16
Knowing your vehicle
6
3
1
2
3
4
5
6
7
8
9
✽
✽ NOTICE
The keyless entry system transmit-
ter is designed to give you years of
troublefree use, however it can mal-
function if exposed to moisture or
static electricity. If you are unsure
how to use your transmitter or
replace the battery, contact an
authorized Kia dealer.
For replacement transmitters, see an
Authorized Kia Dealer for reprogram-
ming.
✽
✽ NOTICE
• Using the wrong battery can cause
the transmitter to malfunction. Be
sure to use the correct battery.
• To avoid damaging the transmit-
ter, don’t drop it, get it wet, or
expose it to heat or sunlight.
Page: 17
3 7
1
2
3
4
5
6
7
8
9
Knowing your vehicle
Your vehicle is equipped with an
electronic engine immobilizer system
to reduce the risk of unauthorized
vehicle use.
Your immobilizer system is com-
prised of a small transponder in the
ignition key, and antenna coil in the
key cylinder and ICU (Immobilizer
Control Unit) in the steering shaft.
With this system, whenever you
insert your ignition key into the igni-
tion switch and turn it to ON, the
antenna coil in the ignition switch
receives a signal from the transpon-
der in the ignition key and then sends
the signal to the ECU (Engine
Control Unit).
The ECU checks the signal whether
the ignition key is valid.
If the key is determined to be valid,
the engine will start.
If the key is determined to be invalid,
the engine will not start.
To deactivate the immobilizer sys-
tem:
Insert the ignition key into the key
cylinder and turn it to the ON posi-
tion.
To activate the immobilizer sys-
tem:
Turn the ignition key to the OFF posi-
tion. The immobilizer system acti-
vates automatically. Without a valid
ignition key for your vehicle, the
engine will not start.
✽
✽ NOTICE
When starting the engine, do not use
the key with other immobilizer keys
around.
Otherwise the engine may not start
or may stop soon after it starts. Keep
each key separately not to have any
malfunction after you receive your
new vehicle.
IMMOBILIZER SYSTEM (IF EQUIPPED)
CAUTION
The transponder in your ignition
key is an important part of the
immobilizer system. It is
designed to give years of trou-
blefree service, however you
should avoid exposure to mois-
ture, static electricity and rough
handling. Immobilizer system
malfunction could occur.
CAUTION
Do not change, alter or adjust
the immobilizer system because
it could cause the immobilizer
system to malfunction and
should only be serviced by an
authorized Kia dealer.
Malfunctions caused by improp-
er alterations, adjustments or
modifications to the immobilizer
system are not covered by your
vehicle manufacturer warranty.
Page: 18
Knowing your vehicle
8
3
1
2
3
4
5
6
7
8
9
Operating door locks from
outside the vehicle
• Turn the key toward rear of vehicle
to unlock and toward front of vehi-
cle to lock.
• Doors can also be locked and
unlocked with the transmitter key.
• Once the doors are unlocked, it
may be opened by pulling the door
handle.
• When closing the door, push the
door by the hand. Make sure that
doors are closed securely.
• Central door locks (if equipped)
If you lock/unlock the front door
with a key, all vehicle doors will
lock/unlock automatically.
To lock a door without the key, push
the inside door lock lever (➀) to the
“LOCK” position and close the door
(➁).
✽
✽ NOTICE
Always remove the ignition key,
engage the parking brake, close all
windows and lock all doors when
leaving your vehicle unattended.
DOOR LOCKS
1SAA2004
Lock
Unlock
1SA2005
Page: 19
3 9
1
2
3
4
5
6
7
8
9
Knowing your vehicle
✽
✽ NOTICE
If the door is locked/unlocked multi-
ple times in rapid succession with
either the vehicle key or door lock
lever, the system may stop operating
temporarily in order to protect the
circuit and prevent damage to sys-
tem components.
Operating door locks from
inside the vehicle
• To unlock a door, pull the door lock
lever to the “UNLOCK” position.
• To lock a door, push the door lock
lever (➀) to the “LOCK” position.
• To open a door, pull the door han-
dle (➁) outward.
• Central door locks (if equipped)
If you lock/unlock the front door
with door lock lever, all vehicle
doors will lock/unlock automatical-
ly.
1SAA2006
Lock
Unlock
Page: 20
Knowing your vehicle
10
3
1
2
3
4
5
6
7
8
9
CAUTION
• The doors should always be
fully closed and locked while
the vehicle is in motion to pre-
vent accidental opening of the
door. Locked doors will also
discourage potential intruders
when the vehicle stops or
slows.
• Be careful when opening
doors and watch for vehicles,
motorcycles, bicycles or
pedestrians approaching the
vehicle in the path of the door.
Opening a door when some-
thing is approaching can
cause damage or injury.
WARNING
Leaving your vehicle unlocked
can invite theft or possible harm
to you or others from someone
hiding in your vehicle while you
are gone. Always remove the
ignition key, engage the parking
brake, close all windows and
lock all doors when leaving your
vehicle unattended.
WARNING — Unattended
children
An enclosed vehicle can
become extremely hot, causing
death or severe injury to unat-
tended children or animals who
cannot escape the vehicle.
Furthermore, children might
operate features of the vehicle
that could injure them, or they
could encounter other harm,
possibly from someone gaining
entry to the vehicle. Never leave
children or animals unattended
in your vehicle.
Page: 21
3 11
1
2
3
4
5
6
7
8
9
Knowing your vehicle
Rear door child safety lock
The child safety lock is provided to
help prevent children from acciden-
tally opening the rear doors from
inside the vehicle. The rear door
safety locks should be used whenev-
er children are in the vehicle.
1. Open the rear door.
2. Push the child safety lock located
on the rear edge of the door to the
“lock” position. When the child
safety lock is in the “lock ( )”
position, rear door will not open
when the inner door handle is
pulled inside the vehicle.
3. Close the rear door.
4. To open the rear door, pull the out-
side door handle.
Even though the doors may be
unlocked, the rear door will not open
by pulling the inner door handle (➀)
until rear door child safety lock is
unlocked ( ).
1SAA2008
WARNING — Rear door
locks
If children accidentally open the
rear doors while the vehicle is in
motion, they could fall out and
be severely injured or killed. To
prevent children from opening
the rear doors from the inside,
the rear door safety locks
should be used whenever chil-
dren are in the vehicle.
Page: 22
Knowing your vehicle
12
3
1
2
3
4
5
6
7
8
9
Rear hatch
Opening the rear hatch
• Rear hatch is locked or unlocked
with a key.
• To open the rear hatch, insert the
key into the lock (➀) and turn it to
the unlock position (➁), pull up the
rear hatch by pressing the handle
(➂).
• You can also lock/unlock the latch
(but not release it) with the central
door lock system (if equipped).
• If unlocked, the rear hatch can be
opened by pressing the handle (➂)
and pulling the hatch up.
1SAE2009
Lock Unlock
➂ ➁
➀
Page: 23
3 13
1
2
3
4
5
6
7
8
9
Knowing your vehicle
Power windows (if equipped)
➀ Driver’s door power window switch
➁ Front passenger’s door power
window switch
➂ Rear door (left) power window
switch (if equipped)
➃ Rear door (right) power window
switch (if equipped)
➄ Window opening and closing
➅ Automatic power window down
(Driver’s window, if equipped)
➆ Power window lock switch
(if equipped)
• Power window timer (if equipped)
The power windows can be operat-
ed for approximately 30 seconds
after the ignition key is removed or
turned to the ACC or LOCK posi-
tion. However, if the front doors are
opened, the power windows can-
not be operated even within the 30
seconds after the ignition key
removal.
WINDOWS
1SAA2010
Page: 24
Knowing your vehicle
14
3
1
2
3
4
5
6
7
8
9
Power windows (if equipped)
The ignition switch must be in the ON
position for power windows to oper-
ate. Each door has a power window
switch that controls that door’s win-
dow. However, the driver has a power
window lock switch which can block
the operation of passenger windows.
If you notice buffeting and pulsation
(wind shock) with either side window
open, you should open the opposite
window slightly to reduce the condi-
tion.
✽
✽ NOTICE
To prevent the power window sys-
tem from the possibility of damage,
do not open or close two windows at
the same time. This will also ensure
the longevity of the fuse. Window opening and closing
The driver’s door has a master power
window switch that controls all the
windows in the vehicle. To open or
close a window, press down (➄) or
pull up (➄) the front portion of the
corresponding switch.
1SAA2012
1SAA2011
• Type A • Type B
CAUTION
• Make sure heads and hands
are safely out of the way
before closing a window.
• Do not allow children to play
with the power windows. Keep
the driver’s door power win-
dow lock switch in the LOCK
position (depressed). Serious
injury can result from uninten-
tional window operation by
the child.
• Do not extend face or arms
outside through the window
opening while driving.
• Always double check to make
sure all arms, hands and other
obstructions are safely out of
the way before closing a win-
dow.
Page: 25
3 15
1
2
3
4
5
6
7
8
9
Knowing your vehicle
Automatic power window down
(driver’s window, if equipped)
Depressing the power window switch
momentarily to the second detent
position (➅) completely lowers the
driver’s window even when the
switch is released. To stop the win-
dow at the desired position while the
window is in operation, pull up the
switch momentarily to the opposite
direction of the window movement.
If the battery has been discharged
or disconnected, the automatic
power window system must be reset
as follows:
1. Turn the ignition key to ON posi-
tion.
2. Close each window and continue
pulling up on each power window
switch for at least 0.5 second after
the window is completely closed.
Power window lock switch
(if equipped)
• The driver can disable the power
window switches on a passenger
door by depressing the power win-
dow lock switch located on the dri-
ver’s door to LOCK (pressed).
• When the power window lock
switch is ON, the driver’s master
control cannot operate the passen-
ger door power windows either.
Manual windows (if equipped)
Use the window crank to open and
close each window.
1SAA2014
1SAA2013
Page: 26
Knowing your vehicle
16
3
1
2
3
4
5
6
7
8
9
Driver’s seat
➀ Seat adjustment, forward / back-
ward (see page 3- 18)
➁ Seatback recliner(see page 3- 19)
➂ Seat heater switch*(see page 3- 20)
➃ Headrest adjustment
(see page 3- 21)
Front passenger seat
➄ Seat adjustment, forward / back-
ward (see page 3- 22)
➅ Seatback recliner(see page 3- 23)
➆ Seat heater switch*(see page 3- 24)
➇ Headrest adjustment
(see page 3- 25)
Rear seat
➈ Folding the rear seat*
(see page 3- 26)
➉ Headrest adjustment*
(see page 3- 31)
* : if equipped
SEAT
1SAE2026
• Type A • Type B
Page: 27
3 17
1
2
3
4
5
6
7
8
9
Knowing your vehicle
(Continued)
• Always drive and ride with
your seatback upright and the
lap portion of the safety belt,
or lap belt, snug and low
across the hips. This position
puts your safety belts in the
best position to protect you in
case of an accident.
• In order to avoid unnecessary
airbag injuries including the
possibility of severe injury or
death, always sit as far back
as possible from the steering
wheel so that your chest is
away at least 250 mm (10 inch-
es) away from the steering
wheel.
WARNING
• Loose objects in the driver’s
foot area could interfere with
the operation of the foot ped-
als, possibly causing an acci-
dent. Loose objects might
interfere with the seat slide
mechanism. Do not place any-
thing under the front seats.
• Children should never be left
unattended in the car.
WARNING — Driver’s seat
• Never attempt to adjust seat
while the vehicle is moving.
This could result in loss of
control, and an accident caus-
ing death, serious injury, or
property damage.
• Do not allow anything to inter-
fere with the normal position
of the seatback. Storing items
against a seatback or in any
other way interfering with
proper locking of a seatback
could result in serious or fatal
injury in a sudden stop or col-
lision.
(Continued)
Page: 28
Knowing your vehicle
18
3
1
2
3
4
5
6
7
8
9
Driver’s seat adjustment
Adjusting the seat forward and
backward
To move the seat forward or back-
ward:
1. Pull the seat slide adjustment
lever under the front edge of the
seat cushion up and hold it.
2. Slide the seat to the position you
desire.
3. Release the lever and make sure
the seat is locked in place.
Adjust the seat before driving, and
make sure the seat is locked secure-
ly by trying to move forward and
backward without using the control
knob. If the seat moves, it is not
locked properly.
1SAA2027
Page: 29
3 19
1
2
3
4
5
6
7
8
9
Knowing your vehicle
Adjusting the driver’s seatback
recliner
To recline the seatback:
1. Lean forward slightly and lift up on
the seatback recline lever located
on the outside of the seat, at the
rear.
2. Carefully lean back on the seat
and adjust the seatback of the
seat to the position you desire.
3. Release the lever and make sure
the seatback is locked in place.
(The lever MUST return to its orig-
inal position for the seatback to
lock.)
WARNING
Driving or riding in a vehicle
with a front seatback reclined
could lead to serious or fatal
injury in an accident. If a front
seat is reclined during an acci-
dent, the occupant’s hips may
slide under the lap portion of
the safety belt applying great
force to the unprotected
abdomen or neck. Serious or
fatal internal injuries could
result. Keep the seatbacks in a
comfortably upright position
whenever the vehicle is in
motion.
1SAA2029
Page: 30
Knowing your vehicle
20
3
1
2
3
4
5
6
7
8
9
Warming the driver’s seat
(if equipped)
The front seats can be electrically
heated individually when the ignition
switch is ON. When you depress the
seat warmer switch, a thermostat
regulates seat temperature. To deac-
tivate the heating system, depress
the switch once again.
✽
✽ NOTICE
• The seat warmer will not operate
if ambient temperature is above
37±3 °C (98.5±5.5°F).
• If the seat warmer doesn’t work
when the ambient temperature is
below 28±3 °C (82.5±5.5°F), have
the system checked by an author-
ized dealer.
• When cleaning the seats, do not
use an organic solvent such as
thinner, benzene, alcohol and
gasoline. Doing so may damage
the surface of the heater or seats.
• To prevent overheating the seat
warmer, do not place blankets,
cushions or seat covers on the
seats while the seat warmer is in
operation.
• Do not place heavy or sharp
objects on seats equipped with
seat warmers. Damage to the seat
warming components could occur.
WARNING
Passengers should use extreme
caution when using seat warm-
ers due to the possibility of
excess heating or burns. In par-
ticular, the following types of
passengers should exercise
extreme care:
1. Infants, children, elderly or
handicapped persons, or hos-
pital outpatients
2. Persons with sensitive skin or
those that burn easily
3. Fatigued individuals
4. Intoxicated individuals
5. Individuals taking medication
that can cause drowsiness or
sleepiness (sleeping pills,
cold tablets, etc.)
1SAE2030
Page: 31
3 21
1
2
3
4
5
6
7
8
9
Knowing your vehicle
Headrest adjustment
Adjusting the height up and down
The headrest not only provides com-
fort for the driver and passengers,
but also helps to protect the head
and neck in the event of a collision.
To raise the headrest, pull it up to the
desired position (➀). To lower the
headrest, push and hold the release
button (➁) on the headrest support
and lower the headrest to the desired
position (➂). For best protection,
adjust the headrest so its center is as
high as your ears. Also adjust the
headrest so its distance from the
head is as wide as your fist.
Removal
To remove the headrest, raise it as
far as it can go then press the
release lever (➀) while pulling
upward (➁).
1SAA2034
WARNING
To reduce the risk of head and
neck injuries, do not drive the
vehicle with the headrest
removed or improperly posi-
tioned.
Do not adjust the driver’s head-
rest while driving.
1SAA2033
Page: 32
Knowing your vehicle
22
3
1
2
3
4
5
6
7
8
9
Adjusting the front passenger
seat
Forward/backward position
adjustment
To move the seat forward or back-
ward:
1. Pull the seat slide adjustment
lever (under the front edge of the
seat cushion) up and hold it.
2. Slide the seat to the position you
desire.
3. Release the lever and make sure
the seat is locked in place.
Adjust the seat before driving, and
make sure the seat is locked secure-
ly by trying to move forward and
backward without using the control
knob. If the seat moves, it is not
locked properly.
WARNING
In order to avoid unnecessary
airbag injuries including the
possibility of severe injury or
death, always sit as far back as
possible by moving the seat far
back, while still maintaining
good vehicle control. Serious
injury or death may be caused
due to the deployment of the
passenger’s airbag.
1SAA2035
Page: 33
3 23
1
2
3
4
5
6
7
8
9
Knowing your vehicle
Adjusting the seatback recliner
To recline the seatback:
1. Lean forward slightly and lift up on
the seatback recline lever located
on the outside of the seat, toward
the rear.
2. Carefully lean back on the seat
and adjust the back of the seat to
the position you desire.
3. Release the lever and make sure
the seatback is locked in place.
(The lever MUST return to its orig-
inal position for the seatback to
lock.)
WARNING
Riding in a vehicle with a front
seatback reclined could lead to
serious or fatal injury in an acci-
dent. If a front seat is reclined,
the occupant’s hips may slide
under the lap portion of the
safety belt applying great force
to the unprotected abdomen or
neck. Serious or fatal internal
injuries could result. Keep the
seatbacks in a comfortably
upright position whenever the
vehicle is in motion.
1SAA2036
Page: 34
Knowing your vehicle
24
3
1
2
3
4
5
6
7
8
9
Warming the front passenger
seats (if equipped)
The front seats can be electrically
heated individually when the ignition
switch is ON.
When you depress the seat warmer
switch, a thermostat regulates seat
temperature. To deactivate the heat-
ing system, depress the switch once
again.
✽
✽ NOTICE
• The seat warmer will not operate
if ambient temperature is above
37±3 °C (98.5±5.5°F).
• If the seat warmer doesn’t work
when the ambient temperature is
below 28±3 °C (82.5±5.5°F), have
the system checked by an author-
ized dealer.
• When cleaning the seats, do not
use an organic solvent such as
thinner, benzene, alcohol and
gasoline. Doing so may damage
the surface of the heater or seats.
• To prevent overheating the seat
warmer, do not place blankets,
cushions or seat covers on the
seats while the seat warmer is in
operation.
• Do not place heavy or sharp
objects on seats equipped with
seat warmers. Damage to the seat
warming components could occur.
WARNING
Passengers should use extreme
caution when using seat warm-
ers due to the possibility of
excess heating or burns. In par-
ticular, the following types of
passengers should exercise
extreme care:
1. Infants, children, elderly or
handicapped persons, or hos-
pital outpatients
2. Persons with sensitive skin or
those that burn easily
3. Fatigued individuals
4. Intoxicated individuals
5. Individuals taking medication
that can cause drowsiness or
sleepiness (sleeping pills,
cold tablets, etc.)
1SAE2037
Page: 35
3 25
1
2
3
4
5
6
7
8
9
Knowing your vehicle
Headrest adjustment
Adjusting the height up and down
The headrest not only provides com-
fort for the driver and passengers,
but also helps to protect the head
and neck in the event of a collision.
To raise the headrest, pull it up to the
desired position (➀). To lower the
headrest, push and hold the release
button (➁) on the headrest support
and lower the headrest to the desired
position (➂). For best protection,
adjust the headrest so its center is as
high as your ears. Also adjust the
headrest so its distance from the
head is as wide as your fist.
Removal
To remove the headrest, raise it as
far as it can go then press the
release button (➀) while pulling
upward (➁).
1SAA2034
1SAA2033
WARNING
To reduce the risk of head and
neck injuries, do not drive the
vehicle with the headrest
removed or improperly posi-
tioned.
Page: 36
Knowing your vehicle
26
3
1
2
3
4
5
6
7
8
9
Rear seat
Folding the rear seat
(if equipped)
The rear seatbacks fold forward to
provide additional cargo space and
to provide access to the cargo area.
• To raise the seatback, lift and push
it firmly until it clicks into place.
• When you return the seatback to
its upright position, reposition the
rear safety belts so that they can
be used by rear seat passengers. 1. Slide the front seat to the forward
position and insert the safety belt
into the belt holder.
✽
✽ NOTICE
When folding or unfolding the rear
seat, make sure to move the front
seat fully forward. If there were no
space enough to be folded, never
force to fold the rear seat causing
damage to the headrest or the related
parts of the seat.
2. Lift the front of seat cushion (➀)
up.
1SAA2039
1SAA2039B
1SAA2039A
• Type A
• Type B
WARNING
After folding the rear seat, unless
the driver’s position is properly
set according to the driver’s
physical figure otherwise, do not
fold the rear seat resulting in
increased body injuries in a sud-
den stop or collision.
Page: 37
3 27
1
2
3
4
5
6
7
8
9
Knowing your vehicle
3. Lift the rear of seat cushion up
(➁).
4 Move the seat cushion firmly until it
clicks (➂).
5. Lower the headrest as low as pos-
sible (if equipped).
6. Pull the lock release lever (➃).
1SAA2038
1SAA2167
1SAA2040A
1SAA2040C
1SAA2040
1SAA2040B
• Type A
• Type B
• Type A
• Type B
• Type A
• Type B
Page: 38
Knowing your vehicle
28
3
1
2
3
4
5
6
7
8
9
7. Fold the seatback forward and
down firmly (➄).
✽
✽ NOTICE
When you fold the rear seatback or
put luggage on the rear seat cushion,
insert the buckle in the pocket
between the rear seatback and cush-
ion. Doing so can prevent the buckle
from being damaged by the rear
seatback or luggage.
1SAA2039A
1SAE2046A/1SAE2046B
• Type A • Type B
1SAA2046
1SAA2041
1SAA2168
• Type A
• Type B
Lap belt type
Lap/shoulder belt type
Page: 39
3 29
1
2
3
4
5
6
7
8
9
Knowing your vehicle
To unfold the rear seat:
1. Lift and push the seatback back-
ward firmly until it clicks into place.
2. Move and push the seat cushion
downward firmly to the proper
position.
3. Replace the rear safty belt to the
proper position.
CAUTION
• When returning the rear seat-
backs to the upright position,
remember to return the rear
shoulder belts to their proper
position.
• Do not remove the floor carpet
in your vehicle. Emission con-
trol system components
cause high exhaust tempera-
tures under the floor.
WARNING — Cargo
Cargo should always be
secured to prevent it from being
thrown about the vehicle in a
collision and causing injury to
the vehicle occupants.
CAUTION
• Make sure the engine is off,
the transaxle is in P and the
parking brake is applied
whenever loading or unload-
ing cargo. Vehicle may move if
shift lever is inadvertently
moved to another position.
• Be careful when loading cargo
through the rear passenger
seats to prevent damage to
the vehicle interior.
• When cargo is loaded through
the rear passenger seats,
ensure the cargo is properly
secured to prevent it from
moving while driving.
Unsecured cargo in the pas-
senger compartment can
cause damage to the vehicle
or injury to it’s occupants.
Page: 40
Knowing your vehicle
30
3
1
2
3
4
5
6
7
8
9
Adjusting the seatback recliner
(6:4 split seat only)
To recline the seatback;
1. Pull the lock release lever.
2. Adjust the seatback to the position
you desire from the 3 positions.
3. Make sure the seatback is locked
securely by trying to move forward
and backward without using the
lock release lever. If the seatback
moves, it is not locked properly.
1SAA2038A RSAE2038
Page: 41
3 31
1
2
3
4
5
6
7
8
9
Knowing your vehicle
Headrest adjustment (if equipped)
Adjusting the height up and down
The headrest not only provides com-
fort for the driver and passengers,
but also helps to protect the head
and neck in the event of a collision.
To raise the headrest, pull it up to the
desired position (➀). To lower the
headrest, push and hold the release
button (➁) on the headrest support
and lower the headrest to the desired
position (➂). For best protection,
adjust the headrest so its center is as
high as your ears. Also adjust the
headrest so its distance from the
head is as wide as your fist.
Removal
To remove the headrest, raise it as
far as it can go then press the
release lever (➀) while pulling
upward (➁).
1SAA2042
WARNING
To reduce the risk of head and
neck injuries, do not drive the
vehicle with the headrest
removed or improperly posi-
tioned.
1SAA2043
Page: 42
Knowing your vehicle
32
3
1
2
3
4
5
6
7
8
9
Pre-tensioner seat belt
(if equipped)
Your vehicle is equipped with driver’s
and front passenger’s pre-tensioner
seat belts. The purpose of the pre-
tensioner is to make sure that the
seat belts fit tightly against the occu-
pant’s body in certain frontal colli-
sions. The pre-tensioner seat belts
can be activated together with the
airbags, where the frontal collision is
severe enough.
The seat belt pre-tensioner system
consists mainly of the following com-
ponents.Their locations are shown in
the illustration.
➀ SRS airbag warning light
➁ Seatbelt pre-tensioner assembly
➂ SRS airbag control module
SAFETY BELTS
2GHB3002
CAUTION
Both the driver’s and front pas-
senger’s pre-tensioner seat
belts will be activated in certain
frontal collisions. The pre-ten-
sioner seat belts can be activat-
ed, where the frontal collision is
severe enough, together with
the airbag. The pre-tensioners
will be activated under these
conditions even if there is no
one on the seat at the time of
the collision.
1SAE3001
➀
➁
➂
Page: 43
3 33
1
2
3
4
5
6
7
8
9
Knowing your vehicle
WARNING
To obtain maximum benefit from
a pre-tensioner seat belt:
• The seat belt must be worn
correctly.
• The seat belt must be adjusted
to the correct position.
CAUTION
When the pre-tensioner seat
belts are activated, a loud noise
may be heard and fine dust,
which may appear to be smoke,
may be visible in the passenger
compartment and are not toxic.
Although, it is harmless, the fine
dust may cause skin irritation
and should not be breathed for
prolonged periods. Wash your
hands and face thoroughly after
an accident in which the airbags
and/or pre-tensioner seat belts
were activated.
CAUTION
• Because the sensor that acti-
vates the SRS airbag is con-
nected with pre-tensioner seat
belt, the SRS airbag warning
light on the instrument panel
will blink or illuminate for
approximately 6 seconds after
the ignition key has been
turned to the “ON” position,
then the light should go off.
• If the pre-tensioner seat belt is
not working properly, this
warning light will illuminate
even if there is no malfunction
of SRS airbag system. If the
SRS airbag warning light does
not illuminate when the igni-
tion key is turned to “ON” , or
if it remains illuminated after
blinking or illuminating for
approximately 6 seconds, or if
it illuminates while the vehicle
is being driven, please have
an authorized Kia dealer
inspect the pre-tensioner seat
belt or SRS airbag system as
soon as possible.
Page: 44
Knowing your vehicle
34
3
1
2
3
4
5
6
7
8
9
WARNING
• Pre-tensioners are designed
to operate once. After activa-
tion, pre-tensioner seat belts
must be replaced. All seat
belts, of any type, should
always be replaced after they
have been worn during a colli-
sion.
• Do not attempt to inspect or
replace the pre-tensioner seat
belts yourself. This must be
done by an authorized Kia
dealer.
CAUTION
The pre-tensioner seat belt
assembly mechanisms become
hot during activation. Do not
touch the pre-tensioner seat
belt assembly for several min-
utes after they have been acti-
vated.
WARNING
• Do not strike the pre-tensioner
seat belt assemblies.
• Do not attempt to service or
repair the pre-tensioner seat
belt system in any manner.
• Improper handling of the pre-
tensioner seat belt assem-
blies, and failure to heed the
warnings not to strike, modify,
inspect, place, service or
repair the pre-tensioner seat
belt assemblies may lead to
improper operation or inad-
vertent activation causing
serious injury.
Always wear the seat belts
when driving or riding in a
motor vehicle.
Page: 45
3 35
1
2
3
4
5
6
7
8
9
Knowing your vehicle
Safety belt restraint system We strongly recommend that the
driver and all passengers be proper-
ly restrained at all times by using the
safety belts provided with the vehi-
cle. Proper use of the safety belts
decreases the risk of severe injury or
death in accidents or sudden stops.
All seats (including or except the
center rear seat) have lap/shoulder
belts. Inertial locks in the safety belt
retractors allow all of the lap/shoul-
der safety belts to remain unlocked
during normal vehicle operation. This
allows the occupants some freedom
of movement and increased comfort
while using the safety belts. If a force
is applied to the vehicle, such as a
strong stop, a sharp turn, or a colli-
sion, the safety belt retractors will
automatically lock the safety belts.
Since the inertial locks do not require
a collision in order to lock up, you
may become aware of the safety
belts locking while braking or going
around sharp corners.
Always use the rear seat position(s)
to install your child restraint(s).
Never install a child restraint system
in the front passenger position, as an
inflating airbag could cause serious
or fatal injury to a child in that posi-
tion.
WARNING — Safety belts
To minimize the risk of serious
or fatal injury in an accident, the
driver and all passengers
should use the appropriate
safety restraints for their age
and size. The presence of
airbags does not change the
need to be properly restrained
by a safety belt or size-appropri-
ate child restraint. In fact,
airbags are designed to work
the best when passengers are
correctly restrained in the vehi-
cle. Be sure you are familiar
with the information in this sec-
tion, including the information
on infant and child restraints.
Read the safety warnings on the
sun visors of your vehicle also.
Page: 46
Knowing your vehicle
36
3
1
2
3
4
5
6
7
8
9
WARNING — Belt use
Safety belts must be used cor-
rectly to work properly in an
accident. Each seating position
in your vehicle has a specific
safety belt assembly that
includes a buckle and tongue
designed to be used together.
For greatest effectiveness, fol-
low these guidelines in using
safety belts:
• Use the shoulder portion of
the safety belt on the outside
shoulder only. Never wear the
shoulder portion under the
arm.
• Never swing the safety belt
around your neck to fit over
the inside shoulder.
• Never wear the shoulder por-
tion of the safety belt across
the neck or face.
(Continued)
Safety belts provide the best restraint
when:
• The seatback is upright.
• The occupant is sitting upright (not
slouched).
• The lap belt is snug across the hips.
• The shoulder belt is snug across
the chest.
• The knees are straight forward.
To help you remember to fasten your
safety belt, a warning light will come
on. See Safety Belt Warning Light on
page 3-38.
WARNING — After a colli-
sion
• Lap/shoulder belt assemblies
may be stretched or damaged
when subjected to the stress
and forces of a collision.
• The entire restraint system
should be inspected following
any collision. All belts, retrac-
tors, anchors and hardware
damaged by a collision should
be replaced before the vehicle
is operated again.
WARNING — Cargo area
Passengers should never be
allowed to ride in the cargo area
of a vehicle. No safety belts are
provided for the cargo area.
Persons riding in the vehicle
without a fastened safety belt
are much more likely to suffer
serious bodily injury or death
during an accident.
WARNING — Twisted belts
A twisted or jammed safety belt
cannot restrain you properly. If
you cannot untwist or unjam the
safety belt, have an authorized
Kia dealer it immediately. Never
drive or ride with a twisted or
jammed safety belt.
Page: 47
3 37
1
2
3
4
5
6
7
8
9
Knowing your vehicle
(Continued)
• Wear the lap portion as low as
possible. Be sure that the lap
belt fits snugly around the
hips. Never wear a lap portion
of a lap/shoulder belt over
your waist; it should always
go over the stronger area of
your hips.
• Never use a single safety belt
for more than one person.
• The front seatbacks should
always remain in a comfort-
able, upright position when
the vehicle is moving.
WARNING — Safety belt
care
• A damaged belt may not give
you the protection you need in
an accident.
• Inspect your safety belts peri-
odically for excessive wear or
damage. Pull out each belt
fully and look for fraying, cuts,
burns or other damage. Pull
the safety belt out and let it
retract a number of times.
Make sure that the lap/shoul-
der belts return smoothly and
easily into the retractor.
• Check the latches to make
sure they latch and release
without interference or delay.
• Never close the doors on any
part of the lap or shoulder
belt.
• Any belt not in good condition
or in good working order
should be promptly replaced.
CAUTION
Never close the doors on any
part of the lap or shoulder belt.
It can damage the safety belt or
buckle which could increase the
risk of injury in case of an acci-
dent.
Page: 48
Knowing your vehicle
38
3
1
2
3
4
5
6
7
8
9
Safety belt warning light and
chime
Type A
As a reminder to the driver and pas-
senger, safety belt warning light will
blink for approximately 6 seconds
each time you turn the ignition switch
ON.
If the driver’s lap/shoulder belt is not
fastened when the key is turned ON,
the safety belt warning light blinks for
approximately 6 seconds.
(if equipped)
Type B (for Europe only,
if equipped)
As a reminder to the driver and pas-
senger, safety belt warning light will
blink or illuminate for approximately 6
seconds each time you turn the igni-
tion switch ON.
If the driver’s lap/shoulder belt is not
fastened when the key is turned ON
or if it is disconnected after the key is
turned ON, the safety belt warning
light will blink or illuminate until the
belt is fastened.
If the driver’s lap/shoulder belt is not
fastened when the key is turned ON
and you drive over 9km/h, the safety
belt warning chime will sound for
approximately 100 seconds after the
warning light blinks for approximately
one minute.
If the driver’s lap/shoulder belt is dis-
connected after the key is turned ON
and you drive over 9km/h, the safety
belt warning chime will sound for
approximately 100 seconds.
But, if the driver’s lap/shoulder belt is
connected and disconnected twice
within 9 seconds after the belt is fas-
tened, the safety belt warning light
and chime will not operate.
Type C
If the driver’s lap/shoulder belt is not
fastened when the key is turned ON
or if it is disconnected after the key is
turn ON, the safety belt warning light
illuminates until the belt is fastened.
1GQA2083
Page: 49
3 39
1
2
3
4
5
6
7
8
9
Knowing your vehicle
Lap/shoulder belt
To fasten the front lap/shoulder
belt:
1. Grasp the buckle and tongue
plate.
2. Slowly pull the lap/shoulder belt
out from the retractor.
3. Insert the tongue plate (➀) into the
open end of the buckle (➁) until an
audible “click” is heard, indicating
the belt is locked in the buckle.
4. Position the lap portion (➀) of the
belt across your lap as LOW ON
THE HIPS as possible to reduce
the risk of sliding under it during
an accident. Adjust the belt to a
SNUG FIT by pulling up on the
shoulder portion (➁) of the safety
belt. The belt retractor is designed
to take up excess webbing auto-
matically and to maintain tension
on the belt. For your safety, do not
put any excess slack into the safe-
ty belt at any location.
1GHA2263 1GHA2264
1GHA2262
Page: 50
Knowing your vehicle
40
3
1
2
3
4
5
6
7
8
9
5. Adjust the shoulder anchor posi-
tion to your size (if equipped). To
raise the anchor position, push the
anchor up (➀).To lower the anchor
position, press (➁) the button ( )
and slide the anchor down (➂).
After adjustment, make sure the
anchor is locked in position.
To unfasten the front lap/shoulder
belt:
Press the release button on the
buckle and allow the belt to slowly
retract.
1GHA2263A
WARNING
• The seatbacks should always
remain in a comfortable,
upright position while the
vehicle is in motion. The safe-
ty belt system will provide the
most protection with the seat-
backs in an upright position.
• Never wear the shoulder por-
tion of the safety belt under
the outside arm or behind the
back.
• Never wear the shoulder por-
tion of the safety belt across
the neck or face.
• Wear the lap portion of the
safety belt as low on the hips
as possible. Be sure the lap
belt fits snugly around the
hips. Never wear the lap belt
over your waist.
(Continued)
1SAA2044
A