инструкцияKia Forte (2010)

www.kia.com
Consumer / Roadside
Assistance: 1—800-333—4KIA
(4542)
See Back Cover for Vehicle
Maintenance Schedule
Always check the Owner’s Manual for
complete operating information and safety
warnings.
Forte
Features & Functions Guide
Посмотреть инструкция для Kia Forte (2010) бесплатно. Руководство относится к категории автомобили, 2 человек(а) дали ему среднюю оценку 7.9. Руководство доступно на следующих языках: английский. У вас есть вопрос о Kia Forte (2010) или вам нужна помощь? Задайте свой вопрос здесь
Главная
| Kia | |
| Forte (2010) | |
| автомобиль | |
| английский | |
| Руководство пользователя (PDF) |
Не можете найти ответ на свой вопрос в руководстве? Вы можете найти ответ на свой вопрос ниже, в разделе часто задаваемых вопросов о Kia Forte (2010).
Как перевести мили в километры?
Где я могу узнать идентификационный номер транспортного средства Kia?
Что такое идентификационный номер транспортного средства (VIN)?
Когда транспортному средству Kia требуется техническое обслуживание?
Когда следует заменять тормозную жидкость на Kia?
В чем разница между топливом E10 и E5?
Одна или несколько дверей не открываются изнутри. Что мне делать?
Автомобильный радиоприемник не включается, что делать?
Инструкция Kia Forte (2010) доступно в русский?
Не нашли свой вопрос? Задайте свой вопрос здесь

- Manuals
- Brands
- Kia Manuals
- Automobile
- 2016 forte
- Features & functions manual
-
Contents
-
Table of Contents
-
Bookmarks
Quick Links
Related Manuals for Kia FORTE 2016
Summary of Contents for Kia FORTE 2016
-
Page 2
Manual. In the interest of your safety and that of your family, and to help you avoid risks that may result in death or serious injury, Kia reminds you to carefully read your Owner’s Manual in order to fully familiarize yourself with the important information it contains. -
Page 3: Table Of Contents
ESSENTIAL FEATURES UVO eServices Setup* . . . . . . . . . . . . . . . . . . . 22 V I D E O S &…
-
Page 4: D E O S & Q R C O D E S
VIDEOS & QR CODES — SMARTPHONES, TABLETS AND COMPUTERS QR CODE Kia provides a number of video resources at your disposal to assist you with becoming familiar with the features and One Click Fuel Cap Video functions found in your Kia vehicle . You can access these resources by snapping the QR Codes with your smartphone/tablet (mobile devices) or by visiting the following website: www.KuTechVideos.com/yd13/2017 .
-
Page 5: Instrument Cluster
INSTRUMENT CLUSTER Instrument Cluster Overview Tachometer Speedometer Turn Signal Indicators x1000rpm LCD Screen/Odometer/Tripmeter* 1050 120 140 RANGE km/h Gear Shift Position Indicator* Avg. Fuel Gauge Next Reset 0012075 Engine Coolant Temperature Gauge Your vehicle’s instrument cluster & indicator light locations may differ from those in the illustrations. (Cluster Type C shown) For more information on the instrument cluster, the LCD Warning Messages and the function of all indicator…
-
Page 6: Indicators & Warning Lights
CENTER PANEL Indicators & Warning Lights 1050 x1000rpm 30.1 L/100mi Your vehicle’s instrument cluster & indicator light 120 140 km/h locations may differ from those in the illustrations. : NEXT For more information on the instrument cluster and the function of all indicator and warning lights, 0012075 please refer to the Owner’s Manual.
-
Page 7: Lcd Instrument Cluster Modes
INSTRUMENT CLUSTER LCD Instrument Cluster Modes* Trip Computer / Tripmeter Press Mode button to scroll through the different LCD modes: The Trip Computer is a driver information system that displays information related to driving on the display when the ignition switch or the ENGINE Trip Computer Mode: Displays driving information for START/STOP button* is in the ON position .
-
Page 8: User Setting Mode
INSTRUMENT CLUSTER User Settings Mode* Service Mode* QR CODE (Type B/C settings) (Type B/C settings) To view these videos on your mobile device, snap To enter the User Settings mode on the LCD* screen, press To enter Service Mode, press the Mode button these QR Codes or visit the the Mode button when the vehicle is at a standstill and…
-
Page 9: Fuel Economy
INSTRUMENT CLUSTER Fuel Economy QR CODES To view these videos on Several factors contribute to your vehicle’s fuel economy, including maintenance of your vehicle, driving style, your mobile device, snap environmental conditions, vehicle weight and vehicle aerodynamics . Below are tips on how to improve fuel economy: these QR Codes or visit the listed website .
-
Page 10: Active Eco System (Eco Mode)
INSTRUMENT CLUSTER Drive Mode Integrated Control System Active ECO System (ECO Mode)* QR CODE The Drive Mode may be selected depending on driver’s The Active ECO system helps improve fuel economy by Active Eco System Video preferences and road conditions . controlling several vehicle components .
-
Page 11: Driver’s Panel
DRIVER’S PANEL Electronic Stability Control (ESC) The ESC system is designed to help stabilize the vehicle during cornering maneuvers . It is a good idea to keep the ESC turned on for daily driving whenever possible . Press ESC button to turn ESC OFF/ON .
-
Page 12: Blind Spot Detection (Bsd) System
DRIVER’S PANEL Blind Spot Detection (BSD) System* QR CODE The BSD system uses radar sensors to help alert the driver before changing Blind Spot Detection (BSD) with RCTA Video lanes . The light on the BSD button will illuminate when turned ON . The outside rearview mirror warning lights will also illuminate for 3 seconds .
-
Page 13: Lane Keeping Assist System (Lkas) / Lane Departure Warning System (Ldws)
DRIVER’S PANEL Lane Keep Assist Lane Keep Assist Lane Keeping Assist System (LKAS) / Lane Departure Warning System (LDWS)* QR CODE With the ENGINE START/STOP button in the ON position, press the Lane Departure Warning System Video LKAS/LDWS button to turn system ON . The instrument cluster indicator will illuminate .
-
Page 14: Engine Start/Stop Button
DRIVER’S PANEL Engine Start/Stop Button* QR CODE Engine Start/Stop Button To start the engine: & Smart Key Video 1 . Depress the brake pedal To view a video on your 2 . Press the ENGINE START/STOP button while the gear shift is in Park (or while in mobile device, snap this Neutral for Manual Gear Shift) QR Code or visit the listed…
-
Page 15: Power Windows, Window Lock & Central Door Lock
DRIVER’S PANEL Power Windows, Window Lock & Central Door Lock Pull/Press to operate Driver’s & Passenger’s Window Auto Up/Down* Press to Unlock/Lock All Doors Press to disable Rear Passenger Windows REMINDER: When pressed , window controls for the Rear Passenger Windows are disabled, including from the driver’s controls .
-
Page 16: Steering Wheel Controls
When the AFLS indicator illuminates on the instrument cluster, the AFLS is not Owner’s Manual. working properly . See authorized Kia dealer for service . FORTE F E A T U R E S & F U N C T I O N S G U I D E…
-
Page 17: Windshield Wipers & Washers
STEERING WHEEL CONTROLS Windshield Wipers & Washers To operate: MIST: Single wipe • Move lever Up/Down to change Wiper modes OFF: Wiper off • Rotate INT switch to adjust Intermittent Wipe Speed INT: Intermittent wipe • Pull lever to spray and wipe LO: Slow wipe QUICK TIP HI: Fast wipe…
-
Page 18: Tilt/Telescoping Steering Wheel
STEERING WHEEL CONTROLS Tilt/Telescoping Steering Wheel FlexSteer Steering Wheel Mode* QR CODE To adjust the Steering Wheel, push down the Lock-Release Select the desired steering mode by toggling FlexSteer Steering ™ Wheel Mode Video Lever and adjust to desired angle and distance through the steering modes .
-
Page 19: Cruise Control
STEERING WHEEL CONTROLS Audio Controls Cruise Control* Audio MODE button: Press to cycle through FM 1-2/AM/SAT 1-3/ CRUISE Control ON/OFF button: Press to turn the Cruise USB/Aux/iPod ® Control ON/OFF Seek/Preset button: Resume Cruising Speed button: Press up to resume or increase Radio Mode — Press to advance through the Preset Stations .
-
Page 20: Bluetooth ® Wireless Technology
End Call button: Press to end a call or cancel a function For more information, if equipped, refer to the Car Multimedia System User’s Manual or the UVO System User’s Manual. For Bluetooth Wireless Technology FAQs, go to www.kia.com, Owners section, or call ®…
-
Page 21
Voice Recognition and Phone Contact Tips Bluetooth Wireless Technology ® QR CODE The Kia Voice Recognition System may Pairing a Phone Voice Recognition Tips Video have difficulty understanding some accents For instructions on how to pair a phone, refer to the audio system’s user’s or uncommon names . -
Page 22: Audio System — Standard Audio Systems
AUDIO SYSTEMS Standard Audio System (Type A)* QR CODE – FM/AM/Sirius /Media (CD, USB, iPod , Aux, My Music, Bluetooth Audio) ® ® ® Standard Audio System Videos Press to turn display ON/OFF To view a video on your Insert CD mobile device, snap this Press to eject CD DISP…
-
Page 23: Standard Audio System (Type B)
AUDIO SYSTEMS Standard Audio System (Type B) /Media (CD, MP3, USB, iPod, AUX, My Music, Bluetooth – FM/AM/Sirius Audio) ® ® Insert disc Press to eject disc DISP Press to turn display ON/OFF Press to select FM/AM/Sirius Modes ® Press to MUTE RADIO MUTE Press to scan Radio/Sirius…
-
Page 24: Uvo Eservices Setup
AUDIO SYSTEMS UVO eServices Setup* UVO eServices Registration/Activation – To use UVO eServices: 1 . Register through your UVO eServices app or at MyUVO .com 2 . On your Smartphone, go to an app store or marketplace to download the UVO eServices app and log in to the app using your MyUVO .com account credentials 3 .
-
Page 25: Audio System — Uvo Eservices System
AUDIO SYSTEMS UVO eServices System* – FM/AM/SiriusXM /Media (USB, iPod , Aux, Bluetooth Audio, My Music) ® ® ® Press to select previous/next Radio/ SiriusXM ® stations/Media tracks/ files . Press and hold to move quickly through stations/tracks/files Press to select UVO eServices mode Press to enter PHONE mode Press to enter RADIO mode Press to enter Apps/Information menu…
-
Page 26: Navigation System
AUDIO SYSTEMS UVO eServices with Premium Navigation* QR CODE , Aux, Bluetooth – FM/AM/SiriusXM /Media (USB, iPod Audio, My Music) ® ® ® UVO eServices with Premium Navigation System Videos To view these videos on your mobile device, snap this QR Code or Press to select previous/next Radio/ SiriusXM ®…
-
Page 27: Aux/Usb/Ipod ® Port & Power Outlets
CENTER PANEL Digital Clock Aux/USB/iPod Port ® & Power Outlets Center Panel Clock and Outside Temperature Setup*: Press the H button to advance the PASS time by one hour . Press the M button OUTSIDE AIR BAG to advance the time by one minute . 180W 180W Press and hold both buttons for more than…
-
Page 28: Air Conditioning / Climate Control
CENTER PANEL Automatic Climate Control* Climate control display Driver or dual temperature control knob Passenger temperature control knob ADS OFF AUTO AUTO ° ° SYNC Automatic climate control button Sync temperature control mode button Cluster Ionizer Air conditioning ON/OFF button System OFF button MODE FRONT…
-
Page 29: Manual Climate Control
CENTER PANEL Manual Climate Control* Mode selection knob Air conditioning* ON/OFF button Recirculated/fresh air button Fan speed Temperature control knob control knob Rear window defroster ON/OFF button Air Flow Modes Defrost Outside Windshield: Defog Inside Windshield: To select Air Flow modes, press the 1 .
-
Page 30: Automatic Gear Shift With Sportmatic ® Shifting
CENTER PANEL Automatic Gear Shift with Sportmatic Shifting* ® QR CODES To view these videos on P: Park your mobile device, snap R: Reverse these QR Codes or visit the listed website . N: Neutral Refer to page 2 for more information .
-
Page 31: Manual Gear Shift
CENTER PANEL Manual Gear Shift* Starting the Engine 1 . Apply Parking Brake 2 . Depress Clutch fully 3 . Shift into Neutral 4 . Turn Ignition to Start Shifting into Reverse 1 . Depress Clutch fully 2 . Shift into Neutral 3 .
-
Page 32: 6-Way Manual Adjustable Driver’s Seat
SEATING 6-Way Manual Adjustable Seat Warmers / Ventilated Seats* QR CODE Driver’s Seat* Seat Warmers button — Press button once for high Heated and Ventilated Seats Video setting (3 LEDs lit) . Press button twice for medium Pull lever to slide Seat forward/backward . setting (2 LEDs lit) .
-
Page 33: 10-Way Power Adjustable Driver’s Seat
SEATING 10-way Power Adjustable Driver’s Seat* Driver Position Memory System* Move/Press controls to adjust Seat forward/backward, Seat Cushion height, Seatback recline and Lumbar support* . To store a seating position into memory, first move the gear shift into P (Park) while the ignition is ON . Then: 1 .
-
Page 34: Folding Rear Seats
SEATING Folding Rear Seats 2- and 4-door model 5-door model 1 . Lower Rear Headrests to the lowest position 1 . Lower the headrest to the farthest position 2 . Ensure the Rear Seatbelt is secured into the guide 2 . Pull the Lock Release Lever , located on Seatback shoulder 3 .
-
Page 35: Sunroof Operation
OTHER KEY FEATURES Sunroof Operation* Map/Room Lamps* The Sunroof and Sunshade operation is controlled through a multi- Map/Personal Lamp directional switch/lever, and the ignition needs to be in the ON position to Push the lens to turn the map/personal lamp ON/OFF . This light produces operate the Sunroof/Sunshade .
-
Page 36: Remote Keyless Entry (Folding Key)
OTHER KEY FEATURES Remote Keyless Entry (Folding Key)* Double-Turn Lock/Unlock All (Type A) • Turn clockwise once to unlock Driver’s Door Press the release button to unfold the key • Turn clockwise again within 4 seconds to unlock All Doors •…
-
Page 37: Smart Key
OTHER KEY FEATURES Smart Key* QR CODE Smart Key Fob: Engine Start/Stop Button & Smart Key Video Press to lock All Doors To view a video on your Press to unlock Driver’s Door . Press twice in 4 seconds to unlock All Doors mobile device, snap this QR Code or visit the listed Press and hold to unlock Trunk/Hatch and manually open…
-
Page 38: Power Trunk / Smart Trunk
OTHER KEY FEATURES Power Trunk / Smart Trunk* Smart Key: Smart Trunk* To open the Power Trunk, press and hold the Trunk button When the Smart Key fob is on your person and you are near the back of the vehicle, until the Trunk begins opening .
-
Page 39: Hood Release Lever And Latch
OTHER KEY FEATURES Hood Release Lever and Latch Trunk Release Button Opening the Hood: Located underneath the Trunk lid . With Trunk unlocked, press the Trunk Release Button and pull the Trunk up by the handle to open . 1 . Pull the Hood Release Lever to unlatch the Hood 2 .
-
Page 40: Homelink ® / Auto-Dimming Rearview Mirror
OTHER KEY FEATURES OTHER KEY FEATURES How to Sync Transmitter with HomeLink ® HomeLink with Auto-Dimming Rearview Mirror* ® If programming for the first time, begin with Step 1 (repeating this step will HomeLink button Glare detection sensor ® delete all information) . HomeLink ®…
-
Page 41: Rear-Camera Display
OTHER KEY FEATURES Rear-Camera Display* Fuel Cap / Malfunction Indicator QR CODE (Check Engine Light) One Click Fuel Cap Video The Rear-Camera Display system is not a safety device . It is a supplemental system that displays the view behind the vehicle Tighten for ONE CLICK to To view a video on your through the Standard Audio System (Type B)*, UVO Audio System*,…
-
Page 42: Passenger Airbag Off Indicator
SAFETY FEATURES SAFETY FEATURES Seat Belts Occupant Detection System (ODS) / Passenger Airbag Off Indicator To properly fasten your Seat Belts: ODS detects the presence of the front passenger . 1 . Insert the belt tongue plate into PASS the buckle until it clicks AIR BAG Depending on the situation and type of accident, the…
-
Page 43
When your vehicle requires service, remember that your dealer knows your vehicle best . Your dealer has factory-trained technicians, recommended special tools, genuine Kia replacement parts, and is dedicated to your complete satisfaction . For expert advice and quality service, see your authorized Kia dealer . -
Page 44
1 . If TOP TIER detergent gasoline is not available, one bottle of additive is recommended . 1 . If TOP TIER detergent gasoline is not available, one bottle of additive is recommended . Additives are available from your authorized Kia dealer along with information on how to Additives are available from your authorized Kia dealer along with information on how to use use them . -
Page 45
1 . If TOP TIER detergent gasoline is not available, one bottle of additive is recommended . 1 . If TOP TIER detergent gasoline is not available, one bottle of additive is recommended . Additives are available from your authorized Kia dealer along with information on Additives are available from your authorized Kia dealer along with information on how to use how to use them . -
Page 46
1 . If TOP TIER detergent gasoline is not available, one bottle of additive is recommended . Additives 1 . If TOP TIER detergent gasoline is not available, one bottle of additive is recommended . Additives are available from your authorized Kia dealer along with information on how to are available from your authorized Kia dealer along with information on how to use them . -
Page 47
Kia products. Contact your local Kia dealer for 1-866-635-2349 to cancel. See SiriusXM Customer Agreement for complete terms at www.siriusxm.com. Other the most current information. -
Page 48
*if equipped Explain first service process and schedule first service appointment Tour Parts & Service departments, introduce staff and explain value of Kia Parts and Service Review recommended maintenance schedule and maintenance requirements to validate warranty Review business hours and Customer 360° Care… -
Page 49
Owner’s Name: _________________________________VIN: _______________________Mileage: ________________ Dealership Name: _______________________________Sales Consultant: _____________Date: ___________________ BEFORE DELIVERY Confirm “Good Battery” with Kia GR8-1299 battery tester Verify all tire pressures are to spec (see driver’s door label) LF Verify proper operation of Remote Keyless Entry and Smart Key lock/unlock… -
Page 50
© 2016 Kia Motors America, Inc. All rights reserved. Part Number: UD170-PS-004 Consumer — Roadside Assistance: 1-800-333-4KIA (4542)
-
Contents
-
Table of Contents
-
Bookmarks
Quick Links
kia, the company
Thank you for becoming the owner of a new Kia vehicle.
As a global car manufacturer focused on building high-quality, value
for money prices, Kia Motors is dedicated to providing you with a
customer service experience that exceeds your expectations.
All information contained in this Owner’s Manual is accurate at the
time of publication. However, Kia reserves the right to make changes
at any time so that our policy of continual product improvement can
be carried out.
This manual applies to all Kia models and includes descriptions and
explanations of optional as well as standard equipment. As a result,
you may encounter material in this manual that is not applicable to
your specific Kia vehicle.
Drive safely and enjoy your Kia!
I n f o r ma t i o n P r o v i d e d b y :
Chapters
Summary of Contents for Kia 2012 Forte
Ваш электронный адрес не будет опубликован. Обязательные поля помечены * *
КОММЕНТАРИЙ *
Имя и фамилия
Эл. адрес
Cайт
Сохраните мое имя, адрес электронной почты и веб-сайт в этом браузере для следующего комментария.
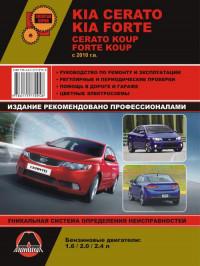
Руководство по эксплуатации и ремонту автомобилей Kia Cerato и Kia Forte с 2010 года выпуска с бензиновыми двигателями объемом 1,6/2,0/2,4 л.
- Автор: —
- Издательство: Монолит
- Год издания: —
- Страниц: 348
- Формат: —
- Размер: —
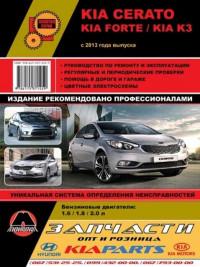
Руководство по эксплуатации и ремонту автомобилей Kia Cerato, Kia Forte и Kia K3 с 2013 года выпуска с бензиновыми двигателями объемом 1,6/1,8/2,0 л.
- Автор: —
- Издательство: Монолит
- Год издания: 2013
- Страниц: 429
- Формат: —
- Размер: —
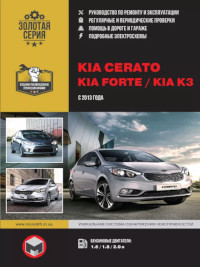
Руководство по эксплуатации и ремонту автомобилей Kia Cerato, Kia Forte и Kia K3 с 2013 года выпуска с бензиновыми двигателями объемом 1,6/1,8/2,0 л.
- Автор: —
- Издательство: Монолит
- Год издания: —
- Страниц: 432
- Формат: —
- Размер: —
